WhatsApp API Integration Dash SaaS
Seamless integration of the WhatsApp API revolutionizes communication and user engagement within the platform.
Introduction
Seamless integration of the WhatsApp API revolutionizes communication and user engagement within the platform. Users can now trigger WhatsApp messages based on specific events, all conveniently managed through customizable event notifications in the settings section. This feature empowers users to stay connected and informed, enhancing the efficiency of communication workflows whether it’s notifying team members of new tasks, revenue updates, user creations, invoices, proposals, appointments, or any other critical event.
How To Install the WhatsApp API Add-On?
To Set Up the WhatsApp API Add-On you can follow this link: Setup Add-On
How to use the WhatsApp API Add-On?
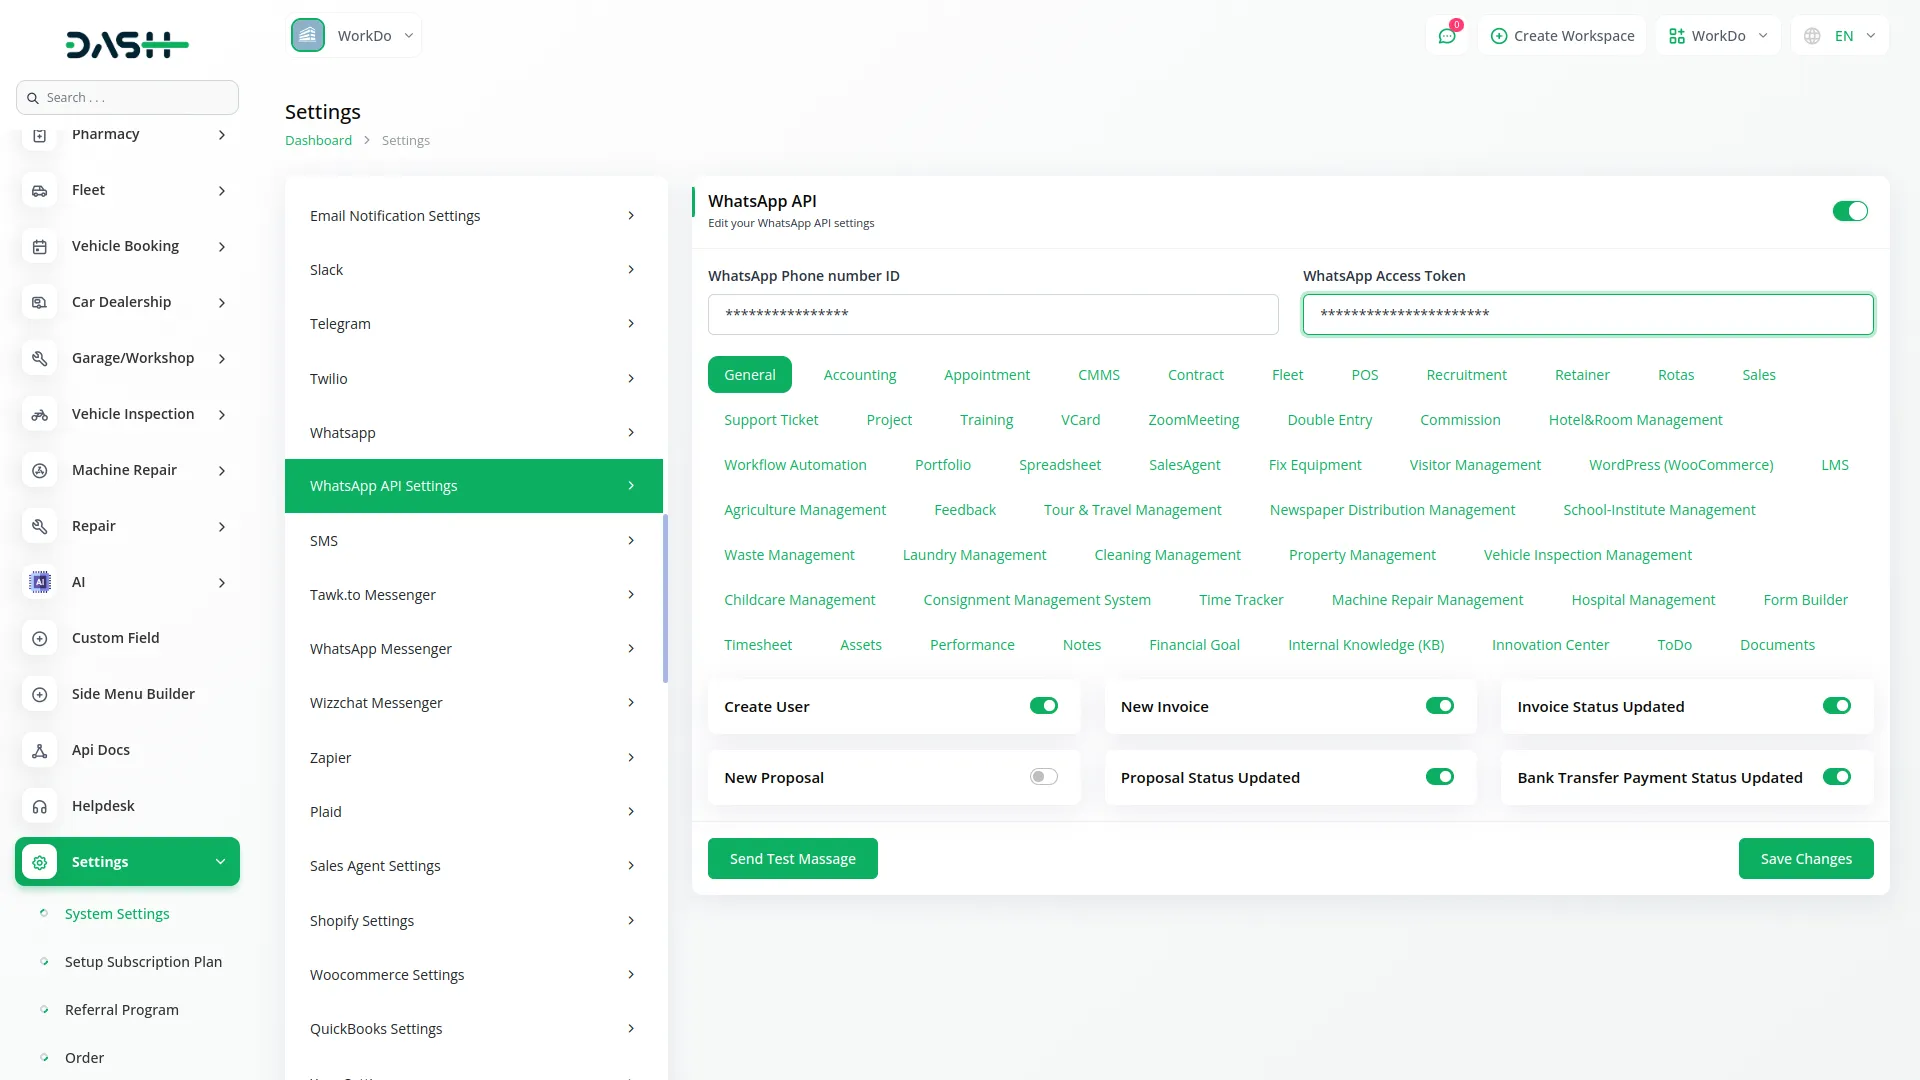
- Once you purchase the Add-On, navigate to the settings page, click on system settings, and find WhatsApp API.
- On that page, you have to enter the WhatsApp Phone Number Id and WhatsApp Access Token, with the help of which you can send messages via WhatsApp.
- To generate the WhatsApp Permanent Access Token, you can follow this link: https://workdo.io/documents/how-to-generate-whatsapp-api-permanent-access-token/ https://workdo.io/documents/how-to-generate-token-of-meta/
- After you do this, you get a chance to choose the notifications settings. Here is the way you can enable or disable the notifications of the various Add-Ons.

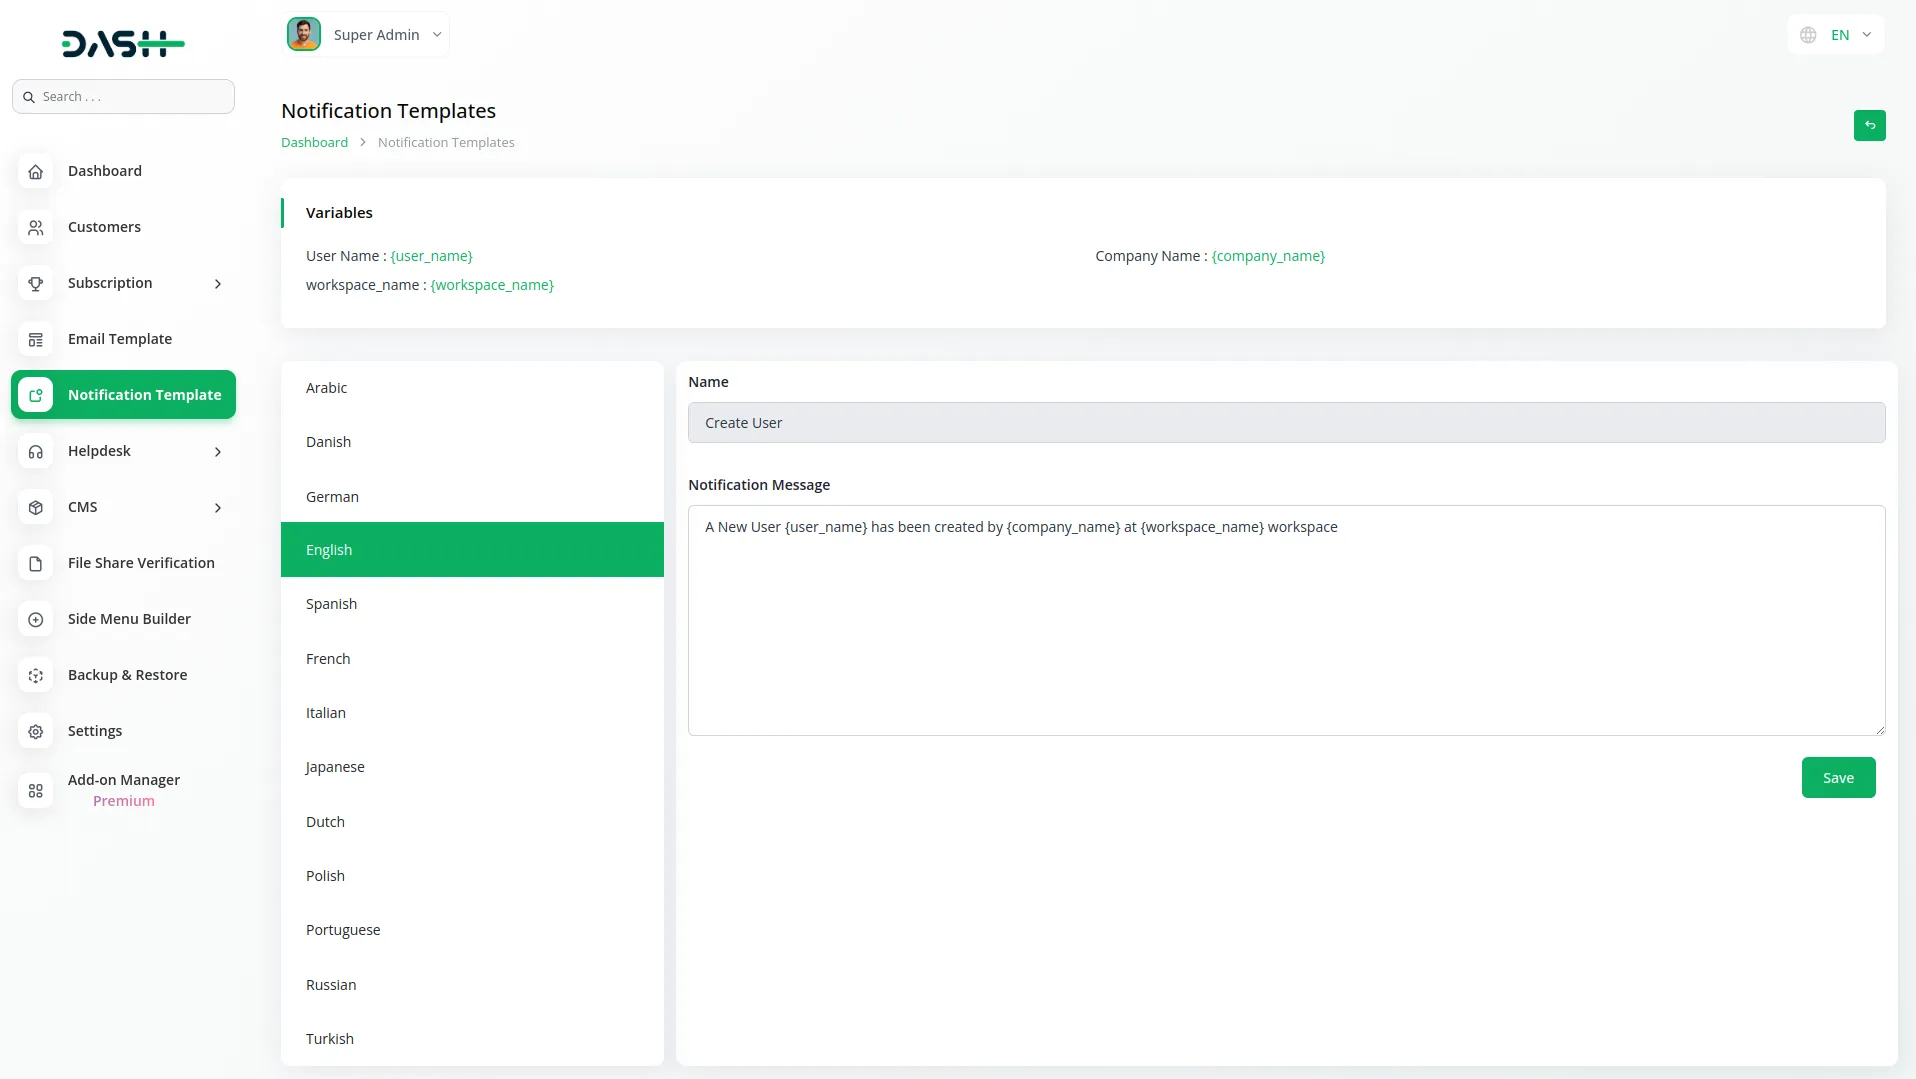
- You can customize notification messages language wise, for example, if you want to change the message for new user notifications, you can do it here.

- For example: If you enable the create user setting from General, then the notification via WhatsApp will be sent to that particular user when the user is created.
General
- Create User
- New Invoice
- Invoice Status Updated
- New Proposal
- Proposal Status Updated
- Bank Transfer Payment Status Updated
Account
- New Customer
- New Bill
- New Vendor
- New Revenue
- New Payment
CMMS
- Work Order Request
- New Supplier
- New POs
- Work Order Assigned
- New Part
- New Component
- New Location
- New Pms
Hrm
- New Monthly Payslip
- New Award
- New Event
- Leave Approve/Reject
- New Trip
- New Announcement
- New Holidays
- New Company Policy
CRM
- New Lead
- Lead to Deal Conversion
- New Deal
- Lead Moved
- Deal Moved
Pos
- New Purchase
- New Warehouse
Hotel & Room Management
- New Booking Coupon
- New Room Facility
- New Hotel Customer
- New Hotel Service
- New Room Booking
- New Room
- Change Hotel Theme
Sales Agent
- New Program
- Sales Agent Request sent
- Sales Agent Request Accept
- Sales Agent Request Reject
- New Sales Agent
- New Sales Agent Order
- Update Order Status
Fix Equipment
- New Accessories
- New Asset
- New Audit
- New Component
- New Consumables
- New Licence
- New Location
- New Maintenance
Agriculture Management
- New Agriculture Fleet
- New Agriculture Process
- New Agriculture cycle
- New Agriculture Office
- New Agriculture Season
- New Agriculture Crop
- Assign Activity Cultivation
- New Agriculture Activity
- New Agriculture Service
- New Agriculture Cultivation
Tour & Travel Management
- New Season
- New Person Detail
- New Tour Booking
- New Tour Booking Payment
- New Tour
- New Tour Detail
- New Tour Inquiry
- New Transport Type
Newspaper Distribution Management
- New Newspaper Distribution Center
- New Agent
- New Journalist
- New Journalist Information
- New Advertisement
- New Newspaper
School-Institute Management
- New Teacher
- New Admissions
- New Parents
- New Students
- New Homework
- New Subject
- New Time Table
Categories
Related articles
- Slack Integration in Dash SaaS
- Petty Cash Management Integration in Dash SaaS
- Google Meet Integration in Dash SaaS
- Backup & Restore Integration in Dash SaaS
- How To Generate The YouTube Credentials
- Activity Log integration in Dash SaaS
- Instamojo Payment Gateway Detailed Documentation
- Whereby Meeting Integration in Dash SaaS
- Spreadsheet Integration in Dash SaaS
- Photo & Studio management Integration in Dash SaaS
- Google Slides Detailed Documentation
- Hospital Management Integration in Dash SaaS
Reach Out to Us
Have questions or need assistance? We're here to help! Reach out to our team for support, inquiries, or feedback. Your needs are important to us, and we’re ready to assist you!


Need more help?
If you’re still uncertain or need professional guidance, don’t hesitate to contact us. You can contact us via email or submit a ticket with a description of your issue. Our team of experts is always available to help you with any questions. Rest assured that we’ll respond to your inquiry promptly.
Love what you see?
Do you like the quality of our products, themes, and applications, or perhaps the design of our website caught your eye? You can have similarly outstanding designs for your website or apps. Contact us, and we’ll bring your ideas to life.
