Click Send Integration in Dash SaaS
Click Send is a communication Add-On that enables you to send SMS messages, schedule SMS communications, make voice calls, and manage contacts across multiple business modules.
Introduction
Click Send is a communication Add-On that enables you to send SMS messages, schedule SMS communications, make voice calls, and manage contacts across multiple business modules. This software integrates with various modules, including General, Account, Appointment, CMMS, Contract, Fleet, HRM, Lead, POS, Recruitment, and many more, to provide seamless notification delivery through SMS and voice calls.
How To Install the Add-On?
To Set Up the Click Send Add-On, you can follow this link: Setup Add-On
How to use the Click Send Add-On?
Settings Configuration
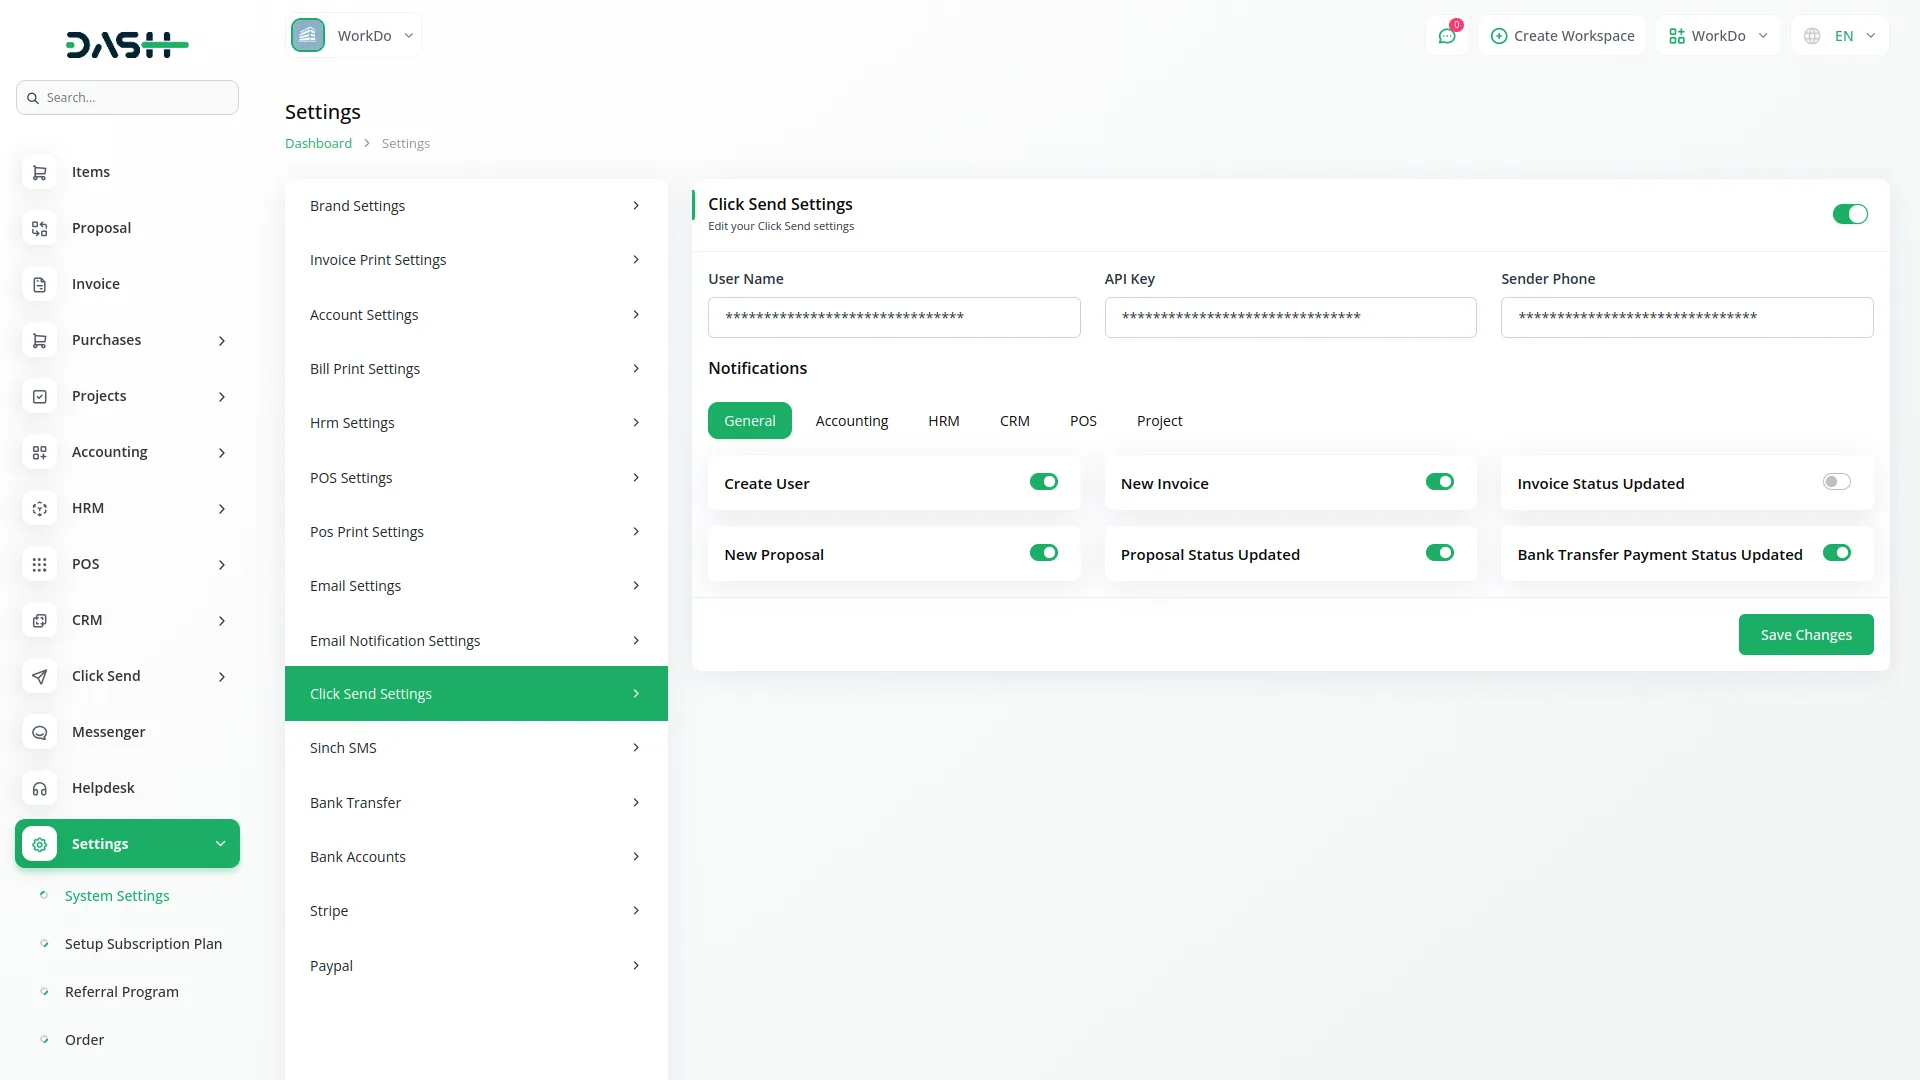
- To start using Click Send, you need to configure your account settings first. Go to Settings and then click on Click Send. You will need three important details from your Click Send account: your User Name, API Key, and Sender Phone number.
- Enter your unique Click Send User Name in the first field. Then add your unique Click Send API Key that you received from Click Send. Finally, enter the phone number that you used to create your Click Send account as your Sender Phone. Make sure you get the correct credentials from the official Click Send Developer Portal before setting up.
- To get these credentials, log in to your Click Send account or create a new one if needed. Visit the Click Send API documentation at: https://developers.clicksend.com/docs to generate your API key.
- Once you have all the details, save your settings to activate Click Send in your WorkDo Dash platform
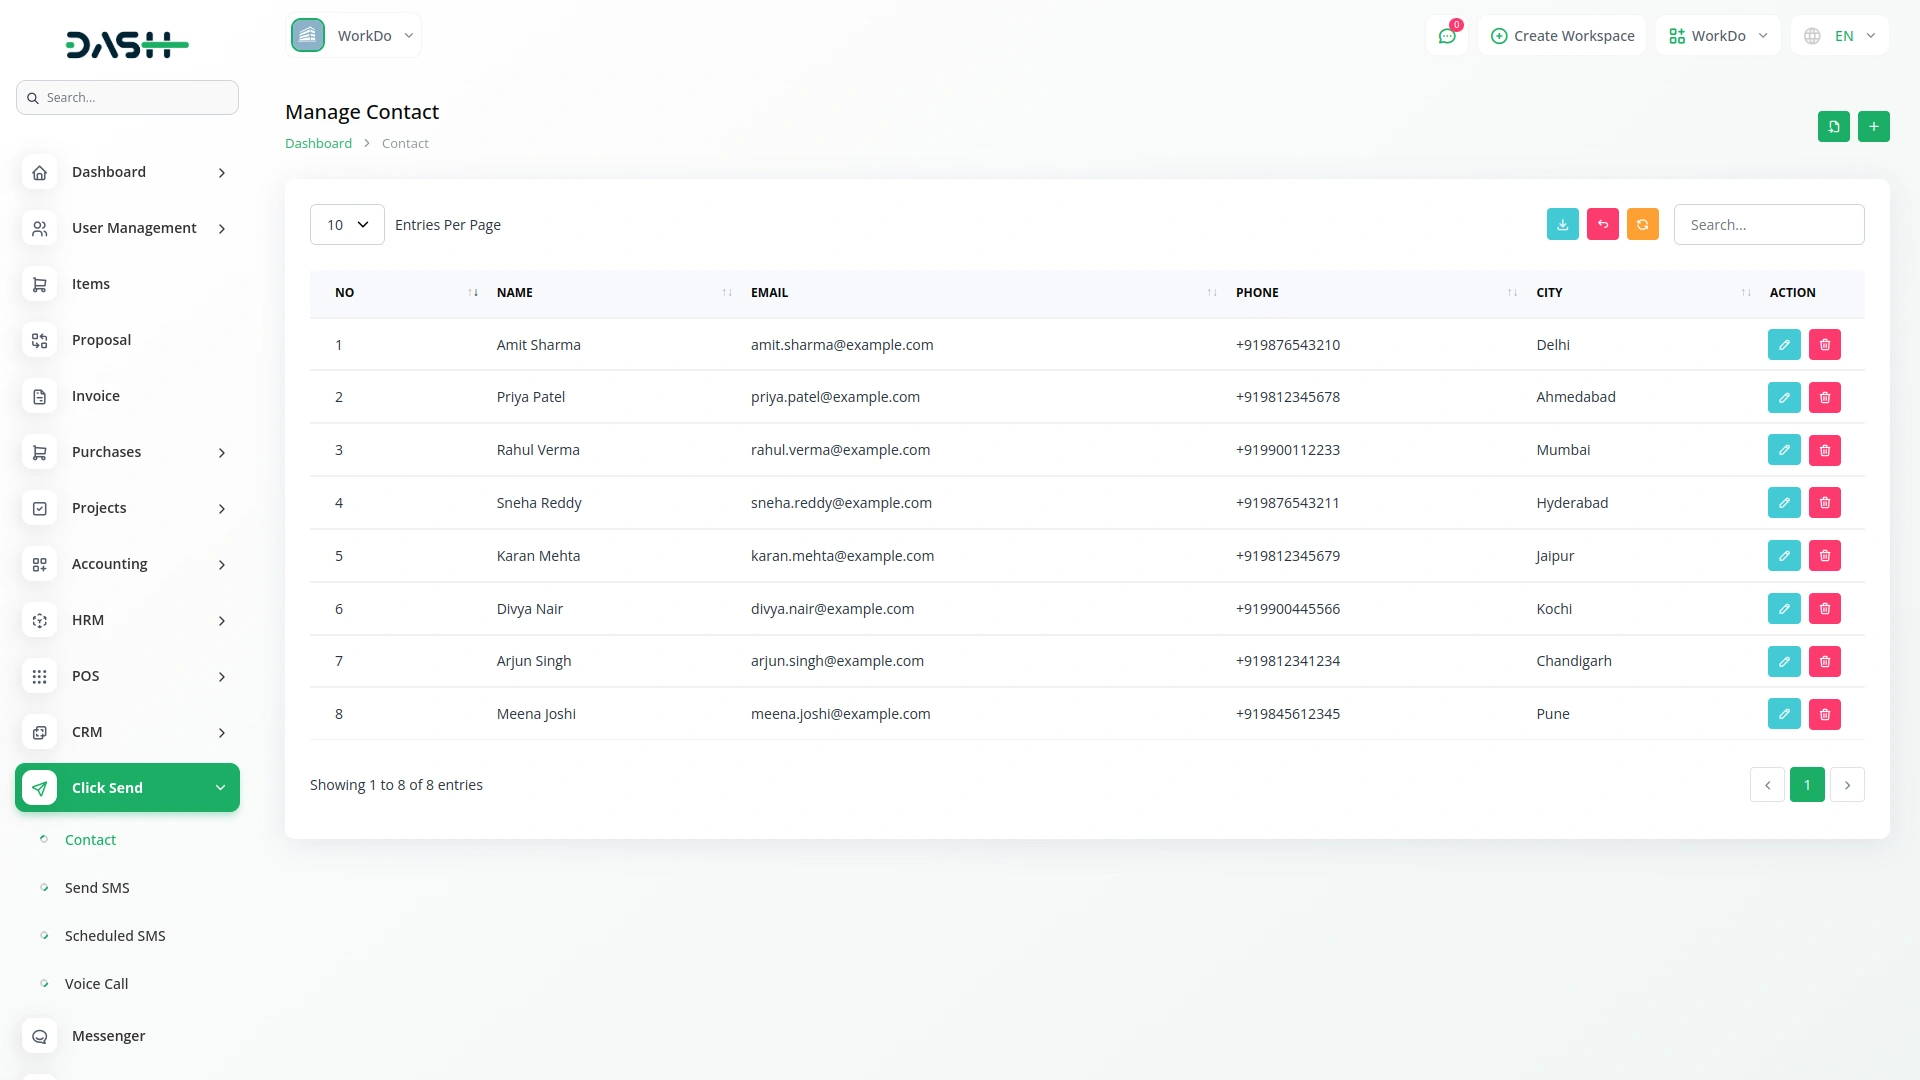
Manage Contact
- After purchasing and installing this Add-On, first you go to the sidebar and search for the Click Send Add-On.
- On this page you can easily create a new contact by clicking the “Create” button at the top of the contact page.
- You will need to enter important details such as the name, email, mobile number, city, state, and zip code.
- The list page shows all contacts with columns like Name, Email, Phone, and City. You can use search, export, reset, and reload buttons to manage your contact list data.In the Actions column, you can click the “Edit” button to modify contact details or “Delete” button to remove a contact from the system.
How To Send SMS
- After creating the contact record, navigate to the send SMS page. Here you can start sending a new SMS by clicking the “Create” button given at the top of the send SMS page.
- First, select the type by choosing one of the radio button options: Custom, User, or Contact. If you choose Custom, a mobile number field will appear where you can enter the recipient’s phone number directly. If you select User, a dropdown menu will show available users from your system. If you choose Contact, a dropdown will display your saved contacts. After selecting the recipient, enter your SMS message.
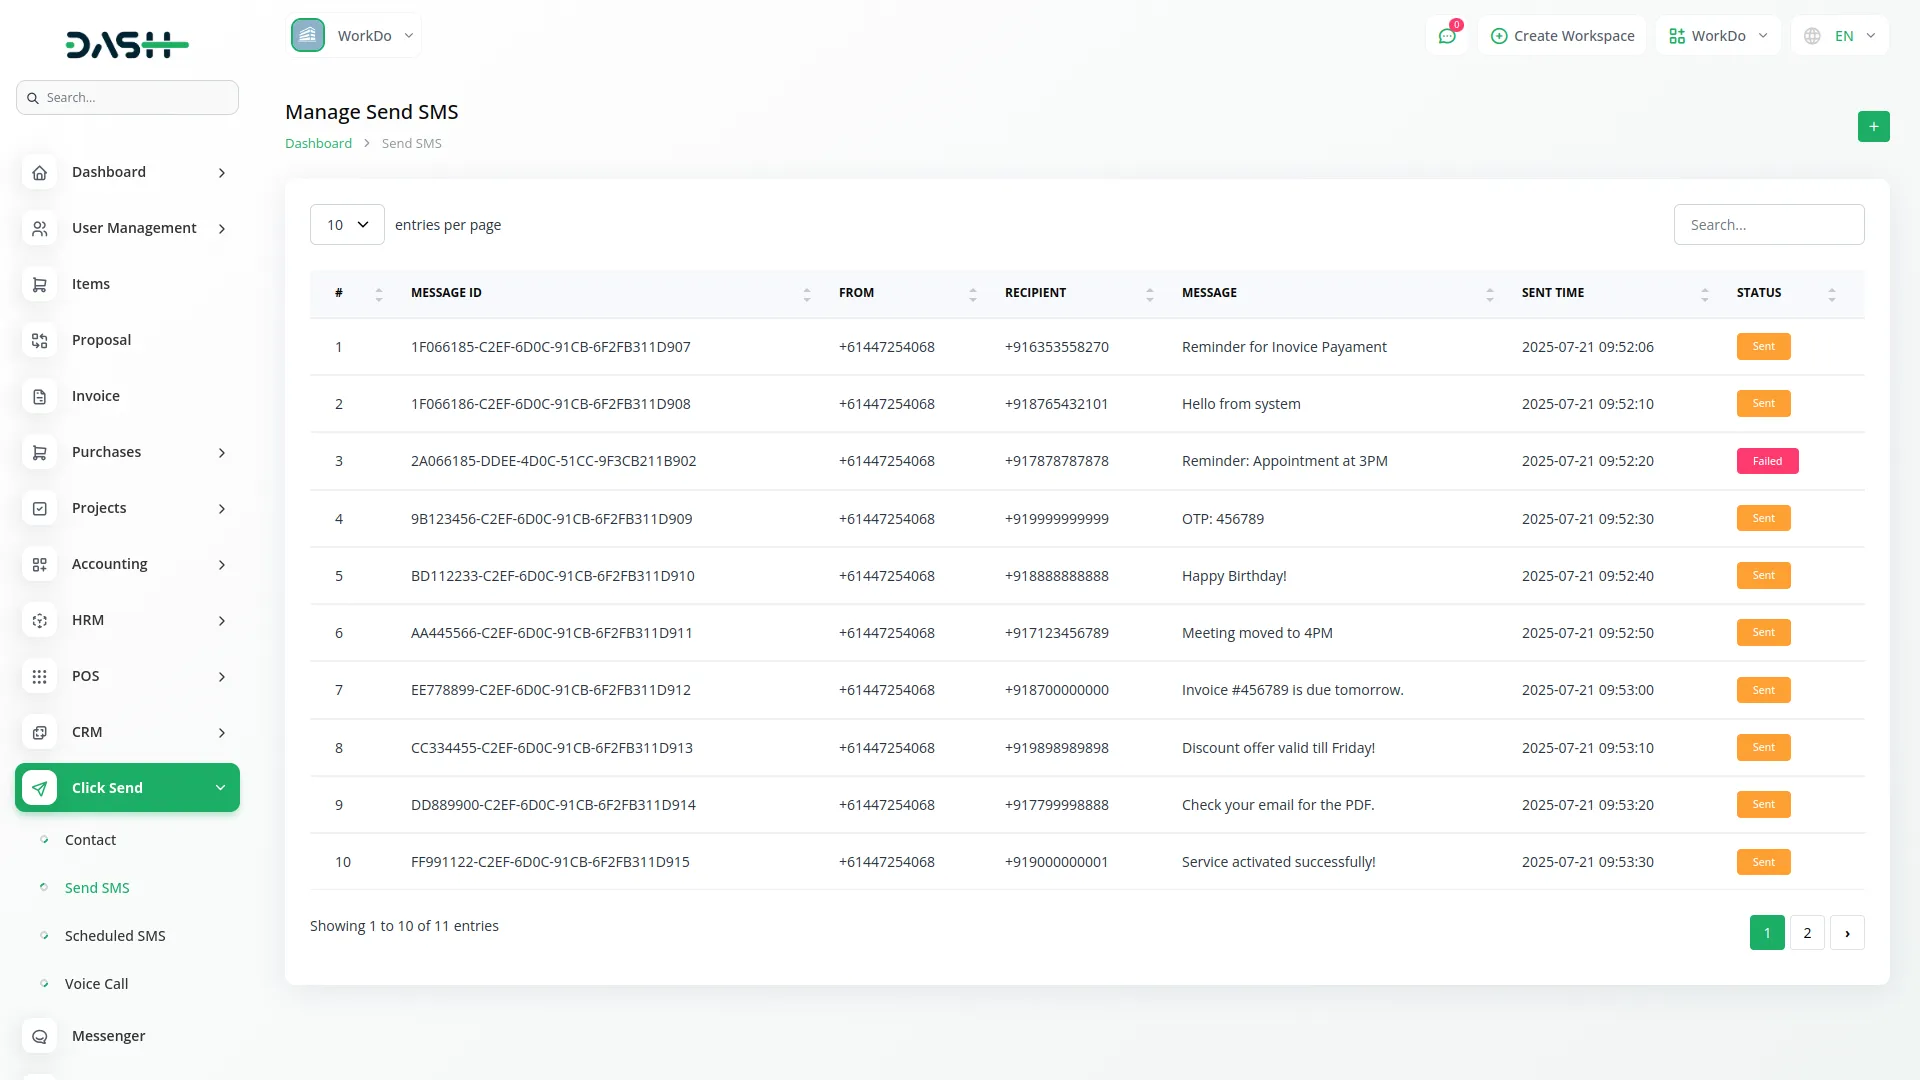
- On the list page, you’ll see all sent messages in a table with columns including ID, Message ID, From, Recipient, Message, Status, and Sent Time. This allows you to track the delivery status and history of all your SMS communications.
Manage Scheduled SMS
- To schedule an SMS for future delivery, click the “Create” button on the scheduled SMS page.
- Choose the recipient type using the radio buttons: Custom, User, or Contact. Based on your selection, either enter a mobile number directly, select from the users dropdown, or choose from the contacts dropdown. Set the scheduled date and time when you want the message to be sent, then enter your SMS message. Click “Schedule” to set up the future delivery.
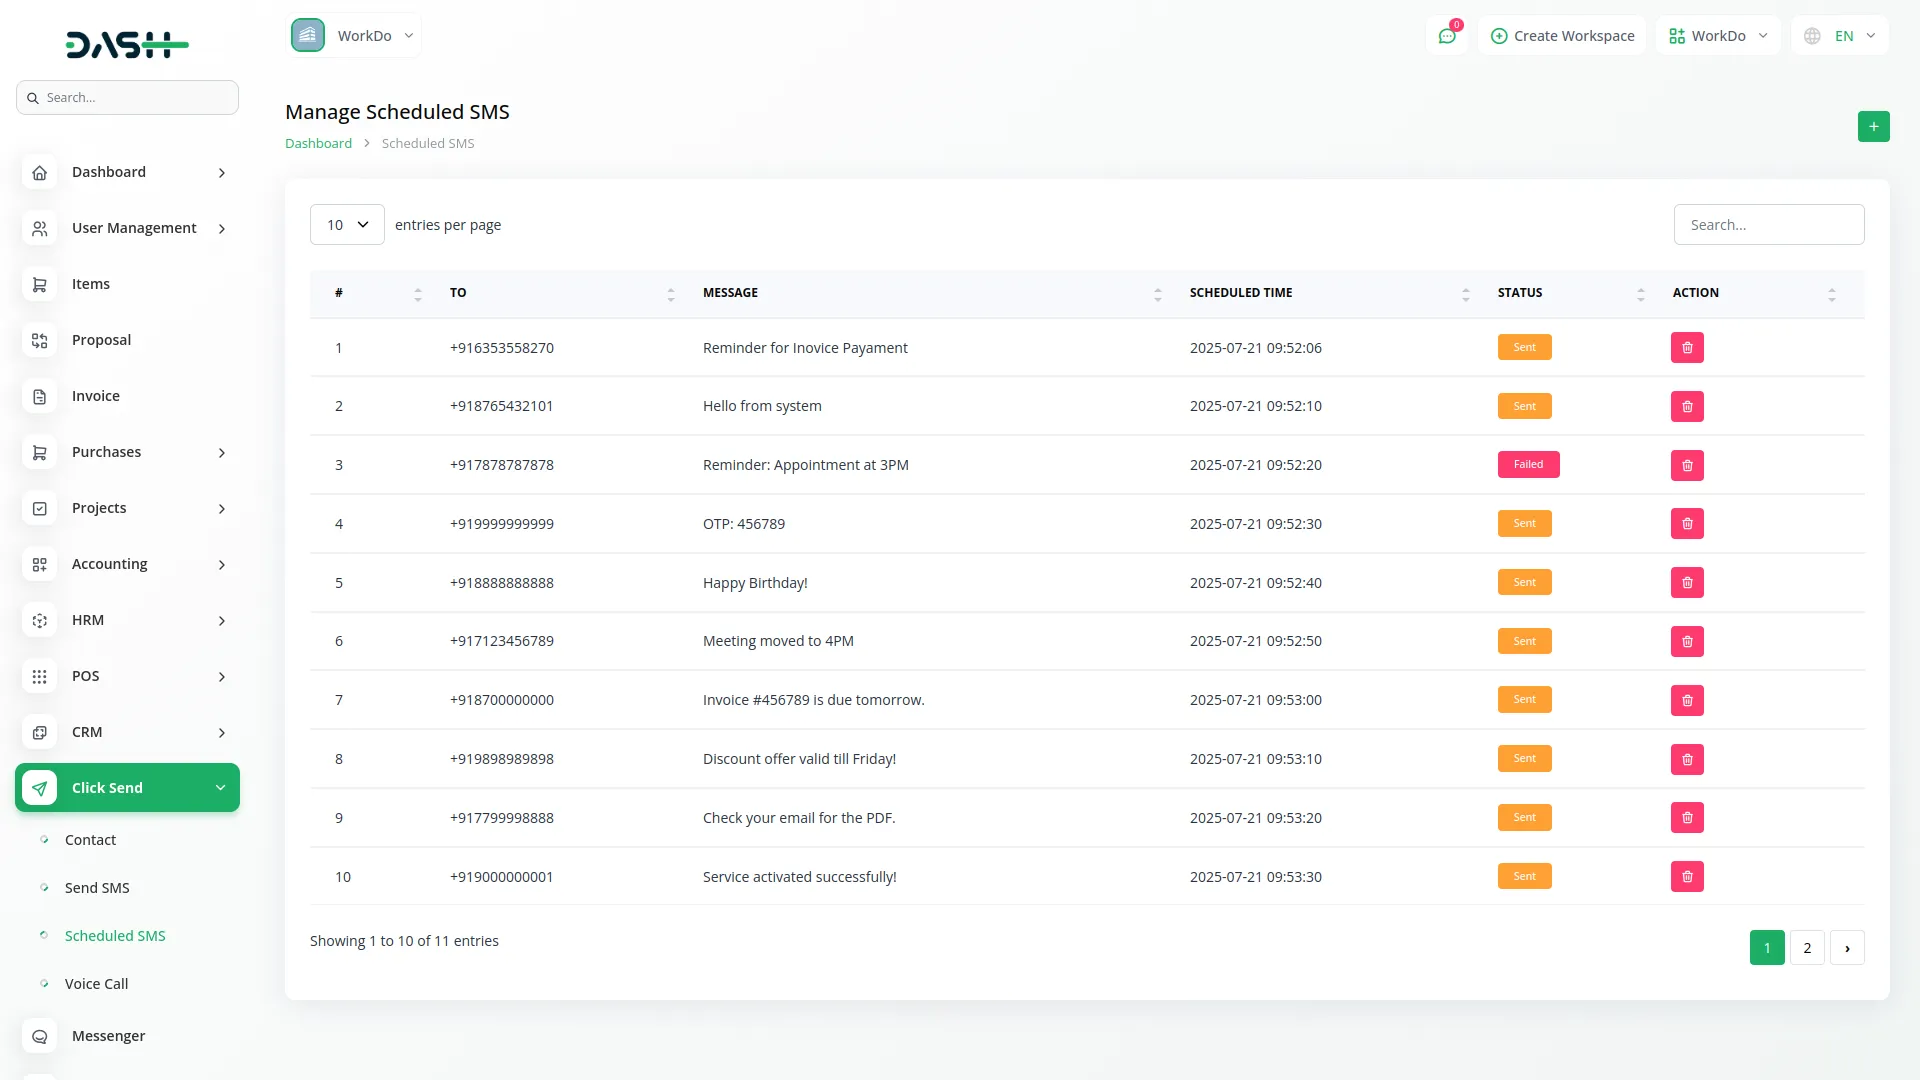
- The list page shows scheduled messages with columns for ID, To, Message, Scheduled Time, and Status. With the help of the Actions column you can easily Delete scheduled messages before it is sent.
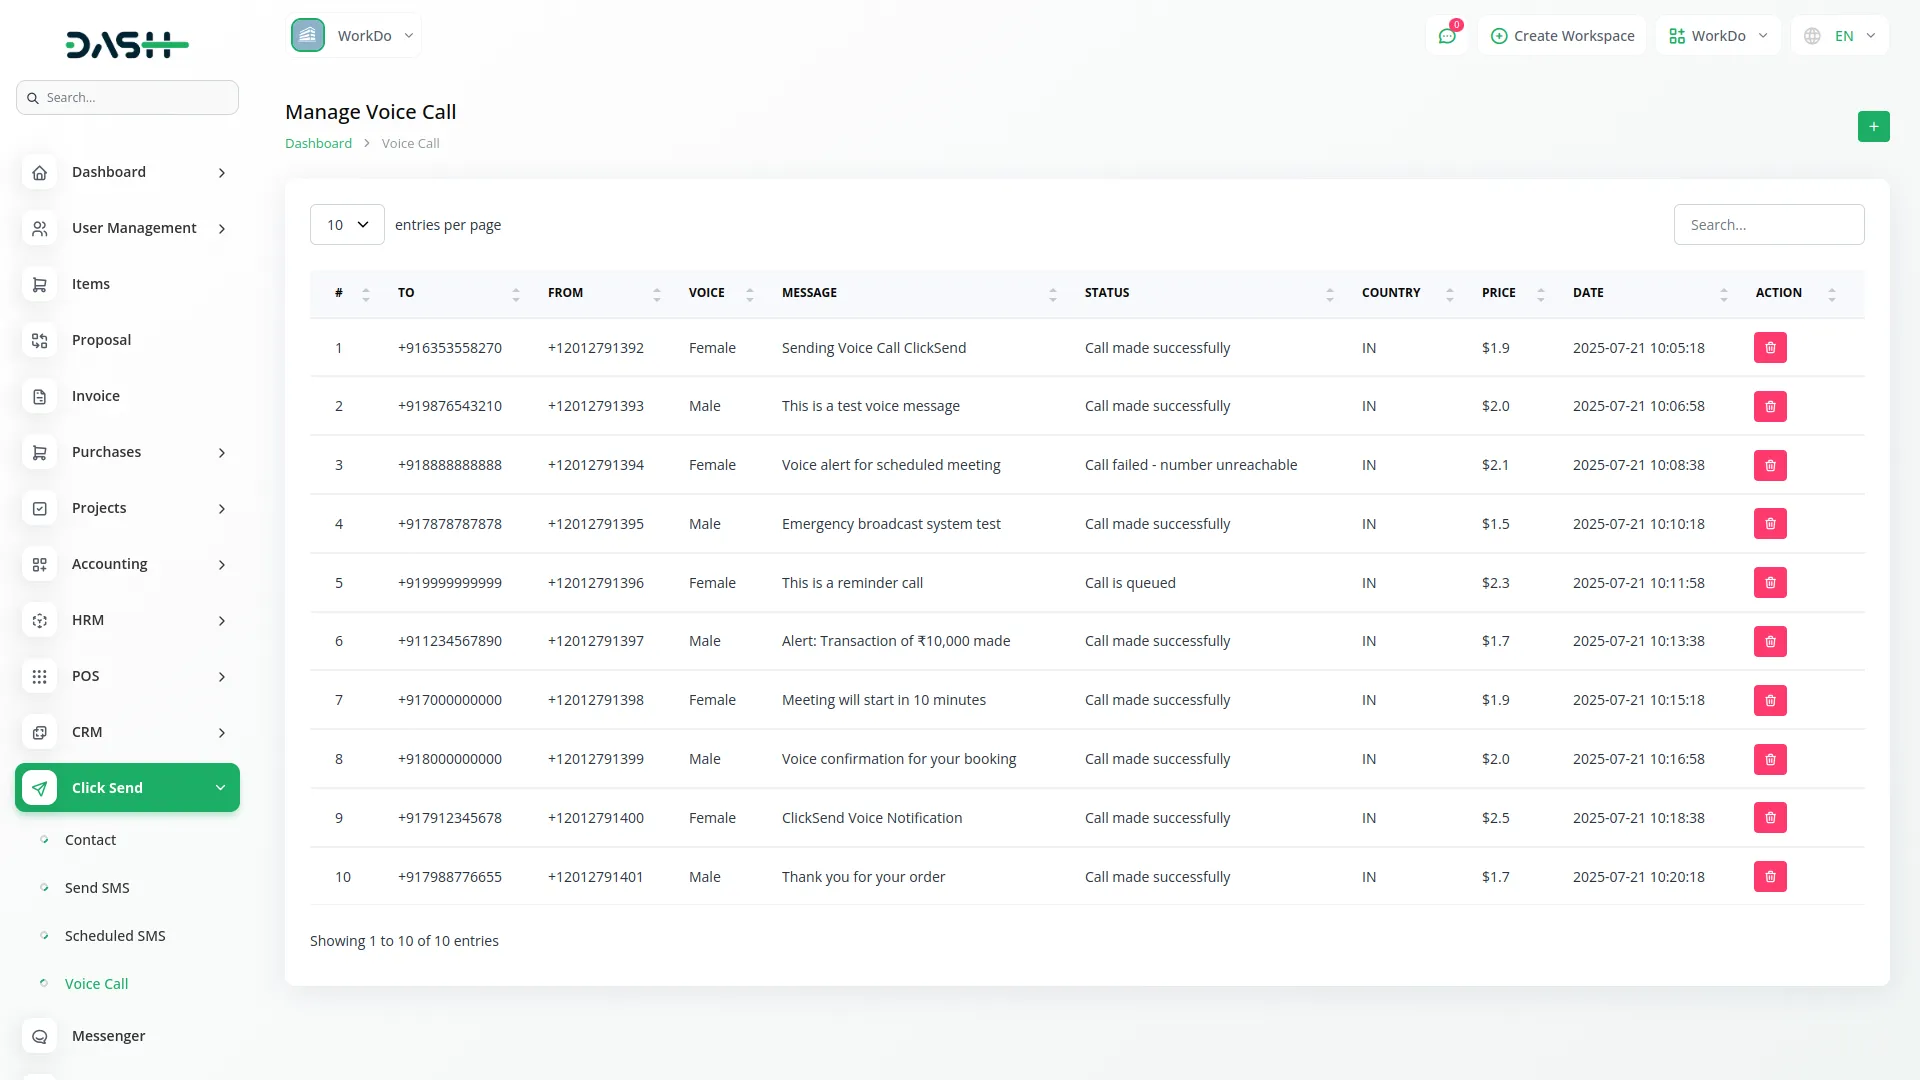
Manage Voice Call
- To make a voice call, click the “Create” button at the top of a voice call page. Select the recipient type using the radio buttons: Custom, User, or Contact. Depending on your choice, enter the mobile number, select a user, or choose a contact.
- Select the language from the dropdown menu for the voice message, then choose the voice type (Female or Male) from the voice dropdown. Enter your message in the SMS field which will be converted to speech for the voice call, then click “Call”.
- The list page displays all voice calls with columns for ID, To, From, Voice, Message, Status, Country, Price, and Date. In the Actions column, you can click “Delete” to remove call records from the system.
Note: Here is a list of some Add-Ons that we can easily connect to with the Click Send Add-On.
General
- Create User
- New Invoice
- Invoice Status Updated
- New Proposal
- Proposal Status Updated
- Bank Transfer Payment Status Updated
Accounting
- New Customer
- New Bill
- New Vendor
- New Revenue
- New Payment
CMMS
- Work Order Request
- New Supplier
- New POs
- Work Order Assigned
- New Part
- New Component
- New Location
- New Pms
Hrm
- New Monthly Payslip
- New Award
- New Event
- Leave Approve/Reject
- New Trip
- New Announcement
- New Holidays
- New Company Policy
CRM
- New Lead
- Lead to Deal Conversion
- New Deal
- Lead Moved
- Deal Moved
Pos
- New Purchase
- New Warehouse
Hotel & Room Management
- New Booking Coupon
- New Room Facility
- New Hotel Customer
- New Hotel Service
- New Room Booking
- New Room
- Change Hotel Theme
Sales Agent
- New Program
- Sales Agent Request sent
- Sales Agent Request Accept
- Sales Agent Request Reject
- New Sales Agent
- New Sales Agent Order
- Update Order Status
Fix Equipment
- New Accessories
- New Asset
- New Audit
- New Fix Equipment Component
- New Consumables
- New Licence
- New Location
- New Maintenance
Agriculture Management
- New Agriculture Fleet
- New Agriculture Process
- New Agriculture Cycle
- New Agriculture Office
- New Agriculture Season
- New Agriculture Crop
- Assign Activity Cultivation
- New Agriculture Activity
- New Agriculture Service
- New Agriculture Cultivation
Tour & Travel Management
- New Season
- New Person Detail
- New Tour Booking
- New Tour Booking Payment
- New Tour
- New Tour Detail
- New Tour Inquiry
- New Transport Type
Newspaper Distribution Management
- New Newspaper Distribution Center
- New Agent
- New Journalist
- New Journalist Information
- New Advertisement
- New Newspaper
School-Institute Management
- New Teacher
- New Admissions
- New Parents
- New Students
- New Homework
- New Subject
- New Time Table
Vehicle Inspection Management
- New Inspection Vehicle
- New Vehicle Inspection Request
- New Inspection List
Categories
Related articles
- PESTEL Analysis Integration in Dash SaaS
- Peach Payment Integration in Dash SaaS
- Events Management Integration in Dash SaaS
- Flutterwave Payment Gateway in BookingGo SaaS
- Consultancy Integration in Dash SaaS
- Wholesale Product – eCommerceGo Addon
- Promo Codes Integration in BookingGo SaaS
- Recruitment Integration in Dash SaaS
- Sign-In with Outlook Add-On Integration in Dash SaaS
- RoadMap Central Integration in Dash SaaS
- Time Tracker Management Integration in Dash SaaS
- Rental Management Integration in Dash SaaS
Reach Out to Us
Have questions or need assistance? We're here to help! Reach out to our team for support, inquiries, or feedback. Your needs are important to us, and we’re ready to assist you!


Need more help?
If you’re still uncertain or need professional guidance, don’t hesitate to contact us. You can contact us via email or submit a ticket with a description of your issue. Our team of experts is always available to help you with any questions. Rest assured that we’ll respond to your inquiry promptly.
Love what you see?
Do you like the quality of our products, themes, and applications, or perhaps the design of our website caught your eye? You can have similarly outstanding designs for your website or apps. Contact us, and we’ll bring your ideas to life.
