Box.com Integration in Dash SaaS
Enhance productivity with direct access to Box.com files in the WorkDo-dash interface. No more switching apps or struggling with downloads.
Introduction
The Box.com Integration allows you to connect your Box storage with the platform, making it easier to access, manage, and organize your files without switching between multiple applications. Once integrated, you can browse, upload, and work with your Box files directly within the platform while keeping them updated across both systems. The setup is simple—upload your Box credentials, enable the required features, and start working with your files instantly. This documentation provides a step-by-step guide on how to configure and use the Box.com Integration effectively within Dash SaaS.
How to Install the Add-On?
To Set Up the Box.com Add-On you can follow this link: Setup Add-On
How to use the Box.com Add-On?
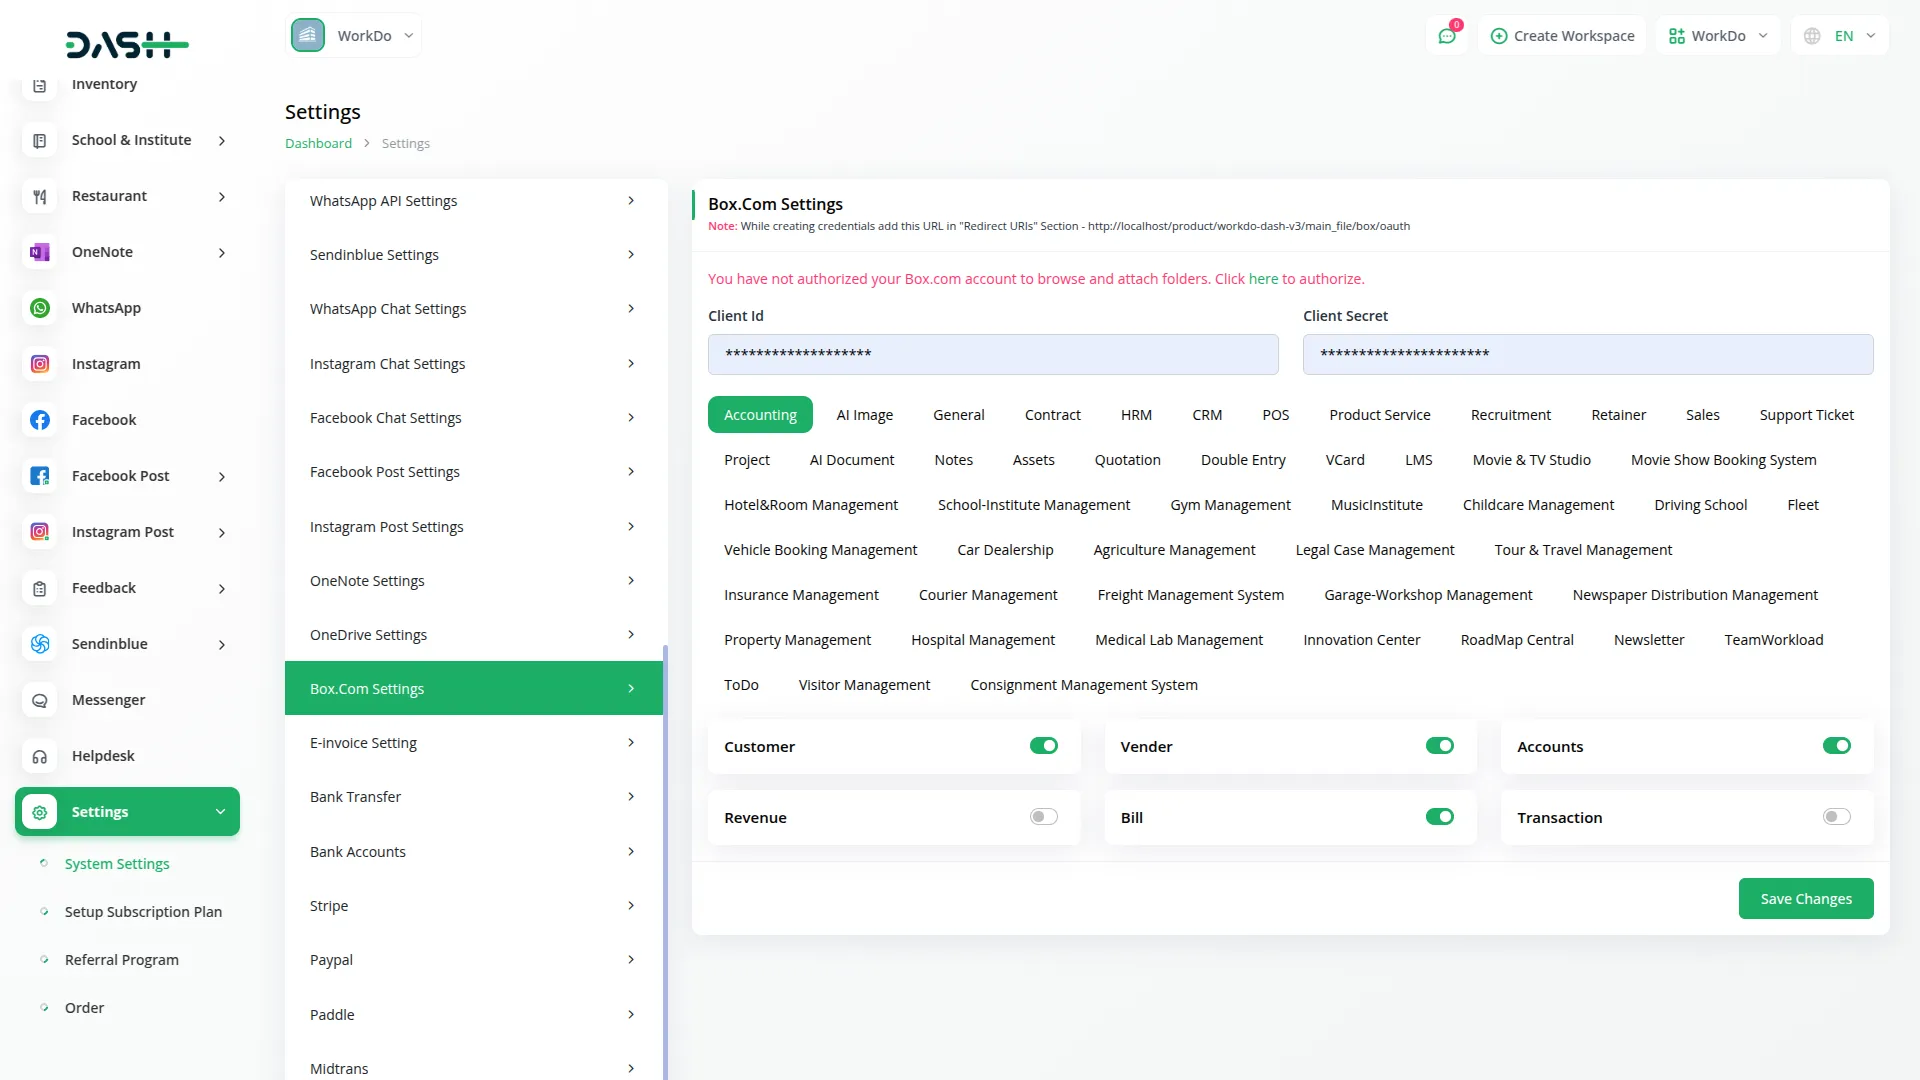
- Go to the settings page and click on system settings.
- Within the system settings, find the Box.com Add-On.
- After you find the Box.com Add-On, you have to enter the Client ID and the Client Secret Key.
- To learn how to generate the Client ID, and Client Secret Key, follow this link https://developer.box.com/
- Select the features you want to sync with Box.com, such as To-Do, Notes, Documents, or Assets.
-

- Once the integration is complete, you’ll be able to access your Box.com files directly from the platform, without any need to switch between different applications.
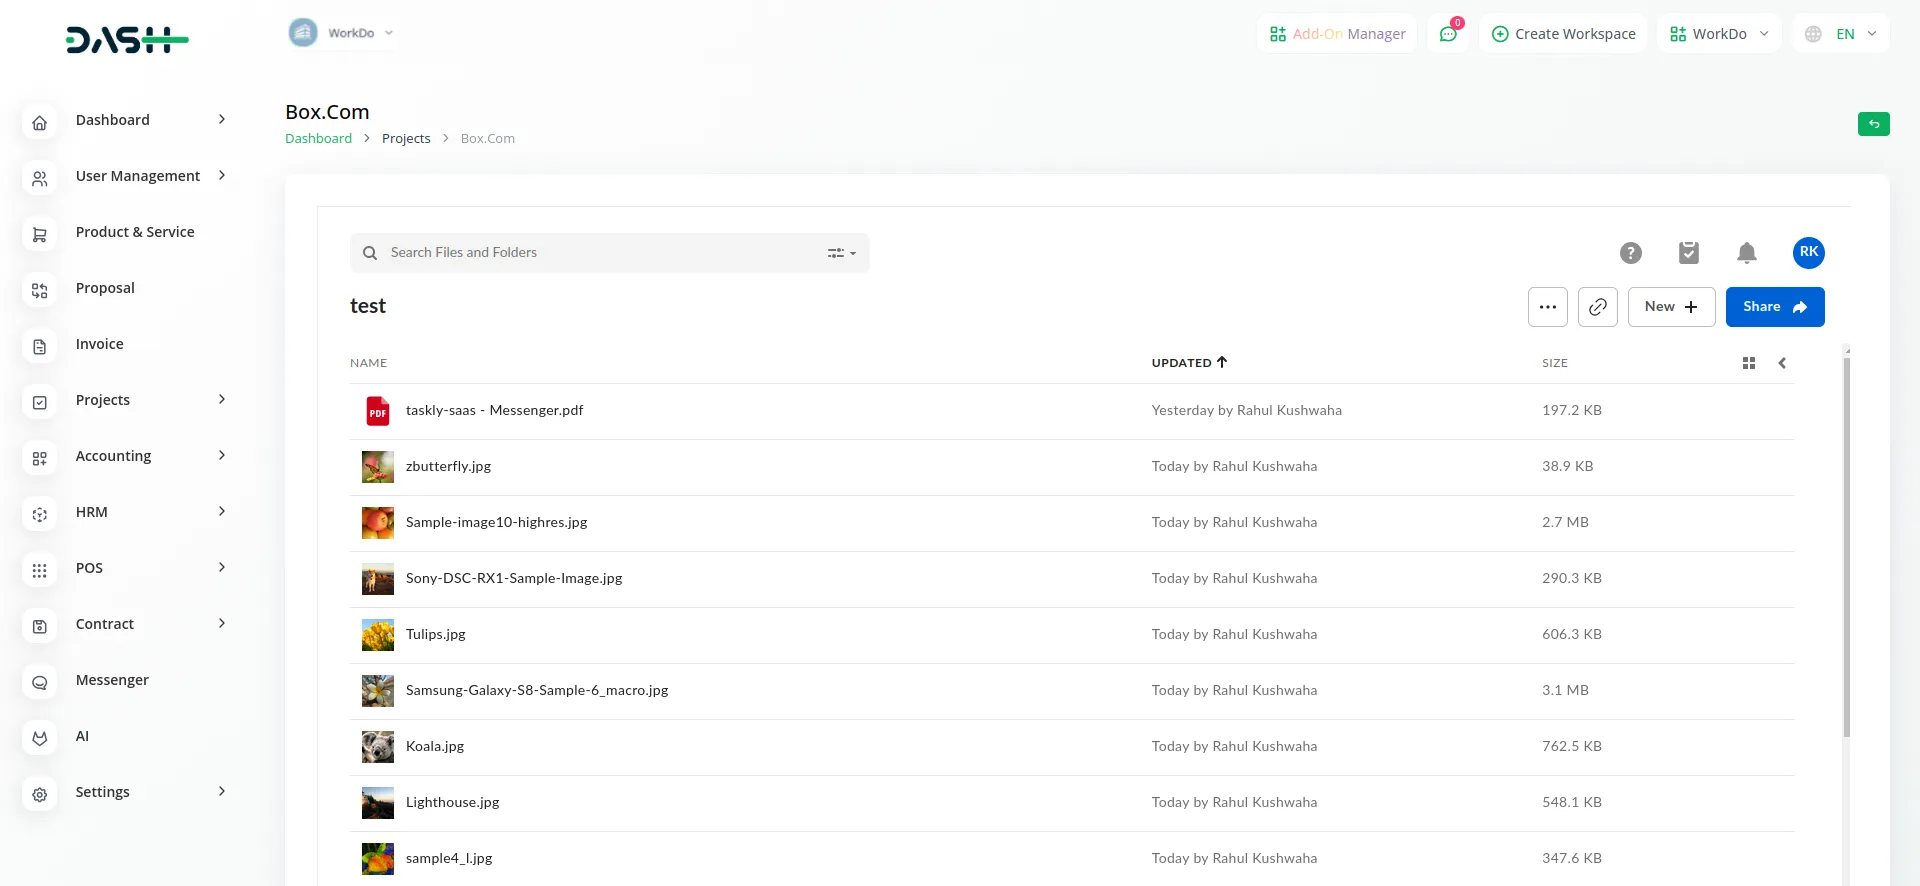
- After setting up this Add-On, a Box icon will appear at the top of any feature you have activated in the system settings. Suppose, if you enable the Invoice feature, you’ll see the Box icon on the Invoice page. Clicking this icon will show all the files you’ve added from Box.com.
- You can sign-up and login easily in your Box.com account, with the help of buttons given at the top of the page.
- Once you do that, you can add new files, share the files, and copy the link of the files from the platform itself. You can also delete the files, deleting a file on the platform will also remove it from Box.com, and vice versa.
-

- View and manage your documents and folders without downloading them.
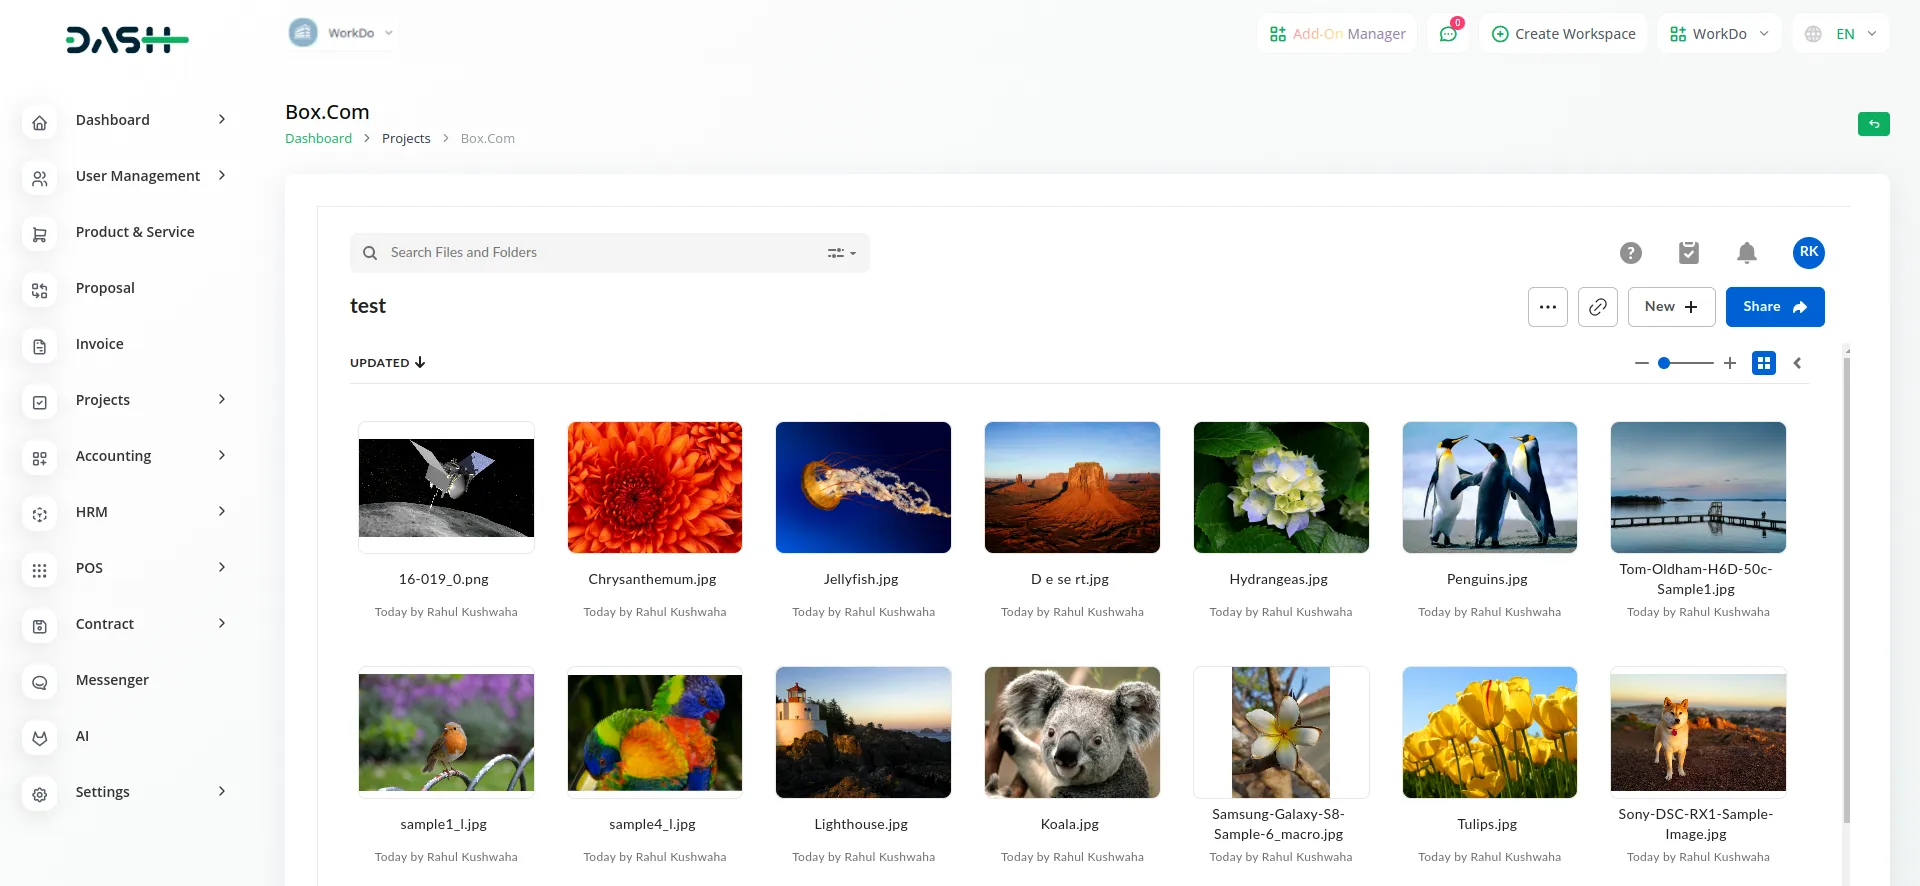
- Organize files in grid or list format for easier navigation.
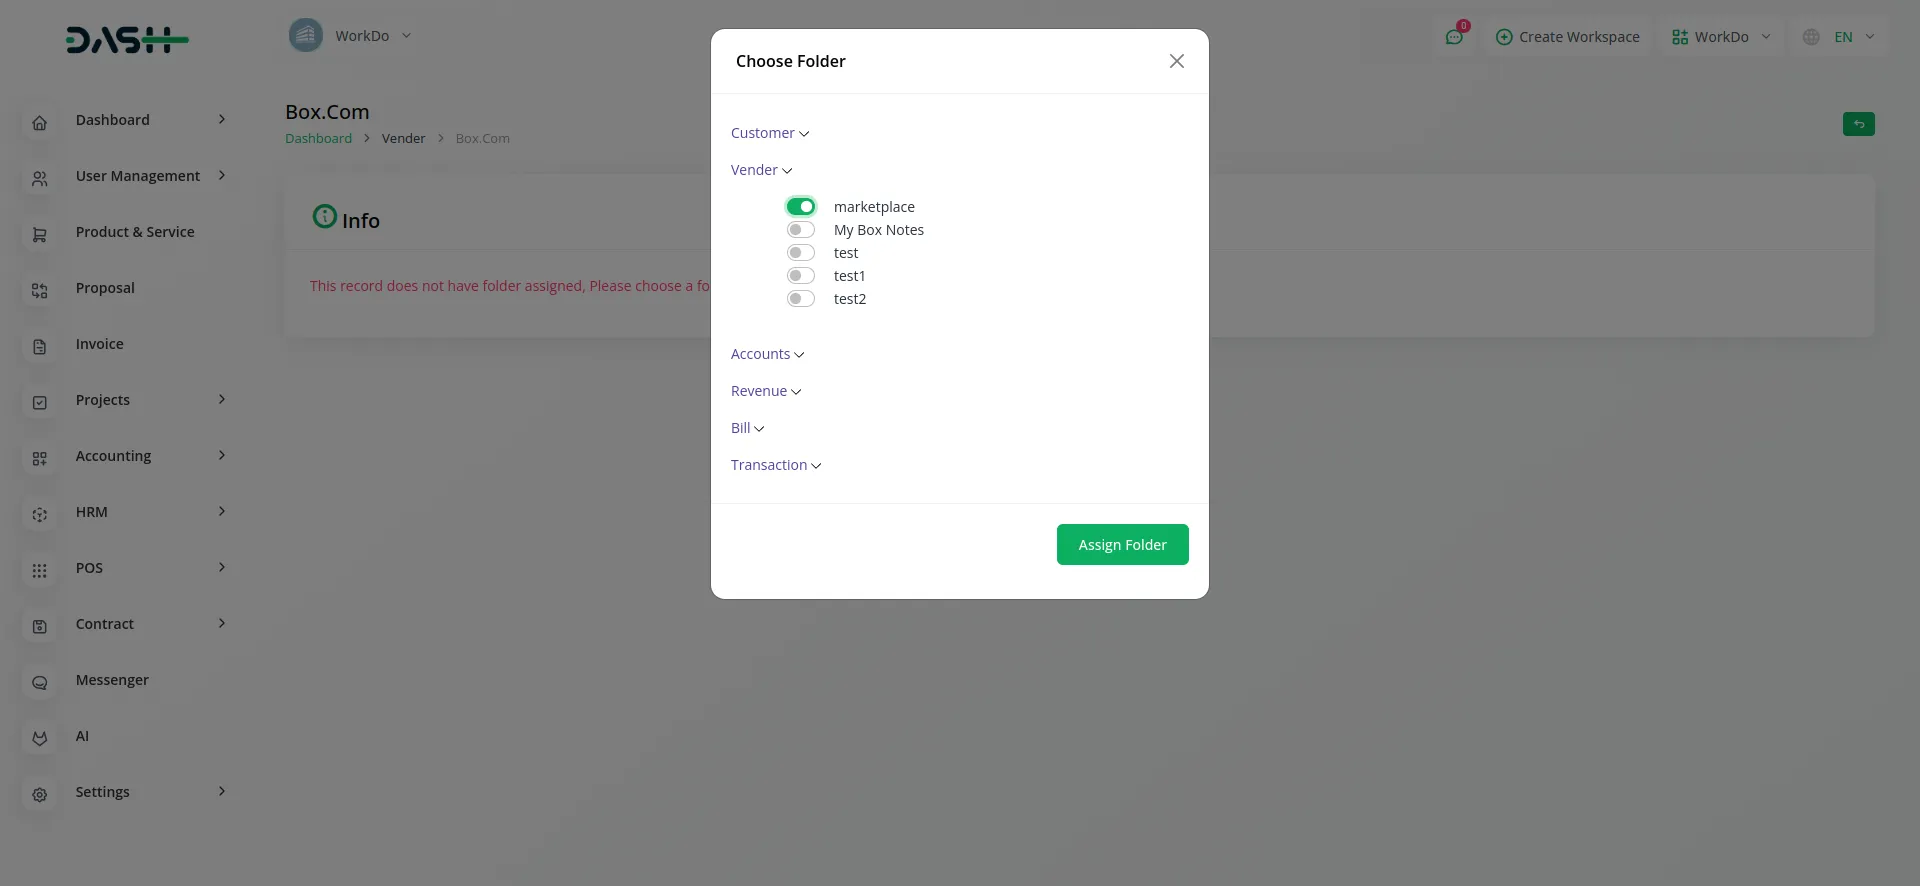
- Connect folders to different features for improved collaboration.
- Any modifications made to a file in Box.com will automatically reflect in the platform, and changes made in the platform will update in Box.com.
-

- Experience effortless synchronization and quick access to your files without constantly switching between tools.
- After connecting Box.com, you can access both main folders and subfolders within the platform. This allows easy navigation and structured file management without missing any content.
-

Box.com Add-On Features
Accounting
- Customer
- Vendor
- Accounts
- Revenue
- Bill
- Transaction
General
- Invoice
- Proposal
- Contract
HRM
- Employee
- Payslip
- Event
- Leave
- Document
CRM
- Lead
- Deal
POS
- Warehouse
- Purchase
- POS Order
Product and Service
- Products
Project
- Projects
- Task
- Bug
Categories
Related articles
- PrintPress Management Integration in Dash SaaS
- Quotation Integration in Dash SaaS
- SWOT Analysis Model Integration in Dash SaaS
- Property Management Integration in Dash SaaS
- Jira Add-On WorkDo Dash Detailed Documentation
- PESTEL Analysis Integration in Dash SaaS
- SSLCommerz Detailed Documentation
- Vehicle Inspection Management Integration in Dash SaaS
- Elderly Care Detailed Documentation
- Pabbly Connect Integration in Dash SaaS
- Portfolio Integration in Dash SaaS
- Sign-In with Slack Add-On Integration in Dash SaaS
Reach Out to Us
Have questions or need assistance? We're here to help! Reach out to our team for support, inquiries, or feedback. Your needs are important to us, and we’re ready to assist you!


Need more help?
If you’re still uncertain or need professional guidance, don’t hesitate to contact us. You can contact us via email or submit a ticket with a description of your issue. Our team of experts is always available to help you with any questions. Rest assured that we’ll respond to your inquiry promptly.
Love what you see?
Do you like the quality of our products, themes, and applications, or perhaps the design of our website caught your eye? You can have similarly outstanding designs for your website or apps. Contact us, and we’ll bring your ideas to life.
