Google Slides Detailed Documentation
This Add-On provides seamless integration with Google Slides, allowing you to create, manage, and edit slide presentations directly from your dashboard.
Introduction
This Add-On provides seamless integration with Google Slides, allowing you to create, manage, and edit slide presentations directly from your dashboard. The system connects to your Google account and synchronizes all presentations between your project and Google Slides in real-time. You can create new presentations, share them instantly, and edit them without leaving your workspace.
How to Install the Add-On?
To Set Up the Google Slides Add-On, you can follow this link: Setup Add-On
How to use the Google Slides Add-On?
System Settings – Google Slides Configuration
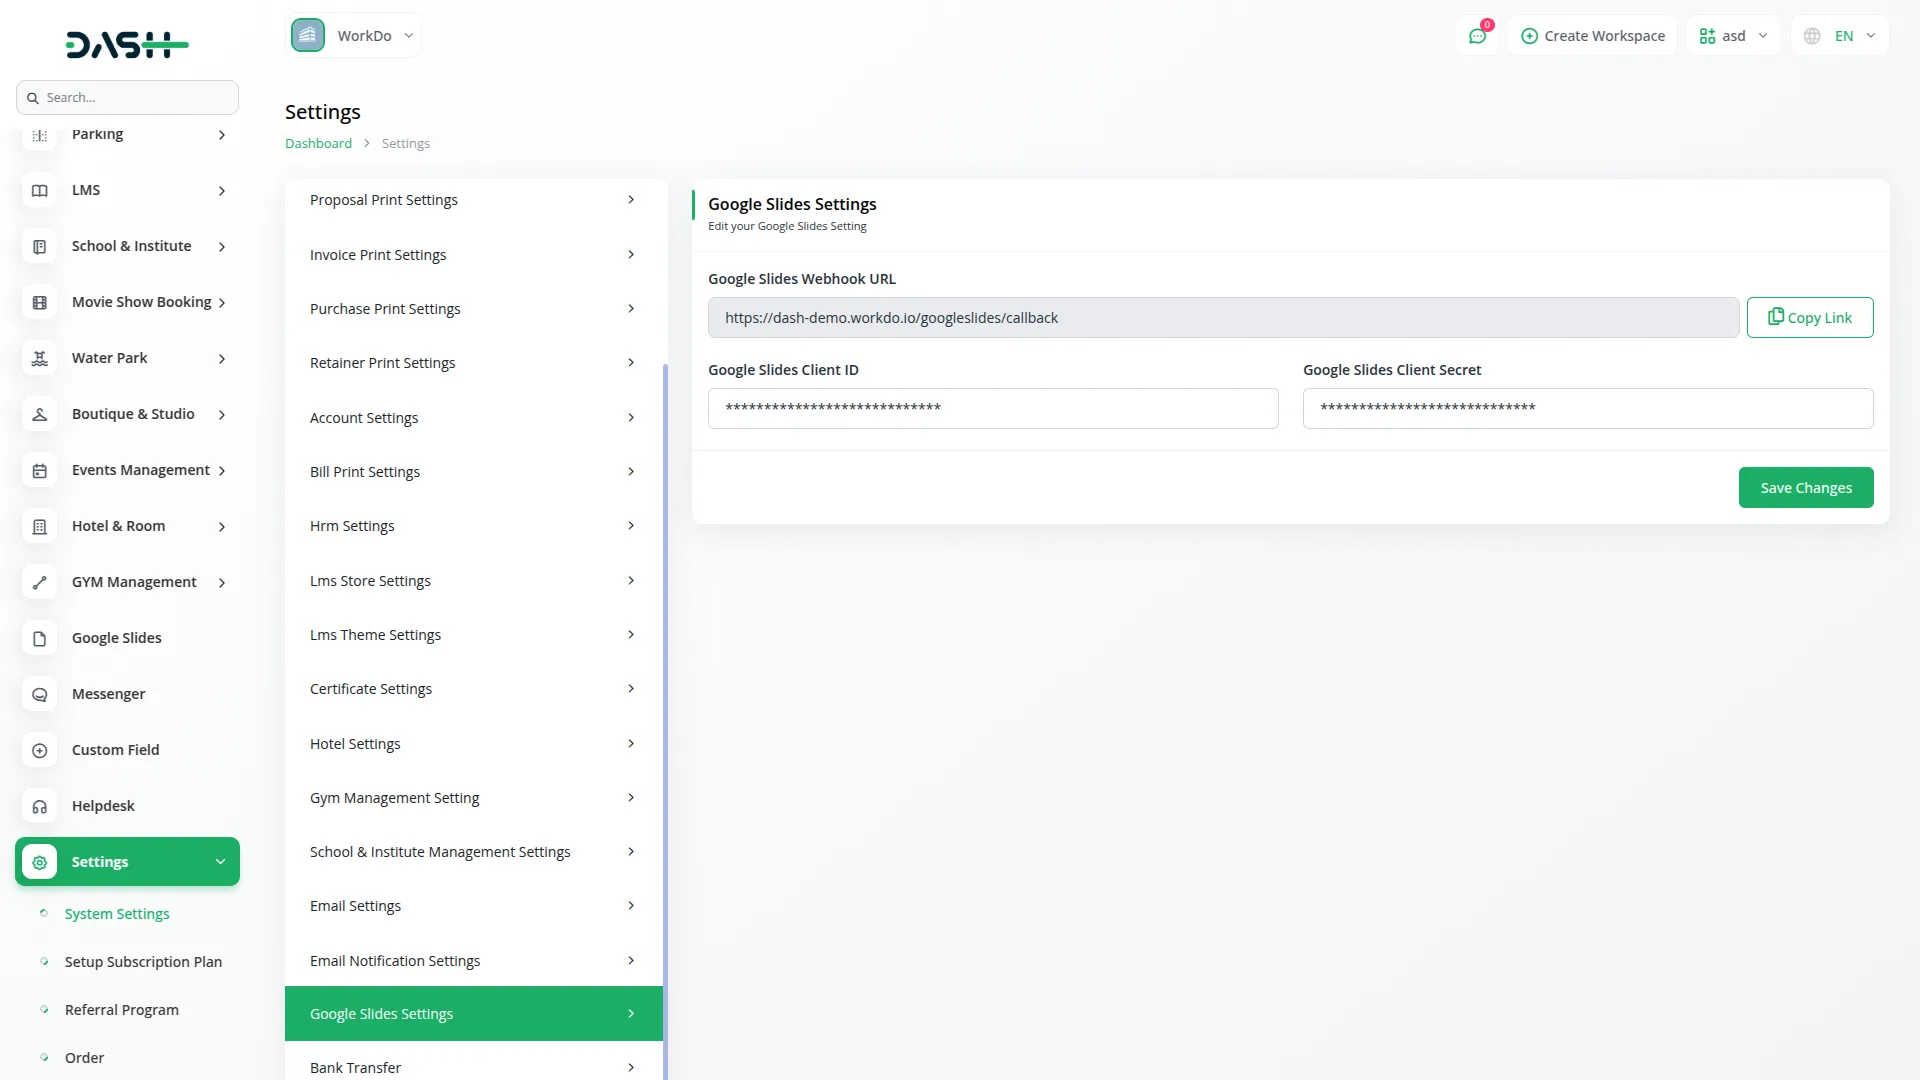
- Before using the Google Slides feature, you must configure the system settings. Navigate to the System Settings module and locate the Google Slides Settings section.
- You will see the Google Slides Webhook URL displayed on the screen with a “Copy Link” button next to it. Click this button to copy the URL to your clipboard.
- Enter your Google Slides Client ID and Google Slides Client Secret in the respective fields. These credentials are obtained from your Google Console.
- Important: You must set the displayed webhook URL as the Callback URL in your Google Console to enable proper integration.
- When creating credentials in your Google Console, make sure to enable the Google Slides API and set the displayed Webhook URL as the Callback URL to ensure proper integration.

Google Slides Management
- To start using Google Slides, you need to authorize your Google account first. If you haven’t authorized your account, you will see a notification stating “You have not authorized your google account to browse. Click here to authorize.” Click on this notification to complete the authorization process.
- To create a new Google Slides presentation, click the “Create” button. Enter the title for your presentation in the Slides Name field. Click “Submit” to create the presentation.
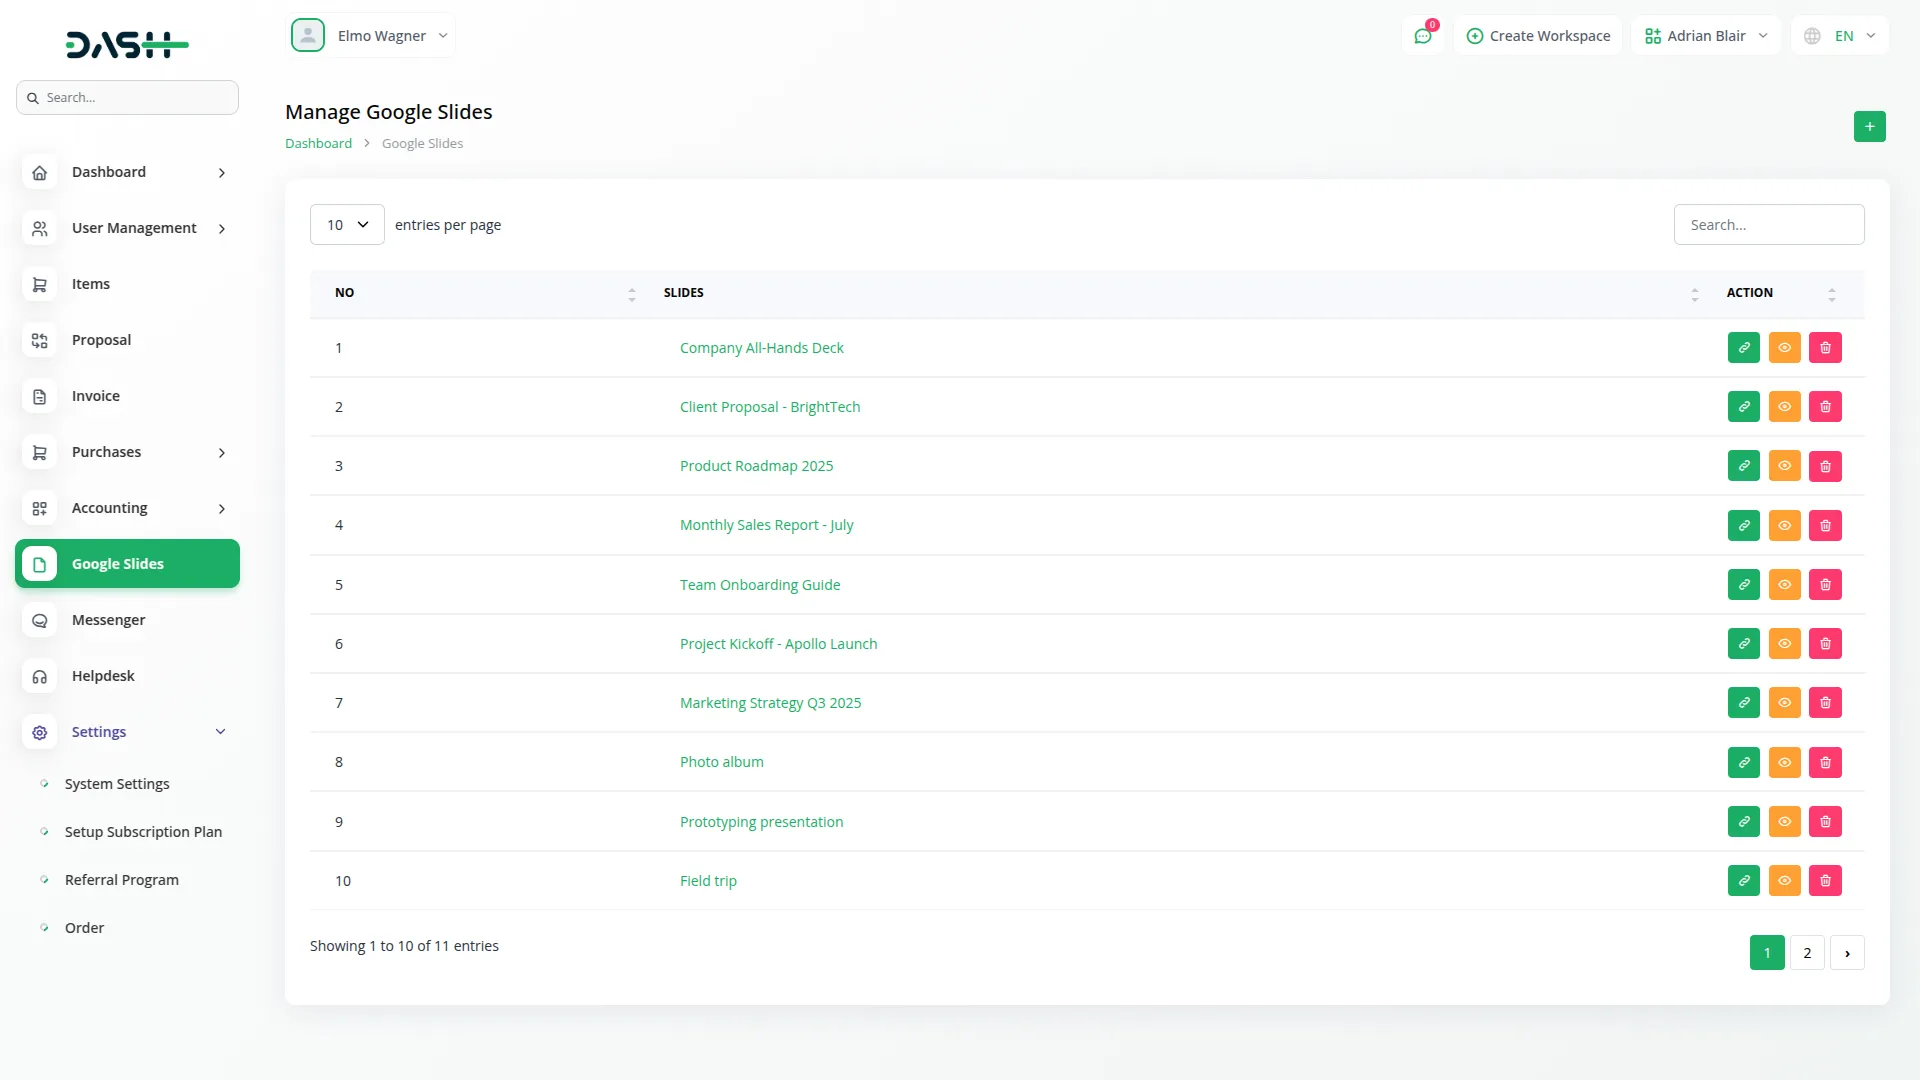
- The list page displays all your presentations in a table with the Slides Name column. You can use the Search button to find specific presentations quickly.

With the help of the action column, you can easily copy the link, view, edit, or delete the google slides whenever you want.
Copy link
- When you click the “Copy Link” button next to a Google Slides presentation, the direct link to that presentation is automatically copied to your clipboard. You can then paste this link into your browser, and it will open the presentation directly in your Google Slides account.
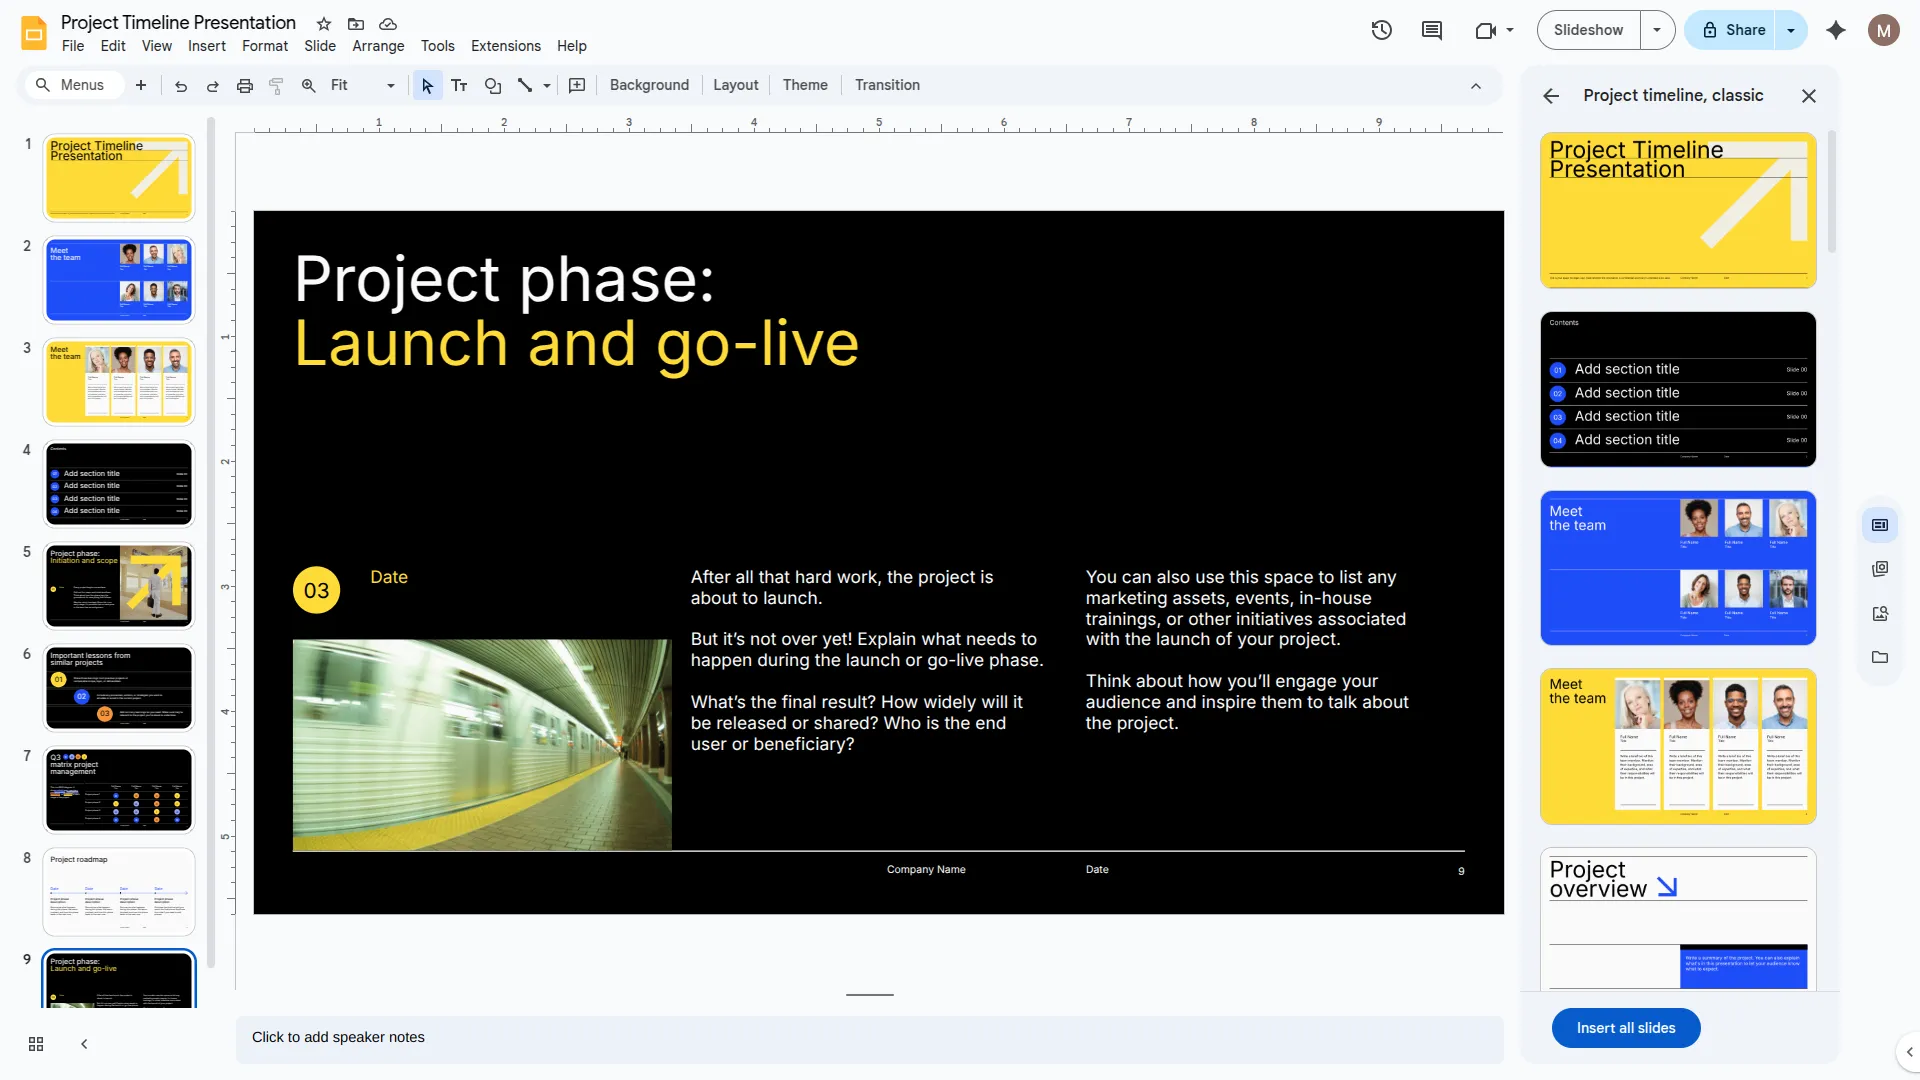
- Once opened, you’ll have full access to Google Slides features where you can create new slides, add content, and customize the design using various fonts, styles, layouts, and themes.
- You can write dynamic content, include speaker notes for each slide, and collaborate in real time with others if needed. The presentation can also be downloaded in different formats like PDF or PowerPoint.
- This simple link-sharing system helps you move quickly between your dashboard and Google Slides, making editing and presentation creation more efficient and accessible.

View & Edit
- If you click on the view button, you can view your presentations and slides easily including all the necessary details.
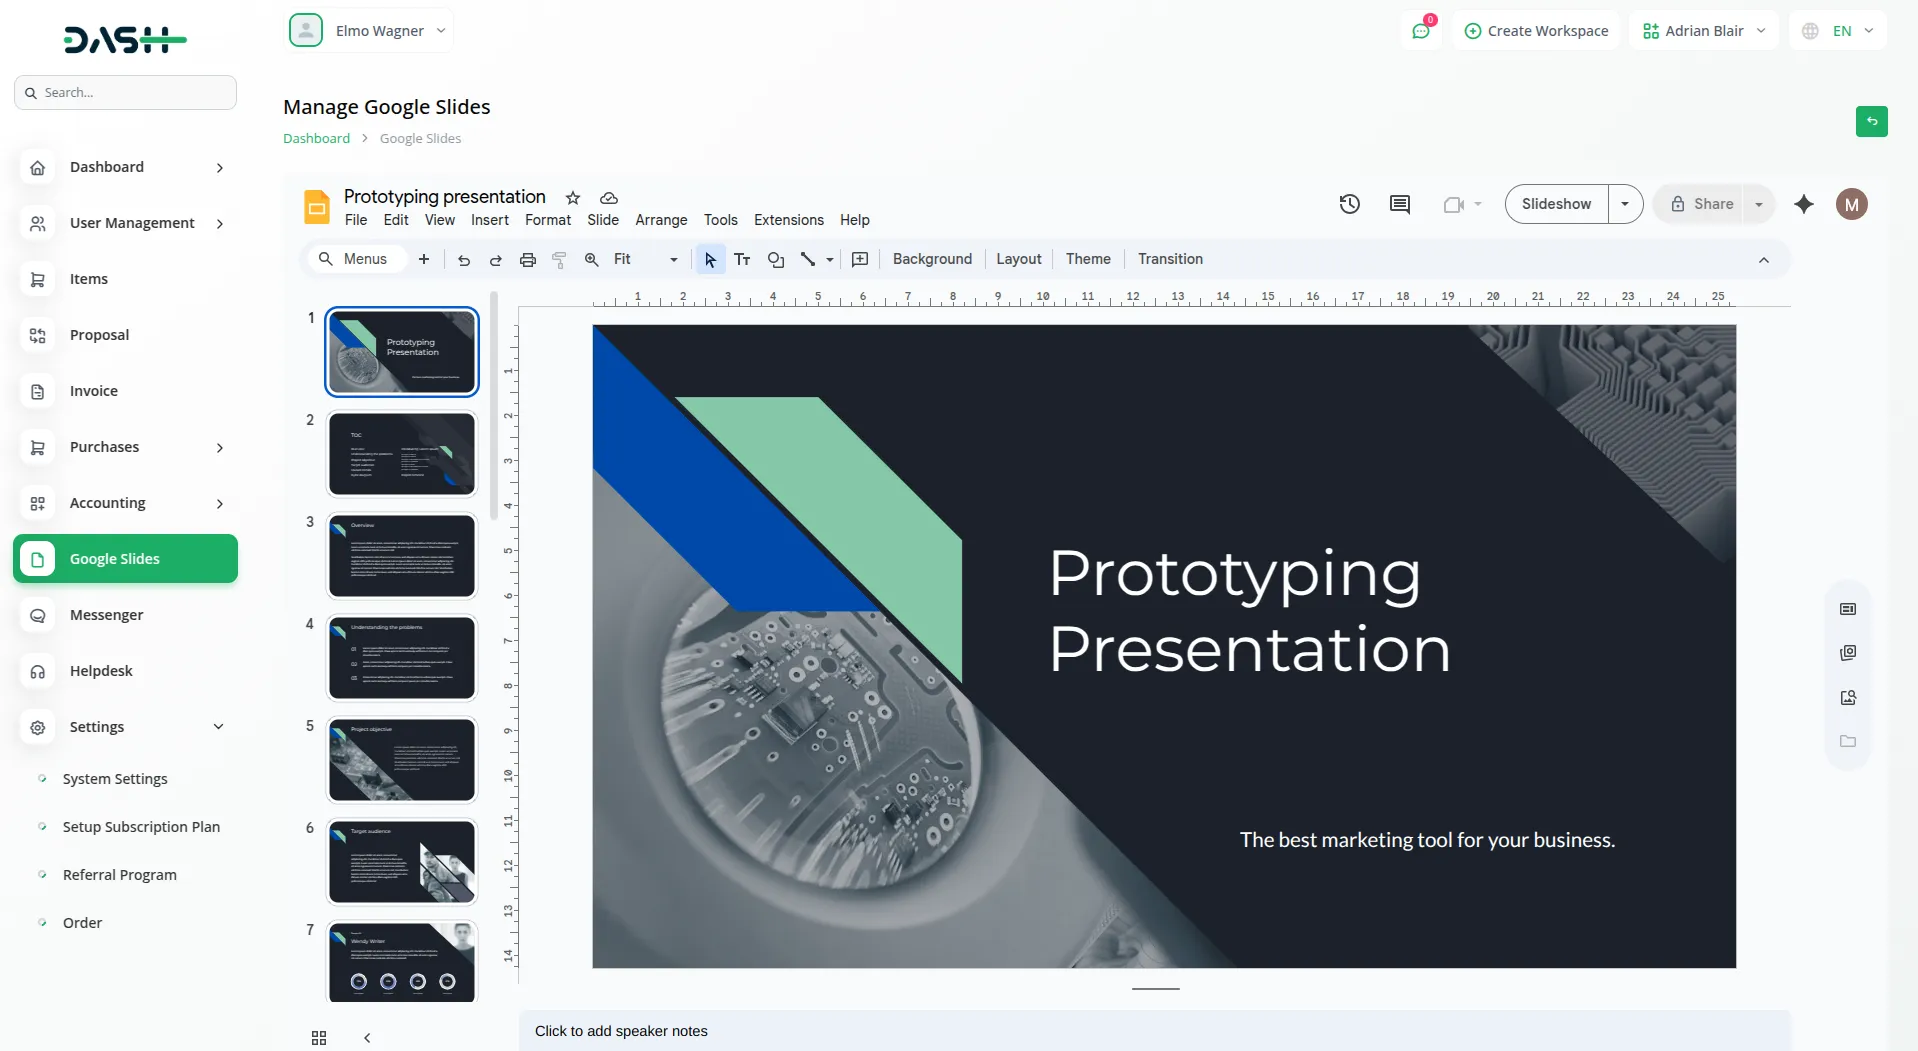
- If you click on the edit button, you can easily edit your presentation from the platform itself.
- Inside the embedded editor, you have full access to Google Slides’ editing tools. You can navigate between slides using the panel on the left, edit text, change fonts and colors, insert images, modify layouts, and apply themes. You can also use menu options like File, Insert, Format, and Tools, just as you would in the regular Google Slides application.
- Additionally, you can add speaker notes at the bottom of each slide and collaborate in real-time if the presentation is shared with other users. Any changes made here are automatically saved and synchronized with your Google account, meaning there’s no need to manually download or re-upload files.

- Delete: Click this button to remove the presentation from your account.
Note: All presentations created in your project will automatically appear in your Google Slides account, and any slides created directly in Google Slides will also be visible in your project due to the bidirectional synchronization feature.
Categories
Related articles
- Video Hub Integration in Dash SaaS
- To Do Integration in Dash SaaS
- Procurement Integration in Dash SaaS
- Business Plan Integration in Dash SaaS
- Custom Field Integration in Dash SaaS
- Business Model Integration in Dash SaaS
- Bookings Integration in Dash SaaS
- Gym Management Integration in Dash SaaS
- MyFatoorah Payment Gateway in Dash SaaS
- Plivo SMS Integration in Dash SaaS
- Fire Safety Detailed Documentation
- Double Entry Integrational Entry Integration
Reach Out to Us
Have questions or need assistance? We're here to help! Reach out to our team for support, inquiries, or feedback. Your needs are important to us, and we’re ready to assist you!


Need more help?
If you’re still uncertain or need professional guidance, don’t hesitate to contact us. You can contact us via email or submit a ticket with a description of your issue. Our team of experts is always available to help you with any questions. Rest assured that we’ll respond to your inquiry promptly.
Love what you see?
Do you like the quality of our products, themes, and applications, or perhaps the design of our website caught your eye? You can have similarly outstanding designs for your website or apps. Contact us, and we’ll bring your ideas to life.
