Plaid Integration in Dash SaaS
Introduction
Plaid is a financial technology service that connects users’ financial accounts with apps and services through secure API integrations. It simplifies financial management by allowing users to share specific account data. Plaid offers features like account aggregation for consolidating accounts, payment initiation for direct transactions, and financial initiation for personal finance apps. It also aids lending platforms by verifying income and creditworthiness and supports identity verification during user onboarding. In summary, Plaid streamlines financial interactions empowers developers, and enhances lending and identity verification processes.
Workflow of Plaid Add-on
Installation
So, here are some steps with the help of which you can have access to the Plaid Add-on.
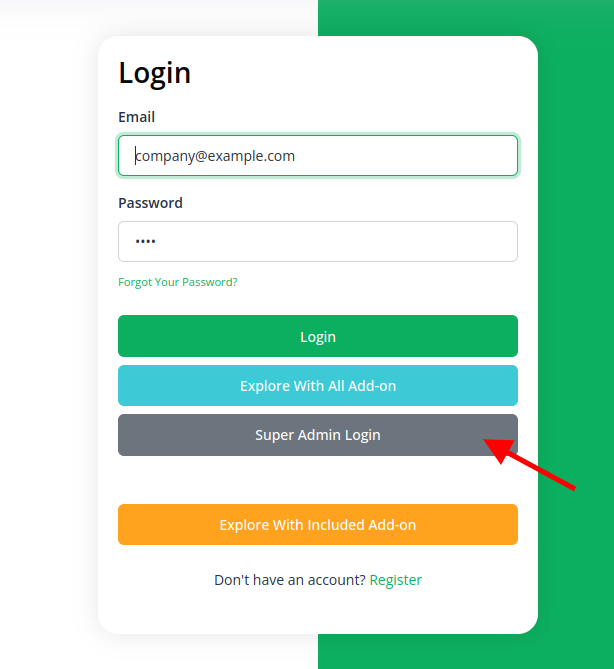
Step 1 : Super Admin Access
First of all the super admin has to add the Plaid Add-on by following the steps given below.
- Login to the super admin side and scroll down to “Add-on manager”.
-
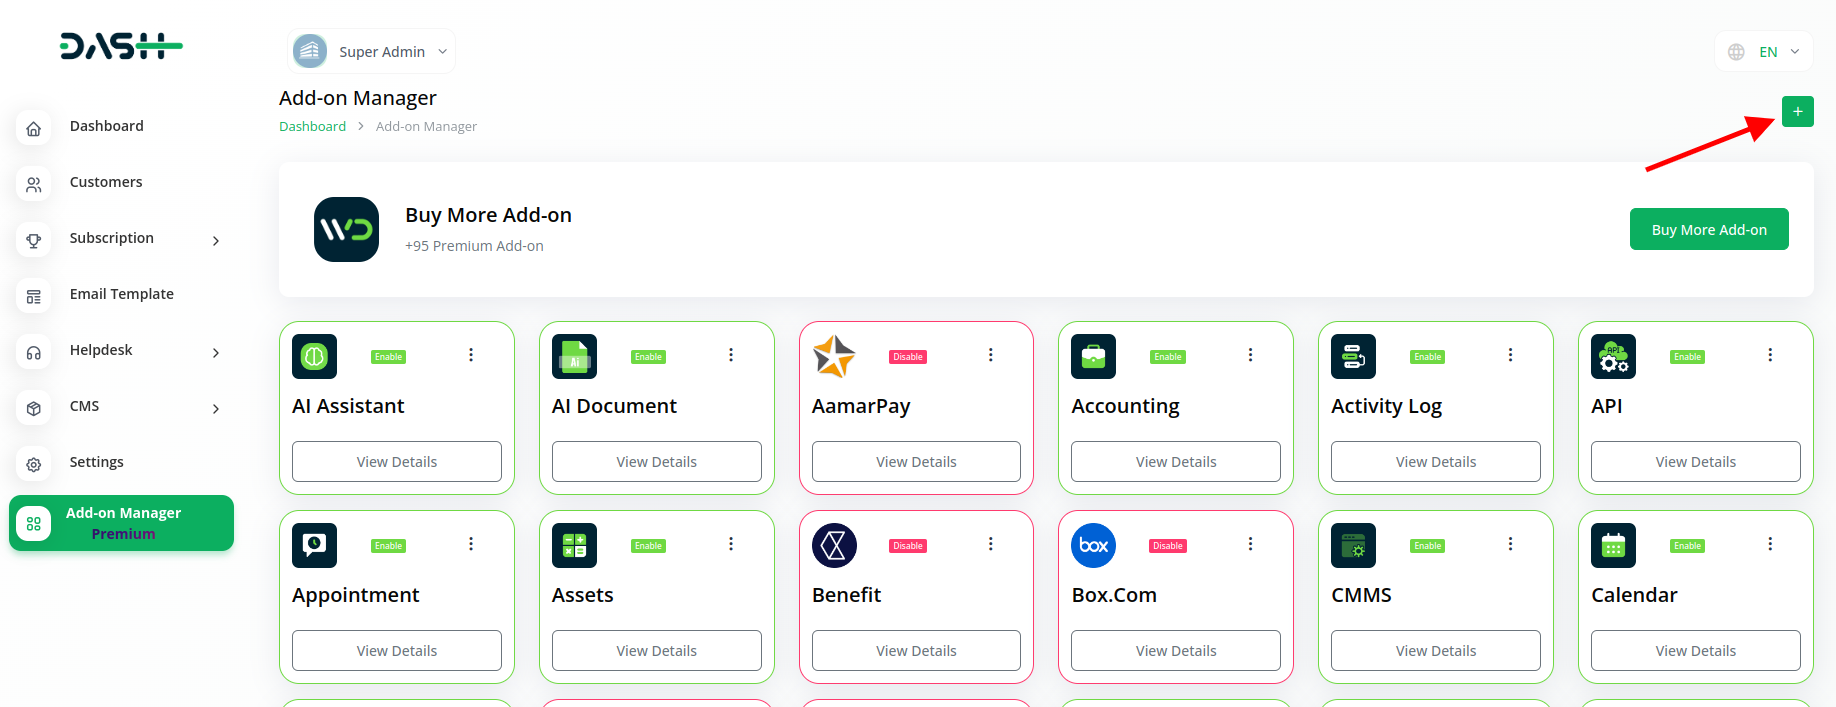
- Click on the “+” (Module Setup) button to add the Add-On.
-
- You will find a box where you will have to attach the ZIP file of “Plaid Add-On.”
-

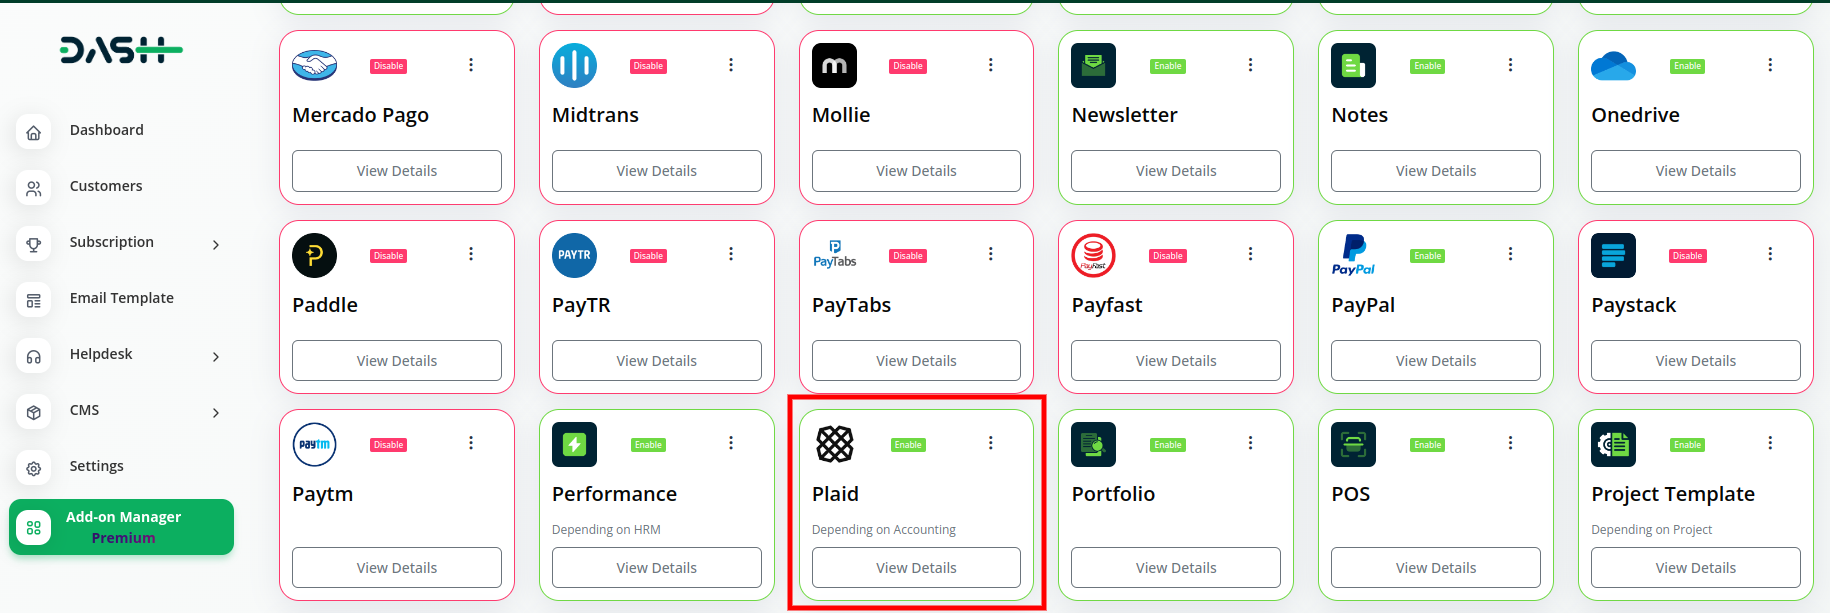
- After you complete the process of module setup, you have to enable it so that the rest of the customers can buy it.
-
Step 2 : Company Settings
So, this is how the admins can have access to the Plaid Add-on.
To sync the Plaid Add-on with WorkDo Dash, follow these steps:
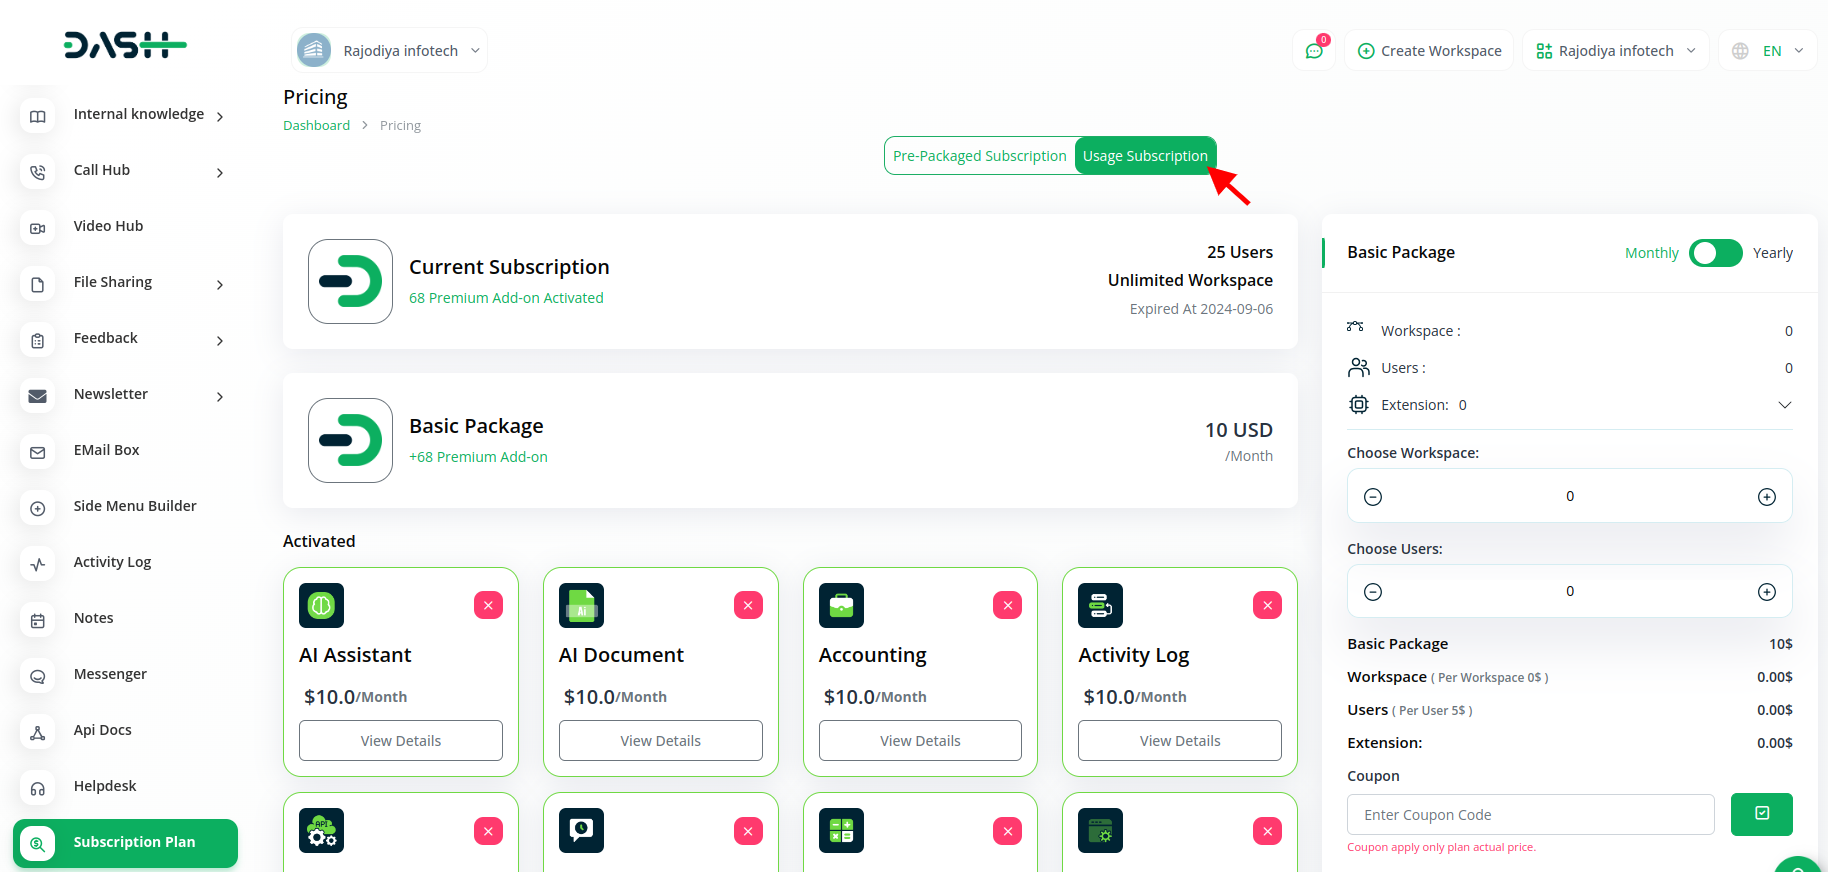
- So, the admin has to first purchase the add-on by navigating to the “Subscription plan” page and then you have to click the “Usage Plan” and find the PLAID add-on and purchase it.
-
Step 3 : How to use the Plaid Add-on?
- Go to the admin page and scroll down to the settings section.
- In the settings, select “System Settings.”
-
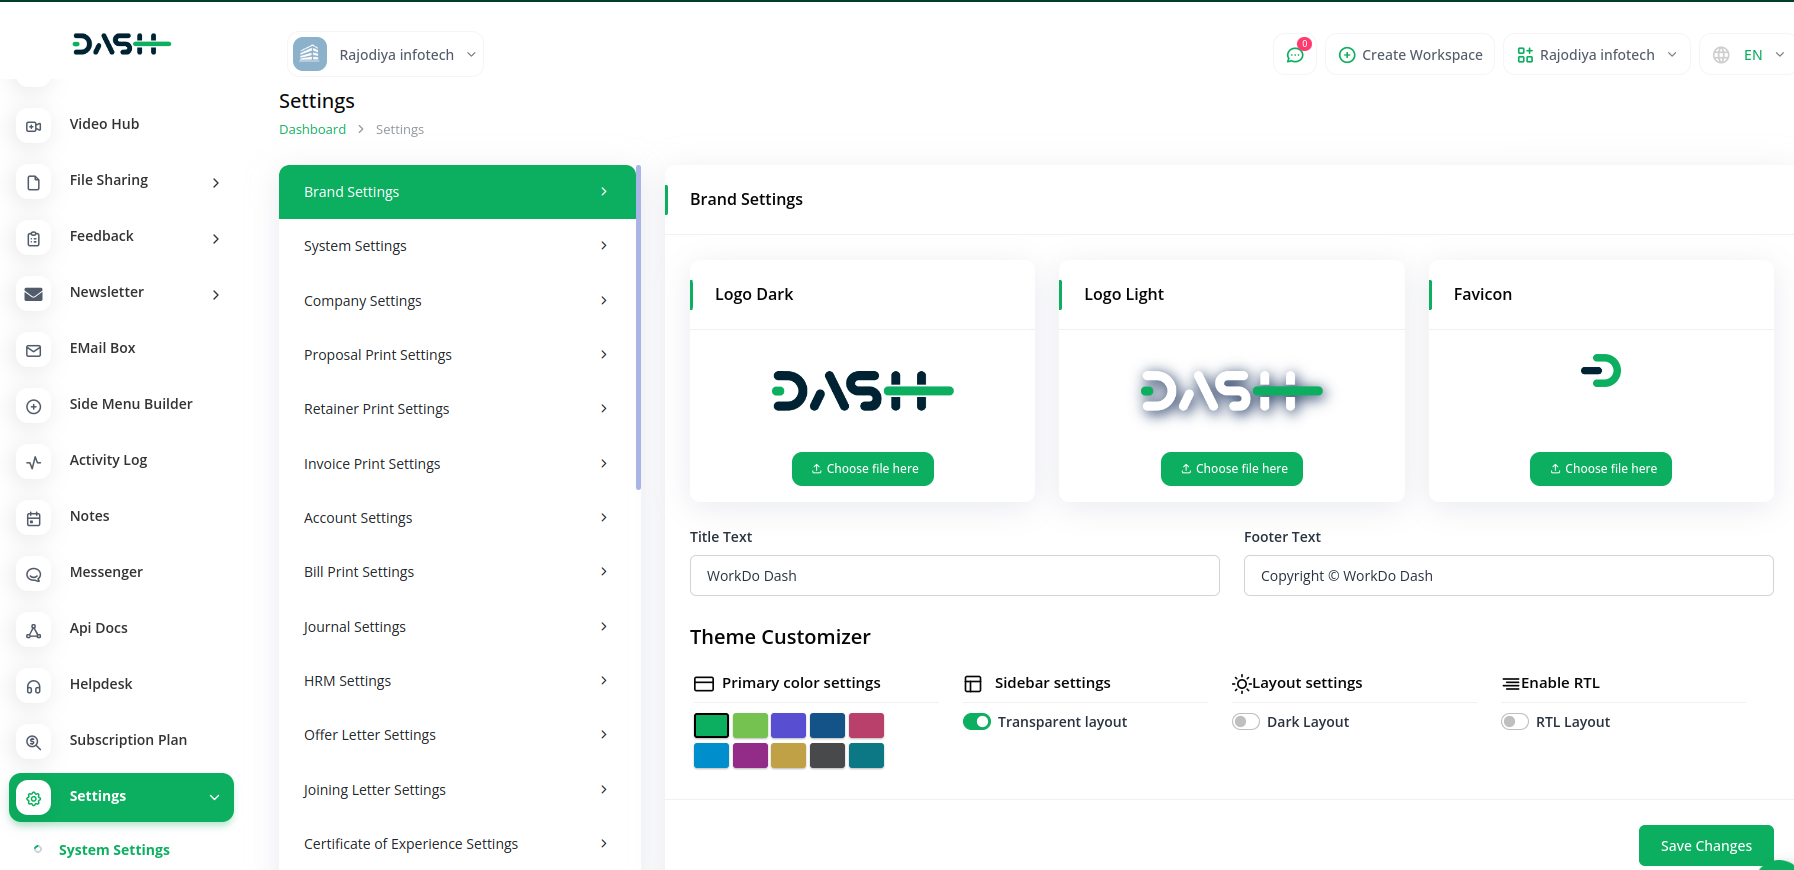
- Scroll down until you find the Plaid Add-On.
- Click on the Plaid Add-On to configure it.
-
Fill in the required details, including :
- Client ID
- Secret Key
- User Name
- User ID
- Select Country
- Select Languages
-
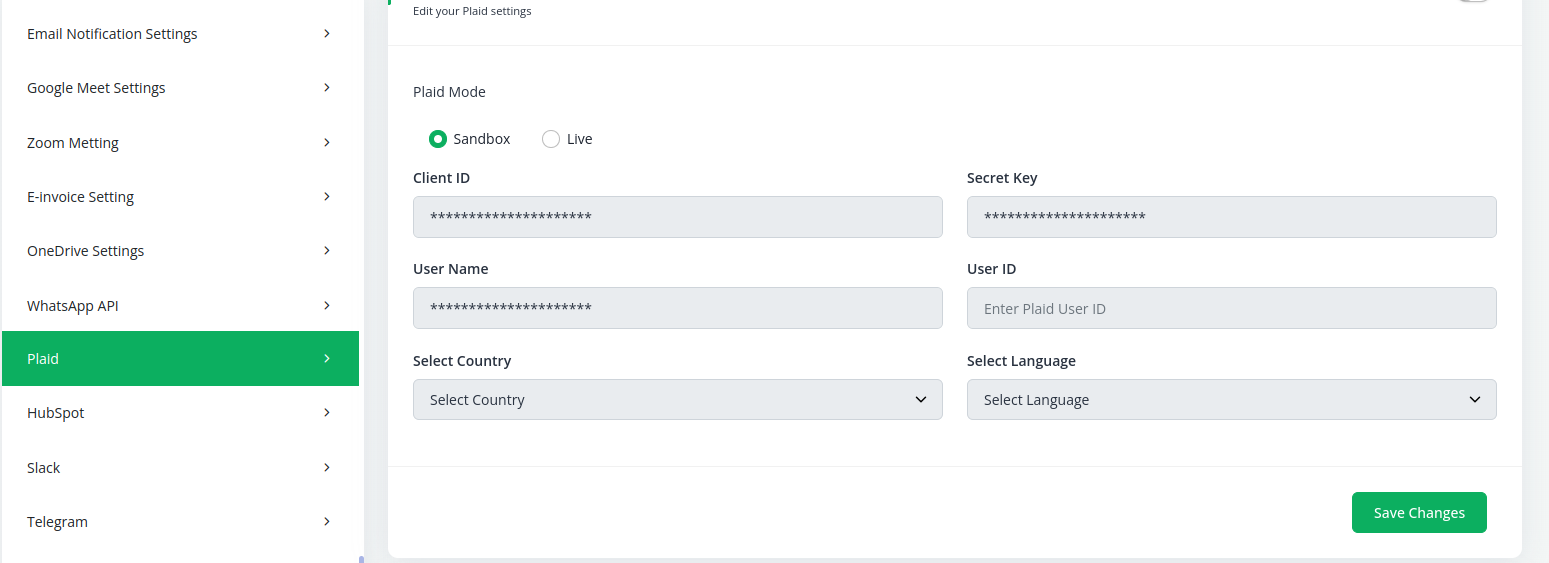
To learn how to generate the Client ID and Secret Key follow this link: https://plaid.com/
- Once you’ve completed this configuration, click on the “Accounting” module.
- In the accounting module, select the “Banking” option.
- Click on the “Bank Sync” option.
- Choose the two dates between which you need the transactions.
- Click on the “Plaid Sync” button.
- After completing these steps, the transaction list between the selected dates will be displayed. Transactions will have one of two statuses: “Matched” or “Unmatched.”
- If the status is “Matched,” there’s no issue.
- If the status is “Unmatched,” you can fix it by clicking on the “+” symbol and selecting the appropriate account from the given options. Provide the requested details and the status will be changed to “Matched.”
That’s it! You’ve successfully synced the Plaid Add-on with WorkDo Dash and managed your transactions.
Categories
Related articles
- Childcare Management Integration in Dash SaaS
- HubSpot Integration in Dash SaaS
- Newspaper Distribution Management Integration in Dash SaaS
- Contract Template Integration in Dash SaaS
- Double Entry Integrational Entry Integration
- Hotel and Room management in Dash SaaS
- AI Document Integration in Dash SaaS
- Business Process Mapping Integration in Dash SaaS
- OneDrive Integration in Dash SaaS
- Documentation For Set Up
- Google Meet Integration in Dash SaaS
- Property Management Integration in Dash SaaS
Reach Out to Us
Have questions or need assistance? We're here to help! Reach out to our team for support, inquiries, or feedback. Your needs are important to us, and we’re ready to assist you!


Need more help?
If you’re still uncertain or need professional guidance, don’t hesitate to contact us. You can contact us via email or submit a ticket with a description of your issue. Our team of experts is always available to help you with any questions. Rest assured that we’ll respond to your inquiry promptly.
Love what you see?
Do you like the quality of our products, themes, and applications, or perhaps the design of our website caught your eye? You can have similarly outstanding designs for your website or apps. Contact us, and we’ll bring your ideas to life.

