Outlook Calendar Integration in Dash SaaS
Welcome to the comprehensive guide for integrating Outlook Calendar with the Dash SaaS add-on. This documentation is crafted to provide a thorough walkthrough of the integration process, ensuring you can effortlessly synchronize your Outlook Calendar with Dash.
Introduction
The Outlook Calendar integration allows users to sync events between their product calendar and their Outlook account. This feature ensures all scheduled activities stay updated across platforms, reducing the chance of missed appointments or duplicate planning. The system includes settings for secure Outlook authorization, syncing options, and a calendar view to monitor all events in one place.
How To Install the Outlook Calendar Add-On?
To Set Up the Outlook Calendar Add-On, you can follow this link: Setup Add-On
How to Use the Outlook Calendar Add-On?
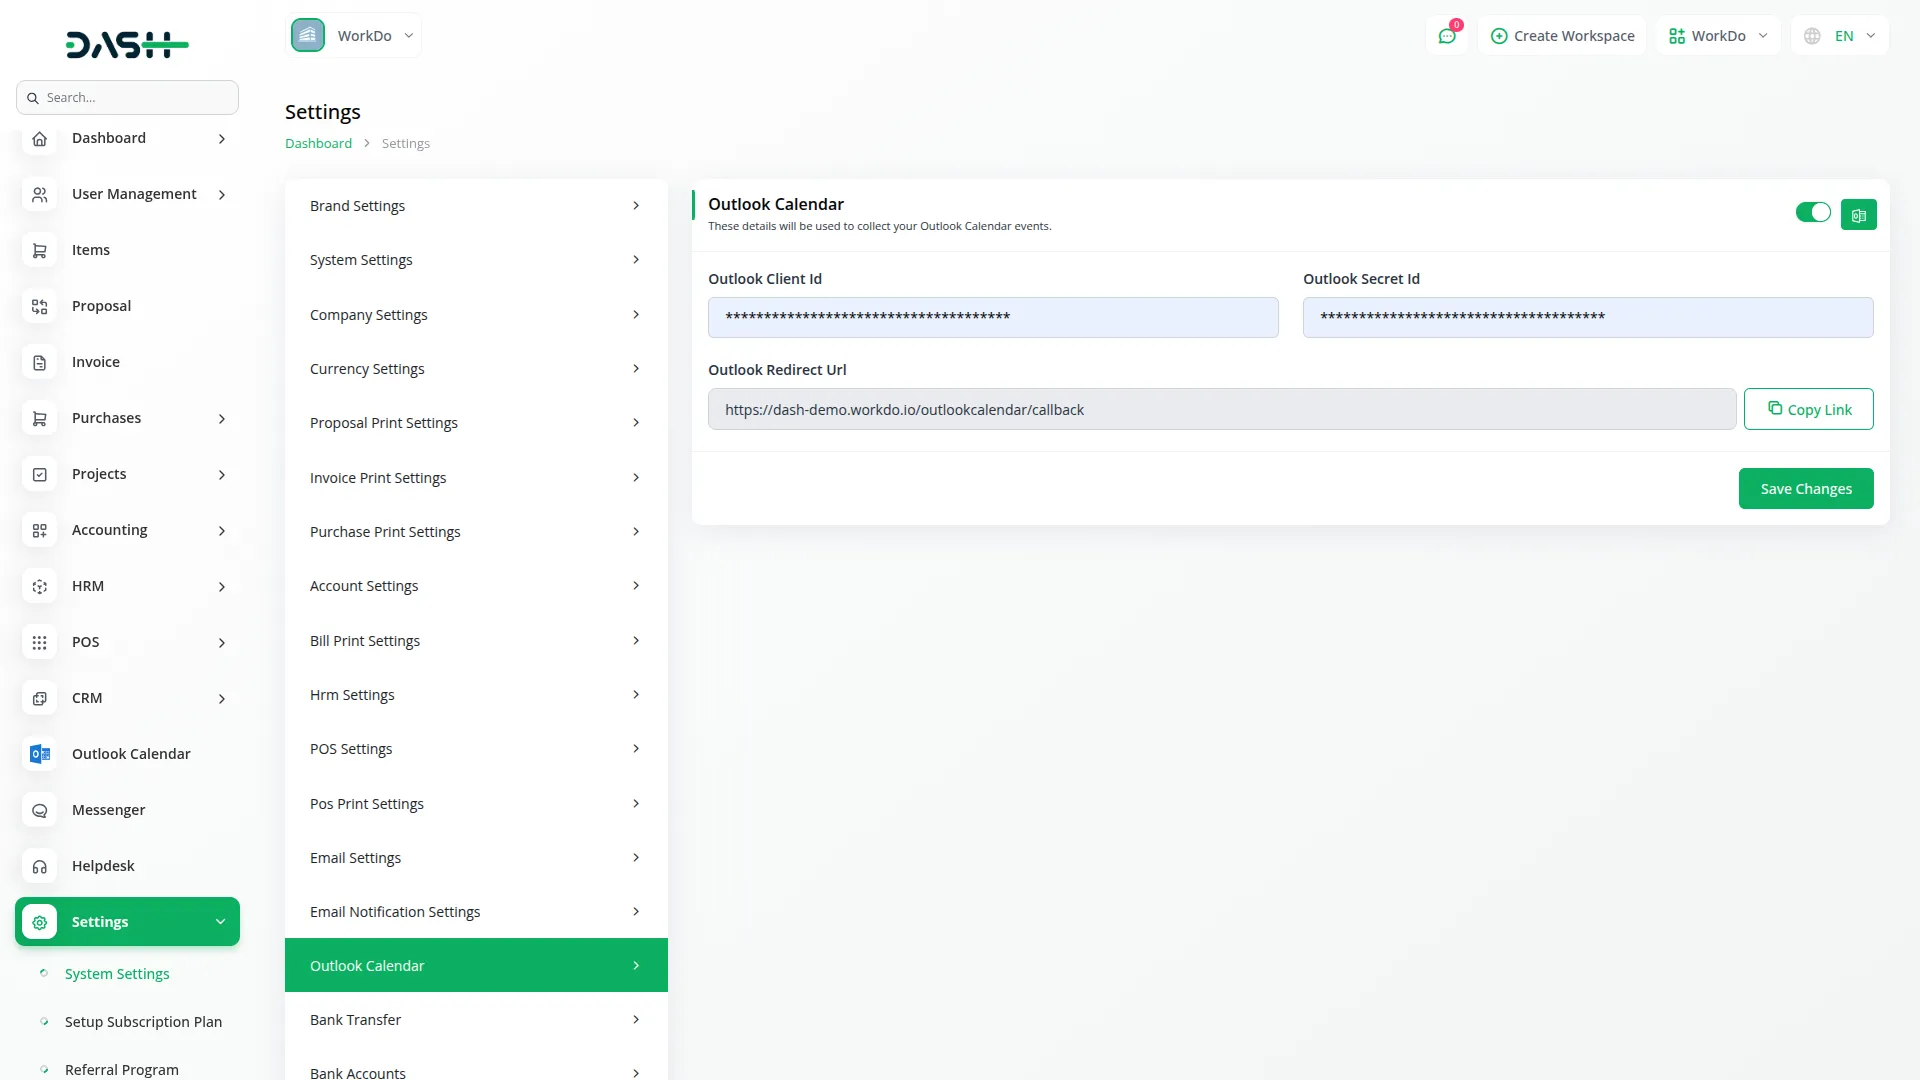
- After successfully purchasing the Add-On, navigate to the settings page and click on the System Settings button.
- In the System settings, scroll down and find the Outlook Calendar settings.
- Use the toggle button on the right side to enable or disable the Outlook Calendar integration.
- Beside the toggle, you will see a button labeled Generate Token — this helps generate the token required to sync data.
- If enabled, enter your:
- Outlook Client ID
- Outlook Secret ID
- Add your Outlook Redirect URL to your registered application in the Azure portal.
- To Generate the Credentials, follow this link: Documentation link
- After saving the credentials, click the Generate Token button to authorize and establish a secure connection with your Outlook account.
-

Outlook Calendar
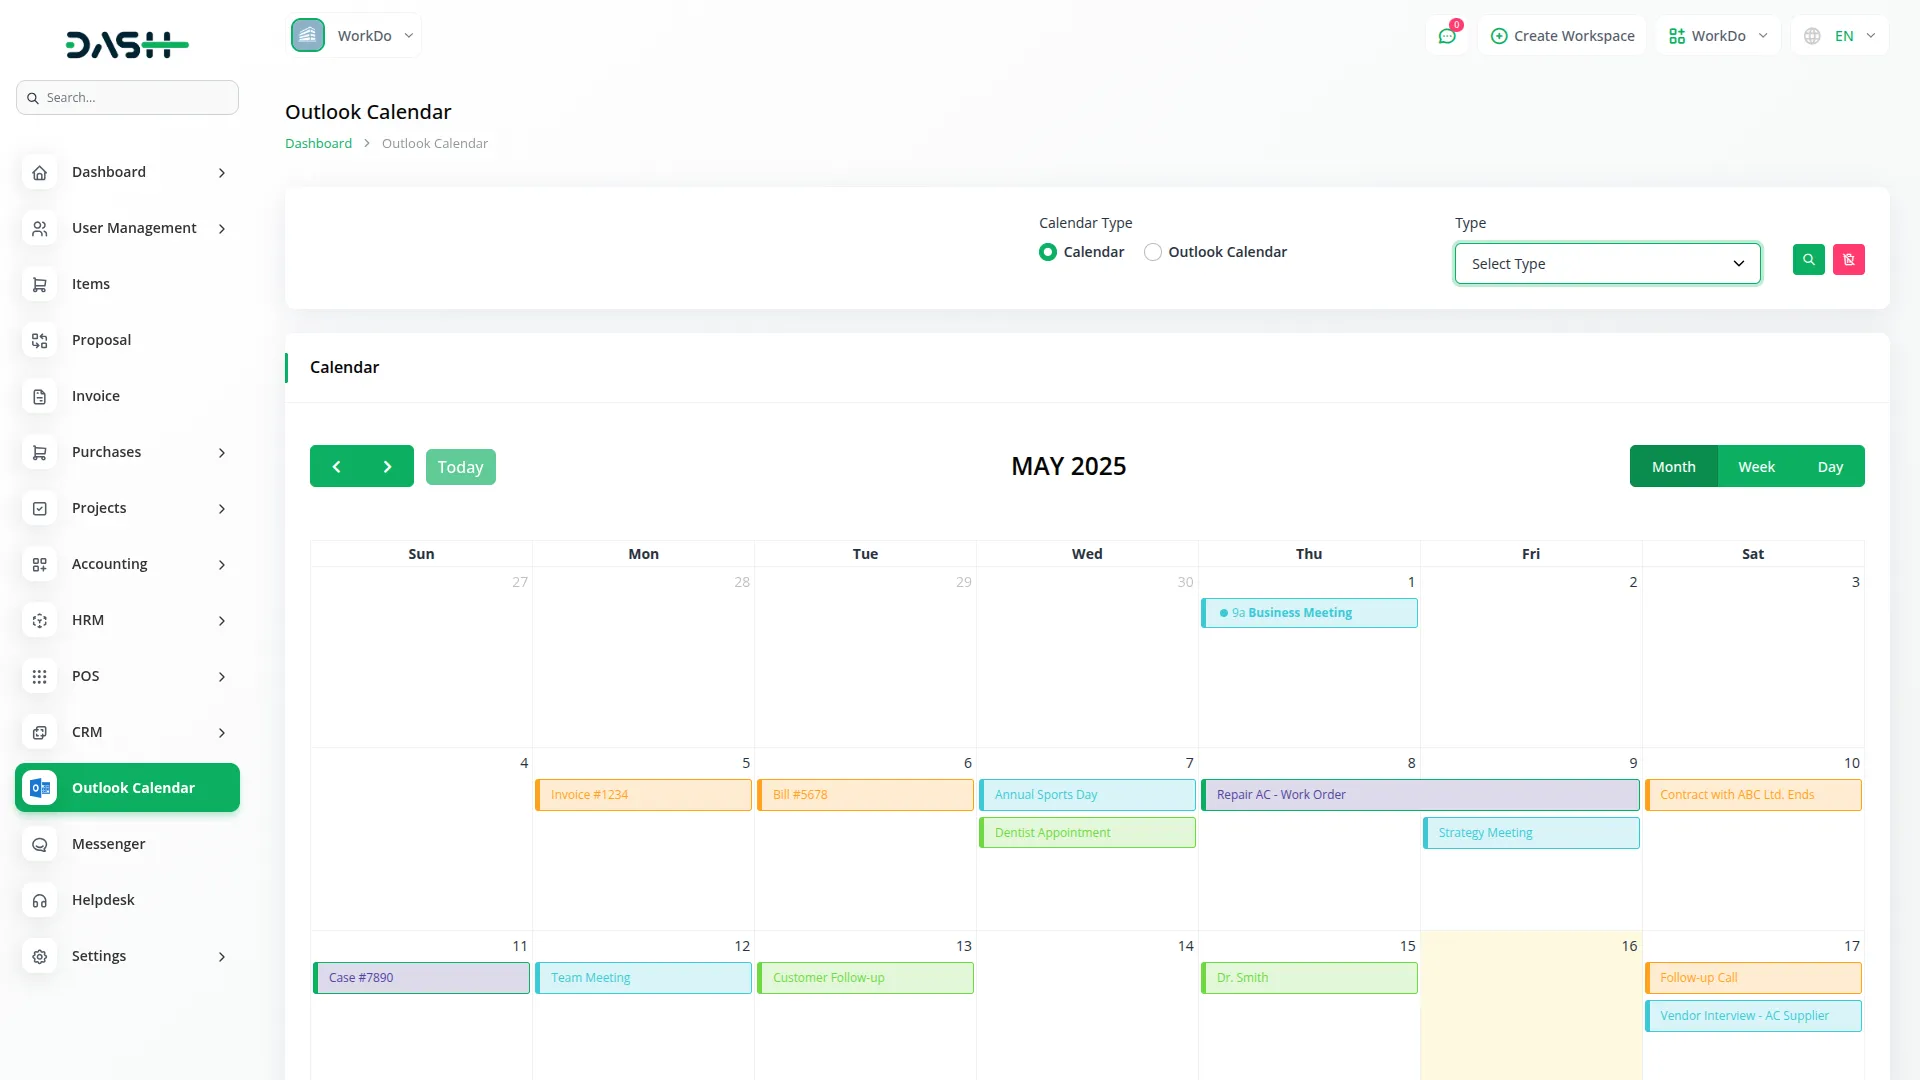
- This Add-On shows all events from enabled Add-Ons in a unified calendar view.
- Use the search bar to filter events by event type or calendar type.
- You can toggle between your internal product calendar and Outlook Calendar.
- All events from different Add-Ons will appear here for a consolidated overview.
-

Syncing Events
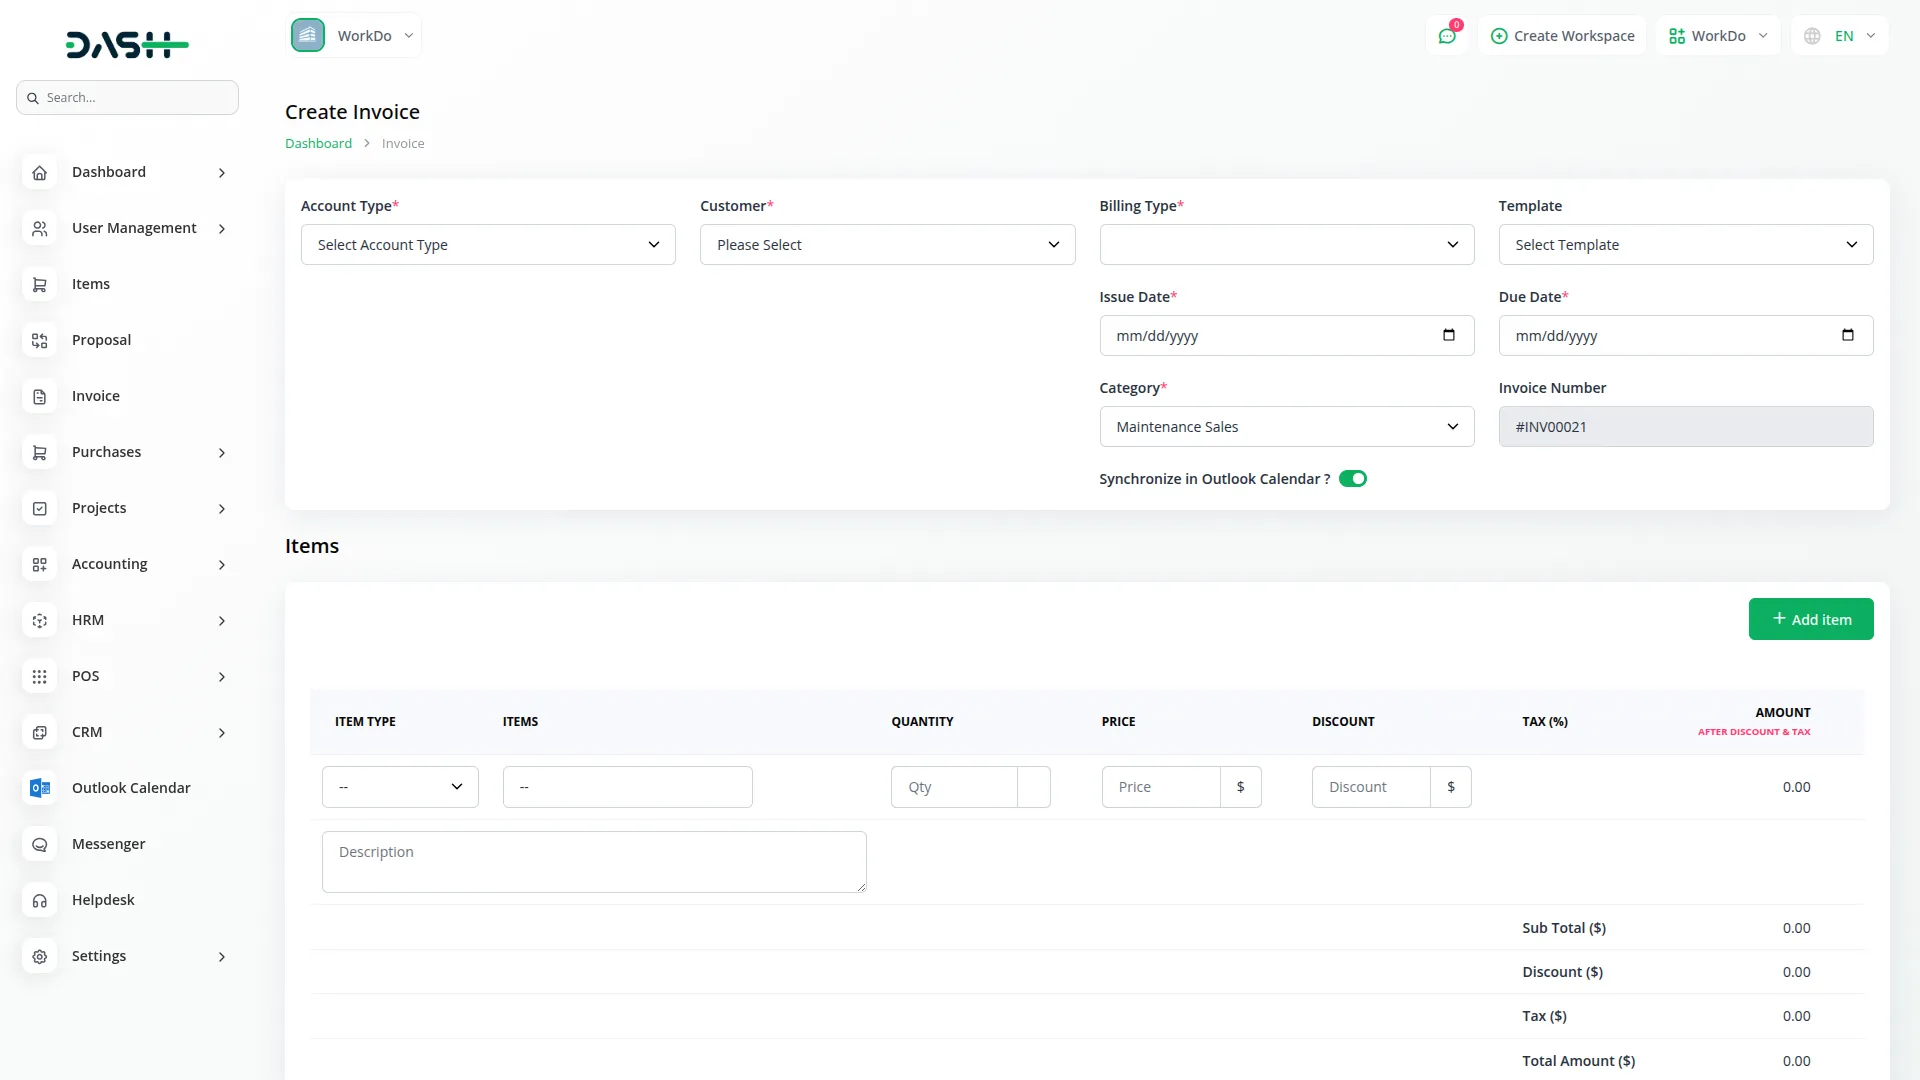
- To sync a new event with your Outlook Calendar, you must enable the Sync toggle during event creation or approval.
- Only events with this toggle turned on will appear on your connected Outlook Calendar.
-

So, this is how you can integrate the Outlook Calendar with your platform.
Here is the list of Add-Ons and their Event types you can sync with Outlook:
Accounting
- Due Invoice
- Due Bill
Appointment
- Appointment
CMMS
- Work Order
HRM
- Event
- Holiday
- Leave
CRM
- Deal Task
- Lead Task
Project
- Due Invoice
- Project Due Task
Categories
Related articles
- User Manual – WorkDo Dash SaaS
- Zapier Integration in Dash SaaS
- Goto Meeting Integration in Dash SaaS
- Sign-In with BitBucket – eCommerceGo Addon
- StoreGo – Product Features
- Vehicle Booking Management Integration in Dash SaaS
- Financial Goal Integration in Dash SaaS
- Sign-In with Github – eCommerceGo Addon
- How To Generate Credentials in GoTo
- SSLCommerz Detailed Documentation
- Sign-in With Bitbucket Detailed Documentation
- Recruitment Integration in Dash SaaS
Reach Out to Us
Have questions or need assistance? We're here to help! Reach out to our team for support, inquiries, or feedback. Your needs are important to us, and we’re ready to assist you!


Need more help?
If you’re still uncertain or need professional guidance, don’t hesitate to contact us. You can contact us via email or submit a ticket with a description of your issue. Our team of experts is always available to help you with any questions. Rest assured that we’ll respond to your inquiry promptly.
Love what you see?
Do you like the quality of our products, themes, and applications, or perhaps the design of our website caught your eye? You can have similarly outstanding designs for your website or apps. Contact us, and we’ll bring your ideas to life.
