Game Zone Add-On Detailed Documentation
Game Zone is a software product designed to manage various entertainment and gaming services under one system.
Introduction
Game Zone is a software product designed to manage various entertainment and gaming services under one system. It helps administrators organize zones, games, game players, rentals, membership plans, and related activities. Each Add-On is connected to others, such as Zones linking to Games, Players, Rentals, and Memberships. This guide will help you understand how to use each Add-On step by step.
How To Install the Game Zone Add-On?
To Set Up the Game Zone Add-On, you can follow this link: Setup Add-On
How To Use the Game Zone Add-On?
System Setup
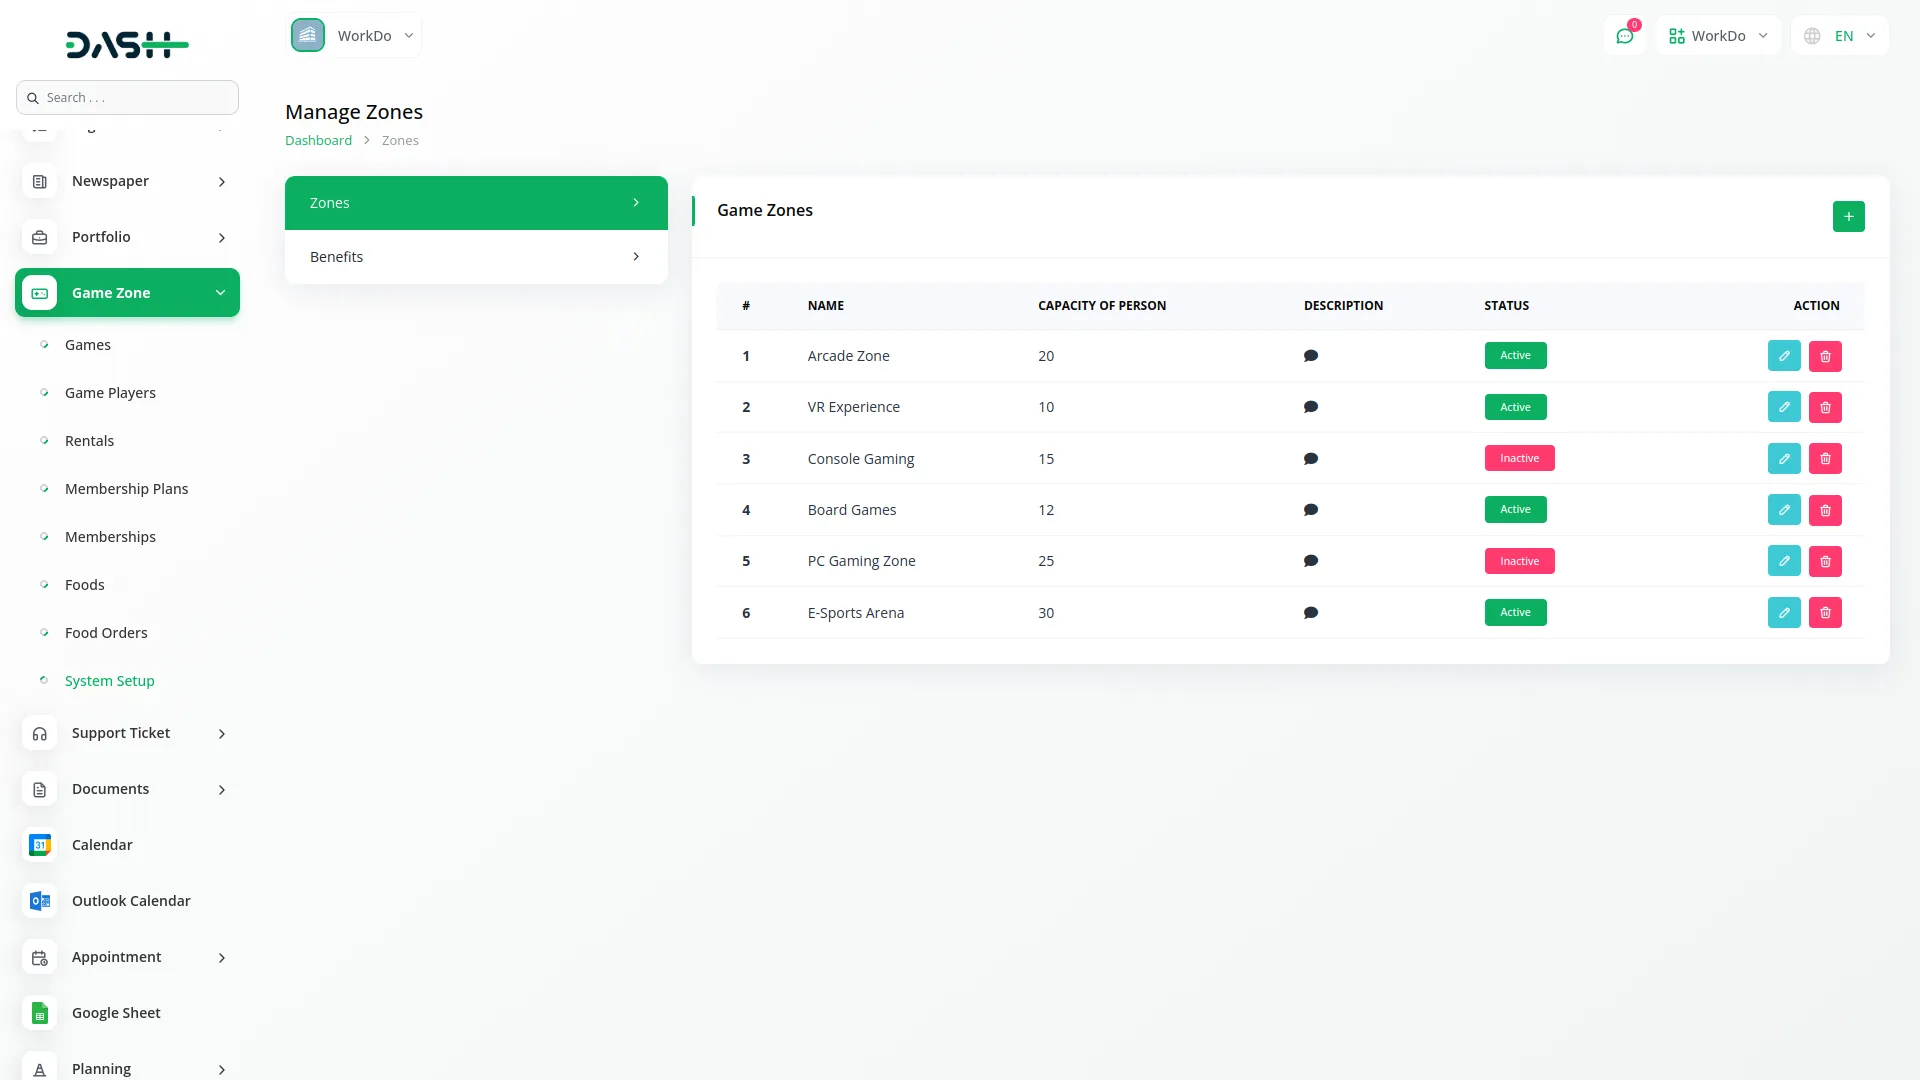
Manage Zones
- To create a new zone, click the “Create” button on the Manage Zones page. Fill in the zone name, enter the capacity of persons allowed in the zone, provide a description, and click “Save” to add the zone.
- On the list page, you will see all the added zones in a table with columns like No, Name, Capacity of Person, Description, and Status.
- Available actions include Edit and Delete. You can change the status to Active or Inactive by editing the record.
-
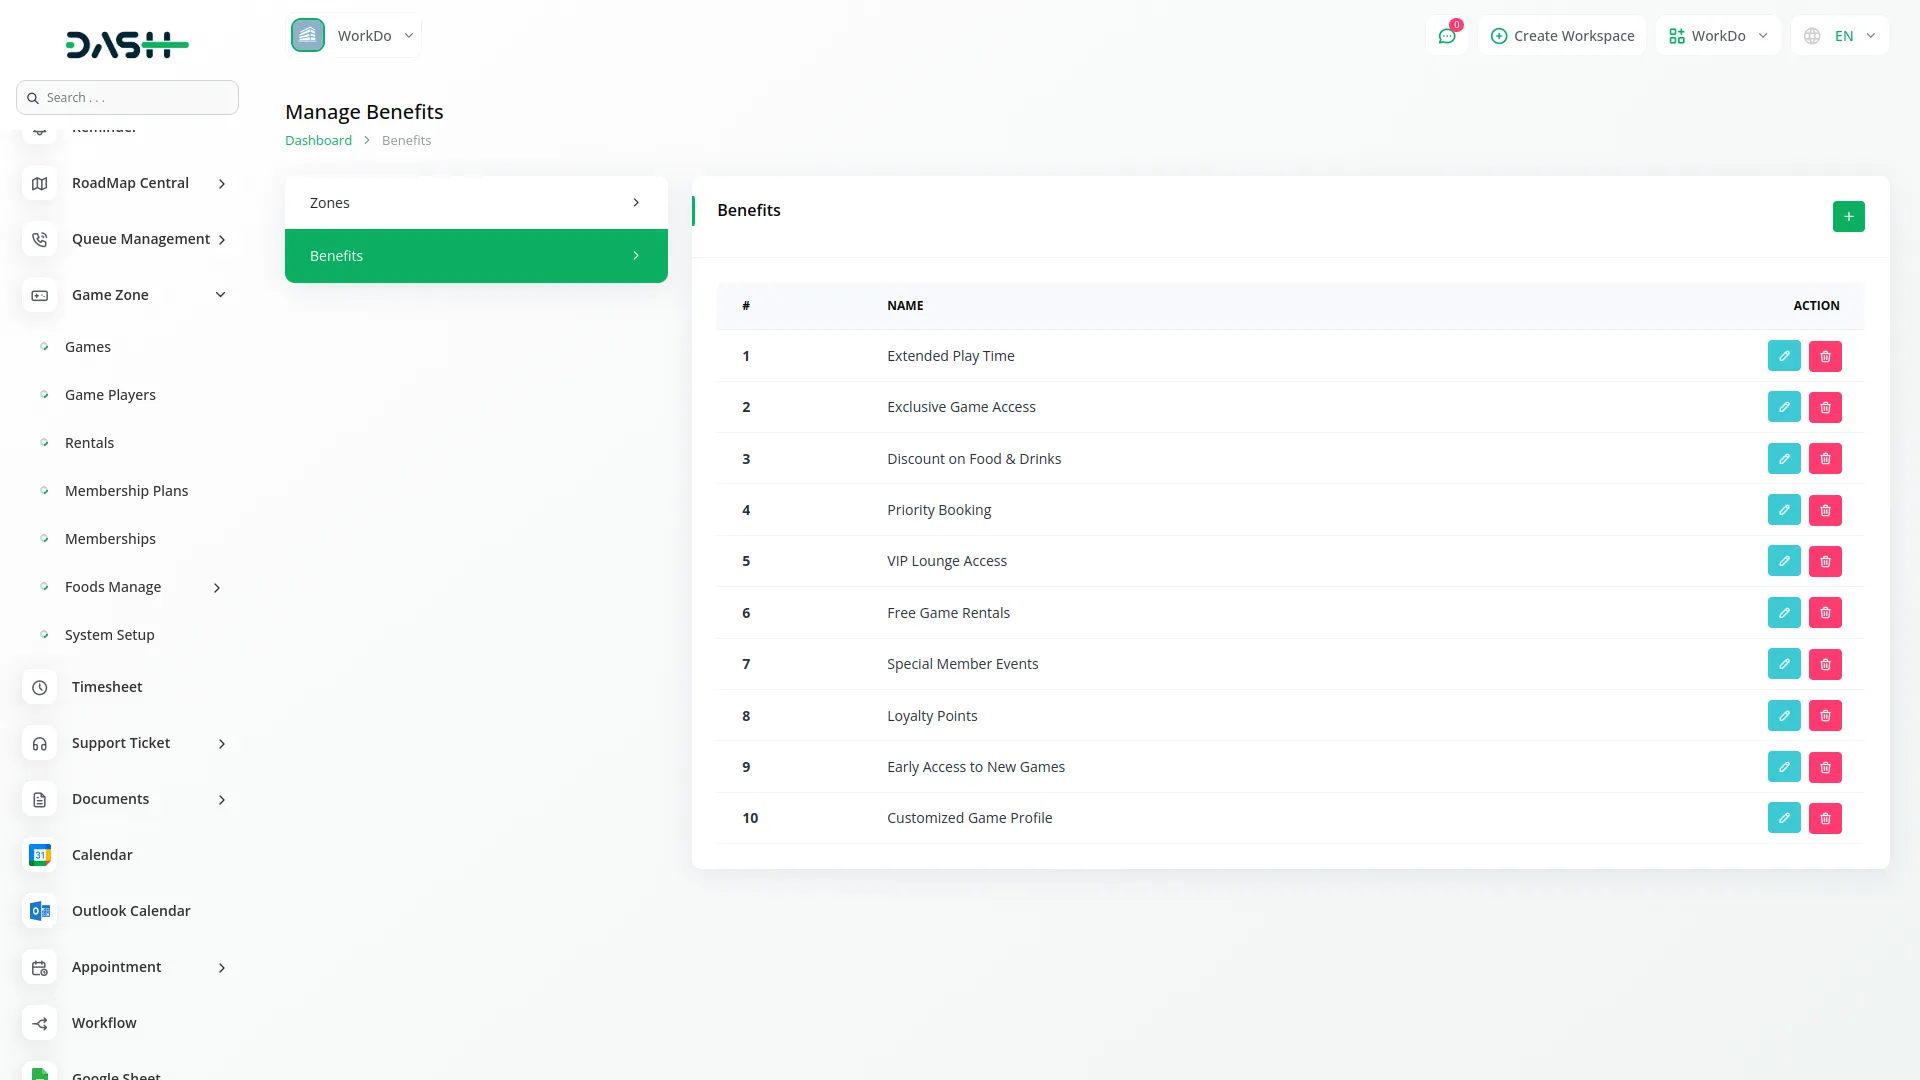
Manage Benefits
- To add a new benefit, click the “Create” button on the Manage Benefits page. Enter the benefit name and click “Save”.
- All added benefits appear in a list with columns No and Name.
- Available actions are Edit and Delete.
-
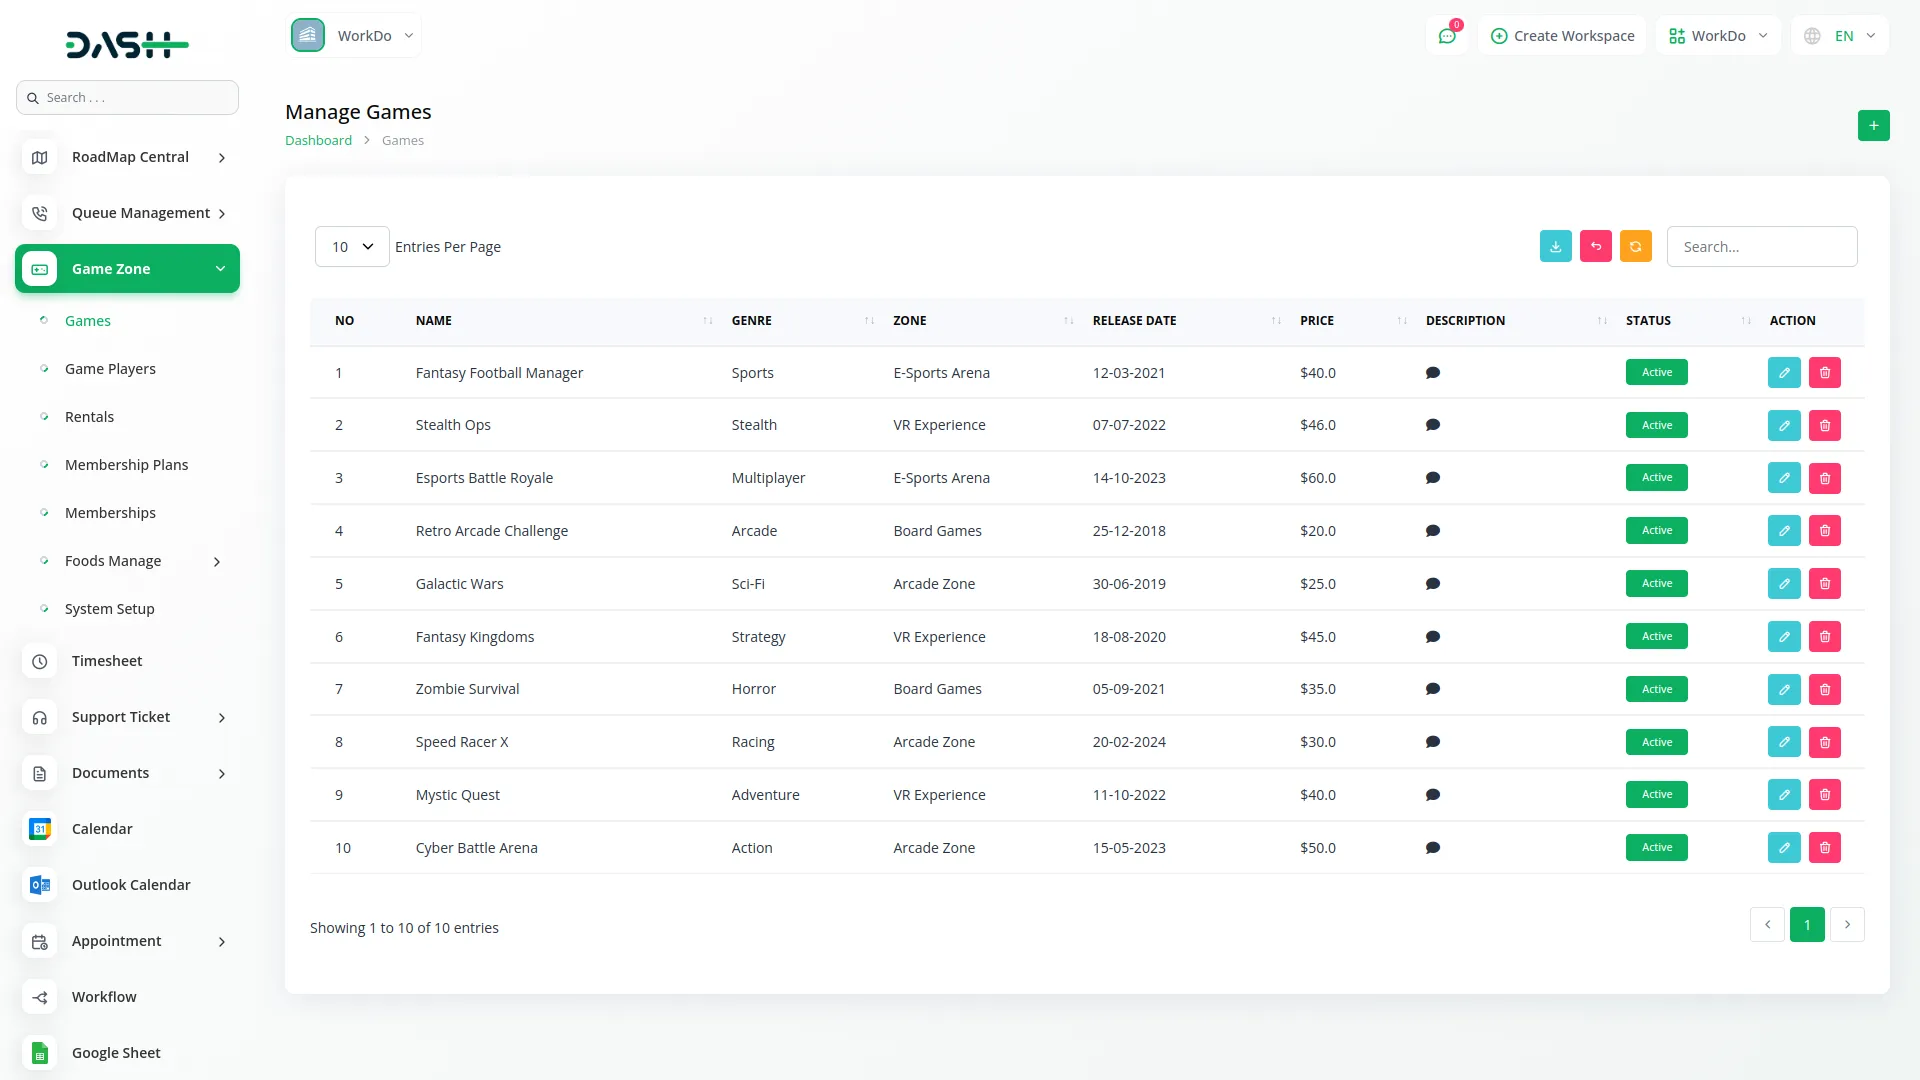
Manage Games
- To add a new game, click the “Create” button on the Manage Games page. Fill in the game name, genre, and release date. Select a zone from the dropdown. Only active zones will appear. Once the zone is selected, enter the price and write the game description. Click “Save” to add the game.
- On the list page, you can view all added games in a table with columns like No, Name, Genre, Zone, Release Date, Price, Description, and Status.
- You can use the Search and Export buttons to find or download game records.
- Available actions are Edit and Delete. You can change the status to Active or Inactive in the Edit form.
-
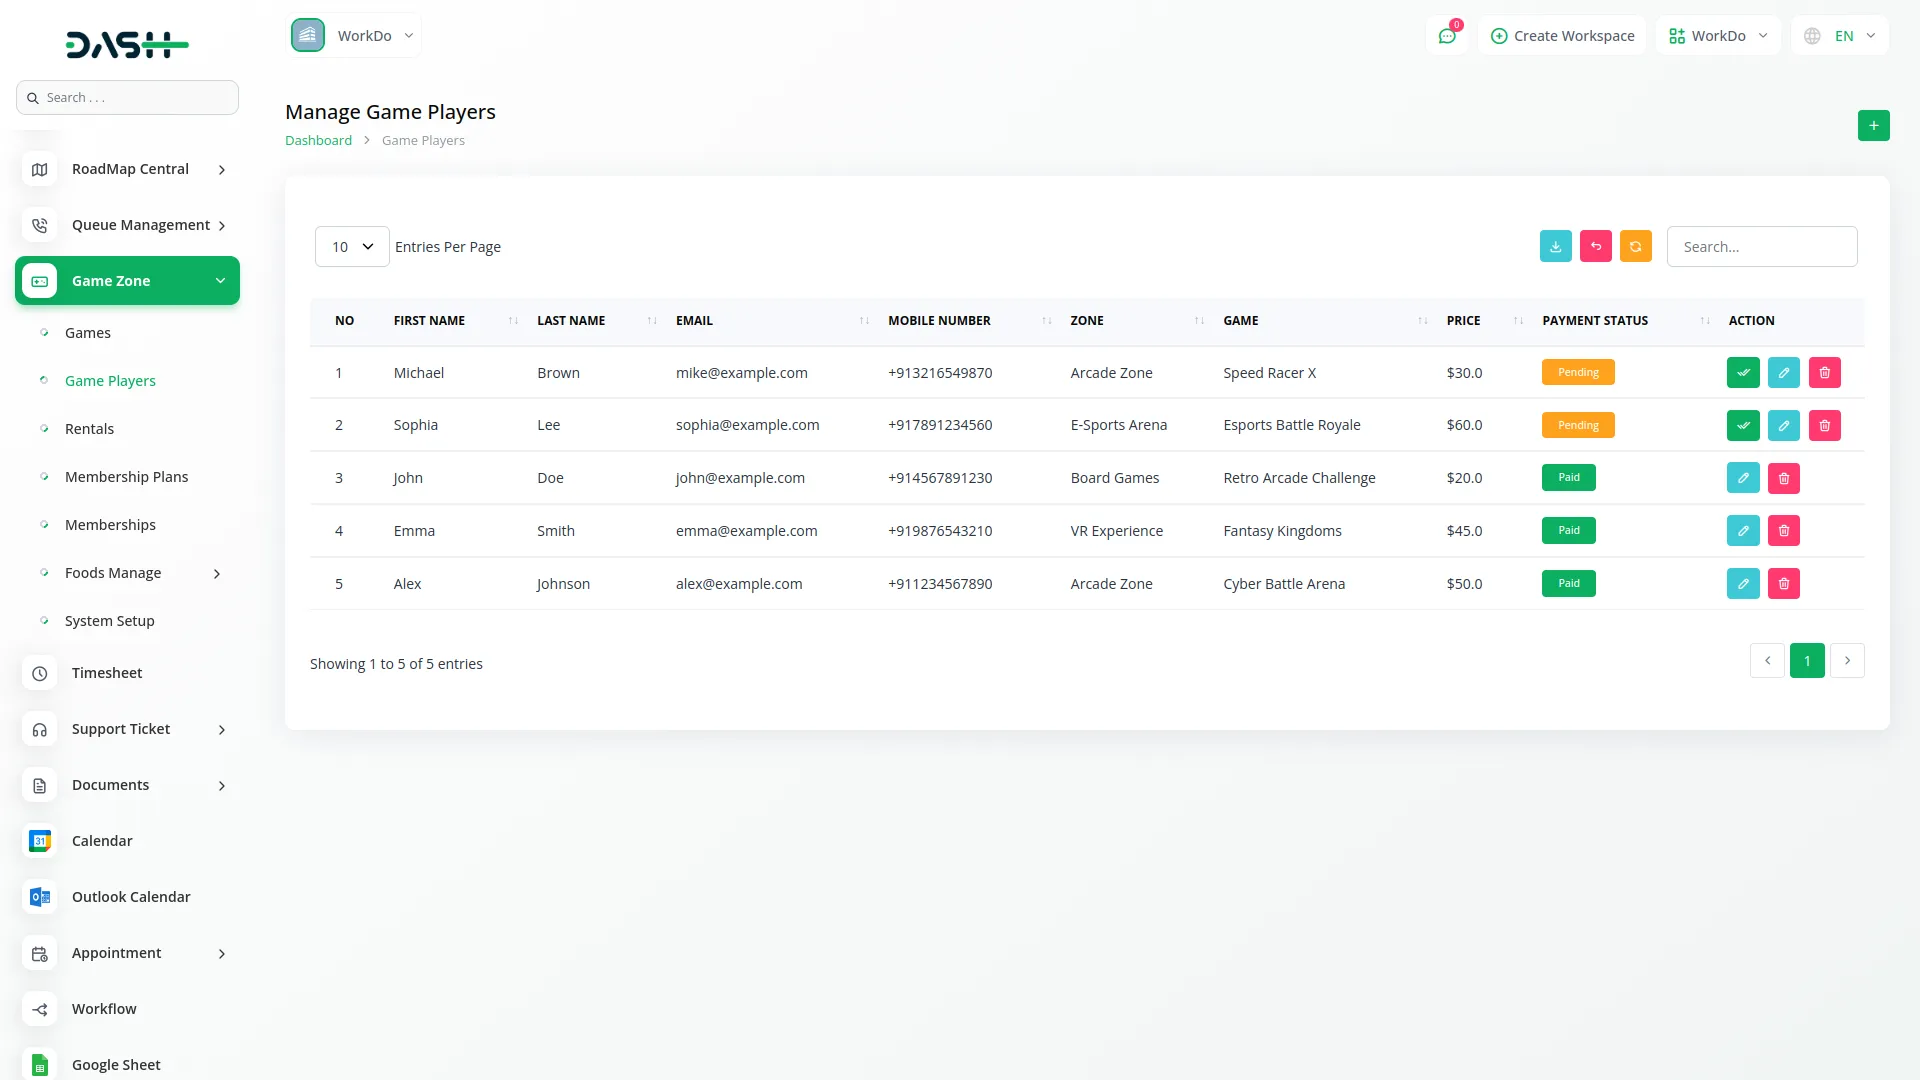
Manage Game Players
- To add a new game player, click the “Create” button on the Manage Game Players page. Enter the first name, last name, email, contact number, and age. Select a zone from the dropdown. Only active zones will appear. Then select a game. Only games that are active and belong to the selected zone will appear. The price will be filled automatically based on the selected game. Click “Save” to add the player.
- The list page shows all players in a table with columns like No, First Name, Last Name, Email, Mobile Number, Zone, Game, Price, and Payment Status.
- You can use the Search and Export buttons to manage the list.
- Available actions are Paid, Edit, and Delete. Click “Paid” to update the payment status.
-
Manage Rentals
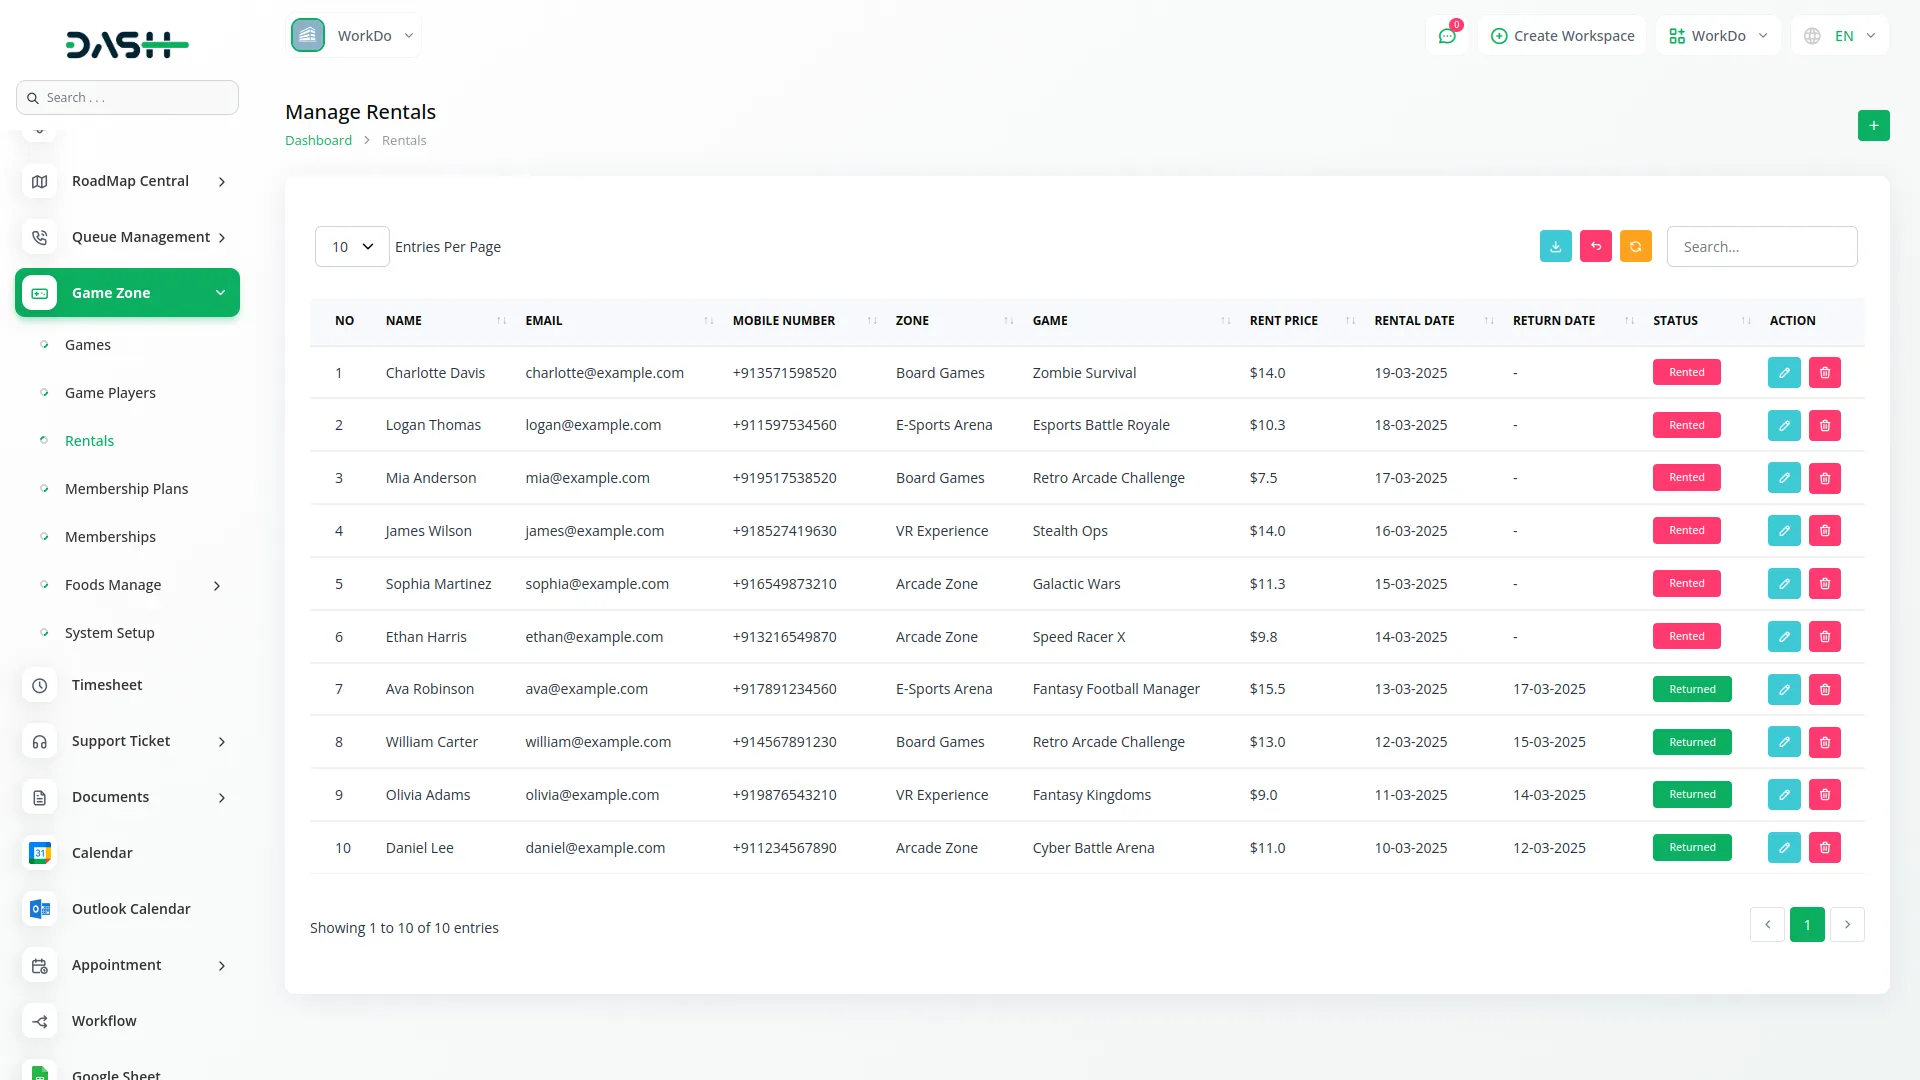
- To add a new rental entry, click the “Create” button on the Manage Rentals page. Enter the name, email, and contact number. Select a zone from the dropdown. Only active zones will be listed. Then select a game from the selected zone. Only active games will be available. Enter the rental price and select the rental date. Click “Save” to record the rental.
- The list page displays all rental records with columns like No, Name, Email, Mobile Number, Zone, Game, Rent Price, Rental Date, Return Date, and Status.
- You can use the Search and Export buttons to manage records.
- Available actions include Edit and Delete. You can update the return date and change the rental status to Returned in the Edit form.
-
Manage Membership Plan
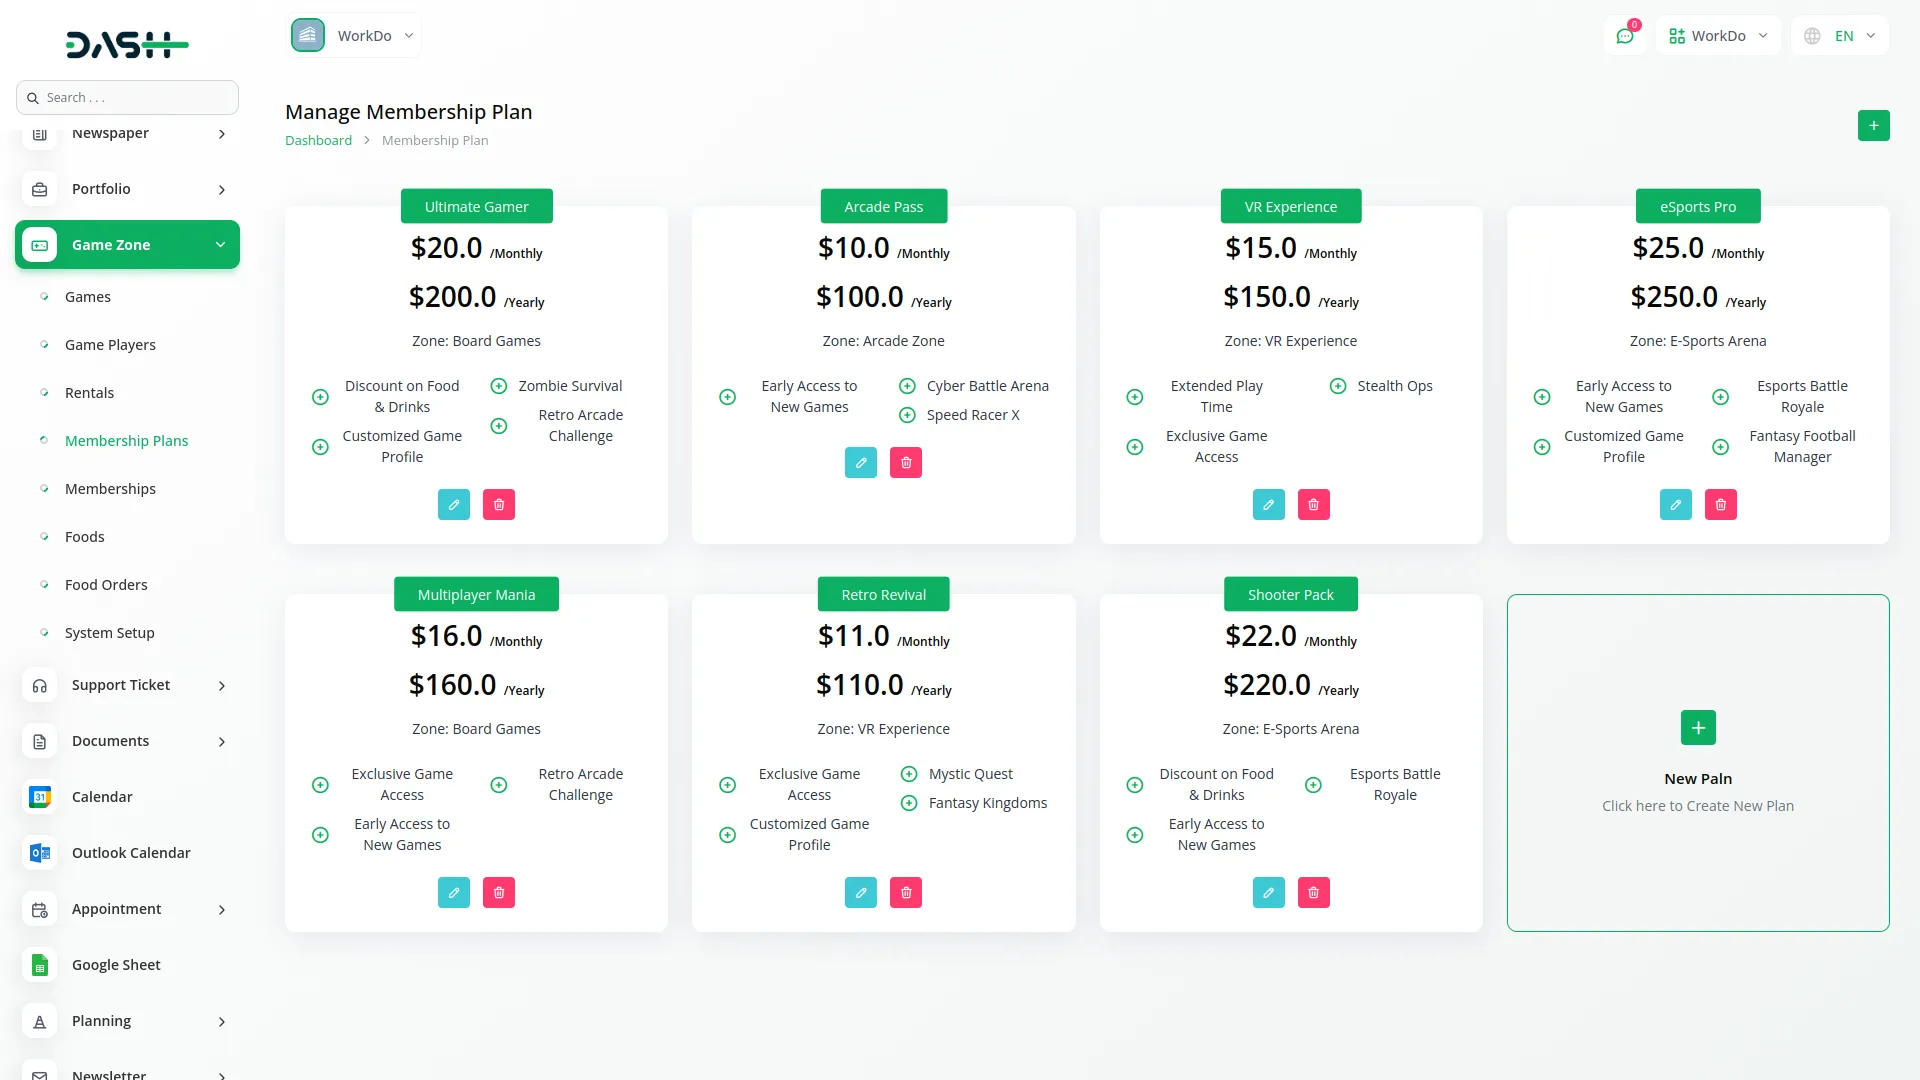
- To create a new membership plan, click the “Create” button on the Manage Membership Plan page. Enter the plan name and select a zone from the dropdown. Only active zones will appear. Fill in the monthly price and yearly price. Then select one or more games from the selected zone. Only active games will be shown. Next, select one or more benefits from the benefits list. Finally, add a game description and click “Save” to add the plan.
- On the list page, all membership plans appear in the card view, showing Name, Monthly Price, Yearly Price, Zone, selected Games, and selected Benefits.
- Available actions include Edit and Delete.
-
Manage Memberships
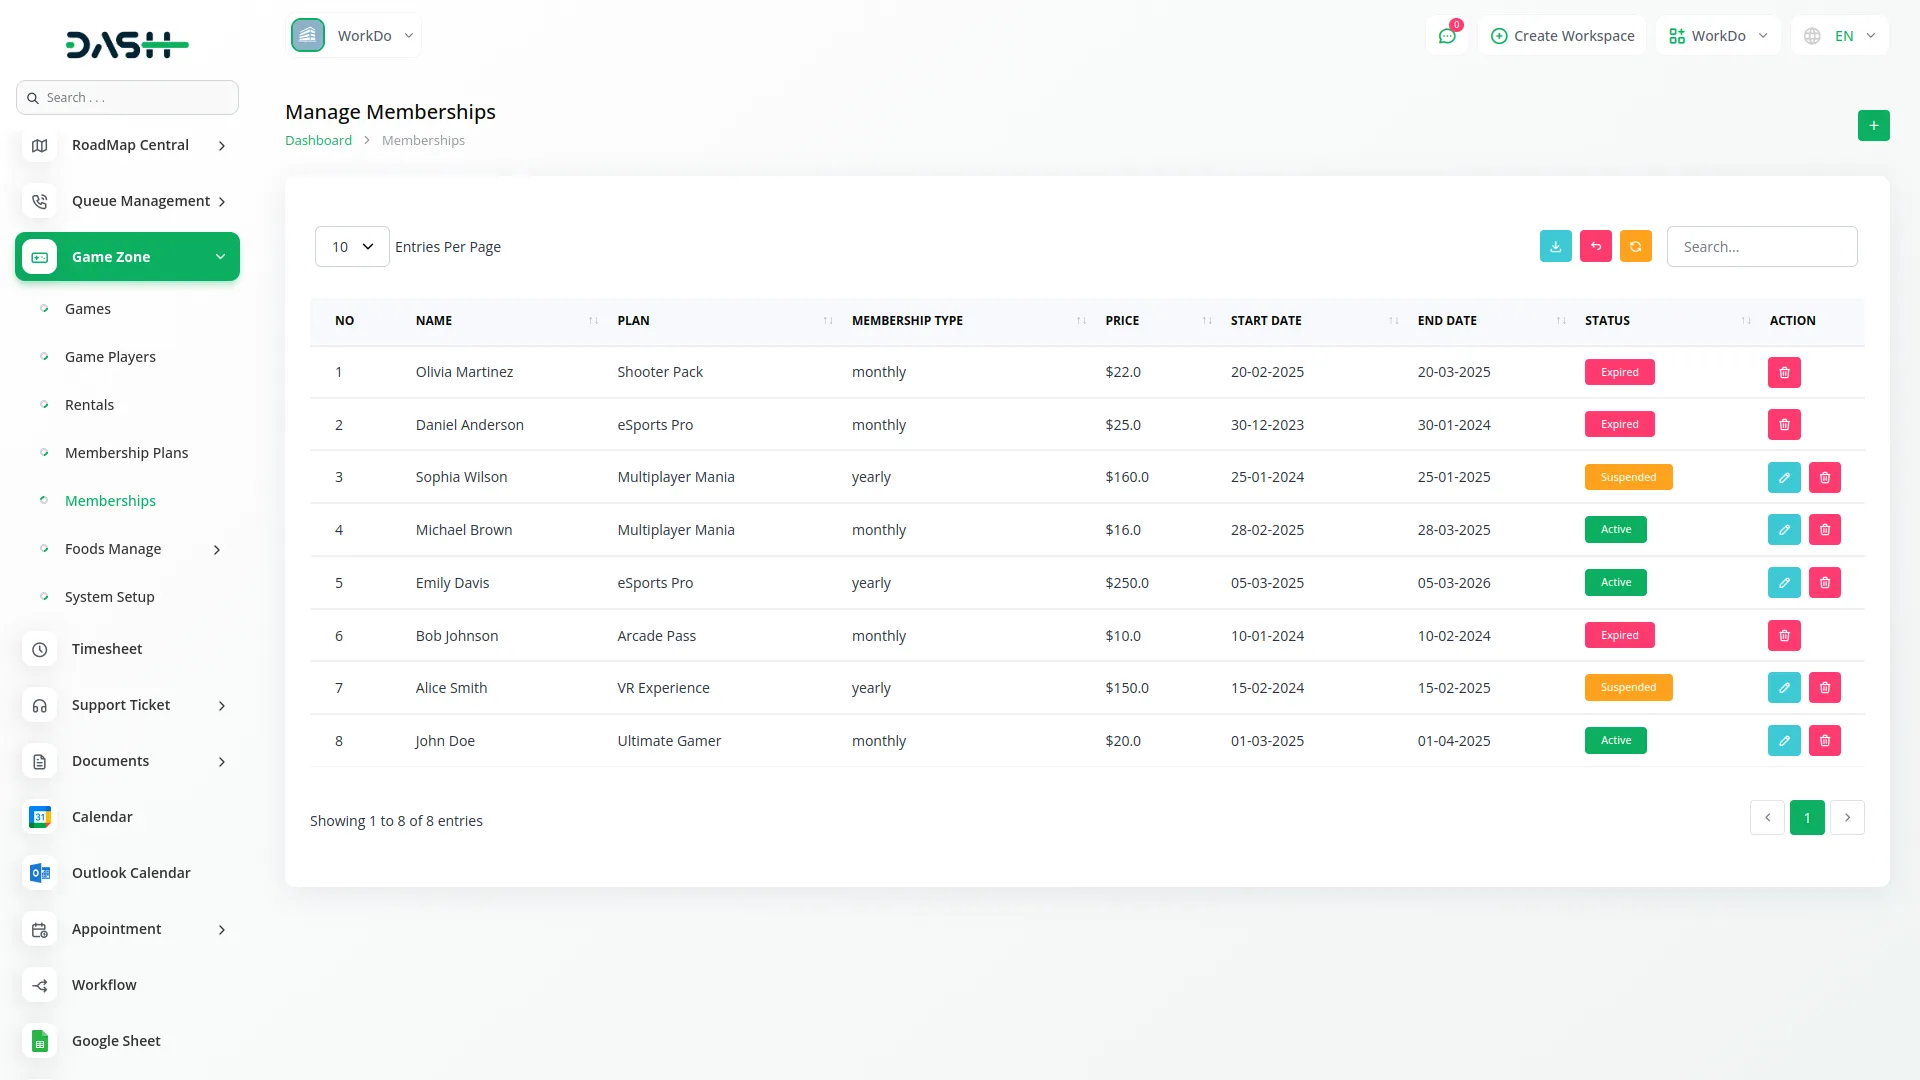
- To add a new membership, click the “Create” button on the Manage Memberships page. Enter the start date and member name. Select a plan from the dropdown. Then choose the price type – Monthly Price or Yearly Price. The final price will be filled automatically based on the selected plan and price type. Click “Save” to add the membership.
- On the list page, all memberships appear in a table with columns like No, Name, Plan, Membership Type, Price, Start Date, End Date, and Status.
- Status can be Active, Suspended, or Expired, which changes based on the duration from the start date.
- You can use the Search and Export buttons.
- Available actions are Edit and Delete. You can change the status to Suspended or Active in the Edit form.
-
Manage Foods
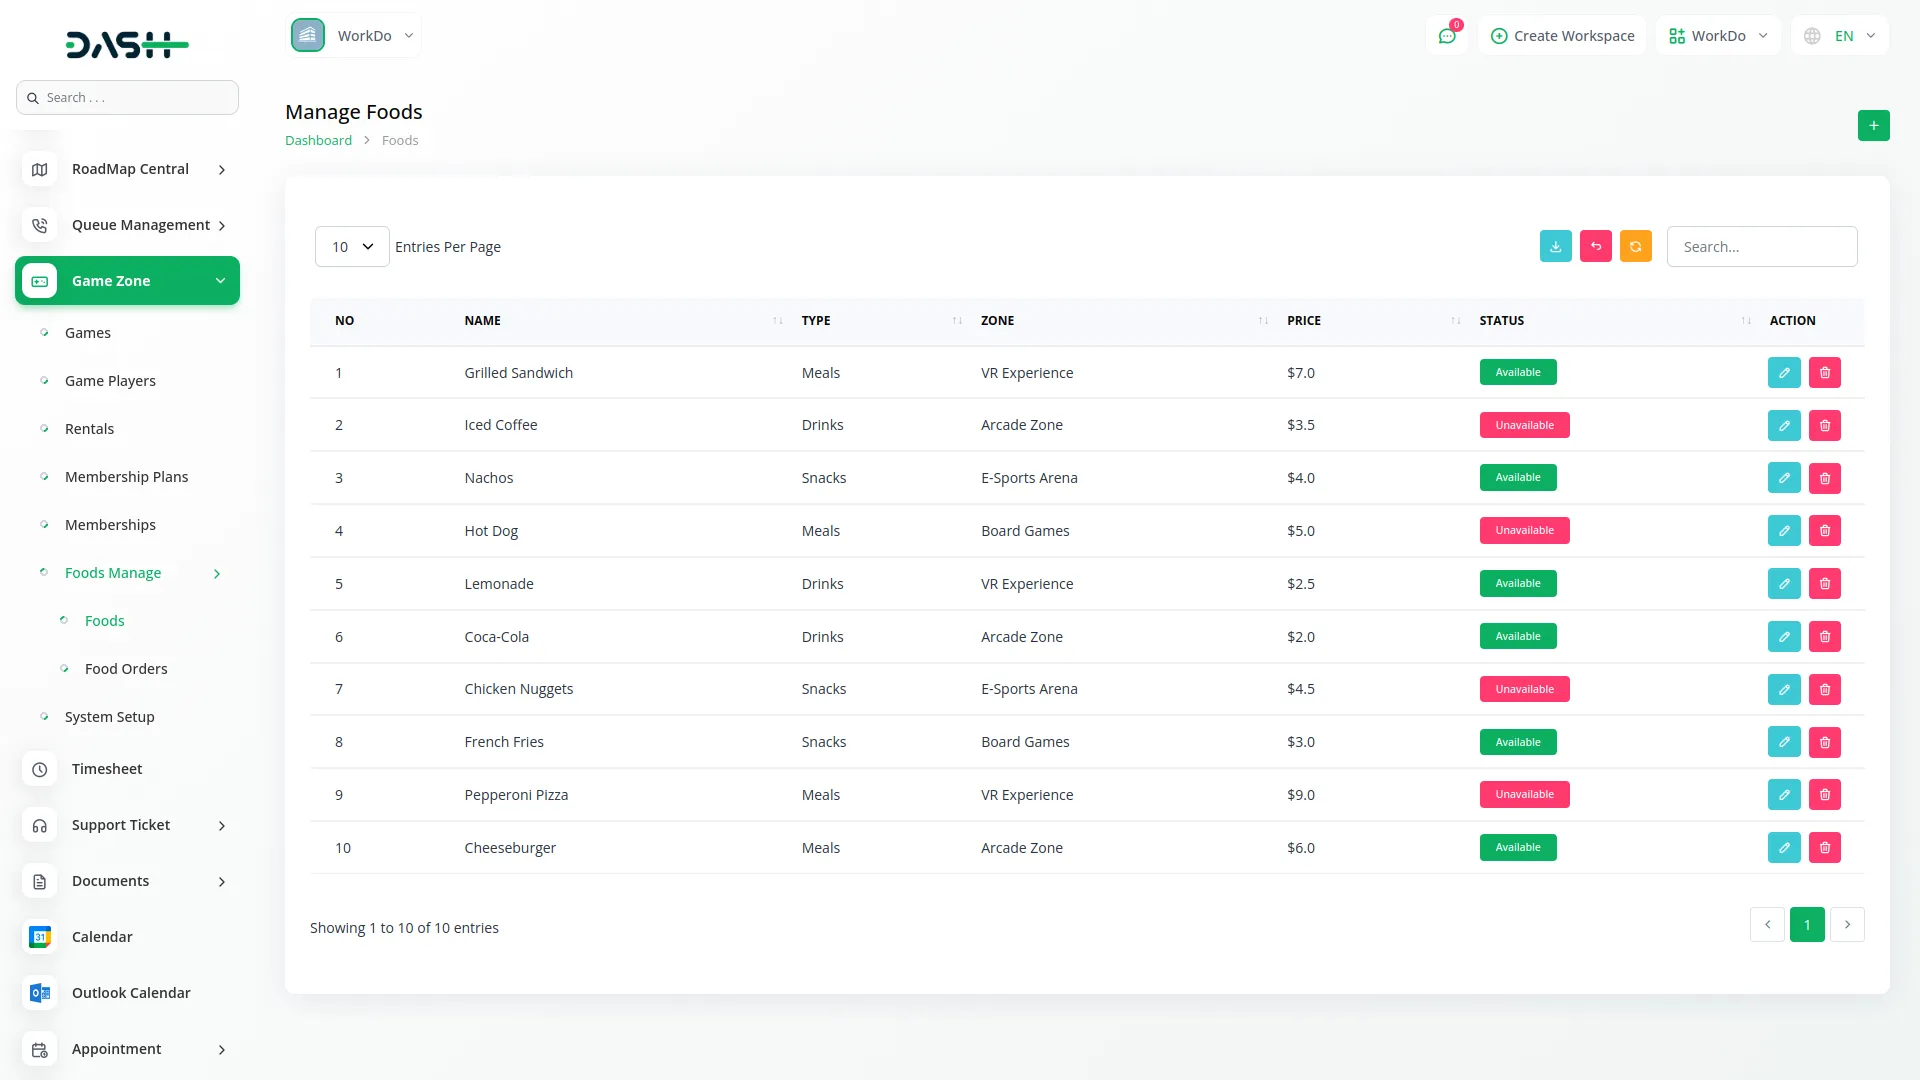
- To add a new food item, click the “Create” button on the Manage Foods page. Select a zone from the dropdown. Only active zones will appear. Enter the food name and choose the food type (Snacks, Drinks, or Meals). Then enter the price and click “Save” to add the food item.
- On the list page, food items are shown in a table with columns No, Name, Type, Zone, Price, and Status.
- Status can be Available or Unavailable.
- You can use the Search and Export buttons.
- Available actions are Edit and Delete. You can update the status in the Edit form.
-
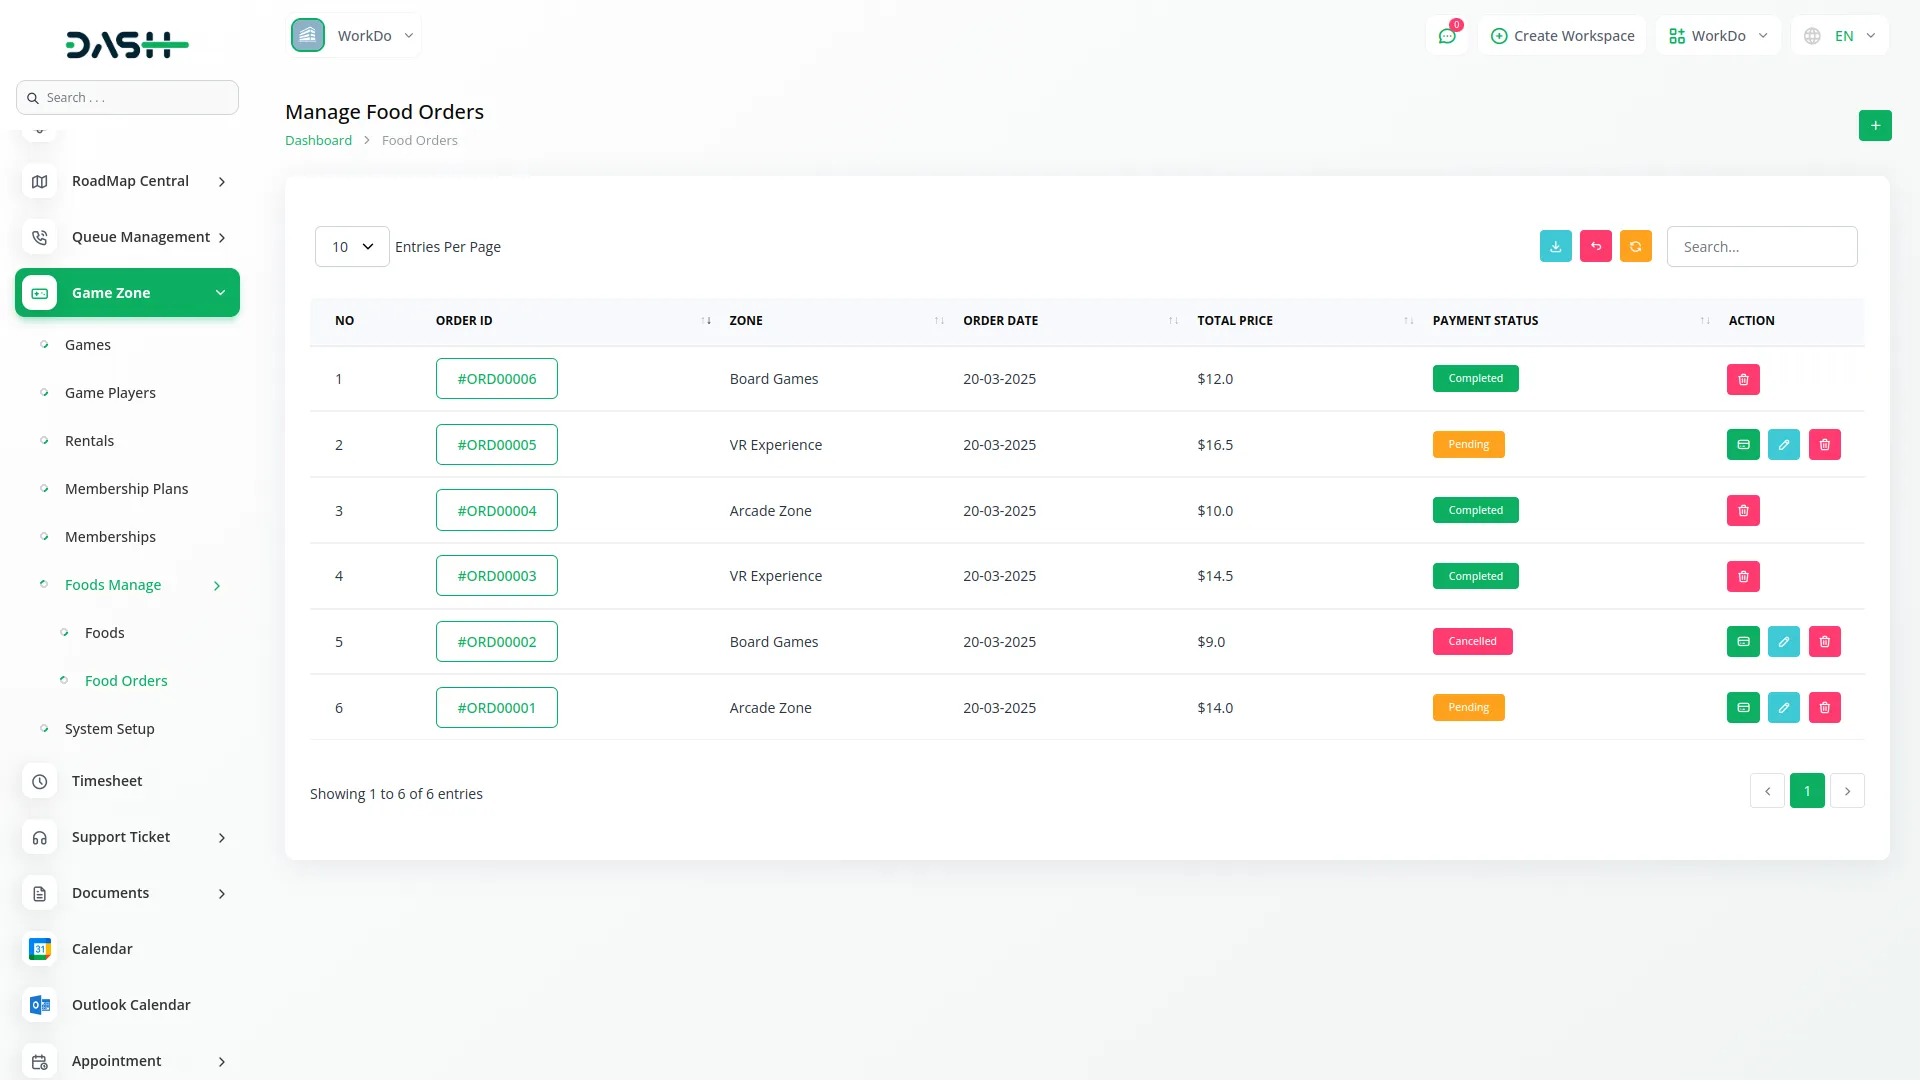
Manage Food Orders
- To add a new food order, click the “Create” button on the Manage Food Orders page. The Order ID is filled automatically. Select a zone from the dropdown. Only active zones will appear. Then in the food section, select food items from the selected zone. Only available food items will be shown. Enter the quantity. The price will be filled automatically based on the selected food. The total price is calculated automatically from the price and quantity. You can add multiple food items in one order. Once done, click “Save”.
- On the list page, all orders appear with columns like No, Order ID, Zone, Order Date, Total Price, and Payment Status.
- Payment Status can be Cancelled, Pending, or Completed. Once the Payment Status is marked as Completed, you will not be able to edit or change the Status of that order.
- You can use the Search and Export buttons.
- Available actions are Status, Edit, and Delete. You can change the Payment Status to Cancelled or Completed using the Status action.
-
Categories
Related articles
- Braintree Payment Gateway Detailed Documentation
- Retainer Integration in Dash SaaS
- Call Hub Integration in Dash SaaS
- Google Slides Detailed Documentation
- Jitsi Meet Detailed Documentation
- Quickbooks Integration in Dash SaaS
- Work Permit Detailed Documentation
- Boutique and Design Add-On Detailed Documentation
- Yoga Classes Integration in Dash SaaS
- SalesForce Integration in Dash SaaS
- DPO Payment Gateway in Dash SaaS
- Freight Management System Integration in Dash SaaS
Reach Out to Us
Have questions or need assistance? We're here to help! Reach out to our team for support, inquiries, or feedback. Your needs are important to us, and we’re ready to assist you!


Need more help?
If you’re still uncertain or need professional guidance, don’t hesitate to contact us. You can contact us via email or submit a ticket with a description of your issue. Our team of experts is always available to help you with any questions. Rest assured that we’ll respond to your inquiry promptly.
Love what you see?
Do you like the quality of our products, themes, and applications, or perhaps the design of our website caught your eye? You can have similarly outstanding designs for your website or apps. Contact us, and we’ll bring your ideas to life.
