Coworking Space Management Detail Documentation
This Coworking Space Management Add-On streamlines every aspect of coworking operations, from membership plans and bookings to amenities, payments, and workspace setup.
Introduction
The Coworking Space Management System is a comprehensive software solution designed to manage all aspects of your coworking business. This system allows you to handle membership plans, bookings, member management, amenities, and complete website customisation. The platform includes both backend administration tools and a fully functional frontend website where customers can book spaces, purchase memberships, and contact your business. With integrated payment processing and automated email responses, this system streamlines your coworking space operations from member registration to booking management.
How to Install the Add-On?
To Set Up the Coworking Space Management Add-On, you can follow this link: Setup Add-On.
How to use the Coworking Space Management Add-On?
Coworking Space Dashboard
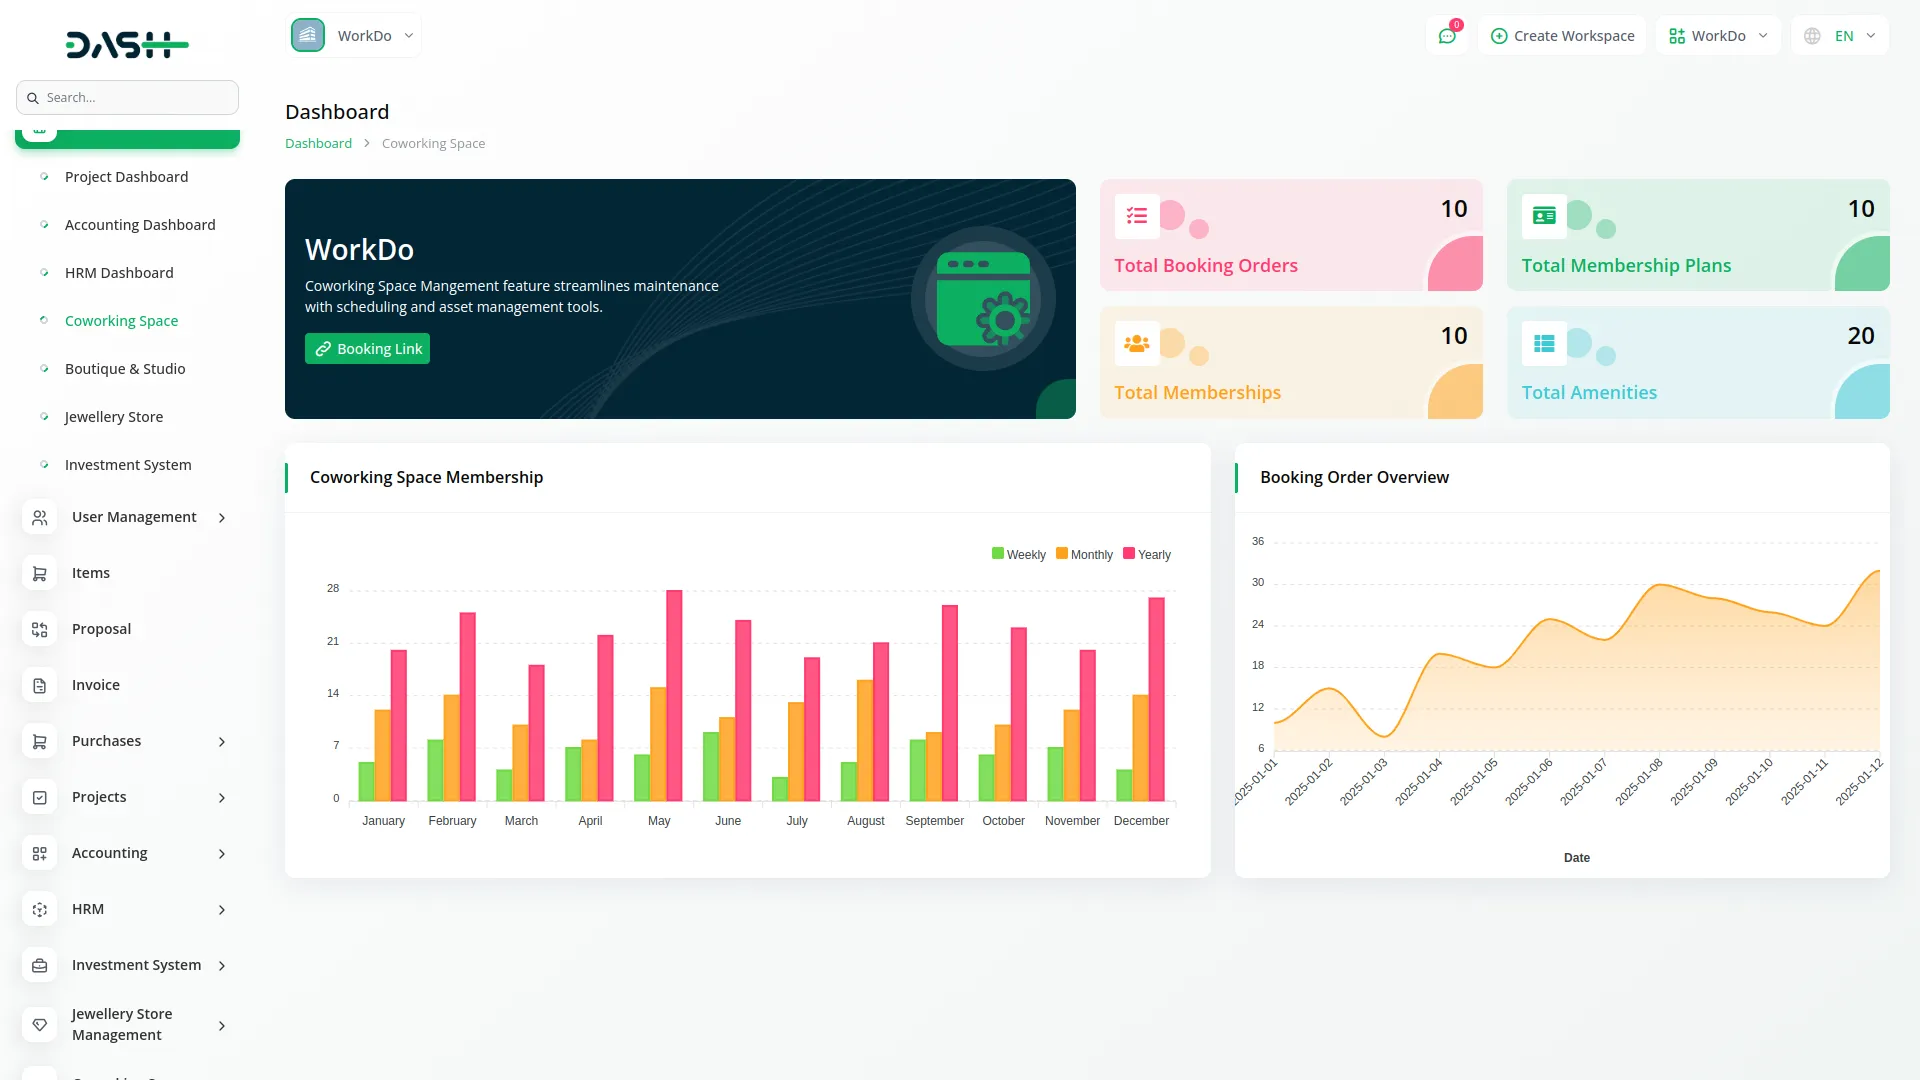
- The Dashboard provides a comprehensive overview of your coworking space business, featuring key metrics and actionable insights. At the top, you’ll find a Booking Link that you can copy and share with customers to direct them to your booking page.
- The dashboard displays four important summary cards showing Total Booking Orders, Total Membership Plans, Total Memberships, and Total Amenities. These cards give you a quick snapshot of your business performance.
- Below the summary cards, you’ll see a bar chart displaying Coworking Space Membership data broken down by Weekly, Monthly, and Yearly memberships. This helps you understand which membership duration is most popular among your customers.
- The dashboard also includes a Booking Order Overview area chart showing booking trends over the last 7 days, helping you track recent booking activity and identify busy periods.
System Setup
- The System Setup section manages automated email responses for your coworking space bookings and memberships.
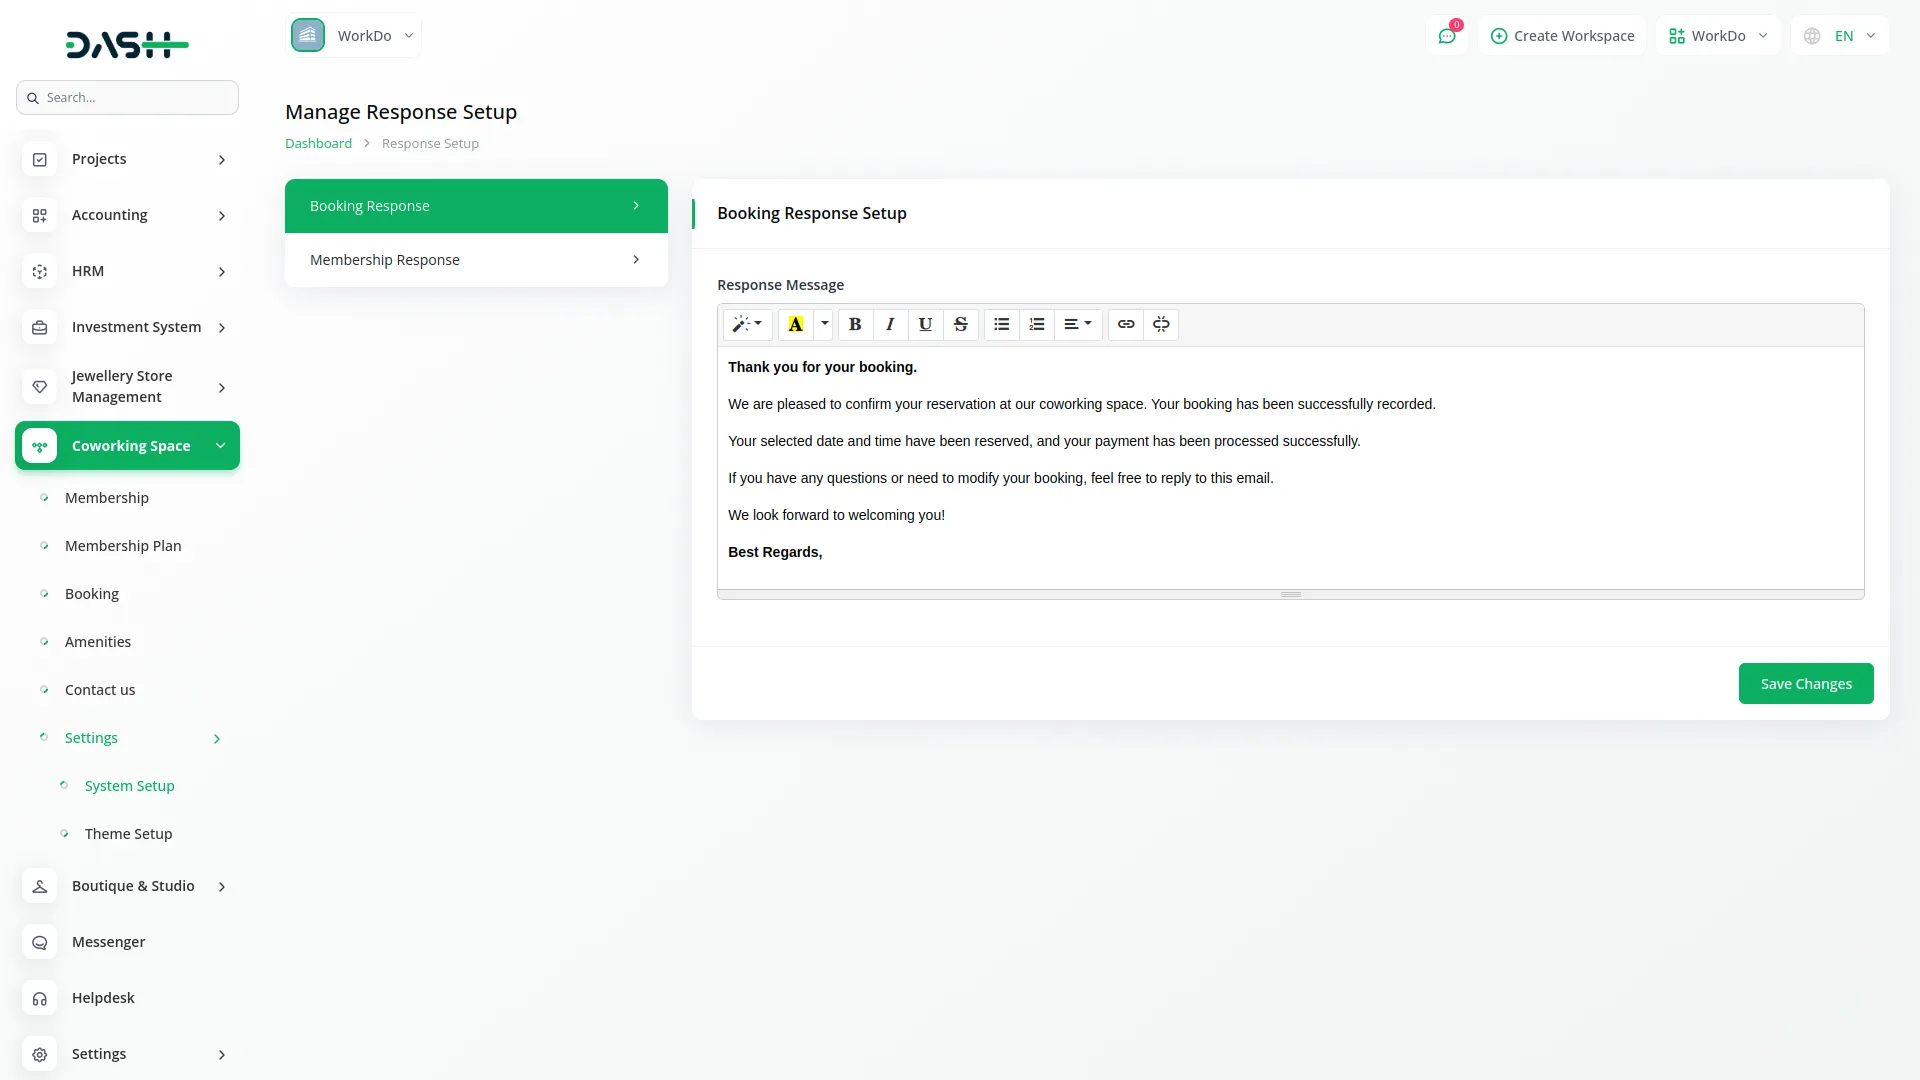
Booking Response
- In the Booking Response field, enter the message that will be displayed in the response email page when customers make bookings from your coworking space. This message will be sent via email to customers after they complete their booking.
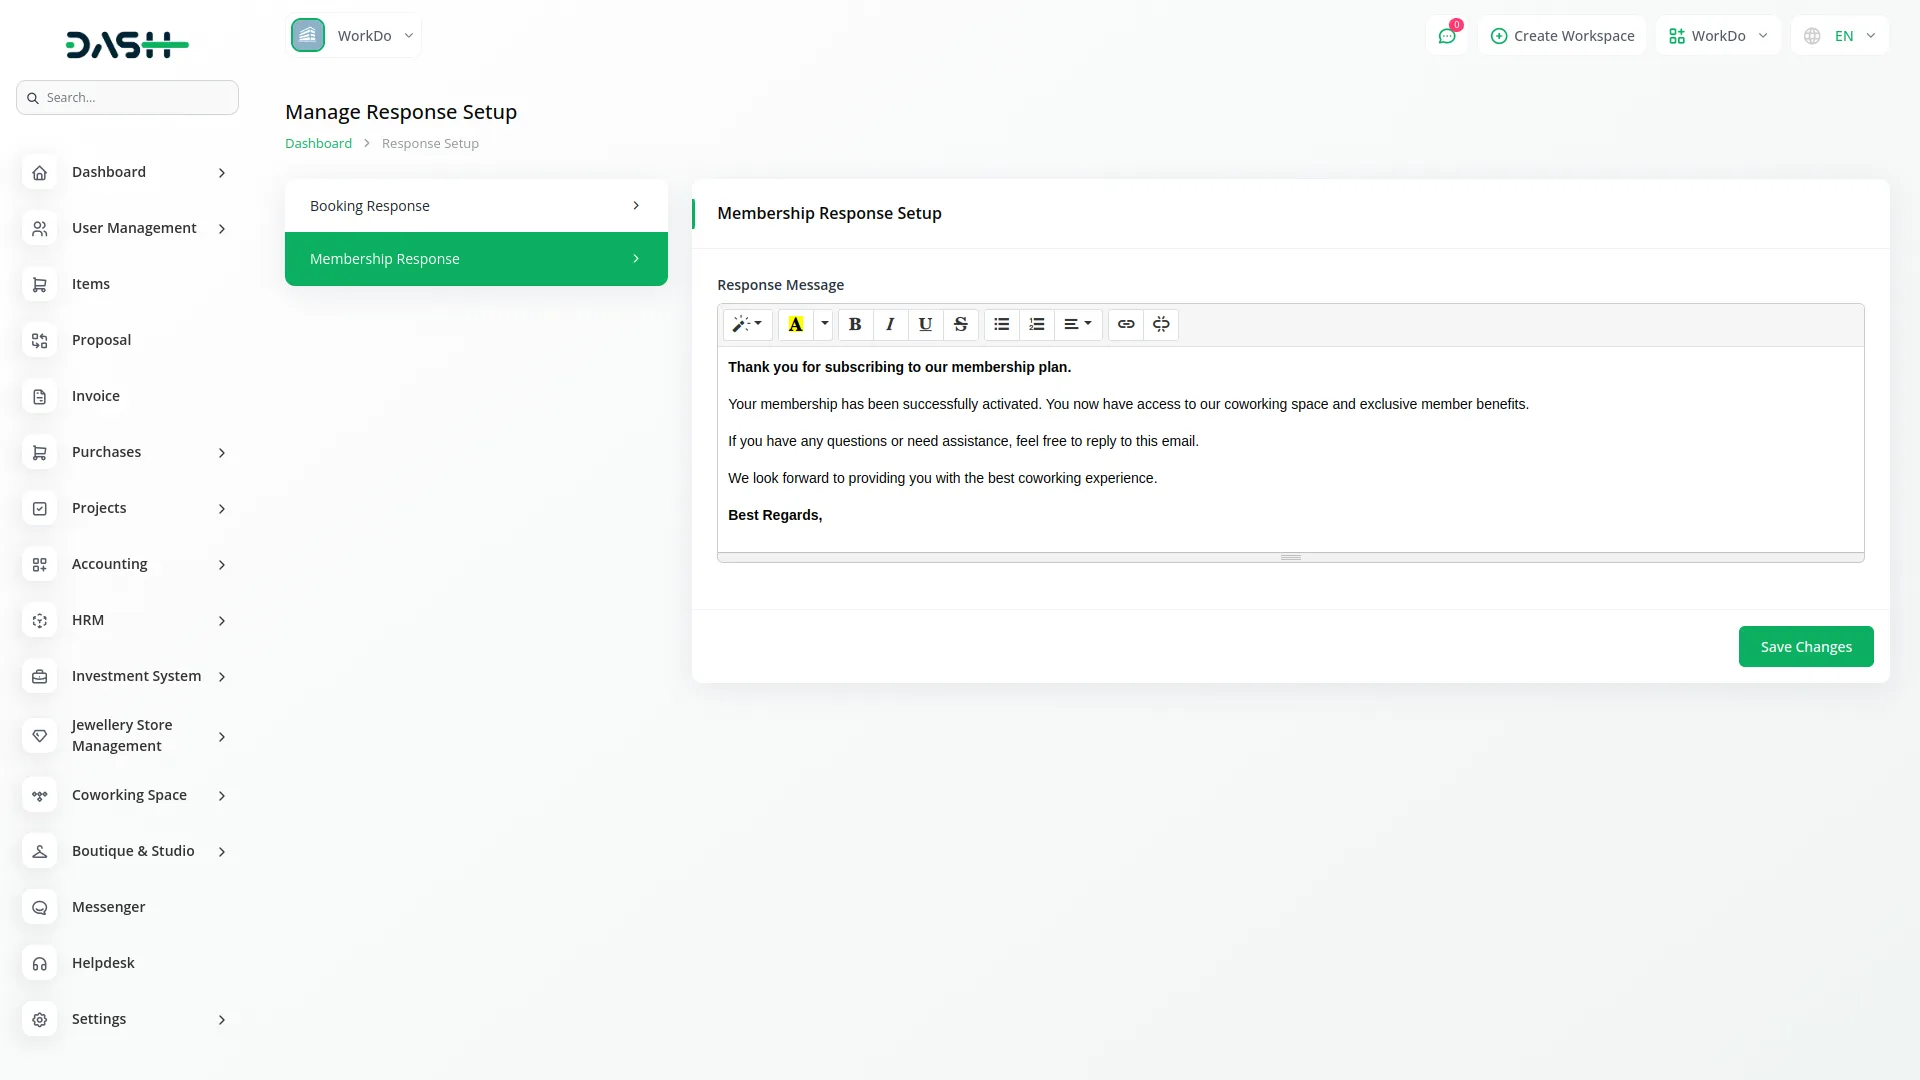
Membership Response
- In the Membership Response field, enter the message that will be displayed in the response email page when customers purchase memberships from your coworking space. This message will be sent via email to members after they complete their membership purchase.
- Once you save these settings, the system will automatically use these response messages when sending confirmation emails to customers and members, ensuring consistent communication from your coworking space.
- Email Automation System: The system sends two types of confirmation emails. Booking Confirmation Emails are sent when the booking payment is completed. Use the booking response template from your system setup and include the customer name, booking ID, and start/end dates. Membership Confirmation Emails are sent when membership payment is completed. Use the membership response template from your system setup and include the member’s name, plan name, expiry date, and membership ID.
Theme setup
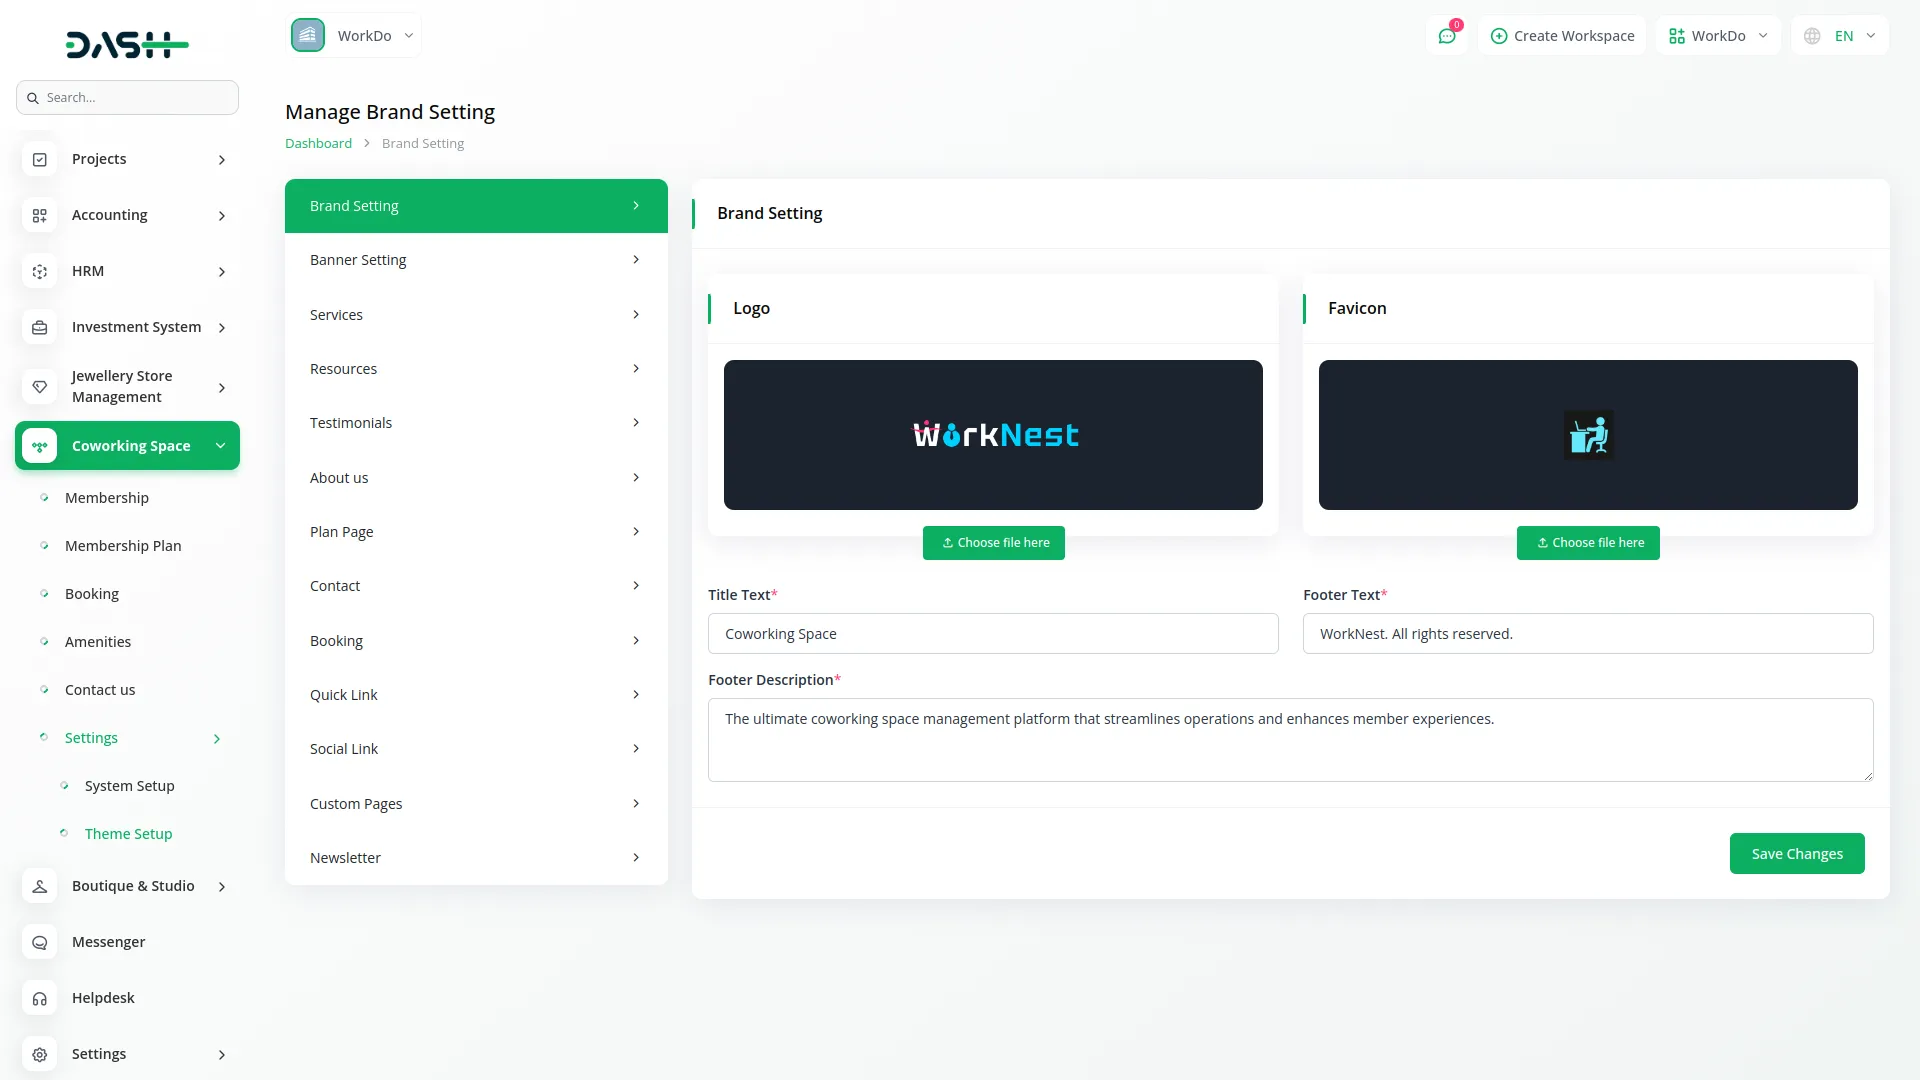
Brand Setting
- In the Brand Setting section, you will find fields for Logo Upload, Favicon Upload, Title Text, Footer Text, and Footer Description. Upload your company logo and favicon, then enter your business details in the text fields.
- Once saved, your Logo and Favicon will appear across your coworking space website, while the Title Text, Footer Text, and Footer Description will automatically display in their respective sections on your frontend website, creating a professional and branded experience for your customers.
- Brand settings appear in multiple locations on your website. The Header Section of all website pages displays your logo from the brand settings along with a navigation menu (Home, About, Purchase, Contact), a language selection dropdown, and a Book Now button. The Footer Section of all pages displays your logo and footer description from the brand settings, along with contact information, quick links, social links, and copyright text, maintaining consistent branding across your entire website.
Banner Setting
- In the Banner Setting section, you will find fields for Banner Title, Banner Description, and Banner Image. Enter your banner details and upload an eye-catching image.
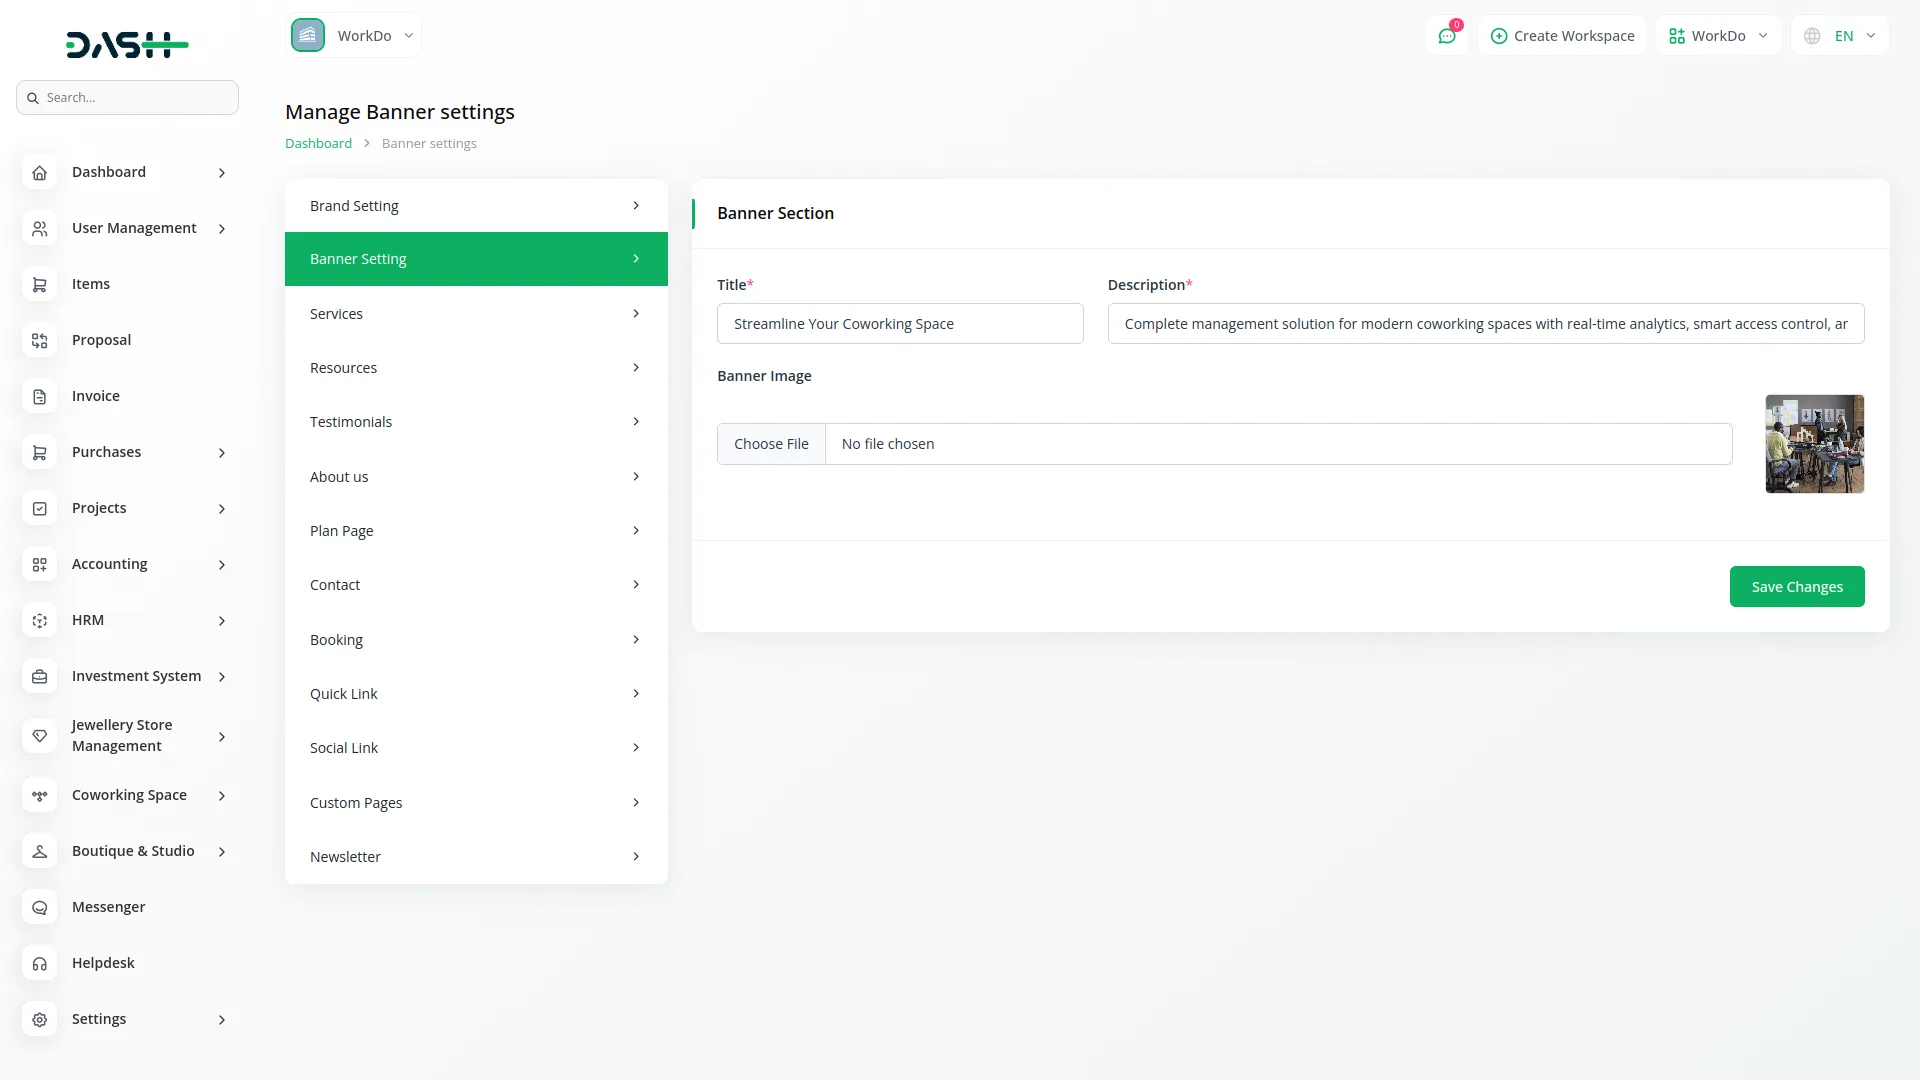
- Once saved, the entered Banner Title, Banner Description, and Banner Image will automatically appear in the banner area of your website’s homepage, giving visitors a clear first impression of your coworking space business.
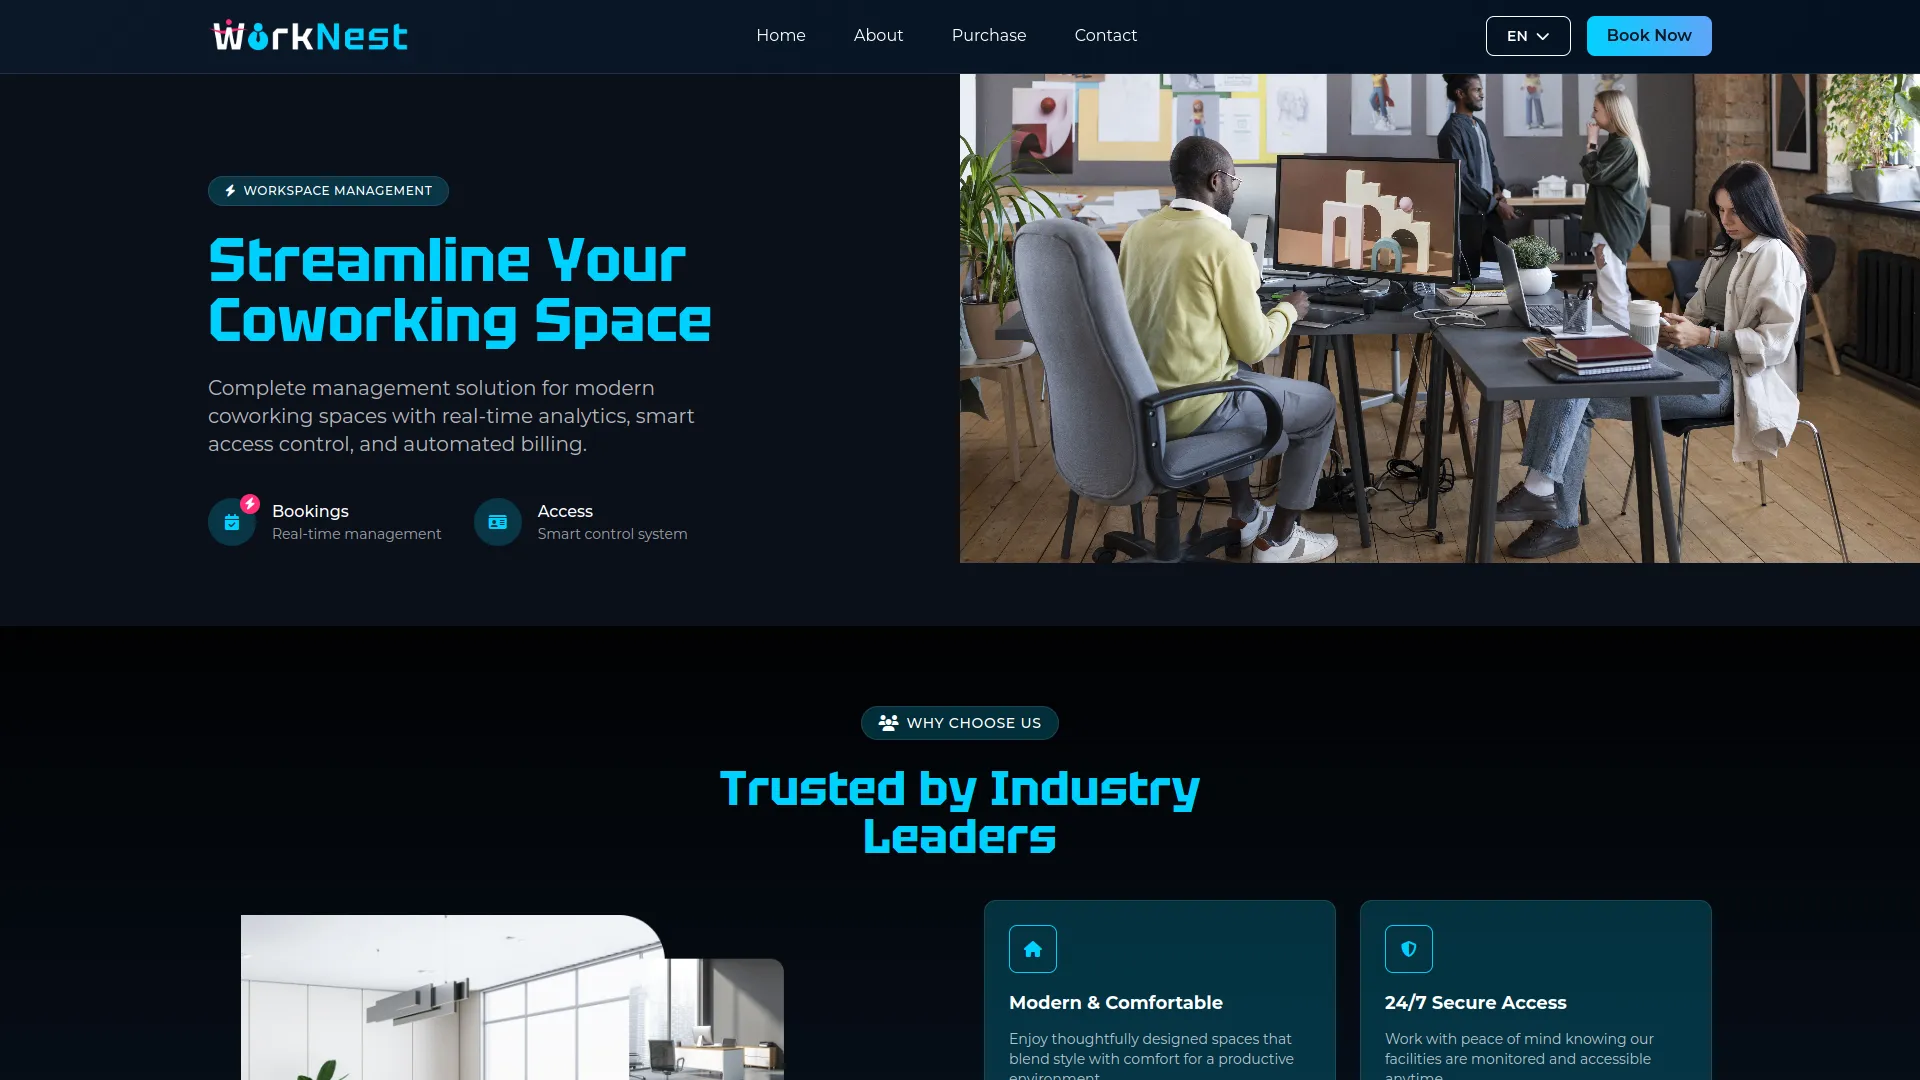
- The Banner Section on your Website Home Page shows the banner title, description, and image from your banner setting, creating an impactful first impression for visitors to your coworking space website.
Services Setting
- In the Services Setting section, you will find fields for Service Title and Service Image. Enter the main title for your services section and upload a relevant image. Below this, you can add individual services by providing a Service Icon, a Service Name, and a Service Description for each service you offer.
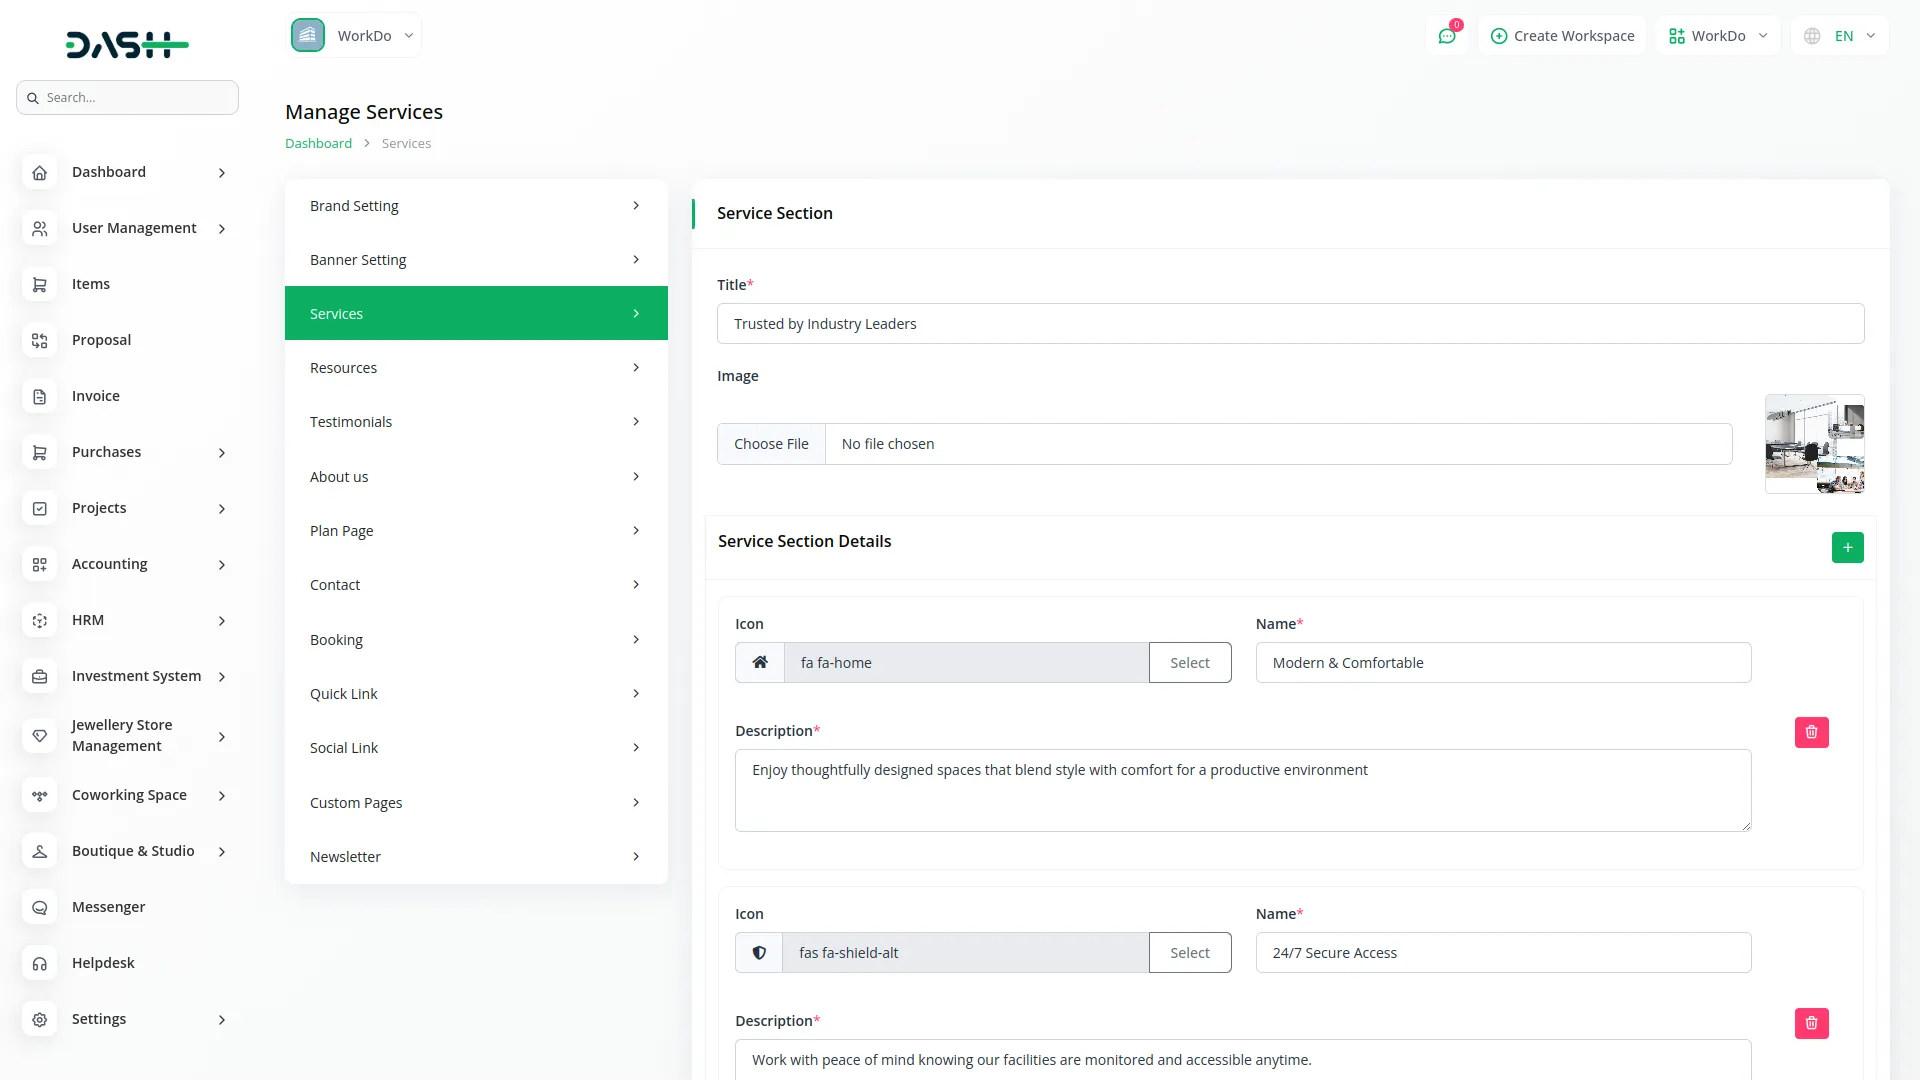
- Once saved, the Service Title and Service Image will appear at the top of your website’s services section, while each individual service will display as cards with their respective icons, names, and descriptions, helping visitors understand what services your coworking space provides.
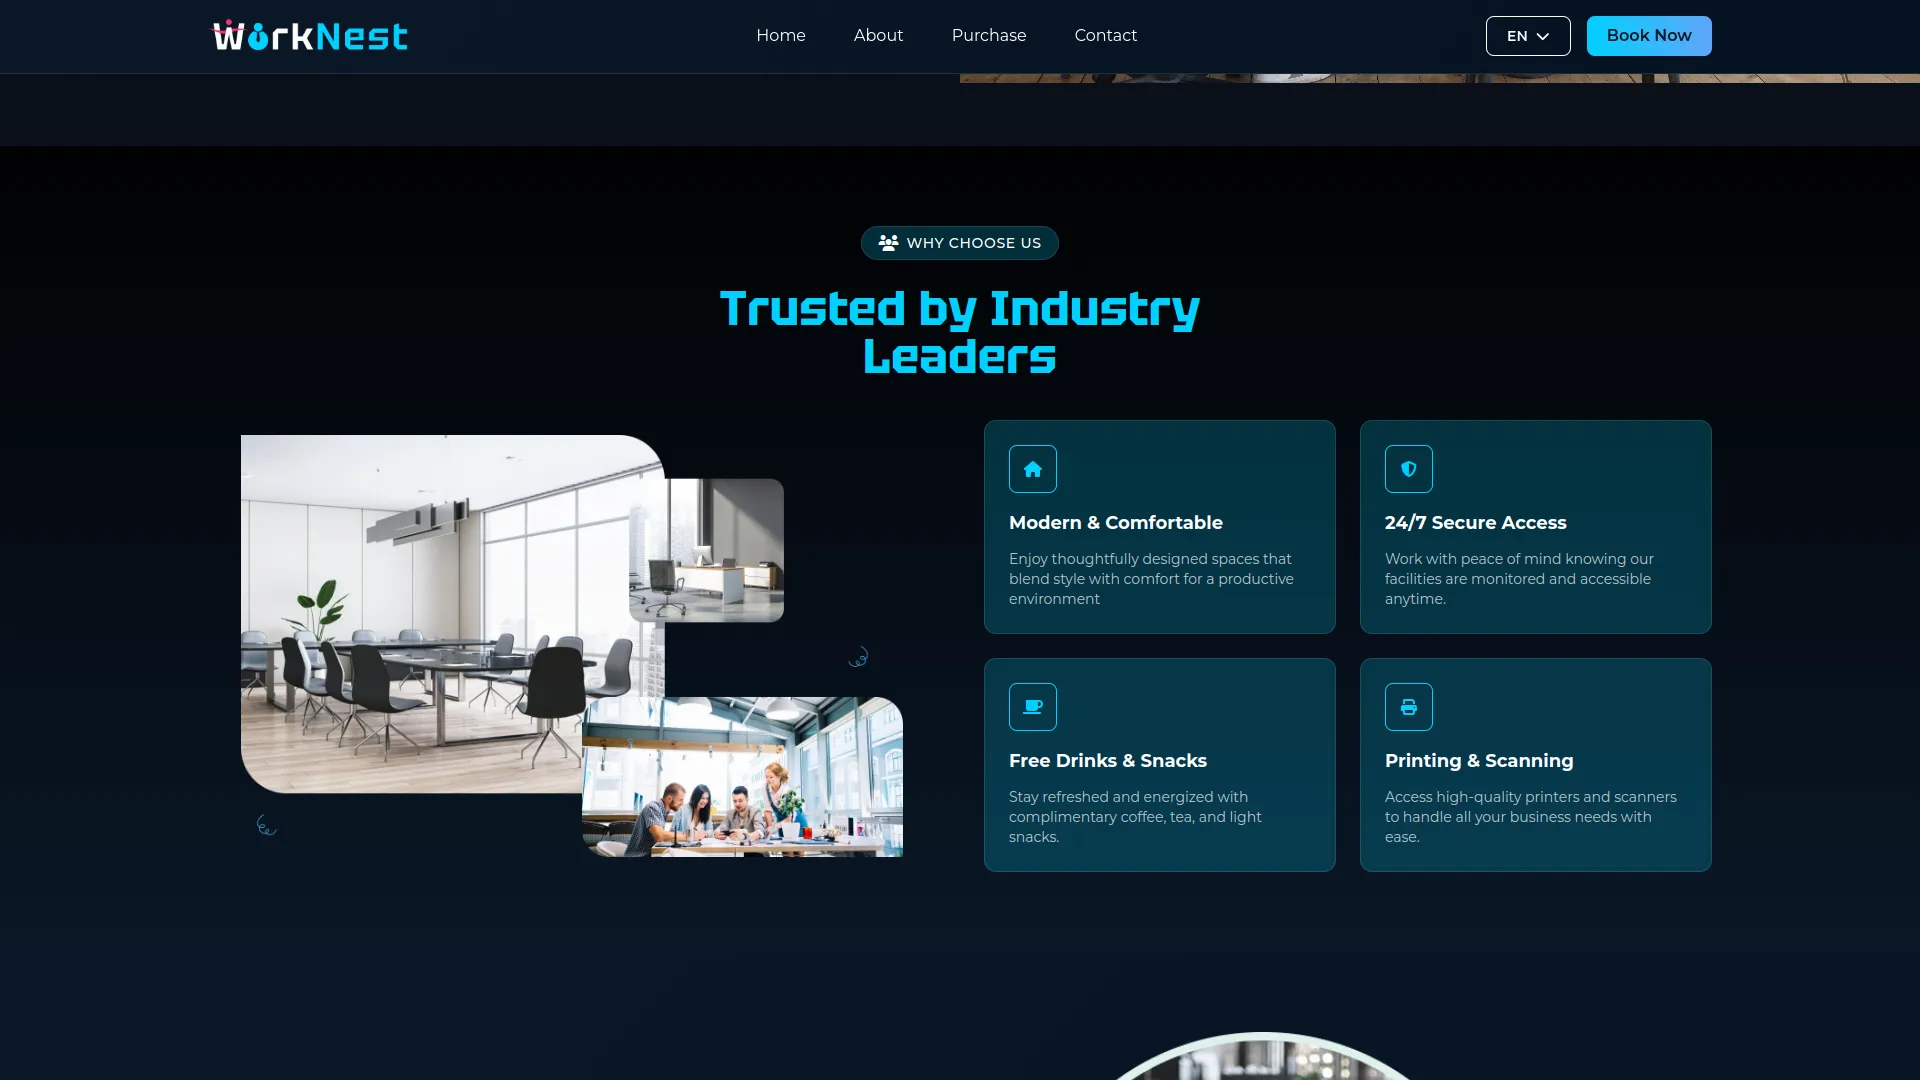
- The Services Section on your Website Home Page displays the service title and image from the services setting, along with service cards showing the icon, name, and description for each service you’ve added in the backend.
Resources Setting
- In the Resources Setting section, you will find fields for Resource Title, Resource Description, and Resource Image. Enter the main title for your resources section, add a description, and upload a relevant image. Below this, you can add individual resources by providing Resource Icon, Resource Title, and Resource Description for each resource you want to showcase.
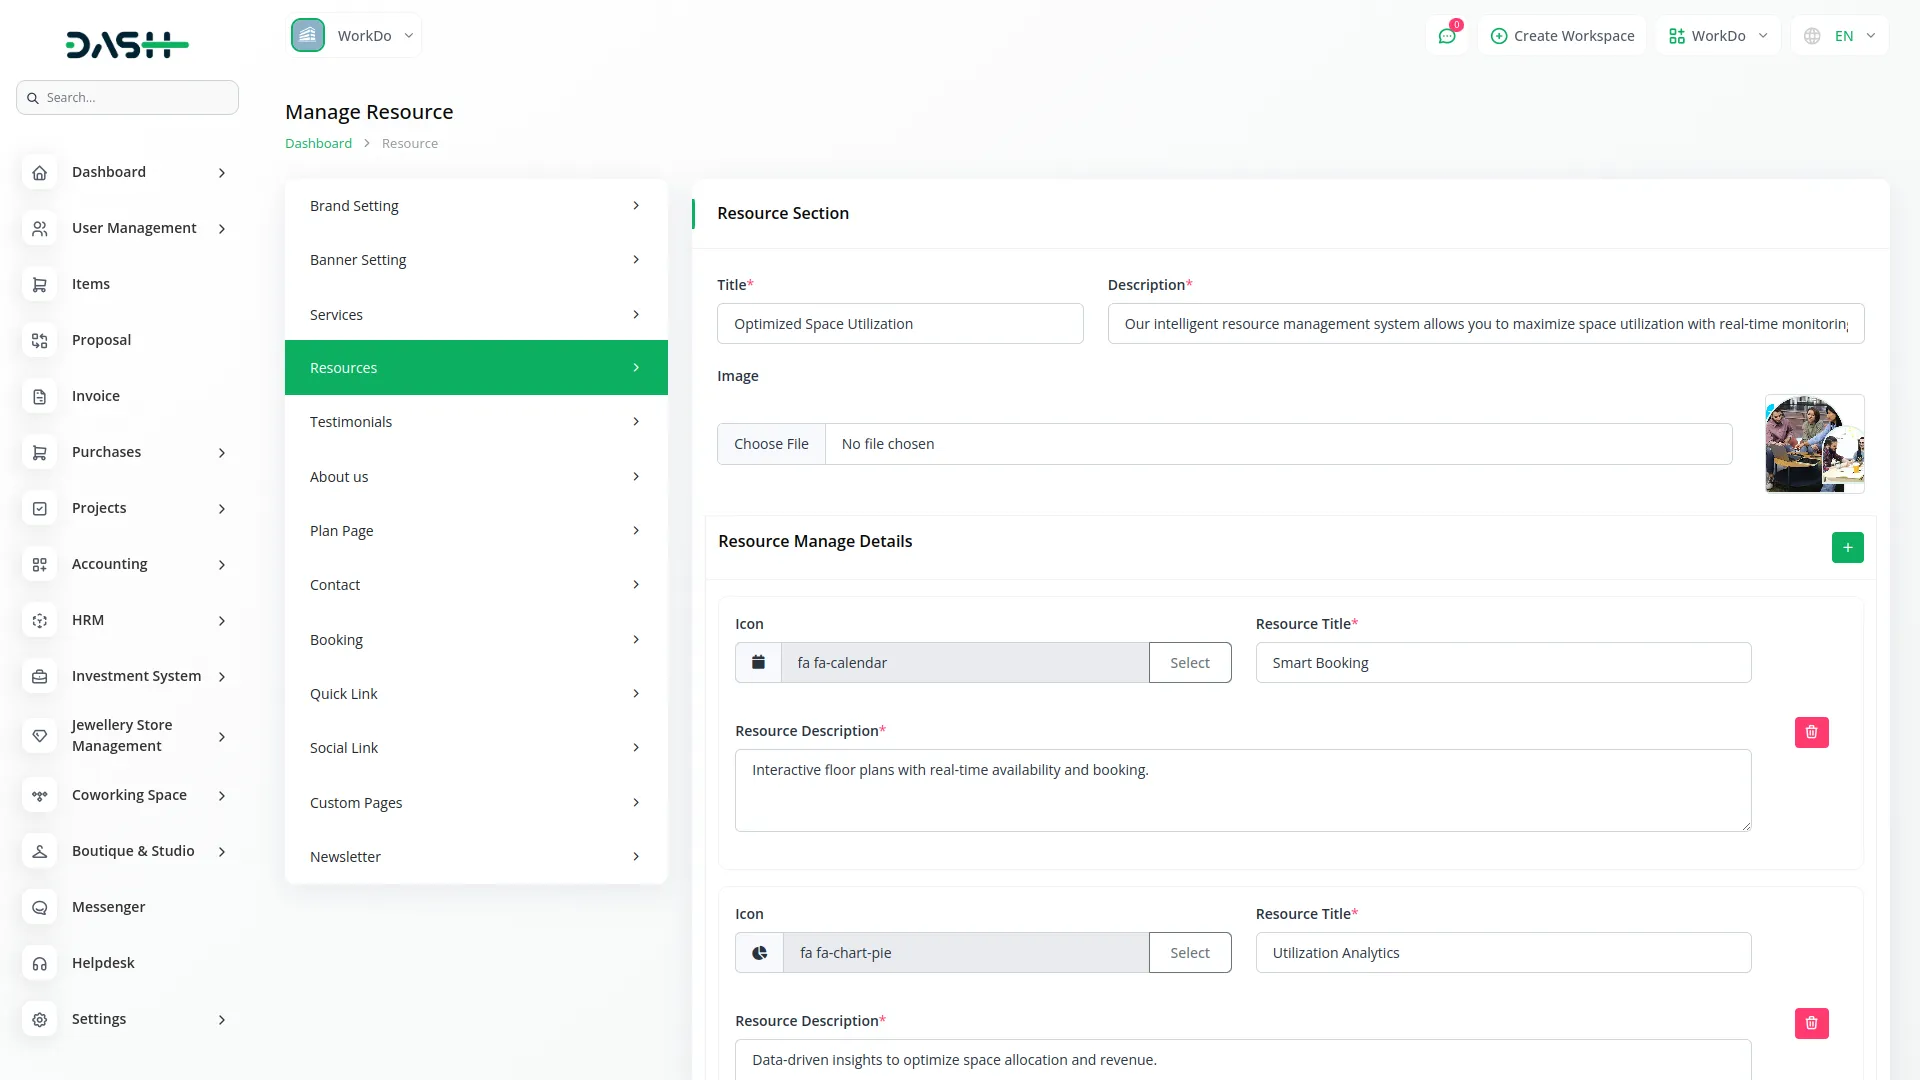
- Once saved, the Resource Title, Resource Description, and Resource Image will appear at the top of your website’s resources section, while each individual resource will display as cards with their respective icons, titles, and descriptions, helping visitors understand the facilities and resources available at your coworking space.
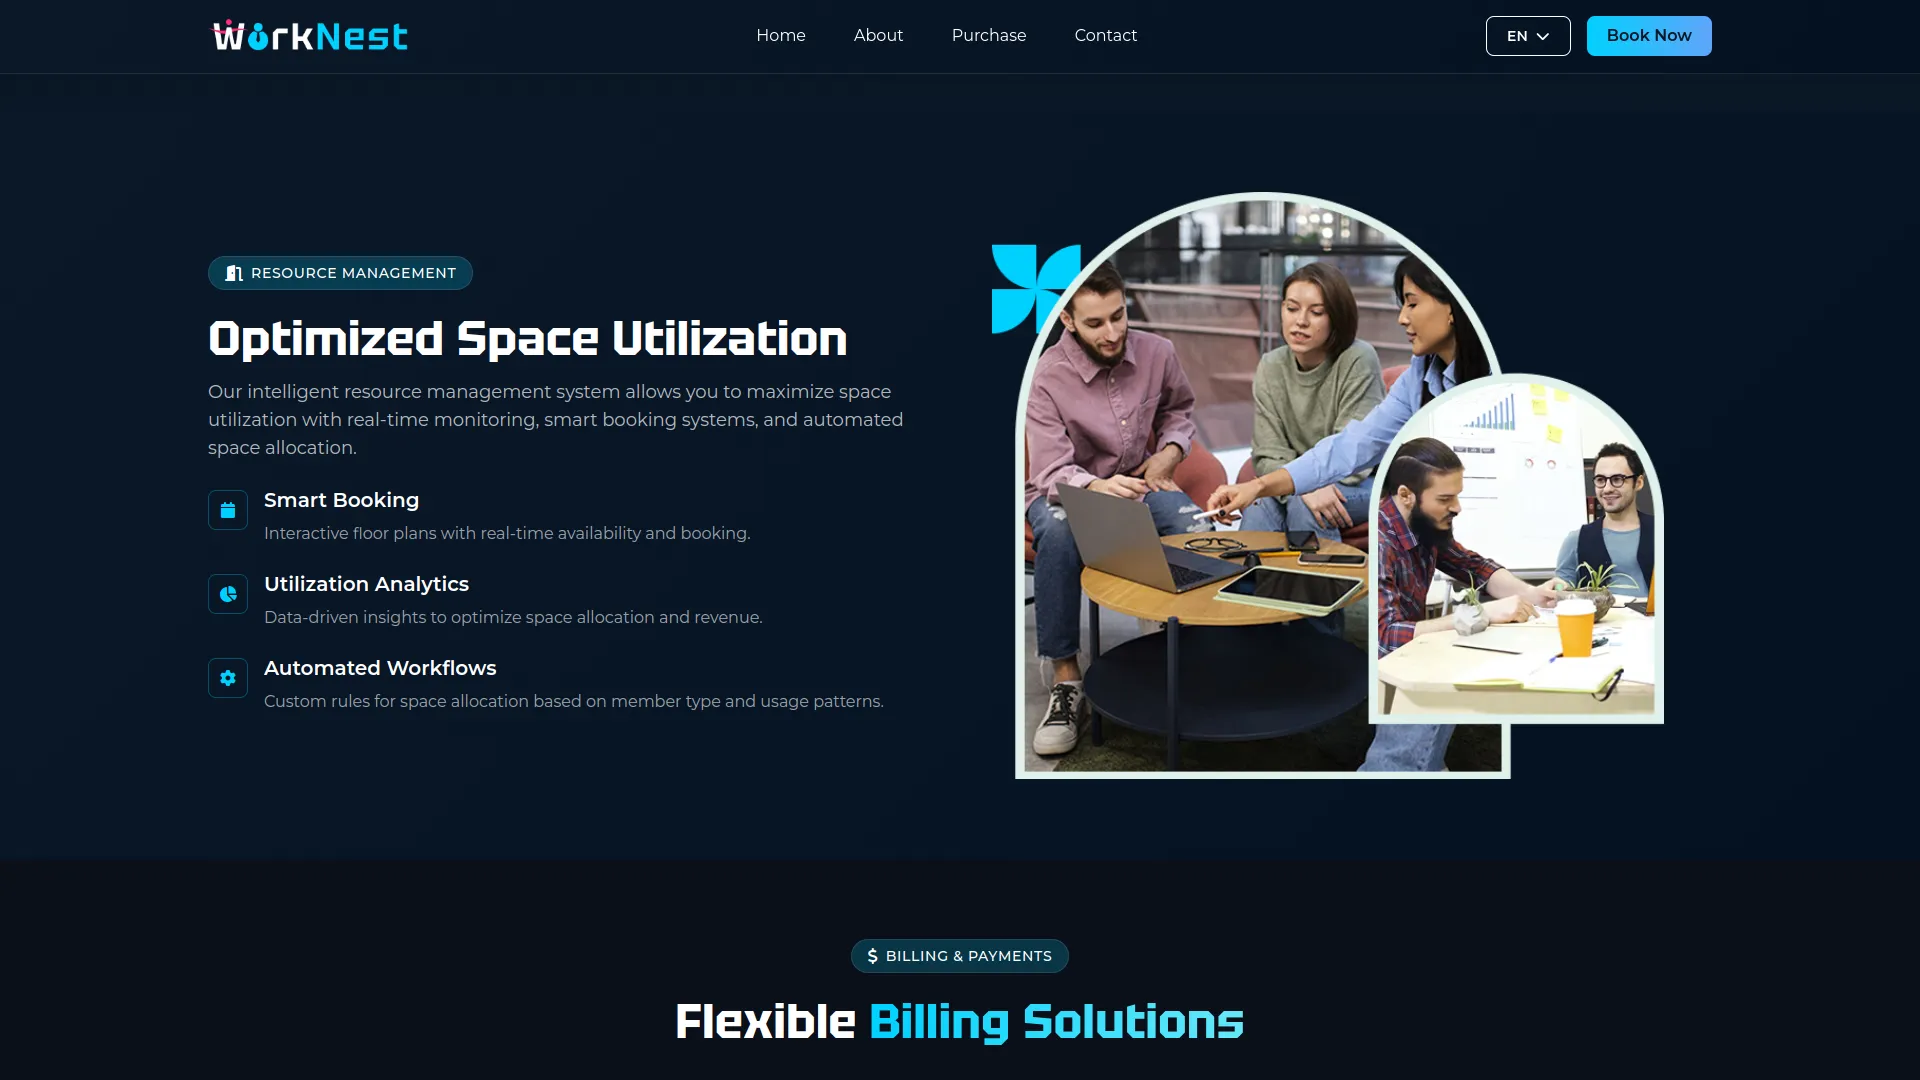
- The Resources Section on your Website Home Page shows the resource title, description, and image from the resources setting, plus resource cards with icon, title, and description for each resource you’ve configured in the backend.
Testimonials Setting
- In the Testimonials Setting section, you will find a field for Testimonial Title. Enter the main heading for your testimonials section. Below this, you can add individual testimonials by providing Member Name, Member Email, Member Rating, Member Quote, and Member Image for each testimonial you want to display.
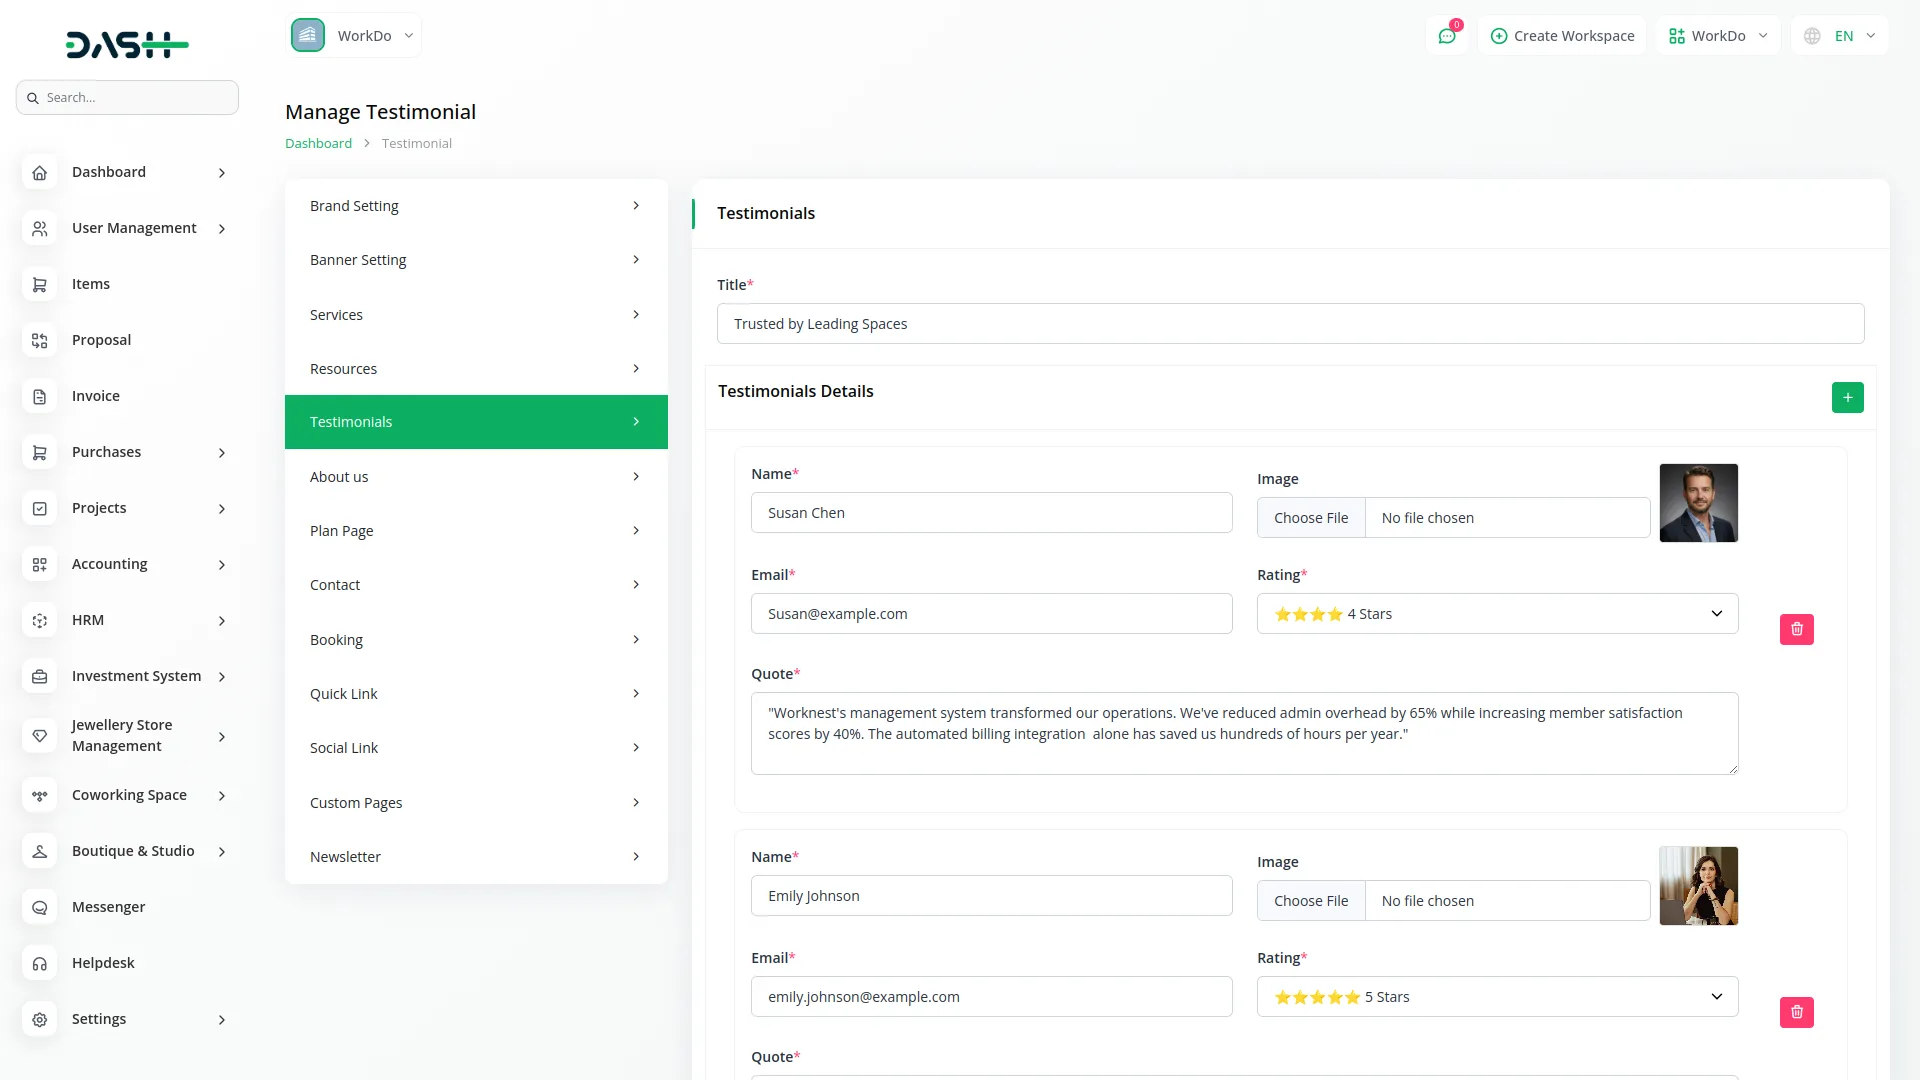
- Once saved, the Testimonial Title will appear at the top of your website’s testimonials section, while each individual testimonial will display with the member’s name, rating, quote, and image, building trust and credibility with potential customers by showcasing positive experiences from your existing members.
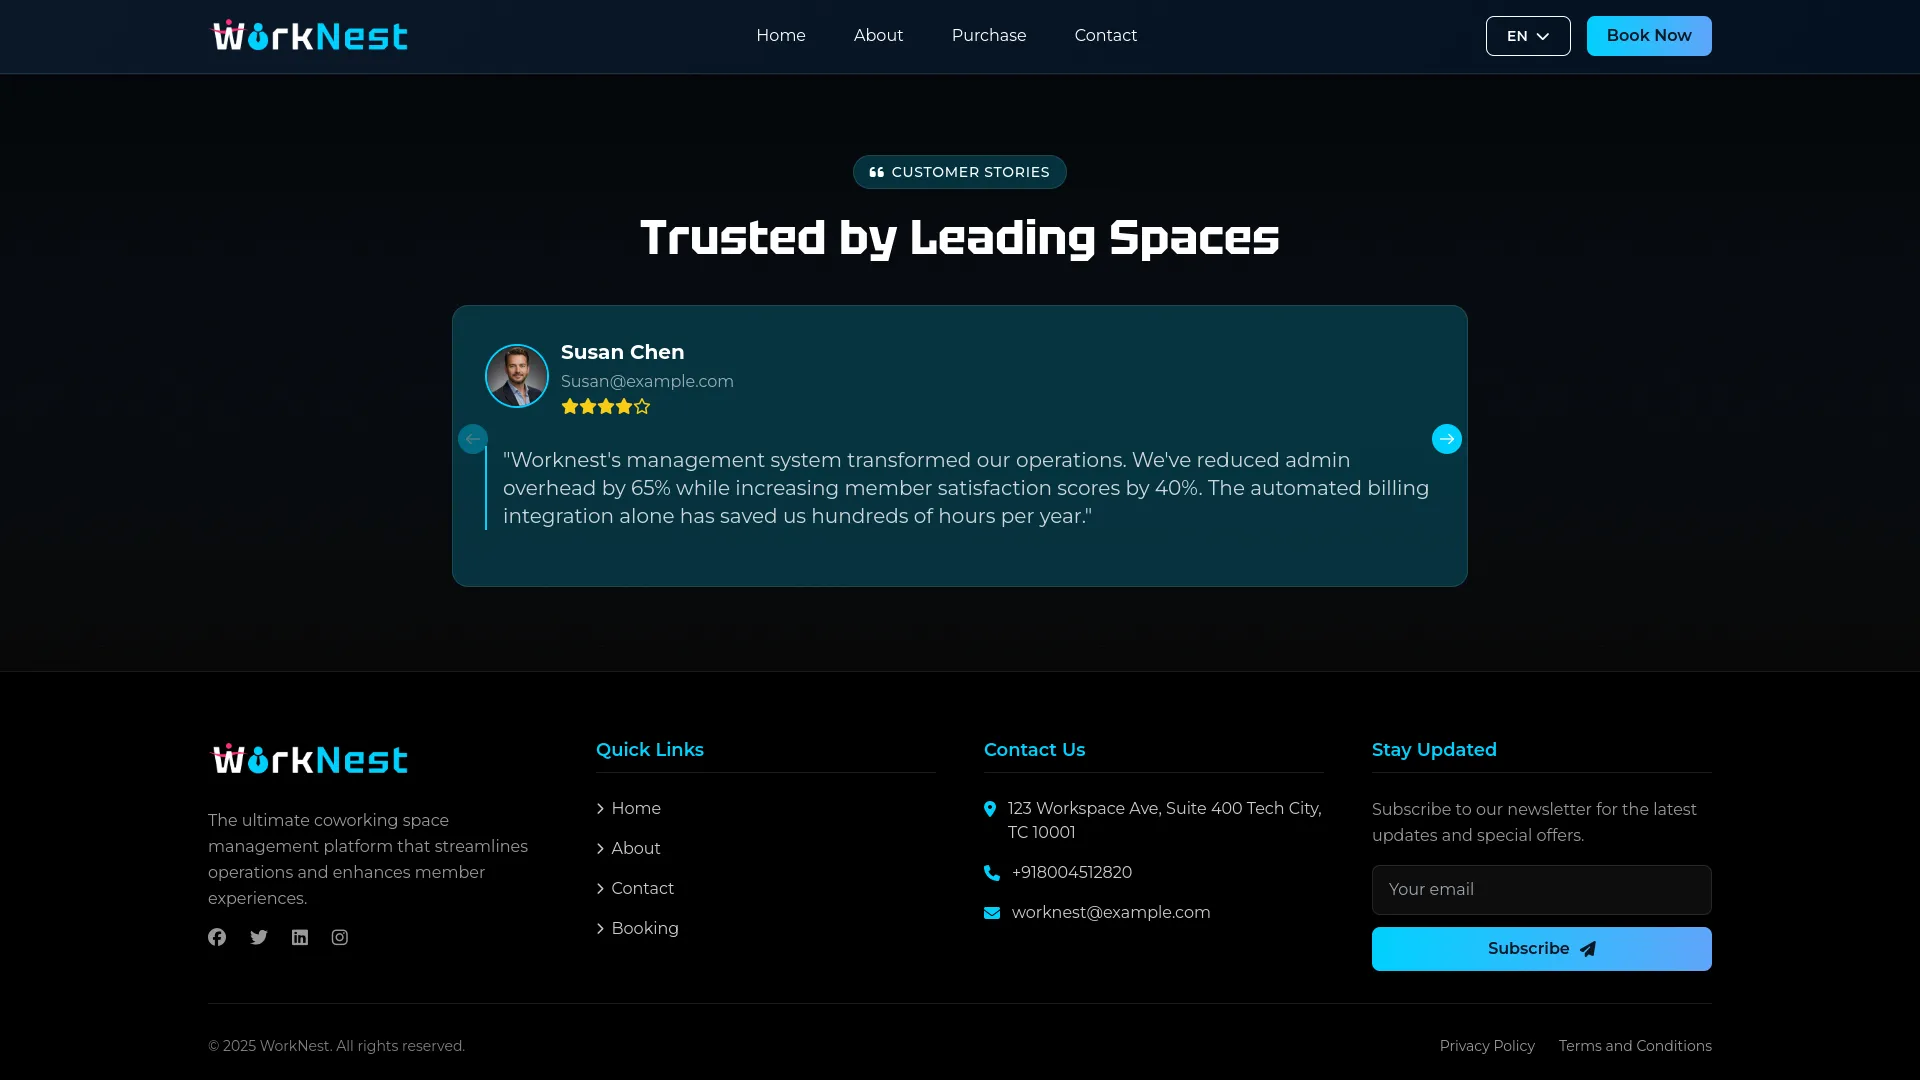
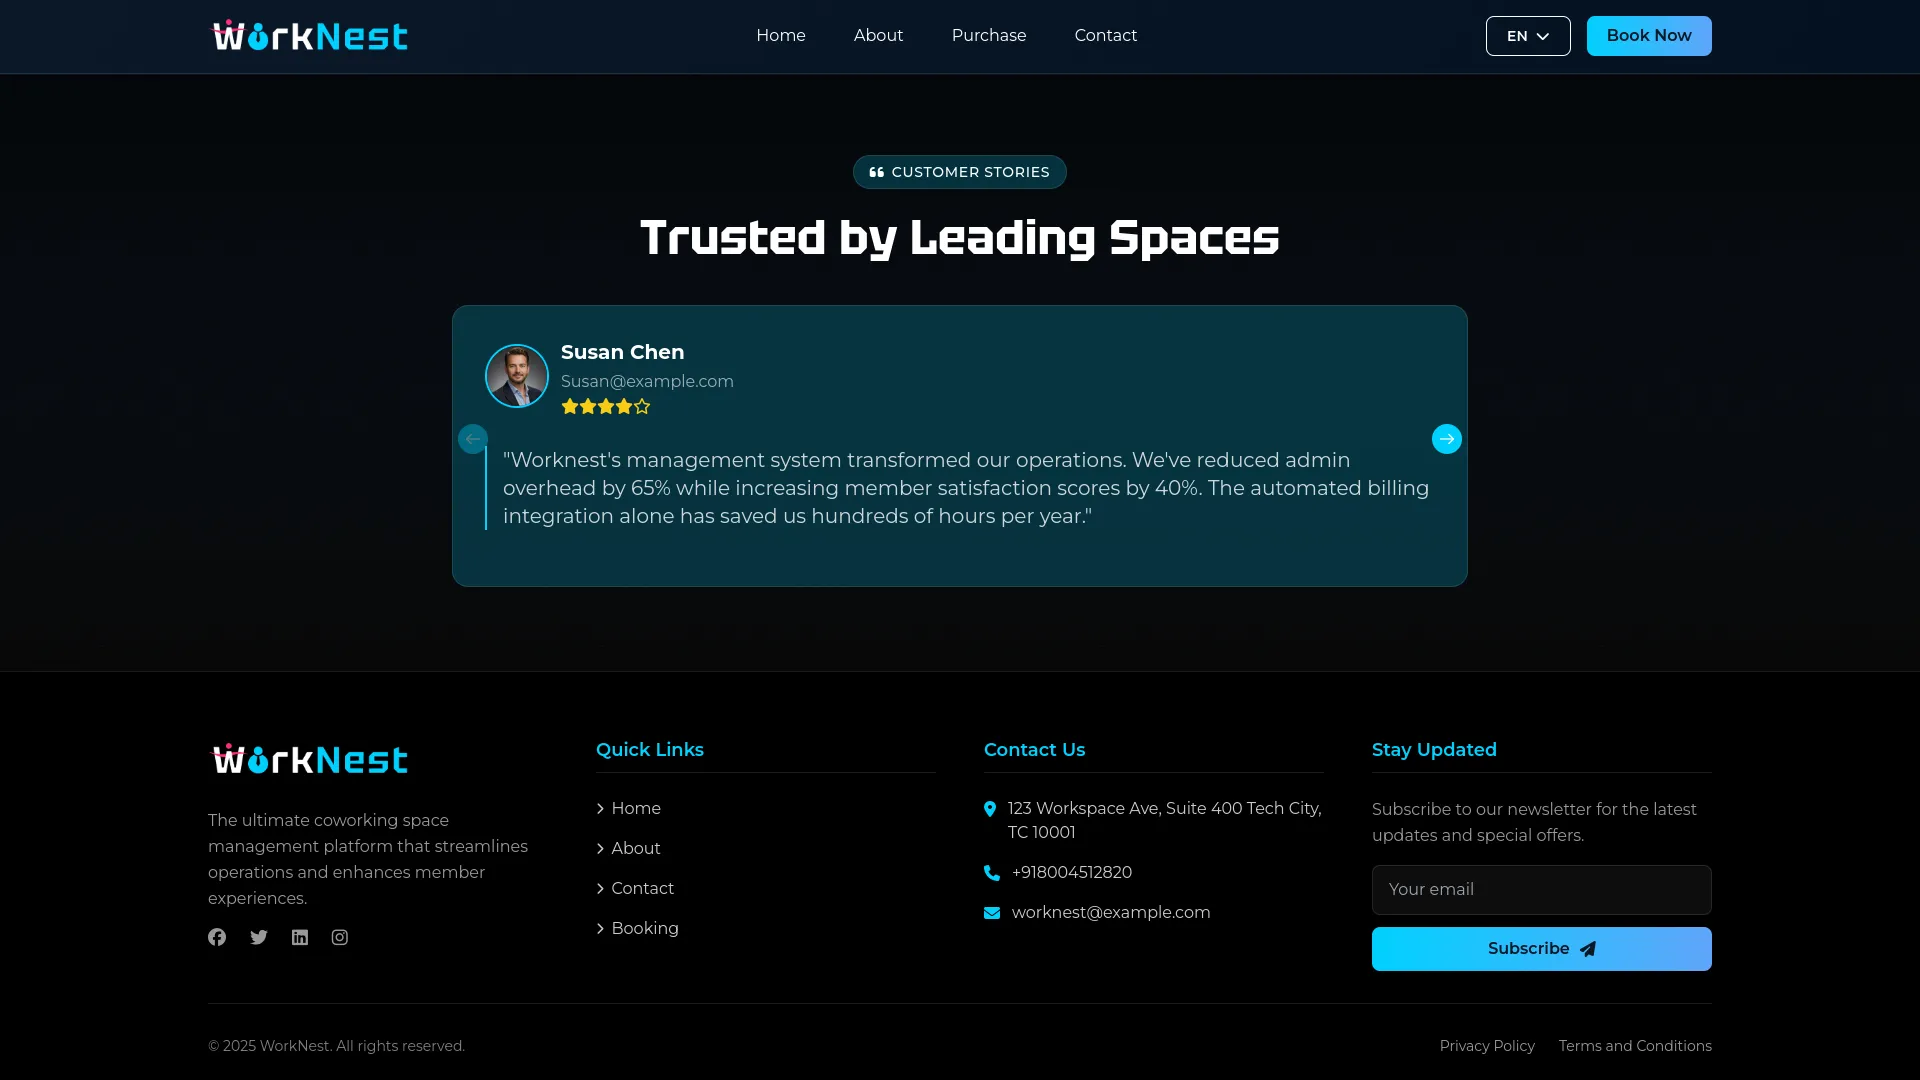
- The Testimonials Section on your Website Home Page displays the testimonial title from the testimonials setting and shows member testimonials with name, rating, quote, and image for each testimonial you’ve added in the backend.
About Us Setting
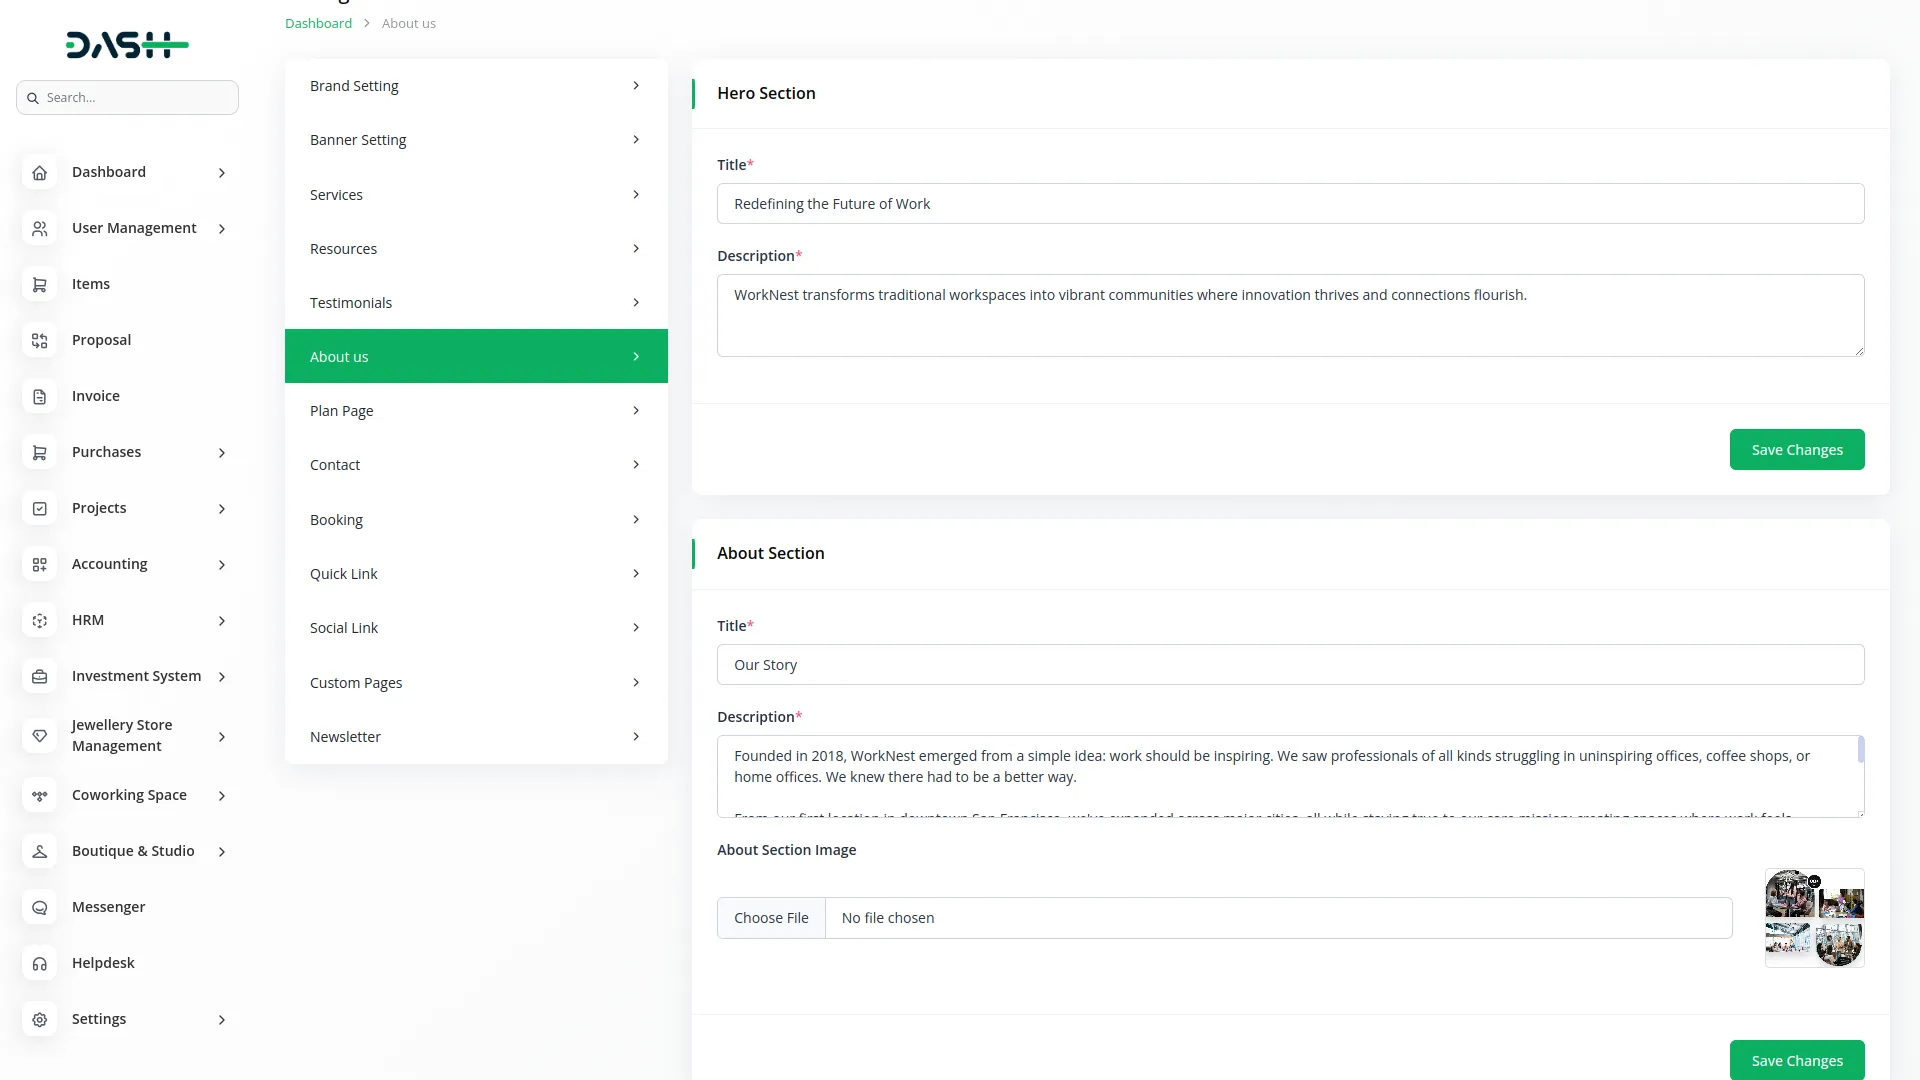
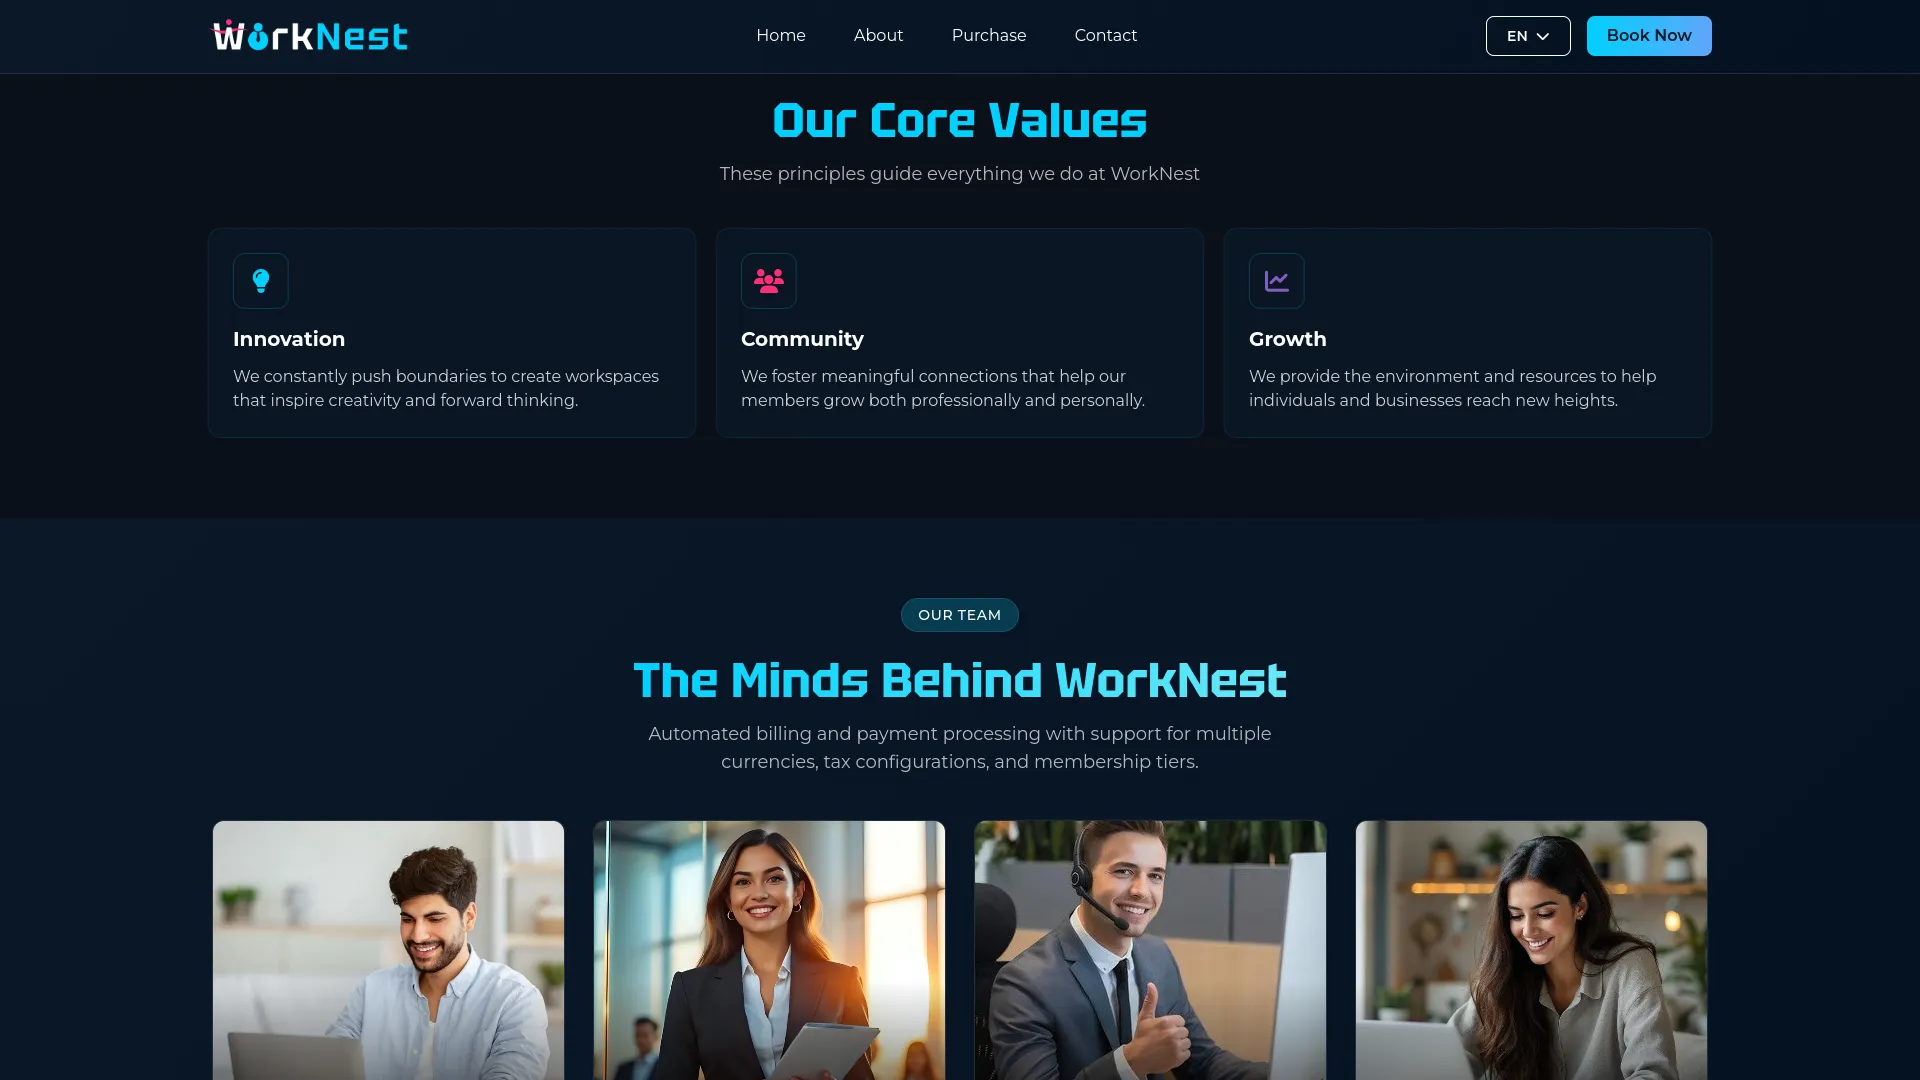
- The About Us Setting section is divided into four main sections that will appear on your website’s about page. Once saved, all these sections will automatically display on your website’s about page, giving visitors comprehensive information about your coworking space, mission, and team.
- The Website About Page consists of three main sections. The Common Banner Section displays fixed text and images that create a consistent header
- In the Hero Section, enter About Hero Title and About Hero Description to create an impactful introduction. In the About Section, provide an About Title, an About Description, and upload an About Image to tell your coworking space’s story.
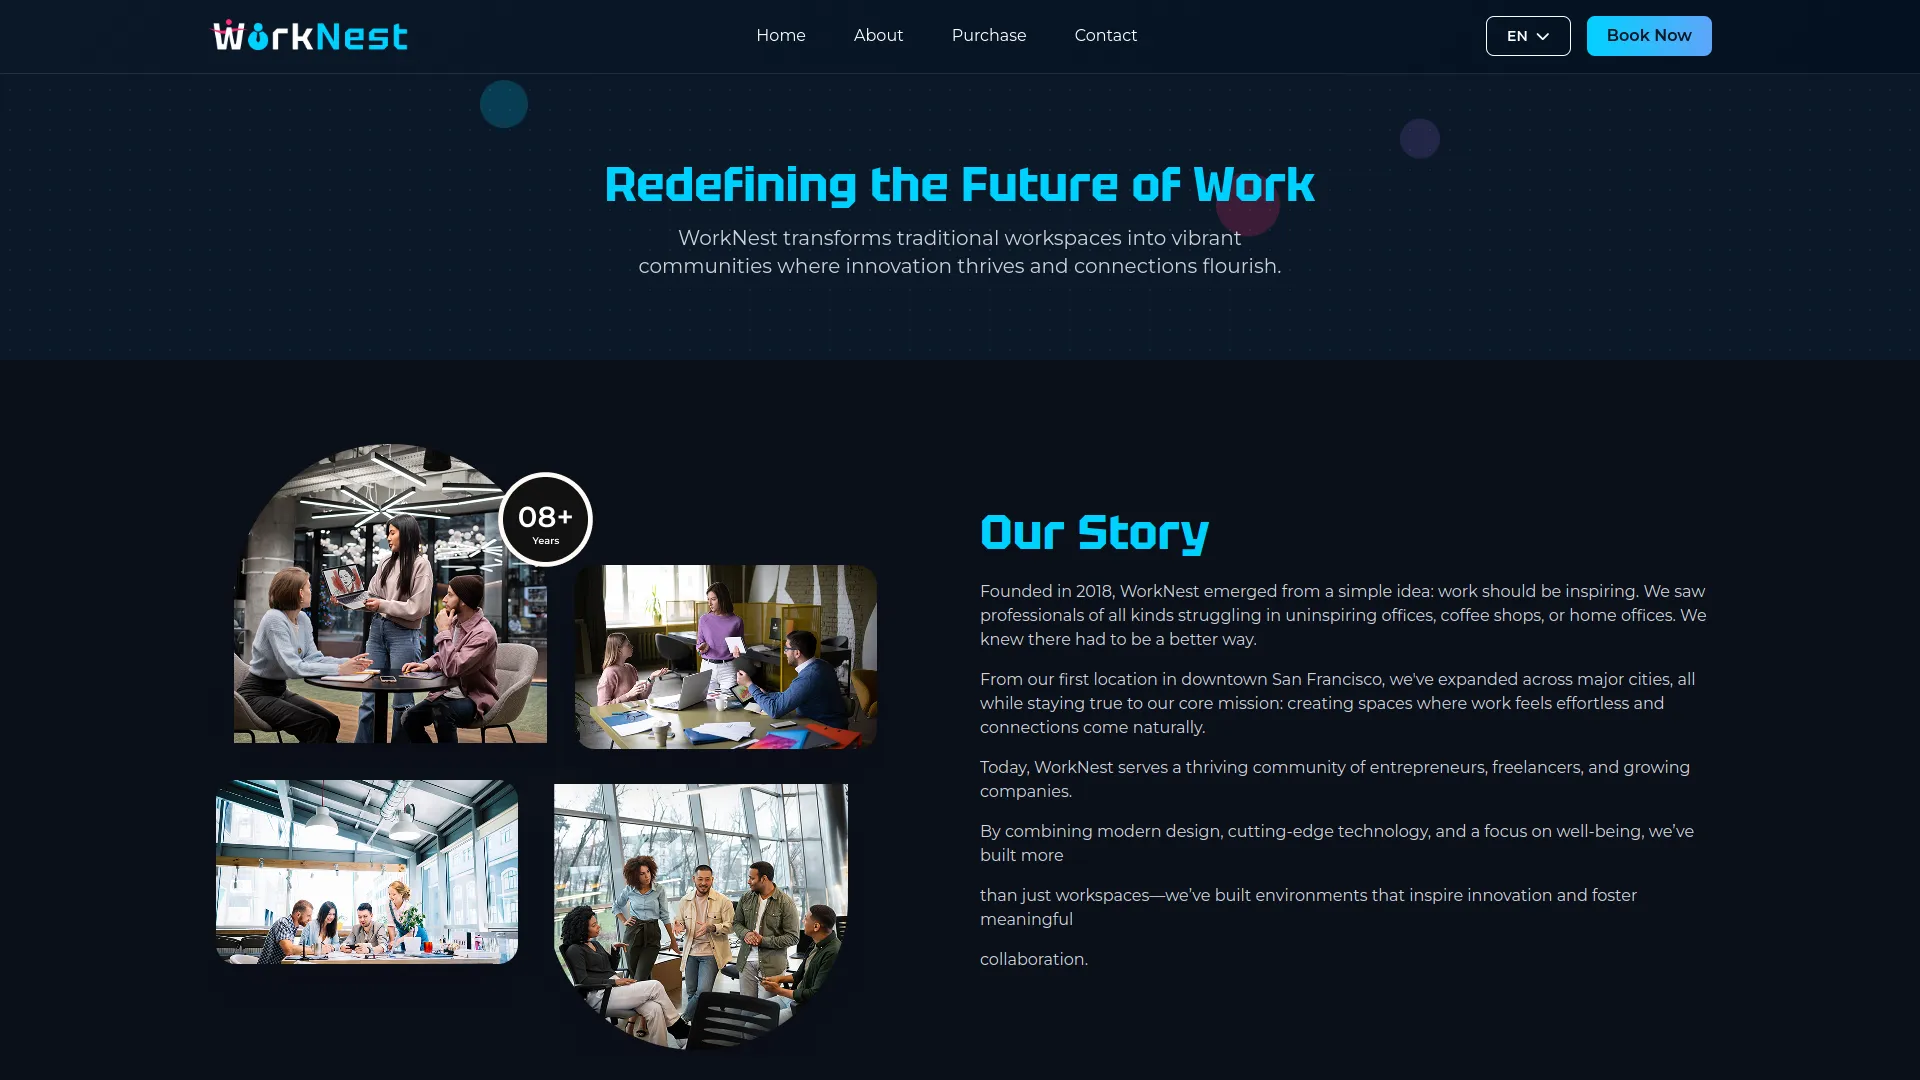
- The About Section shows content from your About Us setting, including the hero section with About Hero Title and About Hero Description, the main About section with About Title, About Description, and About Image.
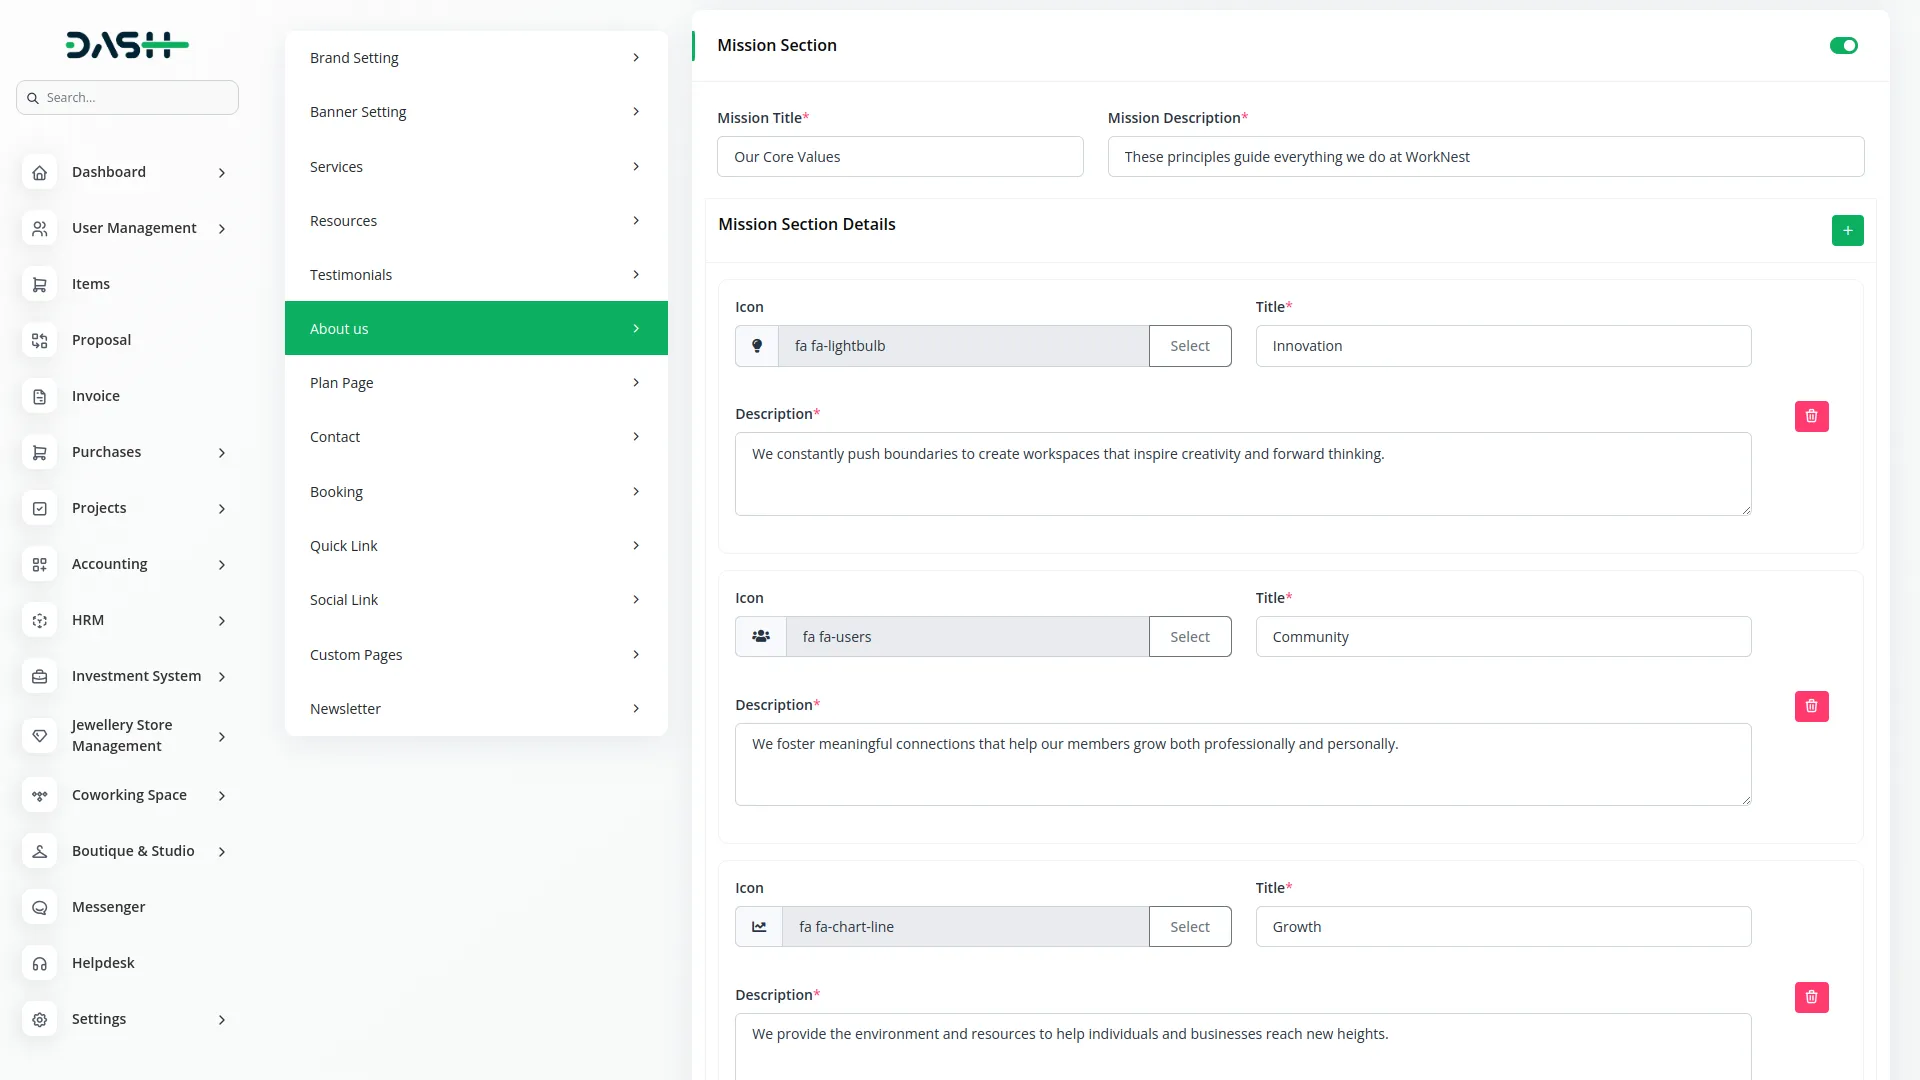
- In the Mission Section, enter Mission Title and Mission Description, then add Mission Details, including Icon, Title, and Description for each mission point you want to highlight.
- The Mission Section displays your Mission Title, Mission Description, and Mission Details. Each detail can include an icon with a short description, allowing you to highlight the purpose and values of your organization in a clear and structured way.
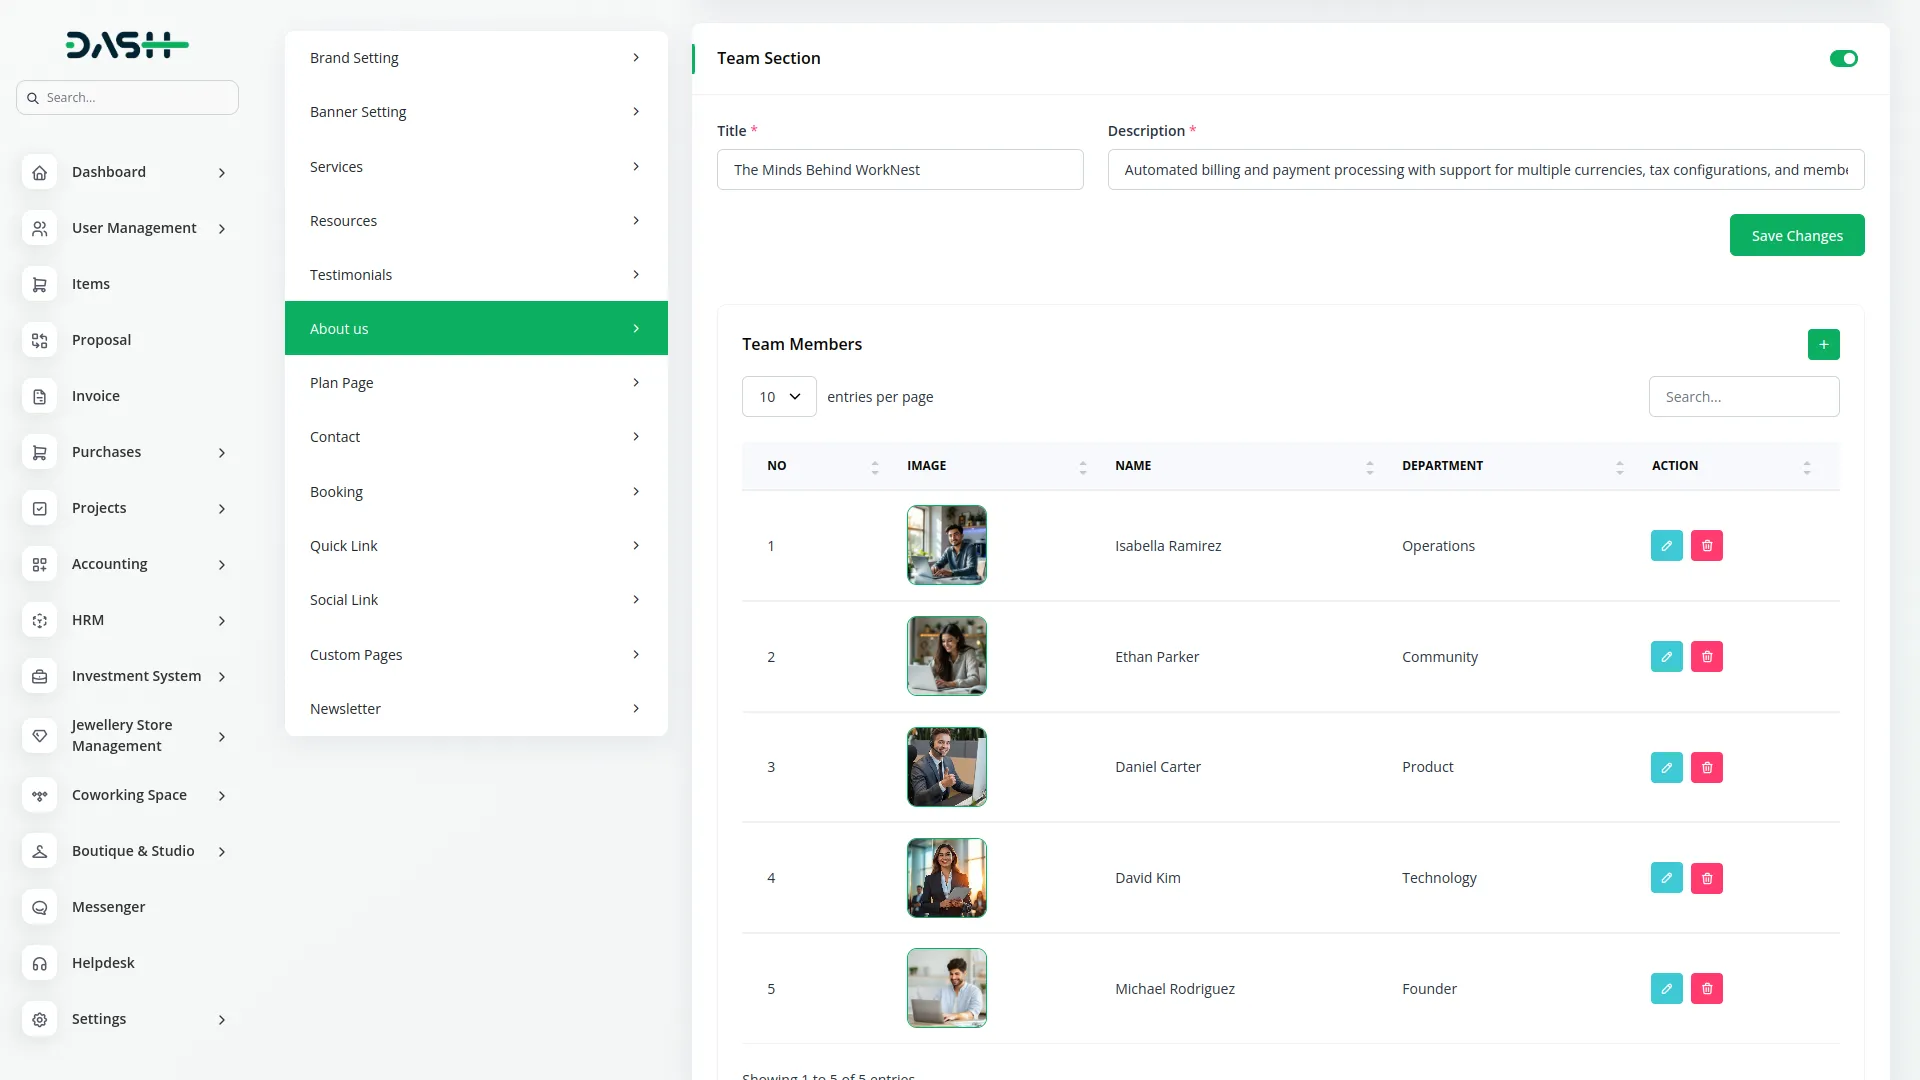
- In the Team Section, you can add a Team Title and Team Description to introduce your members. After that, you can upload images and details of each member to showcase the people behind your work, making the section more personal and engaging.
- The team section shows Team Title, Team Description, and Team Members with their images, names, and departments. The Footer Section remains consistent with your home page.
Plan Page Setting
- In the Plan Page Setting section, you will find fields for Plan Page Hero Title and Plan Page Hero Description to create an engaging introduction for your membership plans page.
- Once saved, the Plan Page Hero Title and Hero Description will appear at the top of your website’s membership plan page, while the Premium Extras and FAQ sections will display below your membership plans, providing customers with additional information and answers to help them make informed decisions.
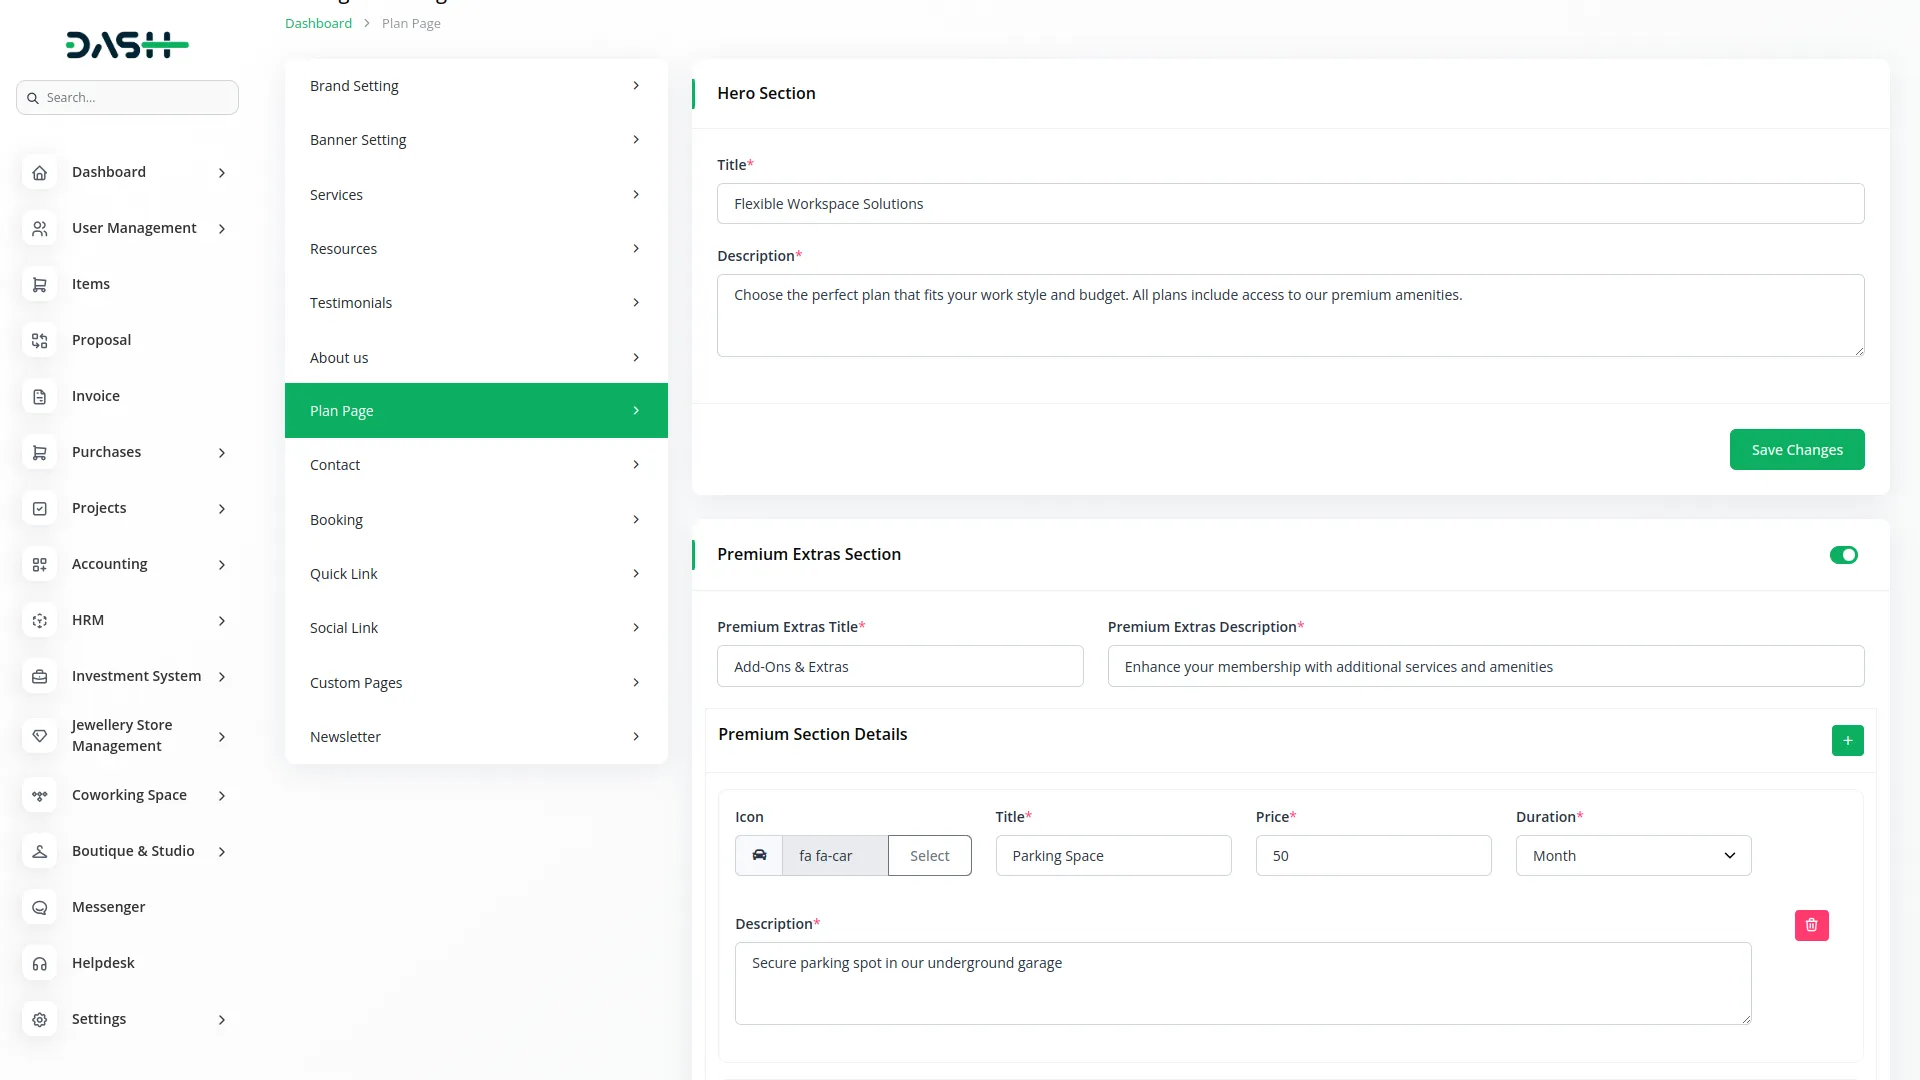
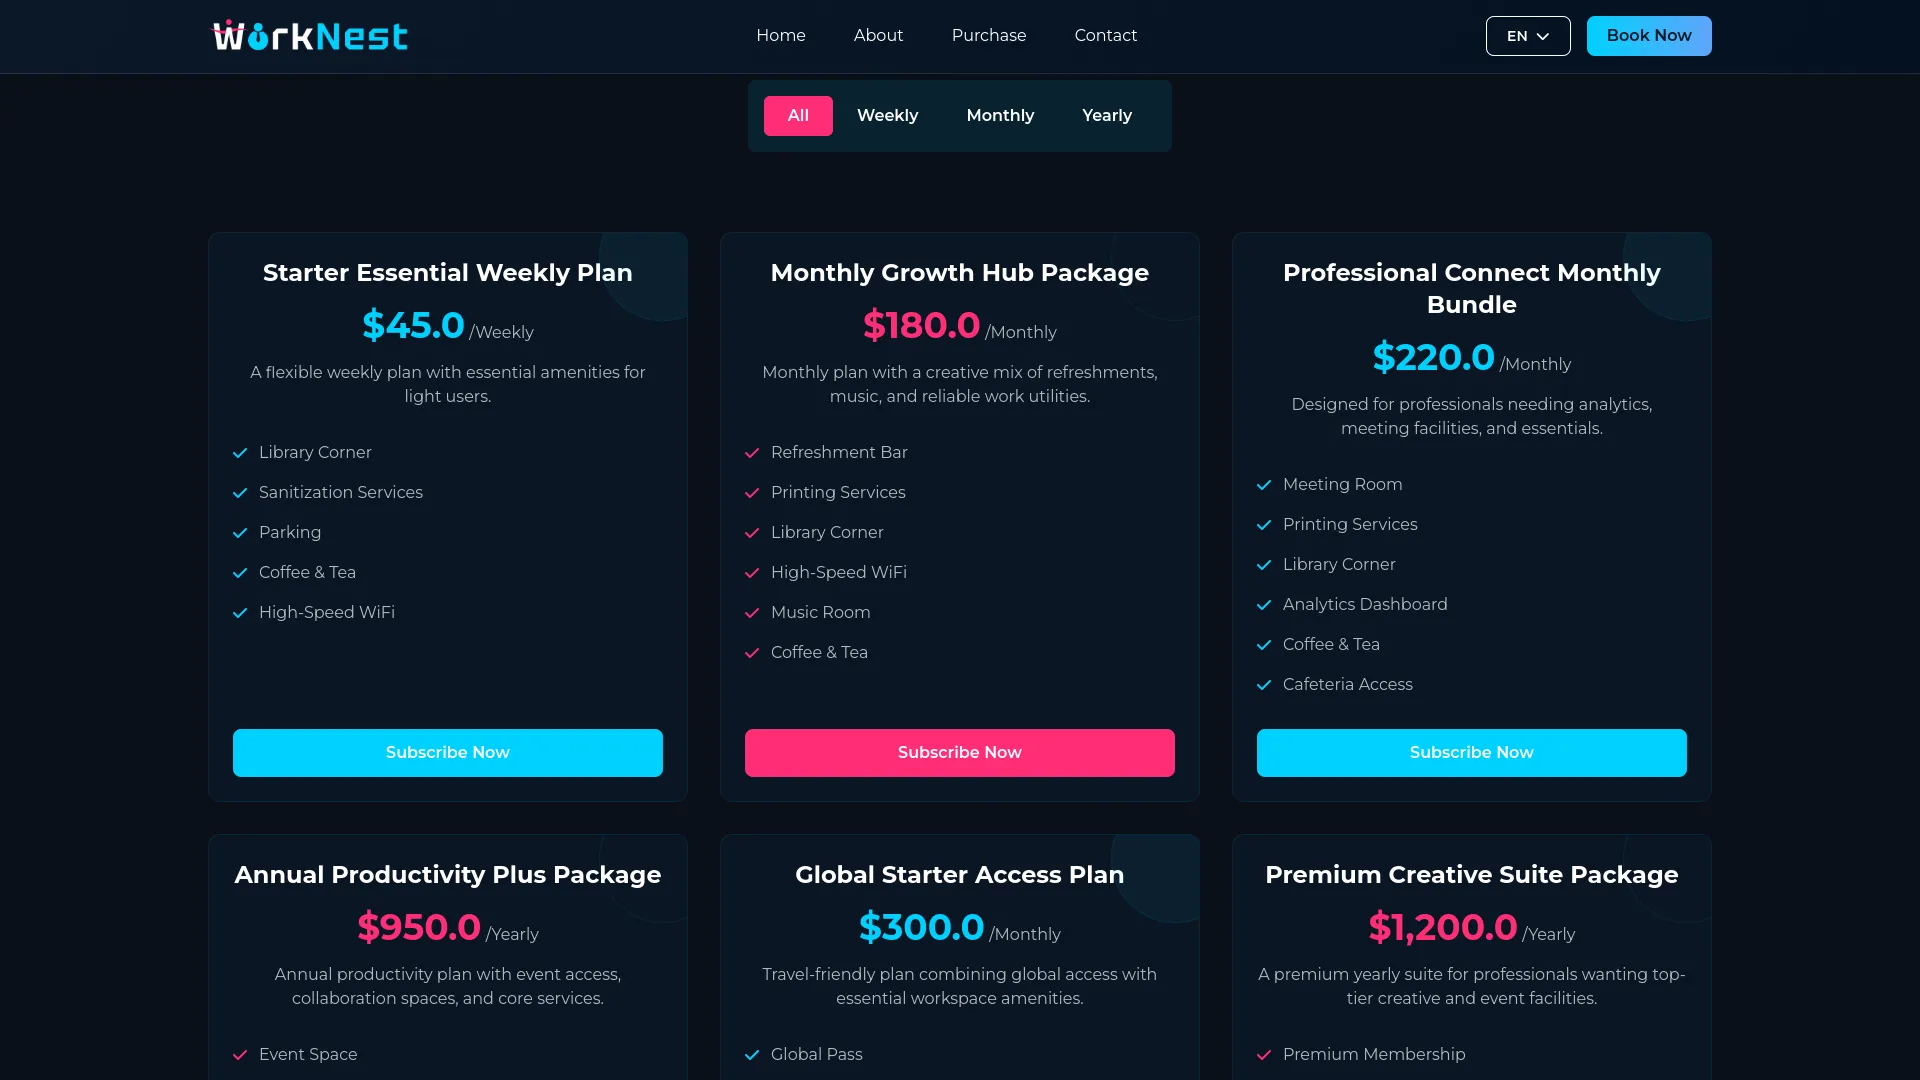
- The Website Membership Plan Page allows customers to view and purchase membership plans. The plans shown here are created from the Membership section on the backend side. The Common Banner Section displays fixed text and images for consistent branding. The Plan Section shows the Plan Page Hero Title and Description from your plan page settings.
- Below this, you can add Premium Extras by entering an icon, title, price, duration, and description. These extras let you highlight additional services or amenities that members can choose along with their main plan.
- The Premium Extras section is displayed just below the membership plans. It automatically shows the icons, titles, prices, durations, and descriptions you set from the backend plan page settings, making it easy for customers to view add-ons.
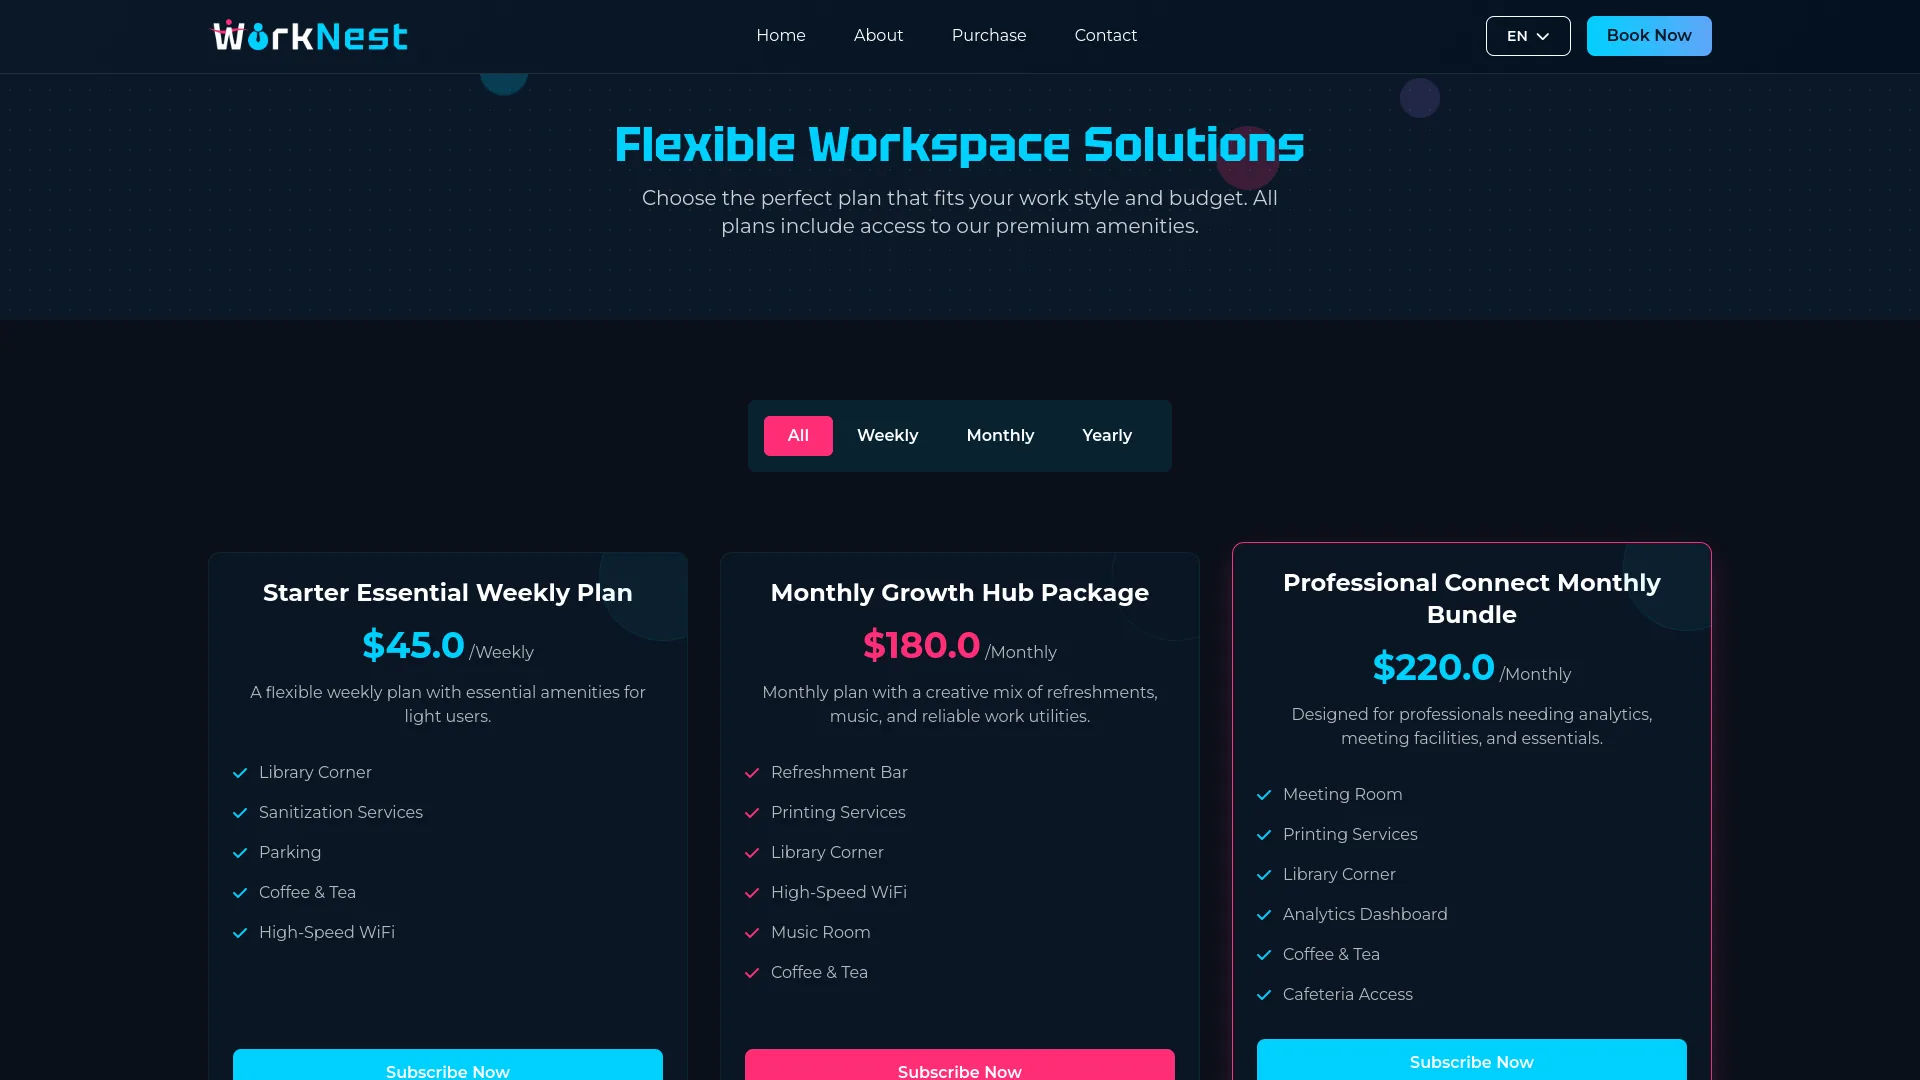
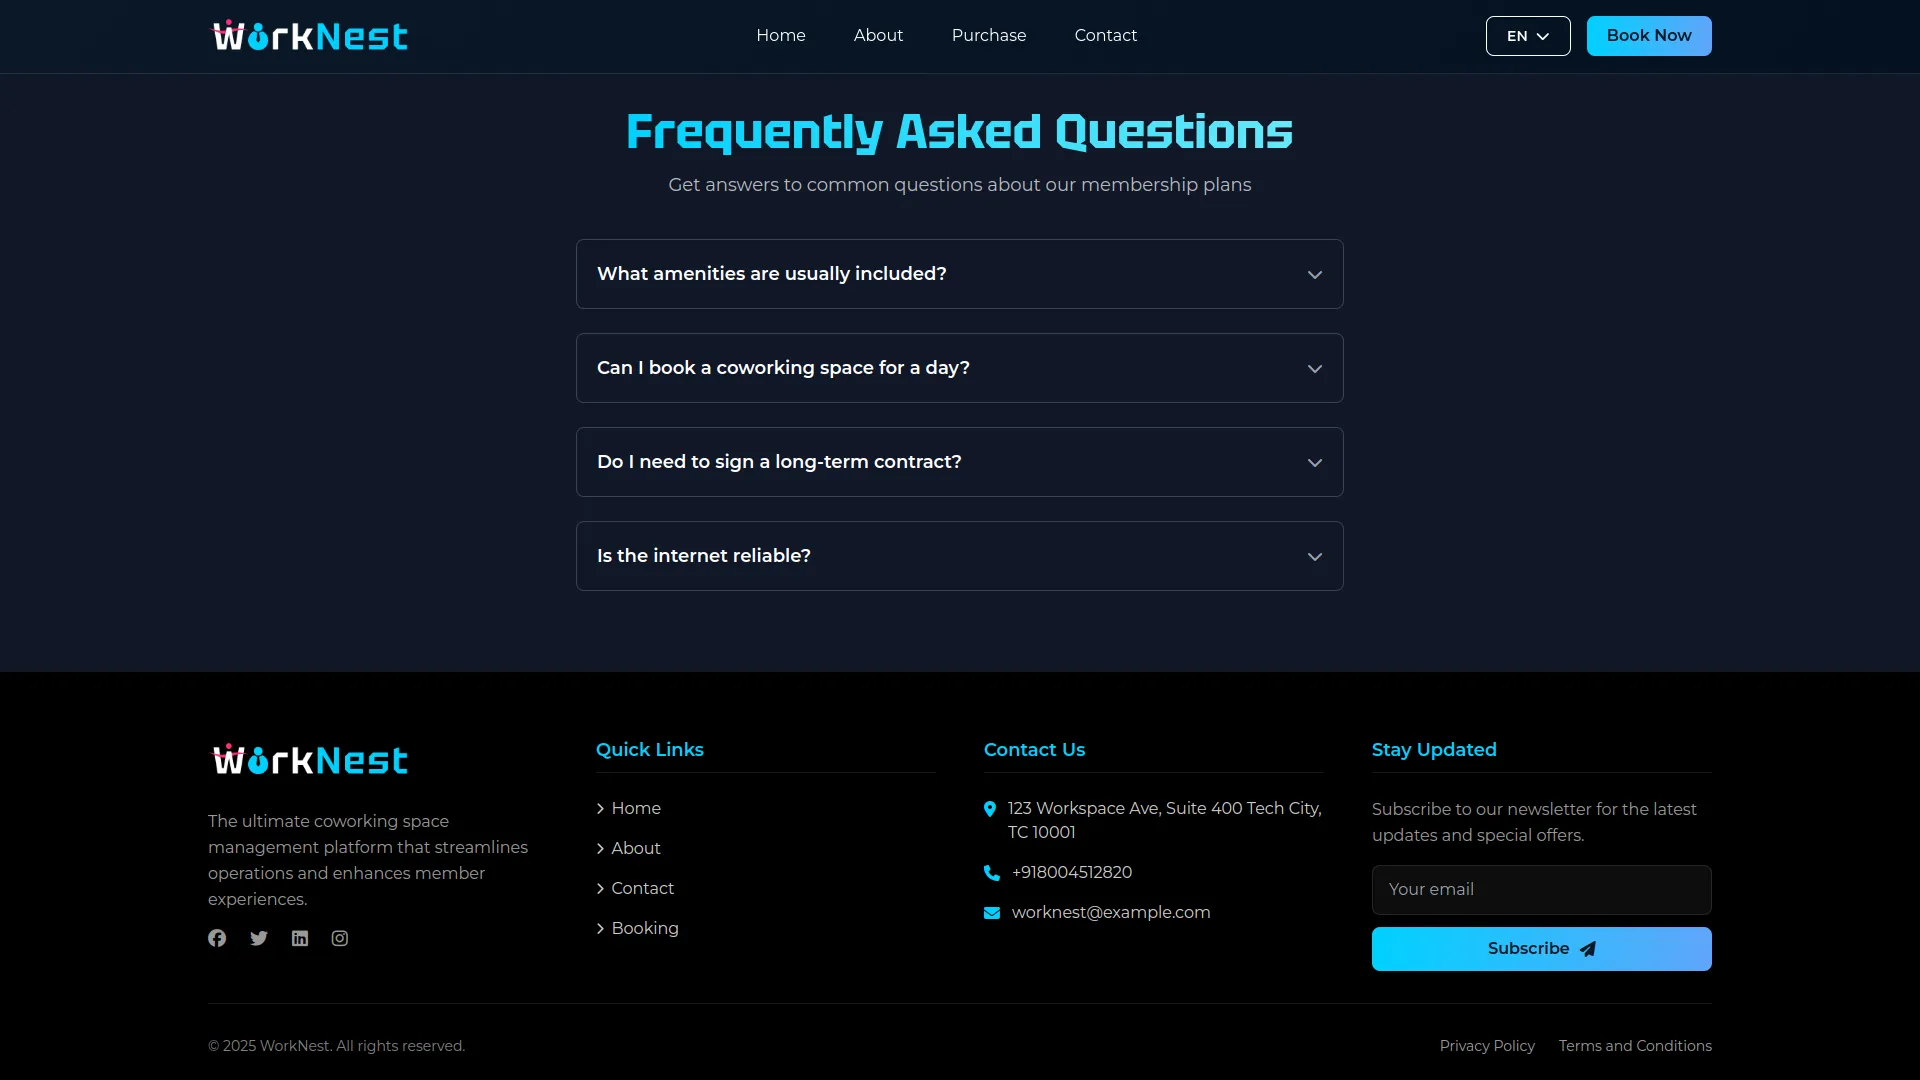
- You can also create an FAQ section by adding a list of questions and answers. This allows you to address common queries about your membership plans directly on the page.
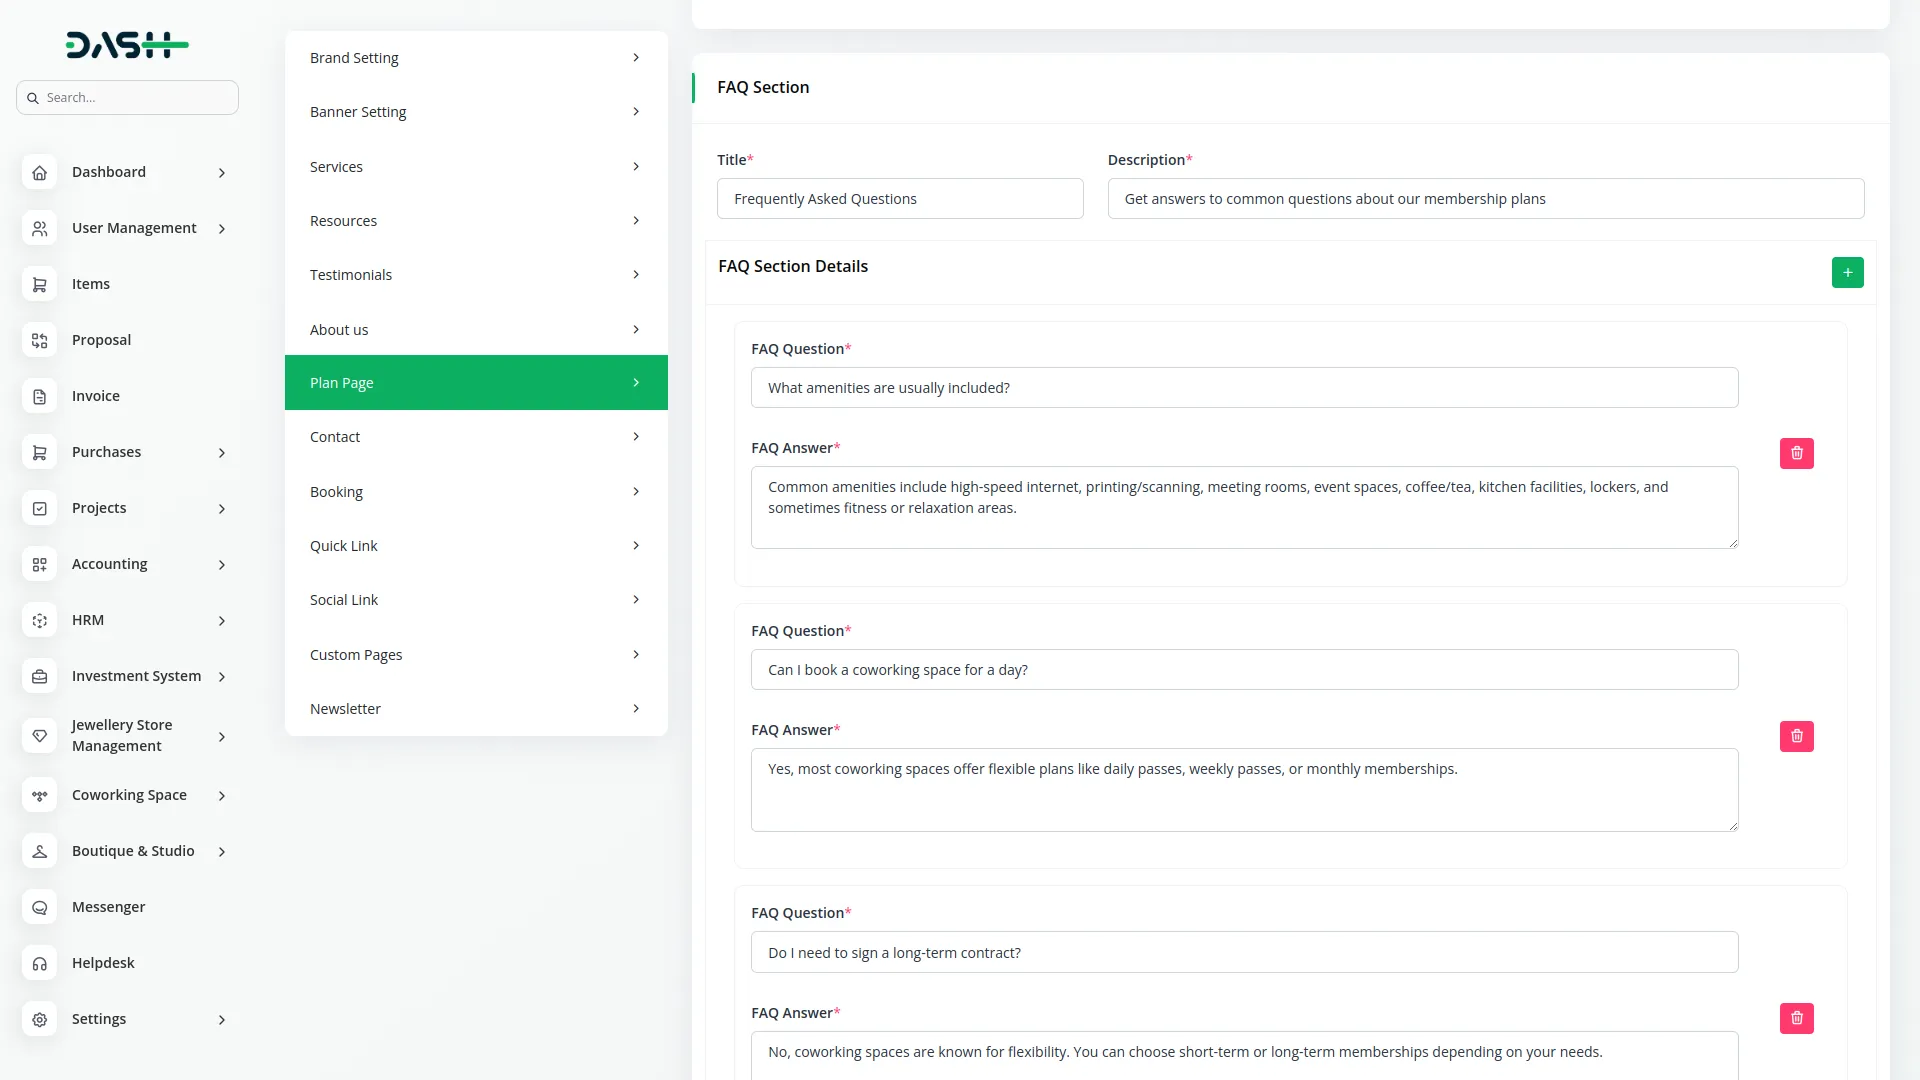
- The FAQ section then appears with each question and its answer, helping customers quickly find information and make confident decisions about joining.
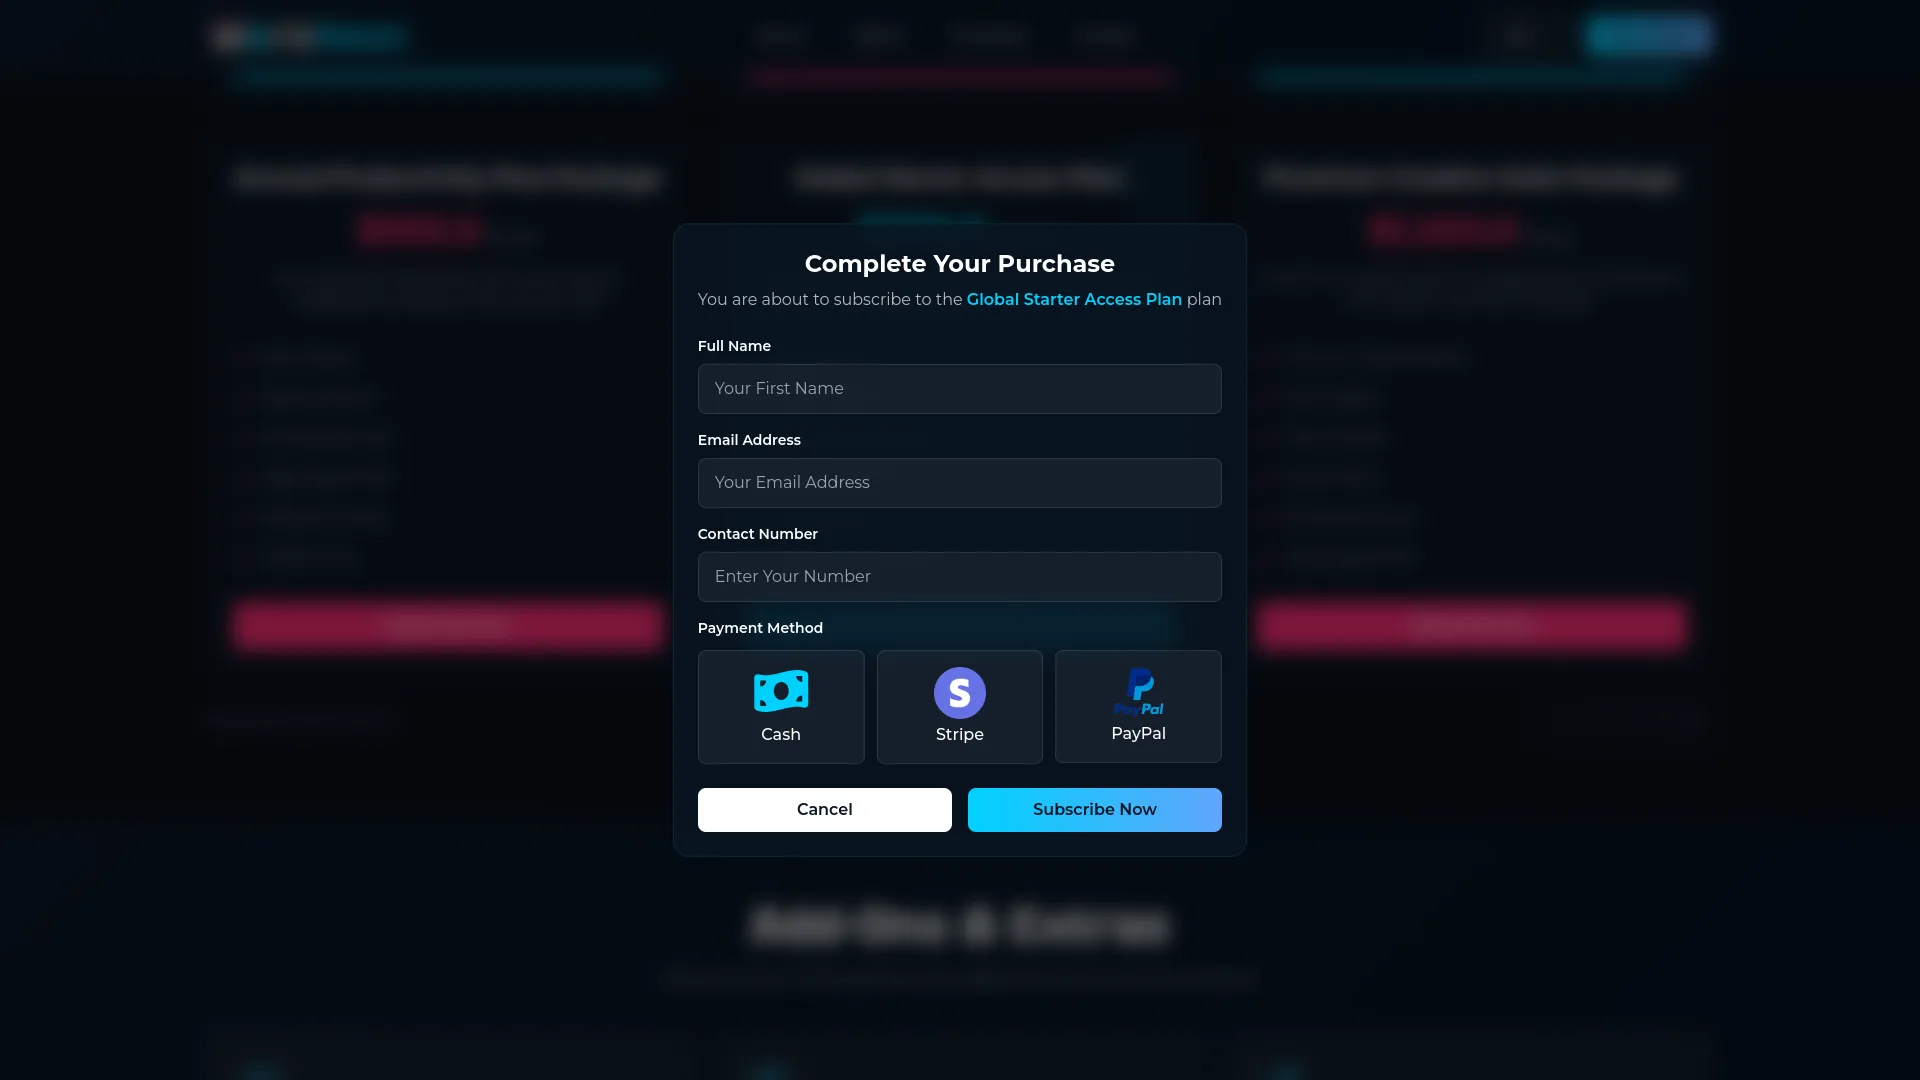
- The Payment Modal includes fields for Member Name, Email, and Contact Number, payment method selection (Cash or Online payments), membership plan summary with total price, and a Subscribe button that processes the payment.
Contact Setting
- In the Contact Setting section, you will find fields for ‘Contact Us Hero Title’ and ‘Contact Us Hero Description’ to create an engaging header for your contact page.
- Enter Contact Title, Contact Footer Title, Contact Email, Contact Phone No, Contact Address, and Contact Iframe (for Google Maps integration) to provide complete contact information.
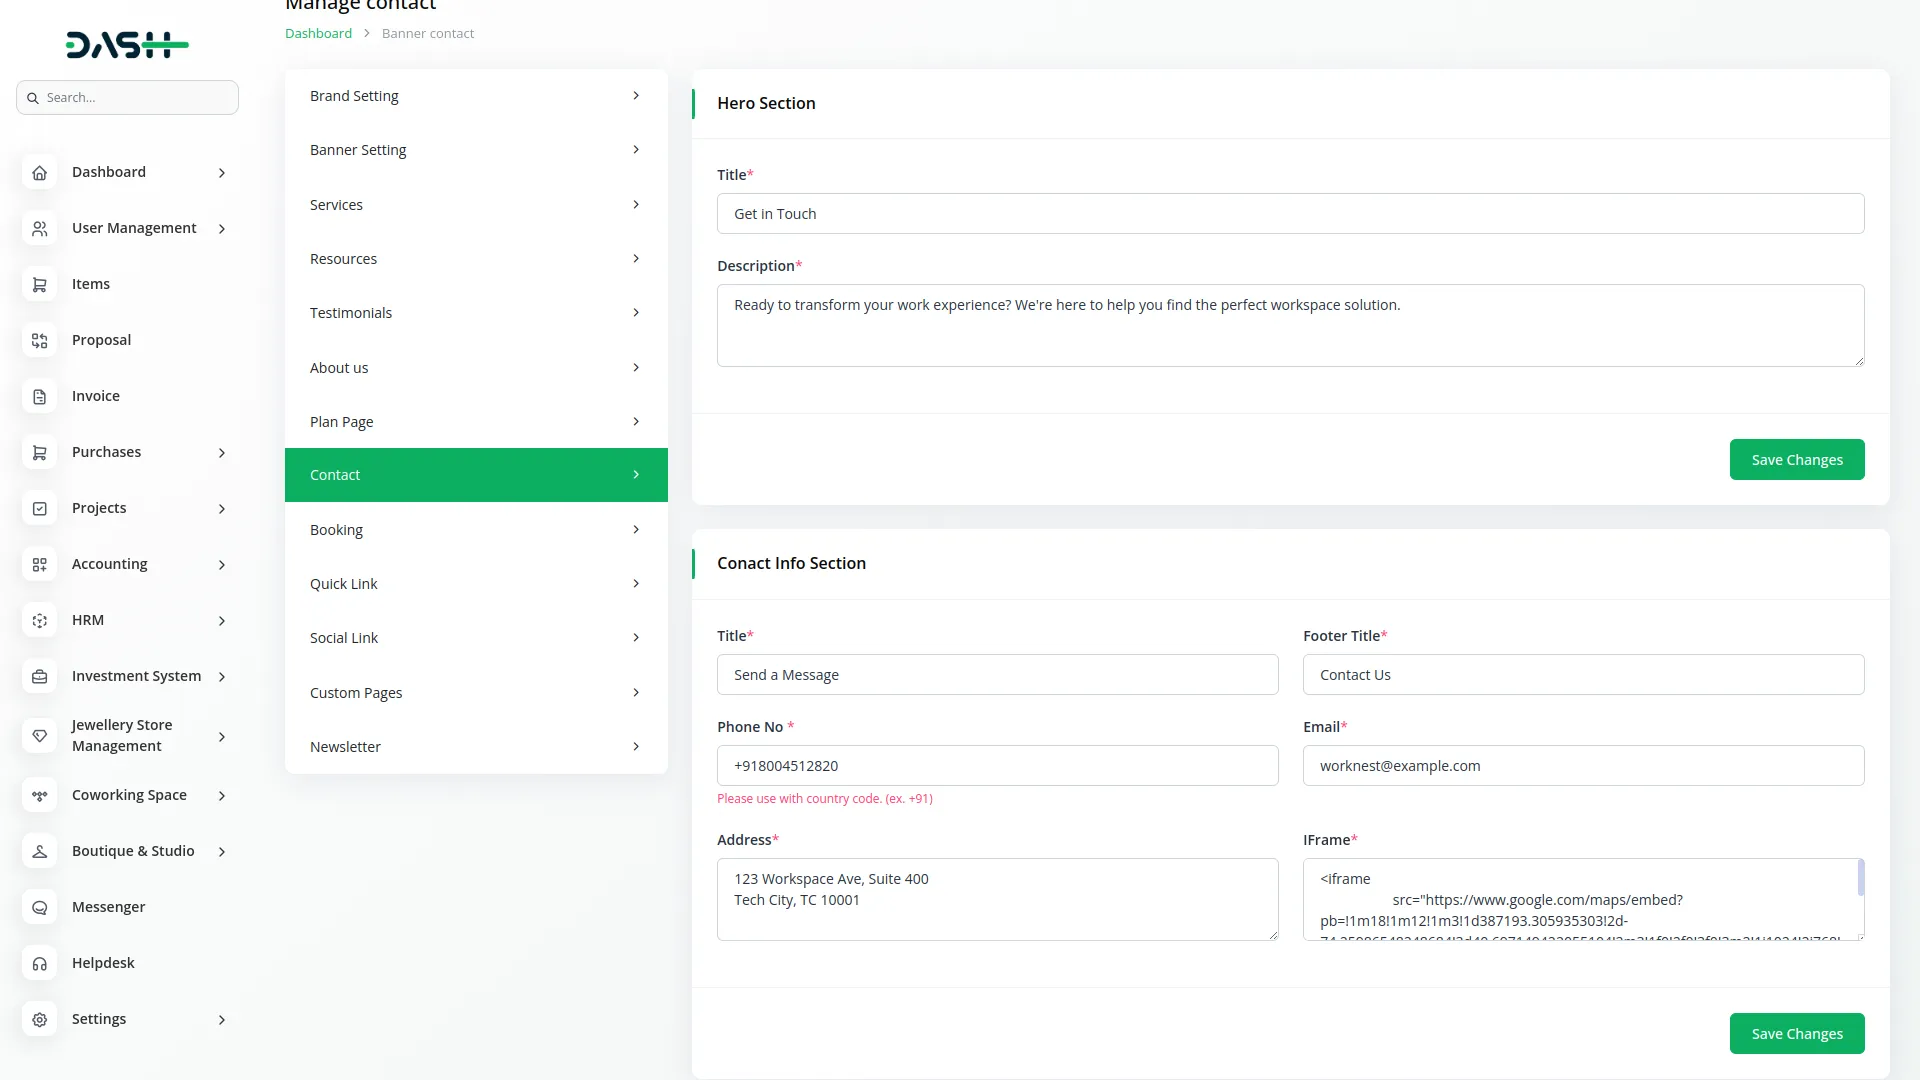
- Once saved, the Contact Us Hero Title and Hero Description will appear at the top of your website’s contact page, while the Contact Email, Contact Phone No, and Contact Address will display in the contact information section alongside the Google Maps iframe, making it easy for customers to reach out and find your coworking space location.
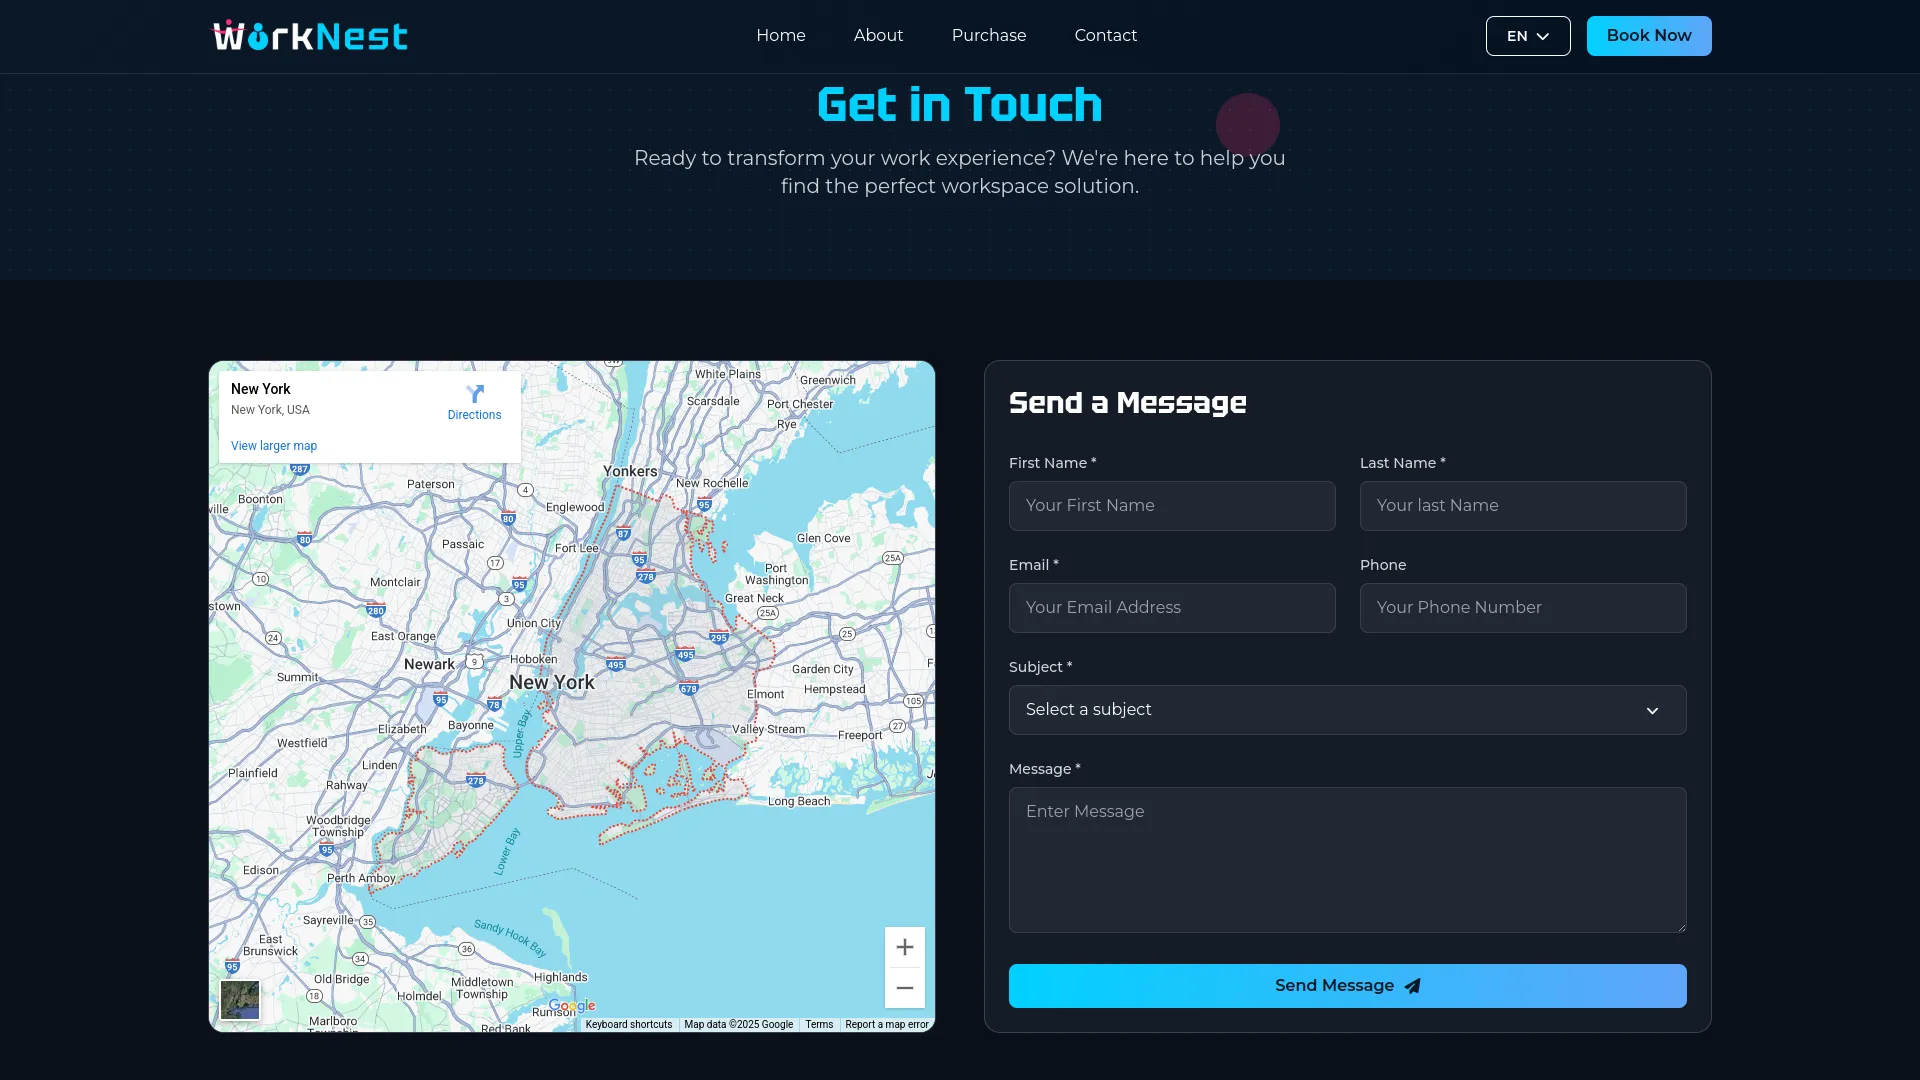
- The Website Contact Page provides customers with multiple ways to reach your coworking space. The Common Banner Section displays fixed text and images for consistent branding. The Contact Form & Map Section shows the Contact Us Hero Title and Description from your contact settings.
- The contact form includes fields for Name, Email, Subject, and Message that customers can fill out to send enquiries. Contact information displays your Address, Phone, and Email from the contact settings. A Google Maps iframe from your contact settings shows your location, making it easy for customers to find your coworking space.
Booking Page Setting
- In the Booking Page Setting section, you will find fields for Booking Page Hero Title, Booking Page Hero Description, and Price Per Hour. Enter an engaging title and description for your booking page header, and set the hourly rate for your coworking space.
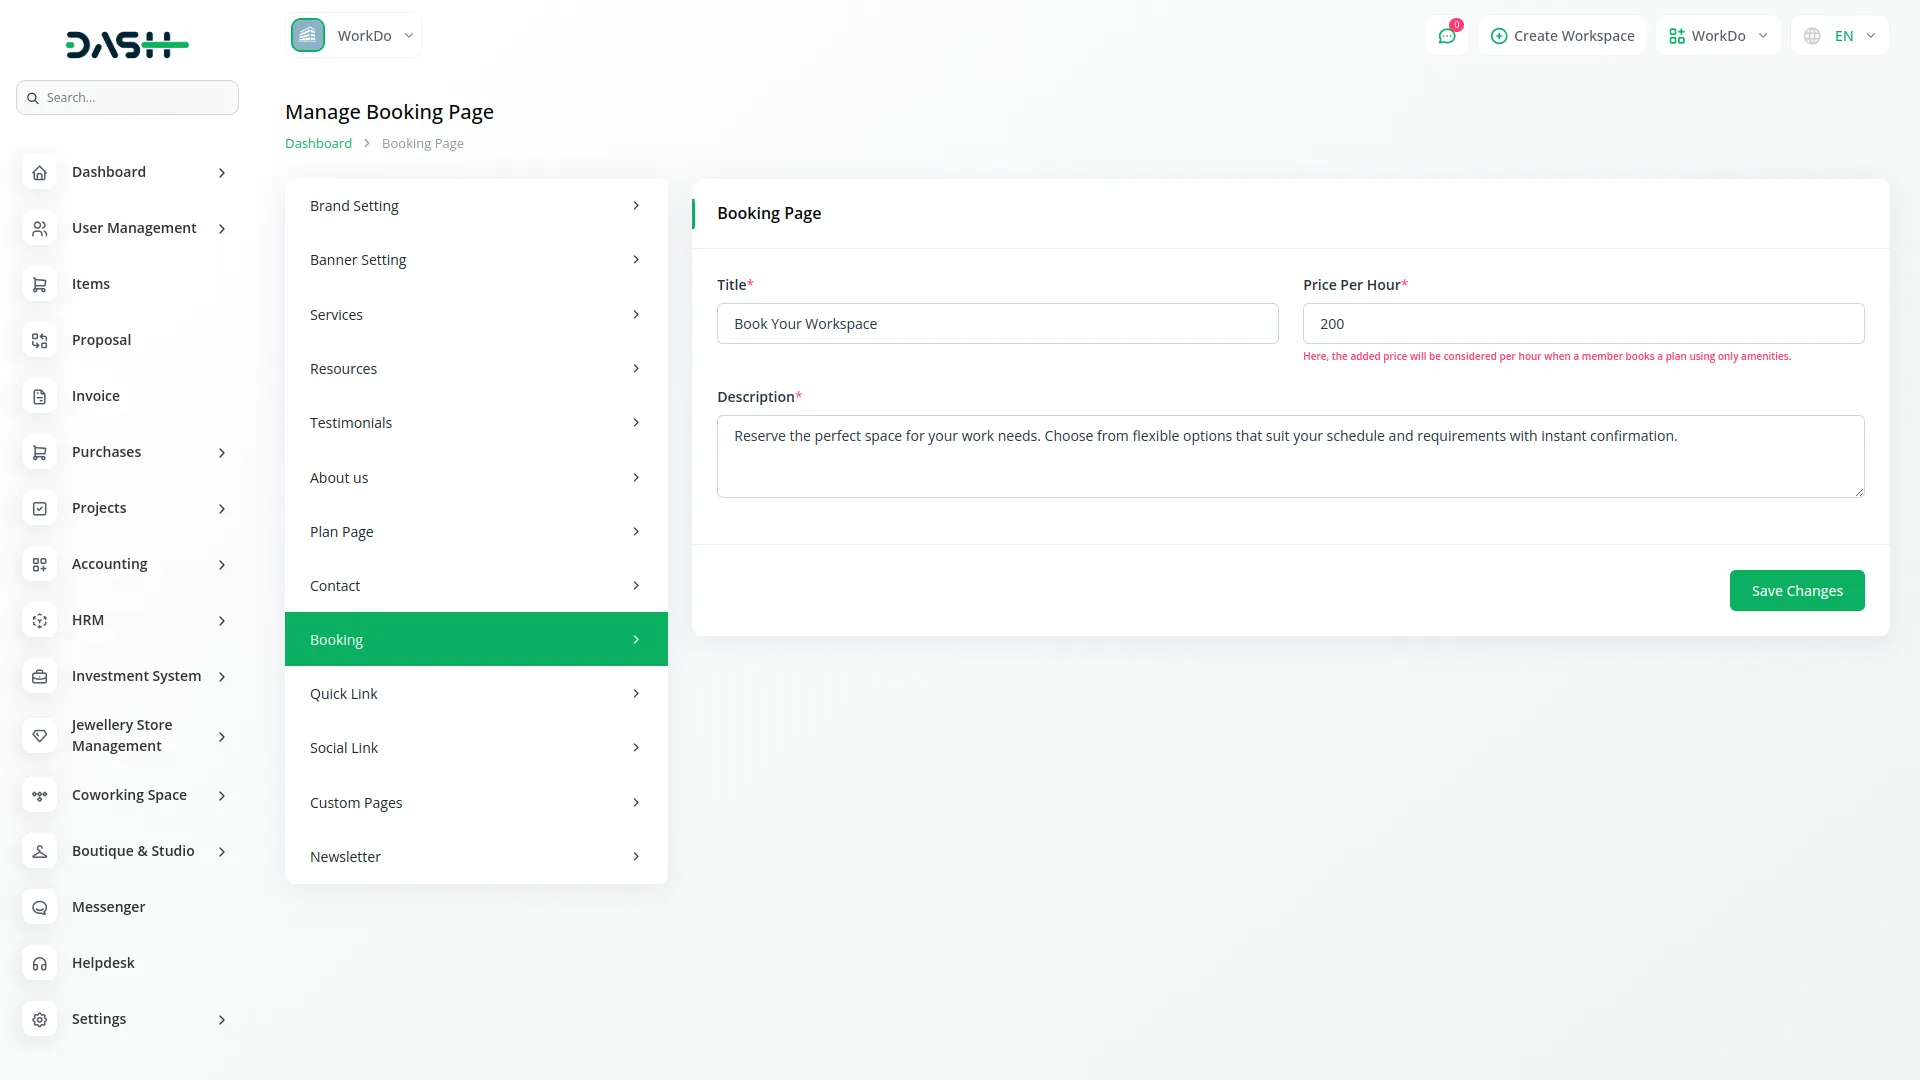
- Once saved, the Booking Page Hero Title and Hero Description will appear at the top of your website’s booking page, while the Price Per Hour will be used to automatically calculate booking costs based on the duration selected by customers during the booking process.
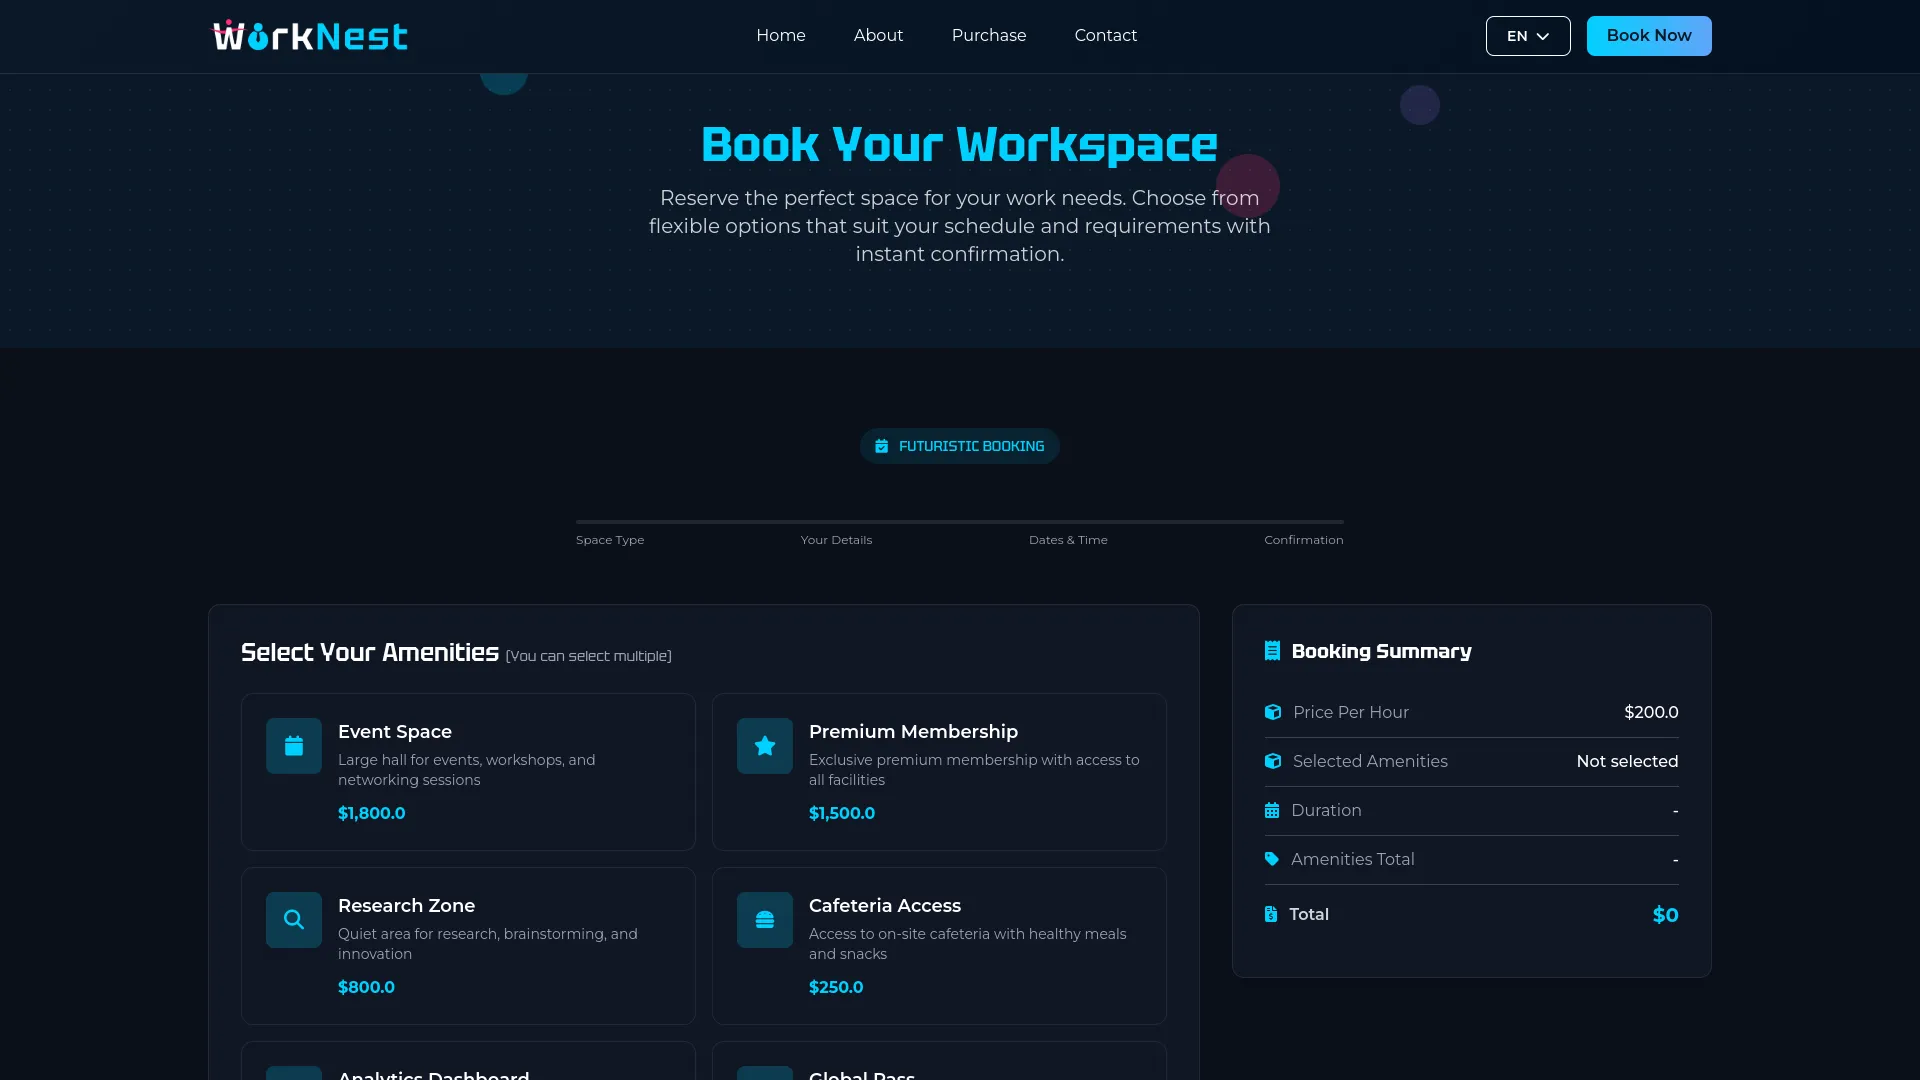
- The Website Booking Page allows customers to book your coworking space and select amenities. The Common Banner Section displays fixed text and images for consistent branding. The Booking Form Section shows the Booking Page Hero Title and Description from your booking page settings.
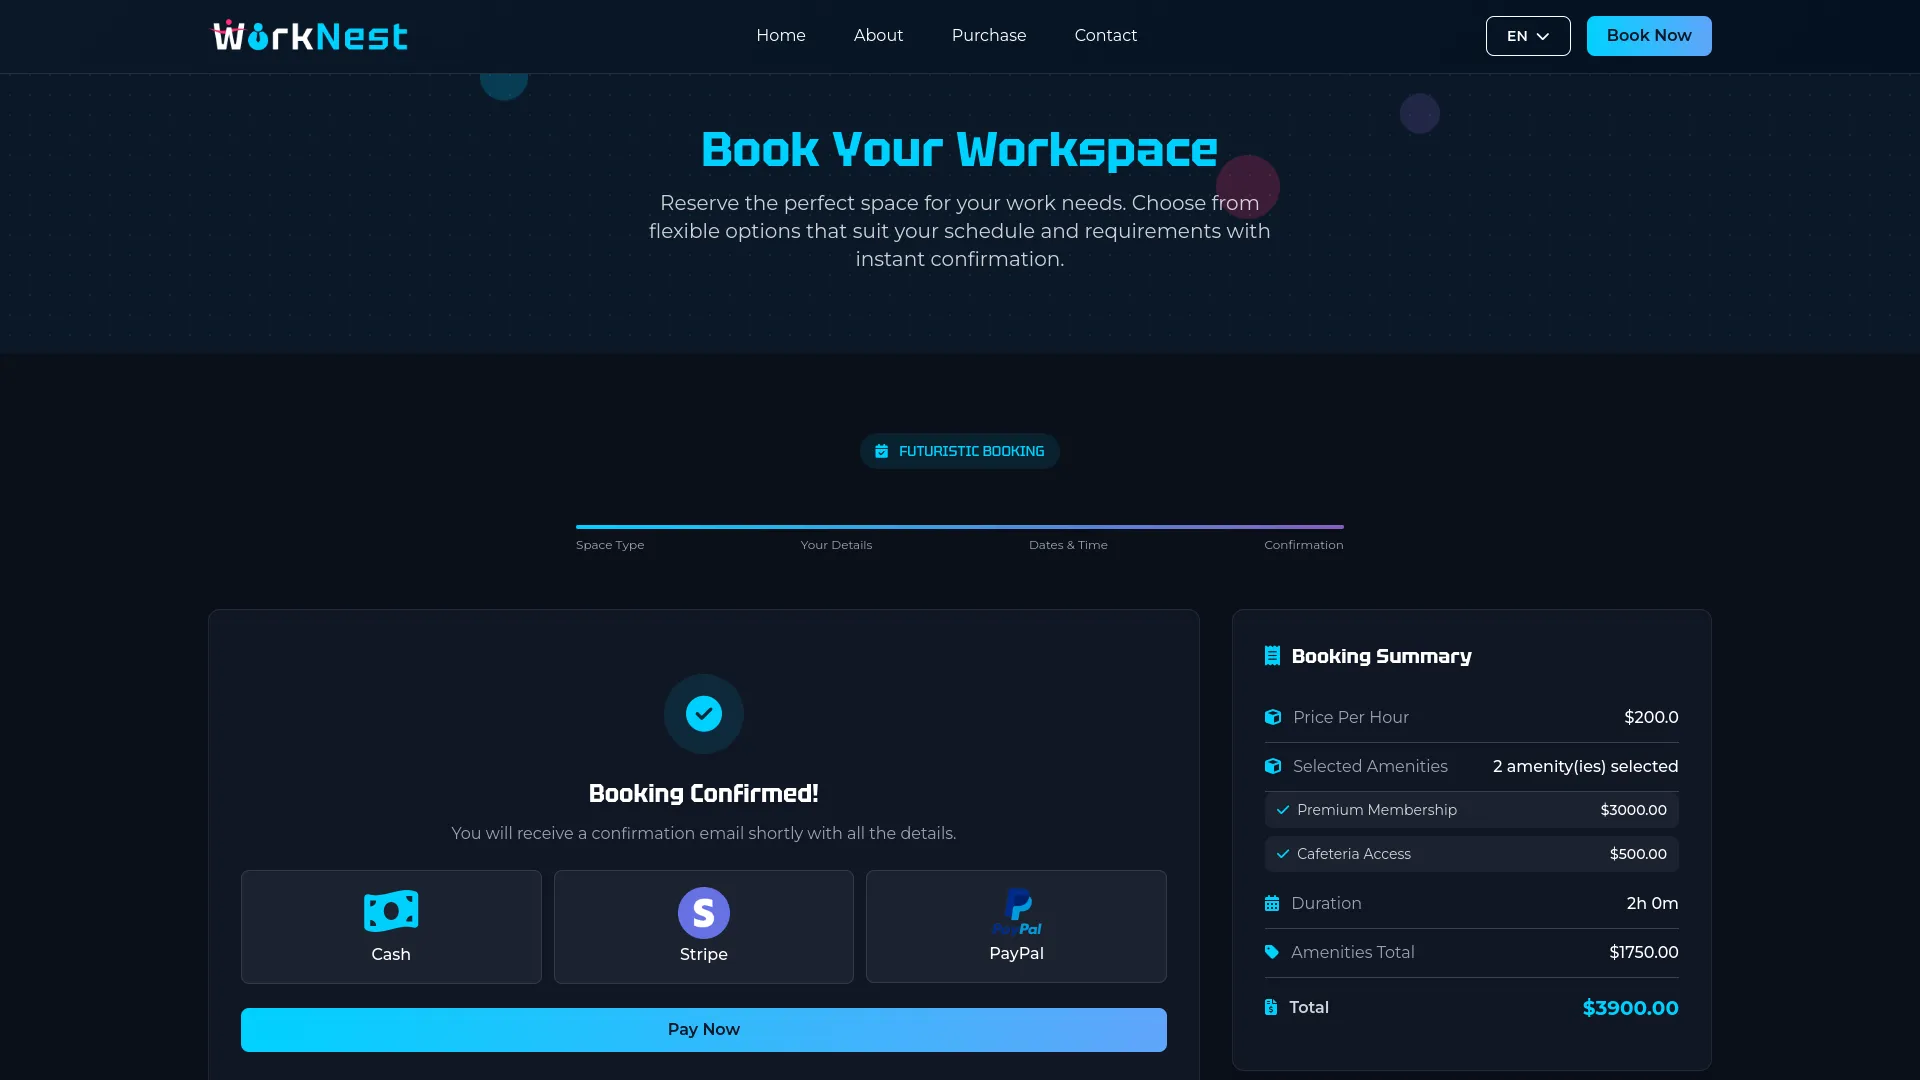
- The form displays all available amenities with icons, names, descriptions, and prices, allowing customers to select multiple amenities. The form includes fields for Customer Name, Email, and Contact Number, Start Date & Time, and End Date & Time pickers; automatically calculated Booking Duration, amenities selection with prices; and automatic amount calculation using the formula: (Duration × Price per hour from booking page setting) + Amenities cost.
- Customers can select Payment Method (Cash or Online payments), view a booking summary with the total price, and click the ‘Book Now’ button to process the booking.
Quick Link Setting
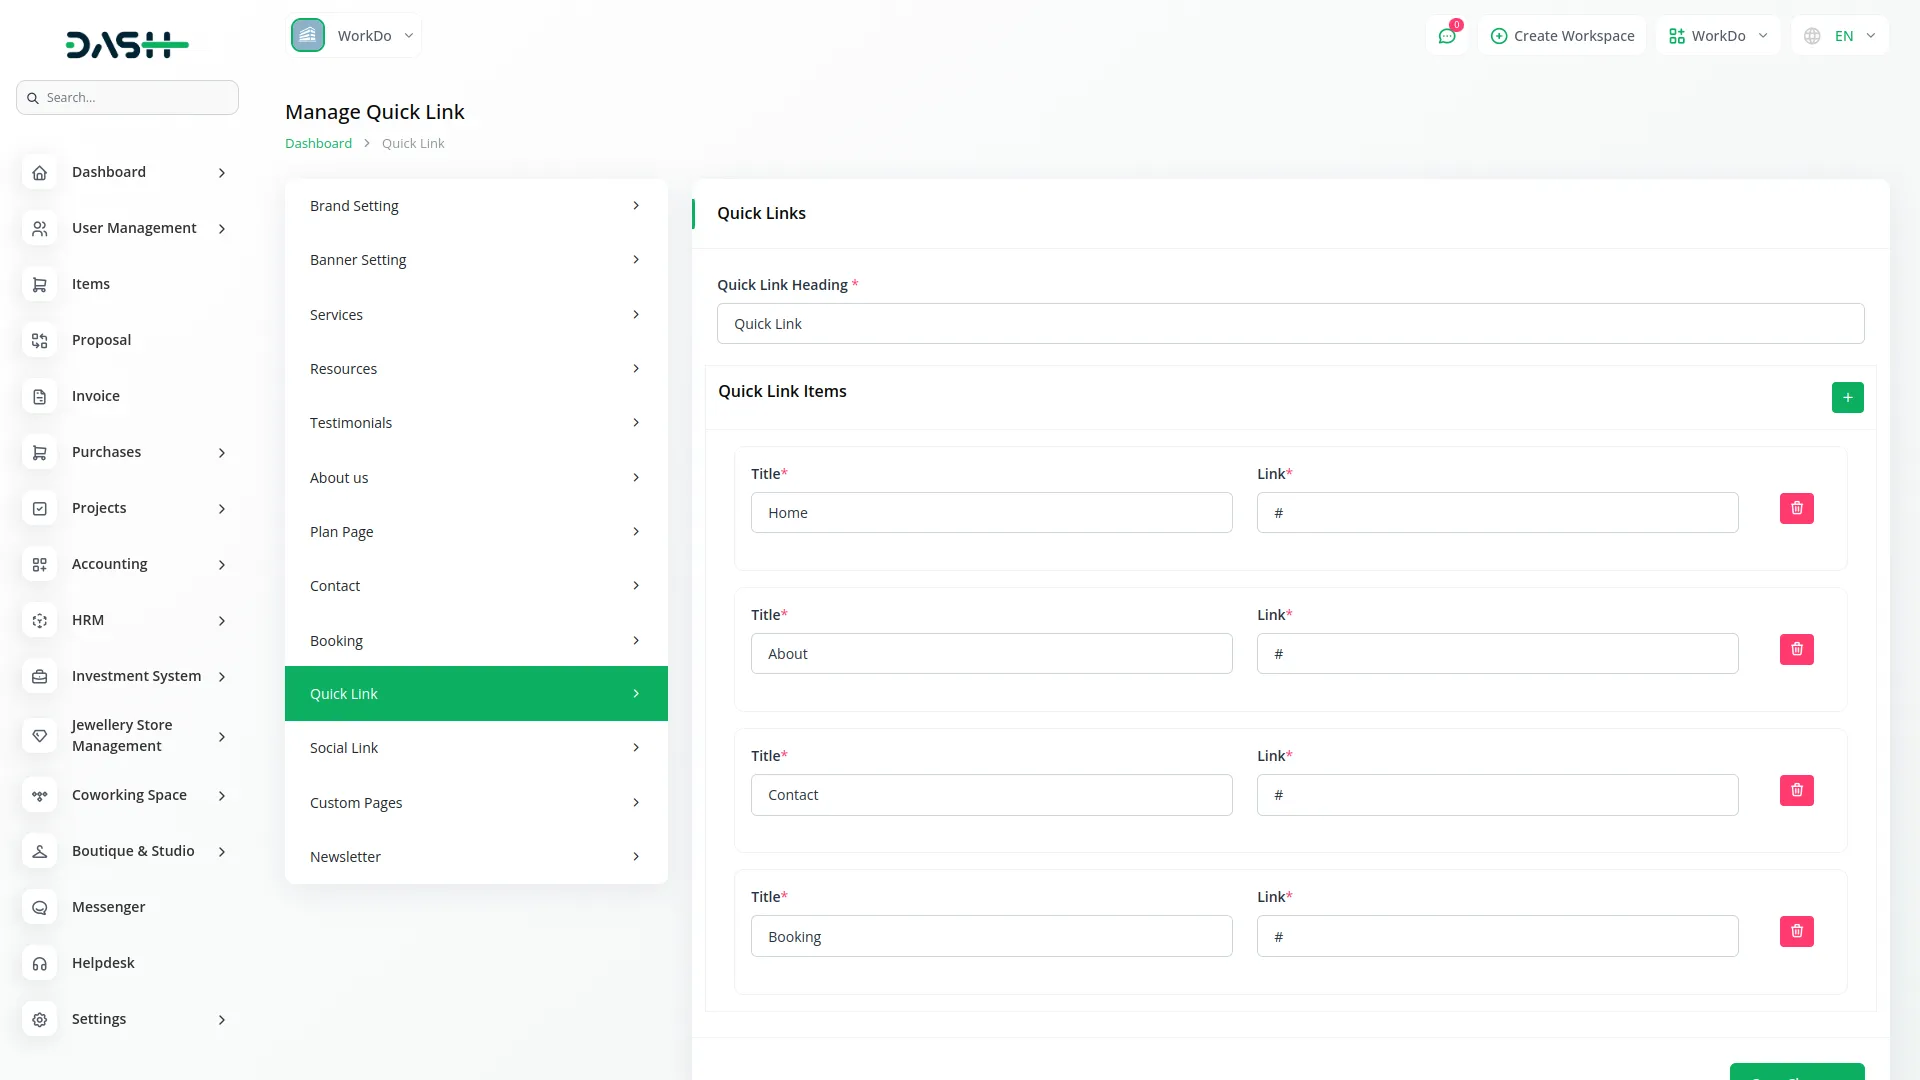
- In the Quick Link Setting section, you will find a field for ‘Quick Section Heading’ to title your footer links section. Below this, you can add multiple Quick Links by providing a Link Title and a Link URL for each link you want to include in your website footer.
- Once saved, the Quick Section Heading will appear as the title for your footer links section, while each individual quick link will display in your website footer, providing easy navigation to important pages and helping visitors access key information quickly.
- These quick links appear in the Footer Section of all website pages, displaying the Quick Section Heading as the title and each individual quick link you’ve configured, providing easy navigation for visitors.
Social Link Setting
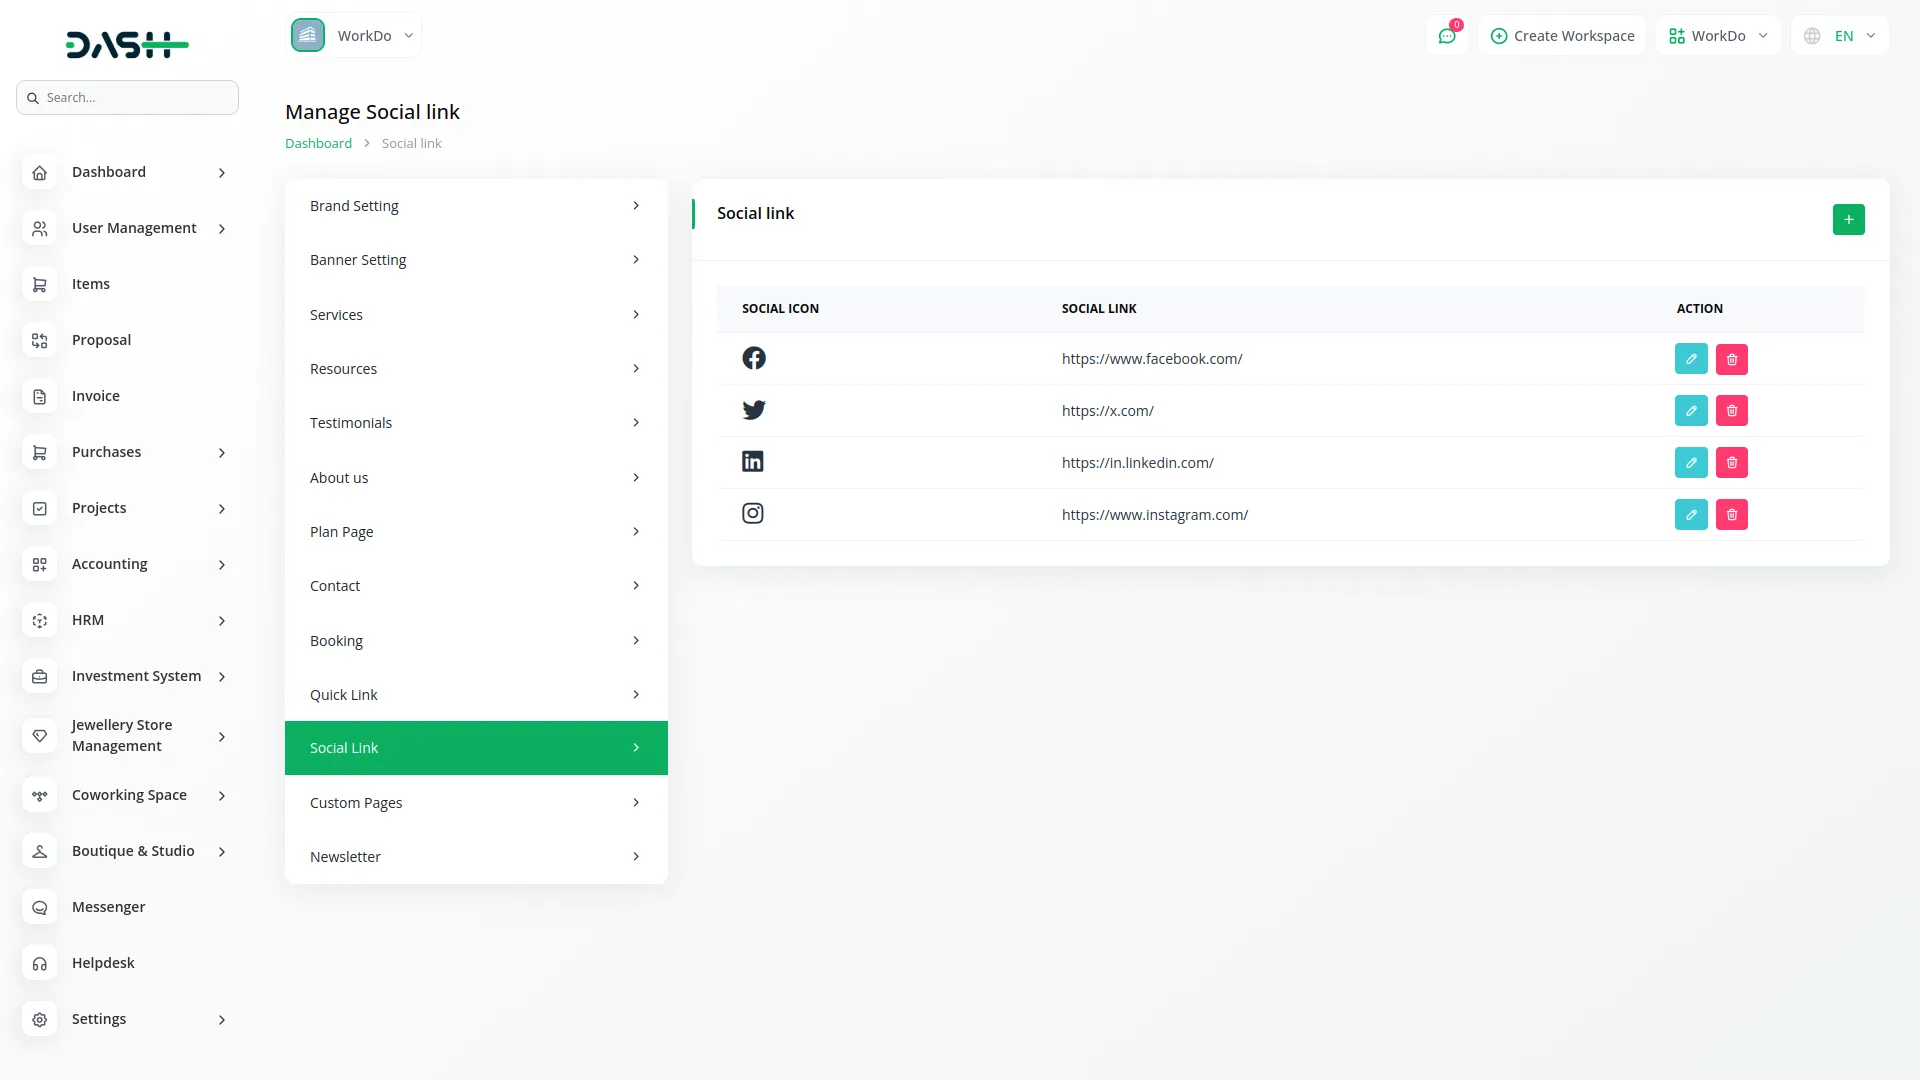
- The Social Link Setting section allows you to manage your social media links that will appear in your website’s footer. Add your social media profiles by providing the appropriate platform links.
- Once saved, these social media links will automatically display in your website footer, allowing visitors to connect with your coworking space on various social platforms and stay updated with your latest news and announcements.
- These social media links appear in the Footer Section of all website pages, allowing visitors to connect with your coworking space on various social platforms.
Custom Pages Setting
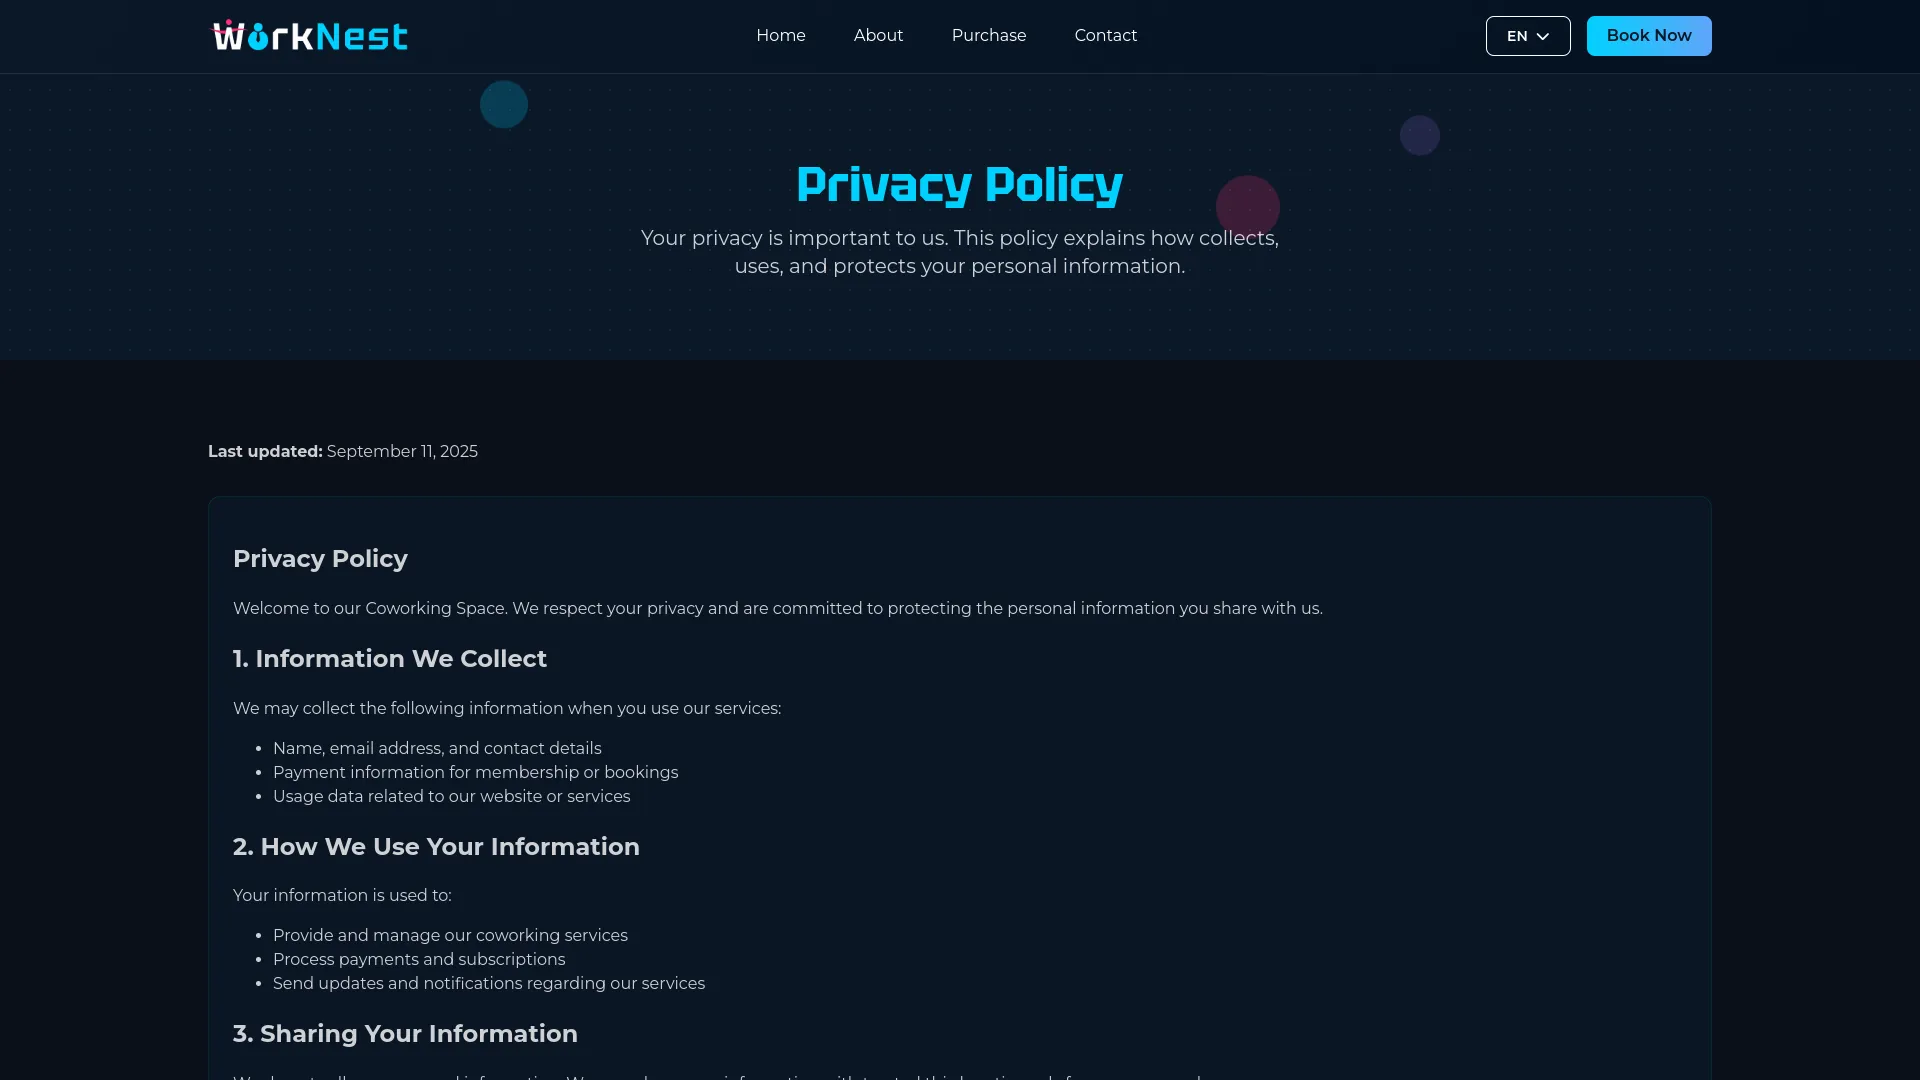
- In the Custom Pages Setting section, you can create additional pages for your website. Enter the Title and Description for each custom page, toggle the Page Footer Display option if you want the page to appear in your website footer, and use the Content rich text editor to add detailed information.
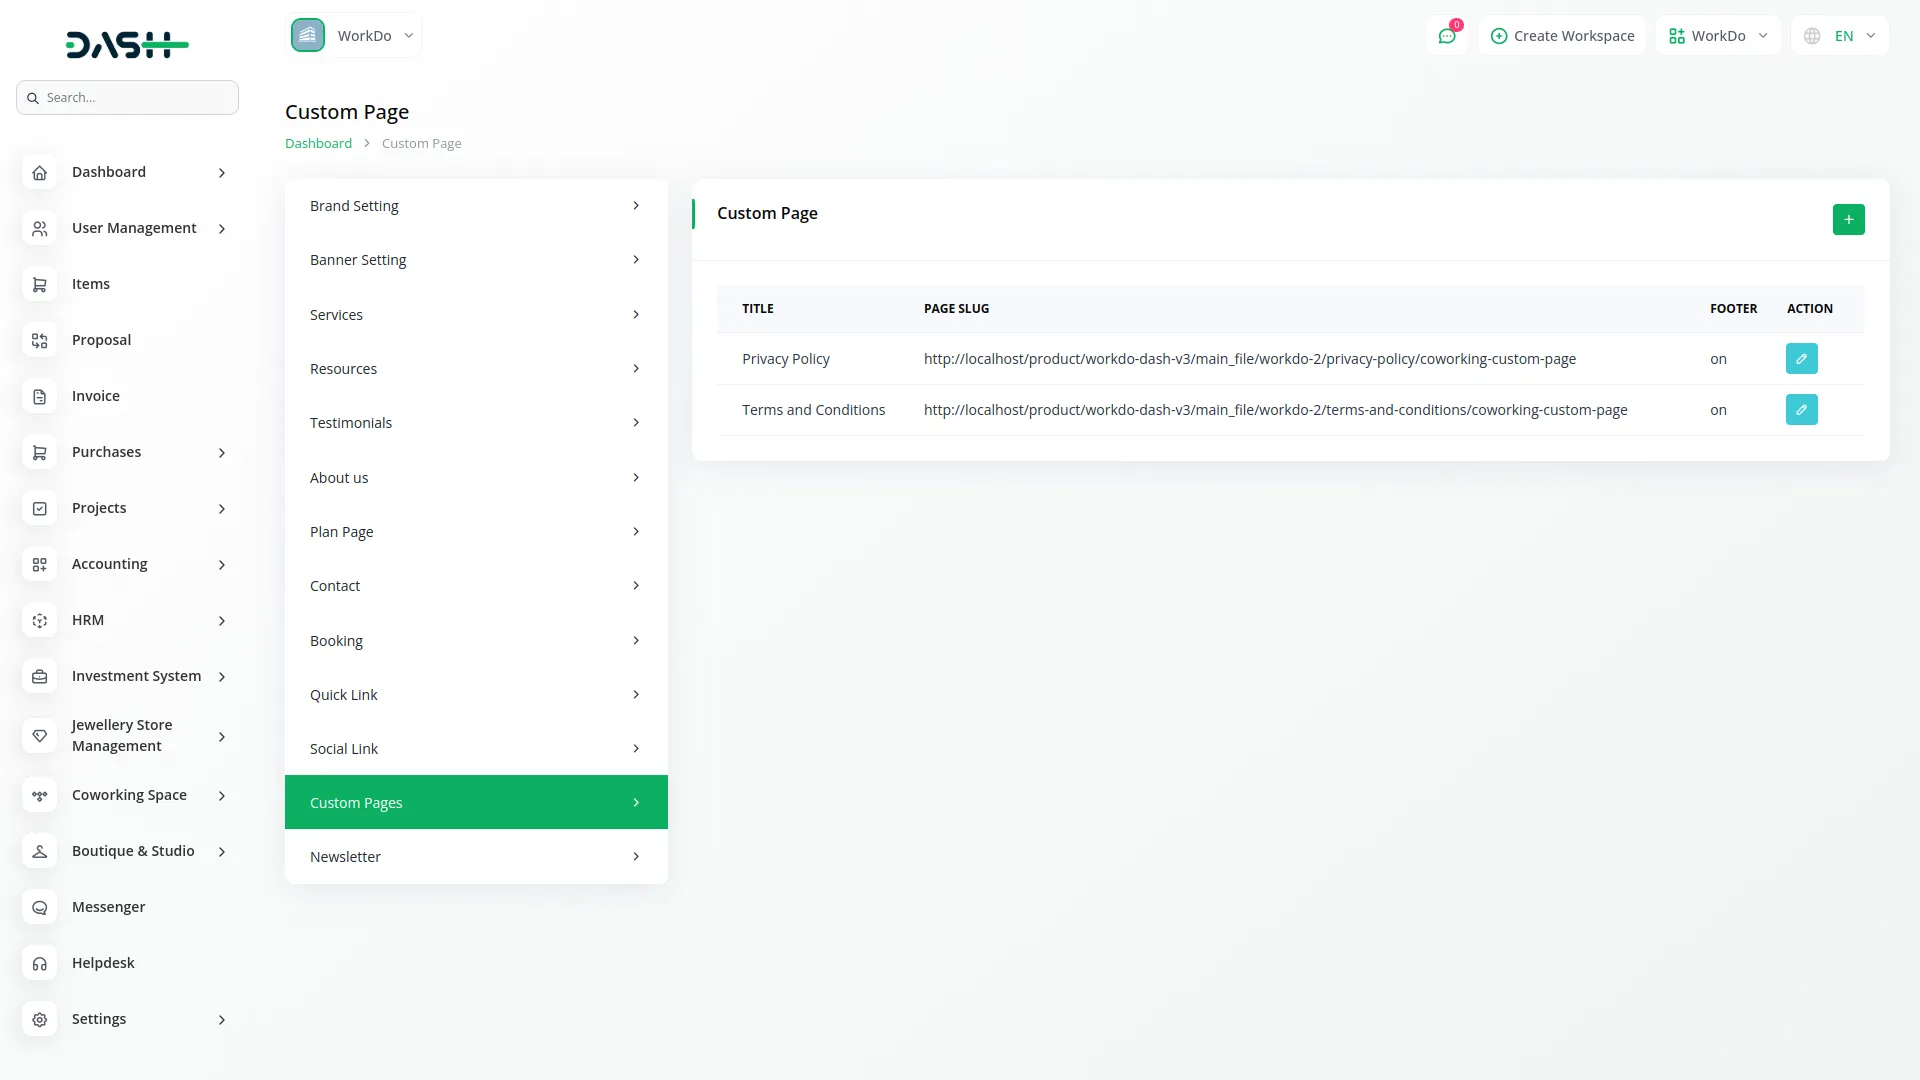
- Once saved, these custom pages will be available on your website with the content you’ve created. If Page Footer Display is enabled, the page will also appear as a link in your website footer, giving visitors access to additional information about your coworking space services or policies.
- Custom pages appear as separate pages on your website with the content you’ve created. If Page Footer Display is enabled, links to these pages also appear in the Footer Section of all website pages.
Newsletter Setting
- In the Newsletter Setting section, you will find fields for Newsletter Title and Newsletter Description. Enter an engaging title and description that encourages visitors to subscribe to your newsletter.
- Once saved, the Newsletter Title and Newsletter Description will appear in the newsletter subscription section on your website, encouraging visitors to subscribe to updates. When users subscribe through the website form, their newsletter emails are automatically stored in the system for your marketing campaigns.
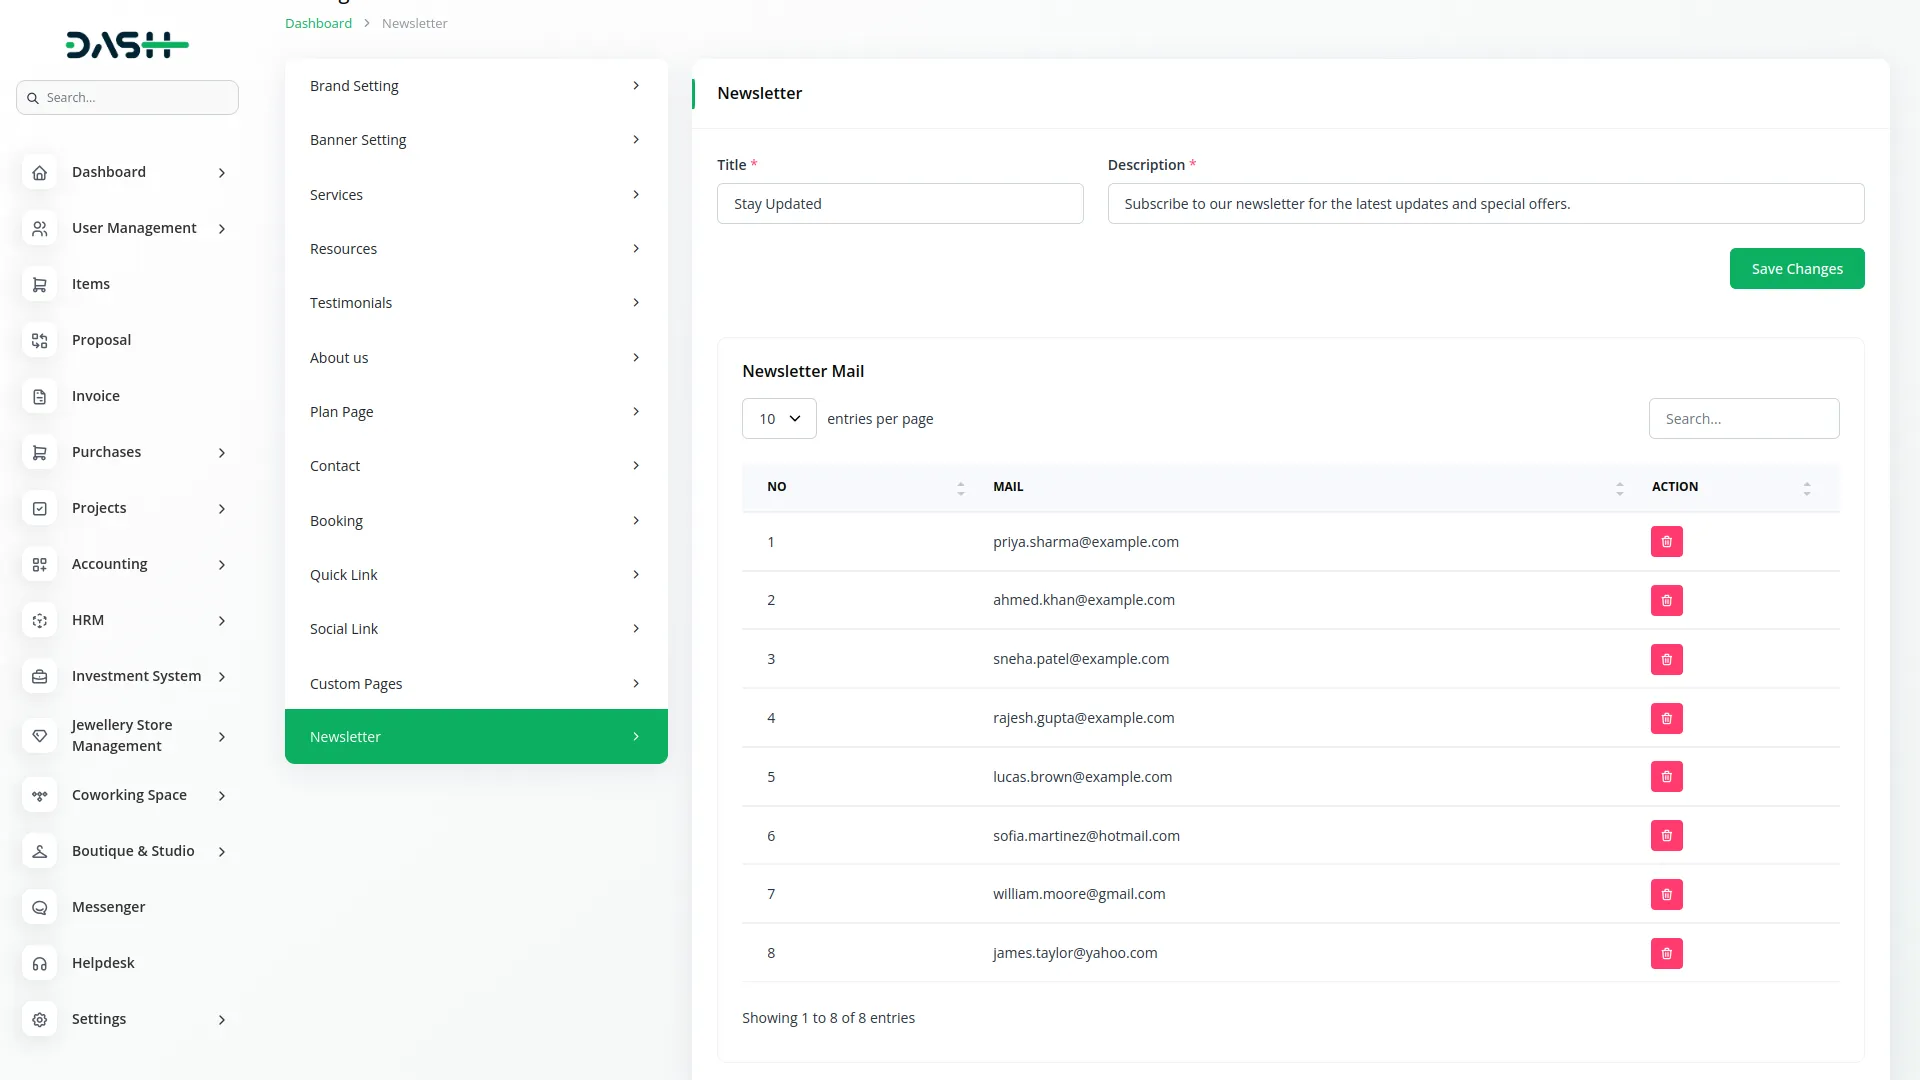
- The Newsletter Section on your Website Home Page shows the newsletter title and description from the newsletter settings with an email subscription form for visitors. When users subscribe, their emails are stored in your backend system.
Membership Plan
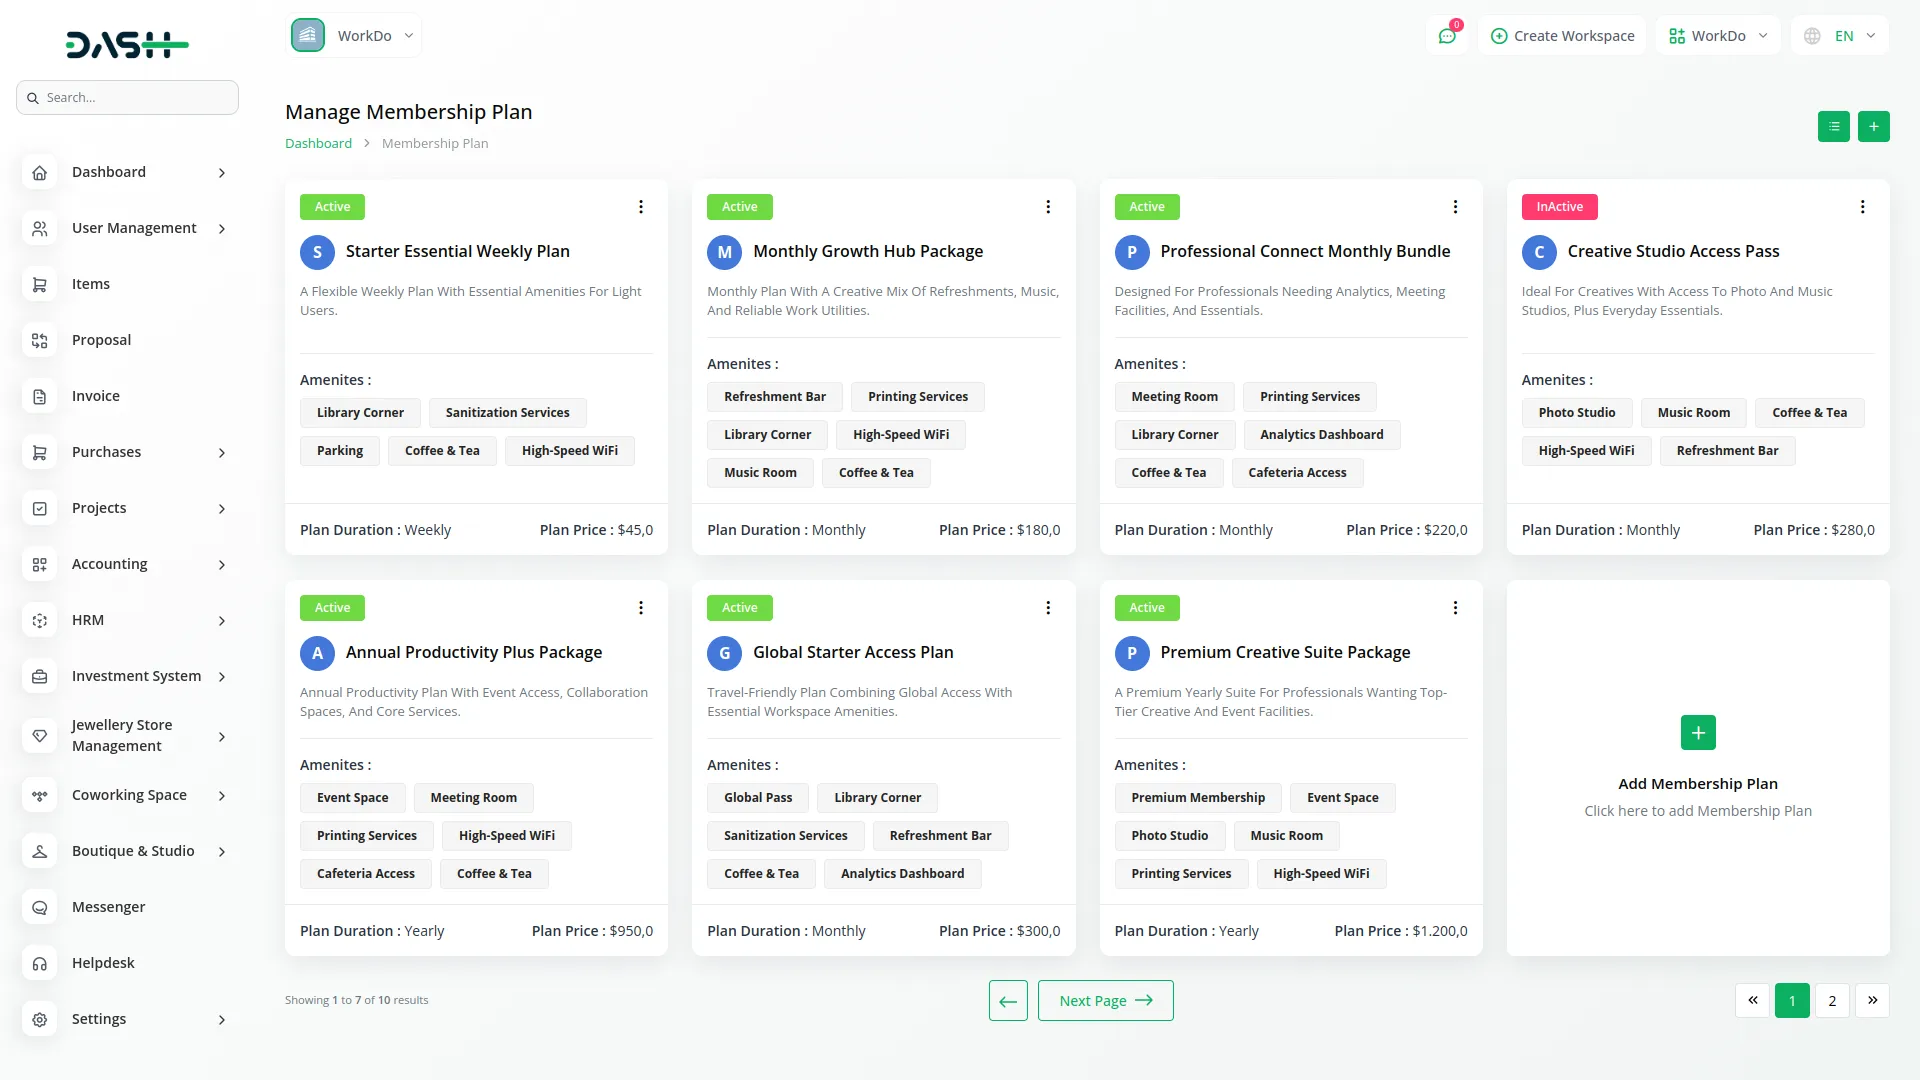
- To create a new Membership Plan, click the “Create” button at the top of the membership plan page. Enter the Plan Name, select Duration (Yearly, Monthly, or Weekly), choose Amenities from the Amenities section using multiple select, set the Price, select Status (Active or Inactive), and add a Description of the plan benefits.
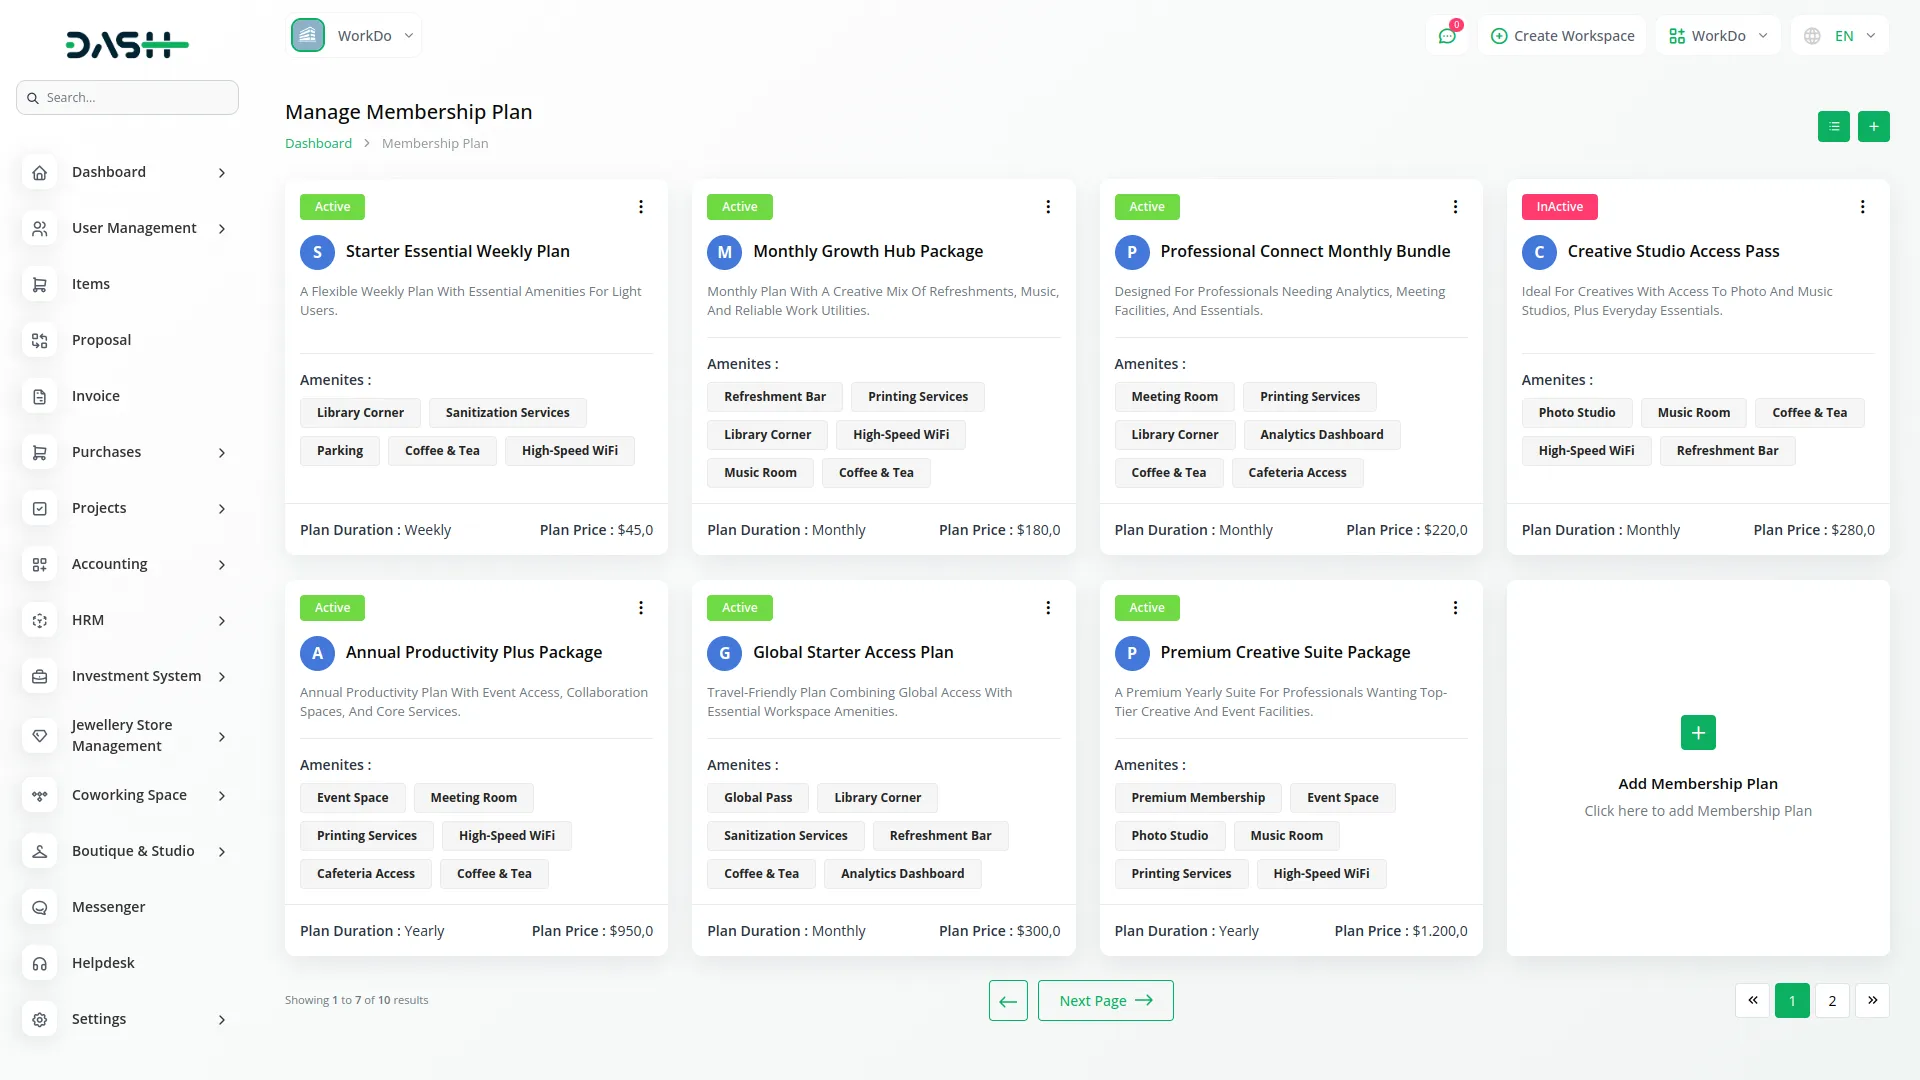
- The list page displays all membership plans in both grid view and table format. In grid view, you’ll see product cards showing Plan Status, Duration, Plan Name, Plan Price, Description, and Amenities. The list page shows all plans with columns like No, Plan Name, Duration, Plan Price, Amenities, and Plan Status.
- You can search, export, reset, and reload to manage the membership plan list page. With the help of the Action column, use the Show, edit, and delete buttons to modify the existing record.
- These membership plans appear on the Website Membership Plan Page as plan cards displaying Plan Name, Duration, Price, Amenities, and Description for each active plan you’ve created in the backend. Customers can filter plans by duration and subscribe to them through the payment modal.
Manage Membership
- To create a new Membership, click the “Create” button at the top of the Membership page. Enter Member Name, Email, and Contact No. Select Duration from the options available in the Membership Plan section, then choose the Membership Plan based on your selected duration.
- The Plan Price will automatically fill based on your selected Membership Plan. Choose Payment Method (card, cash, or online), and note that Payment Status defaults to unpaid and Plan Status defaults to Pending.
- When the plan payment is processed and the payment status is confirmed as paid, the system automatically sets the expiry date based on the plan duration (Monthly, Yearly, or Weekly), activates the plan, and updates the payment status to paid.
- For plan renewal, when a plan expires, you can reactivate it by confirming payment, which again sets the expiry date based on plan duration, activates the plan, and updates the payment status to paid.
- The list page shows all memberships with columns like Membership ID, Member Name, Membership Plan, Price, Plan Expiry Date, Plan Status (Pending, Active, Expired), Payment Status (paid, unpaid), Payment Method, and Action. You can search, export, or perform actions like Show, Edit (not available when payment method is online payments), Delete, Payment (available when creating a first-time subscription by card, cash, or online payment), and Plan Renewal (available when the plan expires).
Note: You can manually create a membership from the backend admin panel, and members can also create a membership through the website.
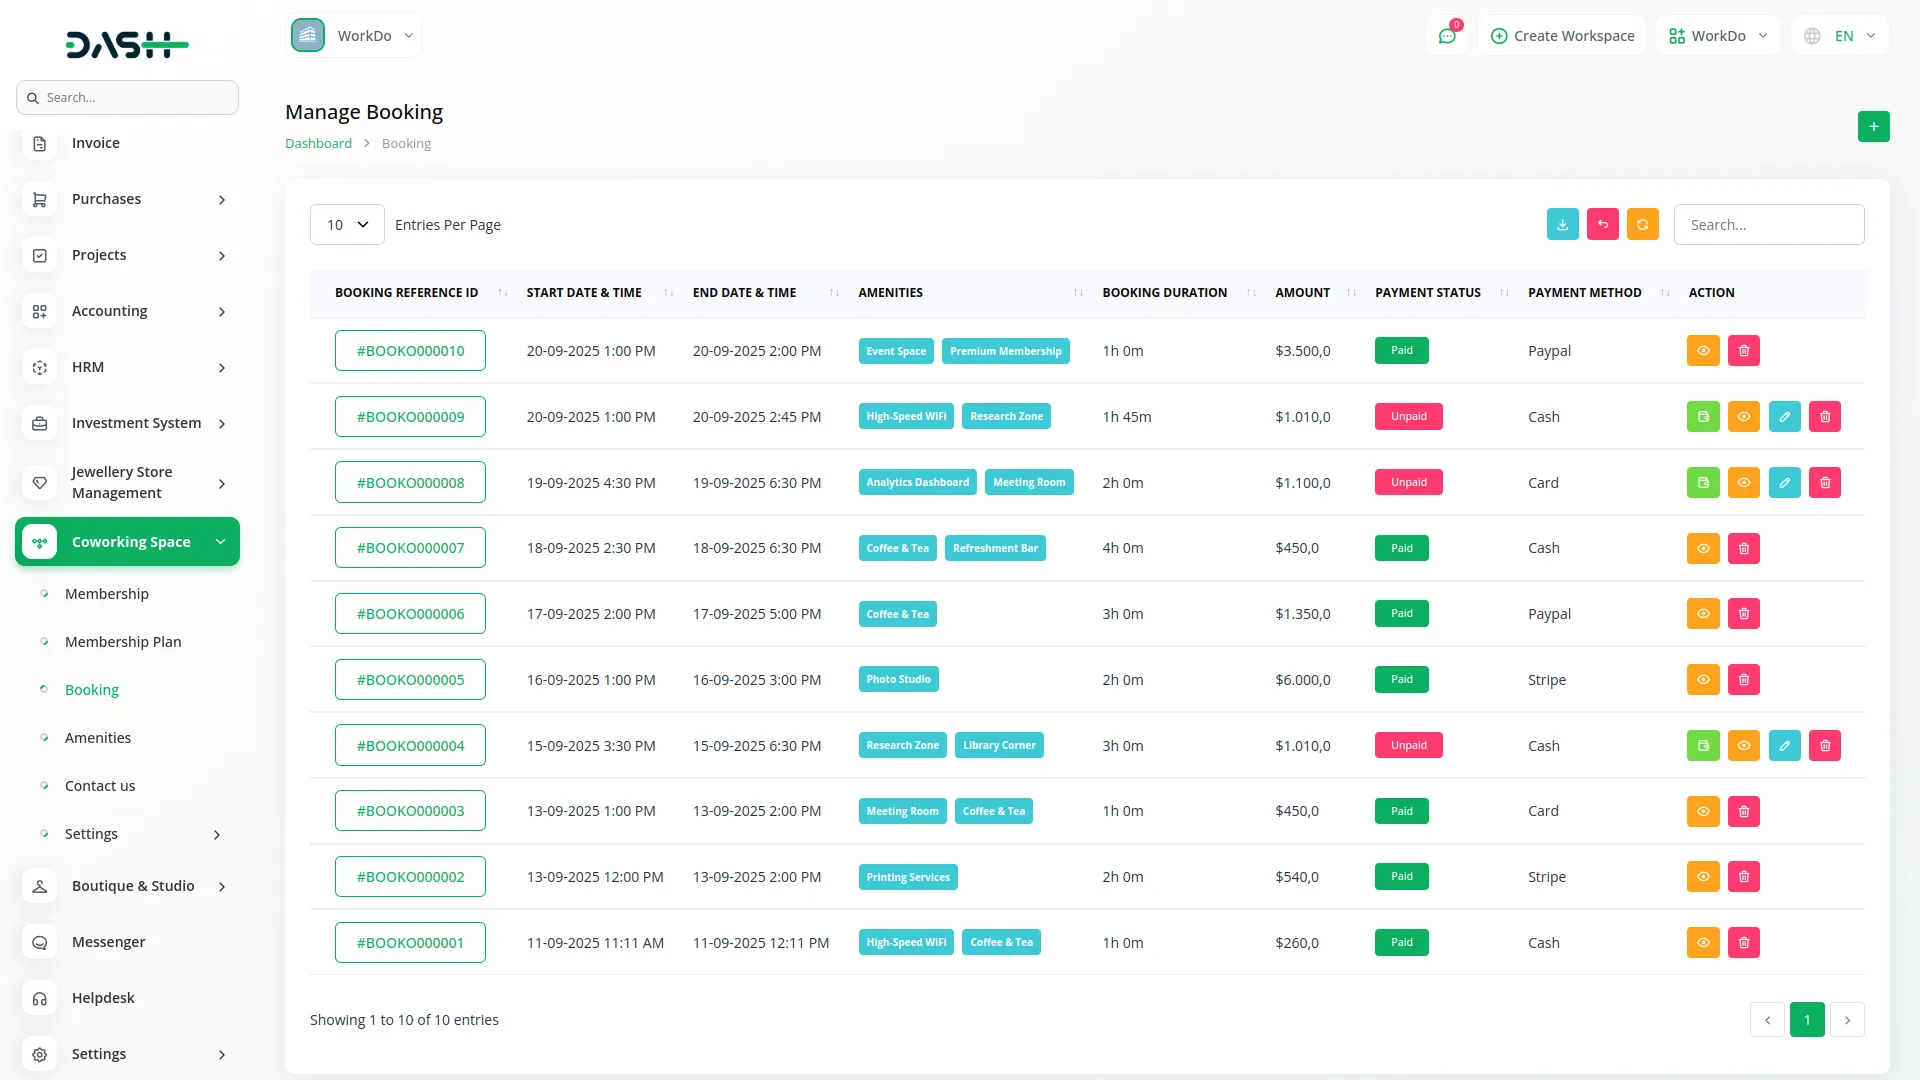
Manage Booking
- After creating a membership, navigate to the booking page to create a new booking by clicking the “Create” button given at the top of this page.
- You need to enter Customer Name, Email, and Contact No. Set Start Date & Time and End Date & Time, and the Booking Duration will be automatically calculated and filled. Select Amenities from the Amenities section using multiple select.
- The Amount will be automatically calculated using the formula: Booking Duration × Coworking Space Charge (from Coworking Space Setup section) + Amenities Cost (from selected amenities). Choose Payment Method (card, cash, or online), noting that Payment Status defaults to unpaid.
- The list page shows all bookings with columns like Booking Reference ID, Start Date & Time, End Date & Time, Amenities, Booking Duration, Amount, Payment Status (paid, unpaid), Payment Method, and Action.
- Use the search, export, reset, or reload button to manage the booking list data. Available actions include show, edit (not available when payment method is online payments), delete, and payment (not available when payment status is already paid).
- Customers can also create bookings through the Website Booking Page, which uses the same booking system and pricing structure from your backend settings.
Amenities
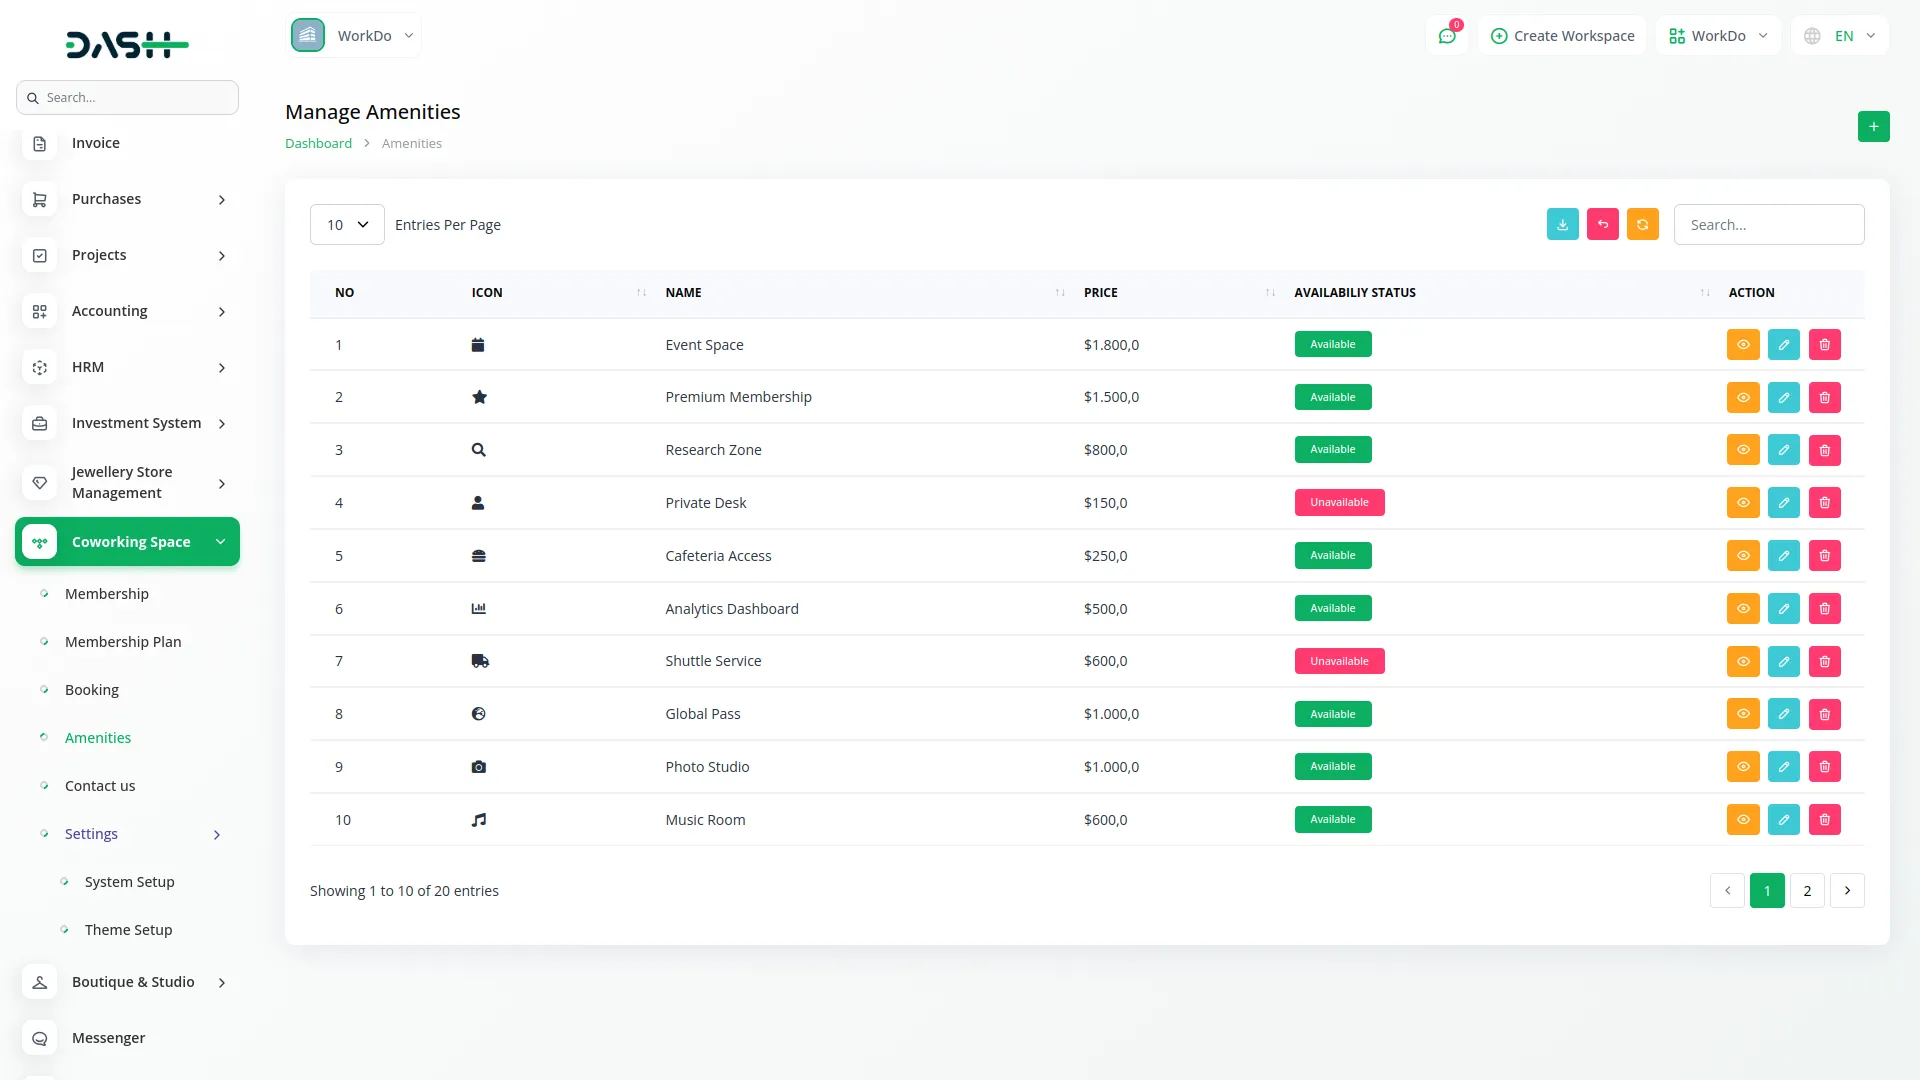
- To create a new Amenity, click the “Create” button at the top of the amenities page. Enter the Amenity Name, set the Price for the amenity (which will be chargeable), select the Availability Status as either Available or Unavailable, and add a Description explaining the amenity details.
- After completing all fields, click “Create” to save the amenity. These amenities will then be available for selection in both Membership Plans and Booking sections.
- The list page shows all amenities with columns for No, Amenity Name, Price (Chargeable), Availability Status, Description, and Action. You can use the Search function to find specific amenities, the Export, Reset, and Reload buttons to manage this page list. In the Action column, you can Show amenity details, Edit amenity information, or Delete amenities as needed.
Manage Contact Us
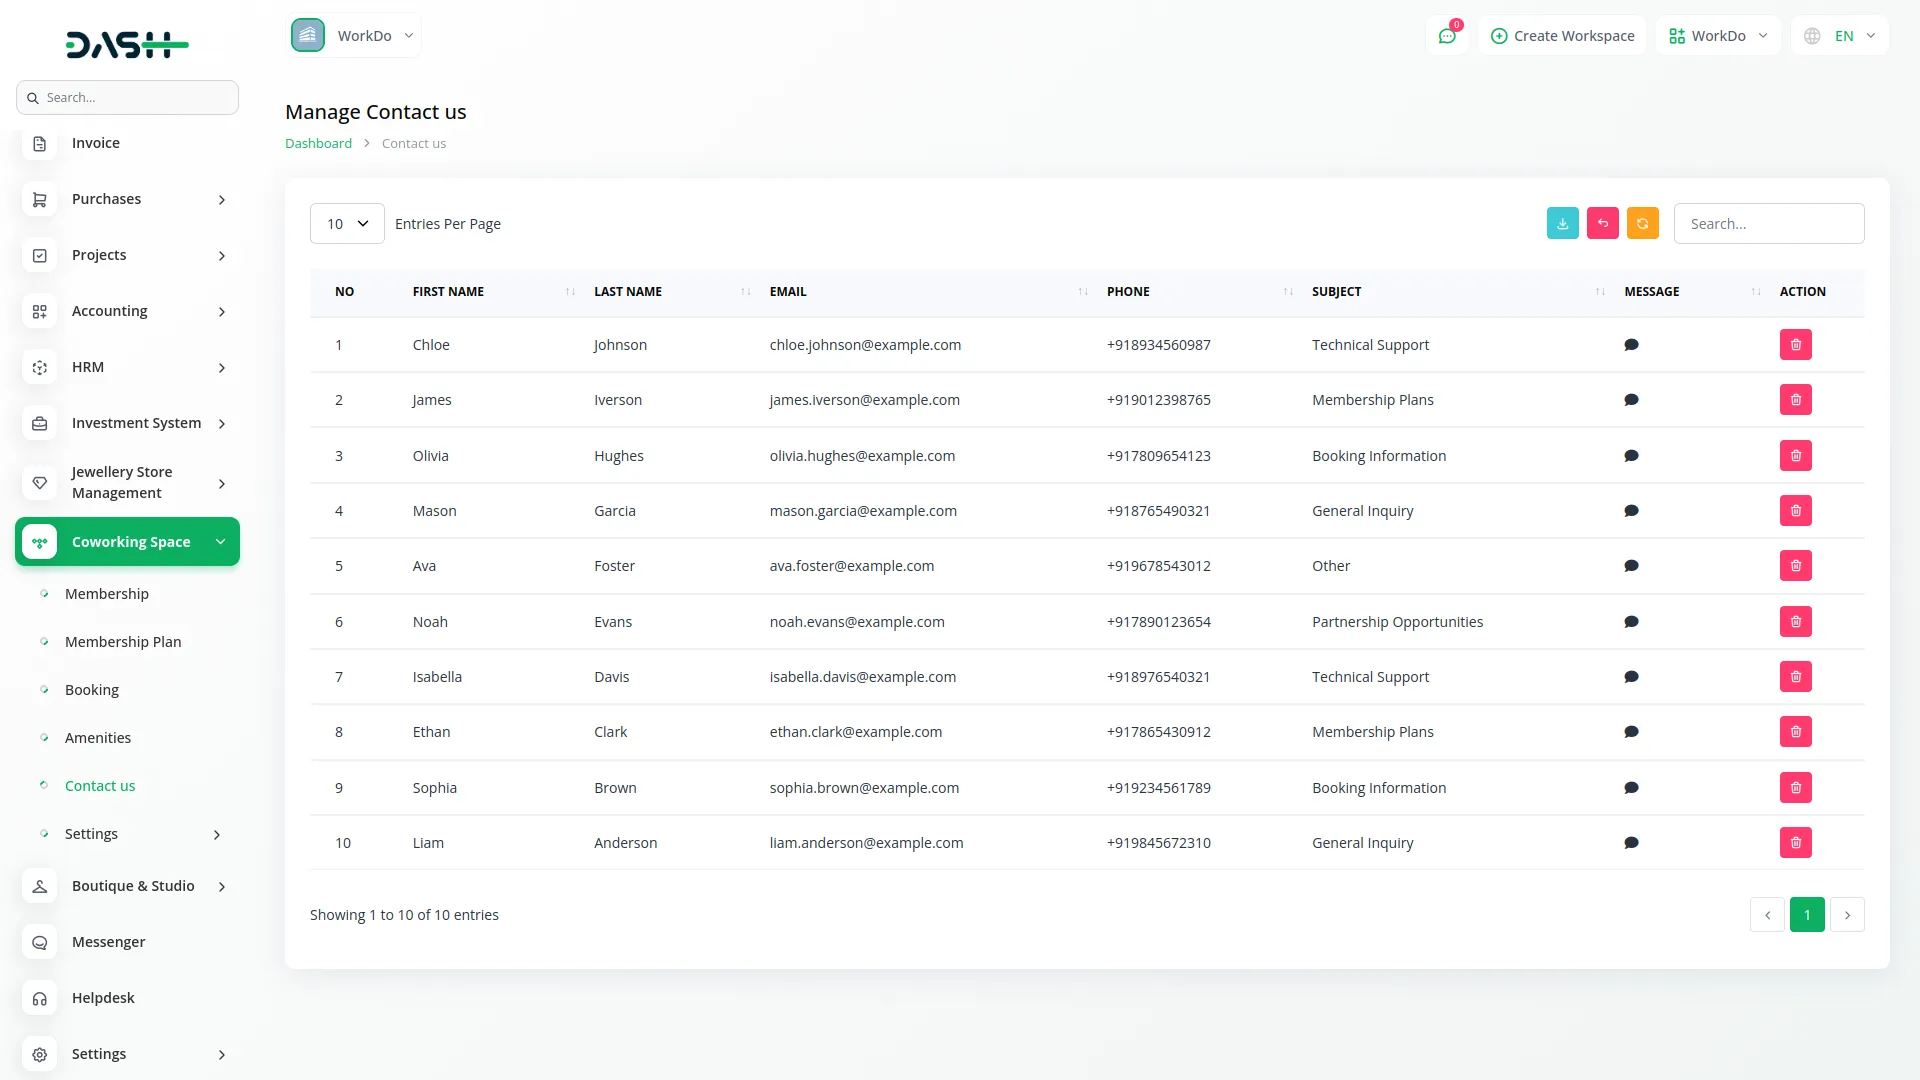
- The Contact Us section displays data from users who have sent messages using the contact us form on your website. This helps you manage customer enquiries and communication effectively.
- The list page shows all contact messages with columns like No, Name, Email, Phone, Subject, and Message (displayed as an icon that you can click to view the full message content). You can use search, export, reset, and reload to easily manage the contact us page data. Available Action: You can use ‘delete’ to remove messages from the System.
- These contact messages come from the contact form on your Website Contact Page, where visitors can fill out Name, Email, Subject, and Message fields to send enquiries directly to your backend system.
Categories
Related articles
- Newspaper Distribution Management Integration in Dash SaaS
- Insurance Management Integration in Dash SaaS
- Form Builder Integration in Dash SaaS
- Recruitment Integration in Dash SaaS
- Jira Add-On WorkDo Dash Detailed Documentation
- How To Generate The YouTube Credentials
- Waste Management Integration in Dash SaaS
- Sign-In with Twitter Add-On Integration in Dash SaaS
- Google Docs Integration Detailed Documentation
- Influence Marketing Detailed Documentation
- Performance Indicator Integration in Dash SaaS
- Movie & Tv Studio Integration in Dash SaaS
Reach Out to Us
Have questions or need assistance? We're here to help! Reach out to our team for support, inquiries, or feedback. Your needs are important to us, and we’re ready to assist you!


Need more help?
If you’re still uncertain or need professional guidance, don’t hesitate to contact us. You can contact us via email or submit a ticket with a description of your issue. Our team of experts is always available to help you with any questions. Rest assured that we’ll respond to your inquiry promptly.
Love what you see?
Do you like the quality of our products, themes, and applications, or perhaps the design of our website caught your eye? You can have similarly outstanding designs for your website or apps. Contact us, and we’ll bring your ideas to life.
