Influence Marketing Detailed Documentation
The Influencer Marketing System is a comprehensive platform designed to connect brands with influencers for effective marketing campaigns
Introduction
The Influencer Marketing System is a comprehensive platform designed to connect brands with influencers for effective marketing campaigns. This system facilitates the entire influencer marketing workflow from campaign creation to completion, enabling brands to find suitable influencers, manage campaigns, and track performance metrics. The platform provides separate interfaces for brands and influencers, complete payment processing capabilities, and detailed analytics. It includes robust content management features, review systems, and administrative tools to ensure successful collaborations between brands and influencers while maintaining transparency and trust throughout the entire process.
How to Install the Add-On?
To Set Up the Influence Marketing Add-On, you can follow this link: Setup Add-On
How to Use the Influence Marketing Add-On?
Website Frontend (Public View)
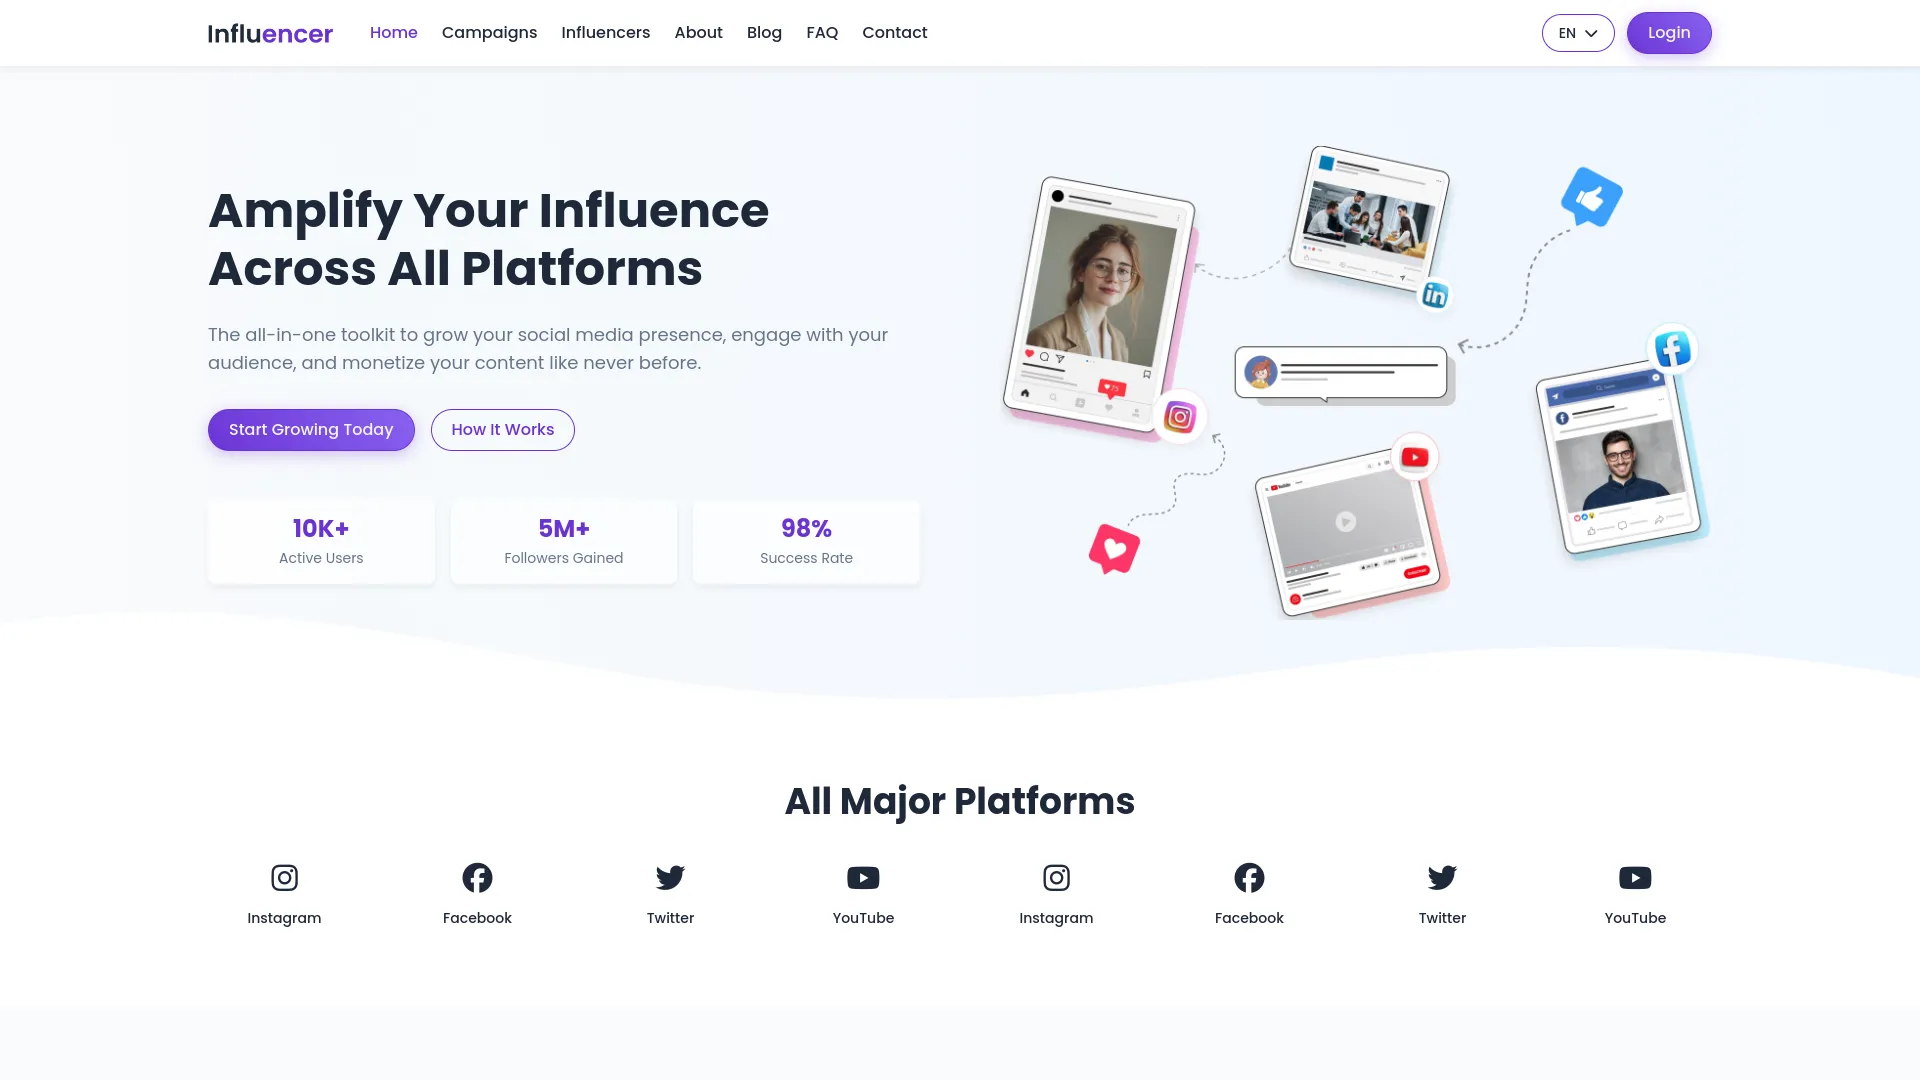
- The public website displays your influencer marketing platform to visitors. The website includes a favicon from your brand settings and a header with your logo and navigation menu. The menu contains links to Home, Campaigns, Influencers, About, Blog, FAQ, Contact, and Login pages where visitors can sign in as either a brand or influencer.
- The Home page features multiple sections that showcase your platform. The banner section displays content from your system setup banner configuration. The platform section shows the platforms you configured in system setup.
- The influencers section displays heading, title, and description if enabled, along with images and information from registered influencers. The category section shows category icons, names, and descriptions if headings are enabled. The “How does it work” section displays your configured workflow information.
- The campaign section shows only active campaigns created by brands if headings are enabled. The testimonial section displays client testimonials when status is on and headings are enabled. The blog section shows blog posts with cover images, dates, titles, and descriptions when headings are enabled.
- The CTA section displays your home page call-to-action content. The footer section includes your brand logo, footer description, footer text, social links, quick links, and custom pages.
- The Campaign page allows visitors to browse available campaigns. It includes the banner section, a search function to find campaigns by name, and an available campaigns section where visitors can filter by budget, platform, duration, and creation date. Clicking “view details” shows complete campaign information and similar campaigns from the same category. The page also includes the campaign page CTA section and footer.
- The Influencers page displays all registered influencers. Visitors can search for influencers by first or last name and filter by platform and creation date. Clicking “view profile” shows complete influencer details, campaigns they worked on, and reviews from brands. The page includes the influencer page CTA section and footer.
- The About page contains your about us content from system setup and the key milestones section. It also includes the about page CTA section and footer.
- The Blog page displays all published blog posts. Clicking “Read more” allows visitors to view complete blog details. The page includes the standard footer section.
- The FAQ page shows all frequently asked questions and answers from your FAQ management section, along with the footer.
- The Contact page displays company information from your system settings and includes the contact page CTA section and footer.
Website Frontend (Brand Login)
- When brands log into the website, they see the same public pages with additional features. The header menu includes a Dashboard option that provides access to brand-specific pages including Deposit, Campaign, Reviews, Favorite, Transactions, and Logout.
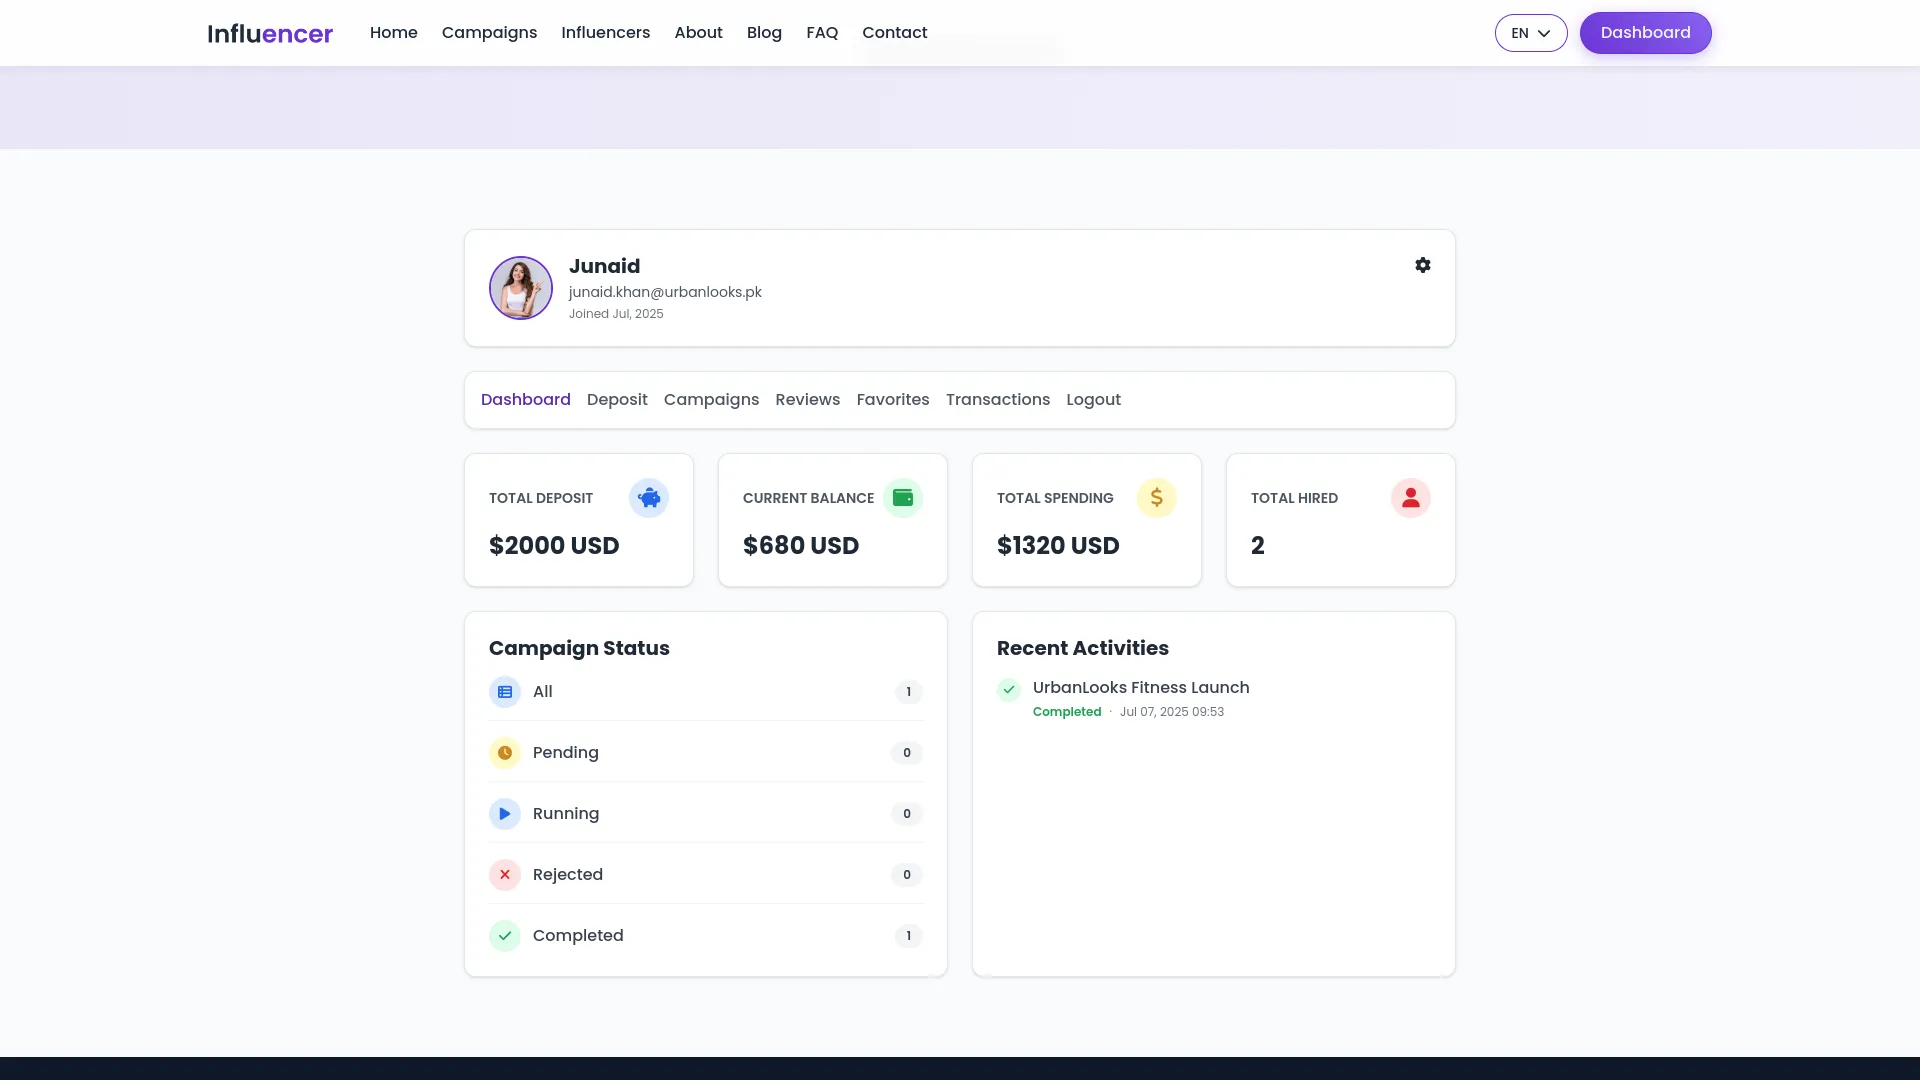
- The Home page campaign section shows only campaigns created by that specific brand instead of all active campaigns. On the Influencers page, brands can give reviews to influencers who worked on their campaigns and add influencers to their favorite list.
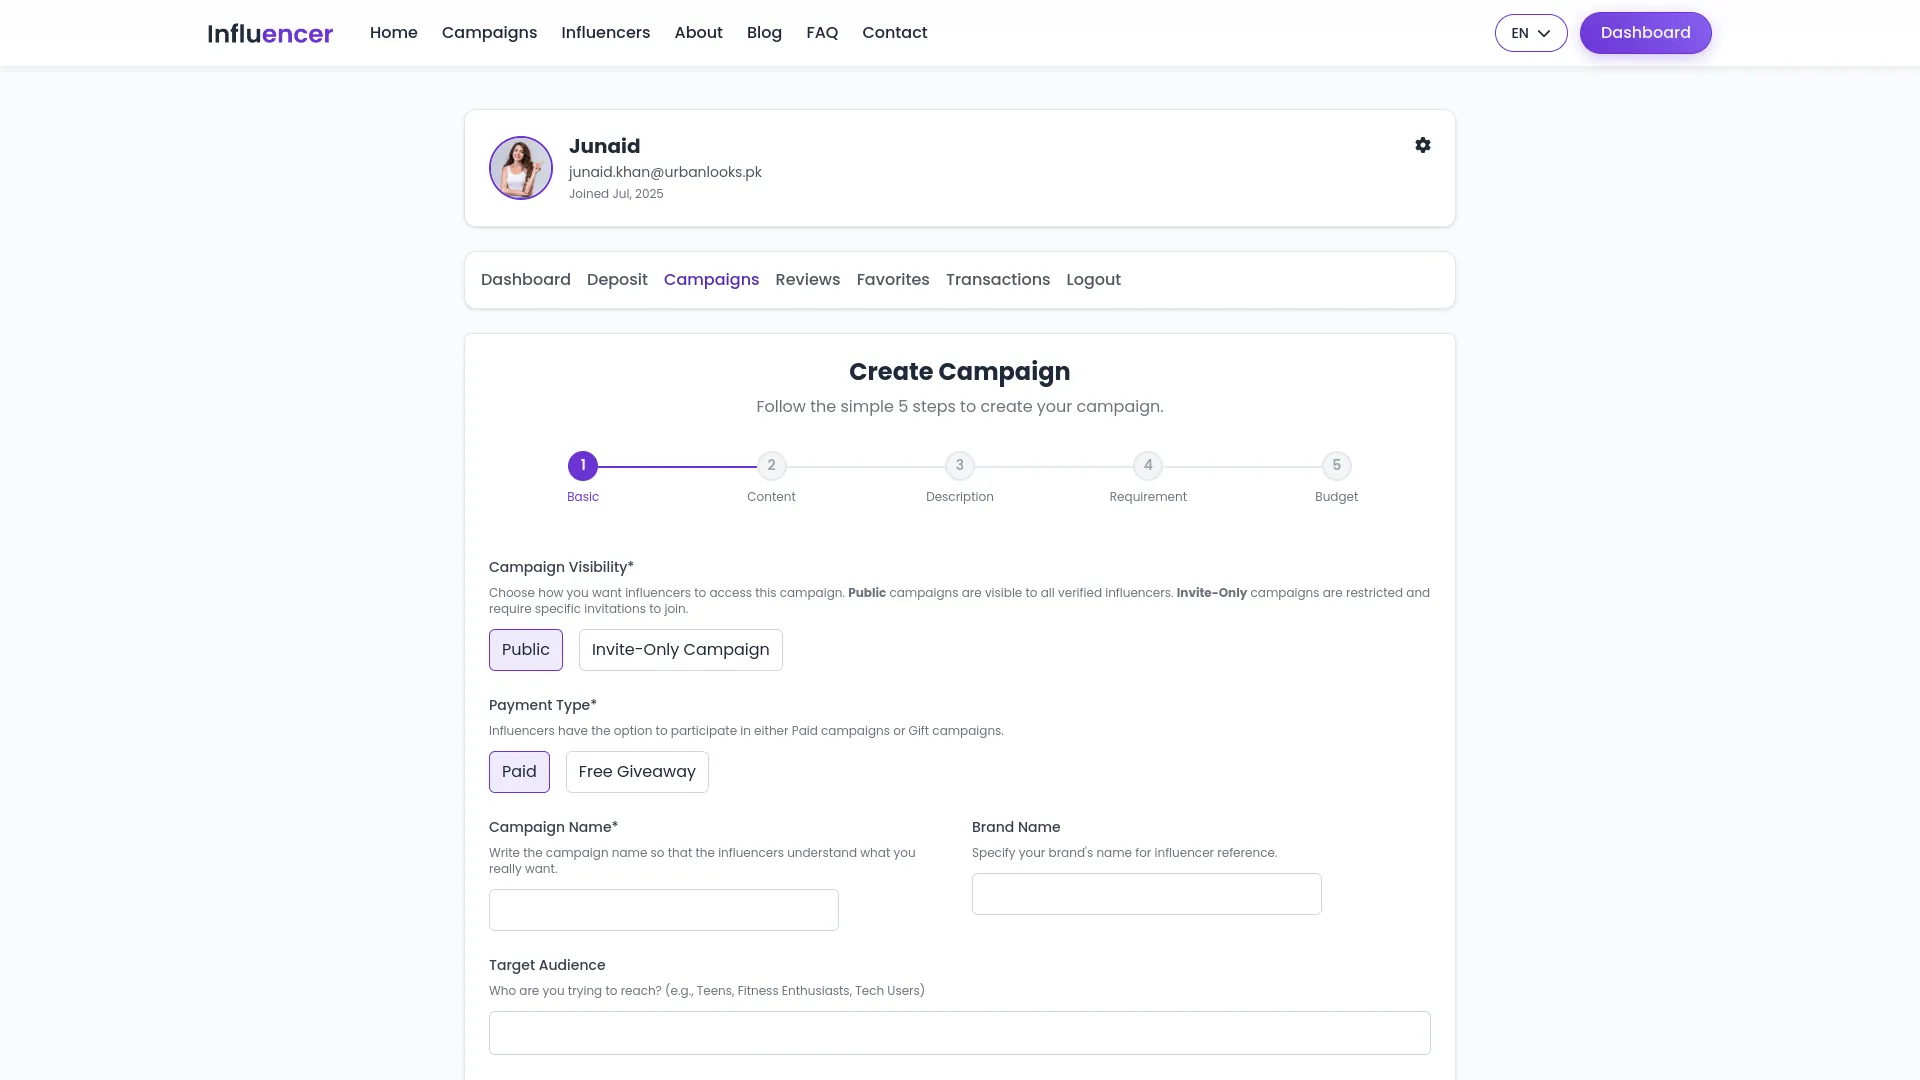
- The Brand Dashboard displays the brand’s profile information including image, name, email, joined date, and a settings icon. Clicking the settings icon provides access to Profile Settings where brands can update their details like name, email, company name, brand name, mobile number with country code, brand website, country, city, state, zip code, address, and profile image. The Change Password option allows brands to update their password by entering current password, new password, and confirm password.
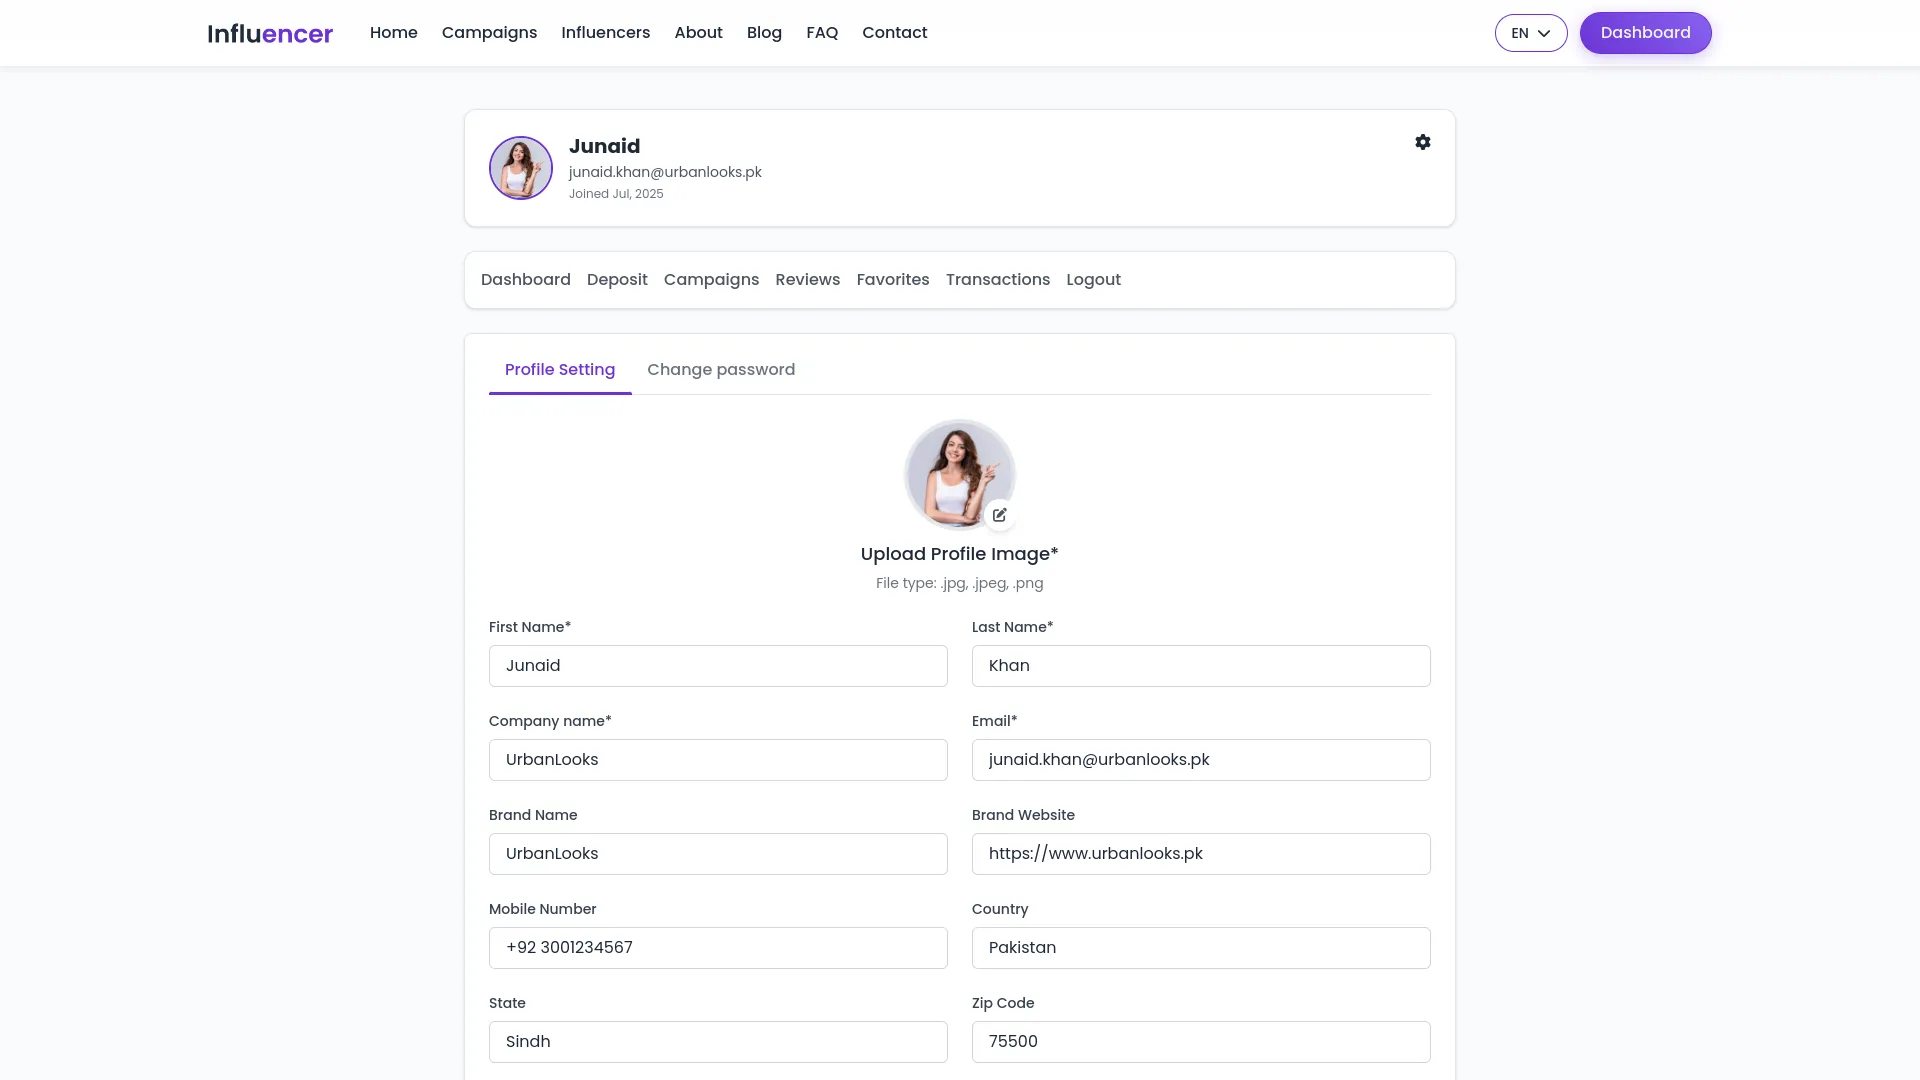
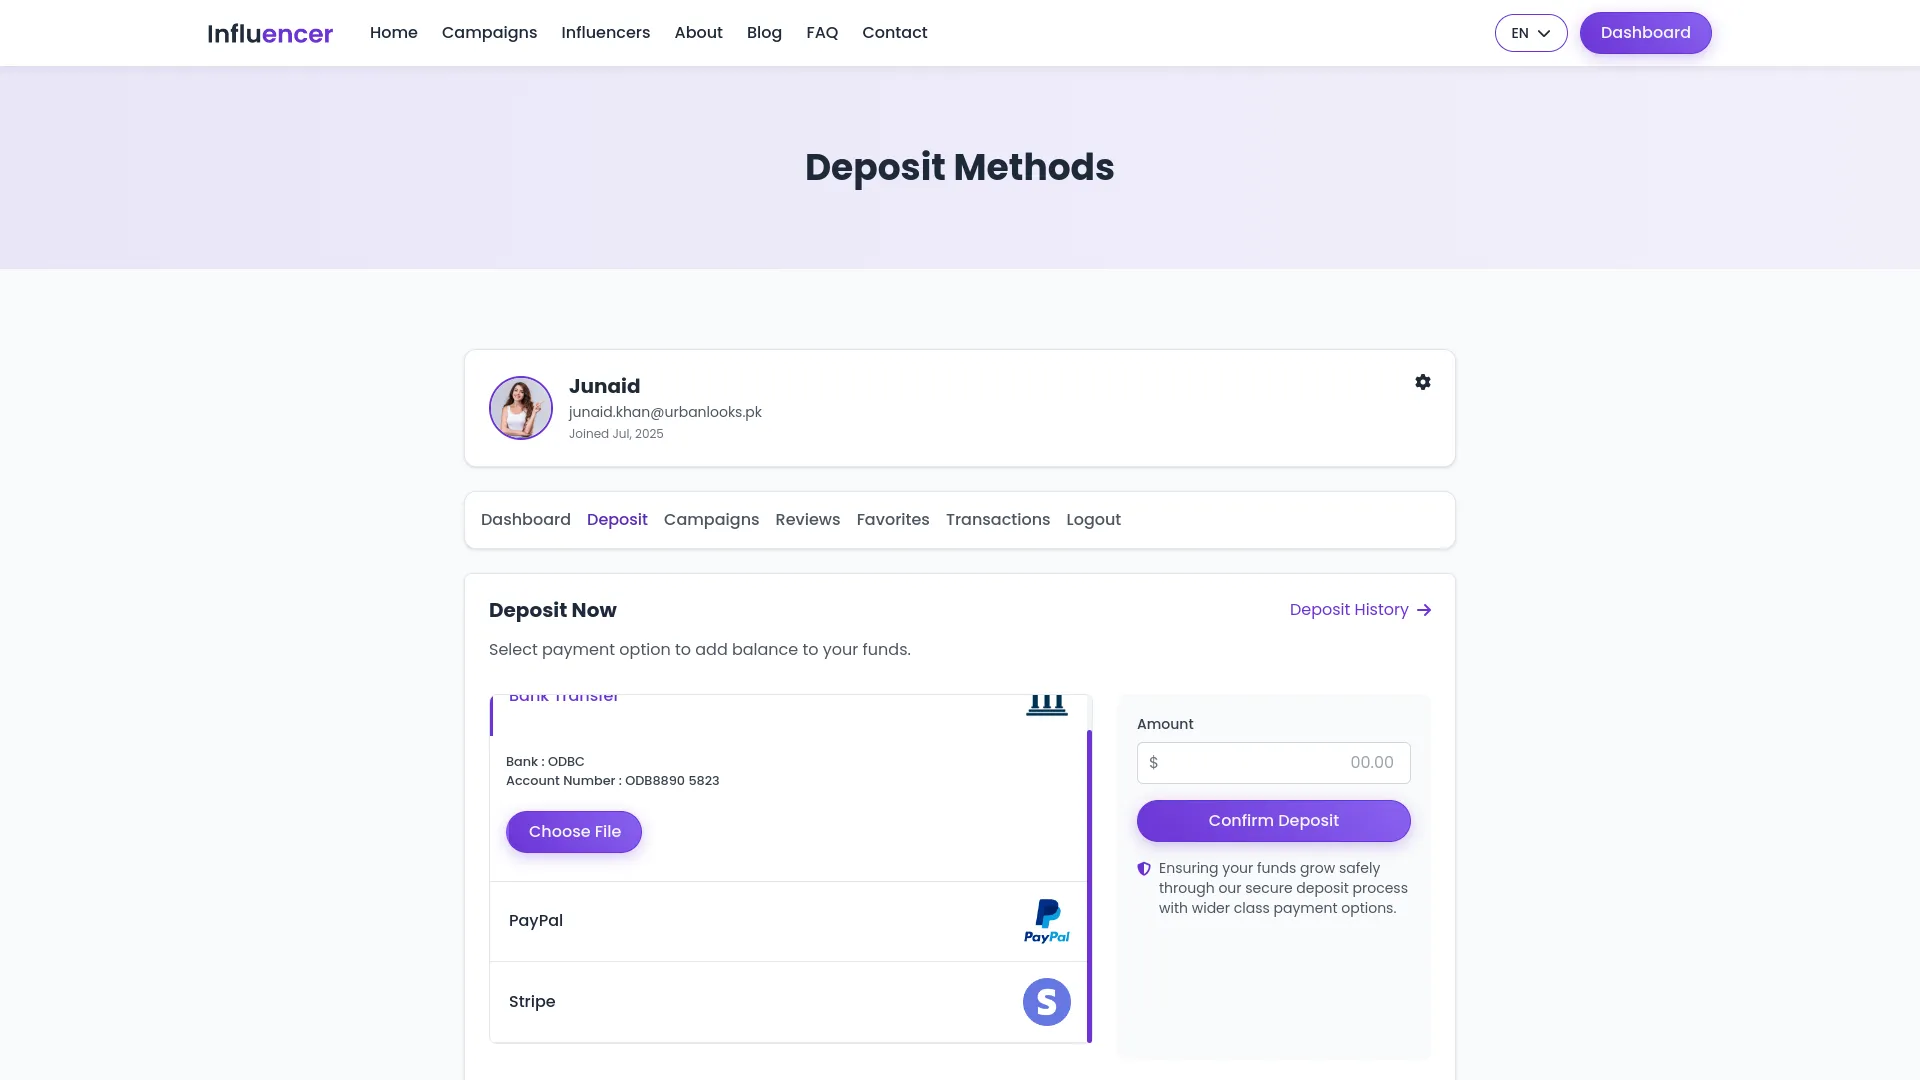
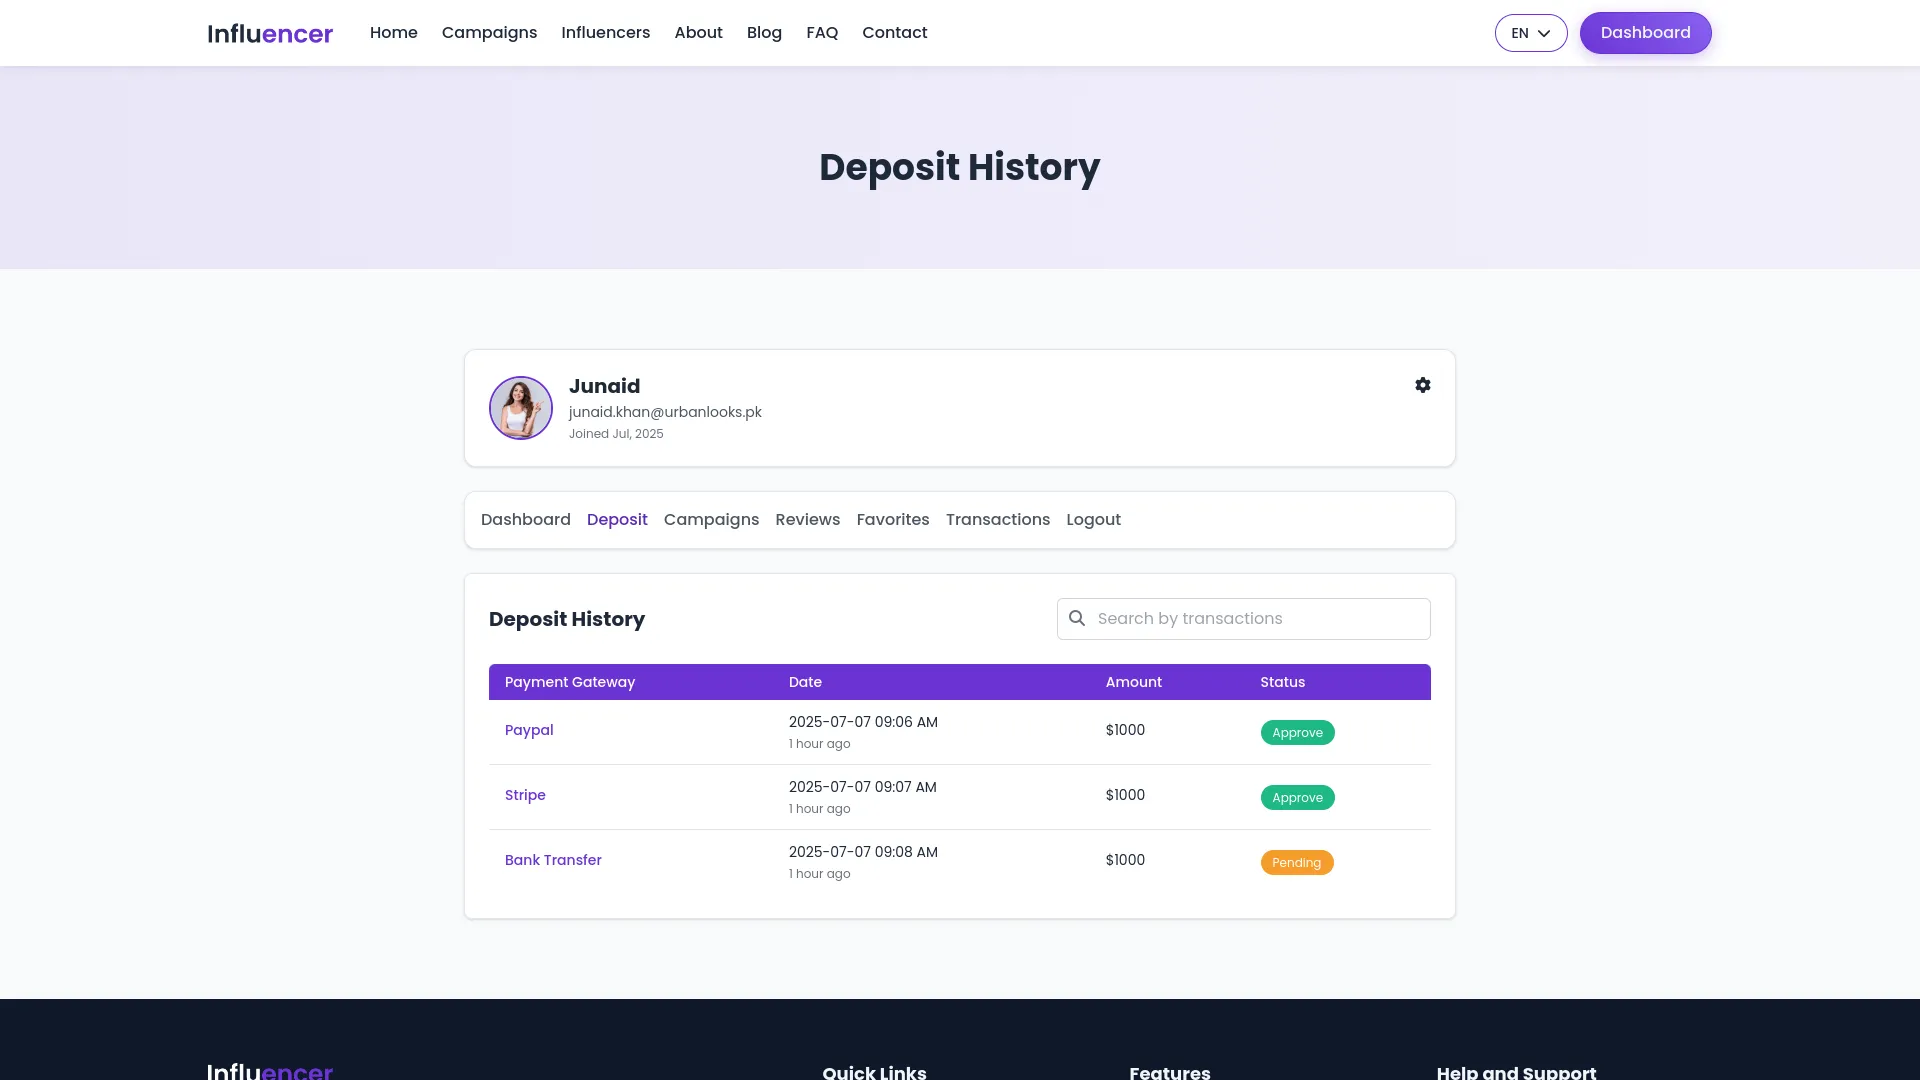
- The dashboard shows cards for Total Deposit, Current Balance, Total Spending, Total Hired Influencers, Campaign Status counts, and Recent Activities. The Deposit section allows brands to deposit money using Bank Transfer, PayPal, and Stripe. Bank transfer requests are sent to the company for approval. Deposit History shows all deposit records with payment gateway, date, amount, and status information.
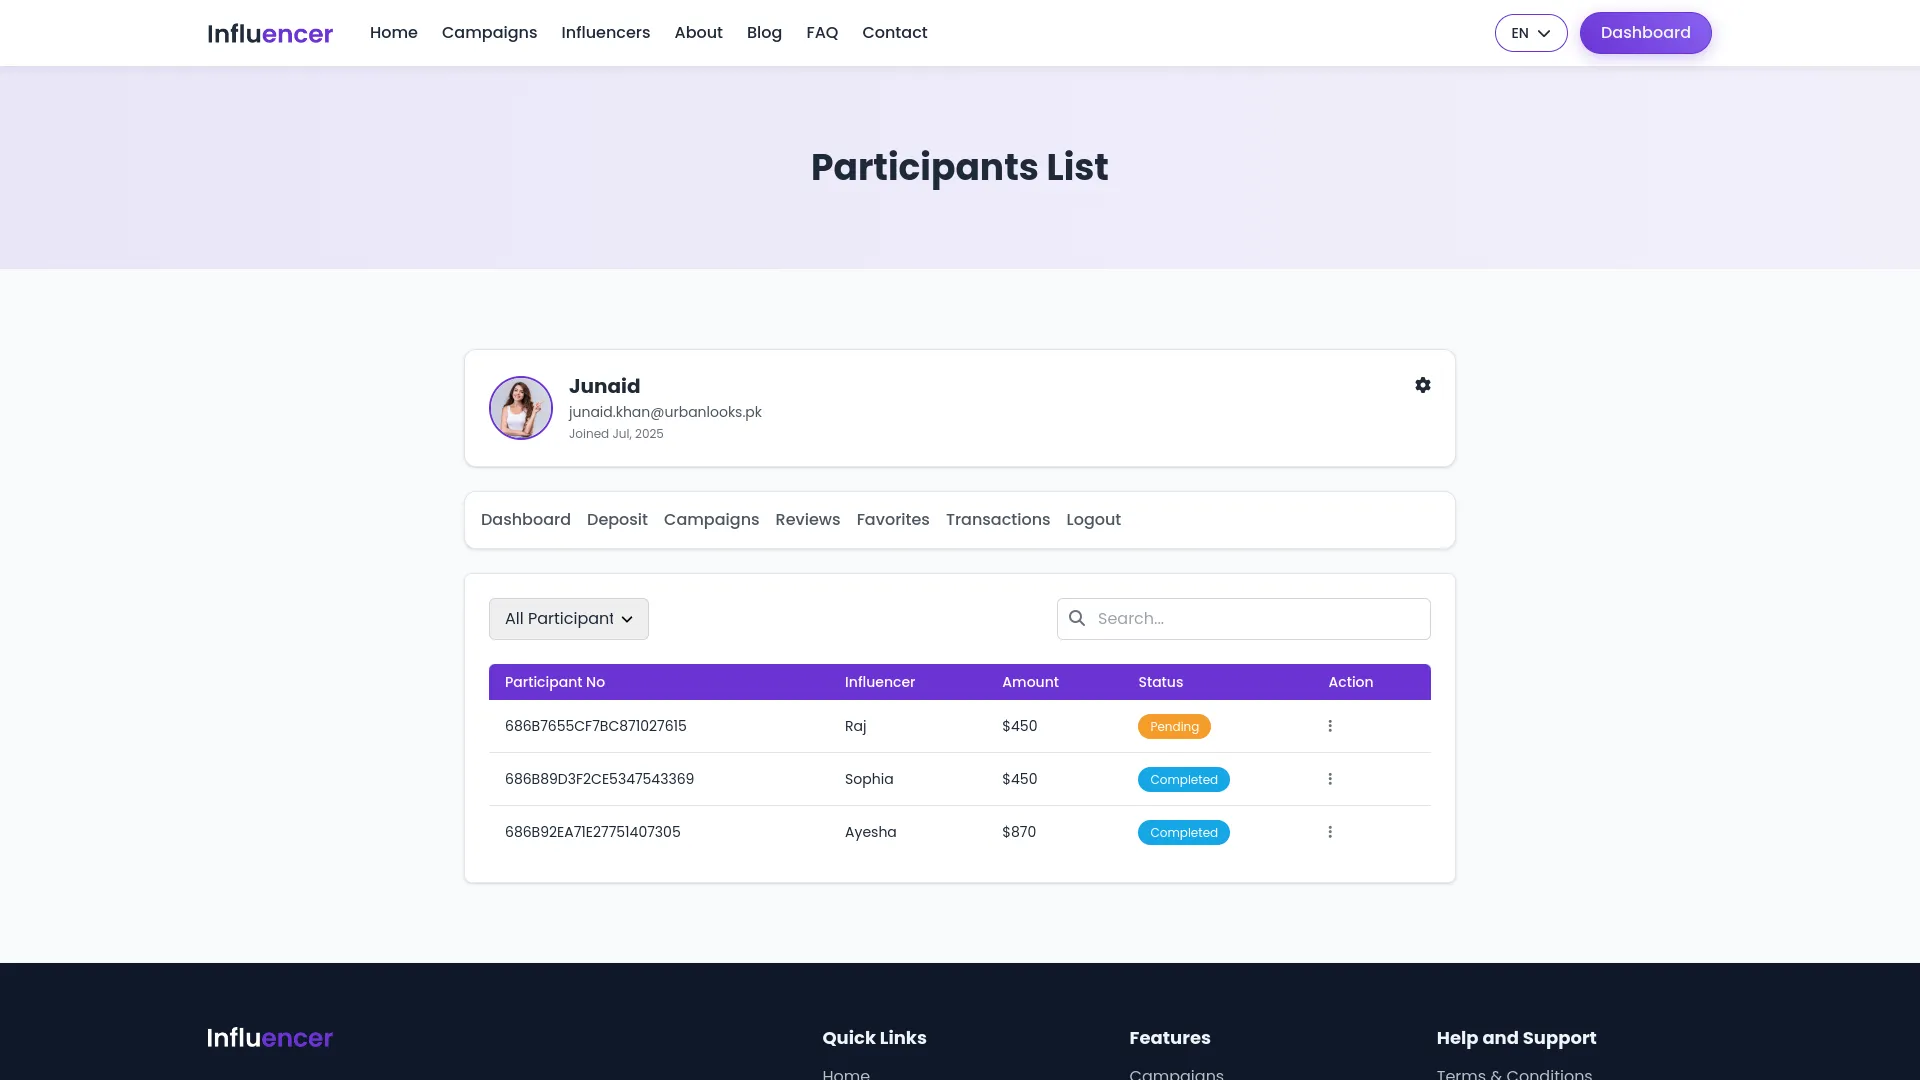
- The Campaigns section allows brands to create new campaigns and view their campaign list with title, type, required influencers, status, and actions for Edit and Participants. Clicking Participants shows all applicants for that campaign where brands can approve or reject requests.
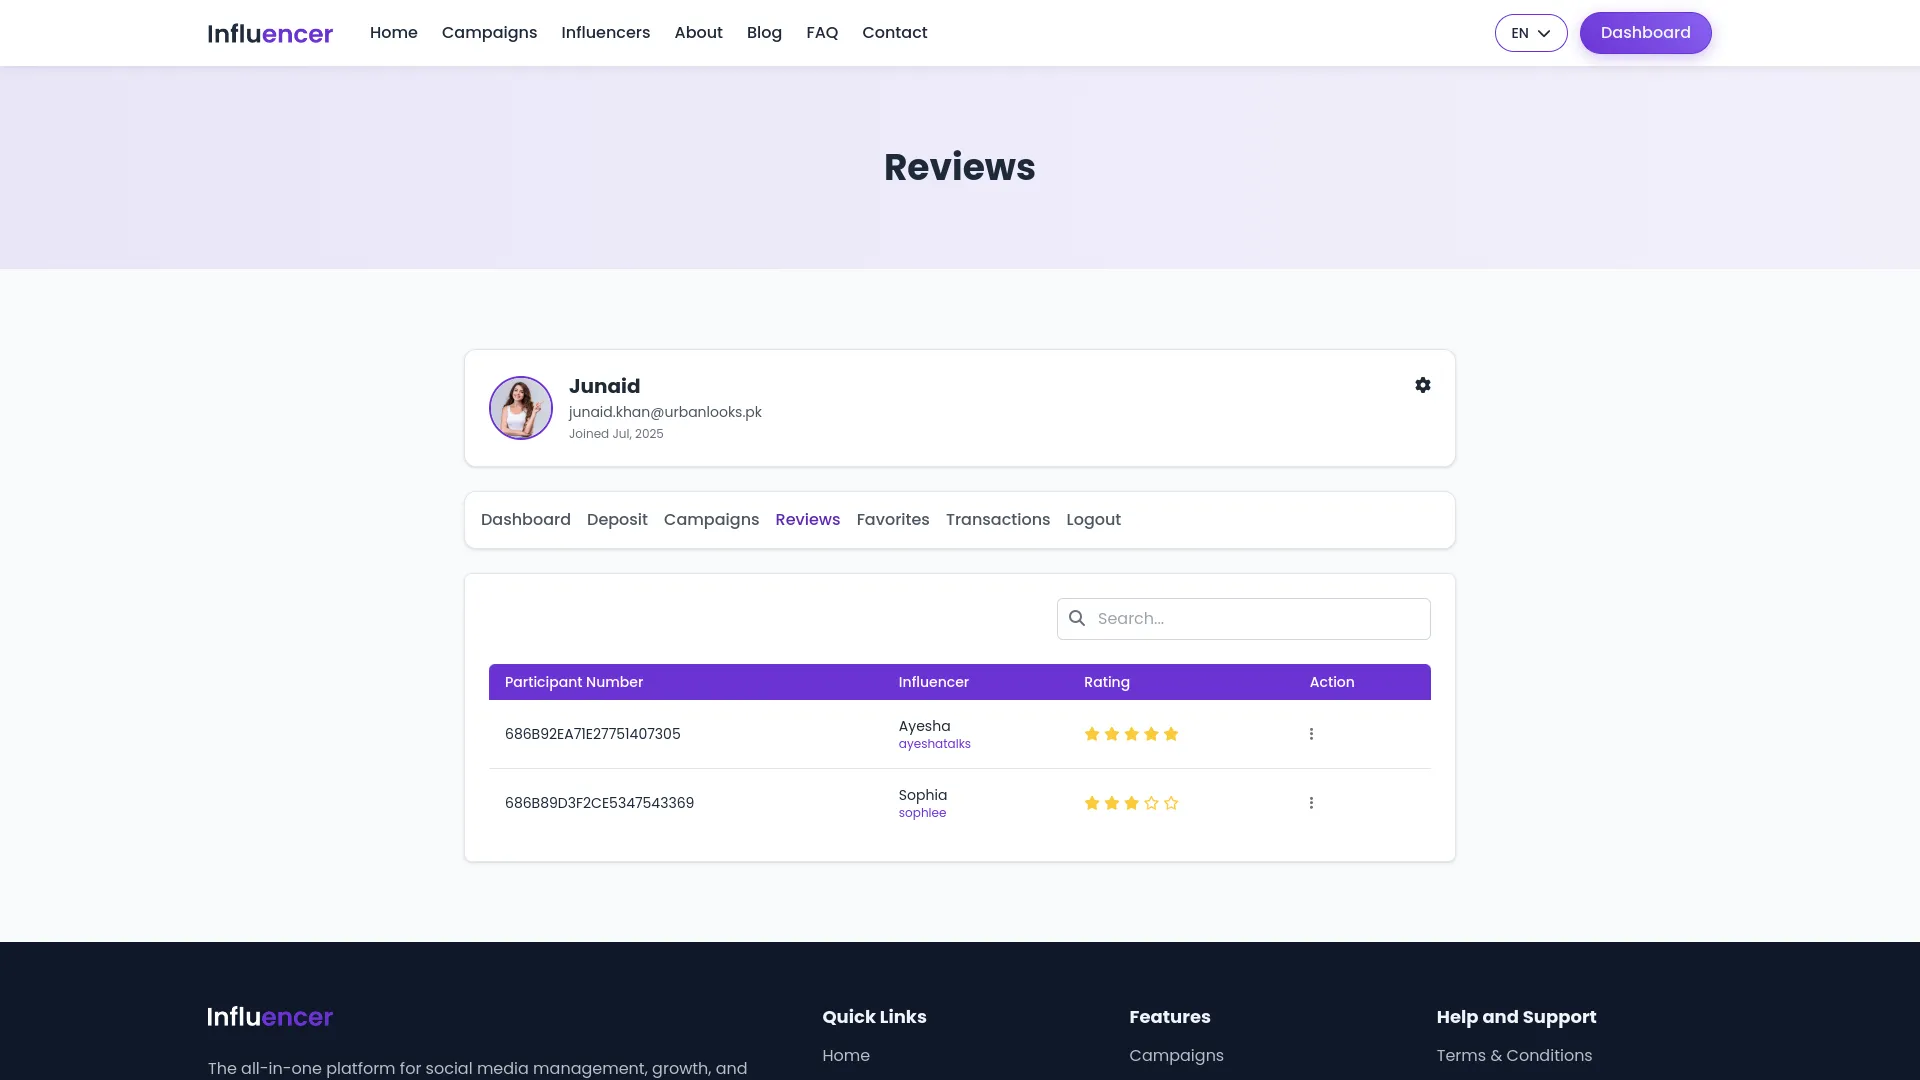
- The Reviews section displays reviews with Participant Number, Influencer, Rating, and actions to Edit or Delete. The Favorites section shows favorite influencers with images, ratings, and options to View or Delete. The Transaction section lists all transactions with transaction numbers, dates, amounts with color coding for deposits and debits, balance, and details.
Website Frontend (Influencer Login)
- When influencers log into the website, they access the same public pages with influencer-specific features. The header menu includes Dashboard access to influencer pages including Withdrawal, Campaigns, Reviews, Transactions, and Logout.
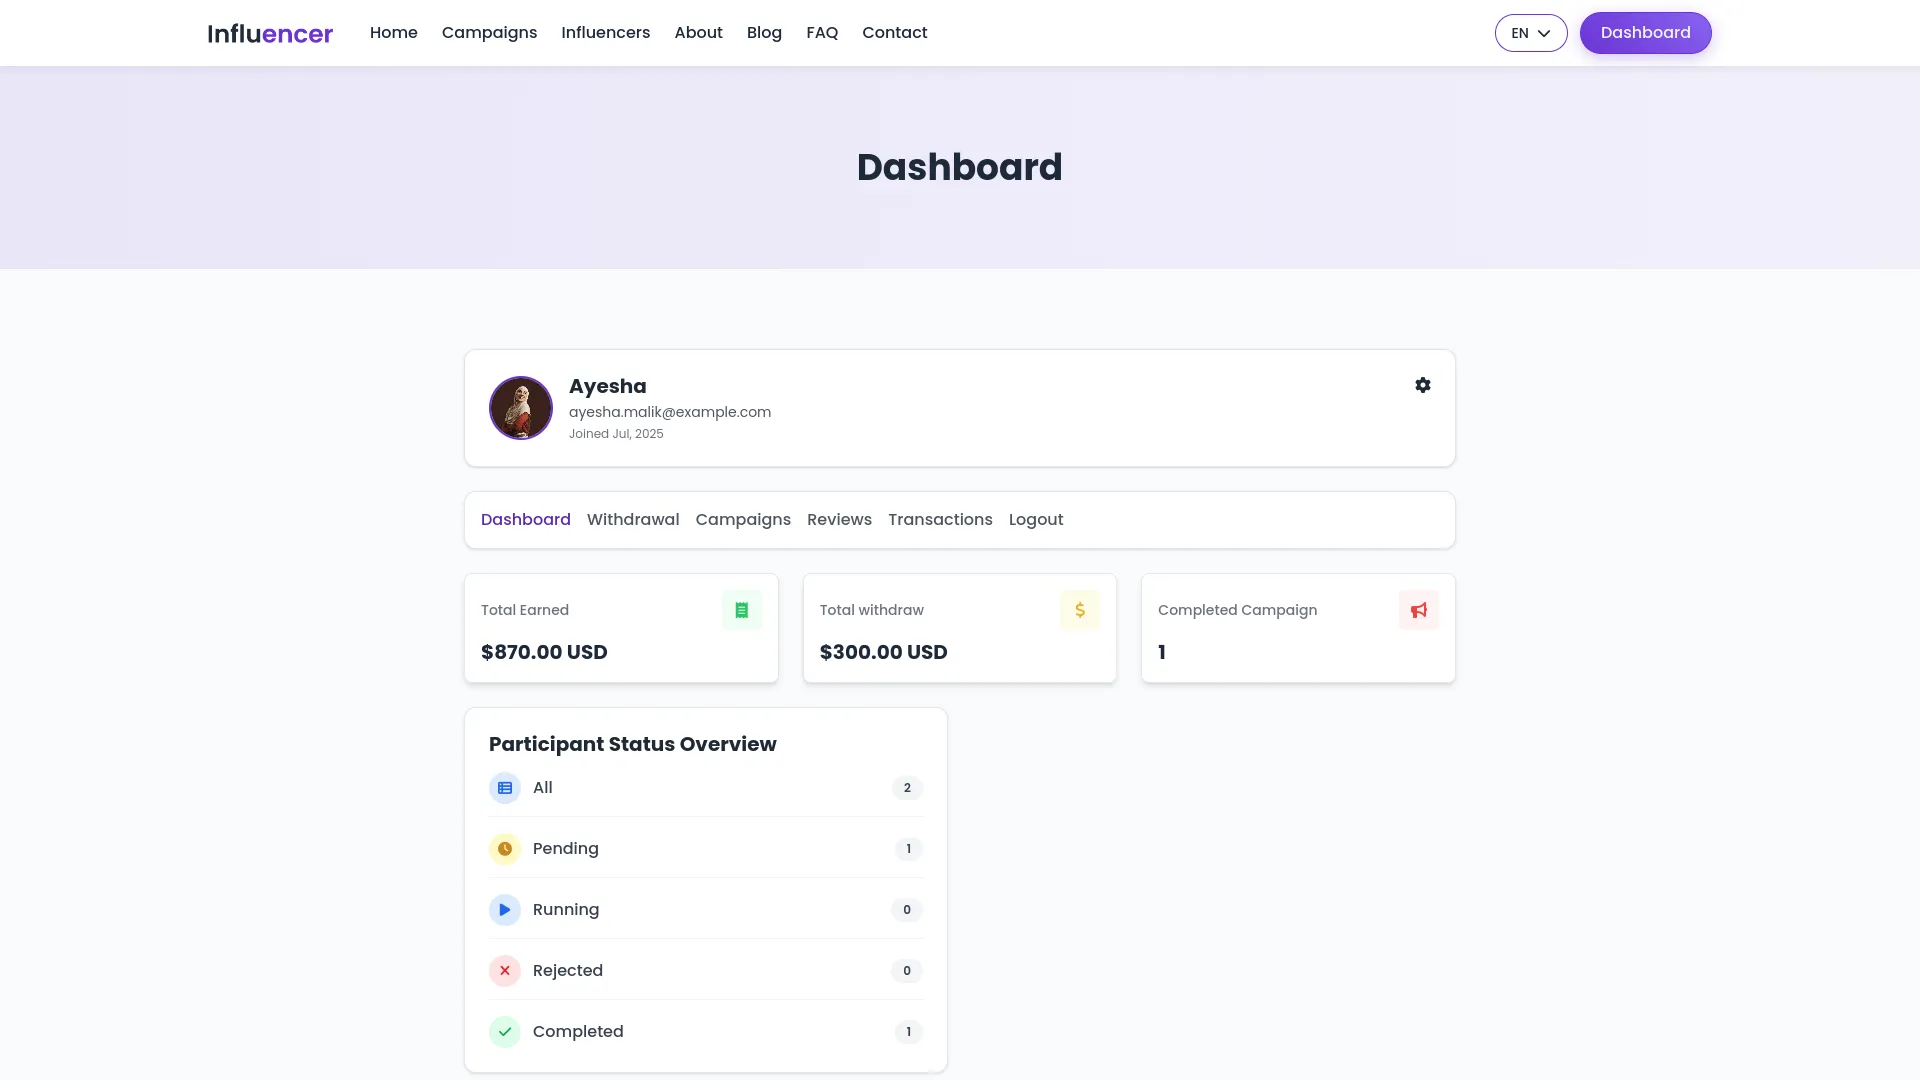
- On the Campaign page, influencers can apply for campaigns by clicking the “Apply Campaign” button when viewing campaign details. The Influencers page shows other influencers’ profiles and campaign work without the ability to add favorites or give reviews
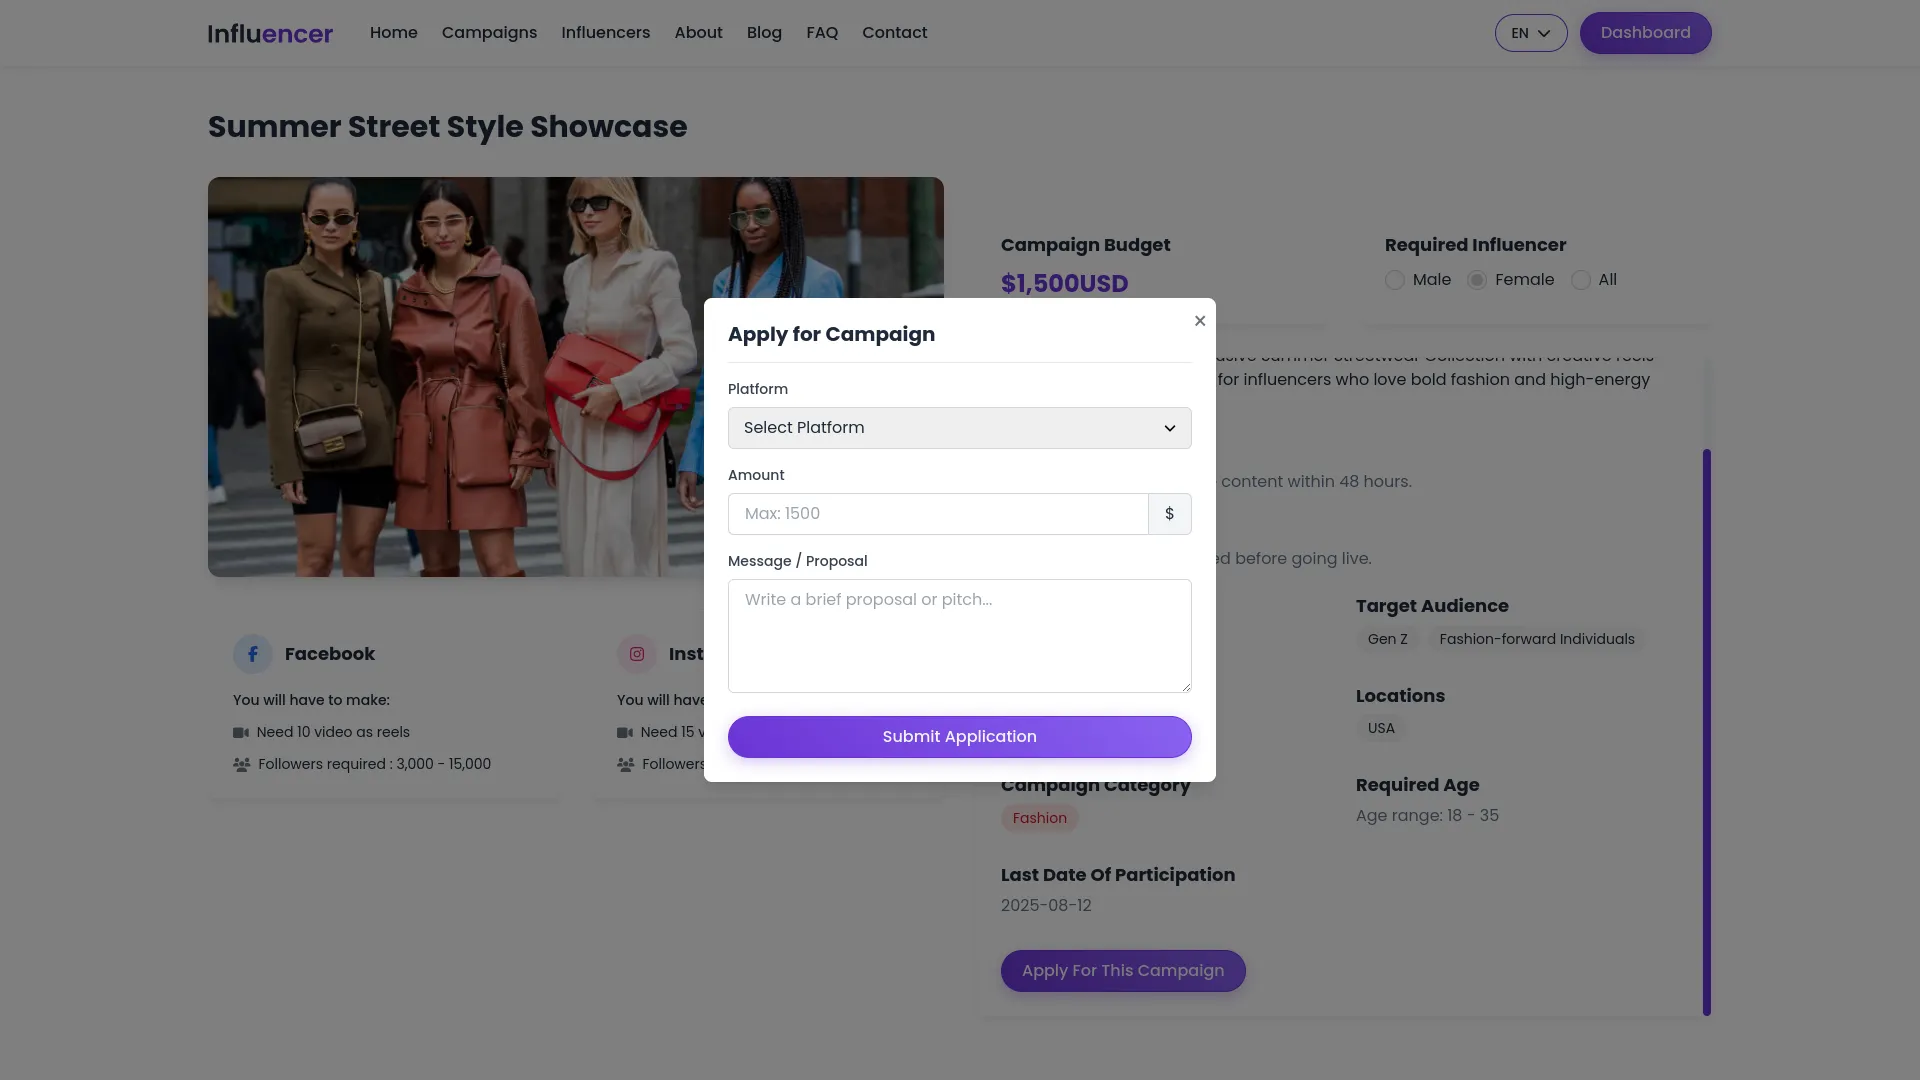
- The Influencer Dashboard displays profile information including image, name, email, joined date, and settings access. Profile Settings allows influencers to update personal details like name, email, company name, username, mobile number with country code, country, city, state, zip code, address, and profile image.
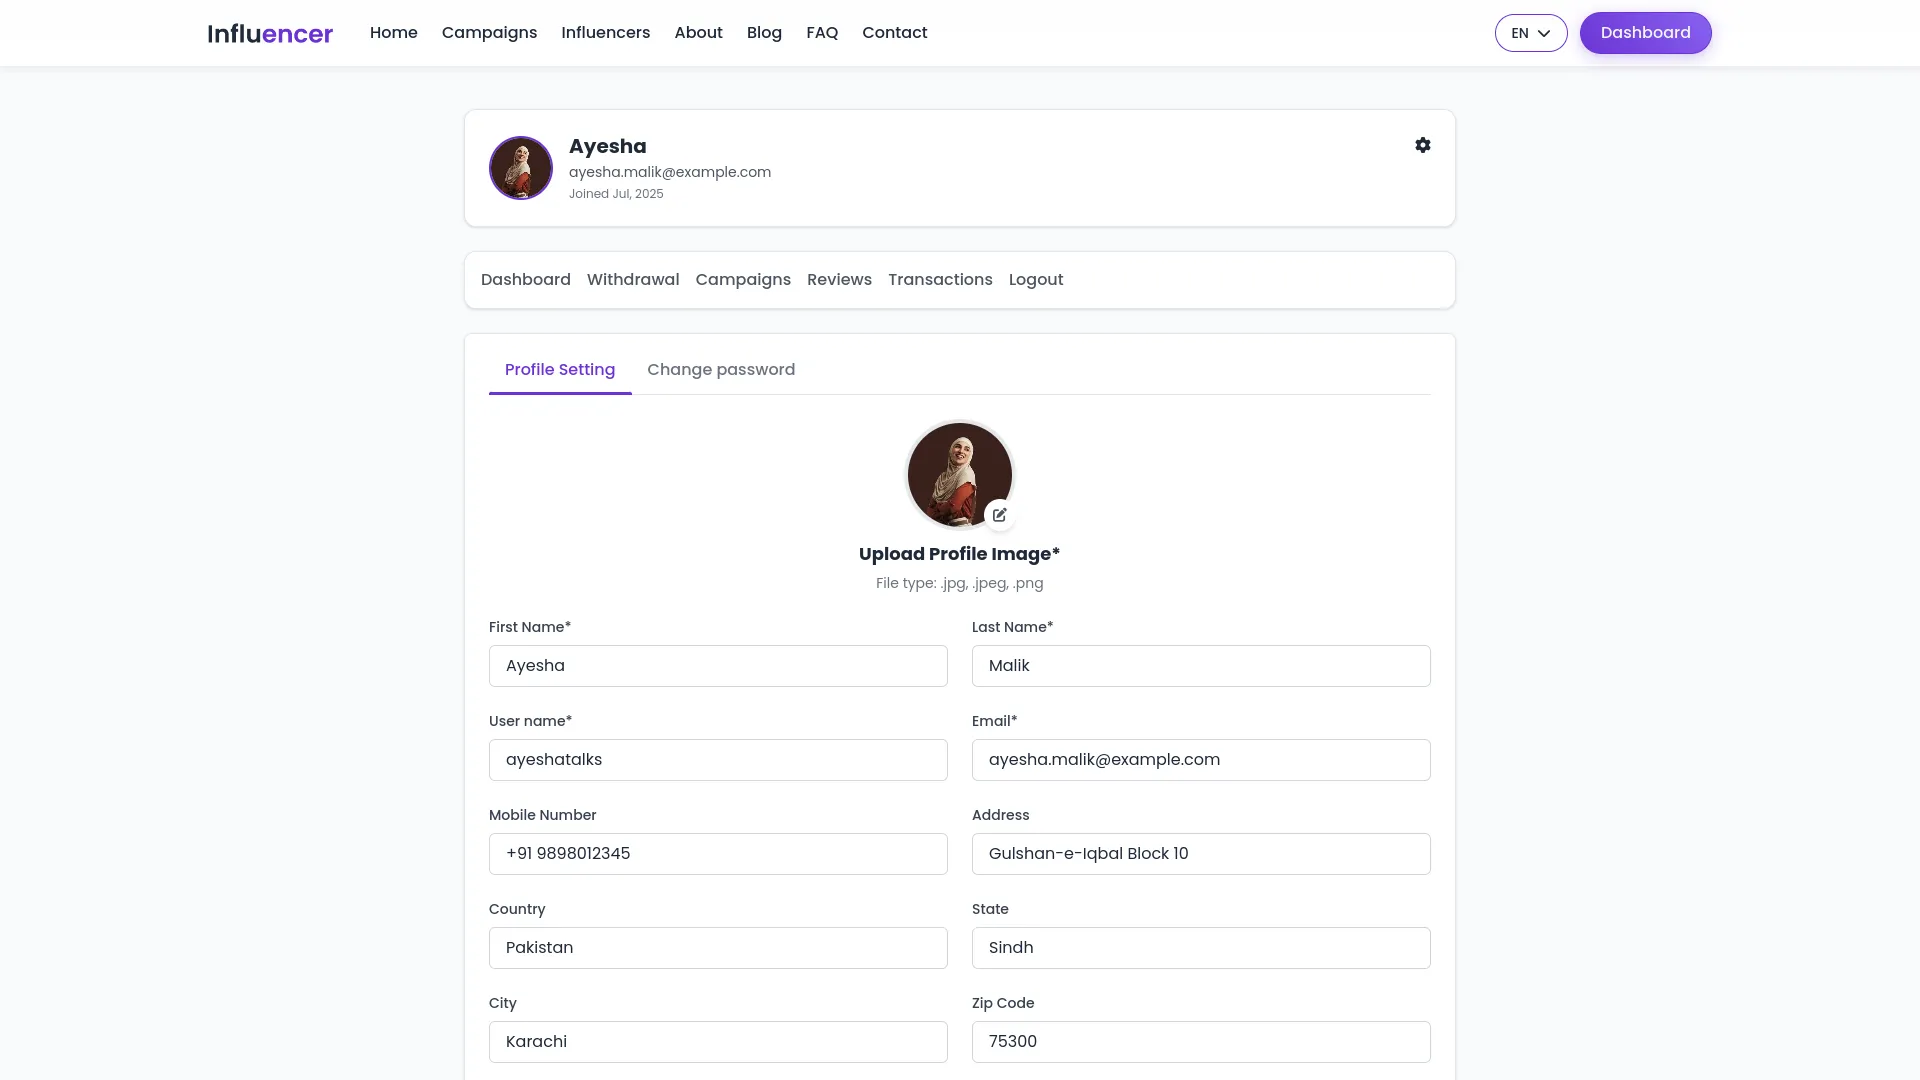
- Influencers can also add social media follower details, upload images to profile gallery, add skills, and add known languages. The Change Password option works the same as for brands.
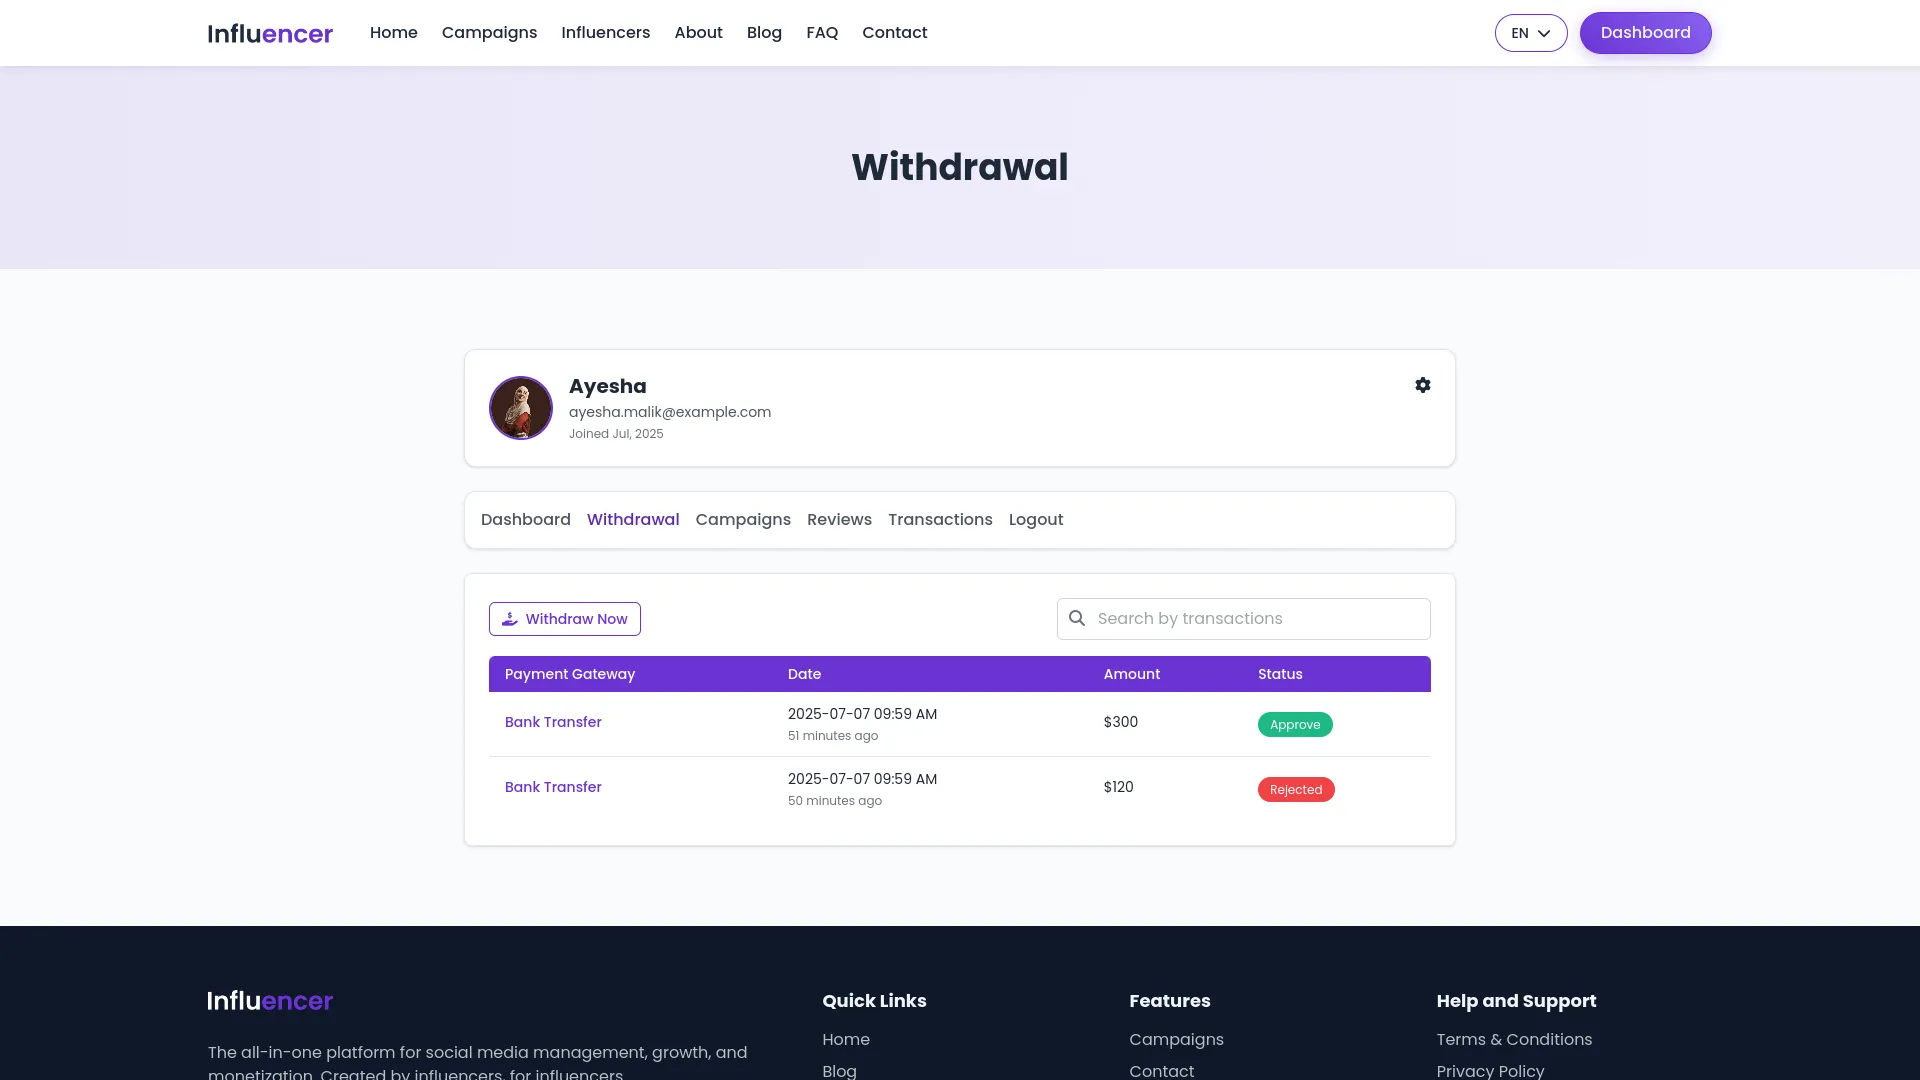
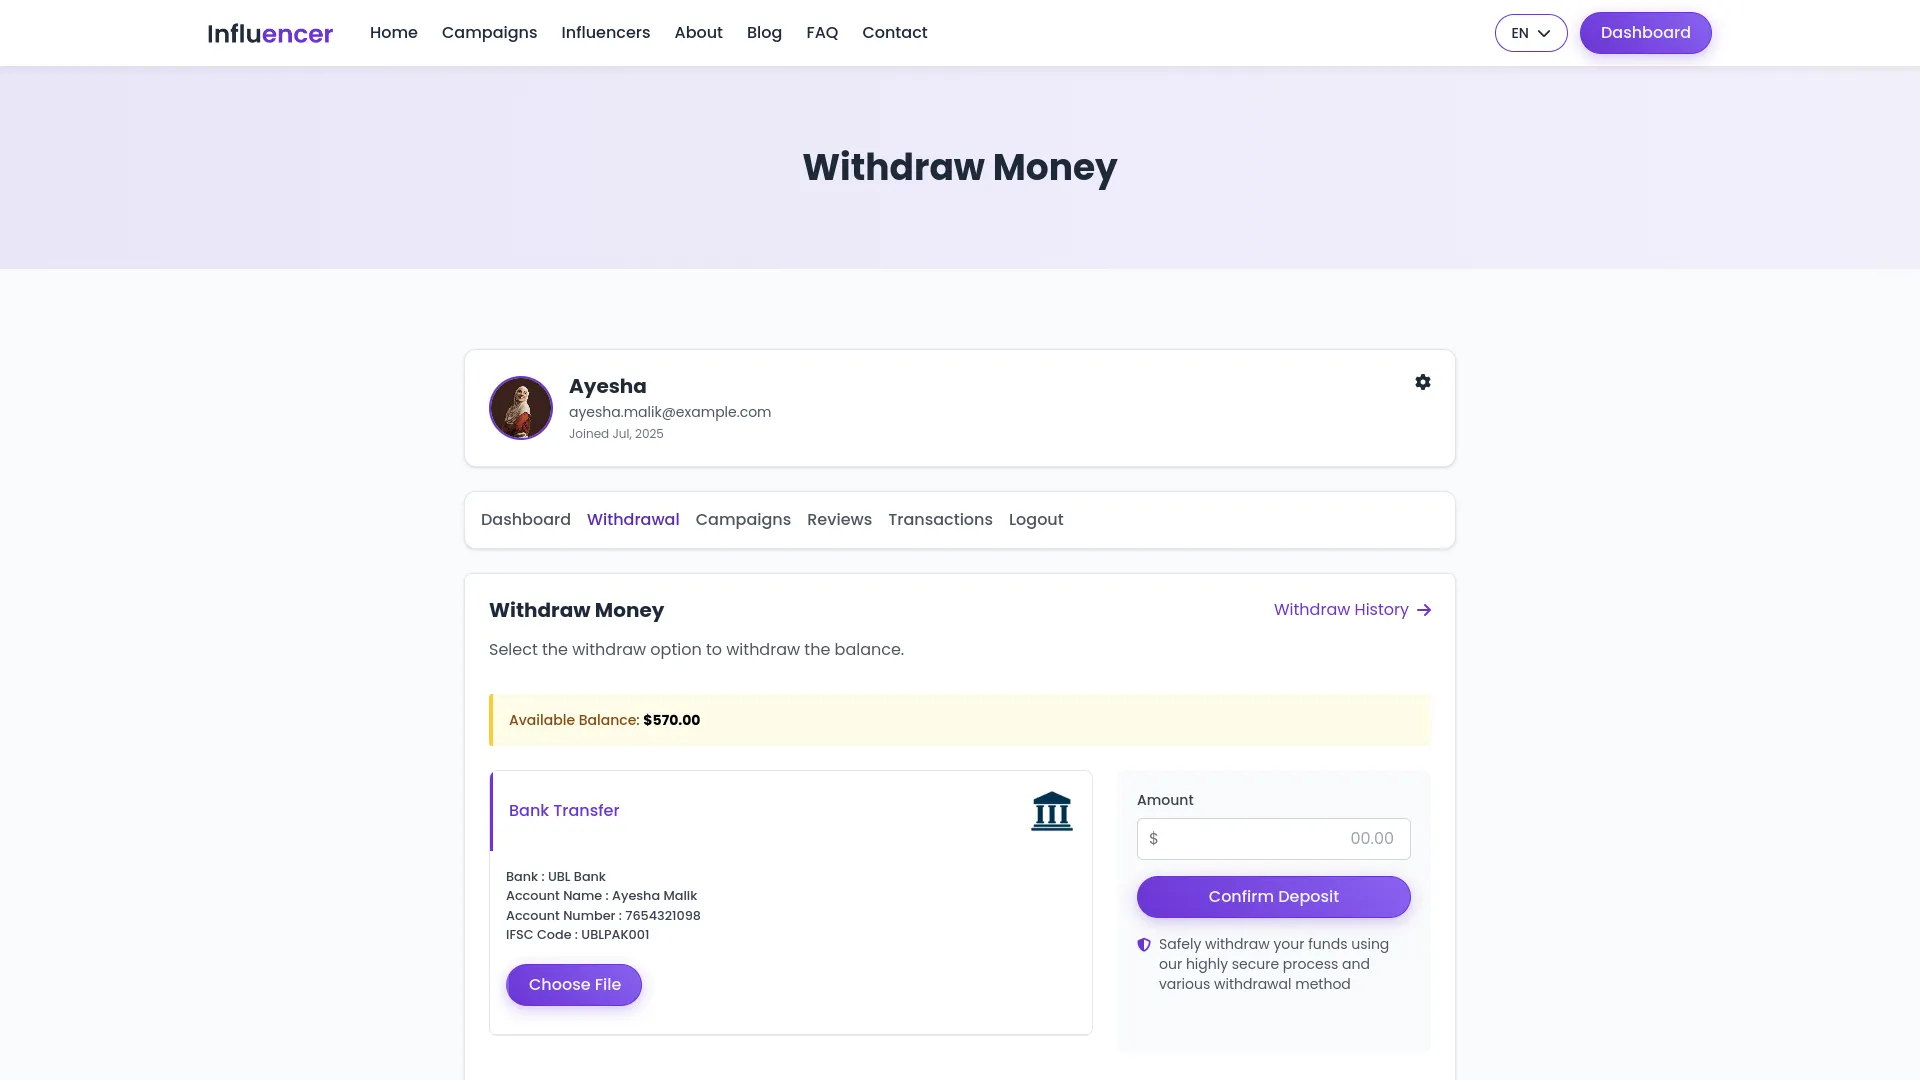
- The dashboard shows cards for Total Earned, Total Withdrawn, Completed Campaigns, and Participant Status Overview. The Withdrawal section displays withdrawal history with search options and a “Withdrawal Now” button to withdraw earned amounts via Bank Transfer after adding bank details in Profile Settings.
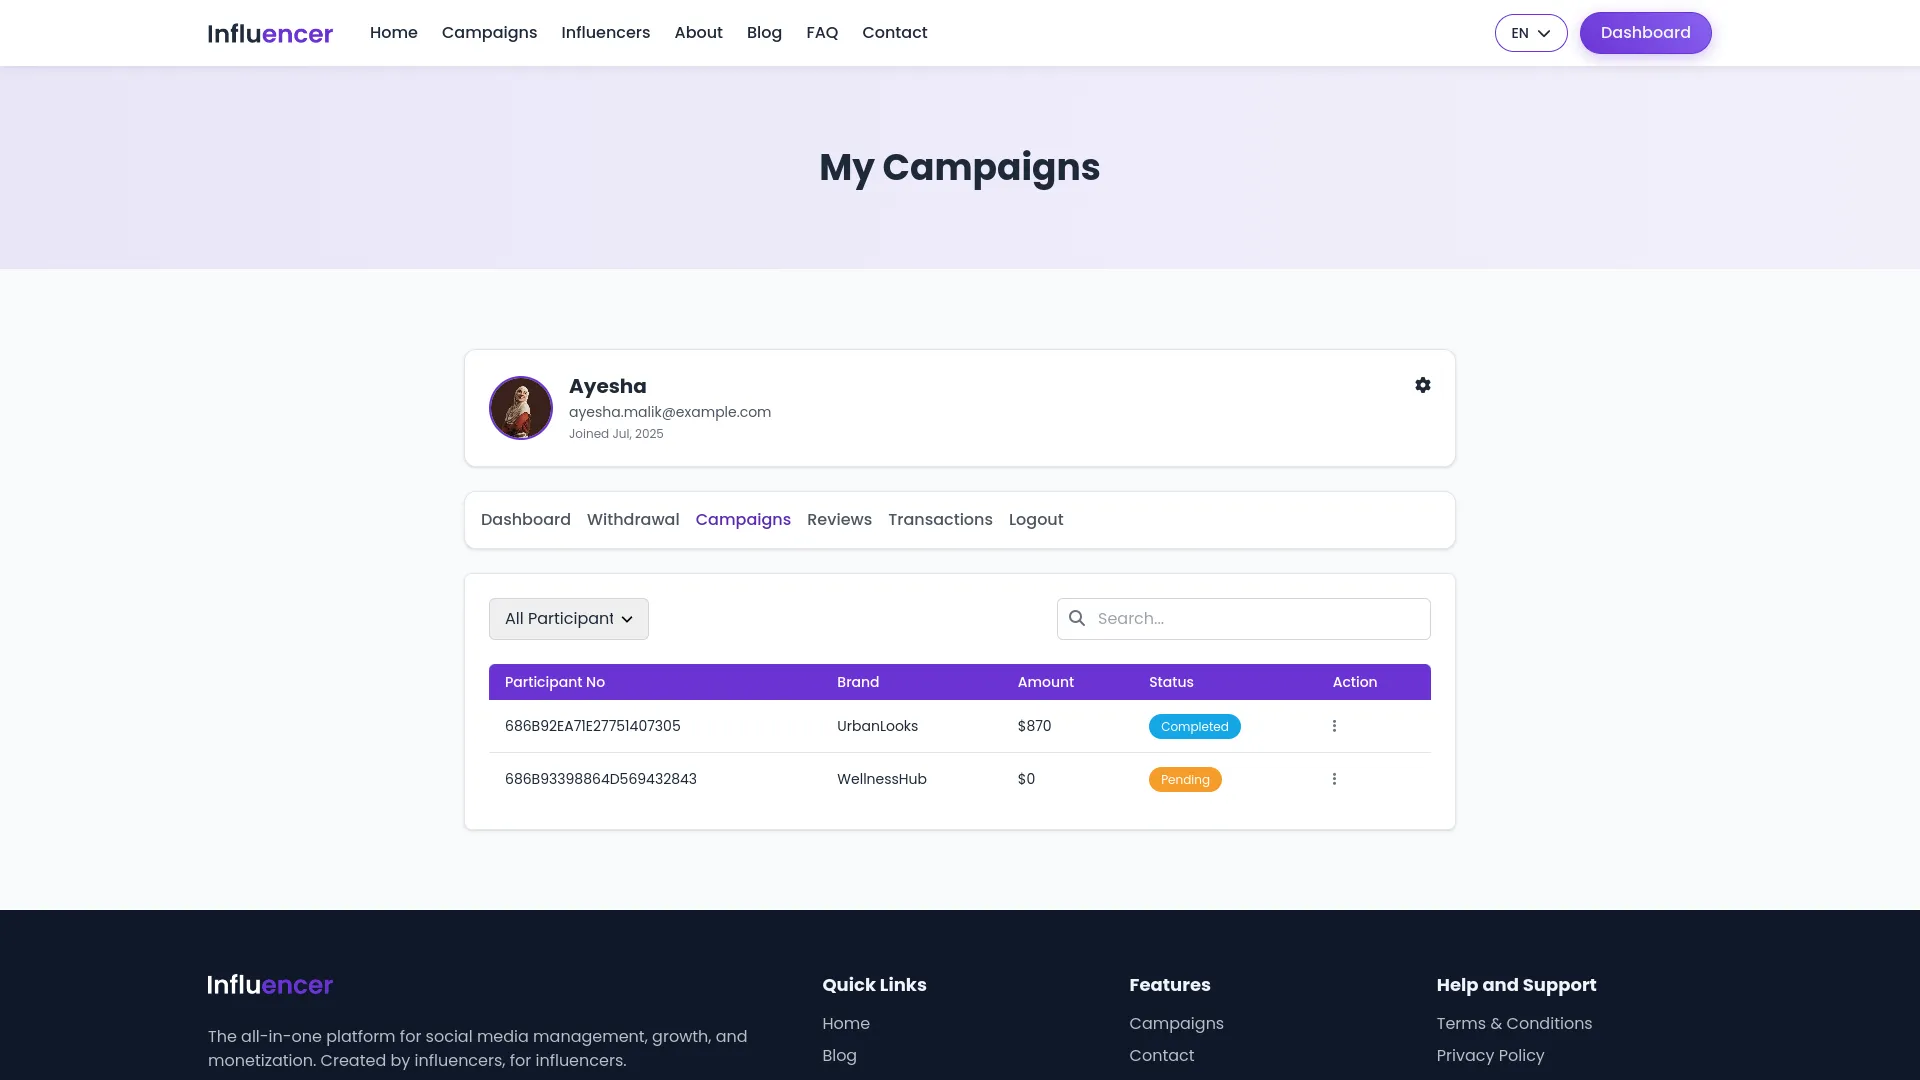
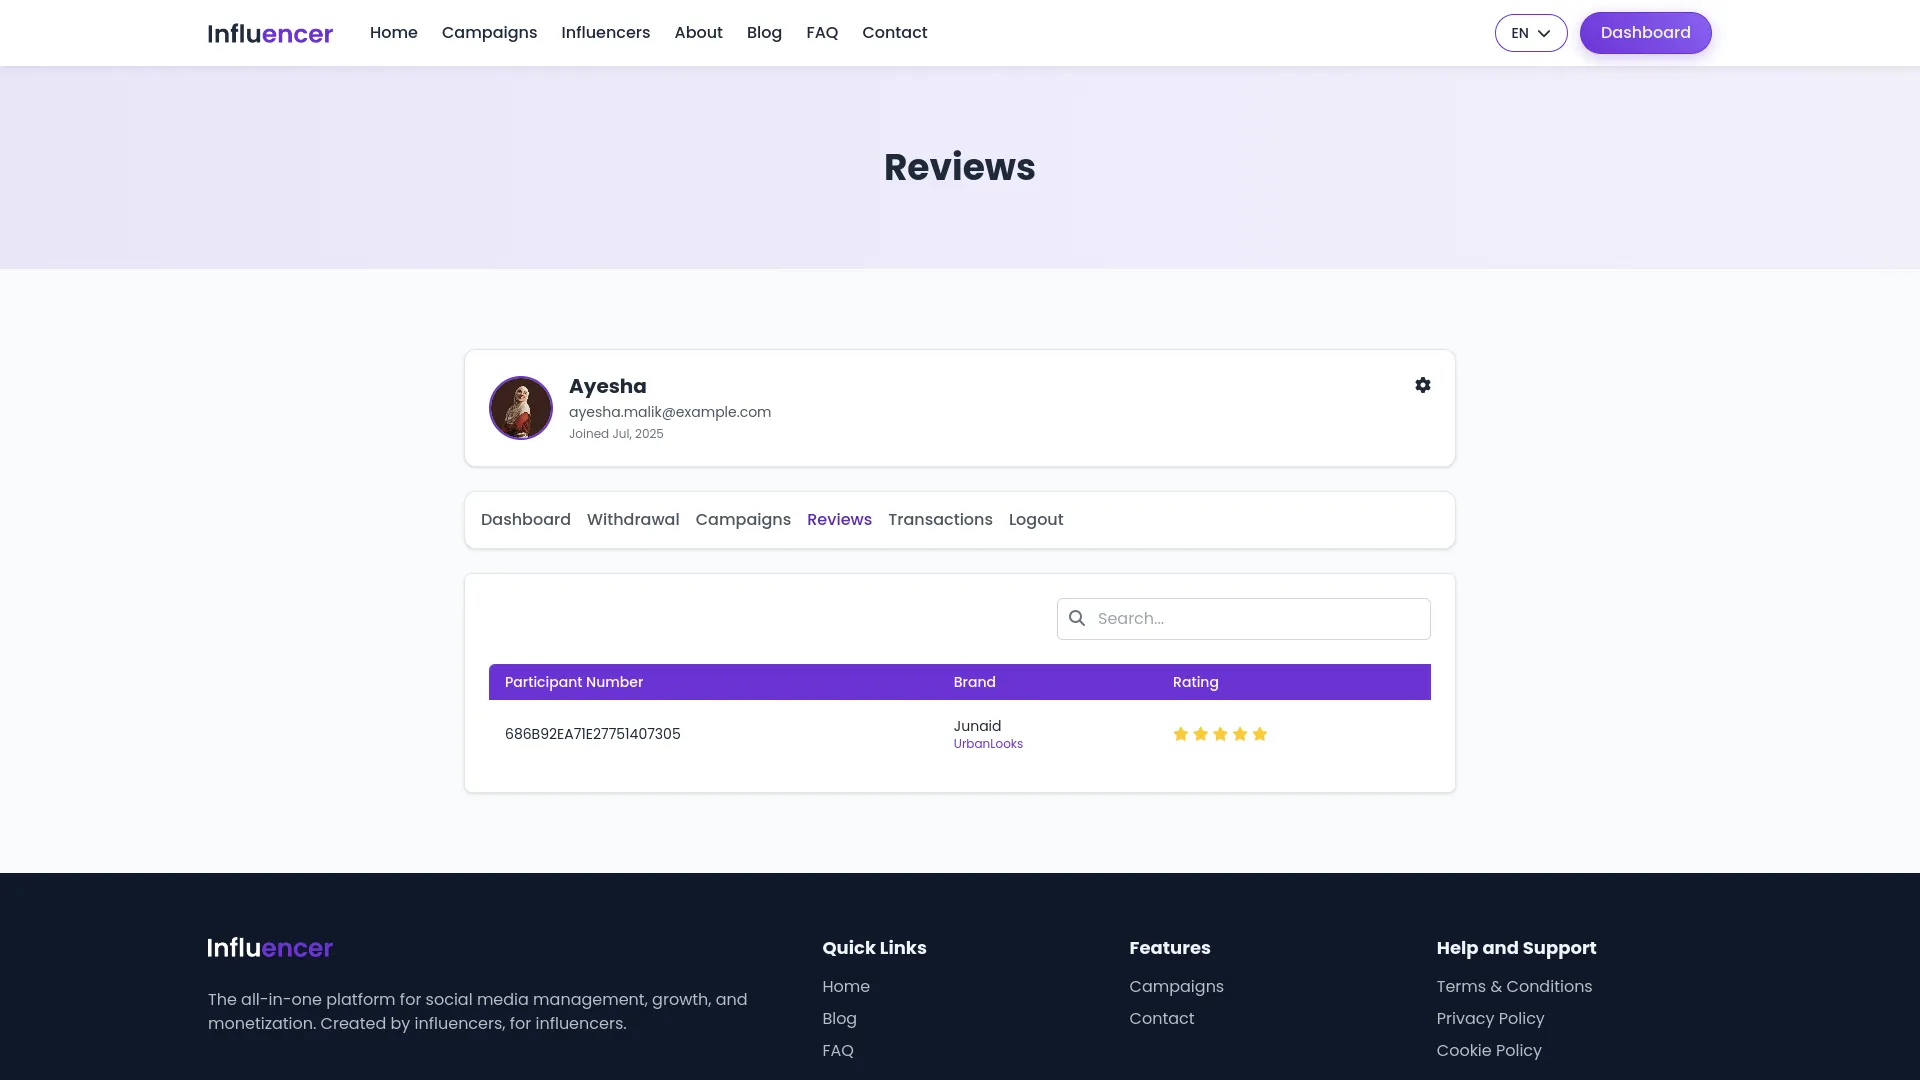
- The Campaigns section shows all campaigns the influencer applied for with Participant Number, Brand, Amount, Status, and Details actions. The Reviews section displays reviews received from brands with Participant Number, Brand, and Rating information.
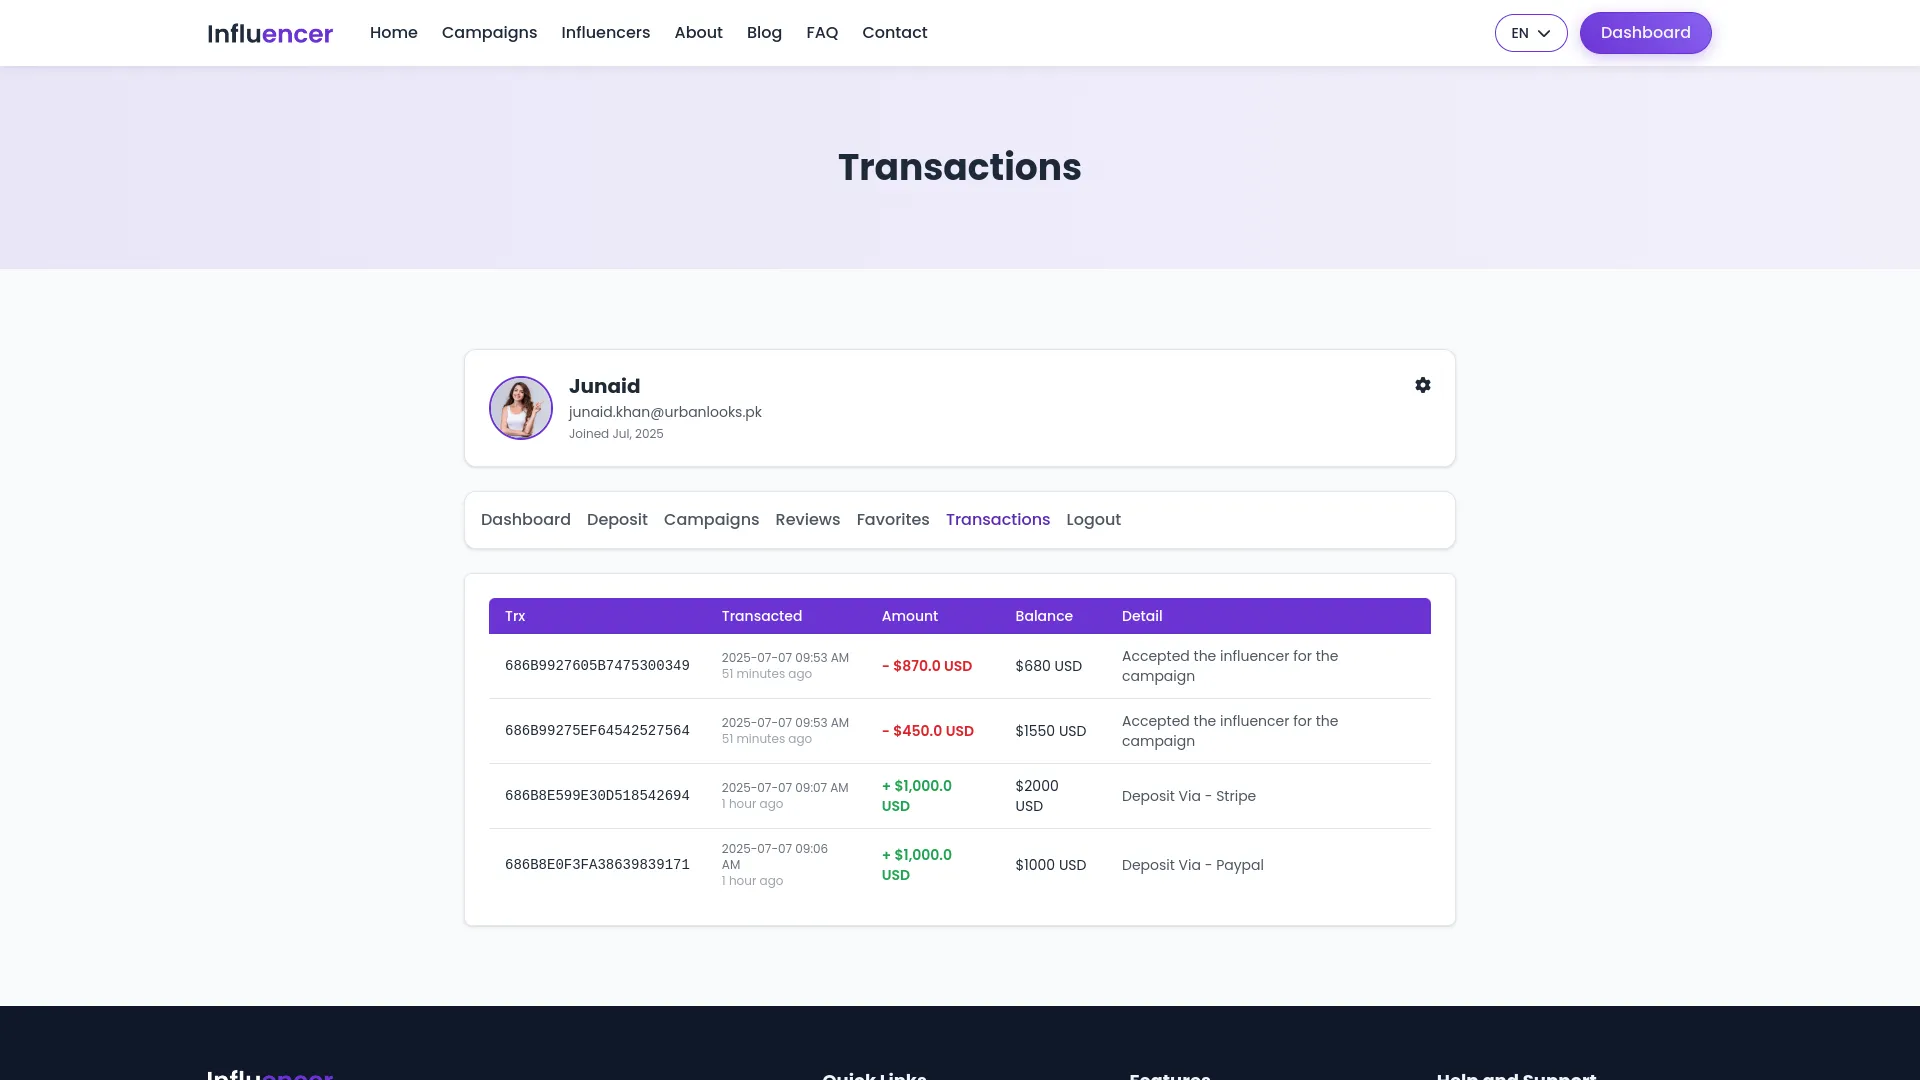
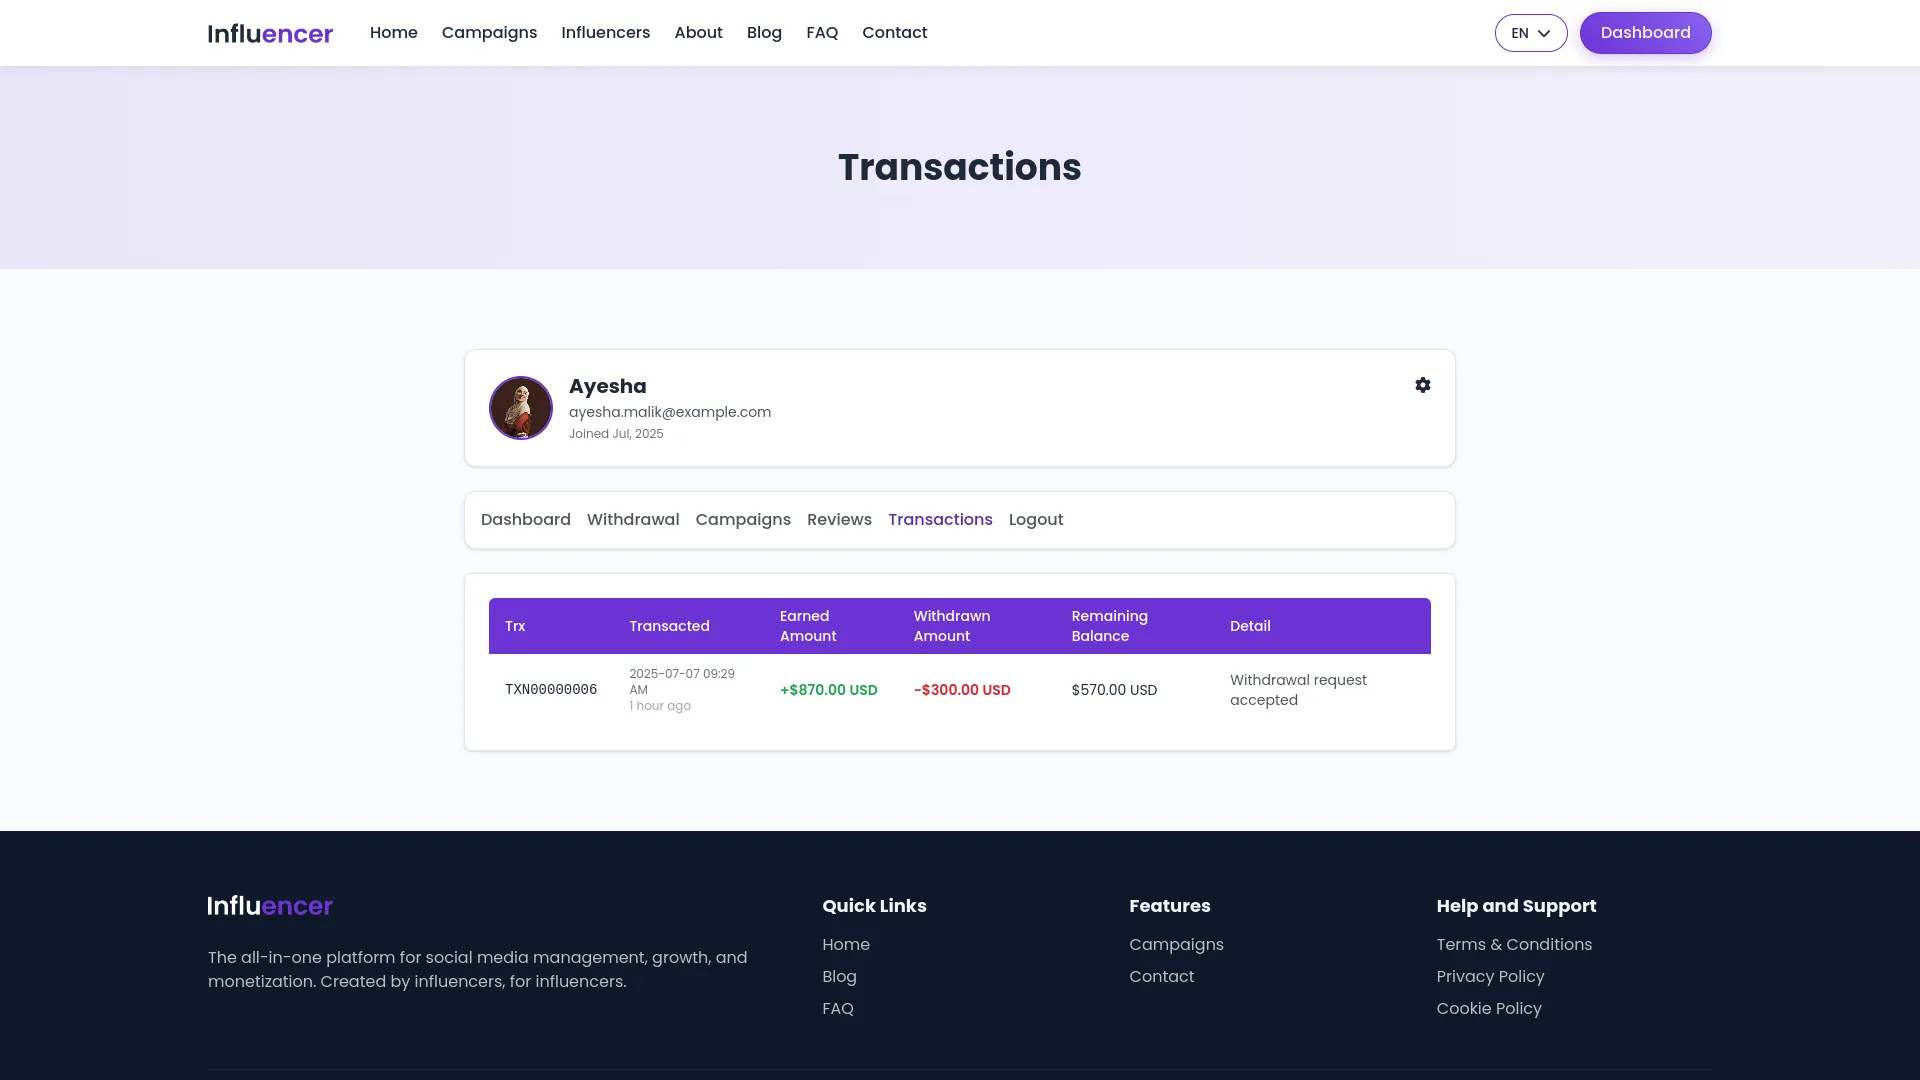
- The Transactions section shows transaction history with earned amounts in green with plus signs, withdrawn amounts in red with minus signs, remaining balance calculations, and transaction details.
Influencer Marketing Dashboard
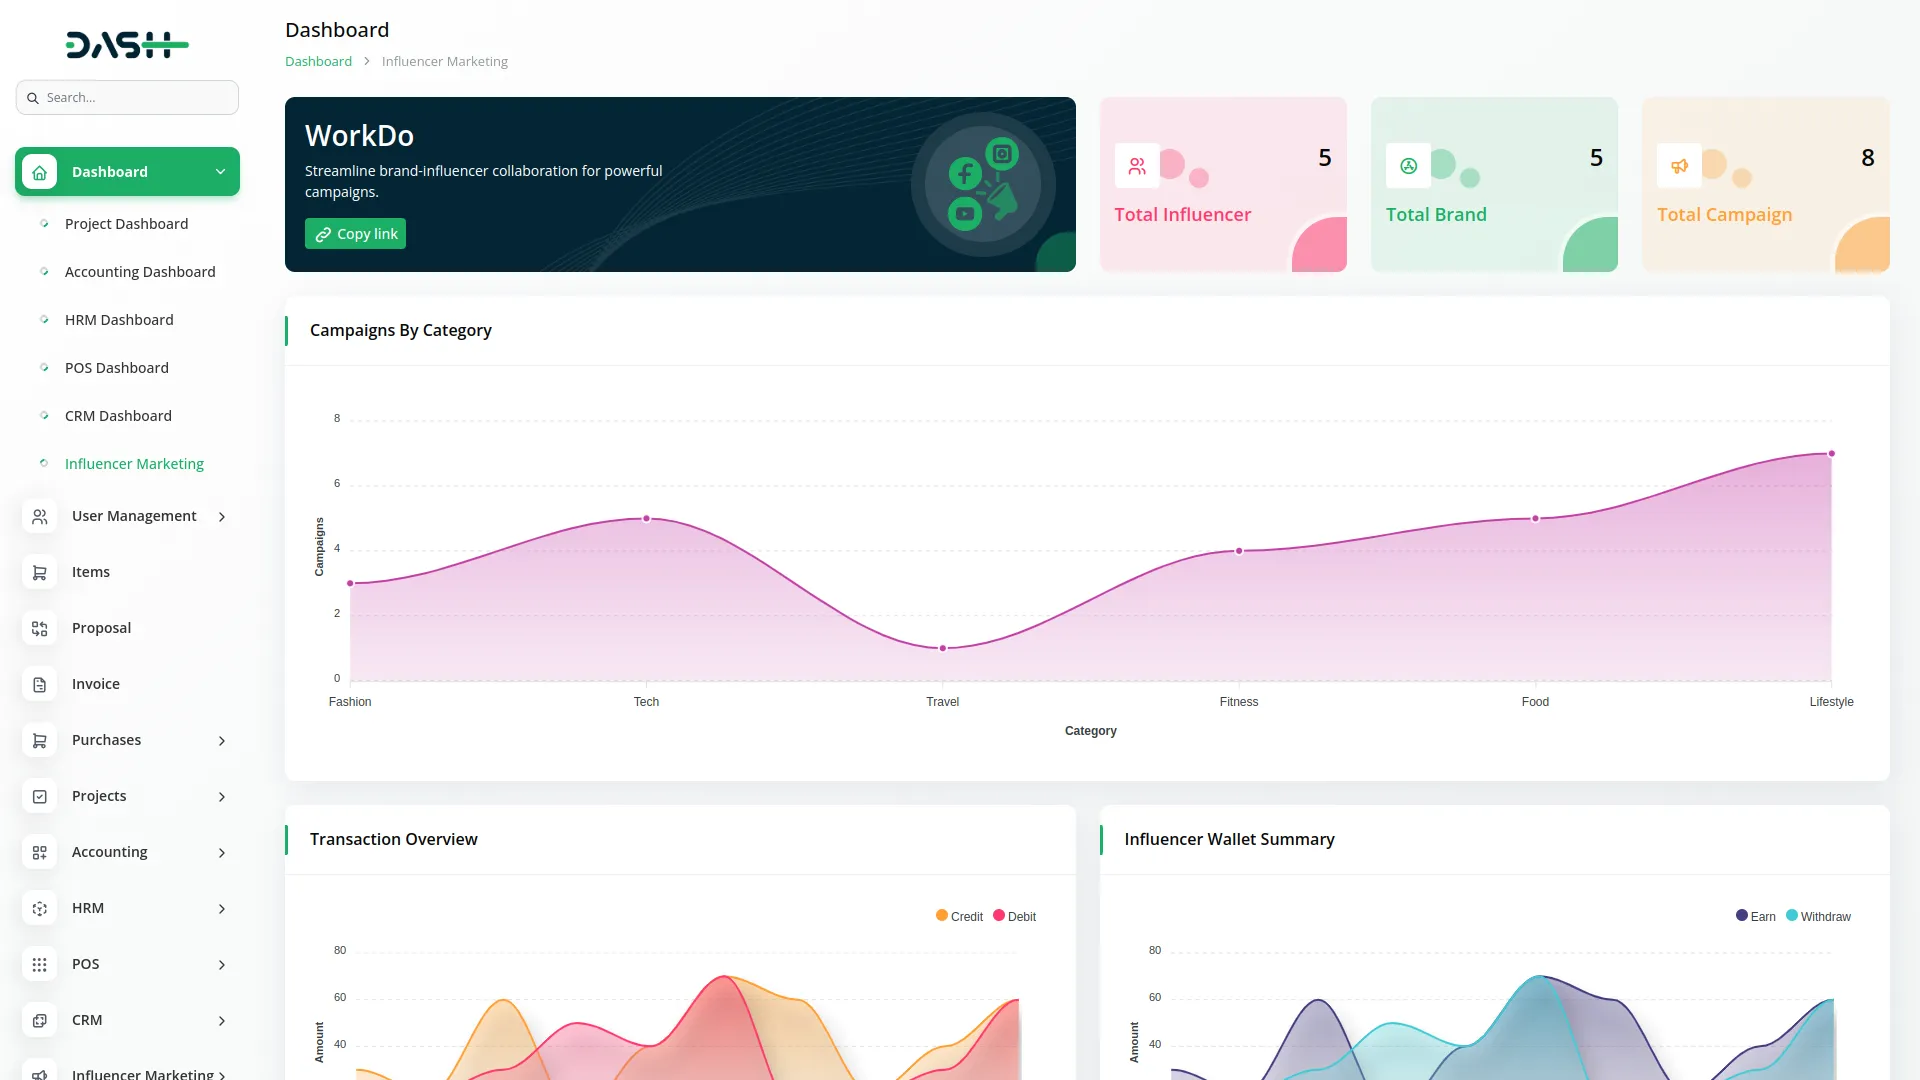
- The Influencer Marketing Dashboard serves as the central command center providing comprehensive overview and quick access to all key metrics and platform features.
- When you access the dashboard, you can copy the studio link using the store link feature for easy sharing and reference. The dashboard displays essential statistics through information cards showing Total Influencer count, Total Brand count, and Total Campaign count, giving you an instant overview of platform activity.
- The dashboard includes visual analytics with a campaigns-by-category area chart that helps you understand campaign distribution across different categories. You can monitor financial activities through the Transaction Overview bar chart which displays credit and debit amounts with clear visual indicators.
- The Influencer Wallet Summary area chart shows earned versus withdrawn amounts, providing insights into influencer earnings and withdrawal patterns.
- These dashboard elements provide real-time data and visual representations to help you make informed decisions about platform management and performance tracking.
Manage Category
- The Manage Category section allows you to organize and categorize campaigns and influencers for better organization and filtering throughout the platform.
- To create a new category, click the “Create” button at the top of the category page. Fill in the Category Name field with a descriptive name for your category. Select an appropriate Color by using the color picker to help visually distinguish categories.
- Choose an icon for the category from the available icon library to make categories easily recognizable. Add a detailed description explaining the purpose and scope of this category.
- The list page includes Search, Export, and Create buttons for comprehensive category management. The table displays columns for Category Icon, Name, Description, and Status with an on/off toggle that you can click to activate or deactivate categories instantly.
- In the Actions column, you can click the “Edit” button to modify category details including name, color, icon, and description, or the “Delete” button to remove the category from the system.

Manage Tag
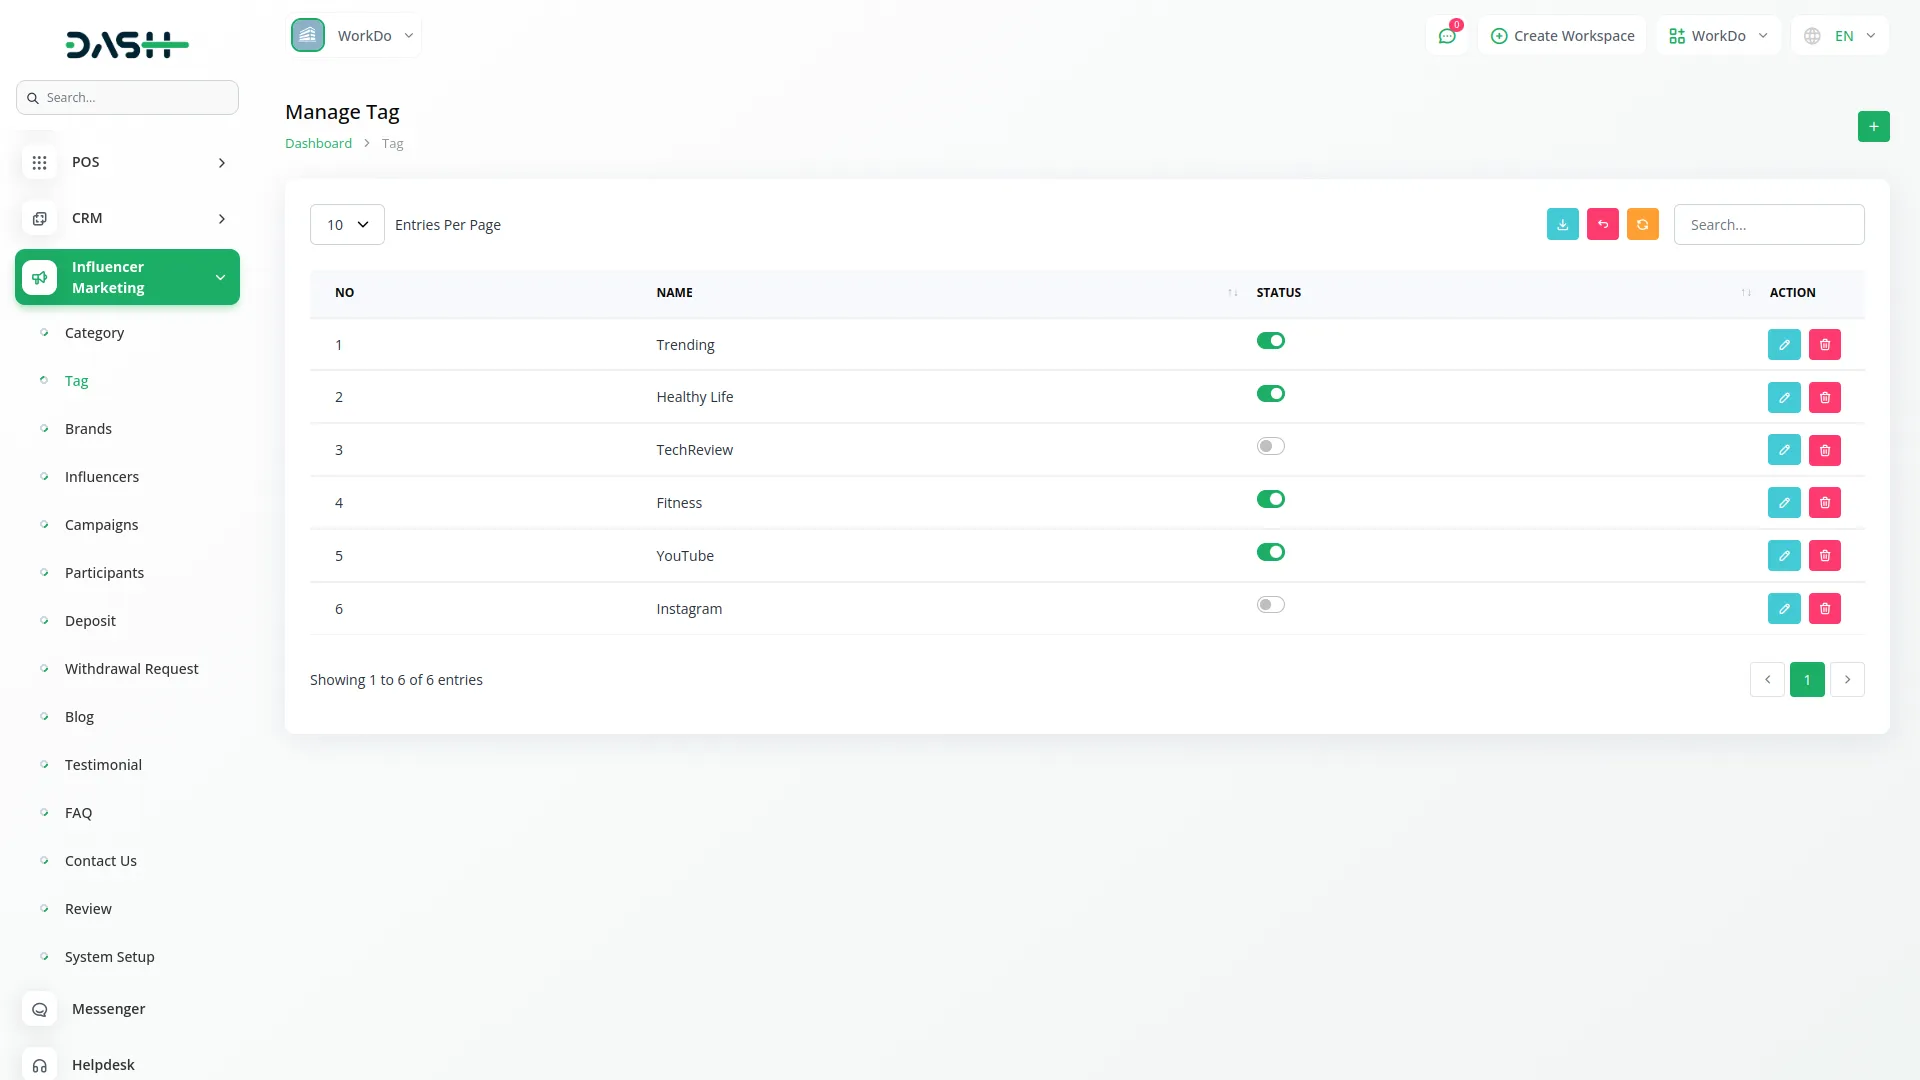
- The Manage Tag section provides a simple tagging system to help organize and filter content across the platform for improved searchability and categorization.
- To create a new tag, click the “Create” button at the top of the tag page. Enter the tag Name in the provided field, choosing a descriptive and relevant term that will help users find related content.
- The list page features Search, Export, and Create buttons for efficient tag management. The table shows columns for Name and Status with an on/off toggle that allows you to instantly activate or deactivate tags as needed.
- In the Actions column, you can use the “Edit” button to modify the tag name or the “Delete” button to remove the tag from the system. Note that deleting tags may affect content that uses those tags for organization and filtering.
Manage Brand
- The Manage Brand section provides administrative control over brand accounts registered on the platform, allowing you to monitor and manage brand users effectively.
- This section displays all registered brand accounts without requiring manual creation, as brands register themselves through the platform’s registration process. The system automatically populates brand information when users complete their registration.
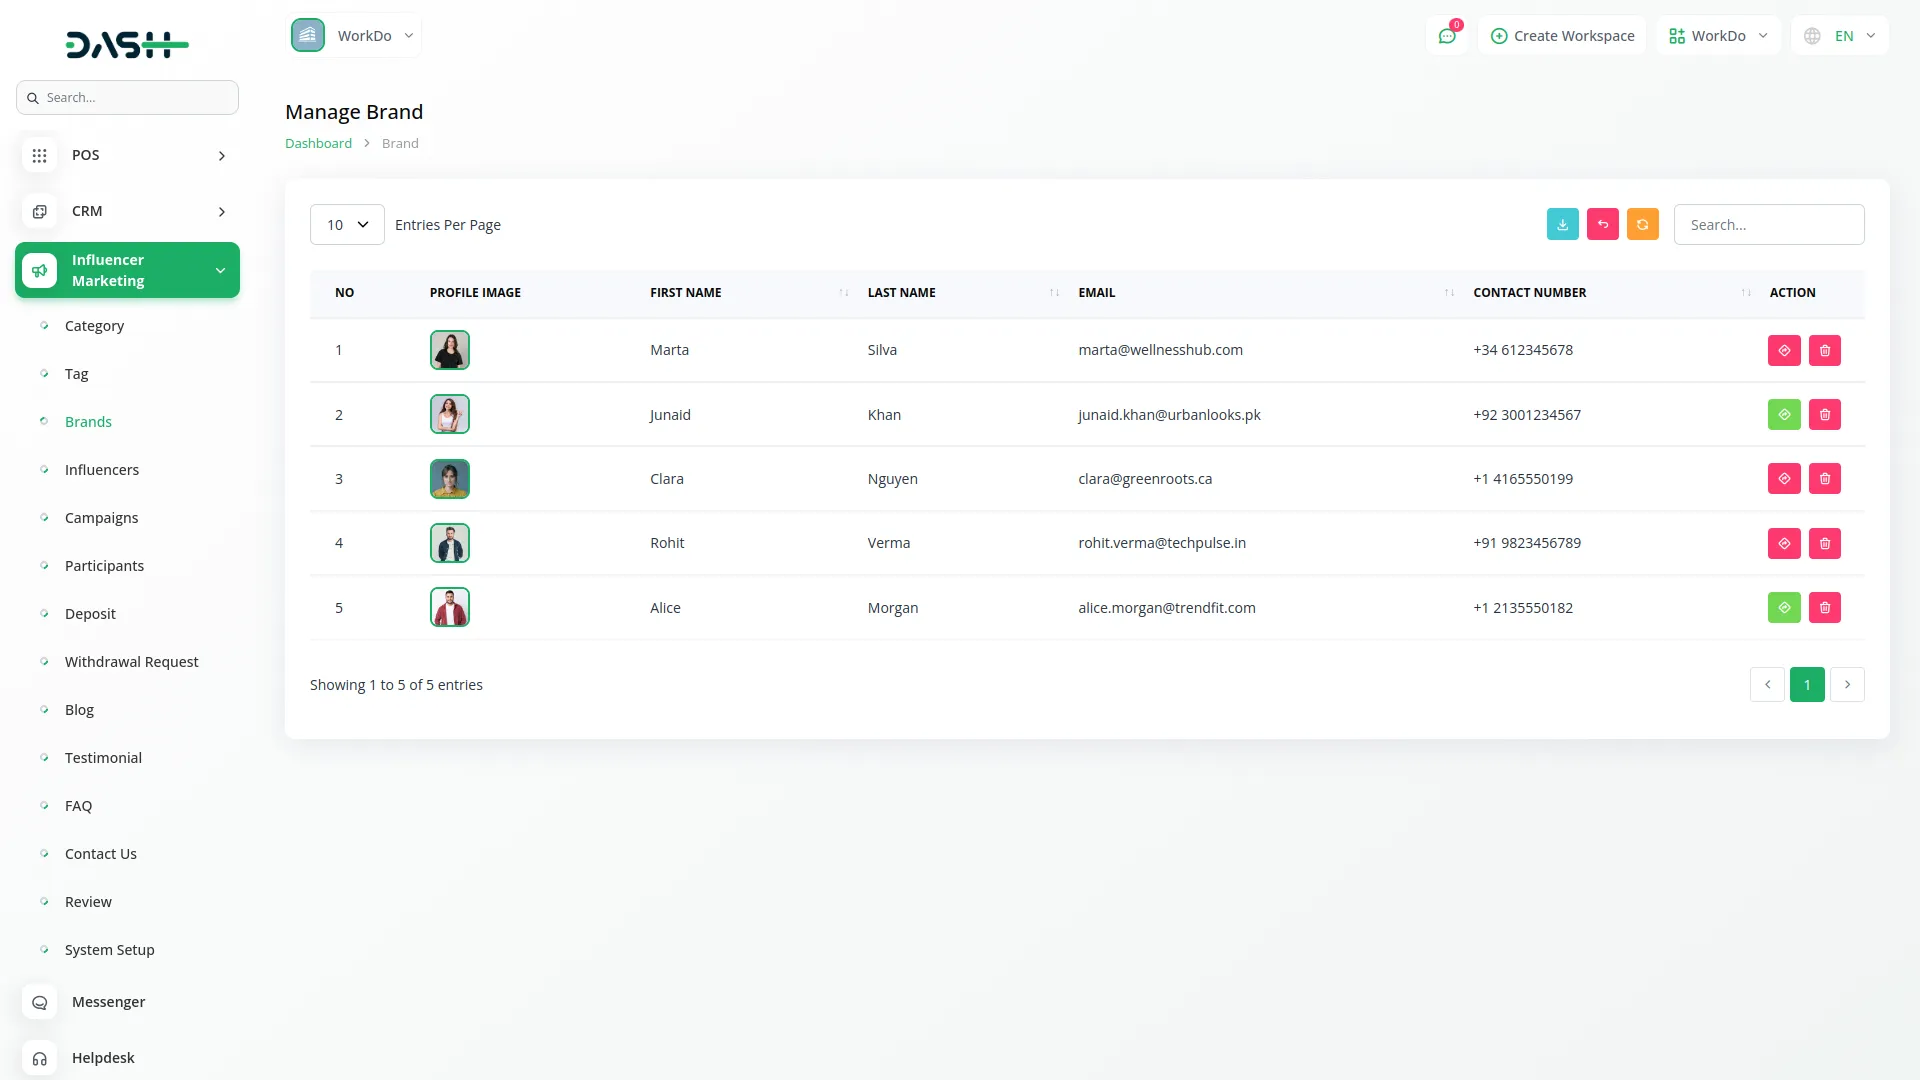
- The list page includes Search and Export buttons for easy brand account management and reporting. The table displays columns for Profile Image, First Name, Last Name, Email, and Contact Number, providing complete visibility of brand user information.
- In the Actions column, you can click “Enable/Disable” to control login access for brand accounts, allowing you to activate or deactivate brand user login capabilities as needed for account management or security purposes. The “Delete” button allows you to permanently remove brand accounts from the system when necessary.
Manage Influencer
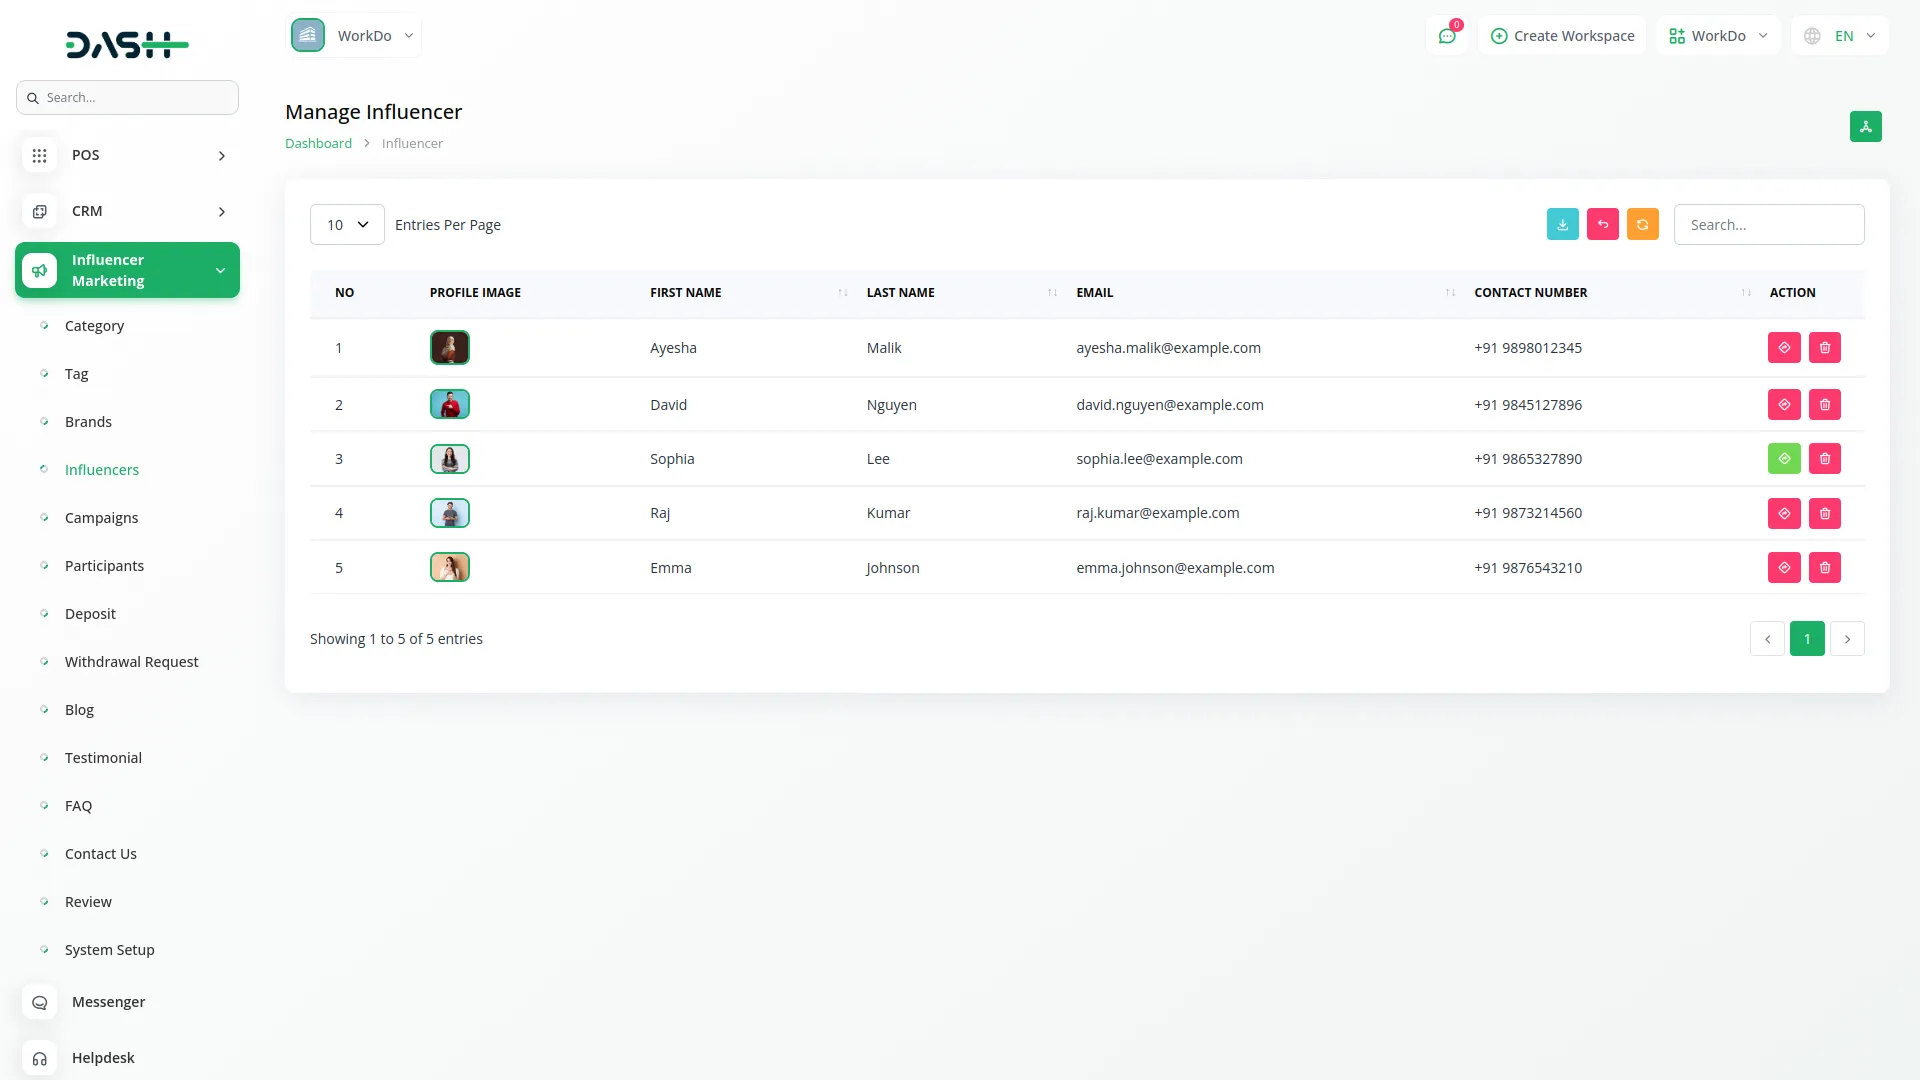
- The Manage Influencer section enables you to control influencer accounts and configure how influencer information is displayed on the platform’s public pages.
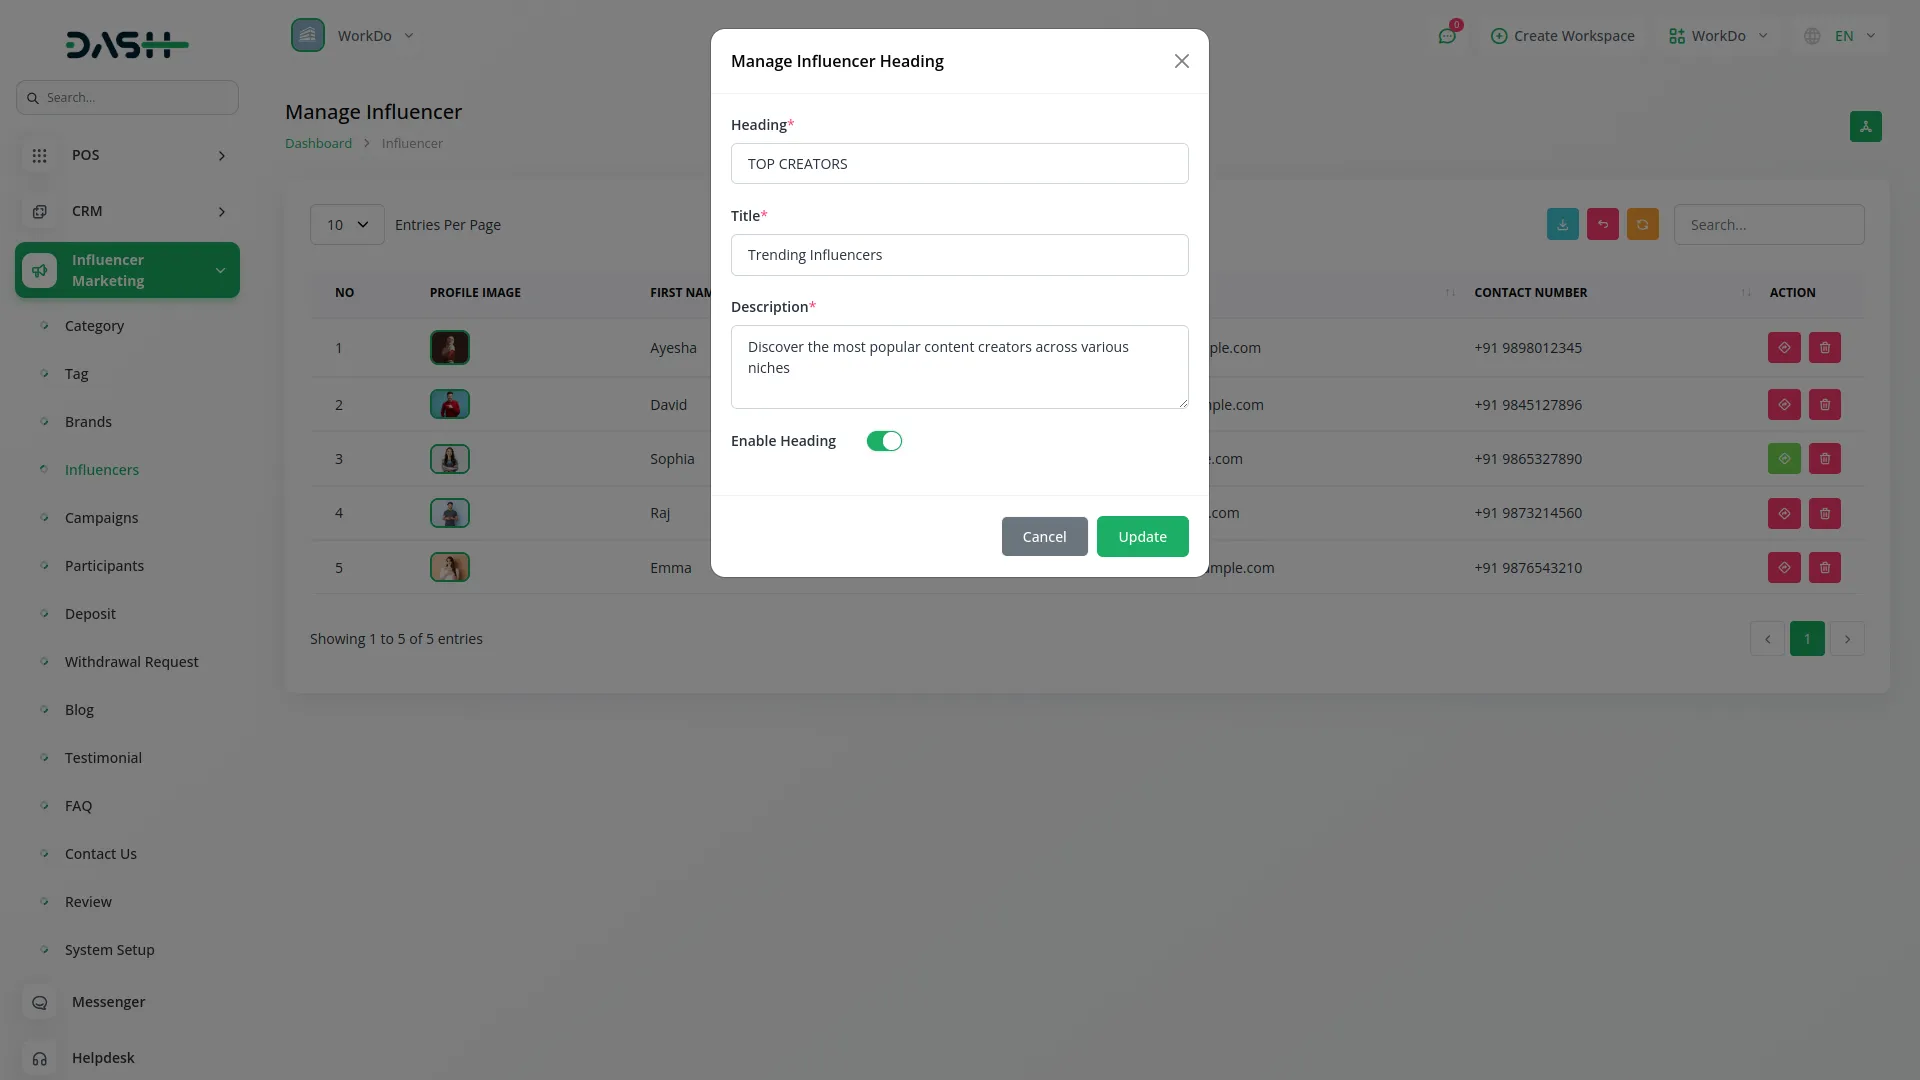
- To configure the influencer section display settings, click the “Create Heading” button. Enter the Heading text that will appear as the main title for the influencer section. Add a descriptive Title and detailed Description that explains what visitors can expect to find in the influencer section. Use the Enable Heading checkbox to control whether the heading, title, and description are displayed on the public website.
- The list page provides Search, Export, and Create Heading buttons for comprehensive influencer management. The table shows columns for Profile Image, First Name, Last Name, Email, and Contact Number, displaying all registered influencer accounts on the platform.
- In the Actions column, you can click “Enable/Disable” to control login access for influencer accounts, managing their ability to access the platform and participate in campaigns. The “Delete” button removes influencer accounts from the system permanently.
Manage Campaign
- The Manage Campaign section enables you to control campaign display settings and manage all campaigns created by brands on the platform.
- To configure campaign section display settings, click the “Create Heading” button. Enter the Heading text that will serve as the main title for the campaign section on the website. Create a descriptive Title and detailed Description that explains the campaign offerings to visitors.
- Use the Enable Heading checkbox to control whether the heading, title, and description appear on the public website.
- The list page includes Search, Export, and Create Heading buttons for comprehensive campaign management. The table displays columns for Thumbnail, Campaign, Brand, and Status, showing all campaigns submitted by brands across the platform.
- In the Actions column, you can click “Accept” to approve campaigns for public display, “Reject” to decline campaigns that don’t meet requirements, “Complete Campaign” to mark campaigns as finished when their objectives are met, or “Delete” to permanently remove campaigns from the system.

Manage Participant
- The Manage Participant section provides oversight of all influencer applications and participation in various campaigns across the platform.
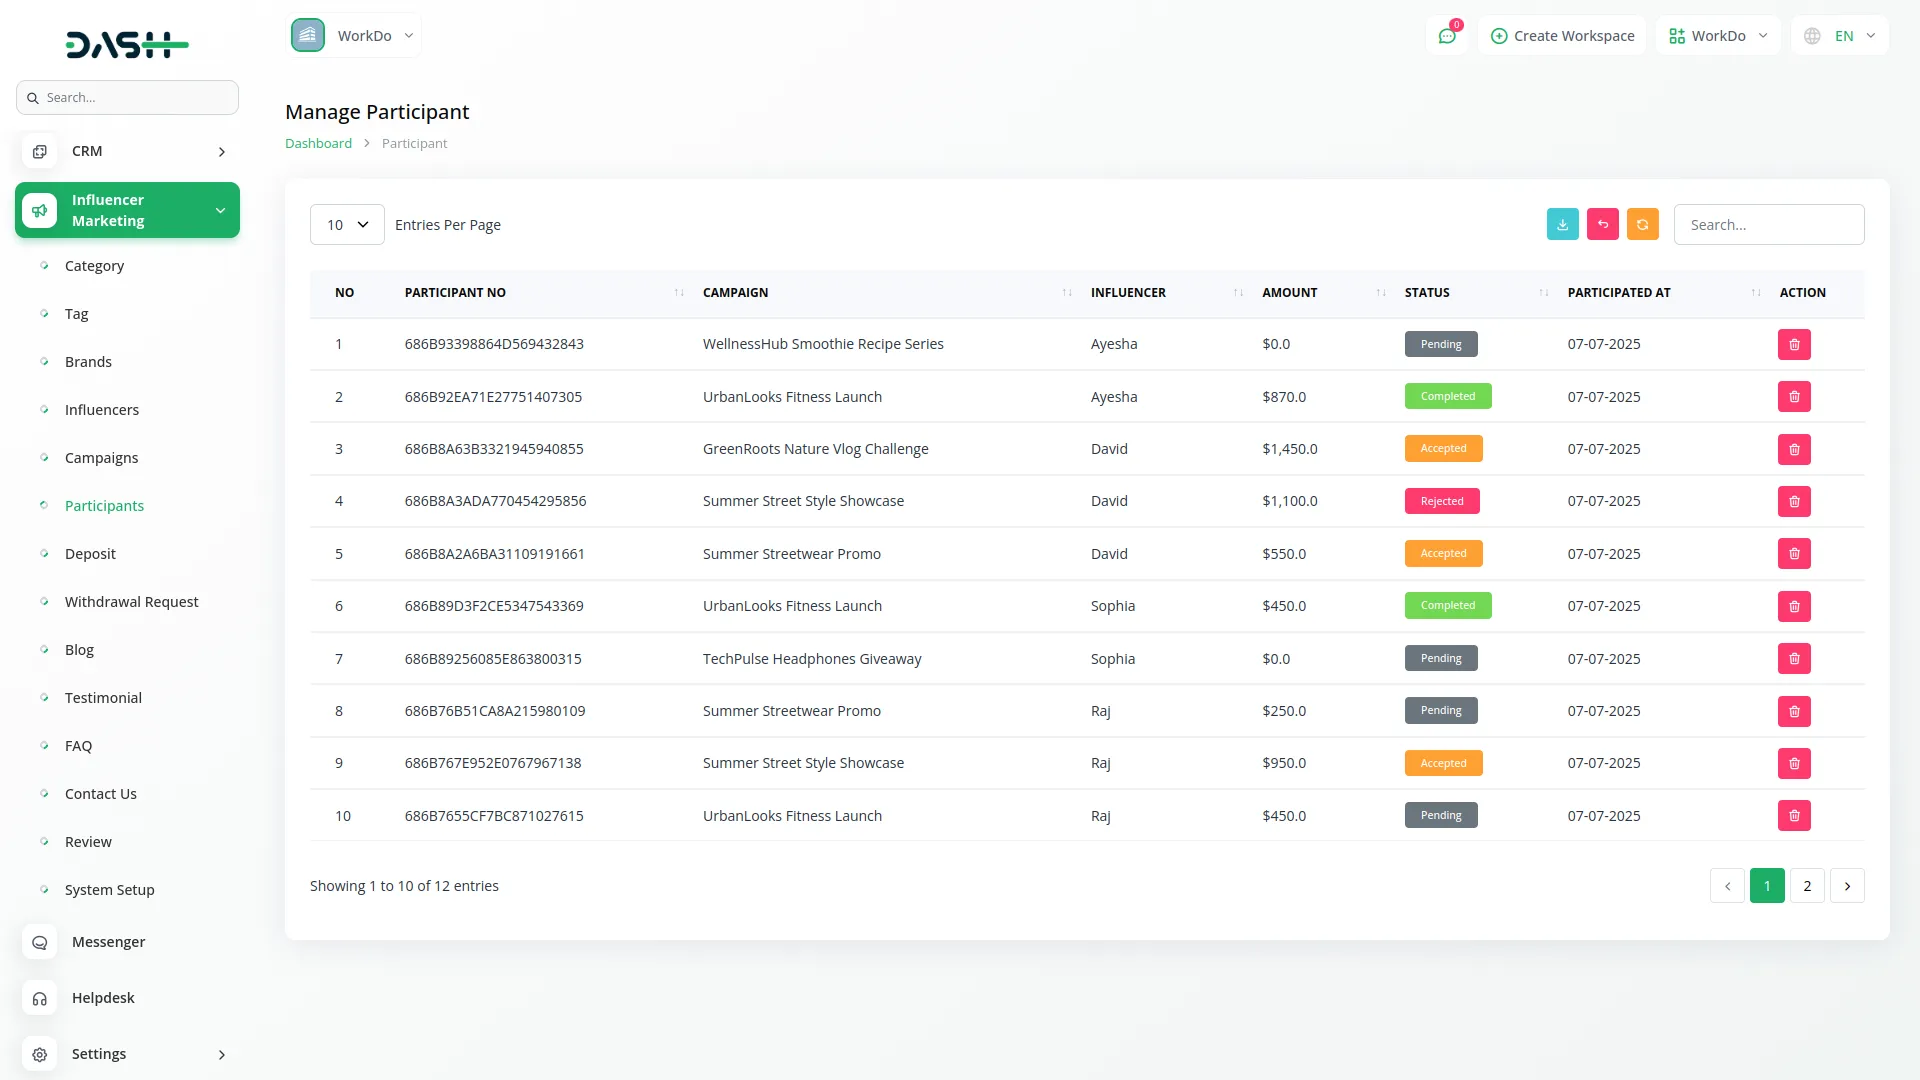
- This section automatically tracks and displays all participant applications when influencers apply for campaigns through the platform. The system records participant details, campaign information, and application status without requiring manual input.
- The list page features Search and Export buttons for efficient participant management and reporting. The table shows columns for Participant Number, Campaign, Influencer, Amount, Status, and Participant At, providing complete visibility of all campaign applications and their current status.
- In the Actions column, you can click “Delete” to remove participant records from the system when necessary, such as for cleaning up test data or removing invalid applications.
Manage Deposit
- The Manage Deposit section allows you to review and approve deposit requests submitted by brands to fund their campaign activities.
- This section automatically displays all deposit requests when brands submit funding requests through various payment methods. The system captures deposit details, payment information, and uploads receipts without requiring manual data entry.
- The list page includes Search and Export buttons for effective deposit management and financial reporting. The table displays columns for Name, Amount, Payment Type, Date, Status, and Receipt, giving you complete oversight of all financial transactions.
- In the Actions column, you can click “Accept” to approve deposit requests and credit funds to brand accounts, “Reject” to decline deposits that don’t meet verification requirements, or “Delete” to remove deposit records from the system when necessary.

Manage Withdrawal Request
- The Manage Withdrawal Request section enables you to process and approve withdrawal requests submitted by influencers for their earned campaign payments.
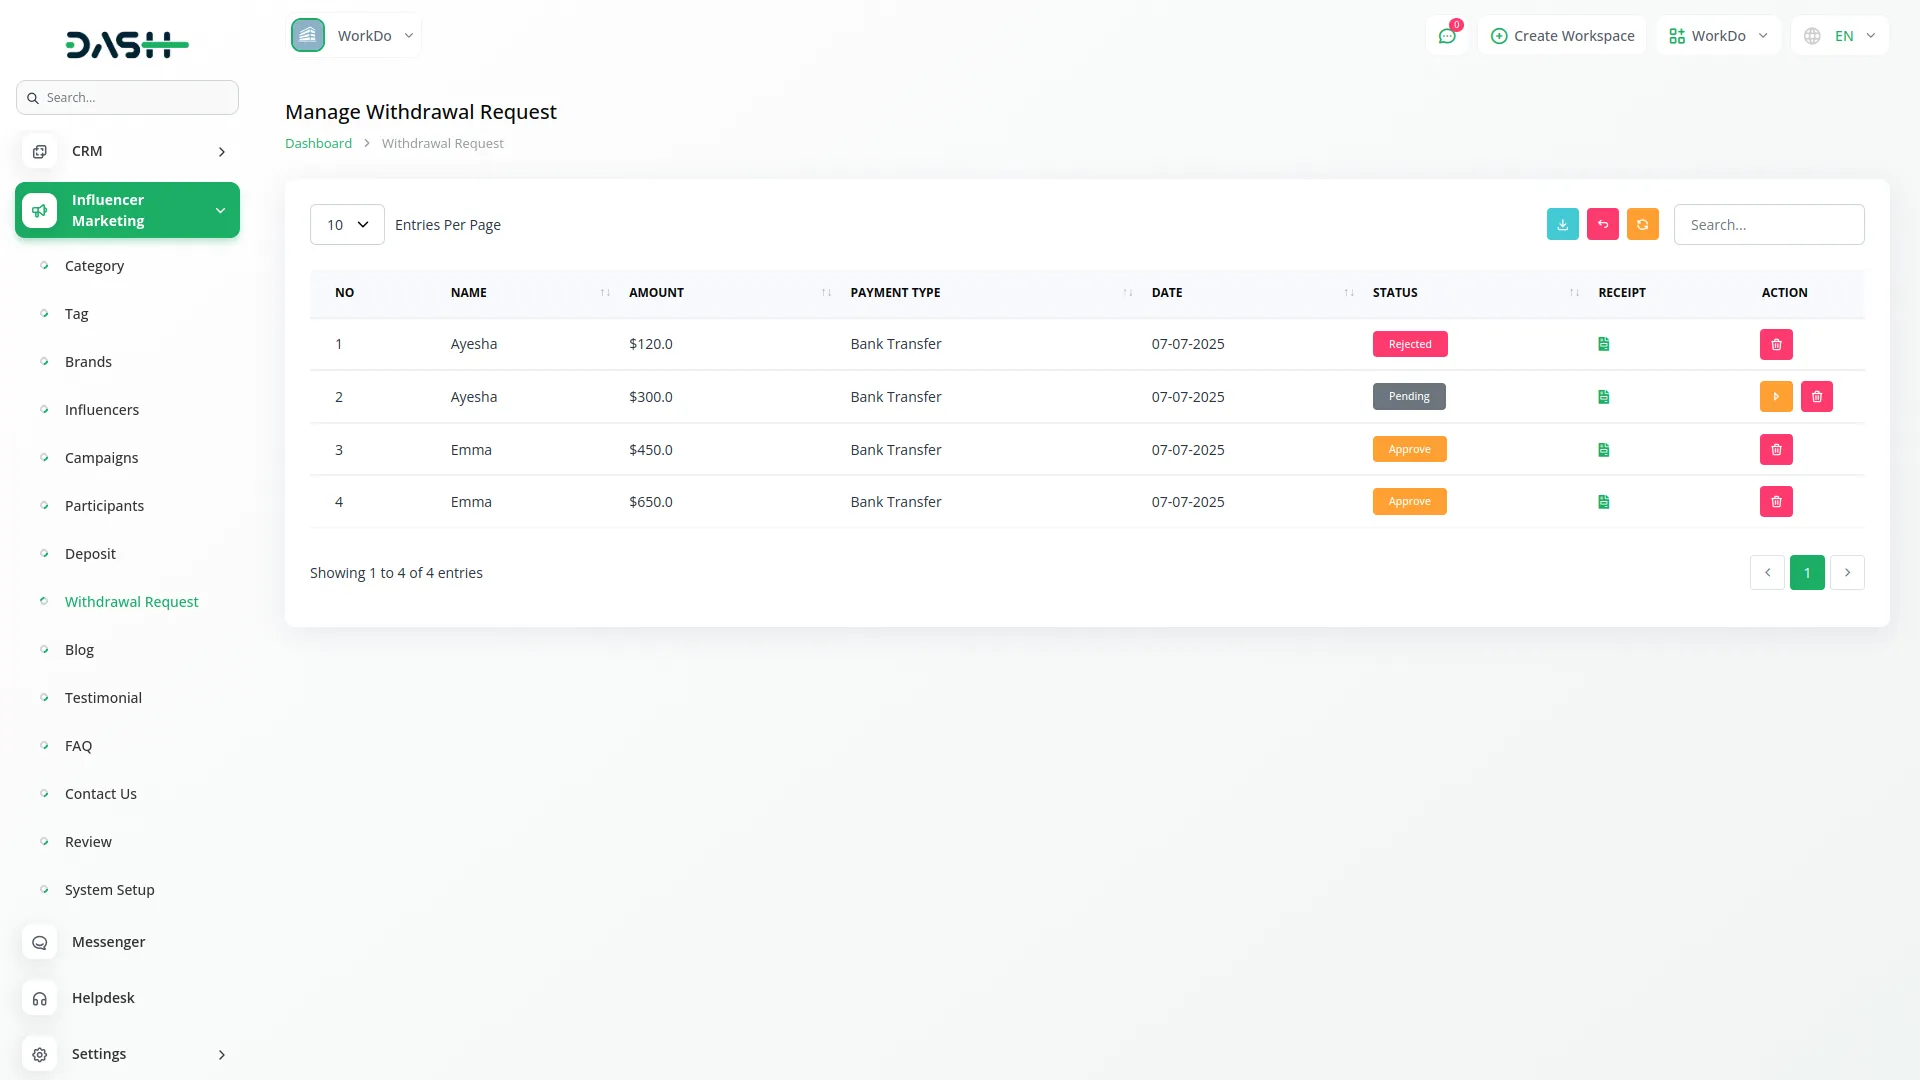
- This section automatically captures all withdrawal requests when influencers submit payment requests through the platform. The system records withdrawal details, payment method preferences, and supporting documentation without manual intervention.
- The list page provides Search and Export buttons for streamlined withdrawal management and financial tracking. The table shows columns for Name, Amount, Payment Type, Date, Status, and Receipt, ensuring complete visibility of all withdrawal transactions.
- In the Actions column, you can click “Accept” to approve withdrawal requests and process payments to influencer accounts, “Reject” to decline withdrawals that don’t meet verification criteria, or “Delete” to remove withdrawal records from the system as needed.
Manage Blog
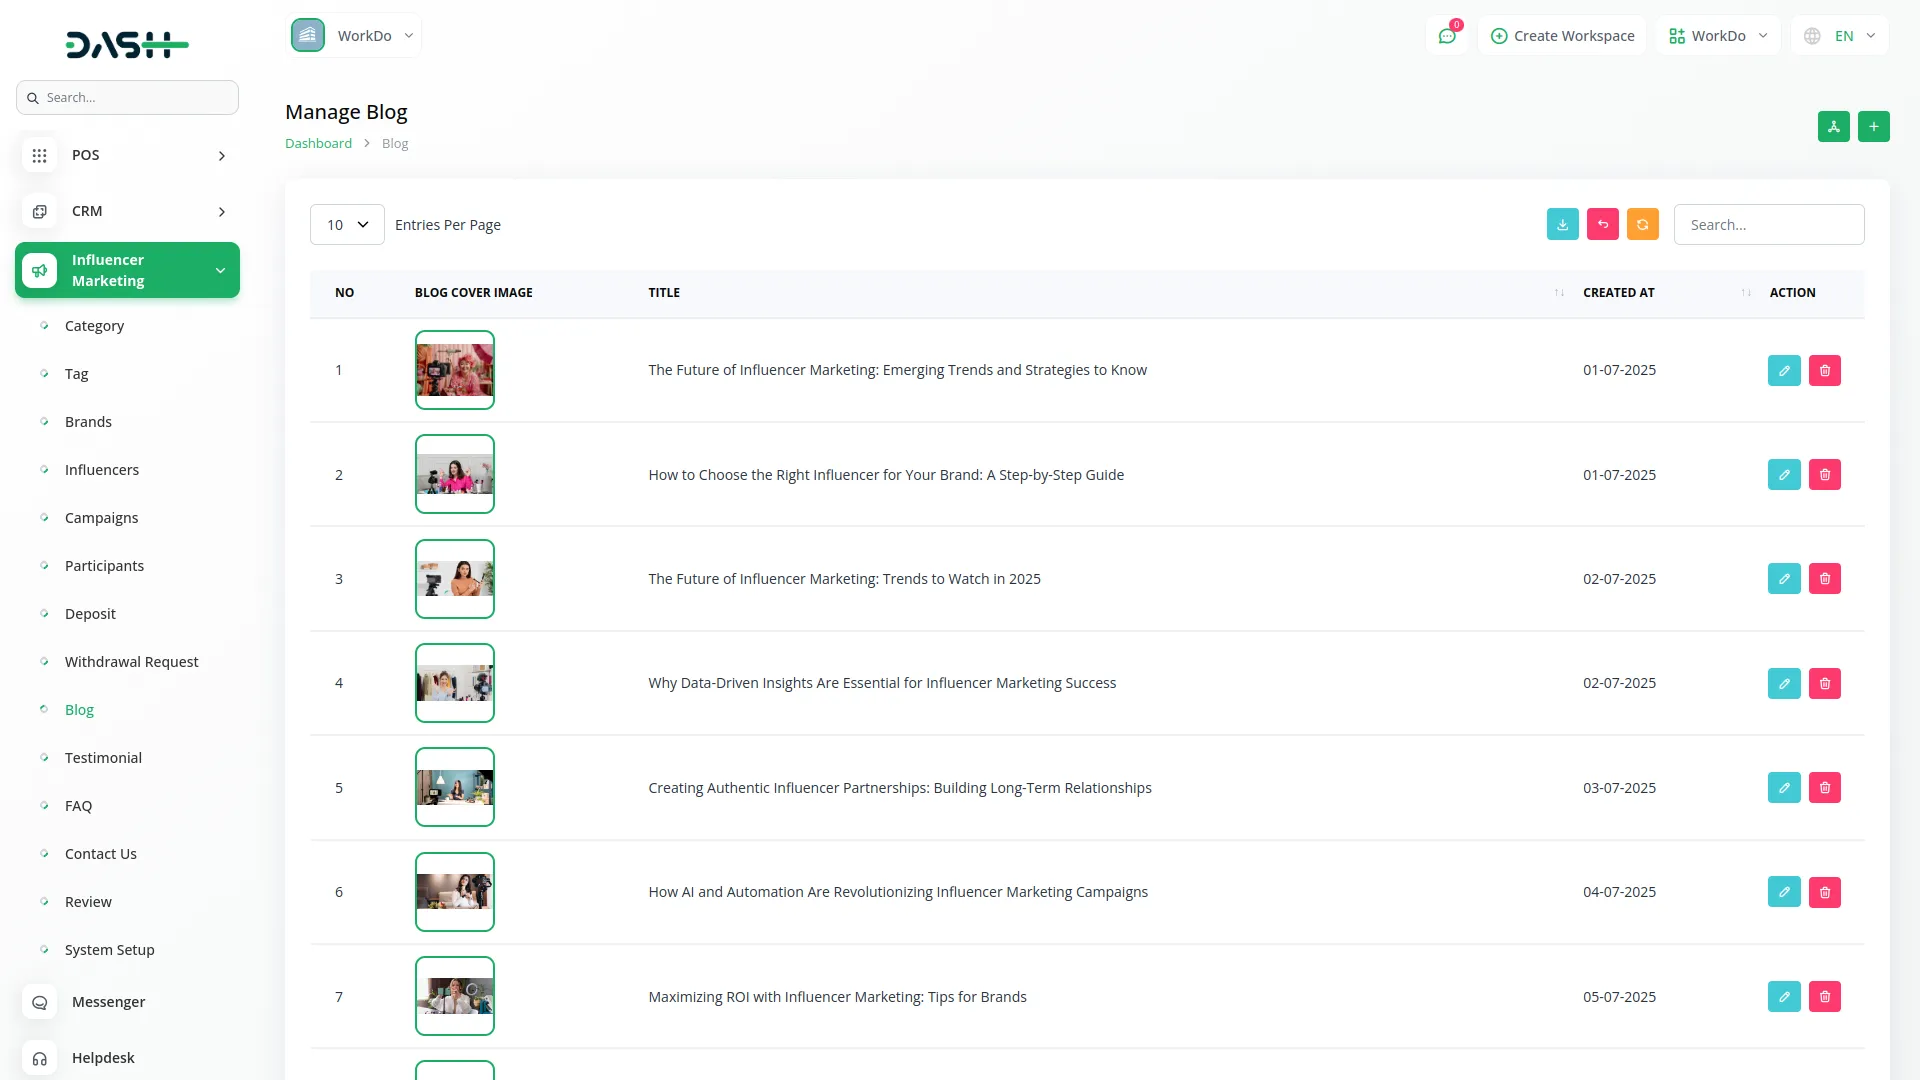
- The Manage Blog section allows you to create and manage blog content that appears on the platform’s website to engage visitors and provide valuable information.
- To create a new blog post, click the “Create” button at the top of the blog page. Enter a compelling Title that accurately describes your blog post content. Upload a Blog Cover Image that will serve as the featured image for the post and attract reader attention.
- Write comprehensive content in the Description field, providing valuable information, insights, or updates related to influencer marketing.
- The list page includes Search, Export, Create Heading, and Create buttons for complete blog management. The table displays columns for Blog Cover Image, Title, and Created At, showing all published blog posts with their publication dates.
- In the Actions column, you can click “Edit” to modify blog post content, title, or cover image, or “Delete” to remove blog posts from the website permanently.
Manage Testimonial
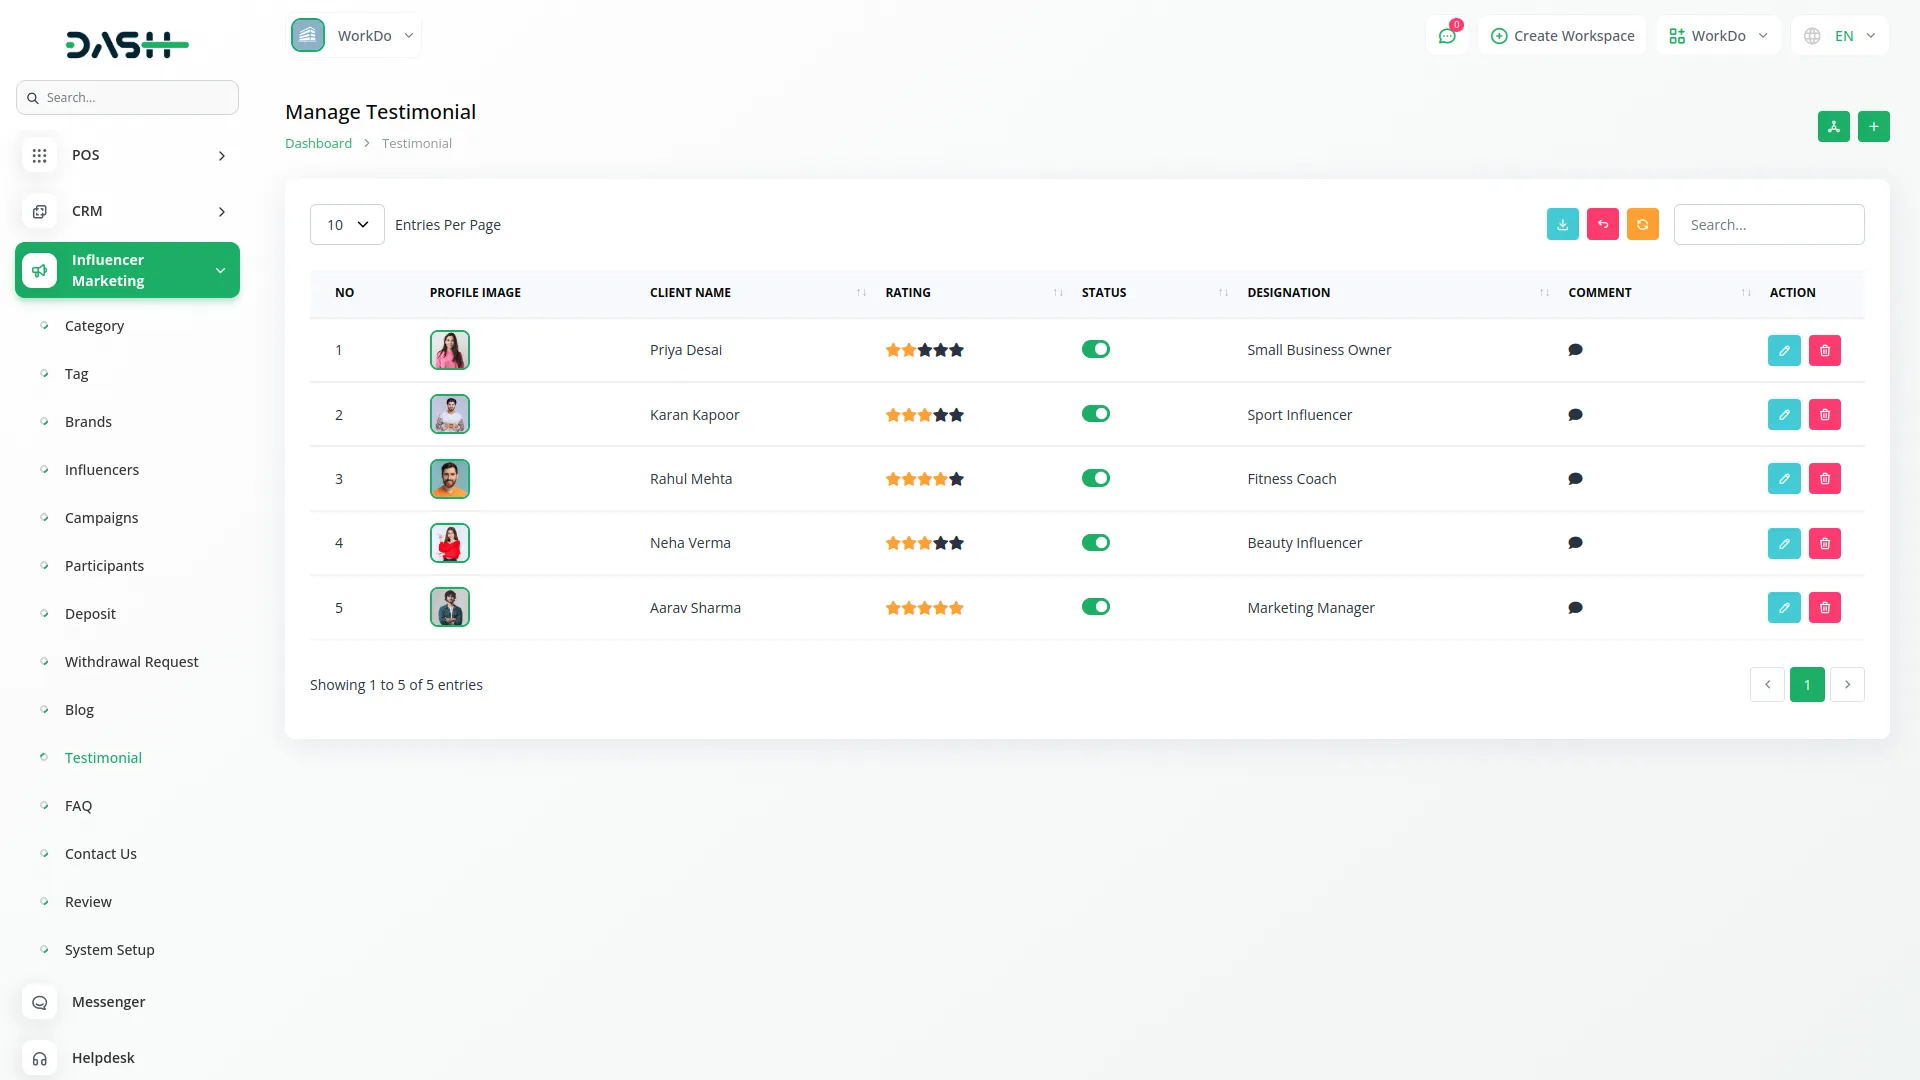
- The Manage Testimonial section enables you to collect and display client testimonials that build trust and credibility for the platform.
- To create a new testimonial, click the “Create” button at the top of the testimonials page. Enter the Client Name of the person providing the testimonial. Add their Designation or job title to establish credibility.
- Upload a Profile Image of the client to personalize the testimonial. Select an appropriate Rating using the rating system to reflect their satisfaction level. Write the client’s Comment or feedback in the provided text area.
- The list page features Search, Export, Create Heading, and Create buttons for comprehensive testimonial management. The table shows columns for Profile Image, Client Name, Rating, Status, and Comment, displaying all collected testimonials with their current visibility status.
- In the Actions column, you can click “Edit” to modify testimonial details, ratings, or comments, or “Delete” to remove testimonials from the display.
Manage FAQ
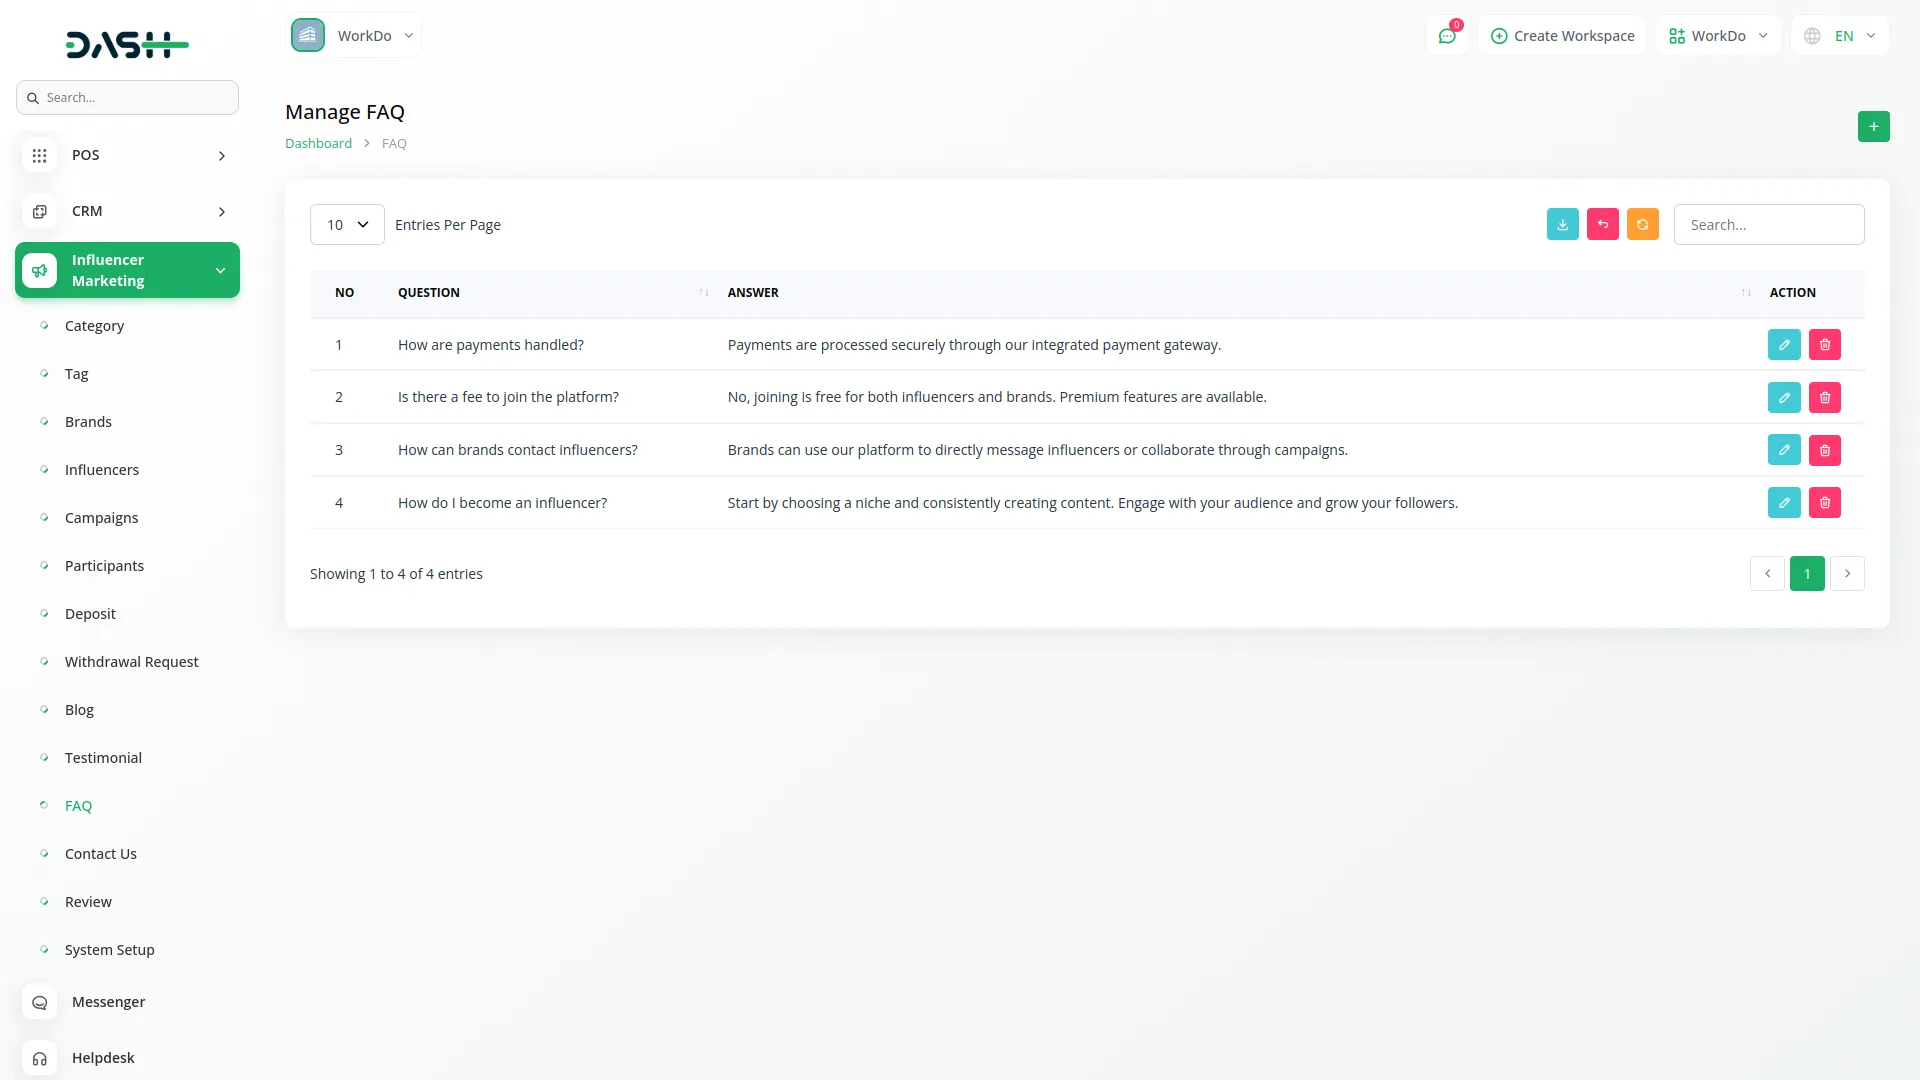
- The Manage FAQ section allows you to create and maintain frequently asked questions to help users understand the platform and resolve common queries.
- To create a new FAQ entry, click the “Create” button at the top of the FAQ page. Enter a clear and specific Question that users commonly ask about the platform or its features. Provide a comprehensive Answer that thoroughly addresses the question and provides helpful information to users.
- The list page includes Search, Export, and Create buttons for efficient FAQ management. The table displays columns for Question and Answer, showing all published FAQ entries for easy review and management.
- In the Actions column, you can click “Edit” to update questions or improve answers based on user feedback, or “Delete” to remove outdated or irrelevant FAQ entries from the system.
Manage Contact Us
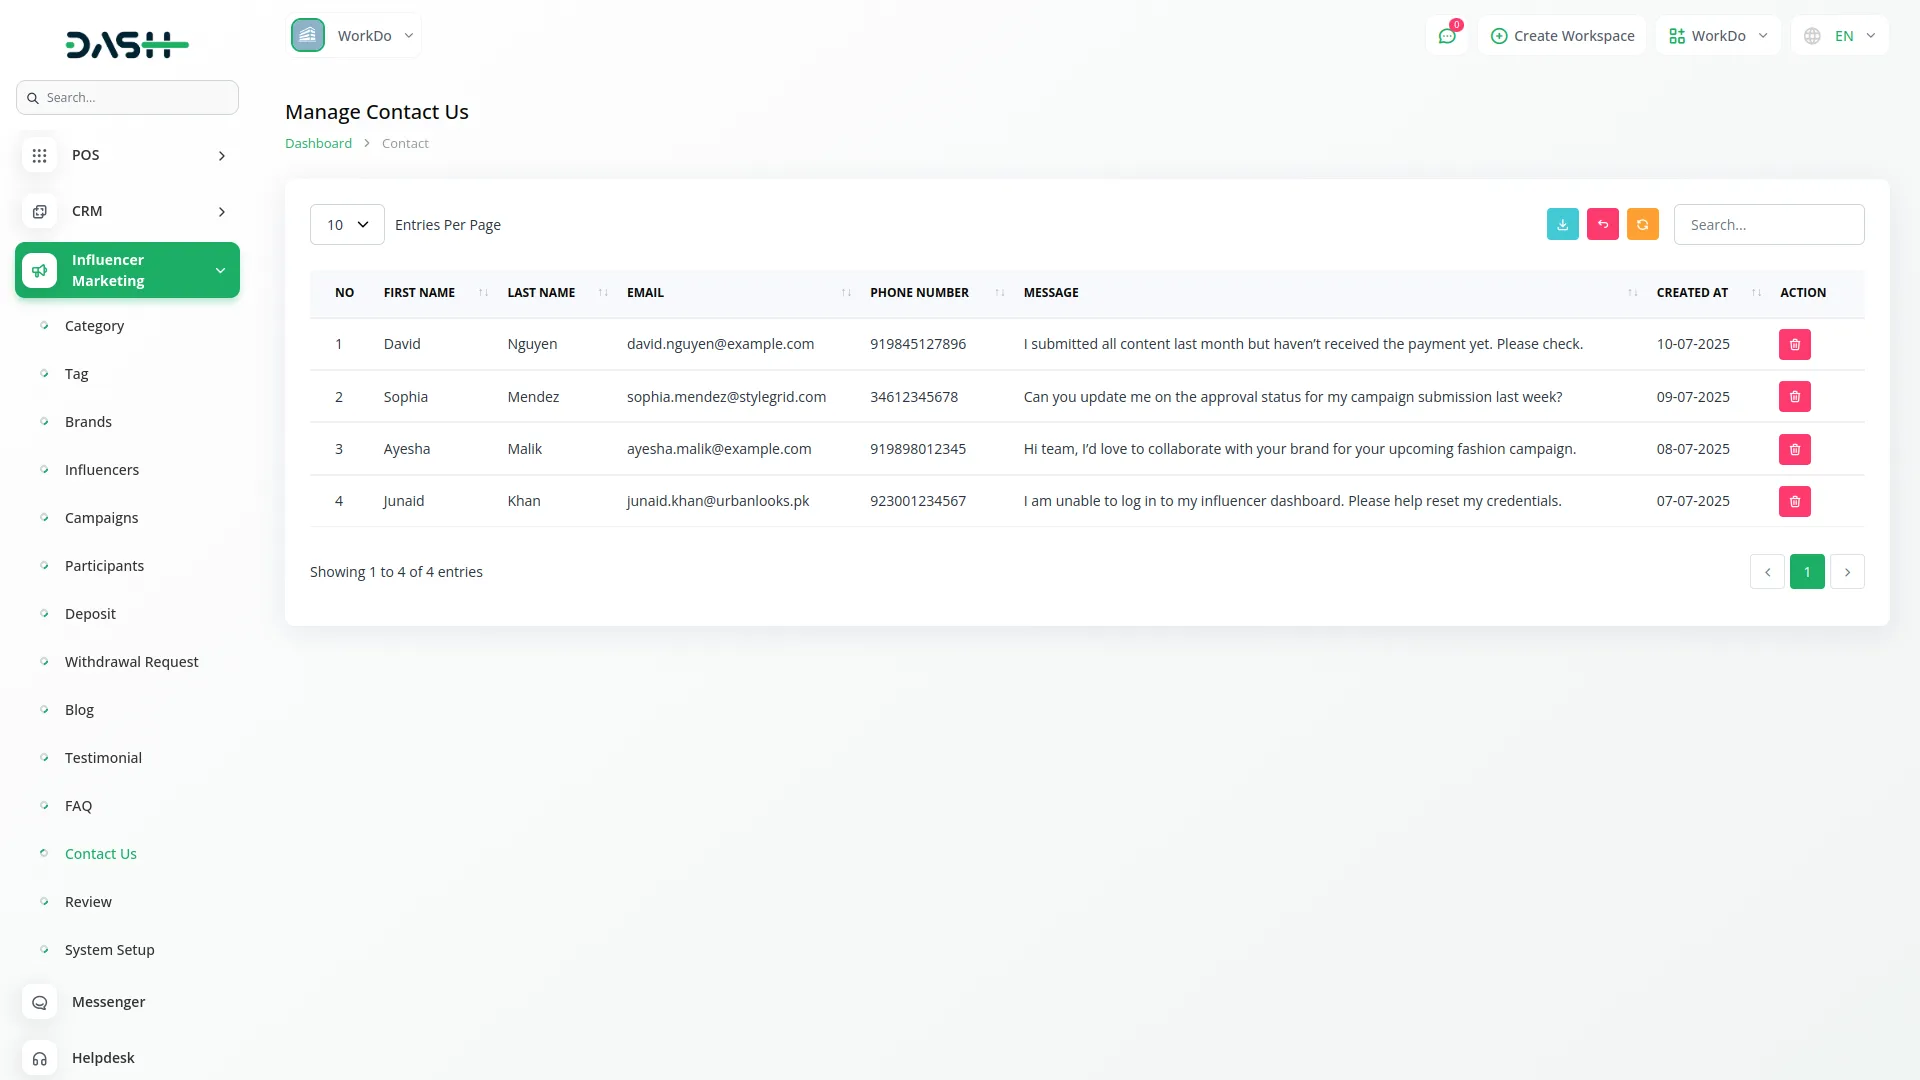
- The Manage Contact Us section displays all contact inquiries submitted by website visitors through the contact form, allowing you to respond to user questions and feedback.
- This section automatically captures all contact form submissions when visitors use the website’s contact form. The system records all submitted information including personal details and messages without requiring manual data entry.
- The list page provides Search and Export buttons for effective contact management and communication tracking. The table shows columns for First Name, Last Name, Email, Phone Number, Message, and Created At, giving you complete visibility of all user inquiries and their submission dates.
- In the Actions column, you can click “Delete” to remove contact records from the system after addressing the inquiries or for data cleanup purposes.
Manage Review
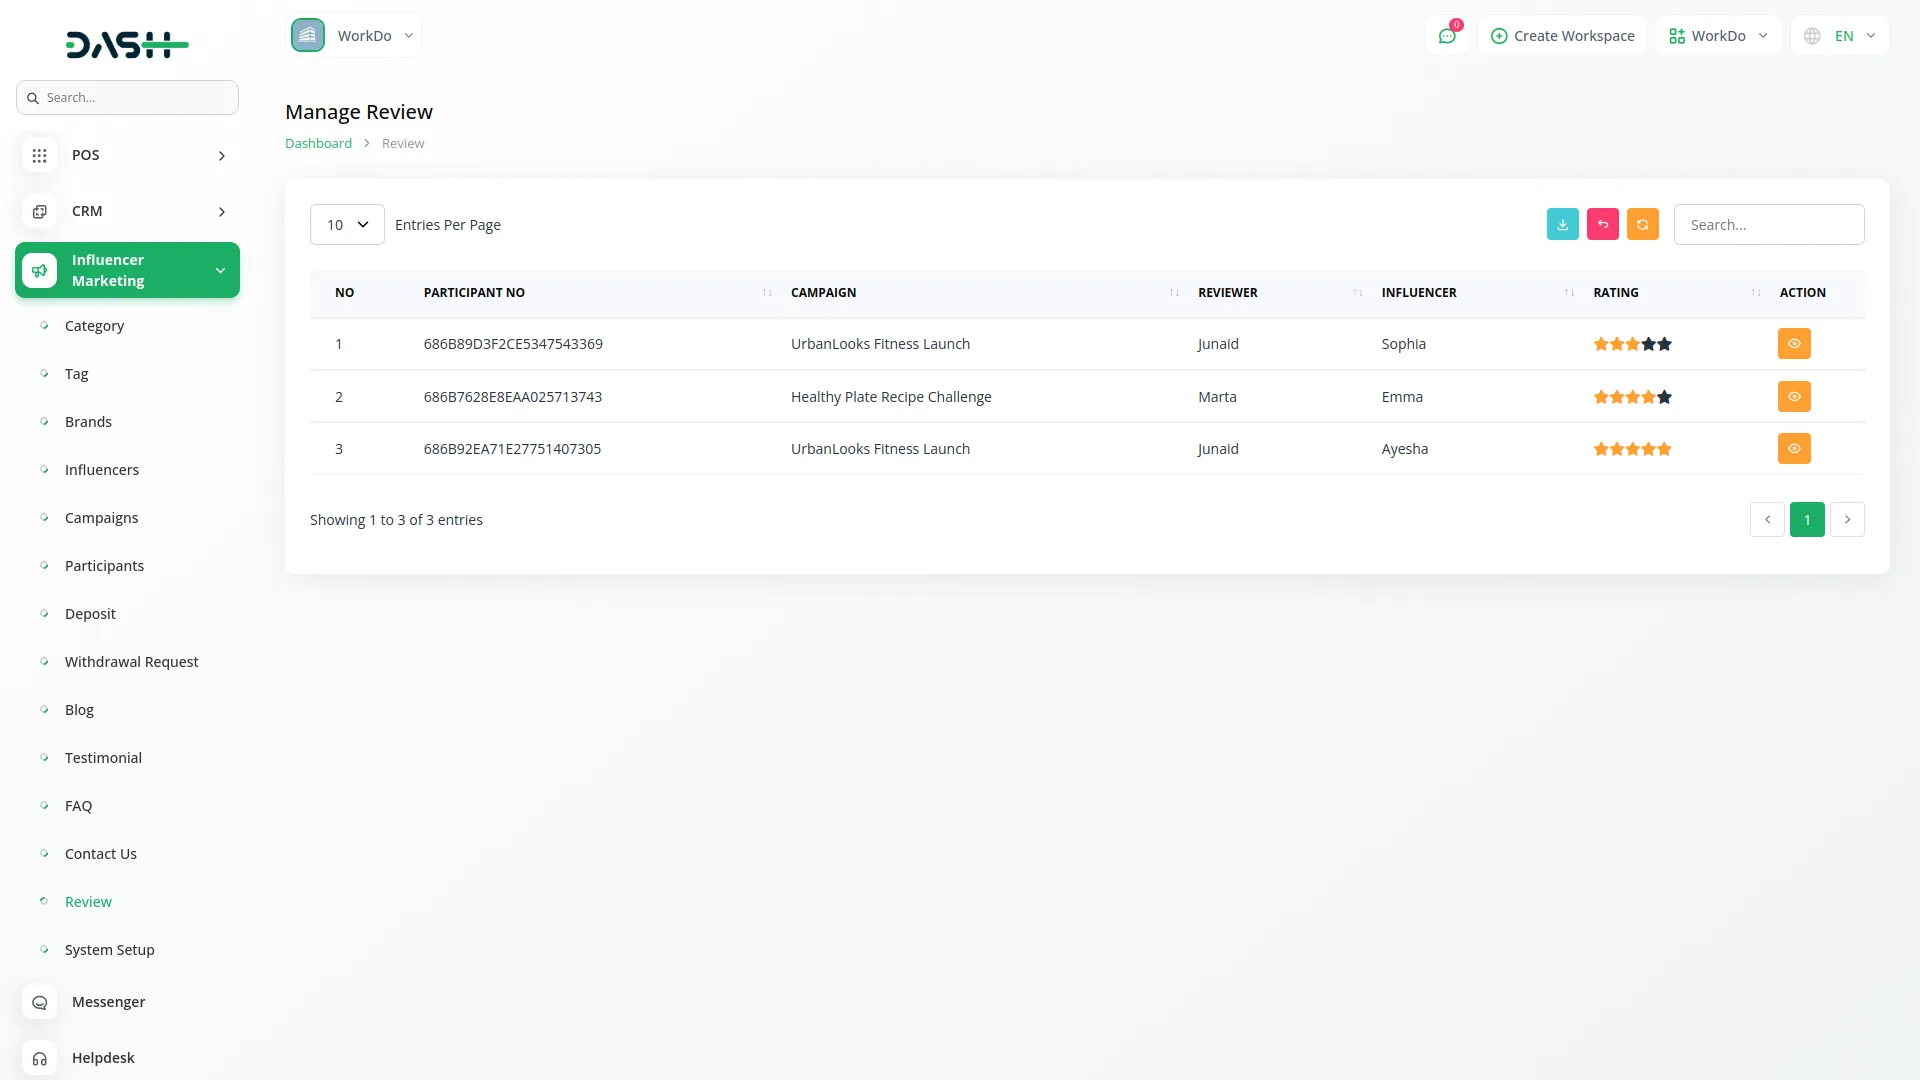
- The Manage Review section provides oversight of all reviews and ratings given by brands to influencers after campaign completion, helping maintain quality standards on the platform.
- This section automatically displays all reviews when brands submit ratings and feedback for influencers through the platform’s review system. The system captures review details, ratings, and participant information without manual input.
- The list page includes Search and Export buttons for comprehensive review management and quality monitoring. The table displays columns for Participant No, Campaign, Reviewer, Influencer, and Rating, showing all submitted reviews with complete context information.
- In the Actions column, you can click “View” to see detailed review information including complete feedback, ratings breakdown, and campaign context for quality assurance and dispute resolution purposes.
System Setup
The System Setup section provides comprehensive configuration options for customizing your platform’s appearance, functionality, and content management across all website sections.
Brand Setting
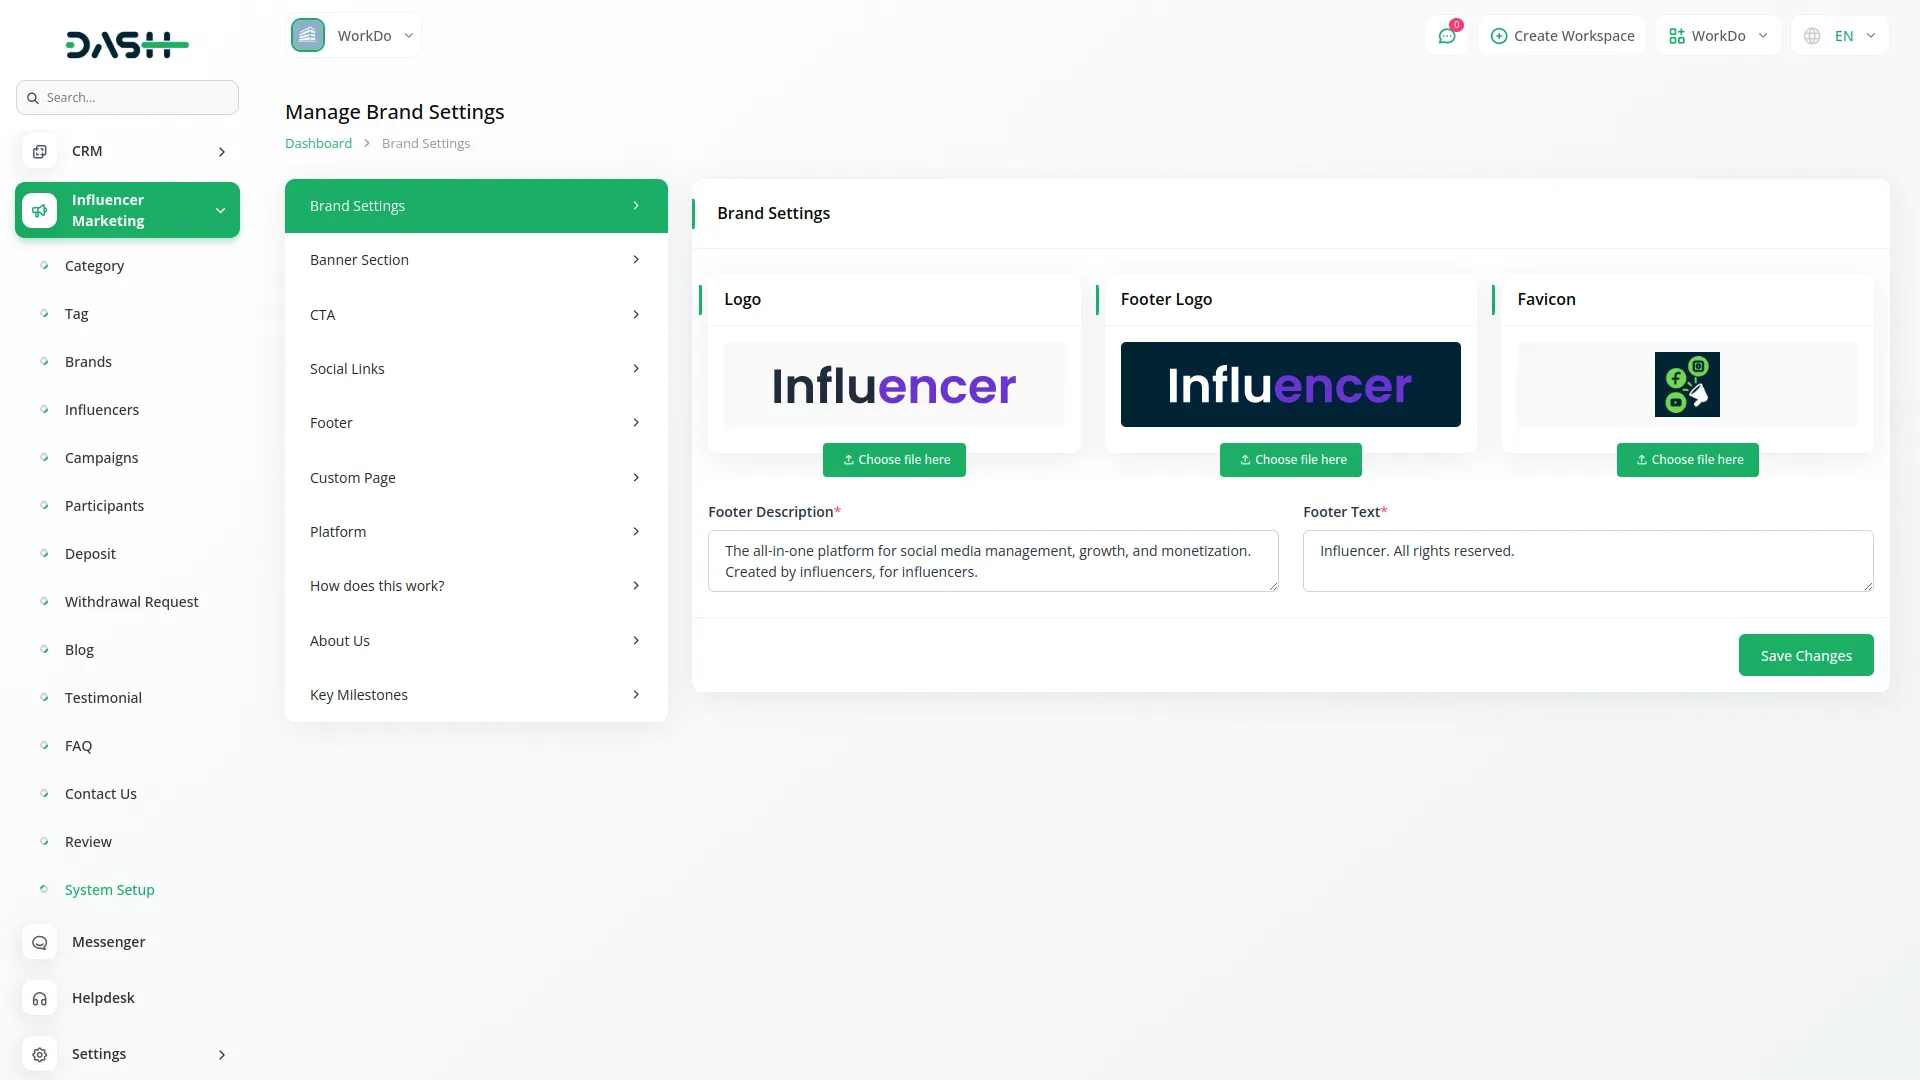
- Configure your platform’s branding elements by uploading your logo for both header and footer sections, ensuring consistent brand visibility throughout the website. Upload and set your favicon which appears in browser tabs and bookmarks.
- Enter your Footer Description to provide brief information about your company in the website footer. Add Footer Text which serves as the copyright sentence displayed at the bottom of all pages.
Banner Section
- Customize the main banner section by entering the Title and Description that welcomes visitors to your platform. Configure Active Users count and Active Users Title to display current user statistics. Set Followers count and Followers Title to showcase social media presence.
- Add Success Rate percentage and Success Title to highlight platform achievements. Upload an Image that represents your platform visually. Use Banner Section Button Details to create multiple call-to-action buttons by entering Title and Title Link for each button, allowing complete customization of the banner section display.
CTA
- To create call-to-action sections, click the “Create” button and select the Page where the CTA will appear. Enter the Heading and Subheading text that will encourage user action.
- Use Enable Heading checkbox to control CTA visibility. The list page shows columns for Page, Heading, and Status. You can click “Edit” to modify CTA content or “Delete” to remove CTA sections.
Social Links
- To create social media links, click the “Create” button and choose an icon for the social link from the available icon library. Enter the Link URL for the social media profile.
- The list page displays columns for Icon and Link. You can click “Edit” to update social links or “Delete” to remove them from the website footer.
Footer
- Configure footer sections by editing the Footer Section Heading and creating Section Cards using the repeater item button.
- Create multiple items with Title and Title Link for each footer section, allowing complete customization of footer navigation and information. The list page shows the Name column with “Edit” action to modify footer configurations.
Custom Page
- To create custom pages, click the “Create” button and enter the page Name and Title. Set Page Footer Display to control whether the page appears in footer navigation.
- Create comprehensive Content for the custom page. The list page displays columns for Name, Slug, and Footer Display status. You can click “Edit” to modify page content or “Delete” to remove custom pages.
Platform
- Configure the platform showcase section by entering the Heading for the section. Use Platform Details repeater to create multiple platform items by entering Name and choosing Icon for each platform, customizing everything displayed in the platform section.
How Does This Work
- Set up the working process section by entering the Heading for this section. Configure Button Name and Button URL for the main action button. Use Working Details repeater to create multiple process steps by entering Title, Description, and choosing Icon for each step, customizing the entire work section display.
About Us
- Configure the about section by entering the Heading for this section. Set Button Name and Button URL for the about section action button. Use Working Details repeater to create multiple about items with Title, Description, and Icon selection, allowing complete customization of the about us section.
Key Milestone
- Set up the milestone section by entering the Heading, Title, and Description for the section overview. Use the Key Milestones Details repeater to create multiple milestone entries by entering Year, Title, and Description for each achievement, customizing everything displayed in the key milestone section of the website.
Categories
Related articles
- Job Search Detailed Documentation
- Product Badge Management – eCommerceGo Addon
- Asana Project Management Detailed Documentation
- Dropbox Integration in Dash SaaS
- Video Hub Integration in Dash SaaS
- User Manual – AccountGo SaaS
- Vehicle Trade Detailed Documentation
- Google Slides Detailed Documentation
- Flutterwave Payment Gateway in BookingGo SaaS
- Service Tax Integration in BookingGo SaaS
- Reward-Club Point – eCommerceGo Addon
- Parking Management Integration in Dash SaaS
Reach Out to Us
Have questions or need assistance? We're here to help! Reach out to our team for support, inquiries, or feedback. Your needs are important to us, and we’re ready to assist you!


Need more help?
If you’re still uncertain or need professional guidance, don’t hesitate to contact us. You can contact us via email or submit a ticket with a description of your issue. Our team of experts is always available to help you with any questions. Rest assured that we’ll respond to your inquiry promptly.
Love what you see?
Do you like the quality of our products, themes, and applications, or perhaps the design of our website caught your eye? You can have similarly outstanding designs for your website or apps. Contact us, and we’ll bring your ideas to life.
