e-Invoice Integration in Dash SaaS
The E-Invoice Integration system is a comprehensive electronic invoicing platform that enables businesses to configure, generate, and export standardized electronic invoices in XML format for regulatory compliance.
Introduction
The E-Invoice Integration system is a comprehensive electronic invoicing platform that enables businesses to configure, generate, and export standardized electronic invoices in XML format for regulatory compliance. This system consists of two main components: the System Settings module where you configure your organization’s electronic invoicing parameters, and the invoice generation process that integrates with customer management. The system automatically enhances customer records with electronic invoicing fields and enables one-click generation of compliant XML invoices. When properly configured, the system streamlines the entire electronic invoicing workflow from customer setup through invoice creation and XML export for submission to regulatory authorities.
How To Install The Add-On?
To Set Up the E-Invoice Add-On, you can follow this link: Setup Add-On.
How To Use The E-Invoice Add-On?
System Settings – E-Invoice Configuration
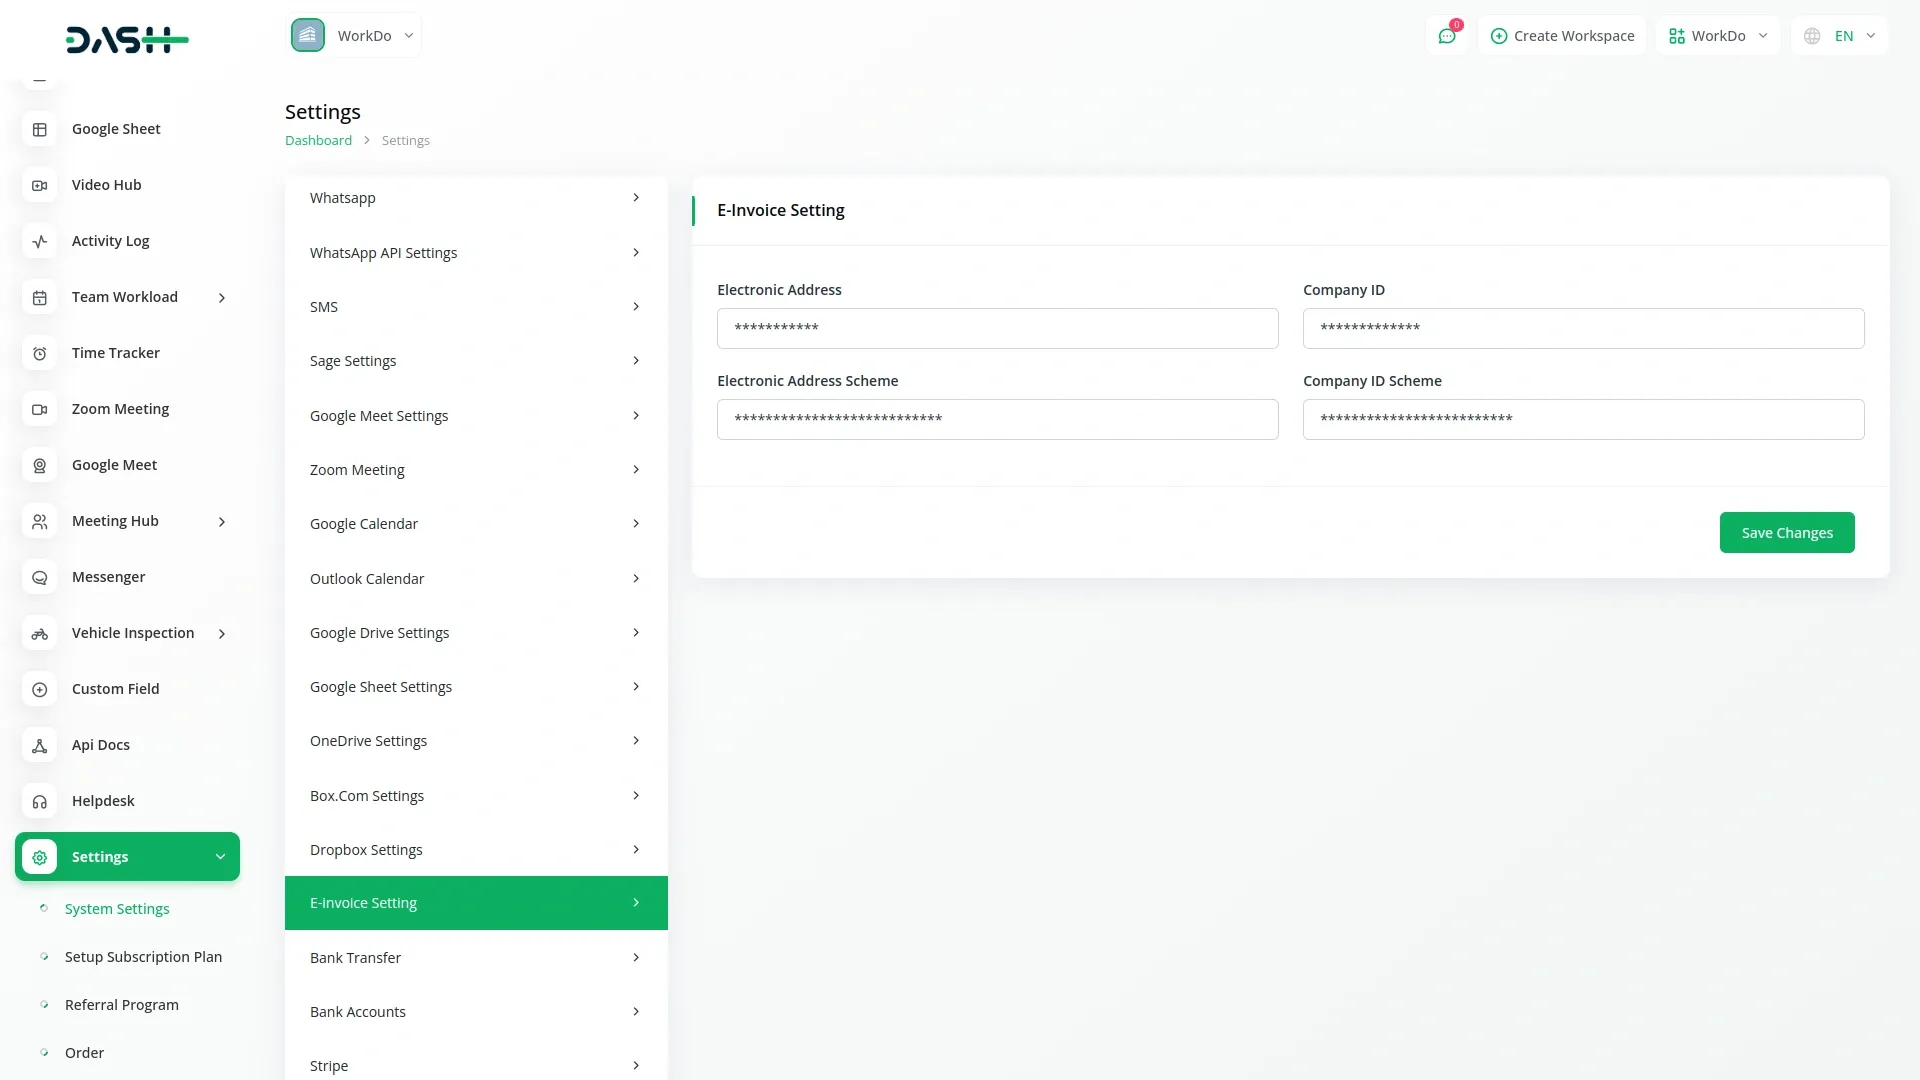
- To set up electronic invoicing for your organization, navigate to the System Settings module and locate the E-Invoice Setting section. Click on the E-Invoice Setting option to access the configuration form where you will enter your organization’s electronic invoicing details.
- Enter your Electronic Address in the designated field – this is your organization’s official electronic address used for e-invoicing purposes. Next, input your Company ID, which is your unique company identifier for electronic invoicing systems.
- Then specify your Electronic Address Scheme, which defines the format or standard used for your electronic address. Finally, enter your Company ID Scheme, which indicates the identification system or standard used for your company ID.

- These configuration settings are essential for generating compliant electronic invoices and must be completed accurately according to your country’s or region’s electronic invoicing regulations.
- Once saved, these settings will be used automatically when generating e-invoices for customers, ensuring all invoices contain the proper electronic addressing and identification information required for regulatory compliance.

- This configuration directly connects to the customer management and invoice generation process, as the system will use these settings along with customer electronic address information to create compliant XML invoices that can be submitted to electronic invoicing networks or regulatory authorities.
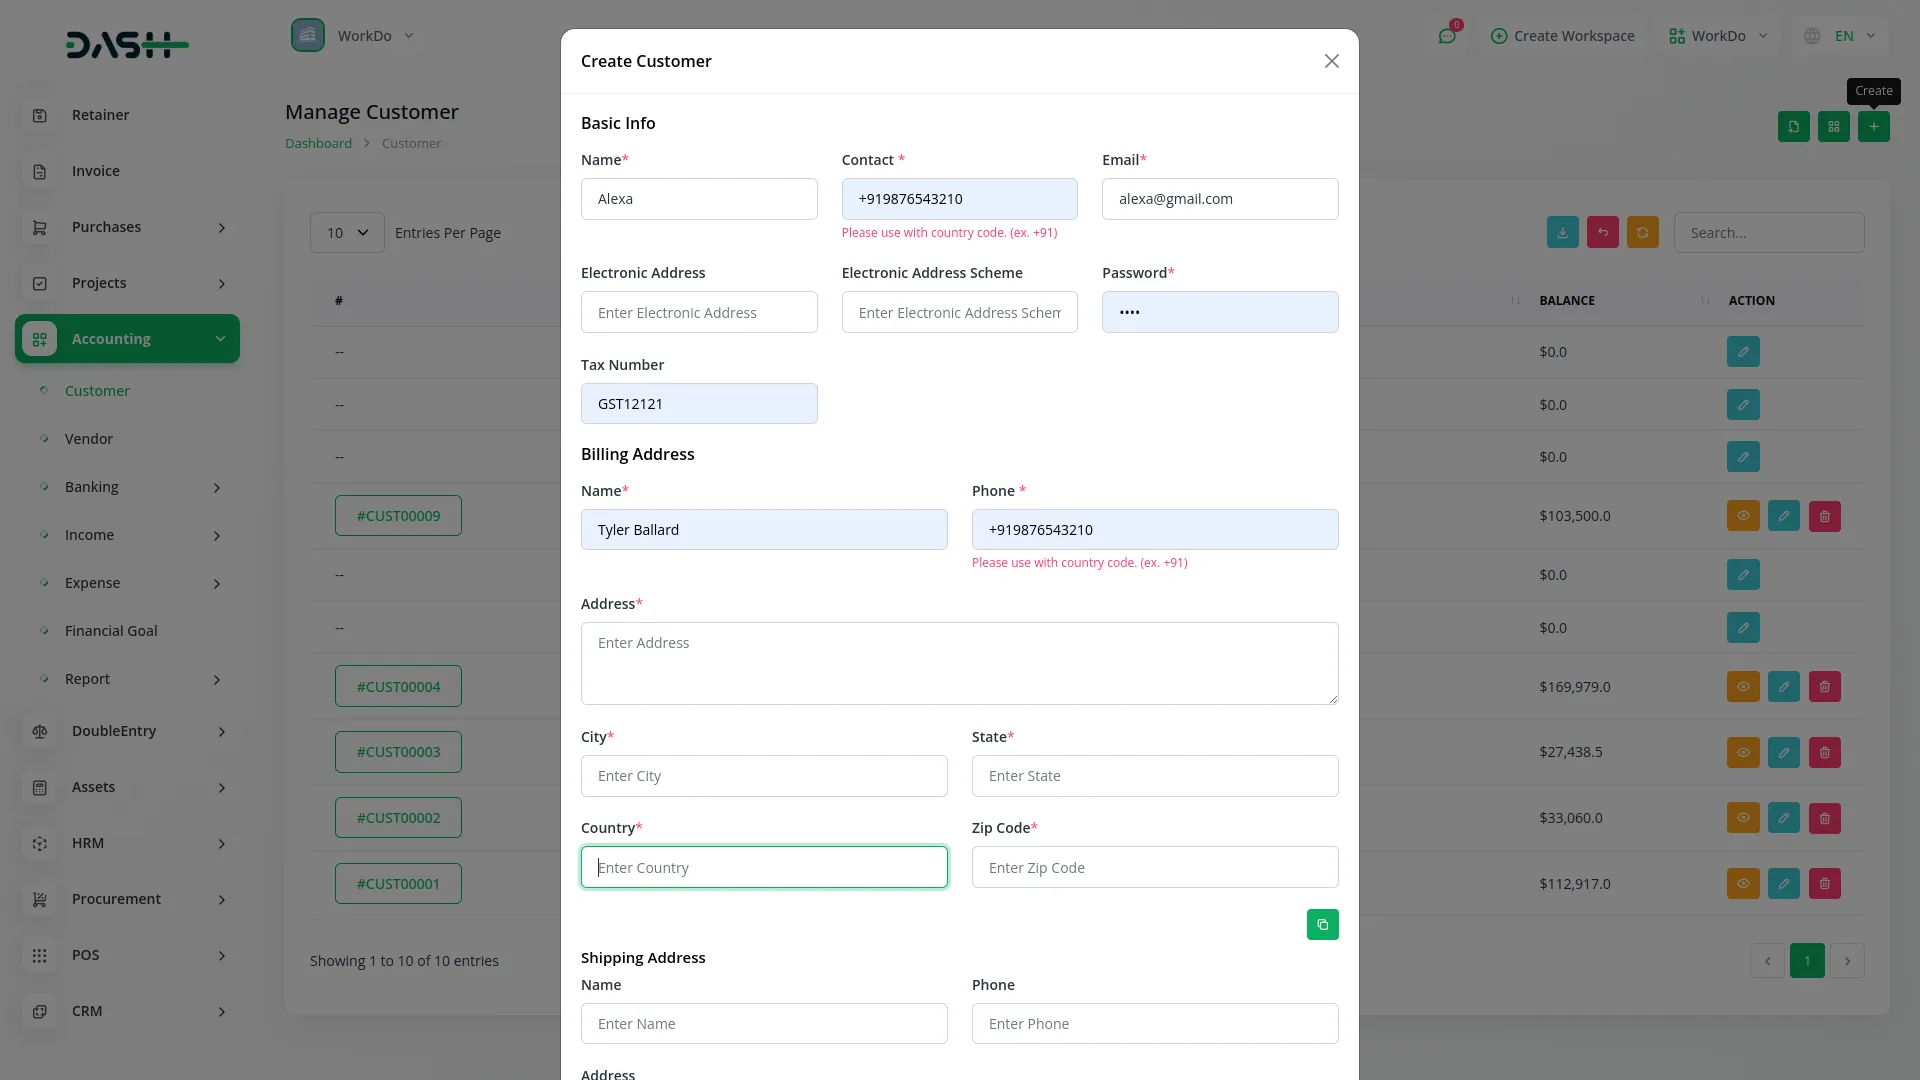
- When customers are created in the system after this configuration is complete, the system automatically adds Electronic Address and Electronic Address Scheme fields to each customer record.
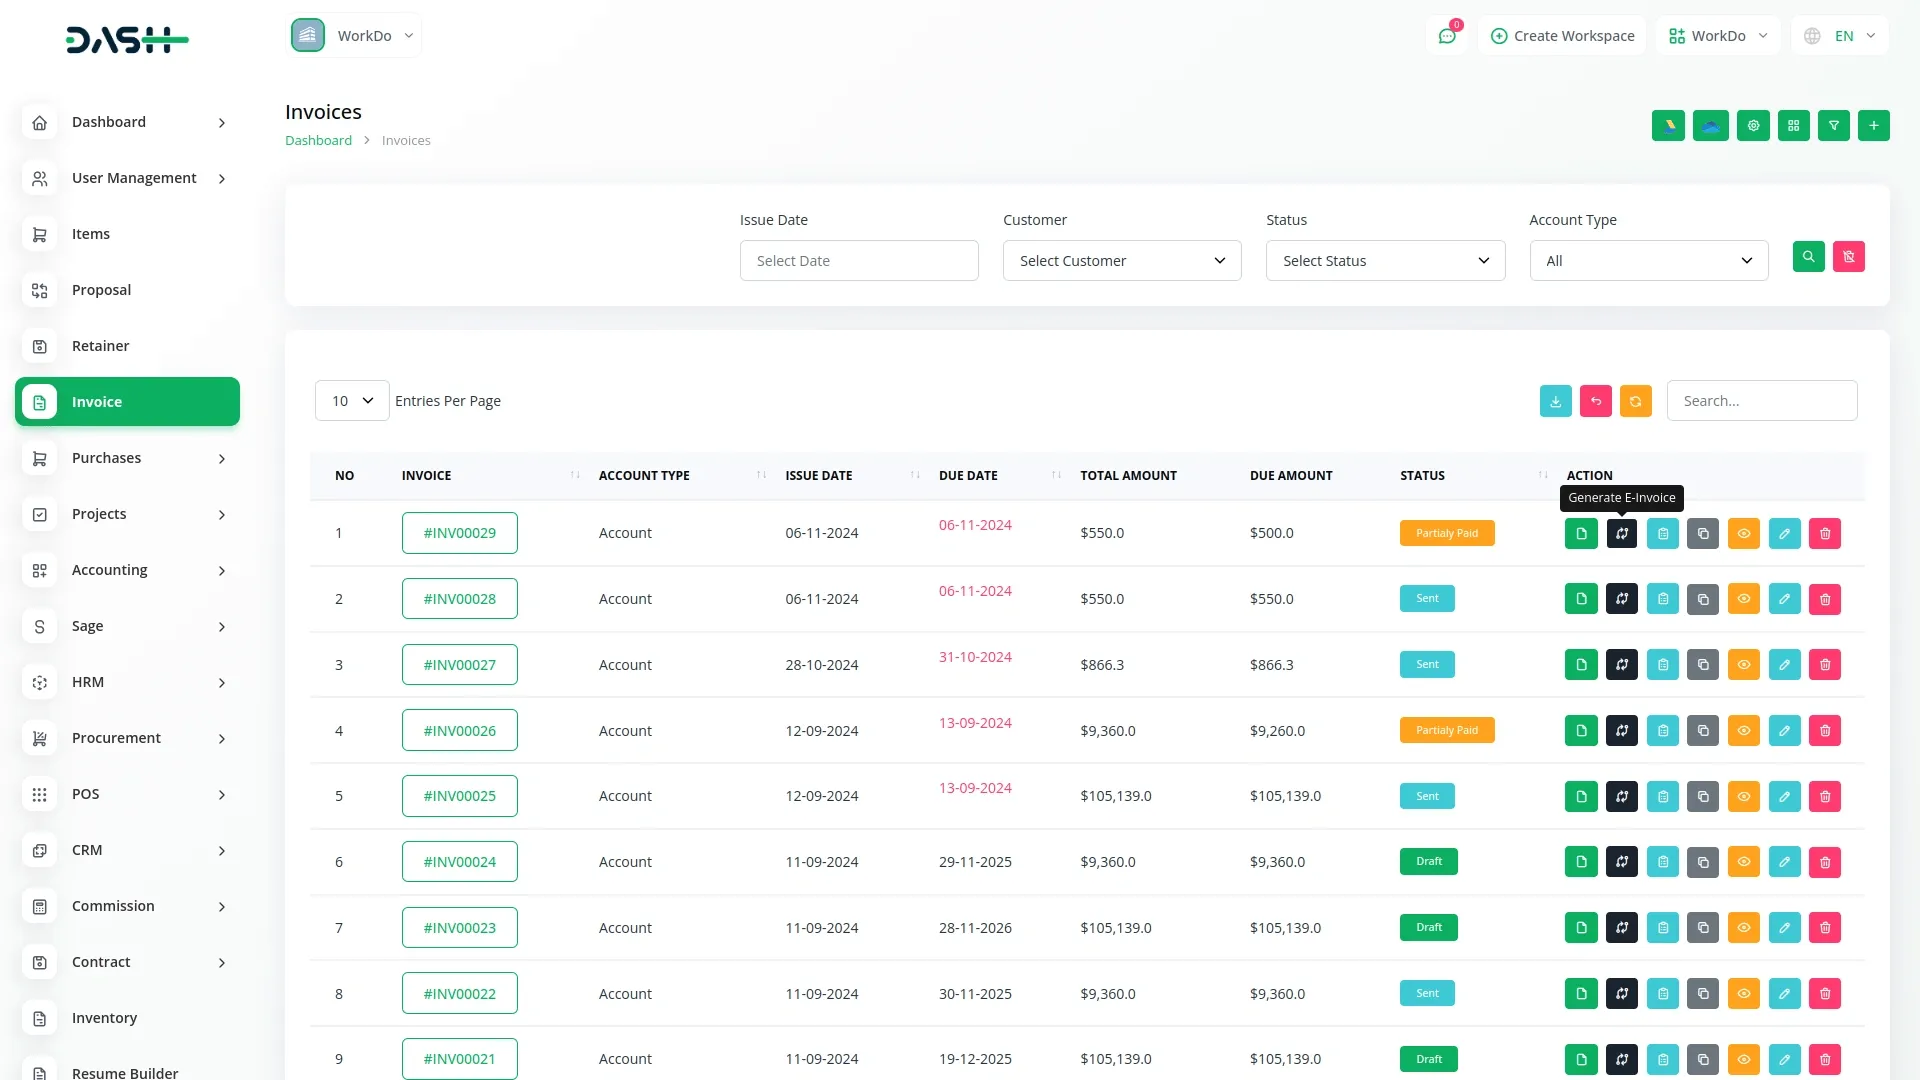
- By selecting a customer with this electronic addressing information, you can generate invoices and then click the “Generate E-Invoice” button to download the invoice export in XML format, creating a seamless workflow from customer management through compliant electronic invoice delivery.

Categories
Related articles
- Property Management Integration in Dash SaaS
- eBook Integration in Dash SaaS
- PEST Analysis Integration in Dash SaaS
- Vehicle Booking Management Integration in Dash SaaS
- Sign-in With Bitbucket Detailed Documentation
- Commission Integration in Dash SaaS
- Google Wallet Integration in Dash SaaS
- AI Assistant Integration in Dash SaaS
- Bulk SMS Detailed Documentation
- WhatsApp Messenger Integration in Dash SaaS
- Dash SaaS Setup Guide
- Work Permit Detailed Documentation
Reach Out to Us
Have questions or need assistance? We're here to help! Reach out to our team for support, inquiries, or feedback. Your needs are important to us, and we’re ready to assist you!


Need more help?
If you’re still uncertain or need professional guidance, don’t hesitate to contact us. You can contact us via email or submit a ticket with a description of your issue. Our team of experts is always available to help you with any questions. Rest assured that we’ll respond to your inquiry promptly.
Love what you see?
Do you like the quality of our products, themes, and applications, or perhaps the design of our website caught your eye? You can have similarly outstanding designs for your website or apps. Contact us, and we’ll bring your ideas to life.
