
Meeting Hub – WorkDo Dash SaaS Add-On Guide
Learn how to schedule and manage meetings in WorkDo Dash SaaS easily.
Introduction
The Meeting Hub Add-On is designed to simplify the entire process of managing meetings within your organization. It provides a structured system where users can create, schedule, and track meetings with ease, ensuring that no important discussion or decision is missed. With features like meeting details, participant management, agenda tracking, and status updates, the Add-On helps teams stay organized and focused. Whether for internal discussions, client presentations, or project reviews, Meeting Hub serves as a centralized space to plan, conduct, and monitor meetings efficiently. The Meeting Hub Add-On makes it easier for both administrators and team members to get the most out of the system.
How To Install The Add-On?
To Set Up the Meeting Hub Add-On, you can follow this link: Setup Add-On.
How To Use The Meeting Hub Add-On?
Manage Meeting
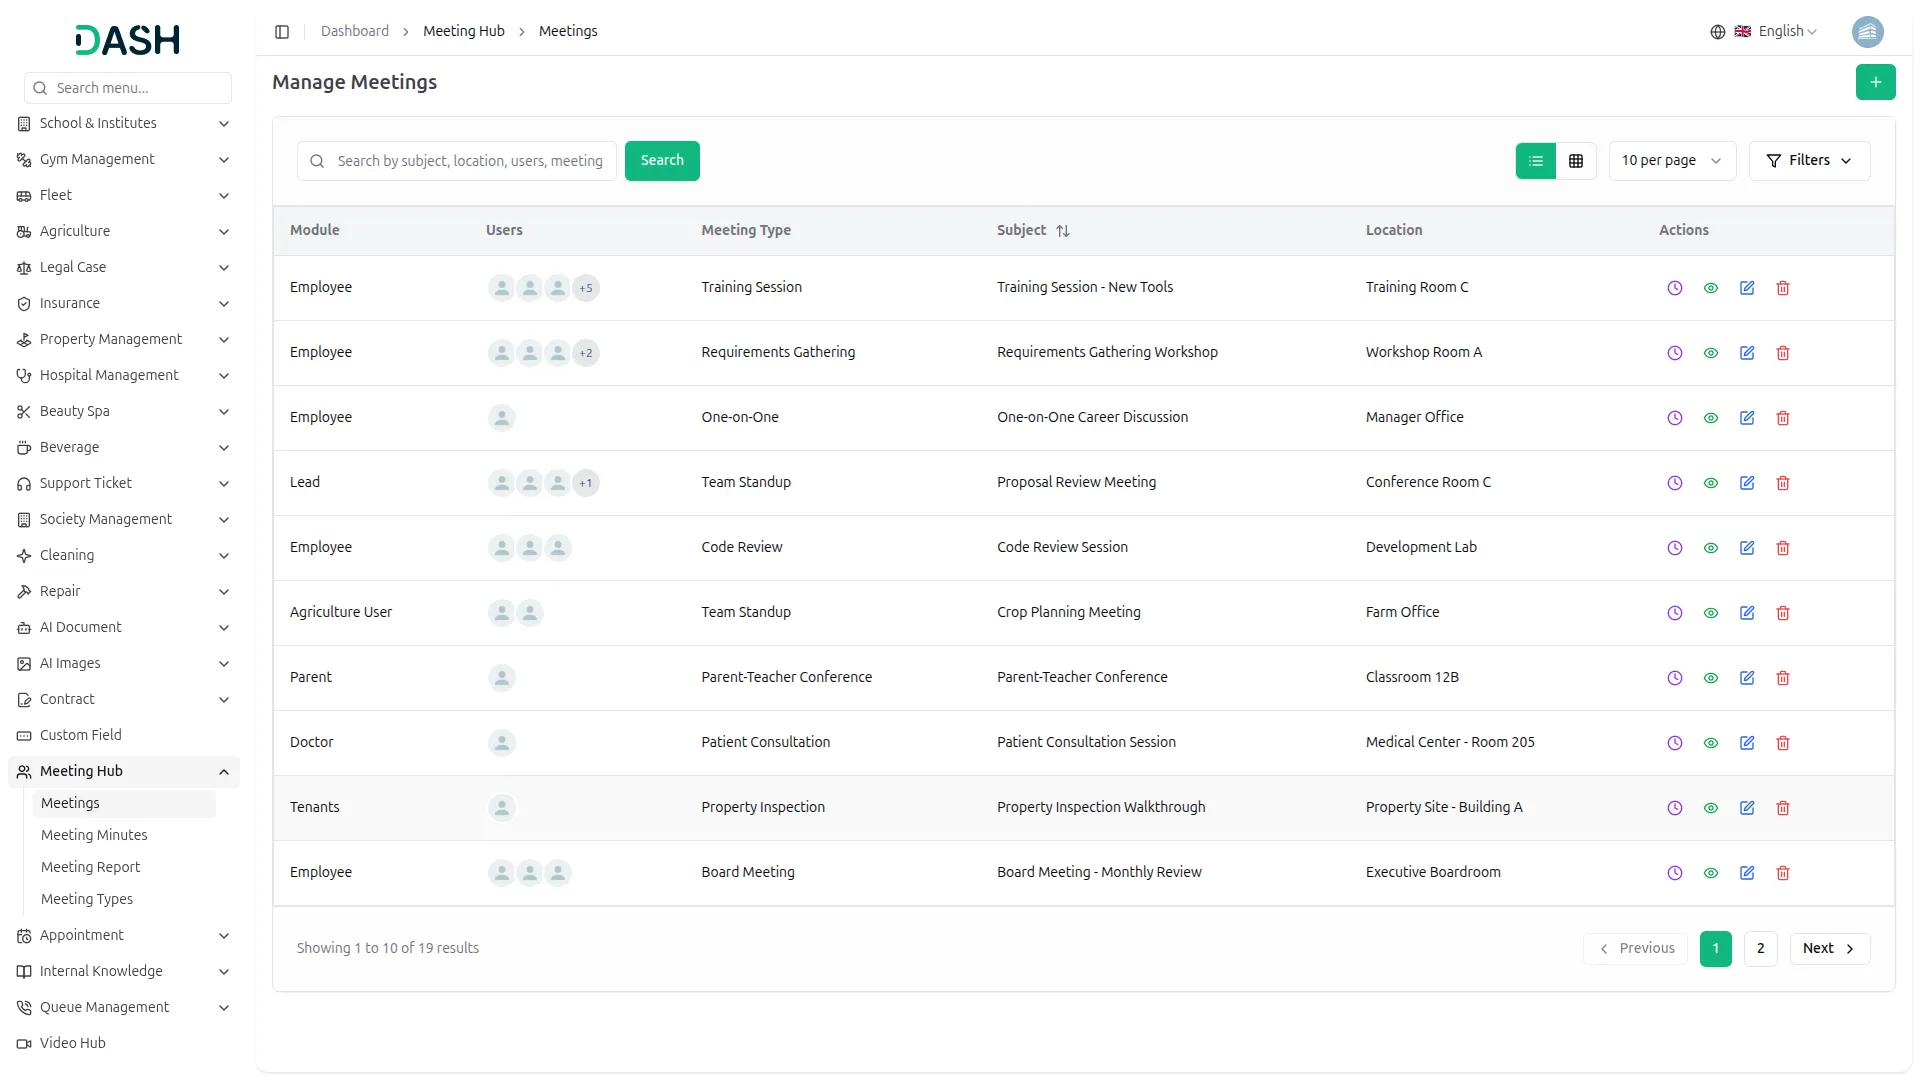
- On the meeting list page, you can easily create the meeting lists with the help of the create button given at the top. Just select the Module from the dropdown, select the users from the dropdown based on the selected module and generated from the users page, select the meeting type from the dropdown that is generated from the Meeting type module, enter the location, enter the meeting subject, and add the description last.
- Once you add the meeting list, it will be included in the list of meeting lists, including the details like module, from, user, meeting type, subject, and location. Besides all the details, you will see an action column from where you can see meeting minutes, view, edit, and delete buttons.
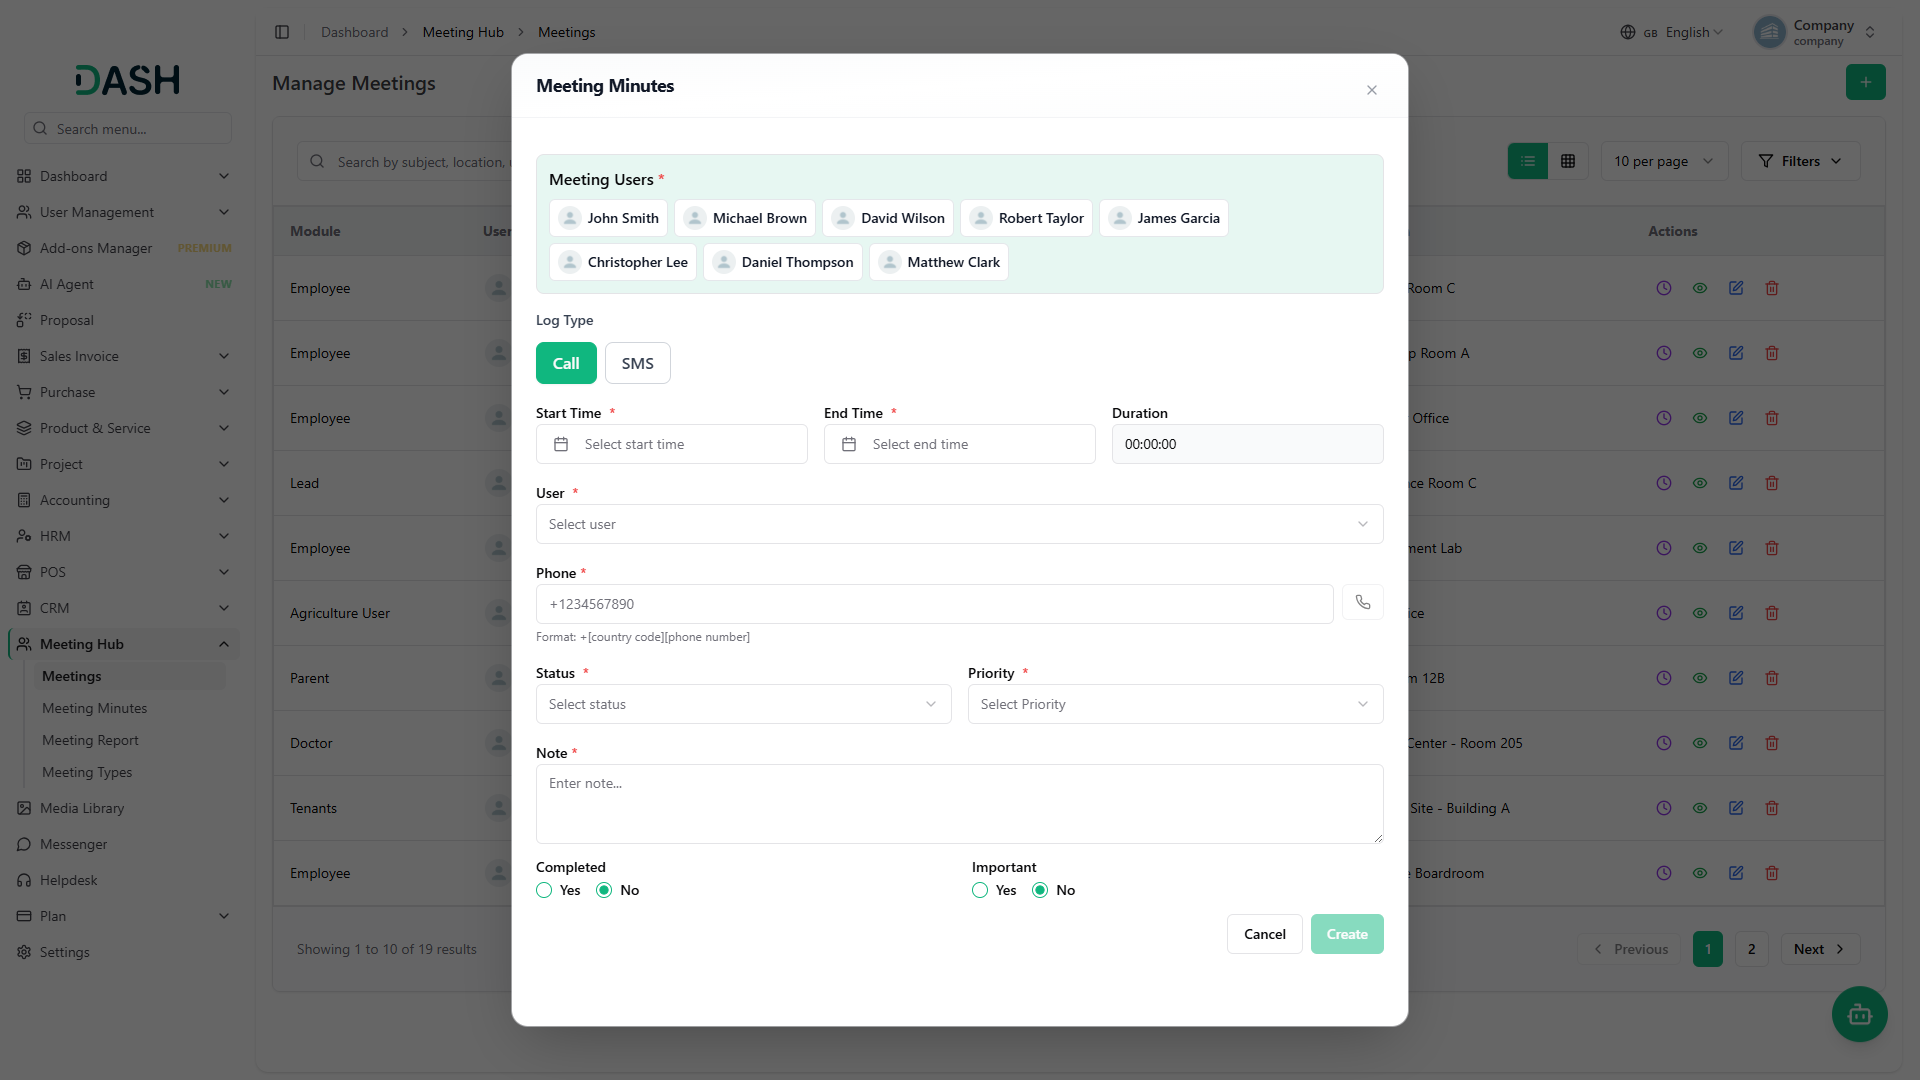
- If you click on the “meeting minutes” button, first of all, you can choose the meeting user which you added on Meeting List, log type (Call/SMS), select the user, start time, end time, duration (auto-generate based on selected start time and end time range), phone, and you can also call that phone number whenever you want by clicking “Call” button, it’s appear when selected log type call. If you selected log type SMS, then Write Your SMS Here and the “Send” button appears. Select the status of the meeting minutes, select the priority from the dropdown, note, then you need to select whether the meeting is completed or not, and beside that, you will need to select whether the meeting is important or not.
Manage Meeting Minutes
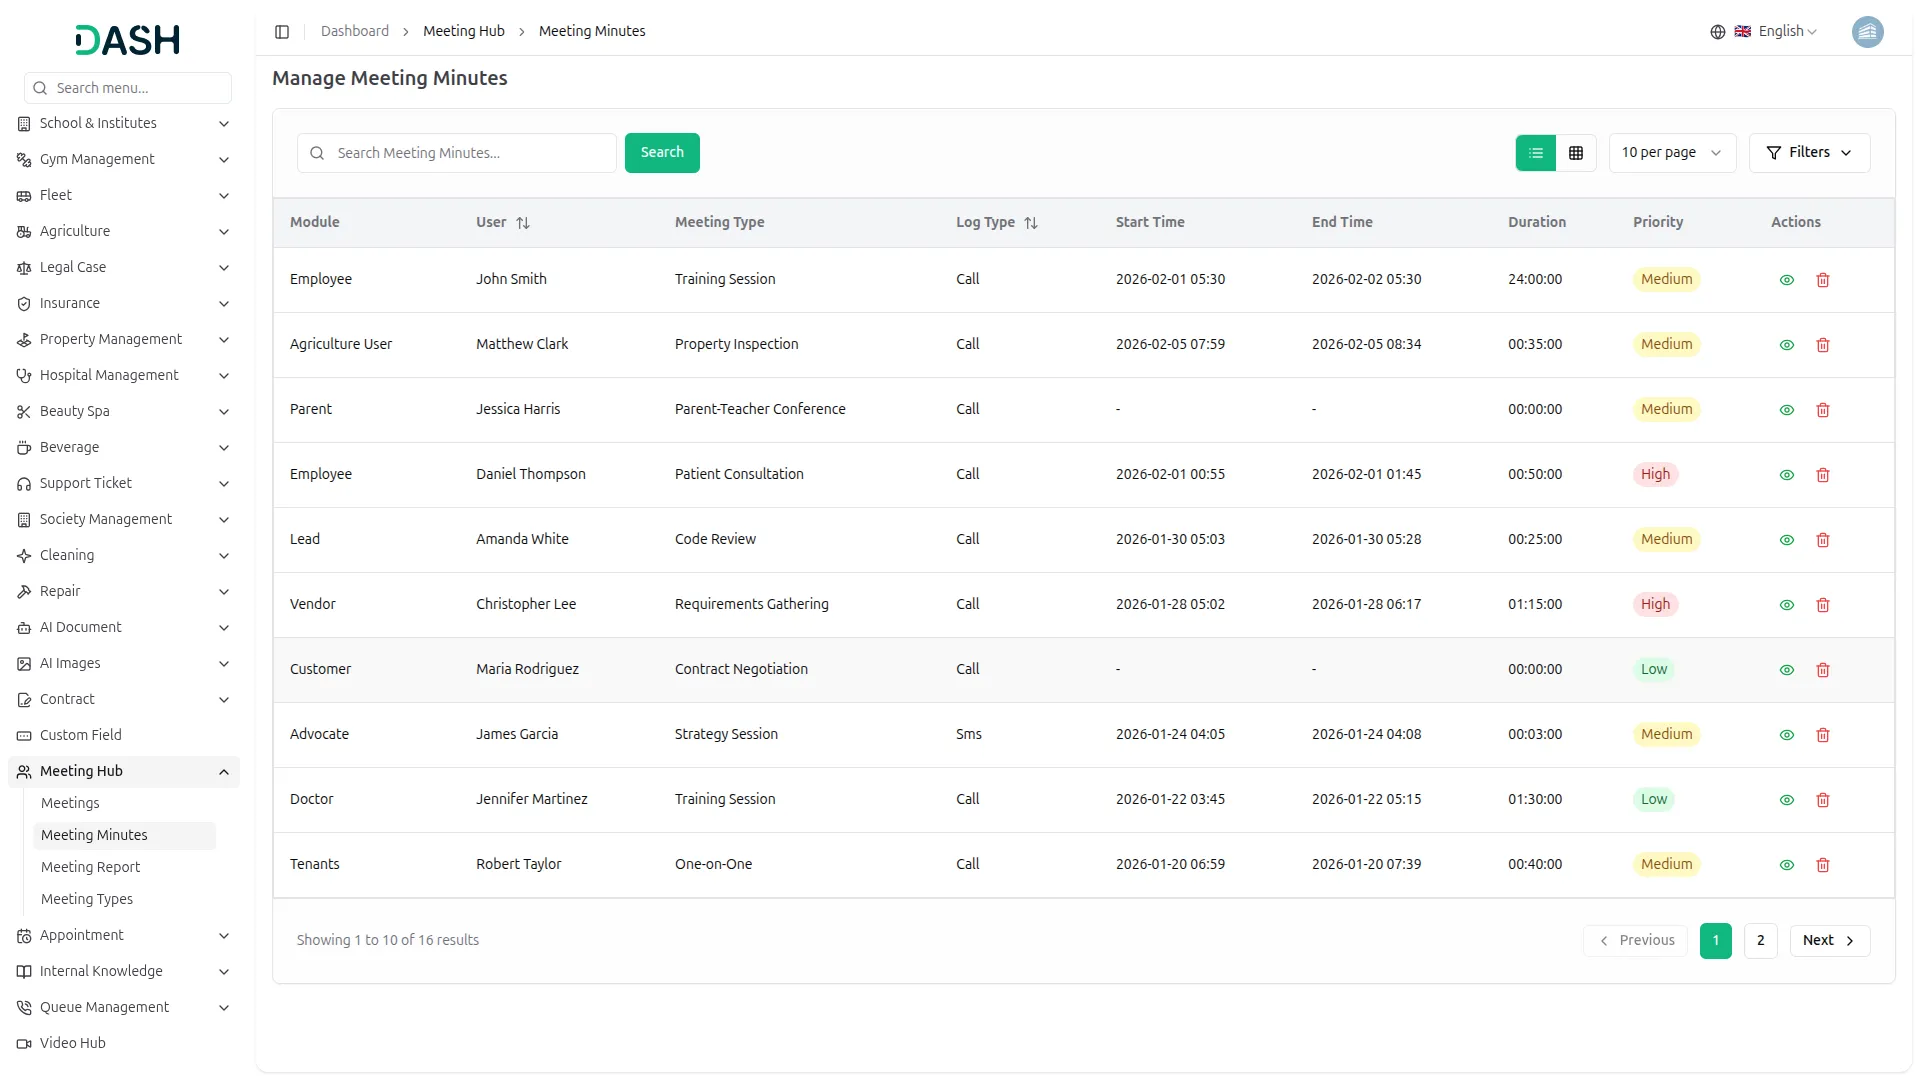
- The meeting minutes that you create on the meeting list page will be visible on this page. Here you will see the details like module, contact user, meeting type, log type, start time, end time, duration, priority, and an action column from where you can view or delete the meeting minutes whenever you want.
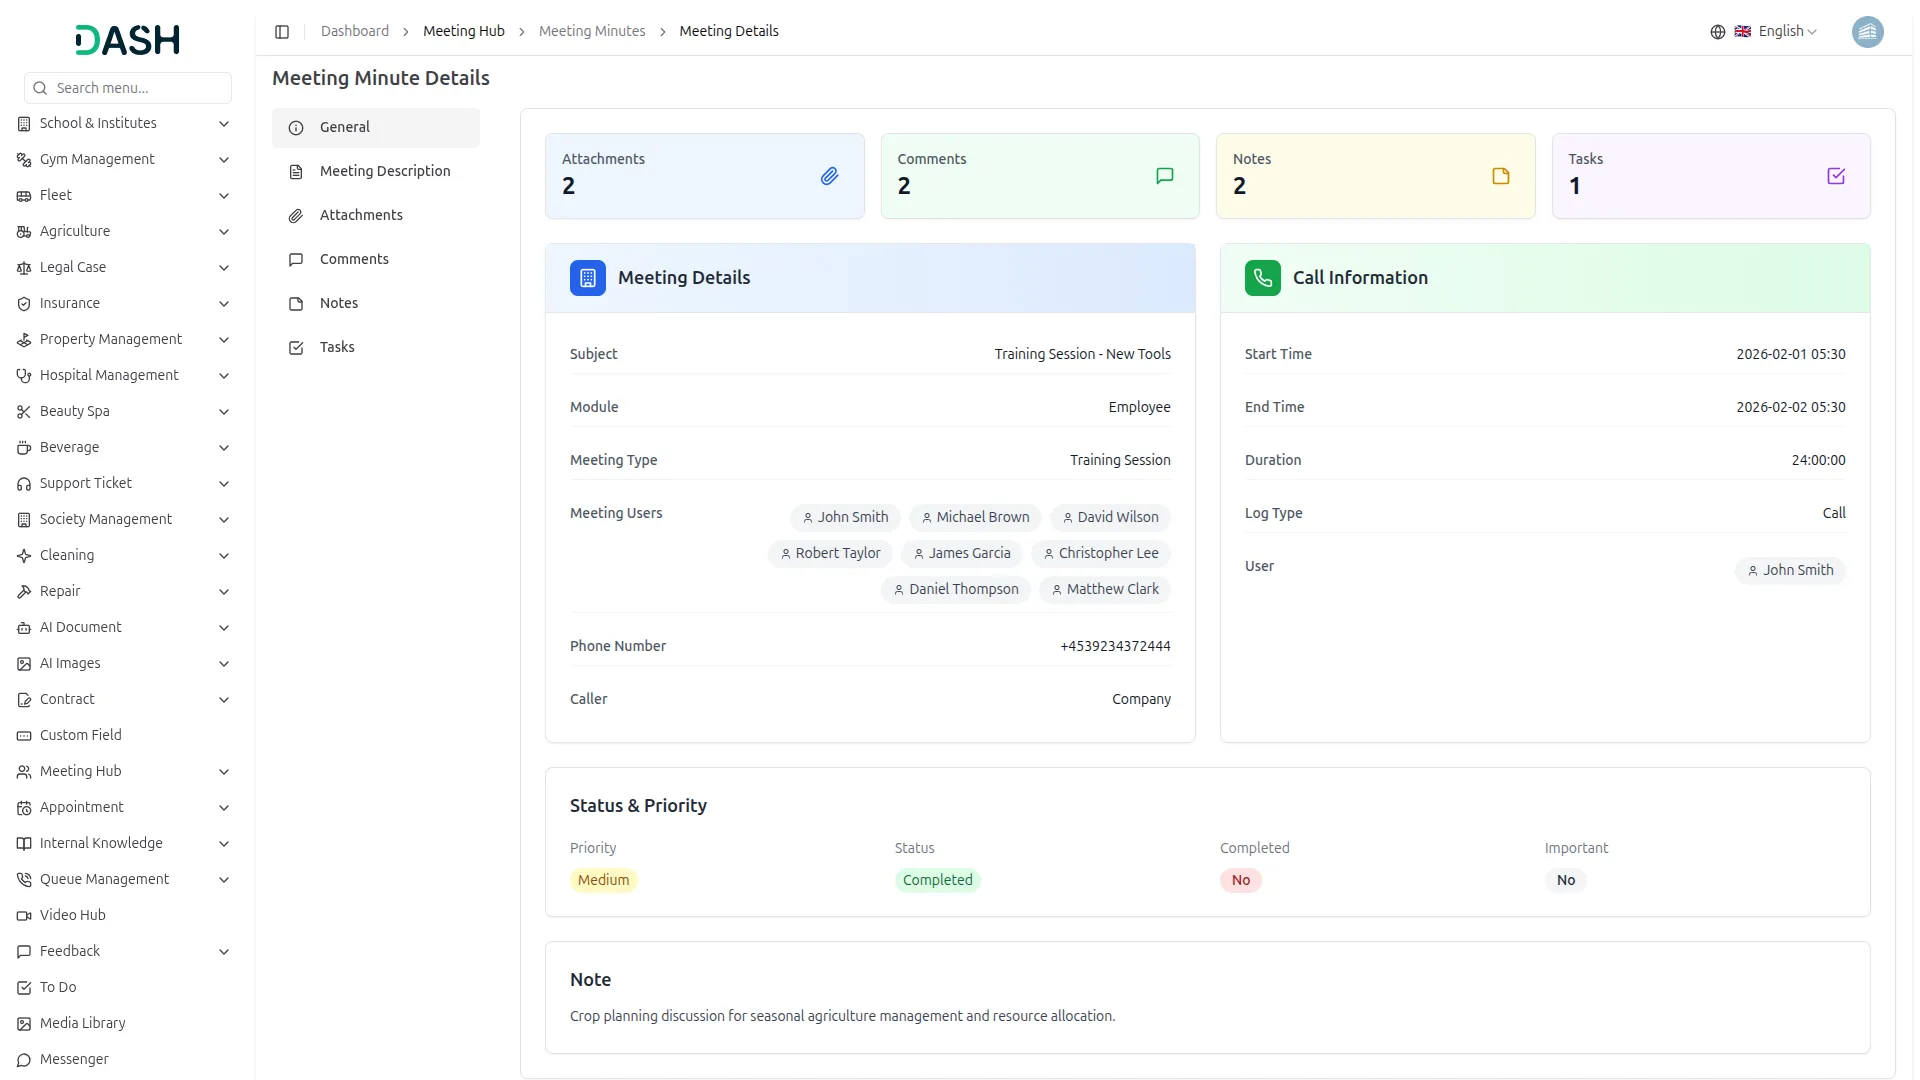
- When you click on the view button, you will see several details over there. First comes the general section, where you can see the number of attachments, the number of comments, the number of notes, the number of tasks, and other details like subject, module, user, and type.
- Then you will get to see the start time, end time, duration, note, priority, status, see whether the meeting is completed or not, and lastly, you will see whether it is important or not.
- Then you will see the meeting description. You can add or edit the description whenever you want. Then comes the section for attachments, where you will upload multiple images and a list of attachments with view, download, and delete buttons.
- After this comes the section for comments, where you can add the comments you want to add. Once the comments are sent, they will be visible below the comment box, and you can delete the comment whenever you want. After this comes the section for notes, where you can add notes and delete them whenever you want.
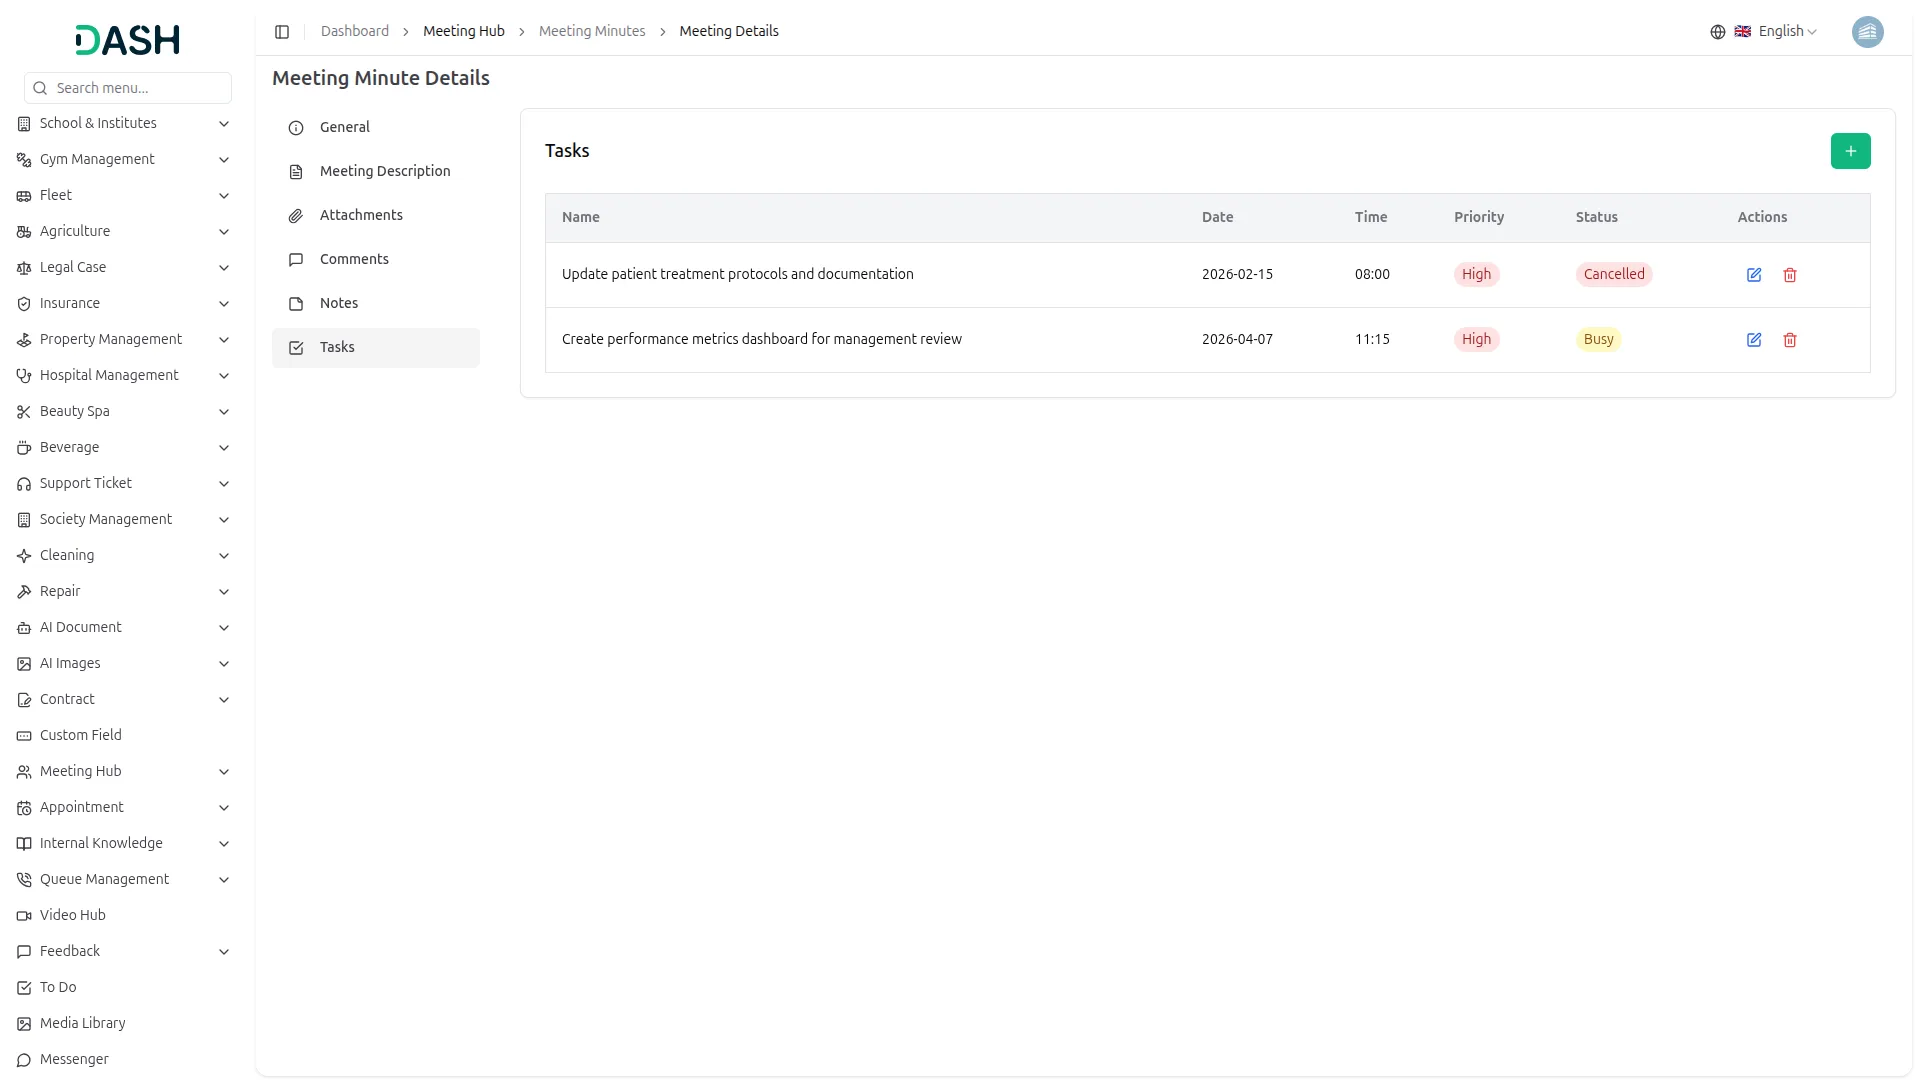
- At last, you will see the section of tasks where you can see the list of tasks, including the details like task name, priority, date & time, status, and action column from where you can edit or delete the task details. You can also create new tasks with the help of the create button given at the top of the tasks section. You just need to add the details like name, date, time, select the priority from the dropdown, and the status
Meeting Report
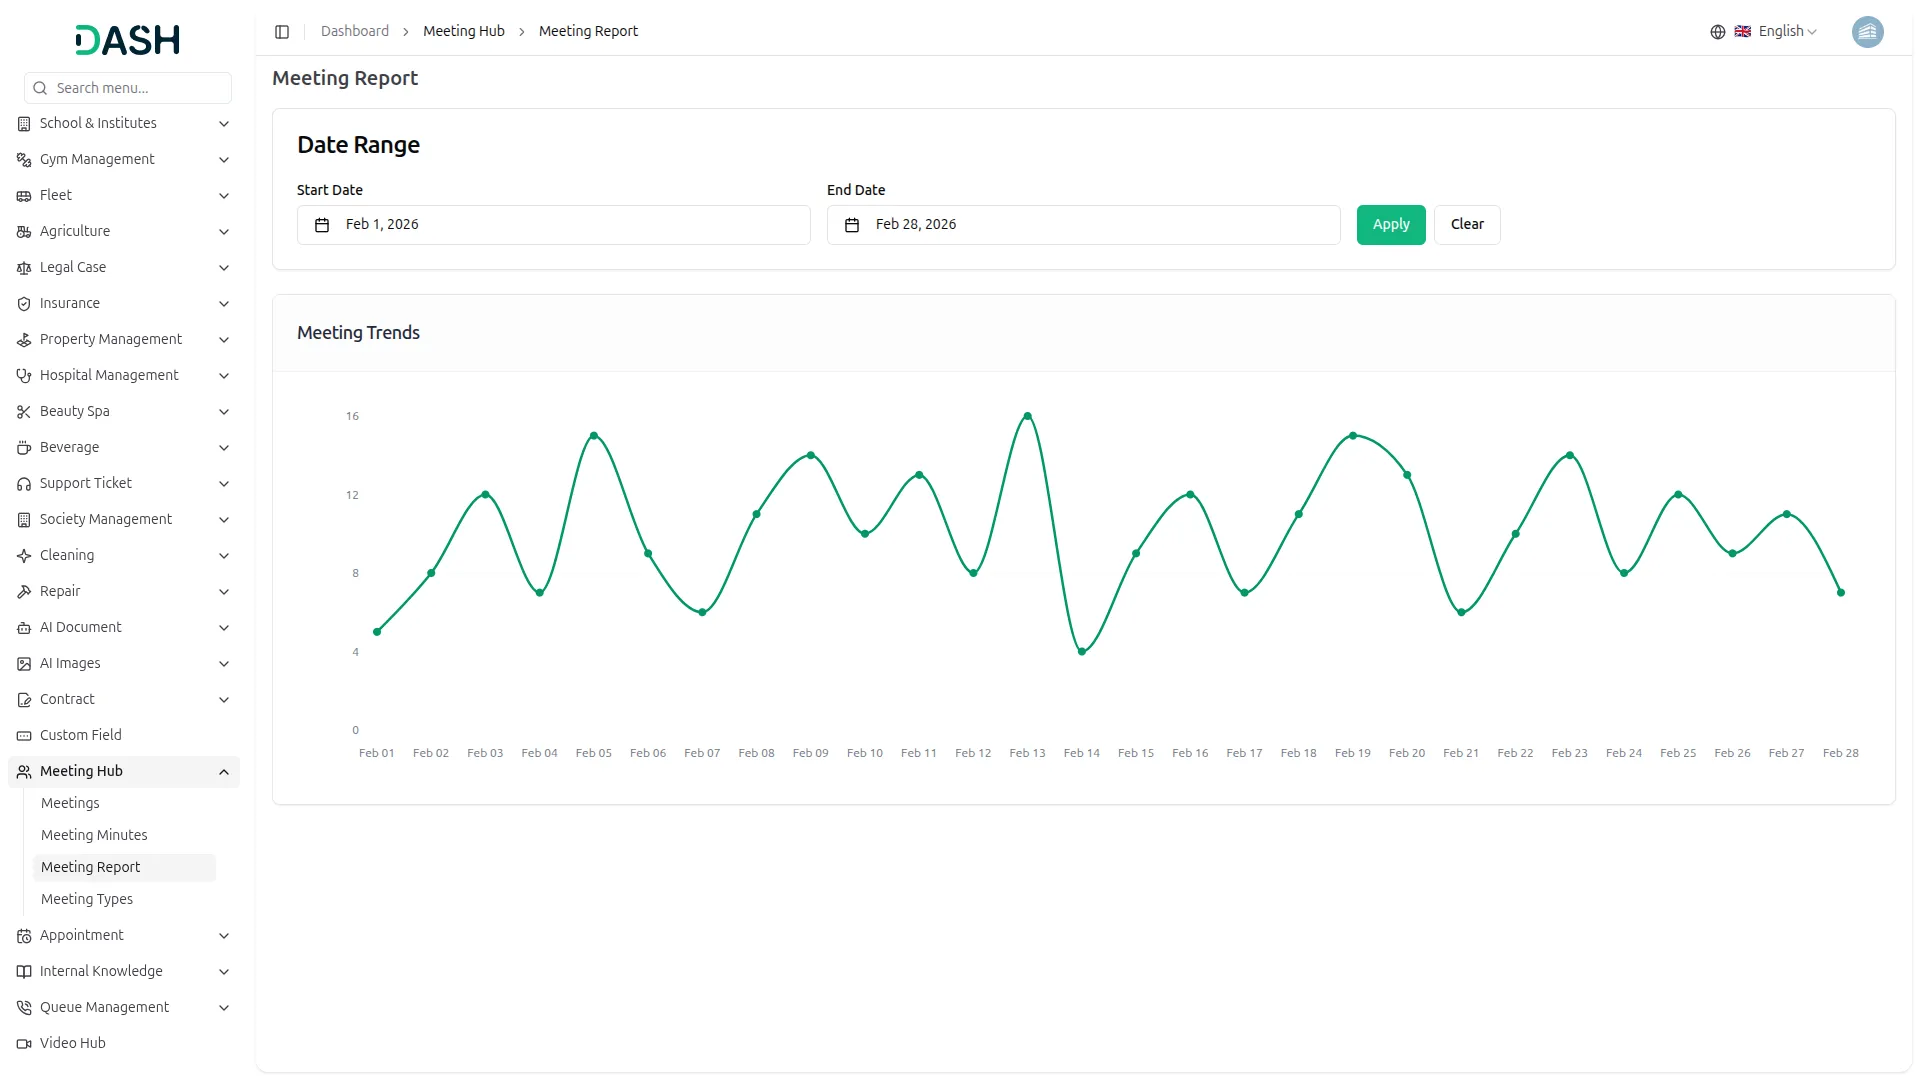
- The Meeting Report page displays a Date Range section at the top, where you can set a Start Date and End Date, then click Apply to filter the report, or Clear to reset the range.
- Below that, the Meeting Trends section shows a line chart of your meeting volume over the selected date range, with each point on the graph representing the number of meetings held on that day.
- Hover over any point on the chart to view the exact meeting count for that specific date, making it easy to spot peaks and dips in activity throughout the month.
Manage Meeting Types
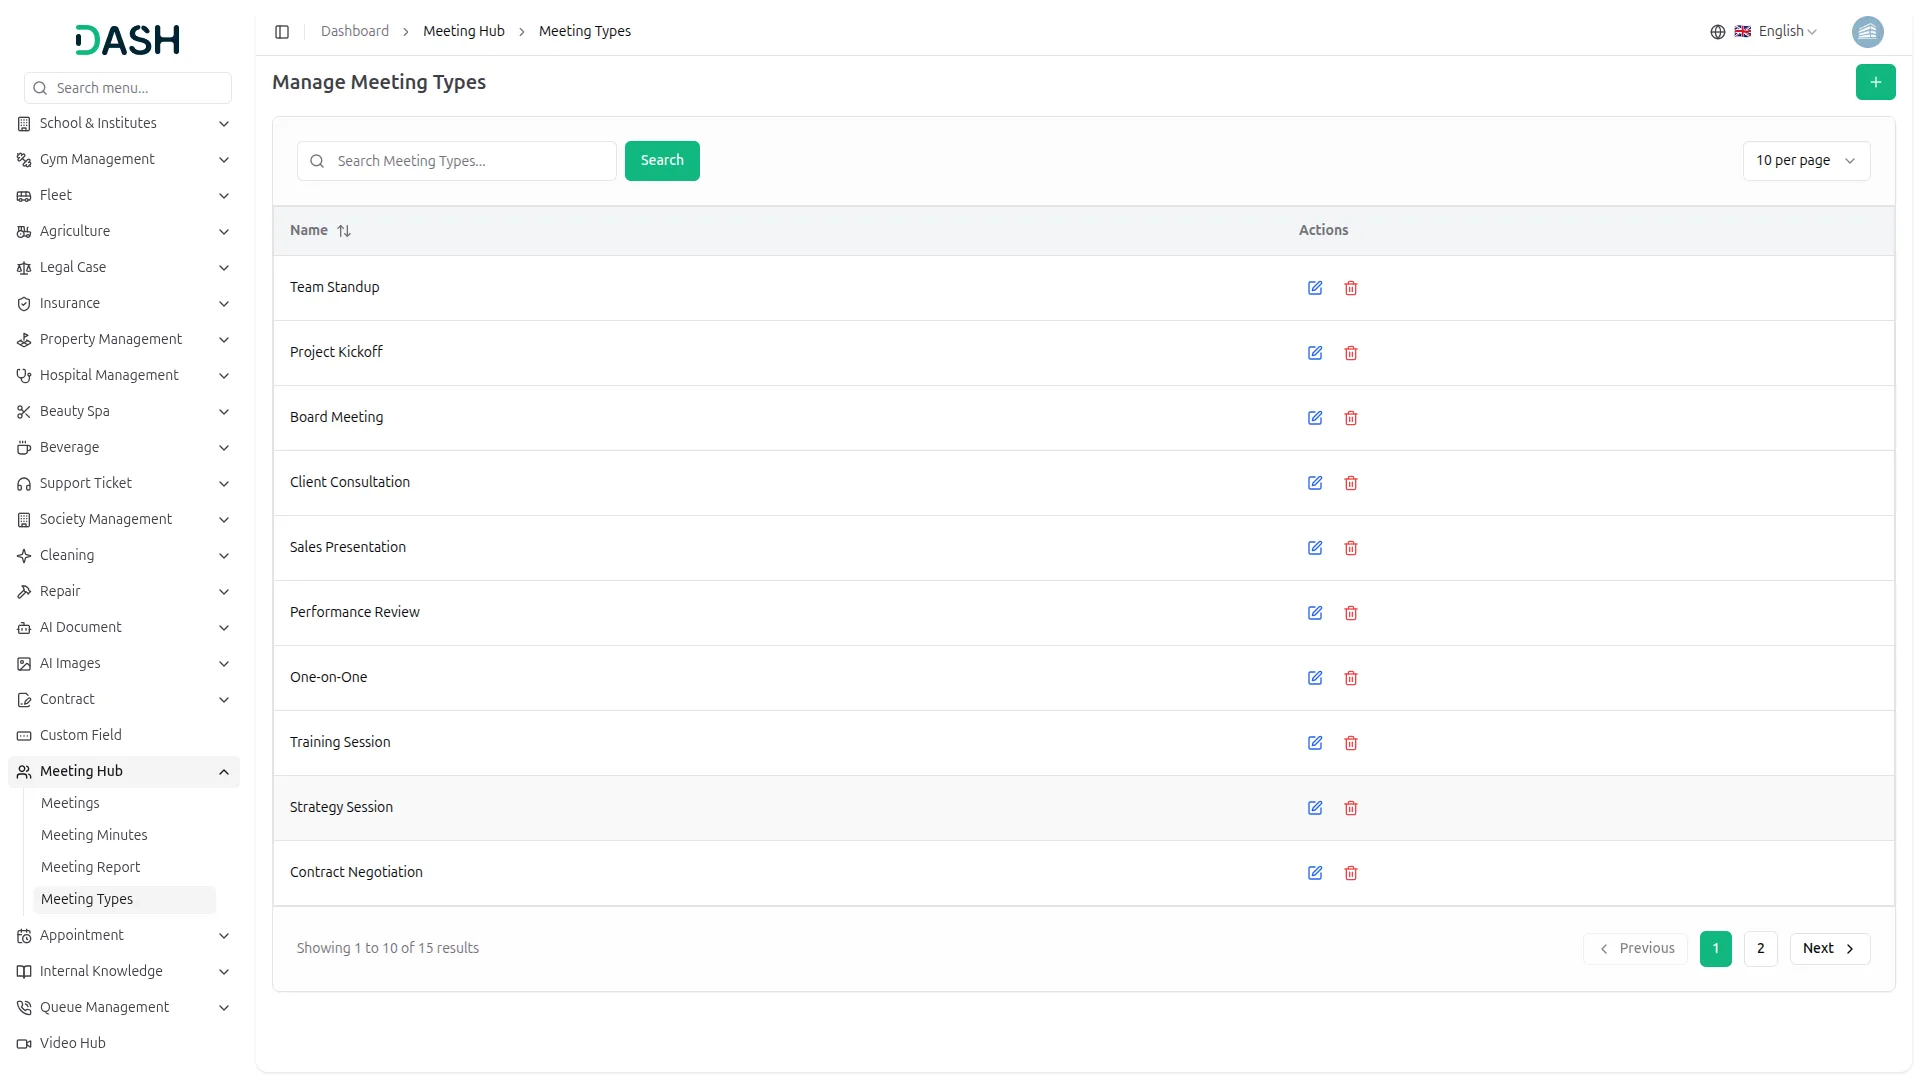
- To create a new meeting type, click the “Create” button on the Manage Meeting Types page. In the Create Meeting Type window, enter a Name and click “Create” to save it.
- The Manage Meeting Types page shows a table of your meeting types with columns for Name and Actions. Use the Search bar to find a specific meeting type by name.
- In the Actions column, click the edit option to update a meeting type’s name, or click the delete option to trash it.
Note:
- You will only be able to send SMS if the Twilio Add-On is enabled on your platform.
- Here is a list of some Add-Ons that we can easily connect to with the Meeting Hub Add-On.
Accounting
- Client
- Vendor
CRM
- Lead
HRM
- Employee
School-Institute Management
- Parent
Legal Case Management
- Advocate
Agriculture Management
- Agriculture User
Property Management
- Tenants
Hospital Management
- Doctor
Categories
Related articles
- App Download – vCard SaaS Add-On Guide
- PrintPress Management – WorkDo Dash SaaS Add-On Guide
- Sign in with LinkedIn – eCommerceGo SaaS Add-On Guide
- WhatsApp API – BookingGo SaaS Add-On Guide
- WooCommerce – WorkDo Dash SaaS Add-On Guide
- Discount – BookingGo SaaS Add-On Guide
- Bakery Store – WorkDo Dash SaaS Add-On Guide
- WizzChat – BookingGo SaaS Add-On Guide
- PayPal – WorkDo Dash SaaS Add-On Guide
- Product Catalog Request – eCommerceGo SaaS Add-On Guide
- Car Dealership – WorkDo Dash SaaS Add-On Guide
- Import Export – eCommerceGo SaaS Add-On Guide
We're Here to Help - Let's Talk
Have questions about our solutions, customization services, or business tools? Our team is here to help you. let's talk.