NGO Management Integration in Dash SaaS
The NGO Management System is a comprehensive solution designed to help non-governmental organizations manage their operations effectively.
Introduction
The NGO Management System is a comprehensive solution designed to help non-governmental organizations manage their operations effectively. This system handles donor management with automatic profile creation, donation processing through multiple payment methods, including PayPal and Stripe, campaign management for fundraising activities, and volunteer coordination. The system includes frontend website functionality allowing donors to contribute online, volunteers to register themselves, and users to submit help requests. It also provides fund utilization tracking, beneficiary management, blog system for content publishing, newsletter management, gallery organization, and complete system customization options for managing the entire NGO operations from a single platform.
How to Install the Add-On?
To Set Up the NGO Management Add-On, you can follow this link: Setup Add-On
How To Use The NGO Management Add-On?
Frontend Website Pages
Home Page
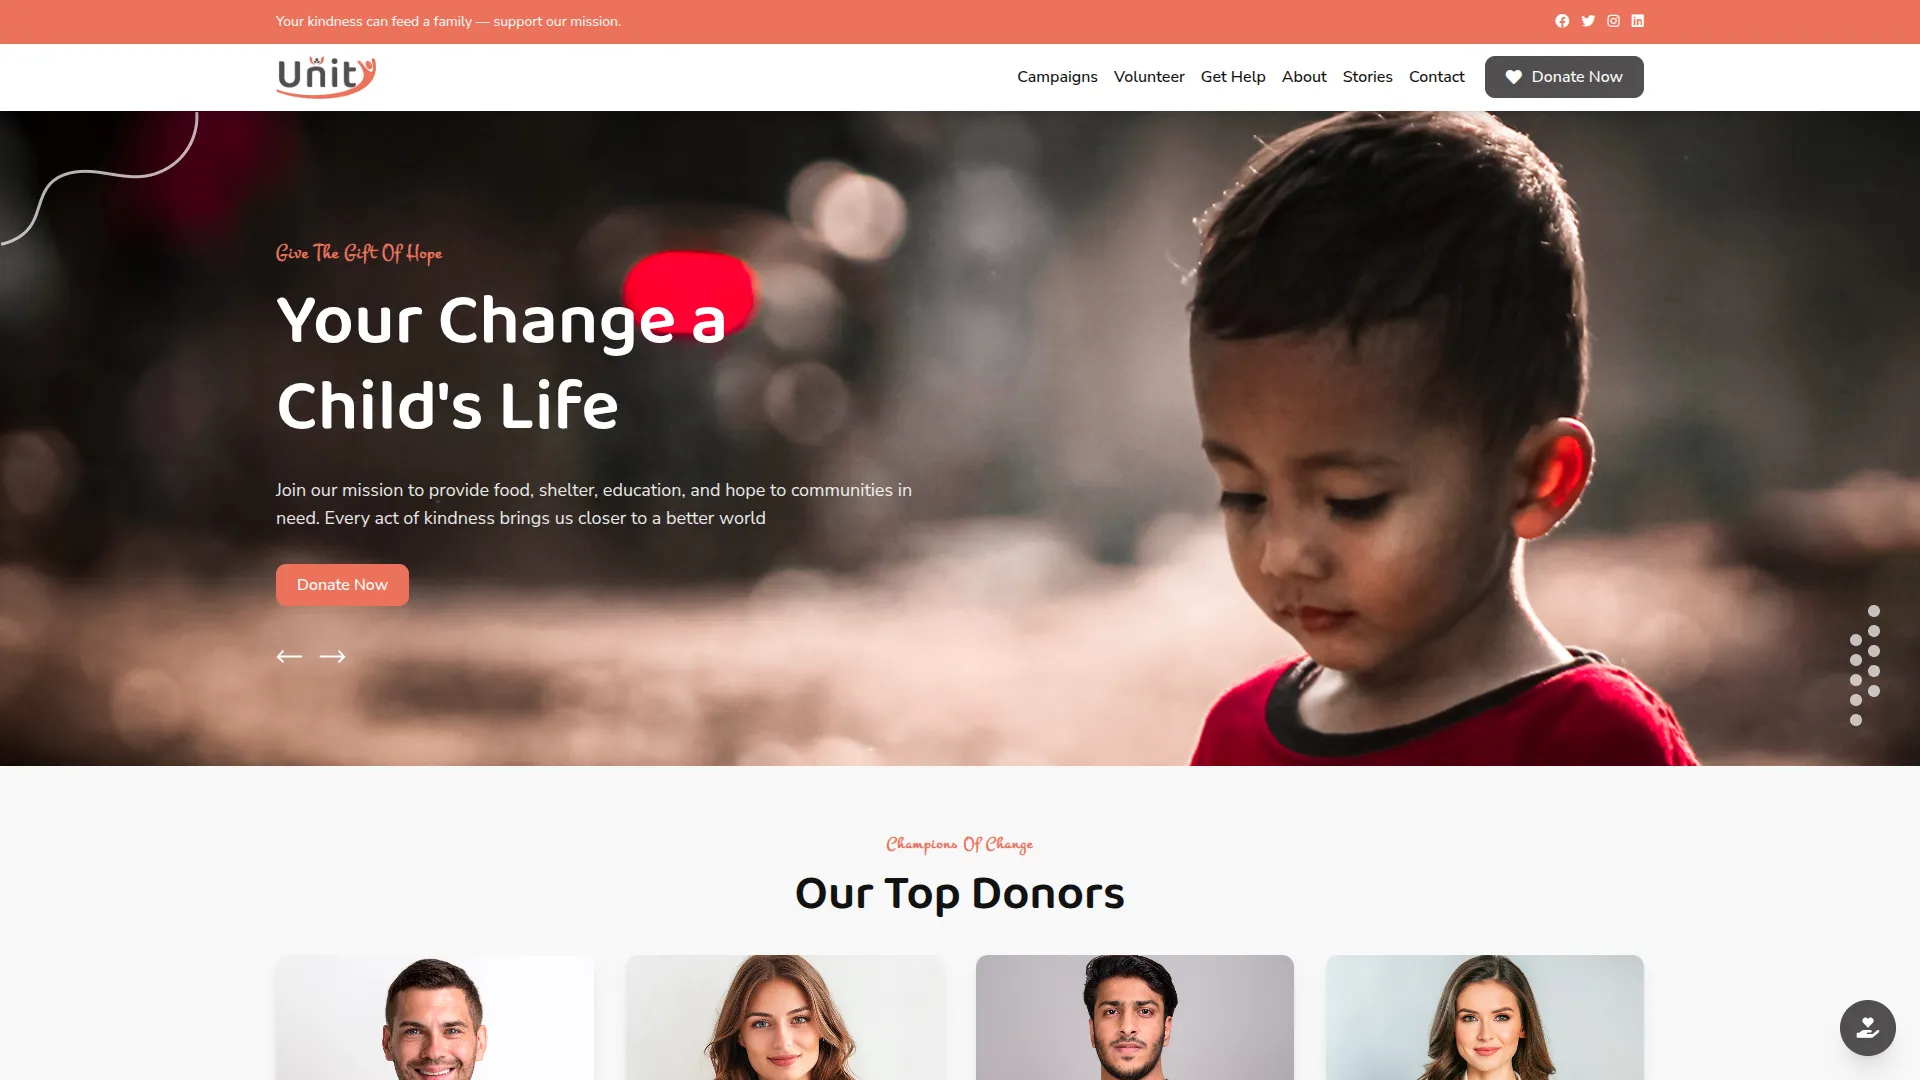
- The home page serves as the main landing page for your organization’s website. Visitors will see an engaging hero banner that introduces your organization, a section highlighting top donors to build credibility, and a quick donation form for immediate contributions.
- The page also displays campaign highlights showing current fundraising efforts, a gallery section with impactful photos of your work, newsletter subscription options, and volunteer registration forms to convert visitors into active supporters.
Campaigns Page
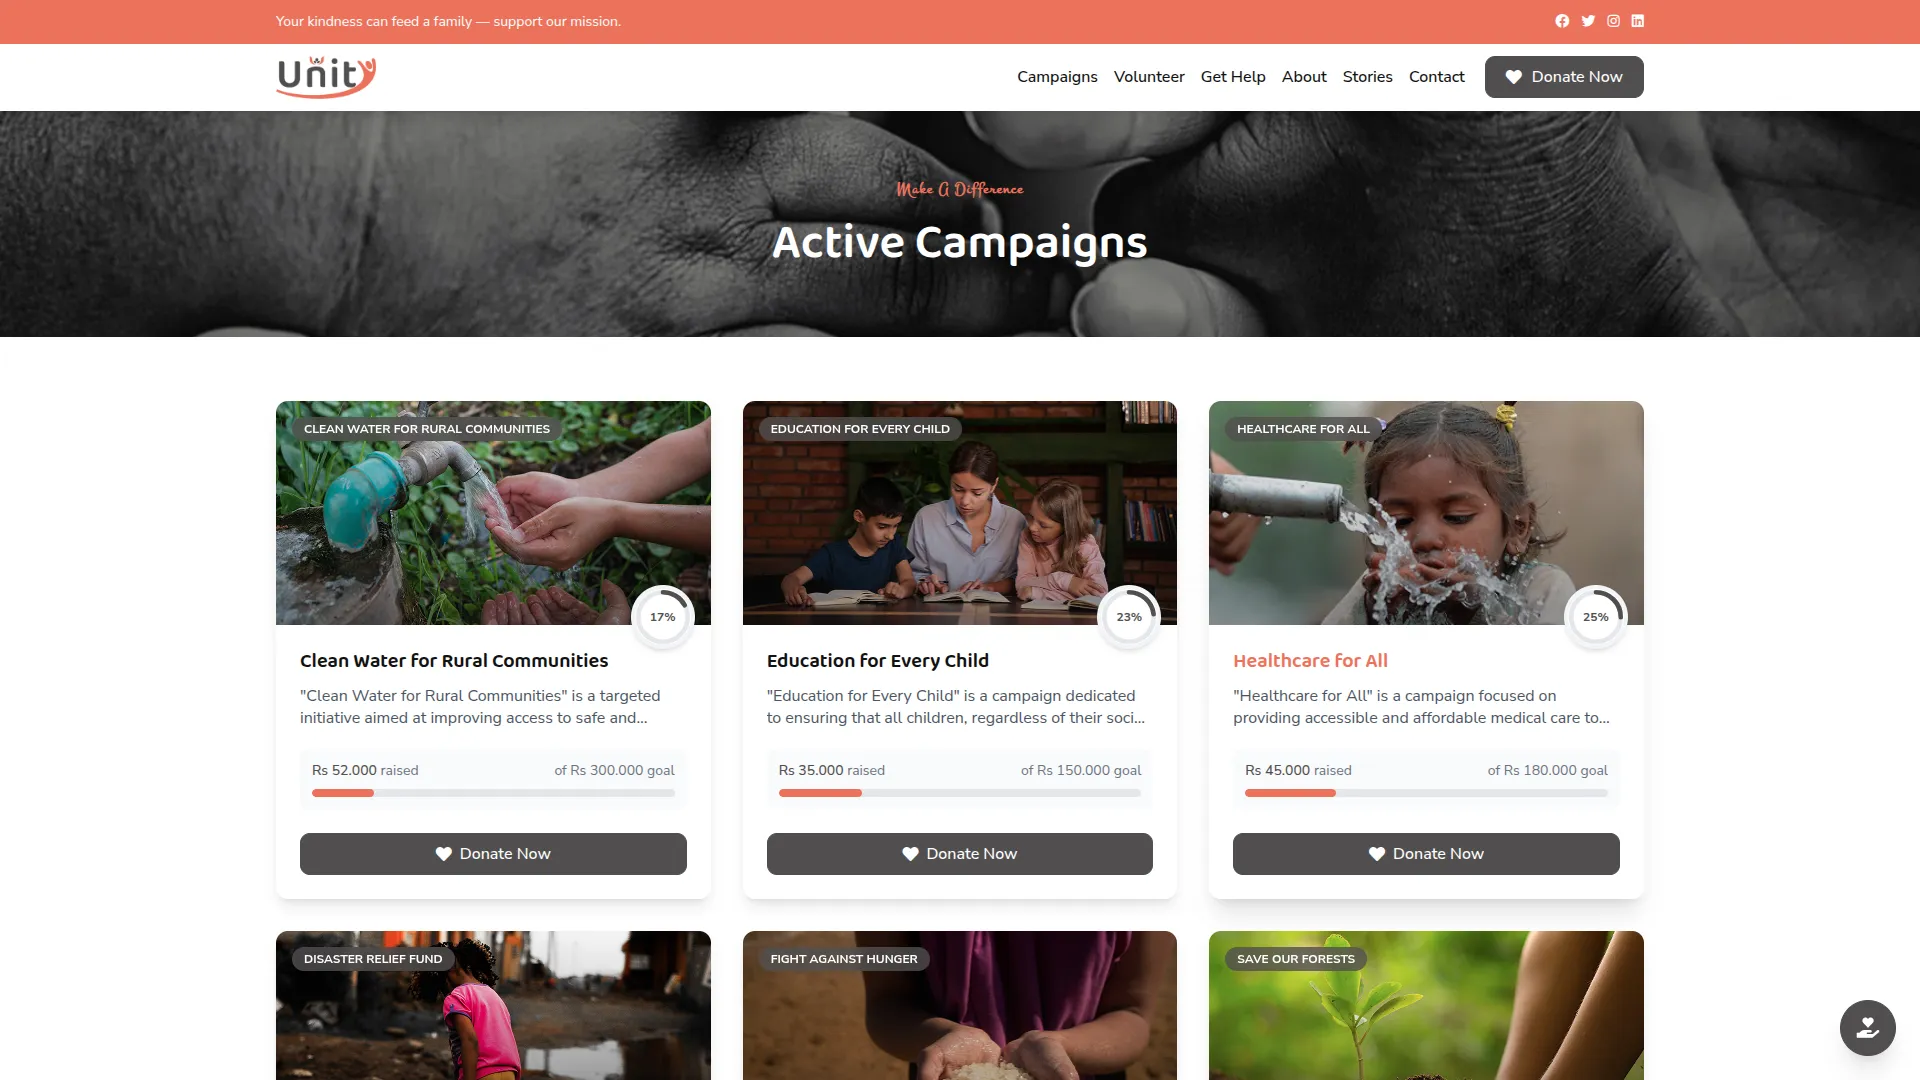
- This page displays all your active fundraising campaigns to website visitors. Each campaign shows progress tracking with visual indicators, donation buttons for immediate contributions, and detailed information about the campaign goals and current status.
- This transparency encourages support by showing exactly how much has been raised and what still needs to be collected.
Volunteer Page
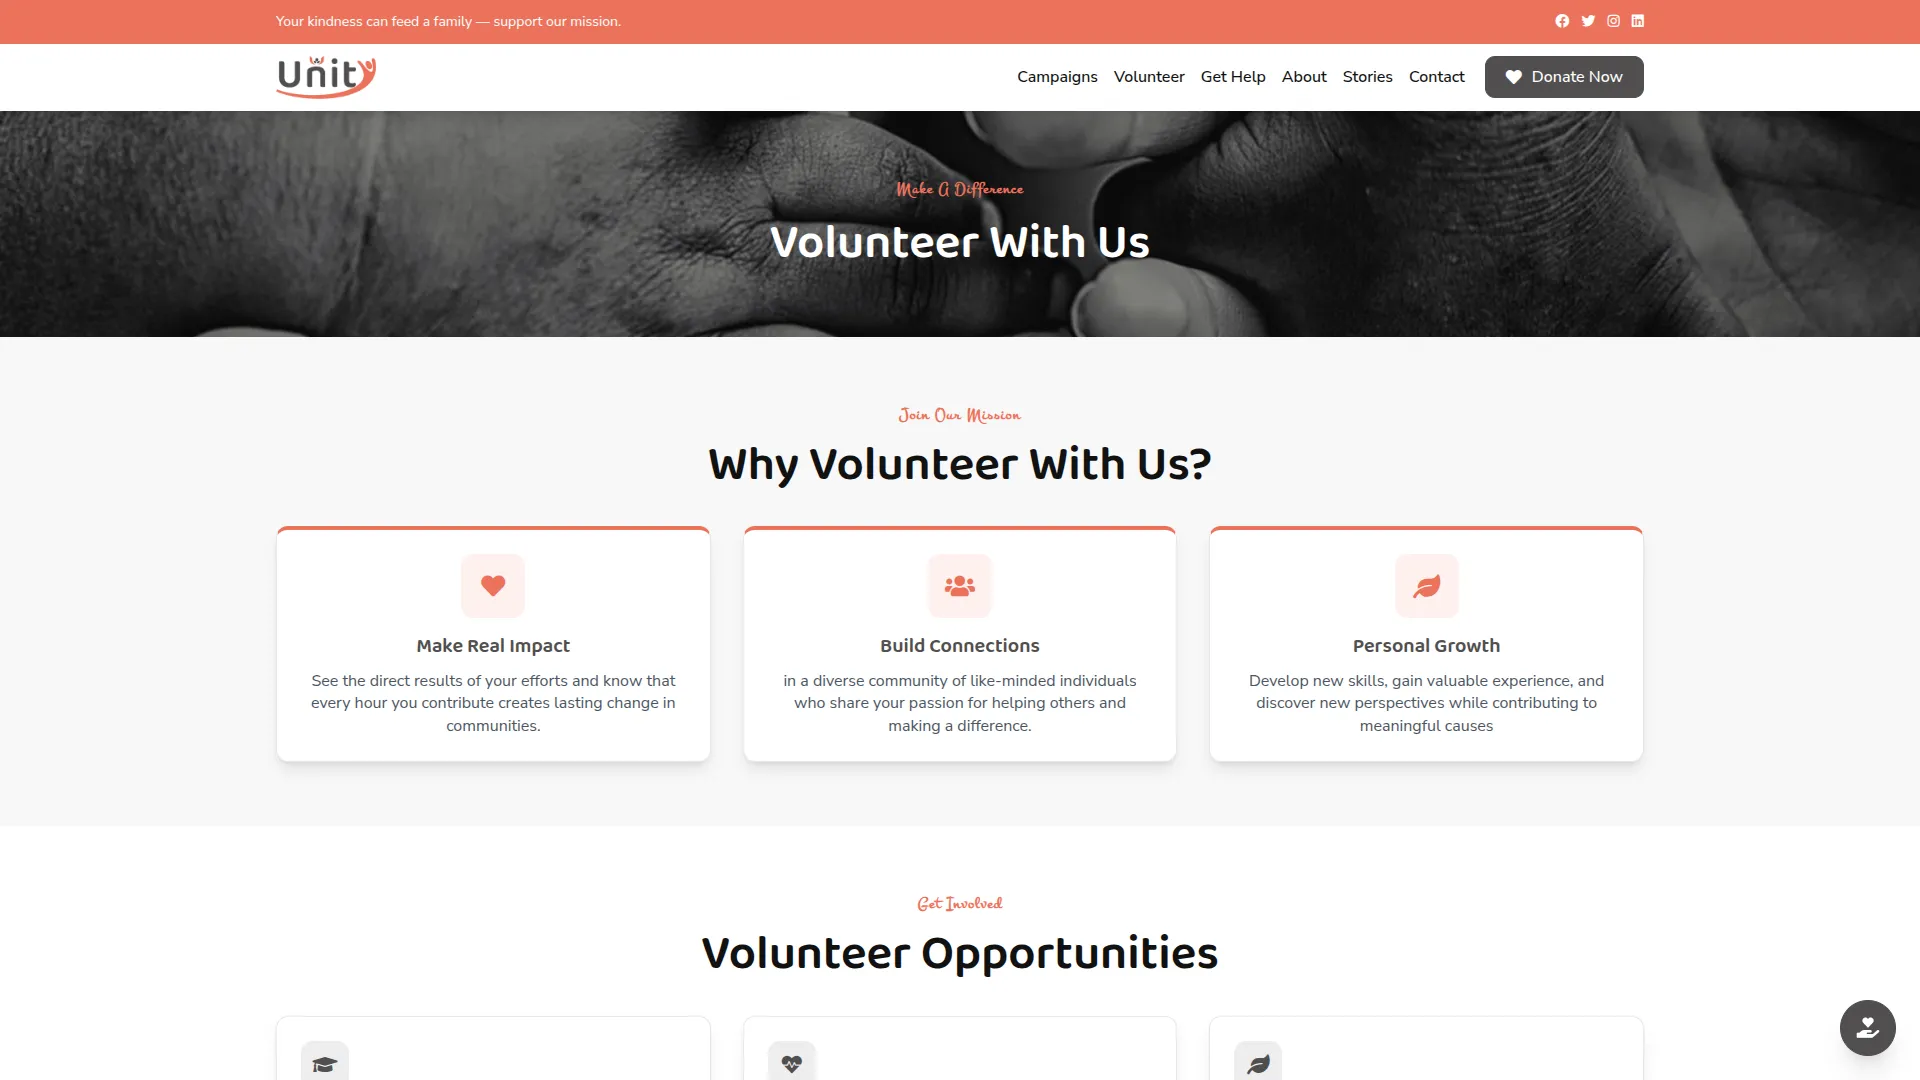
- The volunteer page is designed to attract new volunteers by showcasing the benefits of volunteering with your organization.
- It displays available volunteer roles with clear descriptions and requirements, along with a simple registration process where interested individuals can sign up by providing their contact information, skills, and availability.
Get Help Page
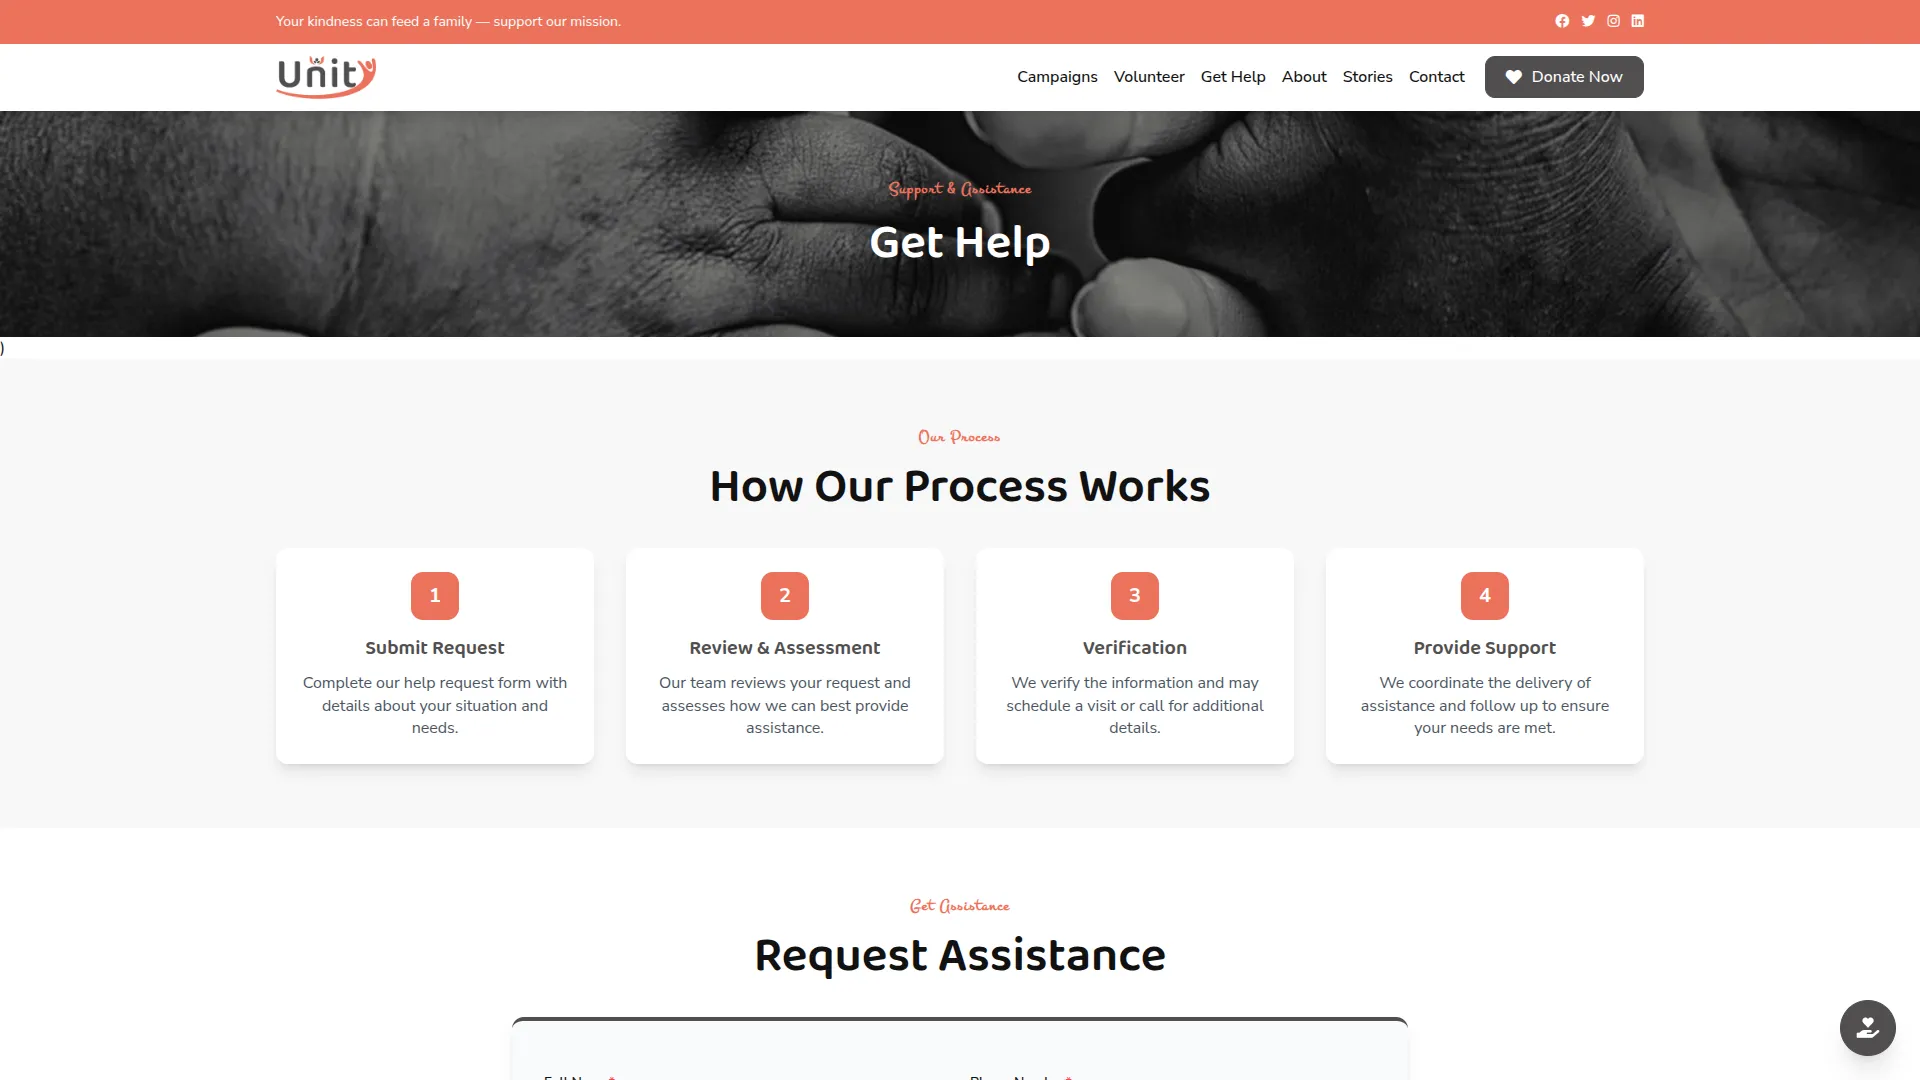
- This page provides a simple form where individuals can request assistance from your organization. The page displays different help categories available, shows urgent contact information for immediate needs, and allows users to upload supporting documents with their requests.
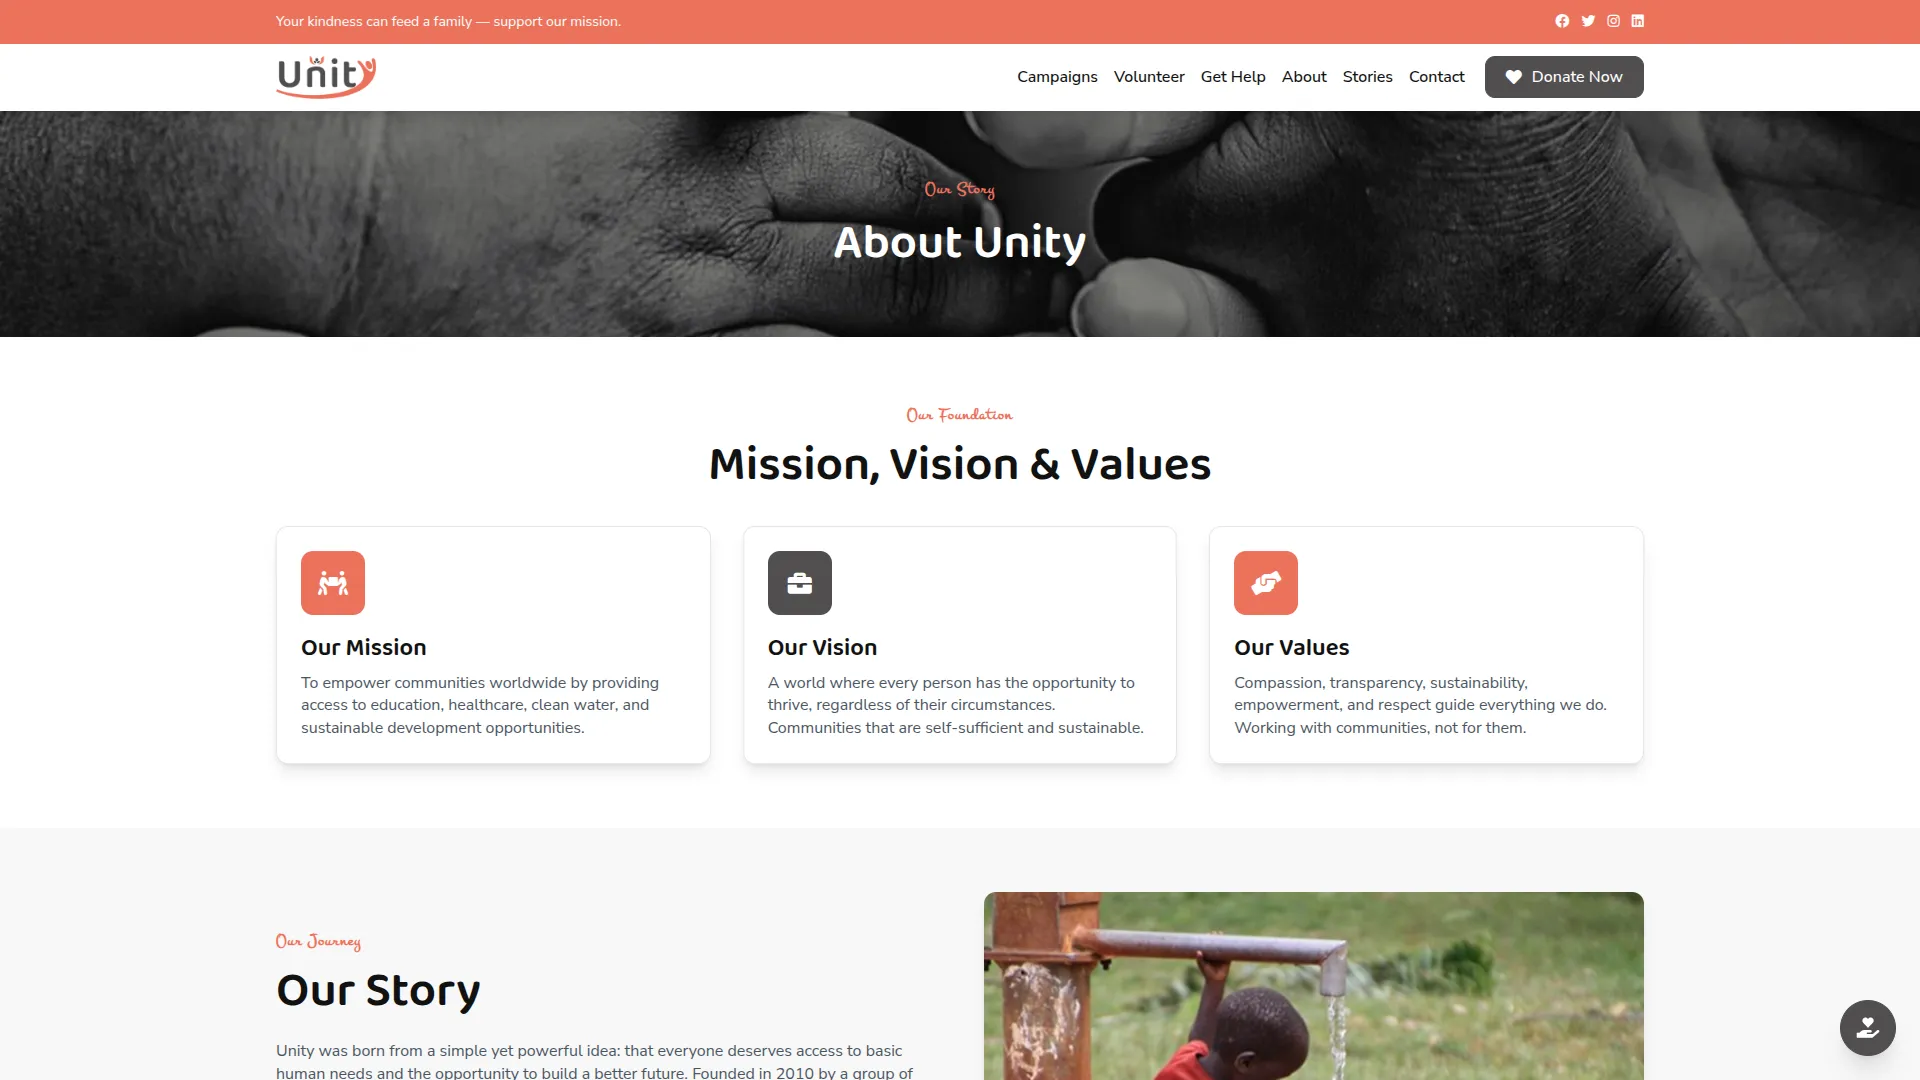
About Page
- The about page builds trust and credibility by introducing your organization’s mission, values, and history. It features team member profiles with photos and descriptions, highlights organizational achievements, and provides background information that helps visitors understand your organization’s purpose and impact.
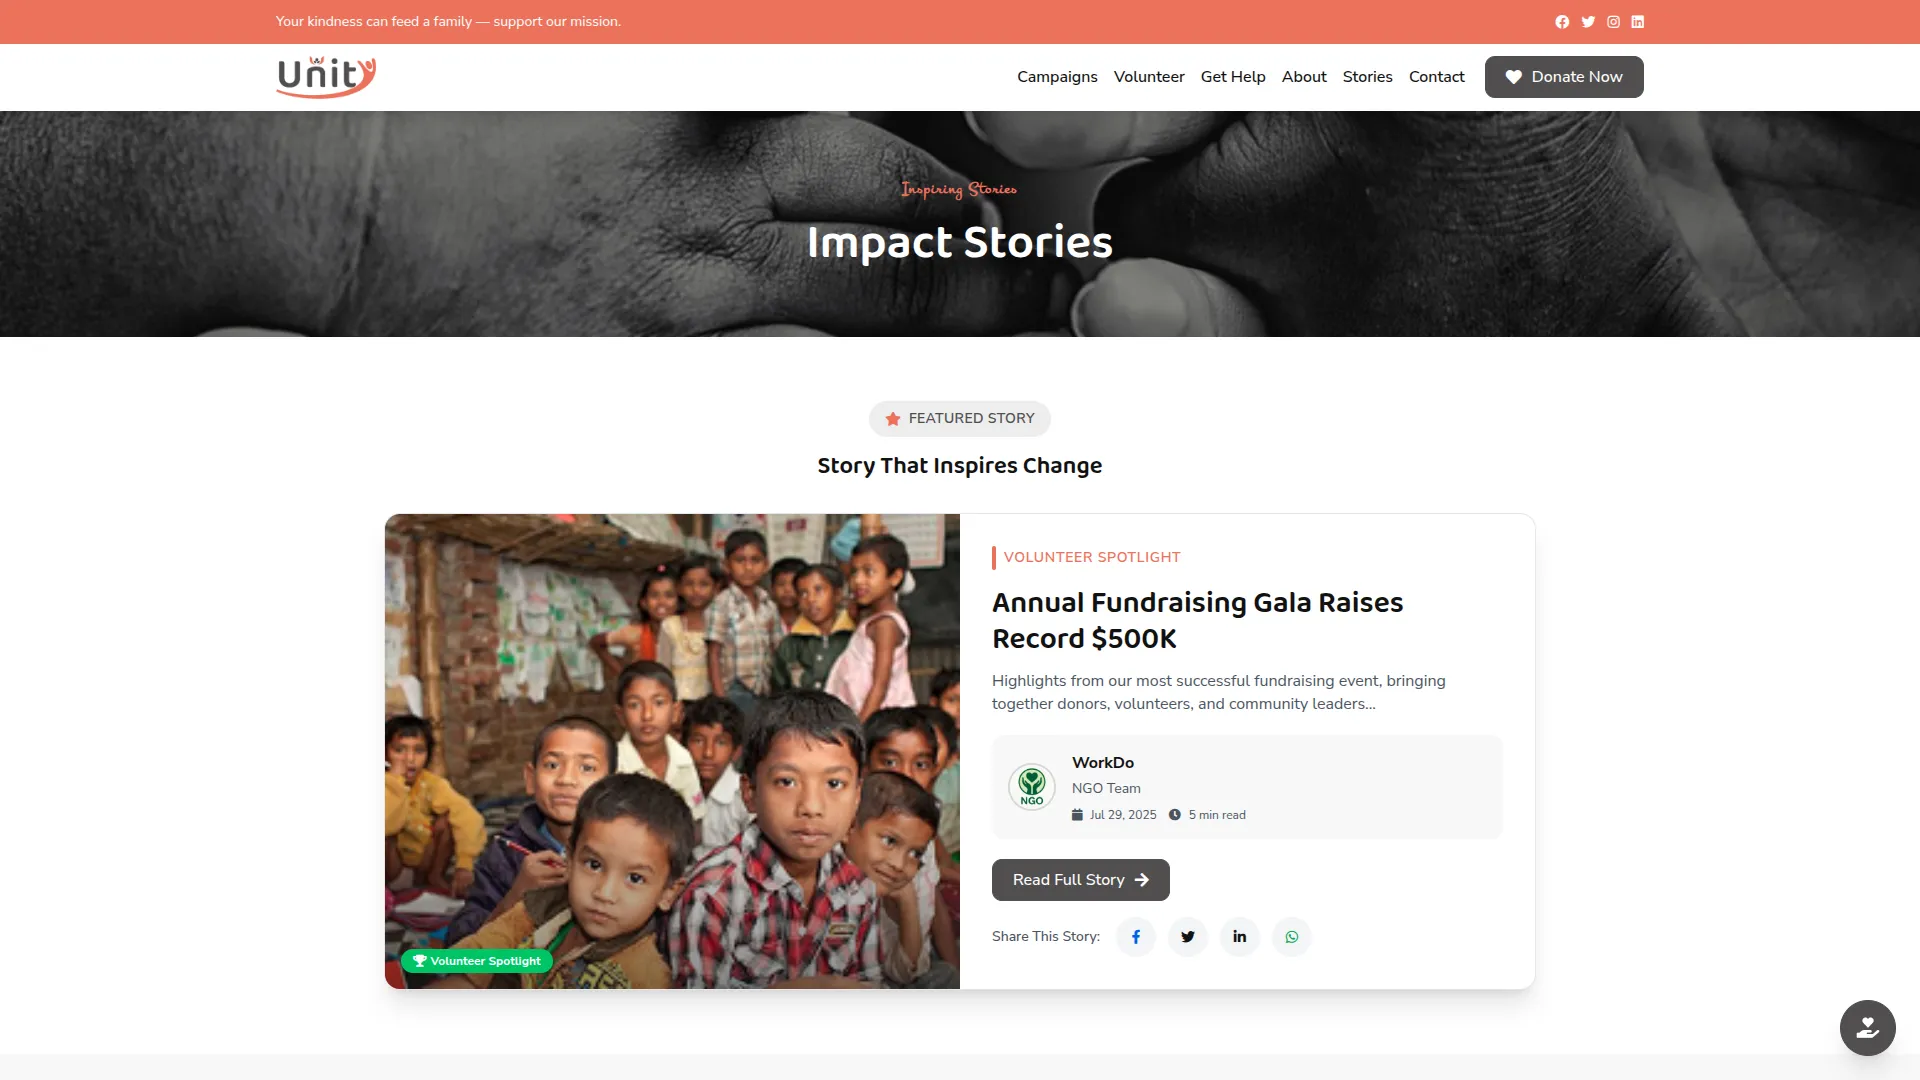
Stories Page
- This page keeps supporters informed and emotionally connected through impact stories, blog posts, and campaign updates. It showcases real beneficiary success stories, project outcomes, and organizational achievements to demonstrate the direct impact of donations and volunteer work.
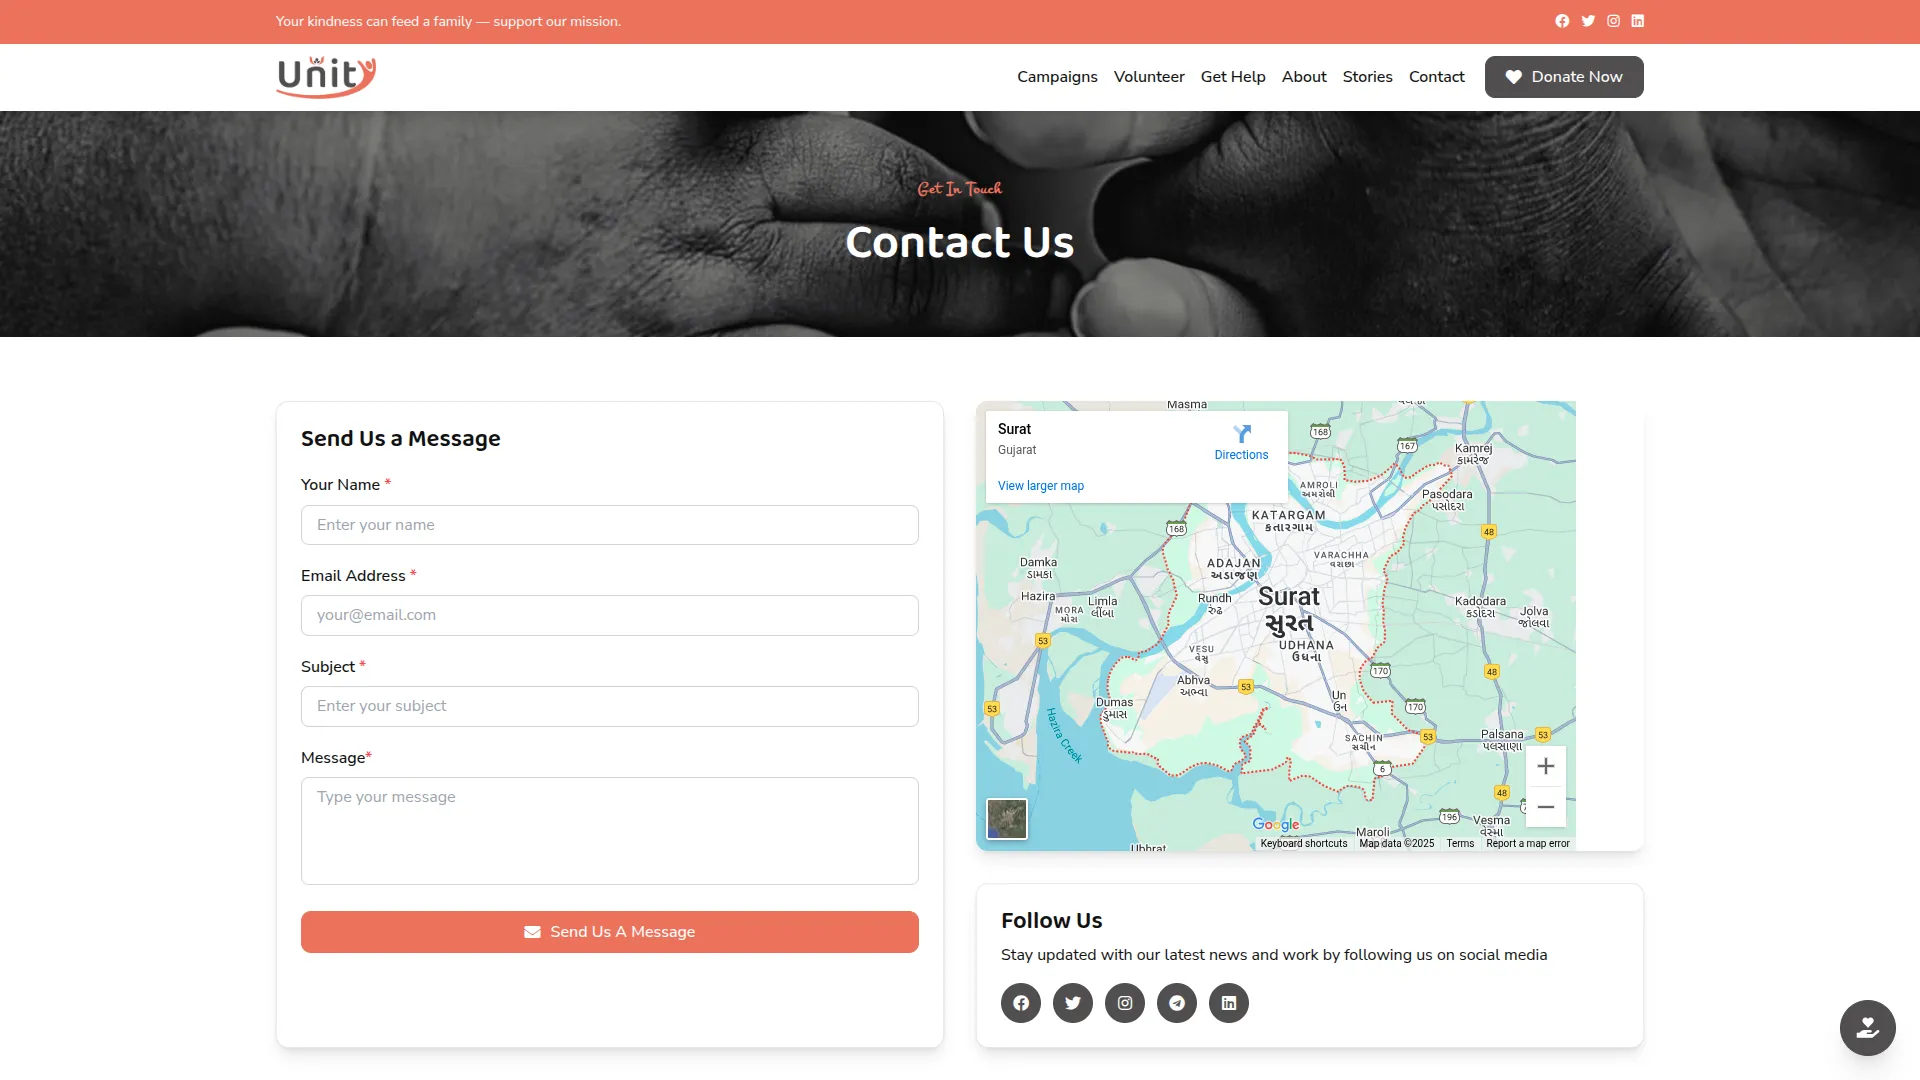
Contact Page
- The contact page facilitates easy communication by providing a comprehensive contact form for various inquiry types, complete contact details including phone numbers and email addresses, social media links for broader engagement, and office location information with directions.
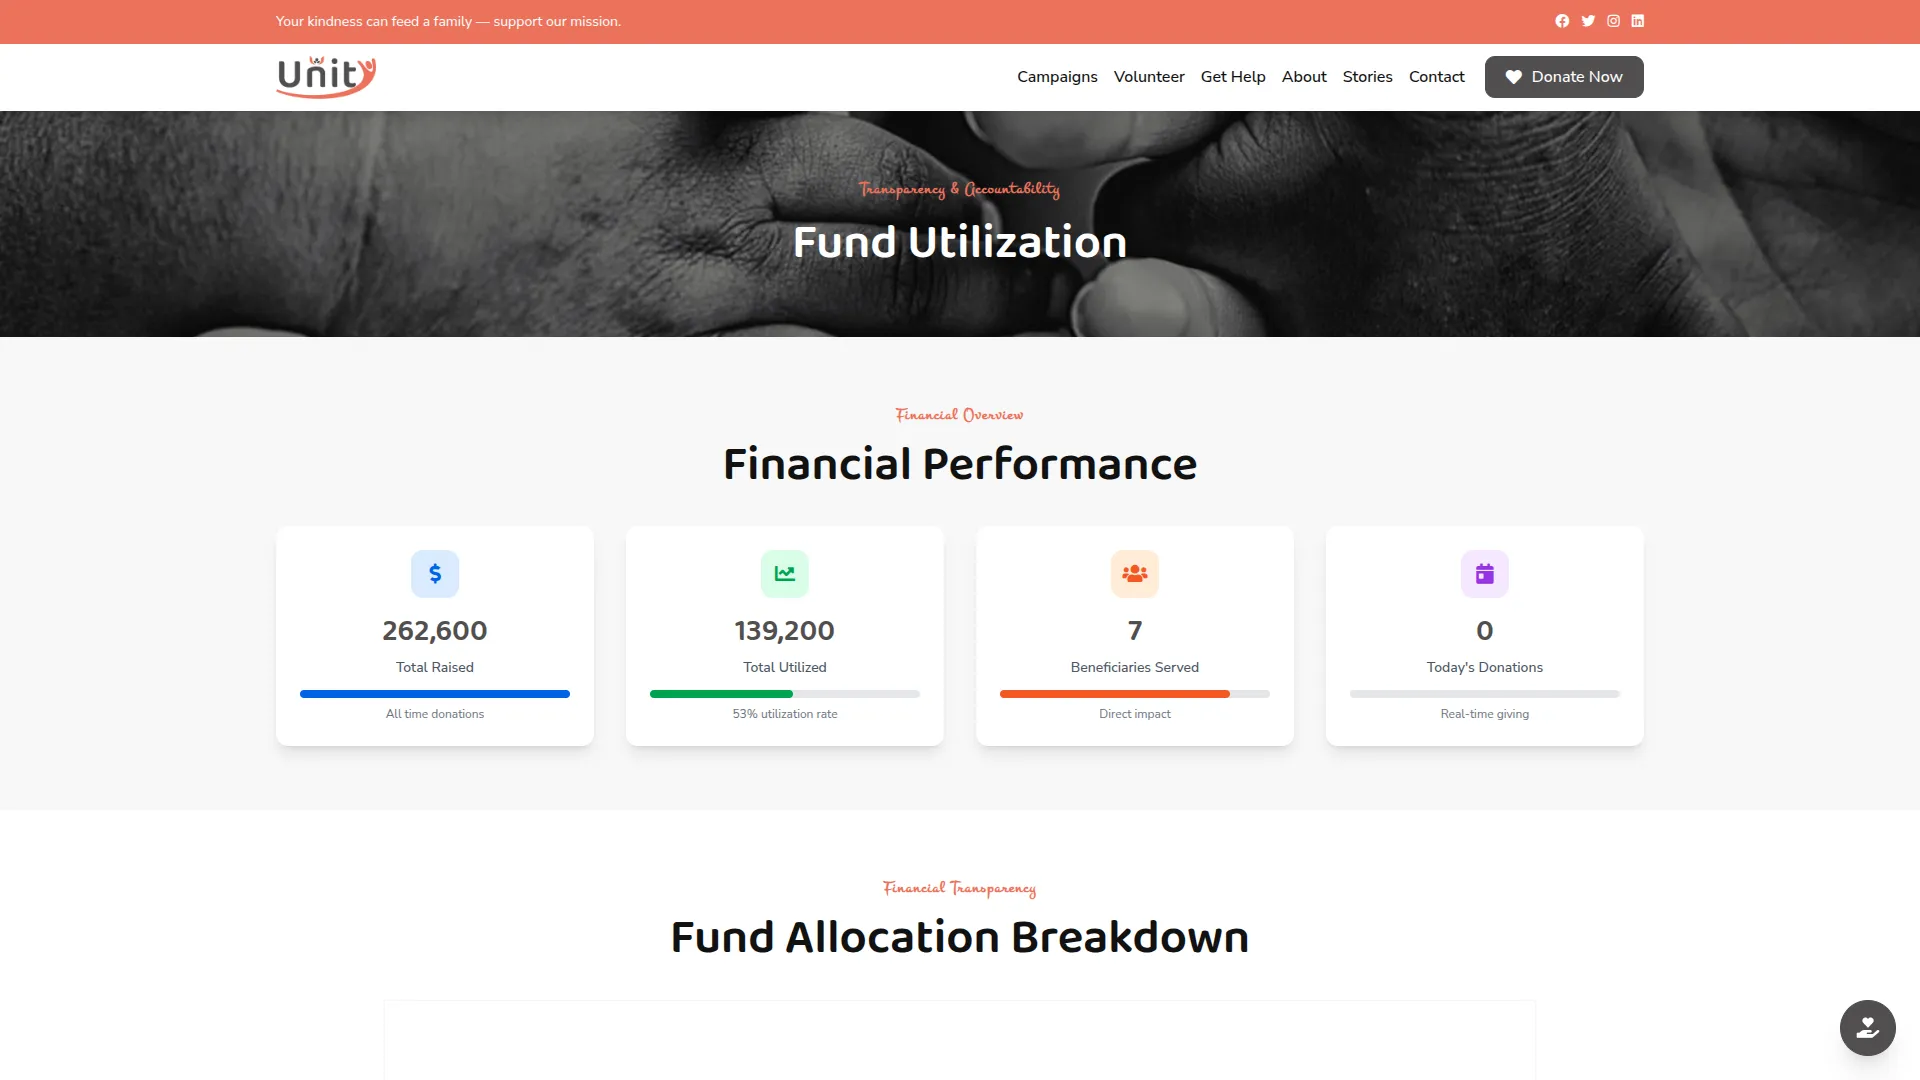
Fund Utilization Page
- This transparency page breaks down exactly how donations are spent using detailed charts and visual reports. It categorizes expenditures, provides supporting documentation, and offers downloadable reports to demonstrate responsible fund management and build donor confidence.
Donate Now Page
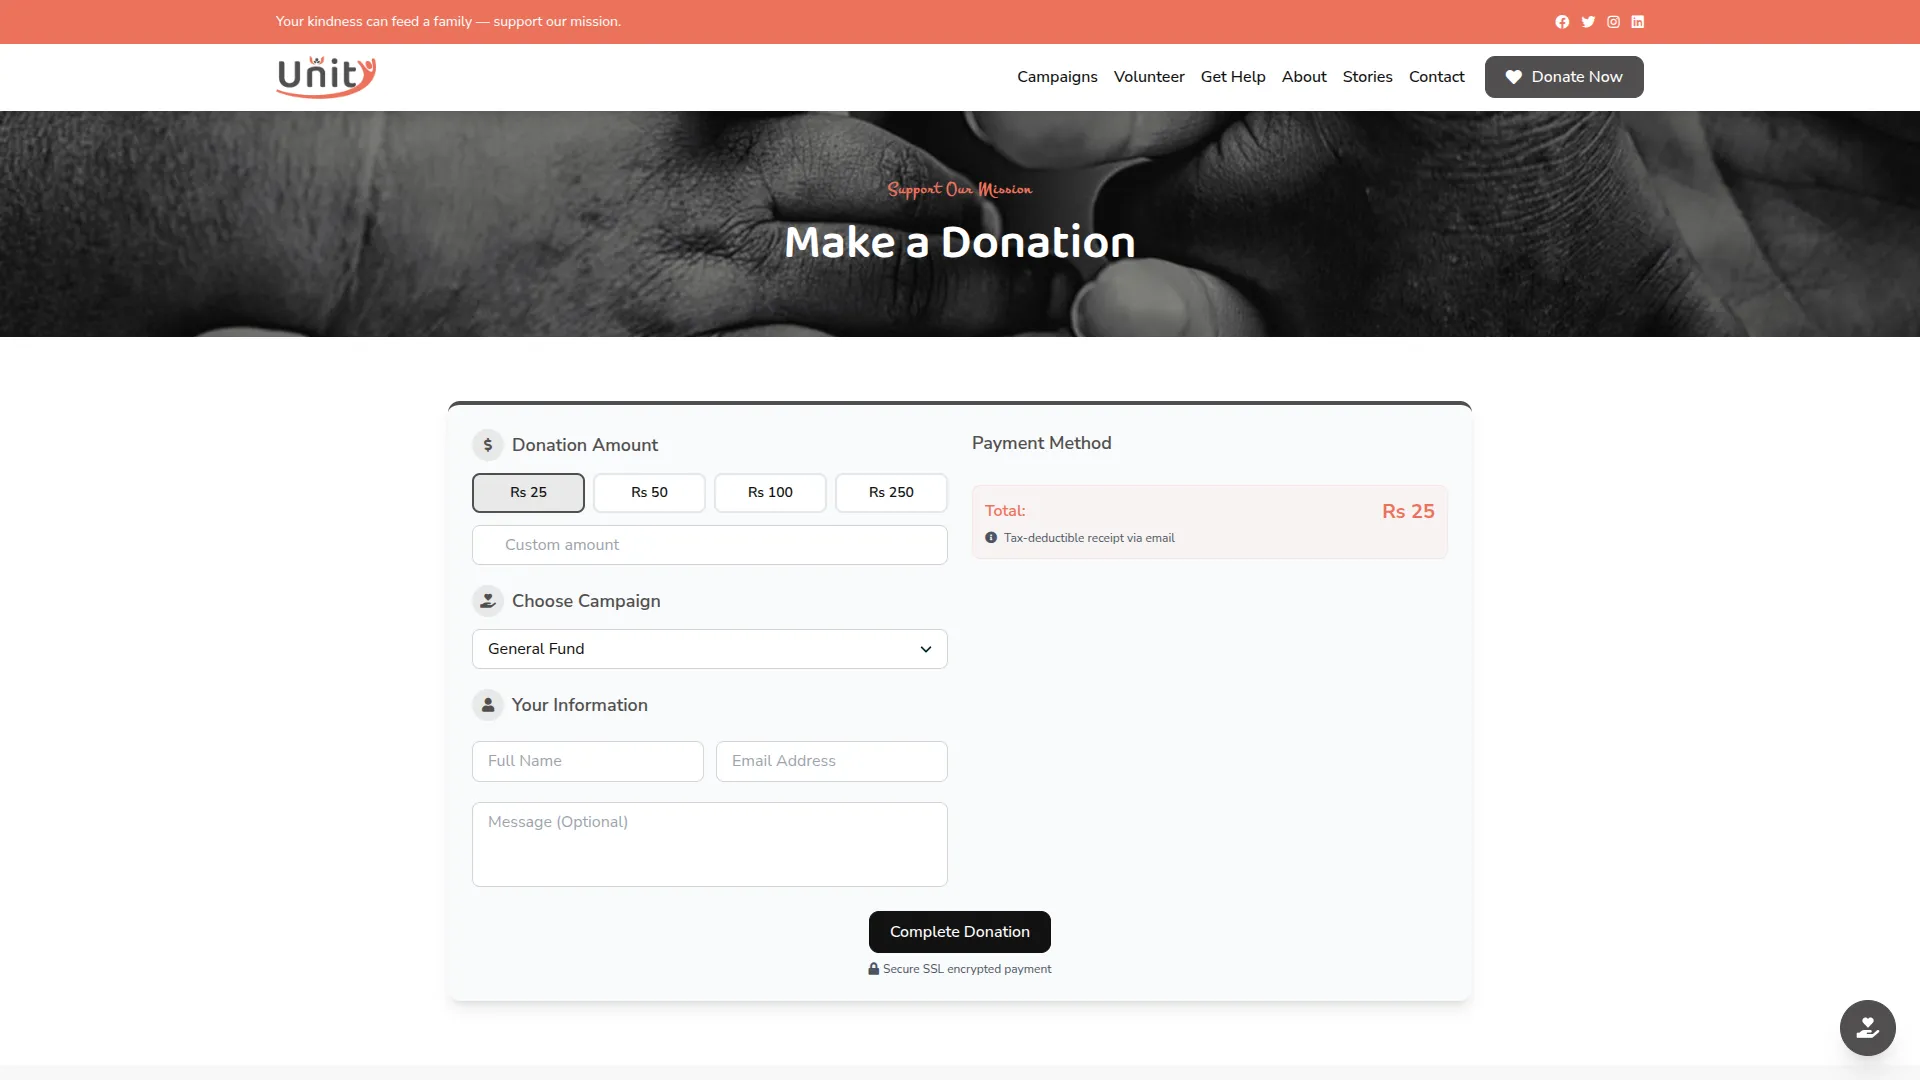
- The donation page provides a streamlined giving experience with multiple secure payment options, including PayPal and Stripe integration.
- It displays tax information for donor records, generates donation receipts, and offers various donation amount options to accommodate different donor preferences while ensuring secure transaction processing.
Manage Dashboard
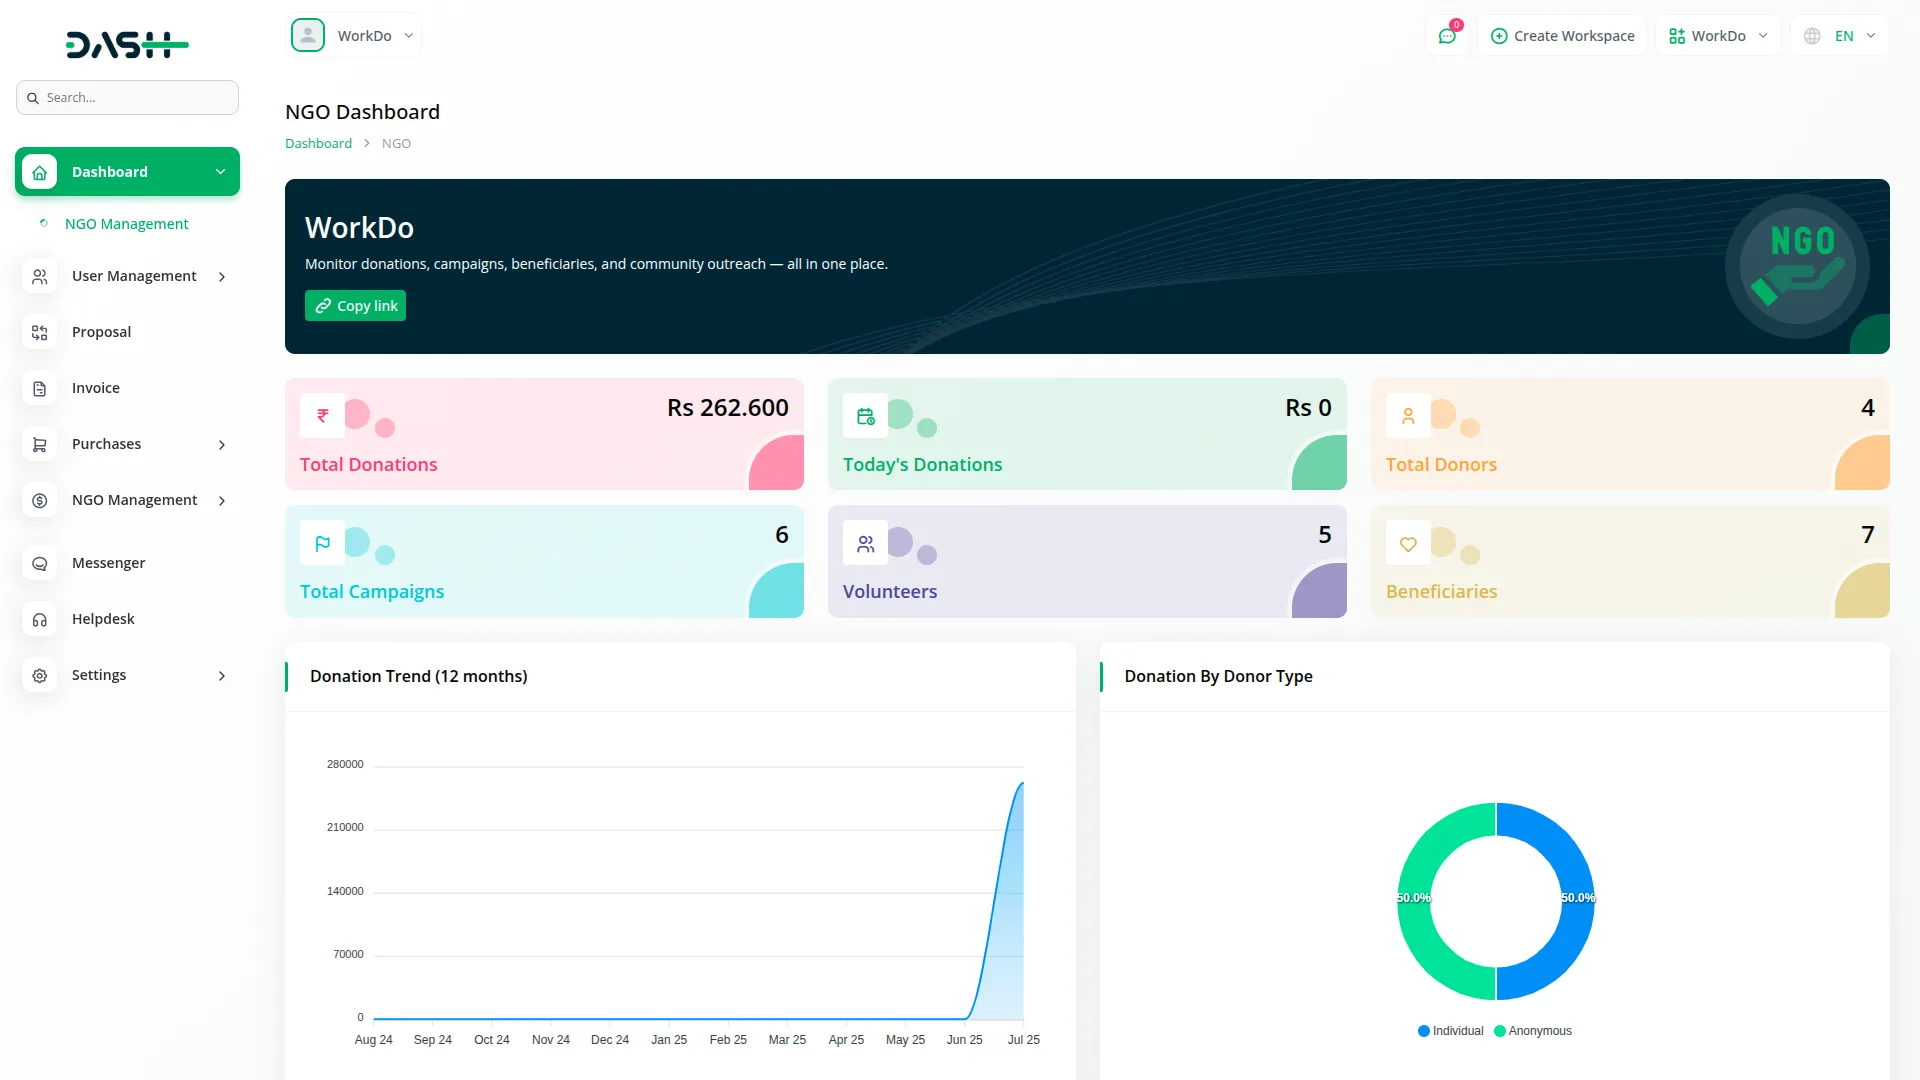
- The dashboard provides a comprehensive overview of your NGO operations through summary cards, recent activities, charts, and analytics.
- The dashboard shows overview statistics including total funds, donations, active campaigns, and volunteer counts. Quick actions provide shortcuts to commonly used functions for efficient management. Recent transactions display the latest donation and fund utilization activities for immediate visibility.
Manage Donors
- To create a new donor, click the “Create” button at the top of the donors page. Enter the donor’s name, email, phone number, and address information. Upload a donor image and add a description to complete the profile.
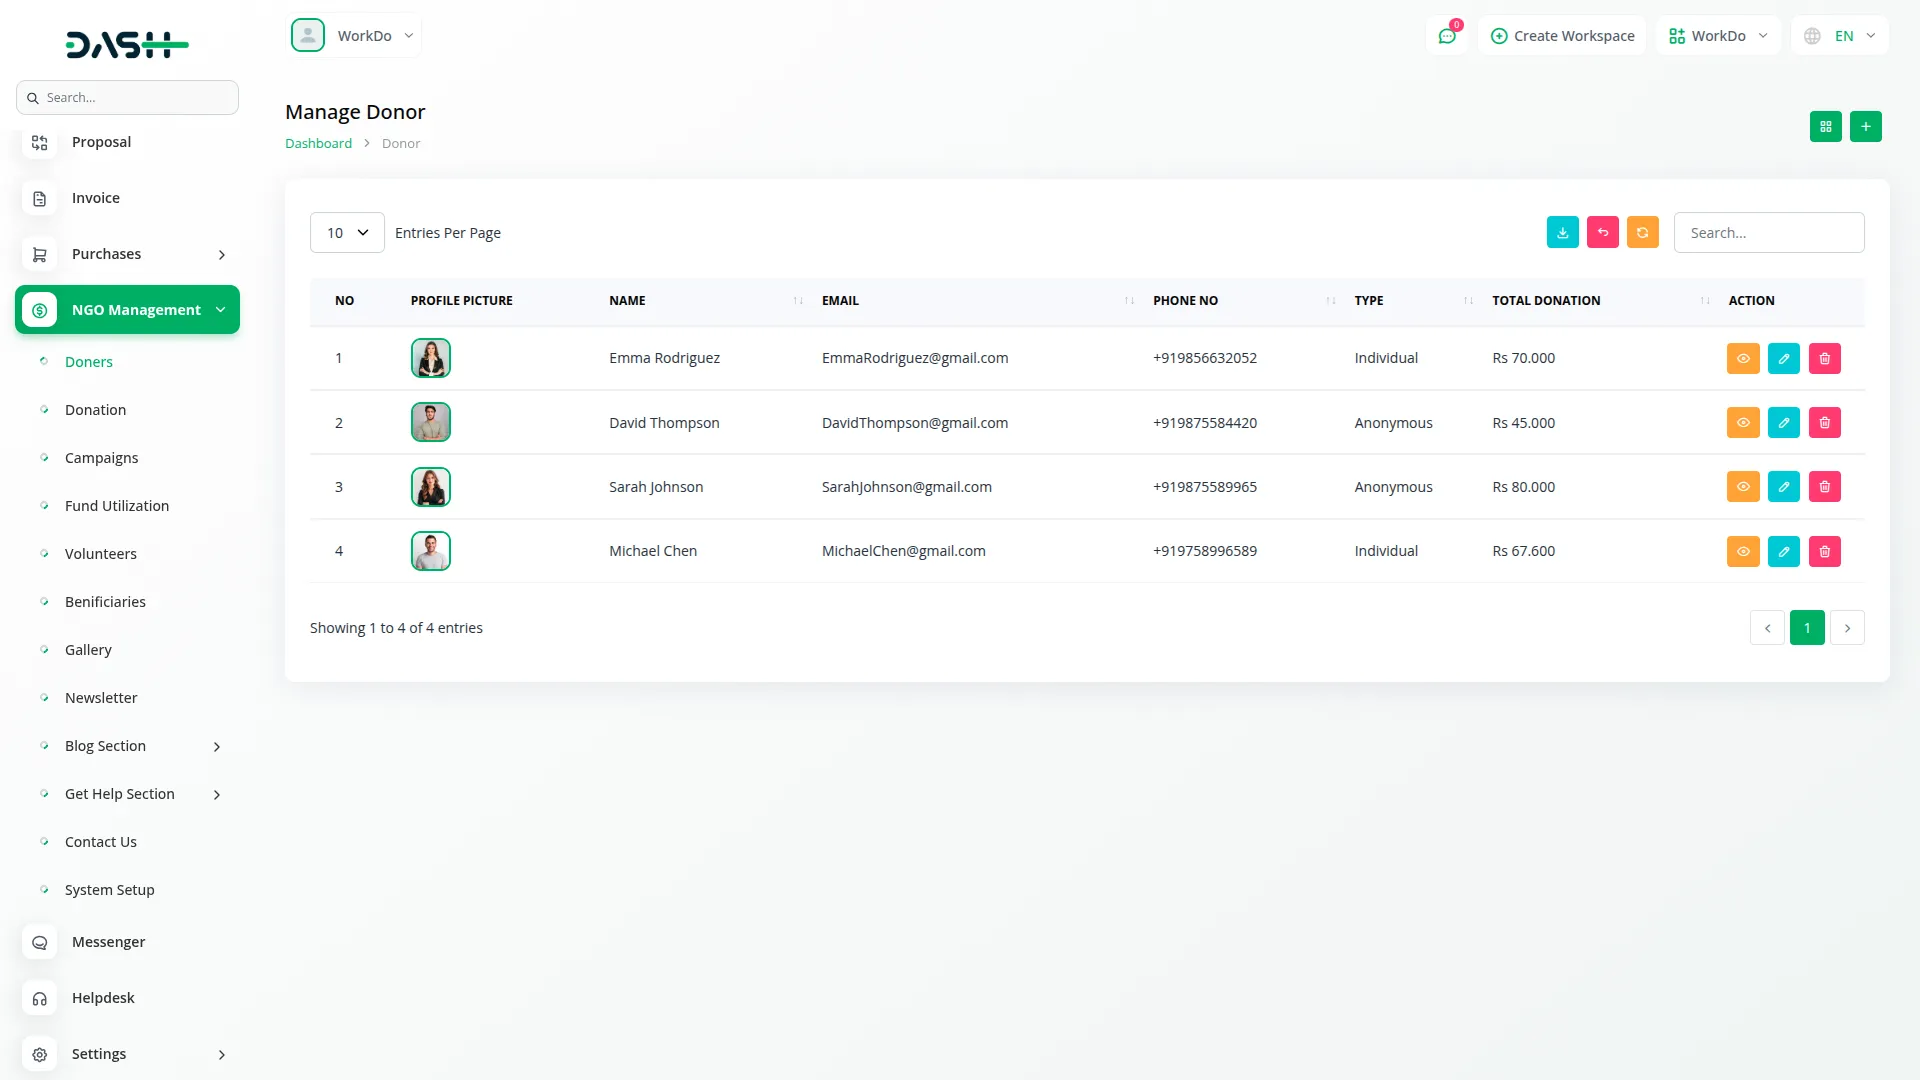
- When donations are made from the frontend, donor profiles are automatically created in the system. The total donations field calculates the sum of all donations made by each specific donor for tracking purposes.
- The list page shows all donors with columns for NO, Image, Name, Email, Phone, and Total Donations. You can use the Search button to find specific donors or the Export button to download donor data.
- In the Actions column, click “View” to show complete donor details, including donation history and contact information. “Edit” allows you to modify donor information, while “Delete” removes the donor record from the system.
Manage Donations
- To create a new donation record, click the “Create” button at the top of the donations page. Select the donor from the dropdown, which pulls from the Donors section. Choose the campaign from the dropdown that displays available campaigns from the Campaigns section.
- Enter the donation amount and select the payment method from the available options. Add the transaction ID for non-cash payments and include any relevant notes about the donation.
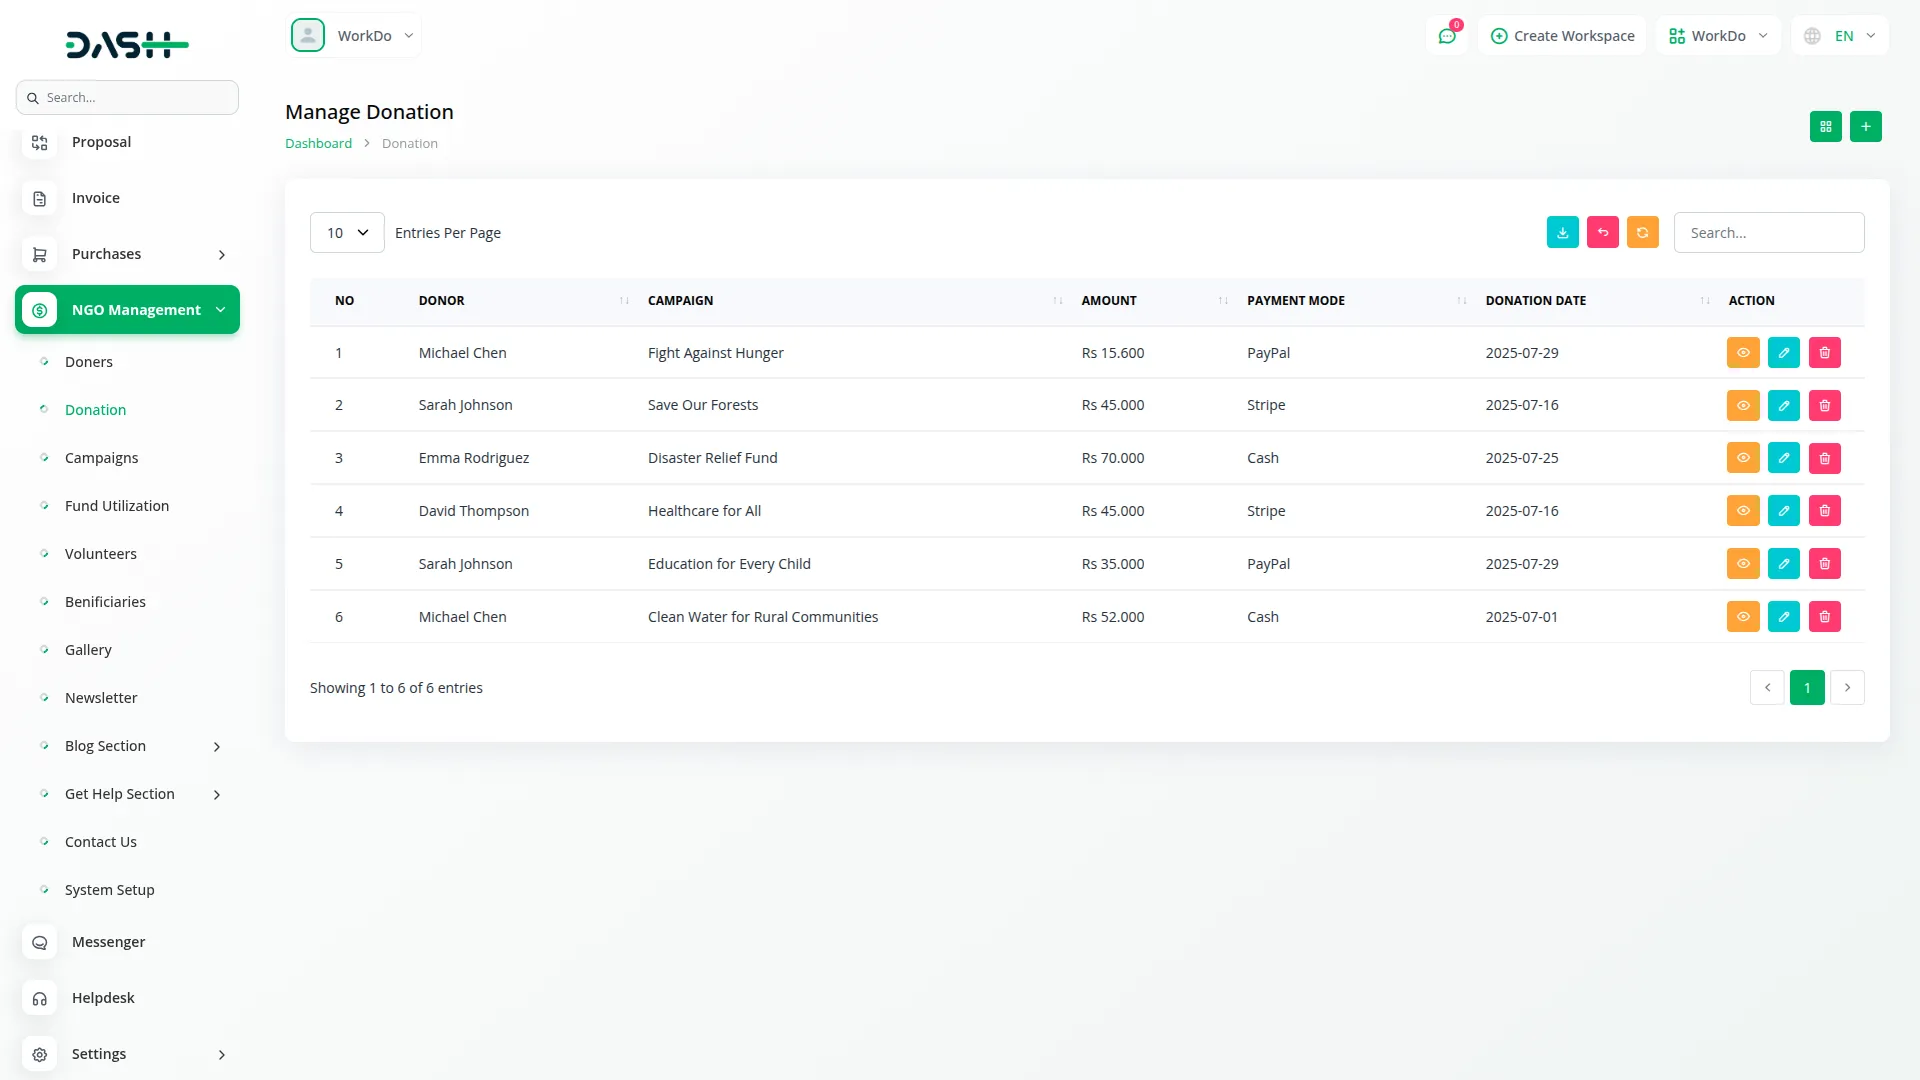
- Donations can be processed through the admin panel using PayPal, Stripe, or Cash methods. Frontend donations are automatically processed through PayPal and Stripe payment gateways for secure online transactions.
- The list page displays all donations with columns for NO, Donor Name, Campaign Name, Amount, Payment Method, Date, and Status. For non-cash payment methods, the Transaction ID is also displayed in the table.
- In the Actions column, click “View” to show complete donation details, including payment information and transaction history. “Edit” allows you to modify donation records, while “Delete” removes the donation from the system.
Manage Campaigns
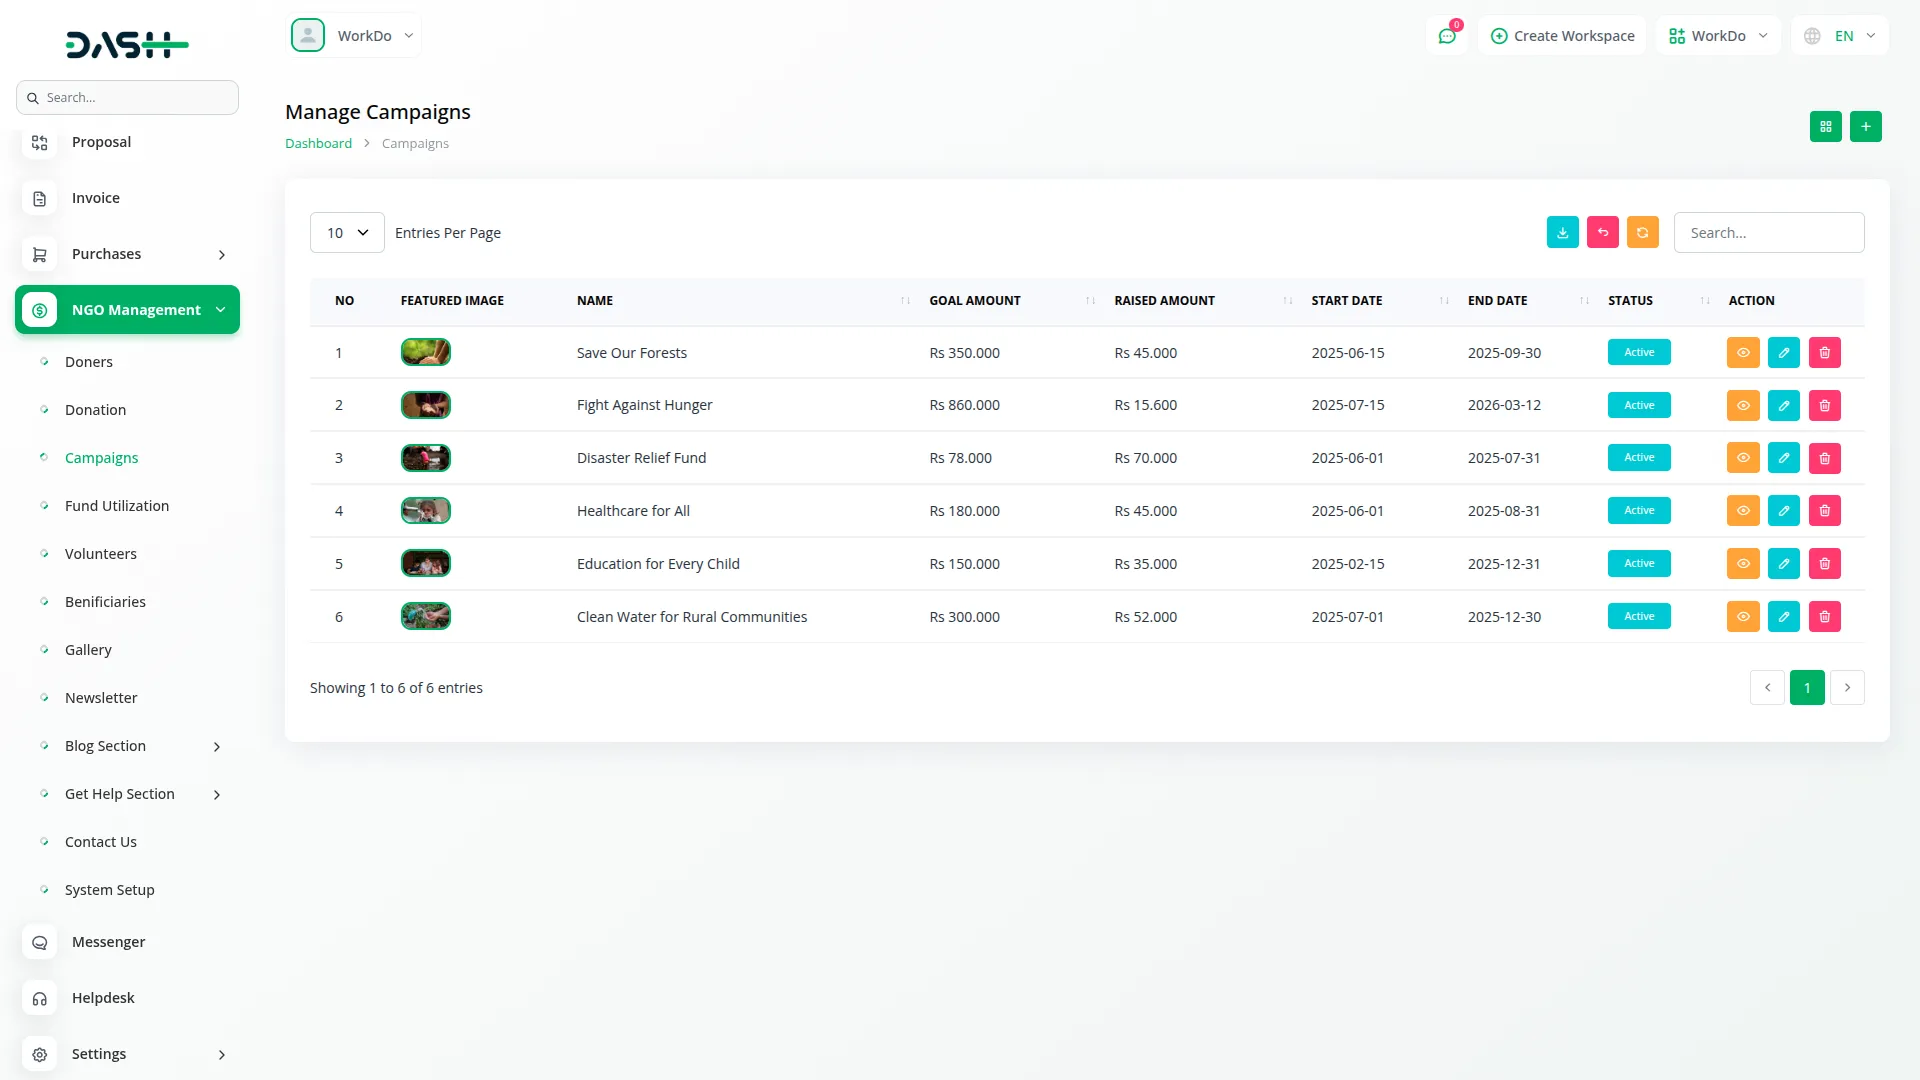
- To create a new campaign, click the “Create” button at the top of the campaigns page. Enter the campaign name and upload a campaign image for visual representation. Add a detailed description explaining the campaign’s purpose and goals.
- Set the target amount for fundraising and specify the start date and end date for the campaign duration. Choose the campaign status to control visibility and participation.
- Campaigns are created specifically for collecting funds toward specific causes or projects. The system automatically tracks the required amount, the amount raised through donations, and calculates the remaining funds needed to reach the target.
- The list page shows all campaigns with columns for NO, Image, Campaign Name, Target Amount, Current Amount, Status, Start Date, and End Date. You can search for specific campaigns or export campaign data using the respective buttons.
- In the Actions column, click “View” to show complete campaign details, including donation progress, timeline, and related information. “Edit” allows you to modify campaign settings and information, while “Delete” removes the campaign from the system.
Manage Fund Utilization
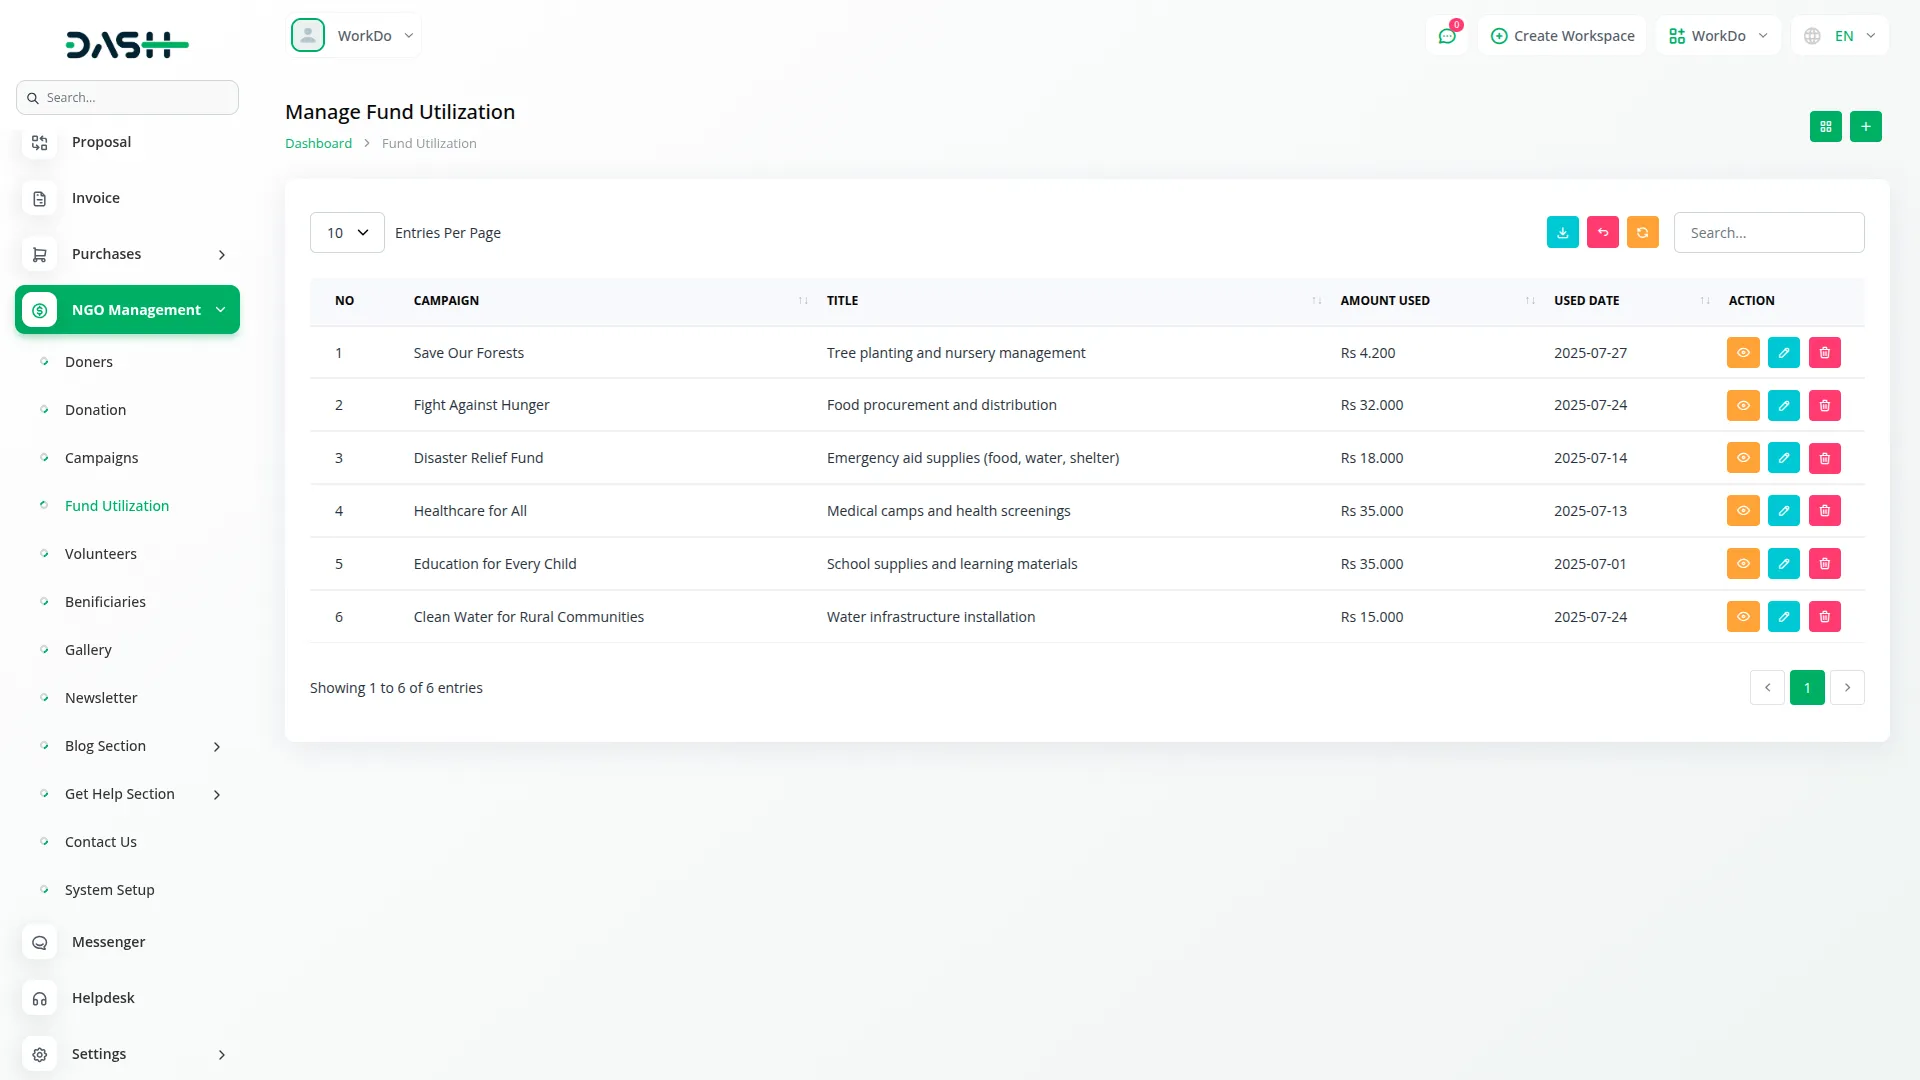
- To record fund utilization, click the “Create” button at the top of the fund utilization page. Enter the Campaign name and provide a detailed description of how the funds were used. Specify the amount used for the particular project or purpose.
- Upload receipt documents for transparency and accountability. Set the date when the funds were utilized and select the appropriate category for classification purposes.
- This section tracks how much funding was used, where it was spent, and for what specific purpose, providing complete transparency in fund management and utilization.
- The list page displays all fund utilization records with columns for NO, Project Name, Amount, Category, Date, and Receipt. You can search through records or export the data for reporting purposes.
- In the Actions column, click “View” to show complete fund utilization details including receipts and supporting documentation. “Edit” allows you to modify utilization records, while “Delete” removes the record from the system.
Manage Volunteers
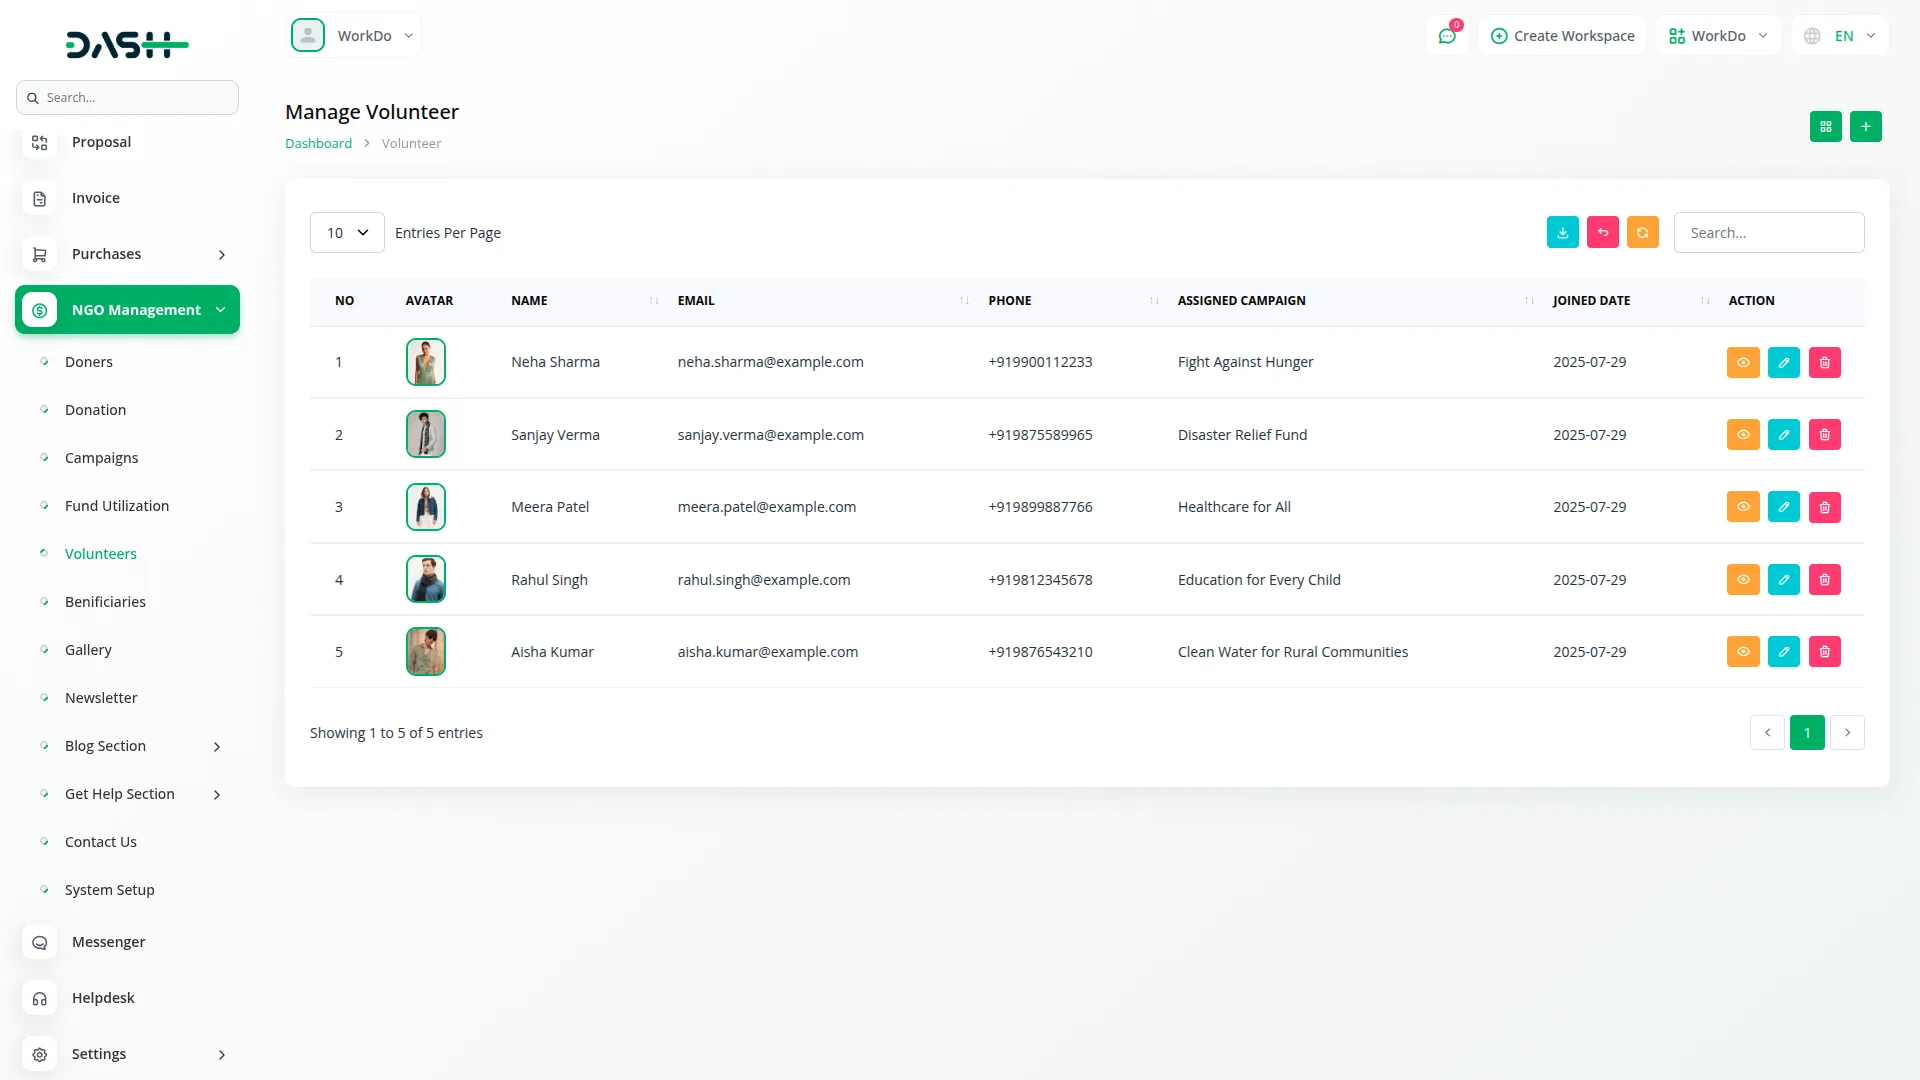
- To create a new volunteer record, click the “Create” button at the top of the volunteers page. Enter the volunteer’s name, email, phone number, short bio, and select the campaign. Upload a volunteer image for profile identification.
- Add the volunteer’s skills and specify their availability for different activities or periods. Assign tasks manually by campaign to control participation level in organizational activities.
- Volunteers can register themselves directly from the frontend website, and their information is automatically added to the system. Admins can contact volunteers manually and assign tasks based on skills and availability.
- The list page displays all volunteers with columns for NO, Image, Name, Email, Phone, Assigned Campaign, Bio, and Join Date. Search and export buttons are available for managing data.
- In the Actions column, use “View” to display full volunteer details, “Edit” to update info or status, and “Delete” to remove a record from the system.
Manage Beneficiaries
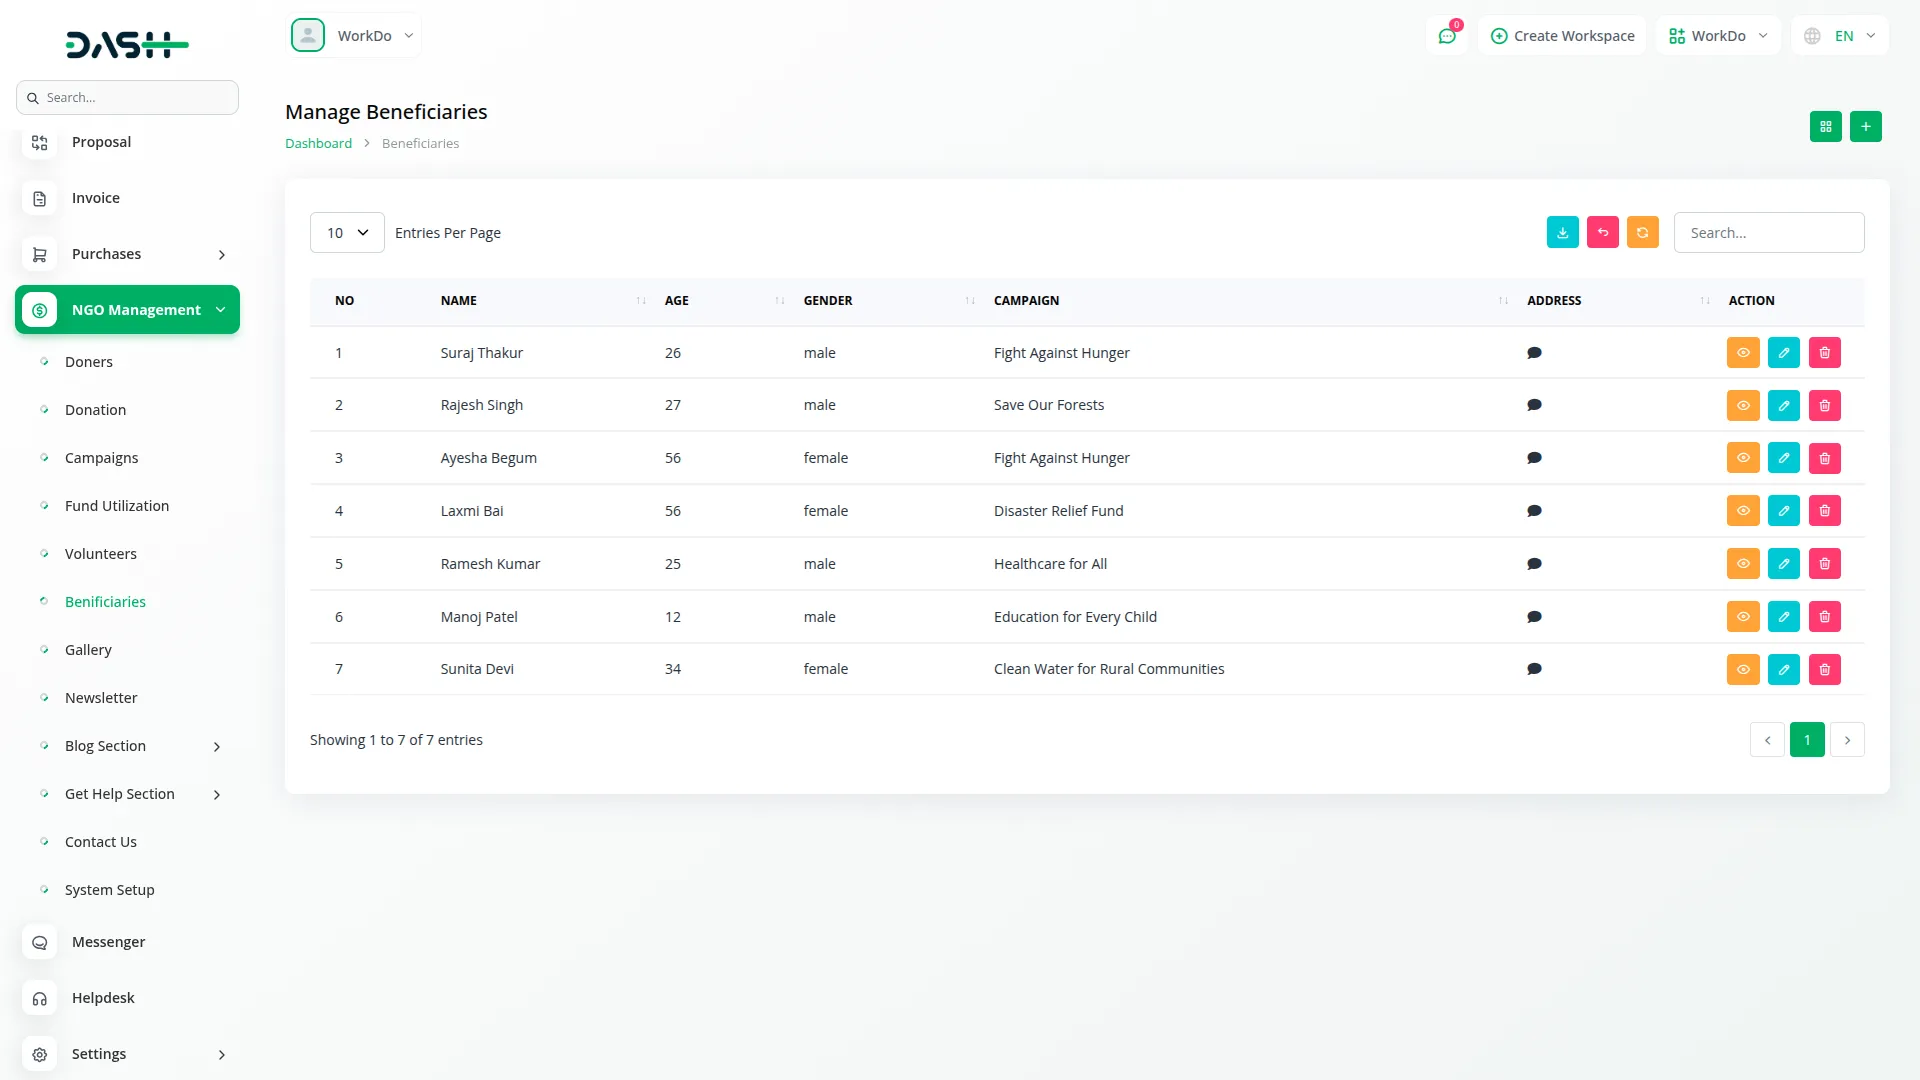
- To add a new beneficiary, click the “Create” button at the top of the beneficiaries page. Enter the beneficiary’s name and complete contact information, including phone and address details. Specify the assistance type they are receiving or have received.
- Enter the amount received by the beneficiary for tracking purposes. Upload a beneficiary image for identification and set the appropriate status for their case.
- This section allows you to add beneficiaries to track how much help they received from your organization, providing complete assistance history and financial records.
- The list page displays all beneficiaries with columns for NO, Image, Name, Contact, Assistance Type, Amount, Status, and Date. You can search through beneficiary records or export the data for reporting purposes.
- In the Actions column, click “View” to show complete beneficiary details, including assistance history and contact information. “Edit” allows you to modify beneficiary information and assistance records, while “Delete” removes the beneficiary from the system.
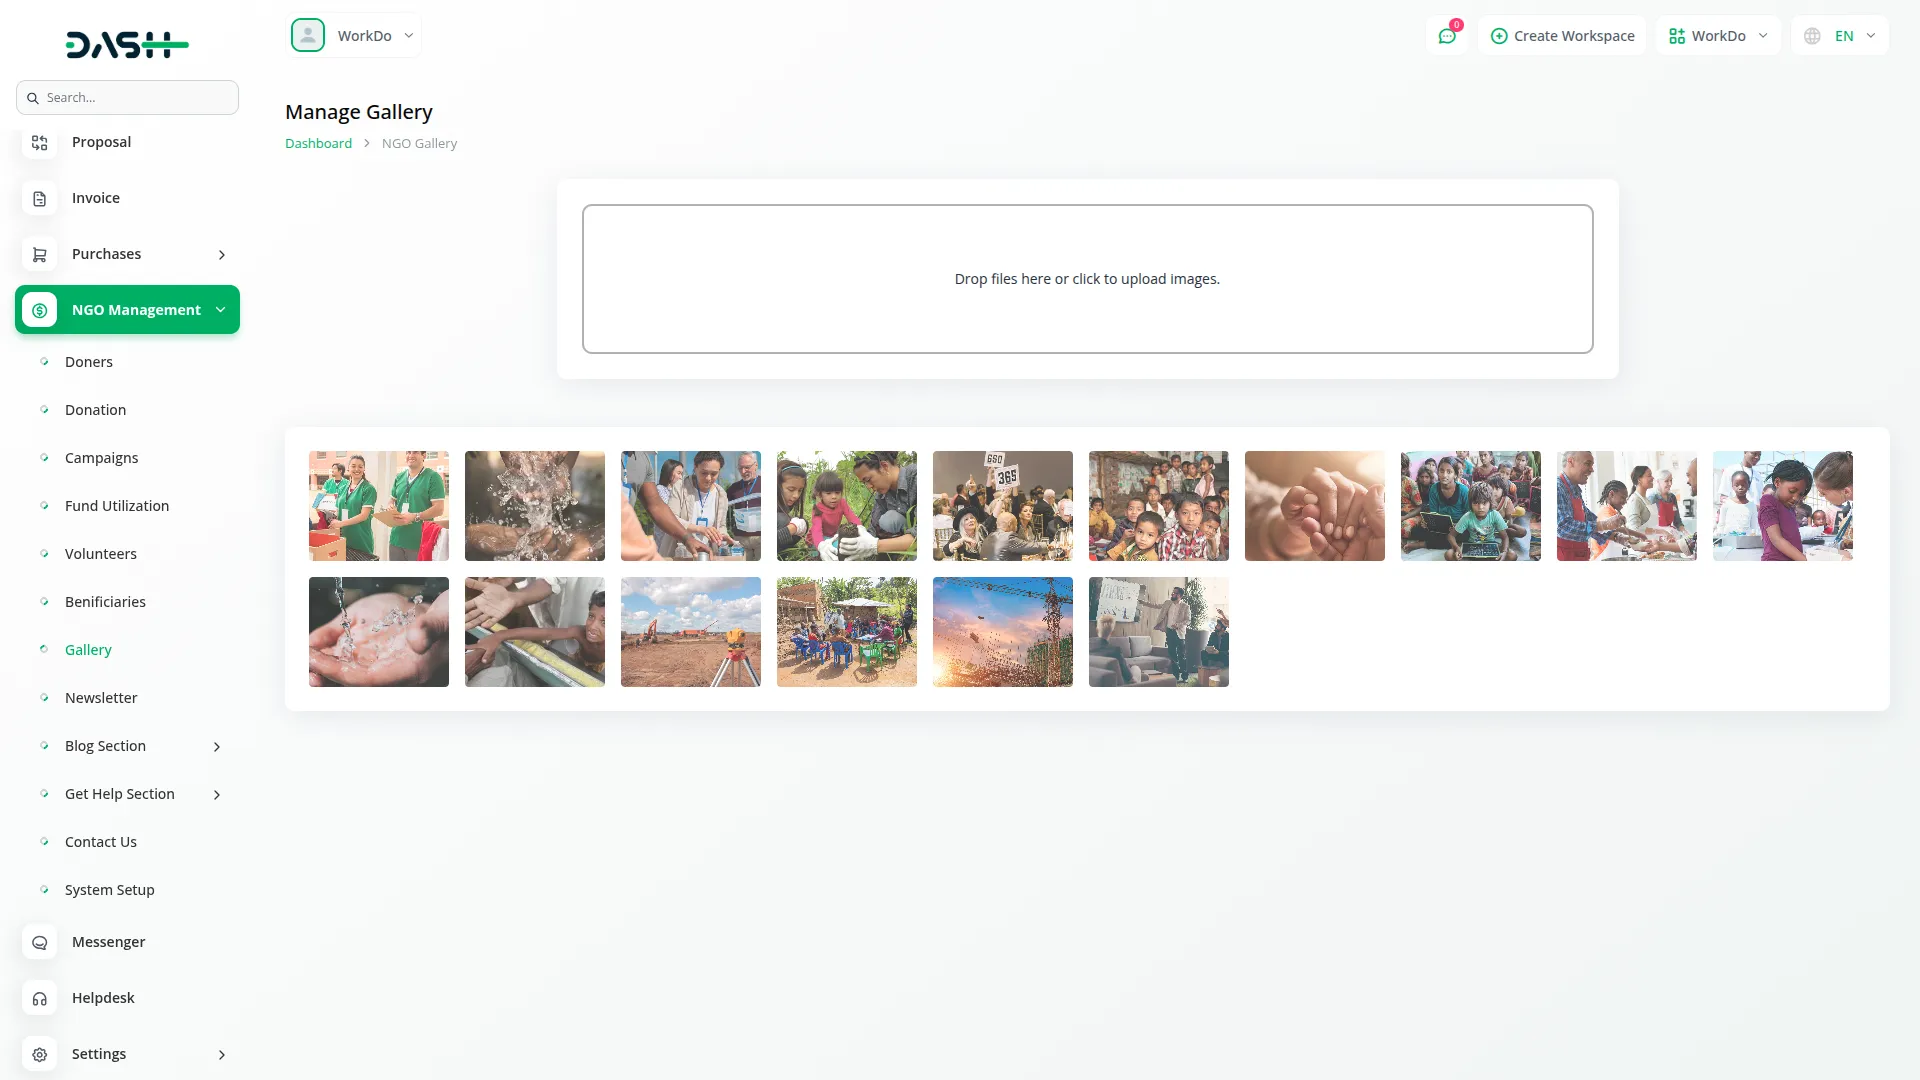
Manage Gallery
- To add images to the gallery, you can easily drag and drop uploaded images and display them on the frontend website.
- This section allows you to upload all work-related photos and display them on the frontend website, showcasing your NGO’s activities and impact to visitors and supporters.
- In the Actions column, you can click “Download” to save images to your device or “Delete” to remove images from the gallery and frontend display.
Manage Blogs
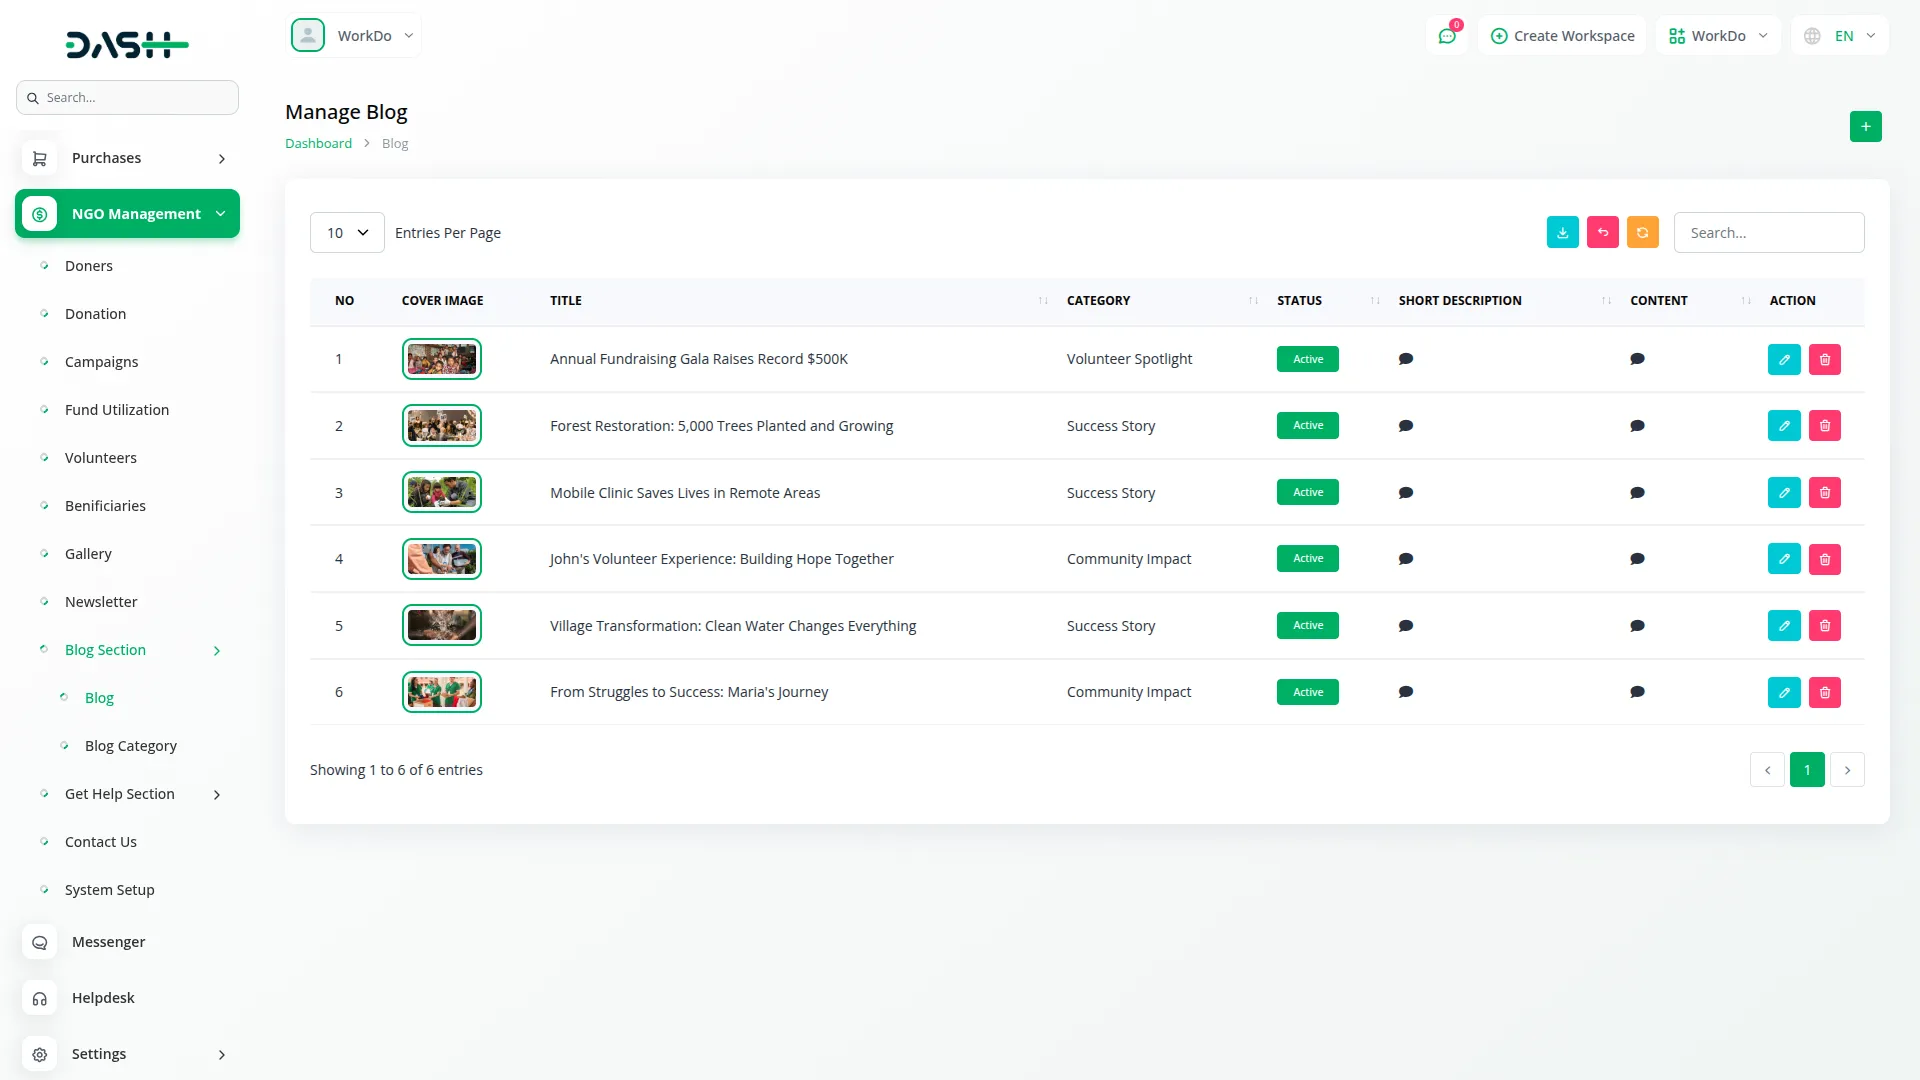
- To create a new blog article, click the “Create” button at the top of the blogs page. Enter the blog title and write the complete content for your article. Select the appropriate category from the dropdown, which pulls from the Blog Categories section.
- Upload a featured image that will be displayed with the blog post. Set the blog status to control whether it appears on the frontend website.
- Blog articles are used to share information about your NGO’s work, impact stories, and updates, which are then displayed on the frontend blog section for public viewing.
- The list page shows all blog articles with columns for NO, Image, Title, Category Name, Status, Short Description, and Content. You can search for specific articles or export blog data using the respective buttons.
- In the Actions column, click “View” to show complete blog details, including full content and metadata. “Edit” allows you to modify blog content, category, and settings, while “Delete” removes the blog article from the system and frontend.
Manage Blog Categories
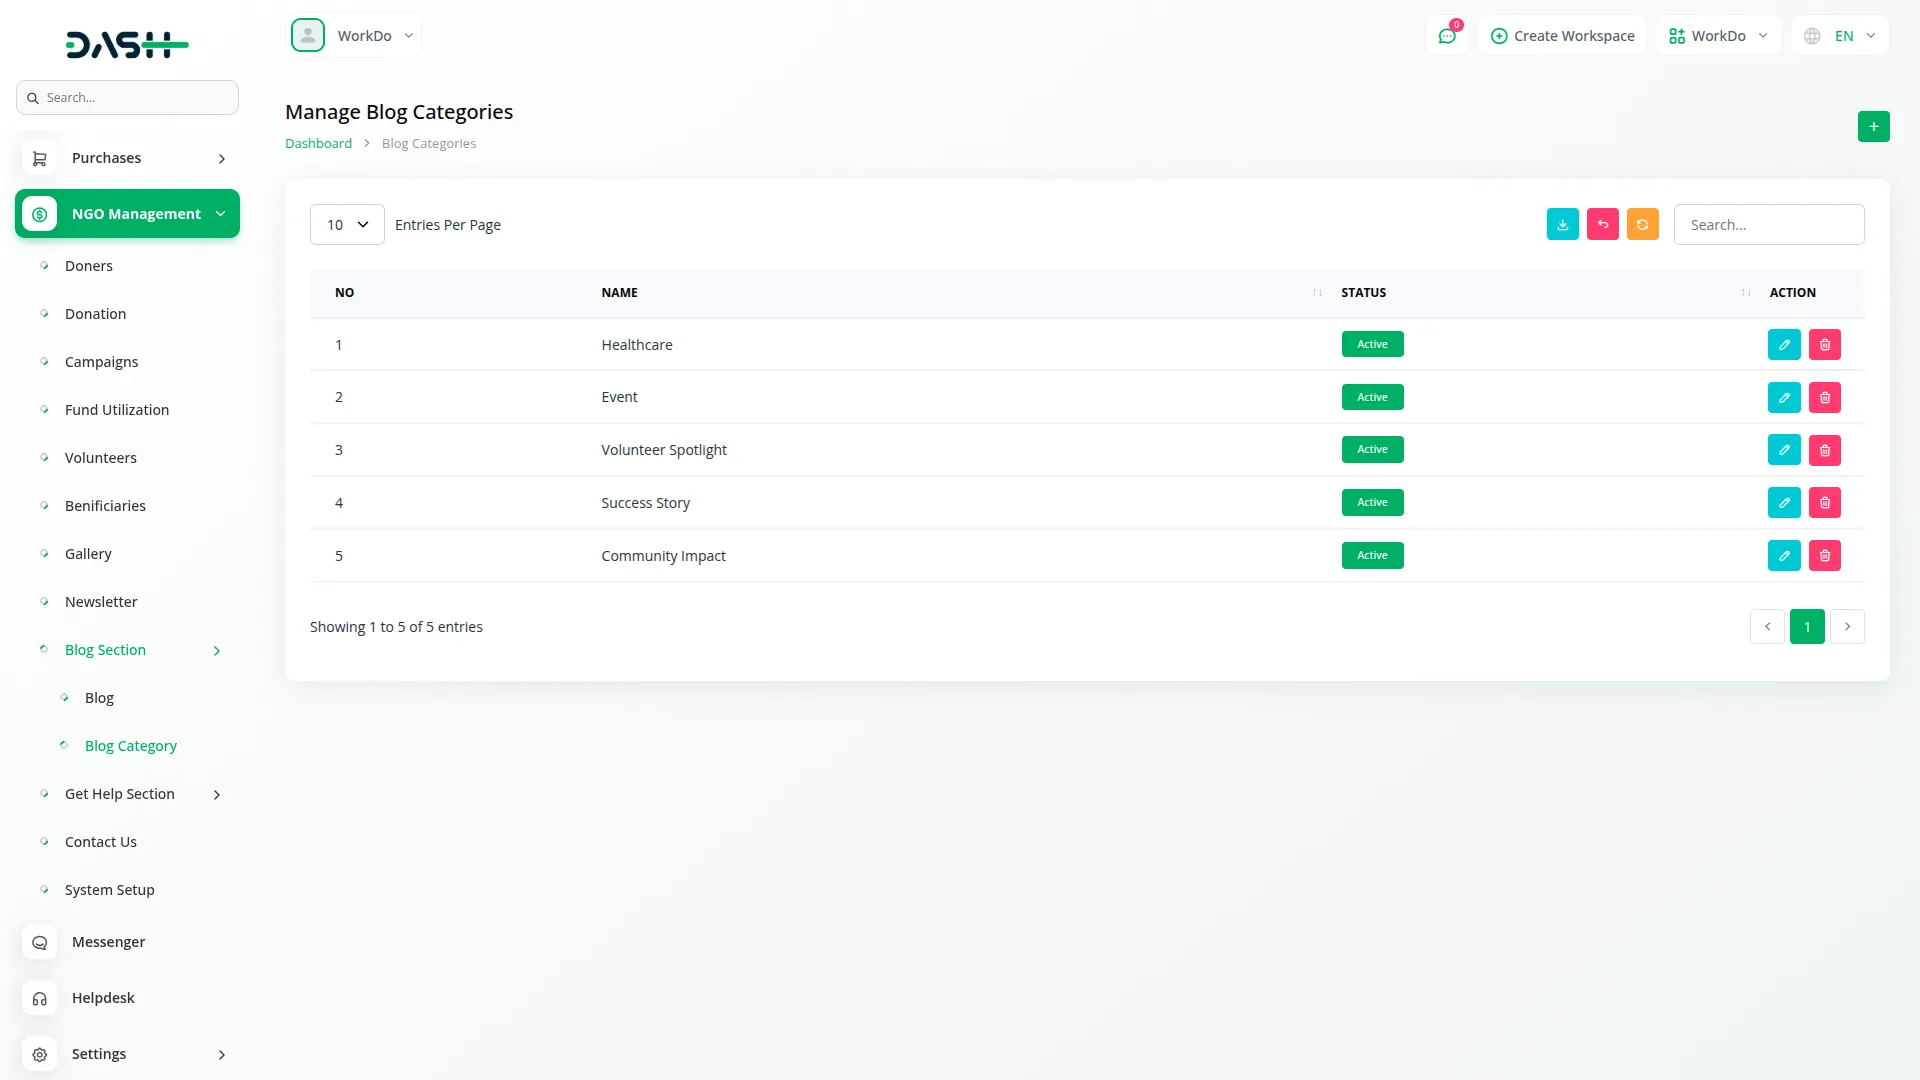
- To create a new blog category, click the “Create” button at the top of the blog categories page. Enter the category name that will be used to group related blog articles.
- Blog categories are used to group blogs under specific topics or themes, making it easier for visitors to find relevant content on your frontend website.
- The list page displays all blog categories with columns for NO, Name, and Status You can search for specific categories or export category data.
- In the Actions column, “Edit” allows you to modify the category name and description, while “Delete” removes the category from the system. Note that deleting a category may affect associated blog articles.
Manage Newsletter
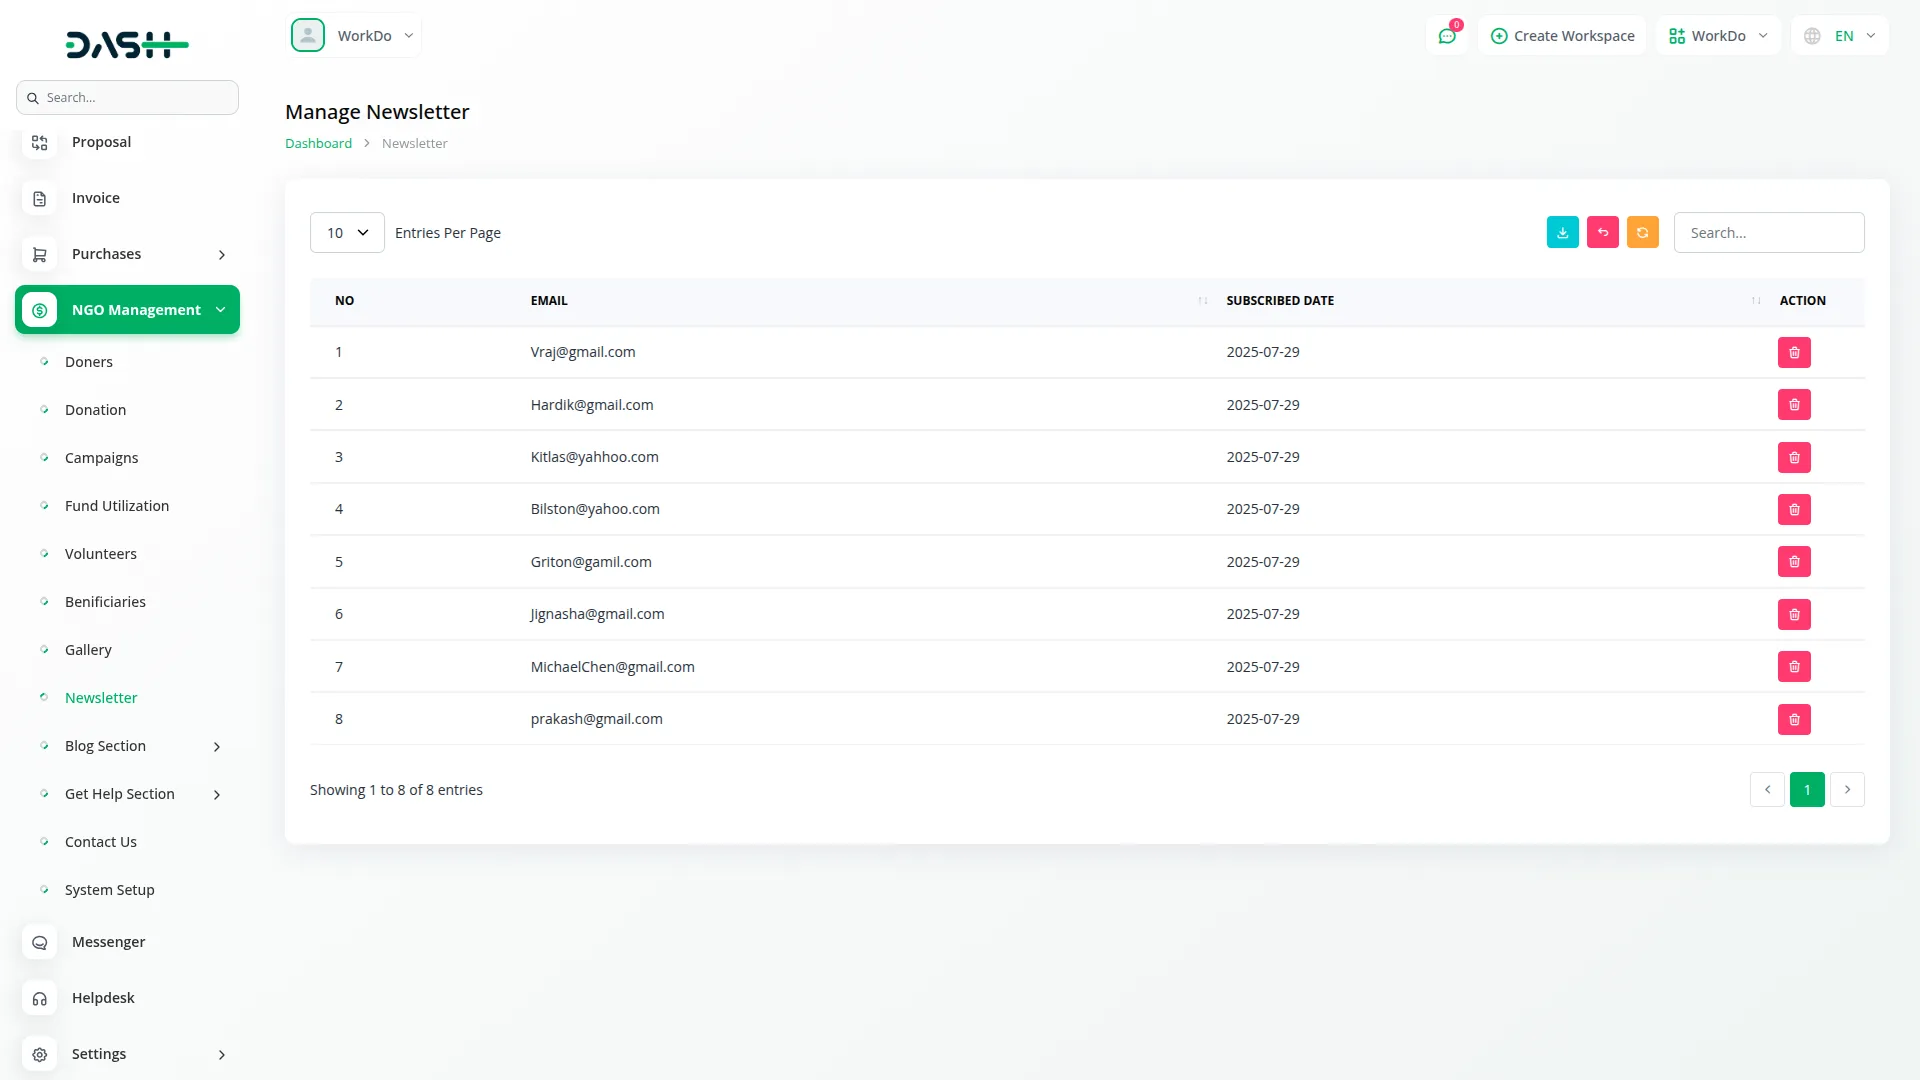
- Users can subscribe to newsletters directly from the frontend website, and their information is automatically added to the subscriber list for receiving updates and news about your NGO activities
- The list page shows all newsletter subscribers with columns for NO, Email, Status, and Subscription Date. You can search for specific subscribers or export the subscriber data for email marketing purposes.
- In the Actions column, “Edit” allows you to modify the subscriber’s email address and status, while “Delete” removes the subscriber from the newsletter list and stops future communications.
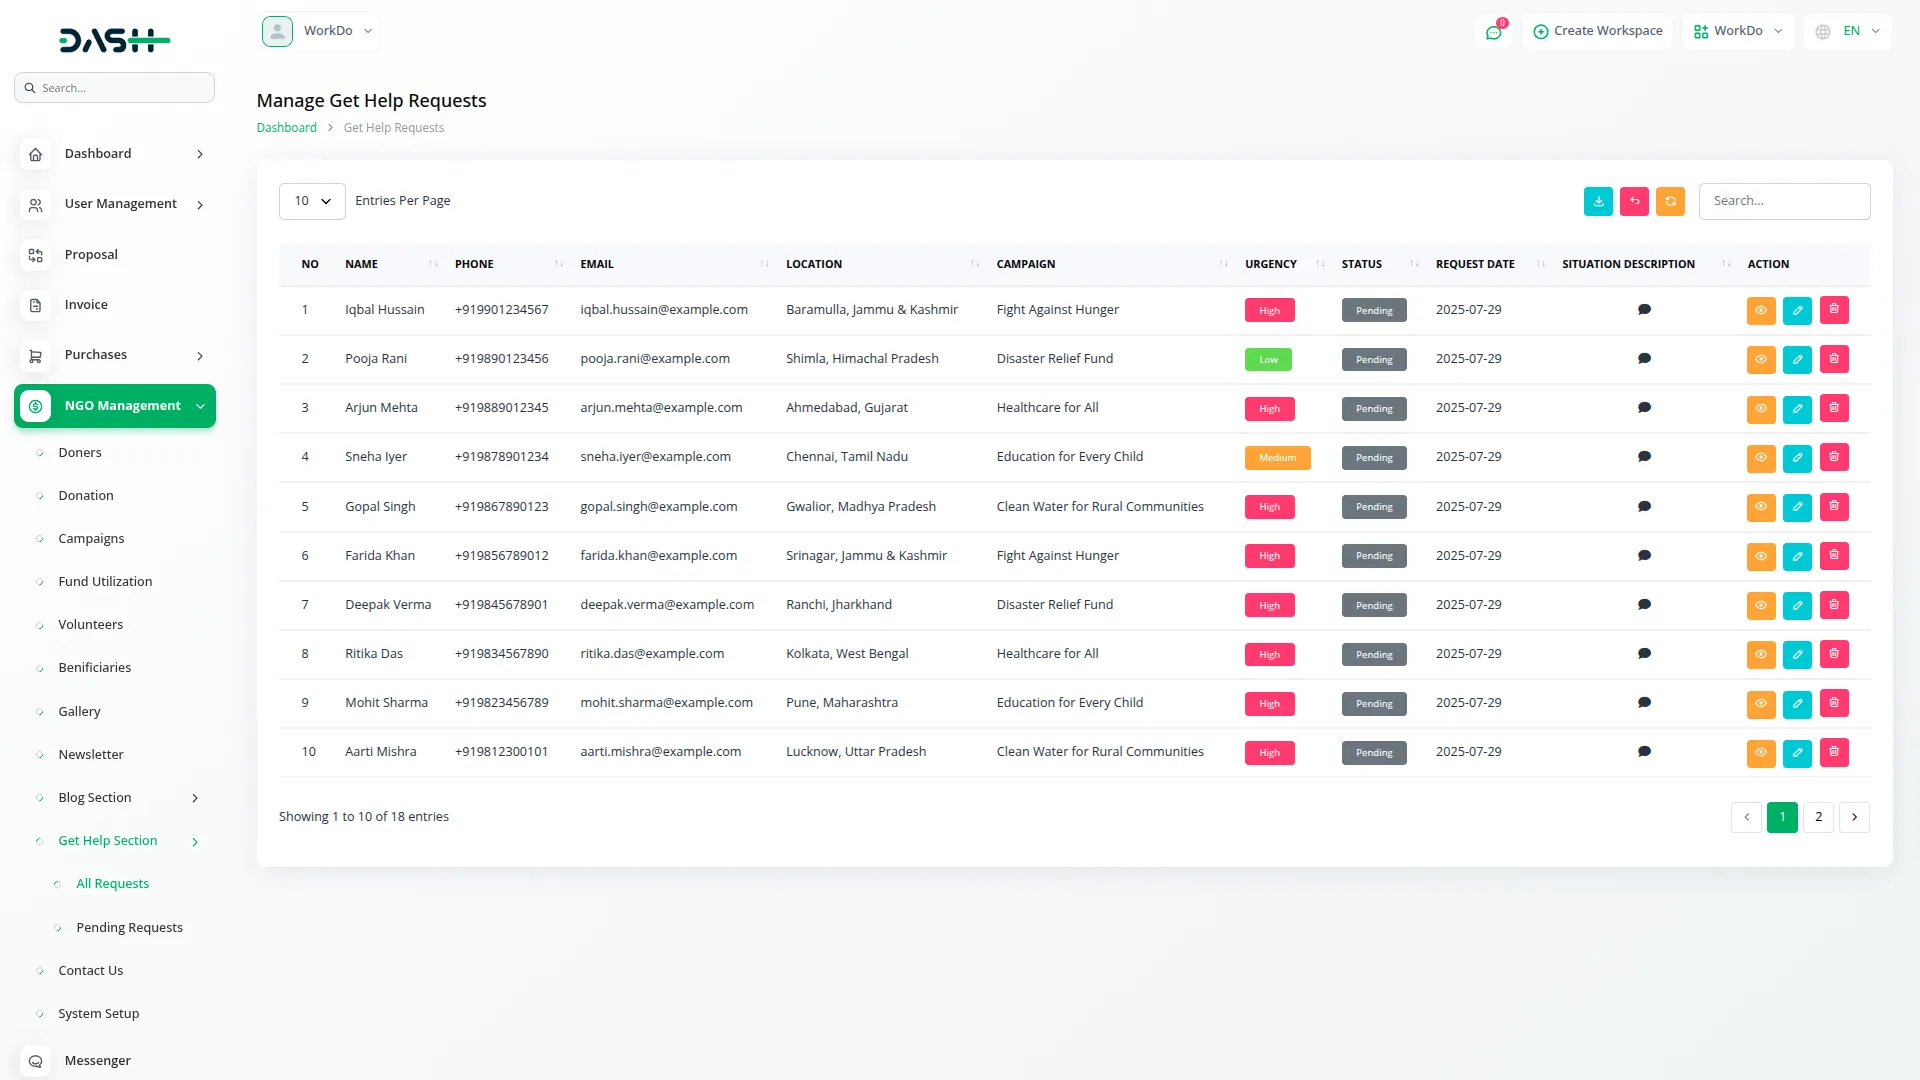
Manage Get Help Requests
- To process a help request, click the “Create” button at the top of the get help requests page. Enter the requester’s name and contact details including phone, address, request type, and description of the assistance needed.
- Upload supporting documents for verification and set the appropriate status to track the request stage. Users can also submit requests directly from the frontend form.
- The admin can verify, accept, or reject requests based on availability and organizational capacity.
- The list page displays all help requests with columns for NO, Requester Name, Phone, Email, Location, Campaign, Urgency Level, Situation Description, and Supporting Documents. Search and export options are also available.
- Actions include “Request Action” to review the full form and documents, “Edit” to update request info, and “Delete” to remove the request. Admins can approve or reject requests easily from the system.
Manage Contact Us
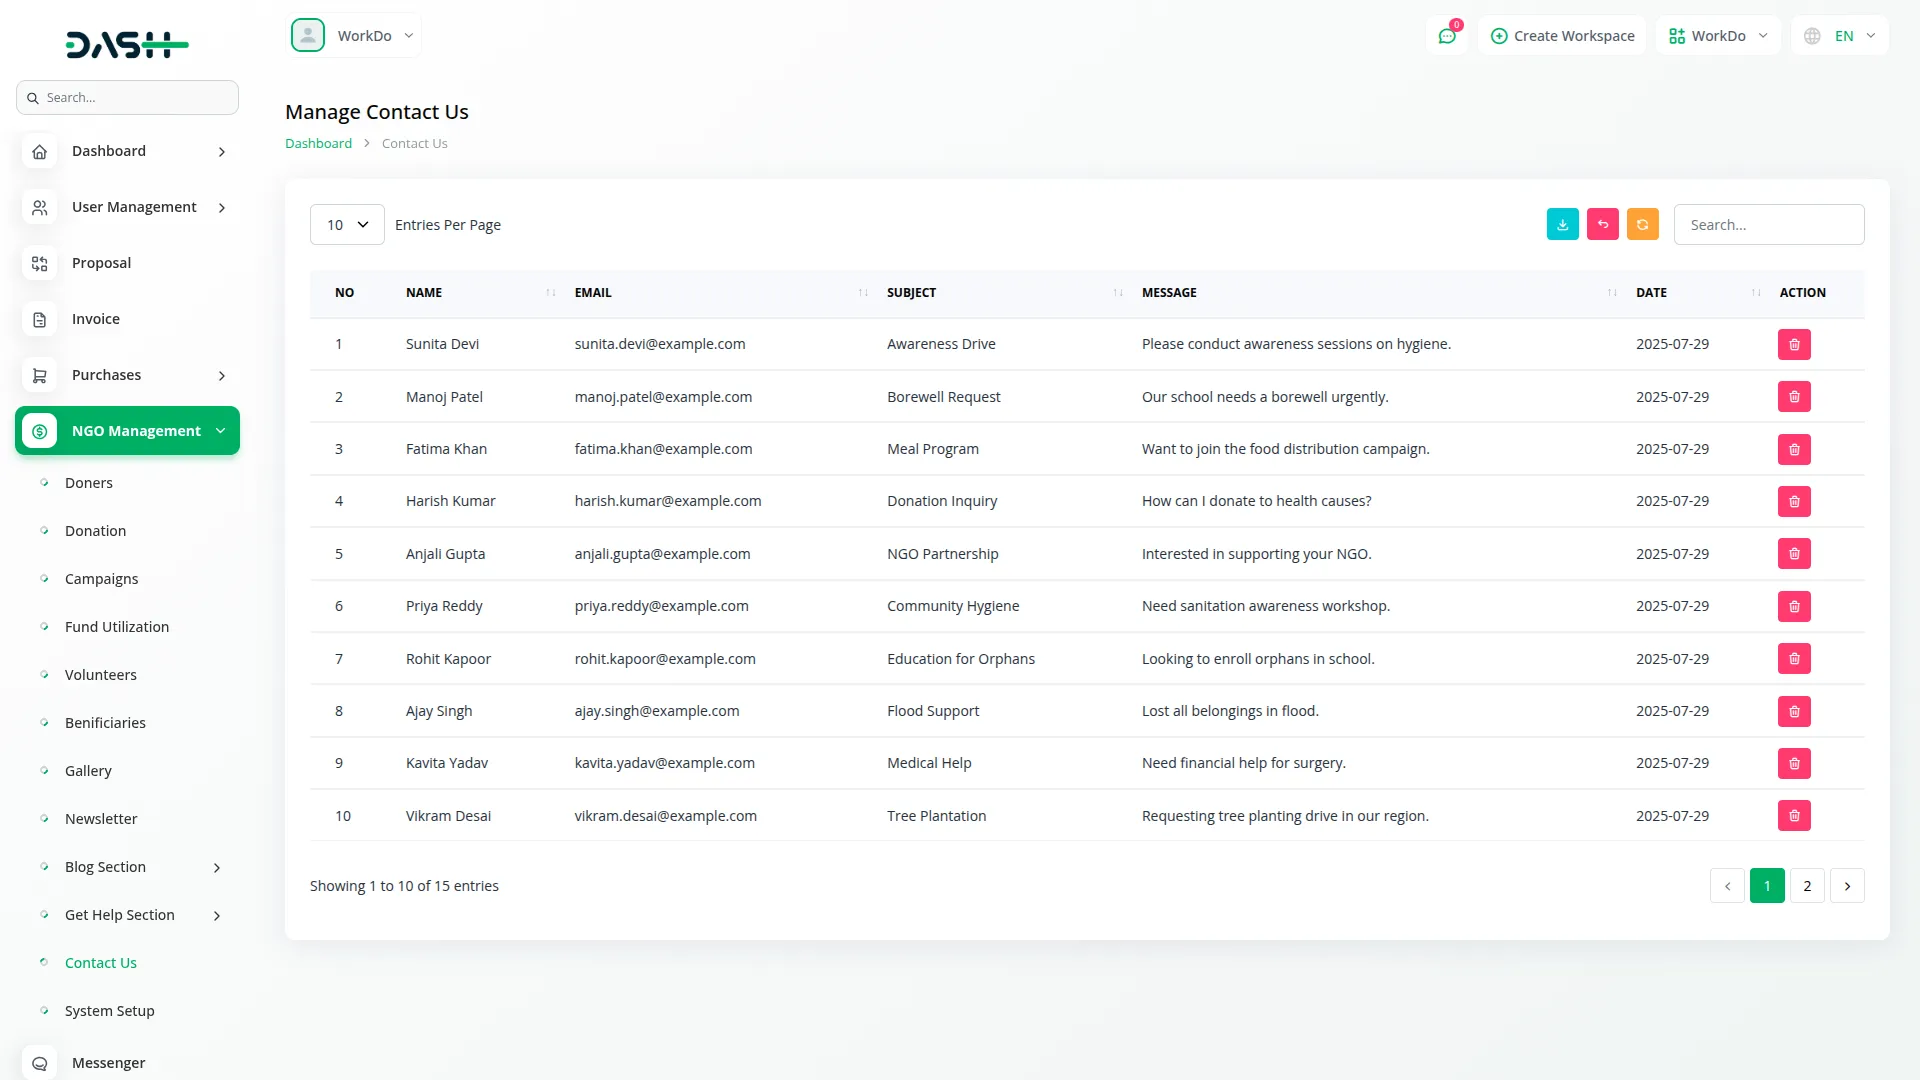
- The Contact Us section displays messages submitted through the frontend contact form. Users can contact your NGO directly through the frontend form, and all inquiries are automatically collected in this section.
- To review contact messages, enter the sender’s name, email address, subject line, and complete message content.
- The list page shows all contact messages with columns for NO, Name, Email, Subject and Date. You can search for specific messages or export contact data for record keeping and response tracking.
- In the Actions column, “Delete” allows you to remove processed or irrelevant contact messages from the system. Note that there are only Search and Export buttons available at the top, with no Add button since messages come from frontend submissions.
Manage NGO System Setup
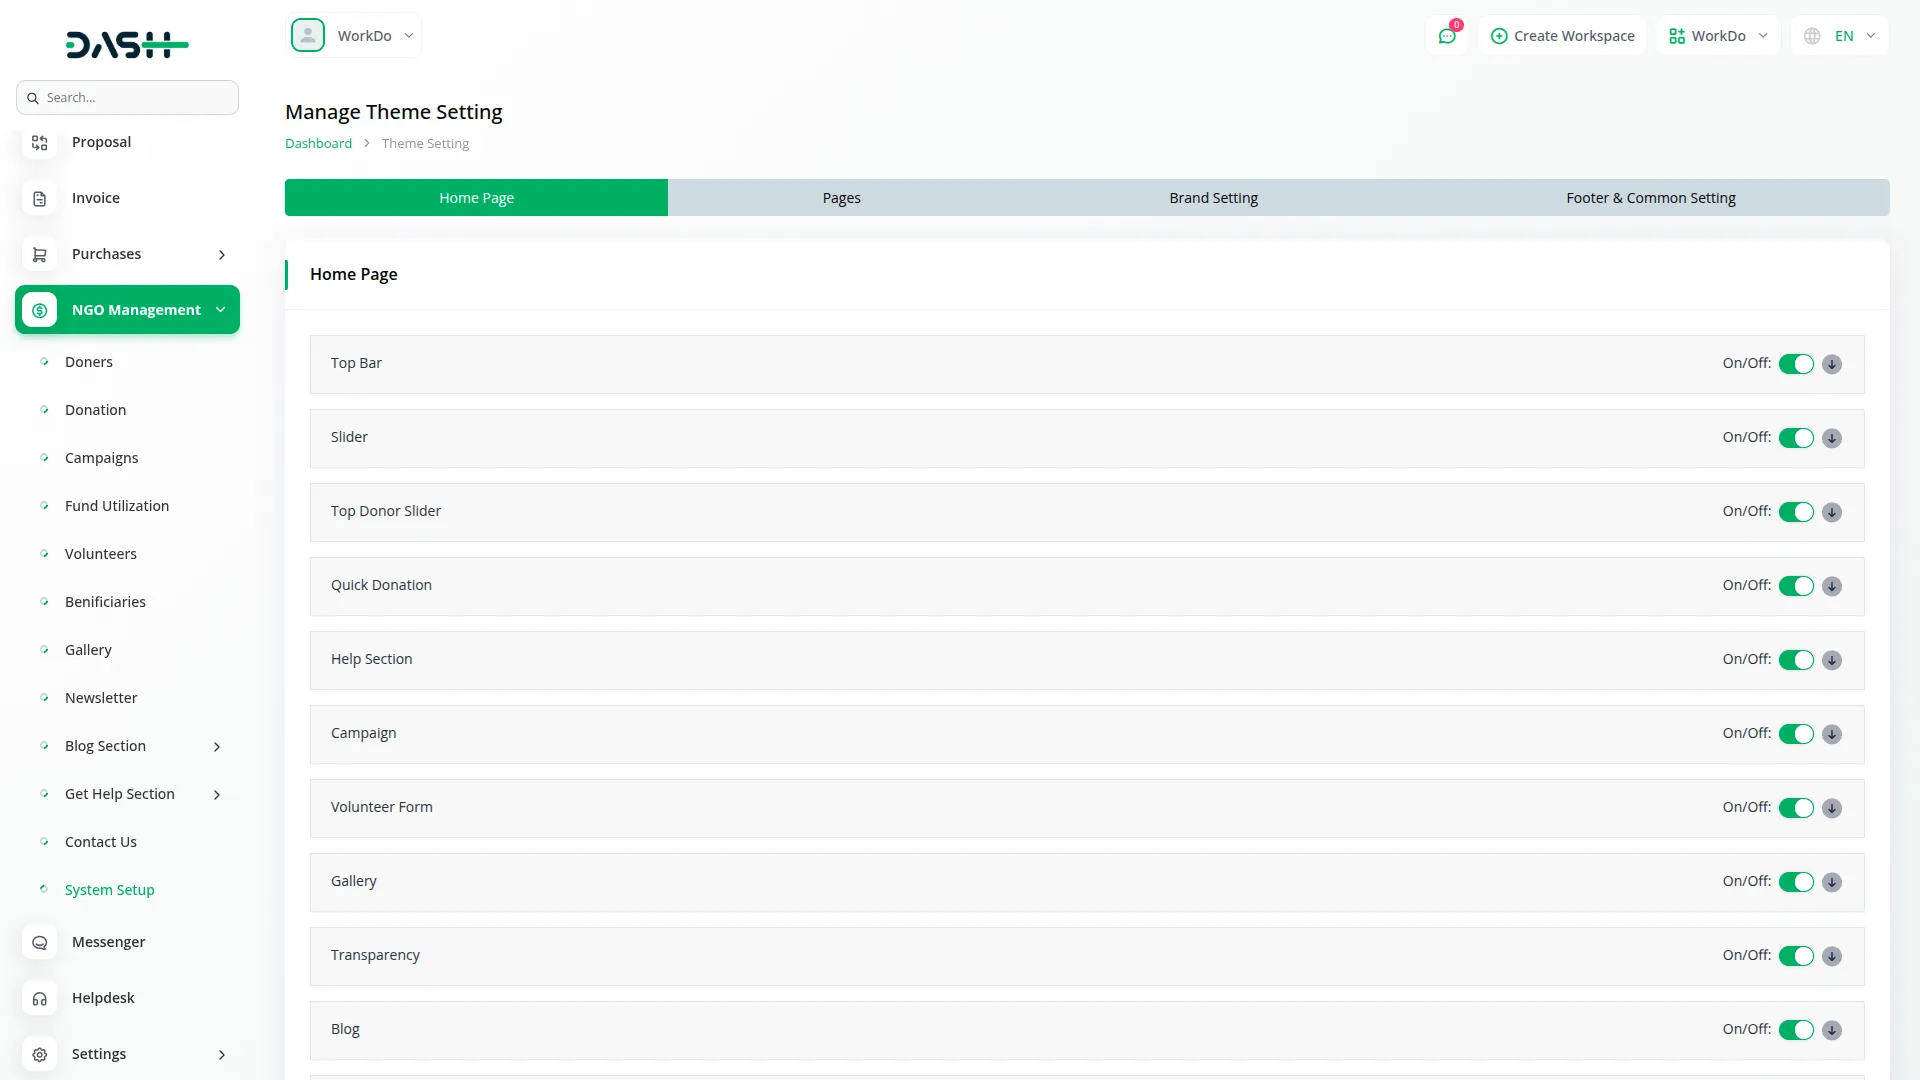
- The NGO System Setup section allows you to customize the entire frontend website and system settings. Configure brand settings including logo upload and display options for consistent organizational branding across the website.
- Set up header and footer settings to control navigation menus, contact information, and footer content displayed on all frontend pages. Manage page content settings to customize text, images, and layout for different sections of your website.
- Add social media links to connect your website with Facebook, Twitter, Instagram, and other social platforms. Configure all section data to control which features and pages are visible or hidden on the frontend website.
- The setup page displays different settings categories with save and update buttons for each configuration section.
- In the Actions section, use “Save Settings” to apply all configuration changes to your website. You can handle the entire frontend from this section, including changing logo, favicon, header and footer text, turning sections on or off, and much more customization options.
Categories
Related articles
- User Manual – Sales SaaS
- Repair Management Integration in Dash SaaS
- Freight Management System Integration in Dash SaaS
- Mailchimp Integration in Dash SaaS
- PayPay Payment Gateway
- Job Search Detailed Documentation
- Pesapal Integration in Dash SaaS
- Purchase Notification – eCommerceGo Addon
- WhatsApp Messenger Integration in Dash SaaS
- Planning Module Detailed Integration in Dash SaaS
- Vehicle Wash Detailed Documentation
- User Manual – Task SaaS
Reach Out to Us
Have questions or need assistance? We're here to help! Reach out to our team for support, inquiries, or feedback. Your needs are important to us, and we’re ready to assist you!


Need more help?
If you’re still uncertain or need professional guidance, don’t hesitate to contact us. You can contact us via email or submit a ticket with a description of your issue. Our team of experts is always available to help you with any questions. Rest assured that we’ll respond to your inquiry promptly.
Love what you see?
Do you like the quality of our products, themes, and applications, or perhaps the design of our website caught your eye? You can have similarly outstanding designs for your website or apps. Contact us, and we’ll bring your ideas to life.
