Music Institute Integration in Dash SaaS
The Music Institute software is a comprehensive management system designed to help music schools and institutes efficiently manage their operations.
Introduction
The Music Institute software is a comprehensive management system designed to help music schools and institutes efficiently manage their operations. This system provides complete control over student enrollment, teacher management, class scheduling, lesson tracking, instrument inventory, and academic progress monitoring. It includes features for attendance management, practice scheduling, library resource management, examination tracking, and detailed reporting. The Add-On also supports role-based access for students and teachers, allowing them to interact with relevant parts of the system based on assigned permissions.
How to Install the Add-On?
To Set Up the Music Institute Add-On, you can follow this link Setup Add-On
How to Use the Music Institute Add-On?
Music Institute Dashboard
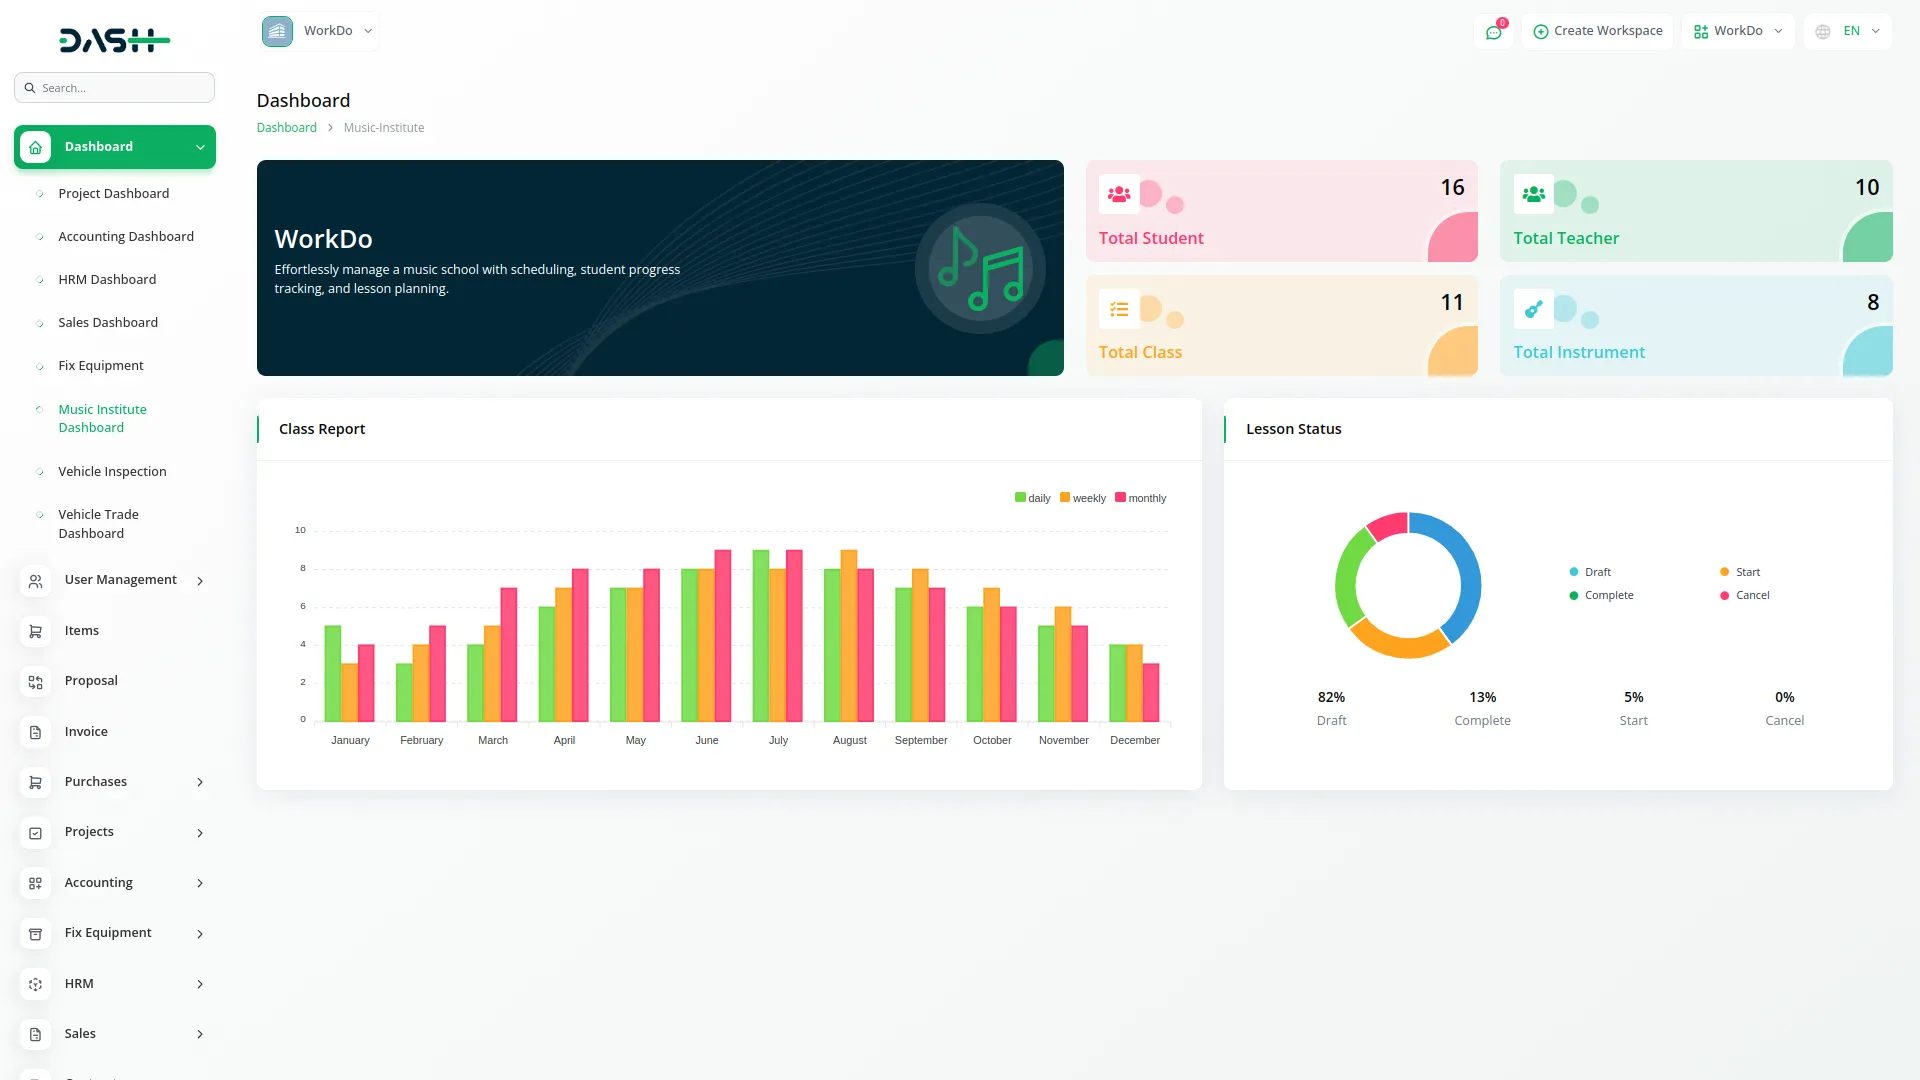
- The Music Institute Dashboard provides a comprehensive overview of your institute’s key metrics and activities.
- The dashboard displays four main cards showing totals for Students, Teachers, Classes, and Instruments.
- You can view monthly class reports through an interactive Bar Chart that can be filtered by daily, weekly, or monthly periods for specific months.
- The dashboard also includes a Lesson Status Donut Chart that displays the distribution of lessons across different statuses including Draft, Start, Complete, and Cancel.
Manage Student
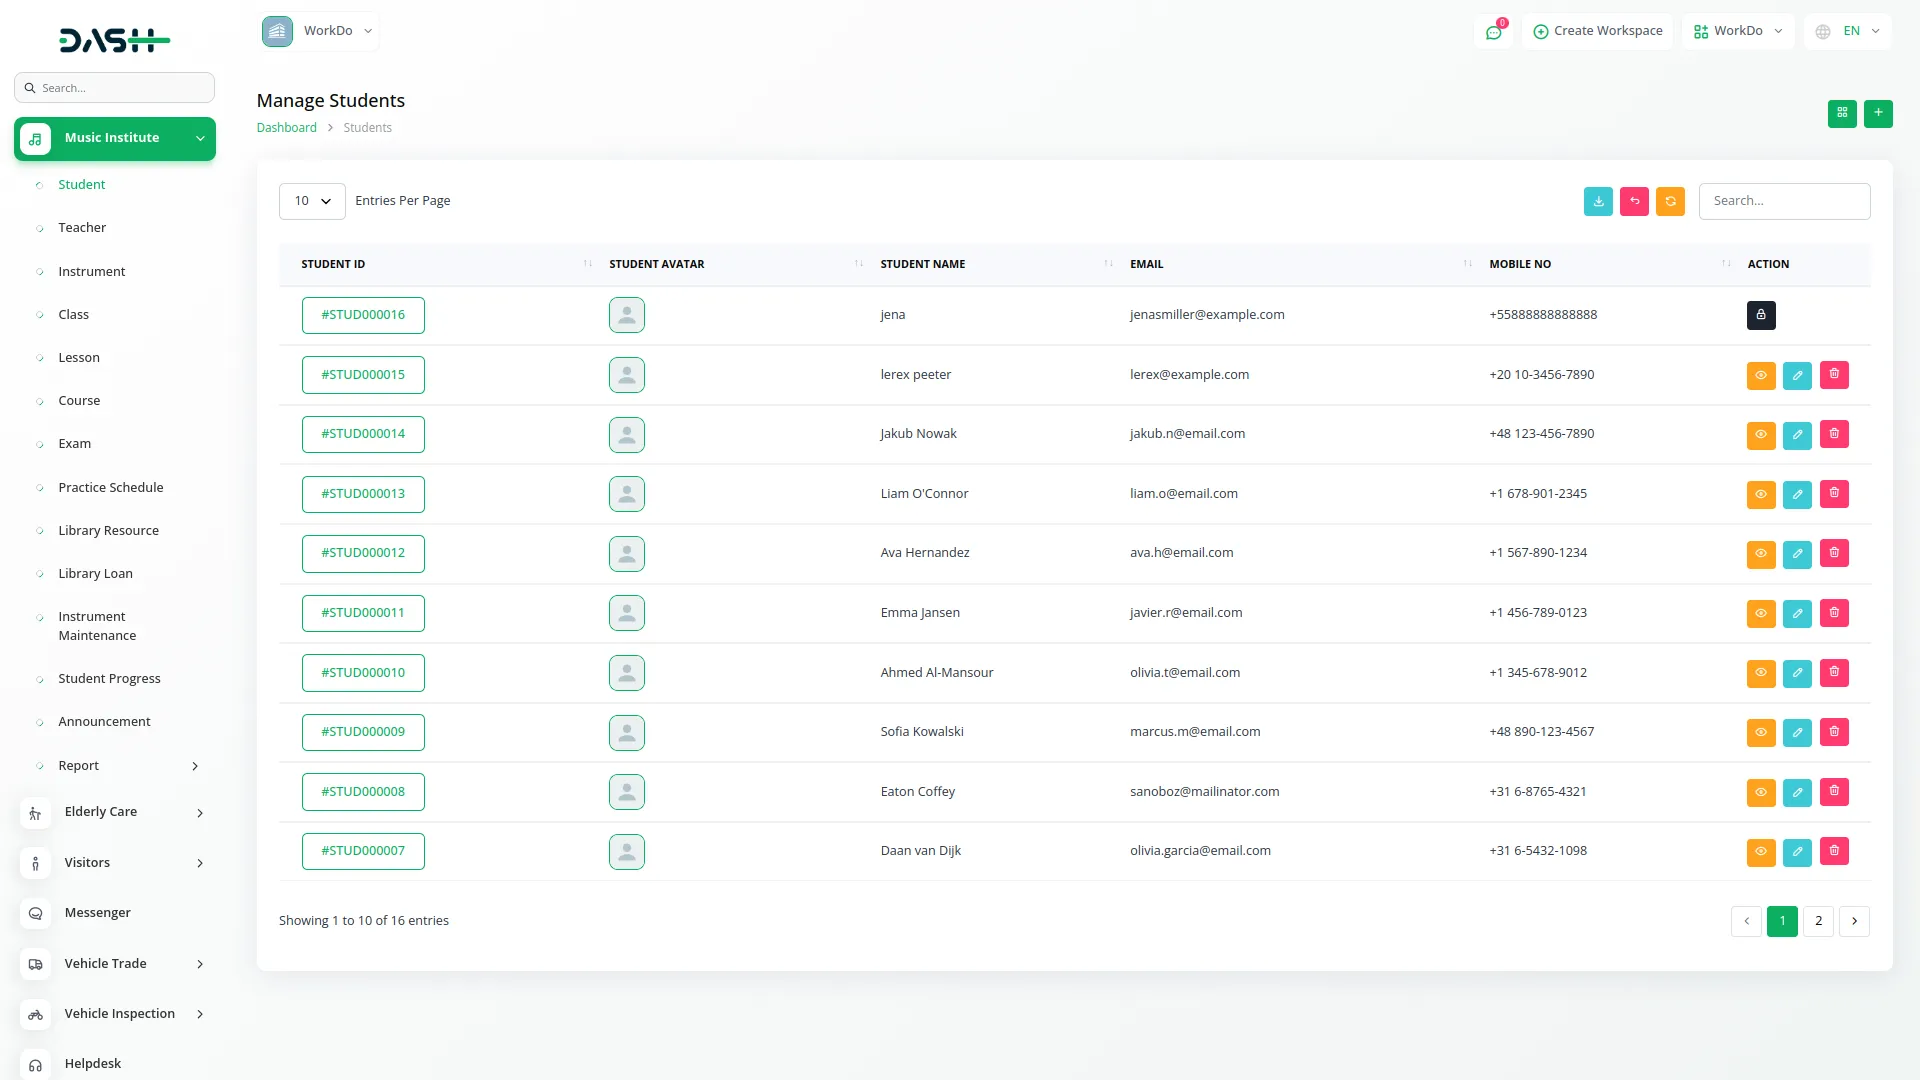
- To create a new Student, click the “Create” button at the top of the student page. Upload the Student Avatar and select the Gender. Enter the Student Name, Email, and Password. Enter the Instrument manually and enter the Mobile Number and Date of Birth.
- Select the Language from the dropdown menu, then fill in the Address, City, State, Country, and Zip Code. The list page shows all students with options for Grid View and Create buttons.
- The table displays columns for Student ID, Student Avatar, Student Name, Email, and Mobile Number. Available actions include View, Edit, and Delete for each student record. You can also export, reset, and reload the list whenever you want.
Manage Teachers
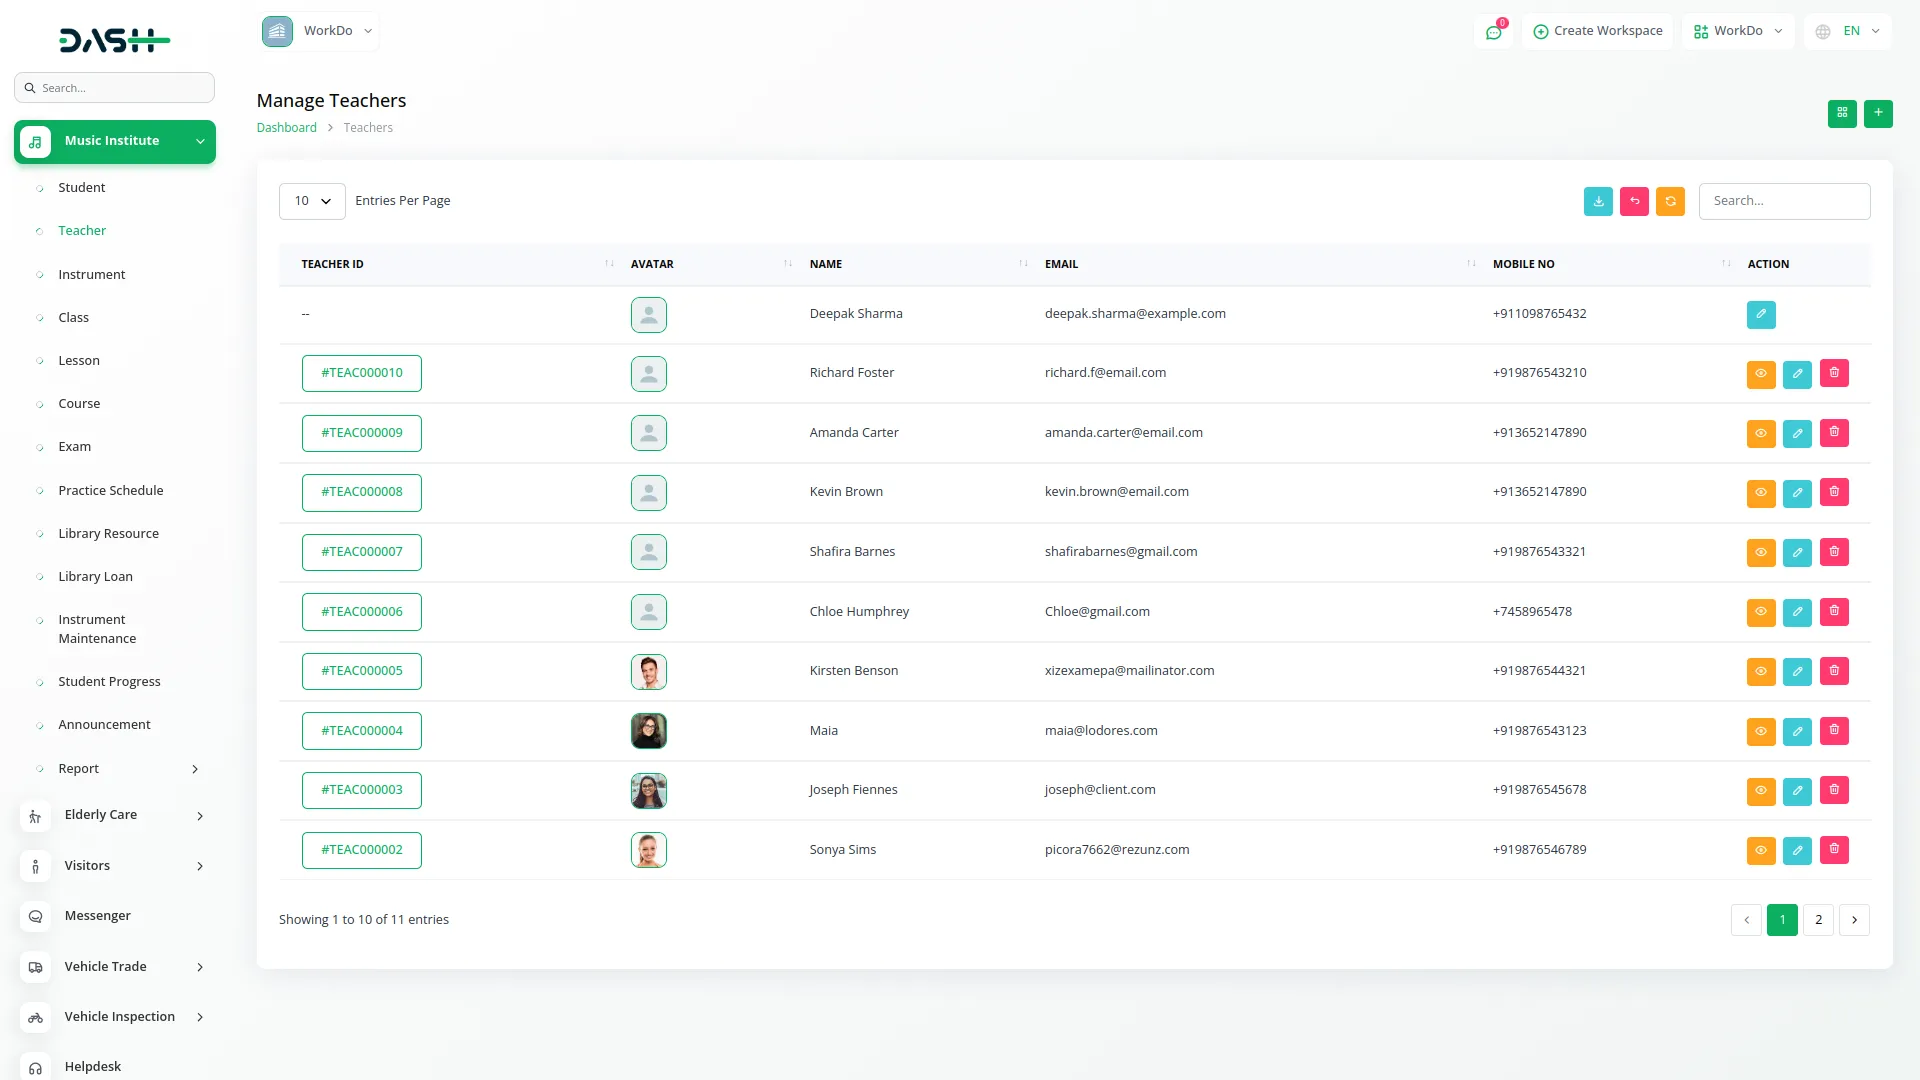
- To add a new Teacher, click the “Create” button at the top of the teacher page. Enter the Name, Email, and Password. Fill in the Date of Birth and Mobile Number, then select the Gender. Add the Expertise details and provide Certification Details for the teacher.
- The list page displays all teachers with Grid View and Create button options. The table shows columns for Teacher ID, Avatar, Name, Email, and Mobile Number. You can perform actions like View, Edit, and Delete on each teacher record. You can also export, reset, and reload the list whenever you want.
Manage Instruments
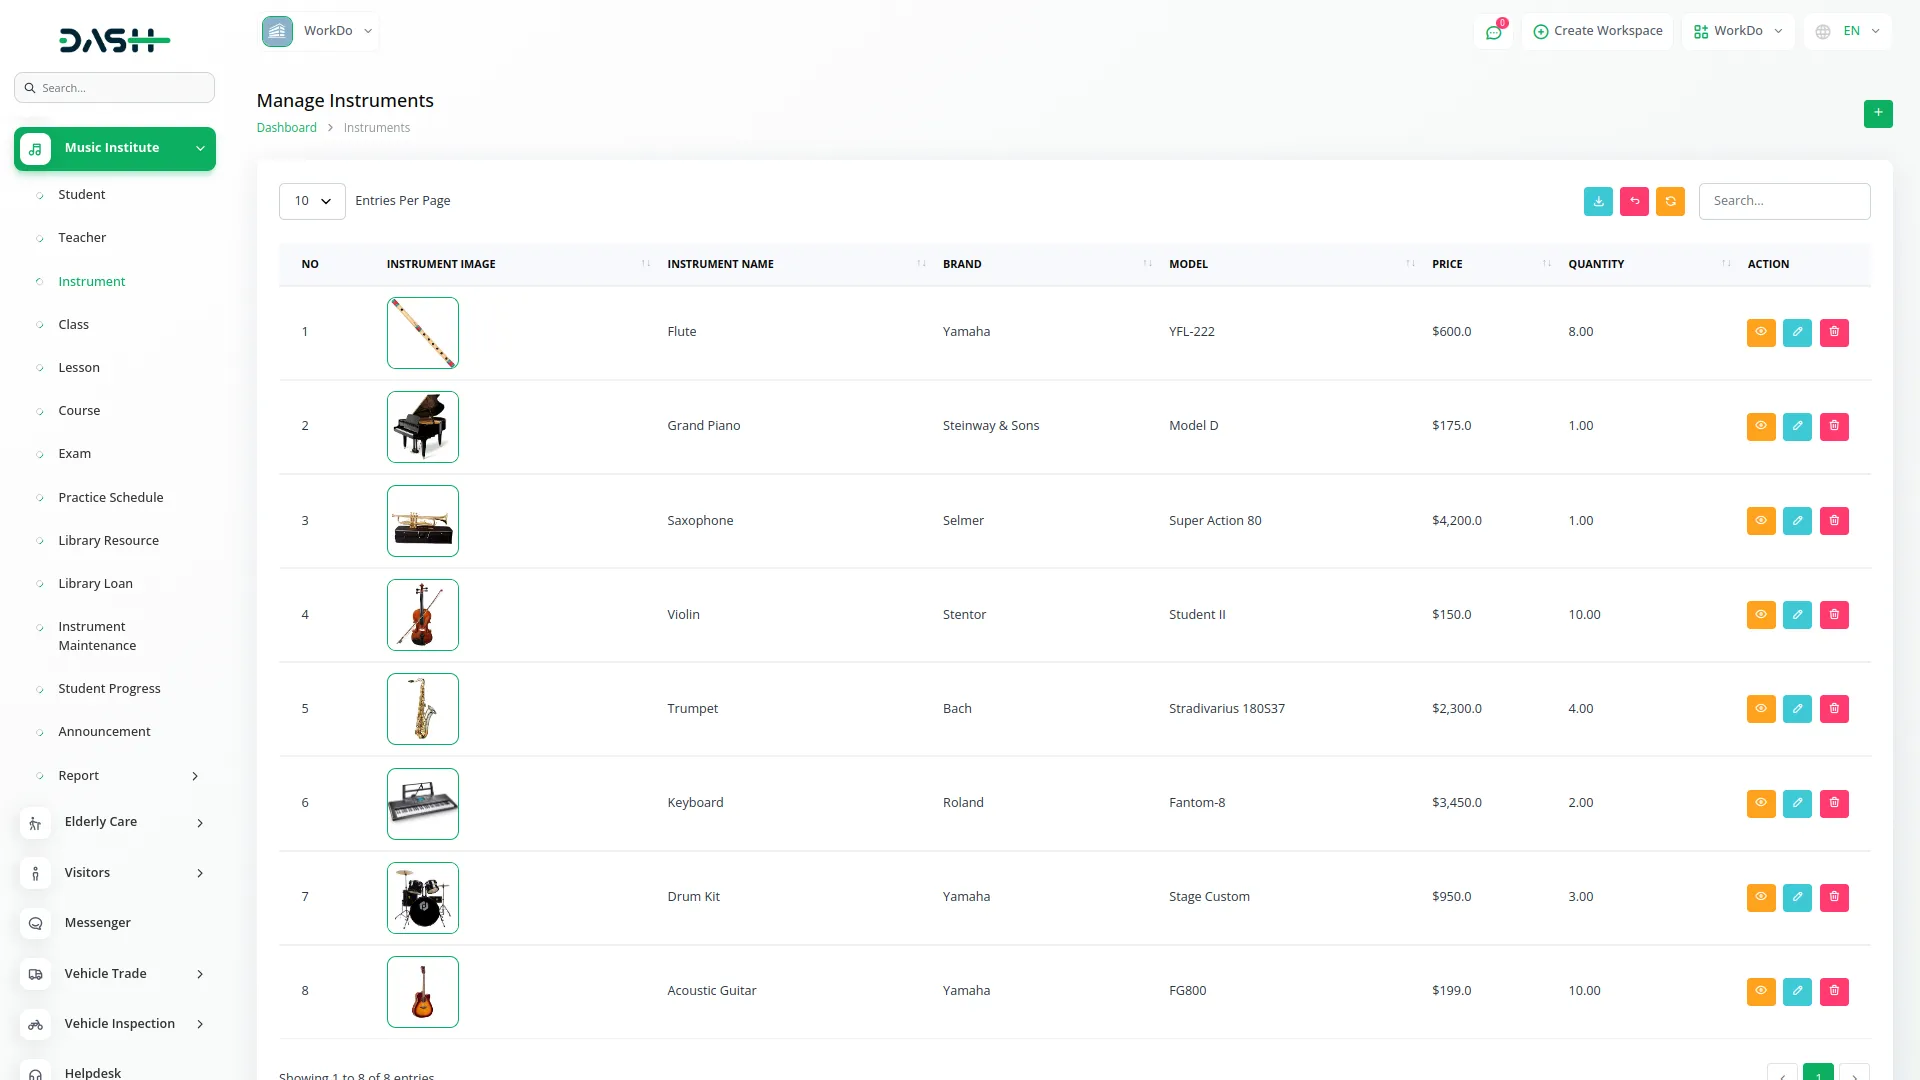
- To create a new Instrument, click the “Create” button at the top of the instrument page. Enter the Instrument Name, Brand, and Model. Fill in the Purchase Date, Price, and Quantity. Add Warranty information and upload an Instrument Image.
- Include any Notes and specify the Technician responsible for the instrument. The list page shows all instruments with a Create button.
- The table displays columns for No, Instrument Image, Instrument Name, Brand, Model, Price, and Quantity. Available actions include View, Edit, and Delete for each instrument record. You can also export, reset, and reload the list whenever you want.
Manage Classes
- To create a new Class, click the “Create” button at the top of the class page. Enter the Class Name and enter the Instrument for this class manually. Fill in the Start Date & Time and End Date & Time. Enter the Location where the class will be held.
- Select the Teacher from the dropdown menu and choose the Student from the available options. Select the Schedule from the dropdown with options for Daily, Weekly, or Monthly. The list page displays all classes with a Create button.
- The table shows columns for Class ID, Class Name, Start Date & Time, End Date & Time, Location, and Schedule. You can also export, reset, and reload the list whenever you want.
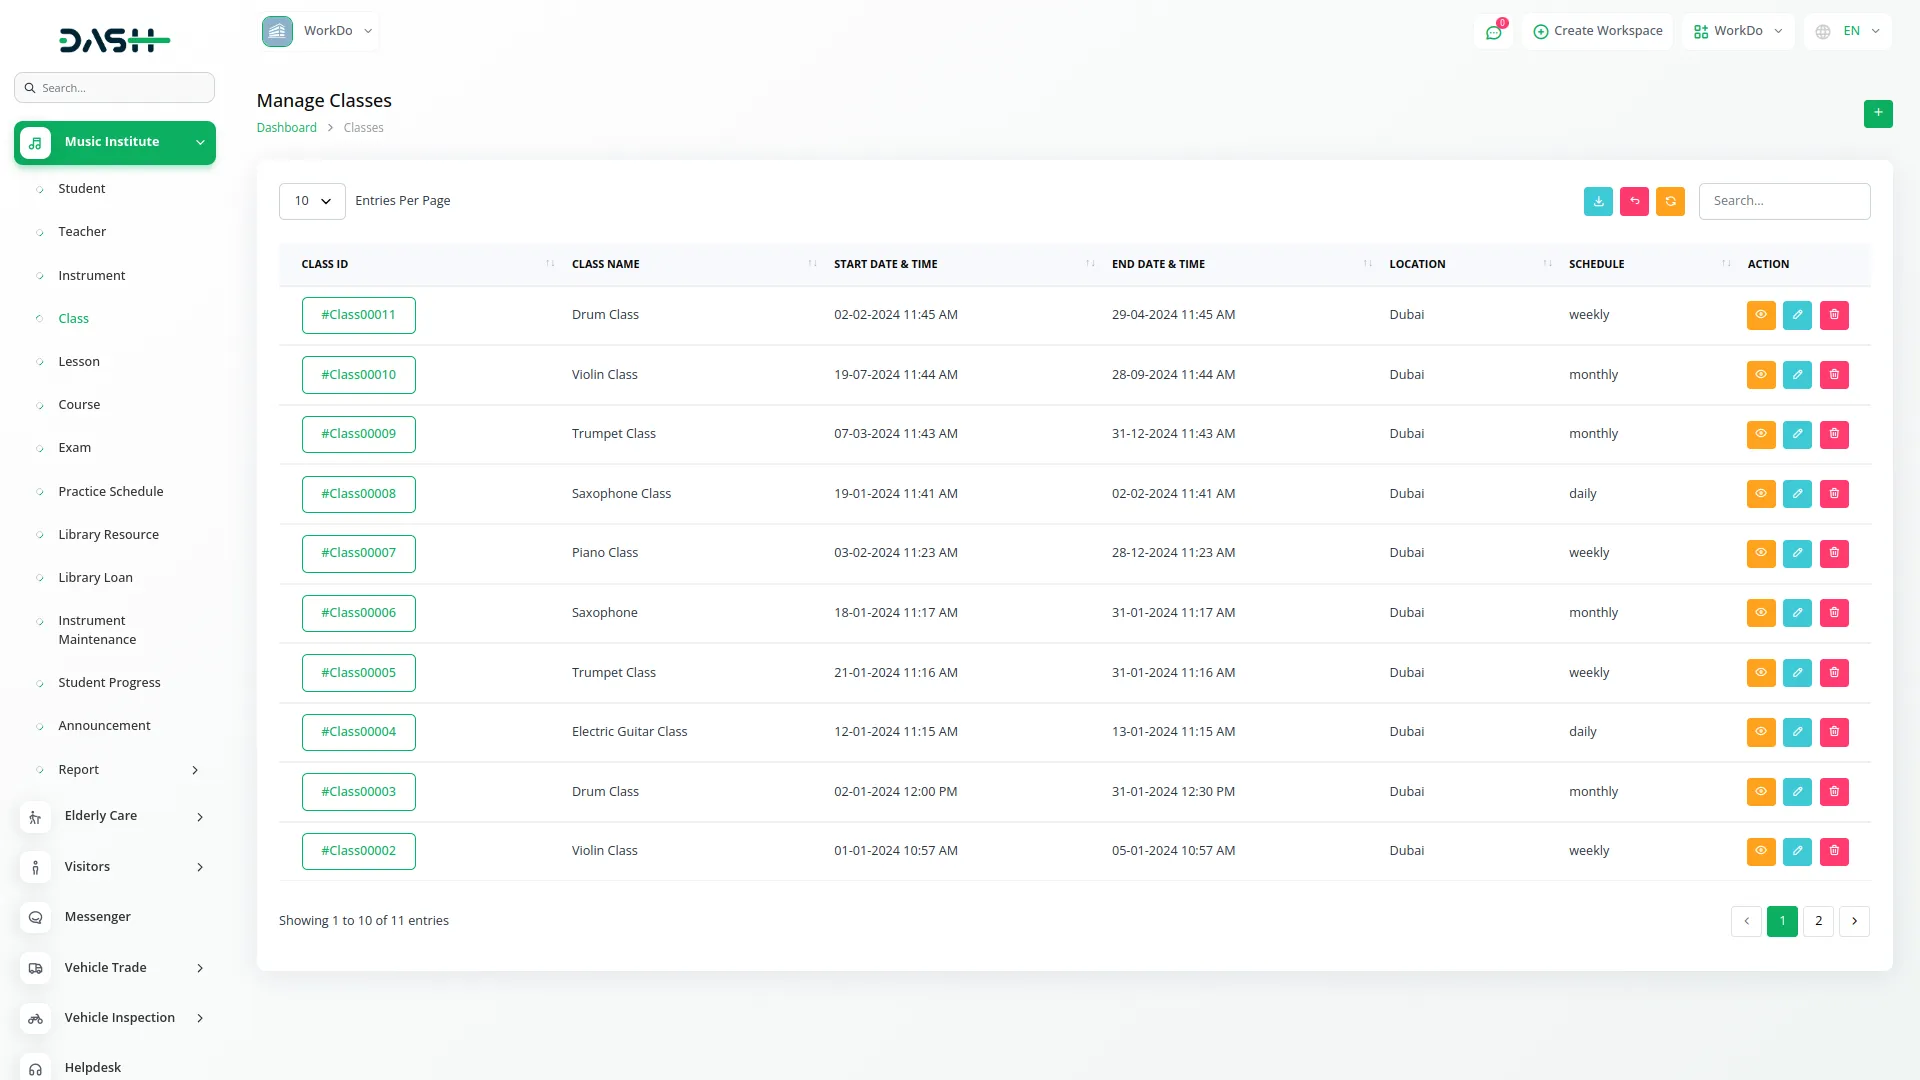
- Available actions include View , Edit, and Delete.
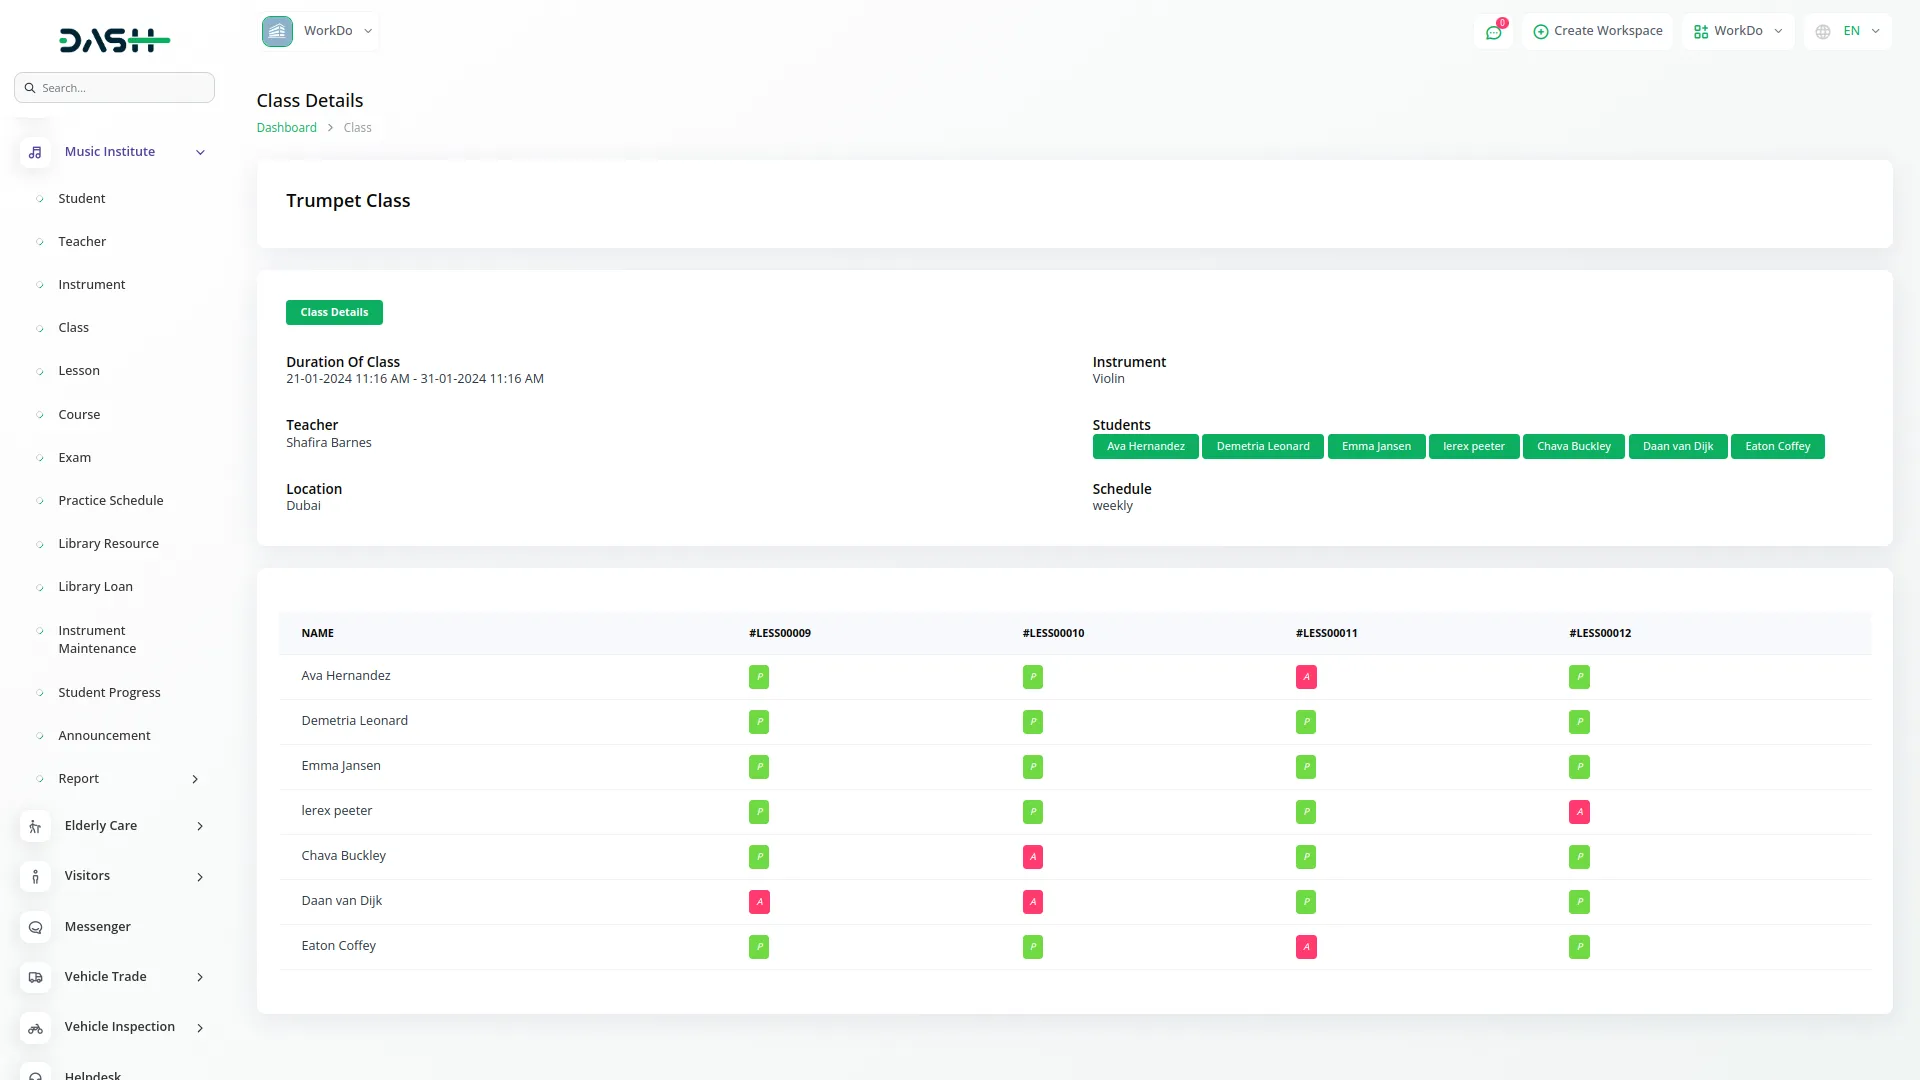
- Clicking on the “View” button displays the attendance records for all lessons associated with the class. This allows you to track and monitor student attendance across every lesson in one centralized view, making it easier to identify patterns or attendance issues without checking each lesson individually.
Manage Lessons
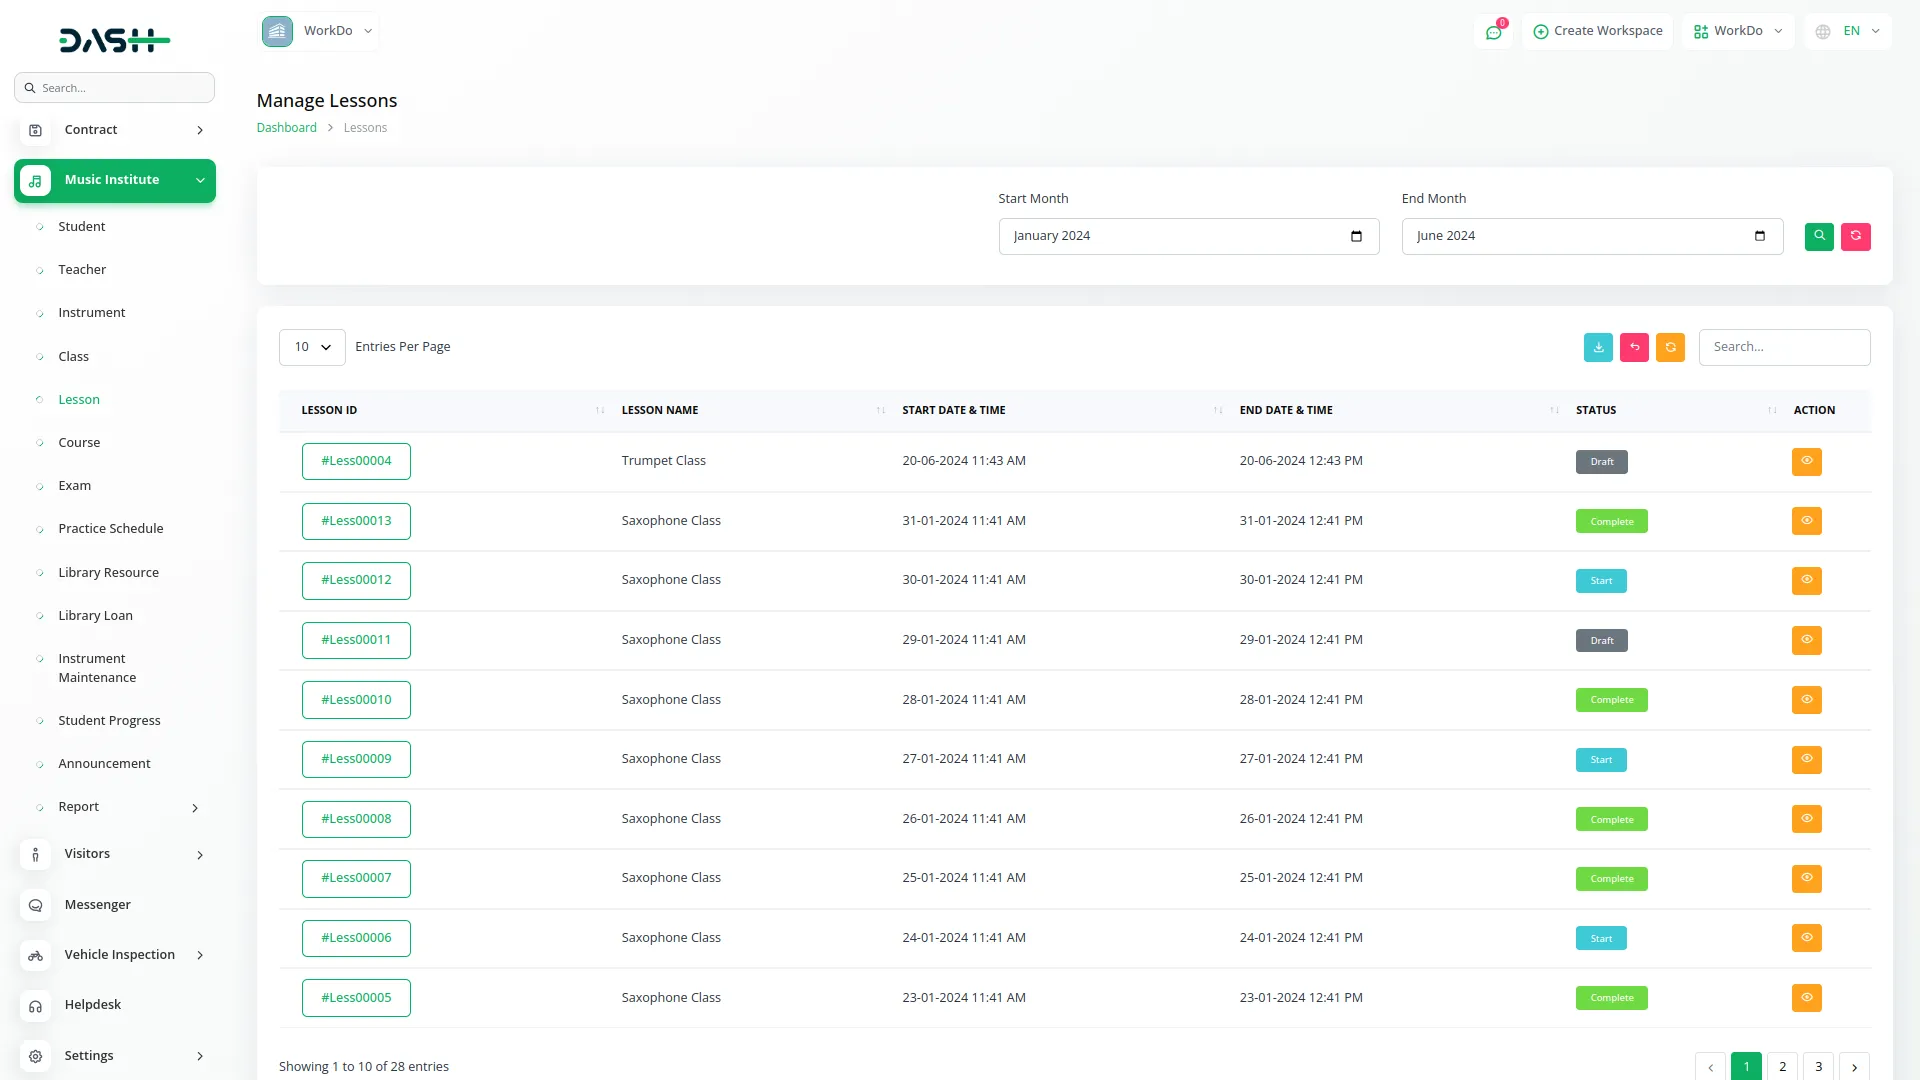
- The Lesson page allows you to manage lessons that are automatically generated when classes are created with their specified schedules. Use the Start Month dropdown to select a year and month, then choose the End Month from the year-wise month dropdown.
- Click the Apply button to search lesson data for the selected duration, or use the Reset button to clear the data. The list page displays lessons with columns for Lesson ID, Lesson Name, Start Date & Time, End Date & Time, and Status (Draft, Start, Complete, Cancel). You can also export, reset, and reload the list whenever you want.
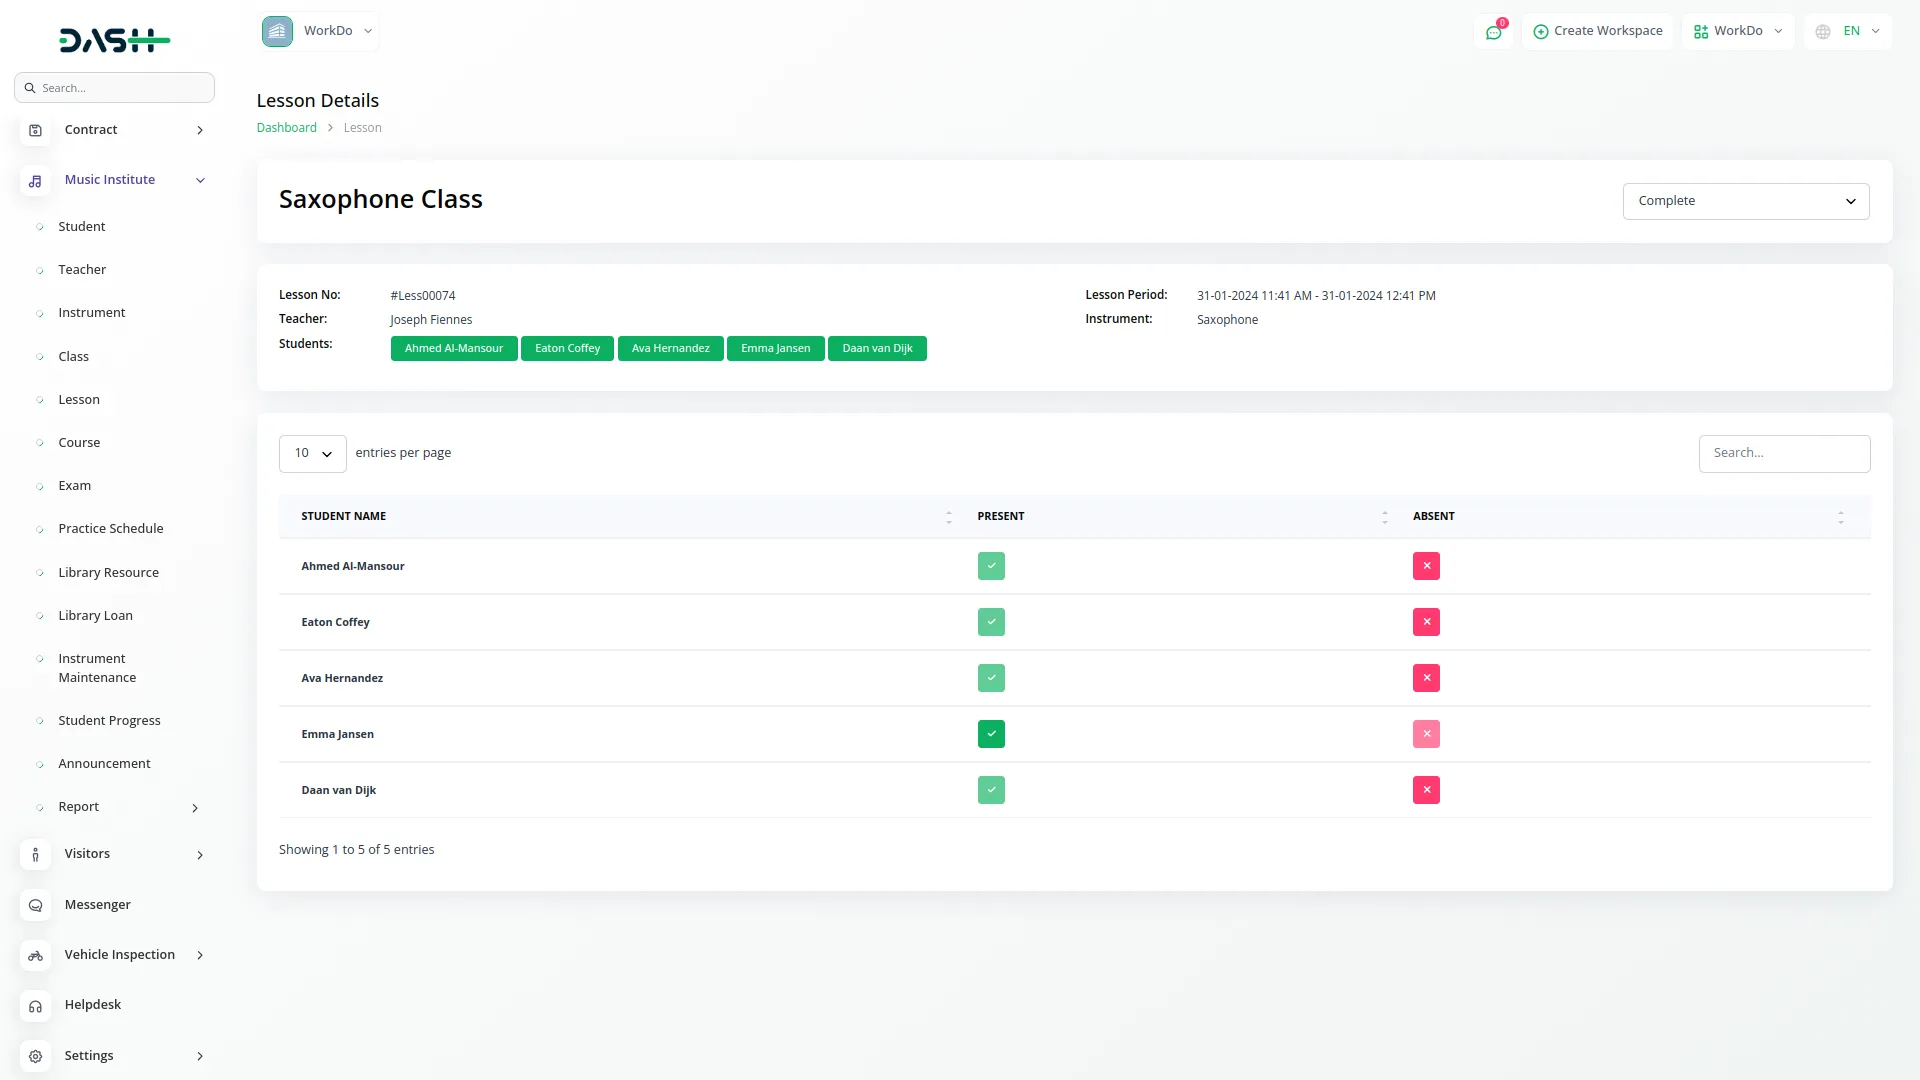
- The View action allows you to manage the student attendance process easily by marking present or absent for each student. You can also change the lesson status using the status dropdown within the lesson view.
Manage Courses
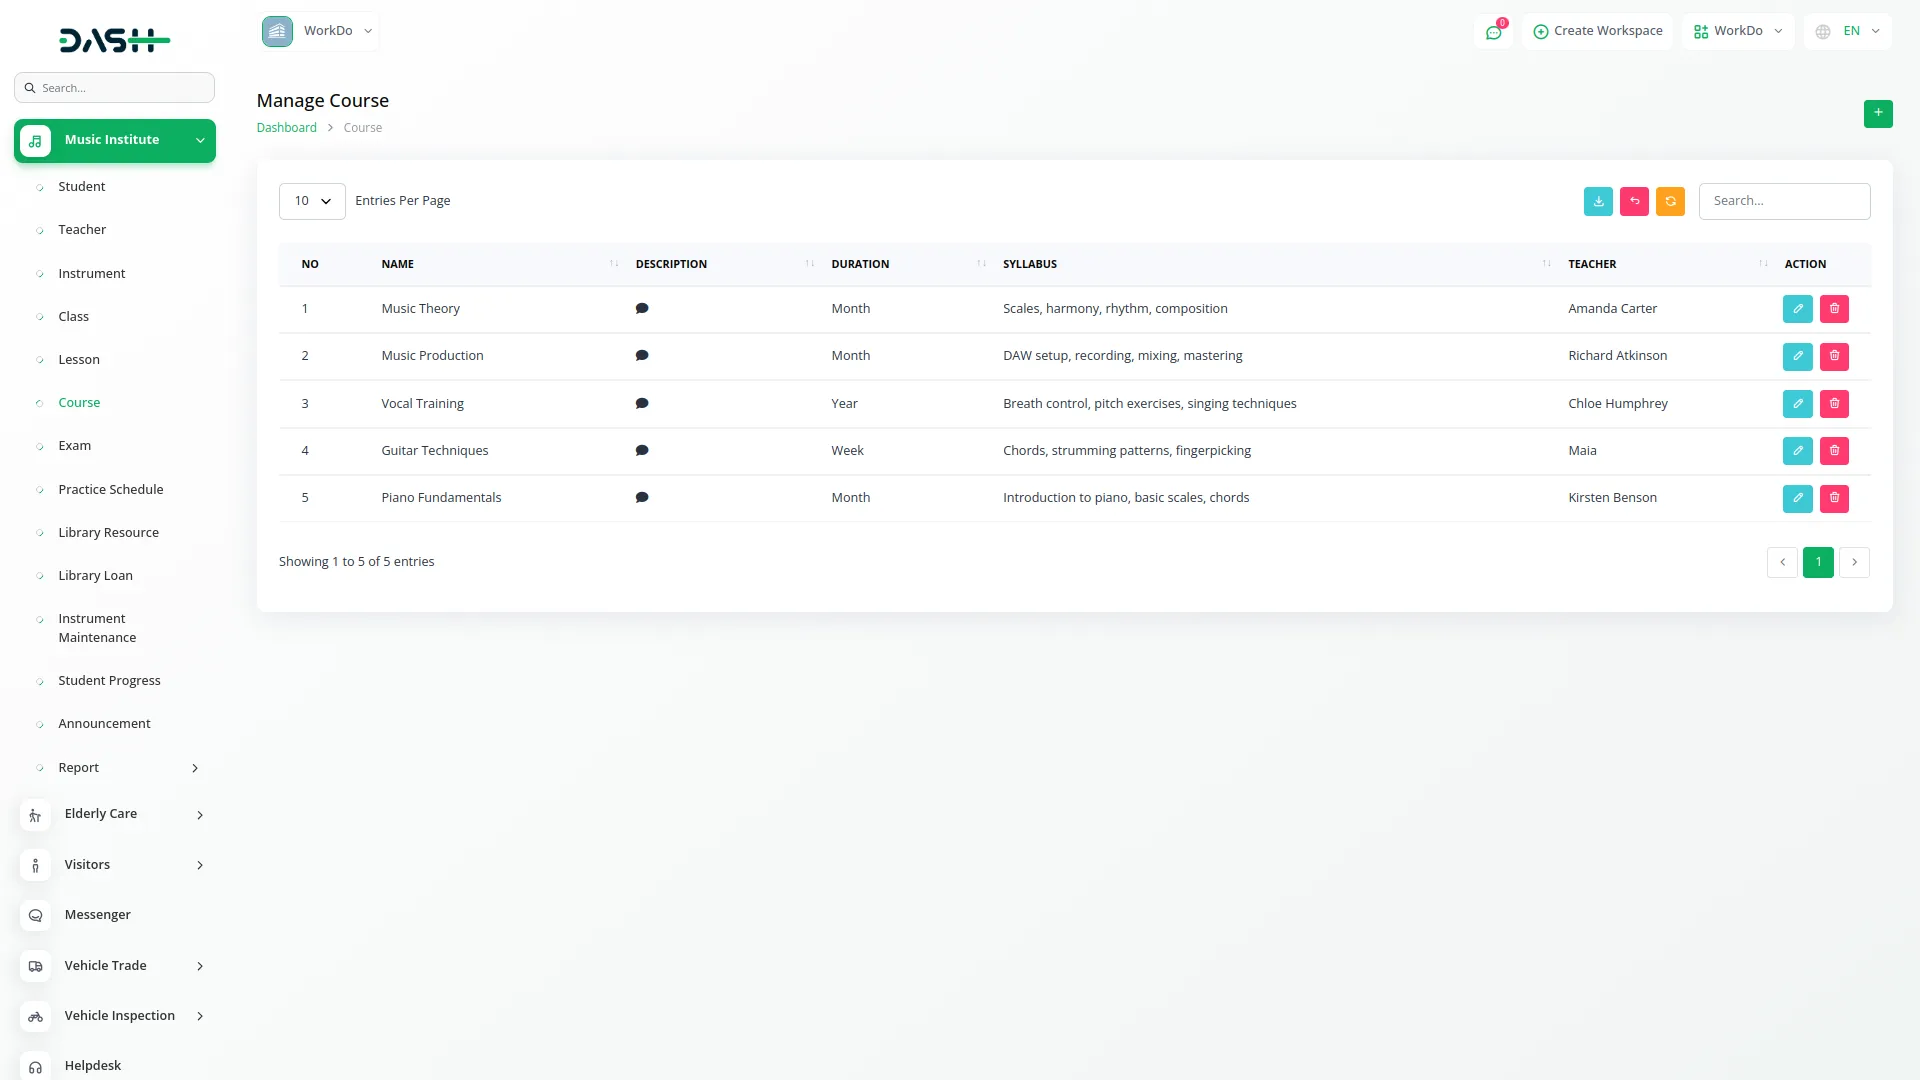
- To add a new Course, click the “Create” button at the top of the course page. Enter the Course Name and add the Syllabus manually. Select the Duration from the dropdown with options for per week, per month, or per year.
- Choose the Teacher from the dropdown menu and add a Description for the course. The list page shows all courses with a Create button.
- The table displays columns for No, Name, Description, Duration, Syllabus, and Teacher. Available actions are Edit and Delete for each course record. You can also export, reset, and reload the list whenever you want.
Manage Exams
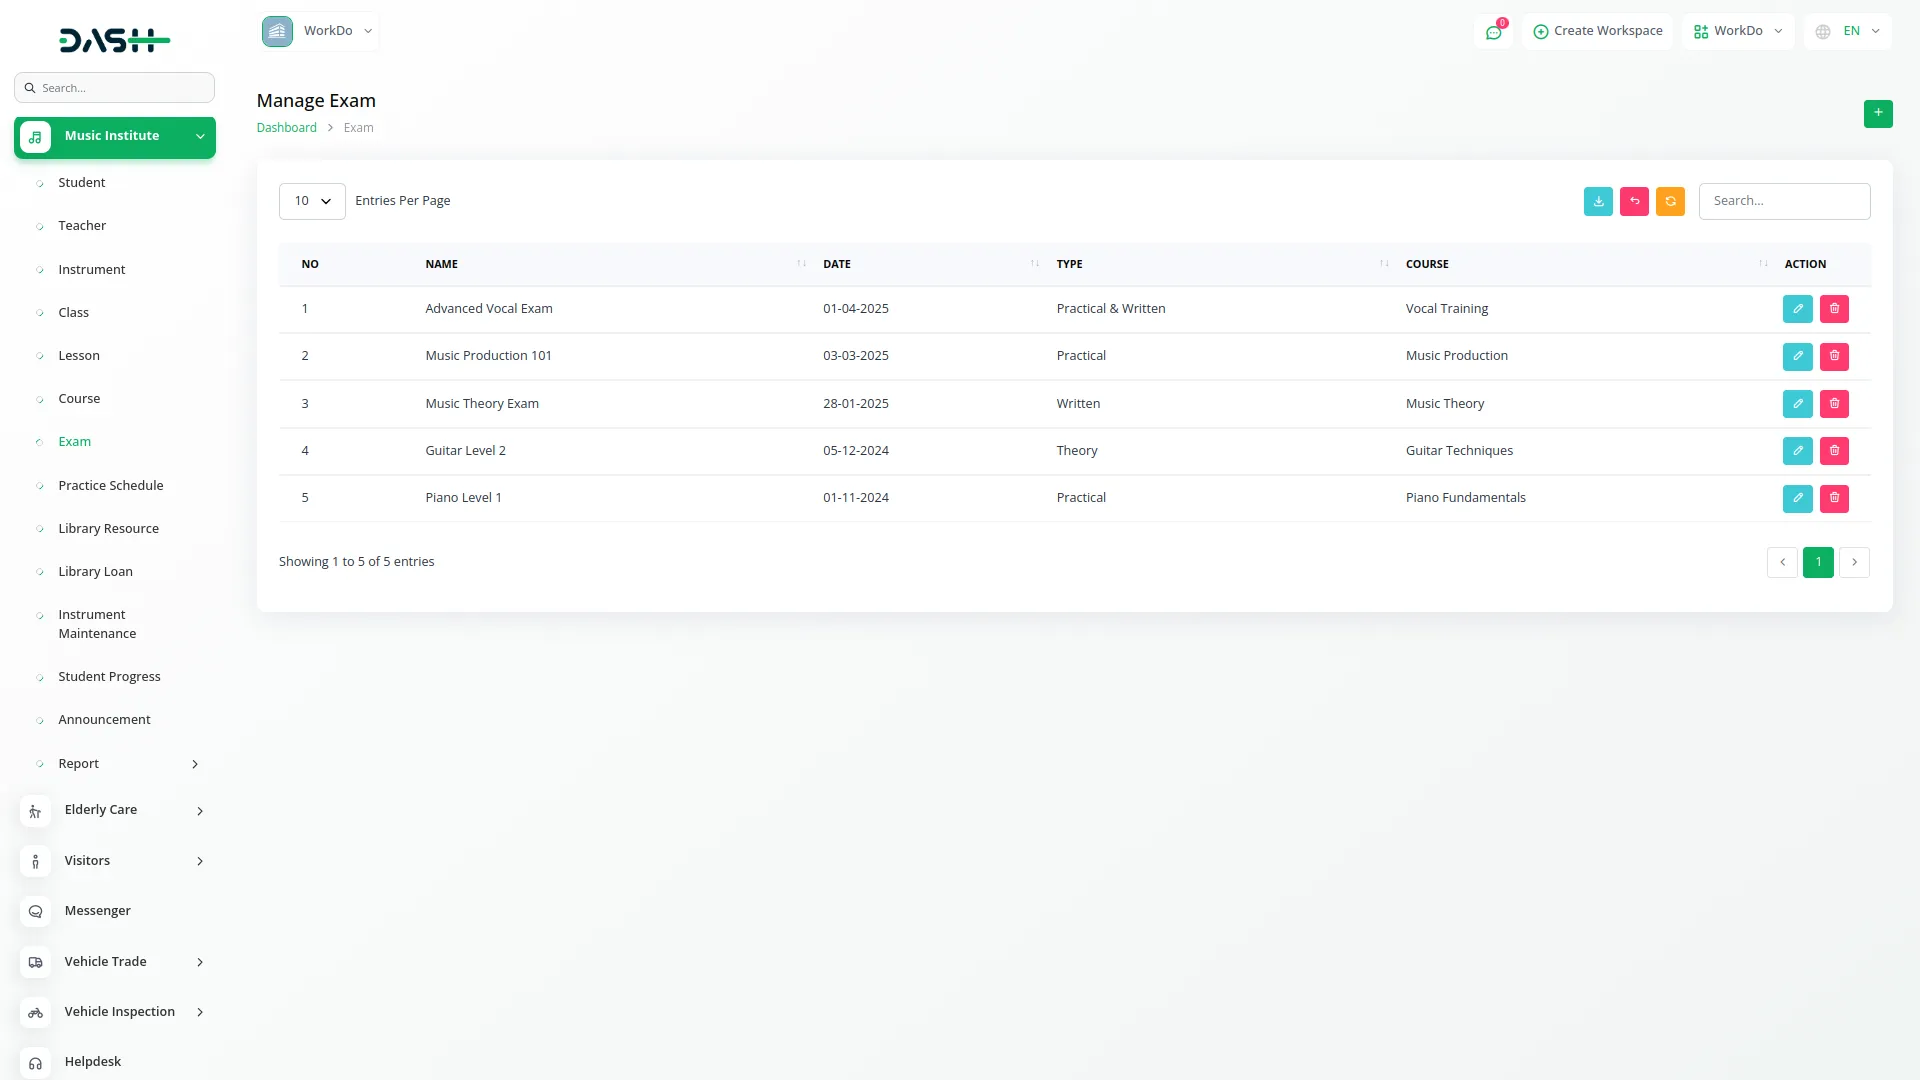
- To create a new Exam, click the “Create” button at the top of the exam page. Enter the Exam Name and select the Exam Date.
- Choose the Exam Type and select the Course from the dropdown menu.
- The list page displays all exams with a Create button. The table shows columns for No, Name, Date, Type, and Course. You can Edit or Delete each exam record. You can also export, reset, and reload the list whenever you want.
Manage Practice Schedules
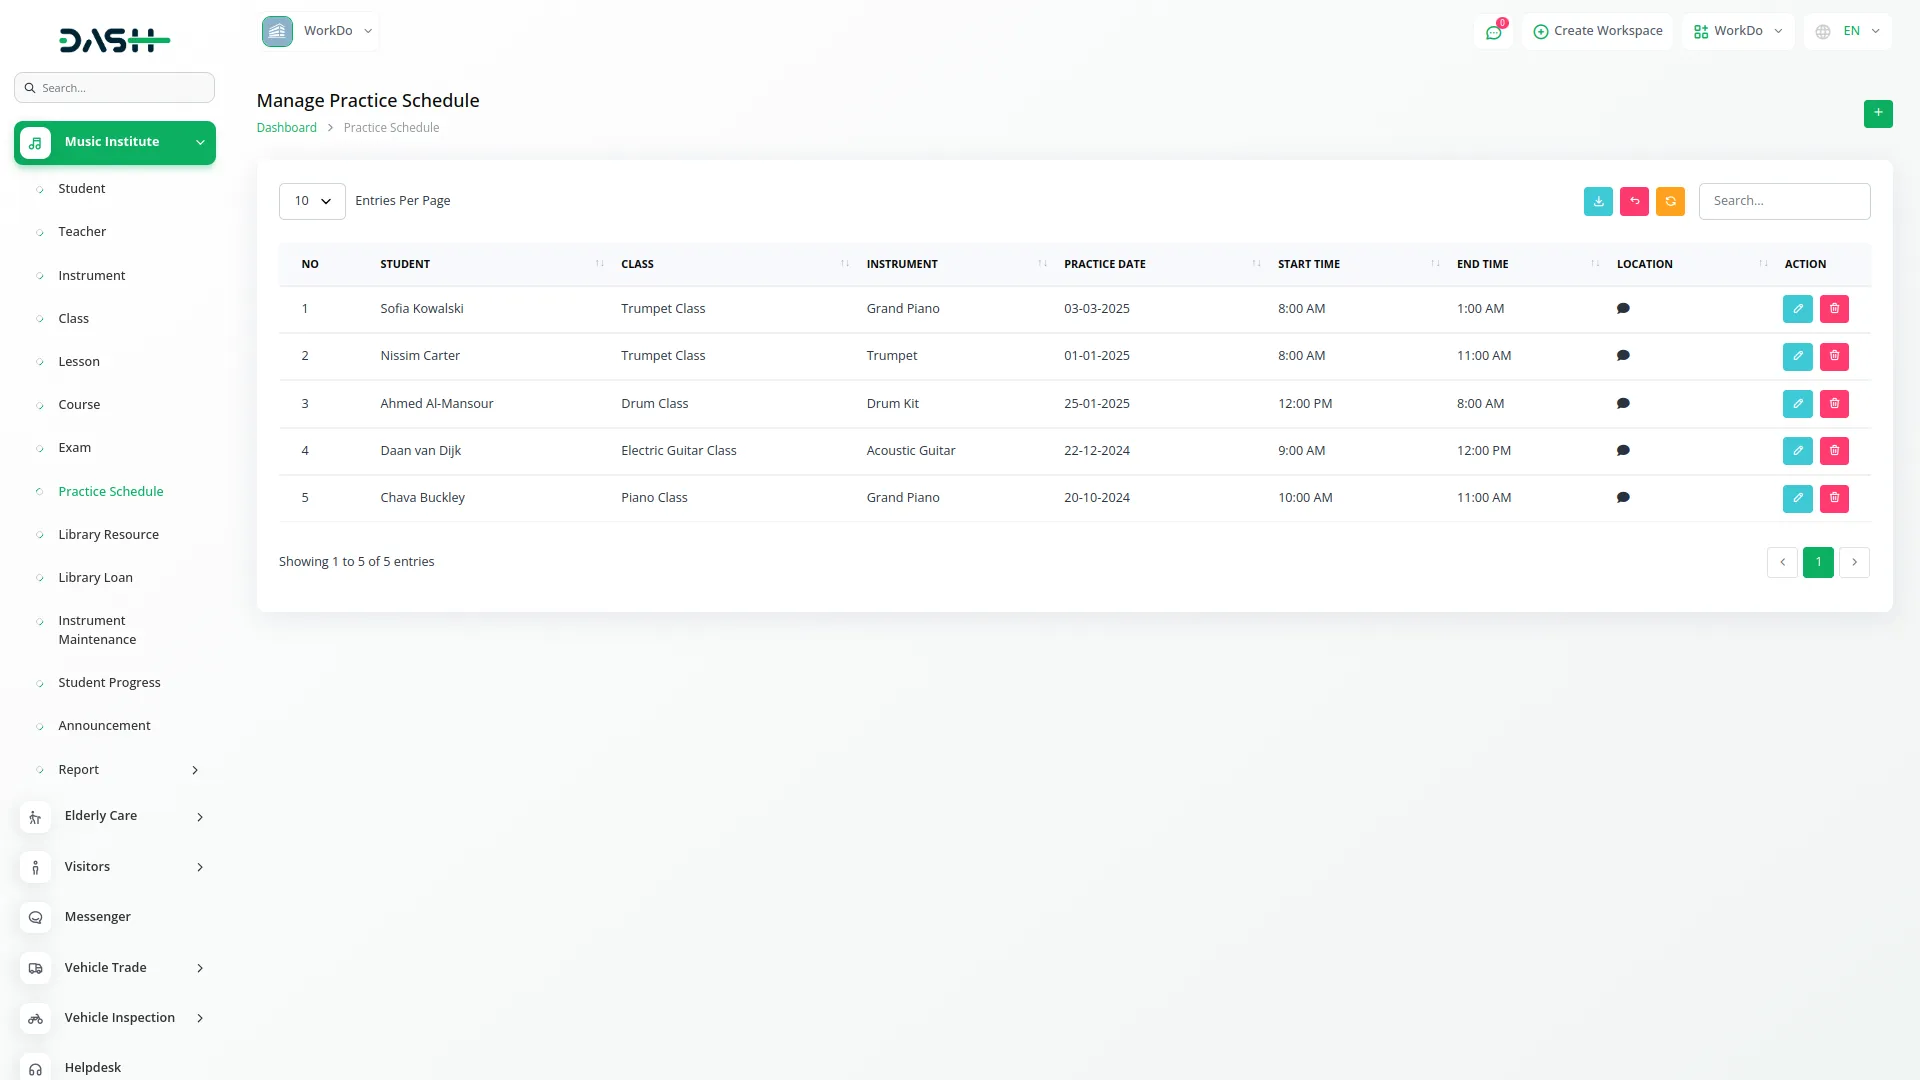
- To add a new Practice Schedule, click the “Create” button at the top of the practice schedule page. Select the Student from the dropdown menu and choose the Class from the available options. Select the Instrument from the dropdown and enter the Practice Date.
- Fill in the Start Time and End Time, then specify the Location for the practice session. The list page shows all practice schedules with a Create button.
- The table displays columns for No, Student, Class, Instrument, Practice Date, Start Time, End Time, and Location. Available actions include Edit and Delete for each practice schedule record. You can also export, reset, and reload the list whenever you want
Manage Library Resources
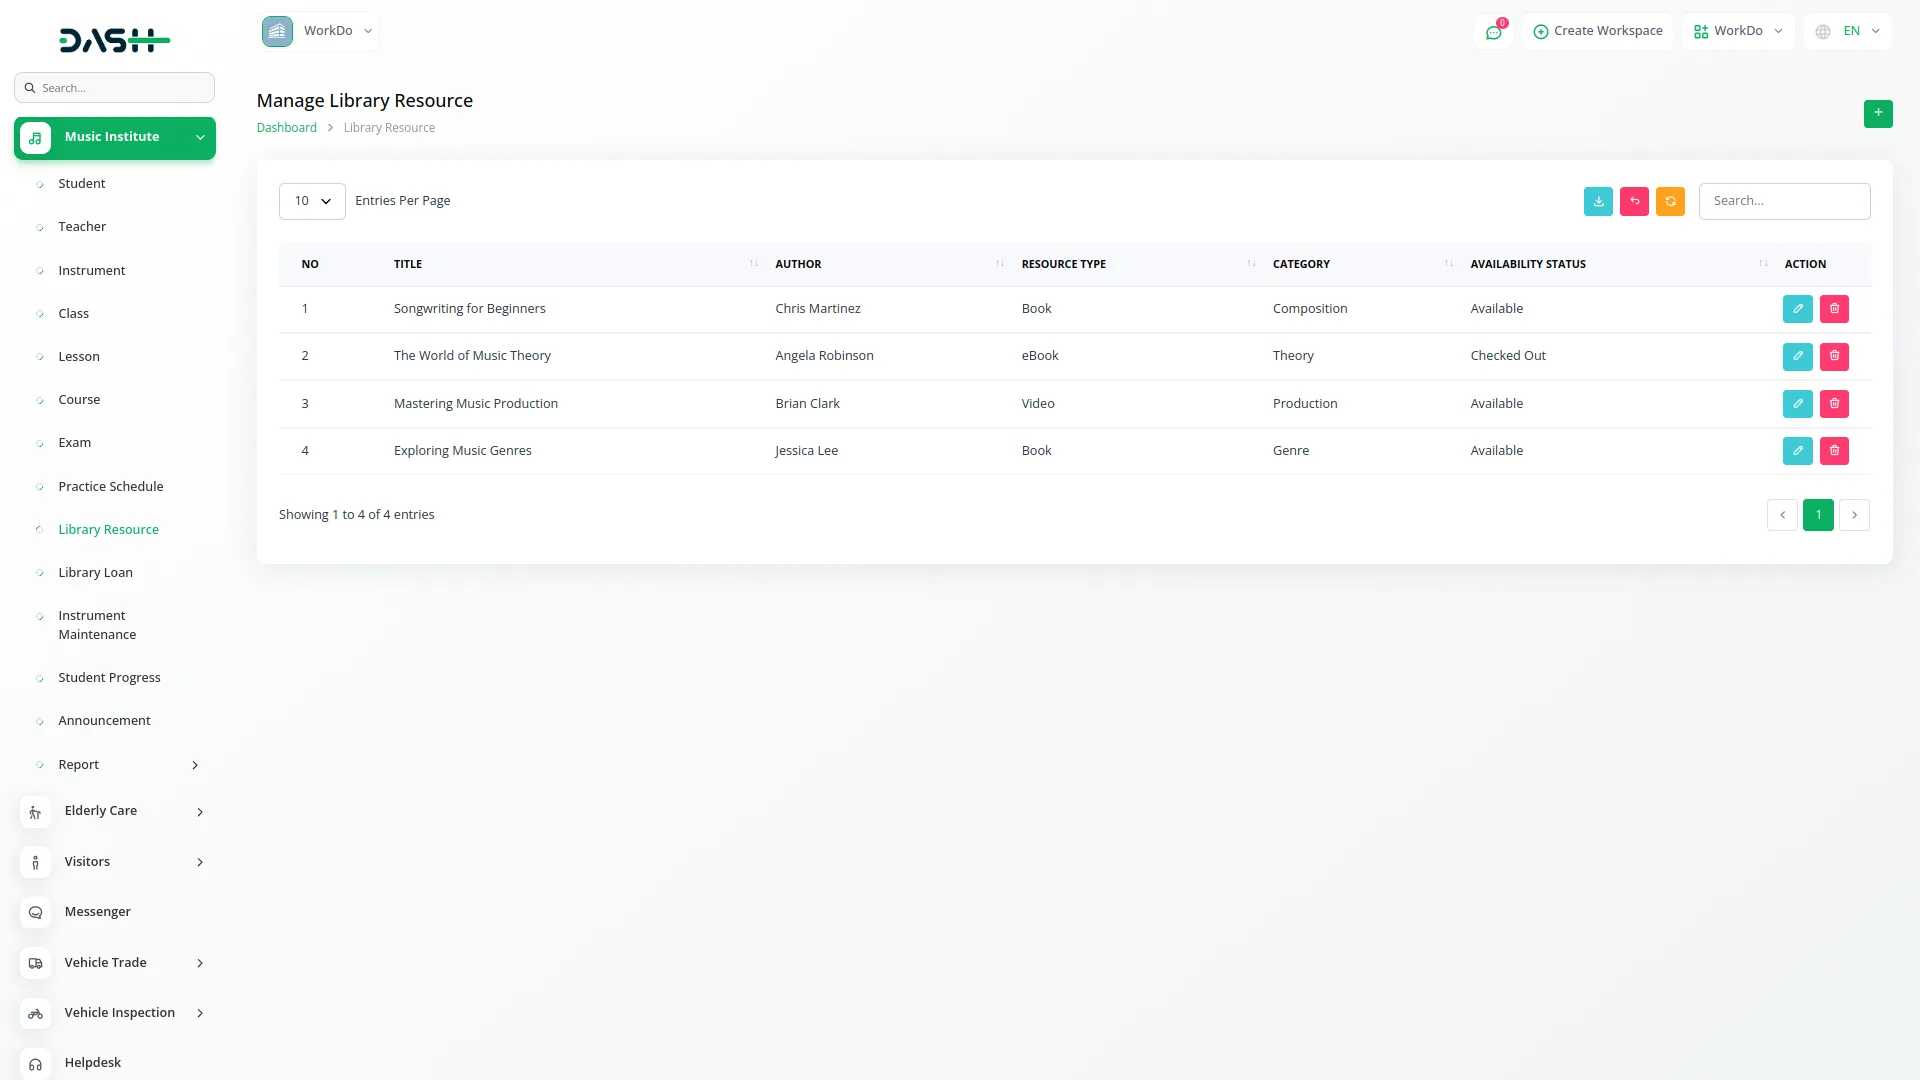
- To create a new Library Resource, click the “Create” button at the top of the library resource page. Enter the Title and Author of the resource.
- Enter the Resource Type manually and Category from the available options. Set the Availability Status for the resource. The list page displays all library resources with a Create button.
- The table shows columns for No, Title, Author, Resource Type, Category, and Availability Status. Available actions include Edit and Delete for each library resource record. You can also export, reset, and reload the list whenever you want.
Manage Library Loans
- To add a new Library Loan, click the “Create” button at the top of the library loan page. Select the Resource from the dropdown menu of available Library Resources and choose the Student from the dropdown.
- Enter the Send Date and Return Date for the loan. Select the Status from the dropdown with options for On time or Overdue.
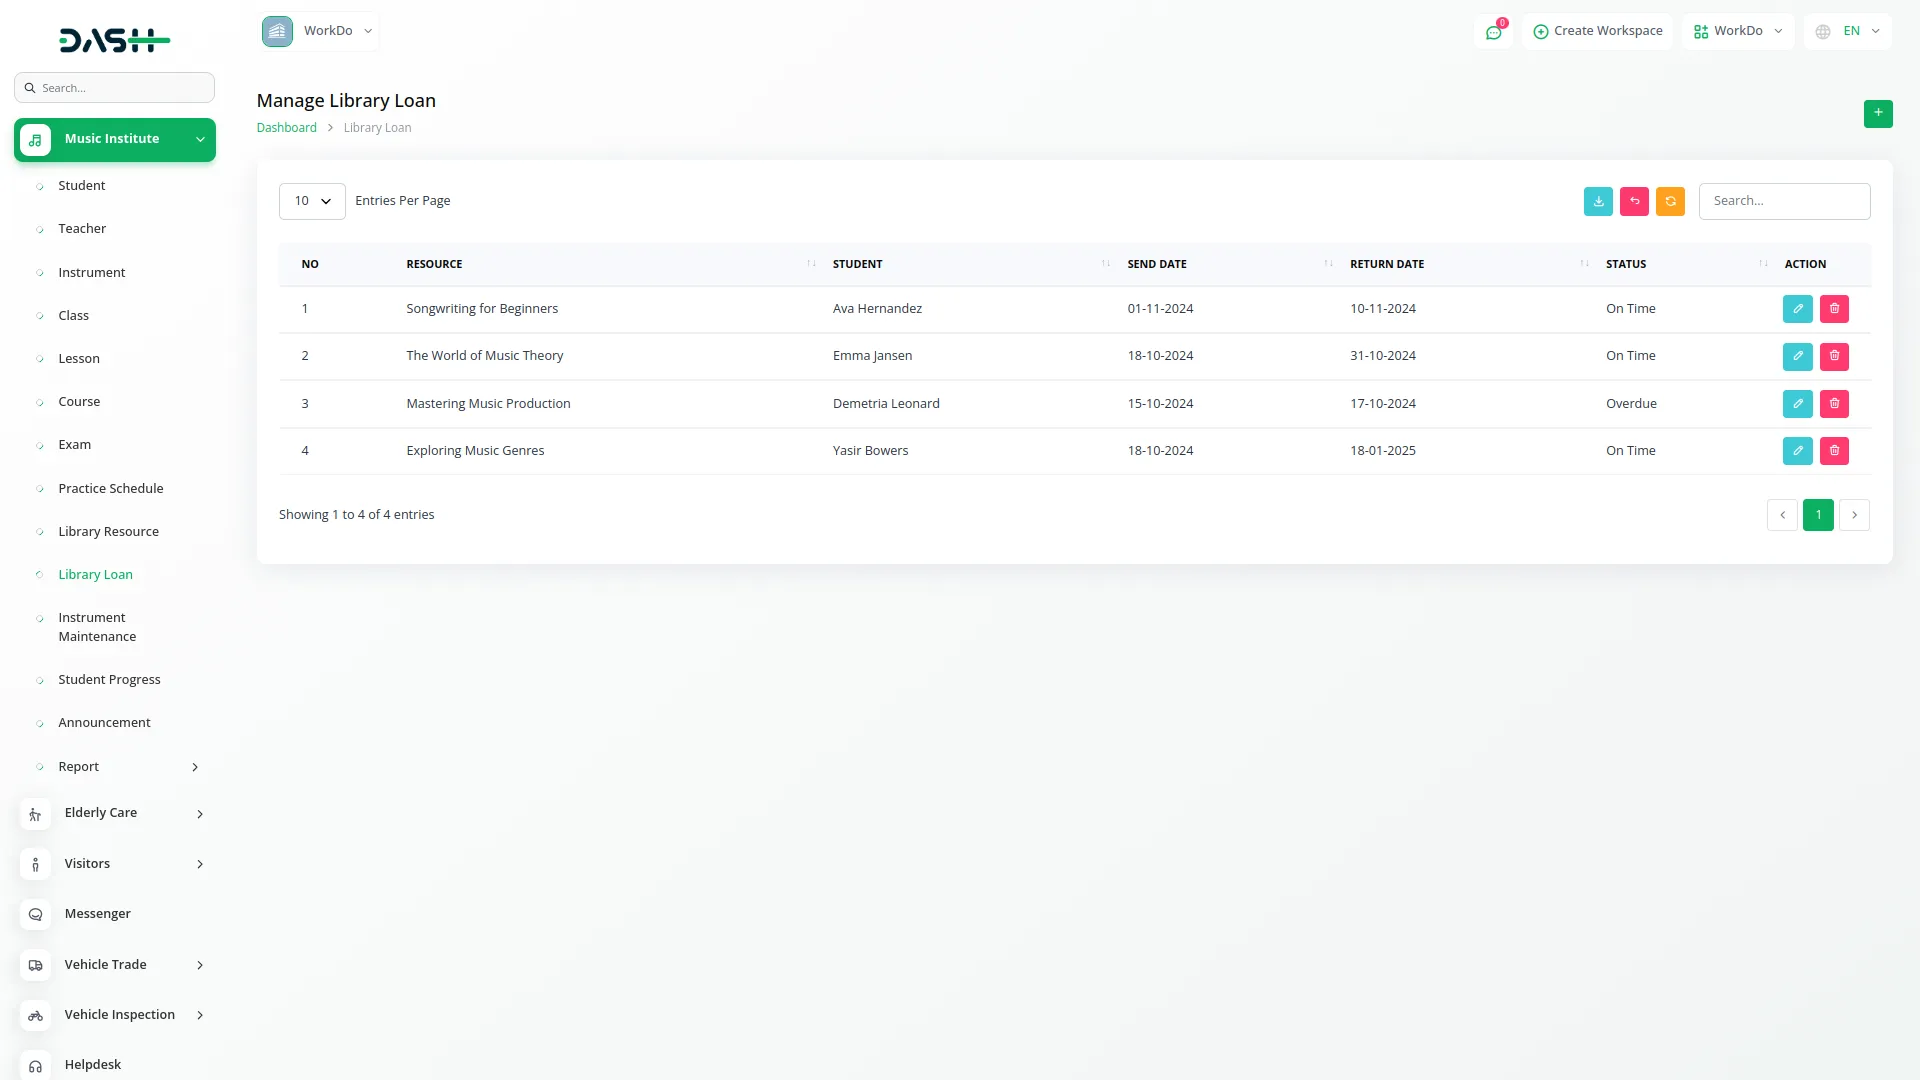
- The list page shows all library loans with a Create button. The table displays columns for No, Resource, Student, Send Date, Return Date, and Status. You can Edit or Delete each library loan record. You can also export, reset, and reload the list whenever you want.
Instrument Maintenance
- To create a new Instrument Maintenance record, click the “Create” button at the top of the instrument maintenance page. Select the Instrument from the dropdown menu of available Library Instruments.
- Enter the Maintenance Type manually and enter the Maintenance Date. Fill in the Cost for the maintenance work, specify who Performed By the maintenance, and add any Notes about the maintenance performed.
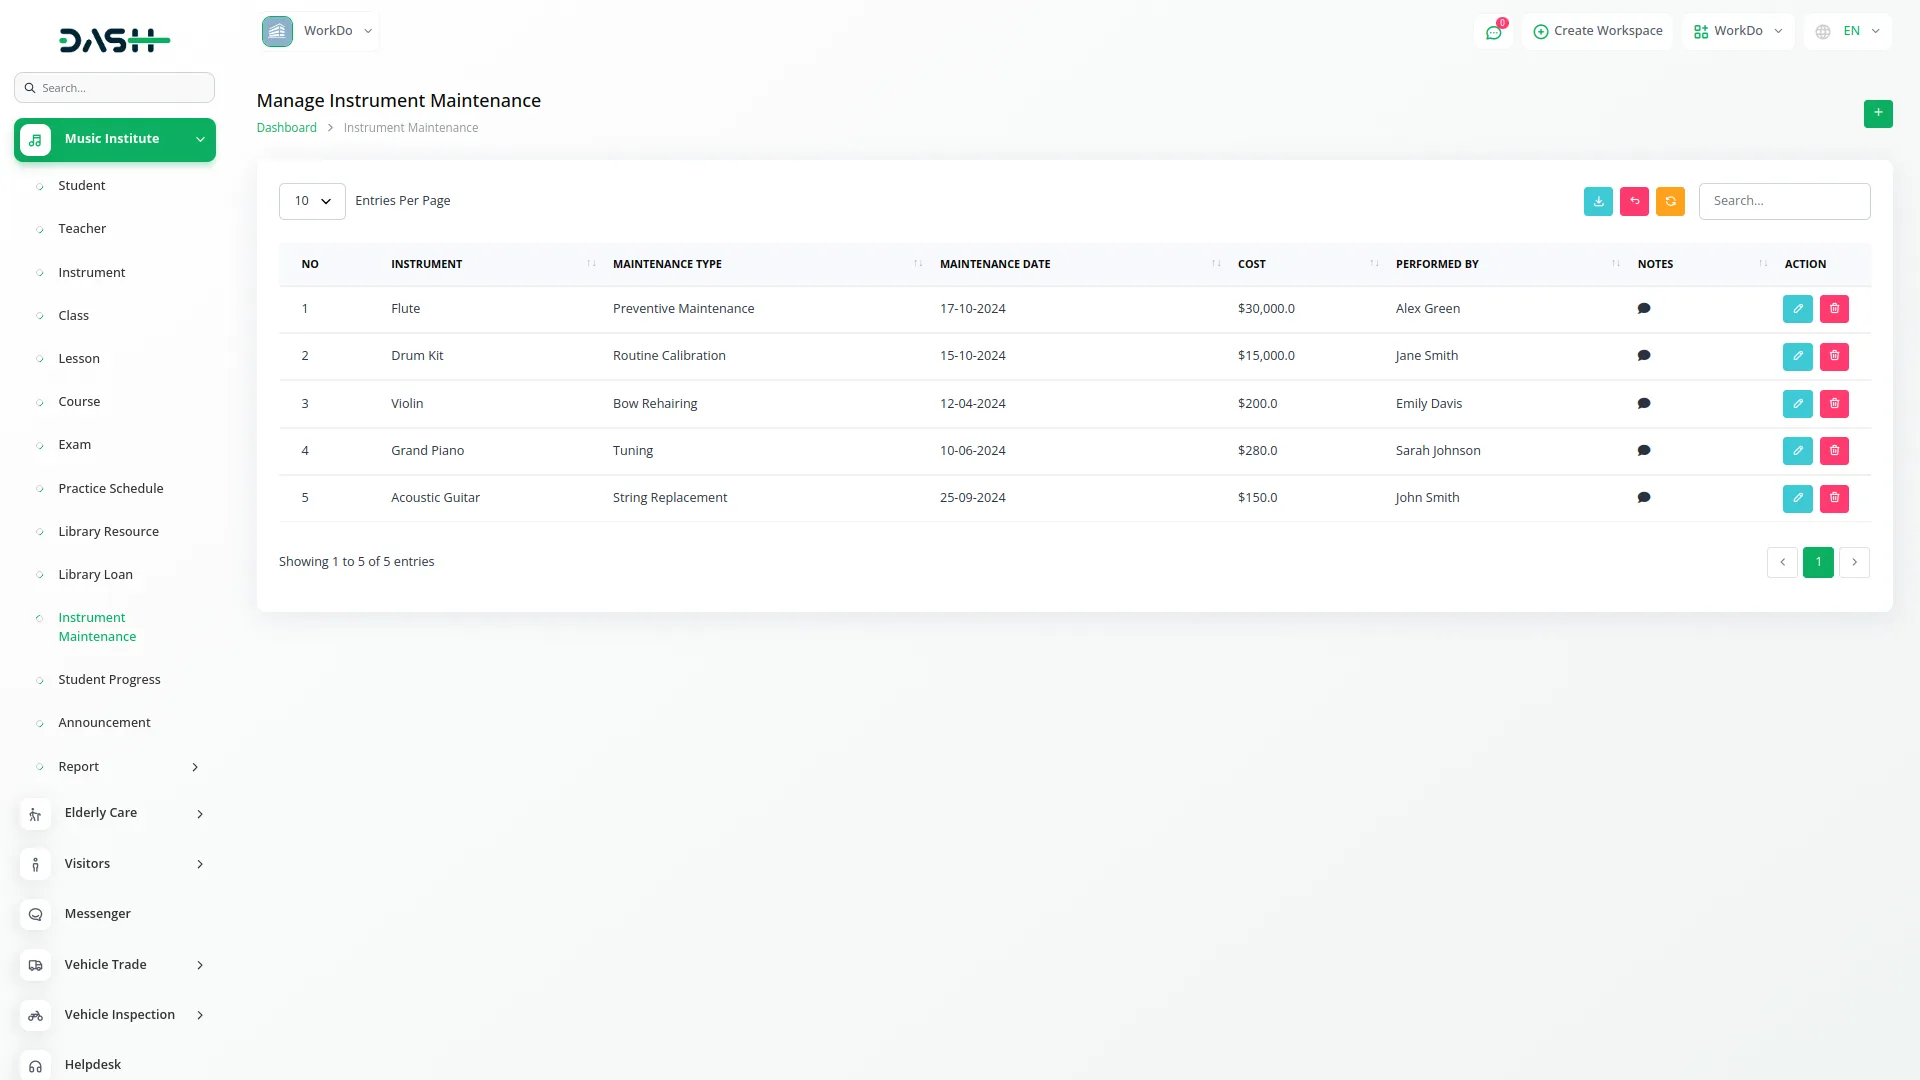
- The list page displays all instrument maintenance records with a Create button. The table shows columns for No, Instrument, Maintenance Type, Maintenance Date, Cost, Performed By, and Notes. Available actions are Edit and Delete for each maintenance record. You can also export, reset, and reload the list whenever you want.
Student Progress
- To add a new Student Progress record, click the “Create” button at the top of the student progress page.
- Select the Student from the dropdown menu and choose the Course from the available options. Enter the Achievement Level and add Progress Notes detailing the student’s development. The list page shows all student progress records with a Create button.
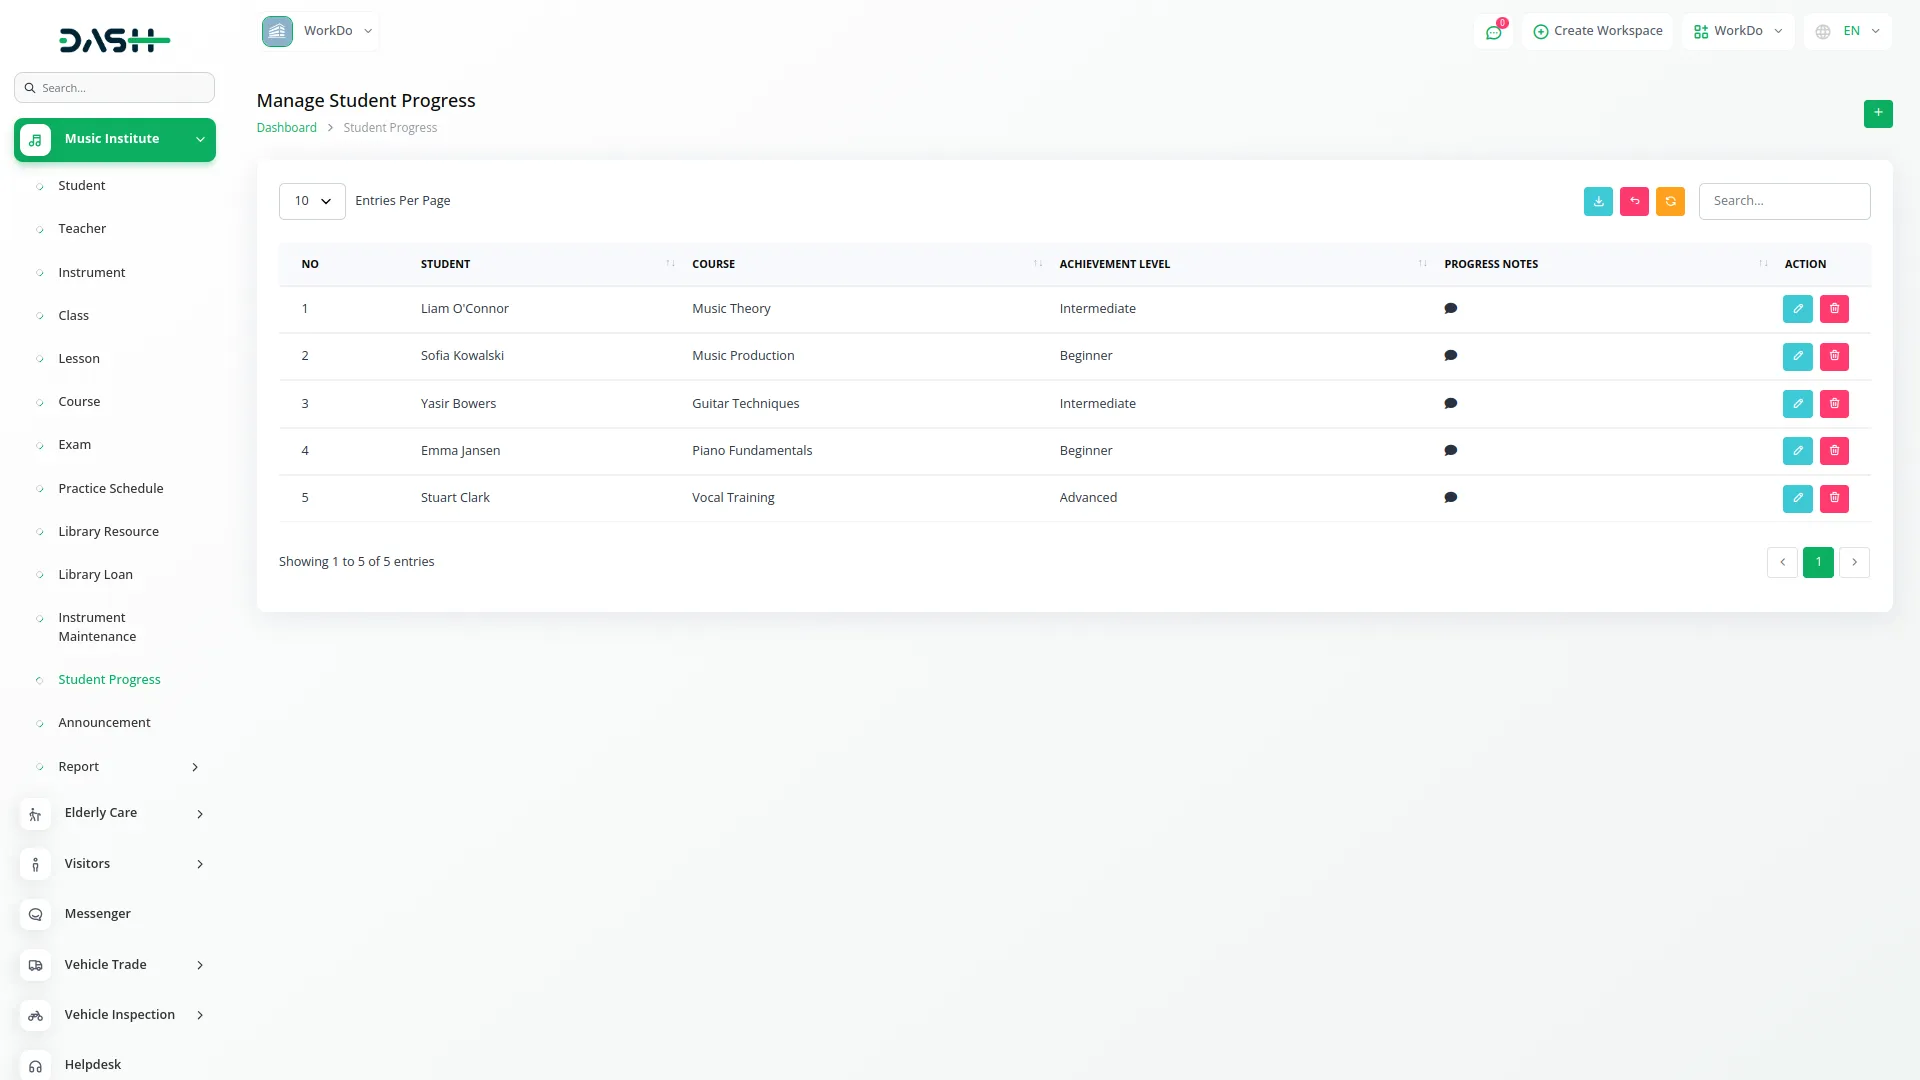
- The table displays columns for No, Student, Course, Achievement Level, and Progress Notes. You can Edit or Delete each student progress record. You can also export, reset, and reload the list whenever you want.
Announcement Management
- To create a new Announcement, click the “Create” button at the top of the announcement page. Enter the Title for the announcement and specify the Target Audience.
- Select the Announcement Date and write the Content for the announcement. The list page displays all announcements with a Create button.
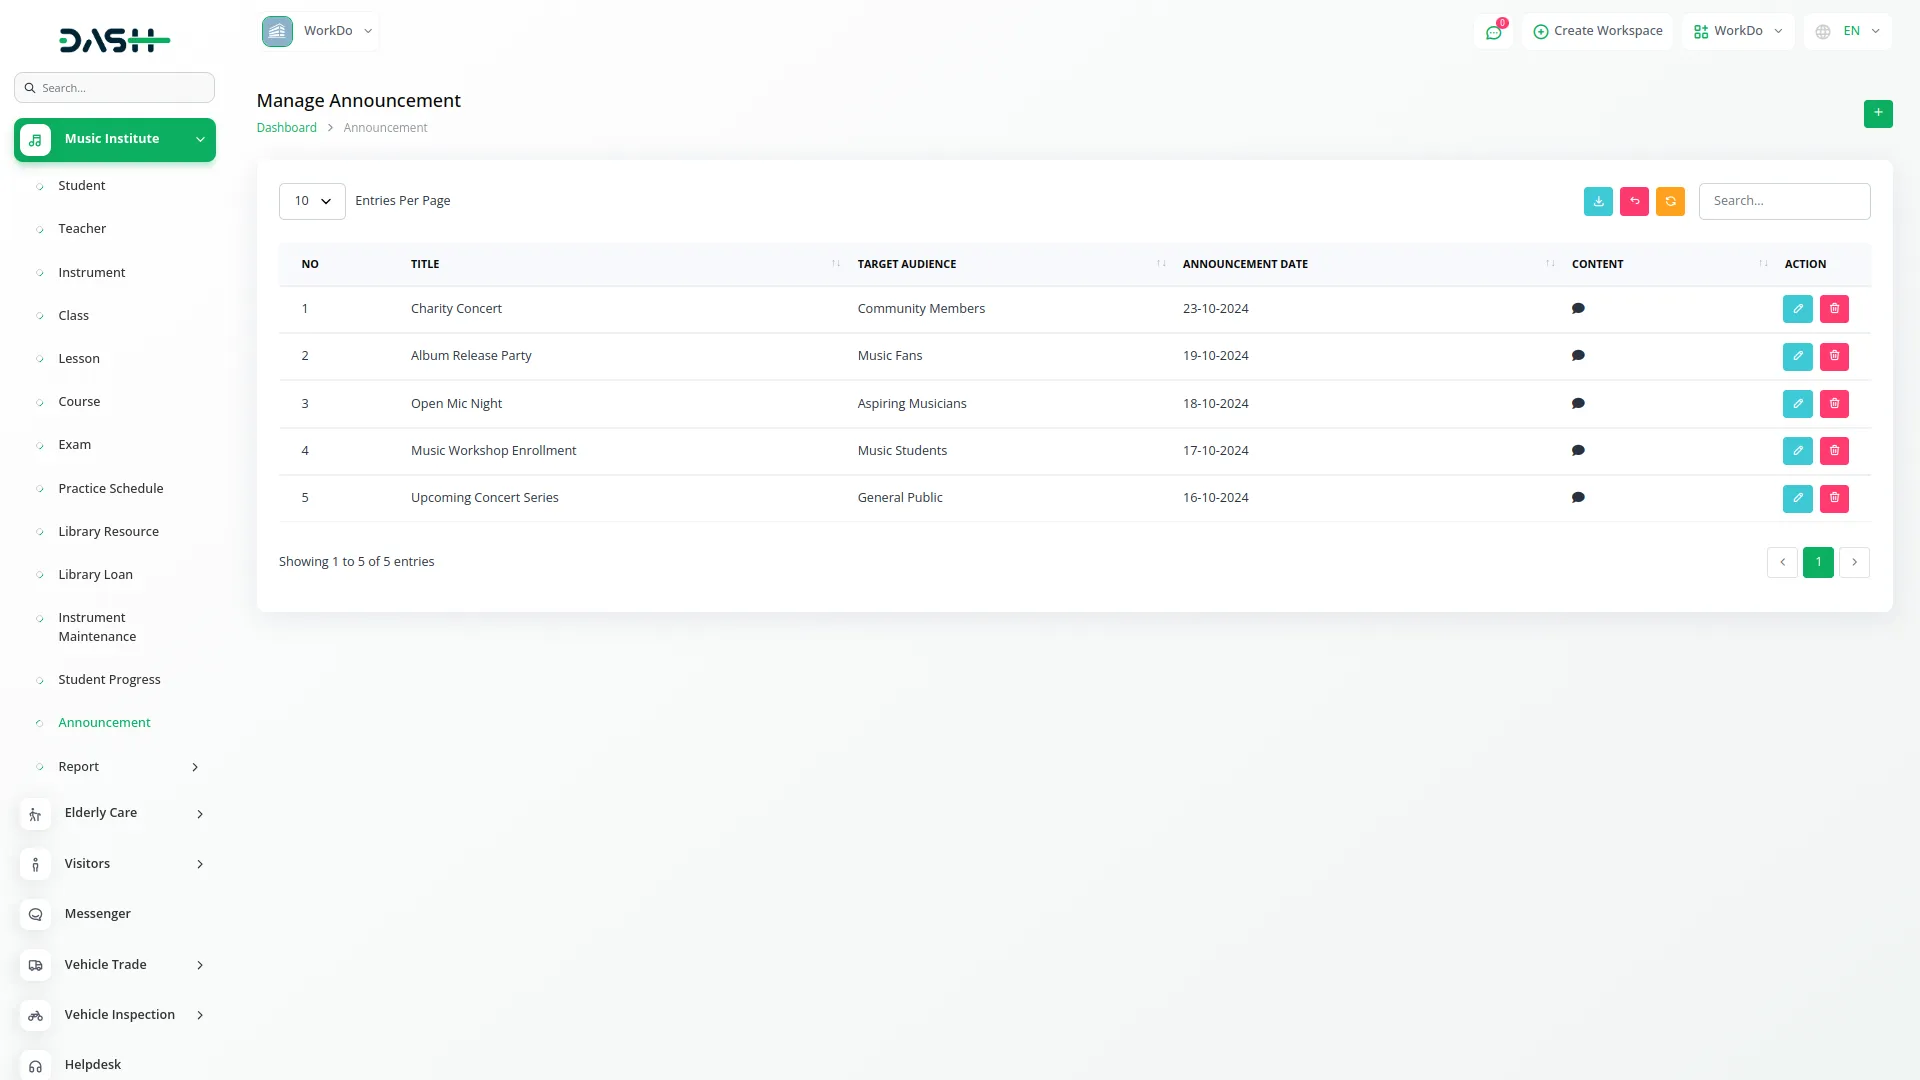
- The table shows columns for No, Title, Target Audience, Announcement Date, and Content. Available actions include Edit and Delete for each announcement record. You can also export, reset, and reload the list whenever you want.
Attendance Report
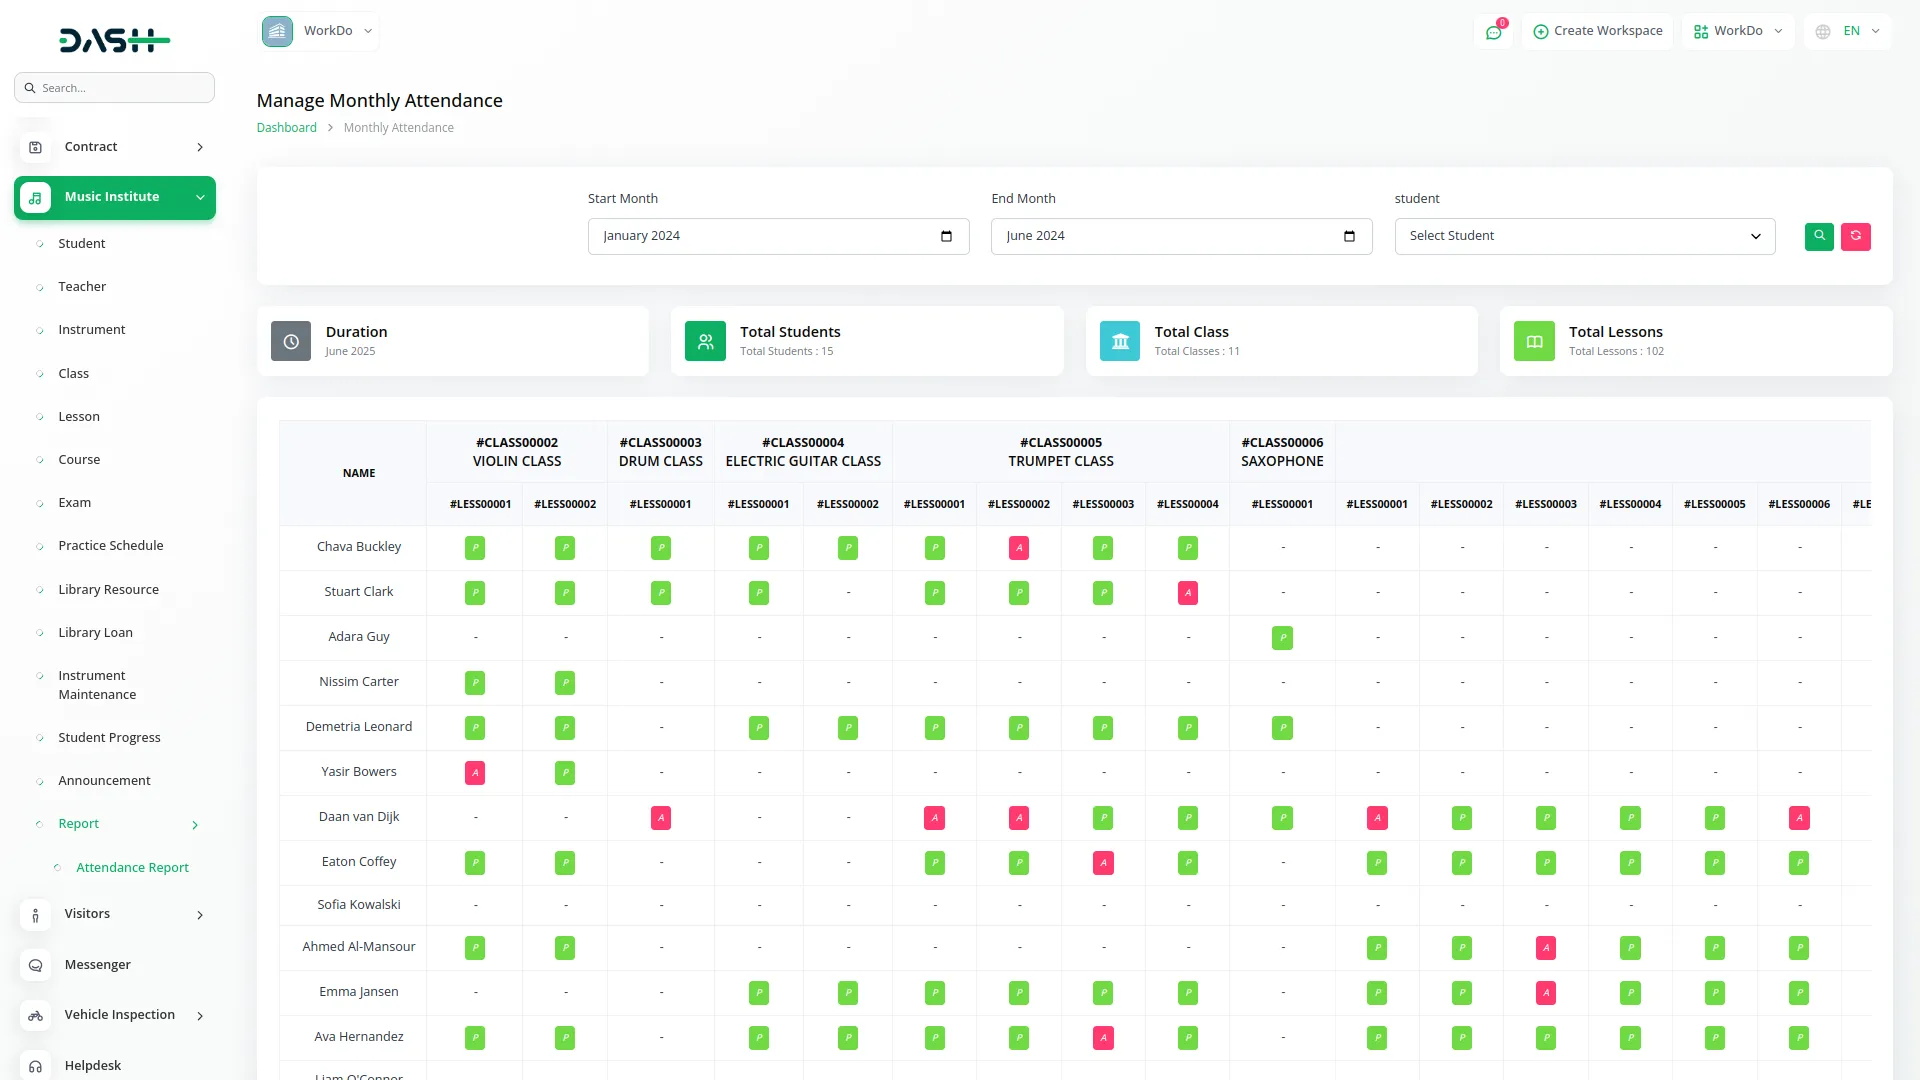
- The Attendance Report provides comprehensive tracking of student attendance across classes and lessons. Use the Start Month dropdown to select a year and month, then choose the End Month from the year-wise month options.
- Select a specific Student from the dropdown if you want to generate a report for an individual student. Click the Apply button to search attendance data for the selected duration, or use the Reset button to clear the filters.
- The report displays four summary cards showing Duration (current month by default), Total Students count, Total Classes count, and Total Lessons count. The table view shows all students with their classes displayed underneath
- Under each class, the lessons are shown where you can easily track each student’s attendance for particular lessons within each class. Using the filter options, you can generate attendance reports from start month to end month and also create reports for particular students.
Student Login
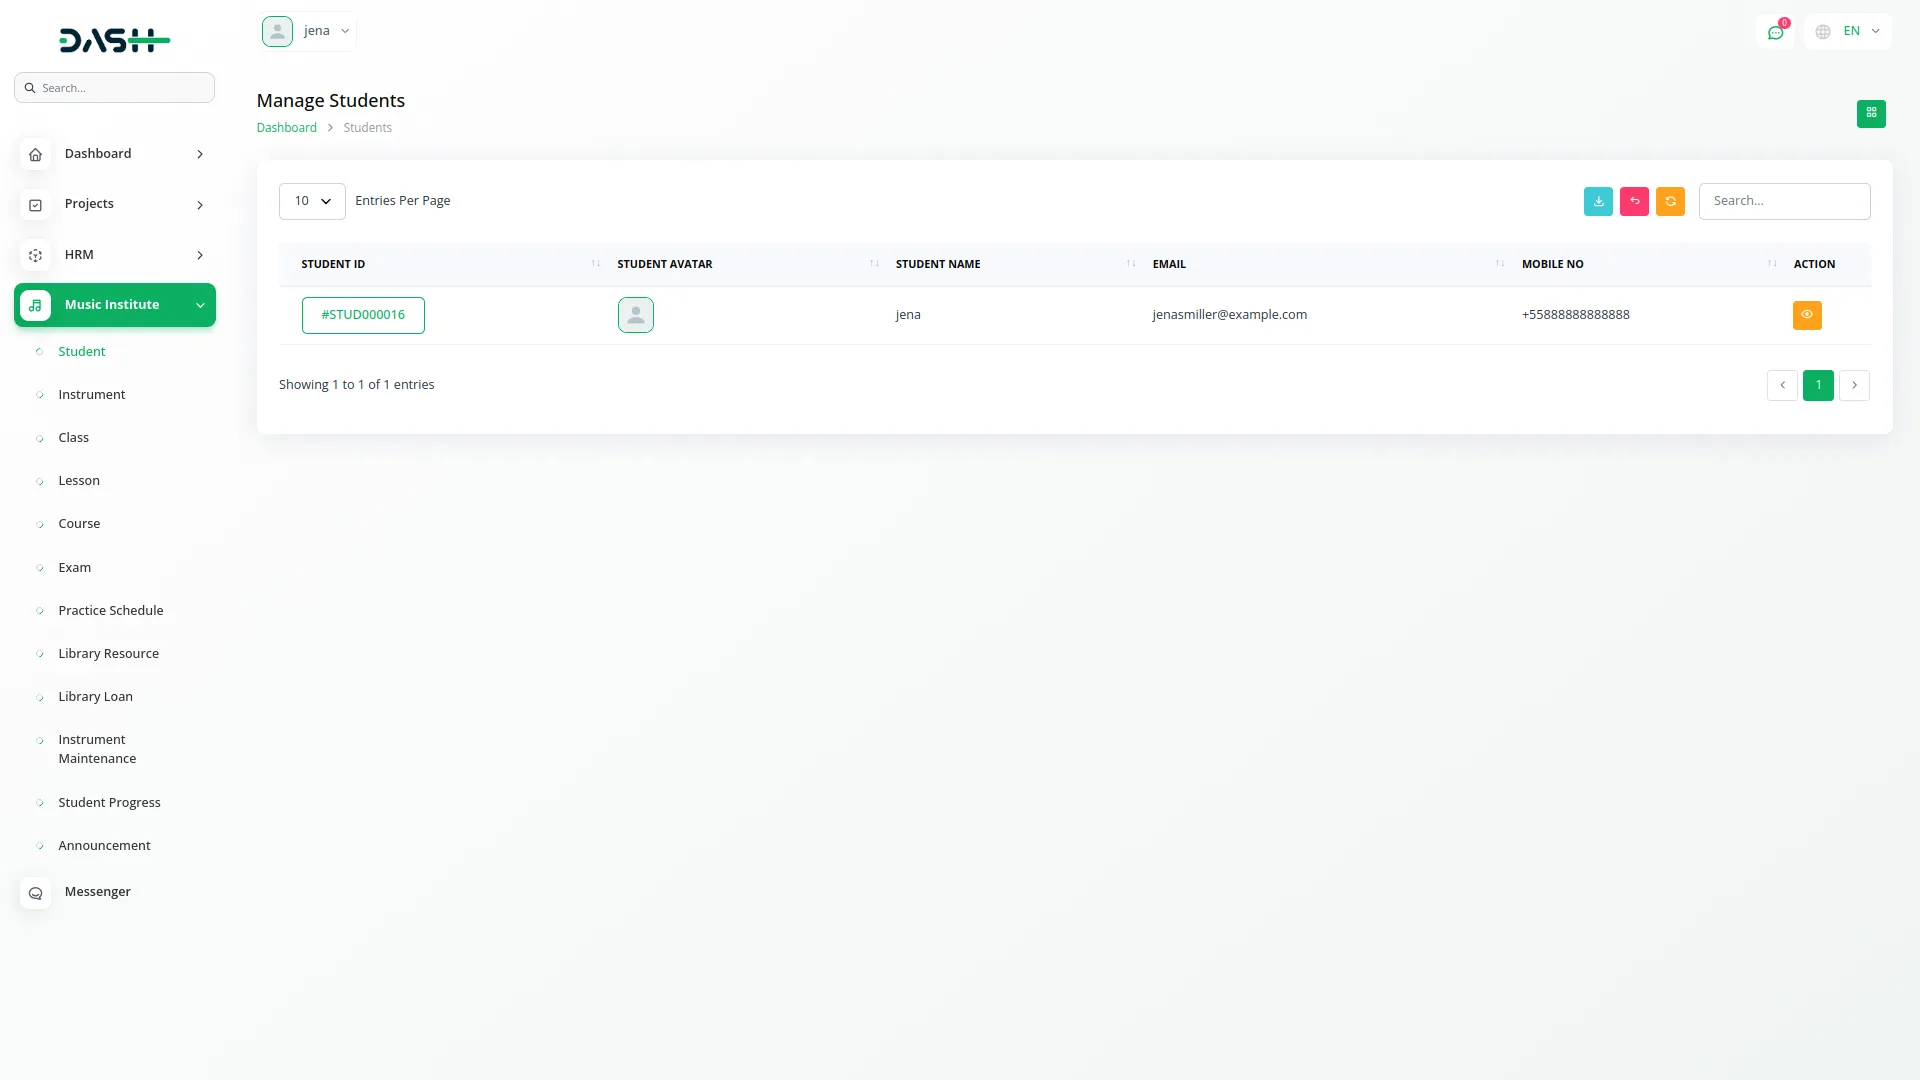
- Students have dedicated login access that allows them to interact with the music institute system based on assigned permissions.
- By default, they can view their profile, track their class schedules, lessons, practice plans, and view their academic progress, exams, and announcements. They can also access library resources and loan details relevant to their learning
- If the admin assigns additional permissions, students can gain access to more sections within the music institute, such as managing specific class tasks or instrument records, enabling a more interactive and empowered learning experience. You can also export, reset, and reload the list whenever you want.
Teacher Login
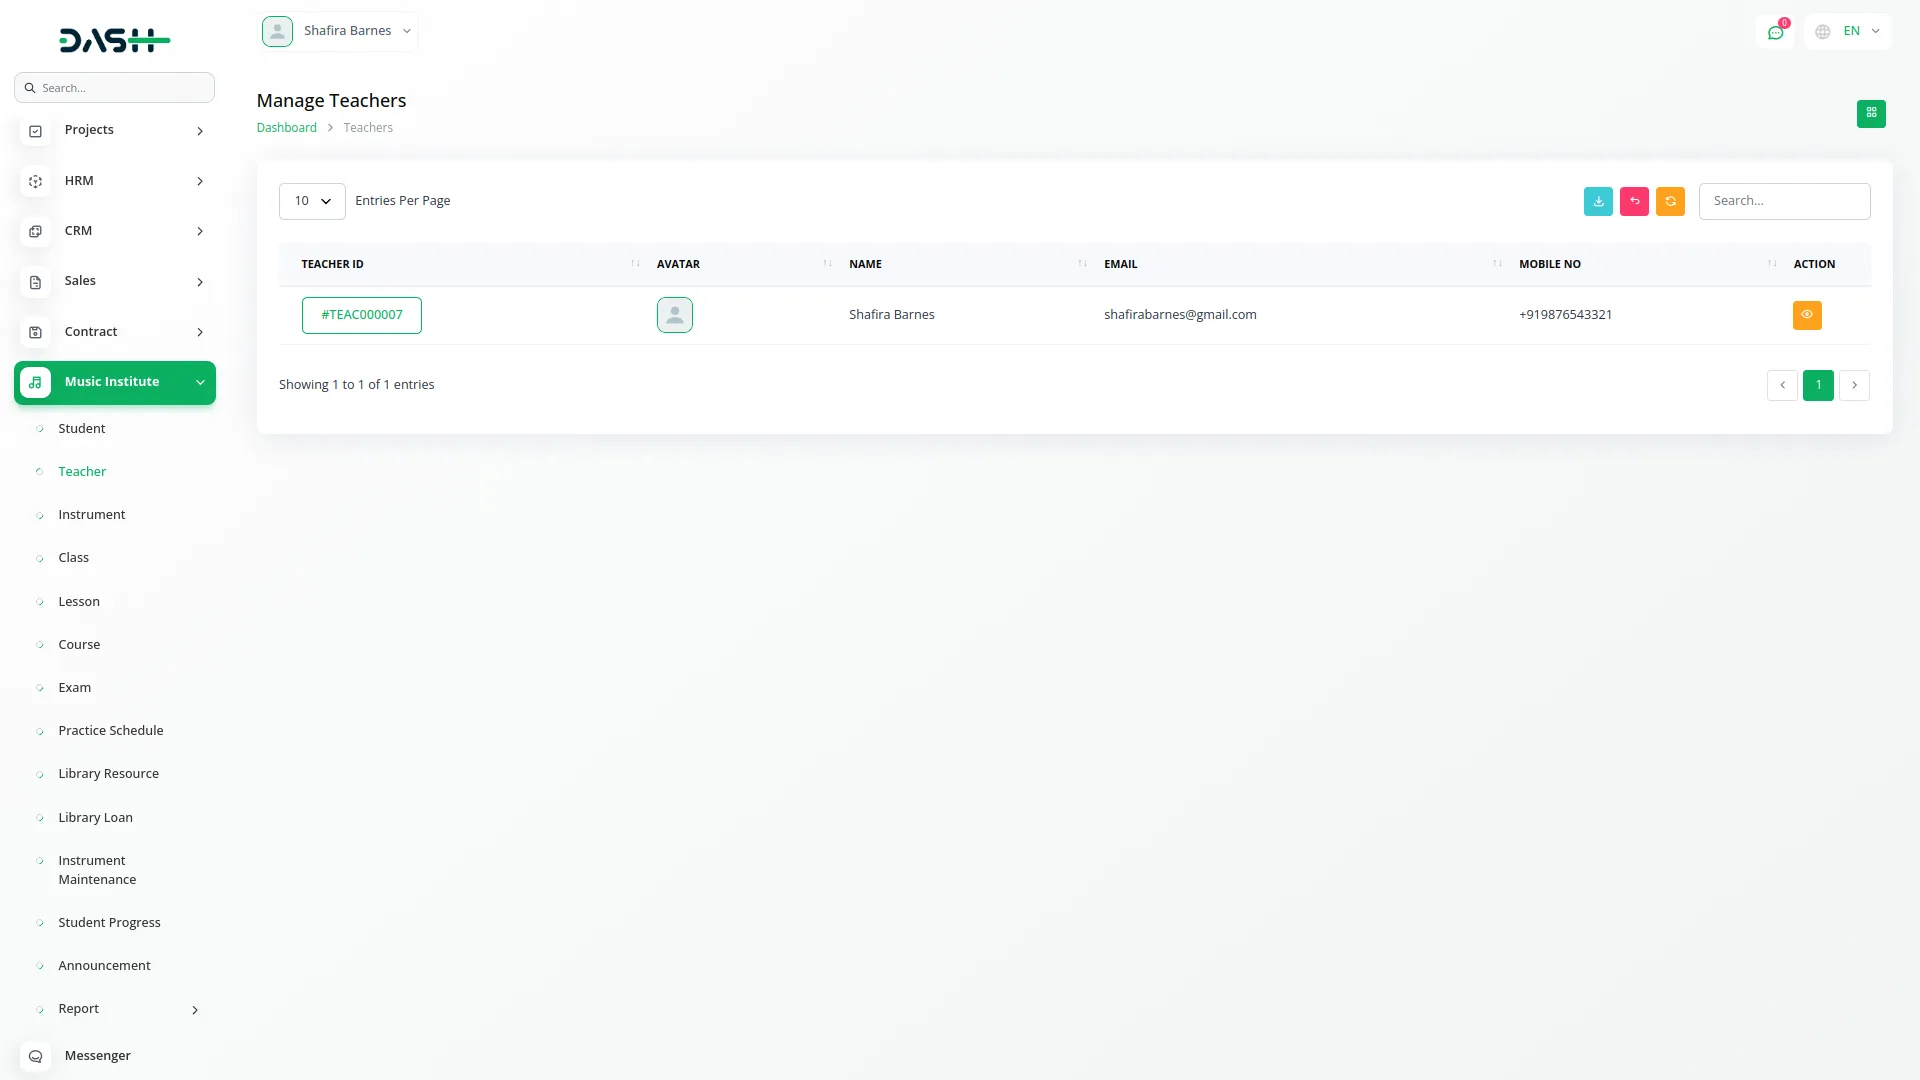
- At teacher login, instructors are granted permission-based access to manage their assigned sections such as classes, lessons, student performance, practice schedules, and attendance.
- They can view and interact with only the features necessary for teaching, ensuring a focused and secure experience. Each teacher’s account is governed by specific permissions that determine what they can create, edit, view, or delete within the system.
- Additionally, if the admin chooses to assign extra permissions like access to the instrument inventory, exams, or library, teachers can perform those extended functions as well.
- This flexible structure ensures teachers have the right tools for instruction while keeping sensitive institute-level controls secure. You can also export, reset, and reload the list whenever you want.
Music Institute Invoice
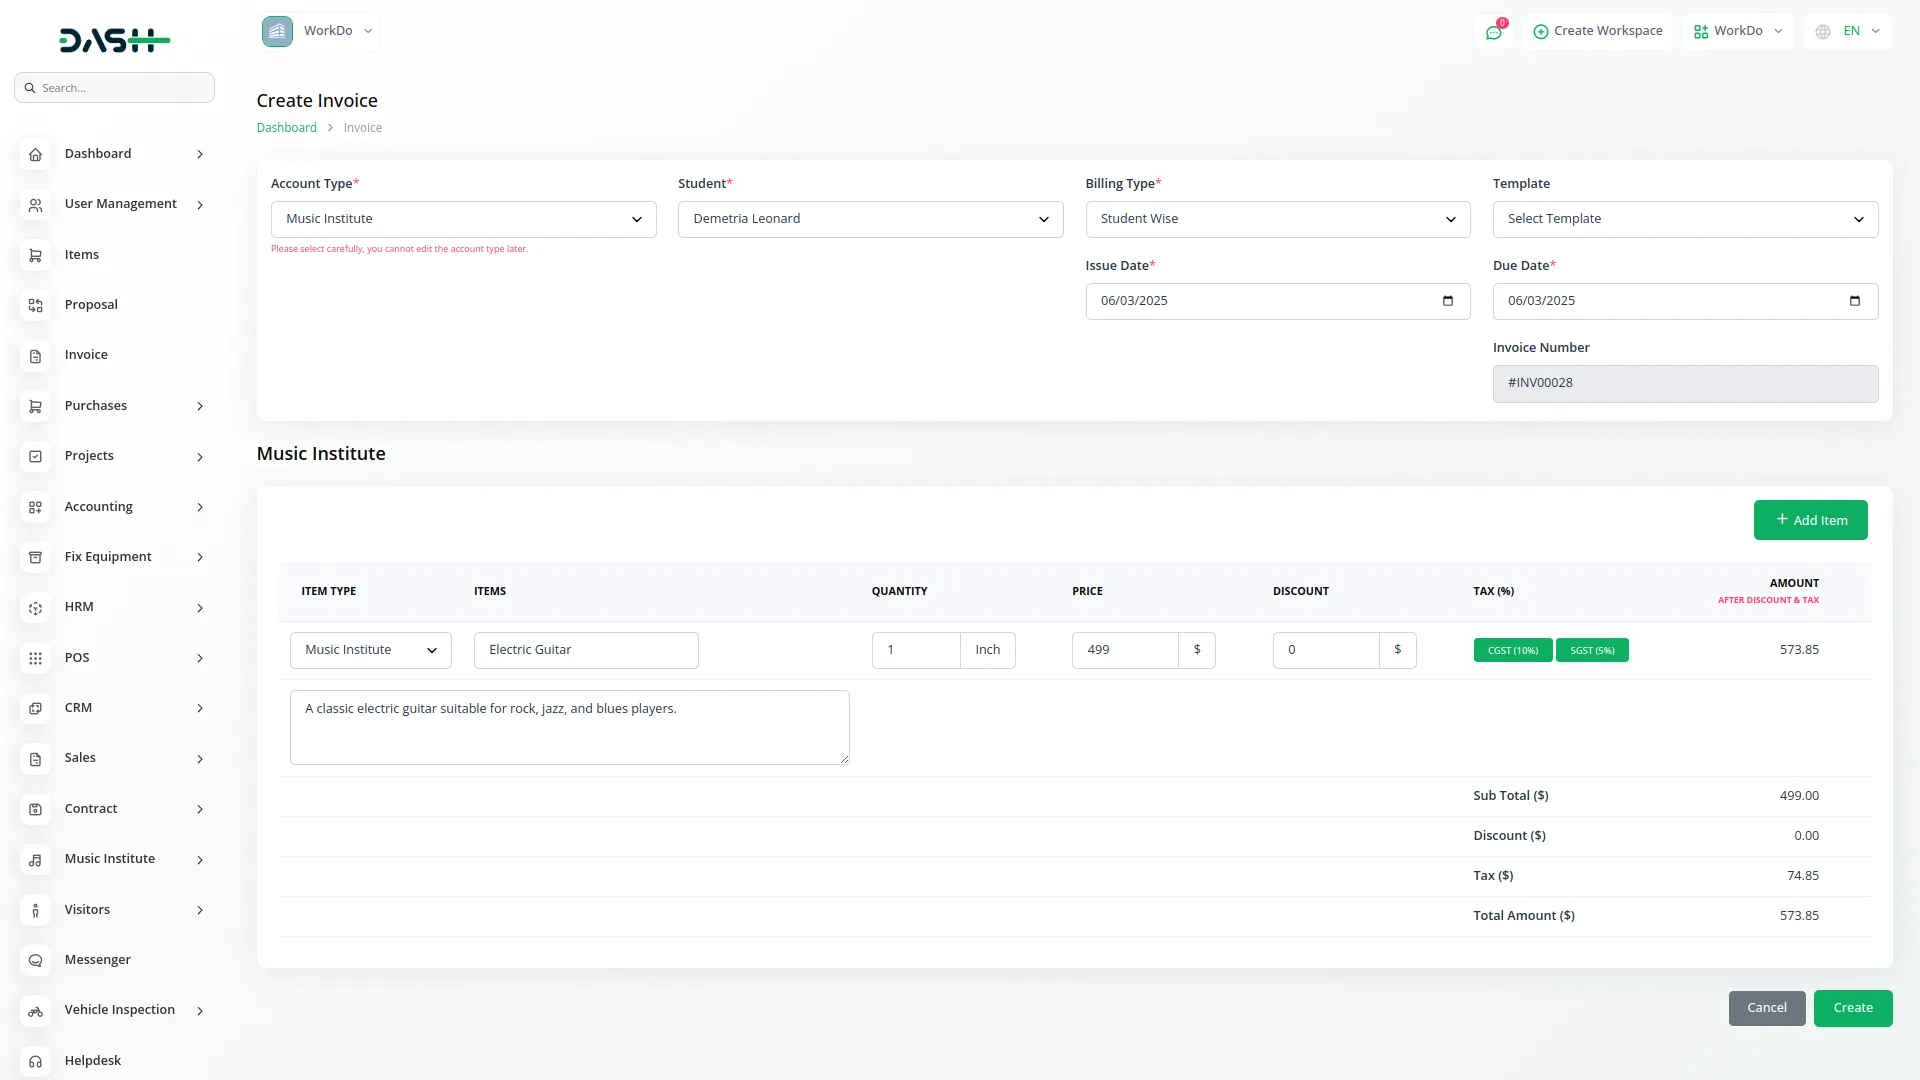
- From the Invoice menu, admins can create invoices by selecting the account type as Music Institute.
- While creating the invoice, you can choose a specific student to associate the invoice with. The system allows adding multiple items or services to the invoice.
- This streamlined process helps manage billing efficiently and ensures accurate financial tracking for each student.
Categories
Related articles
- Mobile Service Management Integration in Dash SaaS
- Job Search Detailed Documentation
- Boutique and Design Add-On Detailed Documentation
- Digital Certificate integration in dash saas
- Box.com Integration in Dash SaaS
- LiveStorm Meeting Detailed Documentation
- Coin Integration in Dash SaaS
- Plaid Integration in Dash SaaS
- Sign-In with Slack Add-On Integration in Dash SaaS
- Equipment Rental Detailed Documentation
- Plivo SMS Integration in Dash SaaS
- Diagram Add-On Detailed Documentation
Reach Out to Us
Have questions or need assistance? We're here to help! Reach out to our team for support, inquiries, or feedback. Your needs are important to us, and we’re ready to assist you!


Need more help?
If you’re still uncertain or need professional guidance, don’t hesitate to contact us. You can contact us via email or submit a ticket with a description of your issue. Our team of experts is always available to help you with any questions. Rest assured that we’ll respond to your inquiry promptly.
Love what you see?
Do you like the quality of our products, themes, and applications, or perhaps the design of our website caught your eye? You can have similarly outstanding designs for your website or apps. Contact us, and we’ll bring your ideas to life.
