
File Sharing – WorkDo Dash SaaS Add-On Guide
Learn how to share files securely and manage file access in WorkDo Dash SaaS.
Introduction
The File Share Add-On lets you securely upload and share files with others through email or a shareable link. Before you can start sharing files, you’ll need to complete a quick verification process, which the super admin will review and approve. Once approved, you can upload files, protect them with a password if needed, and set them to delete automatically after download. You can also keep track of who downloaded your files and when, restore or permanently delete removed files, and customize how your platform looks and feels.
How to Install the Add-On?
To Set Up the File Sharing Add-On, you can follow this link: Setup Add-On.
How to Use The File Sharing Add-On?
System Setup
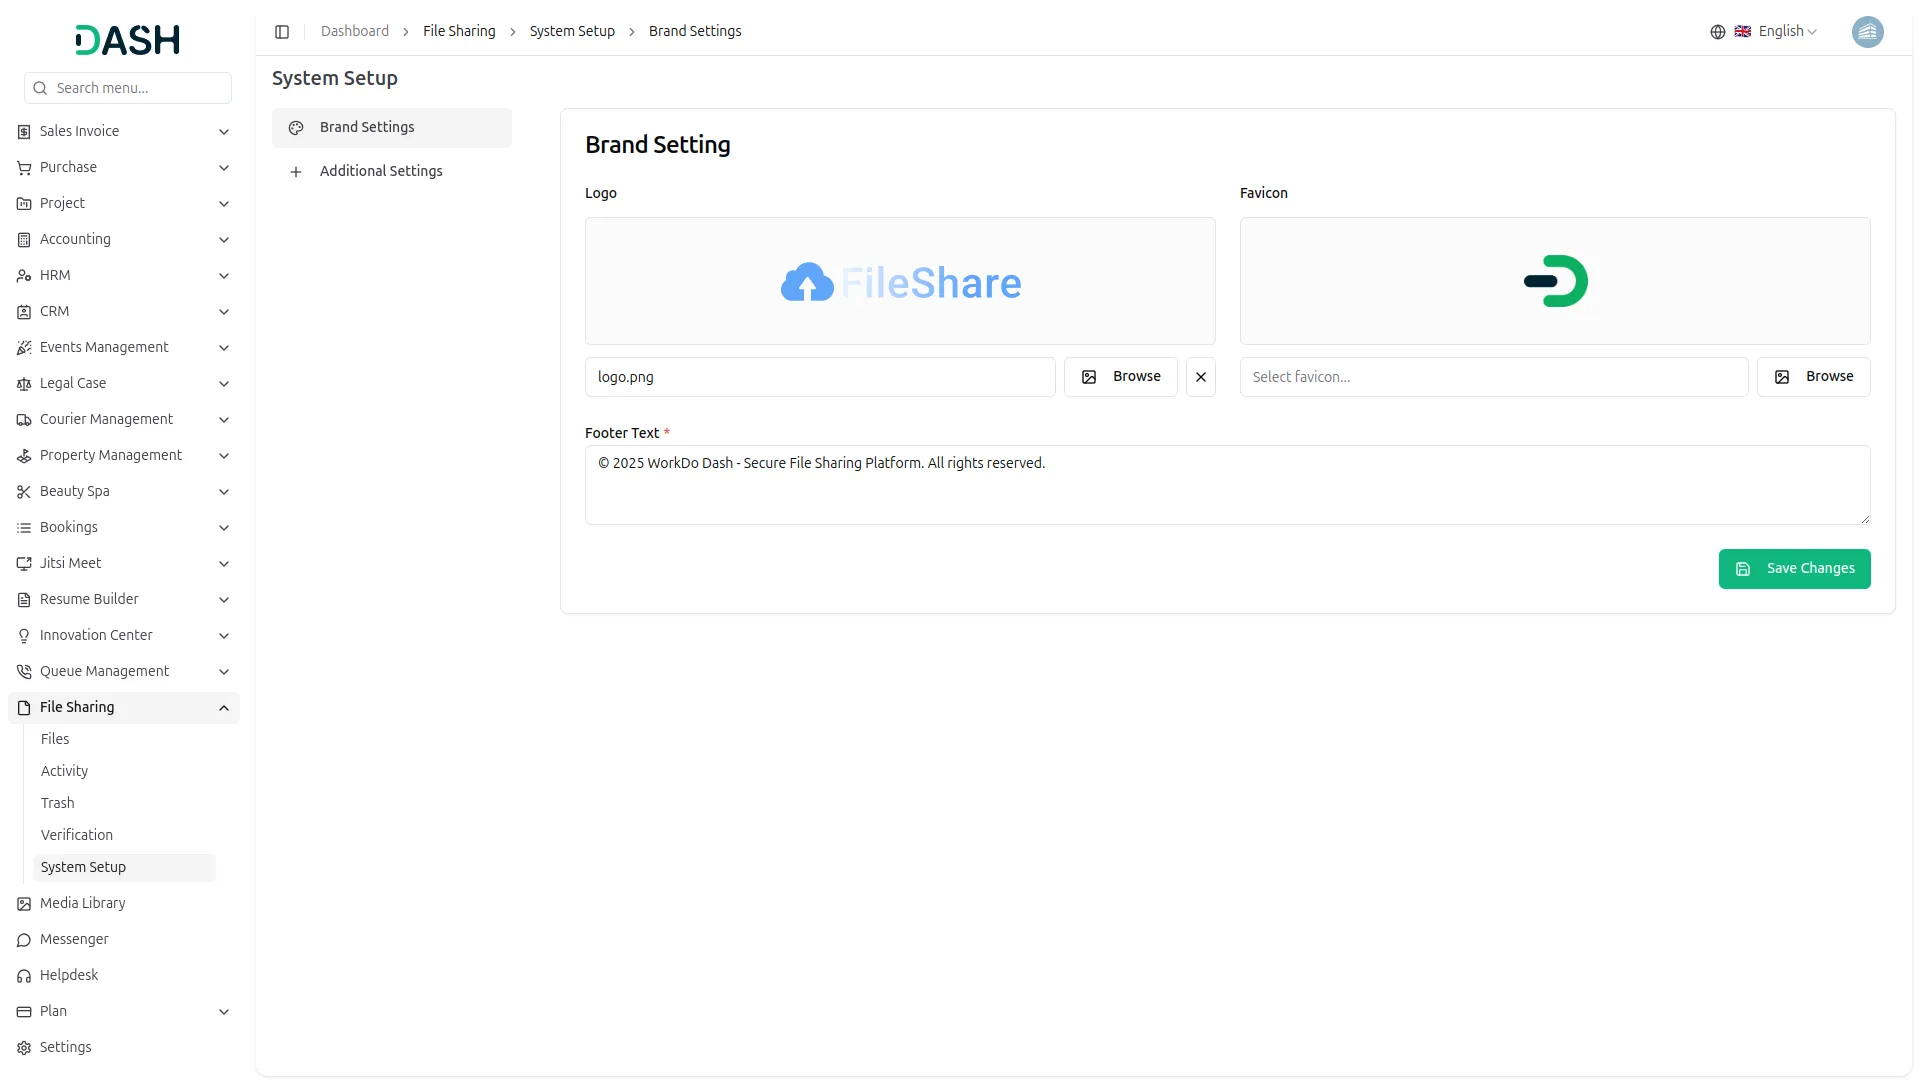
Brand Setting
- The Brand Settings section allows you to configure the basic branding of your file sharing platform. In this section, you can upload the Logo and Favicon by clicking “Browse” and enter the Footer Text. After entering all required details, click the Save Changes button to apply the updates.
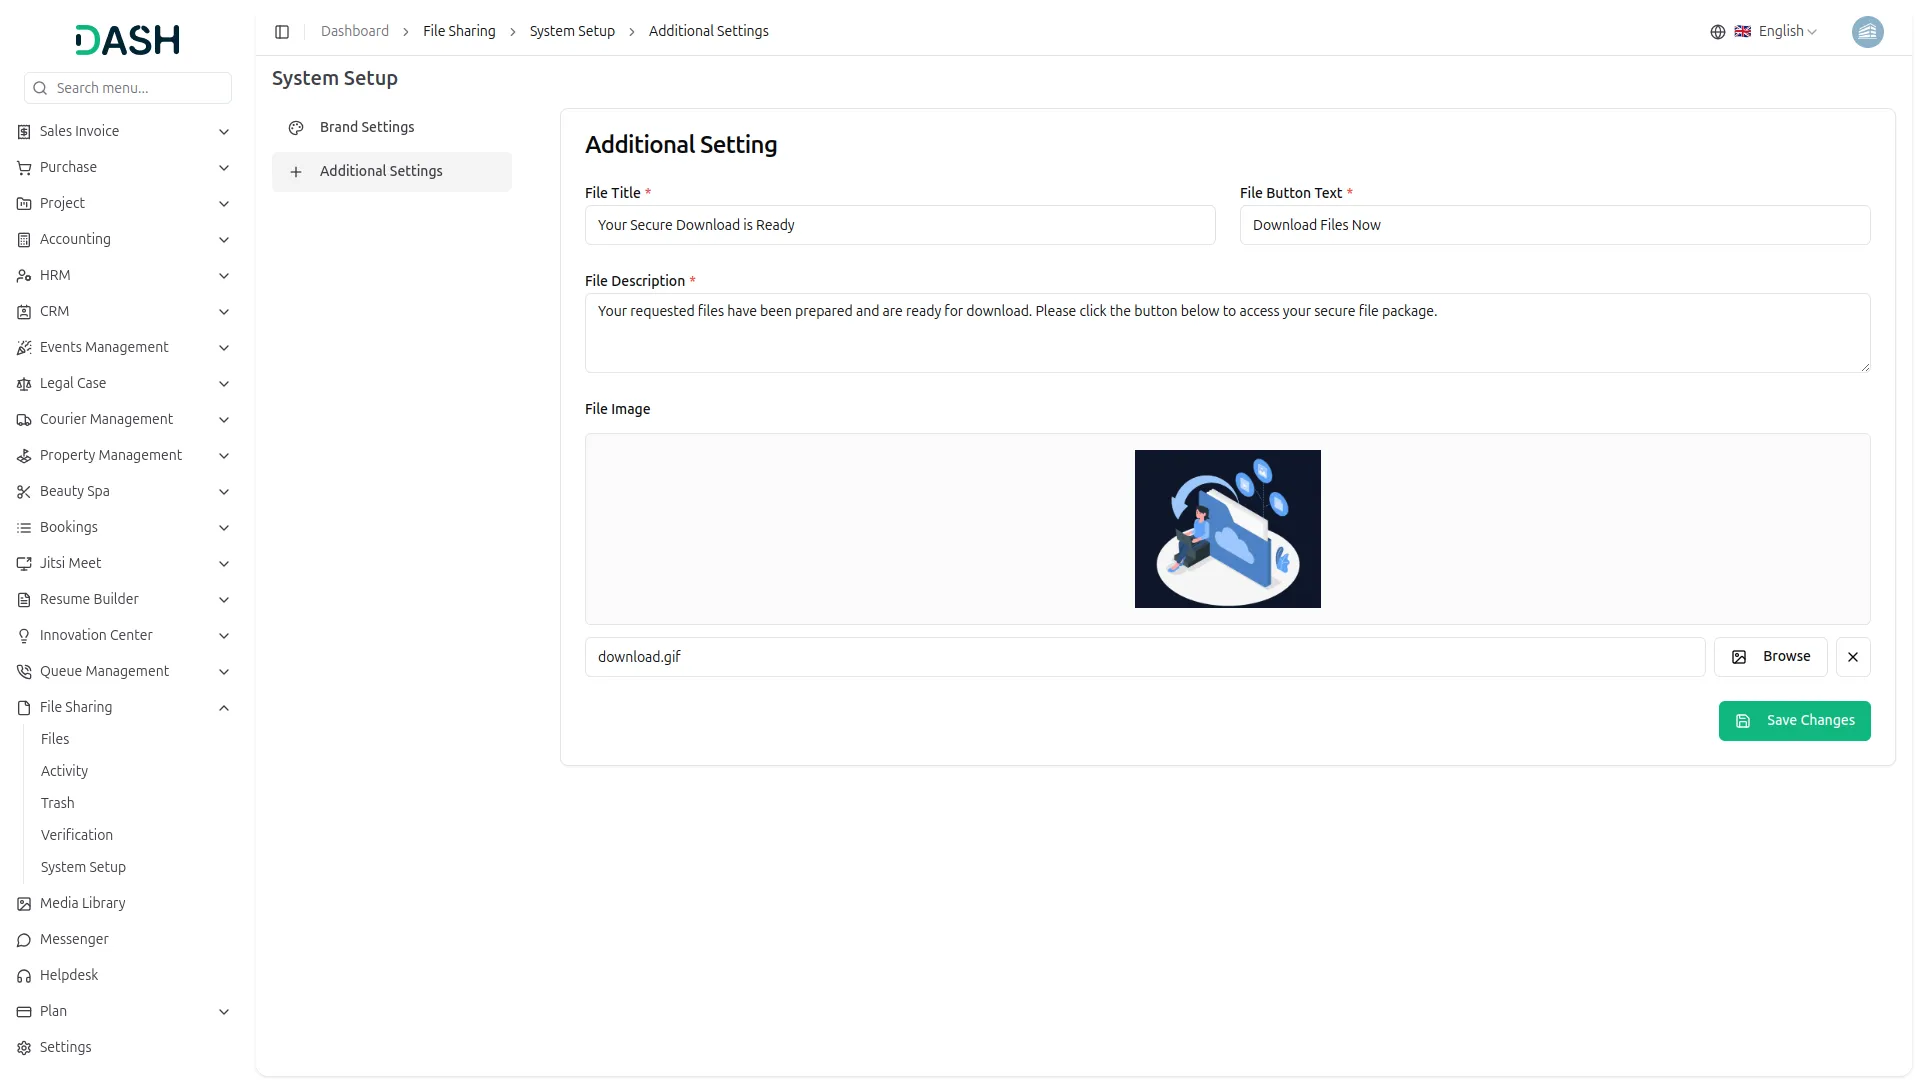
Additional Settings
- The Additional Settings section allows you to configure the content displayed on the file download page. In this section, you can enter the File Title, File Button Text, and File Description, and upload a File Image by clicking “Browse”. After entering all required details, click the Save Changes button to apply the updates.
Verification Flow Explanation
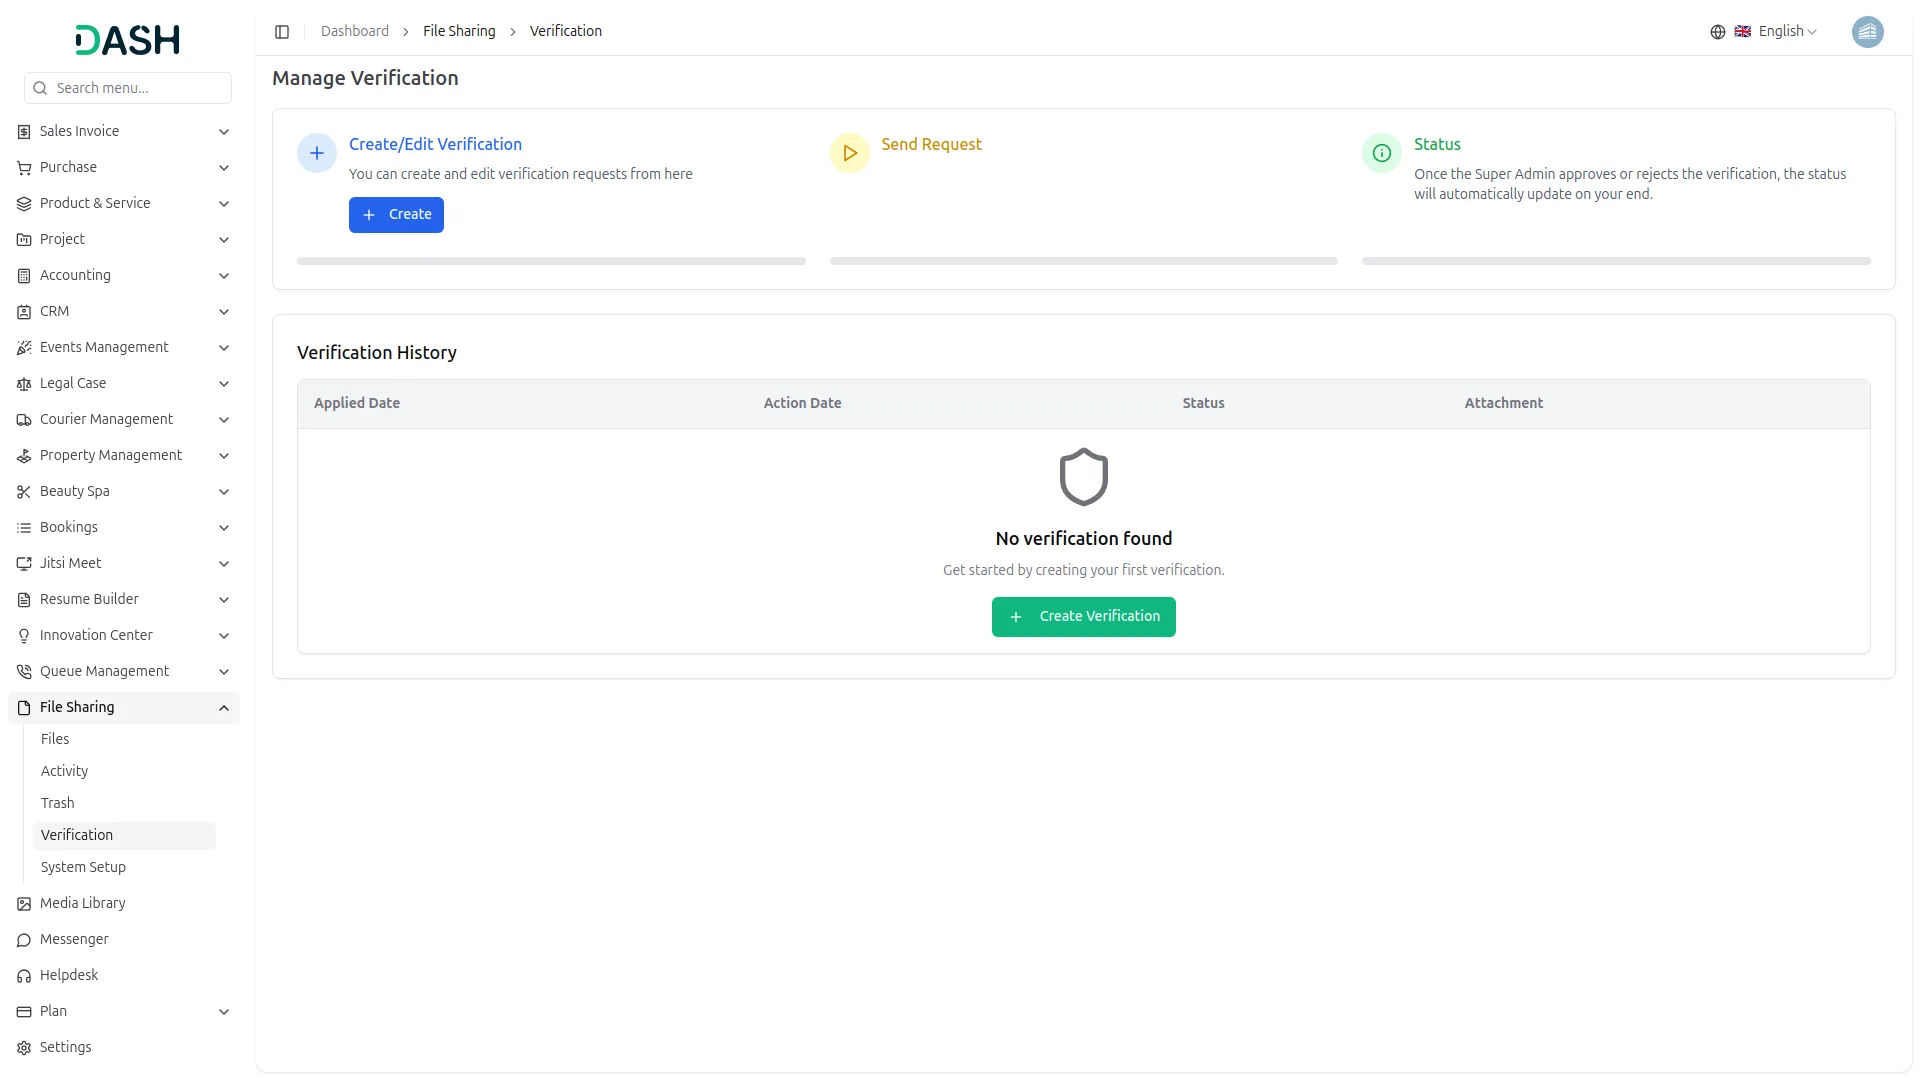
- When you first access the File Sharing page, you will see a verification notice indicating that you need to complete verification before you can create or manage files. Under that note if you click on the verification, you will be navigated to the verification page. On the verification page you will see a create button, if you click on the button, the verification form will open.
- Here you need to upload your required file. Once you submit your verification request, it will show an “Applied Date”, “Particular Attachment” and have a “Pending” status.
- The super administrator will review your submitted documents and either approve or reject your verification request. You can check the status of your verification in the File Share Verification section. Once the super admin approves your request, you will receive an “Action Date” and your status will change to “Approved.”
- Only after your verification is approved can you access the Files section and start creating, uploading, and sharing files. Until then, the file creation features will remain blocked with the verification notice displayed. You can also delete the request if you want, but if you delete it all the data related to that file will be removed, you can also regain the file if you want.
Manage Files
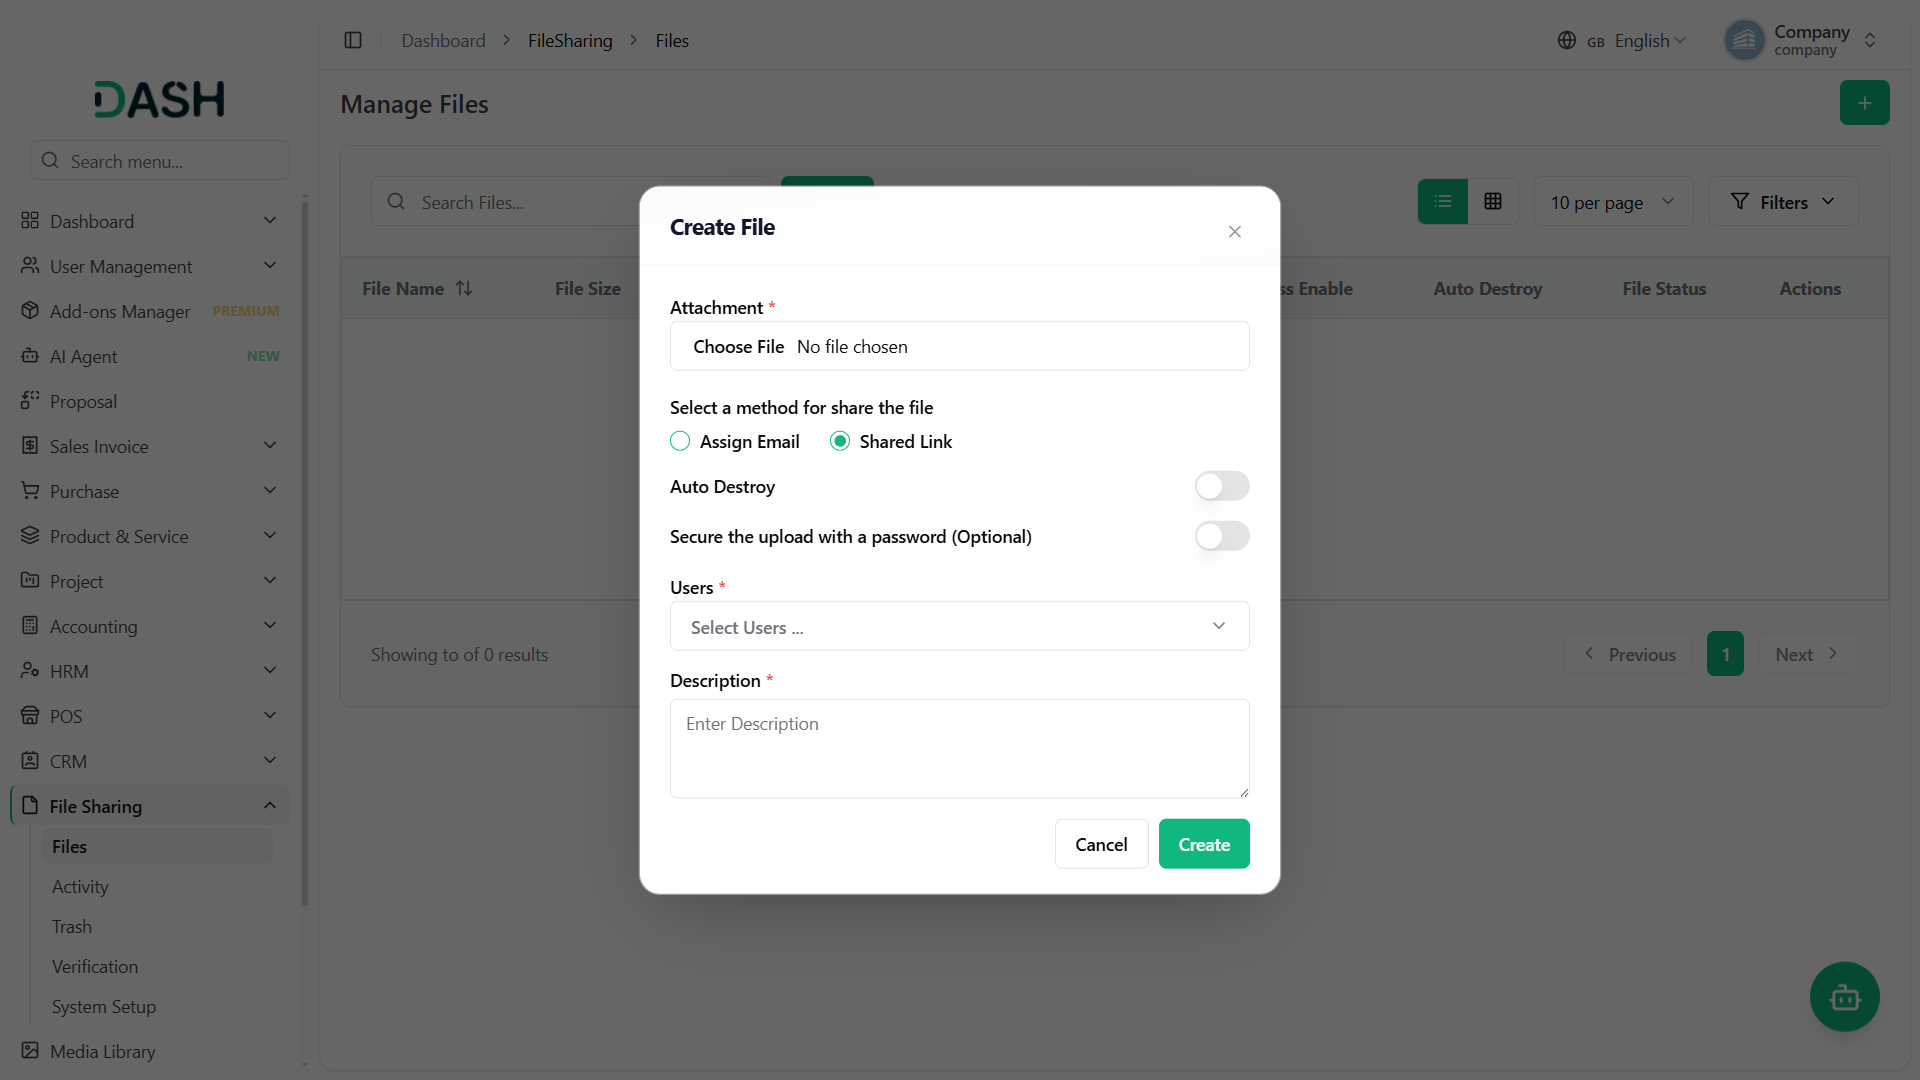
- To upload a new file, click the “Create” button and fill in the form. Choose the file from the Attachment field, then select a method for sharing the file, “Assign Email” or “Shared Link”, by using the radio button.
- Enable the “Auto Destroy” toggle if the file should be deleted after the first download, and enable “Secure the upload with a password” to add a Password. Select the Users who should have access from the dropdown (populated from the user management), and enter a Description.
- The list page displays a table of the file’s File Name, File Size, Filesharing Type, Users, Total Downloads, Is Pass Enable, Auto Destroy, File Status, and Action columns. Use the search bar to find a specific file.
- Click the List/Grid toggle to switch between the table view and a card-based grid view of the files.
- Click the Filters button to filter data by File Status, Filesharing Type, and Users using the dropdowns, then click Apply to filter the data or Clear to reset it.
- In the Action column, you can use the Copy Link option to get a shareable link, the edit option to update the file’s details, or the delete option to remove it from the system.
The list page shows all your uploaded files in a table format. The columns display File Name, File Size, Filesharing Type (Email or Link), Users who have access, Total Downloads count, Is Pass Enable (password protection indicator), Auto Destroy settings, and File Status (Available or Not Available).
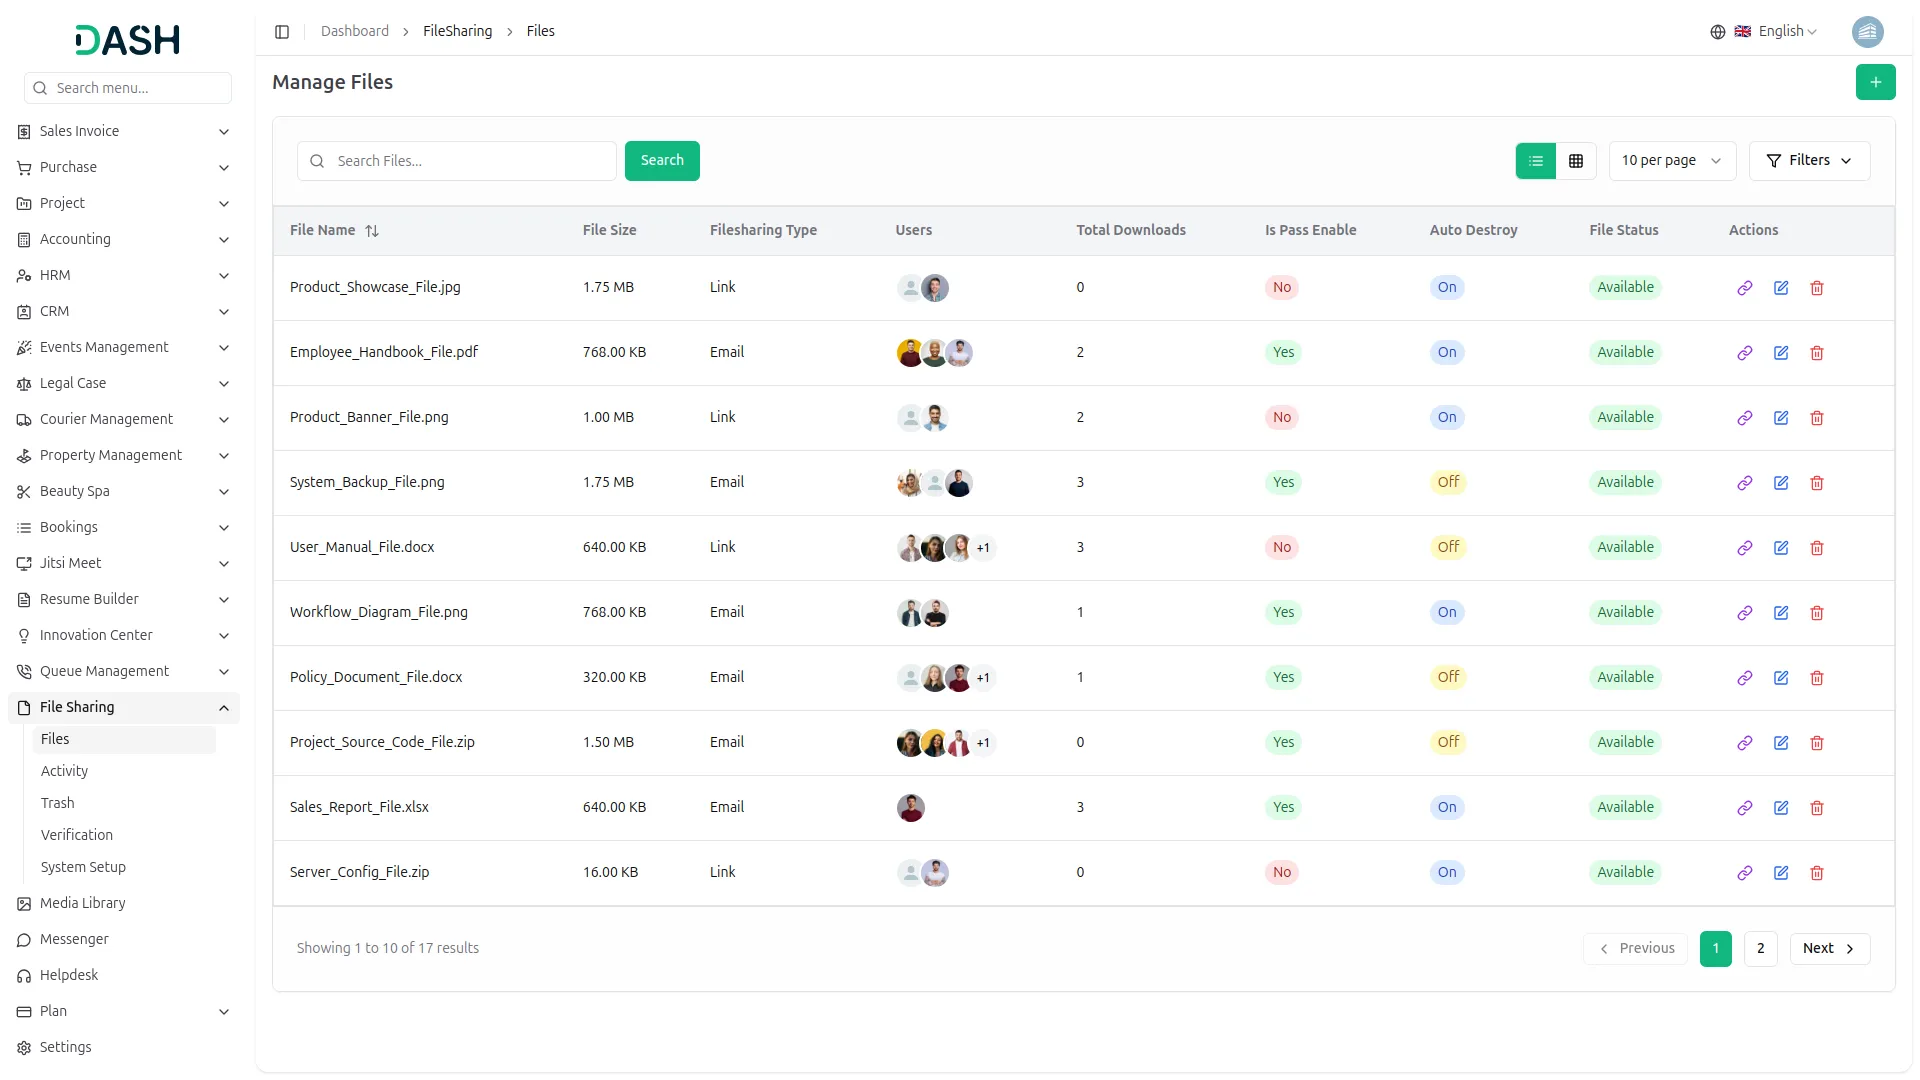
Use the Search button to find specific files by name or other criteria. The Filter button allows you to filter files by File Status, Filesharing Type, and Users. The List/Grid Toggle button switches the view from table format to a visual grid layout showing file thumbnails and detailed information cards. The Per Page Selector lets you control how many files are displayed per page.
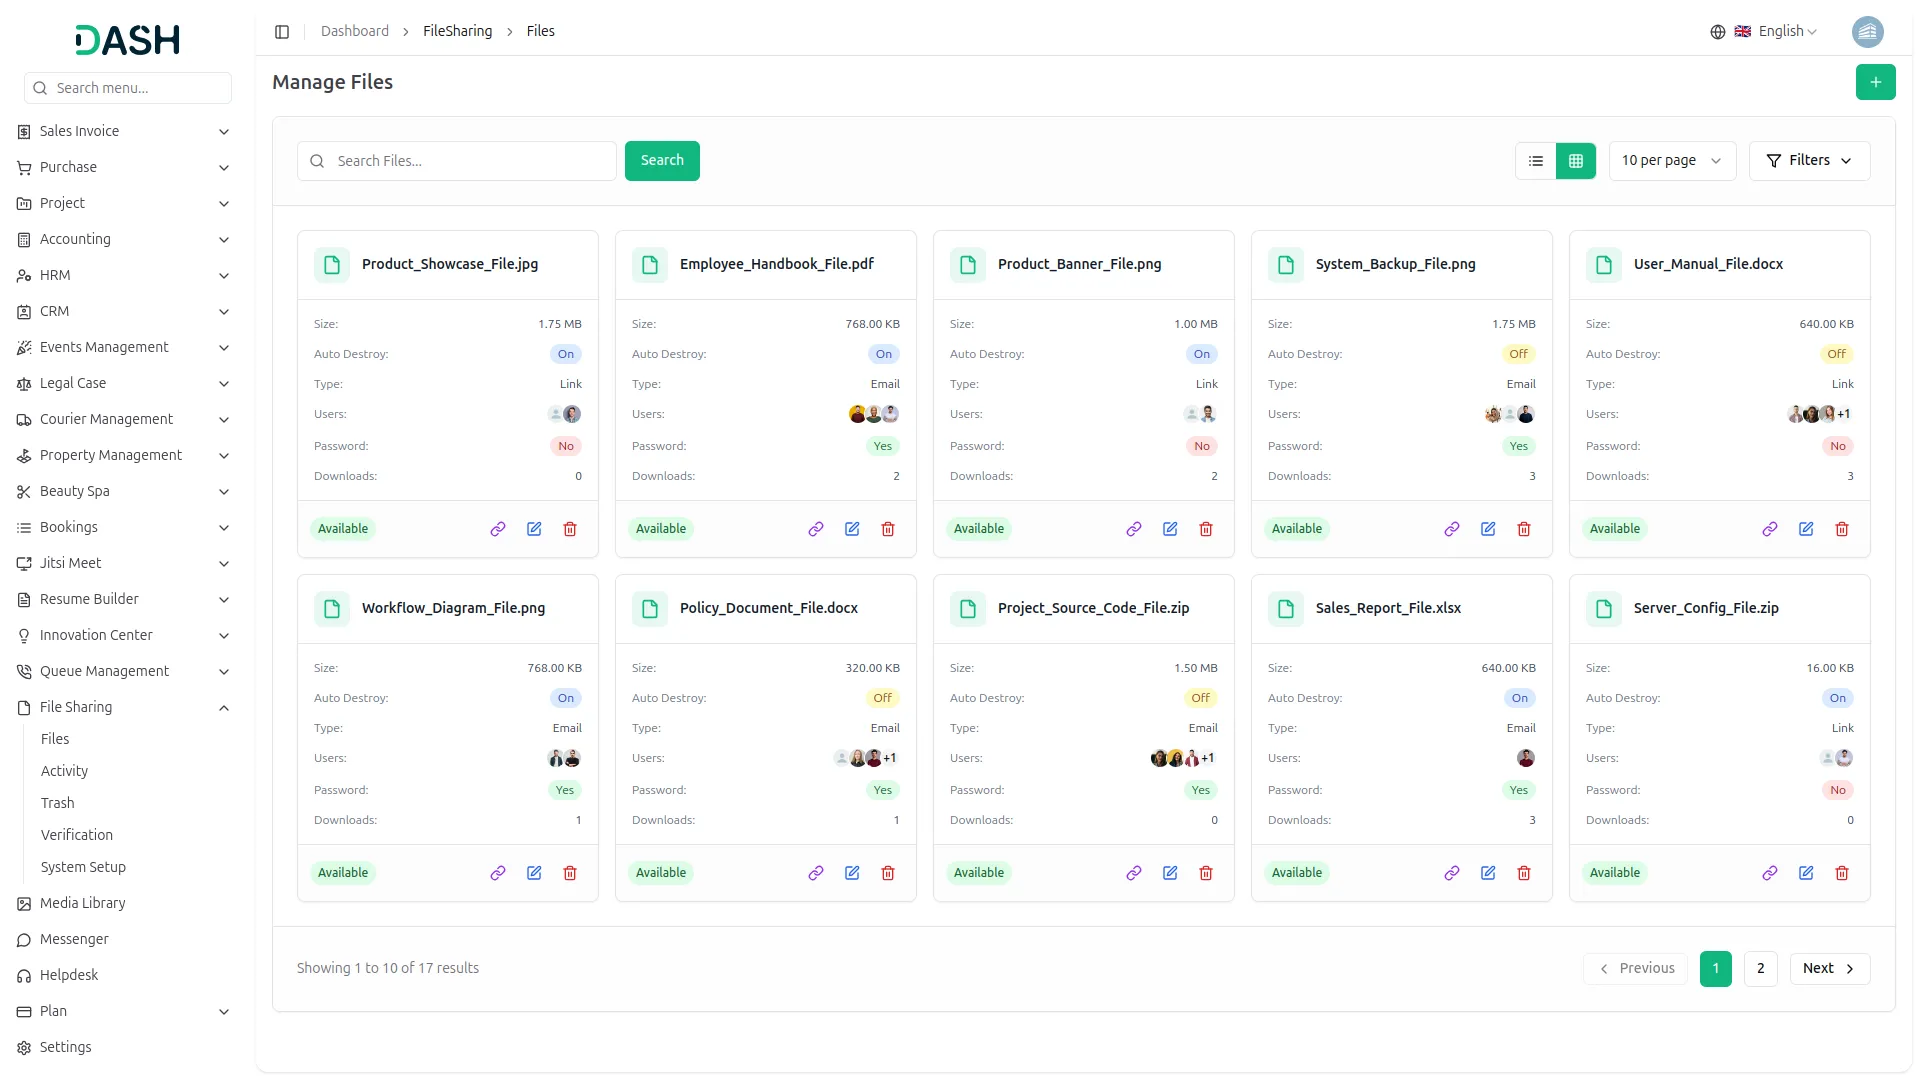
Available actions in the Actions column include:
-Download to get the original file (only for available files)
-Preview to view images or documents directly in the browser
-Copy Link to get a ready-to-share encrypted link with file name and size information
-Edit to modify file settings
-Delete to remove files (moves to trash)
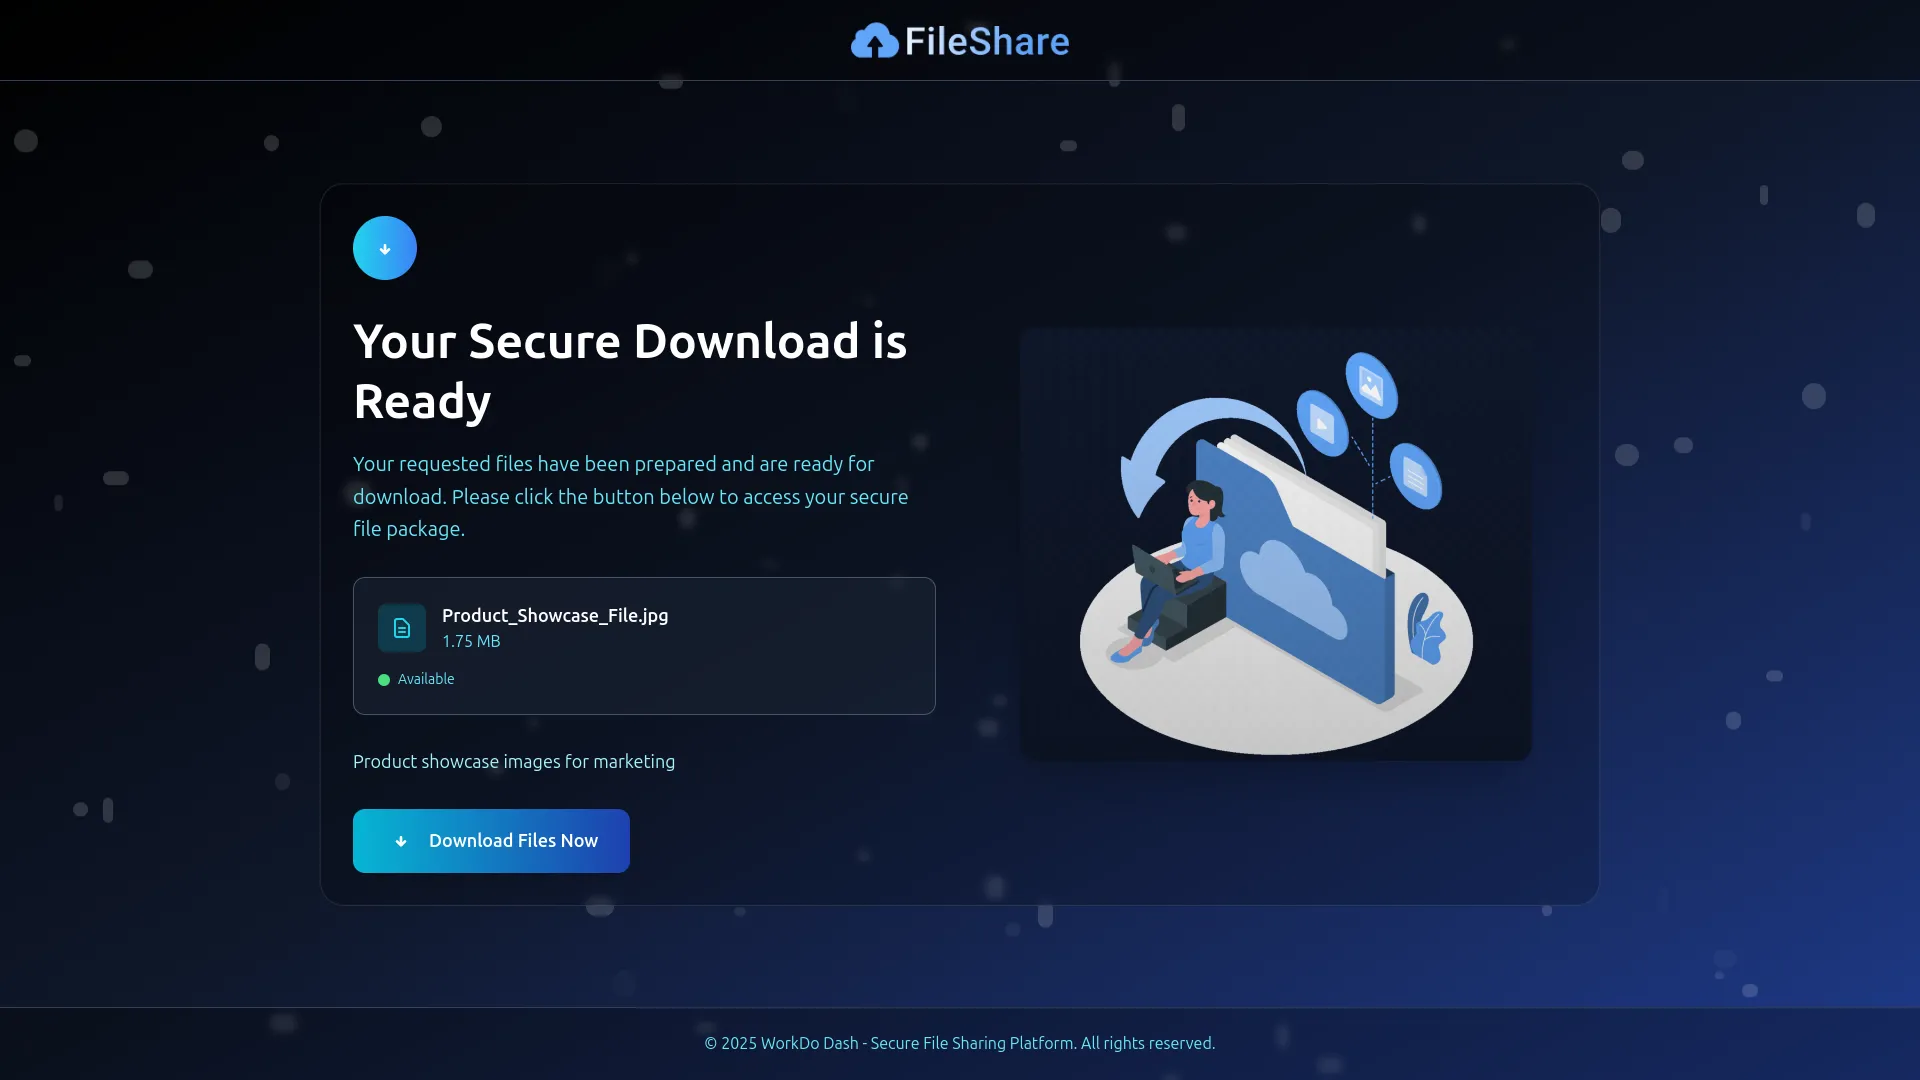
Manage Activity
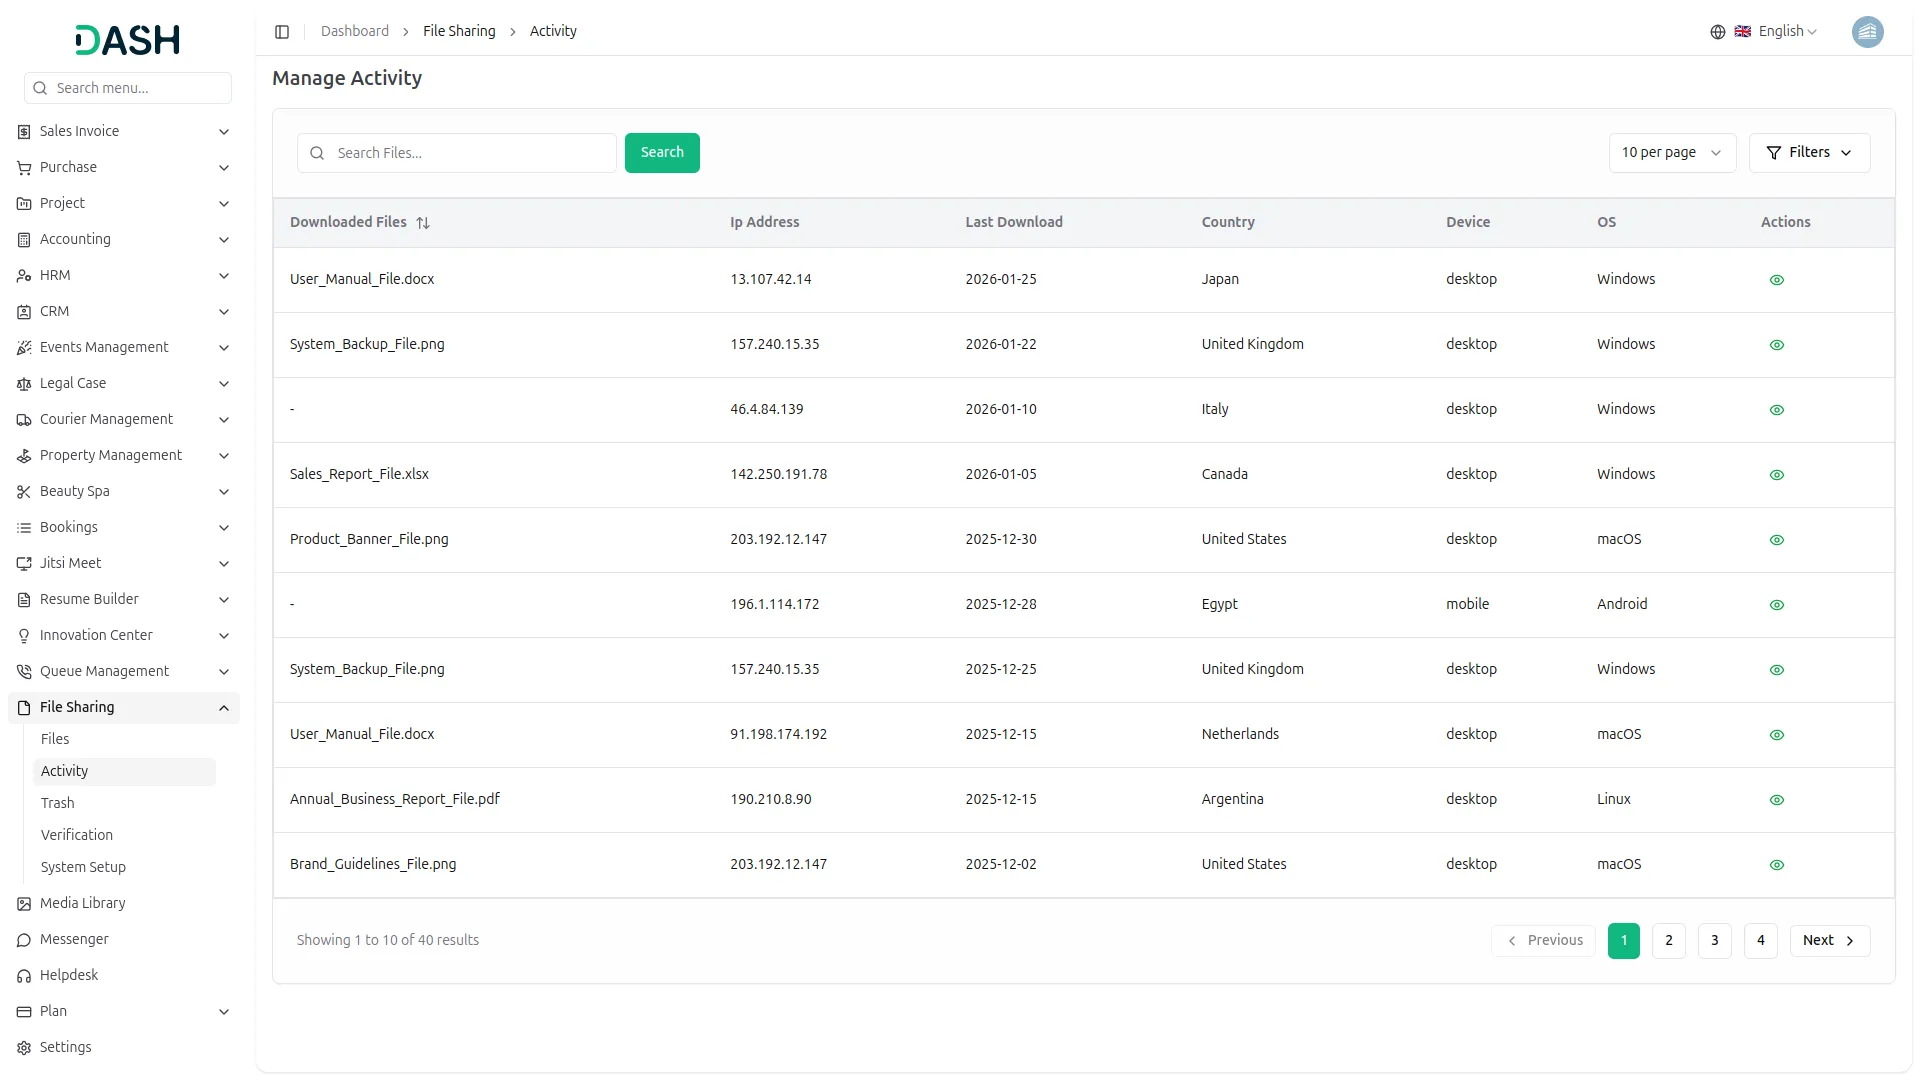
- The list page displays a table of Downloaded Files, IP Address, Last Download, Country, Device, and OS columns. Use the search bar to find a specific download activity.
- Click the Filters button to filter data by IP Address using the field, then click Apply to filter the data or Clear to reset it.
- In the Action column, you can use the view option to see detailed information about that download activity.
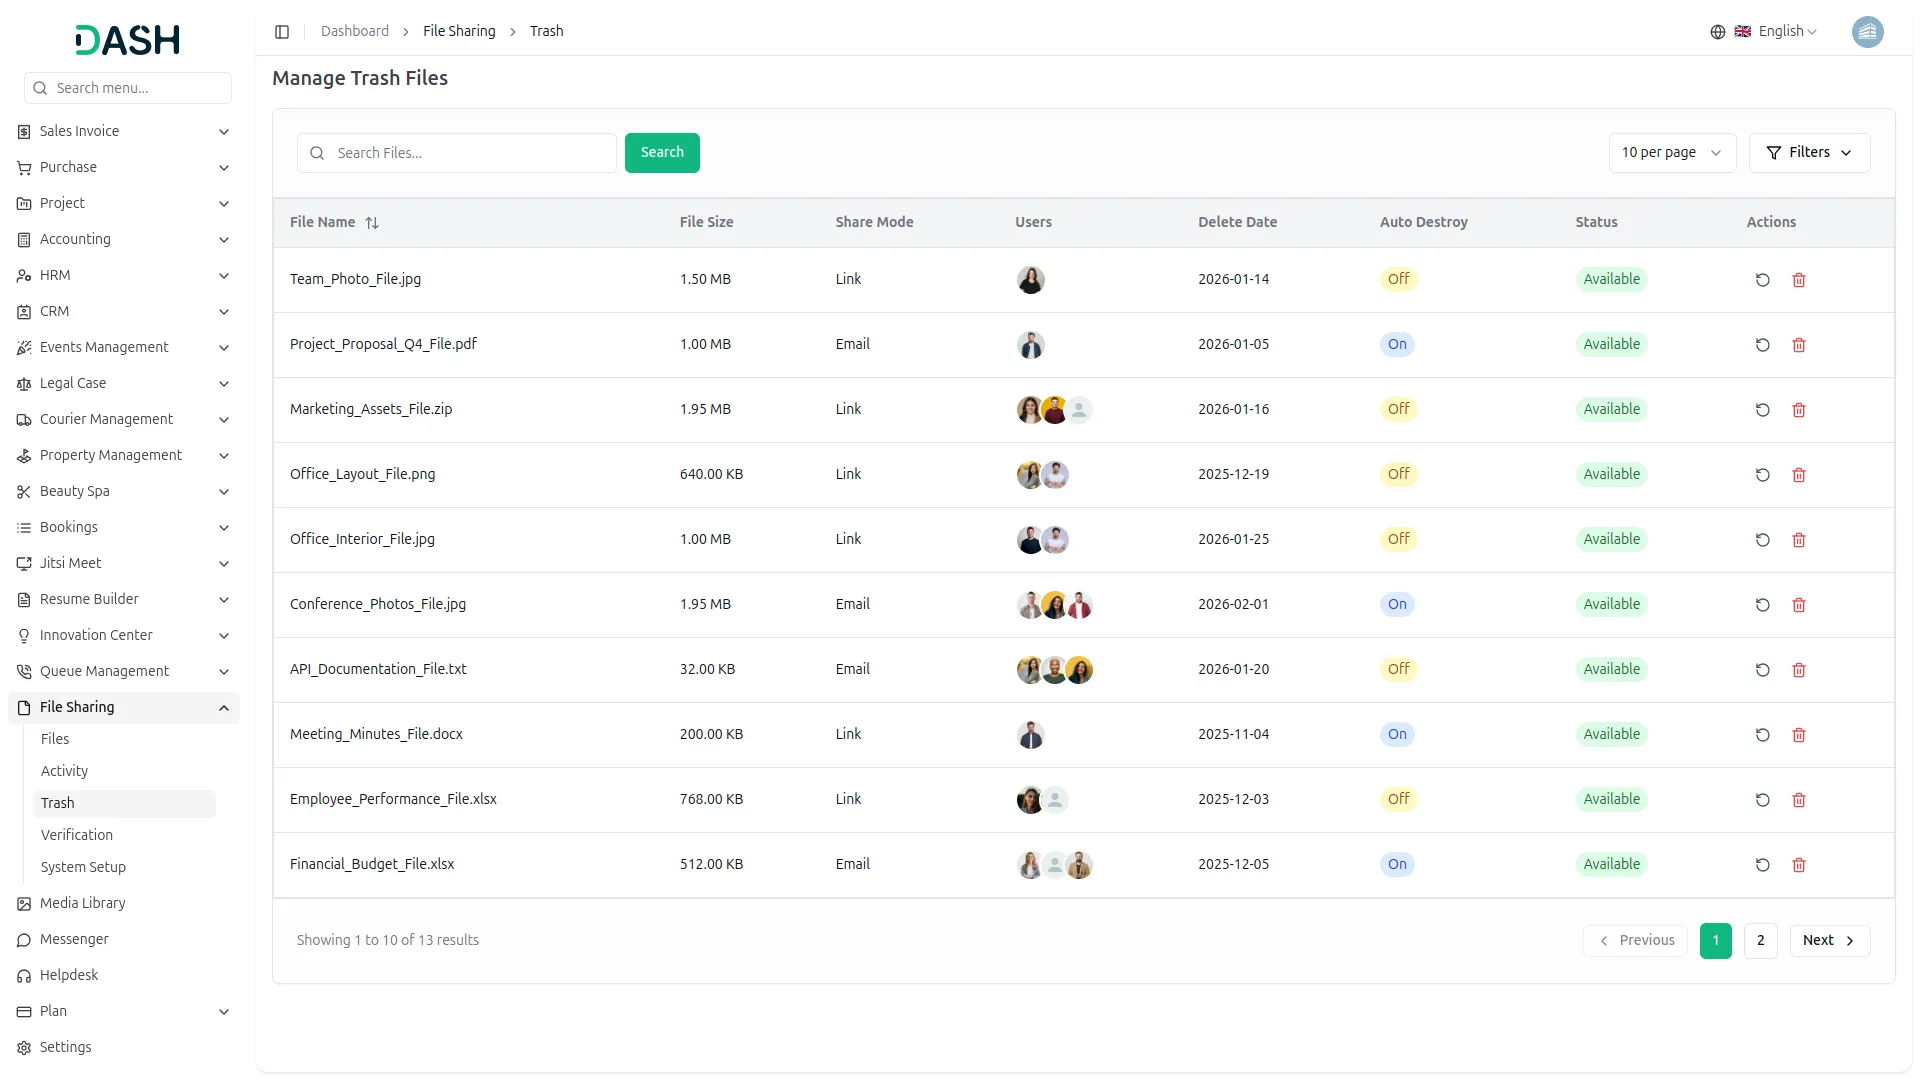
Manage Trash Files
- The list page displays a table of the file’s File Name, File Size, Share Mode, Users, Delete Date, Auto Destroy, Status, and Action columns. Use the search bar to find a specific deleted file.
- Click the Filters button to filter data by File Status, Share Mode, and Users using the dropdowns, then click Apply to filter the data or Clear to reset it.
- In the Action column, you can use the Restore option to bring the file back to active status or the Delete option to permanently remove it from the system.
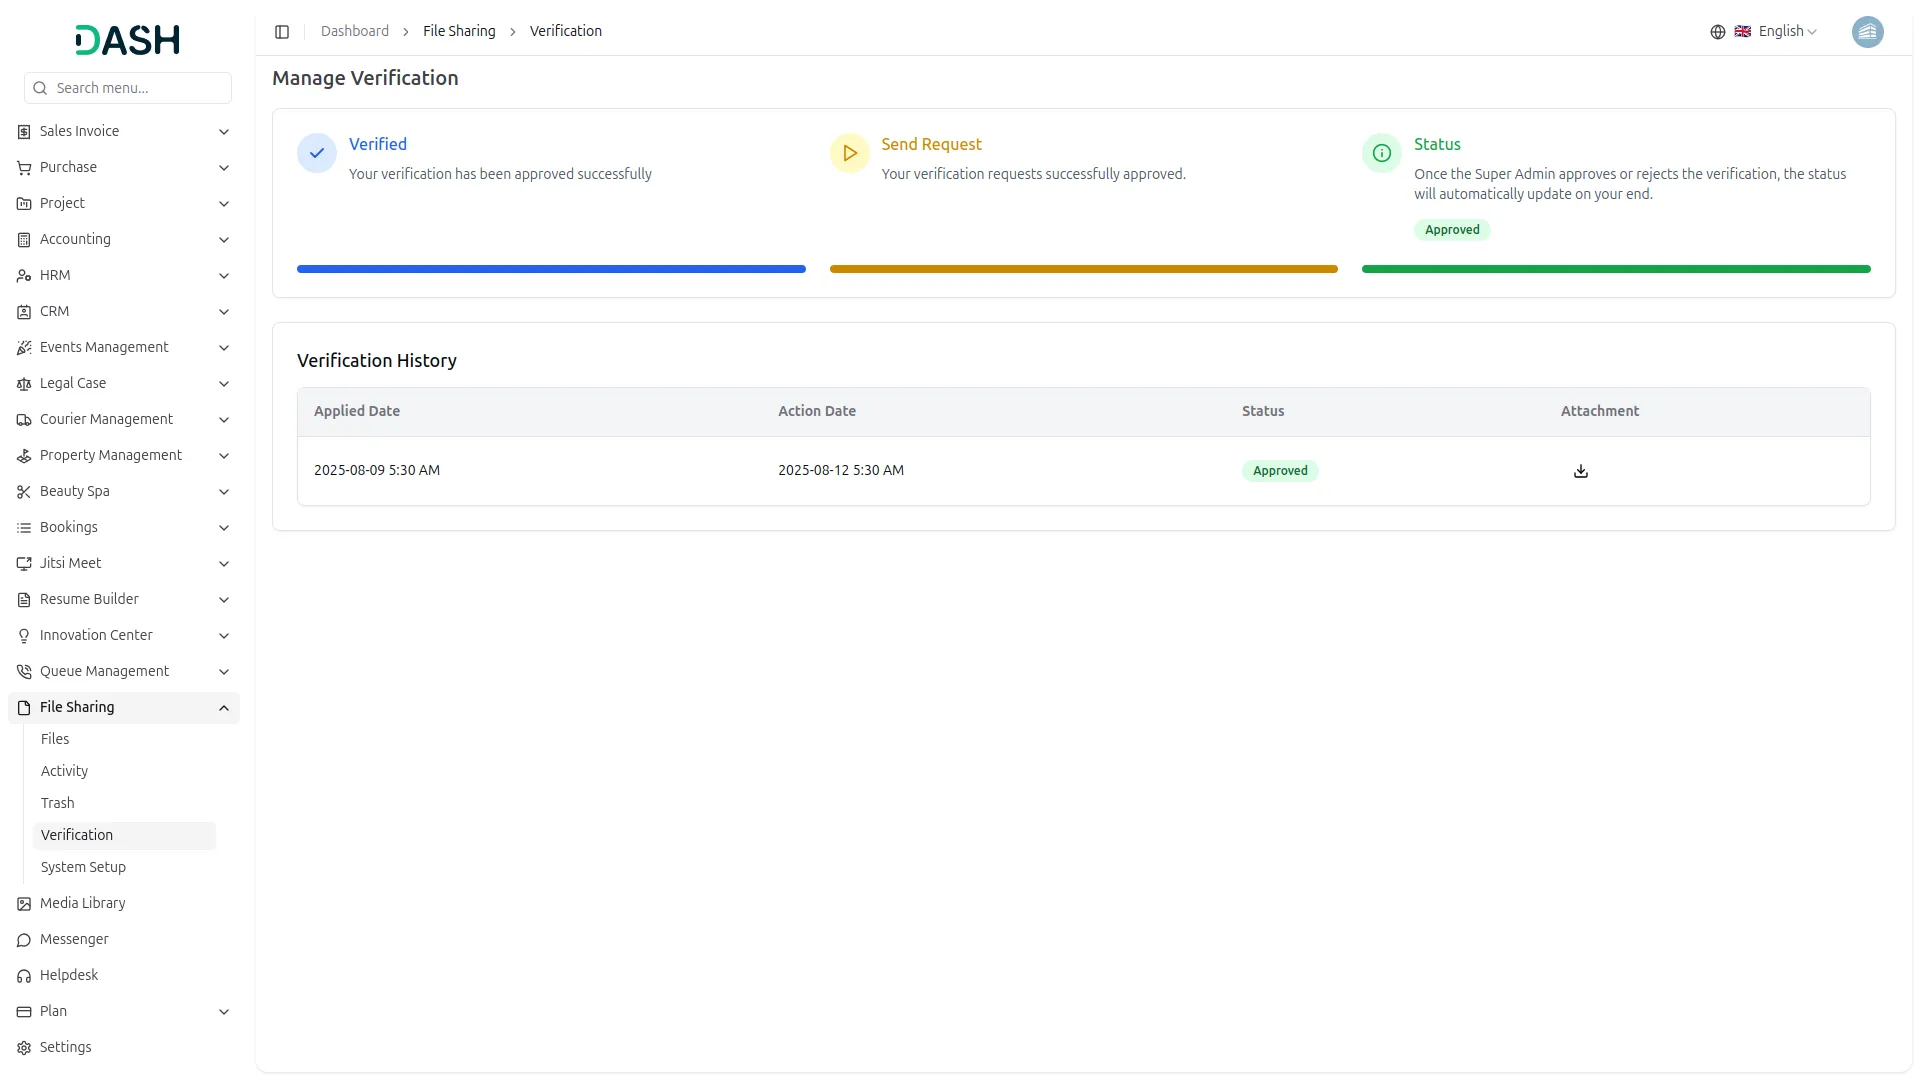
Verification (Company View)
- The verification page displays a progress tracker showing “Verified”, “Send Request”, and “Status” stages, indicating your current verification stage.
- The Verification History table displays the Applied Date, Action Date, Status, and Attachment columns. Use the Attachment column to download the document you previously submitted.
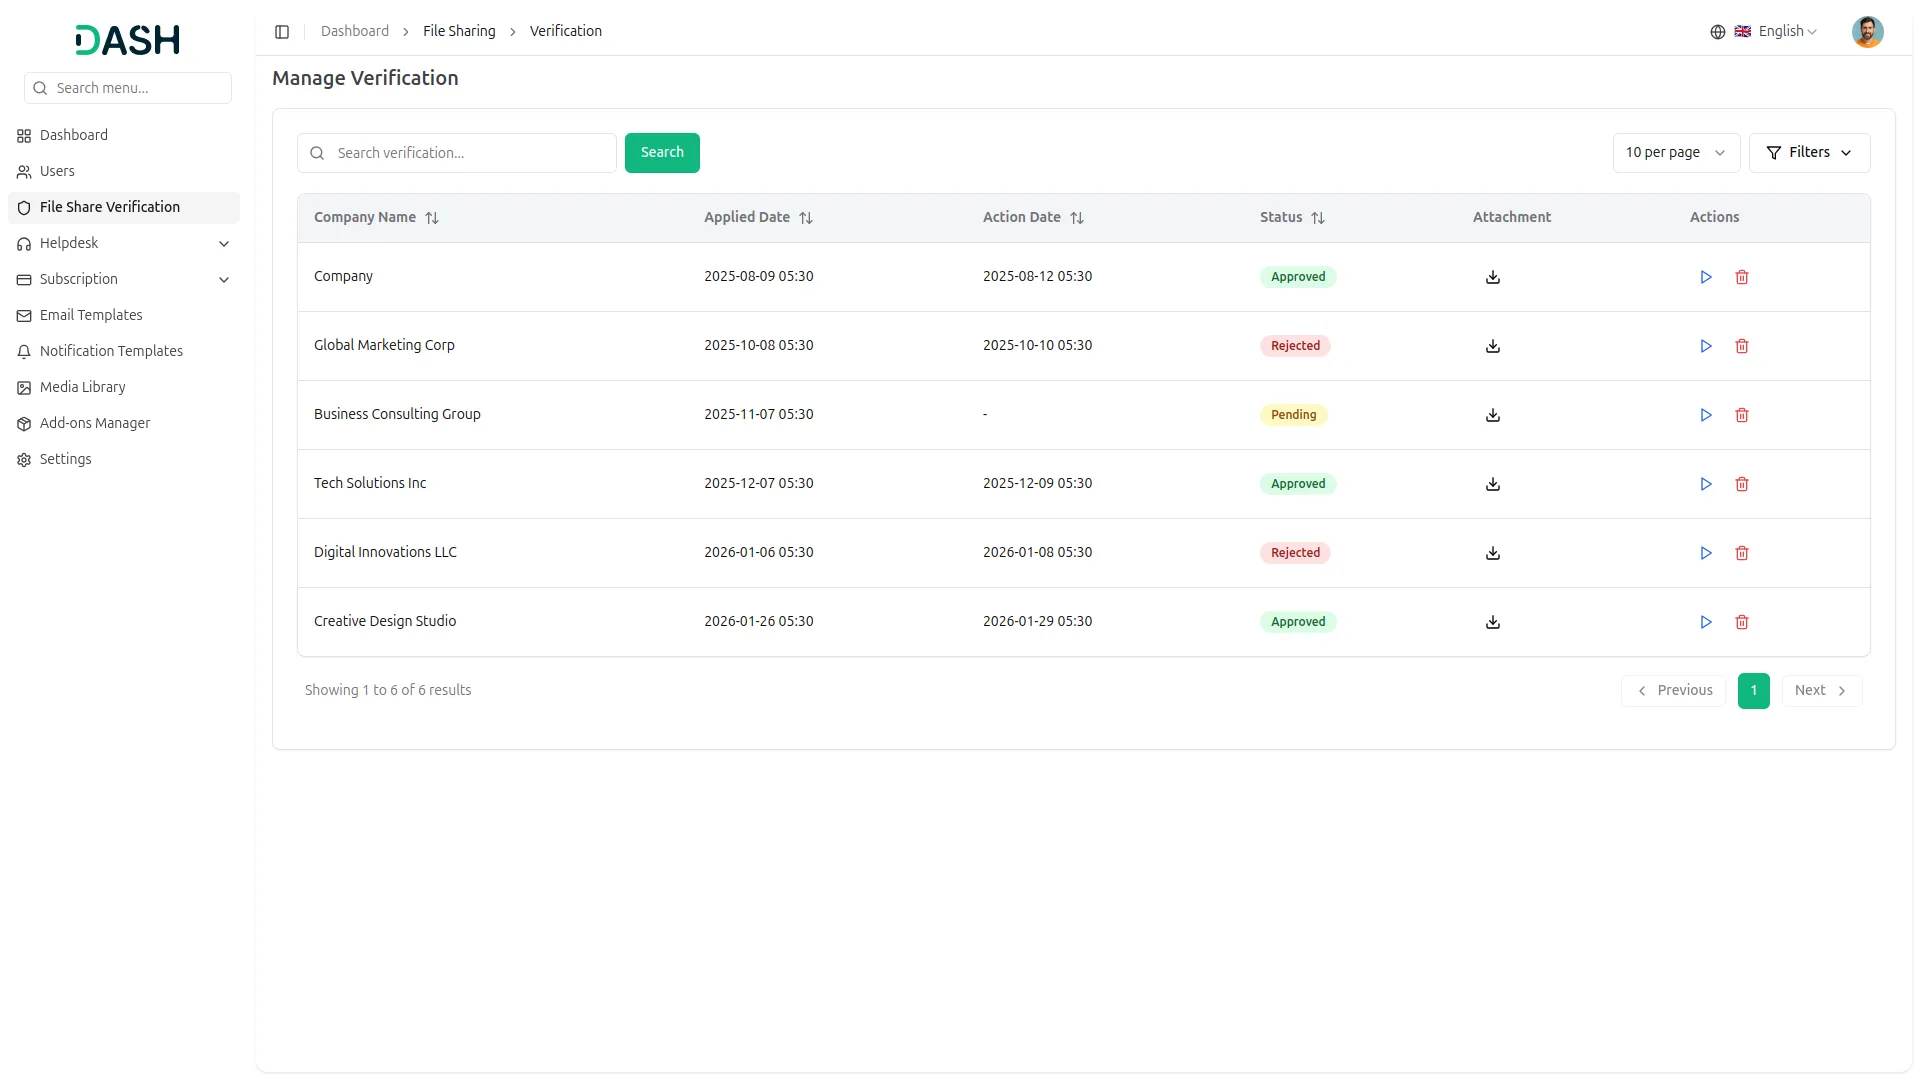
Verification Management (Super Admin View)
- The list page displays a table of the Company Name, Applied Date, Action Date, Status, Attachment, and Action columns. Use the search bar to find a specific verification request.
- Click the Filters button to filter data by Status using the dropdown, then click Apply to filter the data or Clear to reset it.
- In the Action column, you can use the View option to review the verification request and approve or reject it, or the Delete option to remove the verification record from the system.
Categories
Related articles
- GlobalPay – BookingGo SaaS Add-On Guide
- WhatsApp Messenger – BookingGo SaaS Add-On Guide
- Sales Agent – WorkDo Dash SaaS Add-On Guide
- DJ Orchestra – WorkDo Dash SaaS Add-On Guide
- NMI – WorkDo Dash SaaS Add-On Guide
- Sequential Appointment – BookingGo SaaS Add-On Guide
- Game Zone – WorkDo Dash SaaS Add-On Guide
- Google Meet – WorkDo Dash SaaS Add-On Guide
- Asana Project Management – WorkDo Dash SaaS Add-On Guide
- Marketing Plan – WorkDo Dash SaaS Add-On Guide
- User Manual – StoreGo SaaS
- iCal Exports – BookingGo SaaS Add-On Guide
We're Here to Help - Let's Talk
Have questions about our solutions, customization services, or business tools? Our team is here to help you. let's talk.