Inventory Integration in Dash SaaS
Introduction
The Inventory Management module serves as a pivotal component within business software systems, such as Enterprise Resource Planning (ERP) or Inventory Management Software. Its primary purpose is to tackle the multifaceted realm of inventory control and optimization. This versatile software module offers a set of features and functionalities meticulously designed to streamline the management of inventory across various industries.
At its core, Inventory Management is the linchpin of efficient inventory control and optimization. It empowers businesses to meticulously track, control, and fine-tune their inventory levels, ensuring that they always have the right amount of stock to meet customer demand. By doing so, it simultaneously aids in reducing operational costs and eliminating excess inventory, helping companies strike a delicate balance between maintaining product availability and minimizing storage, handling, and obsolescence expenses. In essence, the Inventory Management module is the guardian of operational efficiency, preventing product shortages, stockouts, and financial discrepancies, making it a critical asset for businesses seeking to enhance their financial management and meet customer demands effectively.
Workflow Installation
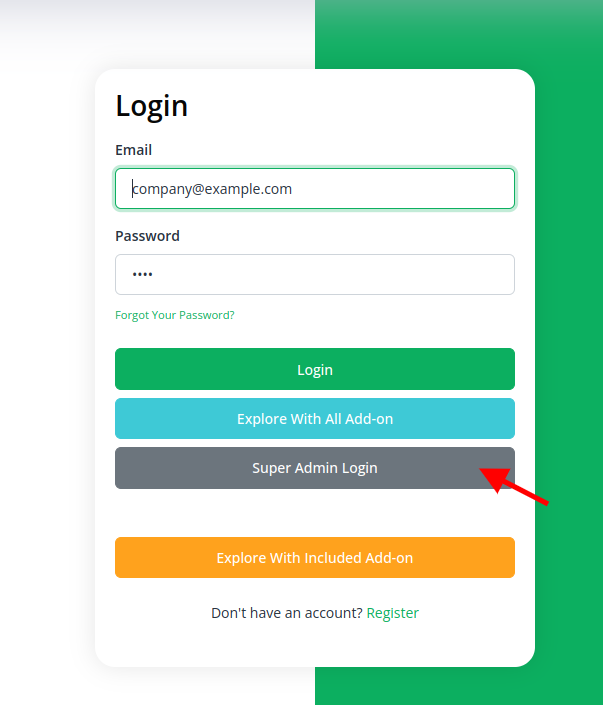
Step 1: Super Admin Access
First, the super admin must add the Inventory add-on by going through a few procedures.
-
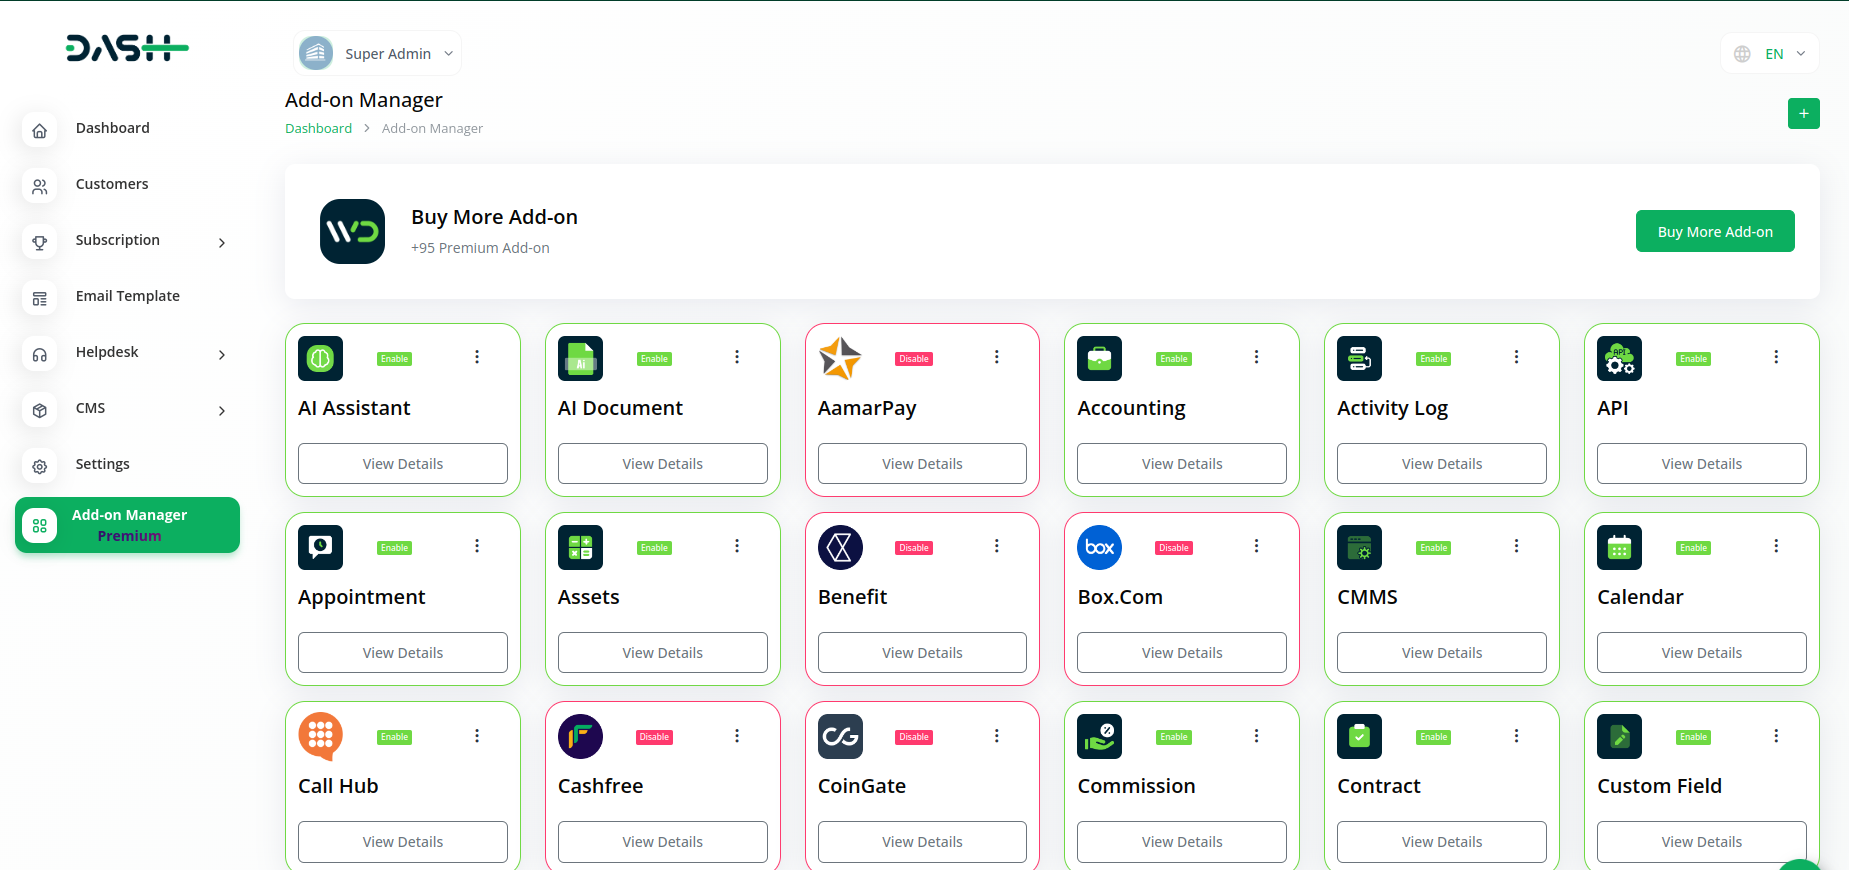
- Scroll down to “add-on manager” after logging in to the super admin side.
- To include the Add-On, click the “+” (Module Setup) button.
-
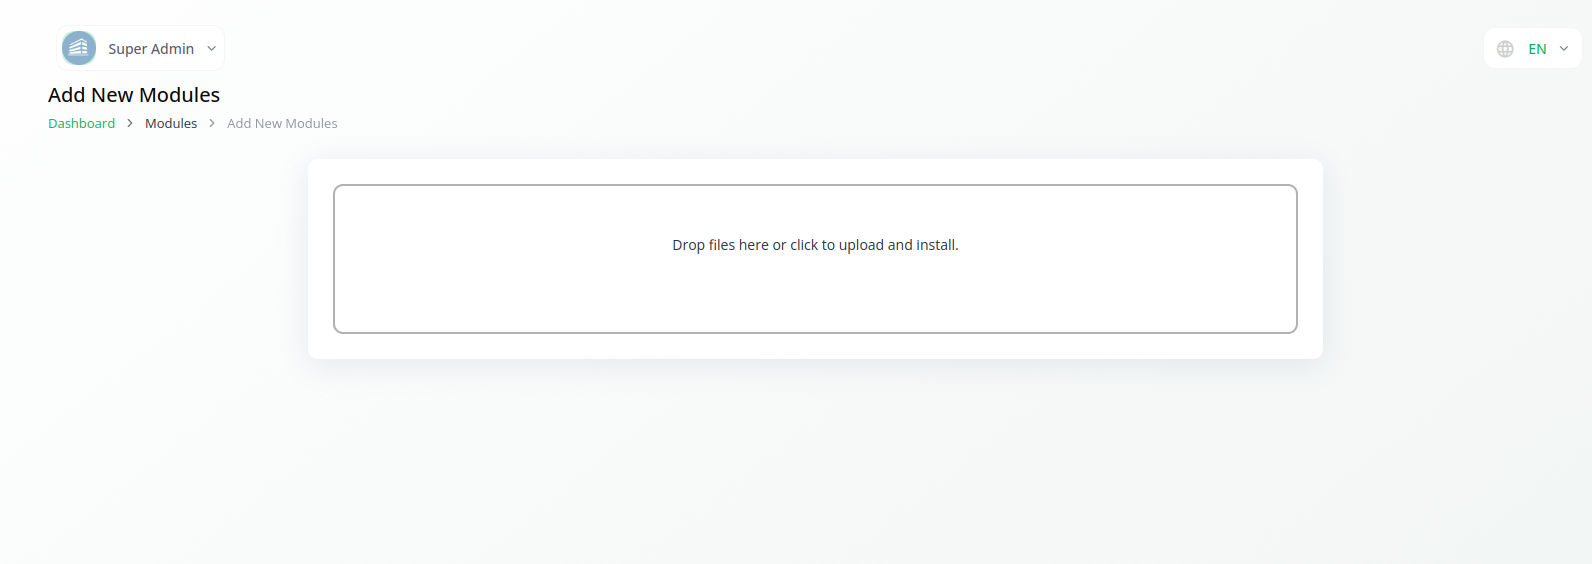
- You will see a box where you must attach the ZIP file for the “Inventory Add-On.”
-
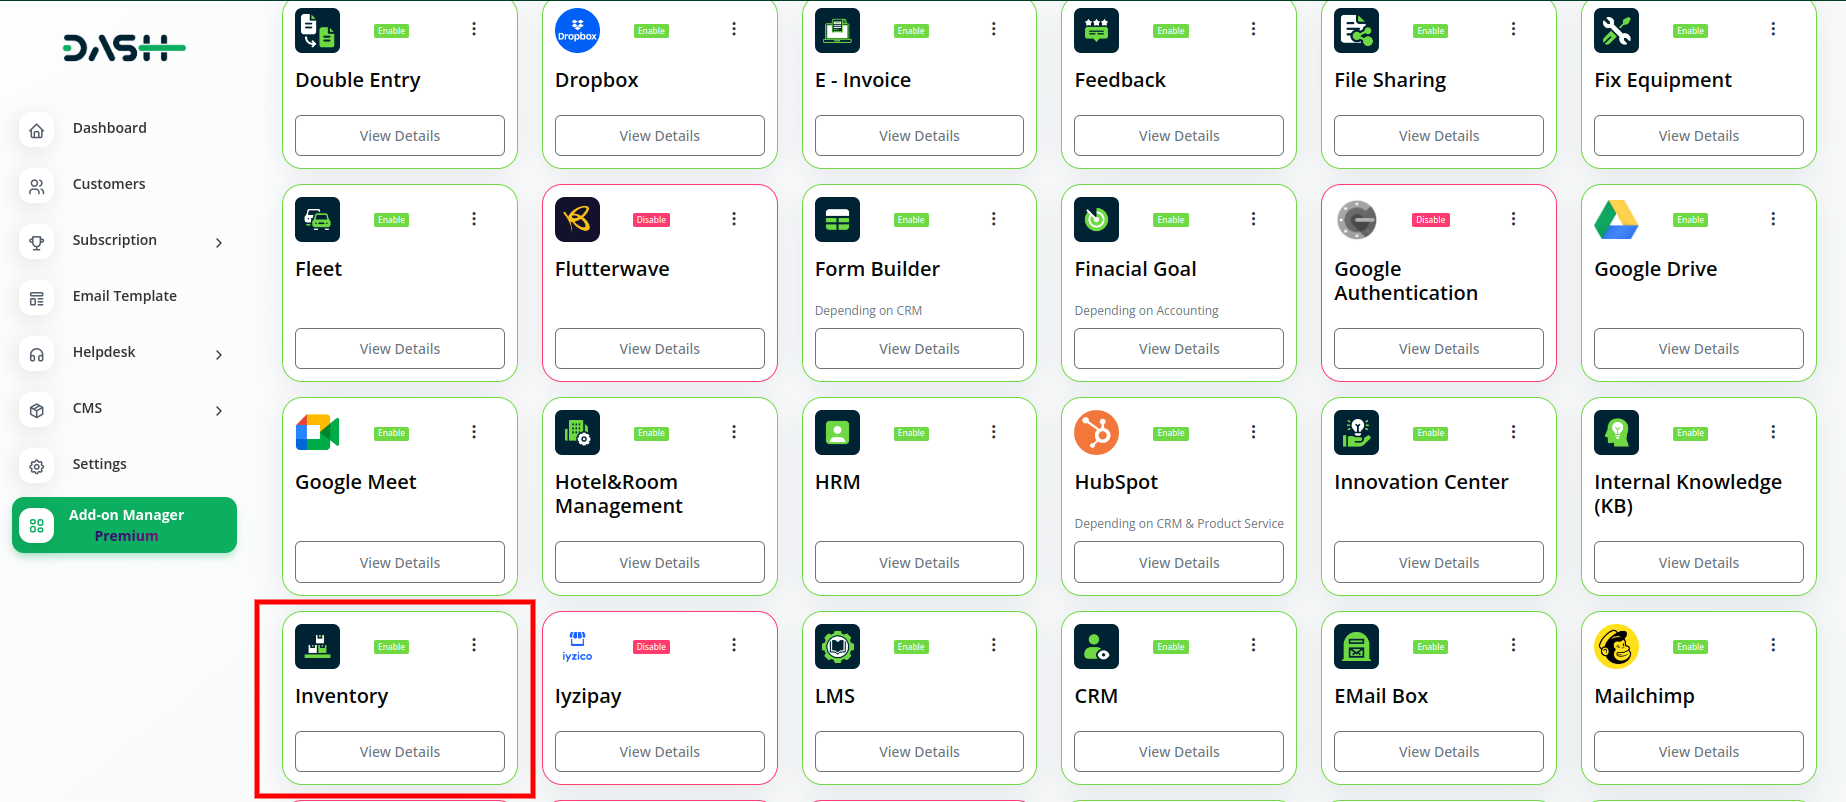
- You must enable the module once the setup procedure is finished in order for the remaining customers to purchase it.
-
Step 2: Company Login Access
After the super admin enables the add-on, the admins can purchase the add-on and have access to the Inventory add-on by following the steps mentioned below.
- So, the admin has to first purchase the add-on by navigating to the “subscription plan” page and then you have to click the “usage plan” and find the Inventory add-on and purchase it.
-
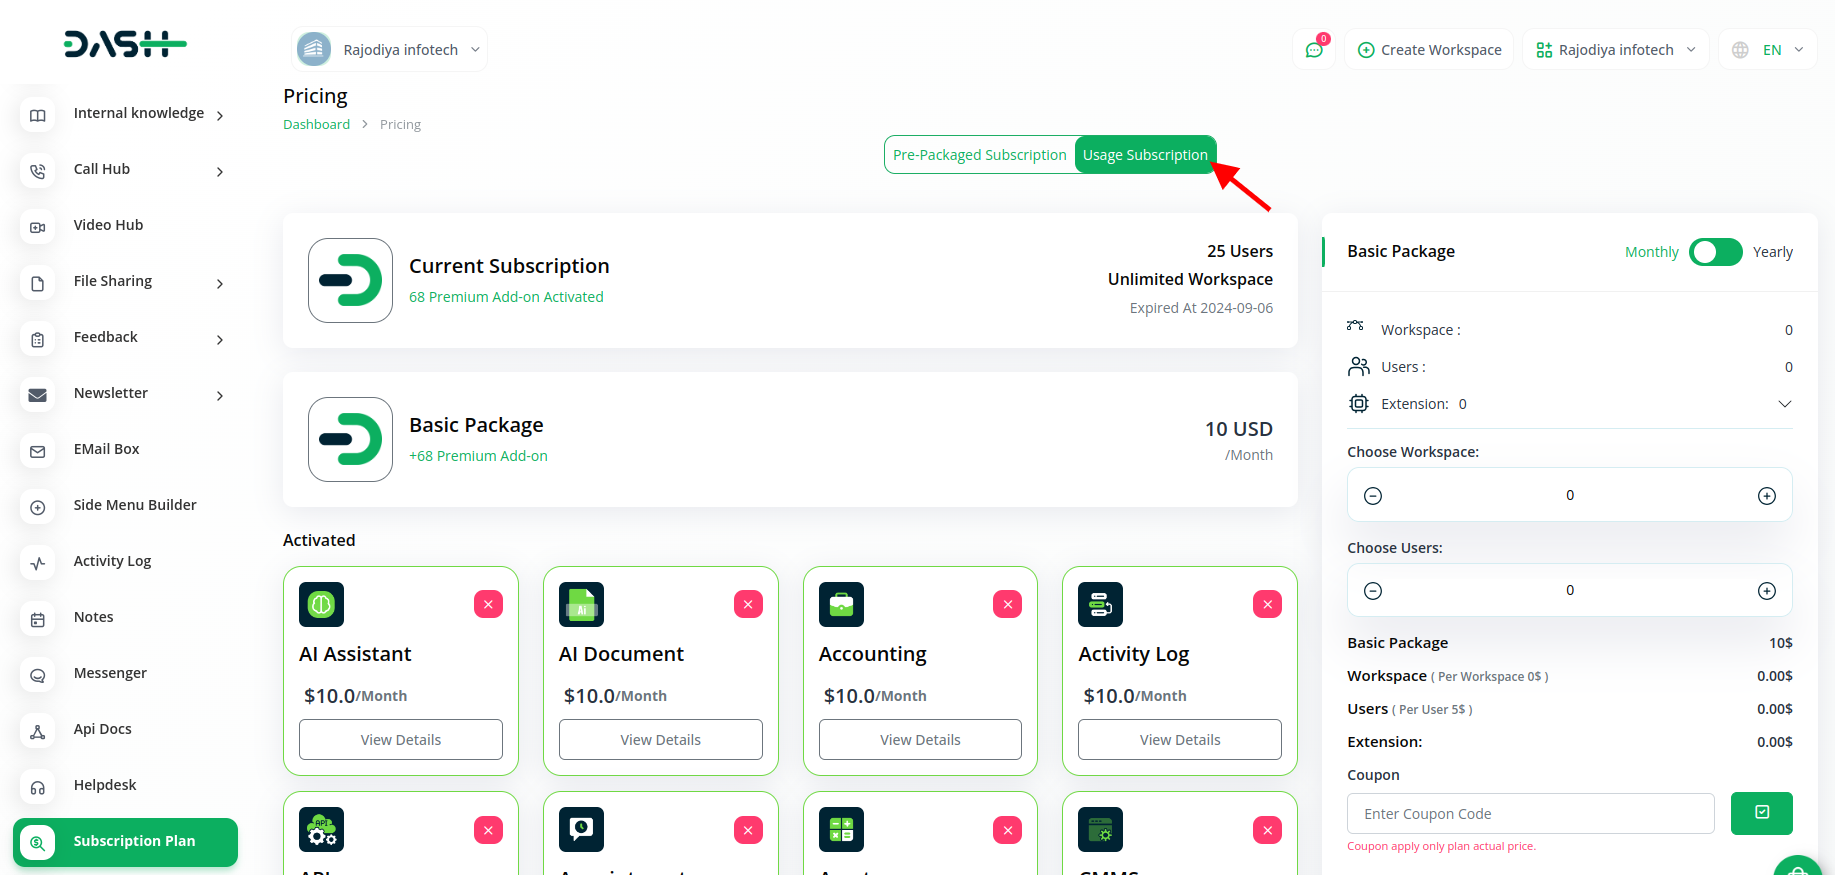
Step 3: How to use the Inventory Add-on?
- After completing the purchasing process, find out the Inventory add-on.
-
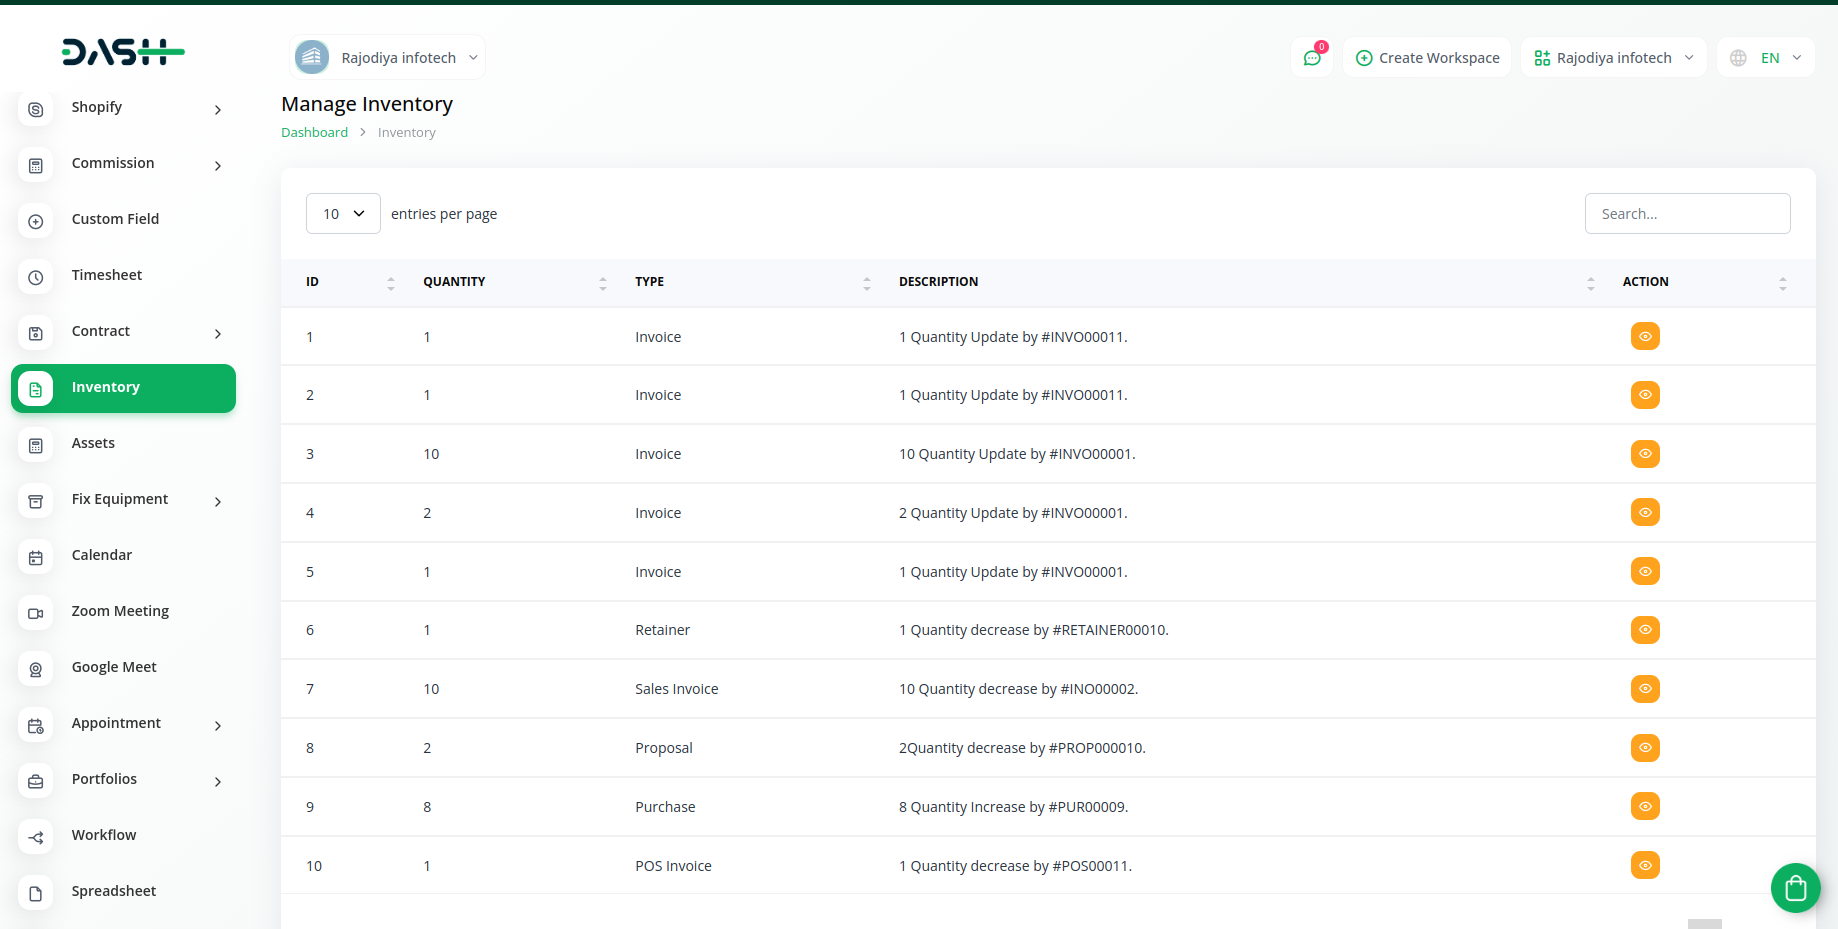
- After clicking on that button, you will get to see the inventory as per the categories.
- Once you click on the “view button” you will get to see the history of invoice, retainer, POS, Invoice Purchase, Bill, Sales Invoice, and Proposal.
So, this is how you can have access to the inventory add-on by following these steps.
Categories
Related articles
- Internal Knowledge Integration in Dash SaaS
- Legal & Case Management Integration in Dash SaaS
- Restaurant Menu Integration in Dash SaaS
- Paddle Integration in Dash SaaS
- Catering Management Integration in Dash SaaS
- Mailchimp Integration in Dash SaaS
- Sage Integration in Dash SaaS
- Form Builder Integration in Dash SaaS
- How to Set up Add-On in WorkDo
- Requests Integration in Dash SaaS
- CyberSource Integration in Dash SaaS
- Commission Integration in Dash SaaS
Reach Out to Us
Have questions or need assistance? We're here to help! Reach out to our team for support, inquiries, or feedback. Your needs are important to us, and we’re ready to assist you!


Need more help?
If you’re still uncertain or need professional guidance, don’t hesitate to contact us. You can contact us via email or submit a ticket with a description of your issue. Our team of experts is always available to help you with any questions. Rest assured that we’ll respond to your inquiry promptly.
Love what you see?
Do you like the quality of our products, themes, and applications, or perhaps the design of our website caught your eye? You can have similarly outstanding designs for your website or apps. Contact us, and we’ll bring your ideas to life.

