
NMI – WorkDo Dash SaaS Add-On Guide
Learn how to configure and manage NMI payment gateway in WorkDo Dash SaaS.
Supported Country: United States of America (USA), Germany, France, Italy, Spain, Netherlands, United Kingdom, Australia, Canada
Supported Currency: USD, EUR, GBP, AUD, CAD, JPY, INR, CNY, and more.
Benefits of NMI Payment Gateway
Robust Transaction Security
NMI safeguards every payment with advanced encryption, tokenization, and PCI-compliant fraud prevention tools, ensuring that all transactions are processed in a fully secure and protected environment for both merchants and customers.
Versatile Payment Method Acceptance
NMI supports a broad range of payment options, including major credit and debit cards such as Visa and Mastercard, as well as ACH payments, giving businesses the flexibility to accommodate diverse customer payment preferences with ease.
Automated Payment Reconciliation
Payment statuses are automatically updated and recorded within the platform, reducing the need for manual tracking and ensuring that financial records remain consistently accurate and well-organized with minimal administrative effort.
Instant Real-Time Payment Processing
Every transaction is processed and confirmed in real time through NMI, enabling immediate payment verification and eliminating unnecessary delays in order fulfillment and service delivery for a smoother customer experience.
How to Access NMI Add-On?
Ready to enhance your online payment capabilities with NMI? Follow these simple steps to get started:
- Visit WorkDo Website:
Visit the WorkDo Dash Website
Go to https://workdo.io/ to access the WorkDo Dash platform. - Navigate to Dash SaaS Add-Ons
Explore the “Dash SaaS Add-Ons” section to view all available integrations. - Discover NMI Add-On
Browse the Add-Ons list and locate “NMI Payment Gateway.” - Activate the Add-On
Click on the Activate button to enable NMI for your WorkDo Dash account.
Once activated, NMI becomes available across supported modules based on permissions and settings.
How Does NMI Work?
NMI integrates with Dash SaaS to provide secure, efficient payment processing for both recurring subscriptions and one-time transactions. By activating the NMI Add-On and configuring API credentials, businesses can accept various payment methods, including credit/debit cards and ACH payments. This integration supports features like tokenization, fraud prevention, and PCI compliance, ensuring safe transactions. Administrators can manage payments through Dash’s settings, streamlining the billing process for SaaS platforms.
Super Admin Settings
(Plan Purchase by the Company)
The Super Admin Settings are accessible only to the highest-level administrator. These settings allow the Super Admin to manage company-level subscriptions and payment configurations.
Key Capabilities:
- Purchase or upgrade company subscription plans
- Configure NMI API credentials for plan payments
- Enable or disable NMI as a payment gateway
Configuration Path:
Super Admin Login → Settings → NMI Settings
Company Settings
(Bookings, Beauty Spa, LMS & Other Payments)
Company Settings allow organizations to configure NMI for receiving payments from customers across multiple modules.
Supported Modules Include:
Configuration Path:
Company Login → Settings → NMI Settings
Company-Level Capabilities:
- Configure NMI API credentials
- Enable NMI for selected modules
- Accept online payments from customers
- Manage Bookings, Beauty Spa, and service
- Handle tax, coupon, and discount calculations
How to Generate NMI API Keys?
1. Generate API Key:
To integrate NMI with WorkDo Dash, you need to obtain API credentials from the NMI developer portal. Follow these steps:
1. Register a Developer Account
- Visit the official NMI Developer Portal: https://docs.nmi.com
- Sign up for a test (sandbox) or live merchant account as needed
2. Access Your Sandbox Credentials
- After logging in, navigate to Settings -> Security Keys
- Create or retrieve your API Key and Security Key under the appropriate mode
Note: Use sandbox credentials for testing purposes only For real transactions, switch to Live mode and obtain production credentials from the NMI team.
2. Configure NMI Gateway:
- Log in to your account with administrator credentials.
- Navigate to the settings page.
3. Access Payment Settings:
- Within the settings page, locate and select the “Payment Settings” option.
4. Set Up NMI Gateway:
- Scroll down the page until you find the NMI Gateway option.
- Click on the Patnow Gateway to access its configuration settings.
5. Enter Required Details:
- In the settings, provide the following essential details:
- Merchants Security Key
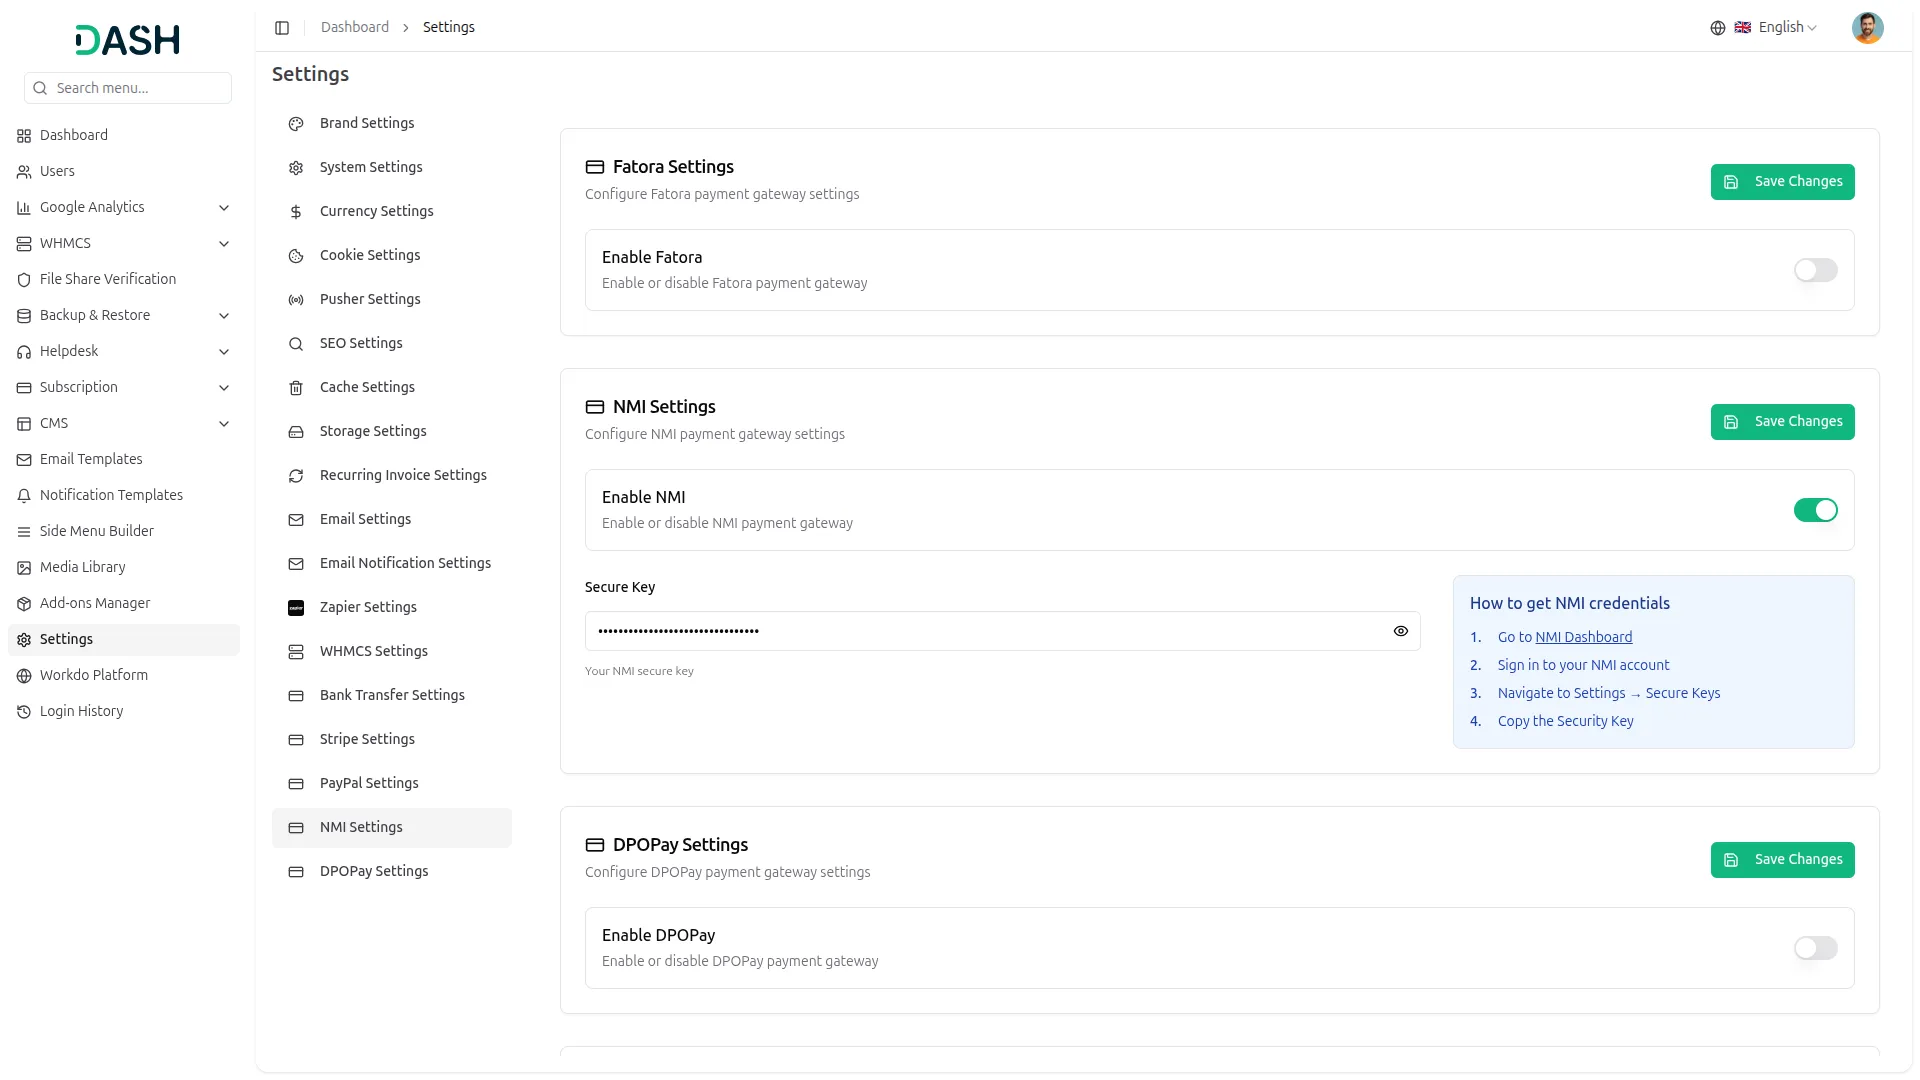
6. Save Your Settings:
- After entering the necessary details, save the settings to activate the NMI Payment Gateway within your platform.
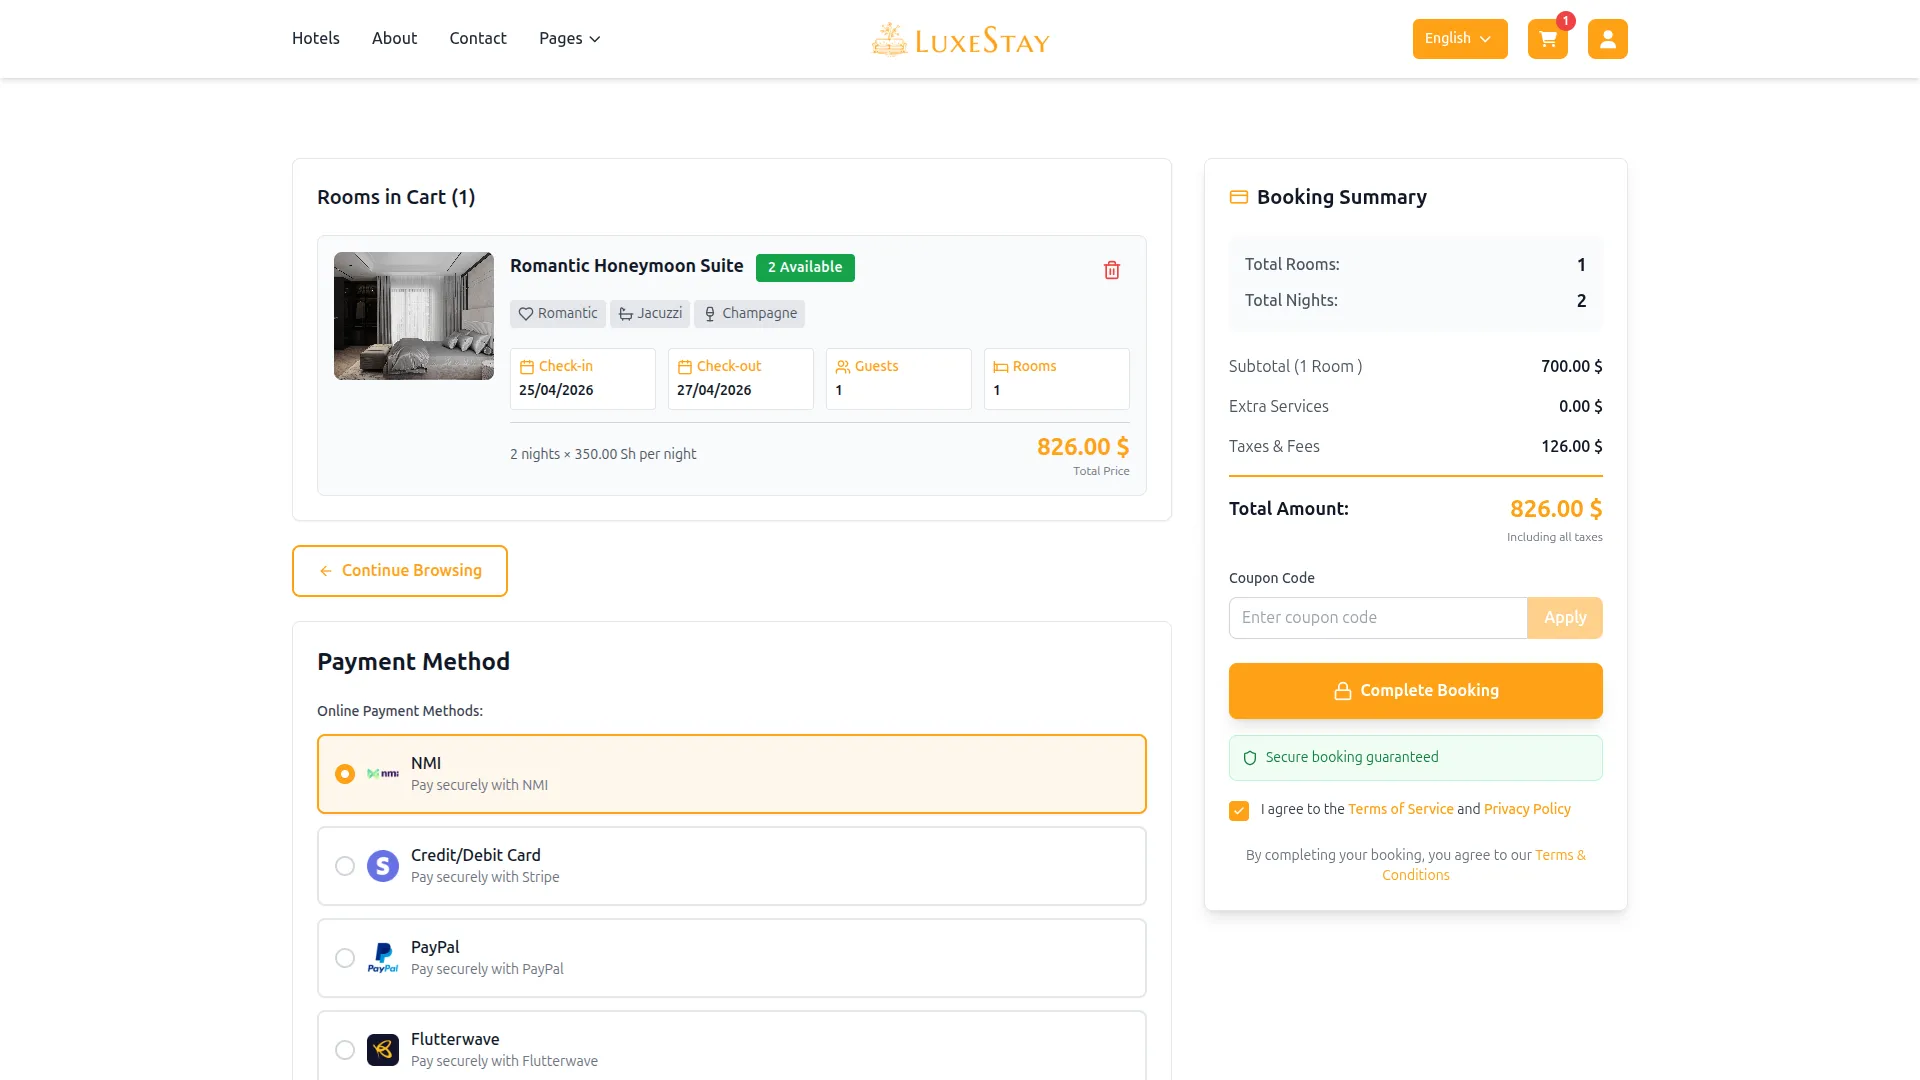
This process will enable you to seamlessly integrate NMI as a payment gateway, allowing your users to make secure and efficient online payments in various cryptocurrencies.
Note: The NMI Add-On is a paid feature and can be accessed by users who have purchased it. By integrating the NMI Add-On into your Dash SaaS account, you’ll provide a reliable and user-friendly payment gateway that supports global transactions
Categories
Related articles
- CoinGate – WorkDo Dash SaaS Add-On Guide
- Automatic Order Printing – eCommerceGo SaaS Add-On Guide
- Save Reply – TicketGo Add-On Guide
- Coupon Email – eCommerceGo SaaS Add-On Guide
- Aamarpay – WorkDo Dash SaaS Add-On Guide
- Google Authentication – BookingGo SaaS Add-On Guide
- Paytm – BookingGo SaaS Add-On Guide
- Zoom Meeting – BookingGo SaaS Add-On Guide
- Bundle Products – eCommerceGo SaaS Add-On Guide
- Helpdesk – eCommerceGo SaaS Add-On Guide
- Moneris – WorkDo Dash SaaS Add-On Guide
- Portfolio – WorkDo Dash SaaS Add-On Guide
We're Here to Help - Let's Talk
Have questions about our solutions, customization services, or business tools? Our team is here to help you. let's talk.