Grant Management Detailed Documentation
The Library Management Add-On is designed to help librarians and administrators efficiently manage books, authors, publishers, categories, I-Cards, and various book-related transactions.
Introduction
The Grant Management System is a comprehensive software solution designed to streamline the entire grant lifecycle from setup to completion. This system allows organizations to create and manage different types of grants, track applications, process payments, and monitor progress reports. The platform serves both administrators who manage grants and users who apply for them, providing a complete workflow for grant administration, including application review, fund allocation, payment processing, and report management.
How To Install the Grant Management Add-On?
To Set Up the Grant Management Add-On, you can follow this link: Setup Add-On
How to use the Grant Management Add-On?
System Setup
Grant Types
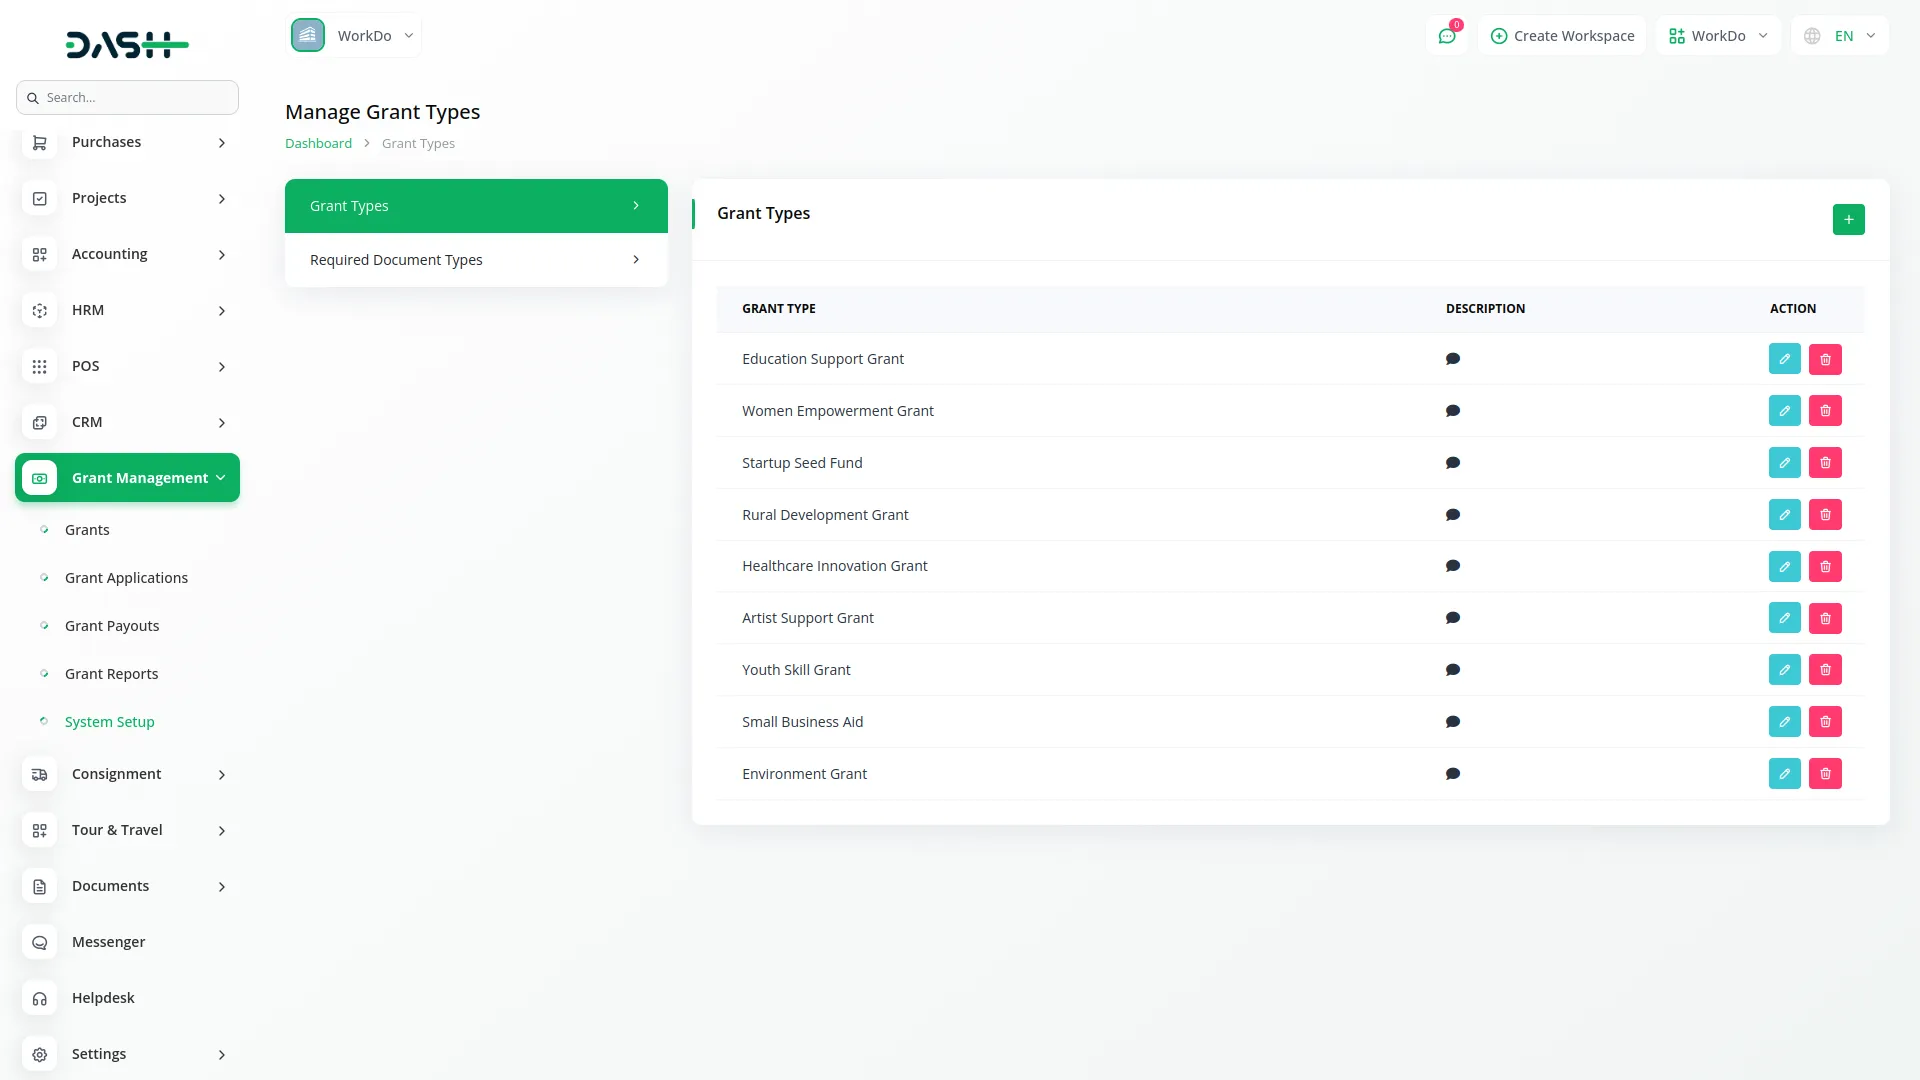
- To create a new Grant Type, click the “Create” button at the top of the Grant Types page. Enter the Grant Type Name and provide a detailed Description of what this grant type covers.
- The list page displays all grant types in a table with columns for Grant Type and Description. You can perform actions like Edit to modify existing grant types or Delete to remove them from the system.
Required Document Types
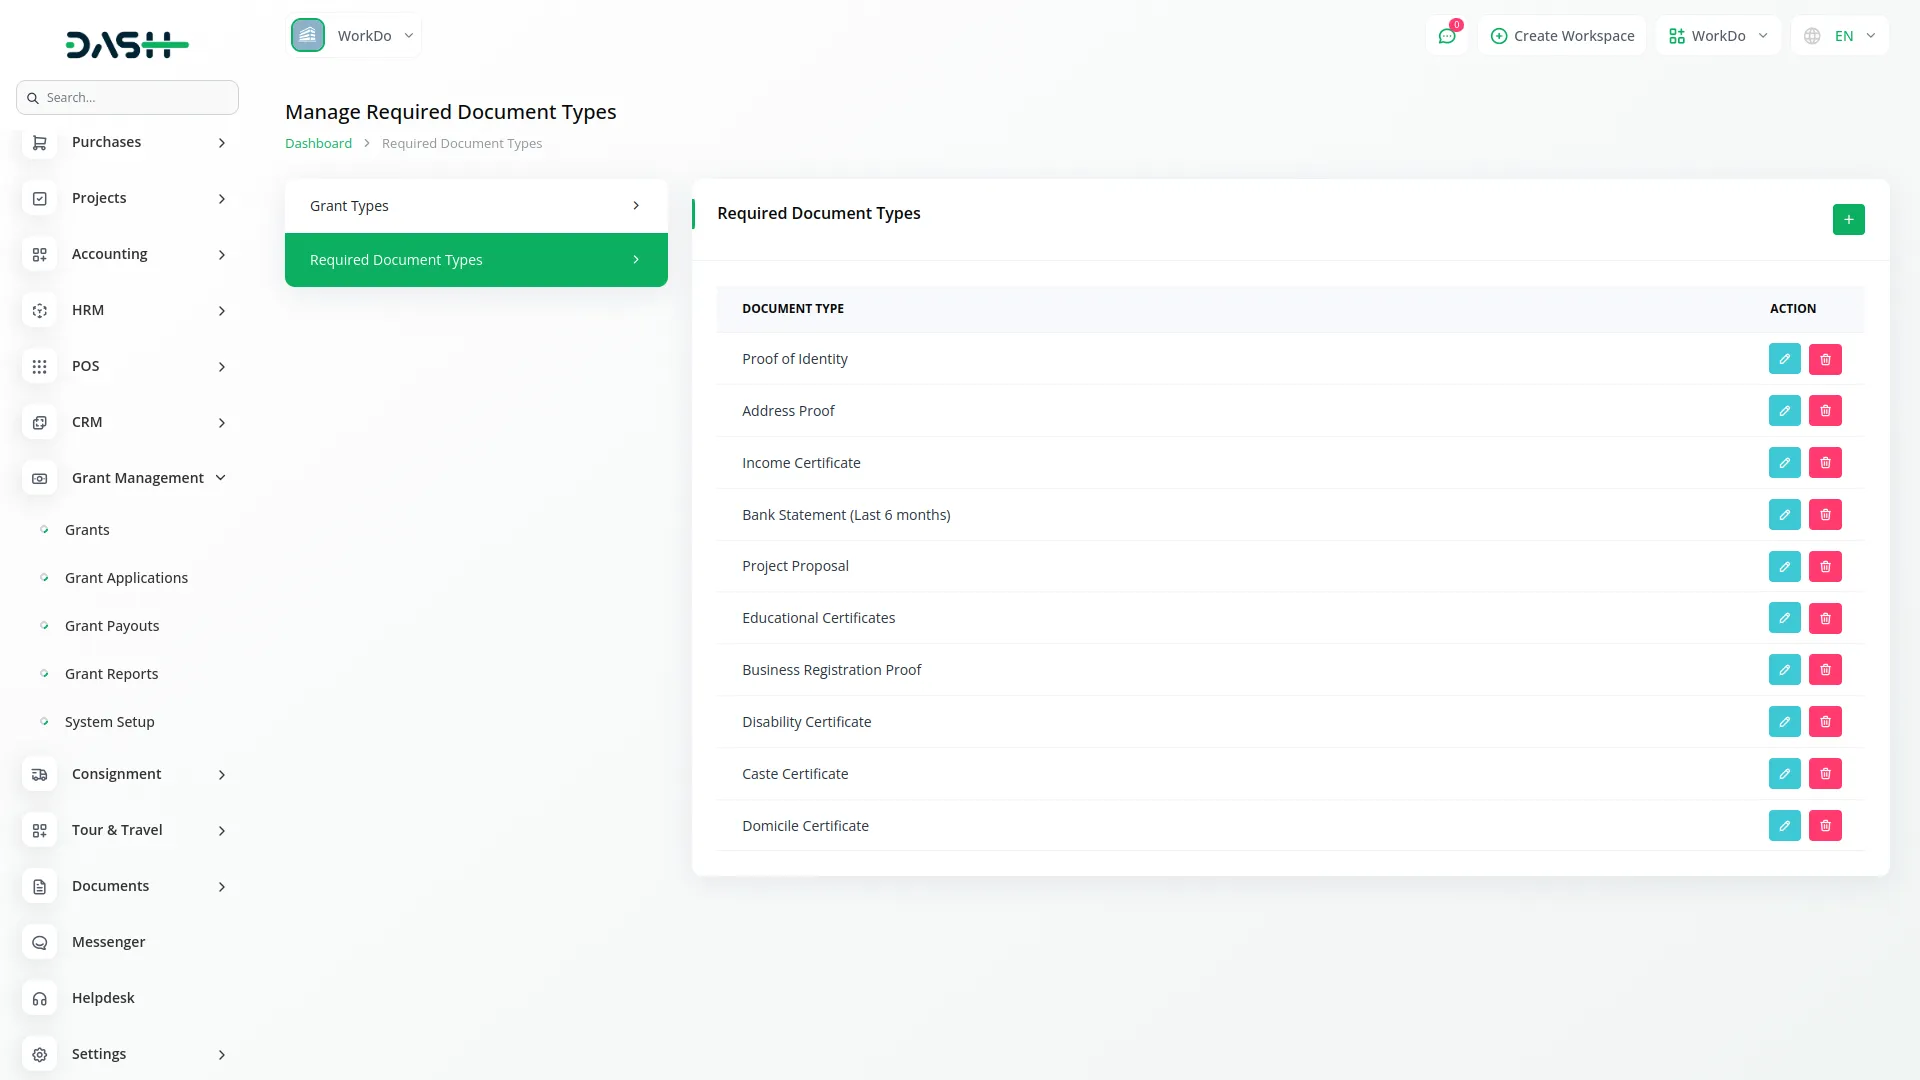
- To add a new Required Document Type, click the “Create” button on the Required Document Types page. Enter the Document Type name that will be required for grant applications.
- The list page shows all document types in a table with the Document Type column. Available actions include Edit to modify existing document types and Delete to remove them from the system.
Manage Grants
- To create a new Grant, click the “Create” button at the top of the Manage Grants page. Fill in the Grant Name and select the Grant Type from the dropdown menu (this will come from the Grant Types created in System Setup). Enter the Application Deadline Date and specify the Total Budget for the grant.
- Next, select the Required Document Types from the available options (these will come from the Required Document Types in System Setup). Finally, set the Grant Status to either Open or Closed depending on whether applications are currently being accepted.
- The list page shows all grants with columns for Grant Name, Grant Type (this will come from Grant Types in System Setup), Application Deadline Date, Allocated Funds, and Grant Status (Open, Closed). You can use the Search function to find specific grants, Export data, or switch between List view and Grid view for different display options.
-
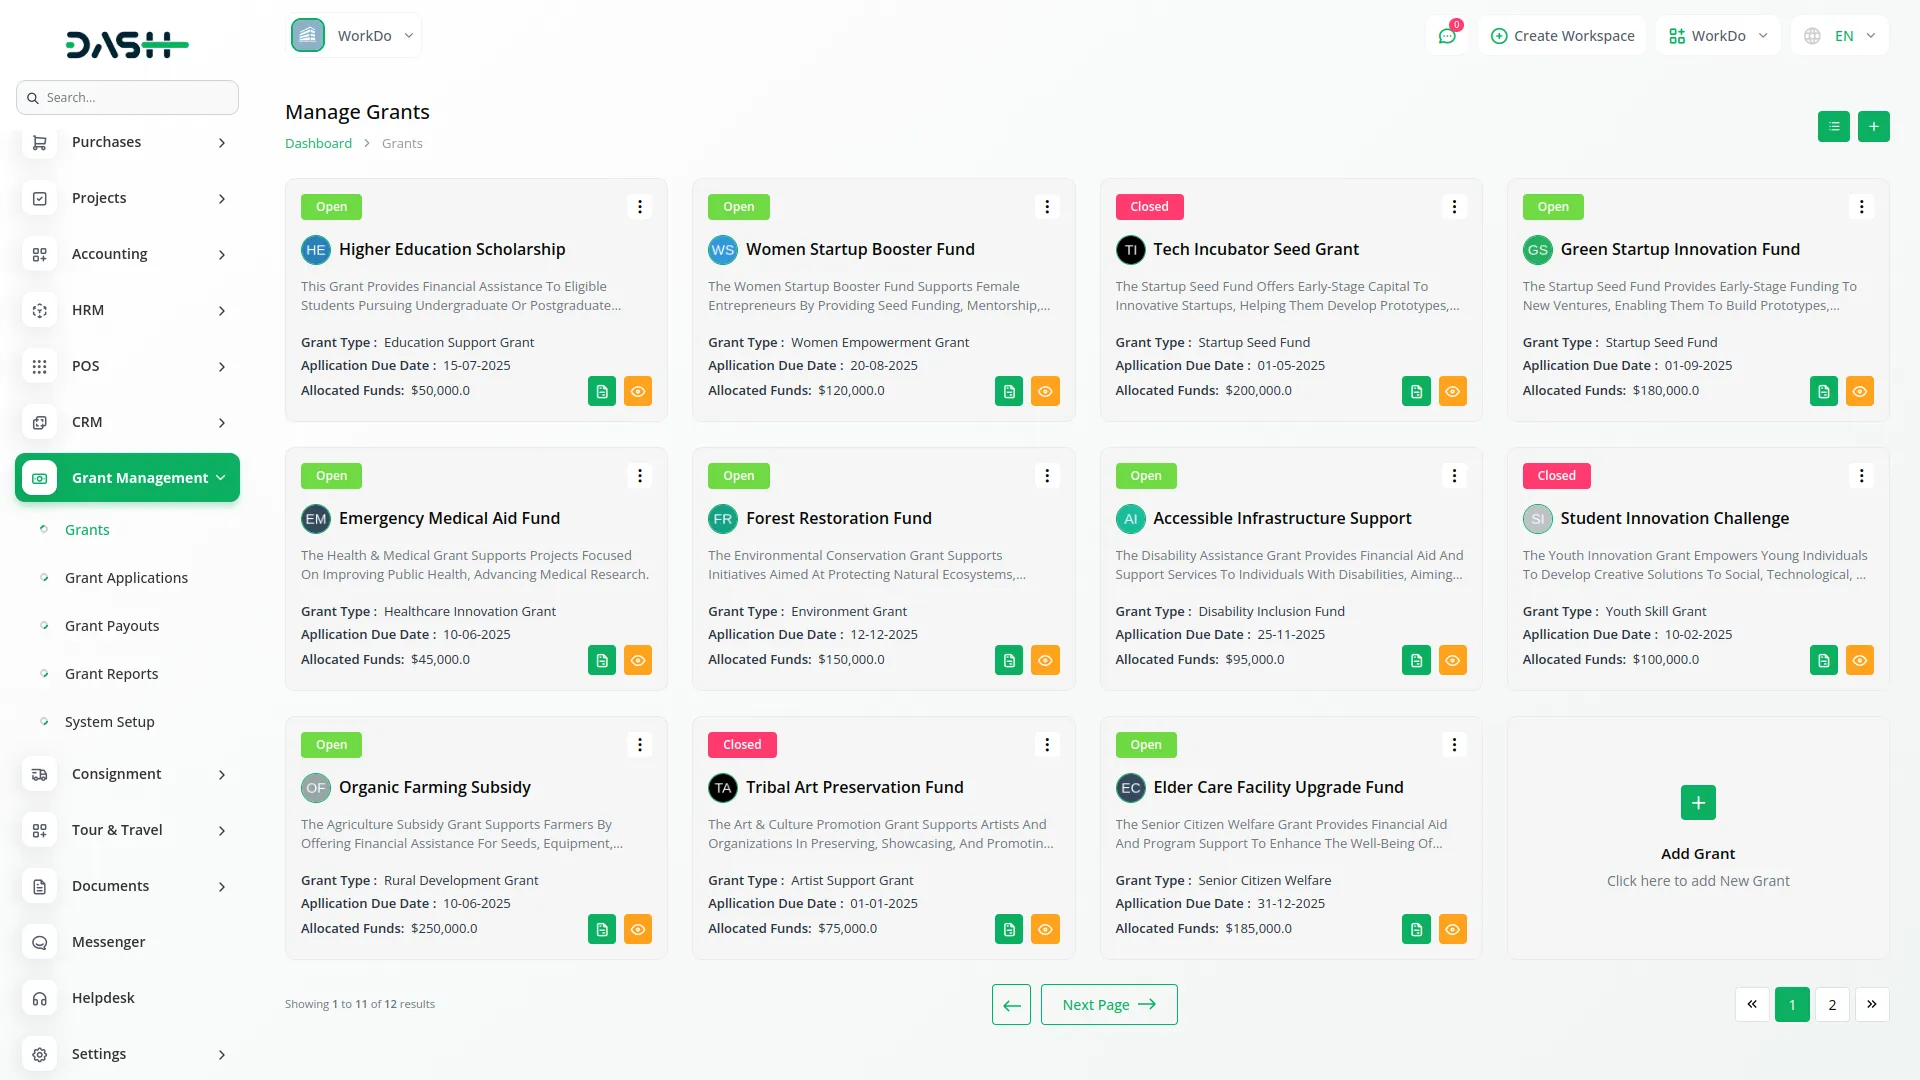
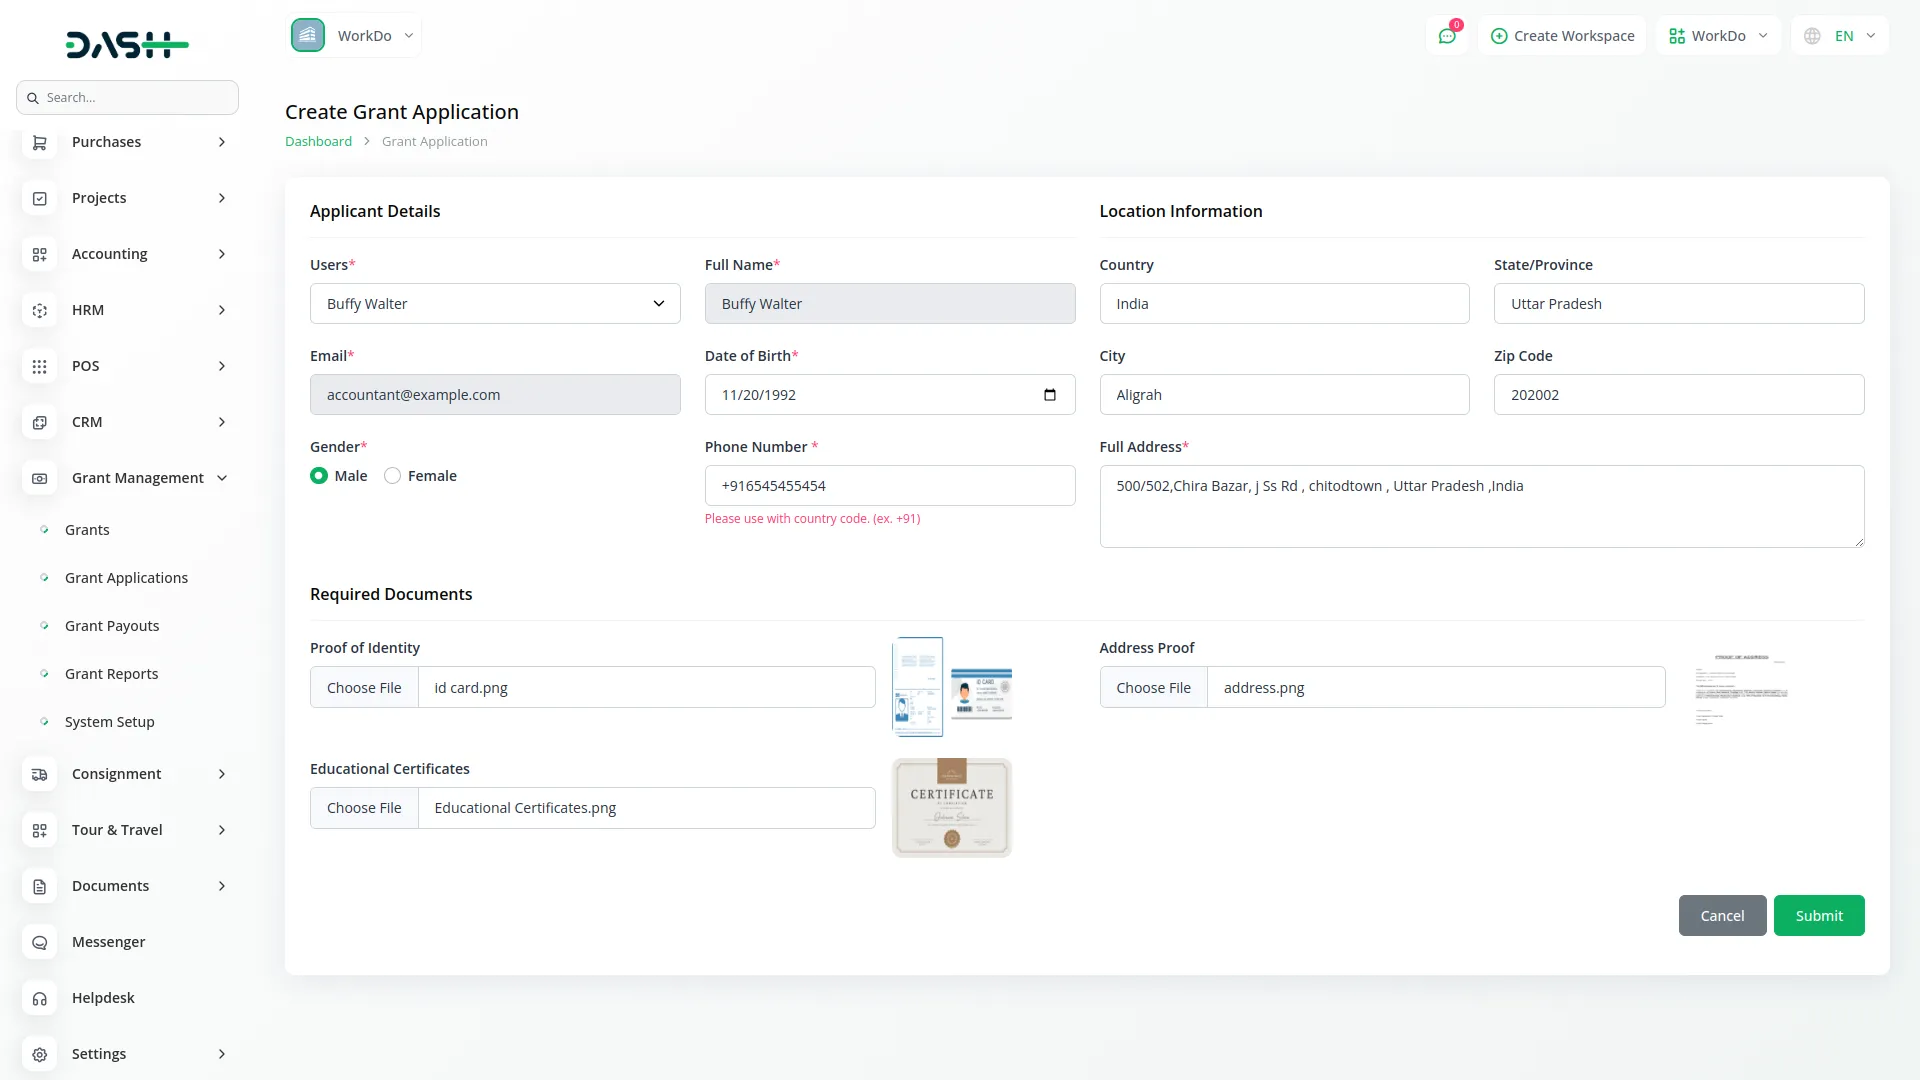
- Available actions include Apply For Grant which opens the Grant Application form where you need to enter details like Full Name, Email, Date of Birth, Gender, Phone Number, Country, State/Province, City, Zip Code, Full Address, and Required Documents (to be selected at the time of grant creation). You can also View to show Grant Details, Edit to modify grant information, and Delete to remove grants.
-
- The Grid View page provides the same functionality as the List View but presents information in a card layout format.
- Users have limited access and can only view grants in both list and grid views, see grant details, and apply for available grants using the Grant Application Form.
Manage Grant Applications
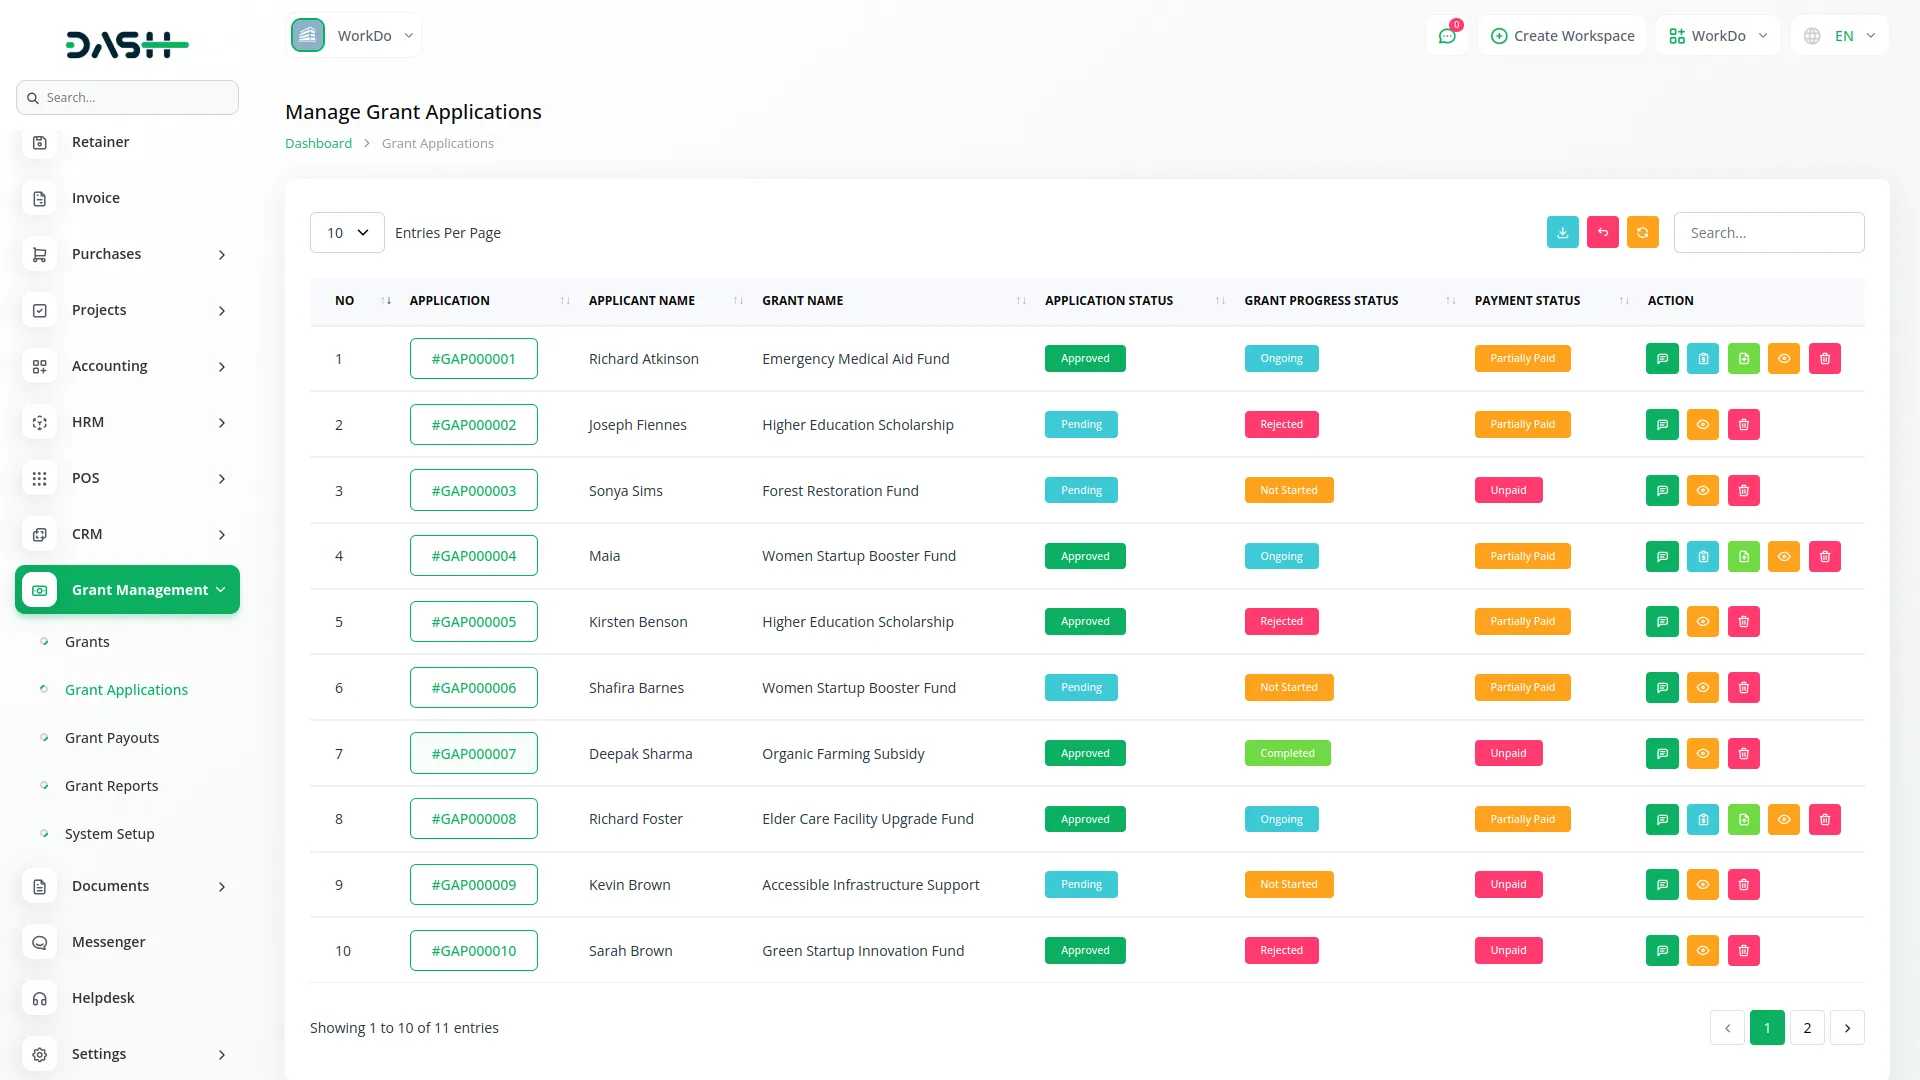
- The Grant Applications page displays all submitted applications with columns for No, Application No, applicant name, applicant email, grant name, application status (pending, approved, rejected), and Grant progress status (not_started, ongoing, completed, rejected). Use the Search and Export buttons to find and download application data.
-
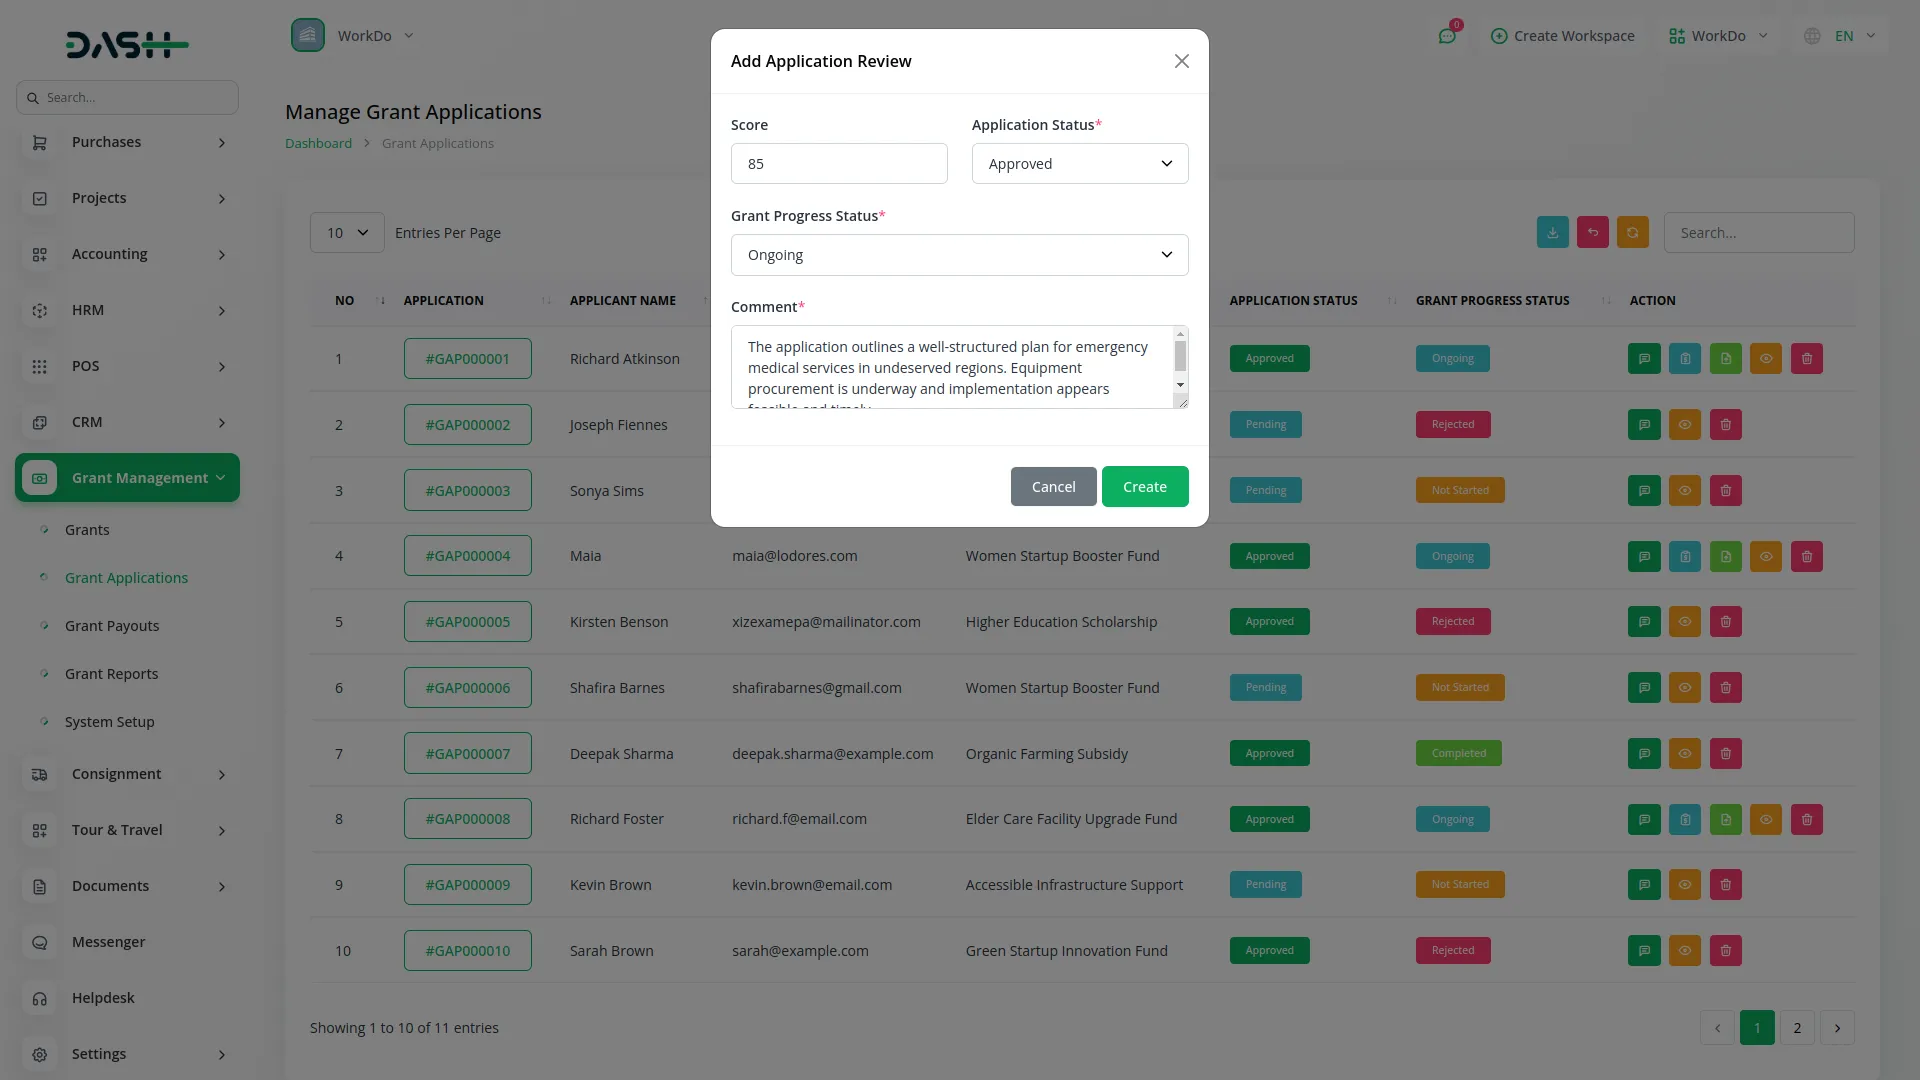
- To review an application, click “Add Application Review,” which opens a Review Form where you need to enter details like Score, application status from the dropdown (pending, approved, rejected), Grant progress status (not_started, ongoing, completed, rejected), and Comment about the application.
- Once you update an Application Status to “Approved” and set the Grant Progress Status to “Ongoing” through the Application Review, additional action buttons become available for that specific application.
-
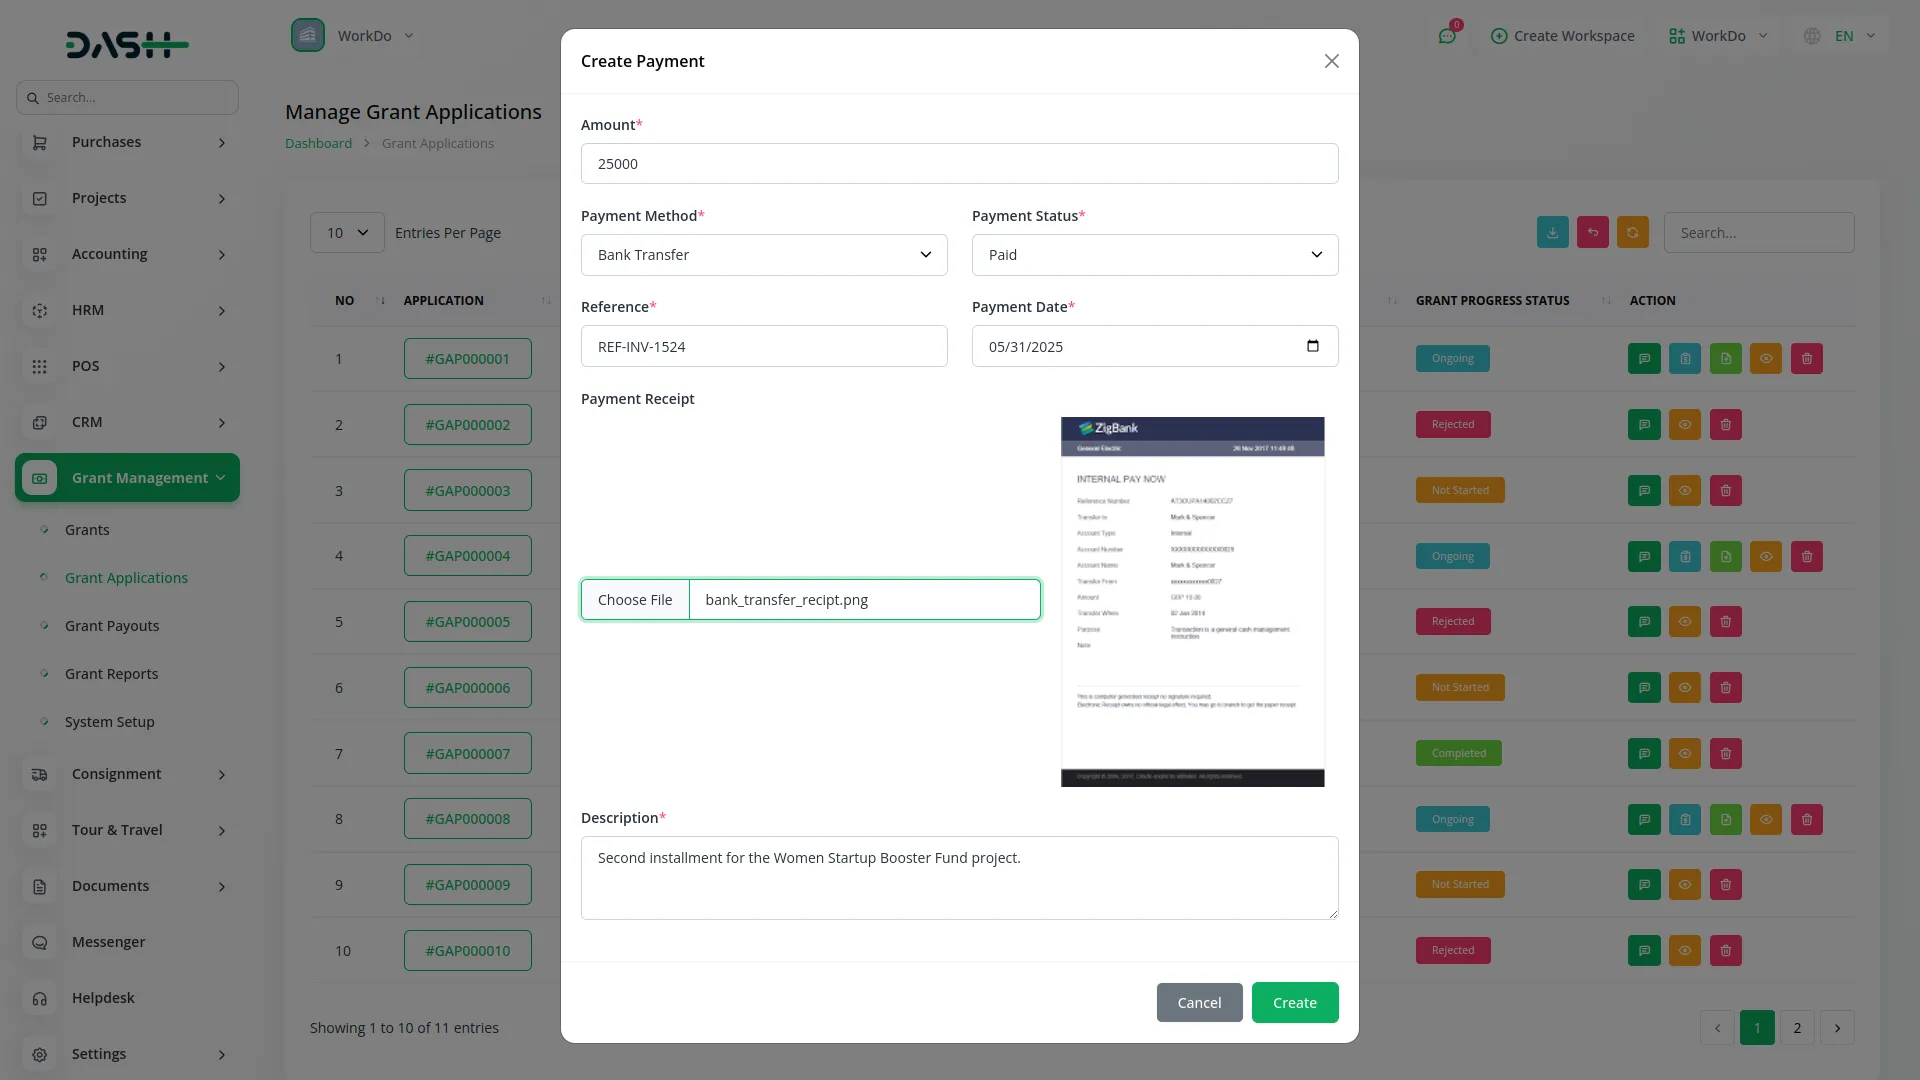
- Click “Add Grant Payment” to open the payment form, where you need to enter details like Amount, Payment Method (Cash, Bank transfer, cheque, other), Payment Status (pending, paid), Reference, Payment Date, Payment Receipt, and Description.
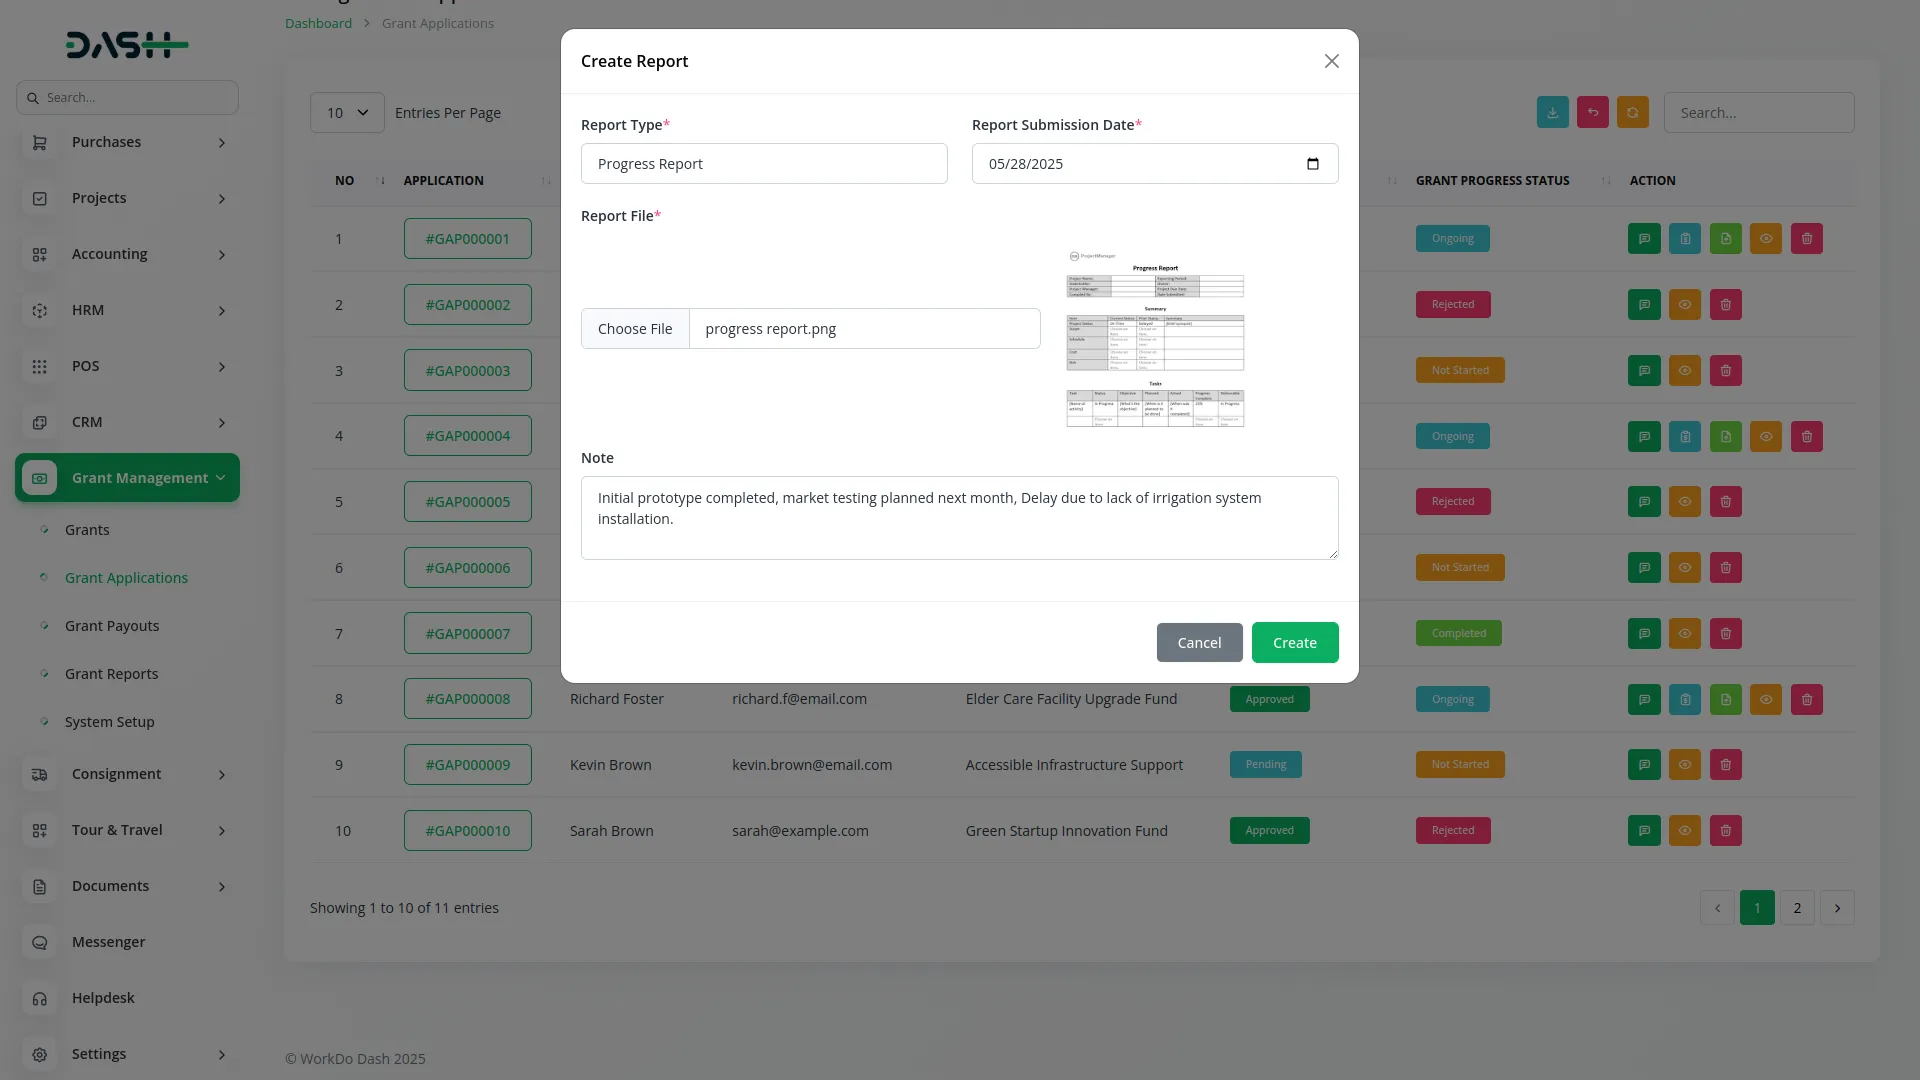
- Click “Add Grant Reports” to open the report form, where you need to enter details like Report Type, Report Submission Date, Report File, and Note.
-
- After a payment is recorded for the specific application and grant, the “Add Grant Reports” button becomes visible to the applicant(users) for submitting required reports.
- Other available actions include View to show Application Details and Delete to remove applications.
- Users can only view their own submitted grant applications and corresponding details, and can access the “Add Grant Report” button for their applications.
-
Manage Grant Payouts
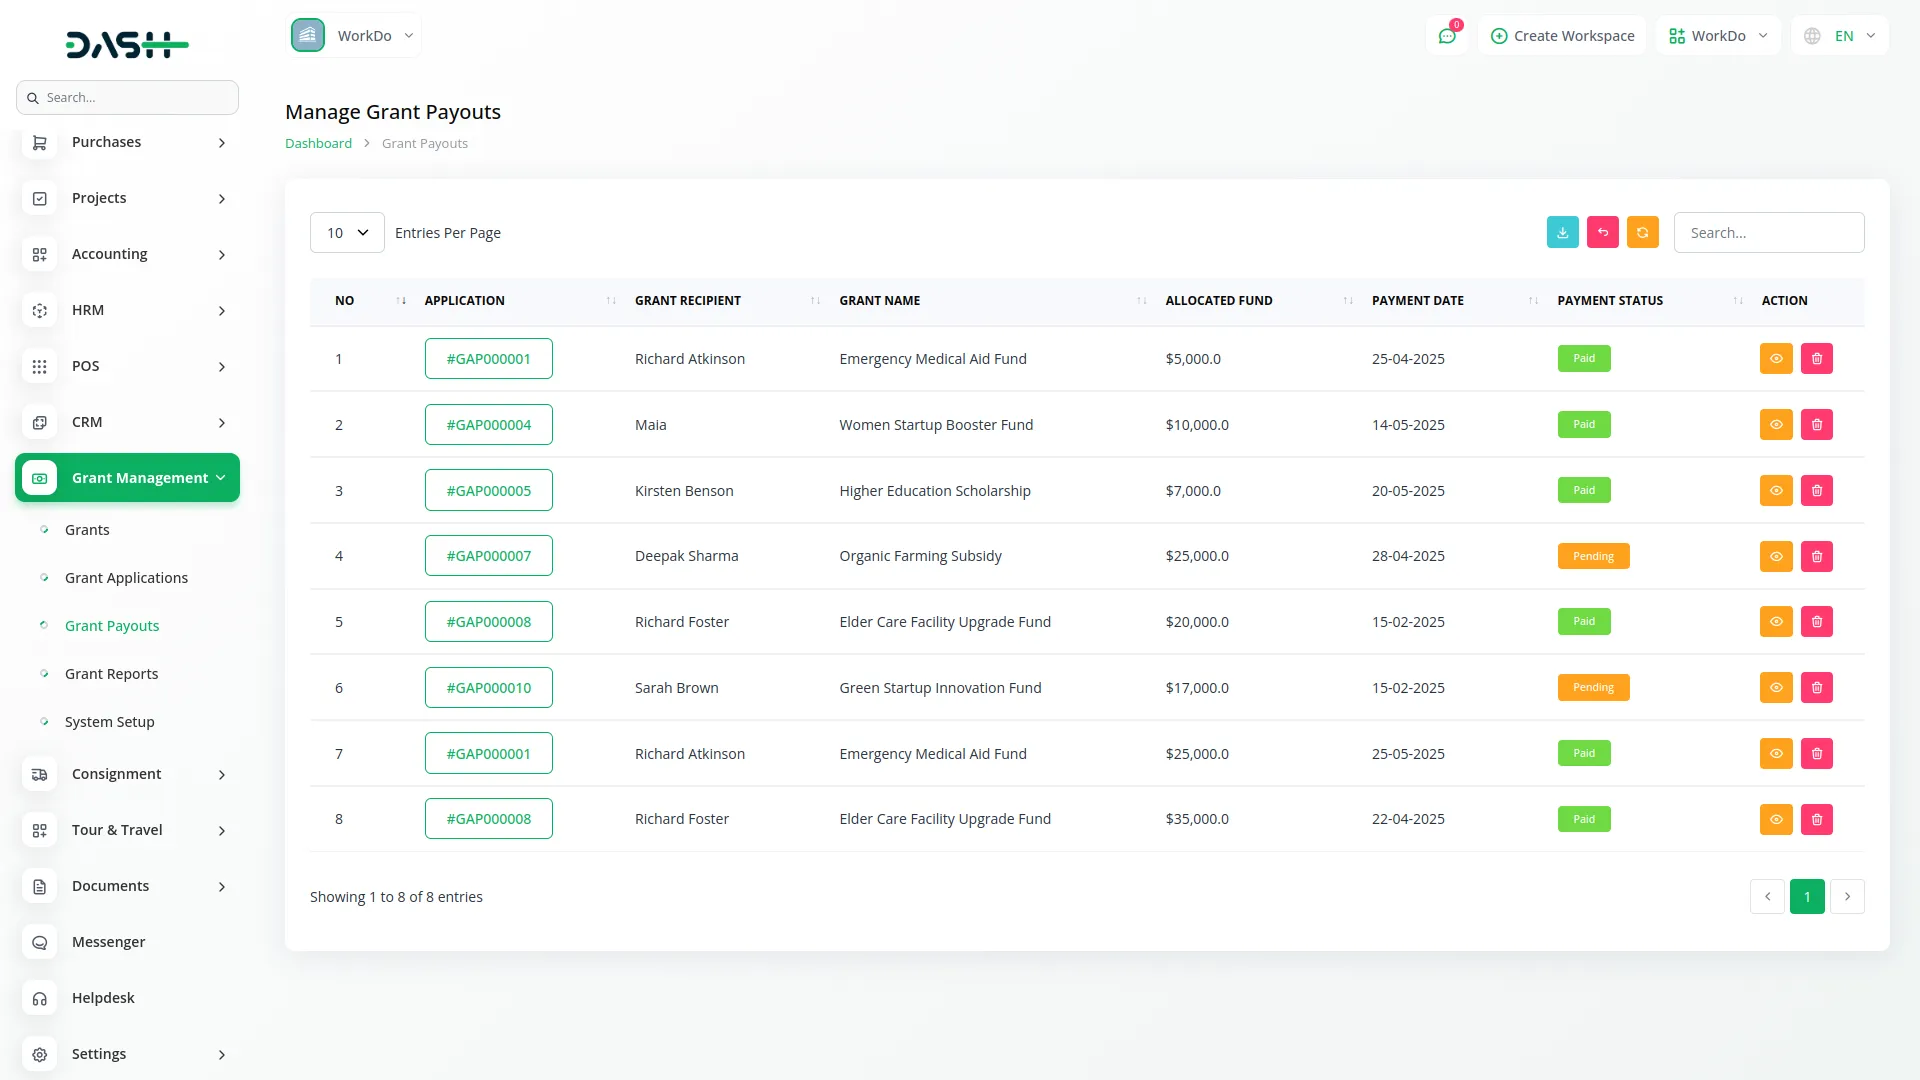
- The Grant Payouts page shows all payment information with columns for No, Application No, Grant Recipient, Grant Name, Allocated Fund, Payment Date, and payment status (pending, paid). Use the Search and Export buttons to manage the payout data.
- Available actions include View to display detailed information about the grant payout, including any associated payment attachments, and Delete to remove payout records.
- Users can only view their own grant payouts and the corresponding details.
-
Manage Grant Reports
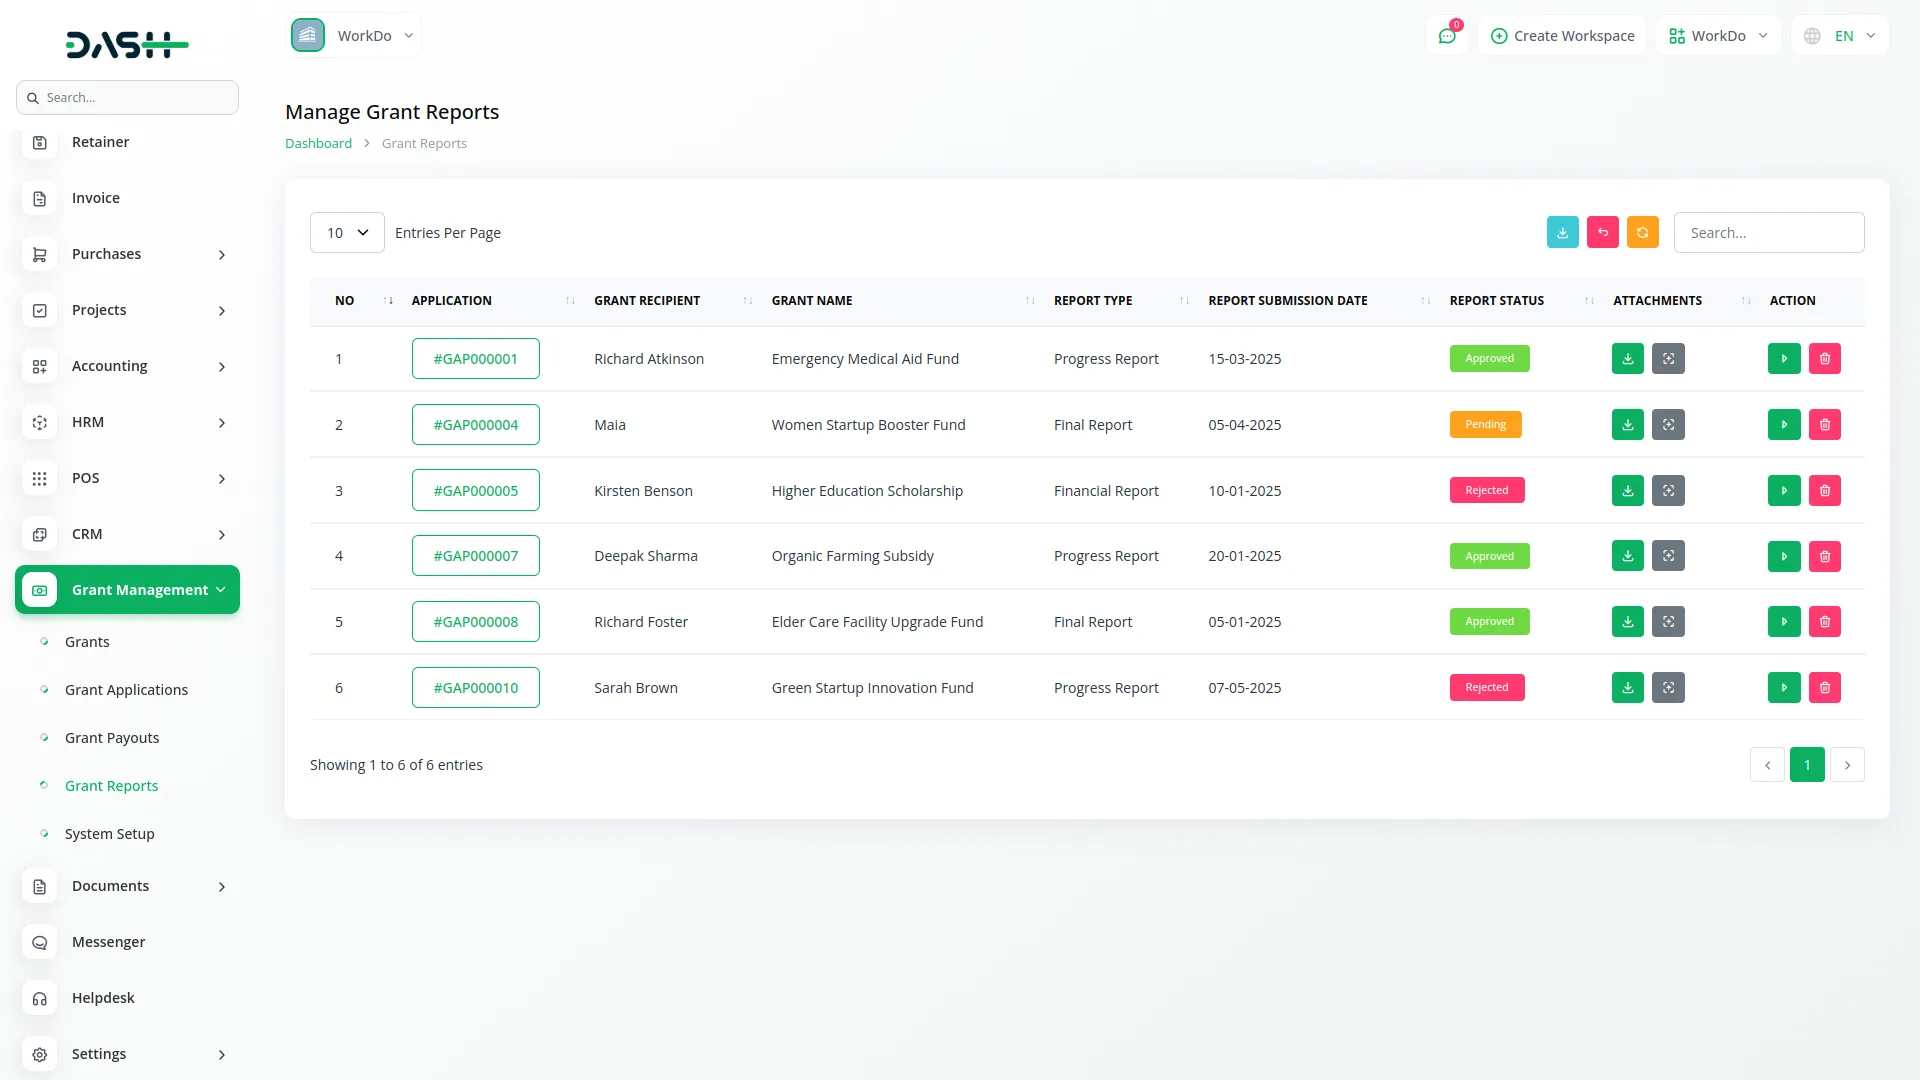
- The Grant Reports page displays all submitted reports with columns for No, Application No, Grant Recipient, Grant Name, Report Type, Report Submission Date, Report Status (pending, approved, rejected), and attachments with Download and Preview buttons.
- Use the Search and Export buttons to manage and download report data.
-
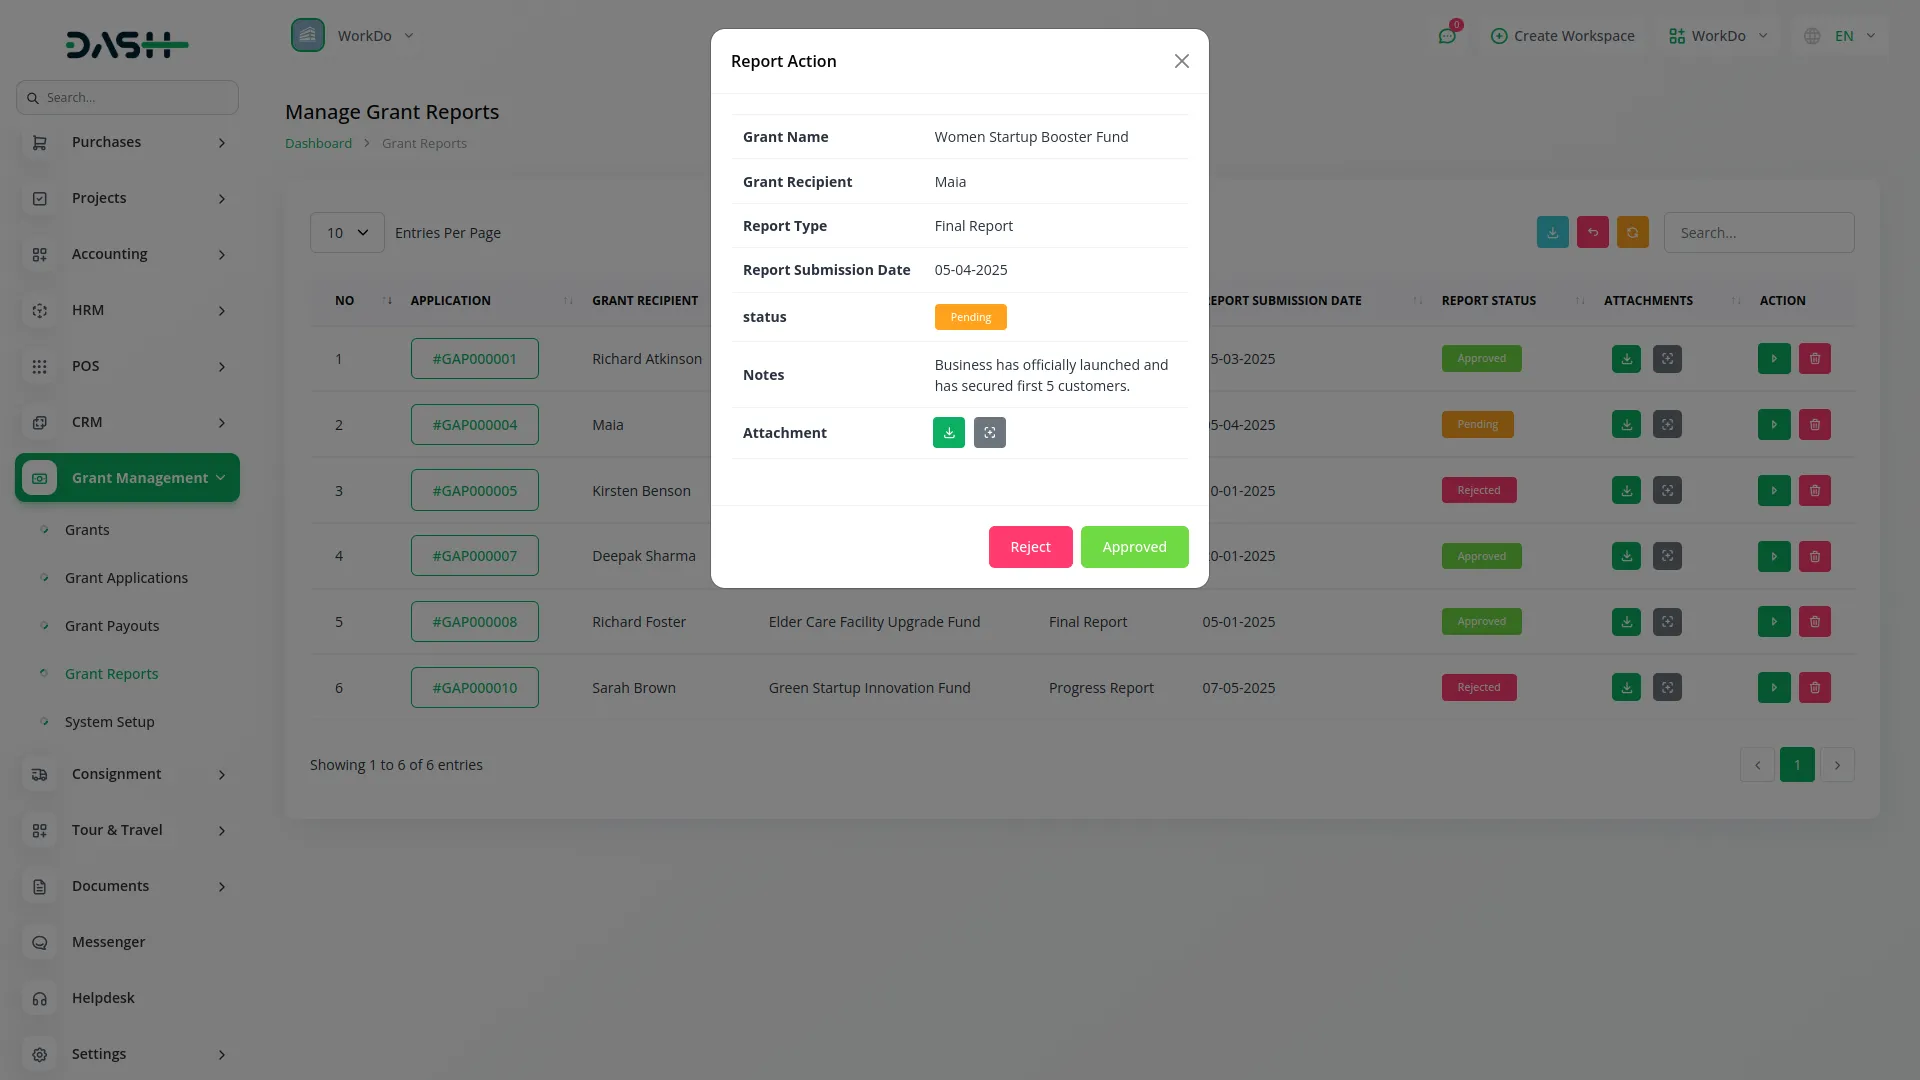
- By clicking the available “Action” button, you can view detailed information about the submitted report, including attachments and approval options. If the report is approved, the Grant Progress Status continues as “Ongoing”. If the report is rejected, the status changes to “Rejected”.
- Once payment has been made for the grant application and all required reports are submitted and approved, the Grant Progress Status can be updated to “Completed” from the Application Review form under Manage Grant Applications. You can also use the Delete option to remove report records if needed.
- Users can only view their own submitted grant application reports and the corresponding details.
-
Categories
Related articles
- Yoga Classes Integration in Dash SaaS
- Hair And Care Studio Integration in Dash SaaS
- Microsoft To Do Integration in Dash SaaS
- e-Invoice Integration in Dash SaaS
- Queue Management Integration in Dash SaaS
- How To Generate Credentials in GoTo
- Commission Integration in Dash SaaS
- Courier Management Integration in Dash SaaS
- Google Slides Detailed Documentation
- Biometric Attendance Integration in Dash SaaS
- Garden Management Integration in Dash SaaS
- Work Permit Detailed Documentation
Reach Out to Us
Have questions or need assistance? We're here to help! Reach out to our team for support, inquiries, or feedback. Your needs are important to us, and we’re ready to assist you!


Need more help?
If you’re still uncertain or need professional guidance, don’t hesitate to contact us. You can contact us via email or submit a ticket with a description of your issue. Our team of experts is always available to help you with any questions. Rest assured that we’ll respond to your inquiry promptly.
Love what you see?
Do you like the quality of our products, themes, and applications, or perhaps the design of our website caught your eye? You can have similarly outstanding designs for your website or apps. Contact us, and we’ll bring your ideas to life.
