eBook Integration in Dash SaaS
The eBook Add-On is a powerful digital book management platform designed to help you create, manage, and sell electronic books online.
Introduction
The eBook Add-On is a powerful digital book management platform designed to help you create, manage, and sell electronic books online. This system includes a complete website with customer features, administrative tools for managing your book catalogue, and a dashboard to track your business performance. The system handles everything from book publishing and customer management to order processing and website customisation.
How to Install the Add-On?
To Set Up the eBook Add-On, you can follow this link: Setup Add-On.
How to use the eBook Add-On?
eBook Dashboard
- After purchasing and installing this Add-On. And go to the sidebar and search for an eBook Add-On.
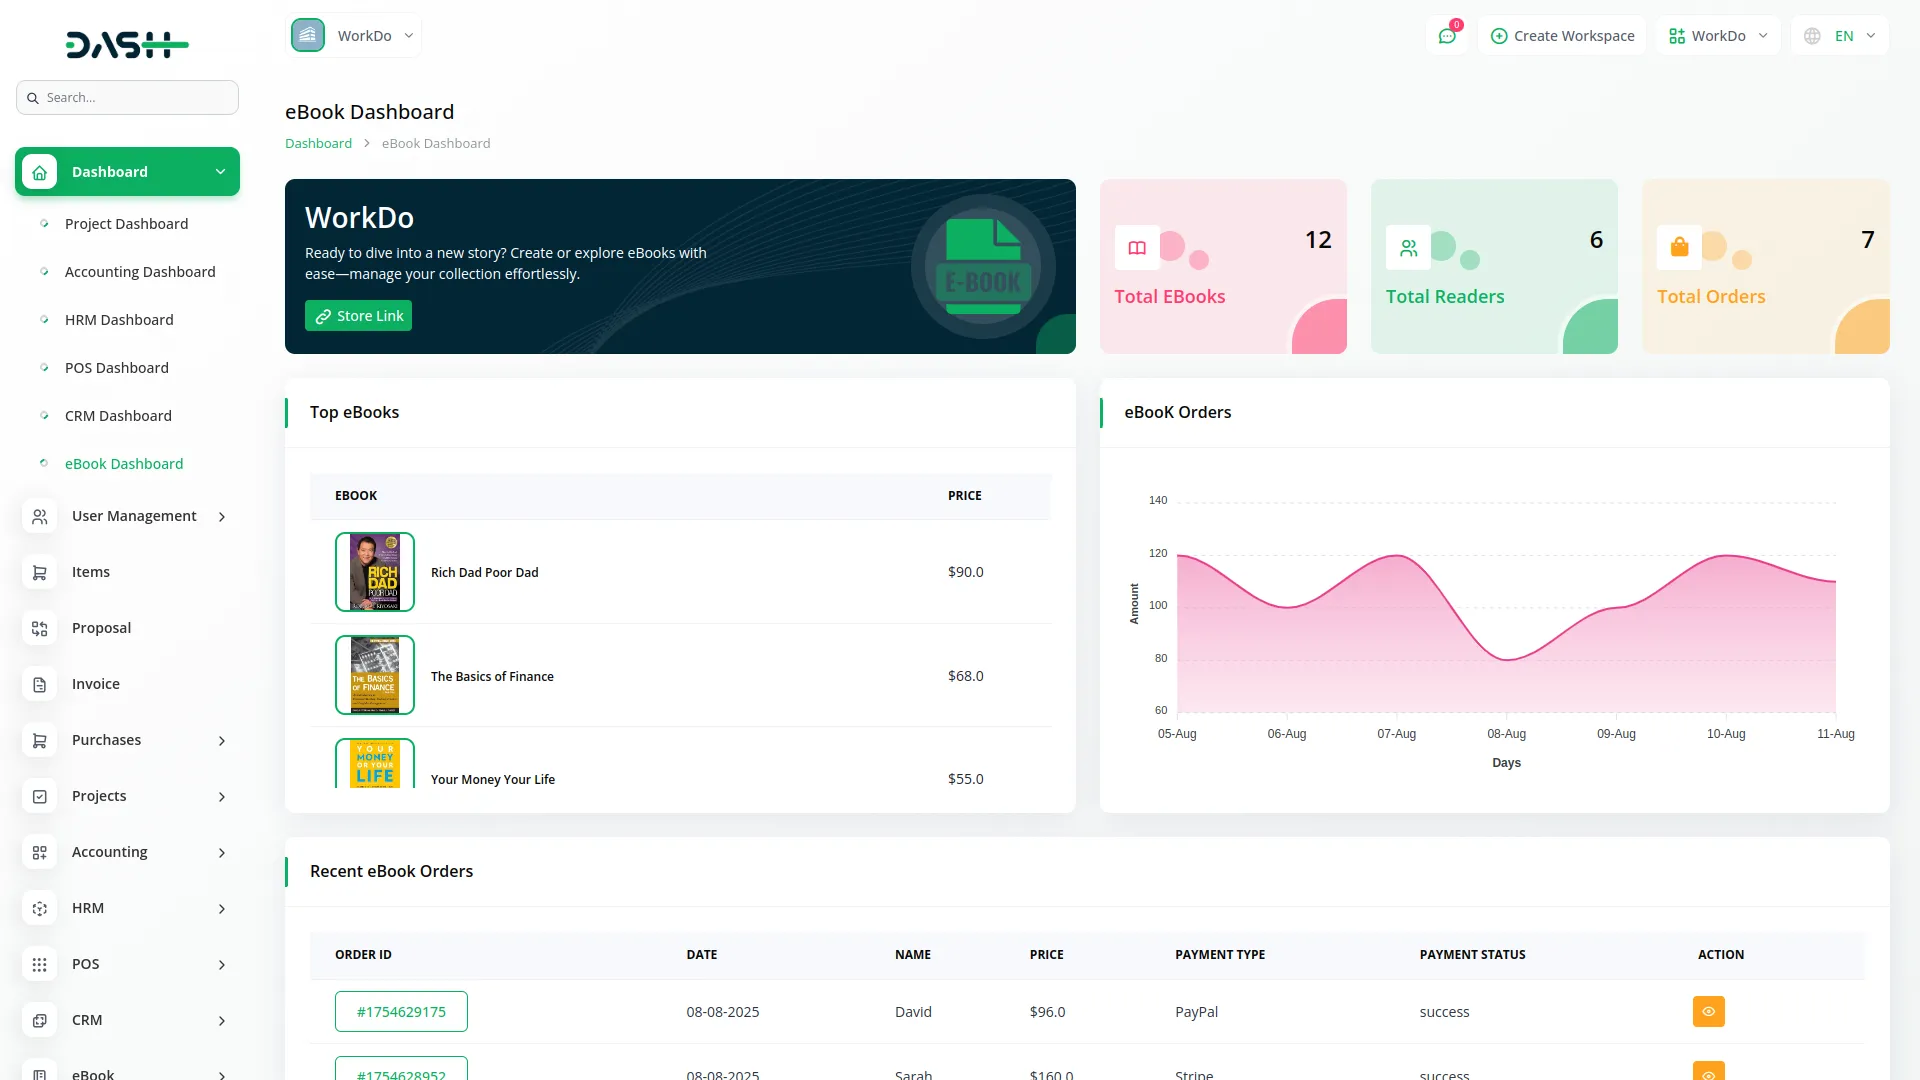
- When you access the dashboard, you’ll see several important cards displaying your “store link” for easy copying, total eBook count, total readers, and total orders. Below these summary cards, you’ll find the Top eBooks section showing your 5 highest-rated books with their images, names, and prices.
- The dashboard also includes an area chart displaying your eBook orders for the last week. At the bottom, you’ll see the Recent eBook Orders section showing the top 5 recent orders in a table format.
- The recent orders table displays Order ID, Date, Name, Price, Payment Type, Payment, Status, and Action columns. In the Action column, you can click “Show” to view detailed information about any specific order.
System Setup
- The System Setup section allows you to customize all aspects of your eBook website’s appearance and content.
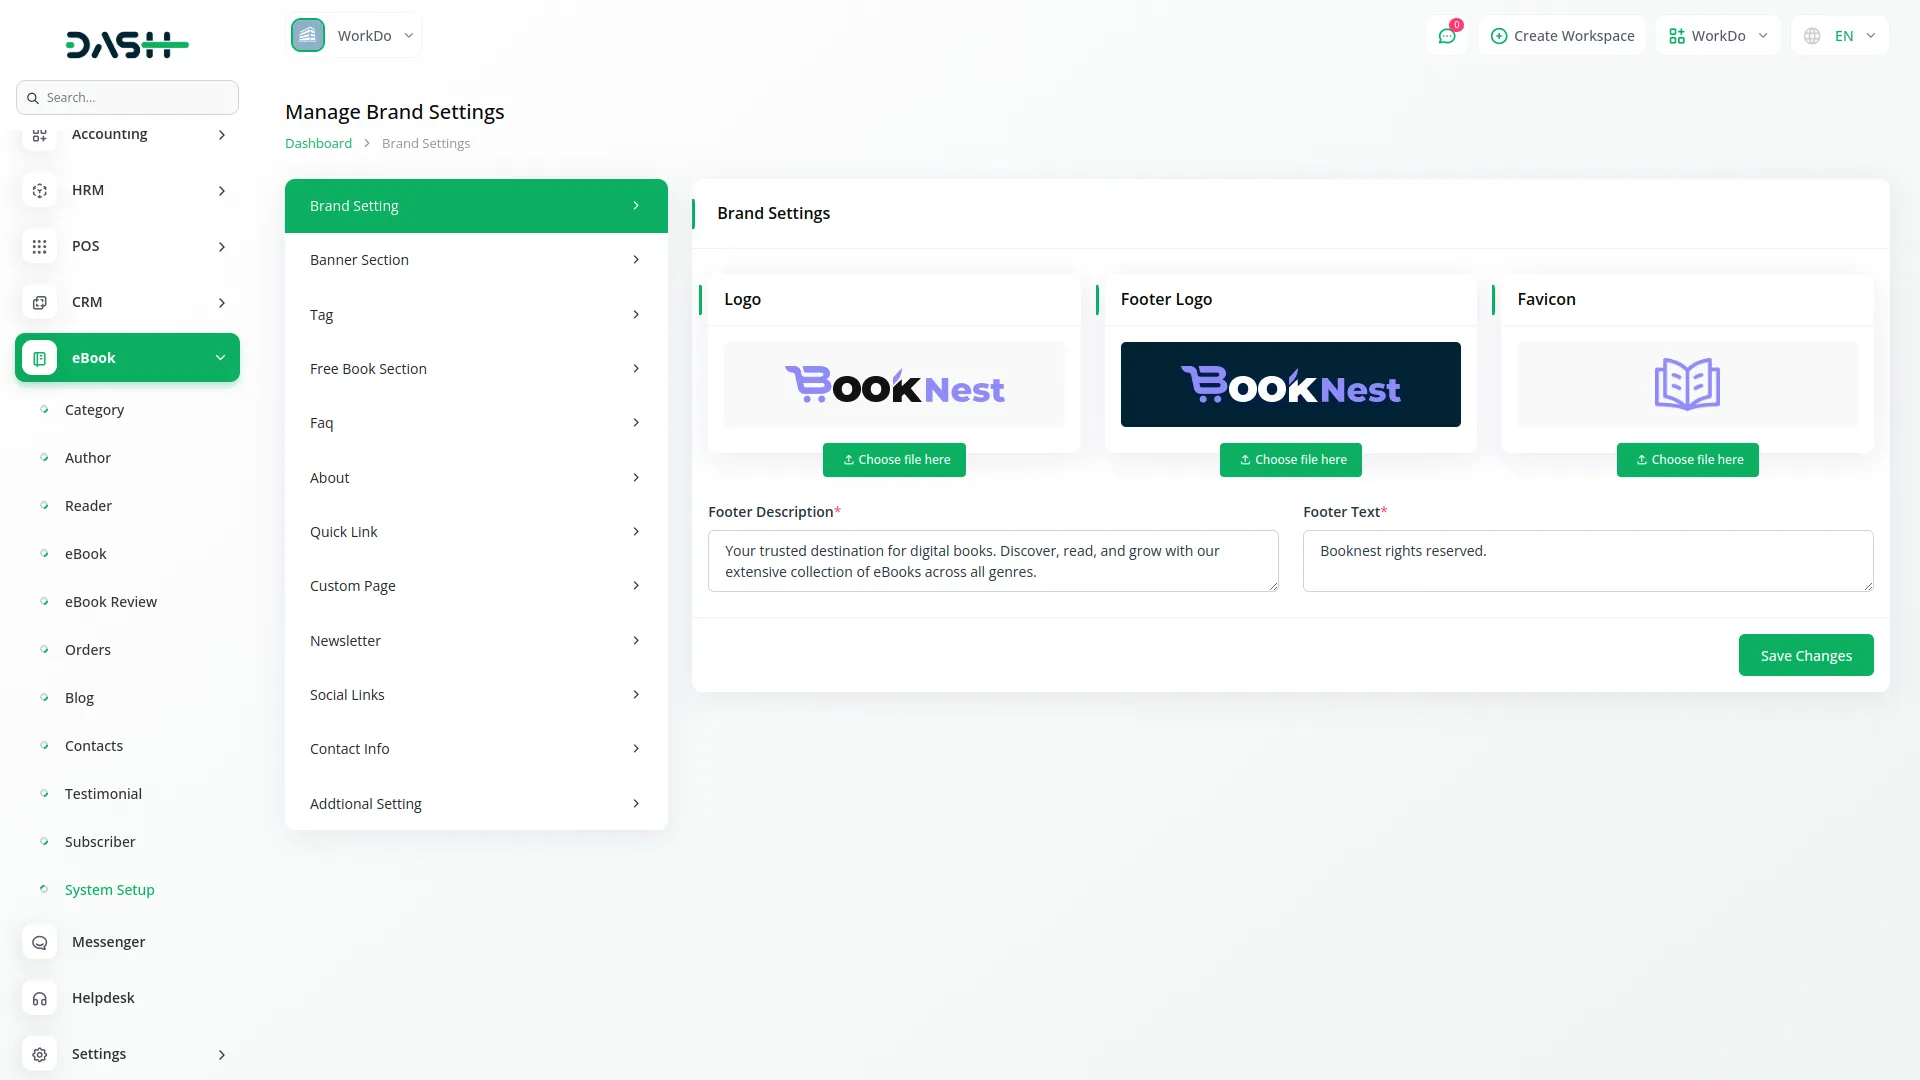
- Brand Setting : Upload your header and footer logos and website favicon, enter footer description, and add footer copyright text that will appear at the bottom of your website.
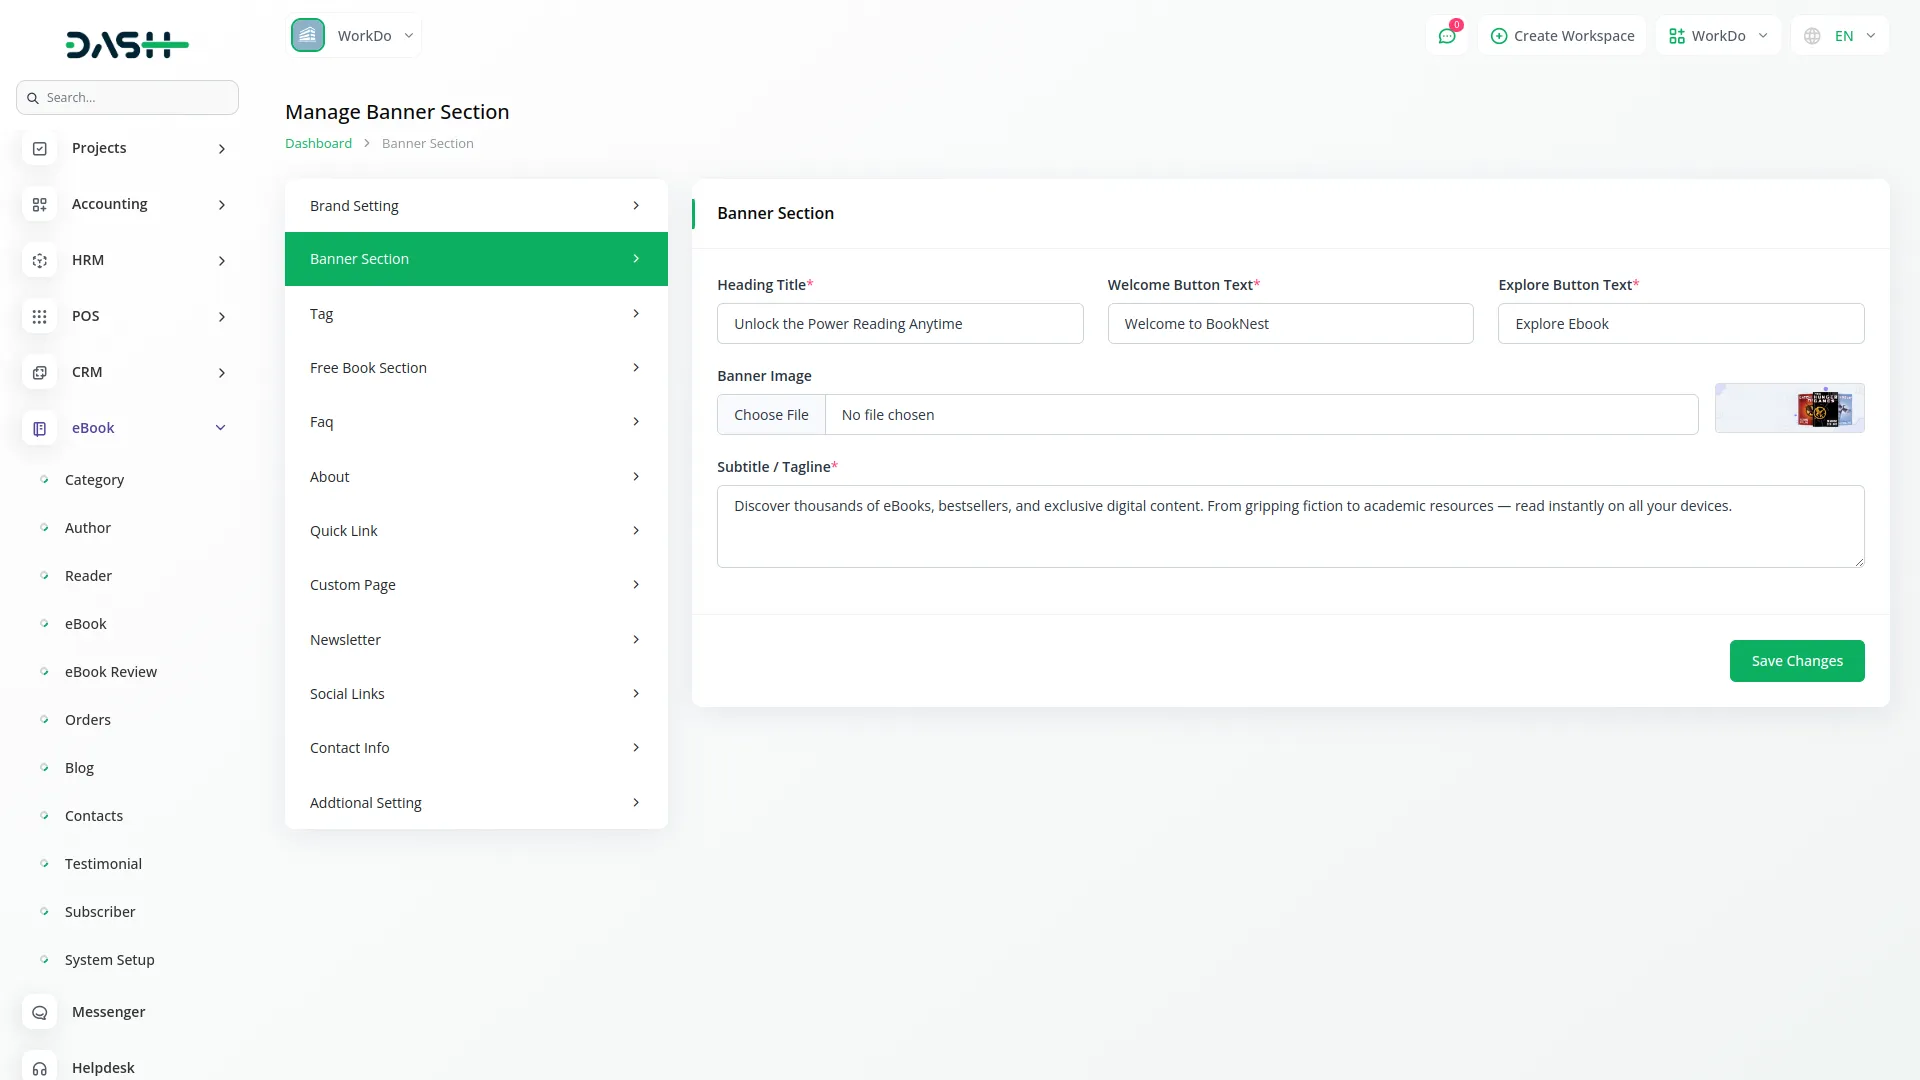
- Banner Section : Customise your homepage banner by entering the heading title, welcome button text, and explore button text, uploading a banner image, and adding a subtitle or tagline.
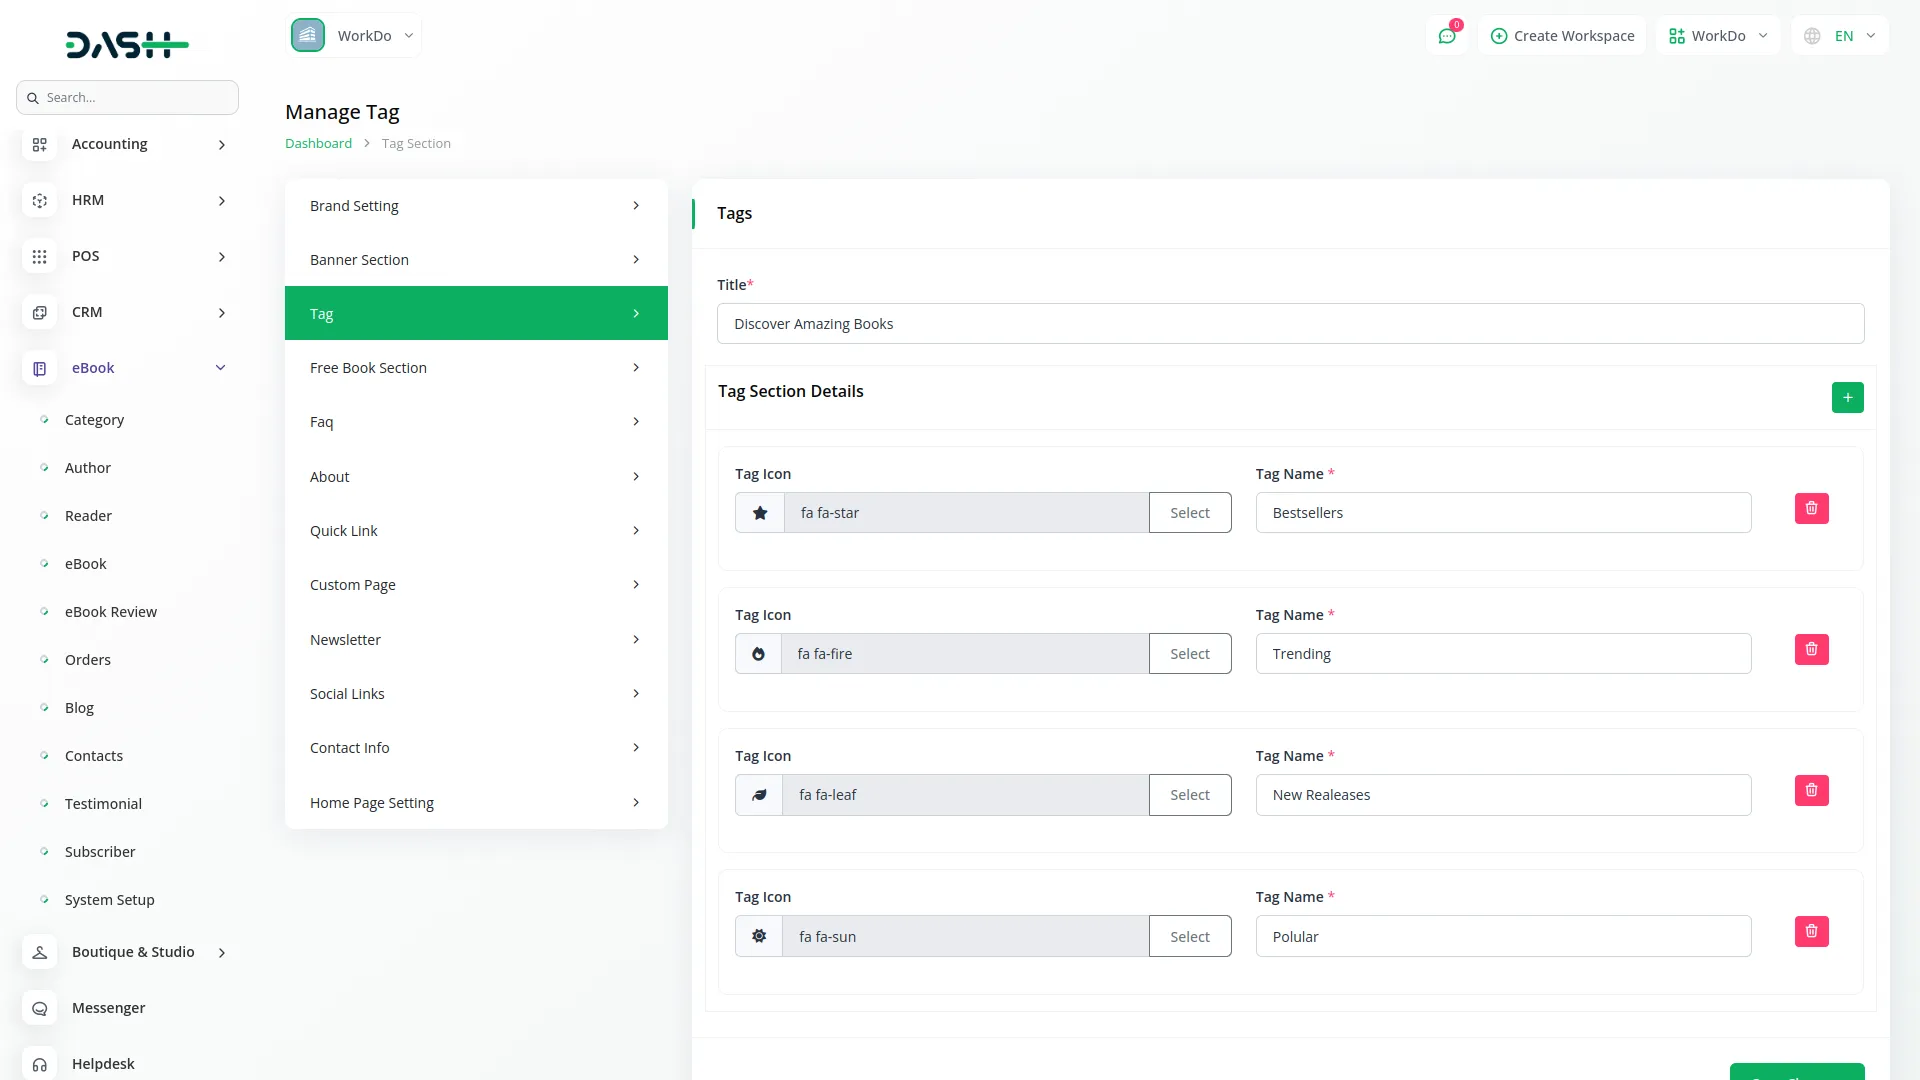
- Tags : Set up the tags section by entering a title and adding multiple tag items using the repeater feature. For each tag, choose an icon and enter the tag name.
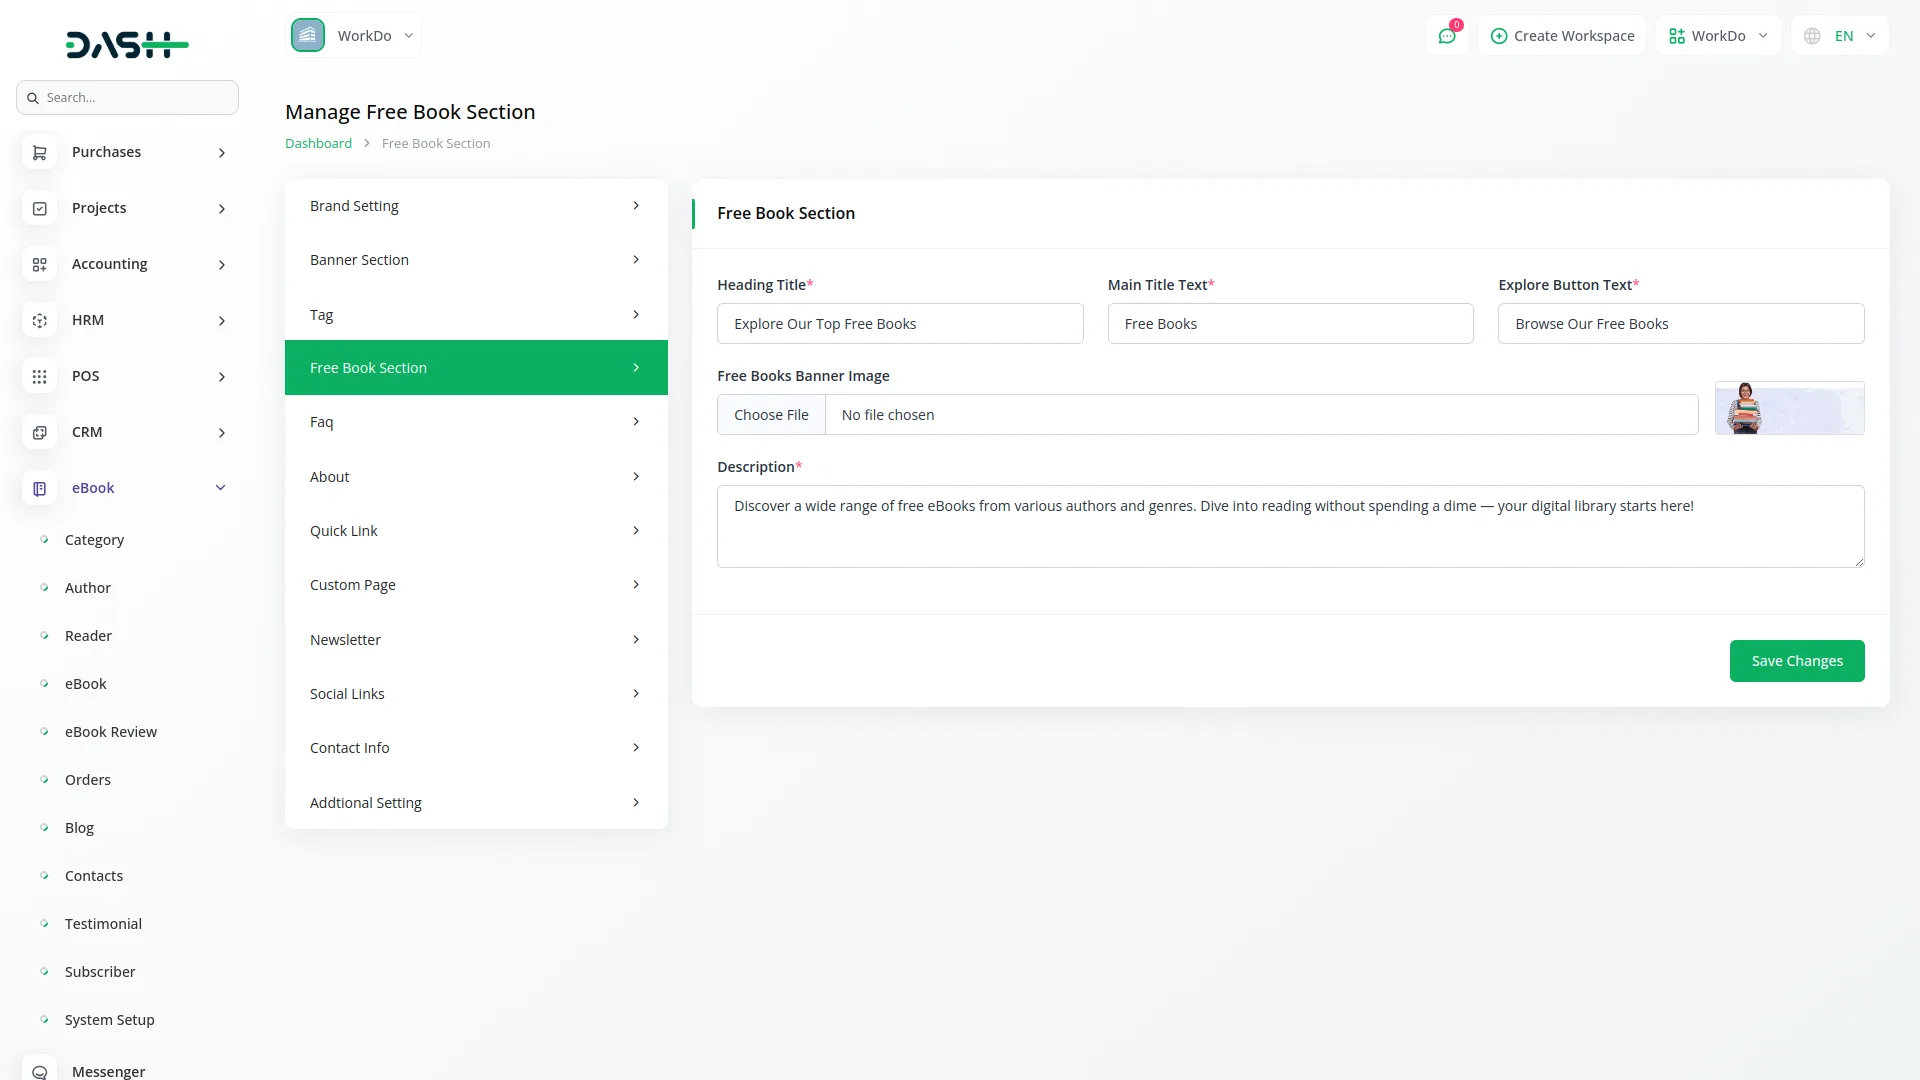
- Free Book Section : Configure this section by entering a heading title, main title text, explore button text, uploading a free books banner image, and adding a description.
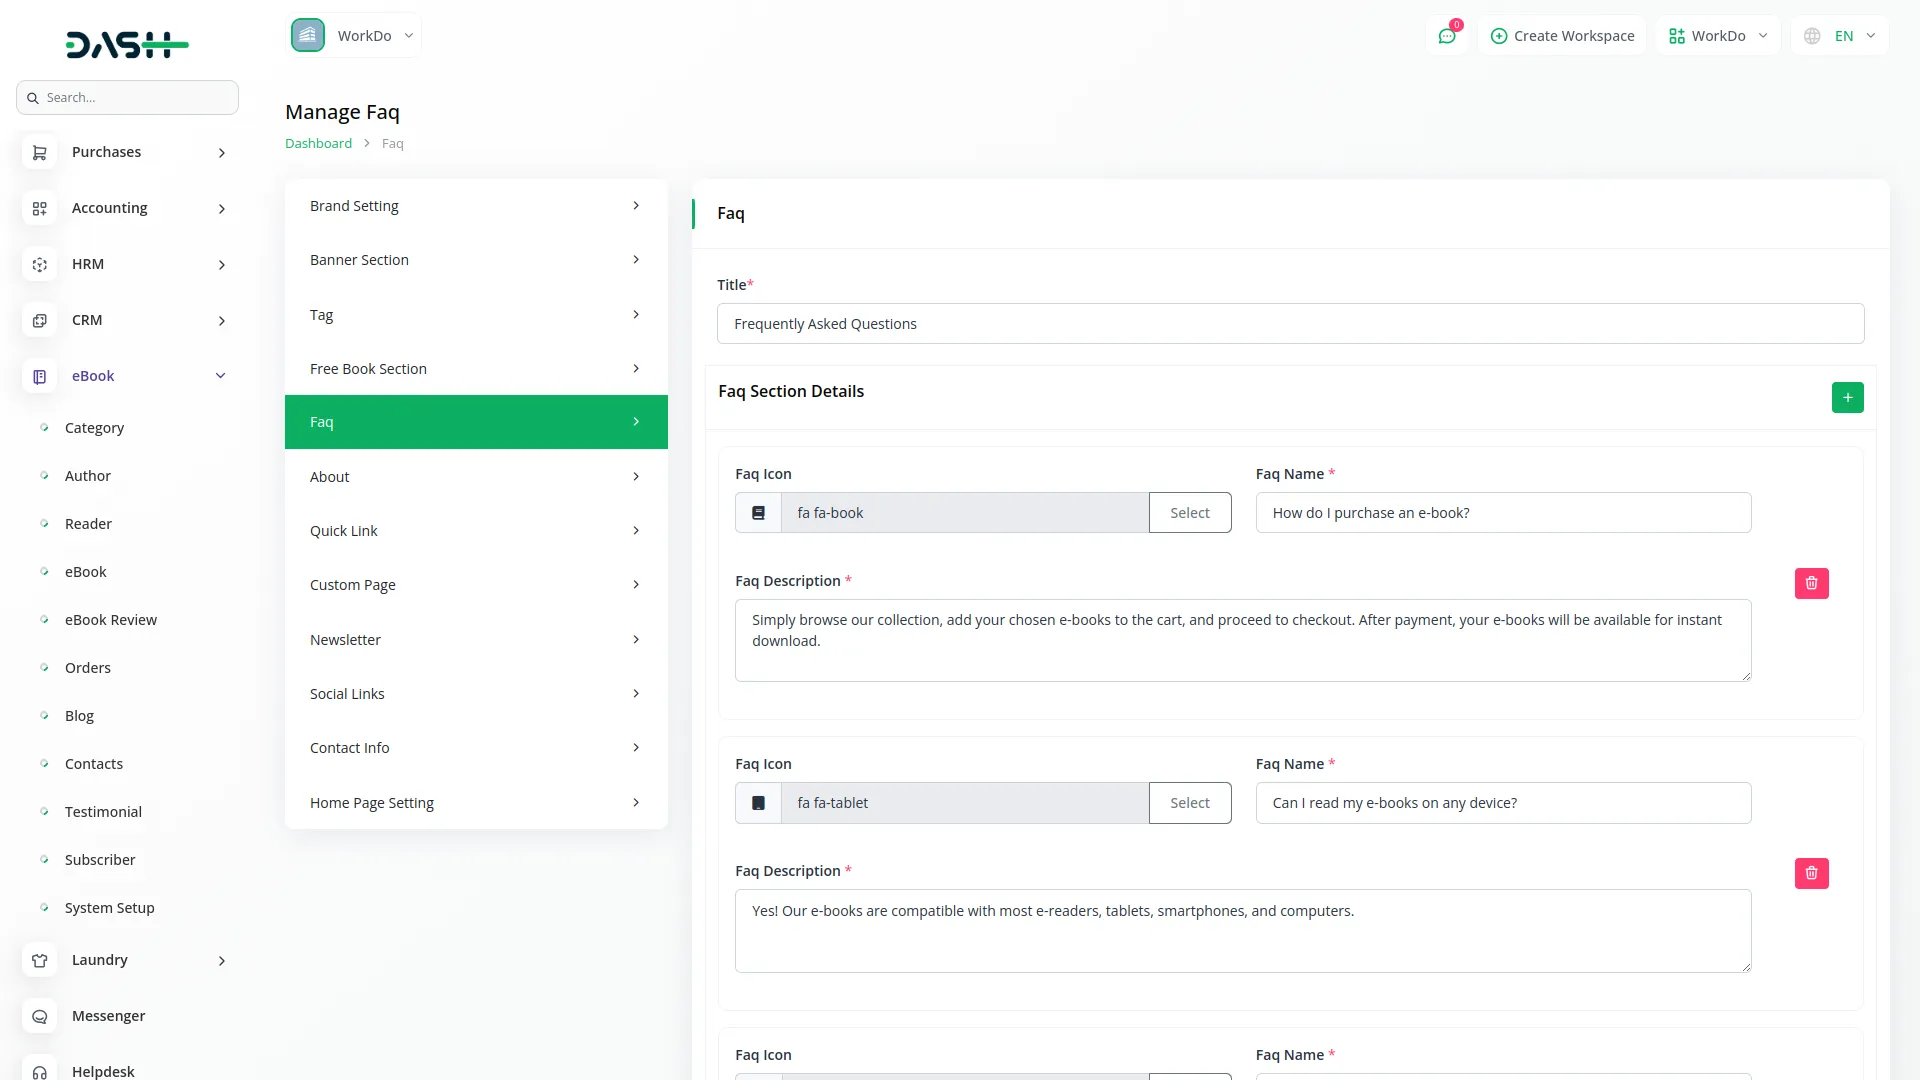
- FAQ : Add a title and create multiple FAQ items using the repeater. For each FAQ, choose an icon, enter the FAQ name, and provide the FAQ description.
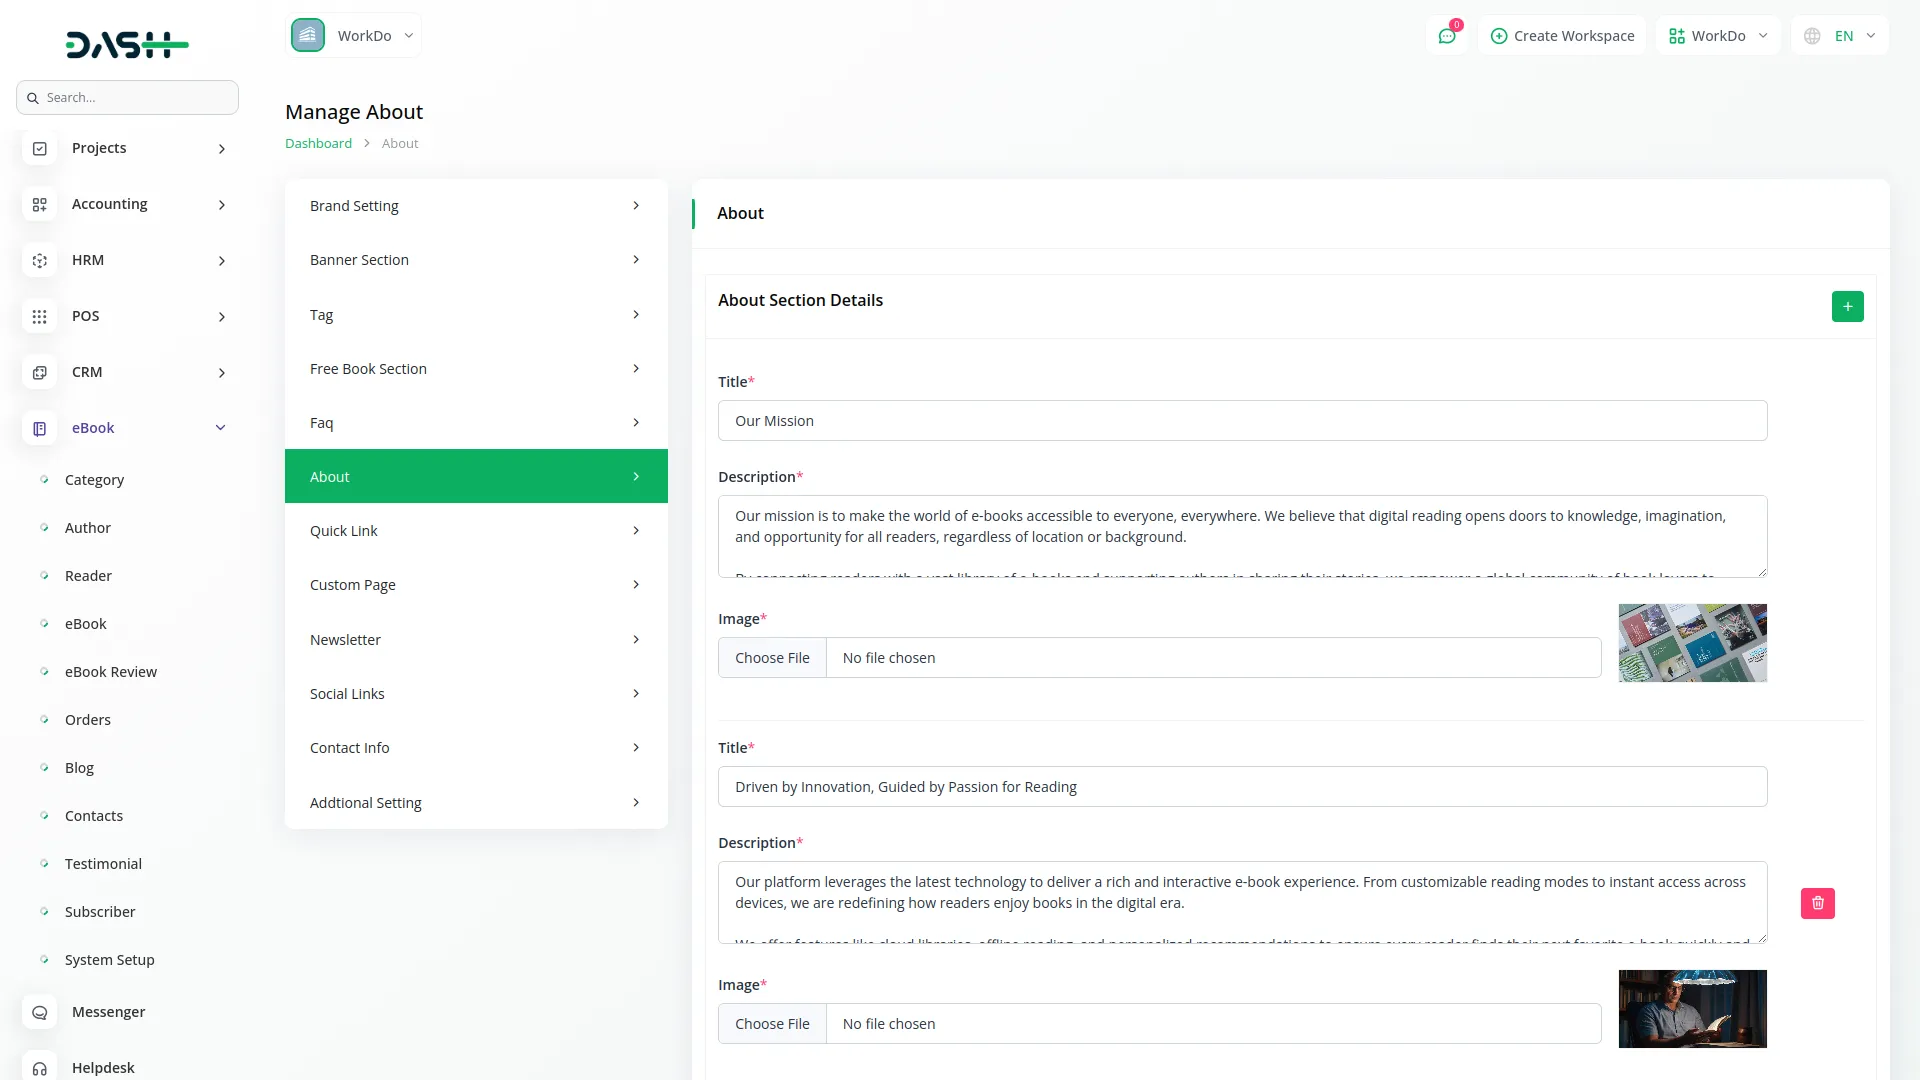
- About : Use the repeater to add multiple items for your about section. Each item requires a title, description, and image.
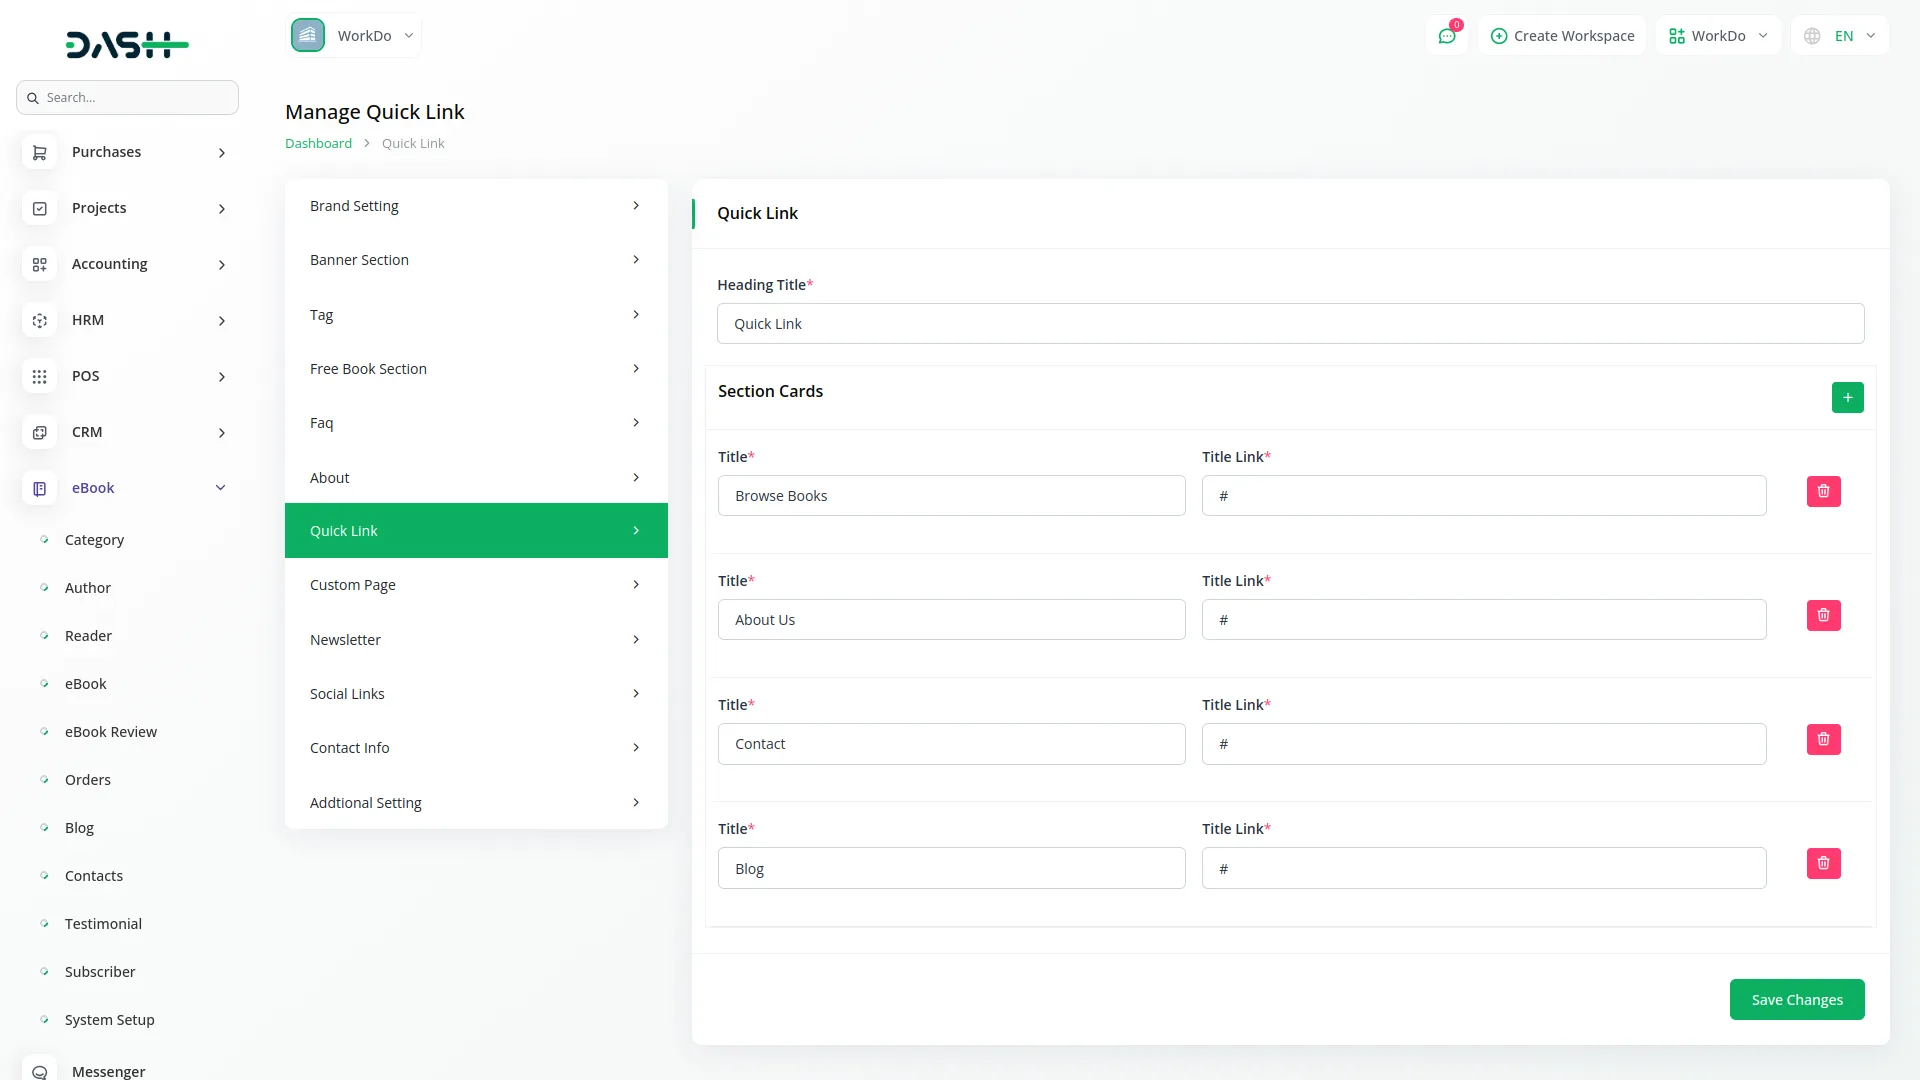
- Quick Link : Enter a heading title and use the repeater to add multiple quick links. Each link needs a title and title link URL
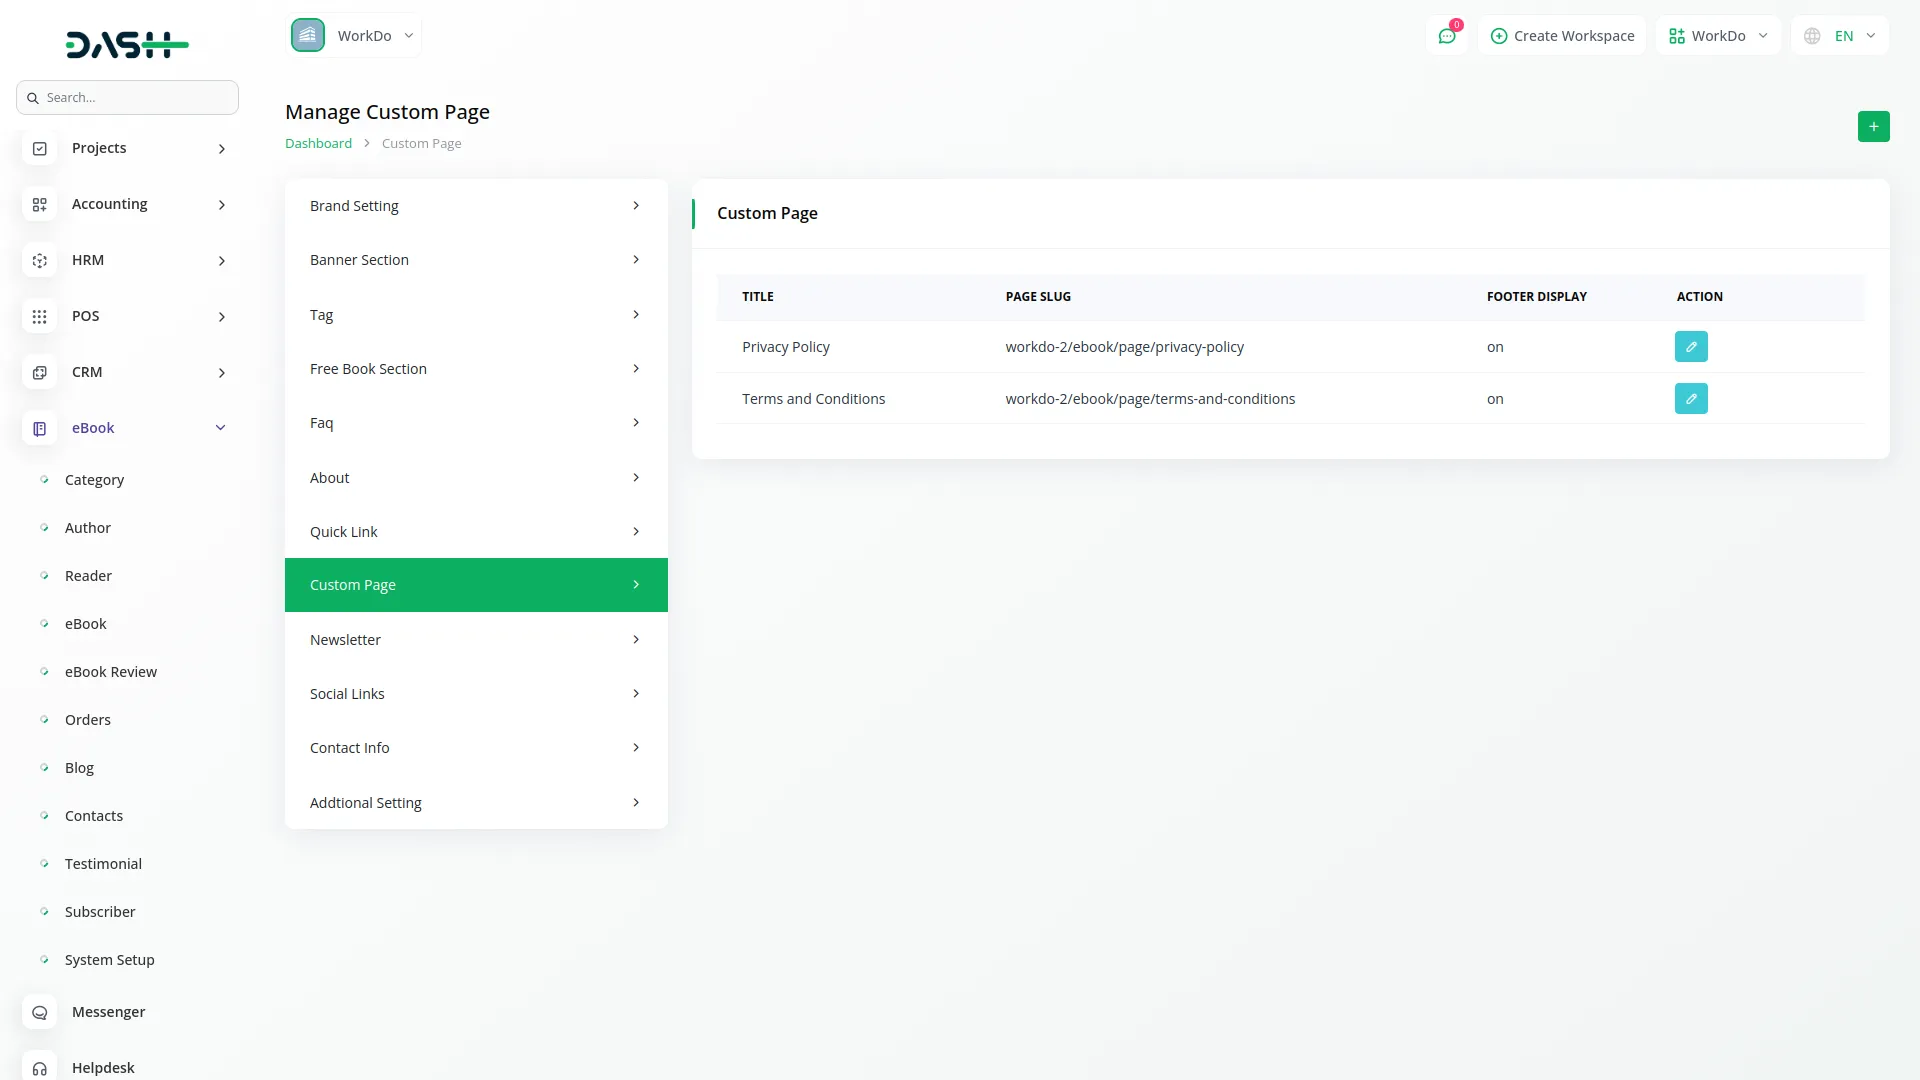
- Custom Page : To create a new custom page, click “Add” and enter the title, select the page footer display option, and add content. The list page shows all custom pages with Title, Slug, and Footer Display columns. In the Action column, you can edit or delete pages.
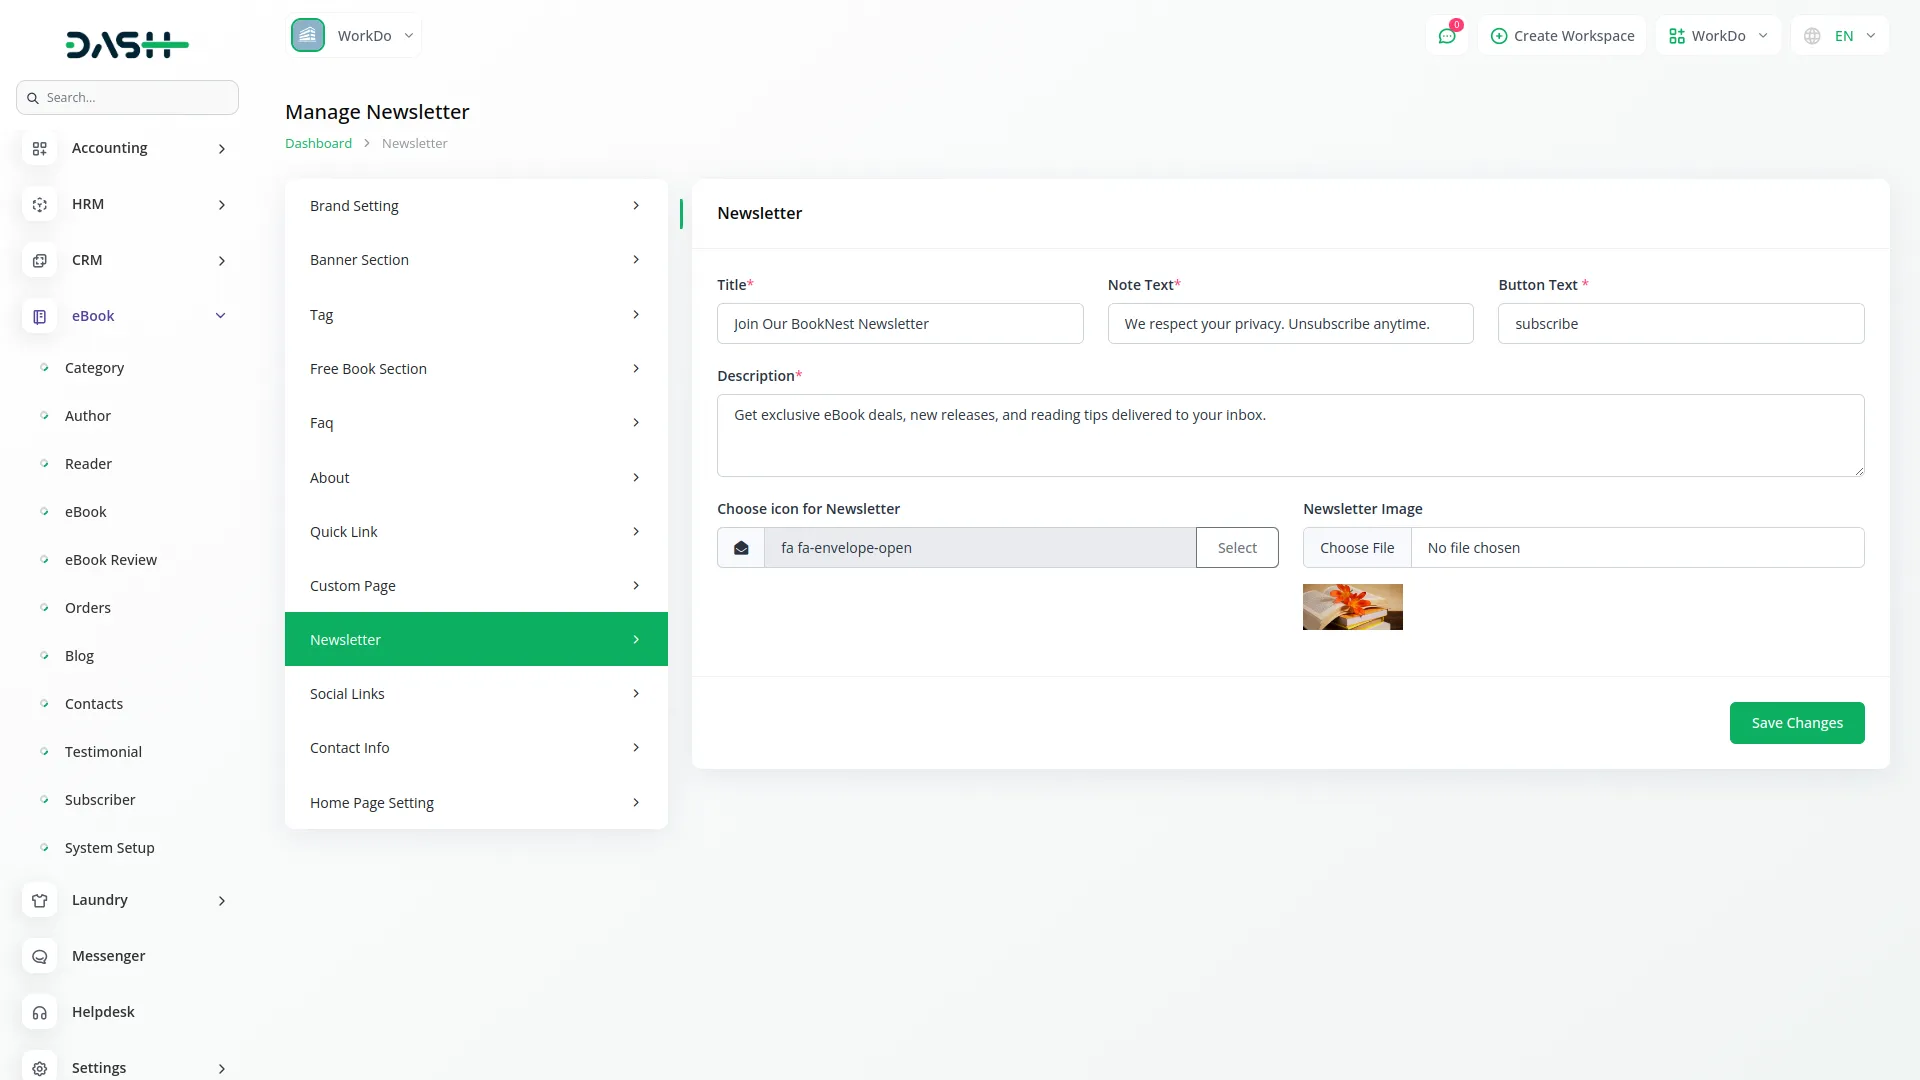
- Newsletter : customize your newsletter section by entering a title, note text, button text, description, choosing an icon, and uploading a newsletter image.
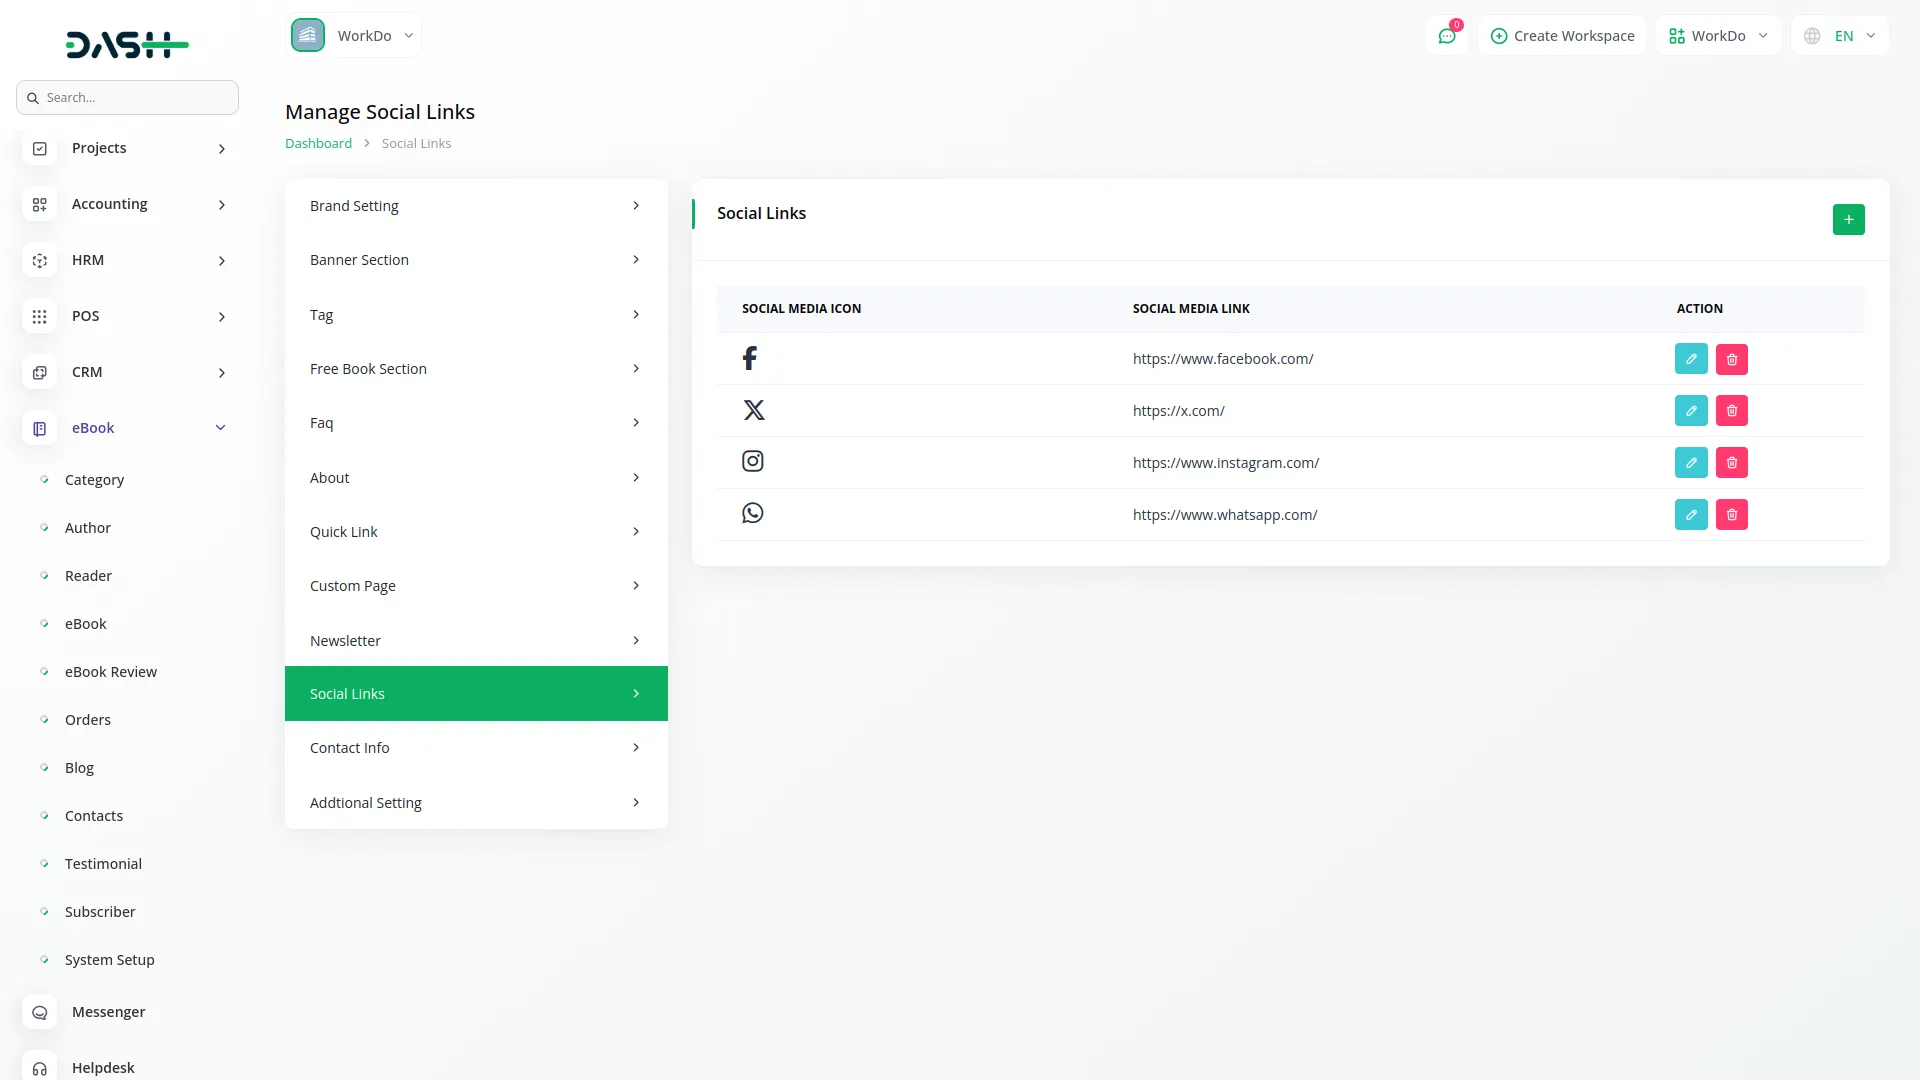
- Social Links : Add your social media links by choosing icons, entering social media URLs, selecting colours for social icons, and viewing icon previews.
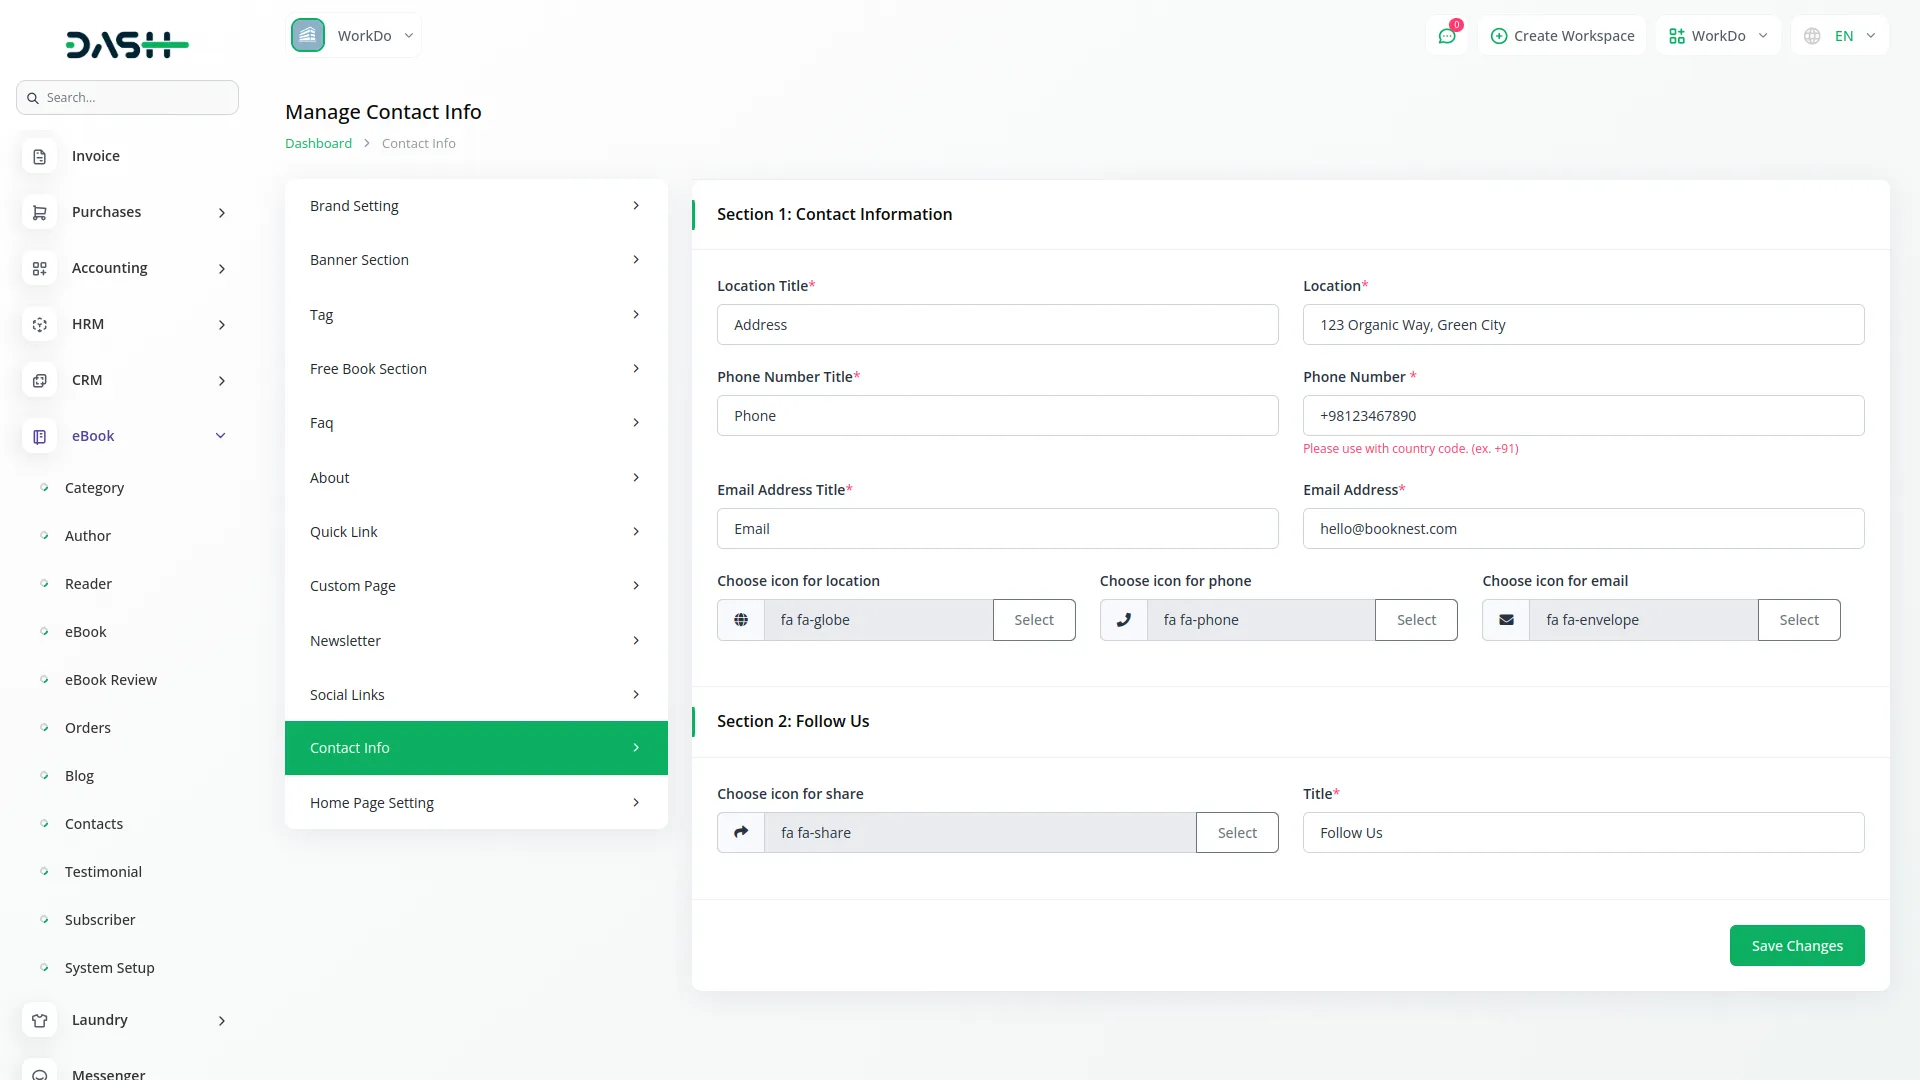
- Contact Info : Set up contact information by entering location title and location, phone number title and number, email address title and email, and choosing icons for location, phone, and email. Also, configure the “Follow Us” section by choosing an icon and title.
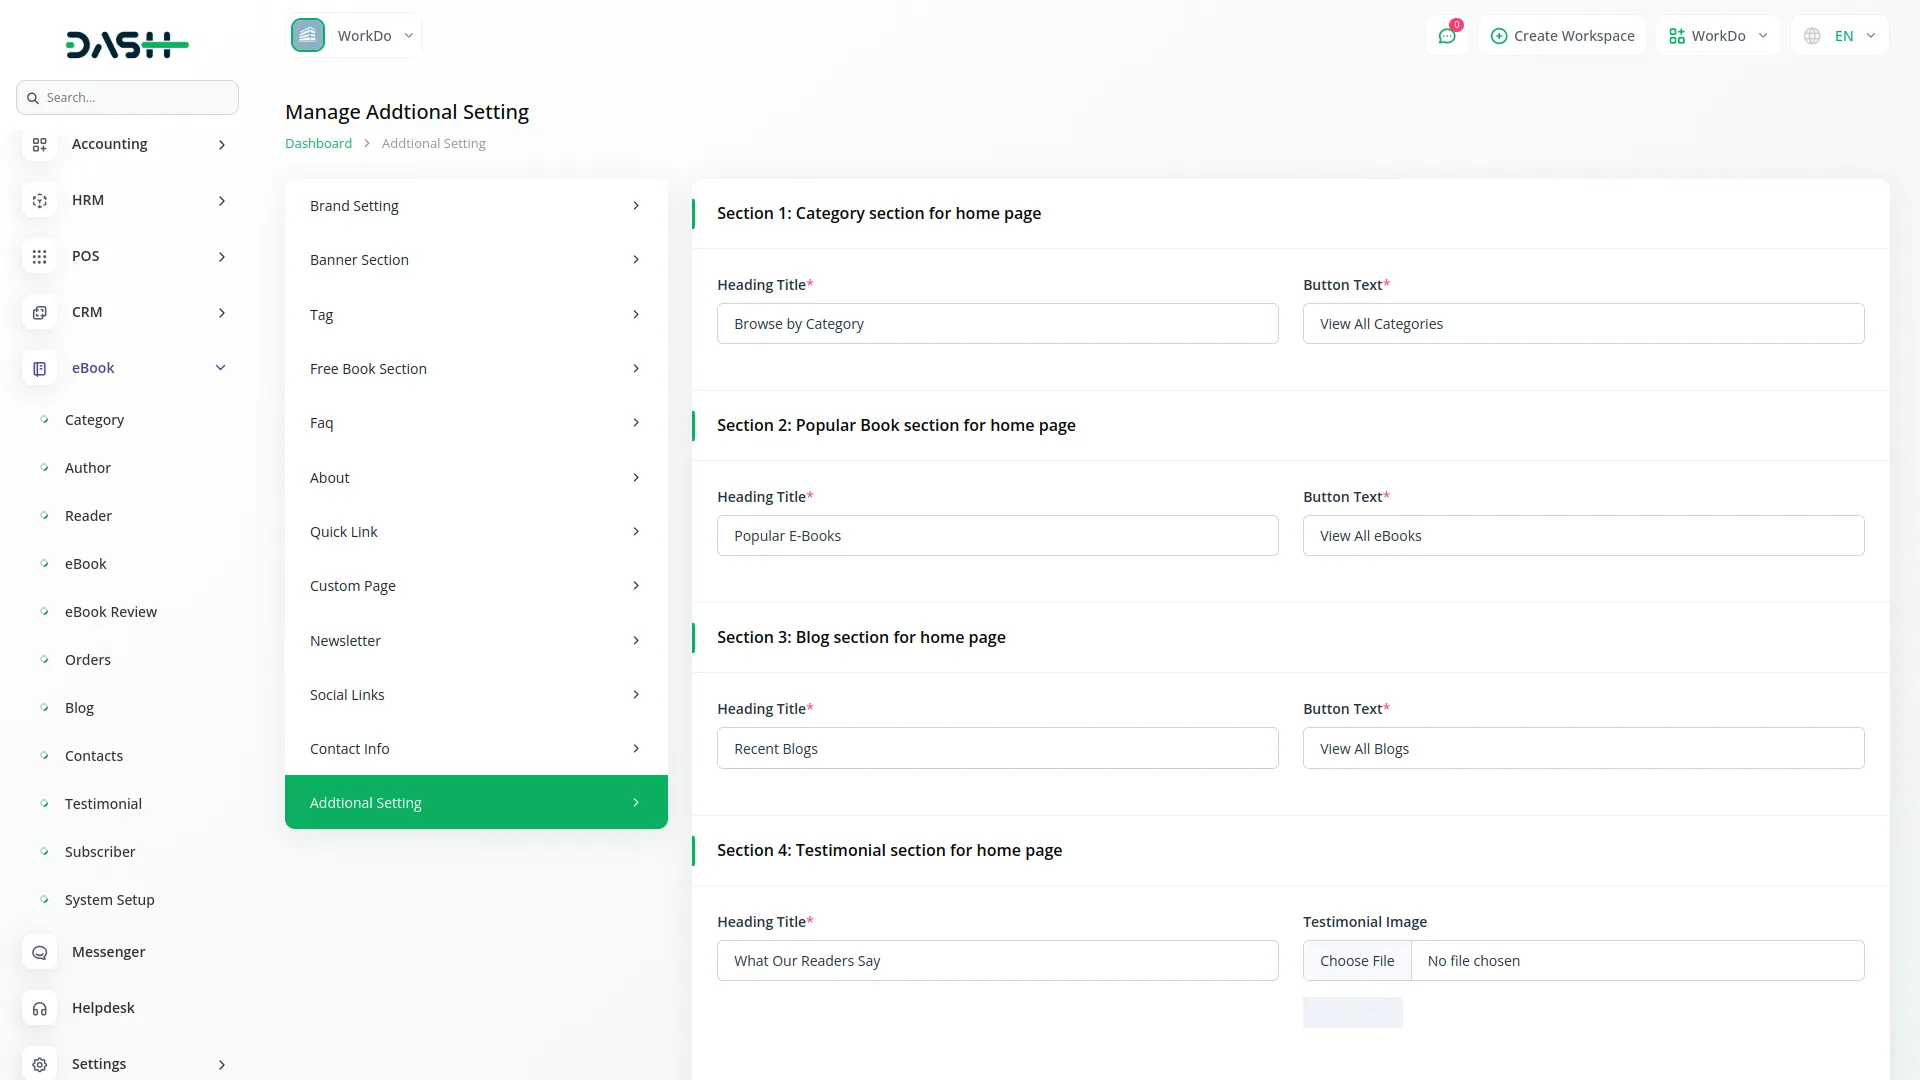
- Additional Setting : Configure homepage sections, including the Category section (heading title and button text), Popular Book section (heading title and button text), Blog section (heading title and button text), and Testimonial section (title and testimonial image).
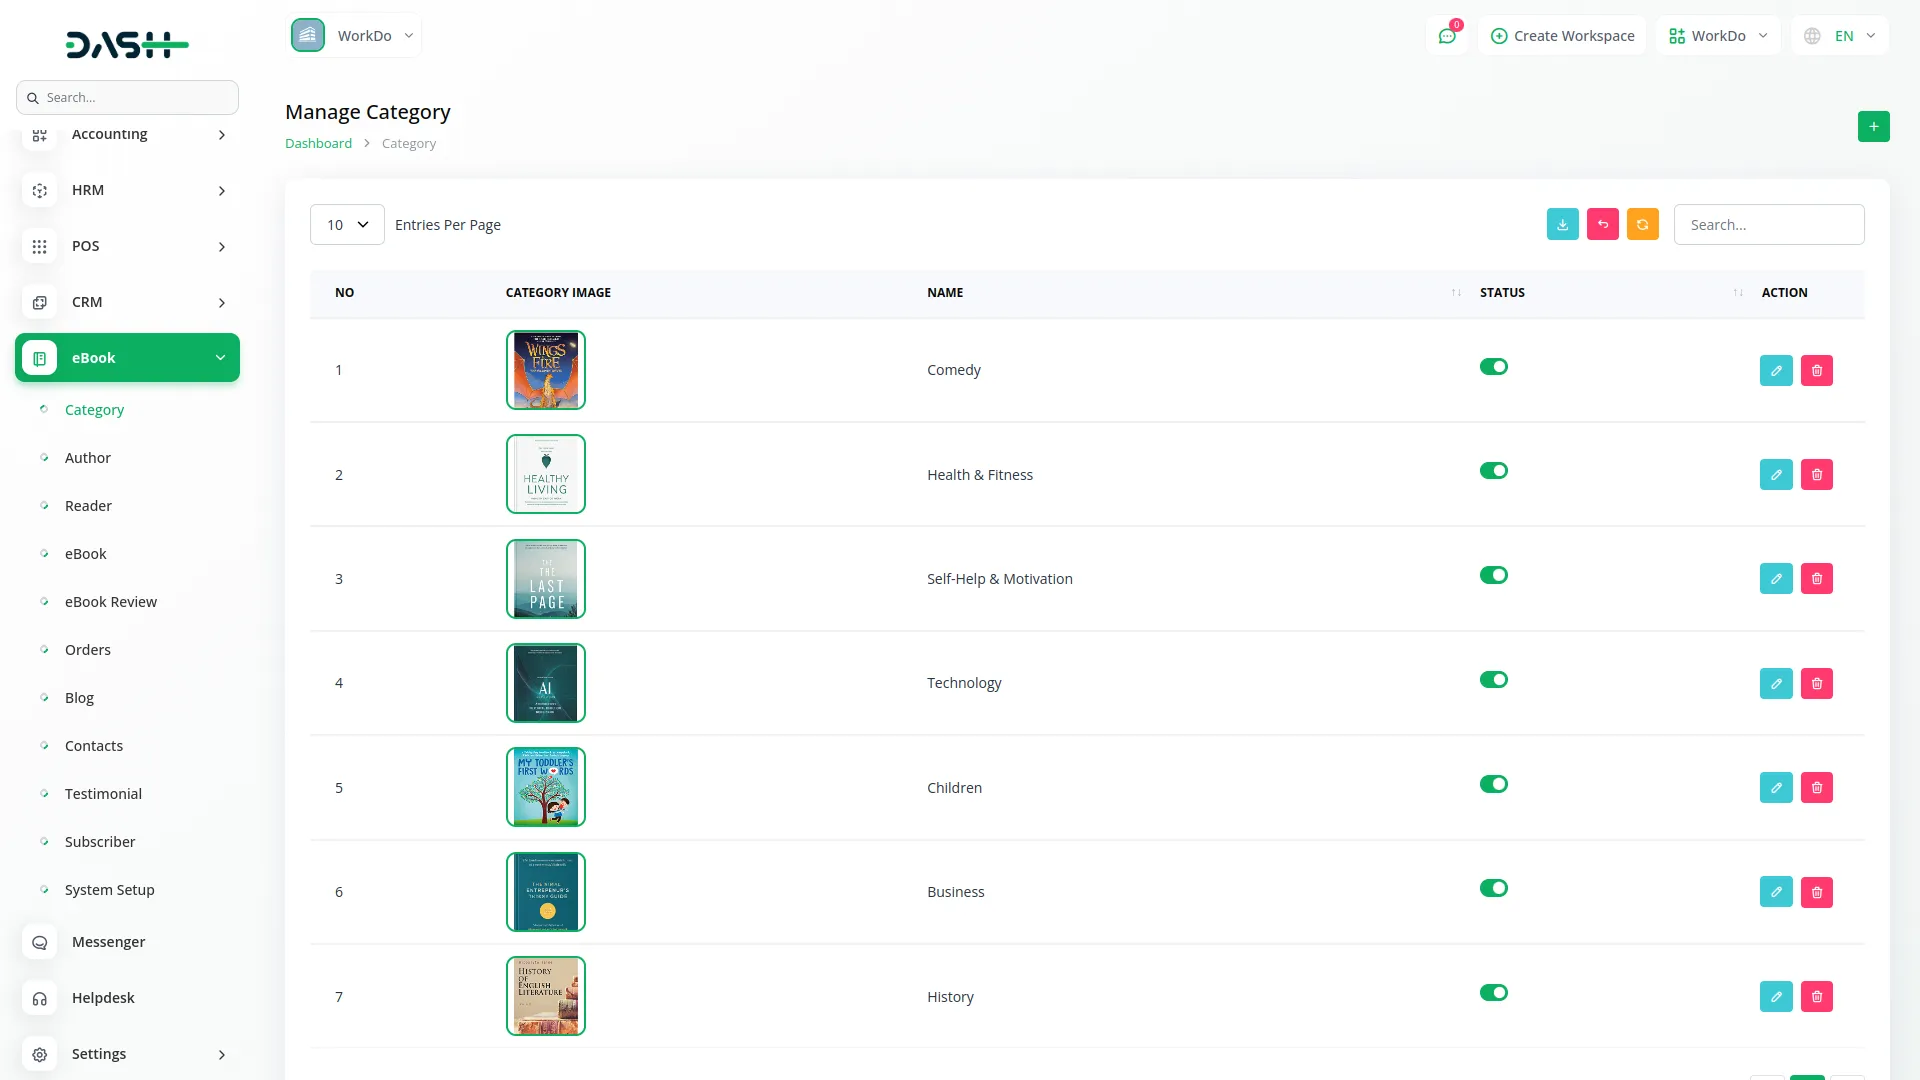
Manage Category
- To create a new category, click the “Create” button at the top of the category page. Enter the category name and upload a category image that represents the type of books in this category.
- The list page displays all categories in a table format with columns including Category Image, Name, and Status toggle. You can use the search for specific categories, export, reload, and reset buttons to manage the category list.
- In the Action column, you can edit existing categories to update their names or images, or delete categories that are no longer needed.
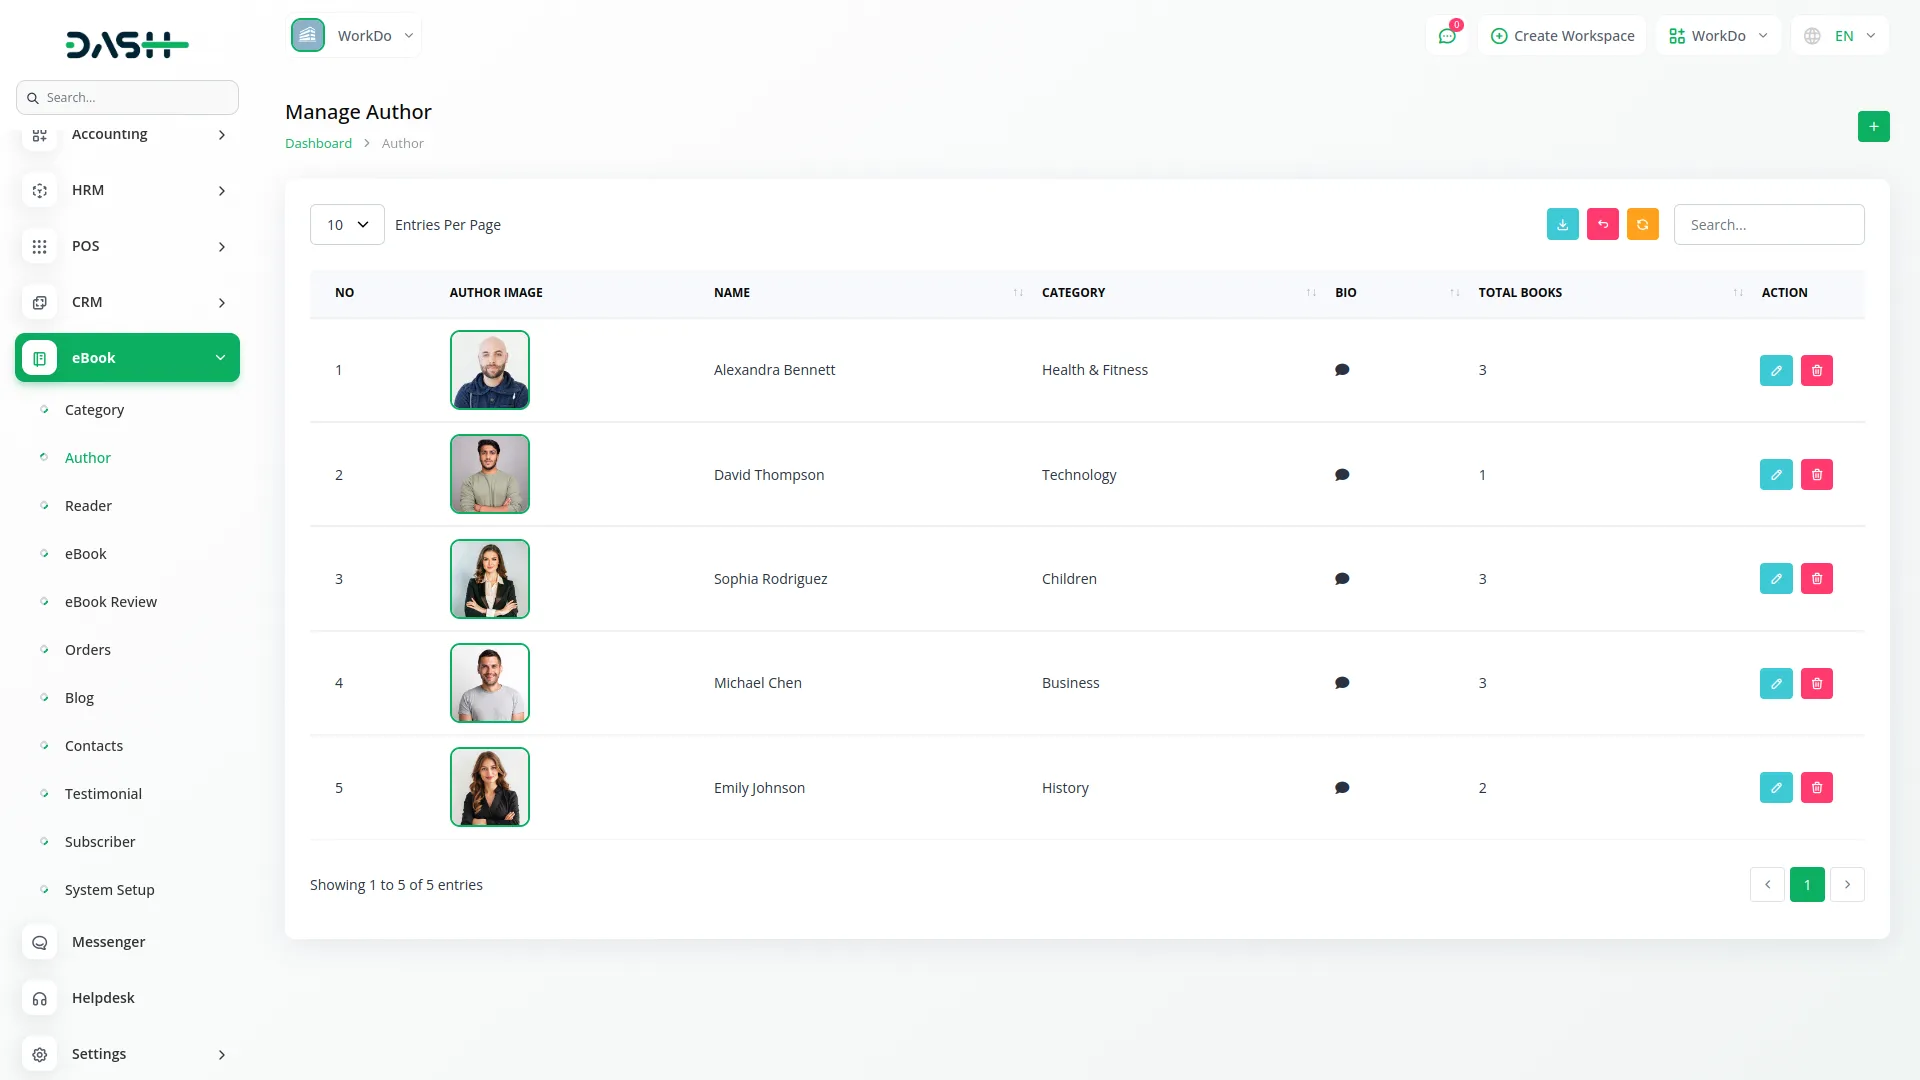
Manage Author
- After creating a Category, go to the Manage Author page and add a new author by clicking the “Create” button at the top of the page.
- You need to enter the author’s name, select their category from the dropdown (comes from the Category section), write their bio, and upload an author image.
- On the list page, you’ll get to see all the authors with columns including Author Image, Name, Category, Bio (click to view full description in a popup), and Total Books (showing the count of books by this author).
- You can search for authors, export, reset, and reload the managed author list using the top buttons. In the Action column, you can Edit author details or Delete authors from the system.
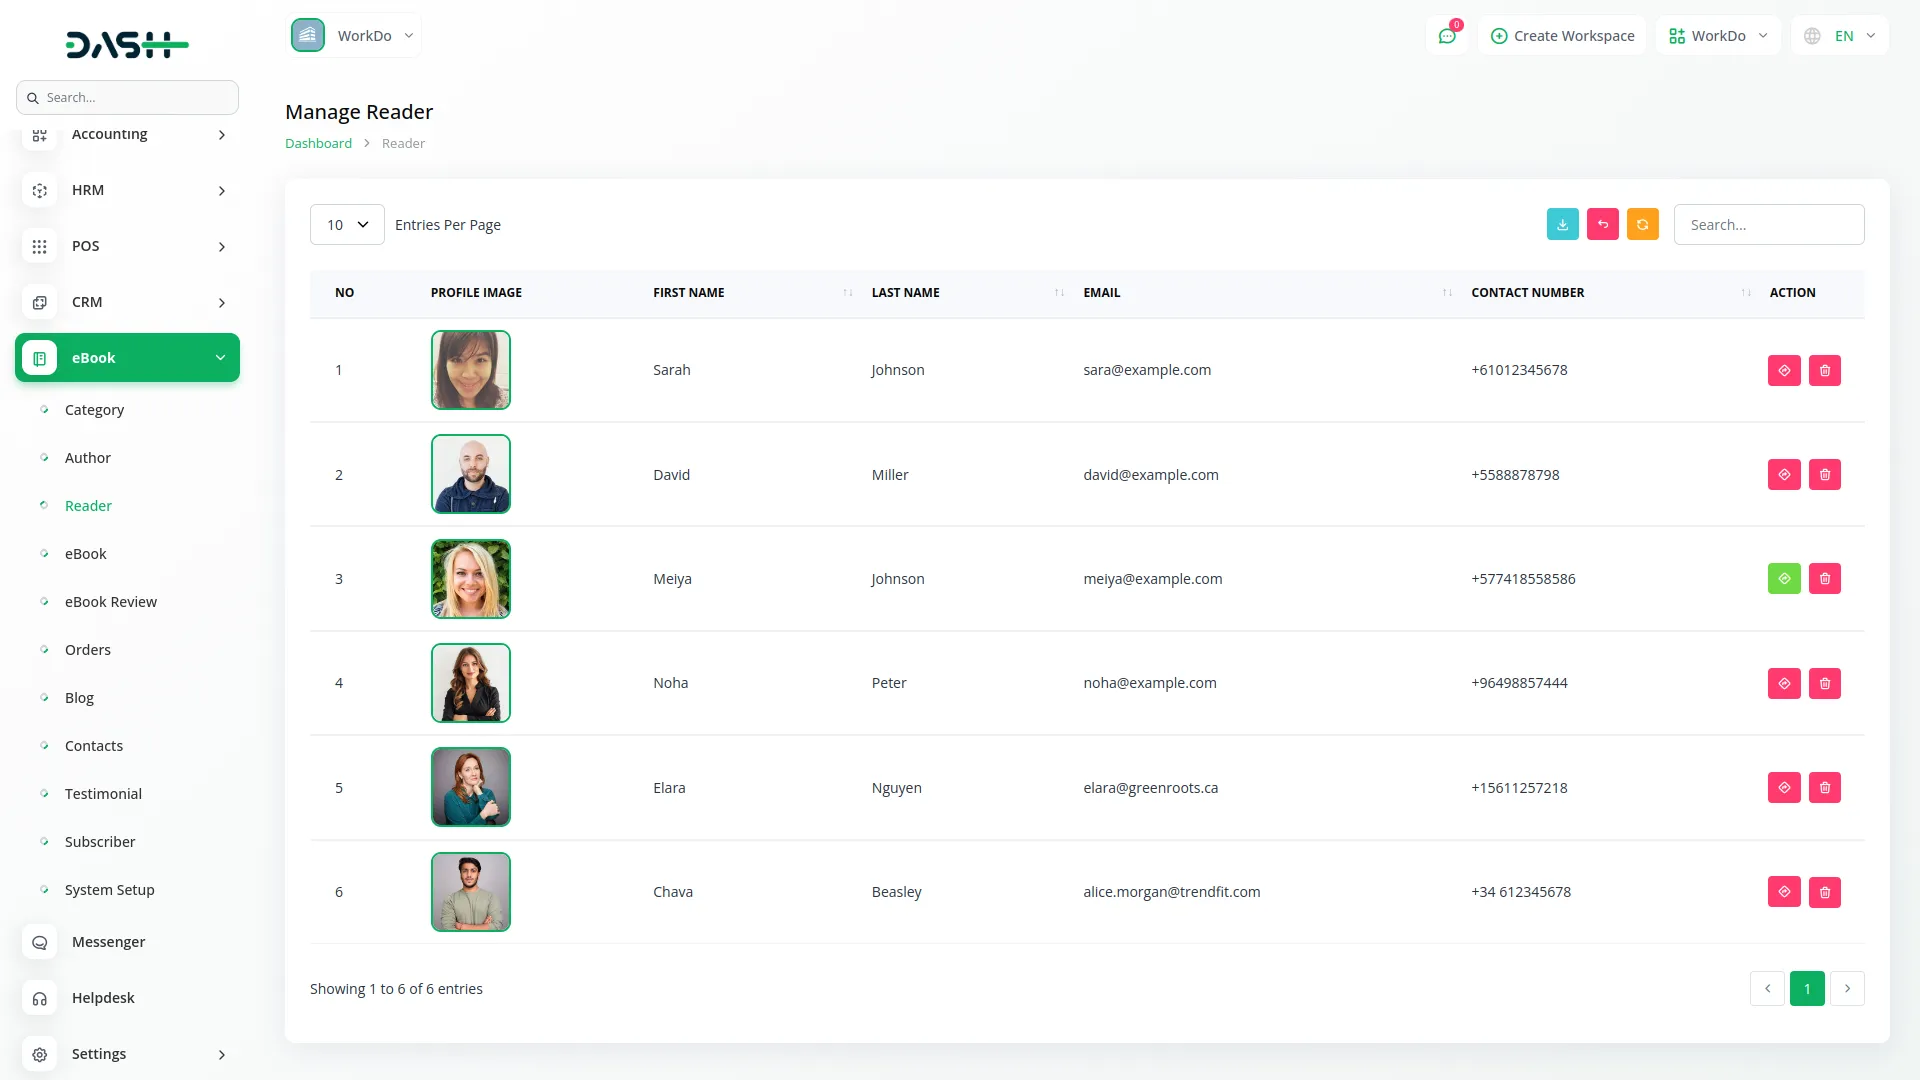
Manage Reader
- The Reader section displays information about readers who have registered on your eBook website.
- The list page shows all registered readers with columns including Profile Image, First Name, Last Name, Email and Contact Number. You can search for specific readers or export, reset, and reload buttons to manage your reader data.
- In the Action column, you have two options: Enable/Disable to control whether a reader can log into the website, and Delete to remove readers from the system.
Manage eBook
- To create a new eBook, click the “Create” button at the top of the eBook page. Enter the eBook name and ISBN. Select the author from the dropdown (comes from the Author section) and choose tags from the multi-select field (comes from the System Setup Tag section).
- Enter the publisher name, publication date, and detailed description. Add description tags using the multi-tag input field for better searchability. Select the eBook language and enter the number of pages.
- Use the “This is free” toggle to mark books as free downloads. Set the “Publish” toggle to control whether the book appears on your website. If the book is not free, enter the price in the price field.
- Upload the eBook PDF file, thumbnail image, and additional eBook images to showcase your book.
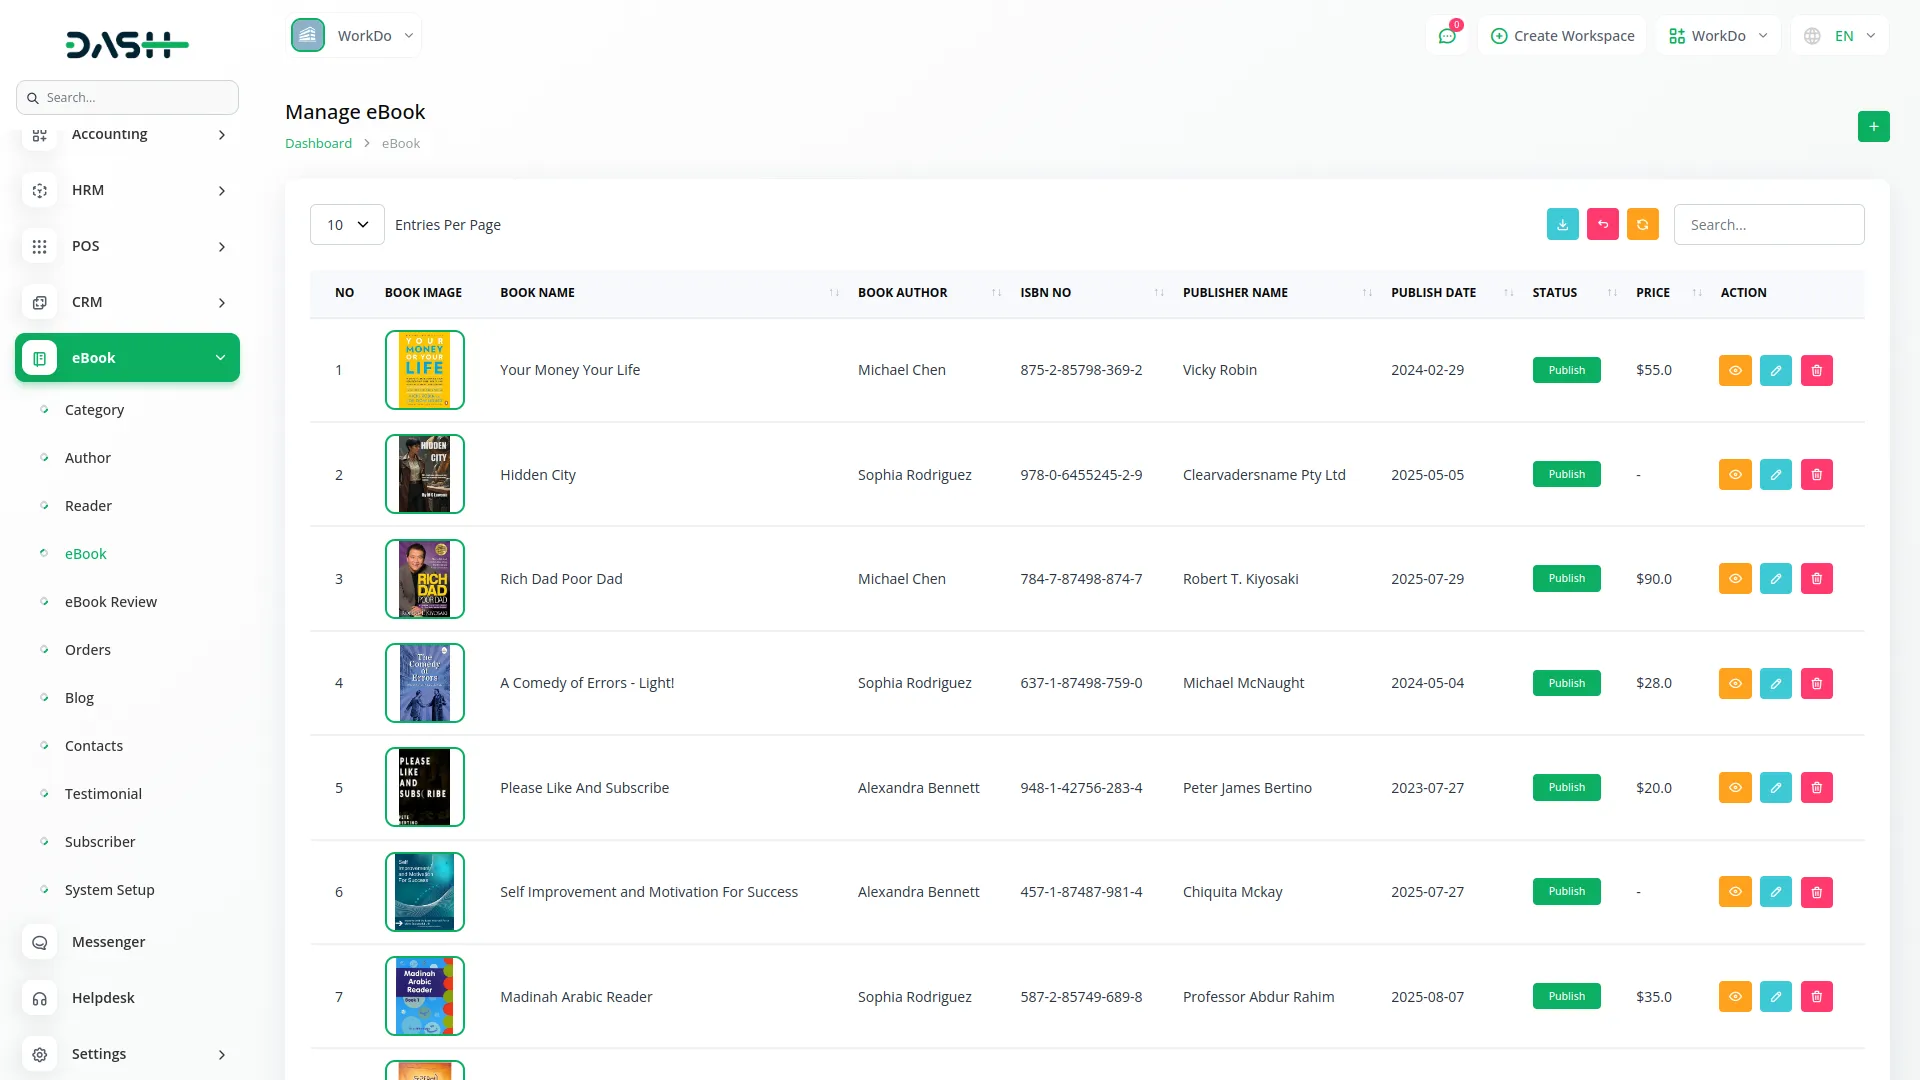
- The list page displays all eBooks with columns including Book Image, Book Name, Book Author, ISBN Number, Publisher Name, Publish Date, Status (Published/Unpublished), and Price. You can easily manage ebook data with search, export, reset, or reload using the top buttons.
- Along with these details, with the help of an Action column, you can view book details, edit existing books, or delete books from your catalog.
Manage eBook Review
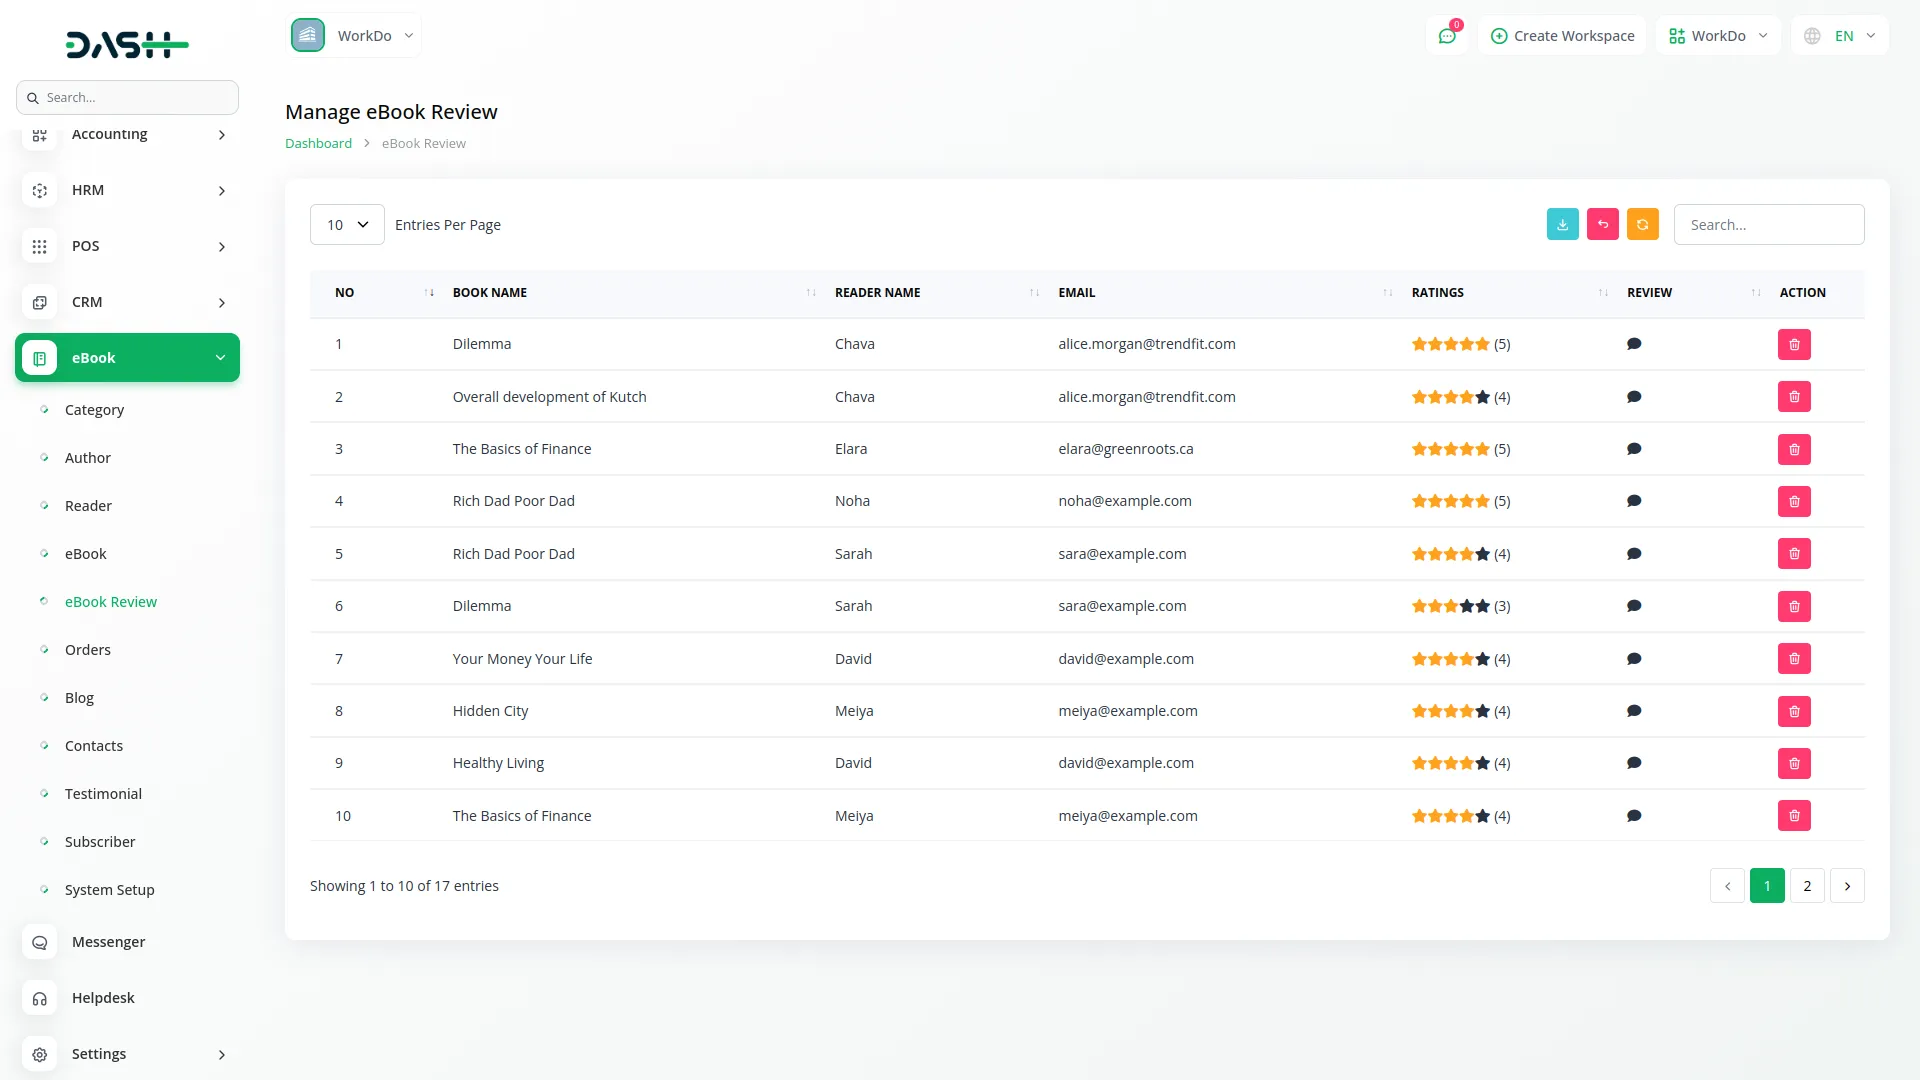
- The list page displays reader feedback with columns including Book Name, Reader Name, Email, Ratings (showing stars and numerical rating out of 5), and Review (click to view full review in a pop-up).
- You can search through reviews or export, reset, and reload the review data using the buttons at the top. With the Action column, you can delete inappropriate or spam reviews to maintain quality feedback on your platform.
Manage Orders
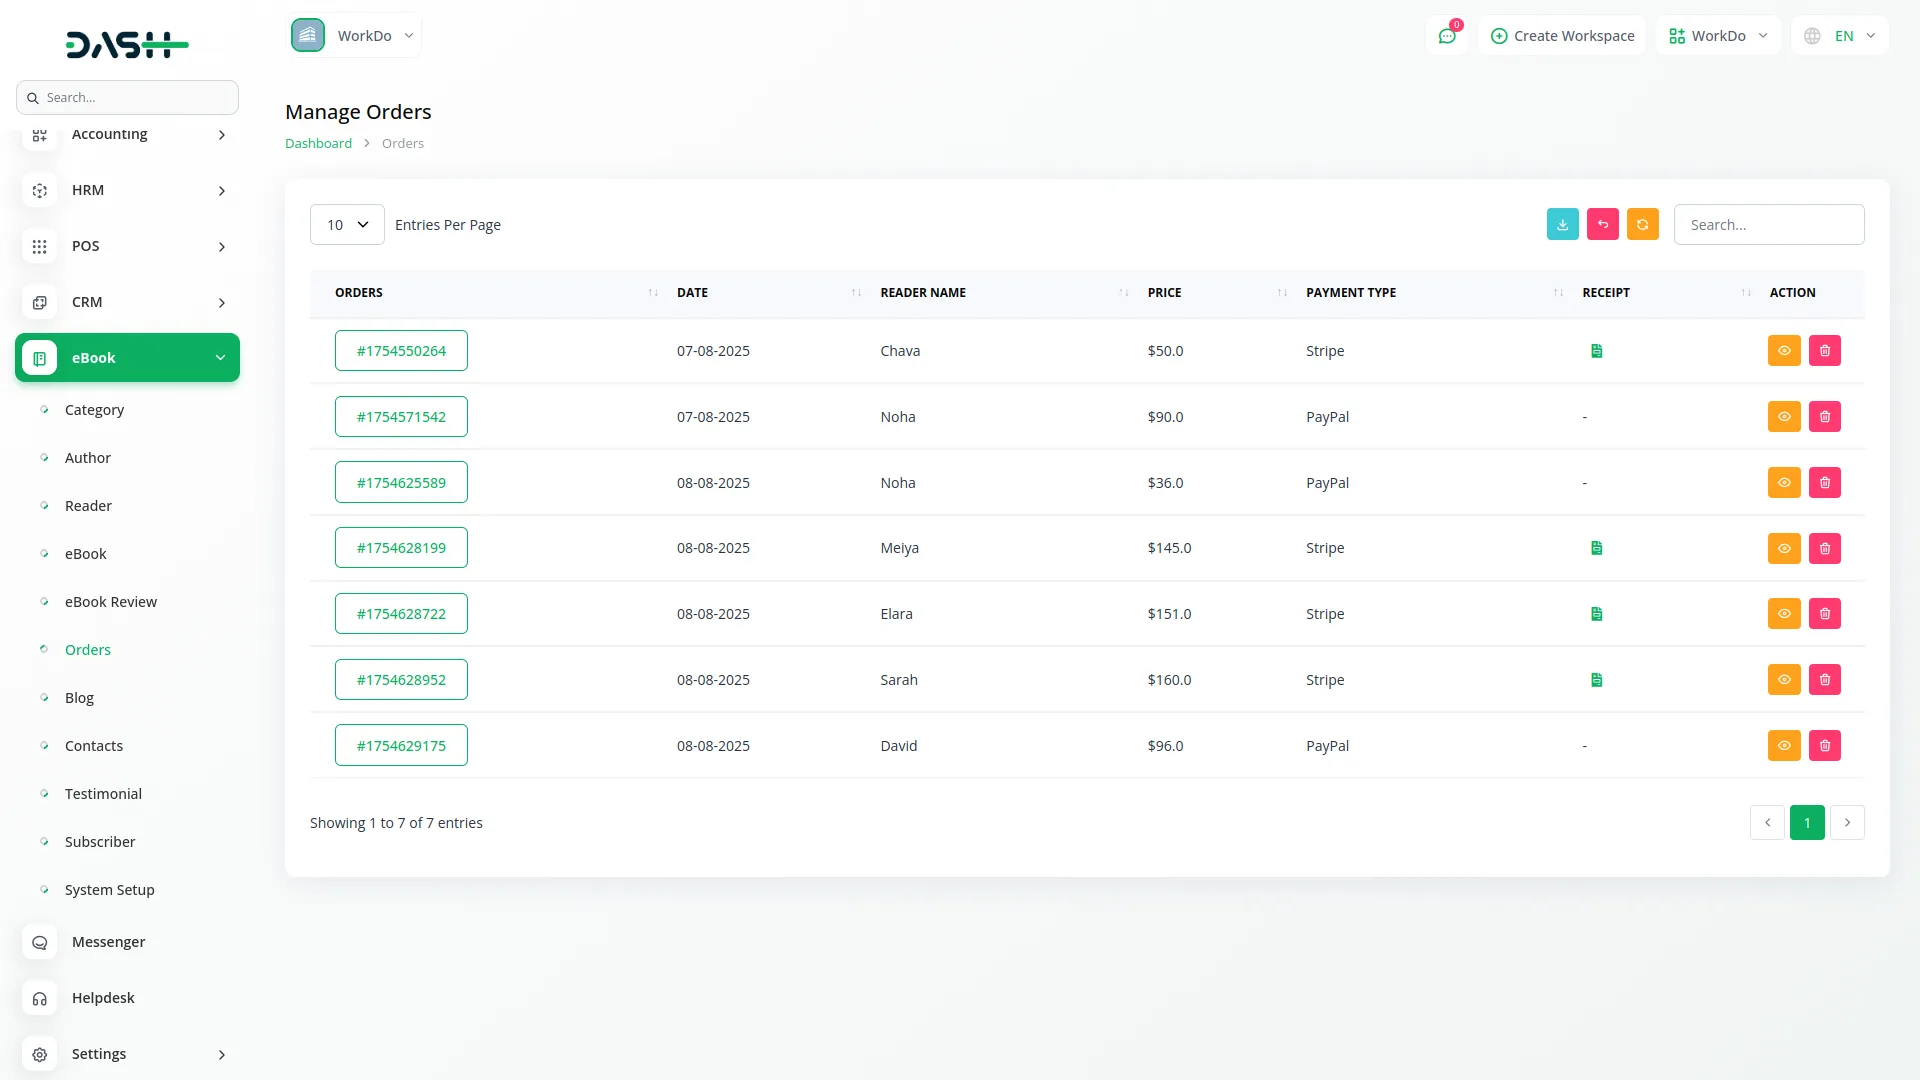
- On the list page, you’ll get to see all reader orders with columns for Orders, Date, Reader Name, Price, Payment Type, and Receipt. You can search for specific orders or export order data using the top buttons.
- In the Action column, you can view detailed order information, including purchased books and reader details, or delete orders from the system if needed.
Manage Blog
- To create a new blog post, click the “Create” button at the top of the blog page. After that, enter the blog title and select the author from the dropdown (comes from the Author section). Add relevant tags, set the published date, and at the end write a short description.
- Upload a blog image that represents your post content. Then create the main blog content with detailed information, tips, or news related to your eBooks or reading community.
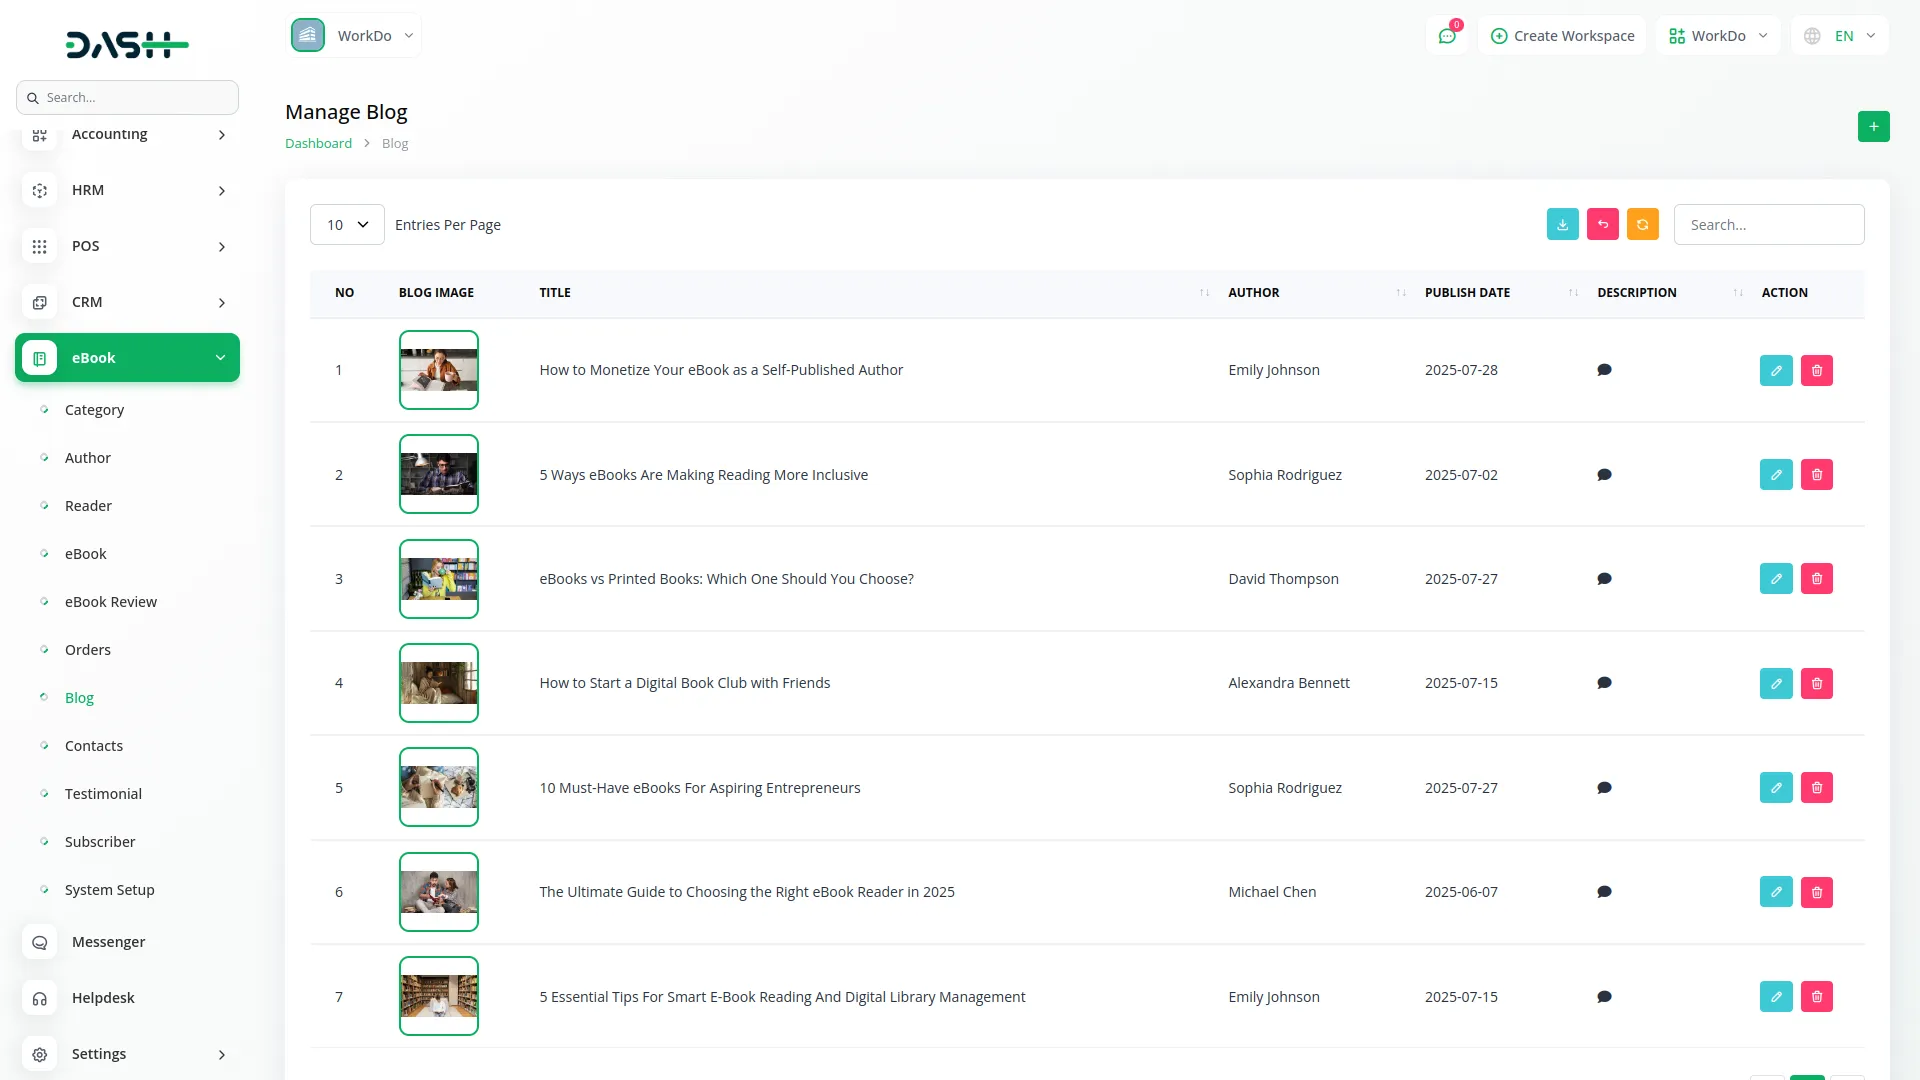
- The list page displays all blog posts with columns for Number, Blog Image, Title, Author, Publish Date, and Description (click to view full description in a popup). You can search, export, reset, or reload buttons to manage the blog list page.
- Below the details, with the help of an Action column, you can edit existing blog posts to update content or delete posts that are no longer relevant.
Manage Contacts
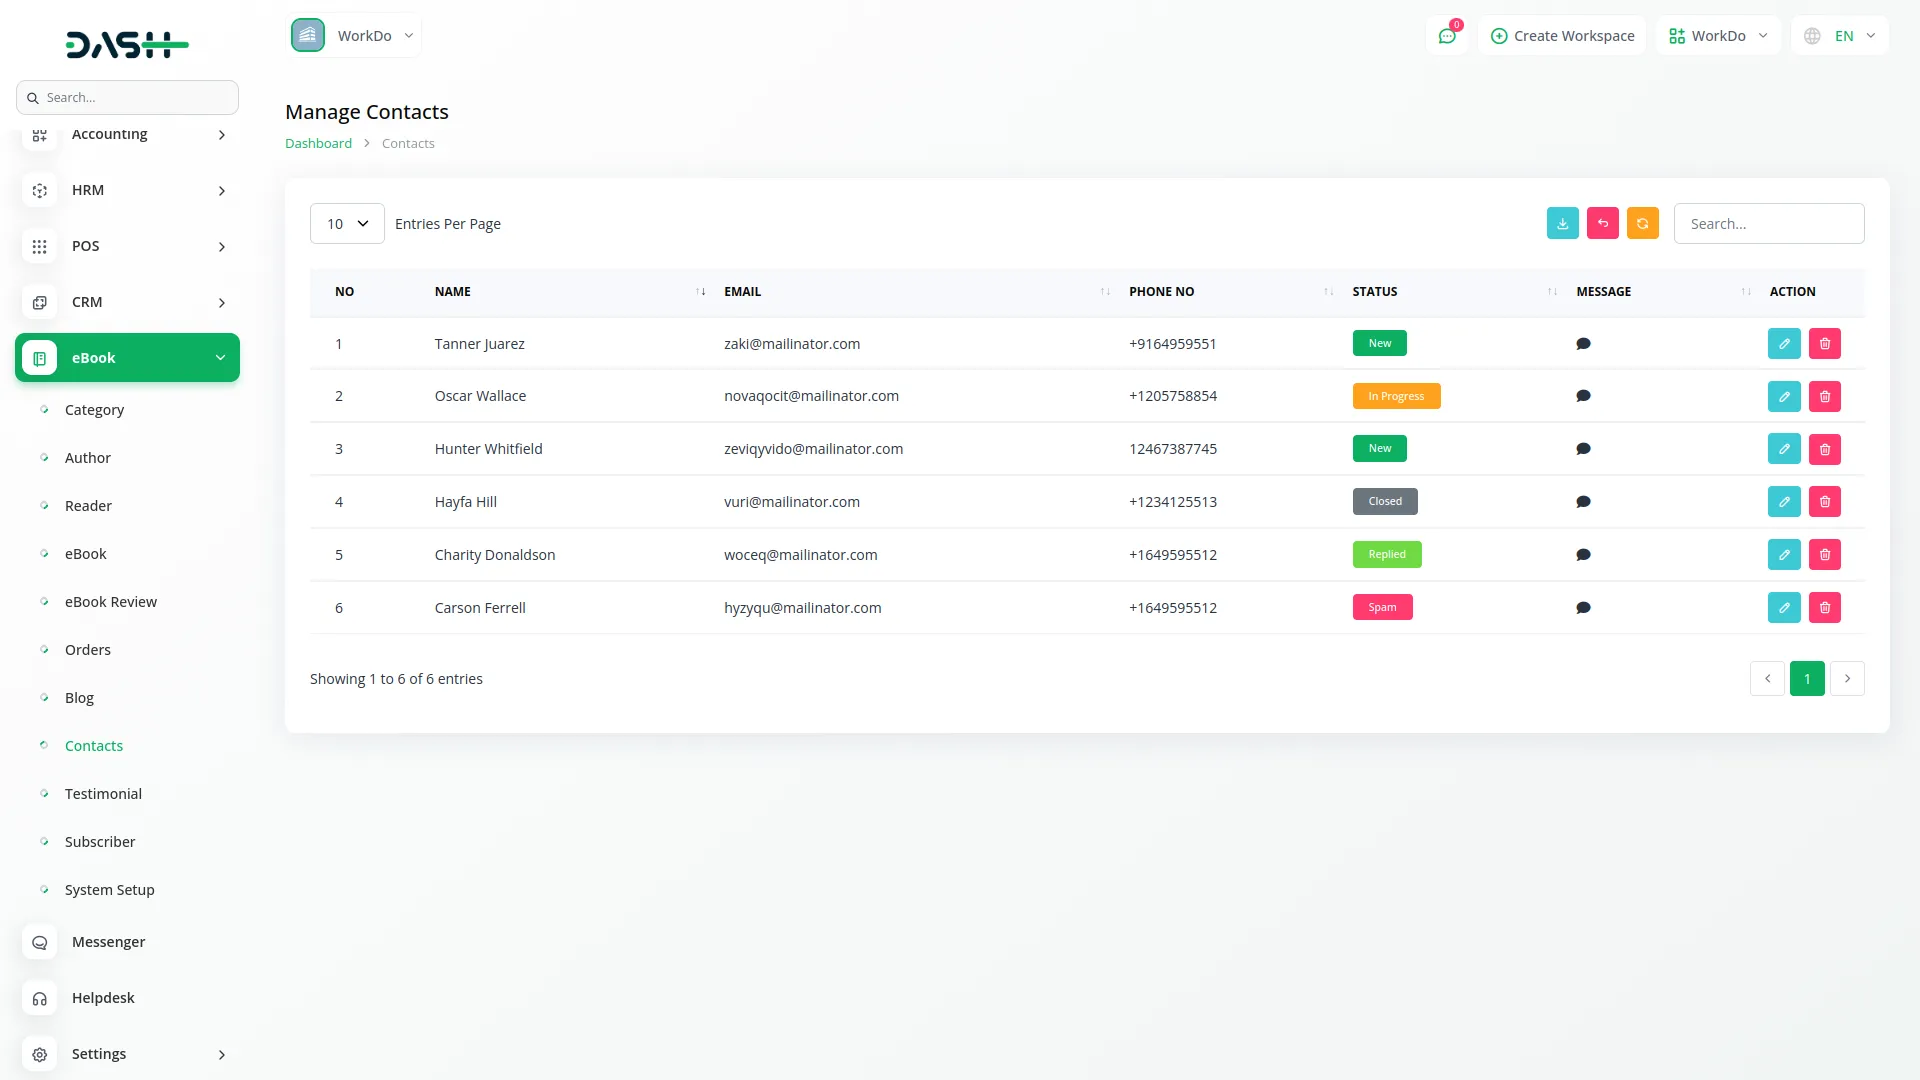
- On this page, you’ll get to see a list page that displays all contact submissions with columns including Name, Email, Phone Number, Status (New, In Progress, Replied, Closed, Spam), and Message (click to view full message in a popup).
- Use the search through contacts or export, reset, and reload buttons to manage your content data. With the help of an action column, you can edit your contact data or delete it to remove it whenever you need.
Manage Testimonial
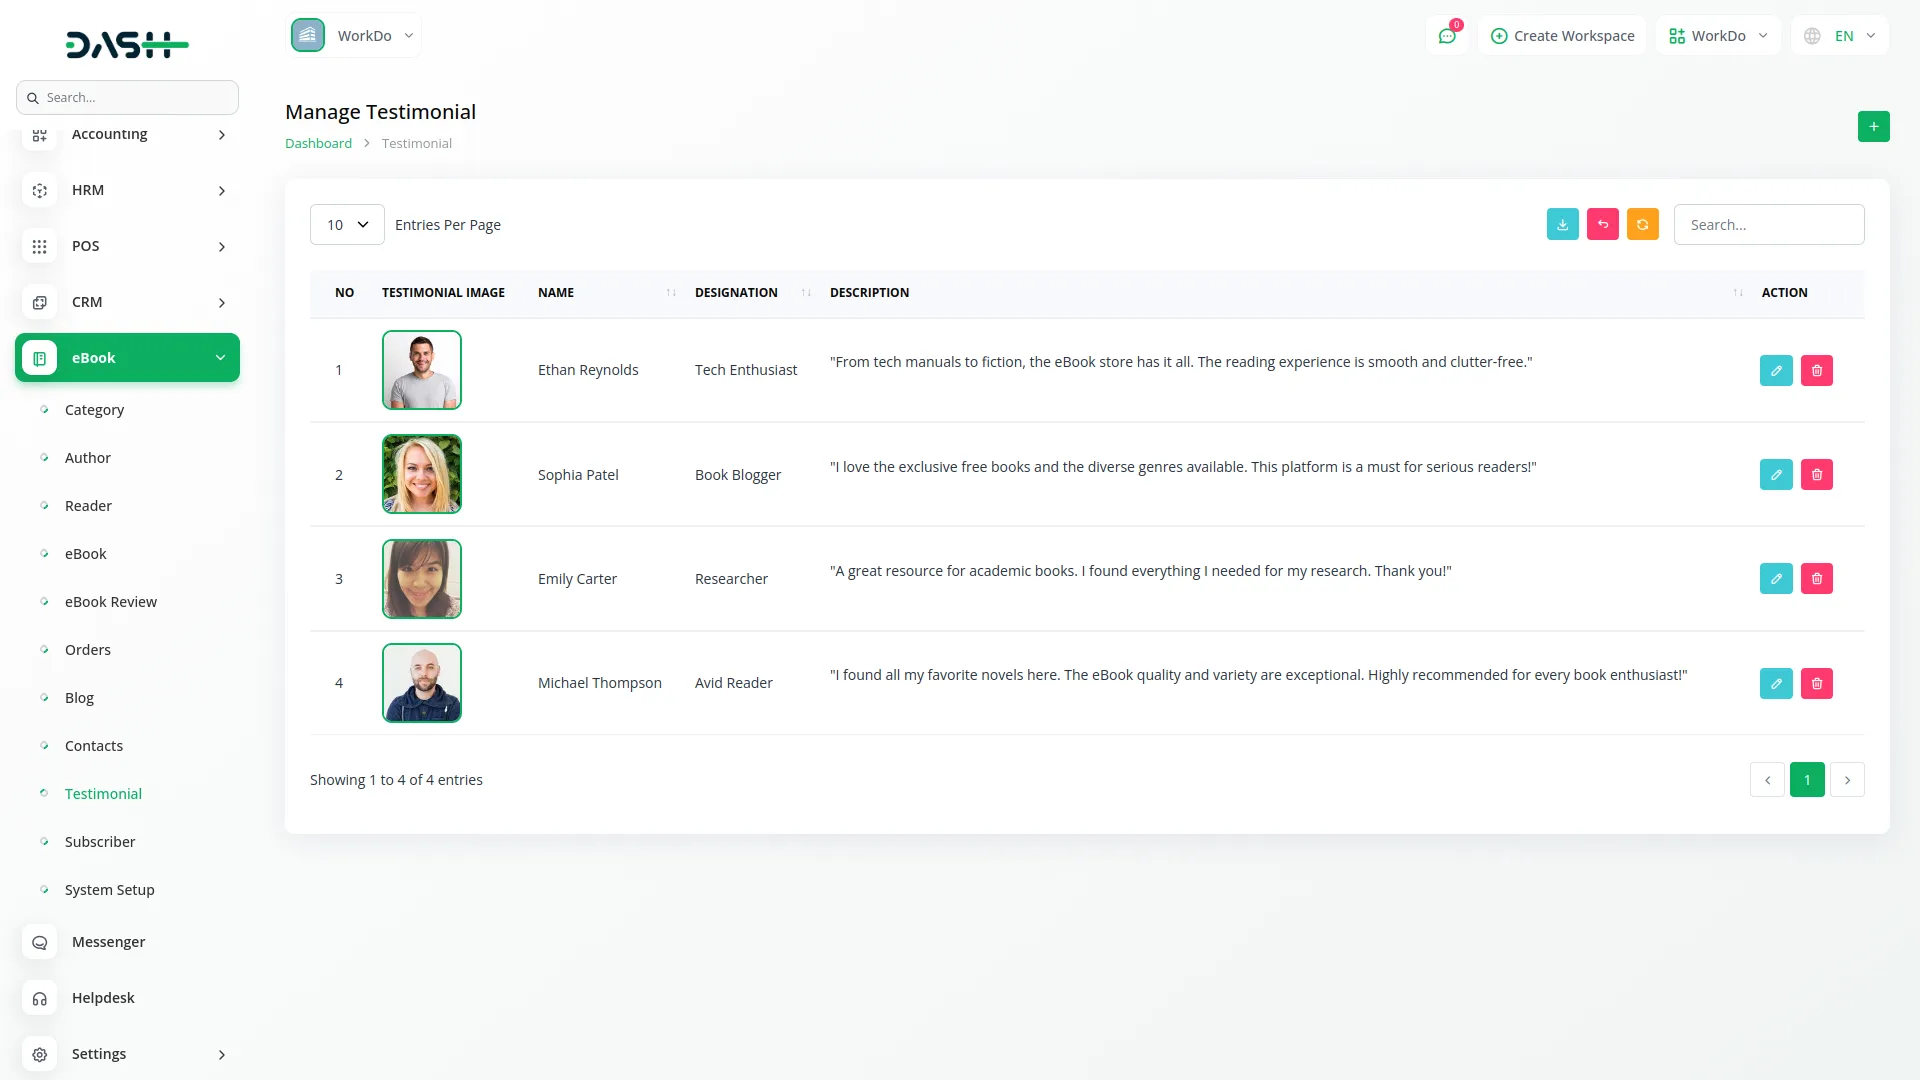
- To add a new testimonial, click the “Create” button at the top of a testimonial page. Then fill in the required details, like entering the name and their designation or title, and write their testimonial description. Upload a testimonial image.
- The list page shows all testimonials with columns including Testimonial Image, Name, Designation, and Description. Use the search, export, reset, and reload buttons to manage testimonial page data.
- Along with the details, In the Action column, you can edit existing testimonials to update information or delete outdated testimonials.
Manage Subscriber
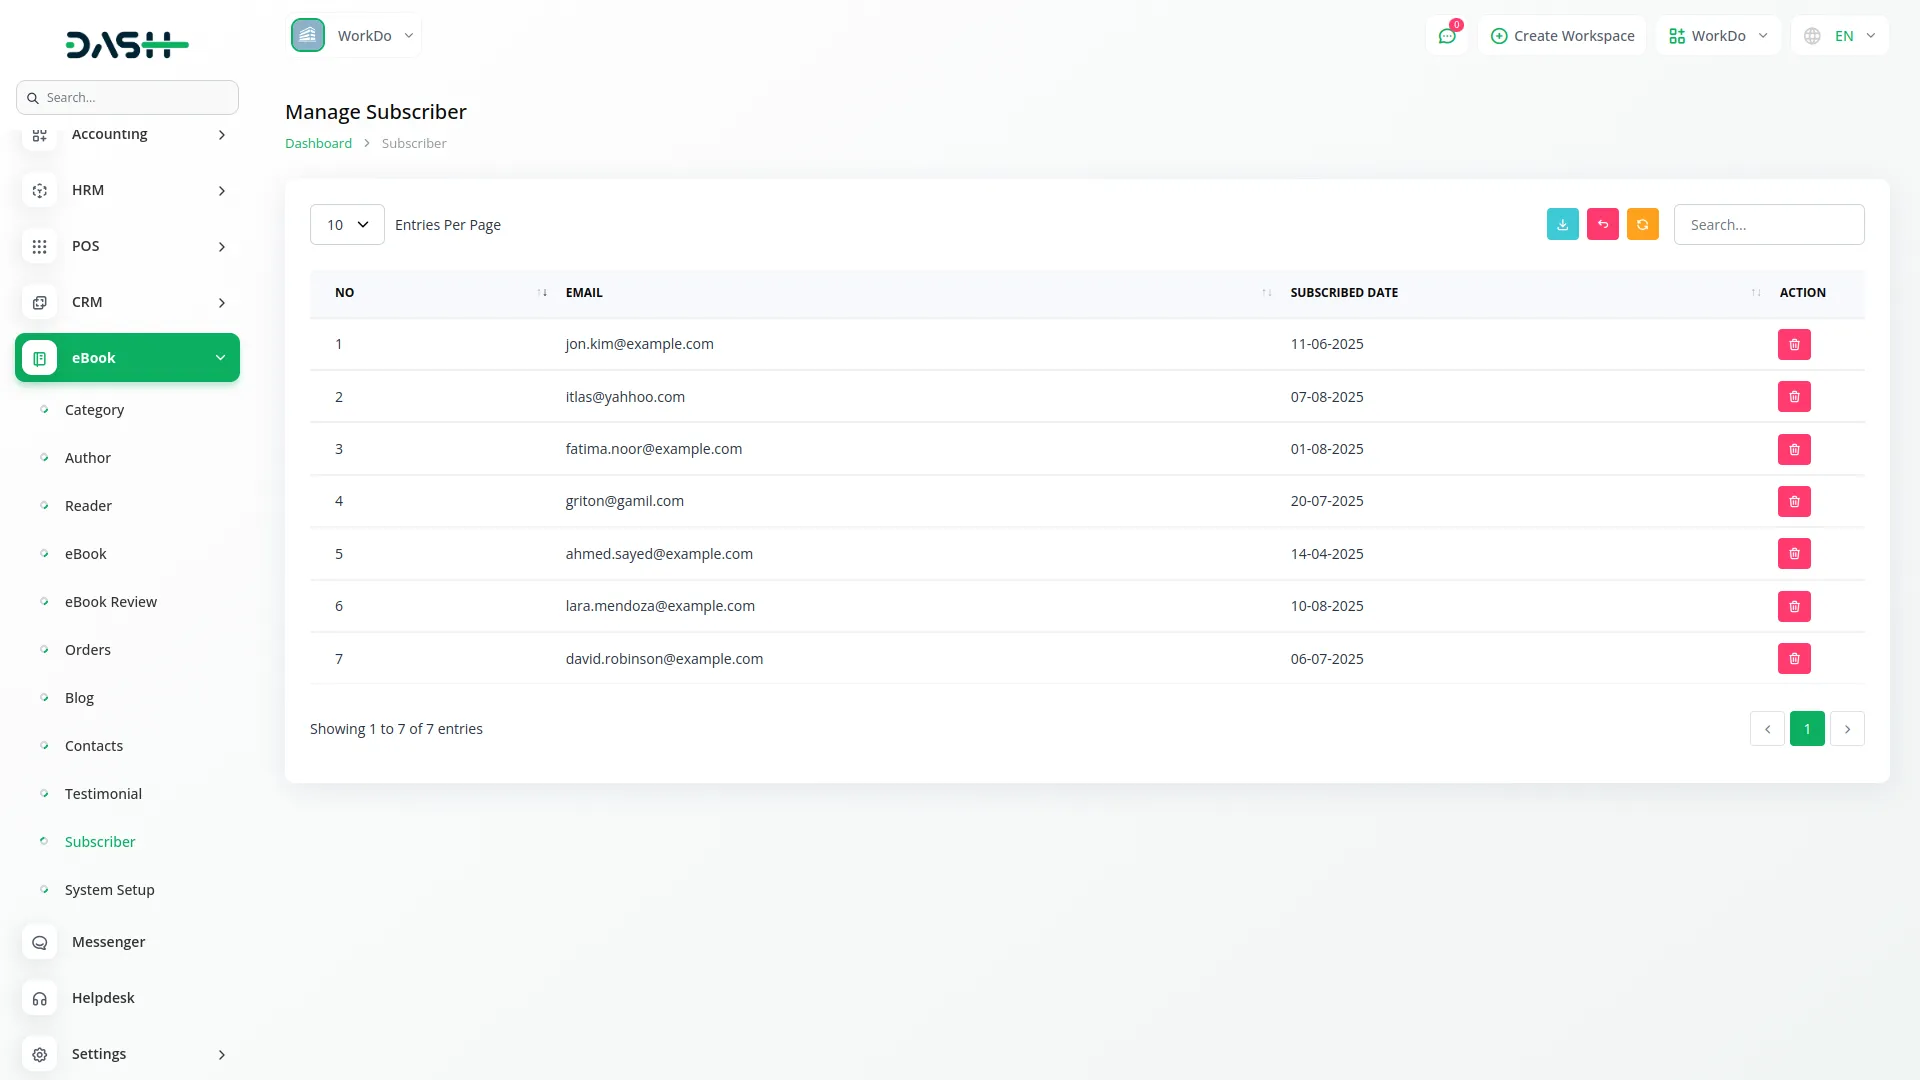
- The list page displays all newsletter subscribers with columns, including an Email address and subscribe date. You can search for specific email addresses or export the subscriber list for email marketing campaigns using the top buttons.
- This page also provides an Action column; you can delete subscribers who have unsubscribed or email addresses that are no longer valid.
eBook Website
Important Note : Only the sections set through System Setup will be displayed on the website. Please ensure the desired sections are properly configured.
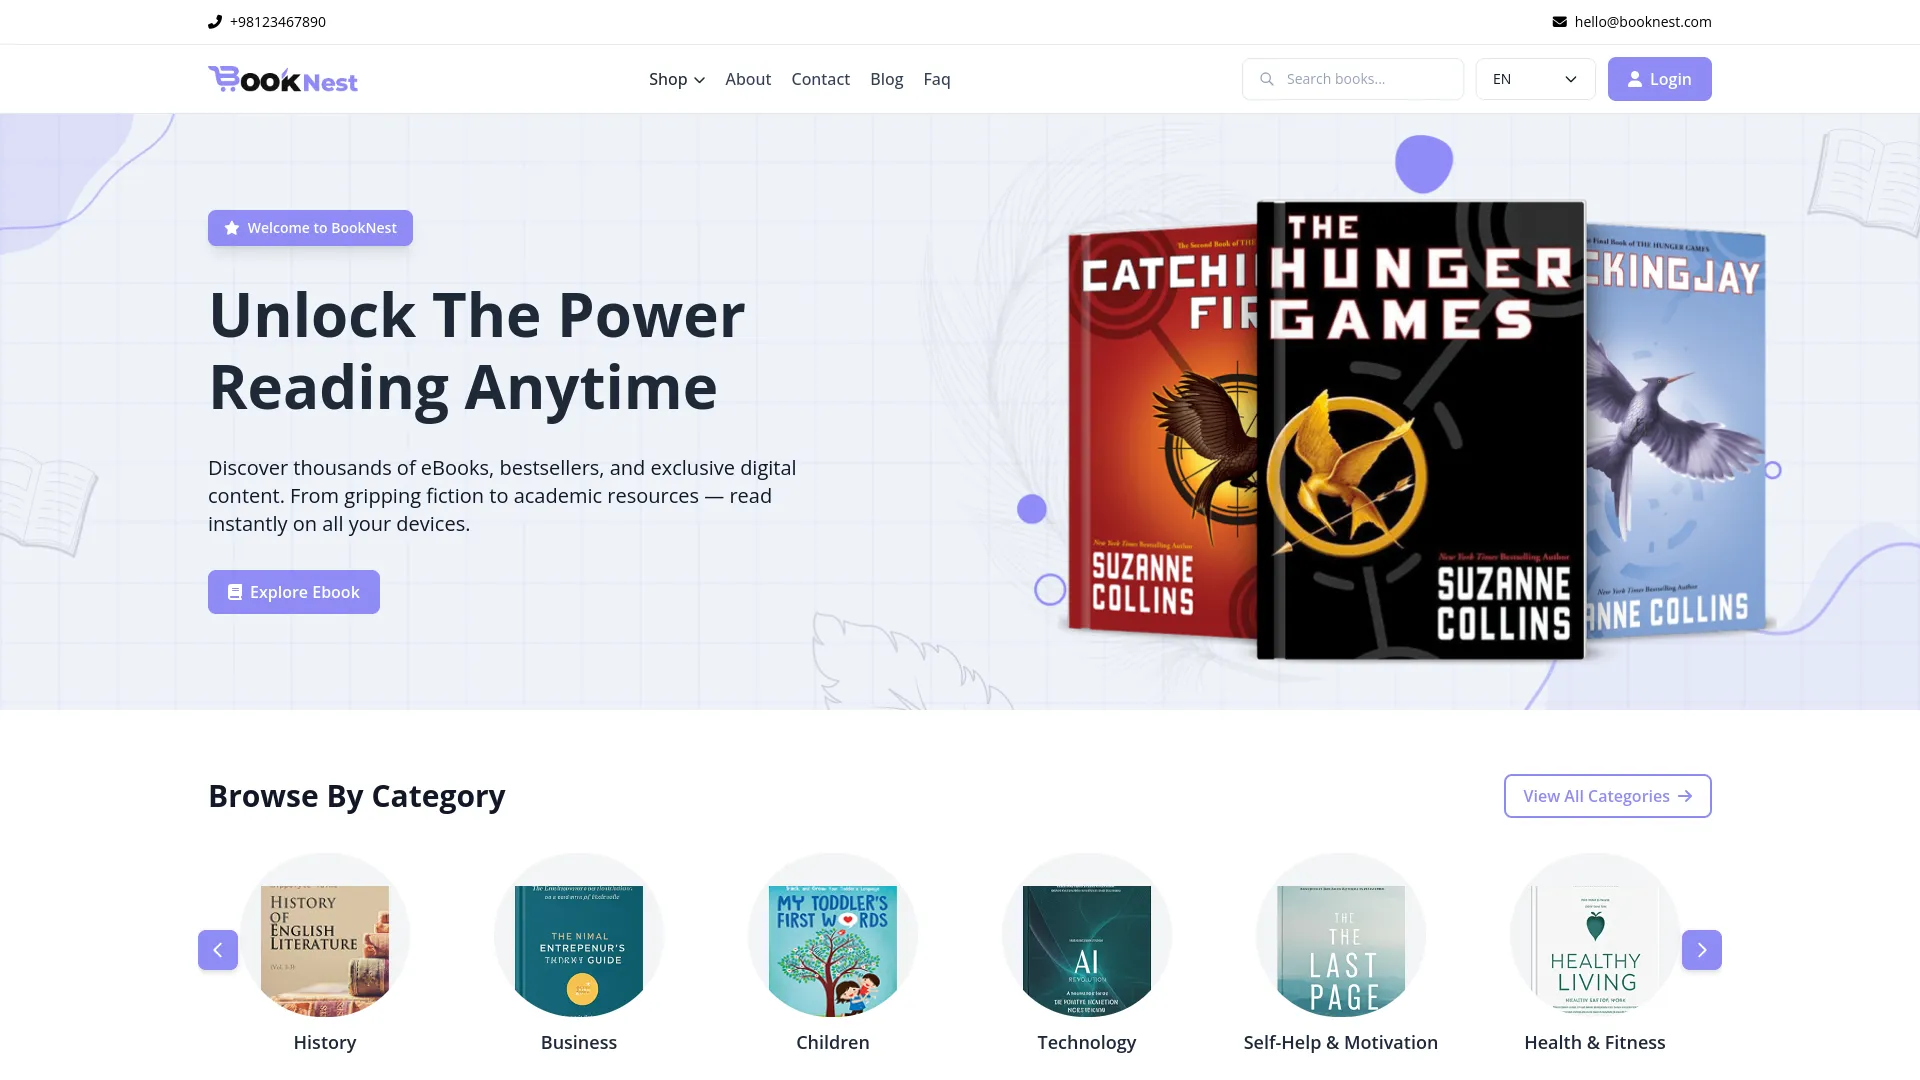
- The eBook Add-On public website is the reader-facing storefront where visitors can browse, purchase, and download eBooks. It features a favicon, brand logo dark & light, and navigation menu configured from System Setup. The top header displays contact information, and the main navigation includes links to Shop, About, Contact, Blog, FAQ, Search Books, Language Dropdown, and Login.
- Home Page : The homepage displays all sections configured in System Setup, including the banner section, category section from the Category section, popular eBook section from the eBook section, free books section, discover amazing books section using eBook section and System Setup tags, testimonial section from the Testimonial section, blog section from Blog section, newsletter section, and footer with brand settings, social links, quick links, custom pages, and contact information.
- About Page : Shows content and images from the System Setup About section, displays total counts of available eBooks, authors, active readers, and genres covered, and features an authors section populated from the Author section.

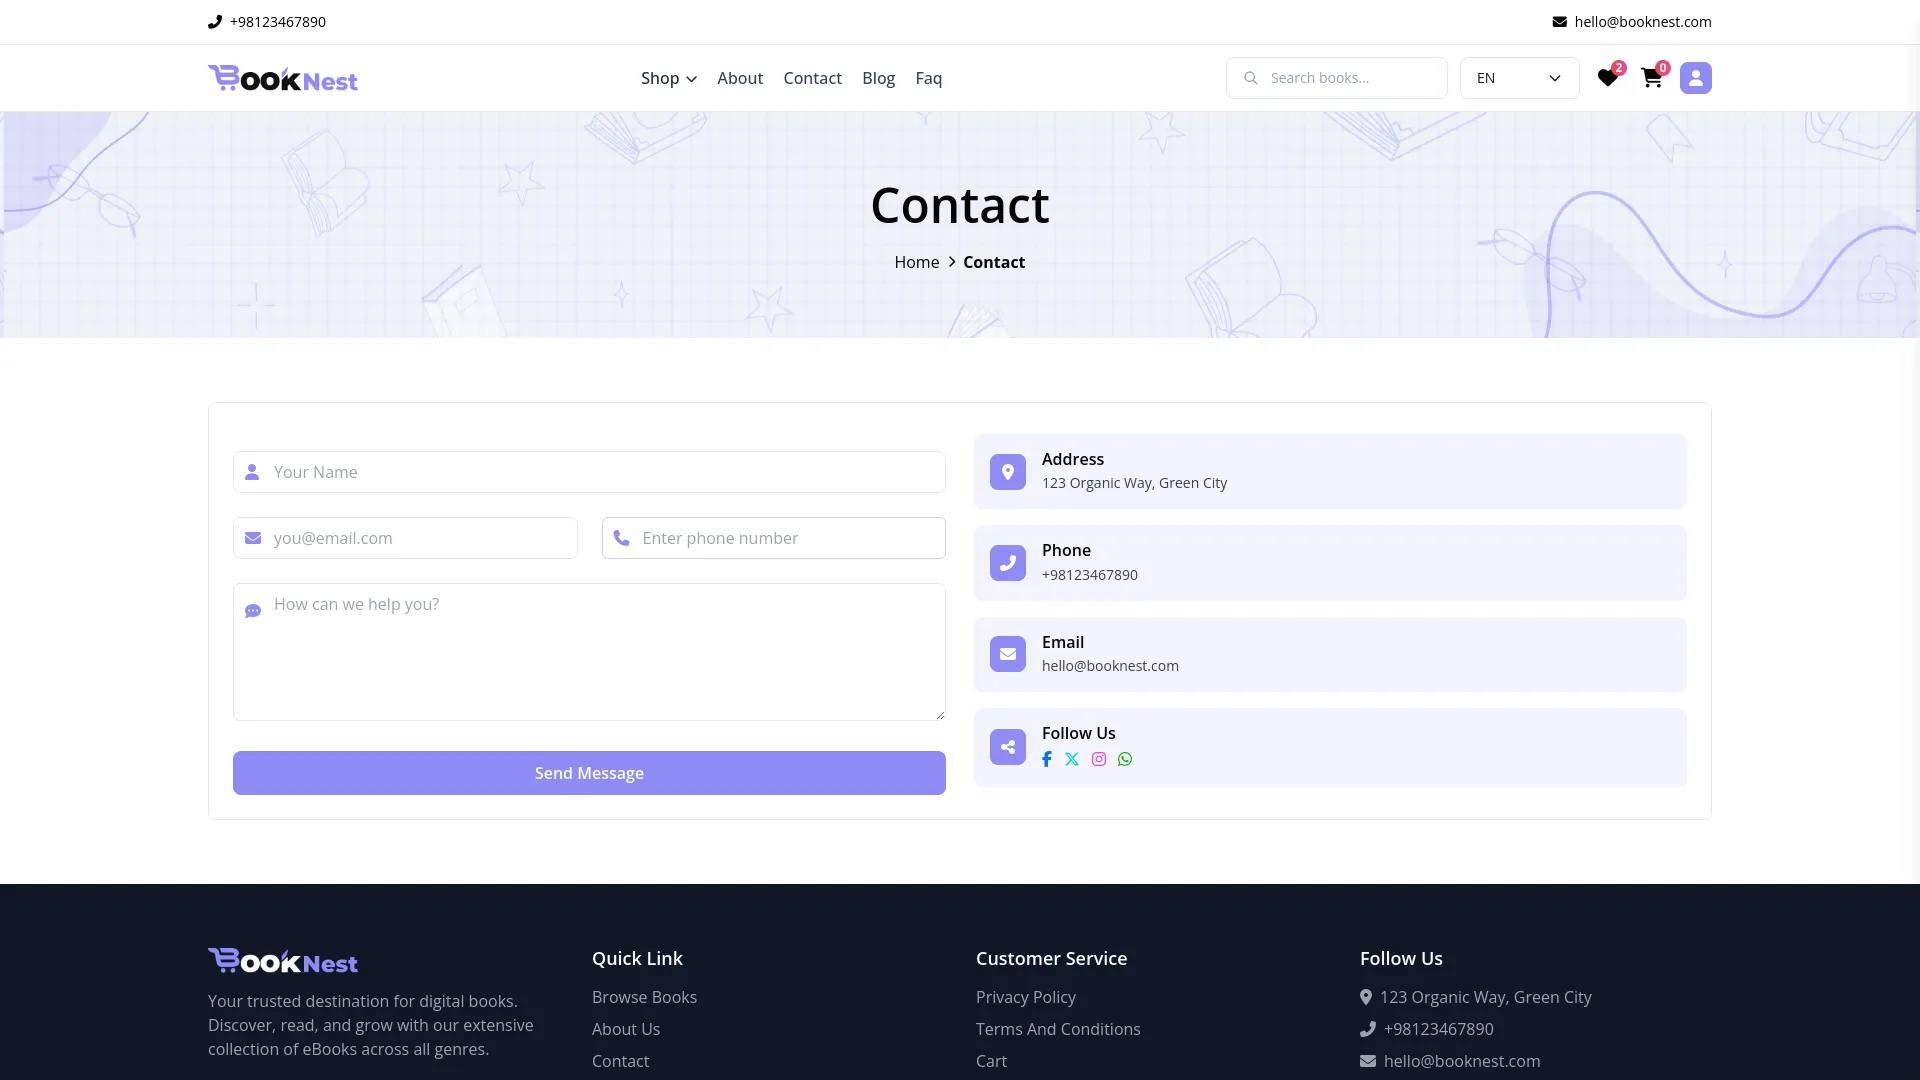
- Contact Page : Contains a contact form with fields for name, email, phone number, and description. Also displays location, phone number, email, and social media follow links from System Setup Contact Info and Social Links.
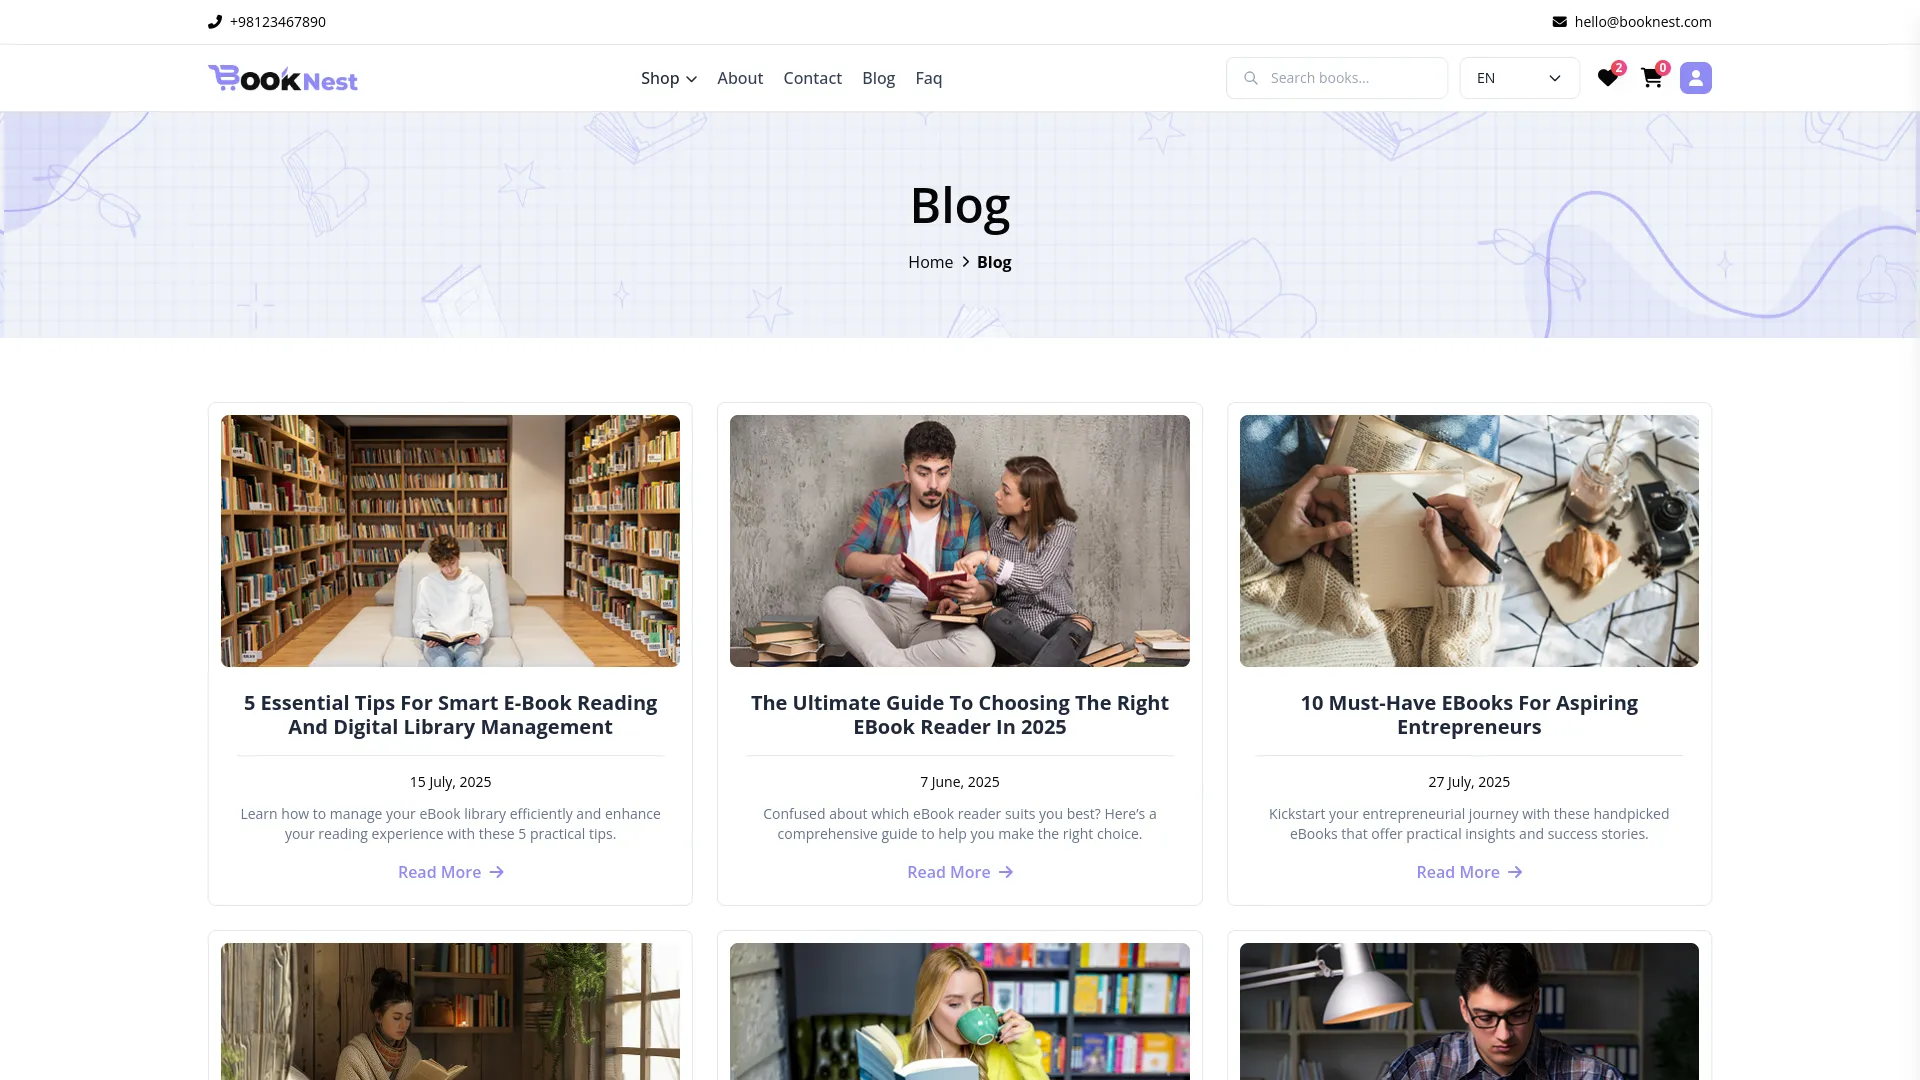
- Blog Page : Displays a list of blog cards showing the blog image, title, date, description, and read more buttons from the Blog section. Clicking on any blog redirects to the detailed article page.
- Article Page : Shows complete blog details, including title, author image and name, date, blog image, description, content, and tags from the Blog section. At the end, it displays an author’s image and bio information.
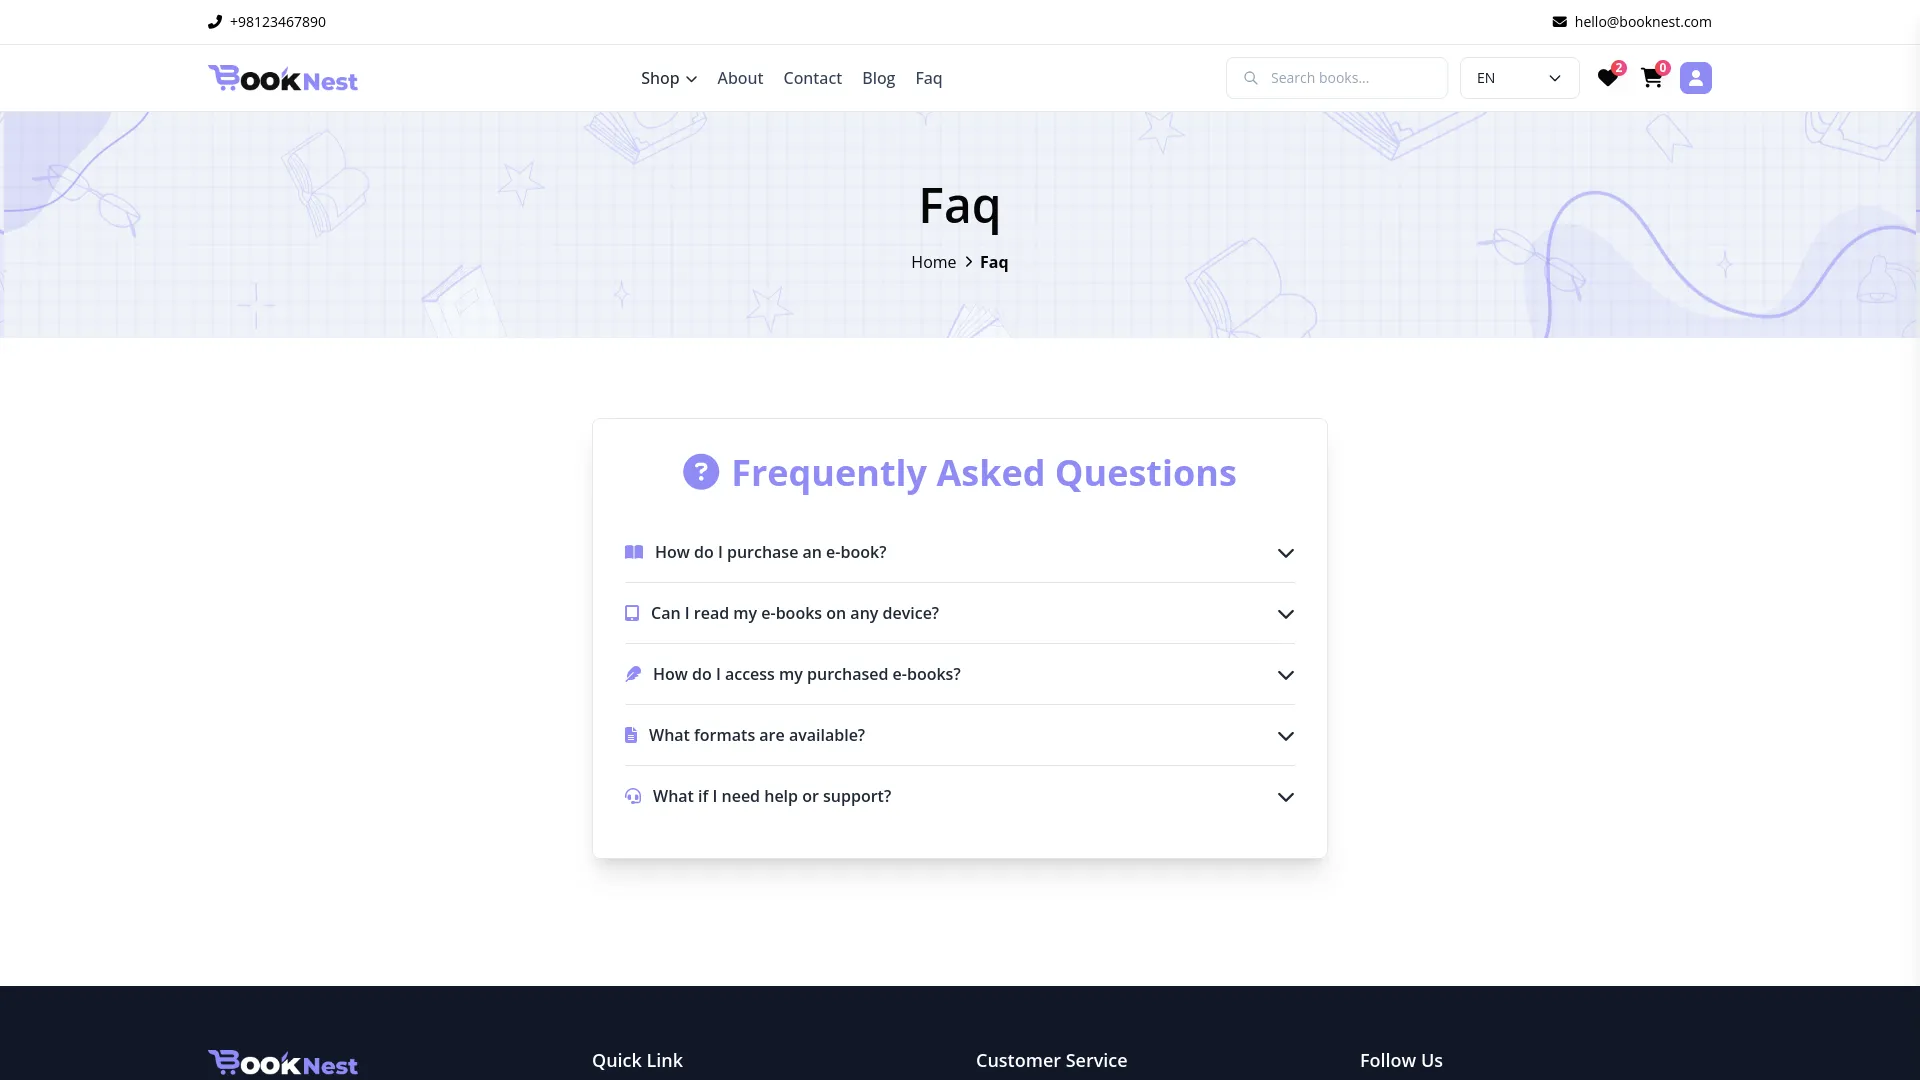
- FAQ Page : Displays a list of FAQ sections with icons, names, and descriptions from the System Setup FAQ section
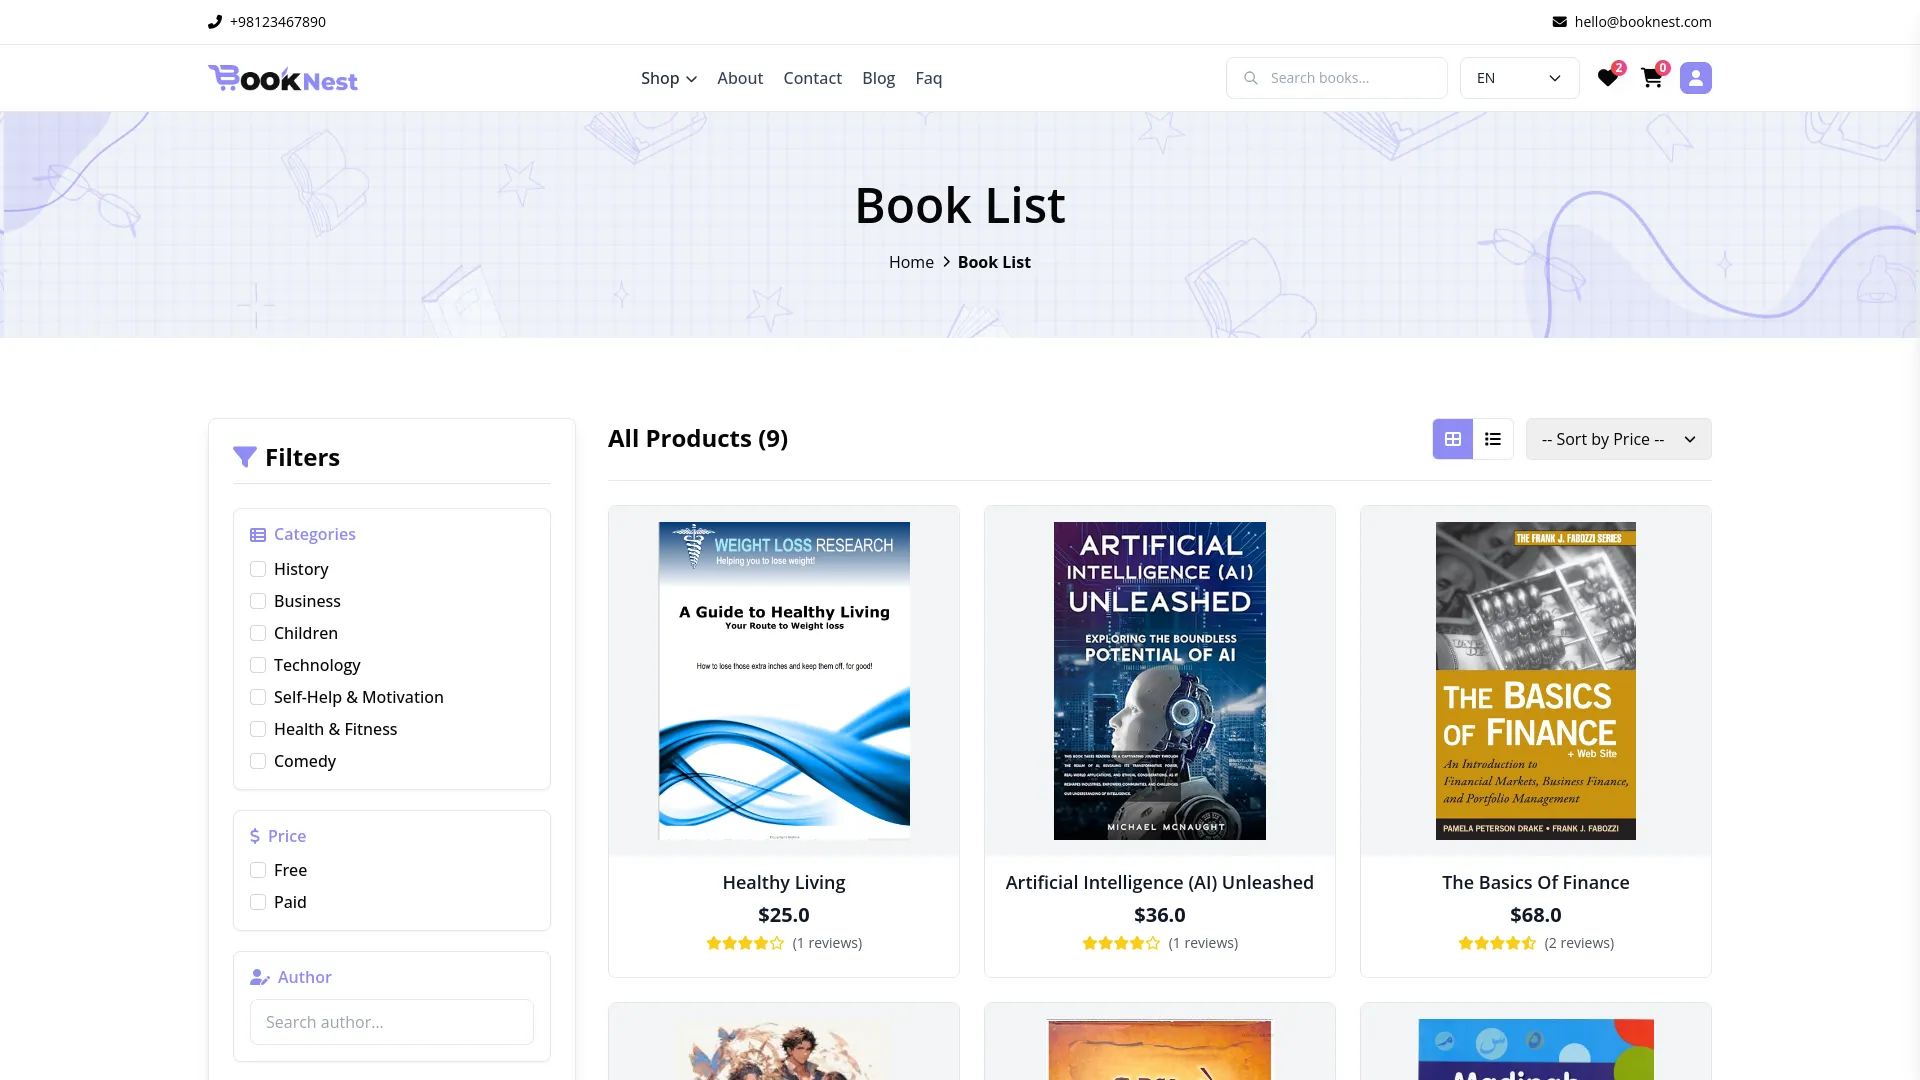
- Book List Page : Features sidebar filters for category checkboxes, price options for paid/free, author name search, language checkboxes, and rating filters. The top section includes a search bar, list/grid view options, and price sorting. The main content shows book cards with images, names, prices, and ratings.
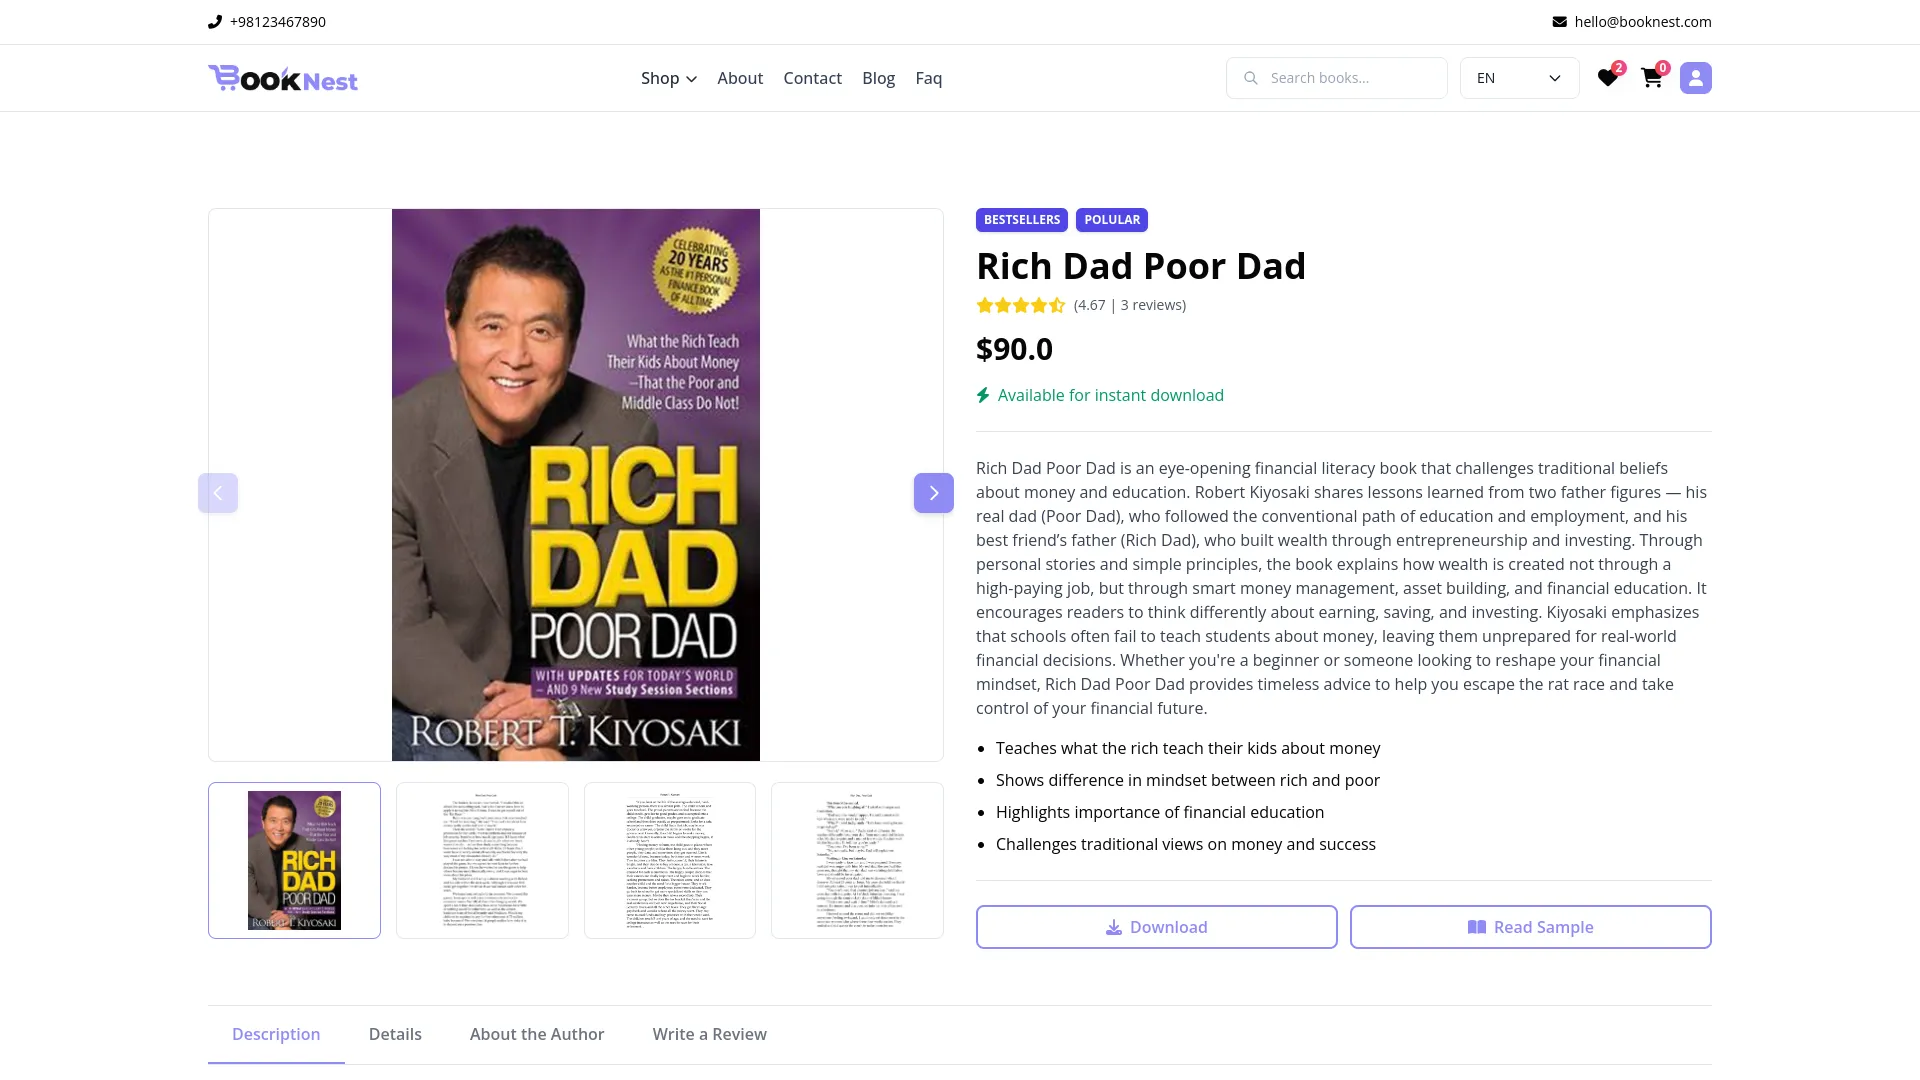
- Book Details Page : Shows book images, tags, name, average rating and total rating count, price, description, and description tags. Includes an Add to Cart button for unpurchased books or a Download and Read Sample button for purchased or free books. Contains tabs for Description, Details (format, pages, language, ISBN, publisher, release date, and file size), About the Author (profile, name, description, and link to all books by this author), and Write a Review section.
- Authentication System : Visitors can register or log in as readers.When a reader is register, a confirmation email is sent to the reader email if a new reader toggle is on (Settings -> System Settings -> Email Setting → Ebook).When the reader uses forget password, a password reset email is sent to their registered email address. If they attempt to purchase books, write reviews, add books to their wishlist, or add to cart without logging in, they will be prompted to sign in. After logging in, readers can: Purchase books, Add reviews, Manage their wishlist and cart, Access purchase history
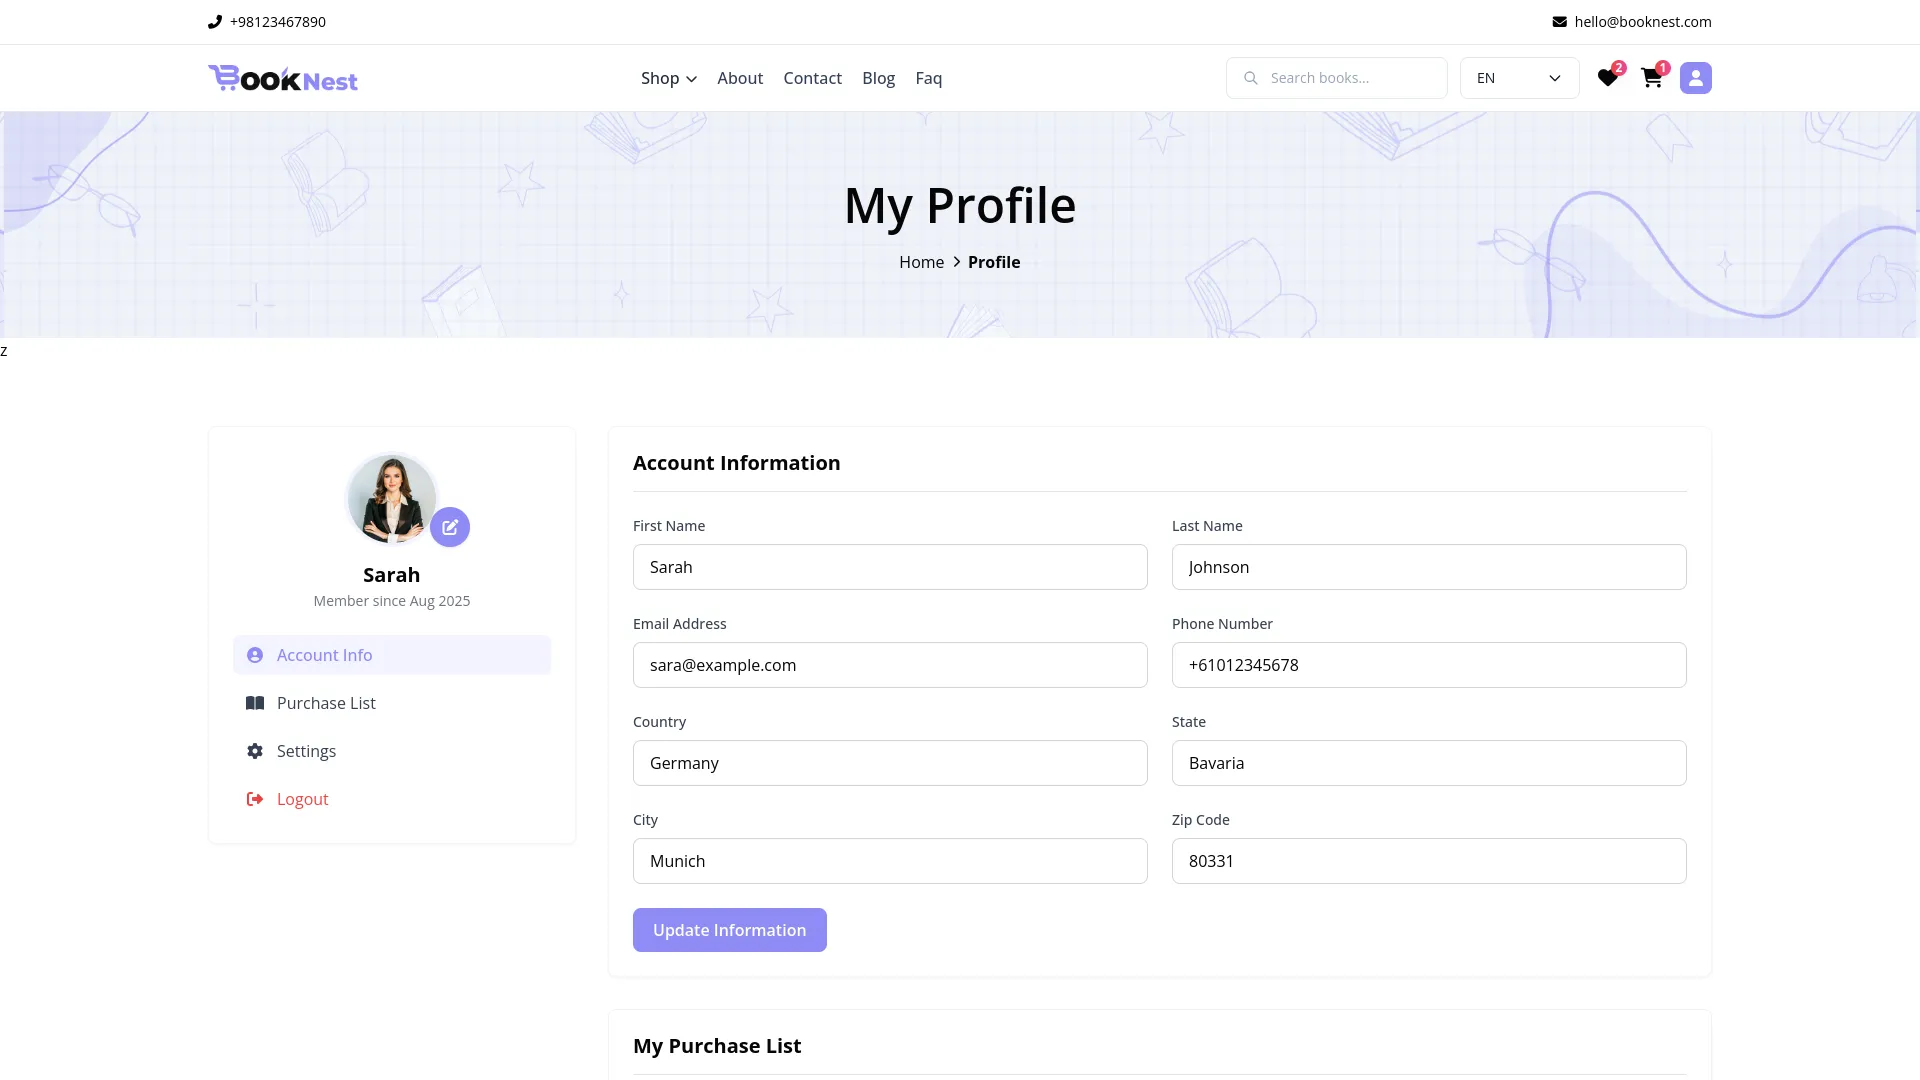
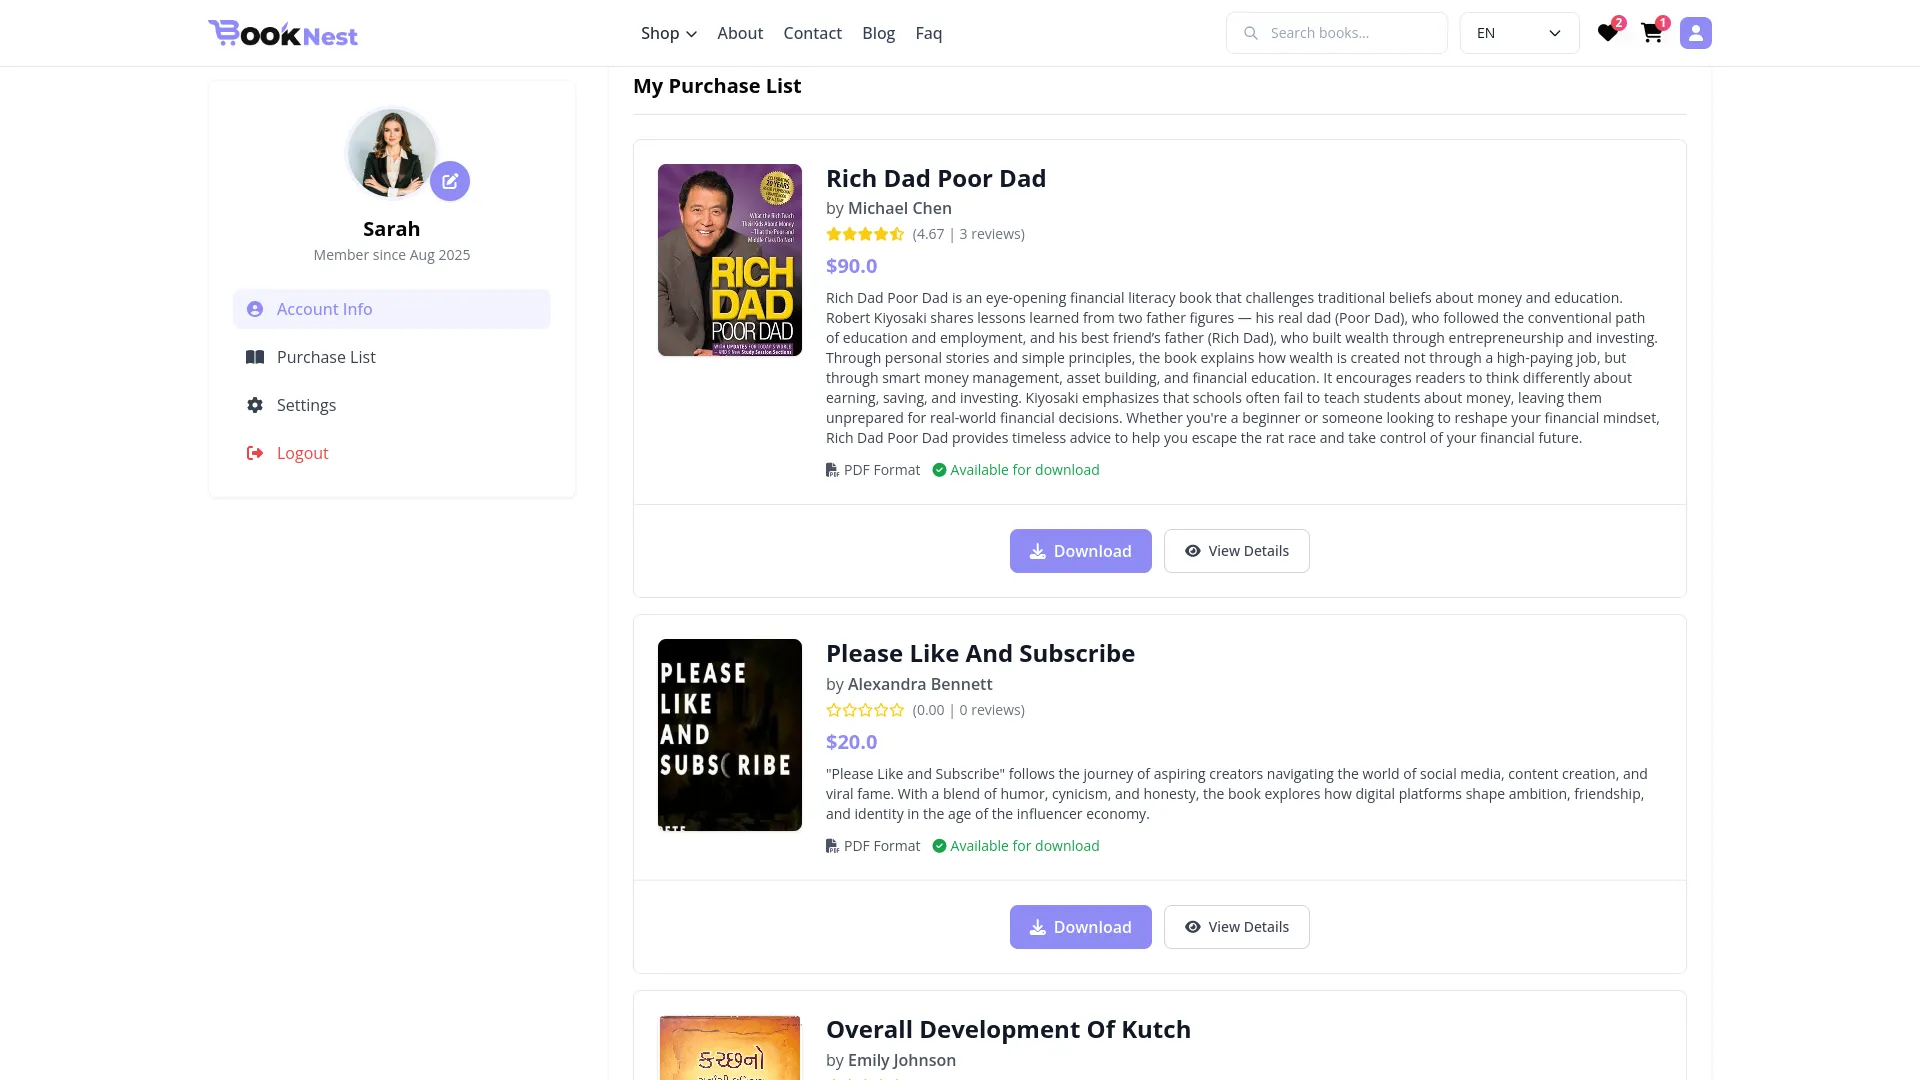
- My Profile Section : Includes Account Info for editing personal details like profile image, first name, last name, email, phone number, profile image, country, state, city, and zip code. My Purchase List shows all purchased books with Download and View Details buttons. Account Settings allows users to change their password by entering their current password, the new password, and confirming the new password.
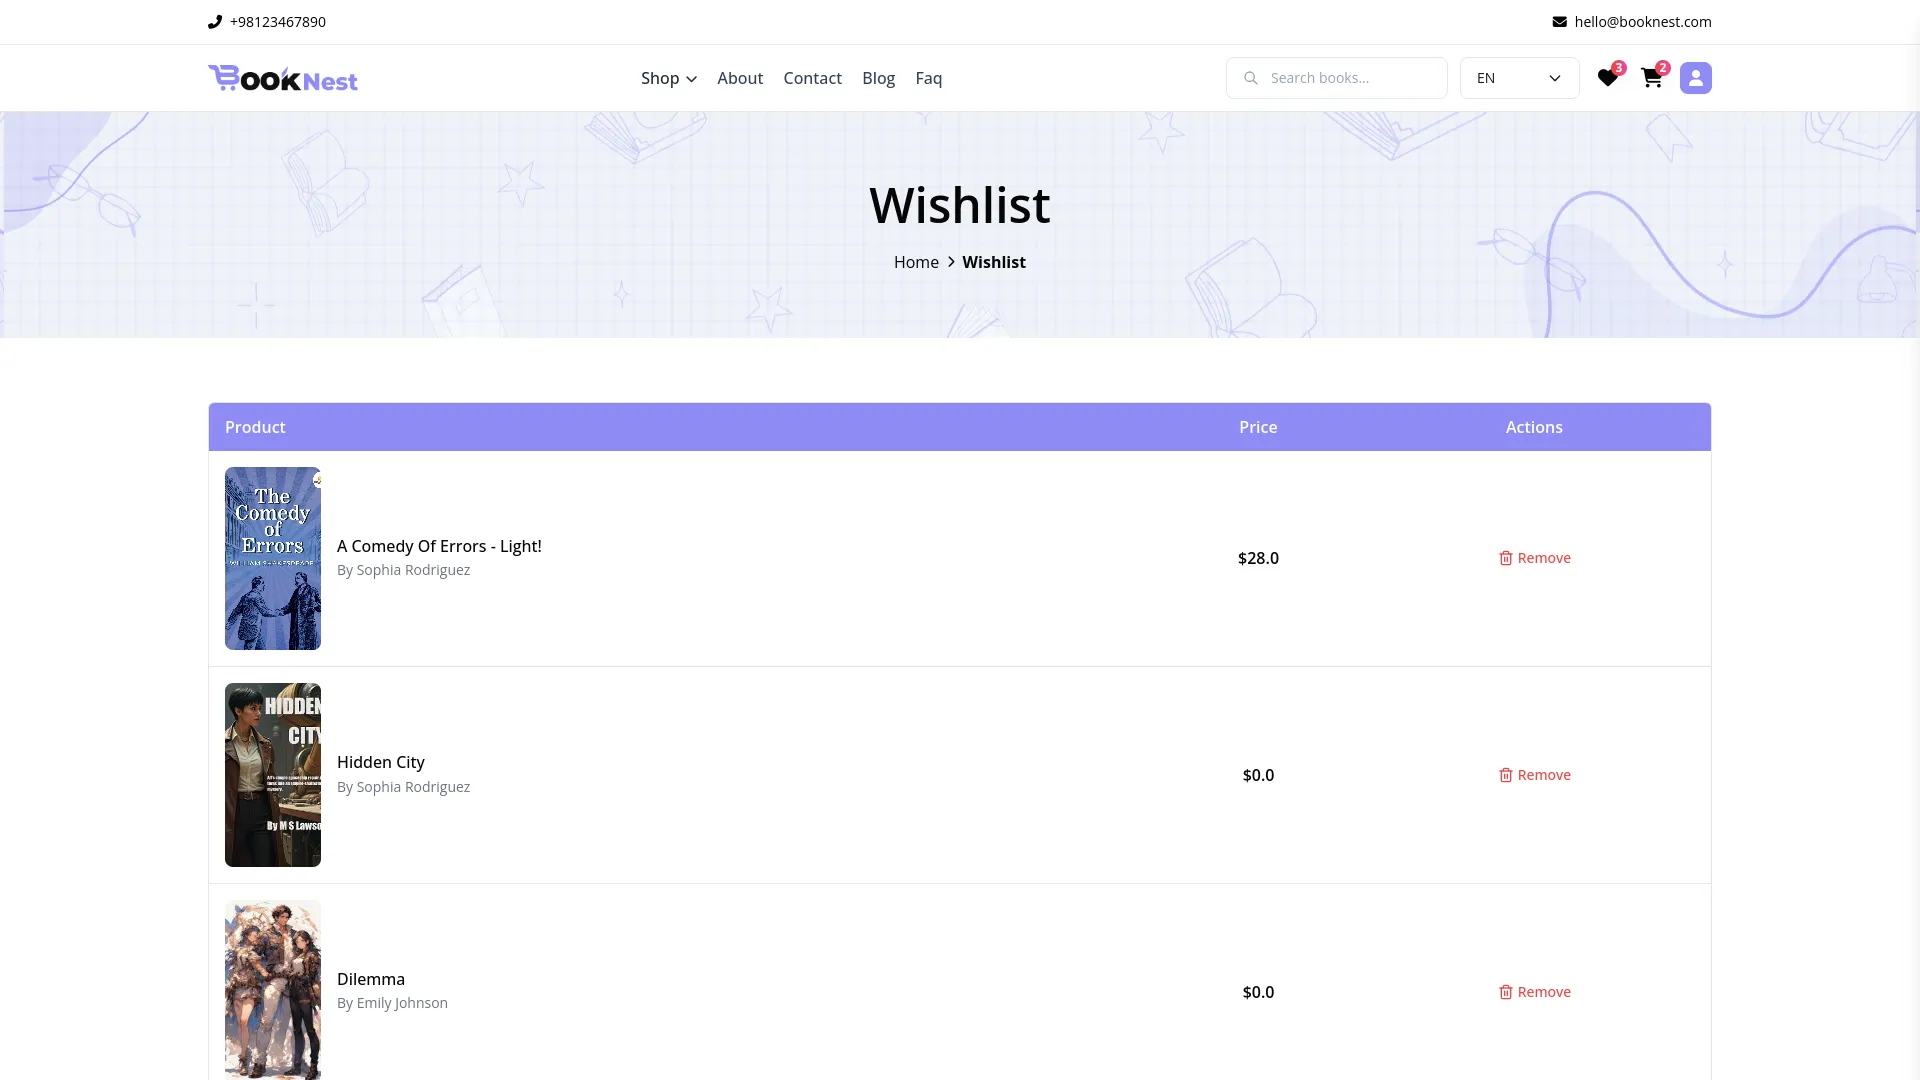
- Wishlist Page : Allows readers to save books using the heart icon, access the wishlist via the header heart icon showing the saved book image, book name, author, price and remove button to remove books from the wishlist.
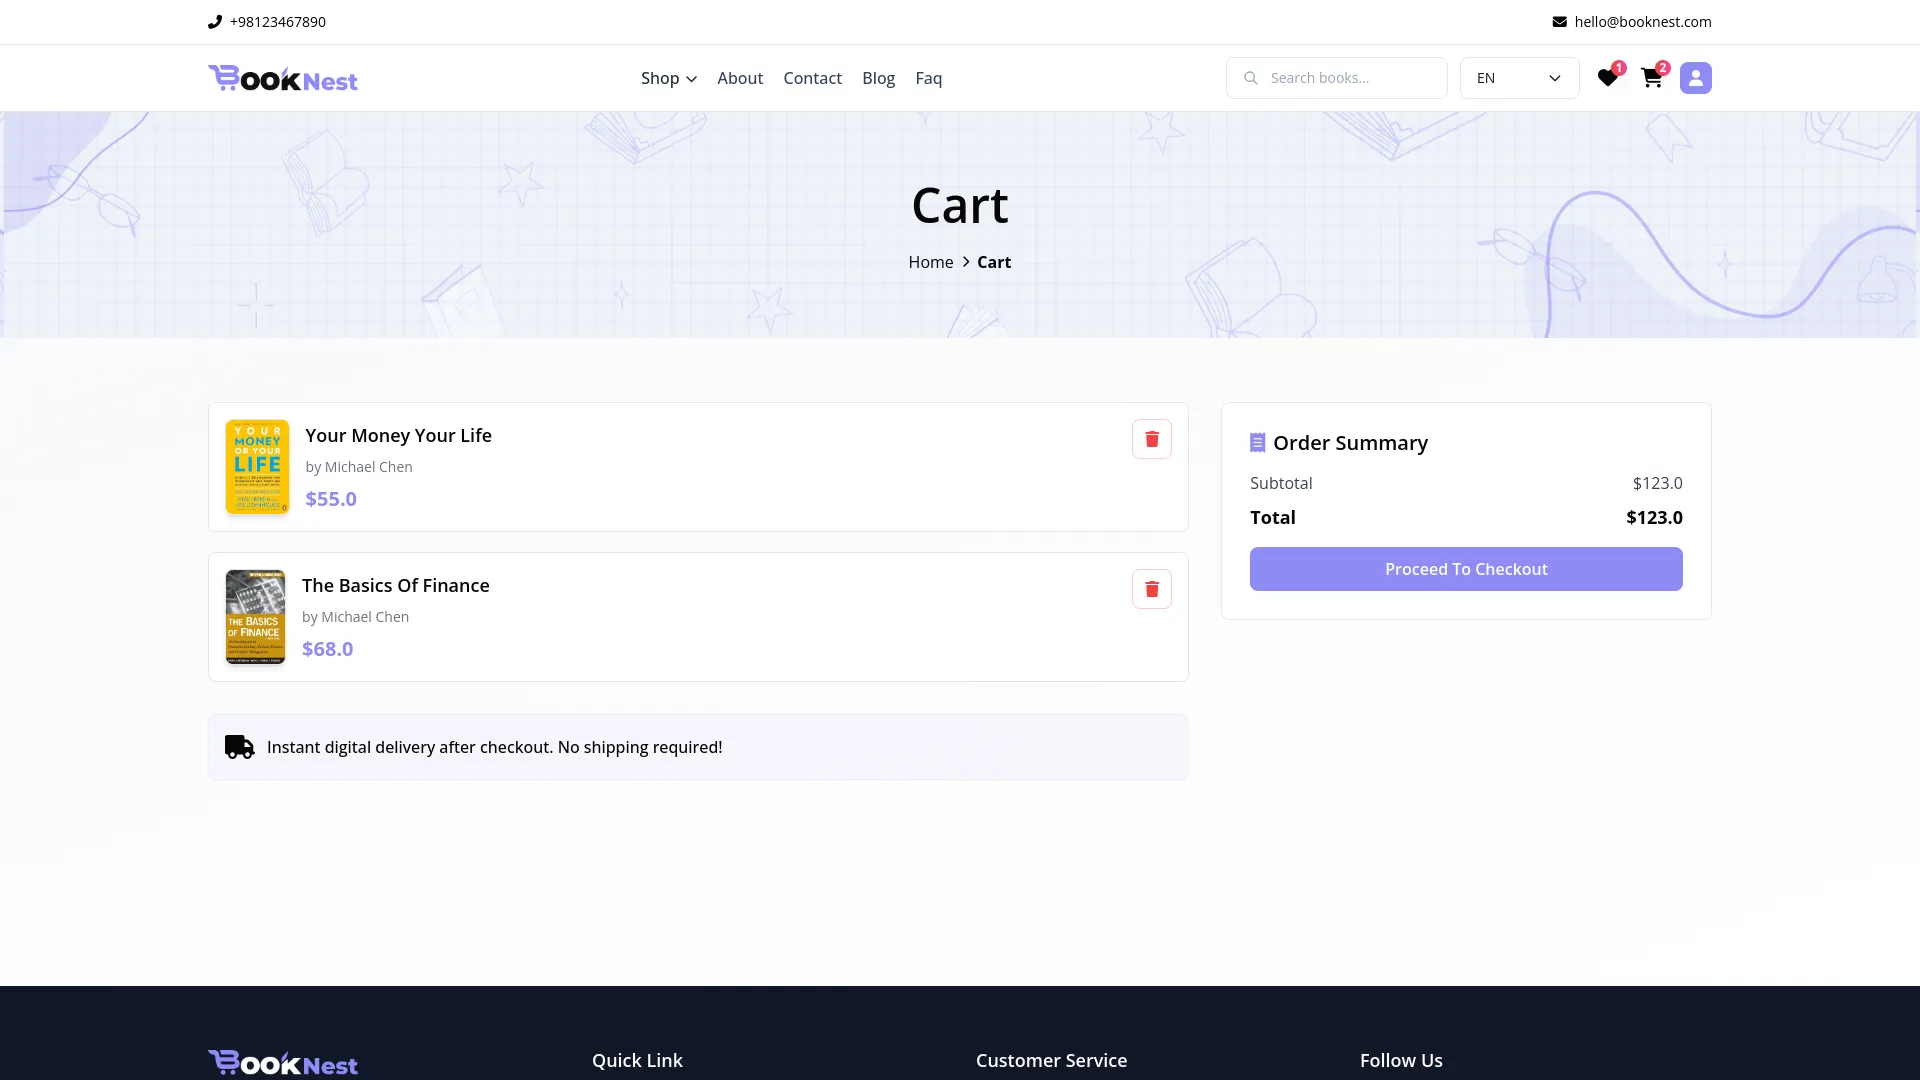
- Cart and Checkout : Users can add books to cart, access cart via header cart icon showing item count, and proceed to checkout with an order summary and payment options, including Stripe and PayPal. After successful payment, users are redirected to a purchase confirmation page with a printable order and book details.
Categories
Related articles
- Reward-Club Point – eCommerceGo Addon
- StoreGo – Product Features
- Service Slot Scheduler Integration in BookingGo SaaS
- Sign-In With LinkedIn – eCommerceGo Addon
- Time Tracker Management Integration in Dash SaaS
- senangPay Payment Gateway Integration
- Finding Email Credentials for the EMailbox Module in Dash SaaS
- RoadMap Central Integration in Dash SaaS
- Activity Log integration in Dash SaaS
- Recurring Invoice/Bills Integration in Dash SaaS
- Music Institute Integration in Dash SaaS
- Locker & Safe Deposit Integration in Dash SaaS
Reach Out to Us
Have questions or need assistance? We're here to help! Reach out to our team for support, inquiries, or feedback. Your needs are important to us, and we’re ready to assist you!


Need more help?
If you’re still uncertain or need professional guidance, don’t hesitate to contact us. You can contact us via email or submit a ticket with a description of your issue. Our team of experts is always available to help you with any questions. Rest assured that we’ll respond to your inquiry promptly.
Love what you see?
Do you like the quality of our products, themes, and applications, or perhaps the design of our website caught your eye? You can have similarly outstanding designs for your website or apps. Contact us, and we’ll bring your ideas to life.
