
Spreadsheet – WorkDo Dash SaaS Add-On Guide
Learn how to create, edit, and manage spreadsheets in WorkDo Dash SaaS.
Introduction
The Spreadsheets Add-On gives you a dedicated space to create, organize, and manage all your business data in spreadsheet format. You can build folders to group related files, create spreadsheets with a full-featured editor for tasks like budgeting, inventory tracking, and performance analysis, and link any folder or file to relevant business records such as Leads, Projects, or Assets. With built-in search, filtering, and sharing options, you can quickly find what you need and control who has access to it, keeping your spreadsheet library organized and easy to navigate as it grows.
How to Install the Add-On?
To Set Up the Spreadsheet Add-On, you can follow this link: Setup Add-On.
You can easily connect the data of these Add-Ons with the Spreadsheet in real-time. There will be a dedicated button for the spreadsheet at the top of all the Add-Ons mentioned, by clicking which you can connect all the required data in the form of a spreadsheet.
How to use the Spreadsheet Add-On?
Manage Spreadsheets
- The Spreadsheets Add-On lets you organize and manage your files using folders and cards, giving you a clear visual overview of your entire spreadsheet library.
- To create a new folder, click the “New Folder” button at the top-right of the page. Enter a required Folder Name. Optionally, add a Description. Click Create to add the folder to your grid.
- To create a new file, use the “New File” button by entering the File Name and adding your content or data in sheet format. Click Create to open the spreadsheet editor. Use the toolbar to build your data; options include undo/redo, print, font family and size, bold/italic/underline/strikethrough, text color, fill color, merge cells, borders, cell alignment, text wrap, insert table, filter, and a sum/functions menu. Use spreadsheets to track budgets, manage inventory, or analyze performance data.
- Four summary cards at the top of the page show Total Items, Total Folders, Total Files, and Total Size, giving you an instant snapshot of your spreadsheet library. Use the Search bar to find folders and files by name.
- Two filter dropdowns help narrow results: Filter by Related (categories such as Project, Contract, Lead, Deal, Tour & Travel, Hospital, Purchase, CMMS, LMS, Sales, School & Institute, Newspaper, and Assets) and Filter by Module, which lets you drill down to a specific record once a related category is selected. After selecting the filters, click Apply Filter to view the filtered data. To remove the filters and display all records again, click Clear Filter.
- The Folders section displays each folder as a card showing its name, Updated At date, and Items count. If a folder is linked to a business record, its card also shows a Related To label along with avatars of the linked users.
- The Files section displays each spreadsheet as its own card, showing the file name, Updated At date, and file Size.
- Folder or file card to access quick actions: View to open the folder or file, Edit to make changes to the folder details or spreadsheet content. Share to grant access to other users. Related: Link the item to a business record. Delete to remove the folder or file permanently in the system.
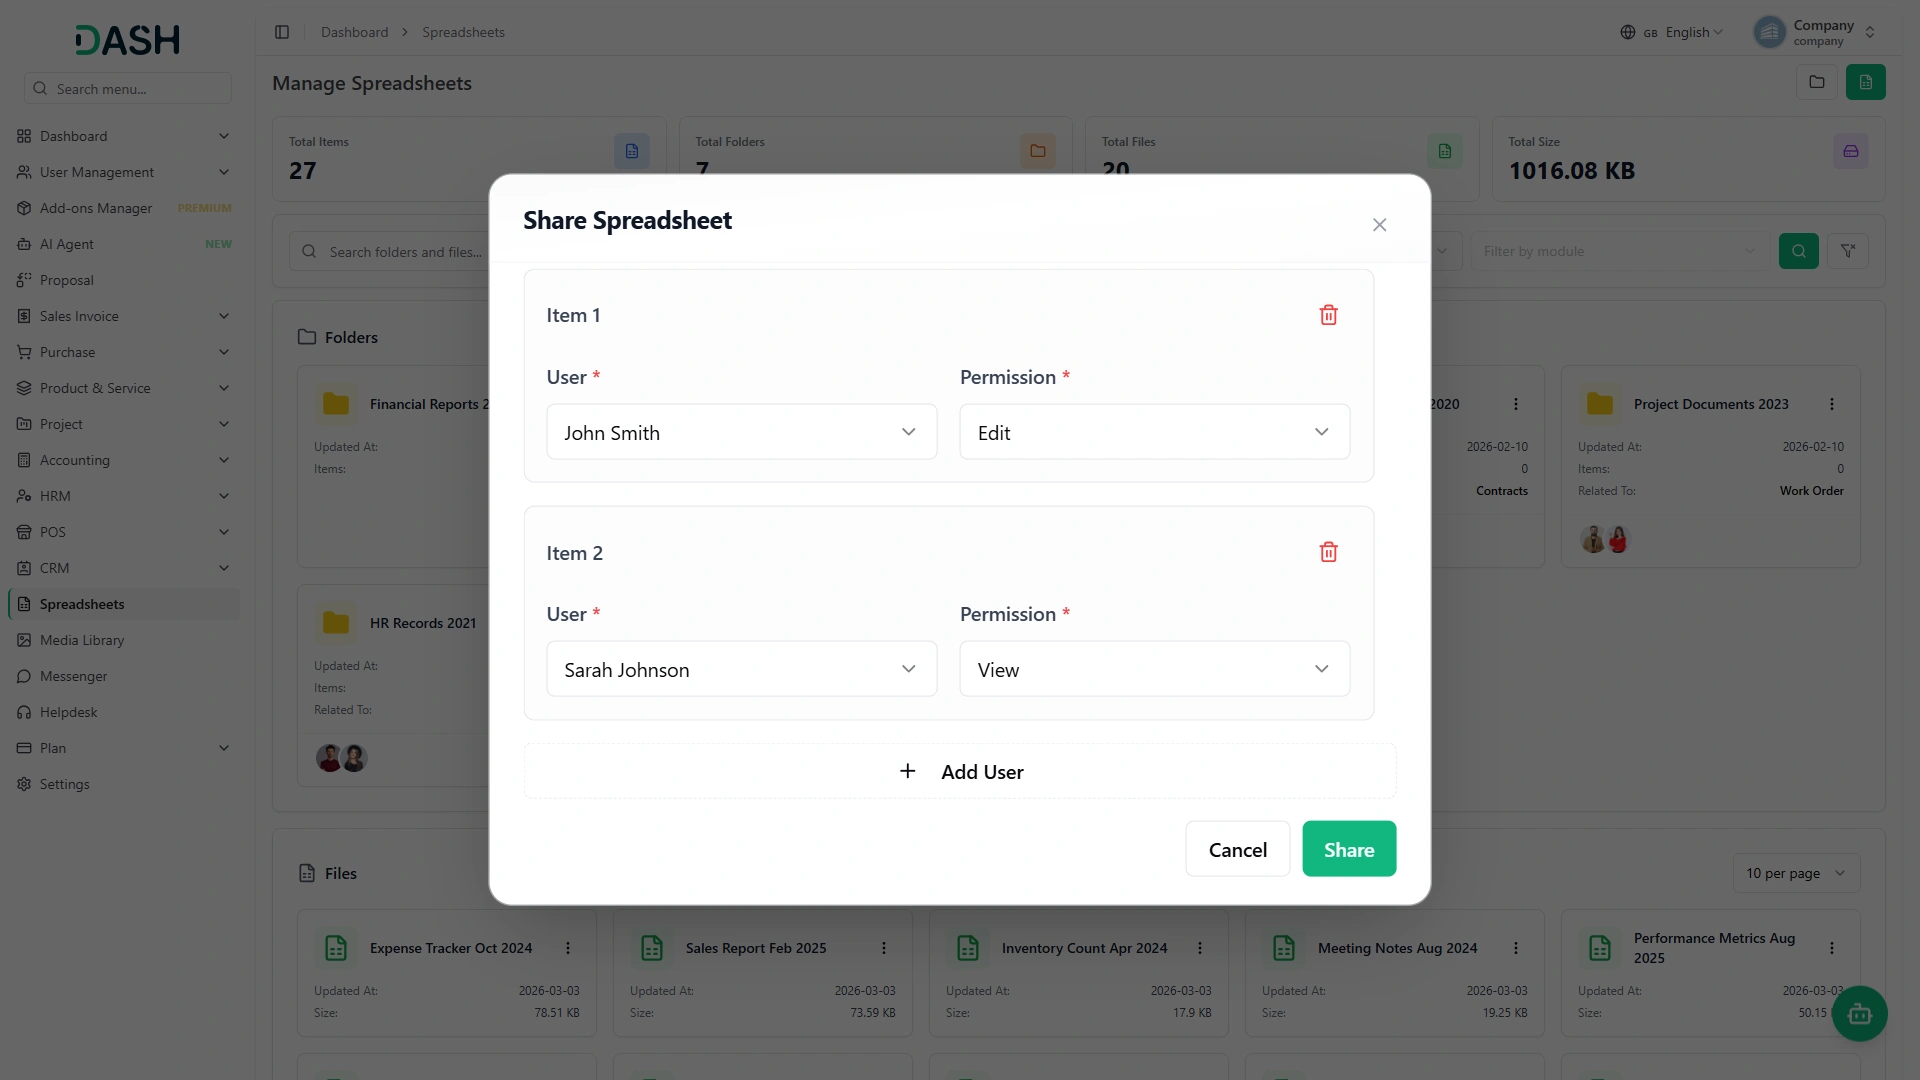
- When a folder or file card is selected, share the option. In the Share Spreadsheet popup, select a User from the dropdown. Choose a Permission level. Click “+ Add User” to share with additional people, or use the trash icon to remove a row. Click Share to confirm, or Cancel to close without saving.
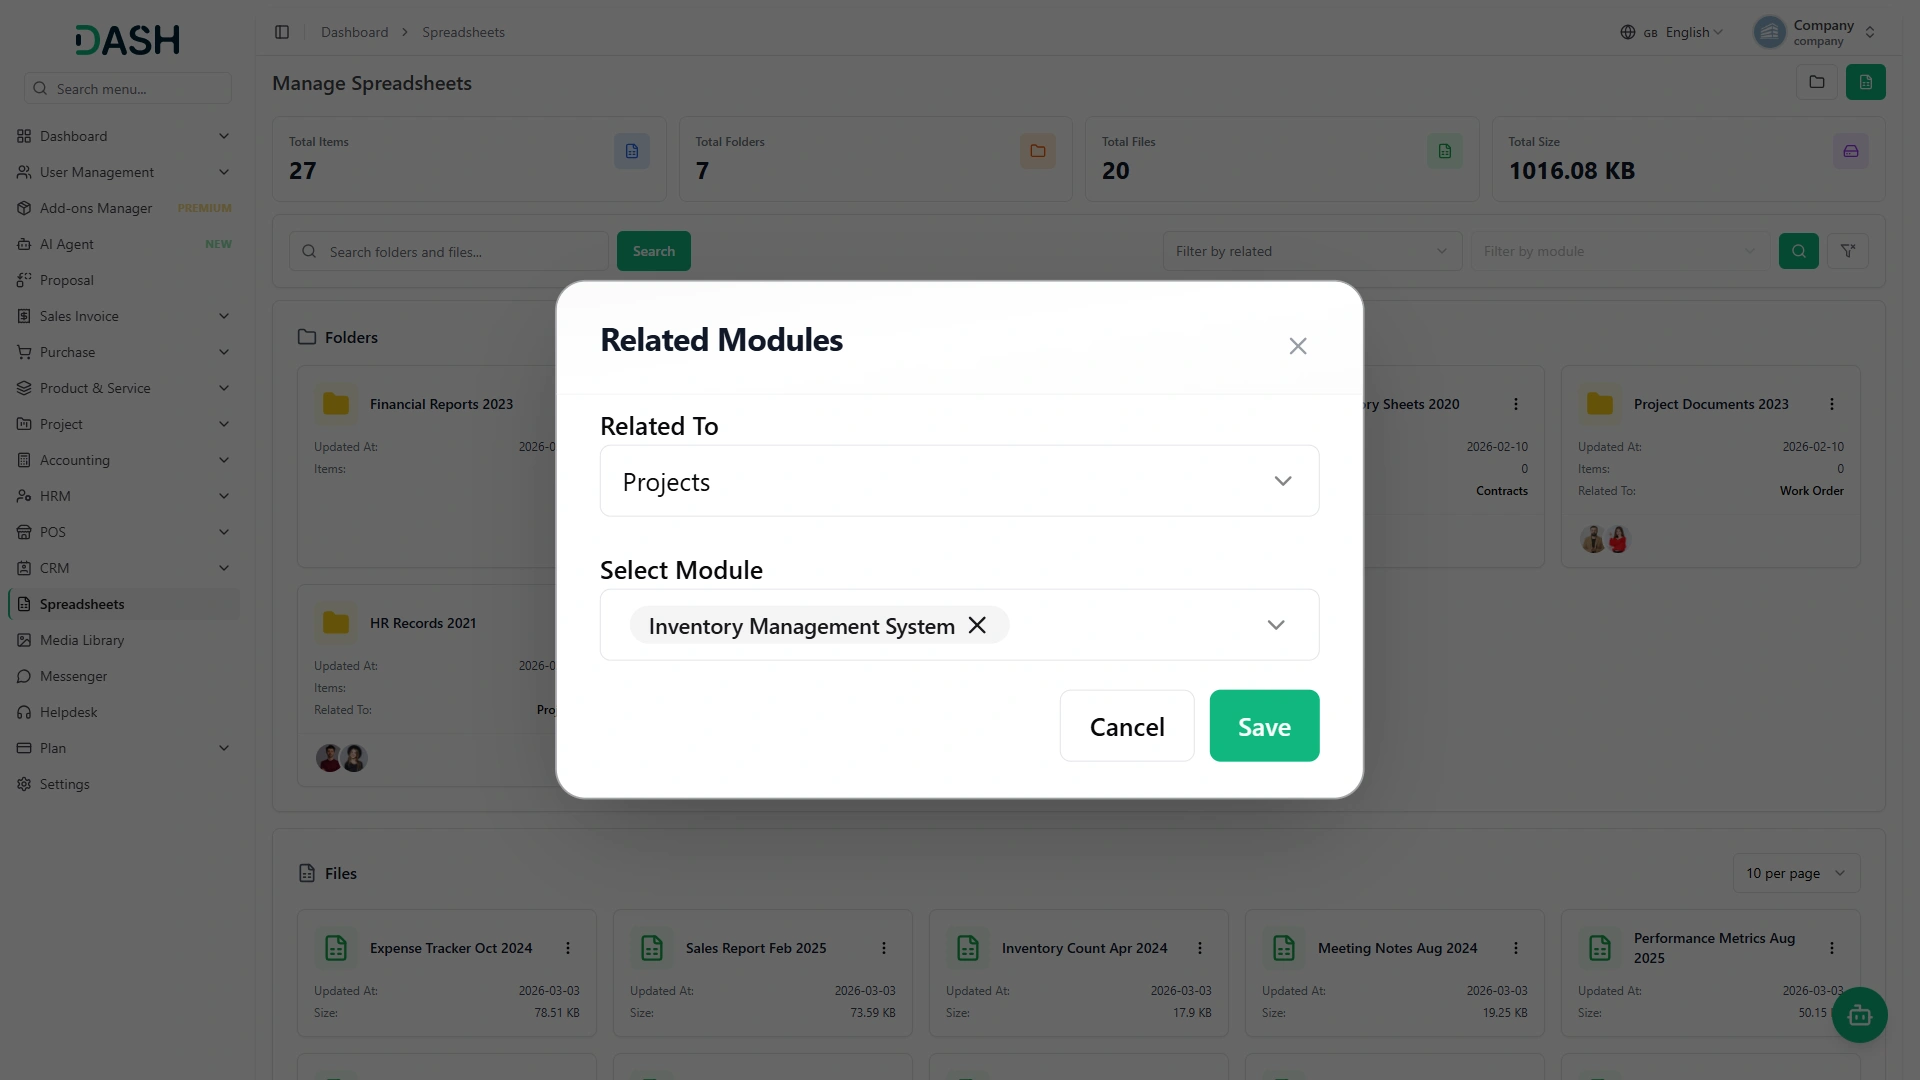
- When a folder or file card is selected, the Related option. In the Related Modules popup, choose a module from the Related To dropdown (for example, Assets). Use the Select Module field to choose the specific record you want to link to the item; the selected record appears as a removable tag. Click Save to apply the changes, or Cancel to close the popup without saving.
- When you click the View button, the folder card opens. The same stat cards, search bar, and filter dropdowns remain available inside the folder. If the folder has no spreadsheets yet, click Create Spreadsheet in the empty state to add the first file directly inside that folder.
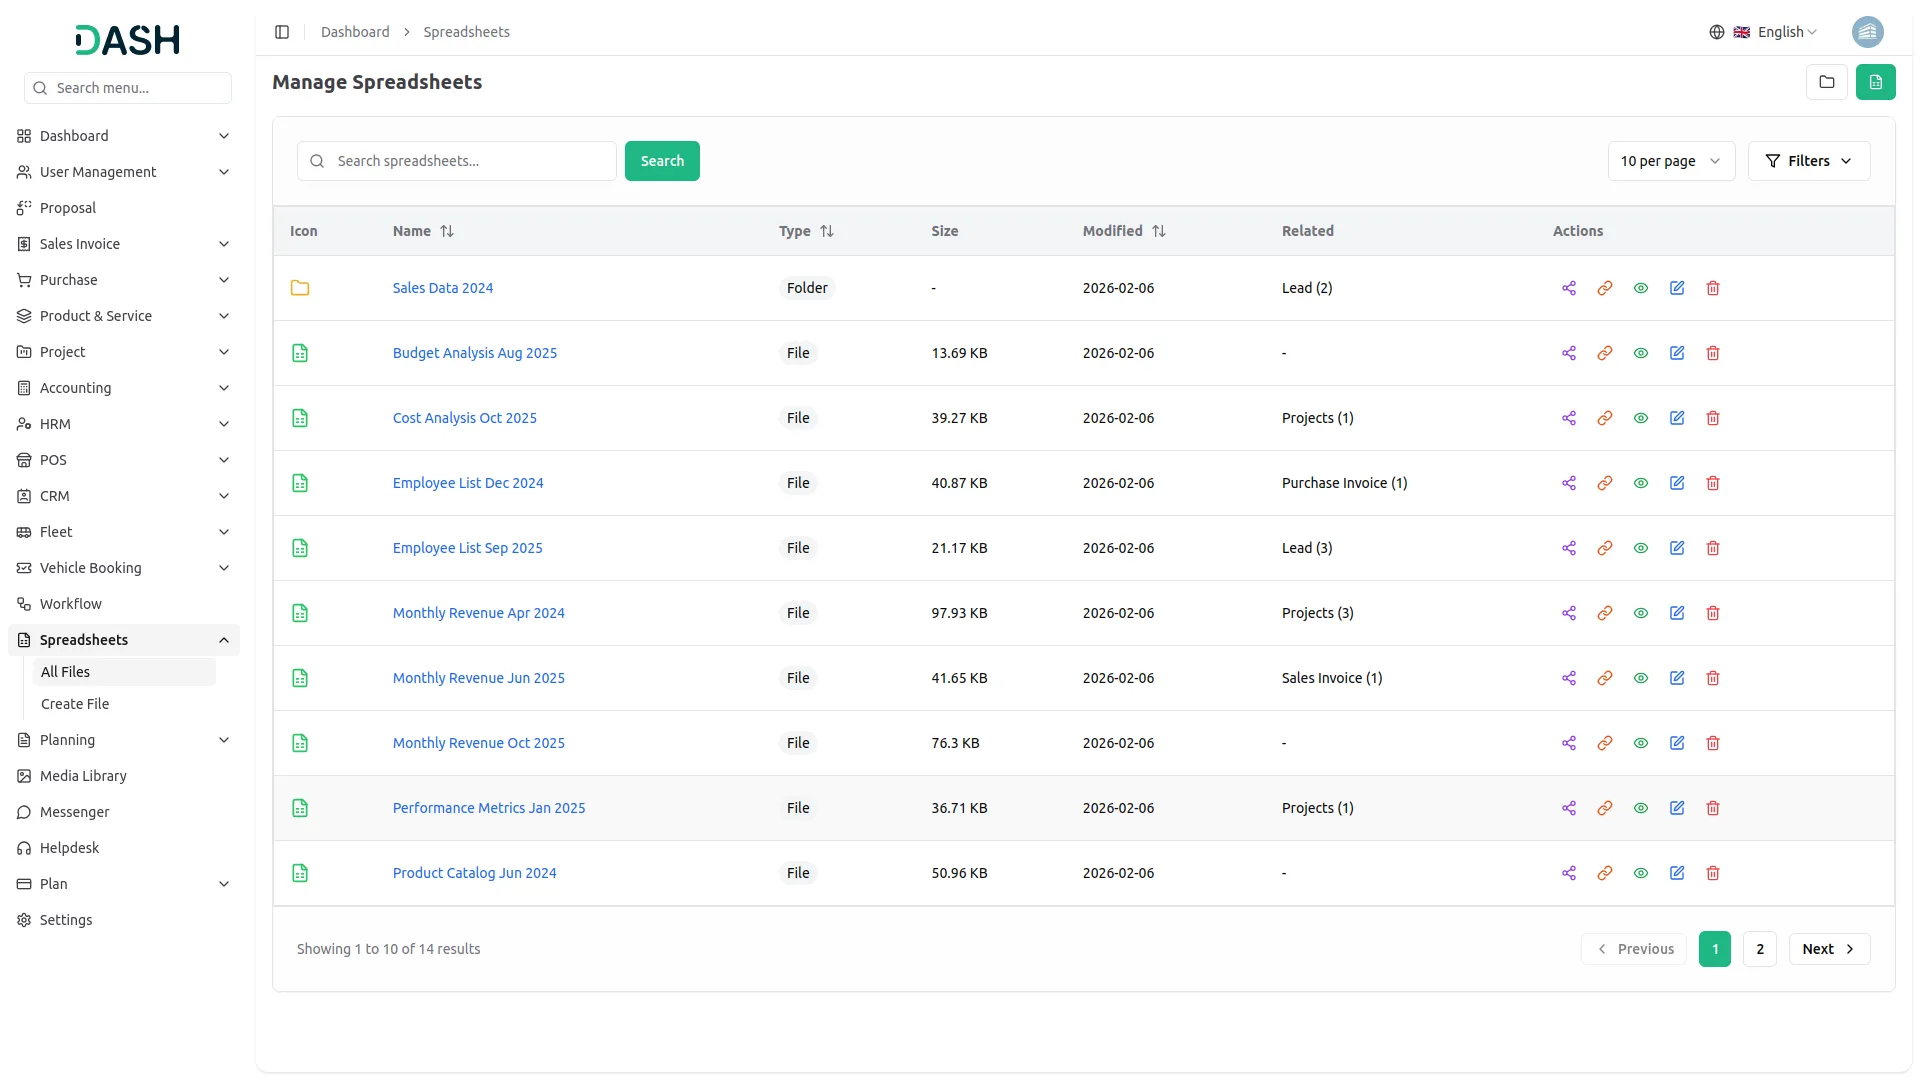
Working with Files and Folders
- In the Action column, you can access several functions that enable comprehensive file management. “Related Folder” allows you to link a file or folder with a specific model and its record, such as connecting a spreadsheet to “Website Development Project” or a specific tour in Tour & Travel. This linking ensures your spreadsheets maintain contextual relationships with your business operations.
- “Share” lets you share files or folders with specific users and set permissions as either View or Edit. When shared, the particular user will see the shared file or folder in their login. This feature enables team collaboration while maintaining control over who can view or modify your spreadsheets.
- “View” opens and displays the content of a file in read-only mode, perfect for reviewing data without risk of accidental changes. This button is only visible for files, not folders, since folders serve as containers rather than having viewable content.
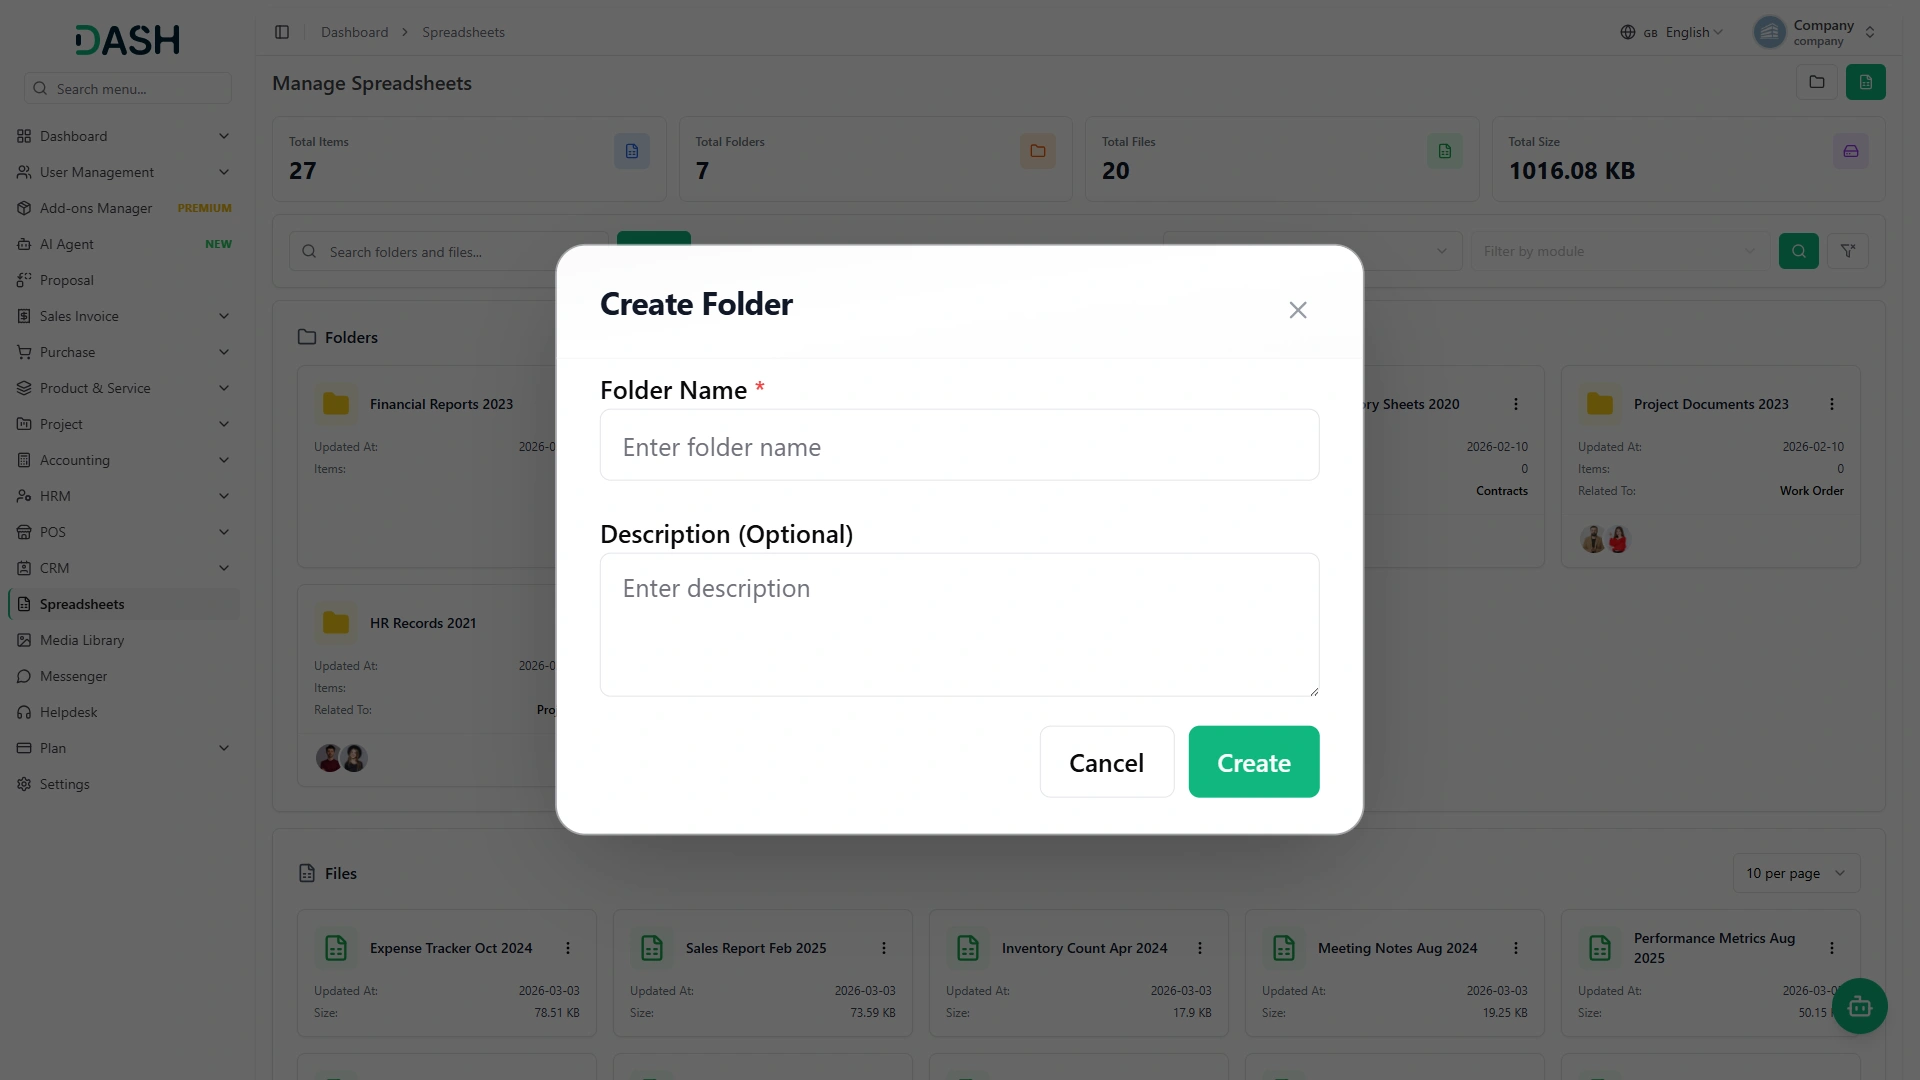
- “Edit” allows you to rename a folder or update the content of a file. For folders, this means changing the folder name to better reflect its purpose. For files, you get full editing capabilities to modify data, formulas, and formatting.
- “Delete” permanently removes a file or folder from the system. Use this function carefully as the deletion cannot be undone, and deleting a folder will also remove all its contents.
Categories
Related articles
- Pharmacy Management – WorkDo Dash SaaS Add-On Guide
- Hotel & Room Management – WorkDo Dash SaaS Add-On Guide
- Laundry Management – WorkDo Dash SaaS Add-On Guide
- Courier Management – WorkDo Dash SaaS Add-On Guide
- Team Booking – BookingGo SaaS Add-On Guide
- Rocket.Chat – WorkDo Dash SaaS Add-On Guide
- ToDo – BookingGo SaaS Add-On Guide
- Quiz Management – WorkDo Dash SaaS Add-On Guide
- Shopify Sync – WorkDo Dash SaaS Add-On Guide
- Waiting List – BookingGo SaaS Add-On Guide
- User Manual – Task SaaS
- Mercado Pago – BookingGo SaaS Add-On Guide
We're Here to Help - Let's Talk
Have questions about our solutions, customization services, or business tools? Our team is here to help you. let's talk.