Assets Integration in Dash SaaS
Assets are the backbone of an organization, representing valuable resources that underpin its capabilities and operations.
Introduction
The Assets Management System is a comprehensive software solution designed to help organizations track, manage, and maintain their physical assets throughout their lifecycle. This system allows you to categorize assets, record purchase information, monitor asset distribution, track defective items, and maintain detailed historical records. The system provides tools for asset creation, distribution management, defective asset handling, and complete audit trails to ensure efficient asset utilization and accountability.
How To Install The Add-On?
To Set Up the Assets Add-On, you can follow this link: Setup Add-On
How To Use The Assets Add-On ?
System Setup
Category
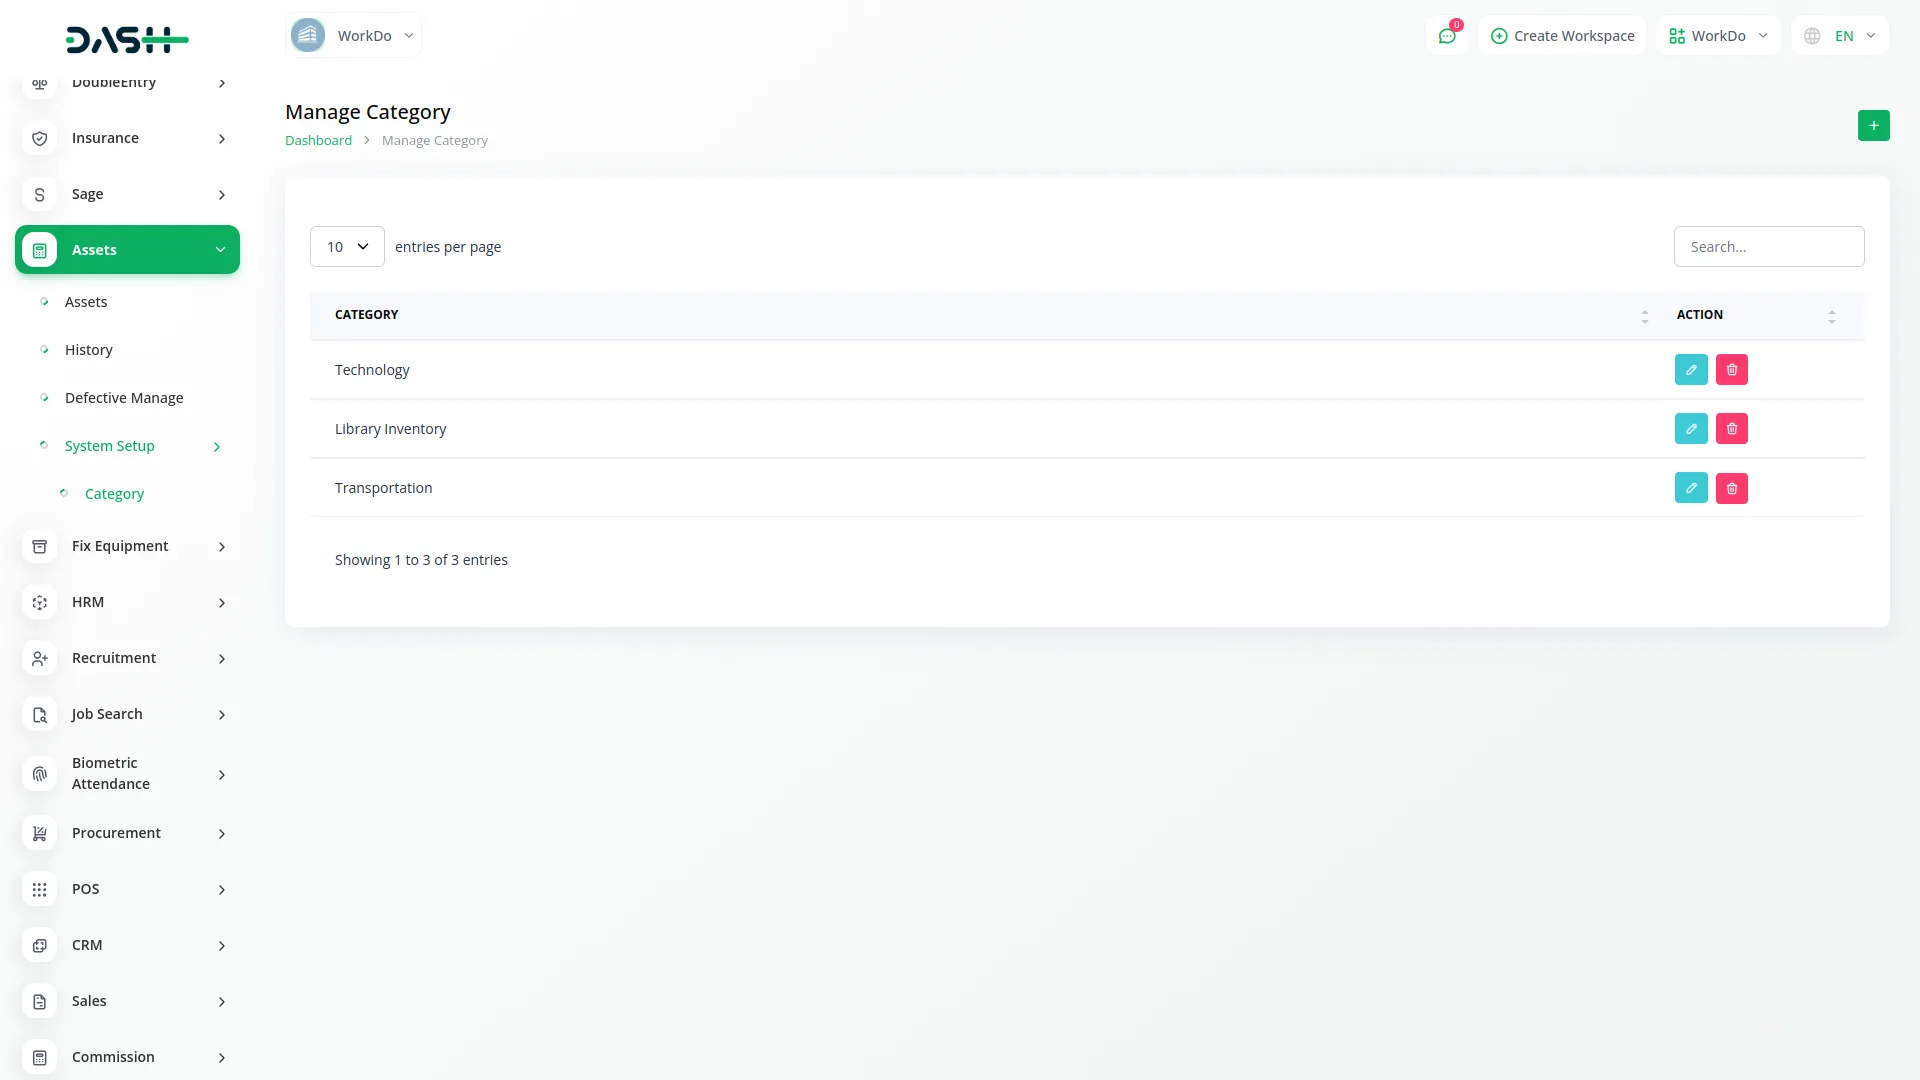
- To create a new category, click the “Create” button at the top of the category page. Enter the category name in the Category field. This categorization will be used when creating assets to organize them into different types such as computers, furniture, vehicles, or equipment.
- The list page shows all categories with a Search button at the top. The table displays the Category column with all created categories. You can use the Edit action to modify existing categories or Delete action to remove categories that are no longer needed.
Assets
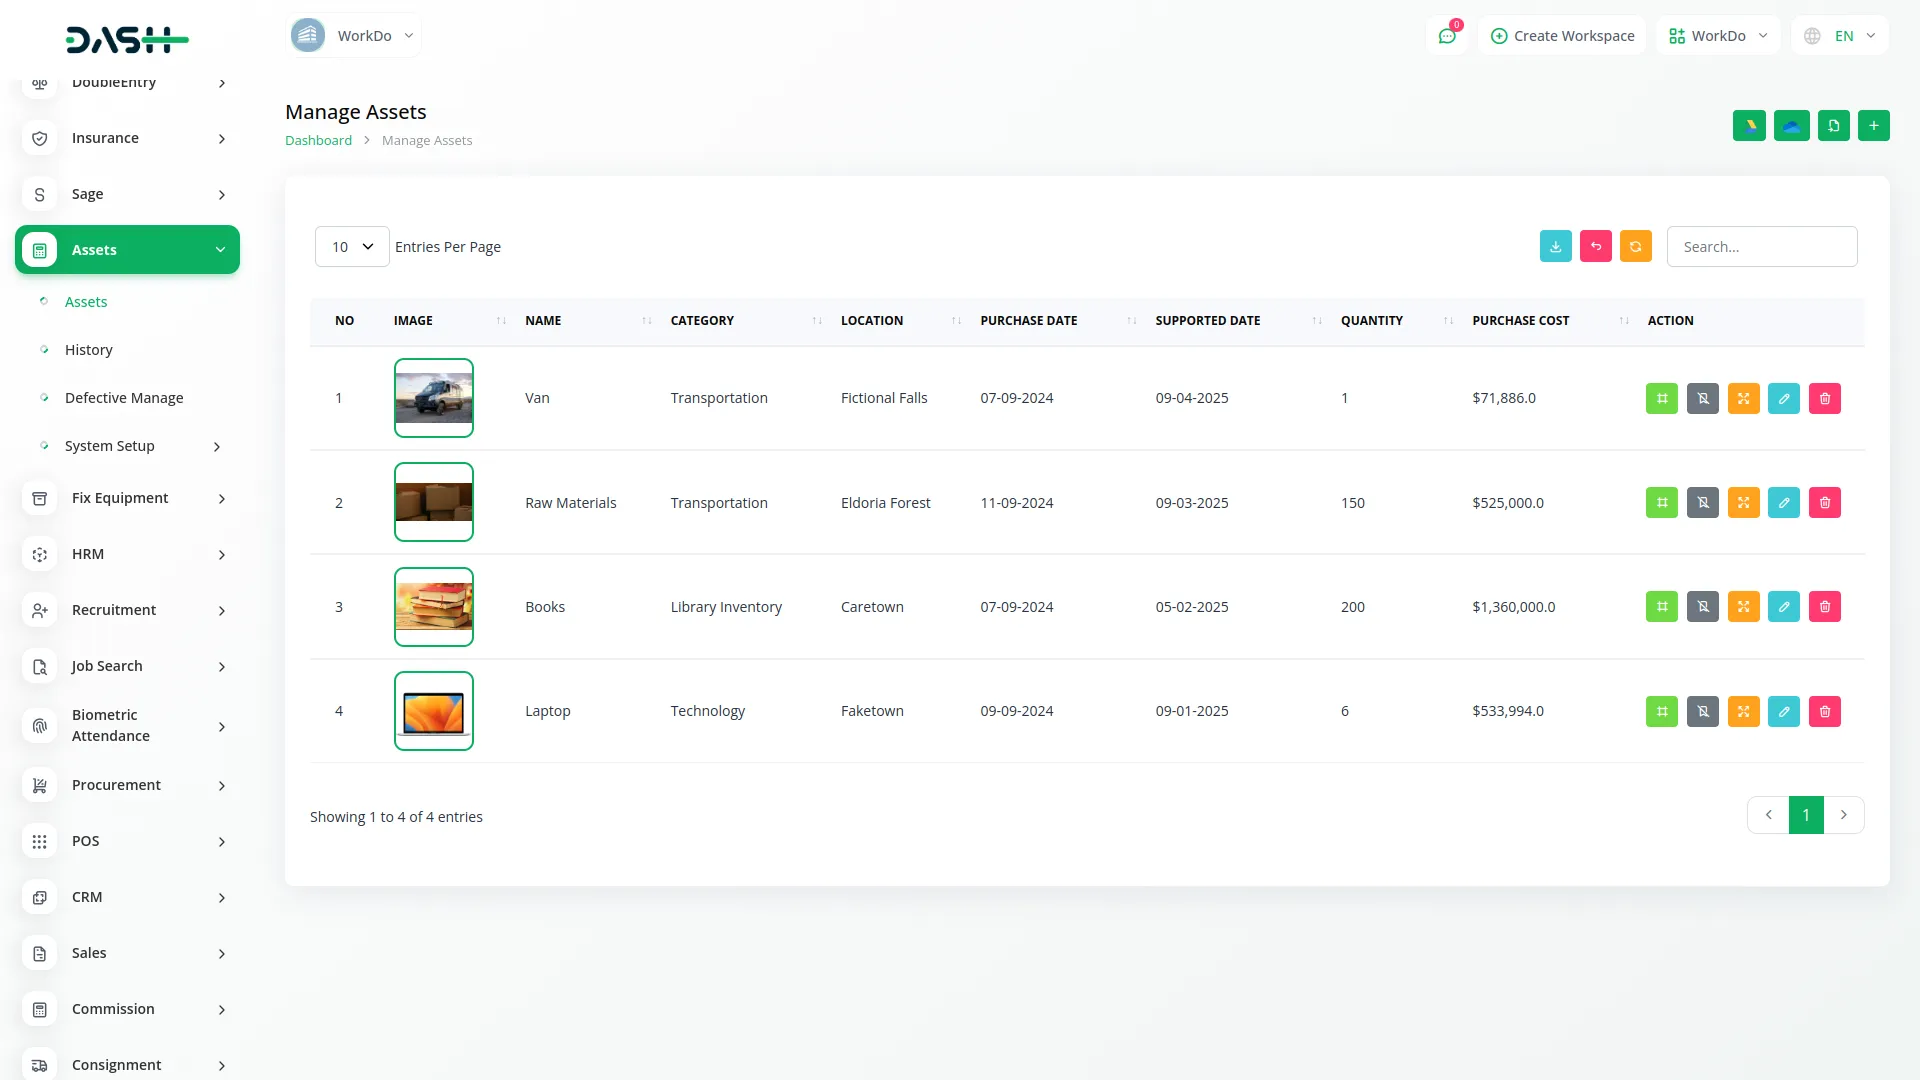
- To create a new asset, click the “Create” button at the top of the assets page. Enter the asset name in the Name field and select the appropriate Category from the dropdown which pulls from the categories created in System Setup. Set the Purchase Date when the asset was acquired and the Supported Date until when the asset is expected to be functional.
- Enter the Serial Code for unique identification, specify the Quantity of identical assets, and input the Unit Price for each asset. The Purchase Cost field will automatically calculate by multiplying Quantity with Unit Price. Add the Warranty Period duration, specify the Location where the asset is stored, provide a Description of the asset, and upload an Image for visual identification.
- The list page features Search, Export, Reload, and Reset buttons at the top. The table shows columns for No, Image, Name, Category, Location, Purchase Date, Supported Date, Quantity, and Purchase Cost. You can import the Assets details whenever you want.
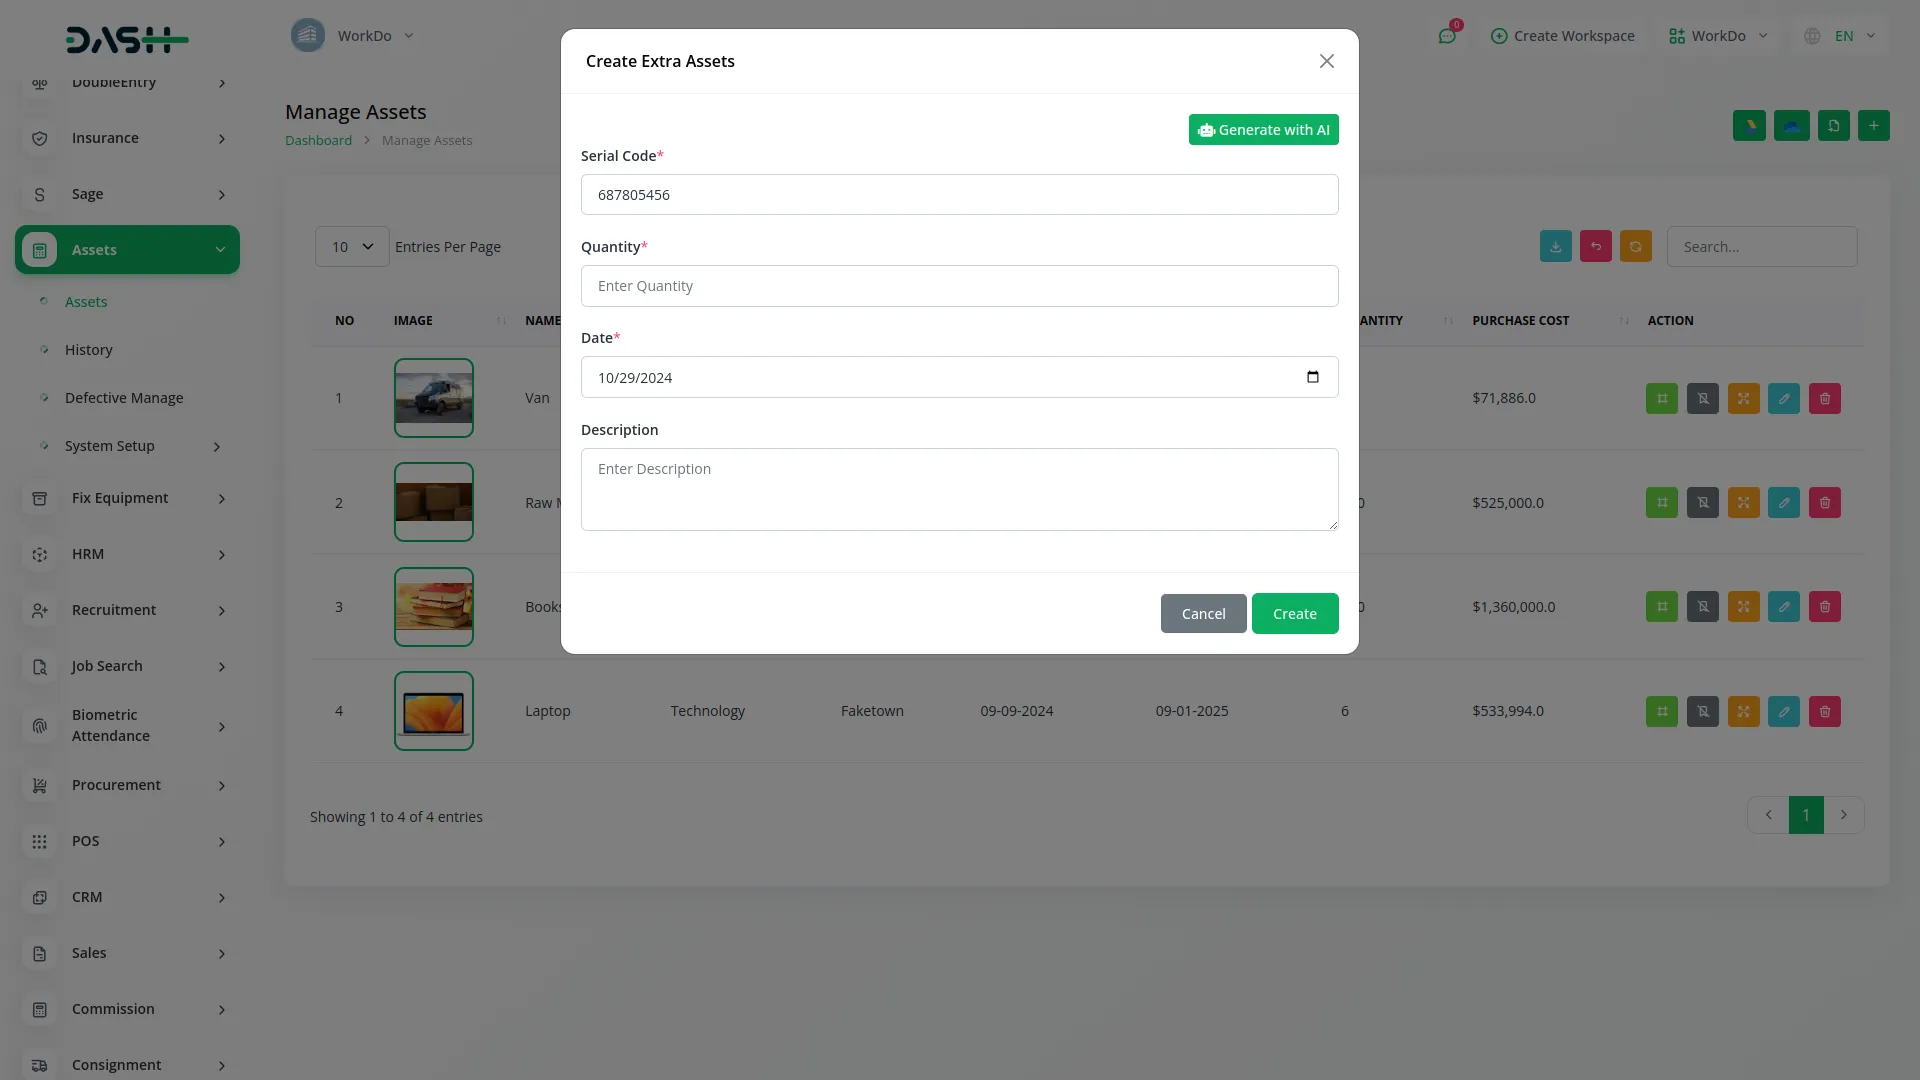
- When you click the Extra action, you can add additional quantities of existing assets. Enter the Serial Code which auto-fills from the selected asset code, specify the additional Quantity you want to add, set the Date when these extra assets were acquired, and add a Description.
- When you complete this action, the system automatically increases the total quantity of the selected asset in your inventory. For example, if you originally had 10 laptops and add 5 more through Extra action, your total quantity will become 15 laptops.
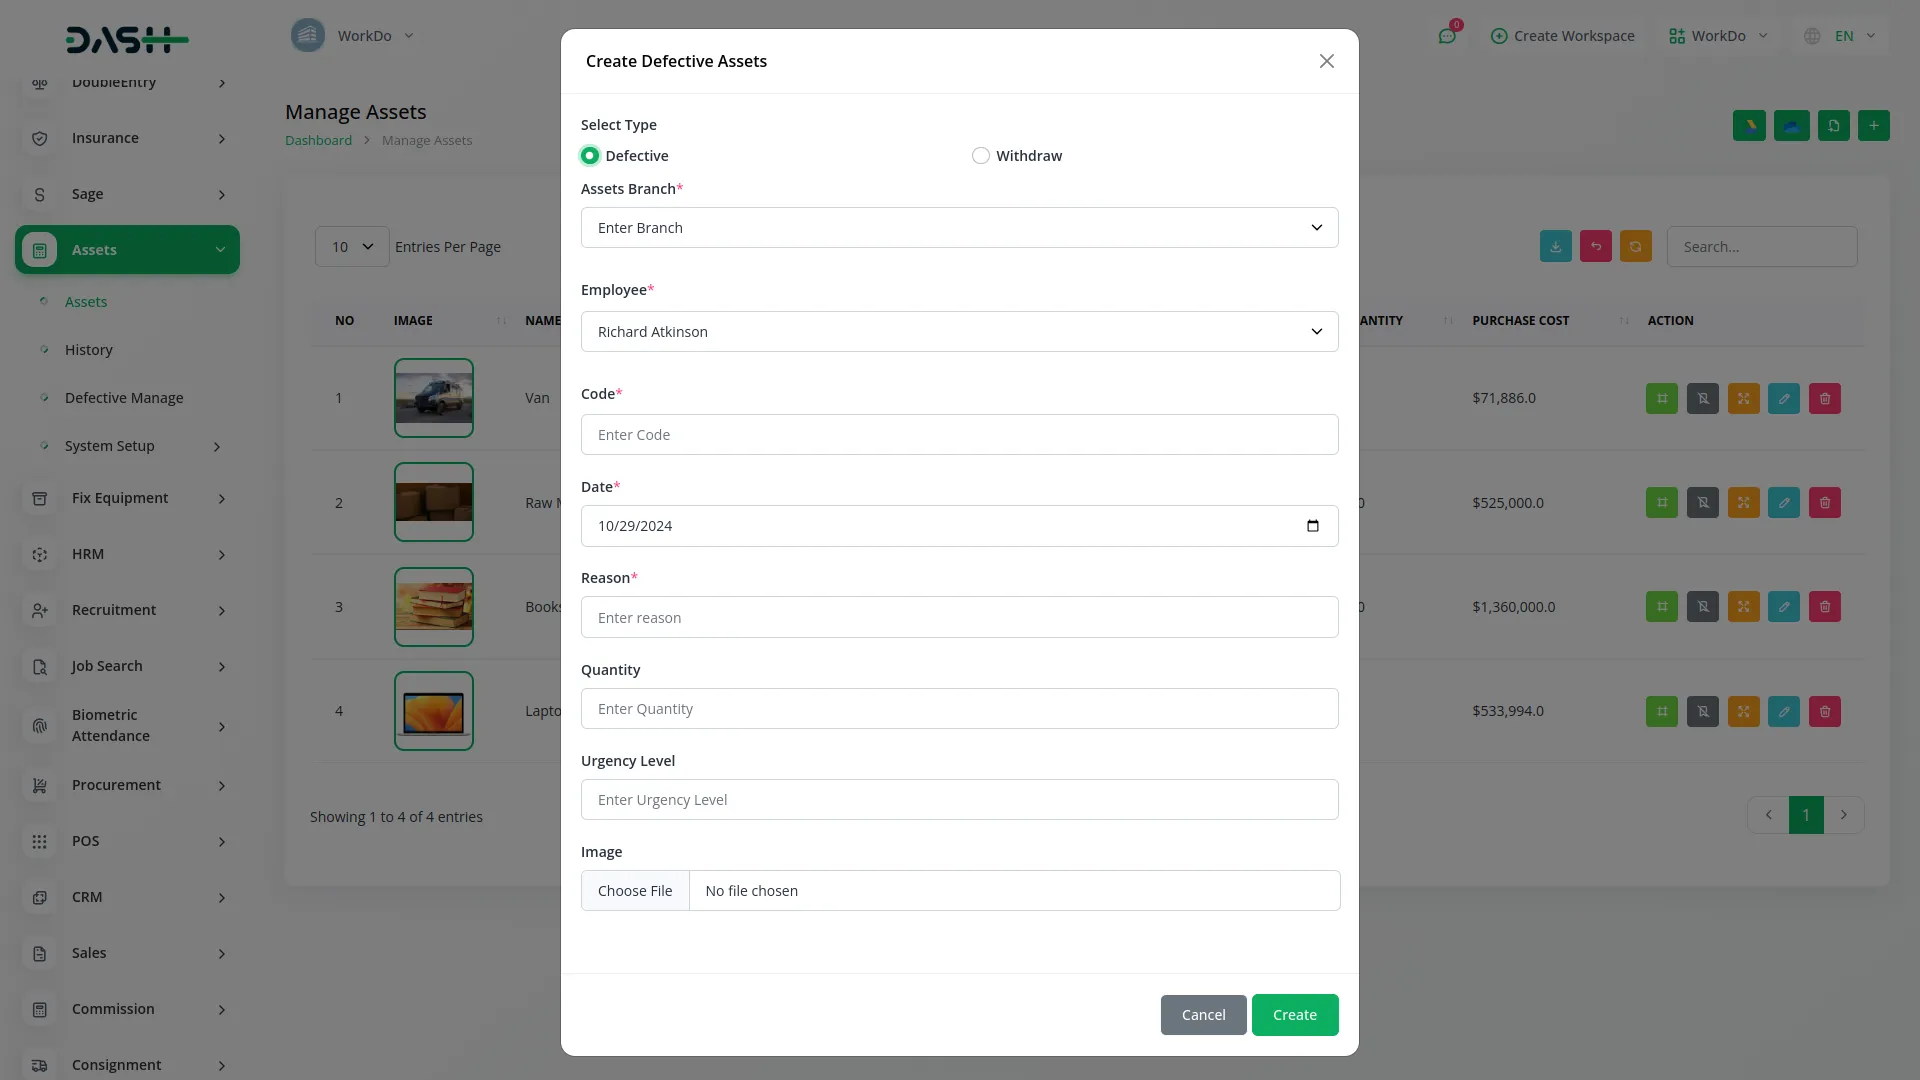
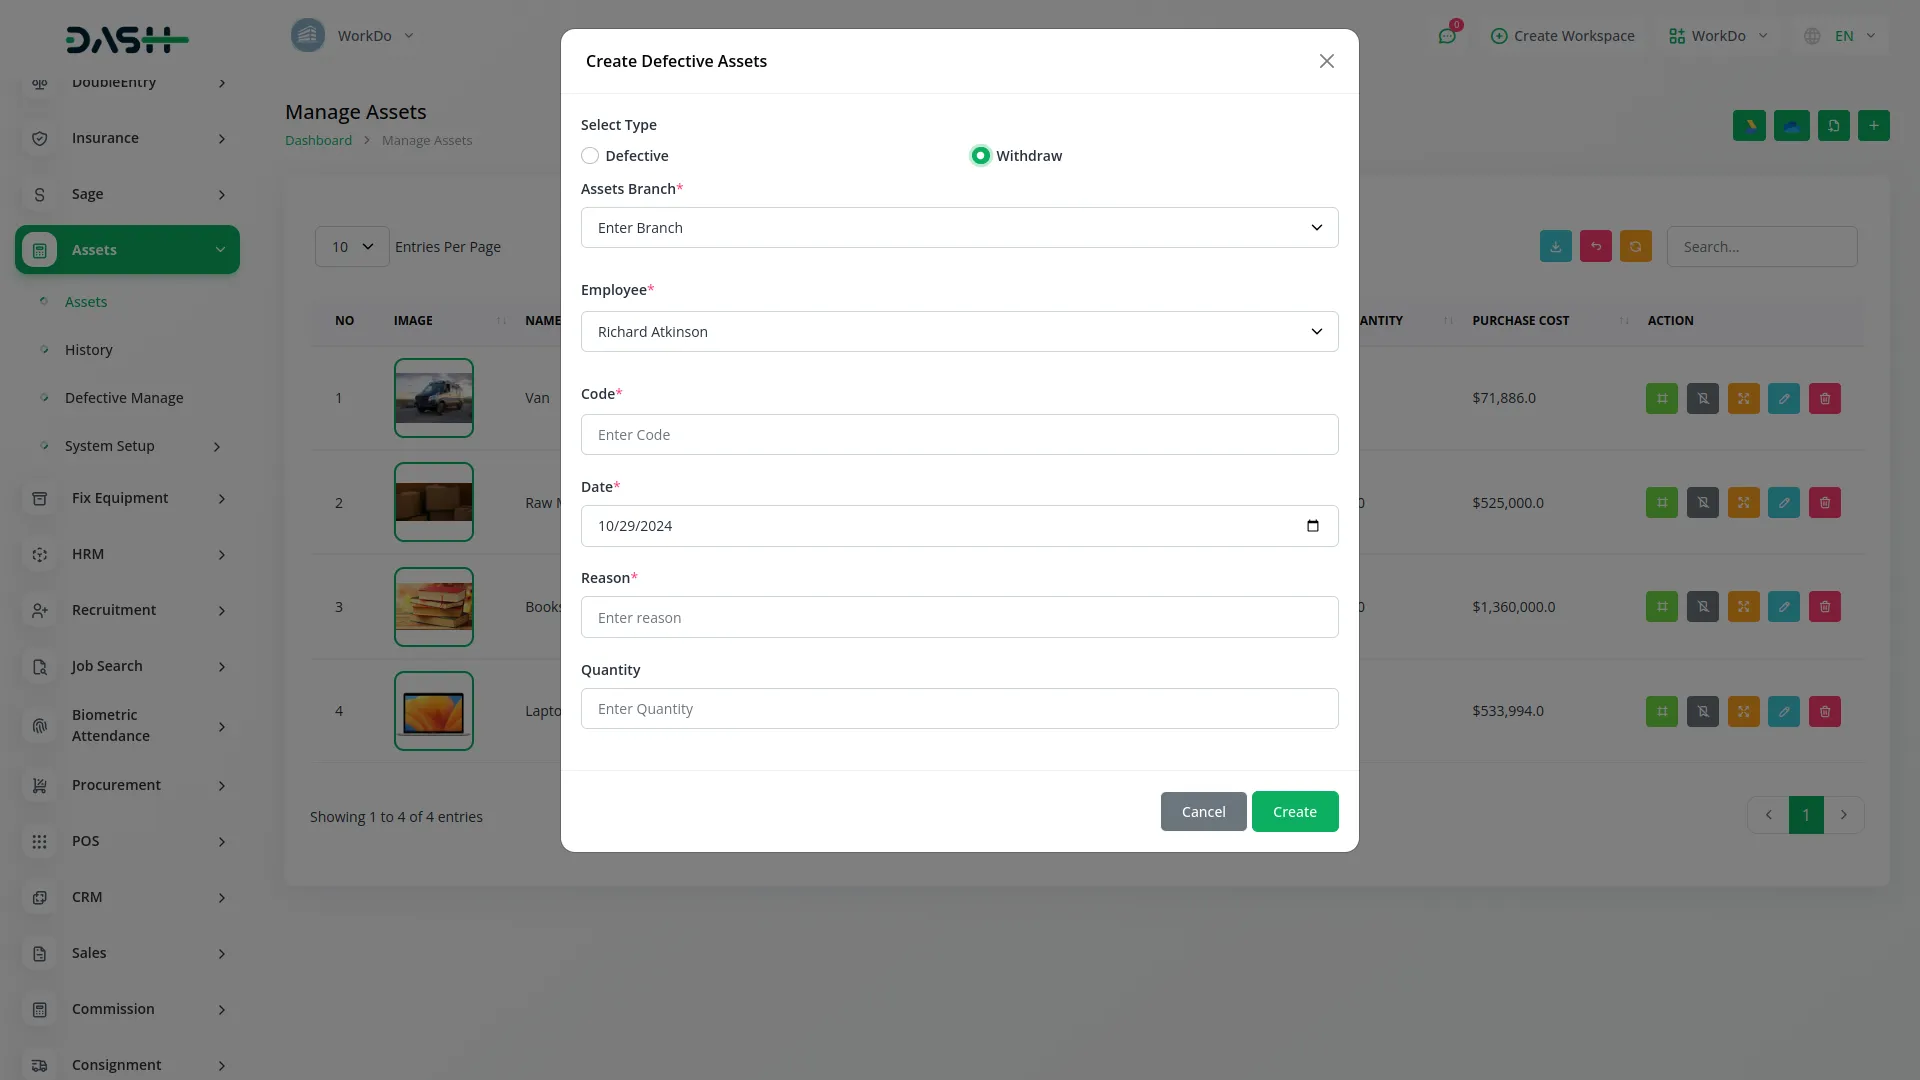
- The Defective action allows you to select the Type using radio buttons for either Defective or Withdraw options, both of which reduce your available asset quantity.
- If you select the Defective option, you need to choose Assets Branch from the dropdown (if HRM Add-On is enabled), select the Employee from dropdown, enter the Code, set the Date, provide the Reason for the defect, specify the Quantity of defective assets, choose Urgency Level, and upload an Image.
- When you mark assets as defective, the system automatically deducts the specified quantity from your available asset inventory and moves these assets to the Defective Manage section with a status of “Defective.”
- If you select the Withdraw option, you choose Assets Branch from dropdown (if HRM Add-On is enabled), select Employee from dropdown, enter Code, set Date, provide Reason, and specify Quantity. When you withdraw assets, the system immediately deducts the specified quantity from your total asset inventory, permanently reducing your available stock.
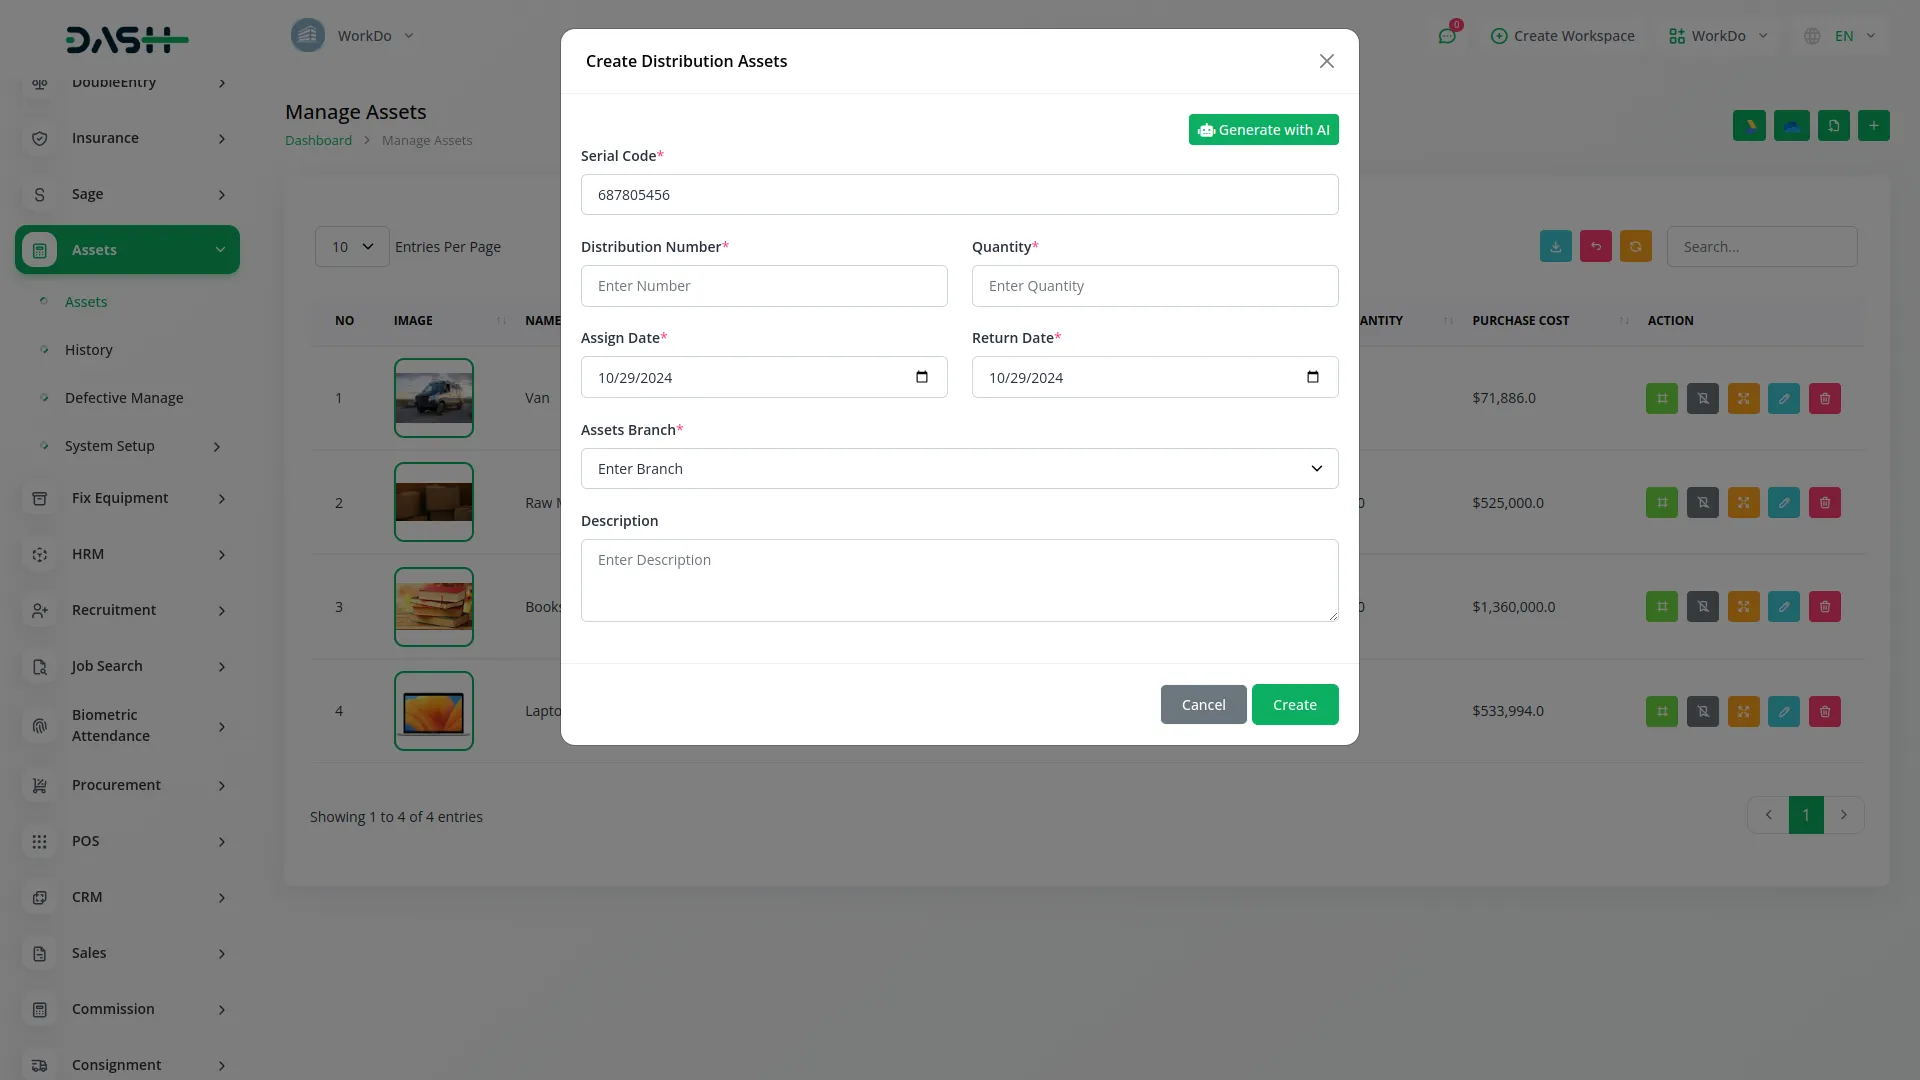
- The Distribution action requires entering the Serial Code which auto-fills from the selected asset code, input the Distribution Number, specify Quantity, set Assign Date and Return Date, choose Assets Branch from dropdown (if HRM Add-On is enabled), and add a Description.
- During distribution, the system temporarily reduces available asset quantity while tracking who has the assets and when they should be returned. Once the return date passes or assets are returned, the quantity is restored to available inventory.
History
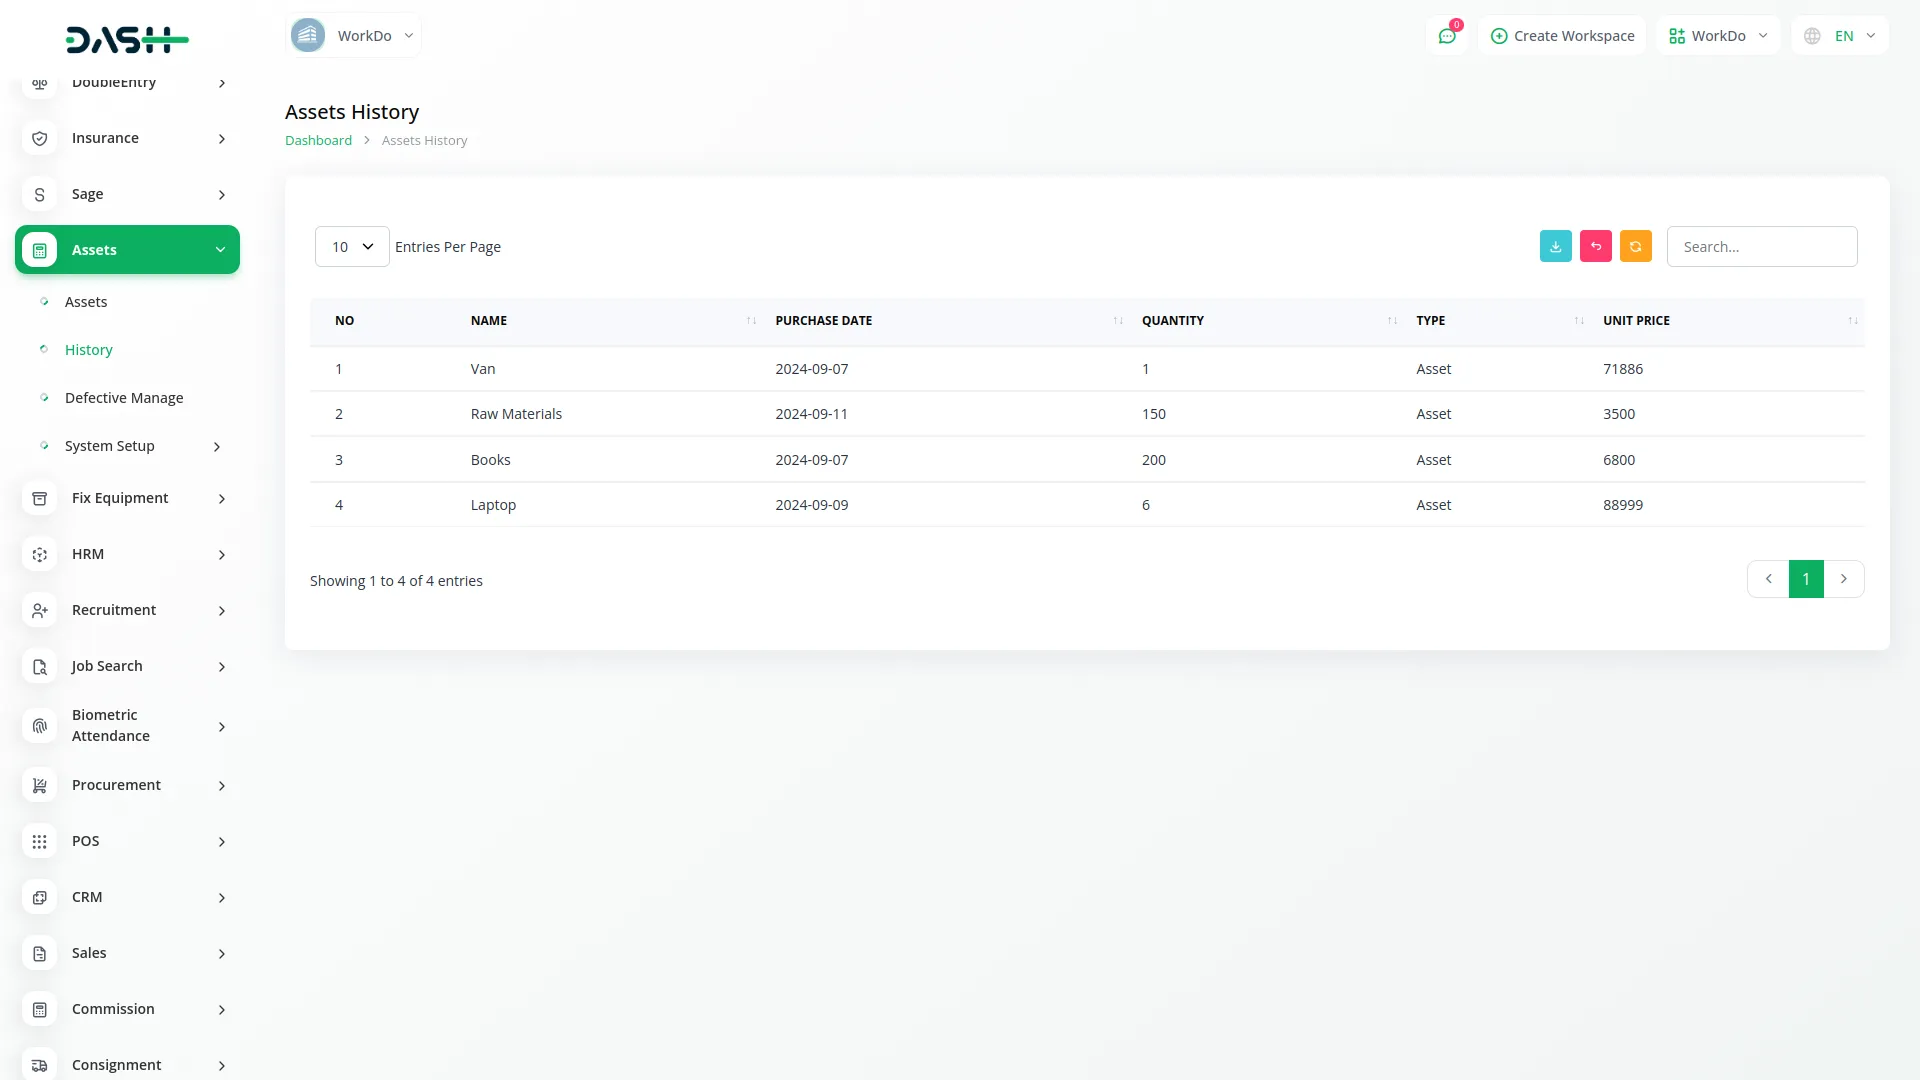
- The History section automatically displays all entries from asset creation, defective reporting, extra additions, and withdrawals in chronological order. This provides a complete audit trail of all asset-related activities in your organization.
- The list page features Search, Export, Reload, and Reset buttons for filtering and managing the historical data. The table displays columns for No, Name, Purchase Date, Quantity, Type, and Unit Price showing all historical asset transactions and modifications.
Defective Manage
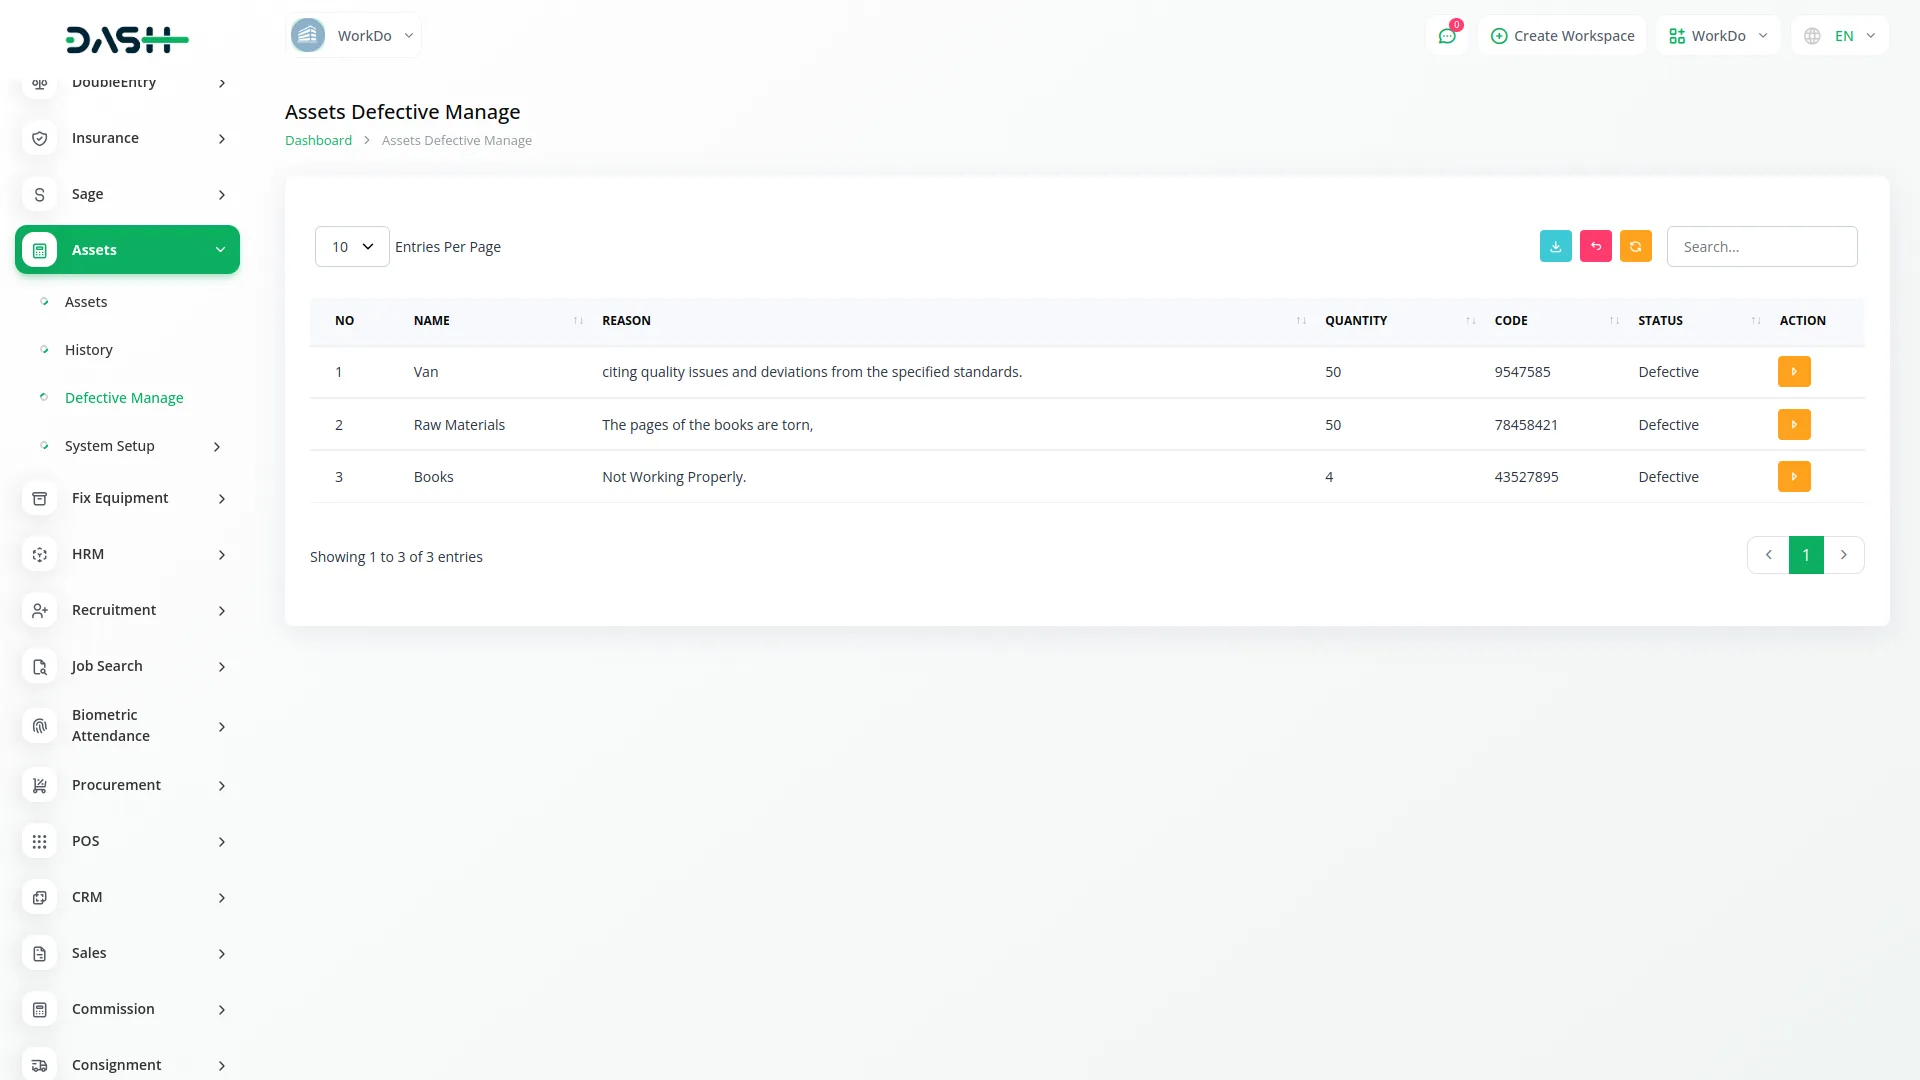
- The Defective Manage section displays all assets that have been marked as defective with a default status of Defective. This centralized view helps you track and manage all problematic assets requiring attention or repair.
- The list page includes Search, Export, Reload and Reset buttons for easy navigation and data management. The table shows columns for No, Name, Reason, Quantity, Code, and Status for all defective assets.
- The Status action allows you to update defective asset information where the Name, Reason, Quantity, and Code fields are auto-filled from the selected defective asset record. You can change the Status to either “Repair” or “Fail” depending on the asset condition and resolution outcome. When you change the status to “Repair,” the assets can potentially be returned to active inventory, while “Fail” status indicates permanent removal from usable assets.
Categories
Related articles
- Garden Management Integration in Dash SaaS
- Peach Payment Integration in Dash SaaS
- Dance Academy Integration in Dash SaaS
- Google Wallet Integration in Dash SaaS
- Quickbooks Integration in Dash SaaS
- e-Invoice Integration in Dash SaaS
- Contract Template Integration in Dash SaaS
- RoadMap Central Integration in Dash SaaS
- Franchise Management Integration in Dash SaaS
- Telegram Integration in Dash SaaS
- Xero Integration in Dash SaaS
- Waste Management Integration in Dash SaaS
Reach Out to Us
Have questions or need assistance? We're here to help! Reach out to our team for support, inquiries, or feedback. Your needs are important to us, and we’re ready to assist you!


Need more help?
If you’re still uncertain or need professional guidance, don’t hesitate to contact us. You can contact us via email or submit a ticket with a description of your issue. Our team of experts is always available to help you with any questions. Rest assured that we’ll respond to your inquiry promptly.
Love what you see?
Do you like the quality of our products, themes, and applications, or perhaps the design of our website caught your eye? You can have similarly outstanding designs for your website or apps. Contact us, and we’ll bring your ideas to life.
