Appointment integration in Dash SaaS
Introducing our user-friendly Appointment feature, a versatile and efficient appointment scheduling system designed for both business and personal use.
Introduction
The Appointment Management Add-On helps users efficiently manage and monitor appointment schedules within an organization. It includes tools to create appointments, customize appointment types, configure related questions, and oversee schedules and callbacks. This Add-on provides a complete overview through dashboards, list views, and actions, allowing businesses to handle free or paid bookings, approve or reject schedules, and maintain organized appointment records. It also connects to other Add-ons like Questions and Feedback to enhance the appointment process with user-defined fields and post-appointment feedback.
How To Install The Add-On?
To Set Up the Appointment Add-On, you can follow this link: Setup Add-On
Appointment Dashboard
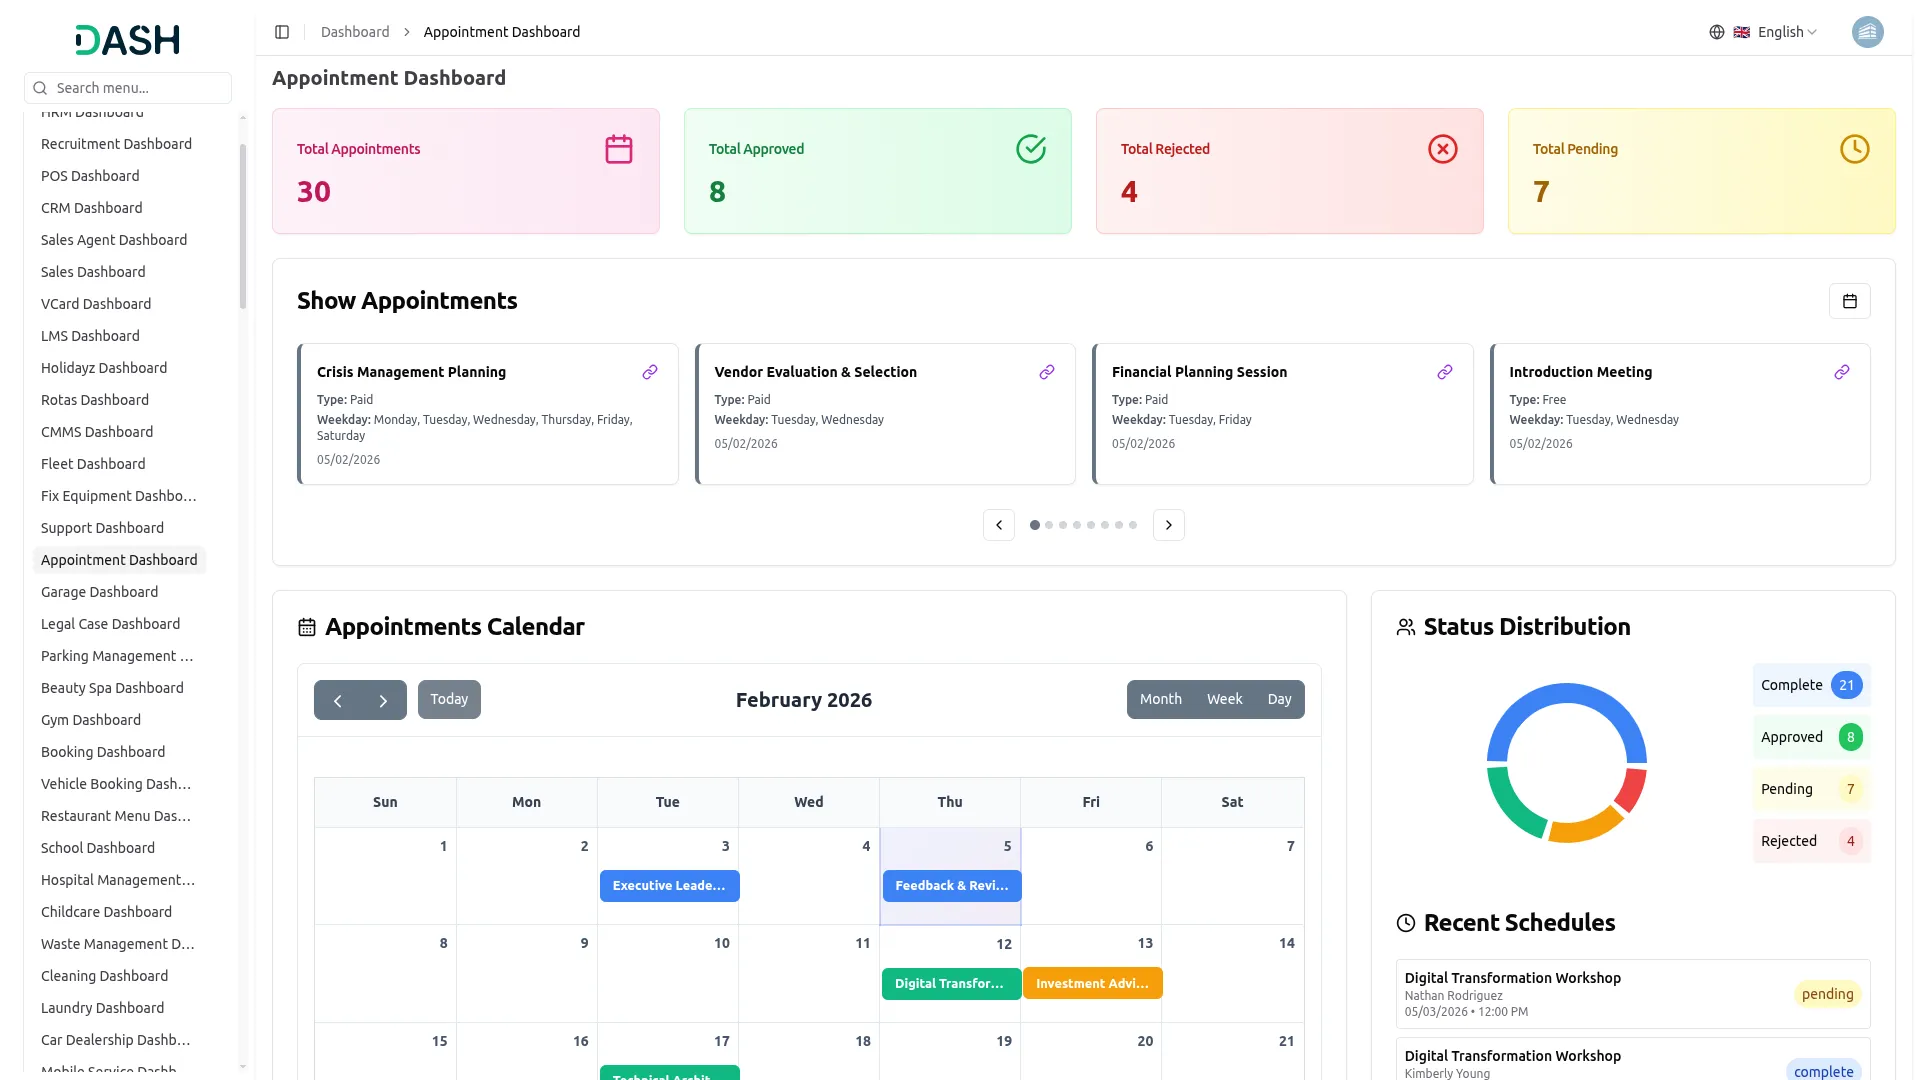
- The Appointment Dashboard provides an overview of your appointment system with key metrics displayed in cards showing Total Appointments, Total Approved, Total Rejected, and Total Pending appointments.
- All appointments are visible through a slider interface that includes a calendar view button for switching to calendar display, detailed appointment information, and a copy link button that opens the appointment form with the help of which you can book appointments from the frontend.
- The dashboard features an appointments calendar that displays all scheduled appointment data in a visual calendar format. A donut chart shows appointment schedule status data with different segments representing various appointment statuses.
- The recently added appointment section displays the 5 most recent appointment schedules, giving you quick access to the latest bookings and their current status.
Staff Dashboard
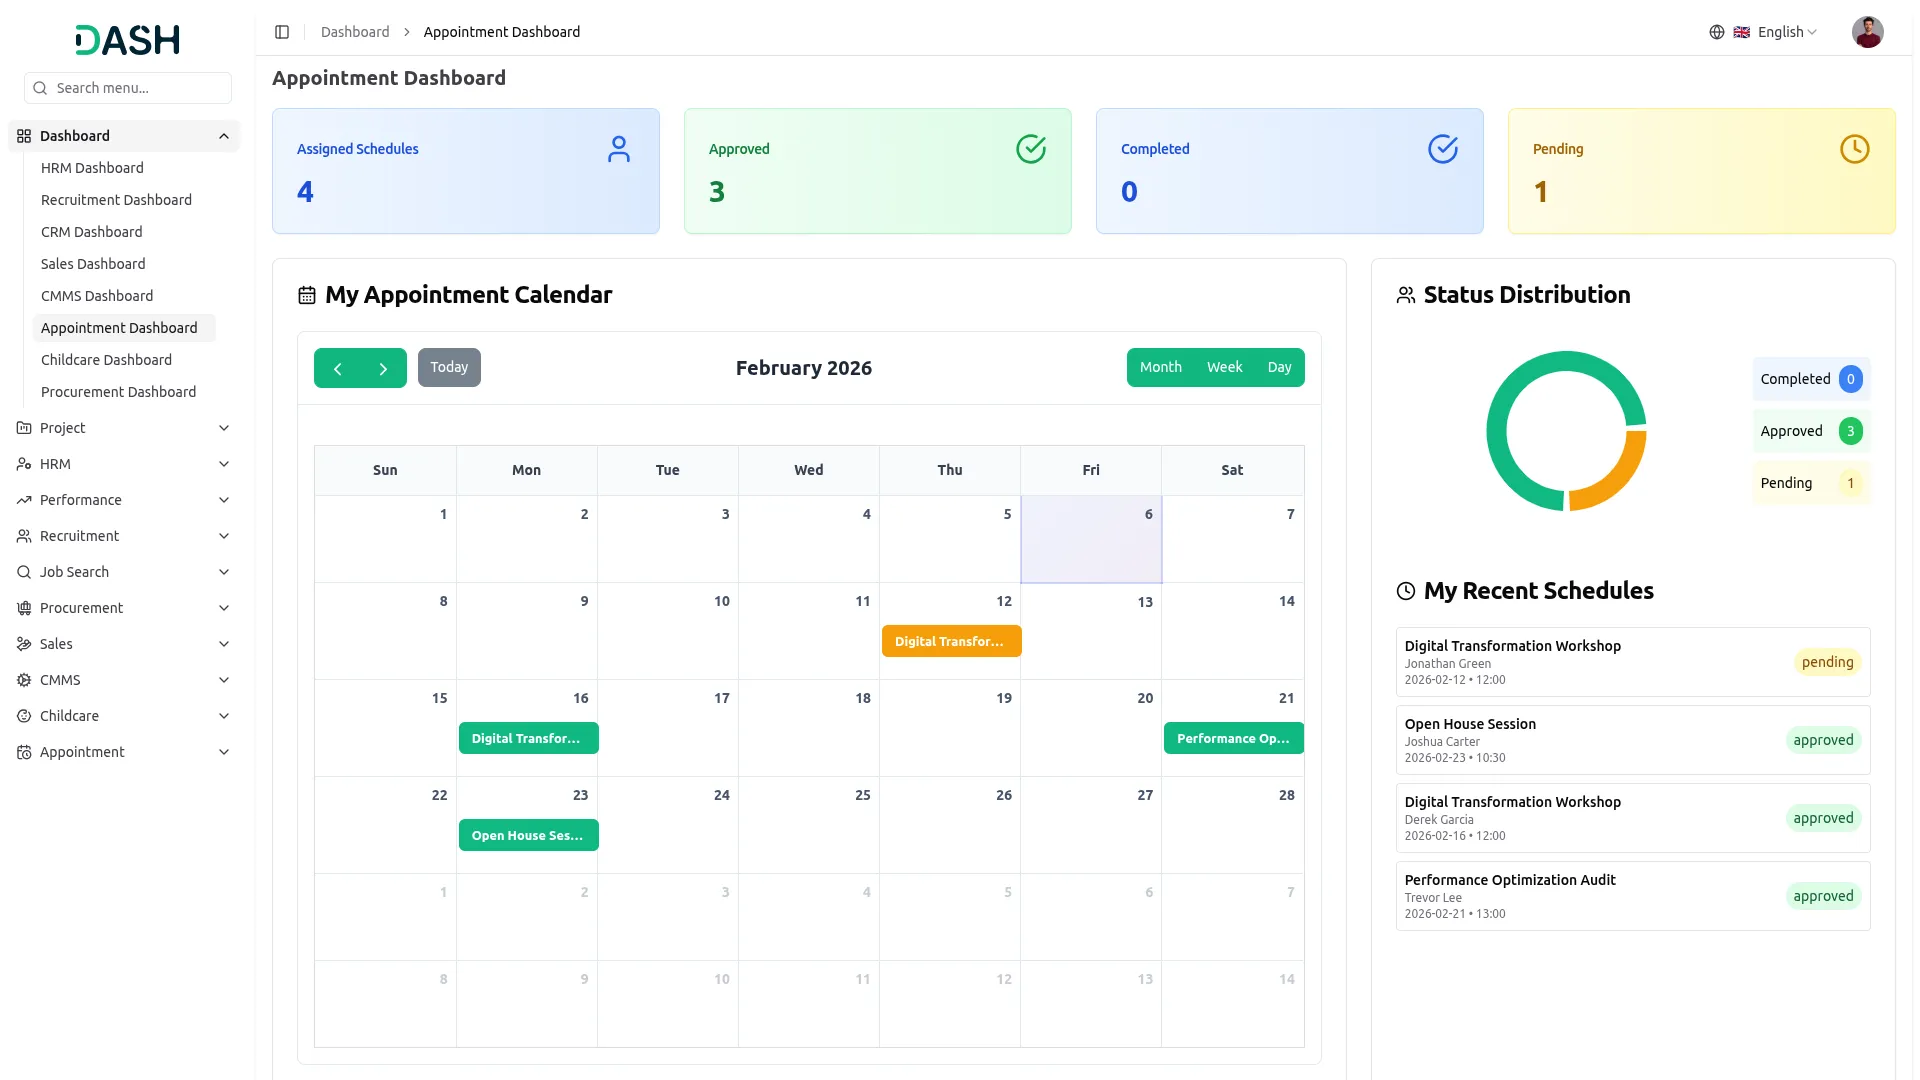
- The Staff Dashboard provides an overview of your staff assigned appointment management system with key metrics displayed in cards showing Assigned Schedules, Approved, Completed, and Pending appointments.
- The dashboard features staff Appointment Calendar that displays all scheduled appointment data in a visual monthly calendar format with navigation controls and view options to switch between Month, Week, and Day displays.
- A Status Distribution donut chart shows appointment schedule status data with different segments representing various appointment statuses including Completed, Approved, and Pending categories with their respective counts.
- The My Recent Schedules section displays the most recently assigned appointment schedules, giving you quick access to the latest bookings and their current status.
System Setup
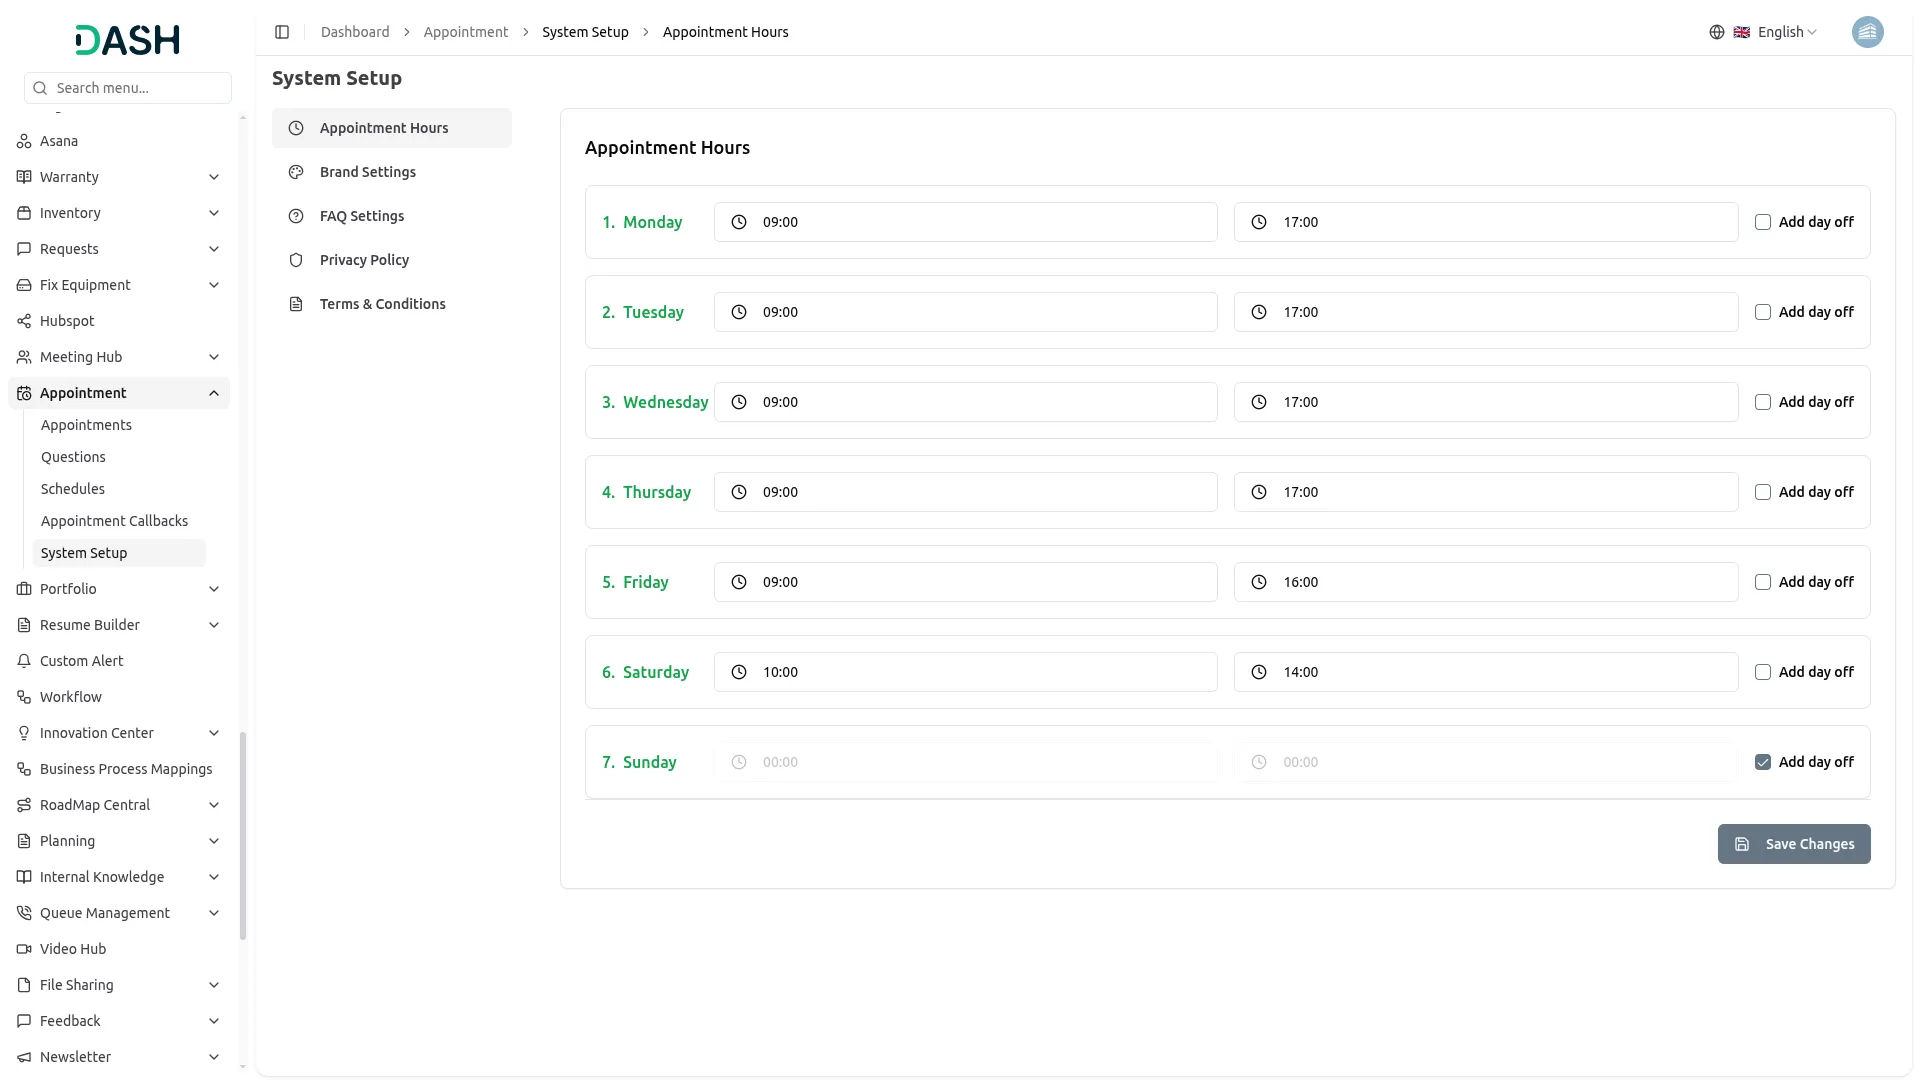
The System Setup section manages appointment hours, brand settings, FAQ settings, privacy policy, and terms & conditions sections.
Appointment Hours
- All appointment hours can be set on a day-wise basis. This defines working and non-working hours for each day of the week. The configured schedule is applied directly when creating and managing appointments.
Brand Setting
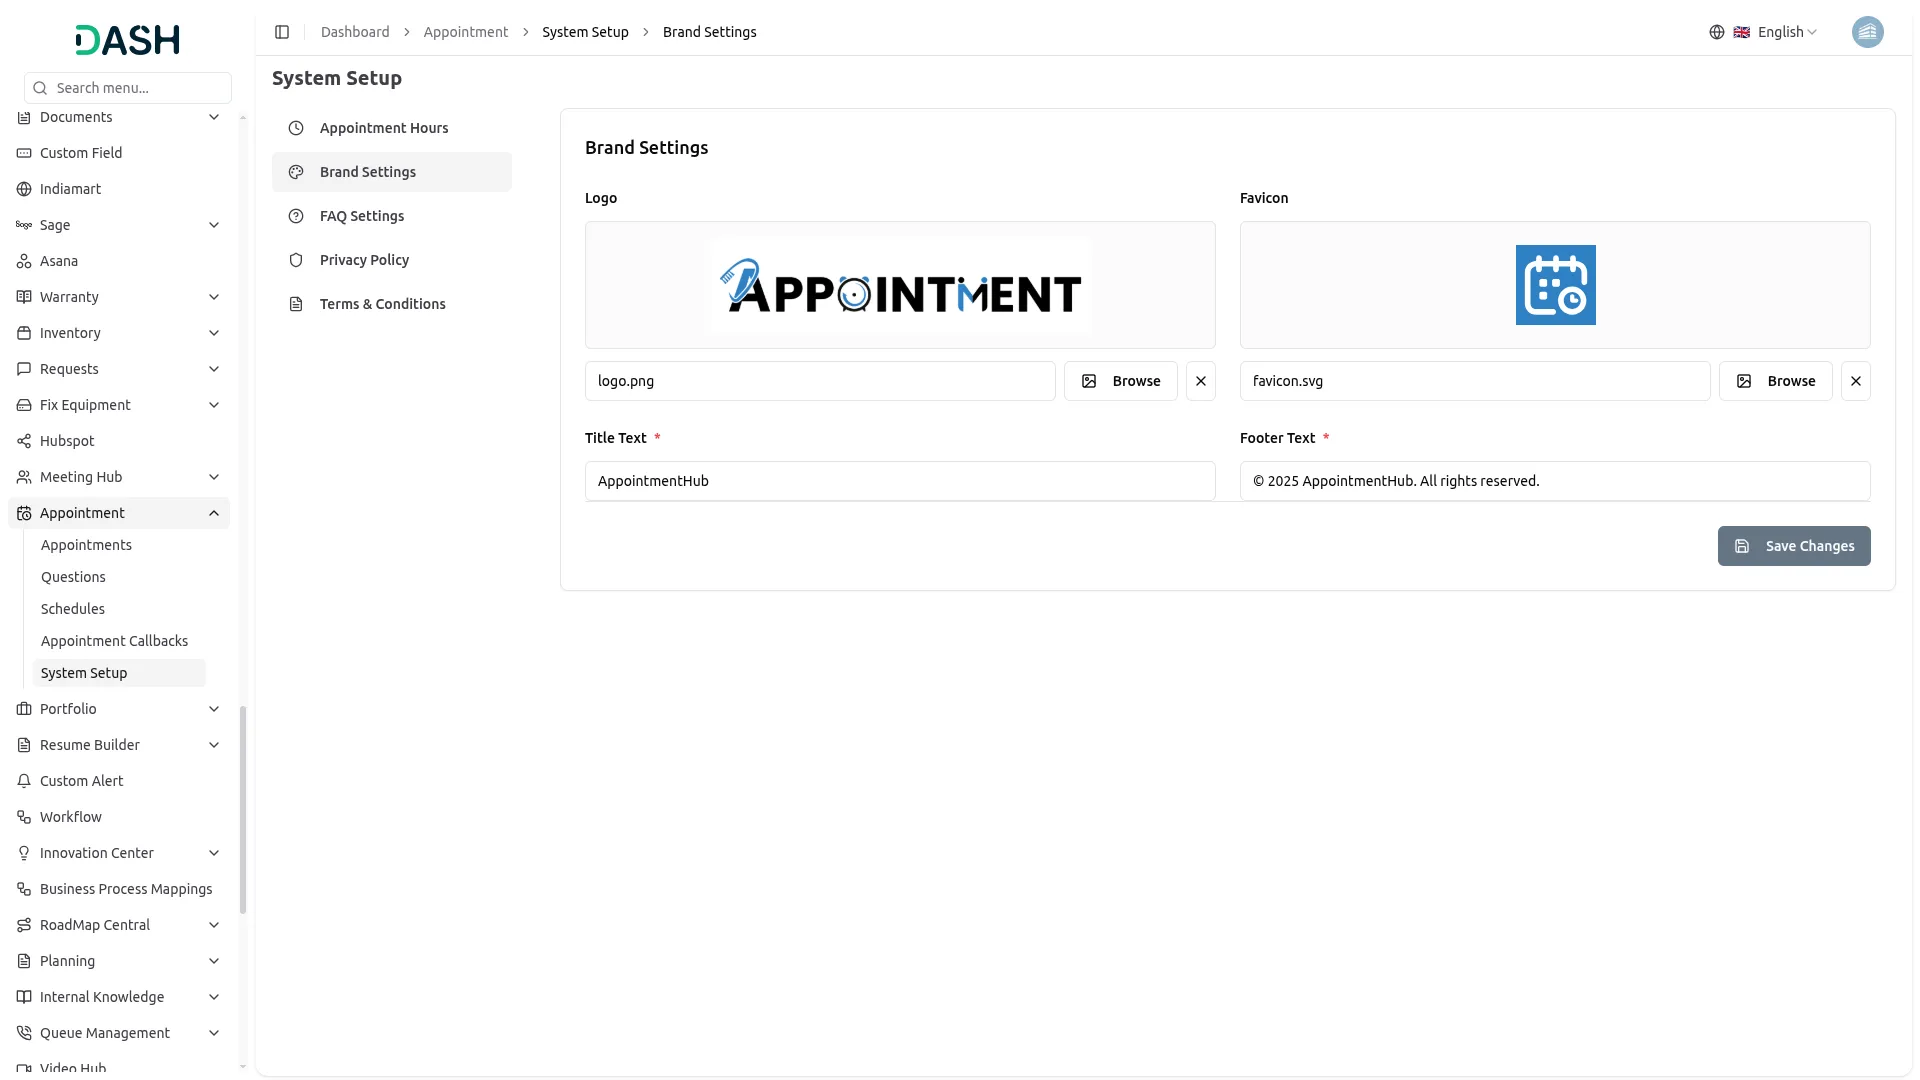
- To configure your brand identity, go to Theme Setup and select Brand Settings. Upload your Logo, which will appear throughout your website.
- Add your Favicon and Title Text for the website tab. Enter your Footer Text that will display at the bottom of your website.
FAQ Setting
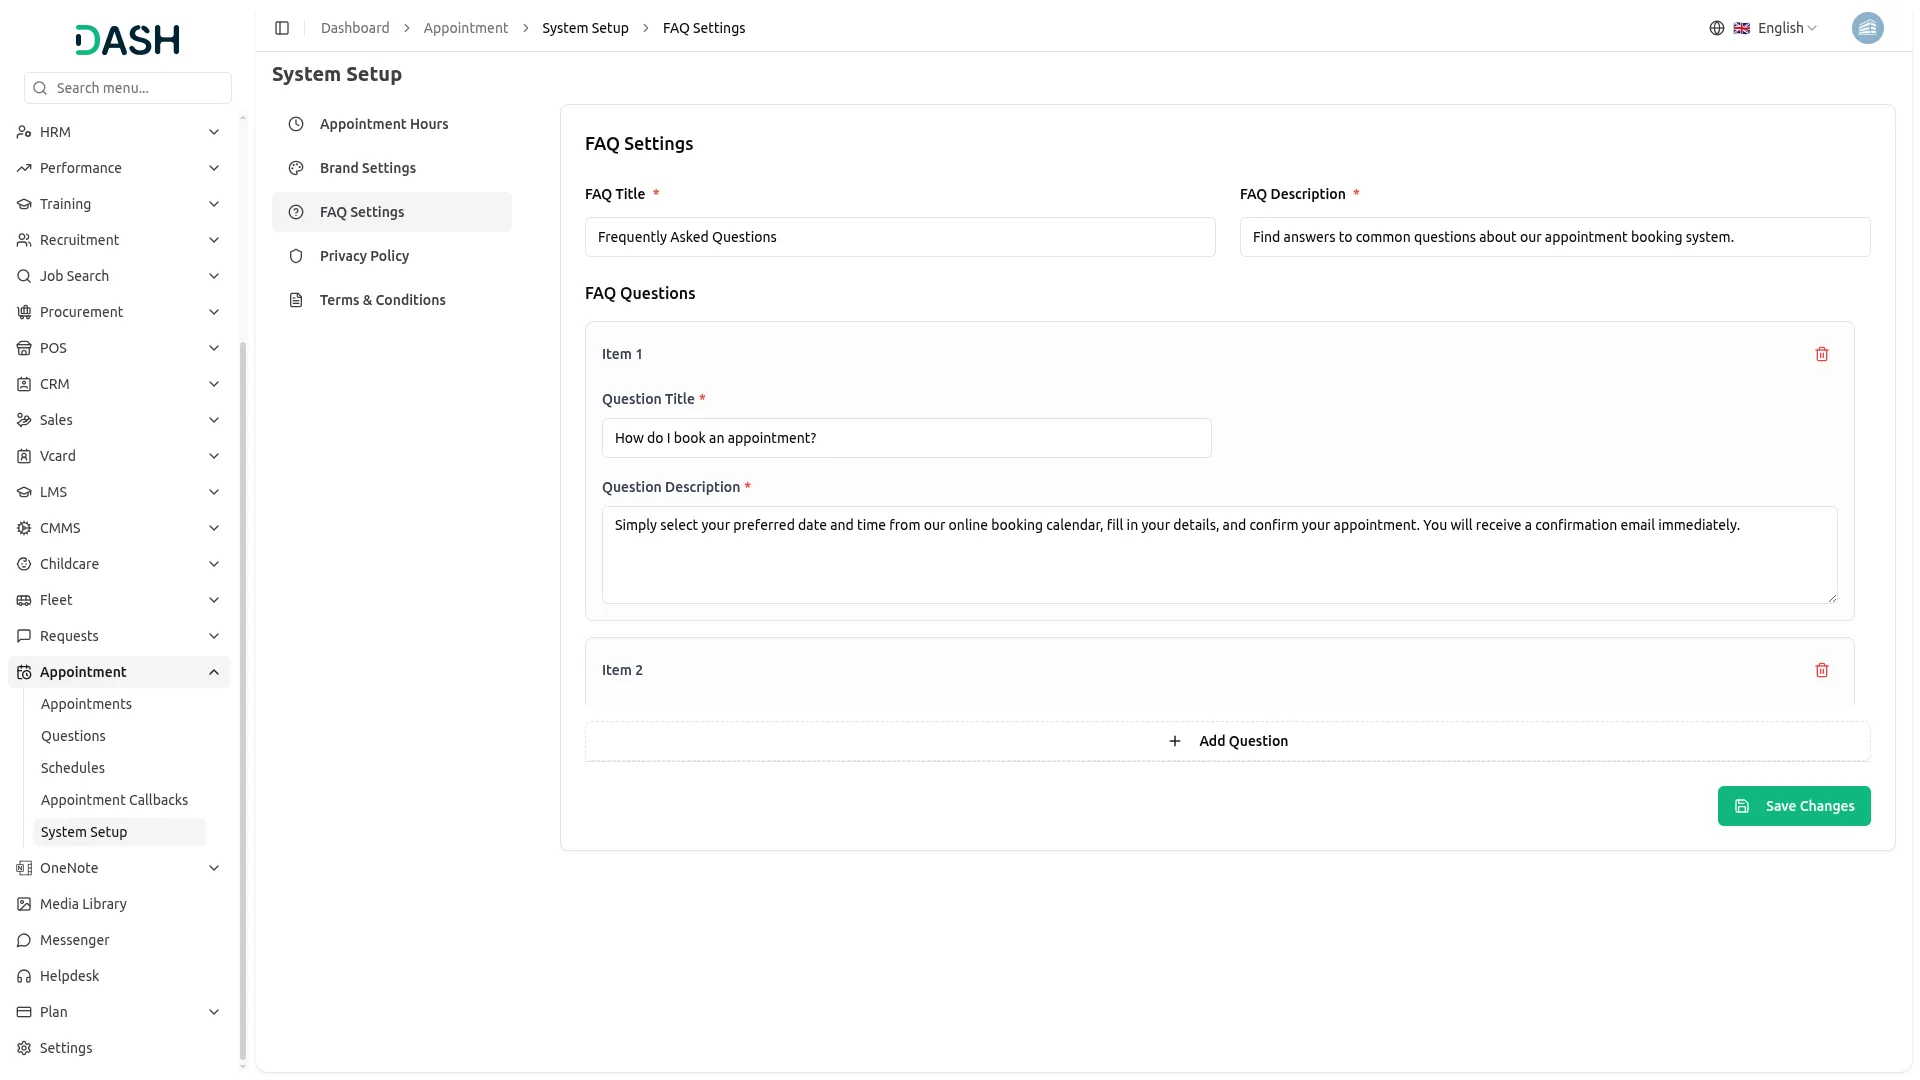
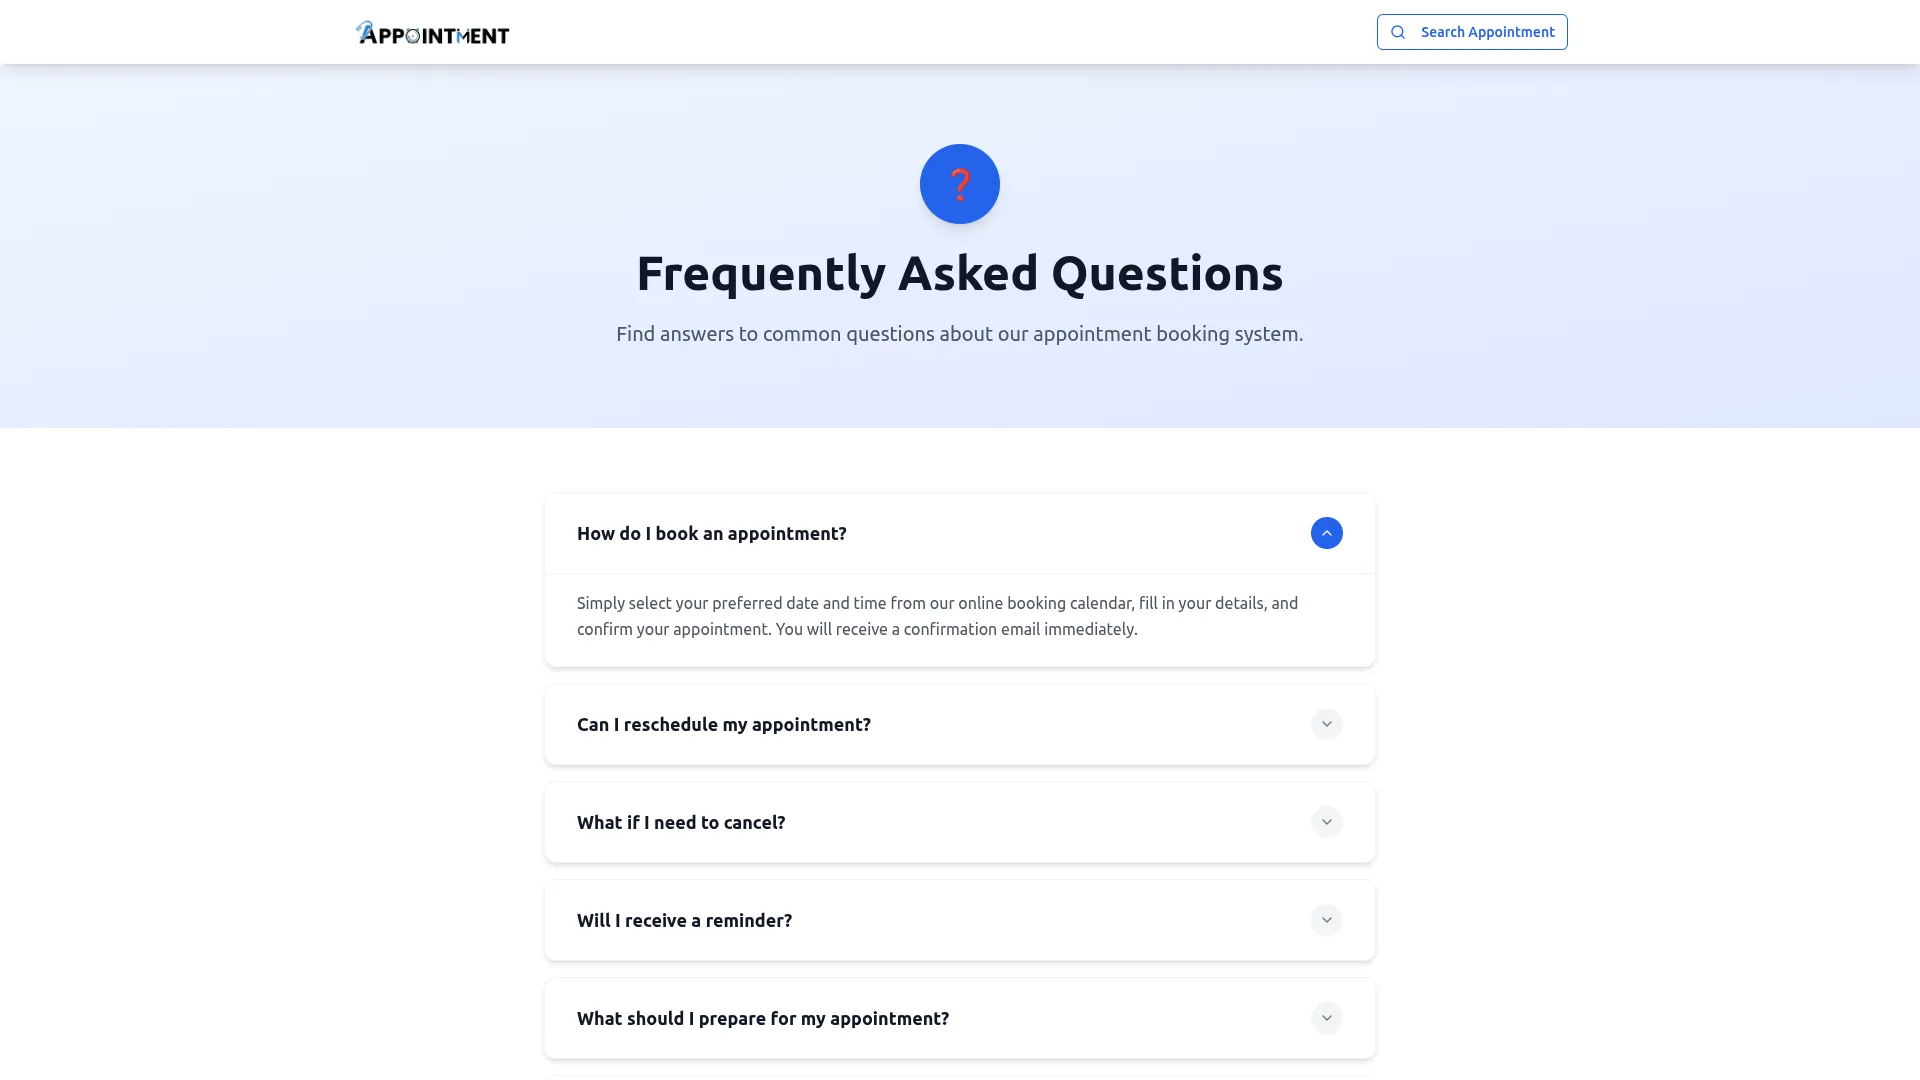
- Go to the FAQ setting to add and manage common questions. Provide the FAQ Title and Description for this setting.
- In the FAQ details, use the repeater function to add multiple frequently asked questions. For each entry, provide the FAQ Question and a complete FAQ Answer that addresses user concerns clearly.
Privacy Policy
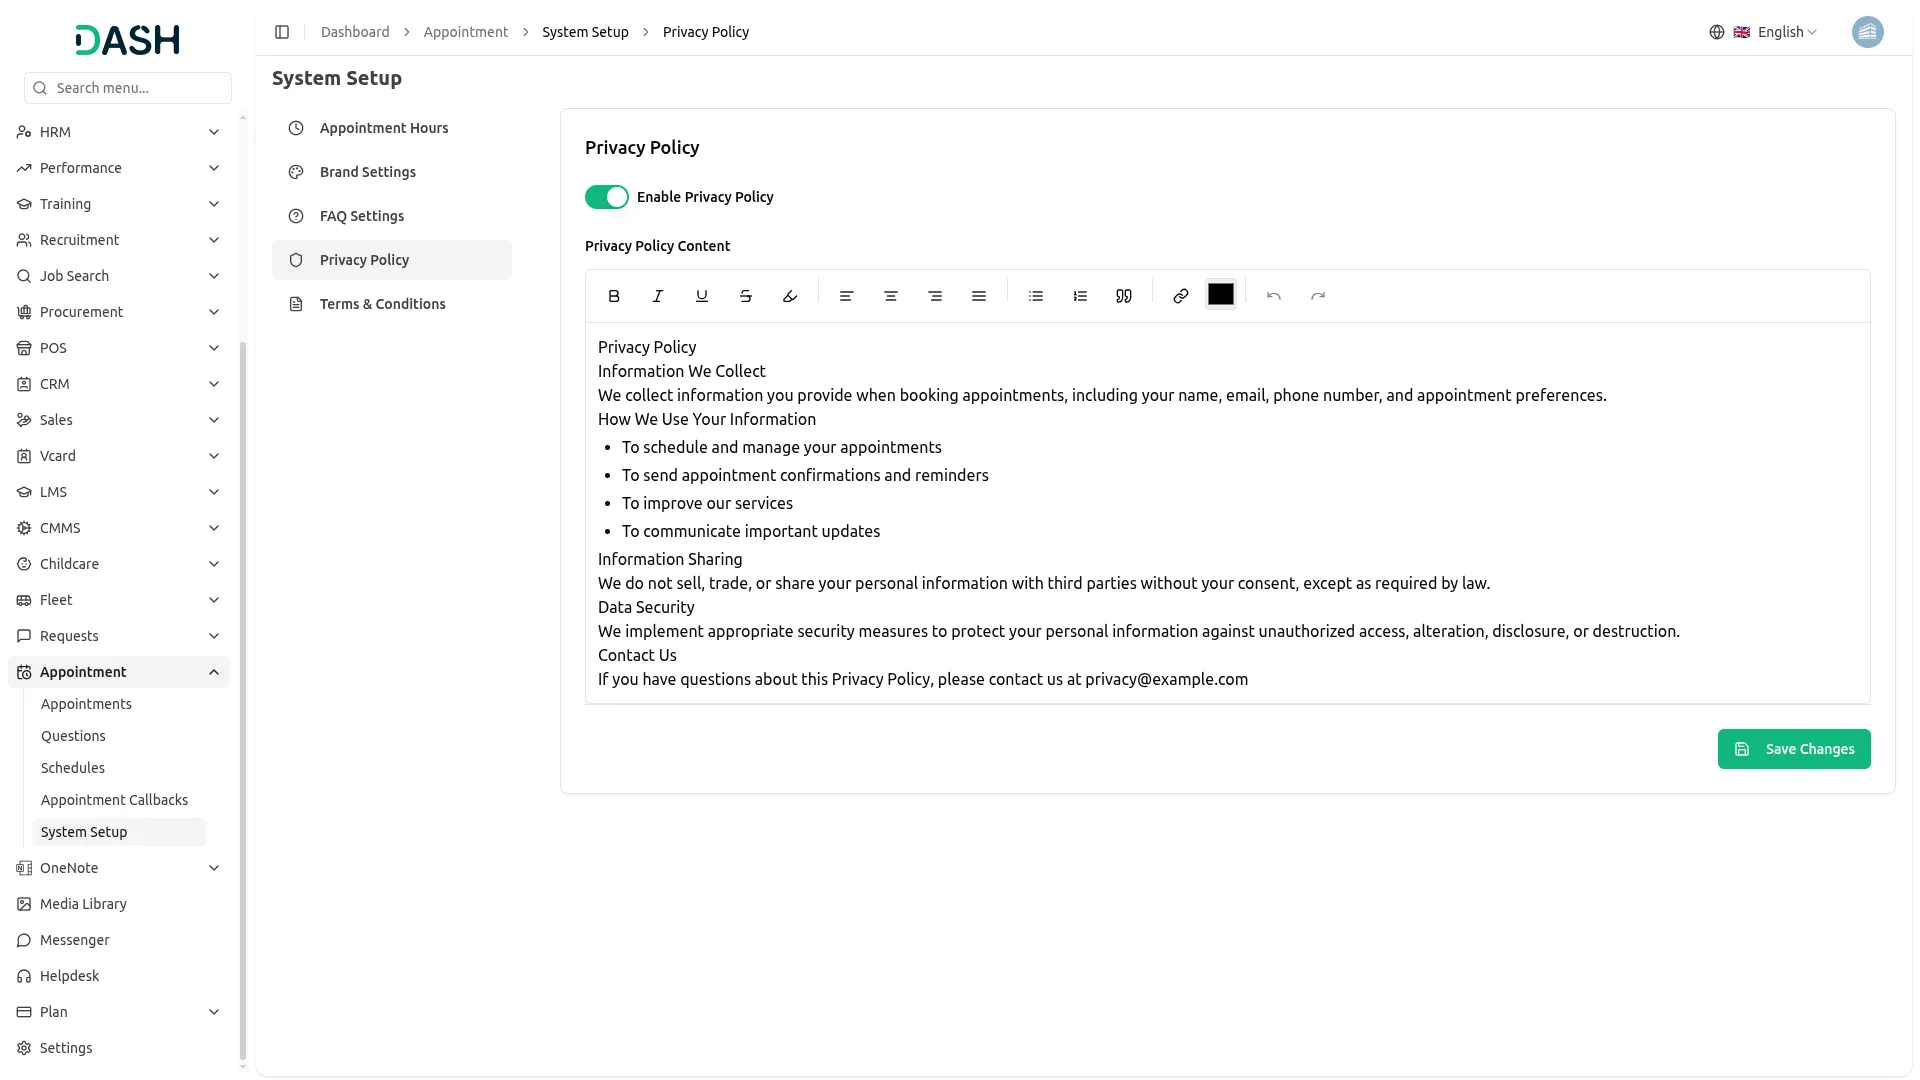
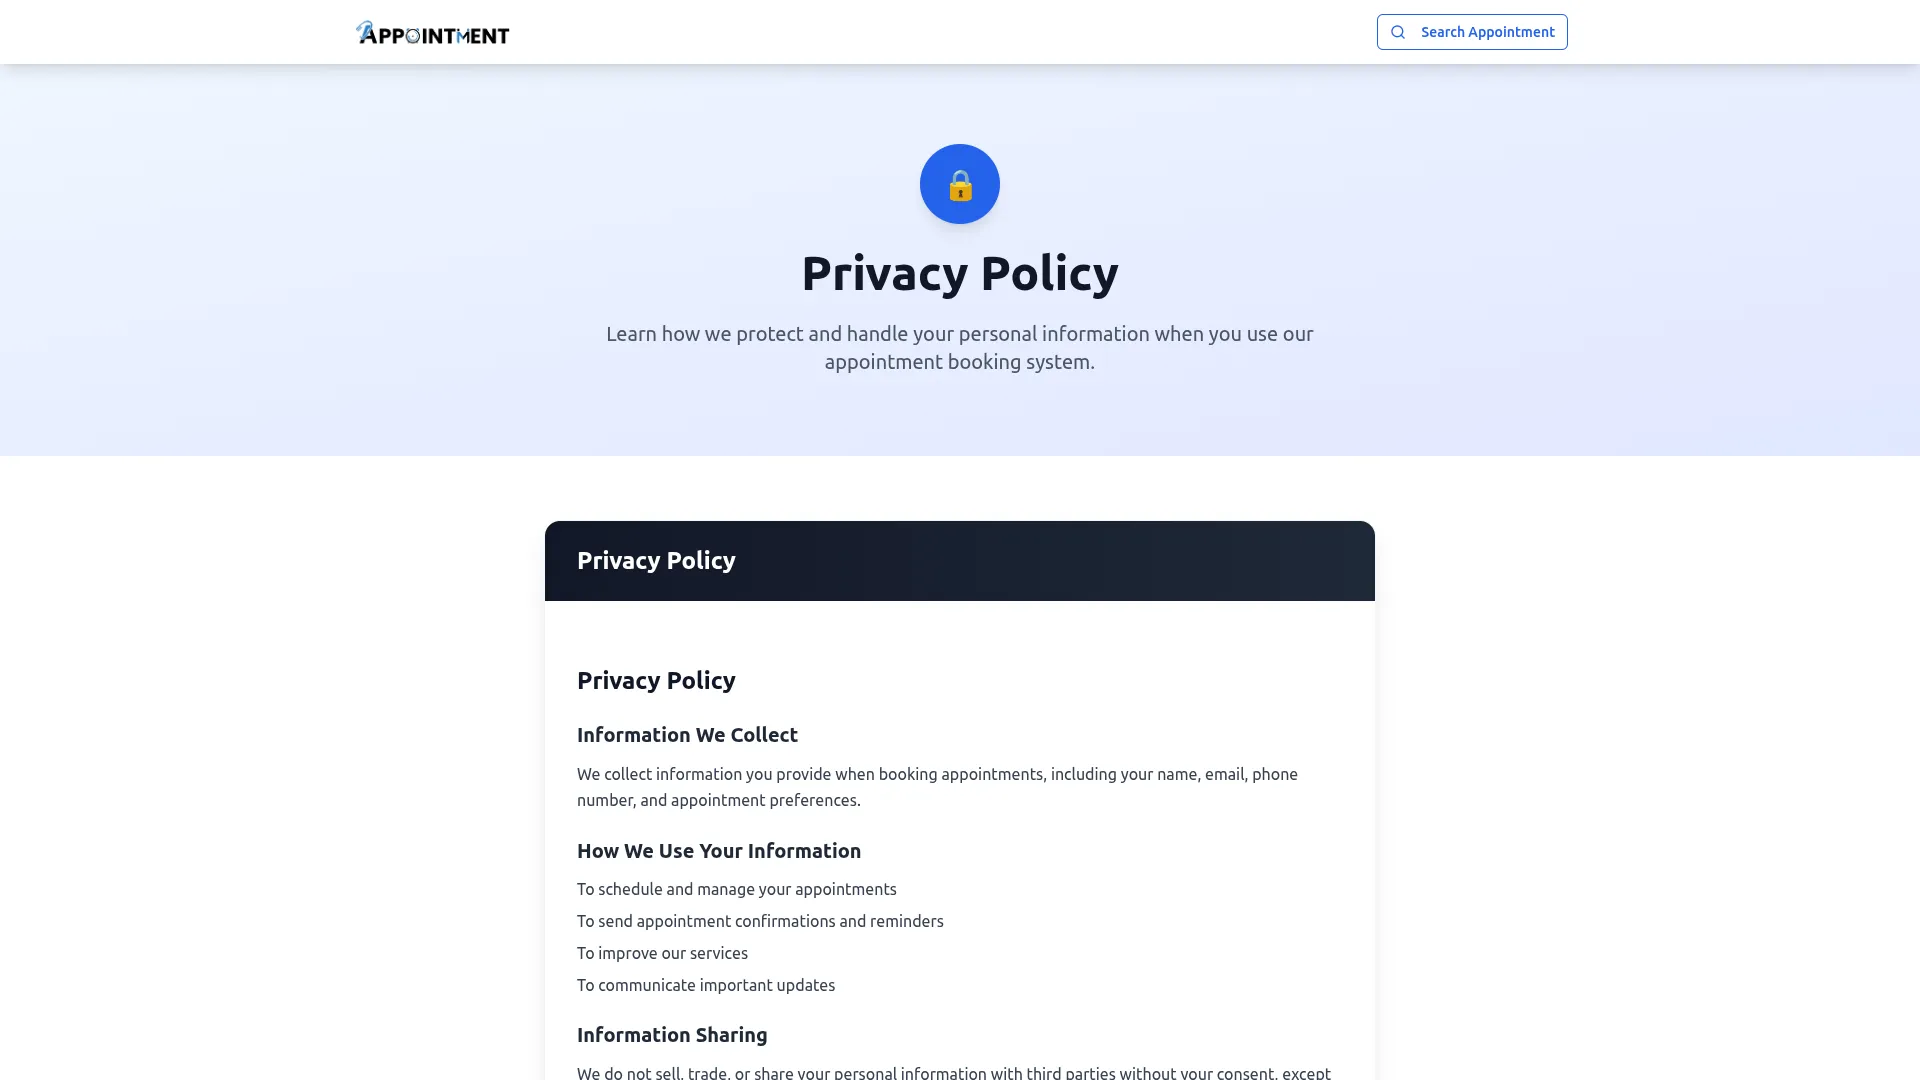
- This setting manages the display of the Privacy Policy on your website. A toggle button is provided to enable or disable the display.
- You can also add Privacy Policy Content here. Enter all content related to the privacy policy. After saving, it will be displayed on your website.
Terms & Conditions
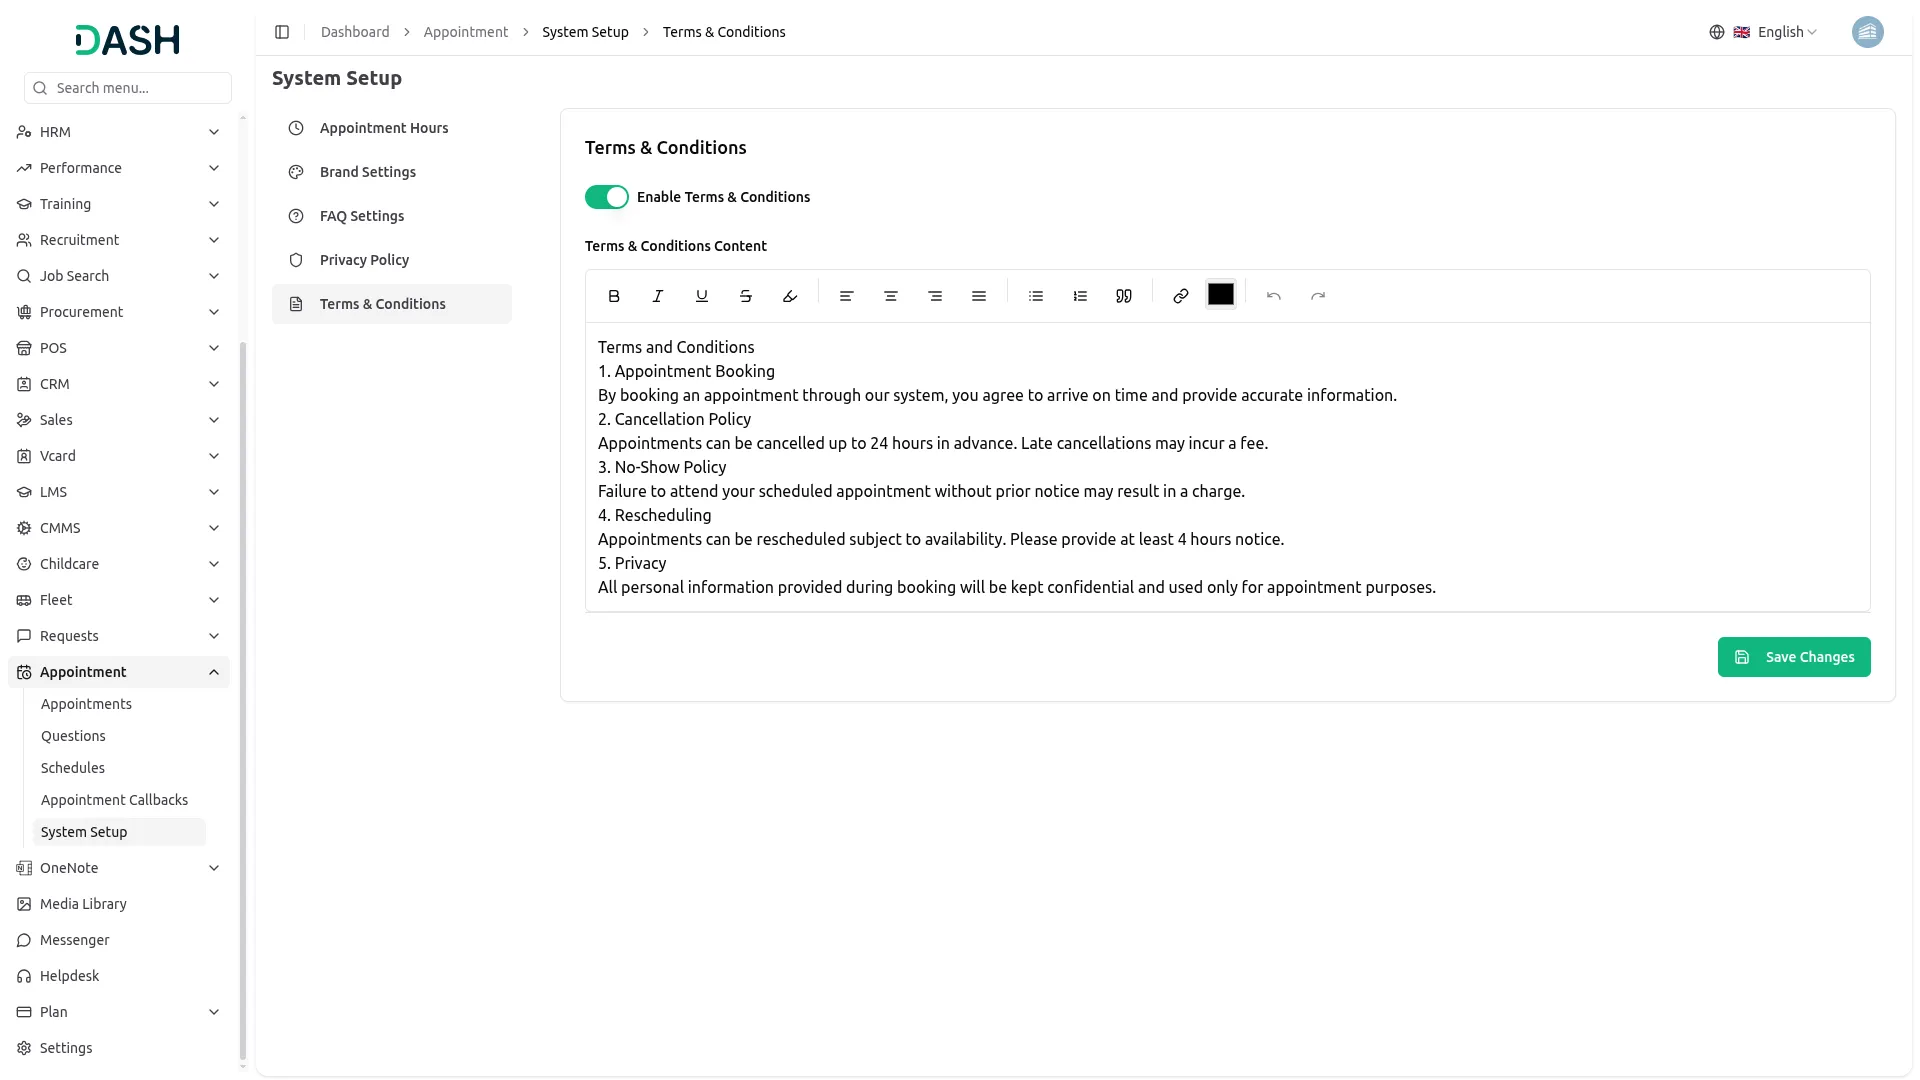
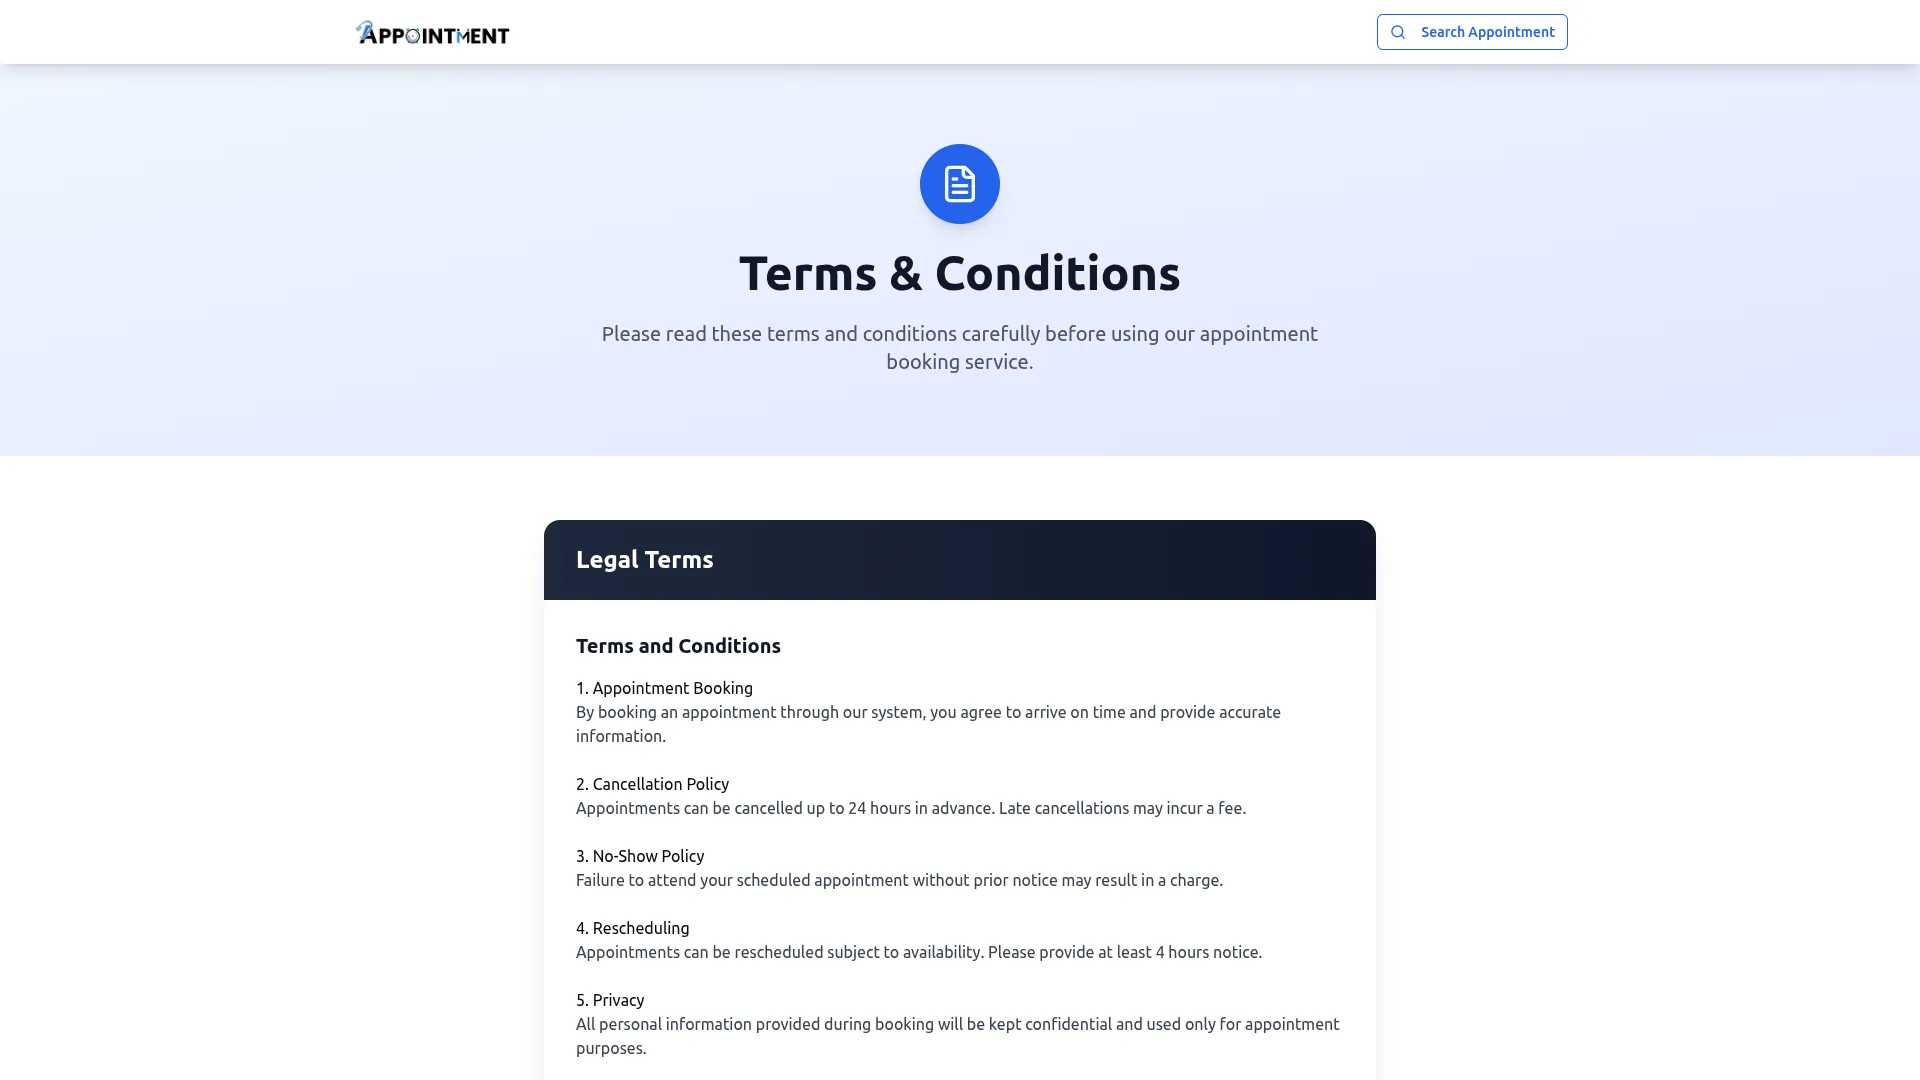
- This setting manages the display of the Terms & Conditions on your website. A toggle button is provided to enable or disable the display.
- You can also add Terms & Conditions Content here. Enter all content related to the terms & conditions. After saving, it will be displayed on your website.
Manage Appointment
- To create a new appointment, click the “Create” button on the appointment management page. Enter the appointment name and select the appointment type as either Free or Paid. Choose the weekday when this appointment will be available and set the enable or disable status for phone fields.
- Set the duration for the appointment and add questions from the Question section by selecting the checkbox option for questions and custom fields.
- Use the appointment enable or disable toggle checkbox to control whether the appointment is shown to clients. Once all details are filled, click “Submit” to create the appointment.
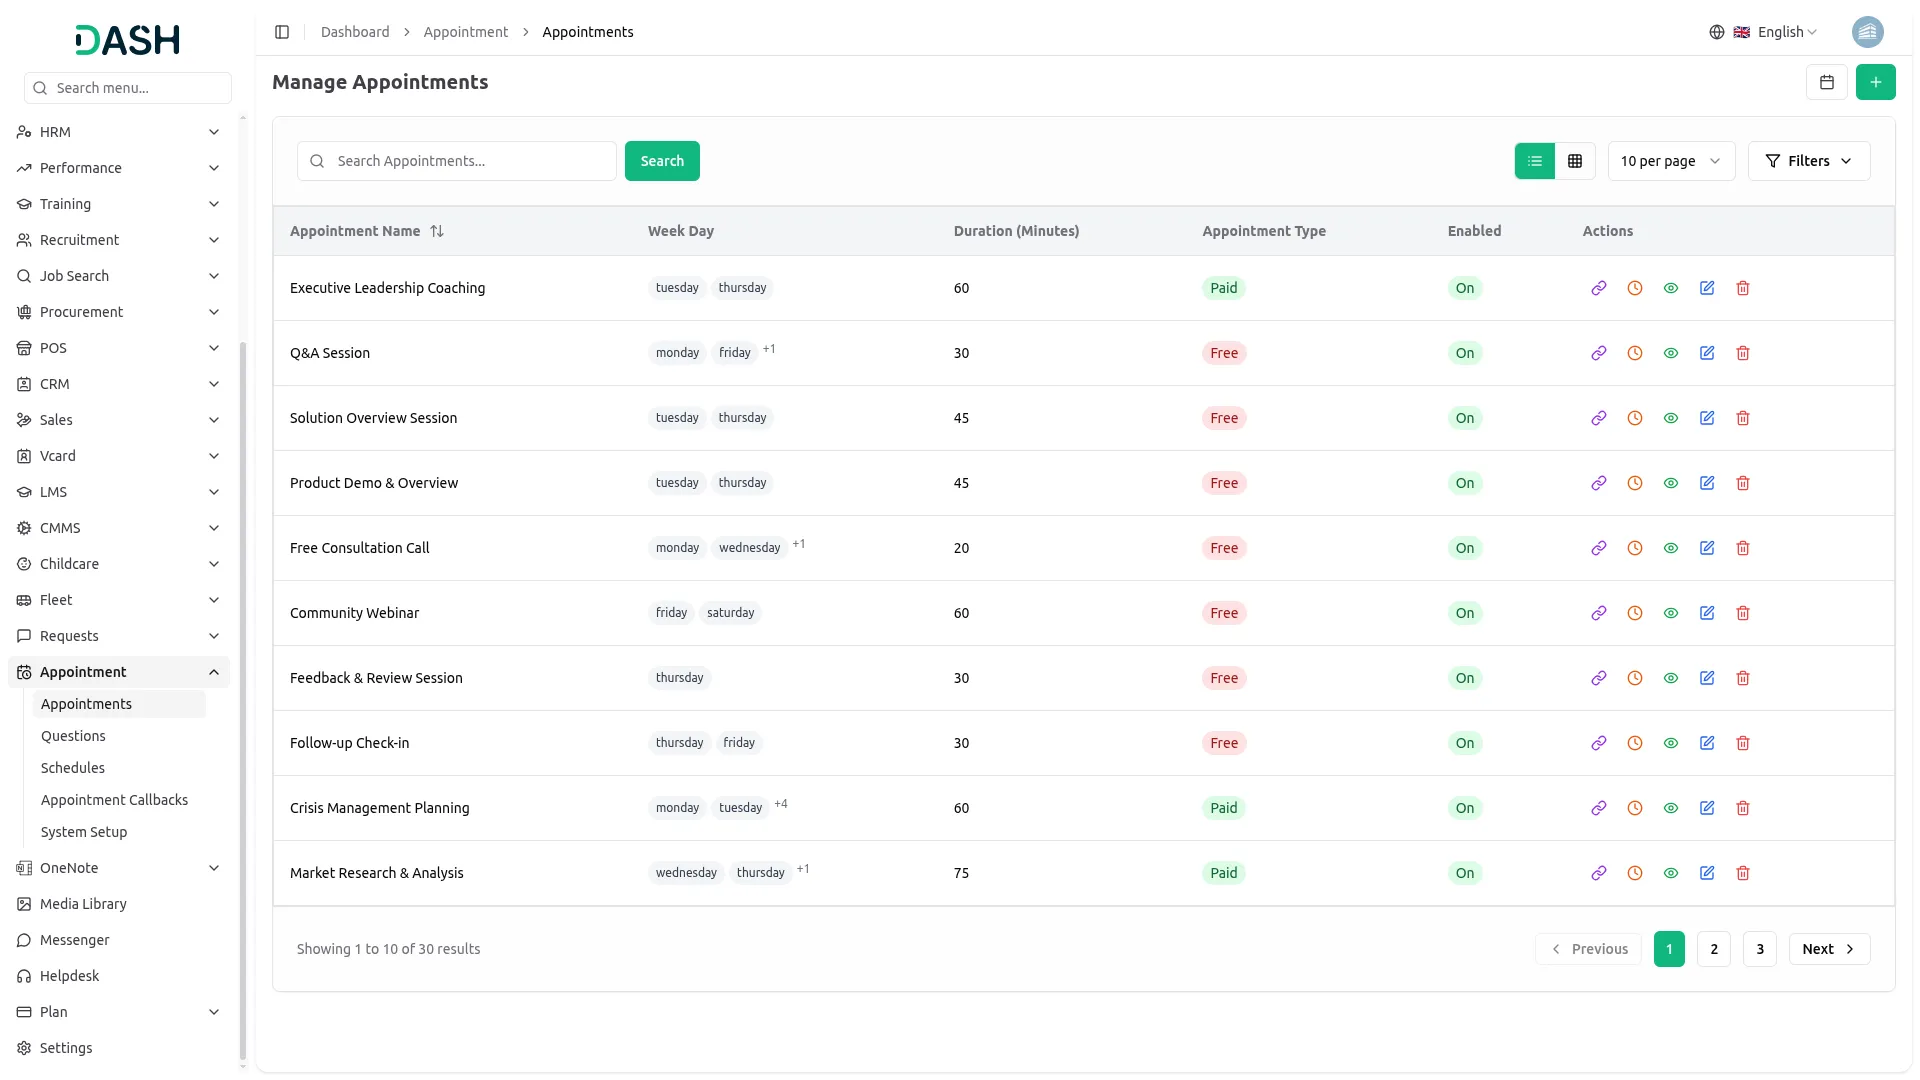
- The list page shows all appointments in a table with columns for Number, Appointment Name, Owner, Appointment Type, and Enabled status. The Calendar View button displays all appointments in calendar format and shows the appointment list.
- Actions available include View Schedule, Copy Link to copy the appointment page link, View to show appointment details, Edit to modify appointment details, and Delete to remove appointments.
Appointment Form (Frontend)
- This section allows users to view and submit appointment forms on the frontend (user-facing side).
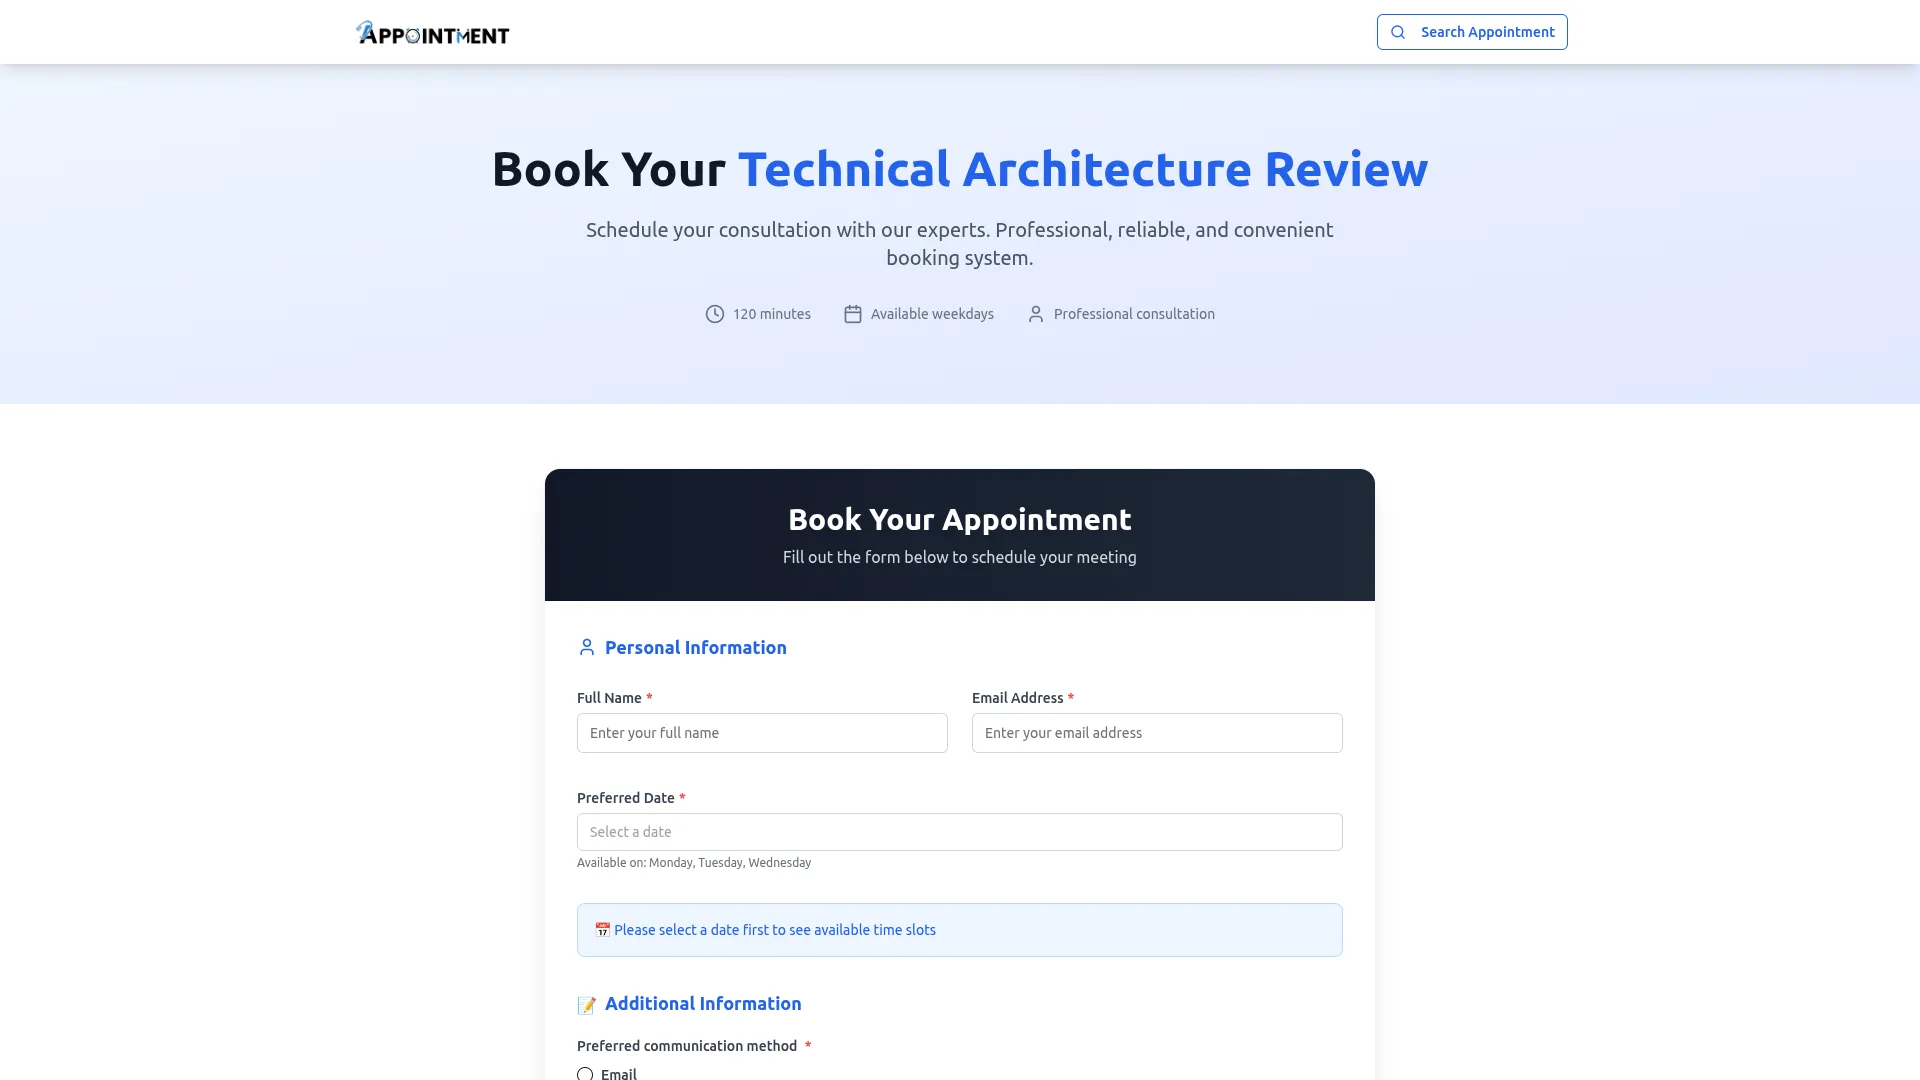
- The logo, favicon, title text and footer text added in Brand Settings are displayed here. The “Search Appointment” button can be used to find appointment details
- By clicking “Copy link,” you can see the appointment form details. This “Copy Link” button is what you will need to copy from the Manage Appointment section.
- While creating an appointment in the Manage Appointment section, enable or disable specific fields (like Phone), and include any custom questions configured from the Manage Question section. These selected options will be visible on the frontend when the appointment form is opened by the user.
- The form displays available timeslots according to the duration you set when creating the appointment in the Manage Appointment section. When clients select a date, available timeslot options will appear for that specific date, allowing them to choose their preferred time slot.
- In the footer, the text from Brand Settings will be displayed along with the Privacy Policy and Terms & Conditions, if they are enabled from System Setup.
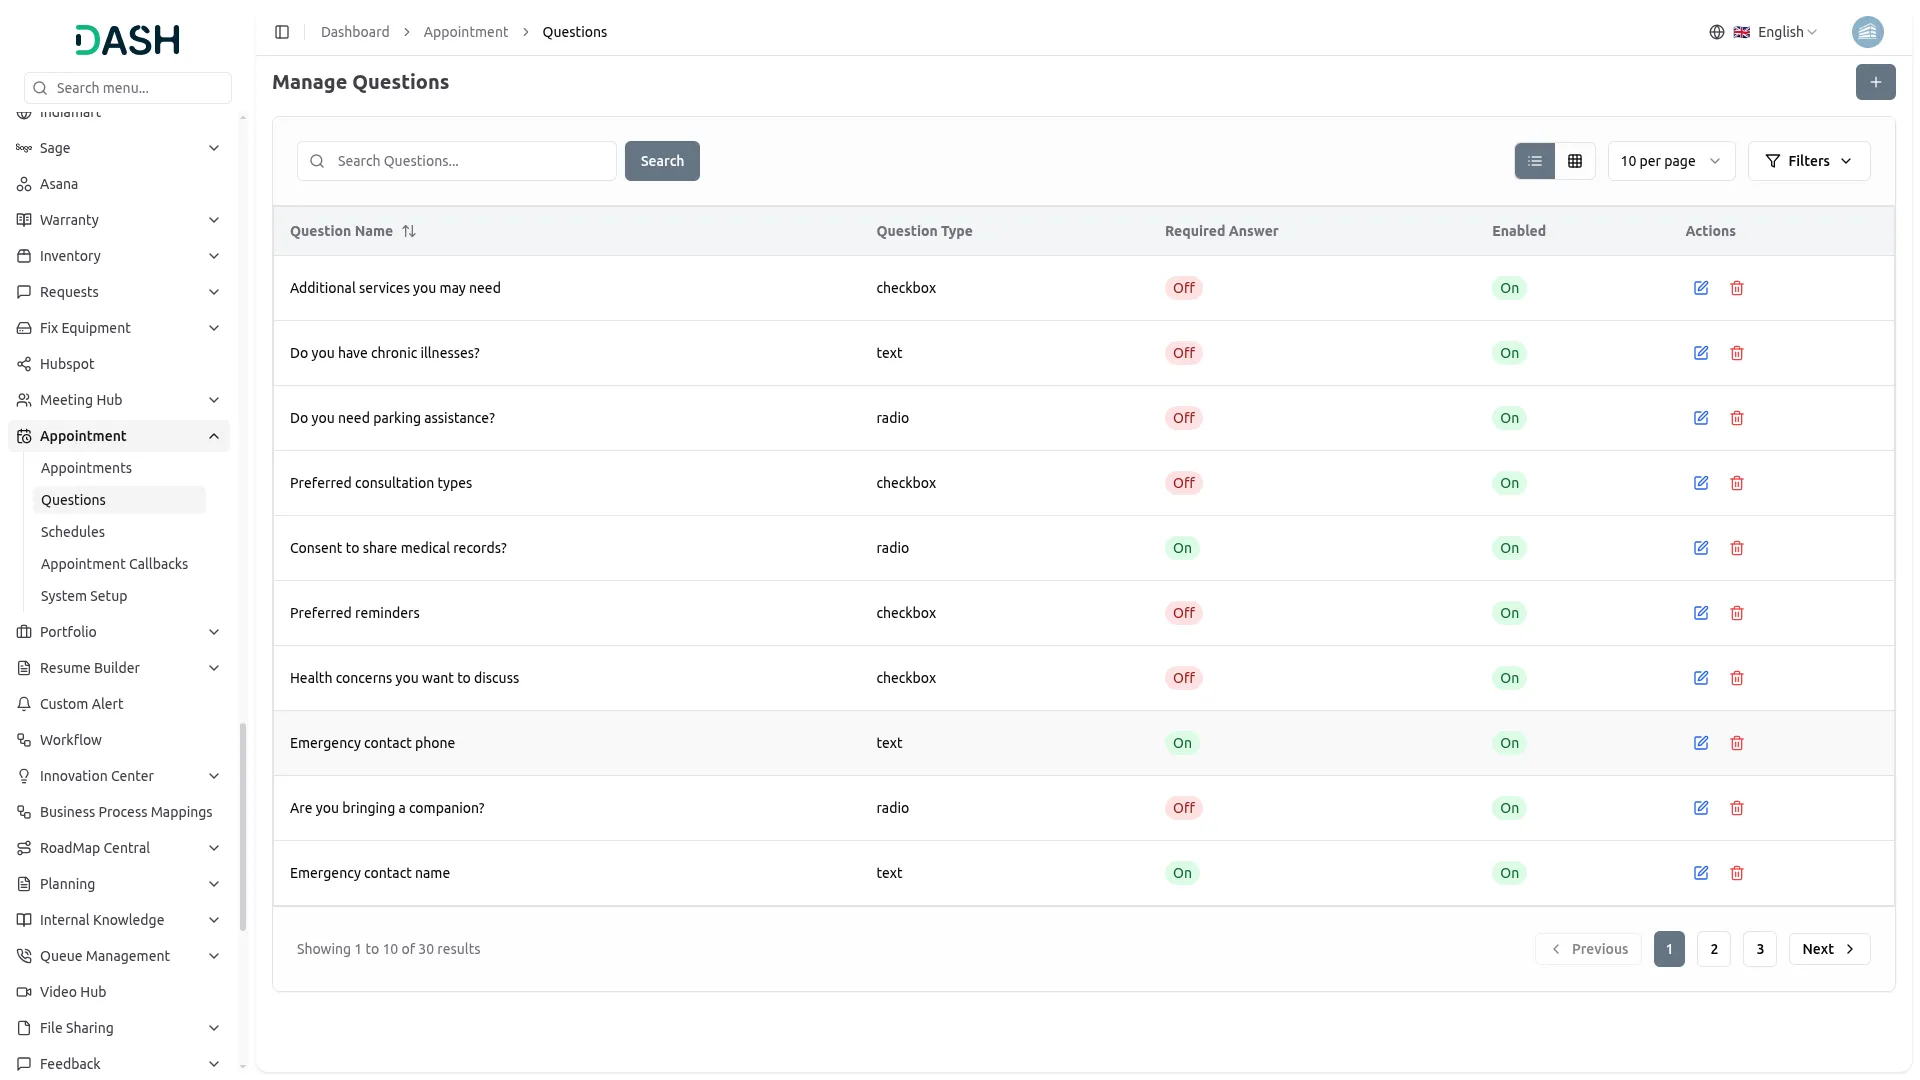
Manage Question
- To create a new question, click the “Create” button.
- Enter the question name and choose the question type (radio, dropdown, text, or checkbox).
- For non-text types, provide the available answer options.
- Use toggle checkboxes to mark the question as required and to enable or disable it.
- The list page displays all questions in a table with the following columns: No, Question, Question Type, Required Answer, and Enabled.
- You can also edit or delete any existing question from this page.
Manage Schedule
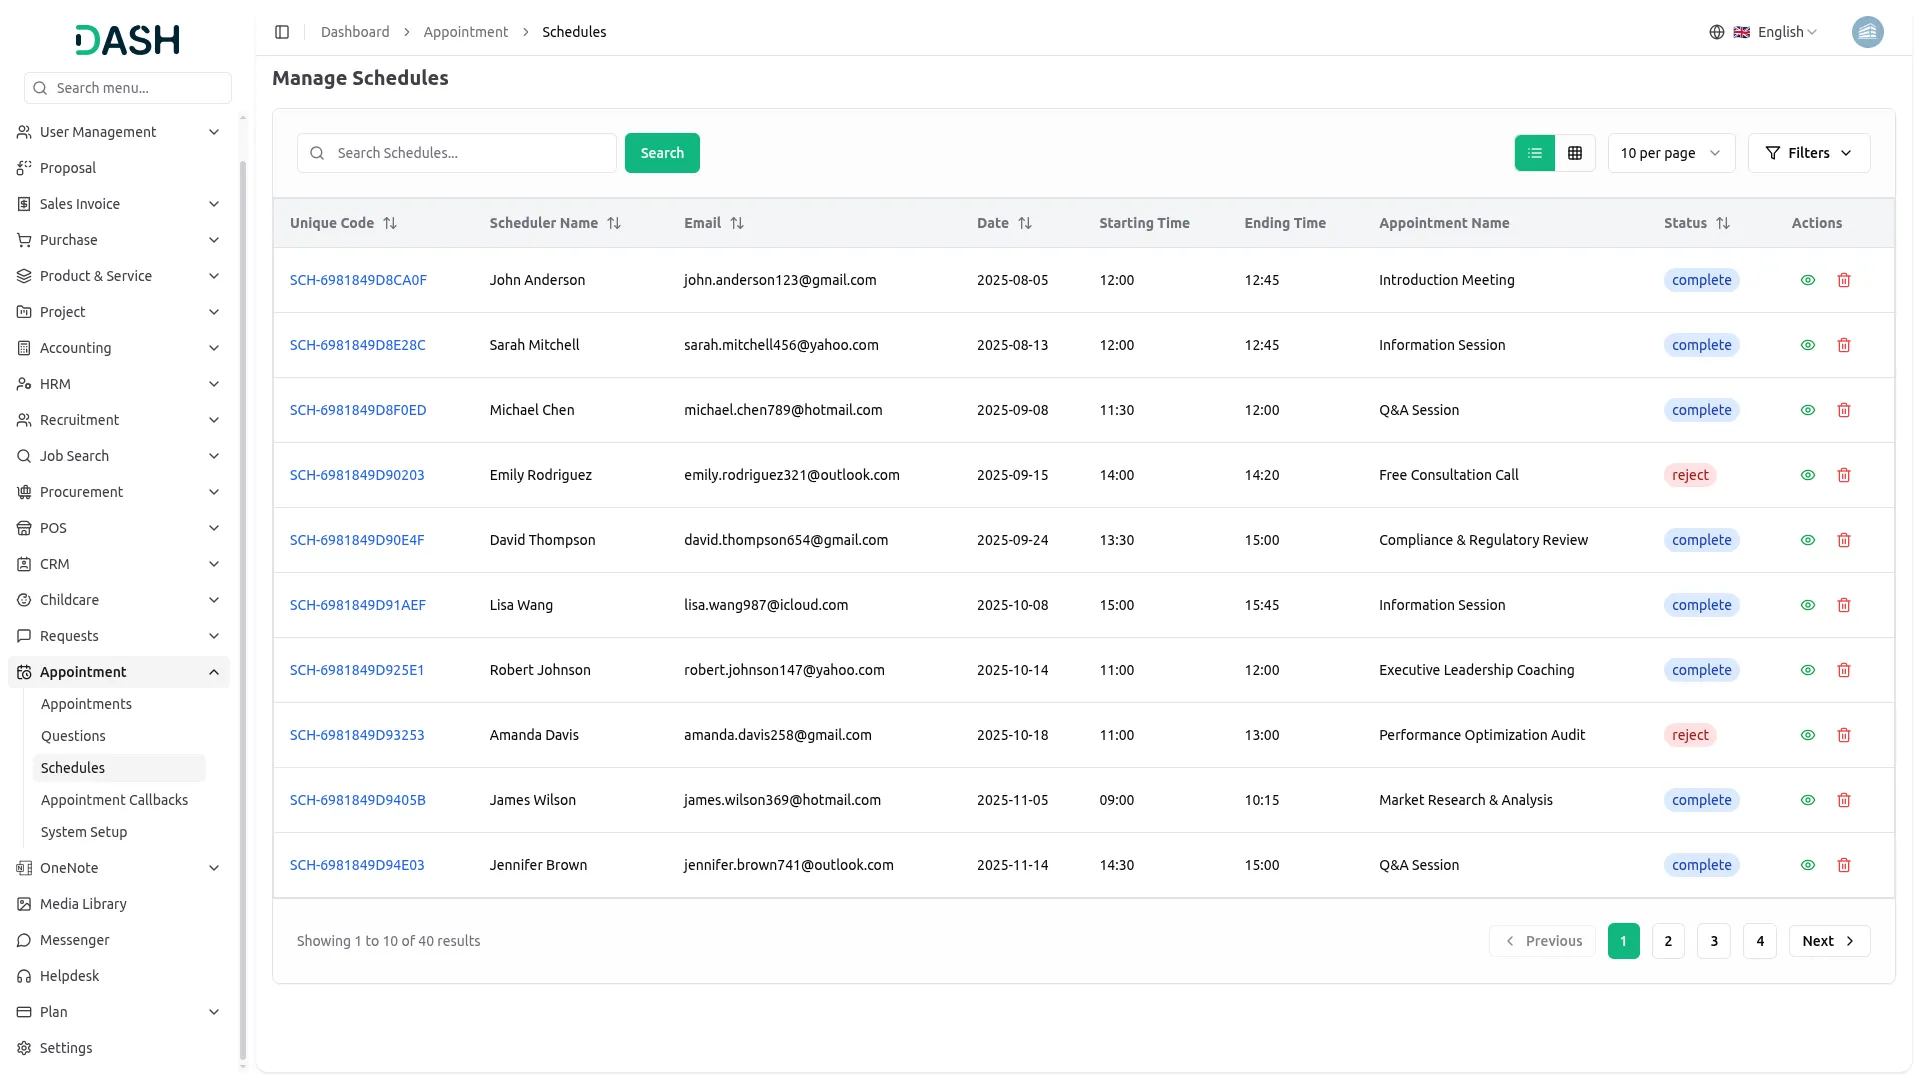
- On the Manage Schedule page, view all scheduled appointments and related details.
- The table includes these columns: No, Name, Date, Start Time, End Time, Appointments (linked from the Appointment section), Owner, and Status (Pending, Approved, Complete, Reject).
- You can assign the users while the status is pending.
- Under the Actions column, click “View” to see appointment details. You can also update the status to “Complete”.
Manage Appointment Callback
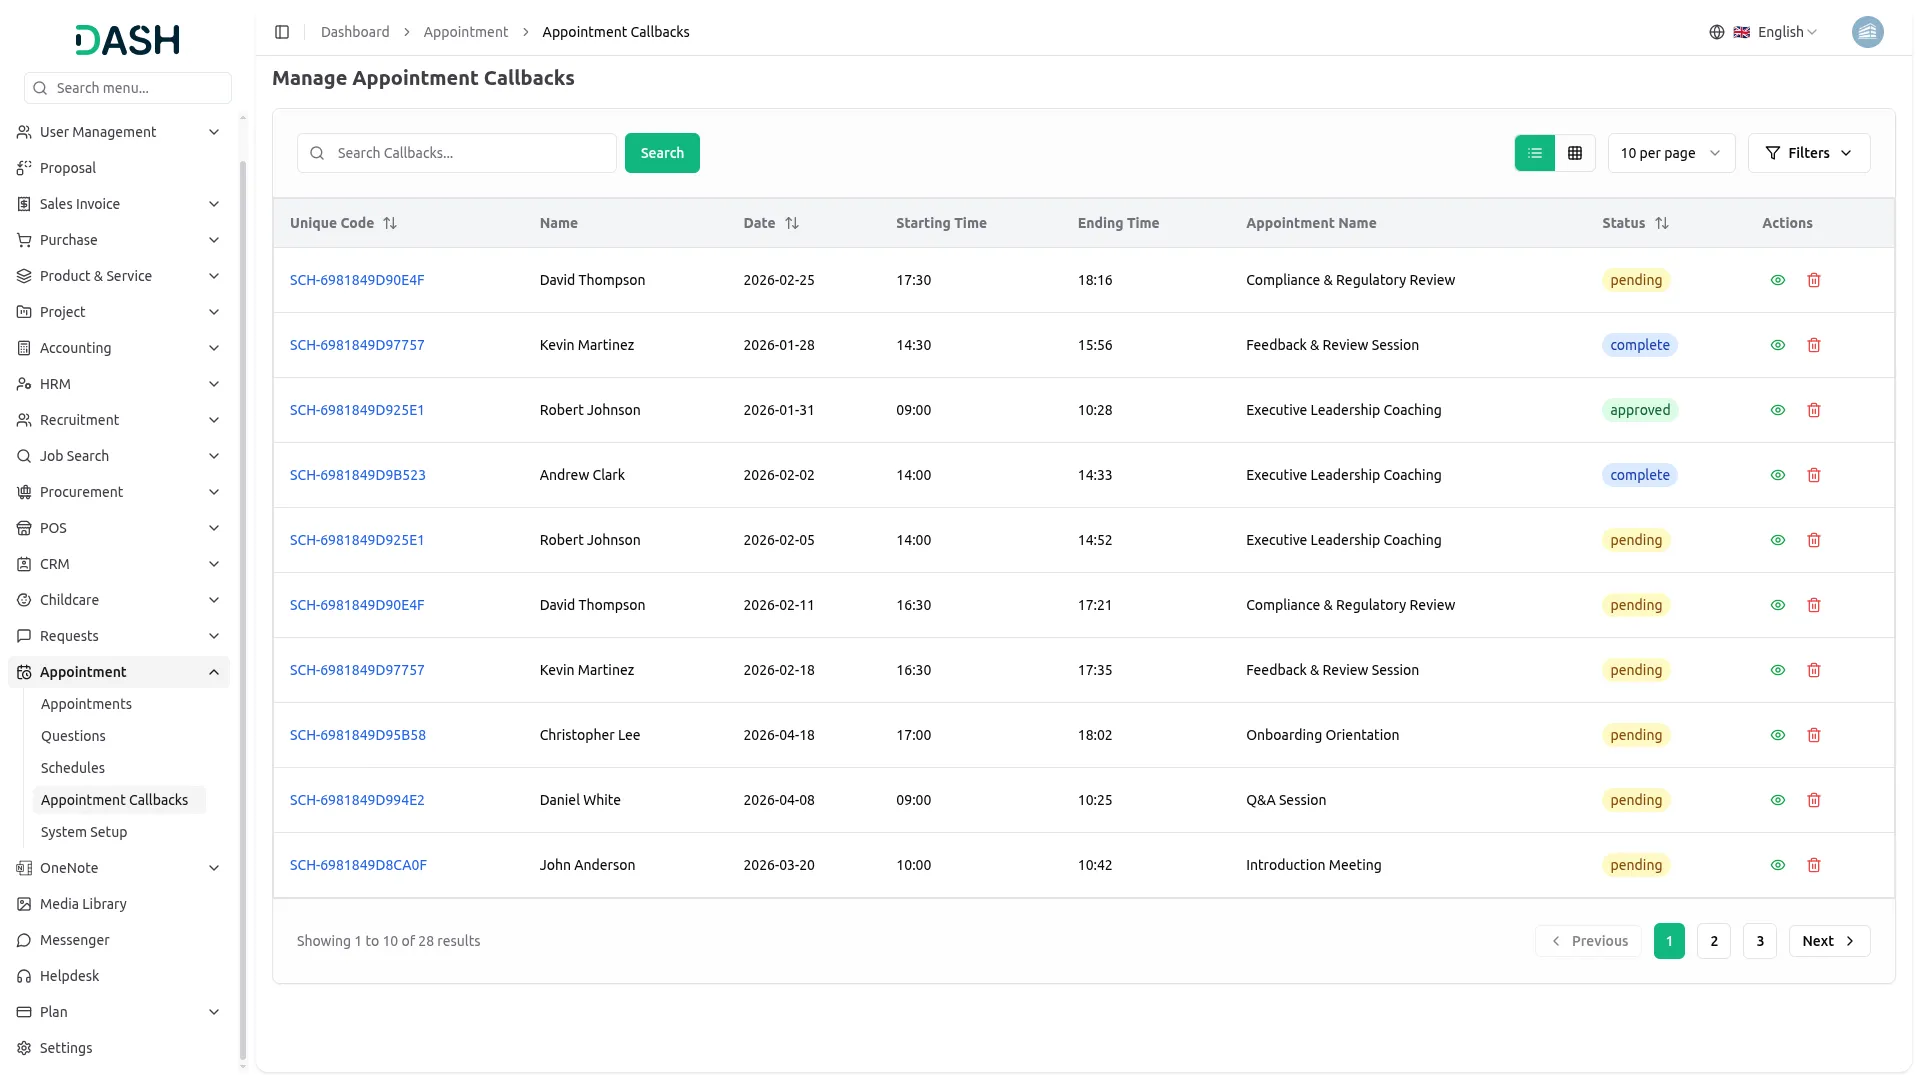
- This section helps track callbacks related to existing appointments.
- The list shows all callback schedules in a table with columns: No, Name, Date, Start Time, End Time, Appointments (from the Appointment section), Owner, and Status (Pending, Approved, Complete, Reject).
- Under the Action column, click “View” to open appointment details or choose Delete to remove a callback entry.
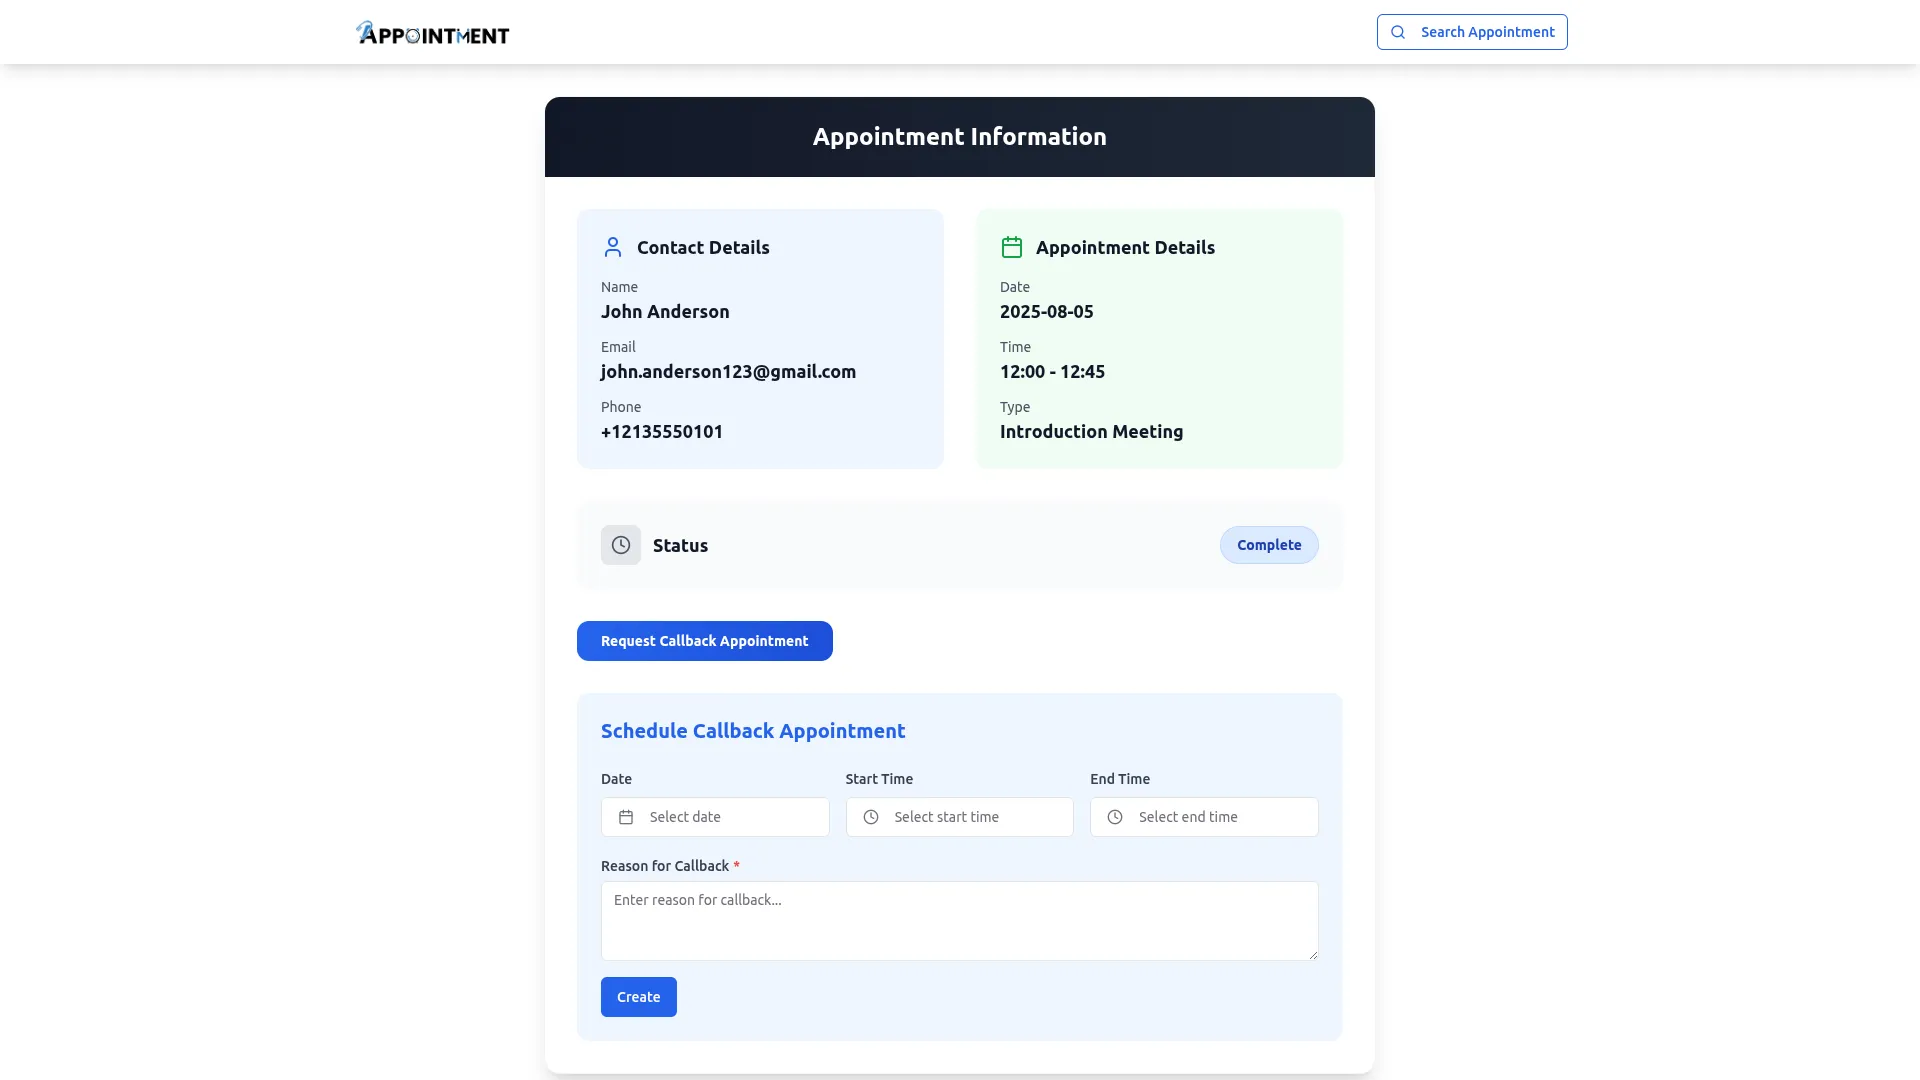
- You can request the appointment callback from the frontend side after the appointment is completed.
Categories
Related articles
- Queue Management Integration in Dash SaaS
- Time Tracker Management Integration in Dash SaaS
- Sign-In with LinkedIn Add-On Integration in Dash SaaS
- Fire Safety Detailed Documentation
- Vehicle Wash Detailed Documentation
- Garden Management Integration in Dash SaaS
- Scholarship Detailed Documentation
- Visitor Management Integration in Dash SaaS
- Movie & Tv Studio Integration in Dash SaaS
- Trello Integration Detailed Documentation
- LiveStorm Meeting Detailed Documentation
- Solar Hub Detailed Documentation
Reach Out to Us
Have questions or need assistance? We're here to help! Reach out to our team for support, inquiries, or feedback. Your needs are important to us, and we’re ready to assist you!


Need more help?
If you’re still uncertain or need professional guidance, don’t hesitate to contact us. You can contact us via email or submit a ticket with a description of your issue. Our team of experts is always available to help you with any questions. Rest assured that we’ll respond to your inquiry promptly.
Love what you see?
Do you like the quality of our products, themes, and applications, or perhaps the design of our website caught your eye? You can have similarly outstanding designs for your website or apps. Contact us, and we’ll bring your ideas to life.
