
AI Document – WorkDo Dash SaaS Add-On Guide
Learn how to create and manage AI-generated documents in WorkDo Dash SaaS.
Introduction
The AI Document System is a comprehensive AI-powered content generation platform designed to help users create professional documents across various categories and languages. This system allows you to generate high-quality content using advanced AI technology with customizable templates, multiple language support, and various tone options. The platform includes template management, document generation, content customization, and history tracking features. Users can create content for blogs, websites, social media, emails, videos, and other purposes while maintaining complete control over language, creativity, and tone settings.
How To Install The Add-On?
To Set Up the AI Document Add-On, you can follow this link: Setup Add-On.
How To Use The AI Document Add-On?
Settings Configuration
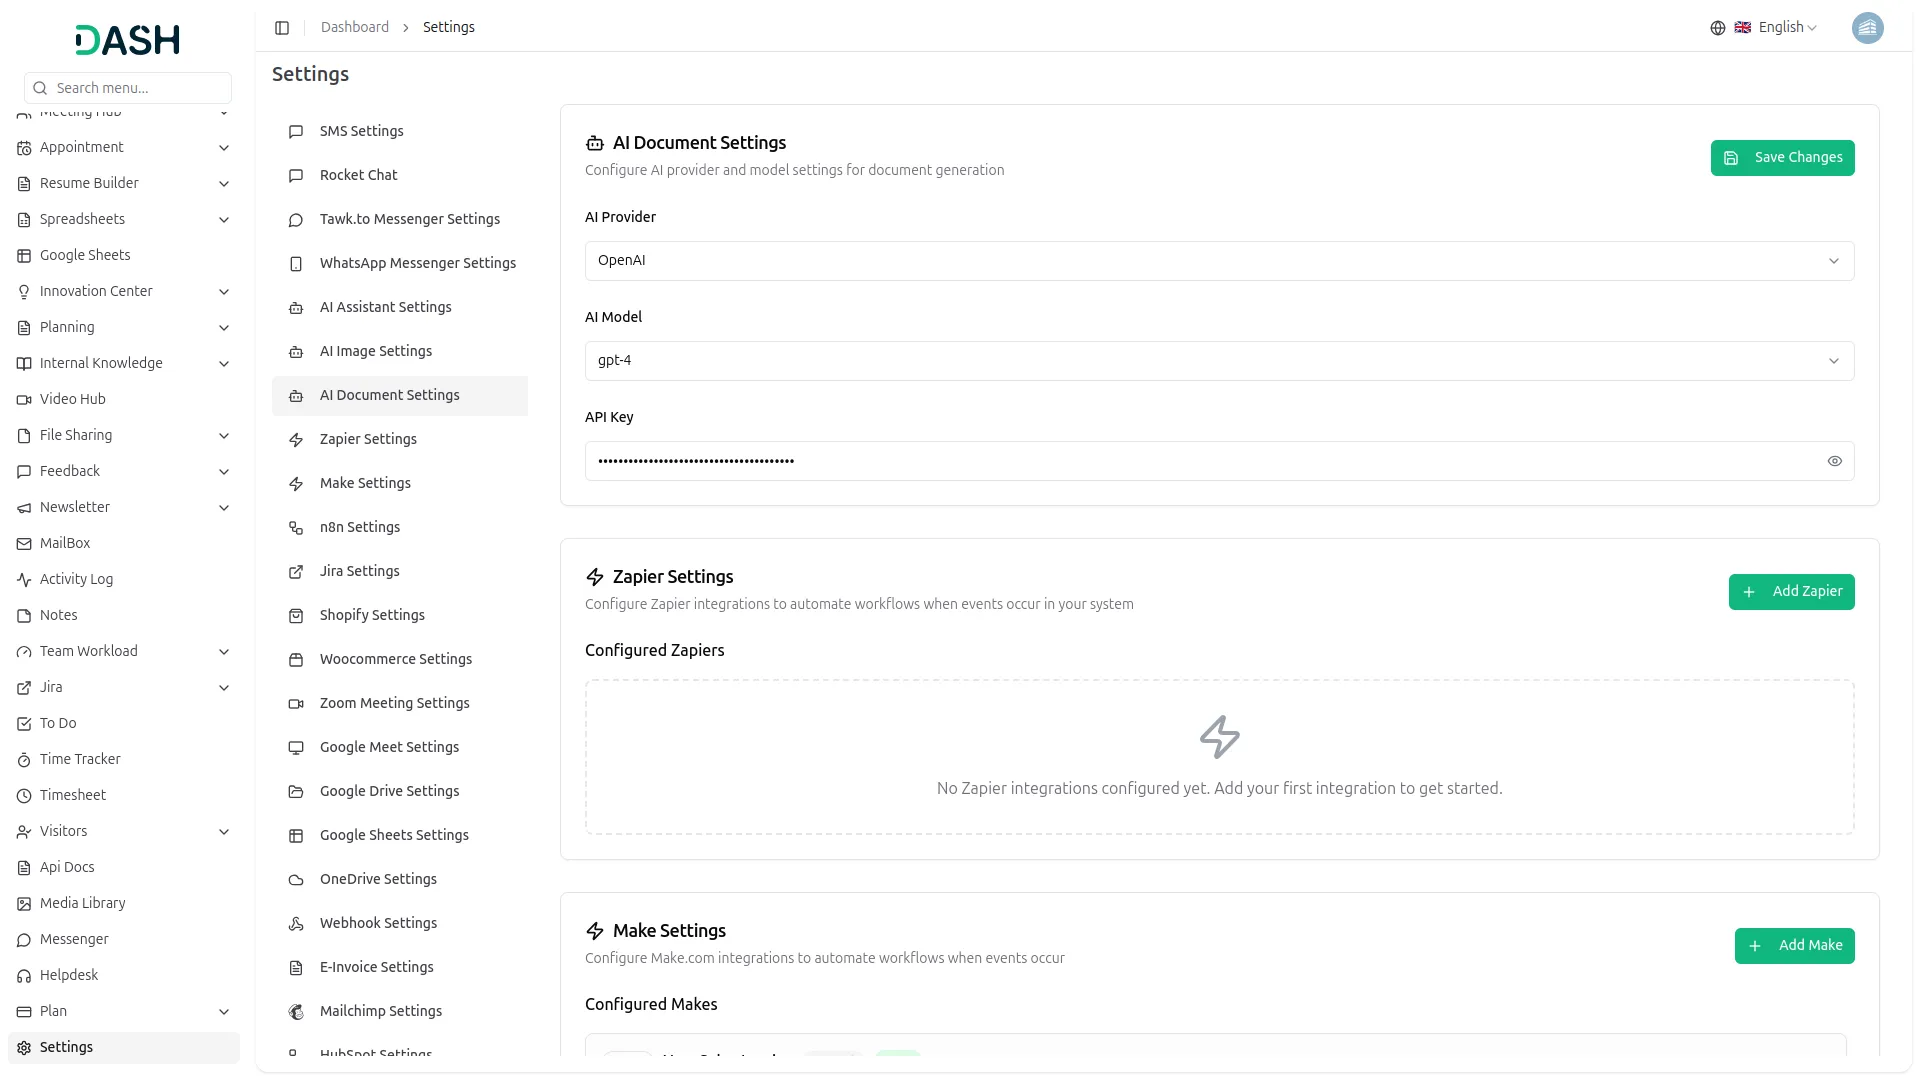
- The Settings Configuration allows company administrators to set up the AI system with multiple AI provider integrations for content generation. This module must be configured before users can generate documents.
- To configure AI Document Settings, access the Settings Configuration section from the settings panel. Select your preferred AI Provider from the dropdown options including OpenAI, Anthropic Claude, and Google Gemini based on your requirements and subscription.
- Choose the appropriate AI Model from the dropdown which dynamically updates based on your selected provider. OpenAI offers models like GPT-4, GPT-4-Turbo, and GPT-3.5-Turbo. Claude provides claude-sonnet-4-5, claude-opus-4-1, and claude-3-5-haiku-latest options. Gemini includes gemini-2.5-flash, gemini-2.5-pro, and gemini-2.5-flash-lite models.
- Enter your API Key in the secure password field with show/hide toggle functionality for enhanced security. Save the configuration to enable AI document generation functionality for all users in the system.
Document Template
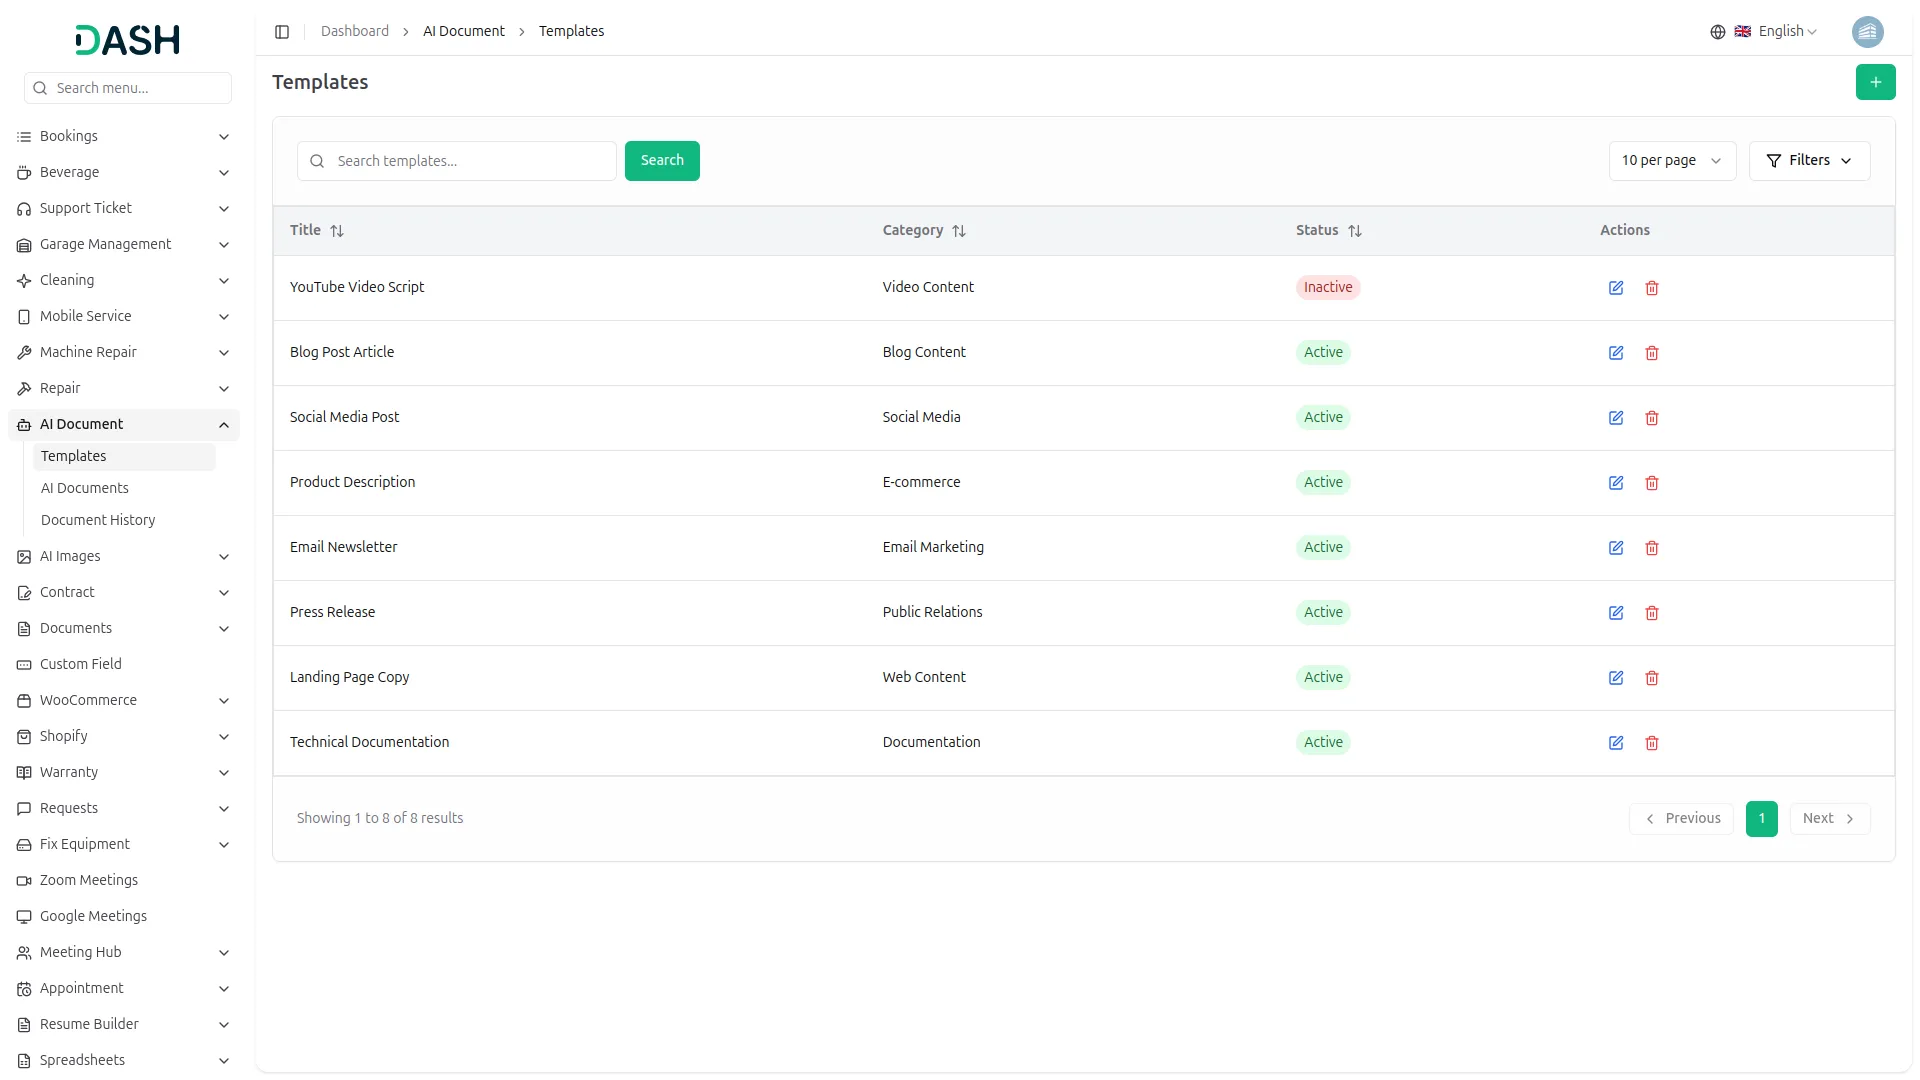
- To add a new Template, click the “Create” button, enter the Title, add a Category, and select the Status from the dropdown (Active or Inactive). Enter a Description for the template, then add the Prompt Template using placeholders like {title}, {keywords}, {tone}, {language}.
- The list page displays all templates in a table format with columns including Title, Category, Status, and Actions. You can use the search bar to find specific templates by name.
- Apply filters by selecting options from Filter by category and Filter by Status, then click “Apply” to activate the filters or “Clear” to reset them. Available actions include Edit to update template information and Delete to remove a template.
Document Generate Page
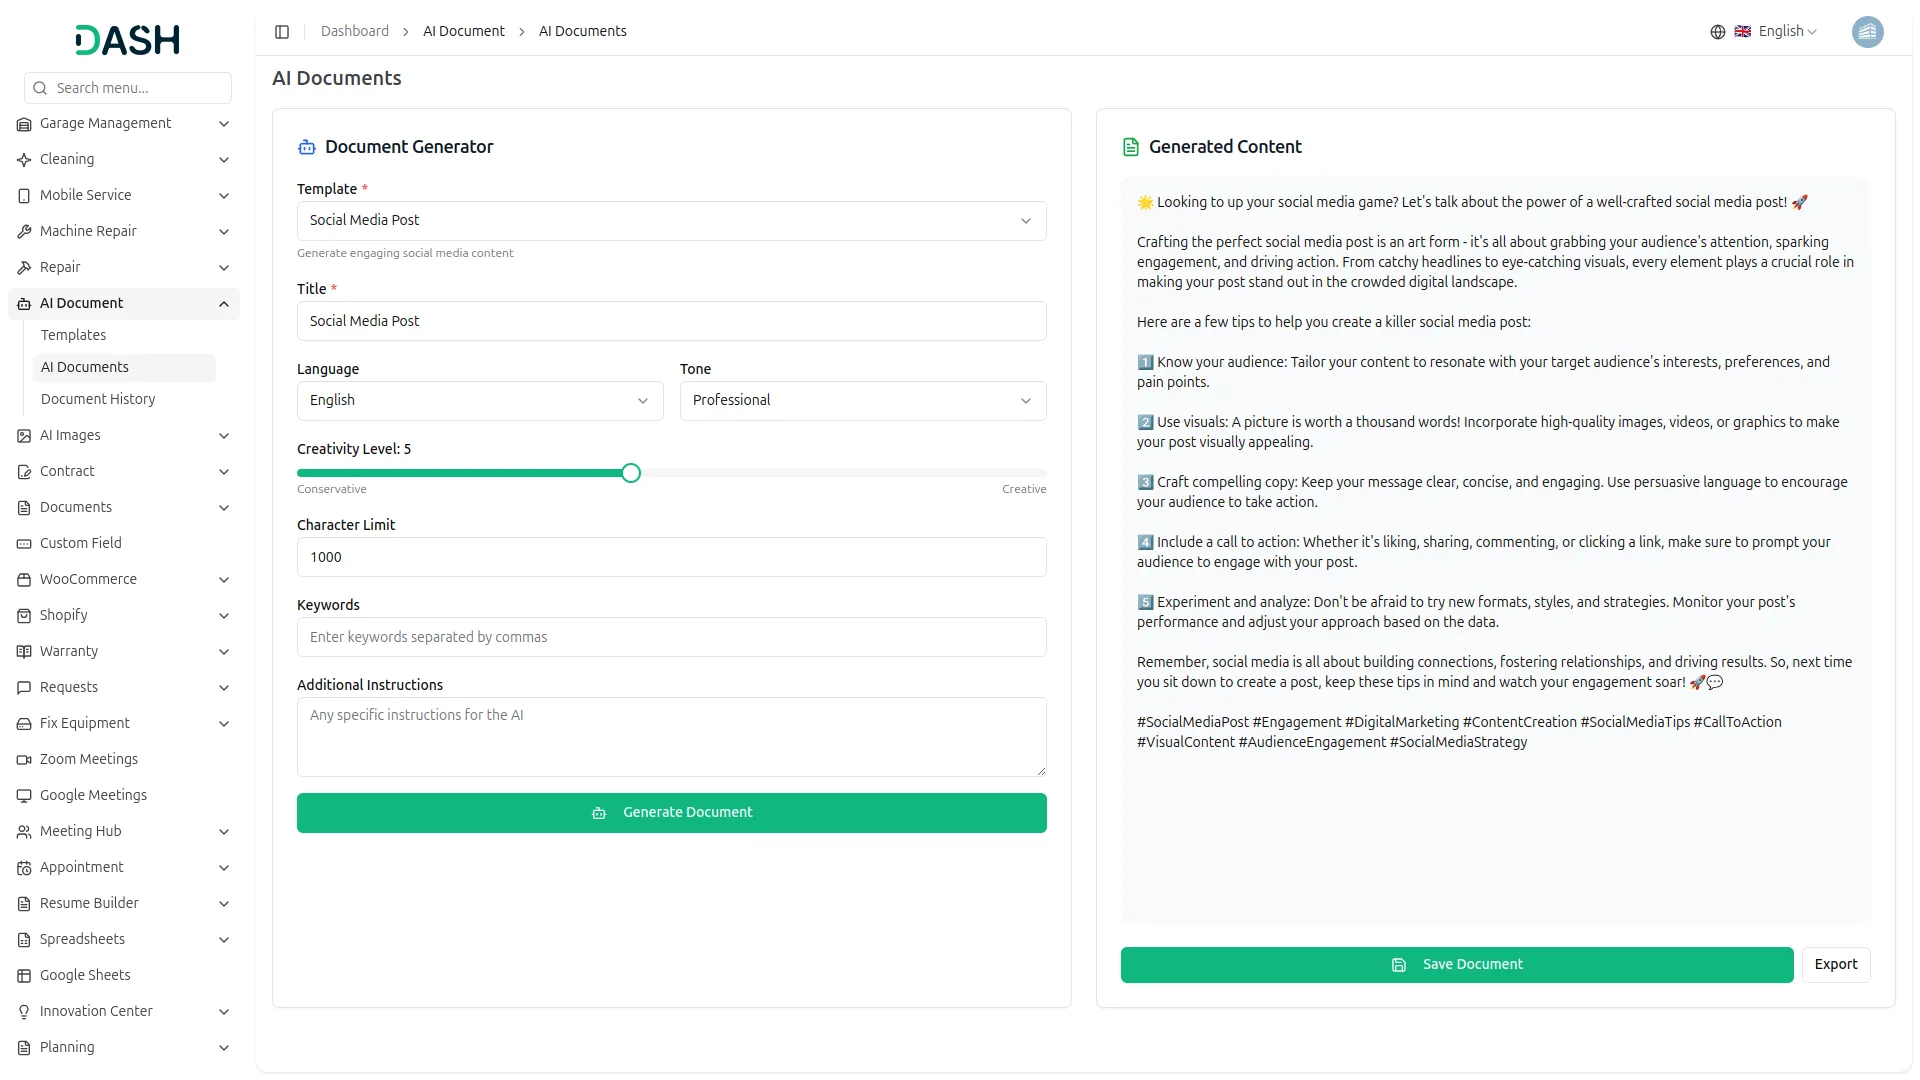
- The Document Generate Page is the main content creation interface where users customize their AI-generated content. This works with templates selected from the Document Template module and provides a comprehensive two-panel layout.
- On the left side of the page, start by selecting your preferred Template from the available options. Enter your document Title in the designated field which is required for generation.
- Select your preferred Language from the comprehensive dropdown menu including English, Arabic, Chinese, Danish, Dutch, French, German, Hebrew, Italian, Japanese, Polish, Portuguese, Russian, Spanish, Turkish, and many other international languages.
- Choose your Tone from the dropdown including Professional, Casual, Friendly, Formal, and Creative options to match your content style. Adjust the Creativity Level using the slider control ranging from 1 (Conservative) to 10 (Creative) to control the AI’s creative approach.
- Set the Character Limit as a number to control the content length with options ranging from 100 to 10,000 characters. Enter Focus Keywords separated by commas for SEO optimization and content targeting.
- Add Additional Instructions in the textarea field to provide specific guidance to the AI for customized content generation. Click the “Generate Document” button to create your content using all the specified parameters.
- On the right side output panel, review the generated content in the editable textarea. The content can be modified directly after generation. Use the available action buttons: Save Document to store your content in the system, Export to download the content as a text file, or copy functionality for clipboard access.
- The interface provides real-time feedback with loading states during generation and success notifications upon completion.
AI Document History
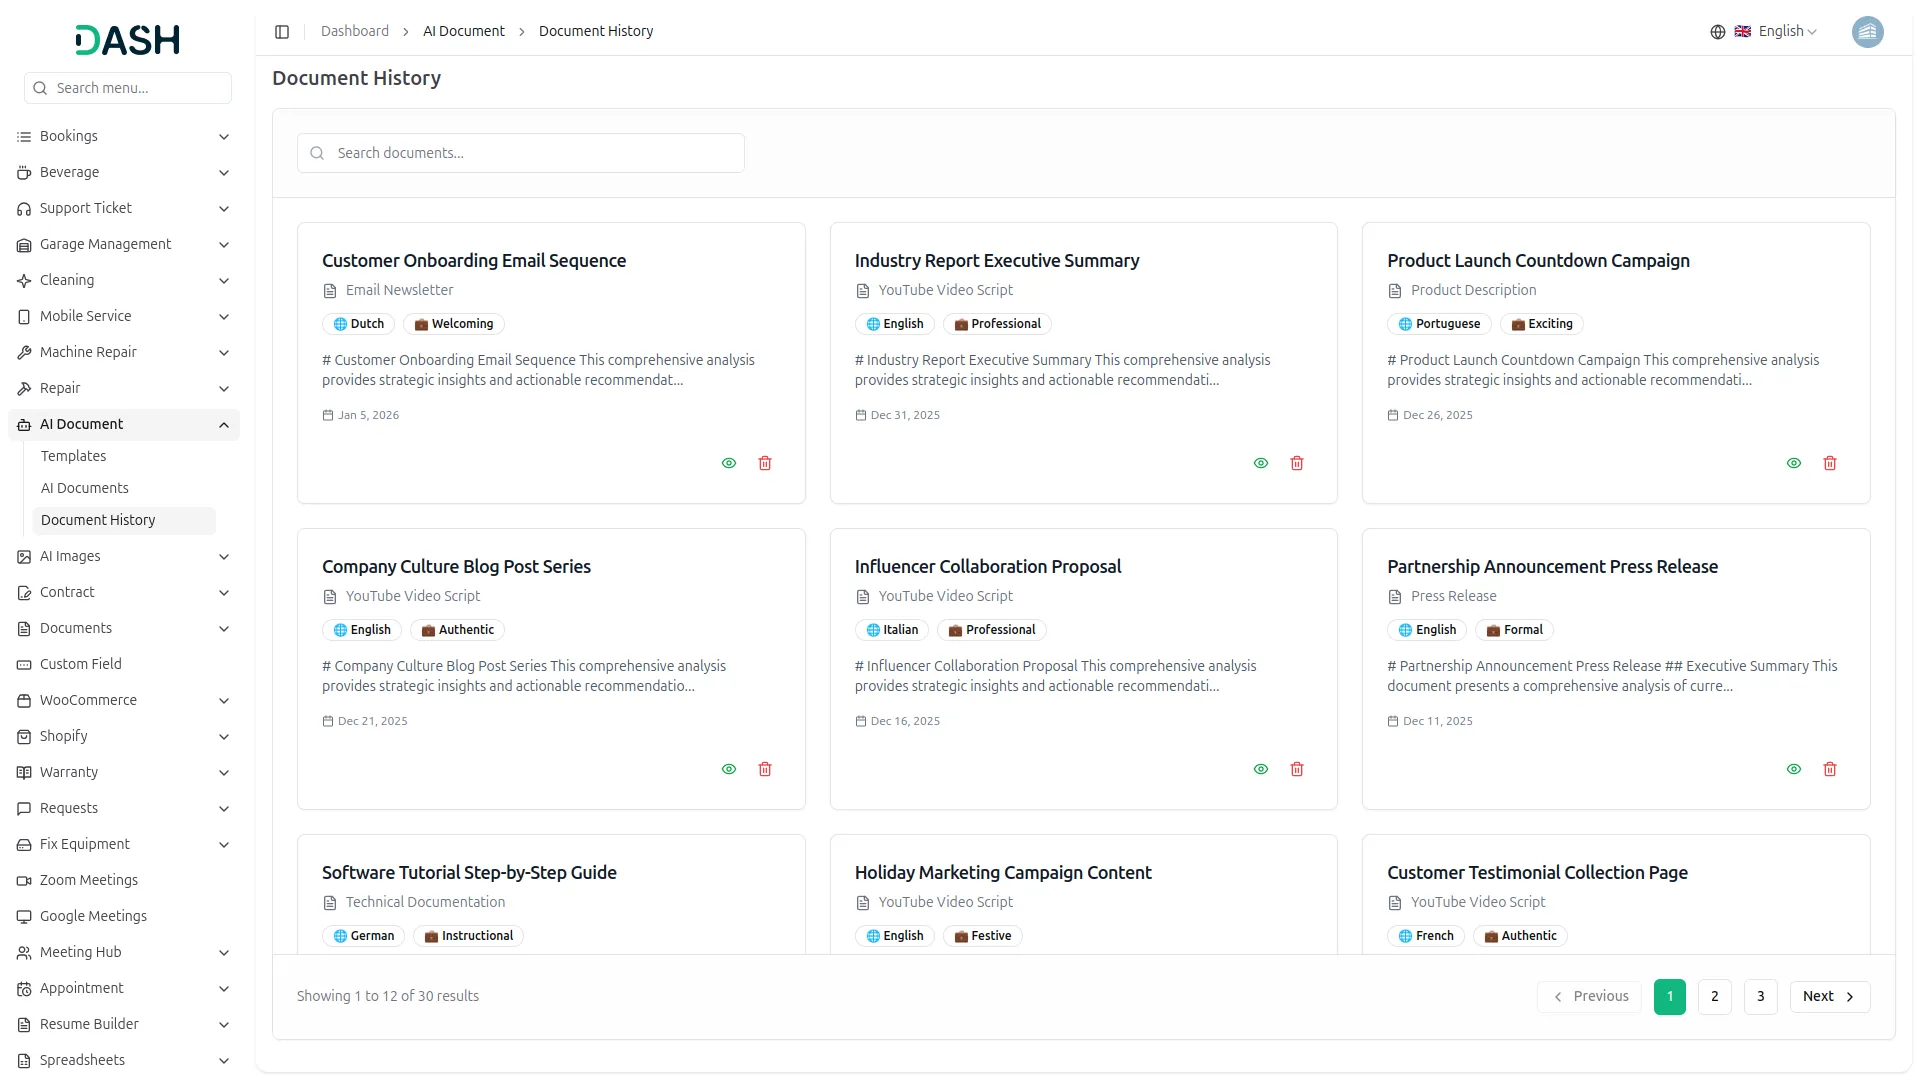
- The Document History page displays all generated documents in a card format. You can use the Search bar to find a specific document by name.
- Each card displays the Document Title, the Template used to generate it, tags for Language and Tone, a short preview of the generated content, and the Date it was created.
- Actions on each card include View to open and read the full document, and Delete to remove it.
Categories
Related articles
- Sign in with Slack – WorkDo Dash SaaS Add-On Guide
- Warranty – WorkDo Dash SaaS Add-On Guide
- ZATCA – WorkDo Dash SaaS Add-On Guide
- Pet Tag – vCard SaaS Add-On Guide
- Google Meet – BookingGo SaaS Add-On Guide
- Solar Hub – WorkDo Dash SaaS Add-On Guide
- Branding & White Label Settings Guide
- Product Catalog Request – eCommerceGo SaaS Add-On Guide
- User Manual – Taskly SaaS
- WhatsApp API – TicketGo Add-On Guide
- Salesforce – WorkDo Dash SaaS Add-On Guide
- eCommerceGo SaaS Theme Setup Guide
We're Here to Help - Let's Talk
Have questions about our solutions, customization services, or business tools? Our team is here to help you. let's talk.