
Appointment – WorkDo Dash SaaS Add-On Guide
Learn how to manage appointments, schedules, and bookings in WorkDo Dash SaaS.
Introduction
The Appointment Management Add-On helps users efficiently manage and monitor appointment schedules within an organization. It includes tools to create appointments, customize appointment types, configure related questions, and oversee schedules and callbacks. This Add-On provides a complete overview through dashboards, list views, and actions, allowing businesses to handle free or paid bookings, approve or reject schedules, and maintain organized appointment records. It also connects to other Add-Ons like Questions and Feedback to enhance the appointment process with user-defined fields and post-appointment feedback.
How To Install The Add-On?
To Set Up the Appointment Add-On, you can follow this link: Setup Add-On.
Appointment Dashboard
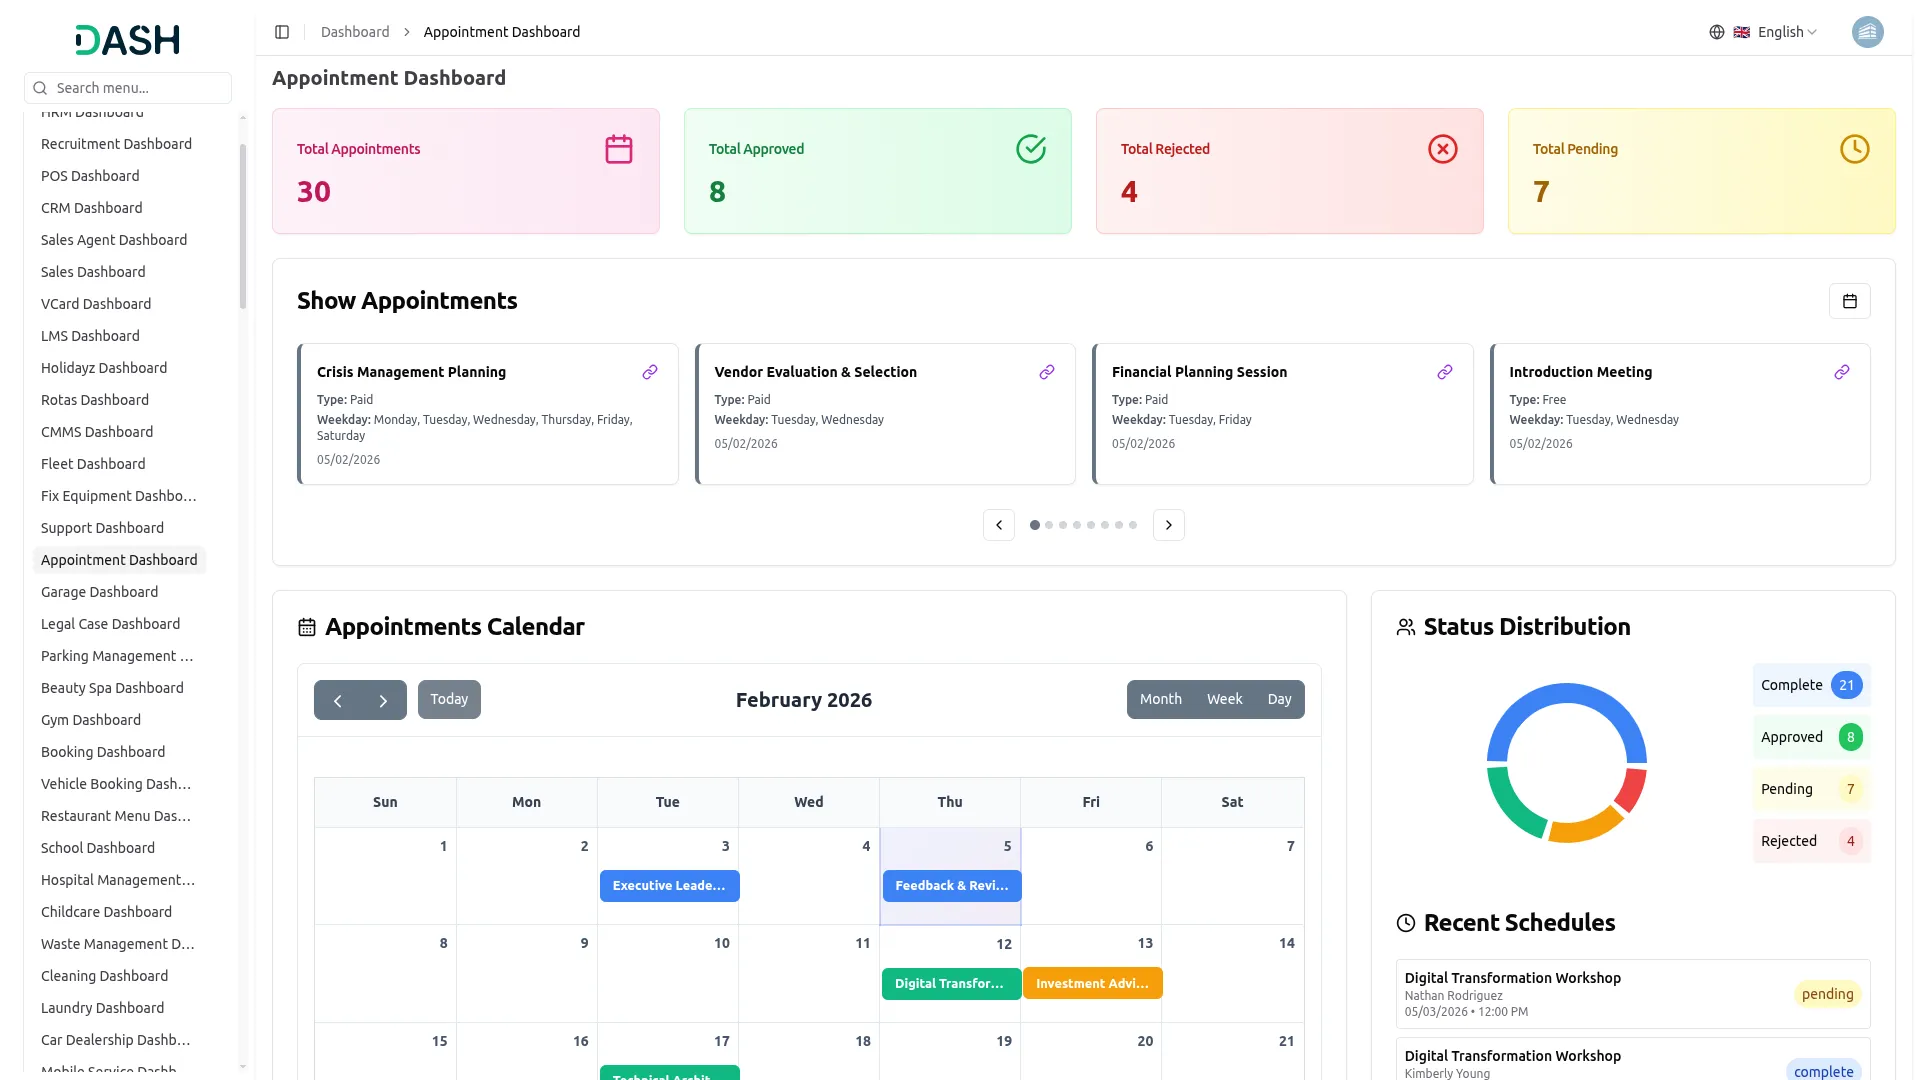
- The Appointment Dashboard provides an overview of your appointment system with key metrics displayed in cards showing Appointments (with Active/Inactive counts), Schedules (with Today/This Week counts), Callbacks (with Today/This Week counts), and Questions (with Active/Inactive counts).
- The Active Appointment Forms section displays each appointment type as a card, showing its name, pricing badge (Paid or Free), available days, duration, and total schedules booked. Each card includes a “Copy Link” button that copies the form’s link, which you can share to let people book appointments directly from the frontend.
- The Recent Schedules and Recent Callbacks sections display the latest bookings with the person’s name, schedule ID, appointment type, date and time, and status (Complete, Rejected, etc.), with a “View all” link to see the complete list.
- The Schedule & Callback Status chart displays a bar graph comparing Callbacks and Schedules across different statuses (Pending, Approved, Complete, Rejected, and Cancelled), giving you a quick visual breakdown of your appointment activity.
Staff Dashboard
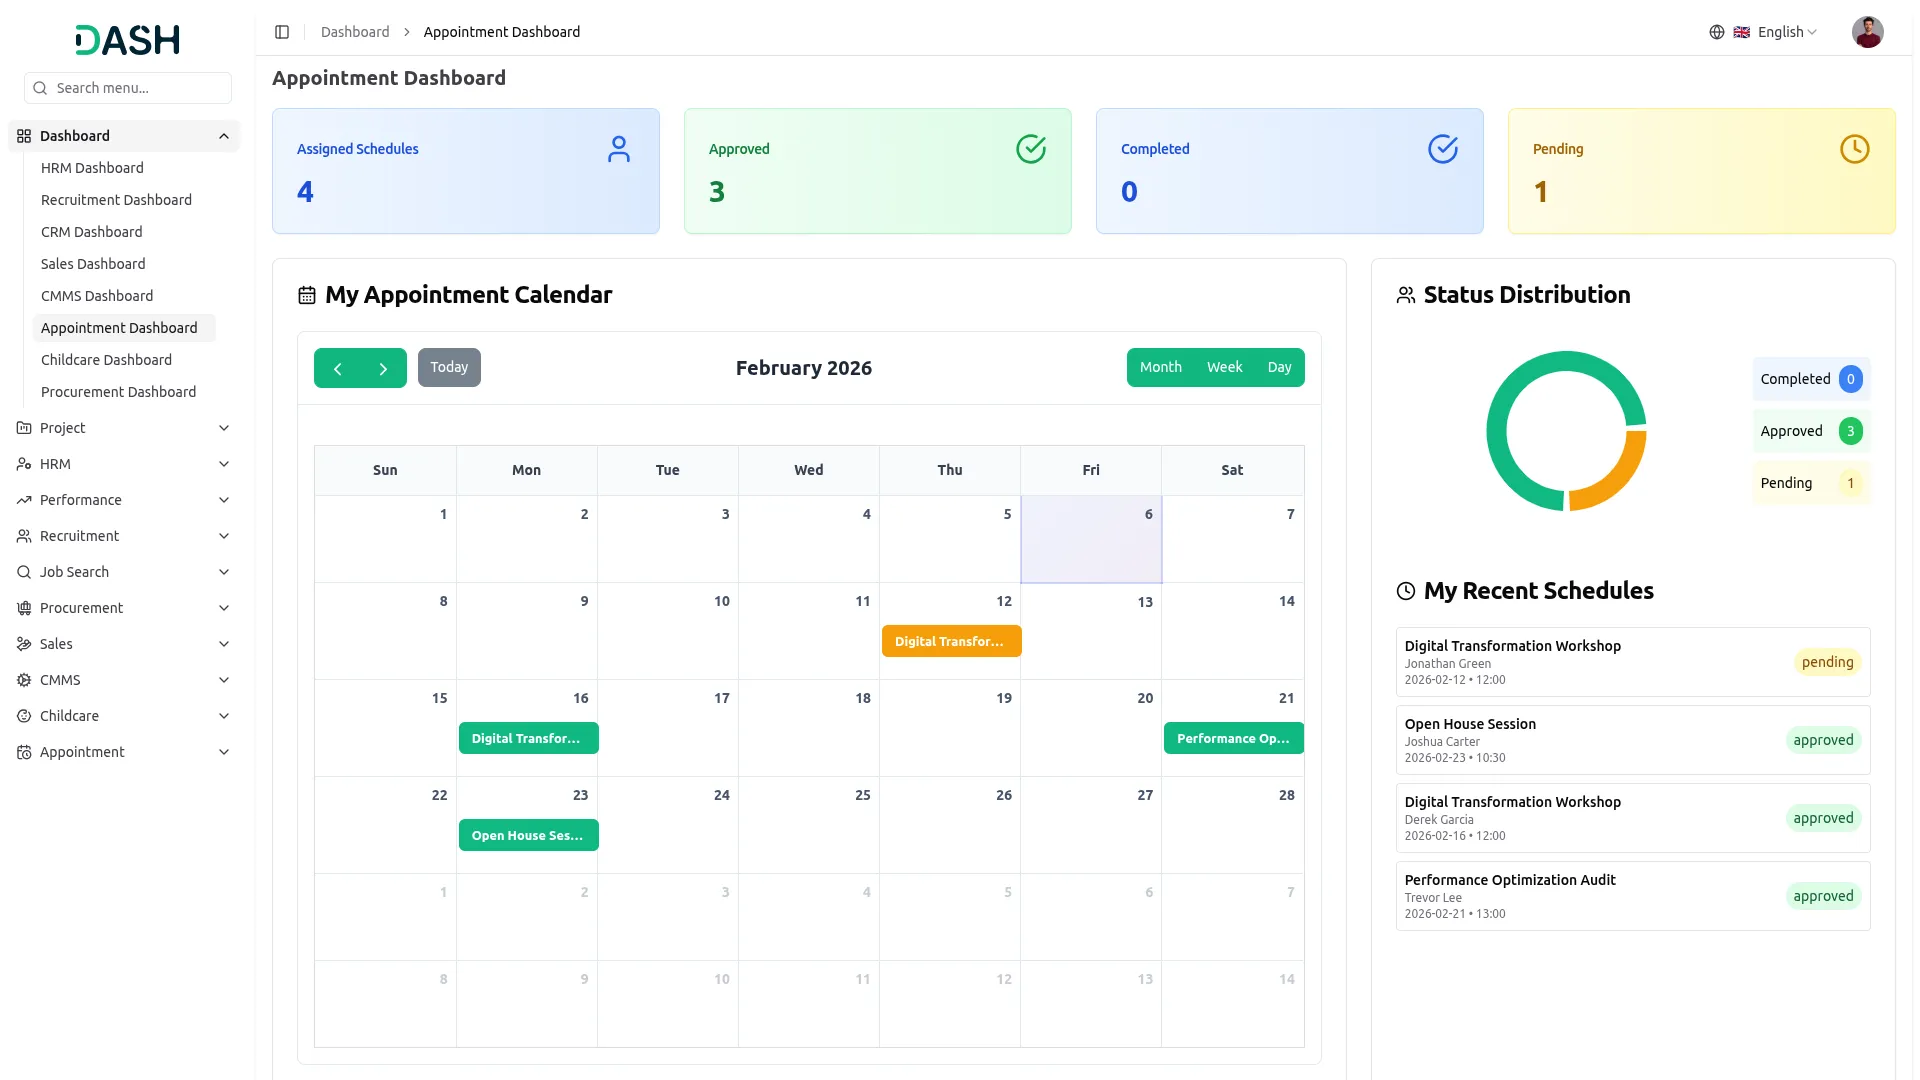
- The Staff Dashboard provides an overview of your staff assigned appointment management system with key metrics displayed in cards showing Assigned Schedules, Approved, Completed, and Pending appointments.
- The dashboard features staff Appointment Calendar that displays all scheduled appointment data in a visual monthly calendar format with navigation controls and view options to switch between Month, Week, and Day displays.
- A Status Distribution donut chart shows appointment schedule status data with different segments representing various appointment statuses including Completed, Approved, and Pending categories with their respective counts.
- The My Recent Schedules section displays the most recently assigned appointment schedules, giving you quick access to the latest bookings and their current status.
Appointment Calendar
- The Appointment Calendar page allows you to filter data using the Appointment dropdown (All Appointments) and Type dropdown (All) and displays four summary cards at the top: Schedules, Schedule Pending, Callbacks, and Callback Pending, giving you a quick overview of your appointment activity.
- The Calendar panel on the left displays a month view where each date shows a colored badge count for its bookings; badges are color-coded by status: Pending, Approved, Complete, Rejected, and Cancel. Use the arrows to navigate months, or click “Today” to jump back to the current date.
- Clicking a date opens its detailed day view on the right, showing the selected date, a summary of total schedules and callbacks for that day, and a time-slot breakdown listing each booking with its time, name, and appointment type.
- Use the All / Schedule / Callback tabs to filter the day view by type, and use the TYPE toggles at the bottom to show or hide Schedule and Callback entries on the timeline.
Manage Schedules
- The Manage Schedules page displays a table of all schedules with columns for Unique Code, Customer (with email and phone), Appointment, Date & Time, Status, and Actions. (Pending, Approved, Rejected, Complete, Cancel).
- In the Actions column, you can use the view option to see the schedule details and the delete option to remove it.
- When you click the view option, it opens the Schedule Details popup, showing the Unique Code, Name, Email, Phone, Date, Time, Appointment, Assigned User, Status, and Type (Paid or Free) for that schedule, along with a Questions & Answers section listing the customer’s responses to the appointment form.
- If the schedule is Pending, select a user from the Assign User dropdown, then click “Approve” to accept the schedule or “Reject” to decline it. If the schedule is Approved, click “Complete” to mark the appointment as finished once it’s been carried out.
- Use the Search bar to find a specific schedule, and toggle between list view and grid view using the icons. Apply filters by Status, Appointment, and Appointment Date range, then click “Apply” to activate the filters or “Clear” to reset them.
Appointment Callbacks
- The Manage Appointment Callbacks page displays a table of all callbacks with columns for Unique Code, Customer (with email and phone), Appointment, Date & Time, Status, and Actions. In the Actions column, you can use the view option to see the callback details and the delete option to remove it.
- Use the Search bar to find a specific callback, and toggle between list view and grid view using the icons. Apply filters by selecting a Status from the dropdown, an Appointment from the dropdown, and a Callback Date range, then click “Apply” to activate the filters or “Clear” to reset them.
Manage Active Appointments
- To create a new appointment, click the “Create” button to open the Create Appointment form. Under Basic Information, enter the Appointment Name, select the Appointment Type from the dropdown (Paid or Free), enter the Duration in minutes, and choose the Available Days from the dropdown. You can also toggle Phone Enabled on to collect the customer’s phone number and toggle Active on to make the appointment bookable.
- Under Questions & Custom Fields, click on a question from the Available list to add it to the Selected list, or use the “Add all” and “Remove all” shortcuts; once added, drag a question to reorder it. Click “Create” to save the appointment, or “Cancel” to discard your changes.
- The Manage Active Appointments page displays each appointment type as a card, showing its name, description, duration, availability, pricing badge (Paid or Free), phone collection status, available days, total schedules, and total questions.
- Each card includes a “Copy Link” button to copy the form’s link, along with a calendar icon to view the appointment’s calendar, a view option to preview the form, an edit option to modify it, and a delete option to remove it. Clicking the Schedules count on a card opens “View Schedules” for that appointment.
- Use the Search bar to find a specific appointment, and use the All / Paid / Free tabs to filter appointments by pricing type.
Manage Questions
- To create a new question, click the “Create” button to open the Create Question form. Enter the question, and select the Question Type from the dropdown (Radio, Dropdown, Text, or Checkbox). If you select Radio, Dropdown, or Checkbox, an Available Answers section appears. Click “+ Add Answer” to add each answer option.
- Toggle Required on if the customer must answer the question, and toggle Active on to show it in the appointment form. Click “Create” to save the question or “Cancel” to discard your changes.
- The Manage Questions page displays a summary line at the top showing Total, Active, Inactive, Required, and Optional question counts. Below that, each question is displayed as a card showing its Question Type badge, the question text, its available answer options (or a “Free text answer” note for text-type questions), and its Optional/Required and Active/Inactive status. Each card includes Design and Preview links at the top, along with an edit icon and a delete icon.
- Use the Search bar to find a specific question. Apply filters by selecting a Question Type from the dropdown, a Required filter, and a Status filter, then click “Apply” to activate the filters or “Clear” to reset them.
System Setup
The System Setup section manages appointment hours, brand settings, FAQ settings, privacy policy, and terms & conditions sections.
Appointment Hours
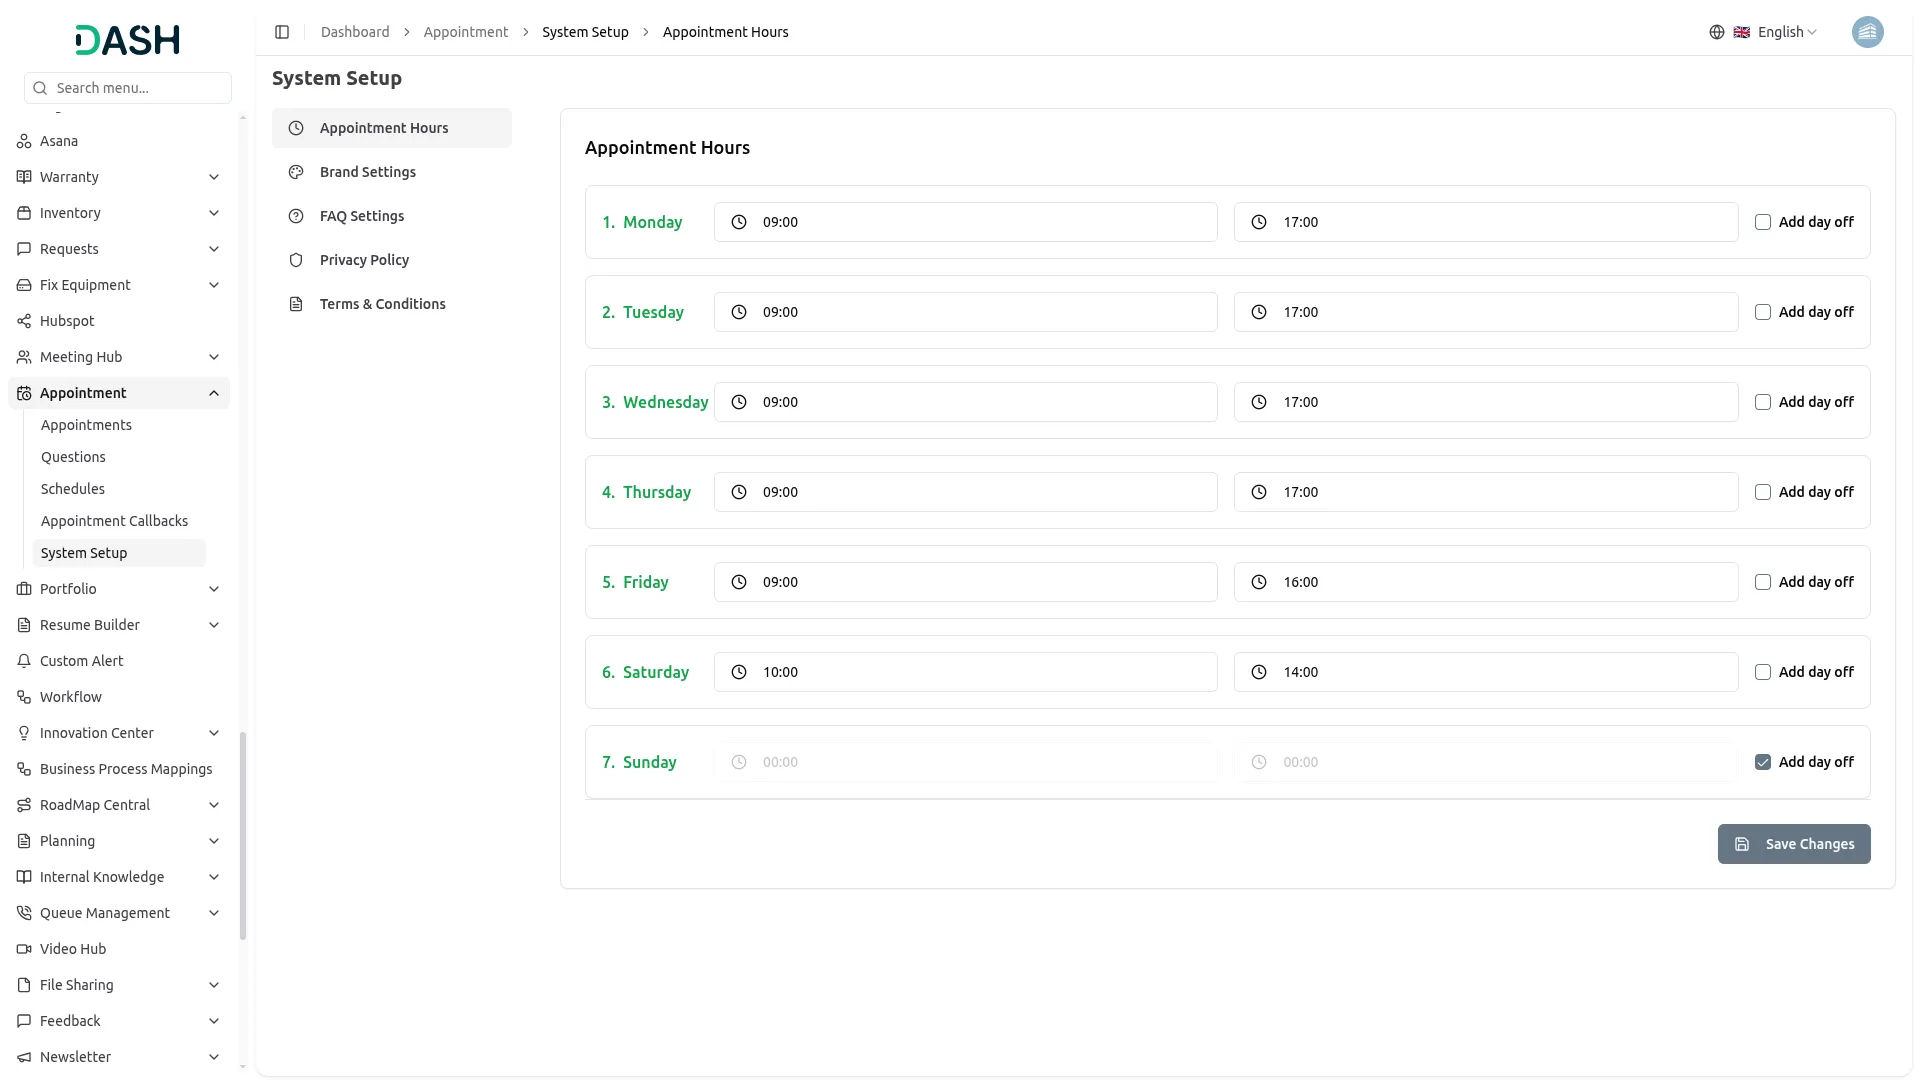
- The Appointment Hours section allows you to set your weekly business hours for accepting appointments. For each day (Monday through Sunday), enter the Start Time and End Time, or toggle Day off to mark that day as unavailable for bookings. After entering all required details, click the Save Changes button to apply the updates.
Brand Settings
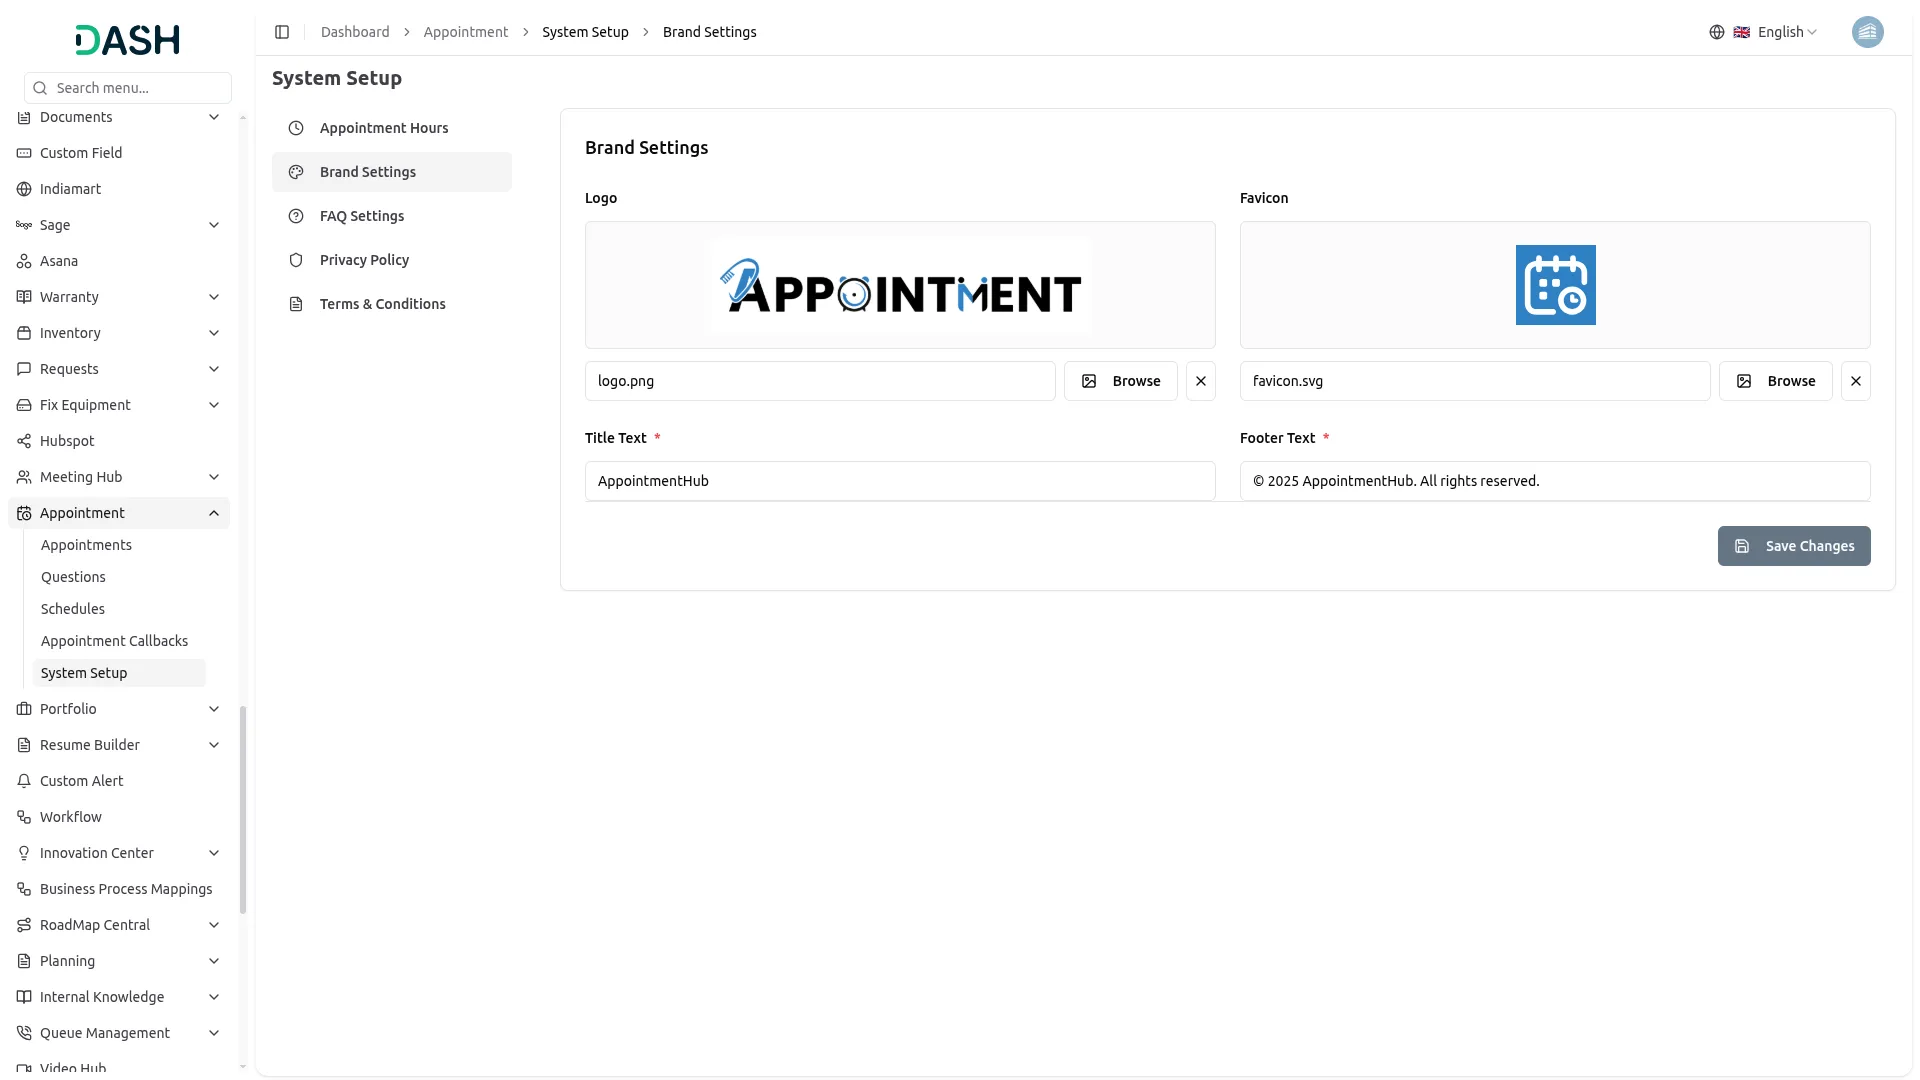
- The Brand Settings section allows you to configure the basic branding of your appointment platform. In this section, you can upload the Logo and Favicon by clicking “Browse” and enter the Title Text and Footer Text. After entering all required details, click the Save Changes button to apply the updates.
FAQ Settings
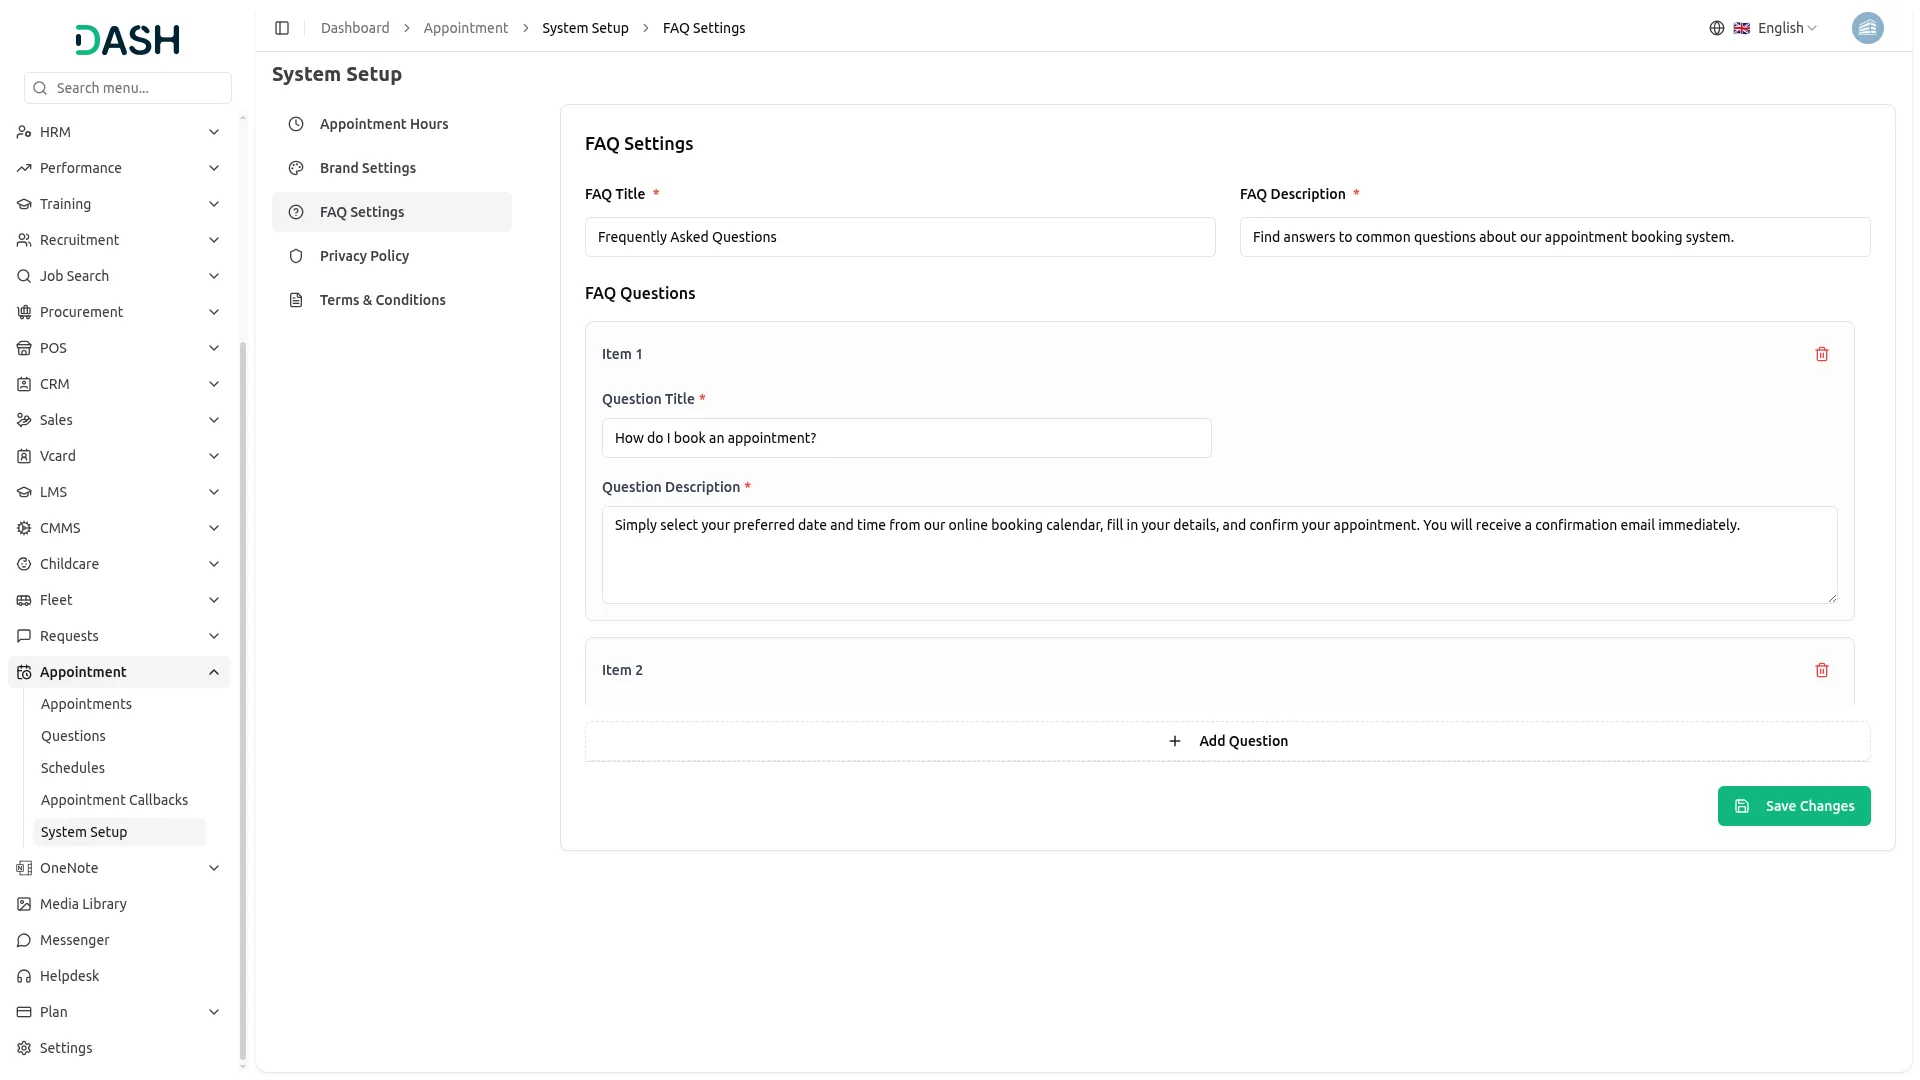
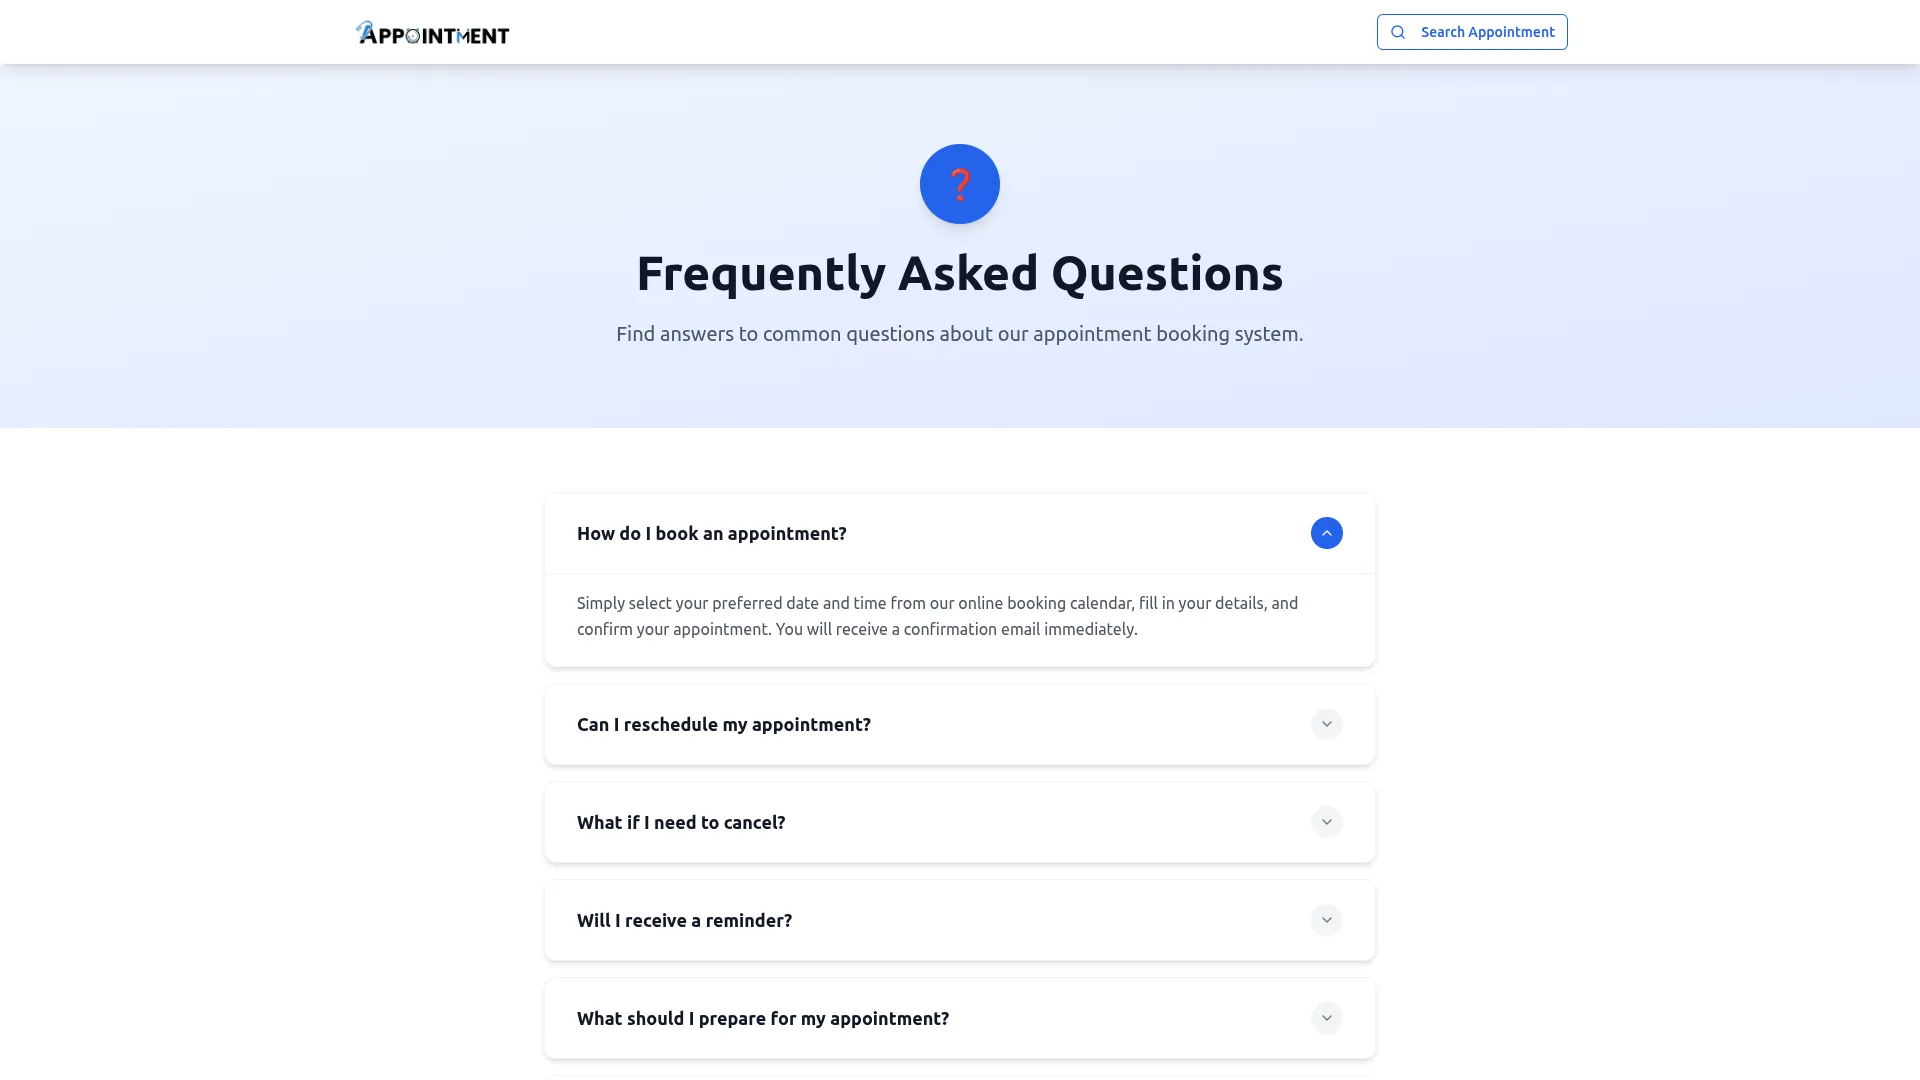
- The FAQ Settings section allows you to manage the frequently asked questions shown on your appointment website. In this section, you can enter the FAQ Title and FAQ Description shown above the questions. To add a new question, click “+ Add Question,” then enter the Question Title and Question Description for that item, and use the delete option to remove an item if no longer needed. After entering all required details, click the Save Changes button to apply the updates.
Privacy Policy
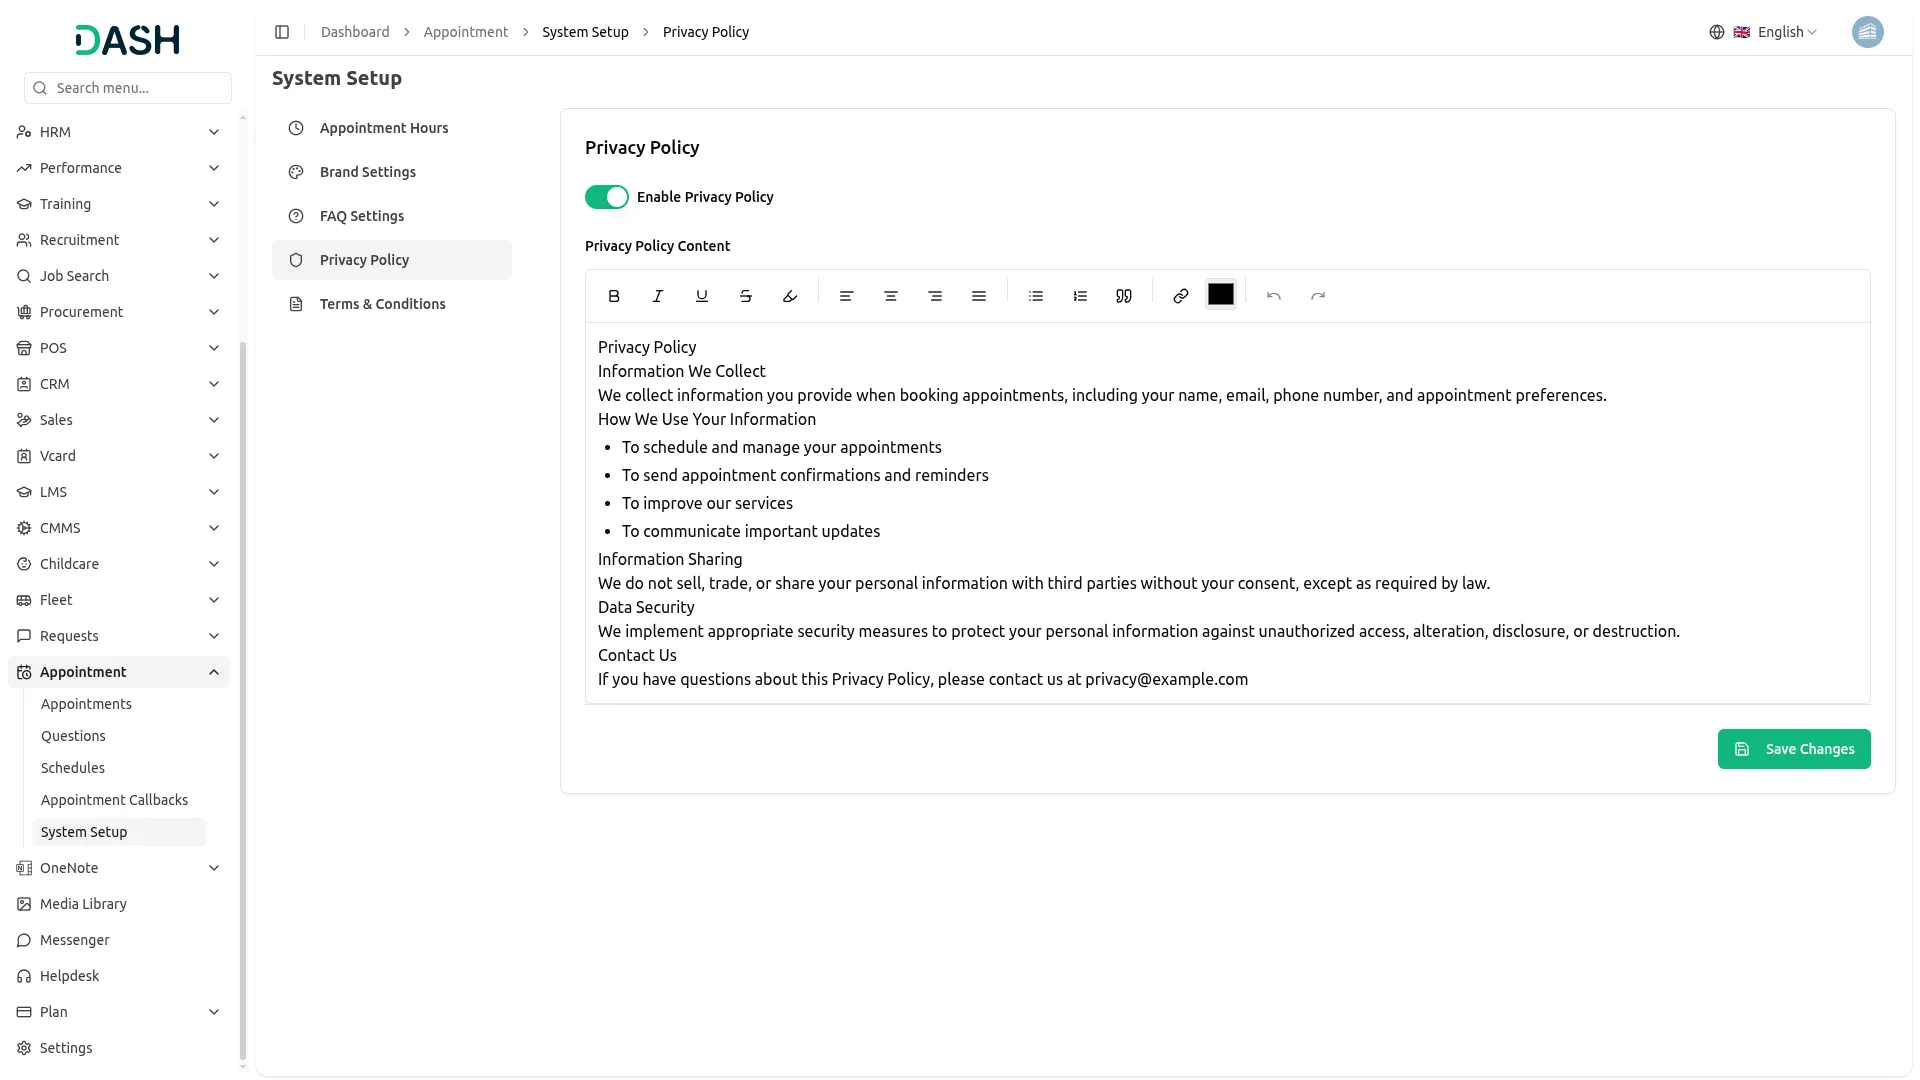
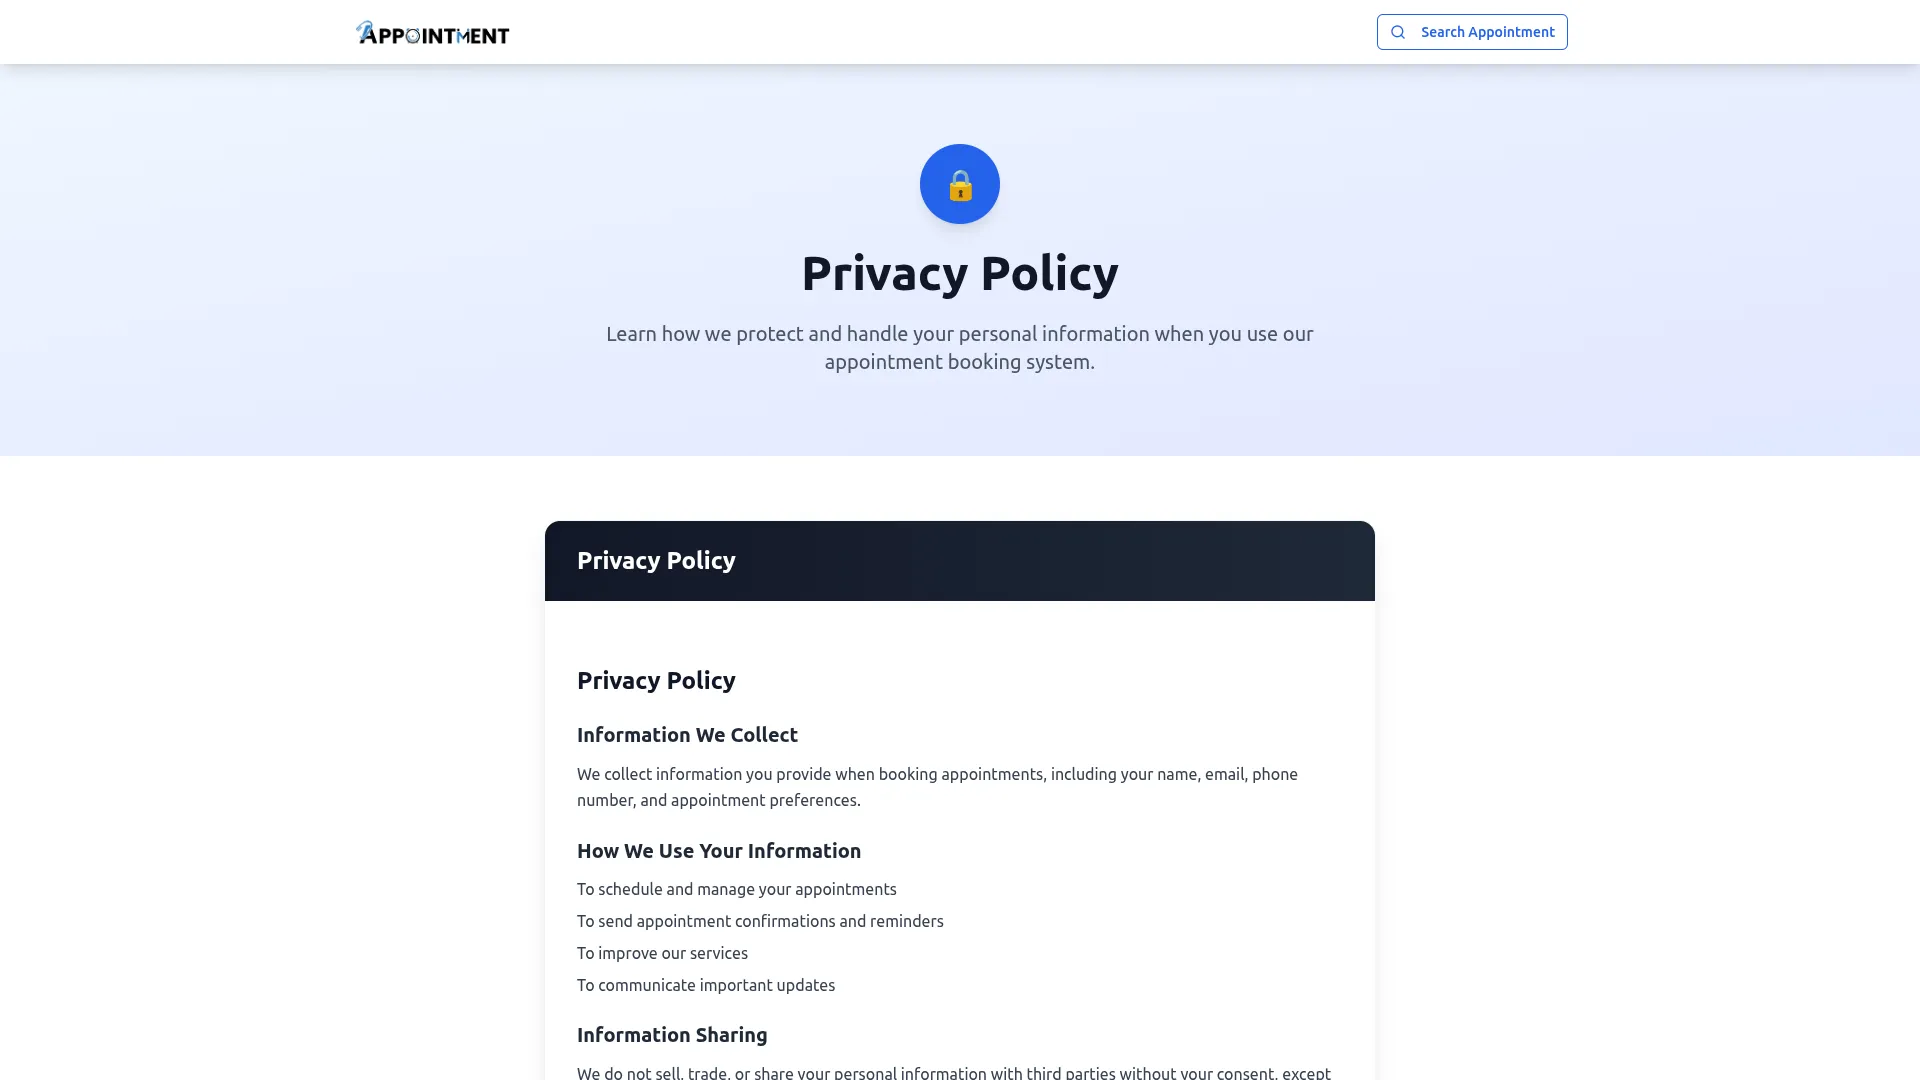
- The Privacy Policy section allows you to manage the privacy policy shown to customers on your appointment website. Toggle Enable Privacy Policy on to display it, then write or edit the Privacy Policy Content using the rich text editor, which supports formatting options like bold, italic, underline, alignment, lists, and links. After entering all required details, click the Save Changes button to apply the updates.
Terms & Conditions
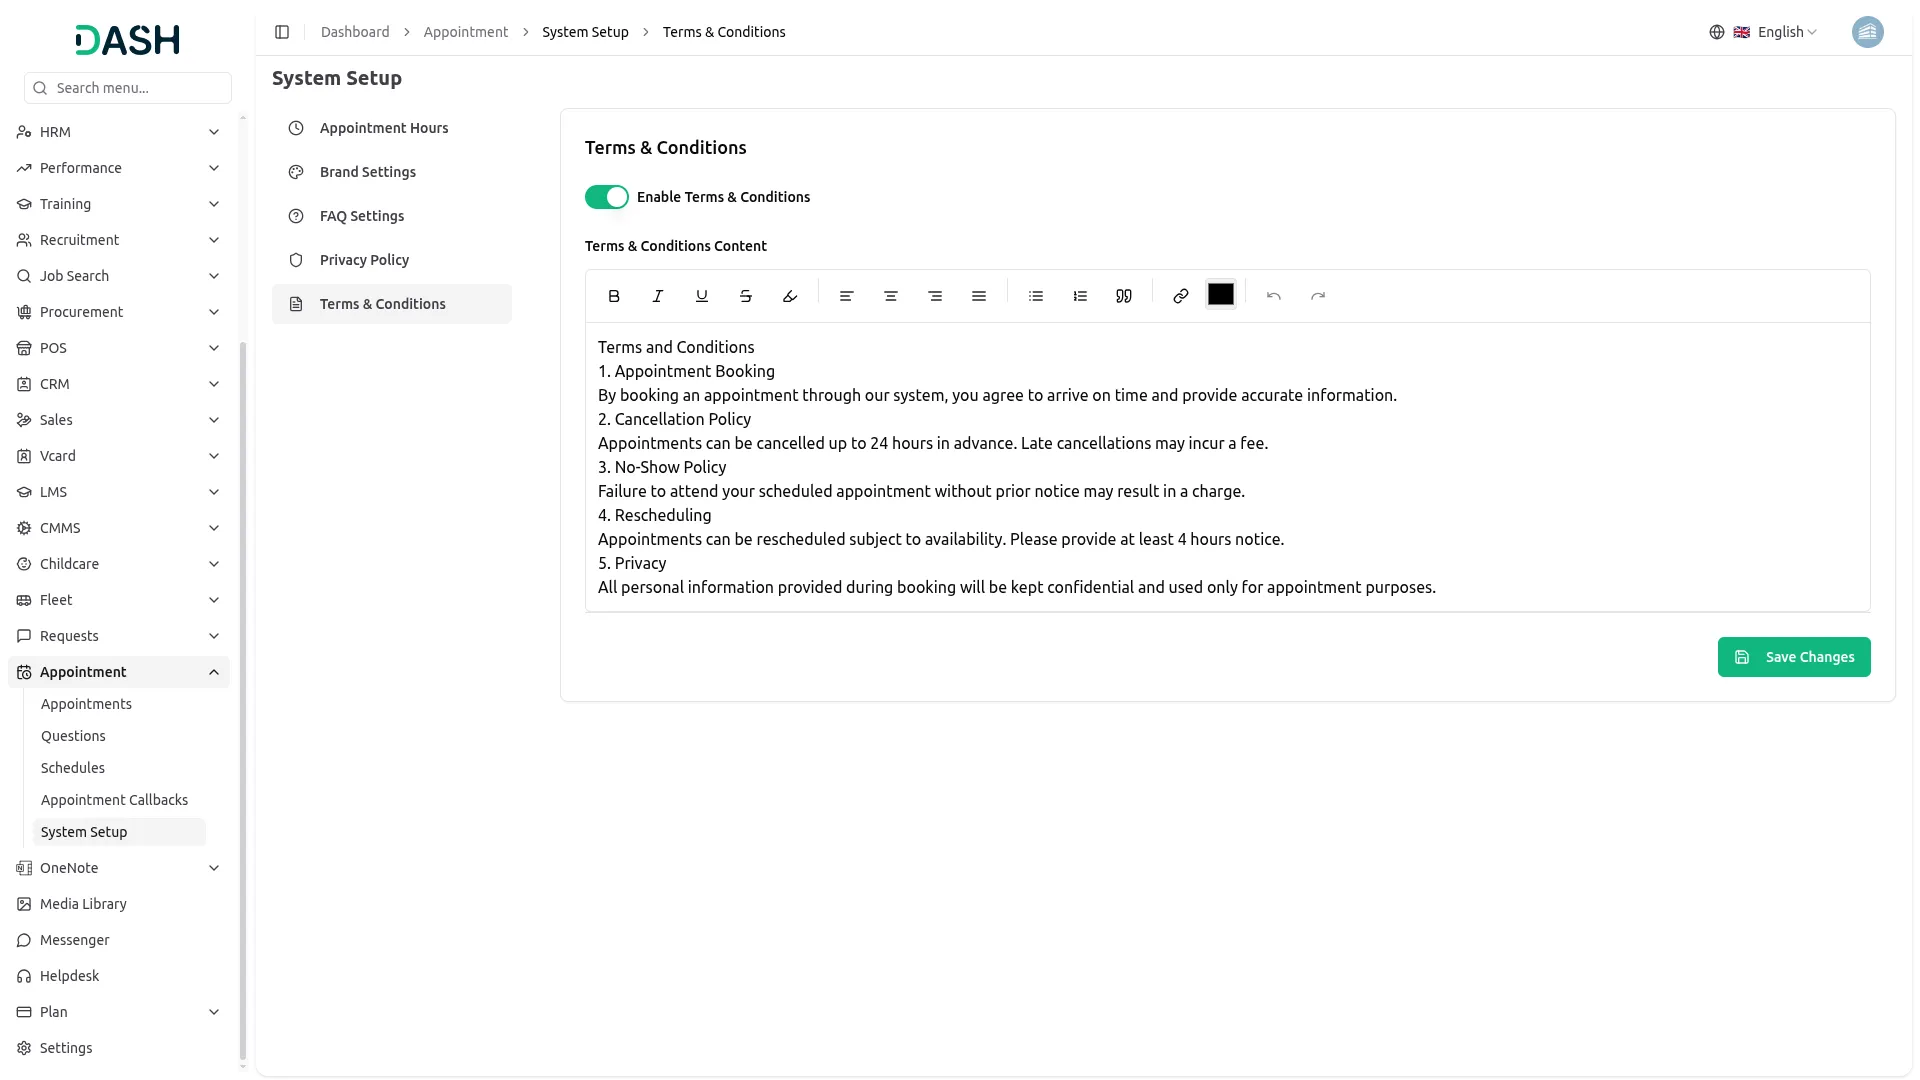
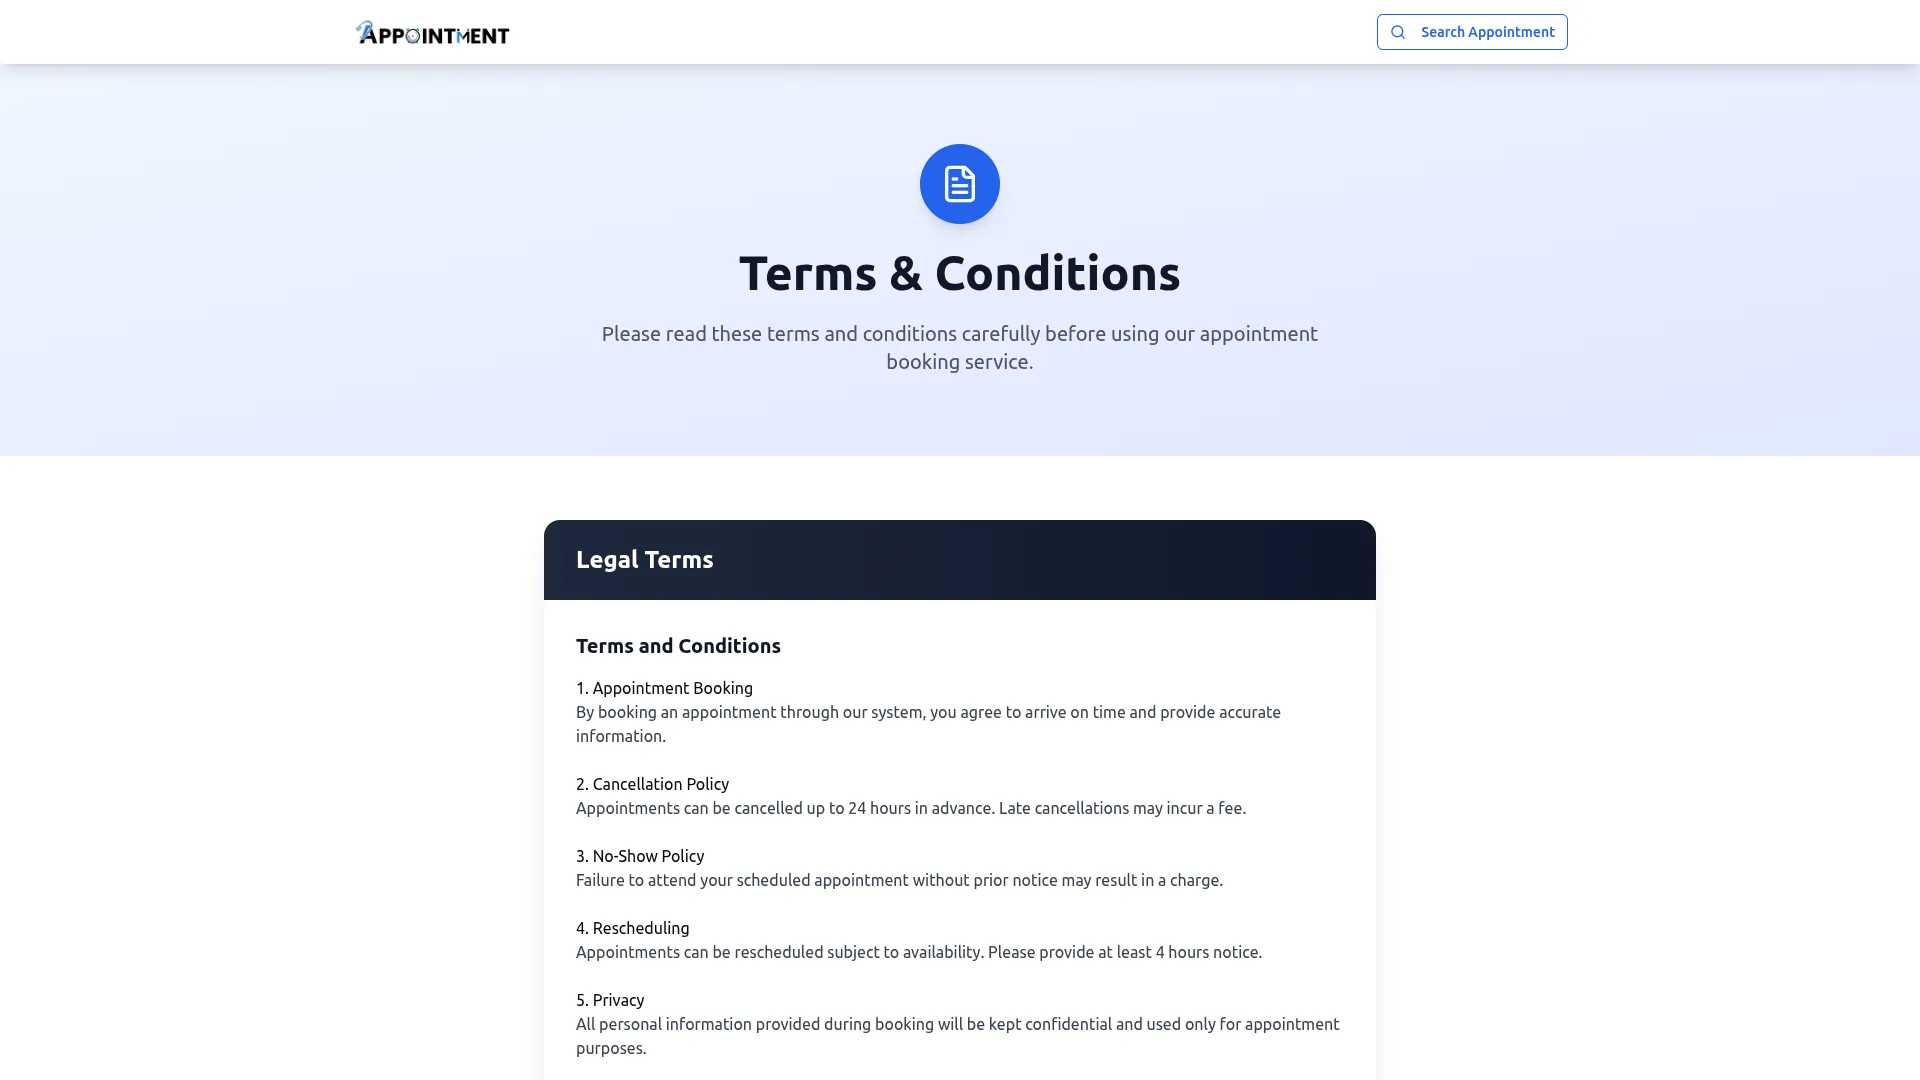
- The Terms & Conditions section allows you to manage the terms shown to customers on your appointment website. Toggle Enable Terms & Conditions on to display it, then write or edit the Terms & Conditions Content using the rich text editor, which supports formatting options like bold, italic, underline, alignment, lists, and links. After entering all required details, click the Save Changes button to apply the updates.
Manage Appointment
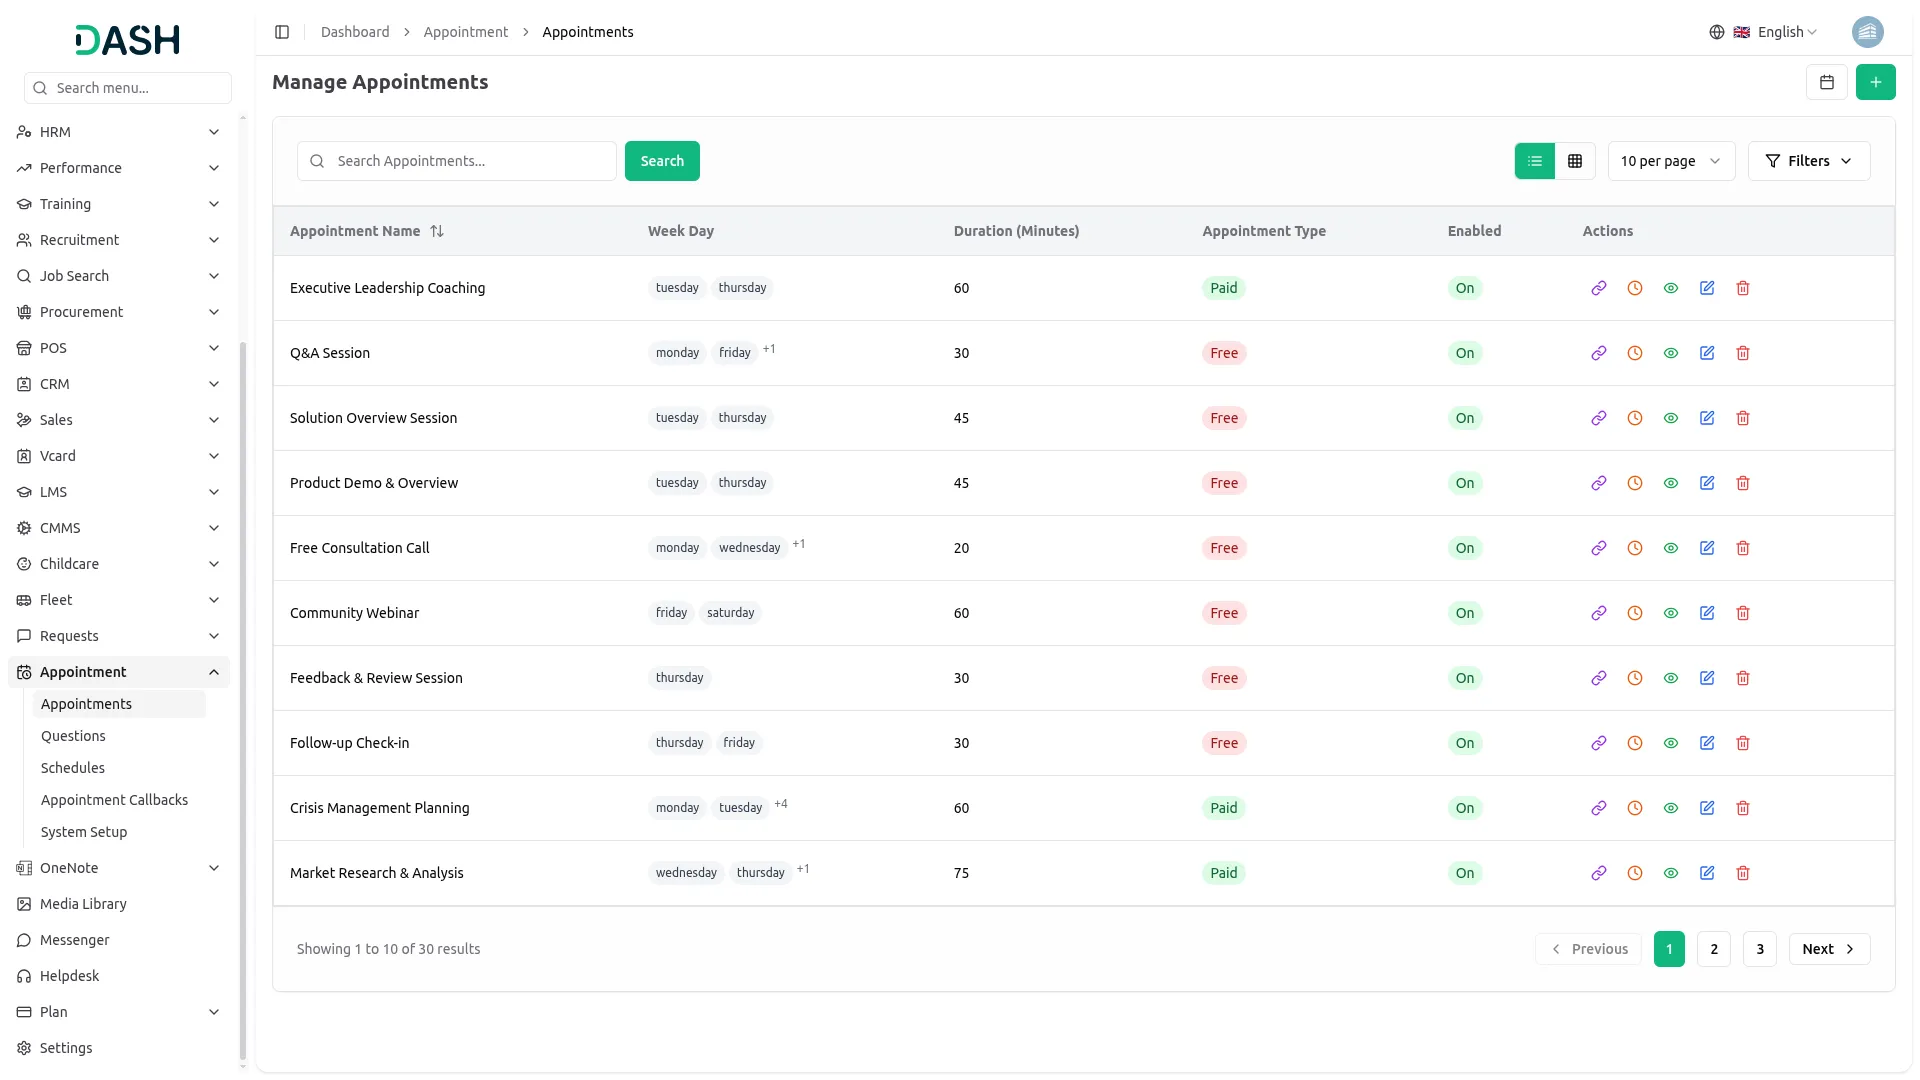
- To create a new appointment, click the “Create” button on the appointment management page. Enter the appointment name and select the appointment type as either Free or Paid. Choose the weekday when this appointment will be available and set the enable or disable status for phone fields.
- Set the duration for the appointment and add questions from the Question section by selecting the checkbox option for questions and custom fields.
- Use the appointment enable or disable toggle checkbox to control whether the appointment is shown to clients. Once all details are filled, click “Submit” to create the appointment.
- The list page shows all appointments in a table with columns for Number, Appointment Name, Owner, Appointment Type, and Enabled status. The Calendar View button displays all appointments in calendar format and shows the appointment list.
- Actions available include View Schedule, Copy Link to copy the appointment page link, View to show appointment details, Edit to modify appointment details, and Delete to remove appointments.
Appointment Form (Frontend)
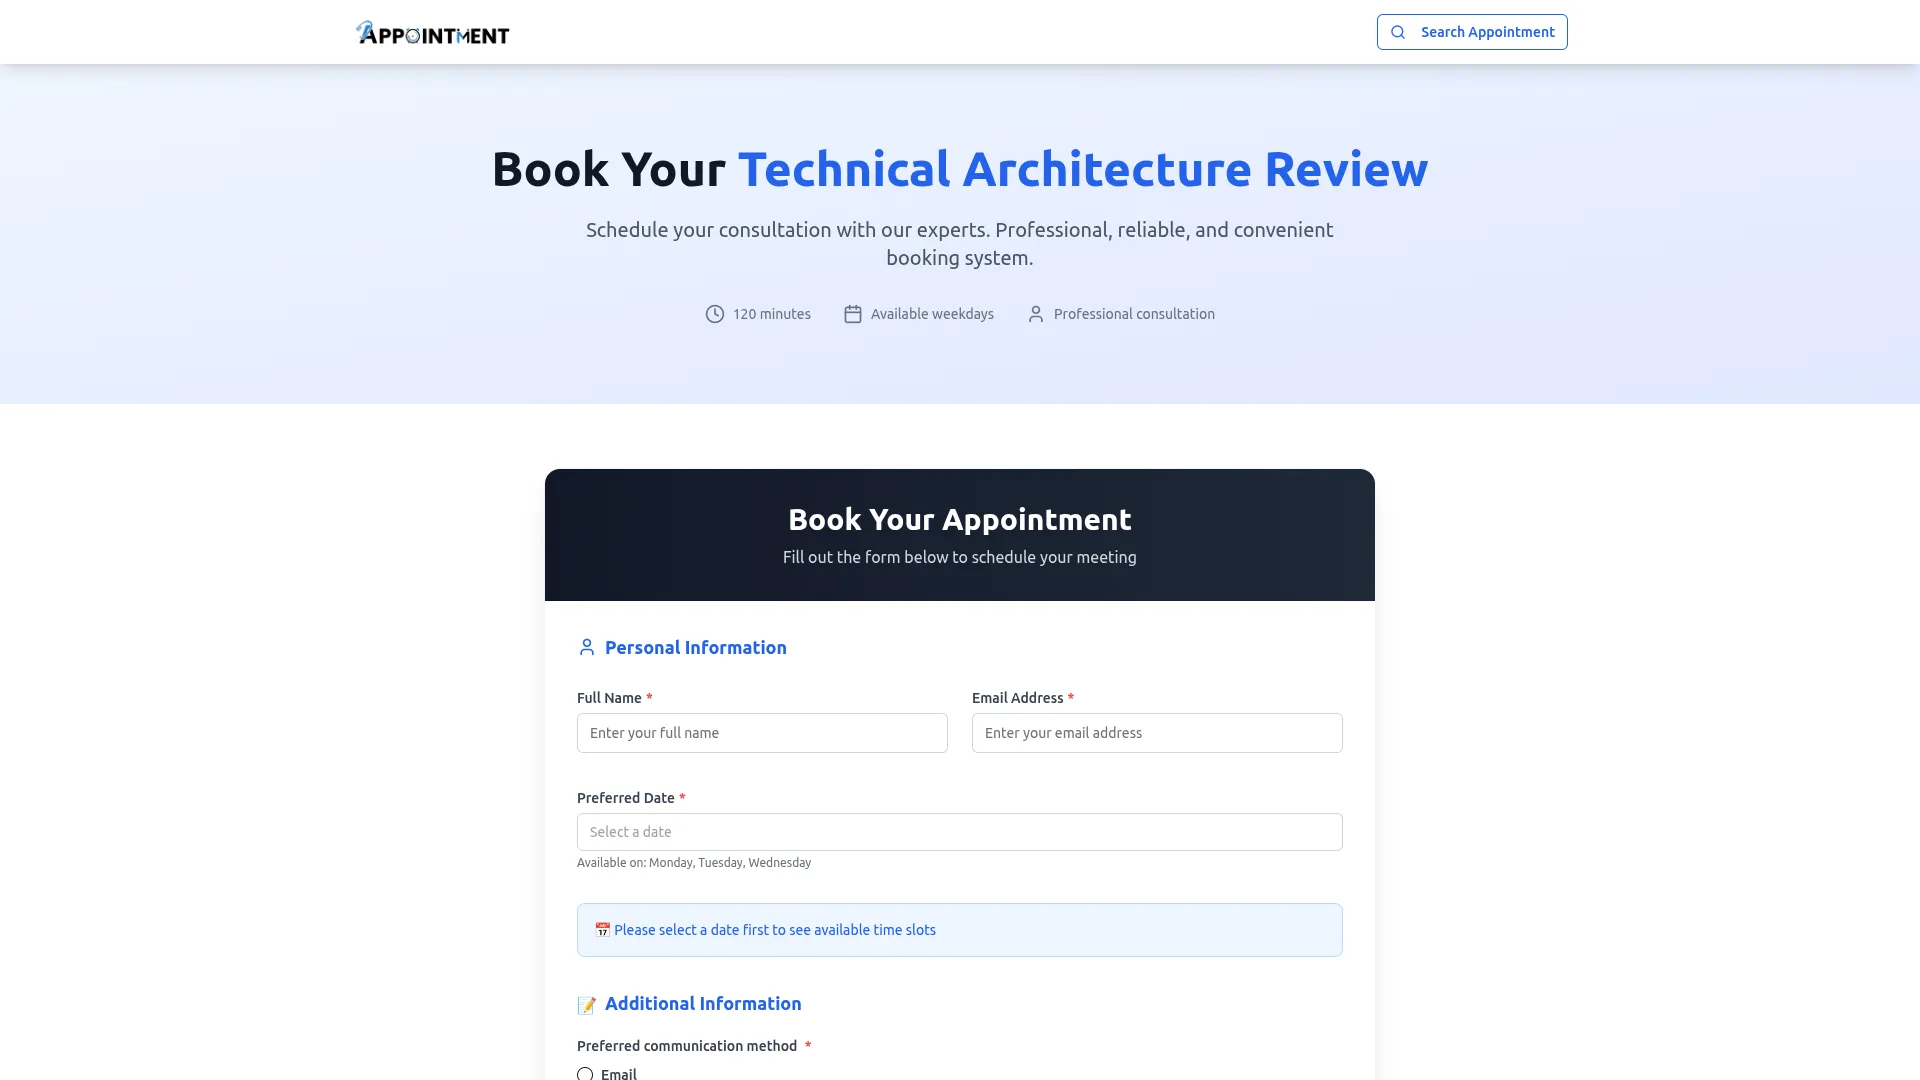
- This section allows users to view and submit appointment forms on the frontend (user-facing side).
- The logo, favicon, title text and footer text added in Brand Settings are displayed here. The “Search Appointment” button can be used to find appointment details
- By clicking “Copy link,” you can see the appointment form details. This “Copy Link” button is what you will need to copy from the Manage Appointment section.
- While creating an appointment in the Manage Appointment section, enable or disable specific fields (like Phone), and include any custom questions configured from the Manage Question section. These selected options will be visible on the frontend when the appointment form is opened by the user.
- The form displays available timeslots according to the duration you set when creating the appointment in the Manage Appointment section. When clients select a date, available timeslot options will appear for that specific date, allowing them to choose their preferred time slot.
- In the footer, the text from Brand Settings will be displayed along with the Privacy Policy and Terms & Conditions, if they are enabled from System Setup.
Manage Question
- To create a new question, click the “Create” button.
- Enter the question name and choose the question type (radio, dropdown, text, or checkbox).
- For non-text types, provide the available answer options.
- Use toggle checkboxes to mark the question as required and to enable or disable it.
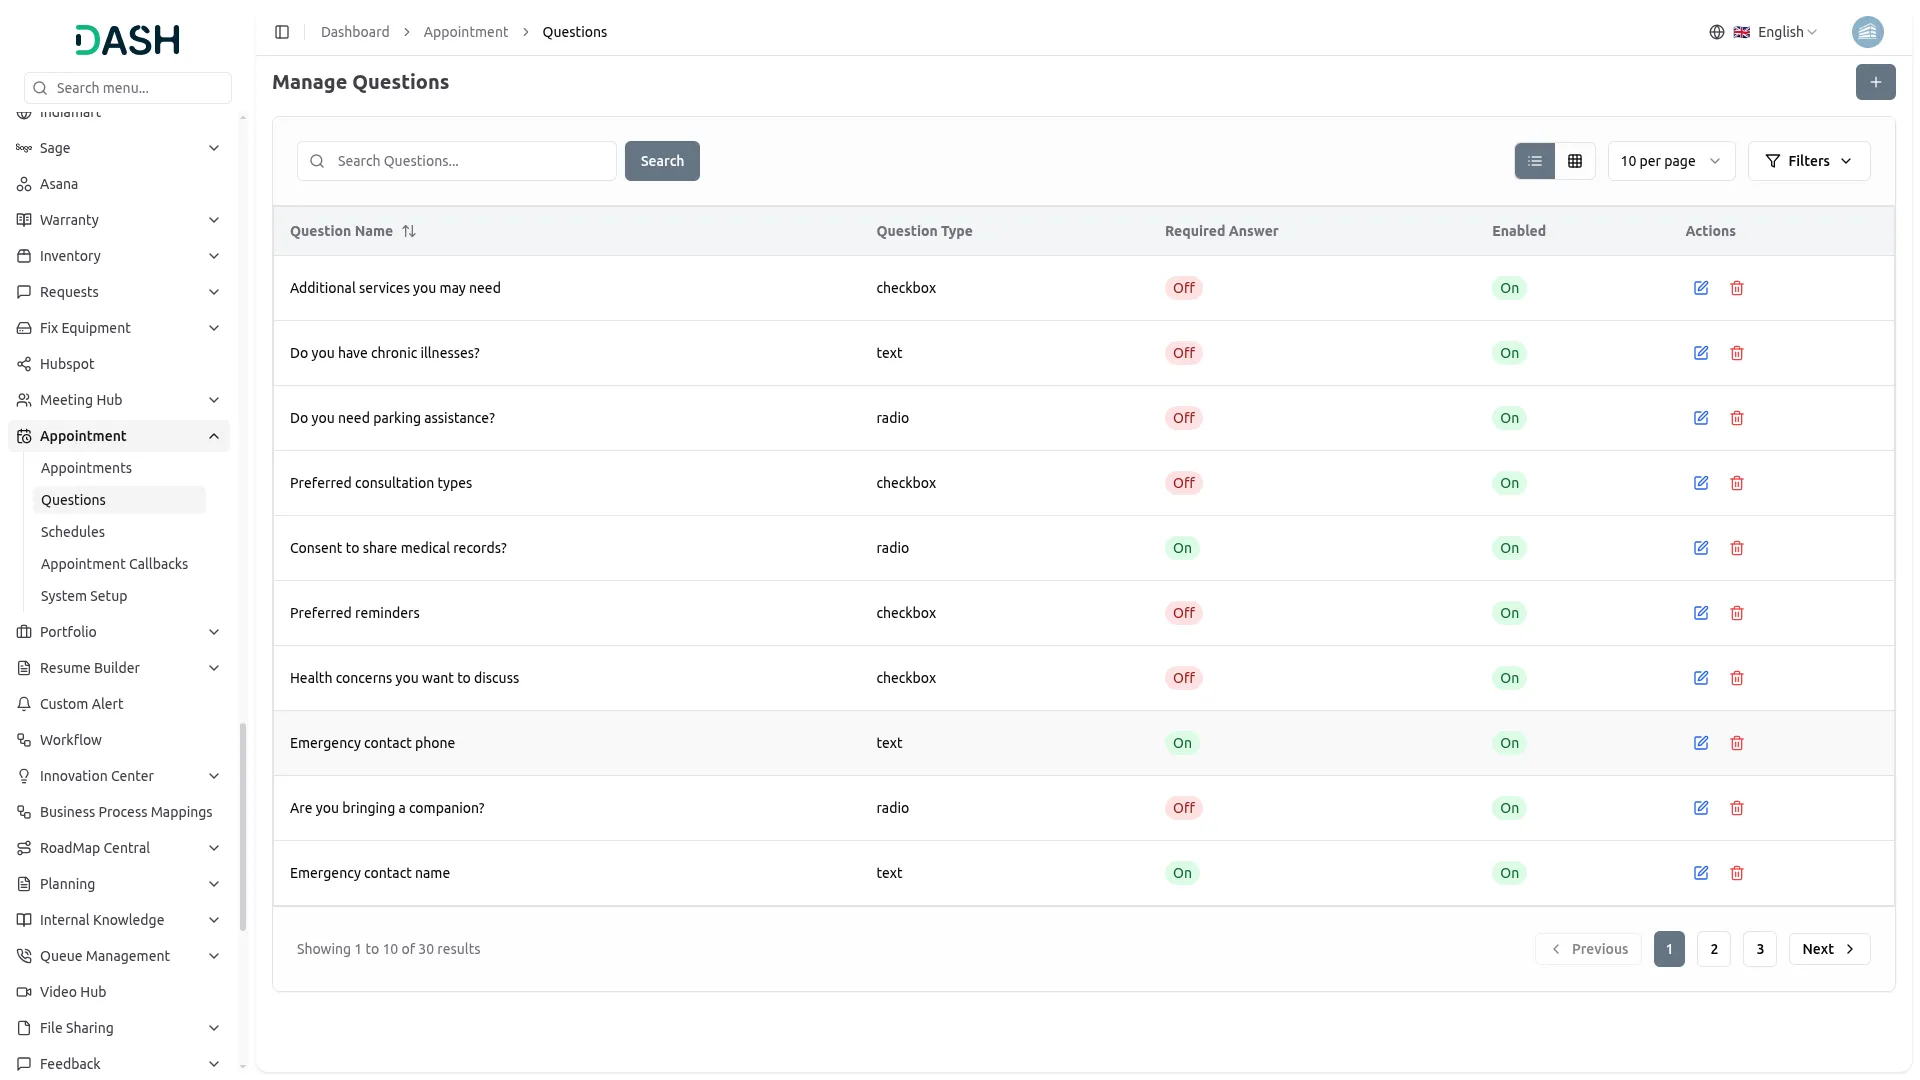
- The list page displays all questions in a table with the following columns: No, Question, Question Type, Required Answer, and Enabled.
- You can also edit or delete any existing question from this page.
Manage Schedule
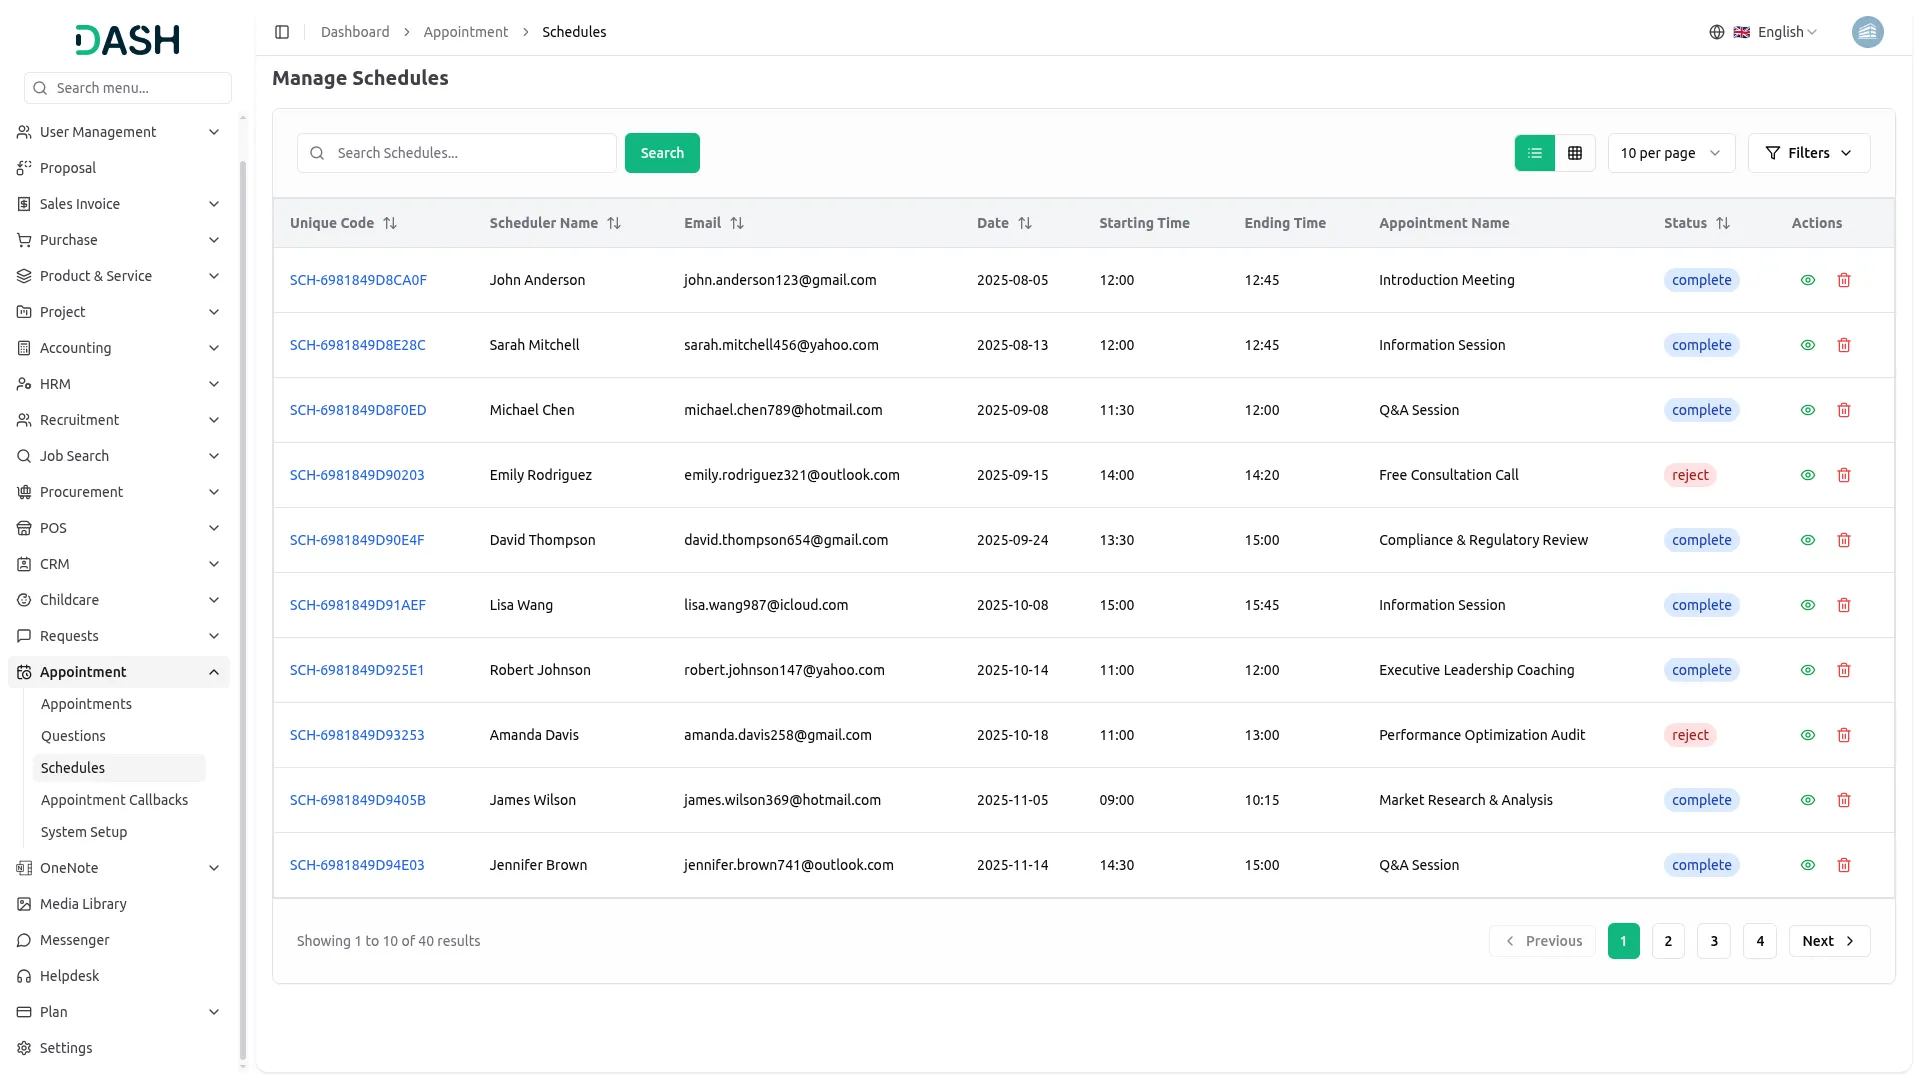
- On the Manage Schedule page, view all scheduled appointments and related details.
- The table includes these columns: No, Name, Date, Start Time, End Time, Appointments (linked from the Appointment section), Owner, and Status (Pending, Approved, Complete, Reject).
- You can assign the users while the status is pending.
- Under the Actions column, click “View” to see appointment details. You can also update the status to “Complete”.
Manage Appointment Callback
- This section helps track callbacks related to existing appointments.
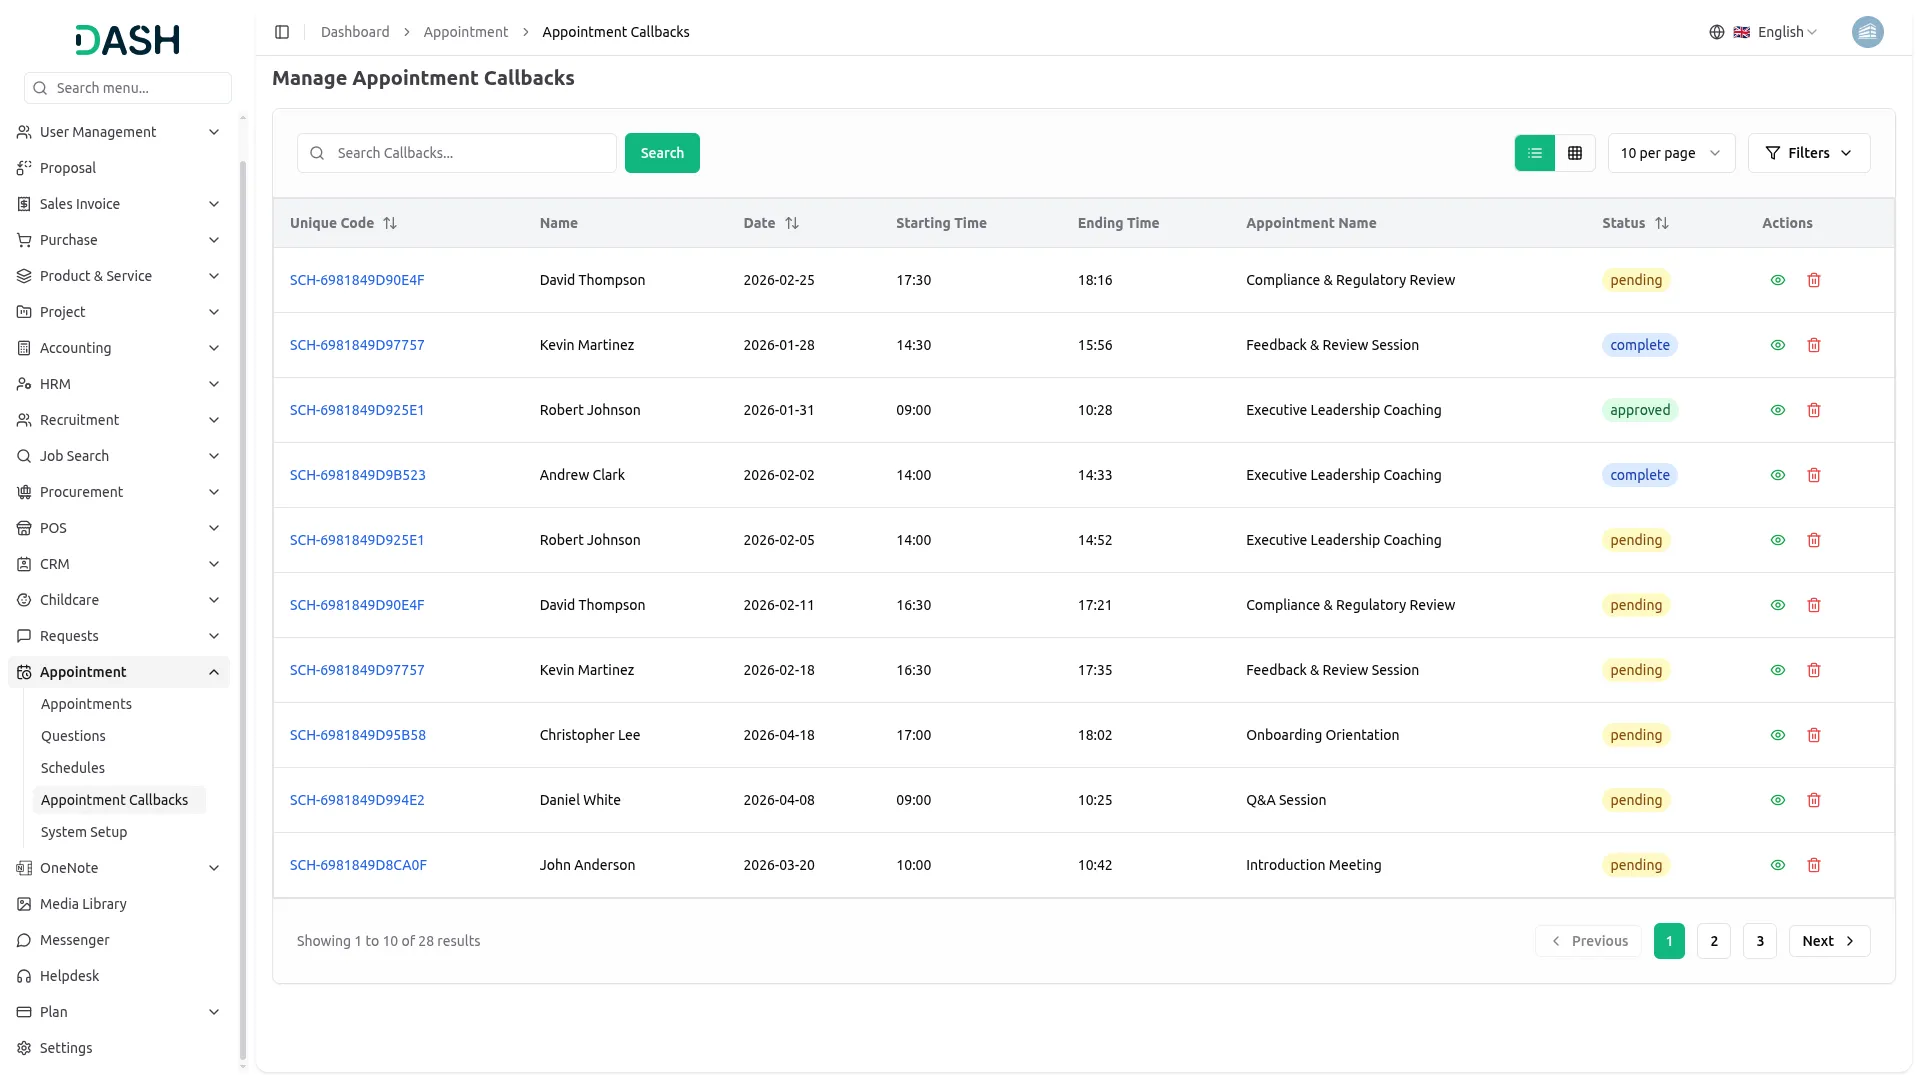
- The list shows all callback schedules in a table with columns: No, Name, Date, Start Time, End Time, Appointments (from the Appointment section), Owner, and Status (Pending, Approved, Complete, Reject).
- Under the Action column, click “View” to open appointment details or choose Delete to remove a callback entry.
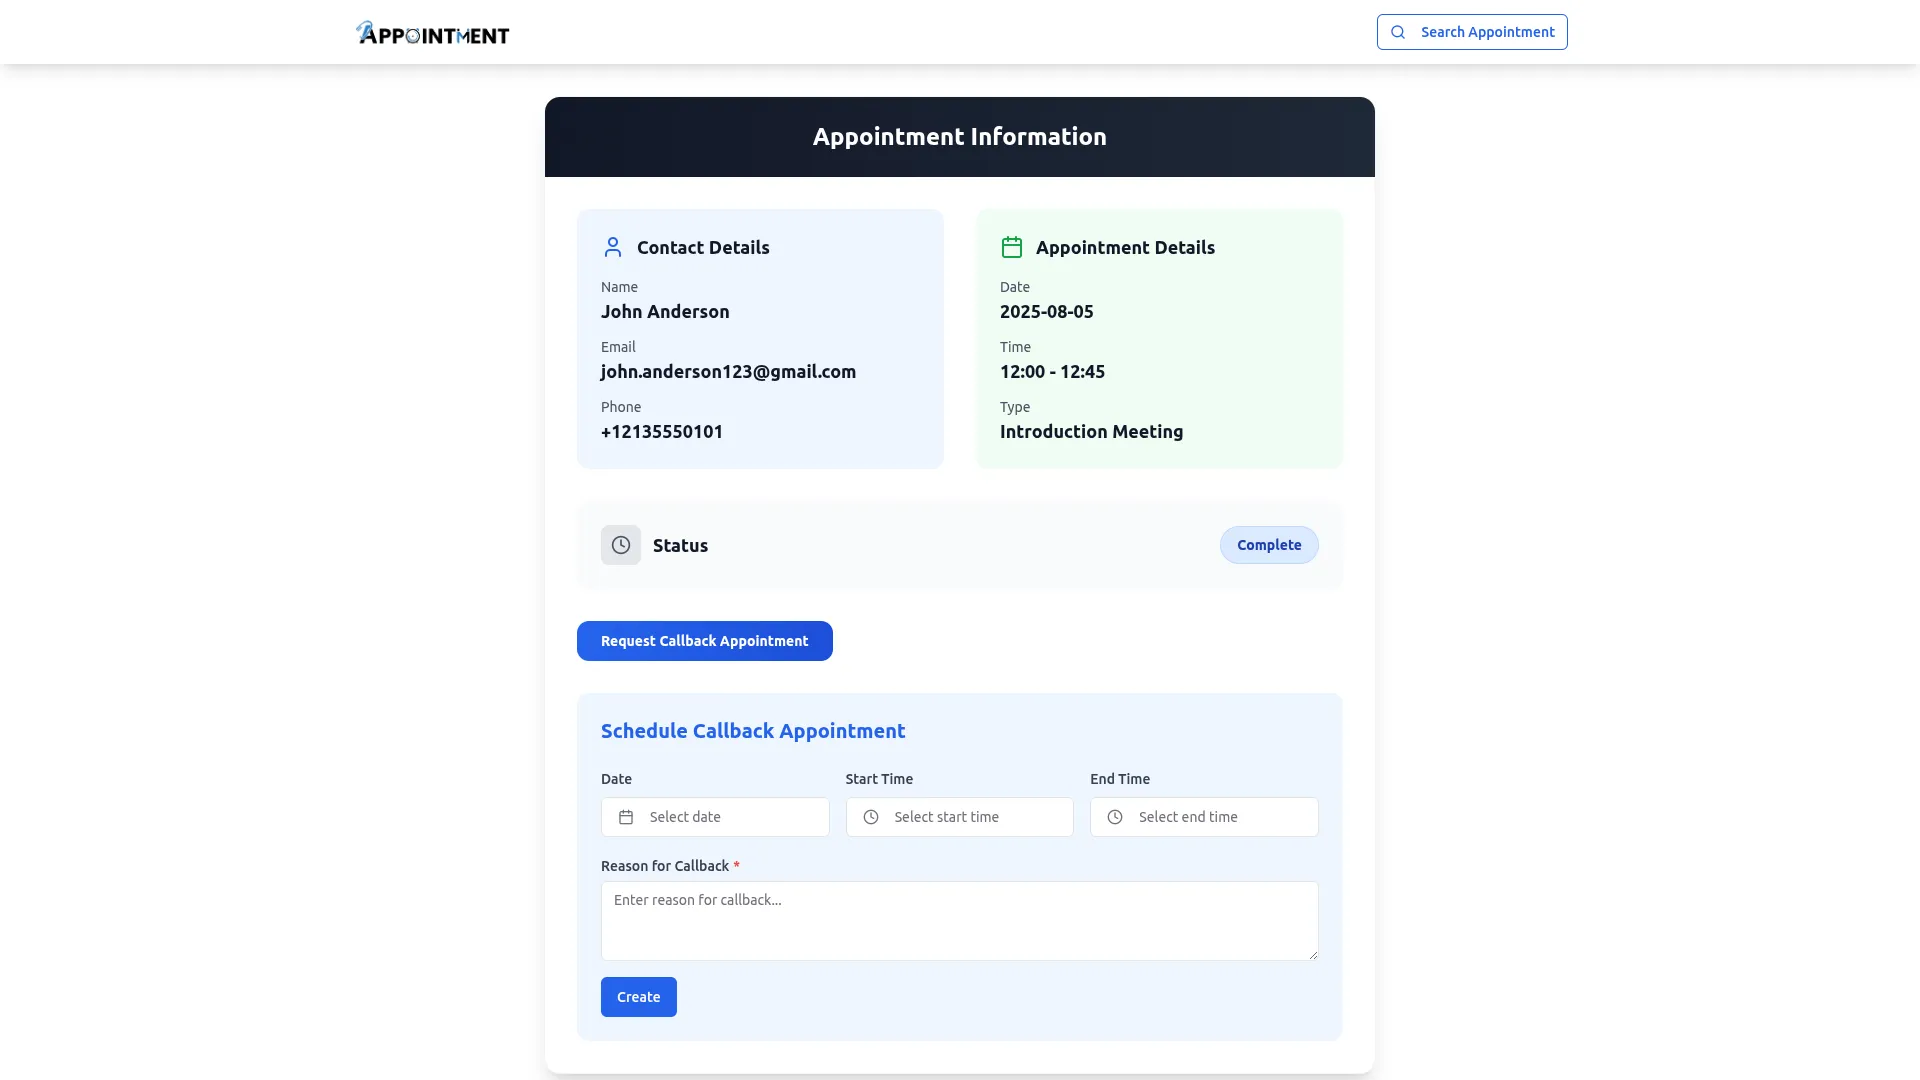
- You can request the appointment callback from the frontend side after the appointment is completed.
Categories
Related articles
- Webhook – BookingGo SaaS Add-On Guide
- Outlook Calendar Credentials Generation Guide
- Spin to Win Reward – eCommerceGo SaaS Add-On Guide
- Instamojo – BookingGo SaaS Add-On Guide
- Helpdesk – BookingGo SaaS Add-On Guide
- Pabbly Connect – BookingGo SaaS Add-On Guide
- Ozow – WorkDo Dash SaaS Add-On Guide
- Return & Refund Guide – eCommerceGo SaaS
- Mobile Service Management – WorkDo Dash SaaS Add-On Guide
- Khalti – BookingGo SaaS Add-On Guide
- Fatora – WorkDo Dash SaaS Add-On Guide
- Quotation – WorkDo Dash SaaS Add-On Guide
We're Here to Help - Let's Talk
Have questions about our solutions, customization services, or business tools? Our team is here to help you. let's talk.