Blog & Article Integration in Dash SaaS
BlogAndArticle is a comprehensive content management Add-On designed for creating, managing, and publishing blogs, articles, and Q&A content.
Introduction
BlogAndArticle is a comprehensive content management Add-On designed for creating, managing, and publishing blogs, articles, and Q&A content. The platform enables both administrators and users to create engaging content while providing robust management tools for approval workflows, user engagement, and website customization. The system includes a complete frontend website with user authentication, content filtering, social features, and an administrative backend for content moderation, system configuration, and user management.
How To Install The Add-On?
To Set Up the Blog and Article Management Add-On, you can follow this link: Setup Add-On.
How To Use The BlogAndArticle Management Add-On?
System Setup
- System Setup is used to configure front-end display and behavior across your entire website. This powerful section controls how your website appears and functions for visitors.
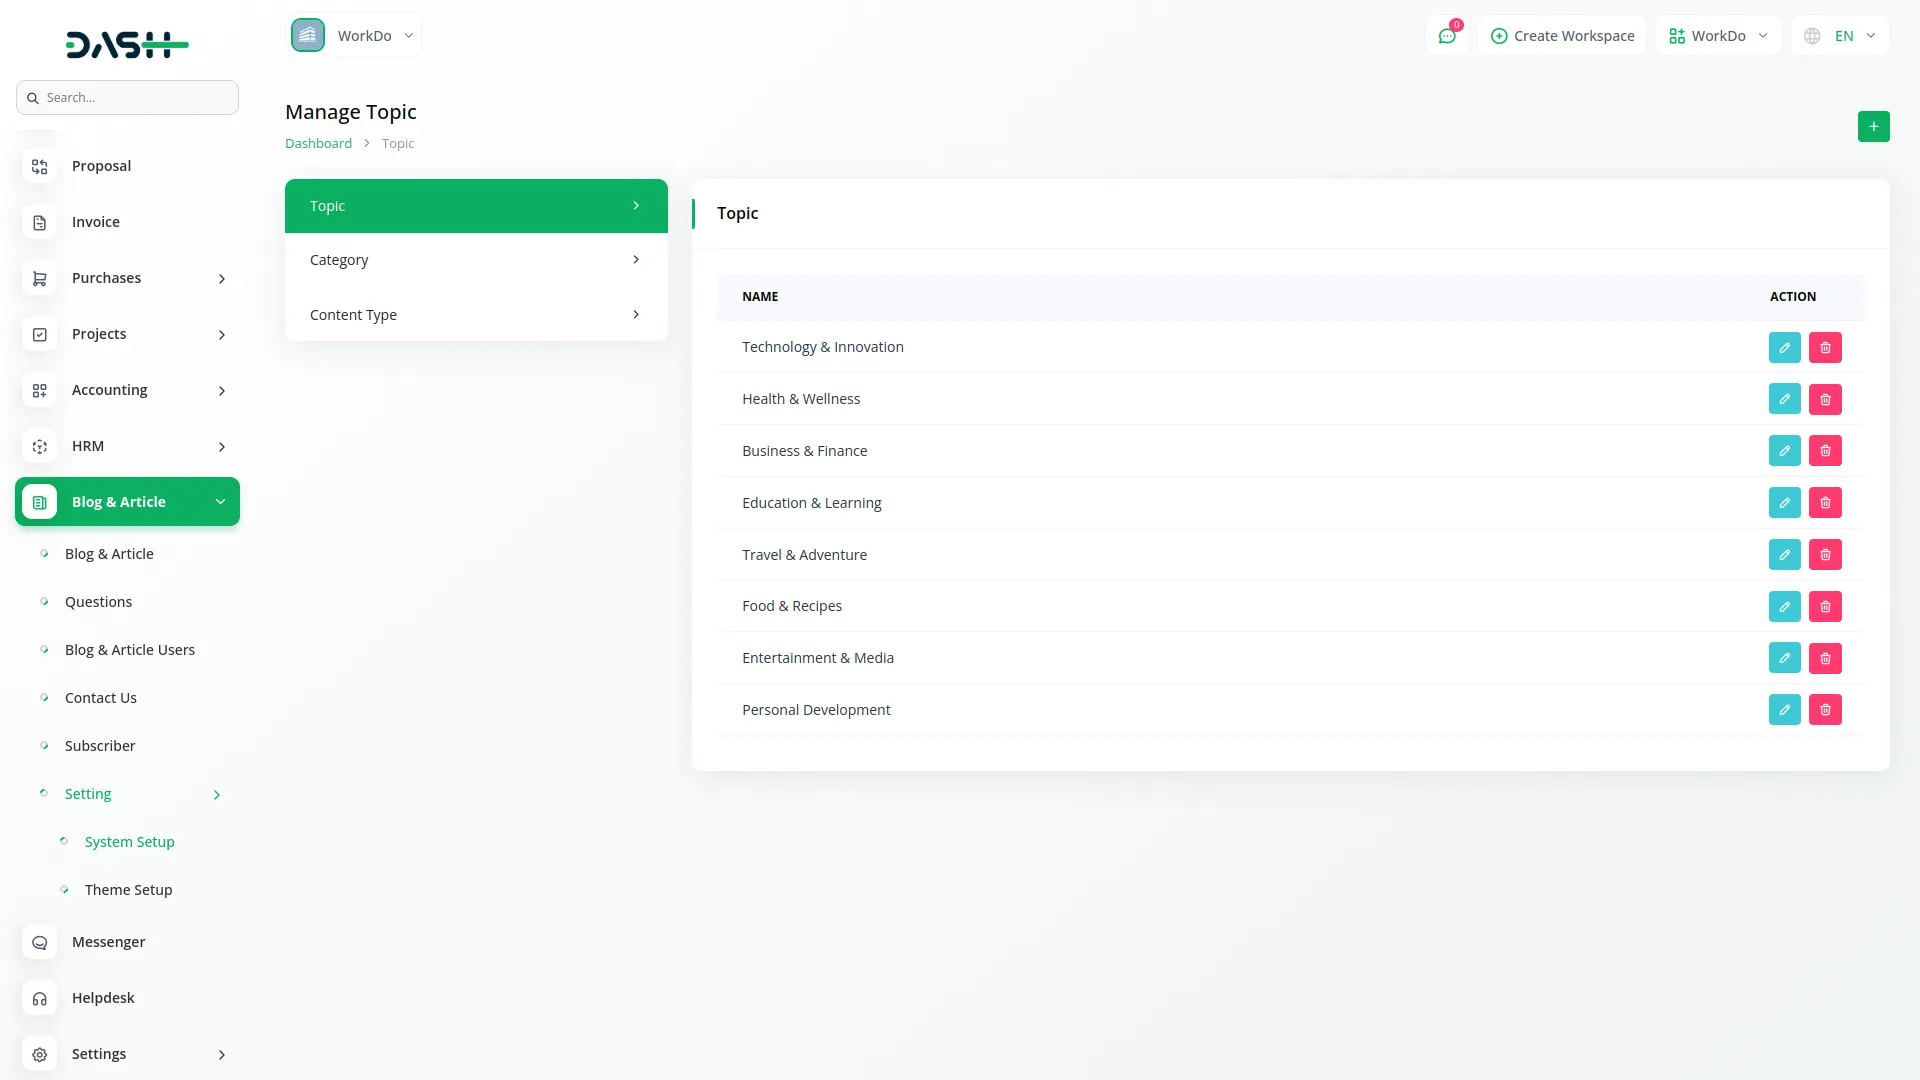
Topic
- In the Topic section, click the “Create” button, and you will find fields for Name. Enter the topic name. The list page displays the topic name, with the availability of edit or delete Action options.
- Once saved, your topics will automatically appear as filter options on your website’s Blog, Article, and Question pages, allowing visitors to easily organize and find content by category.
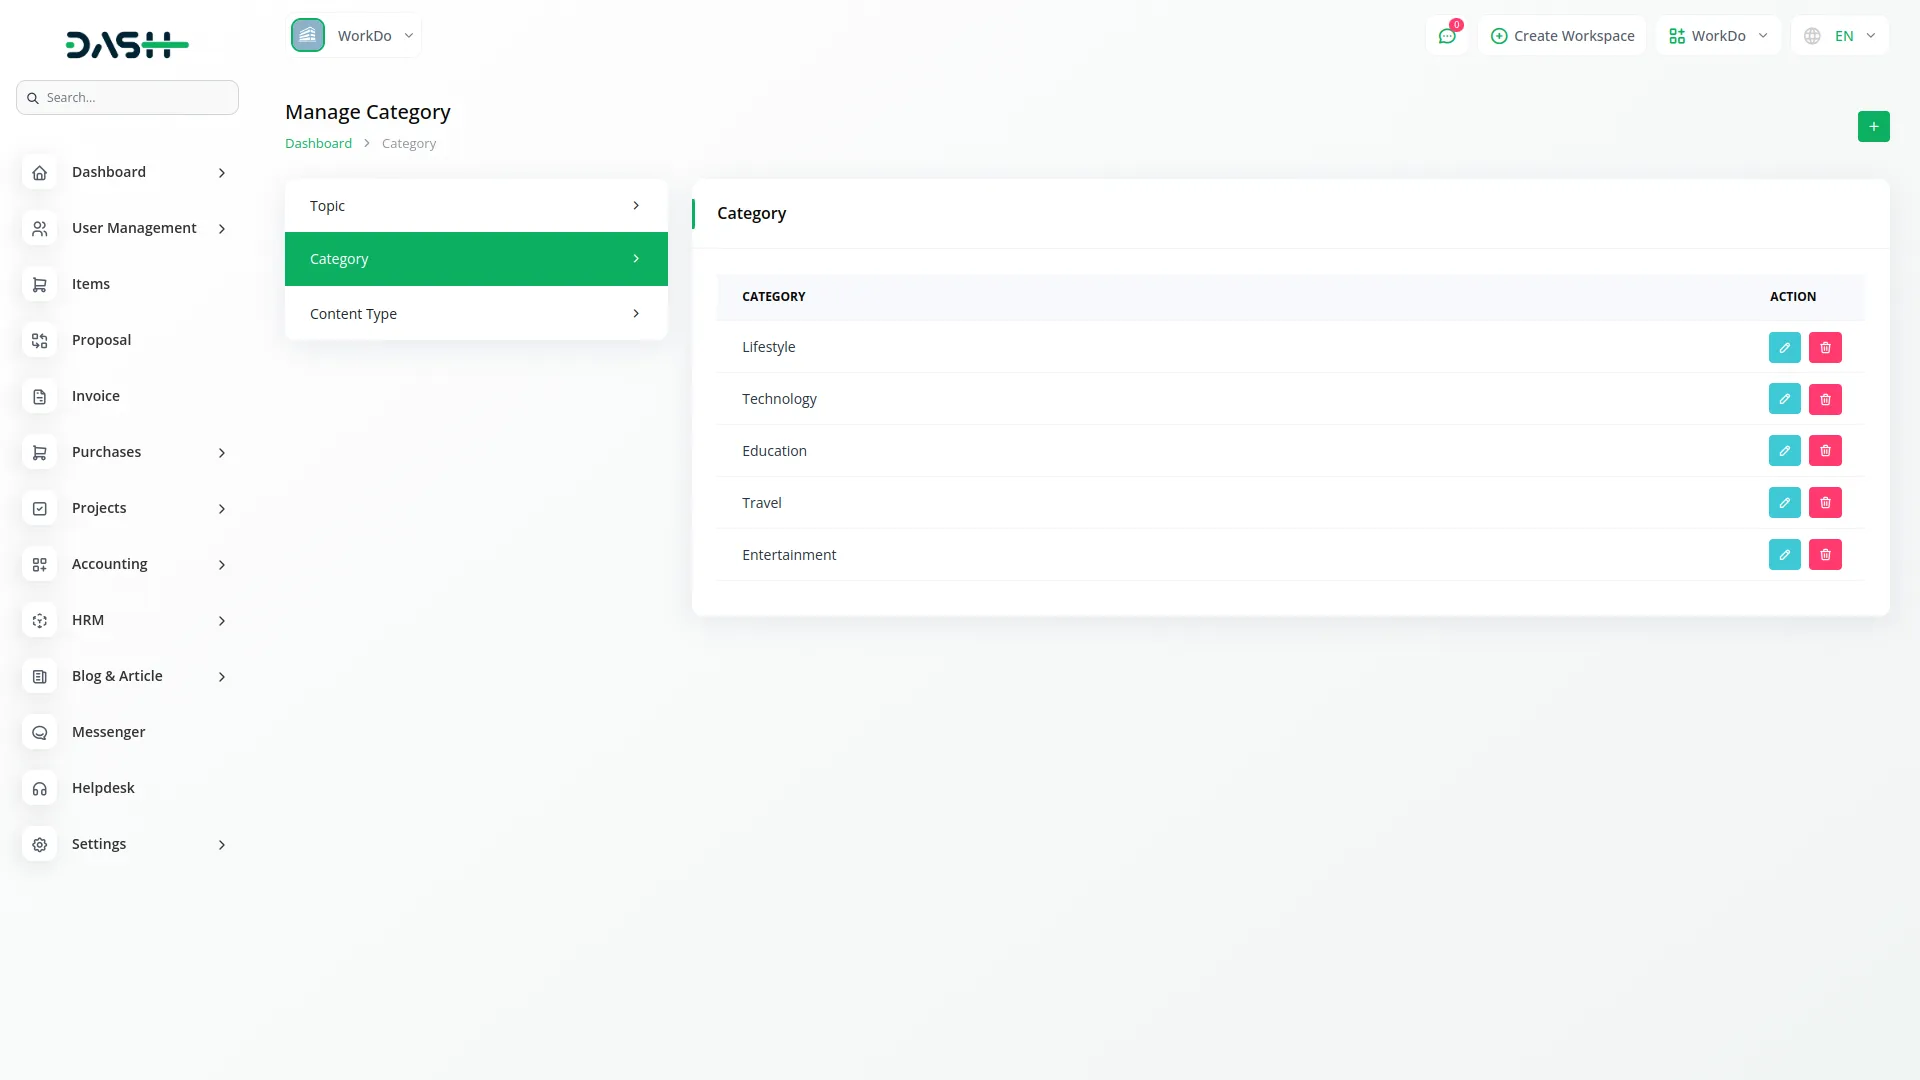
Category
- In the Category section, click the “Create” button, and you will find fields for Name. Enter the category name. The list page displays all category names with action Edit to modify and delete to remove it.
- Once saved, your categories will automatically appear as filter options on your website’s Blog and Article pages, allowing visitors to narrow down content by specific categories for better content discovery.
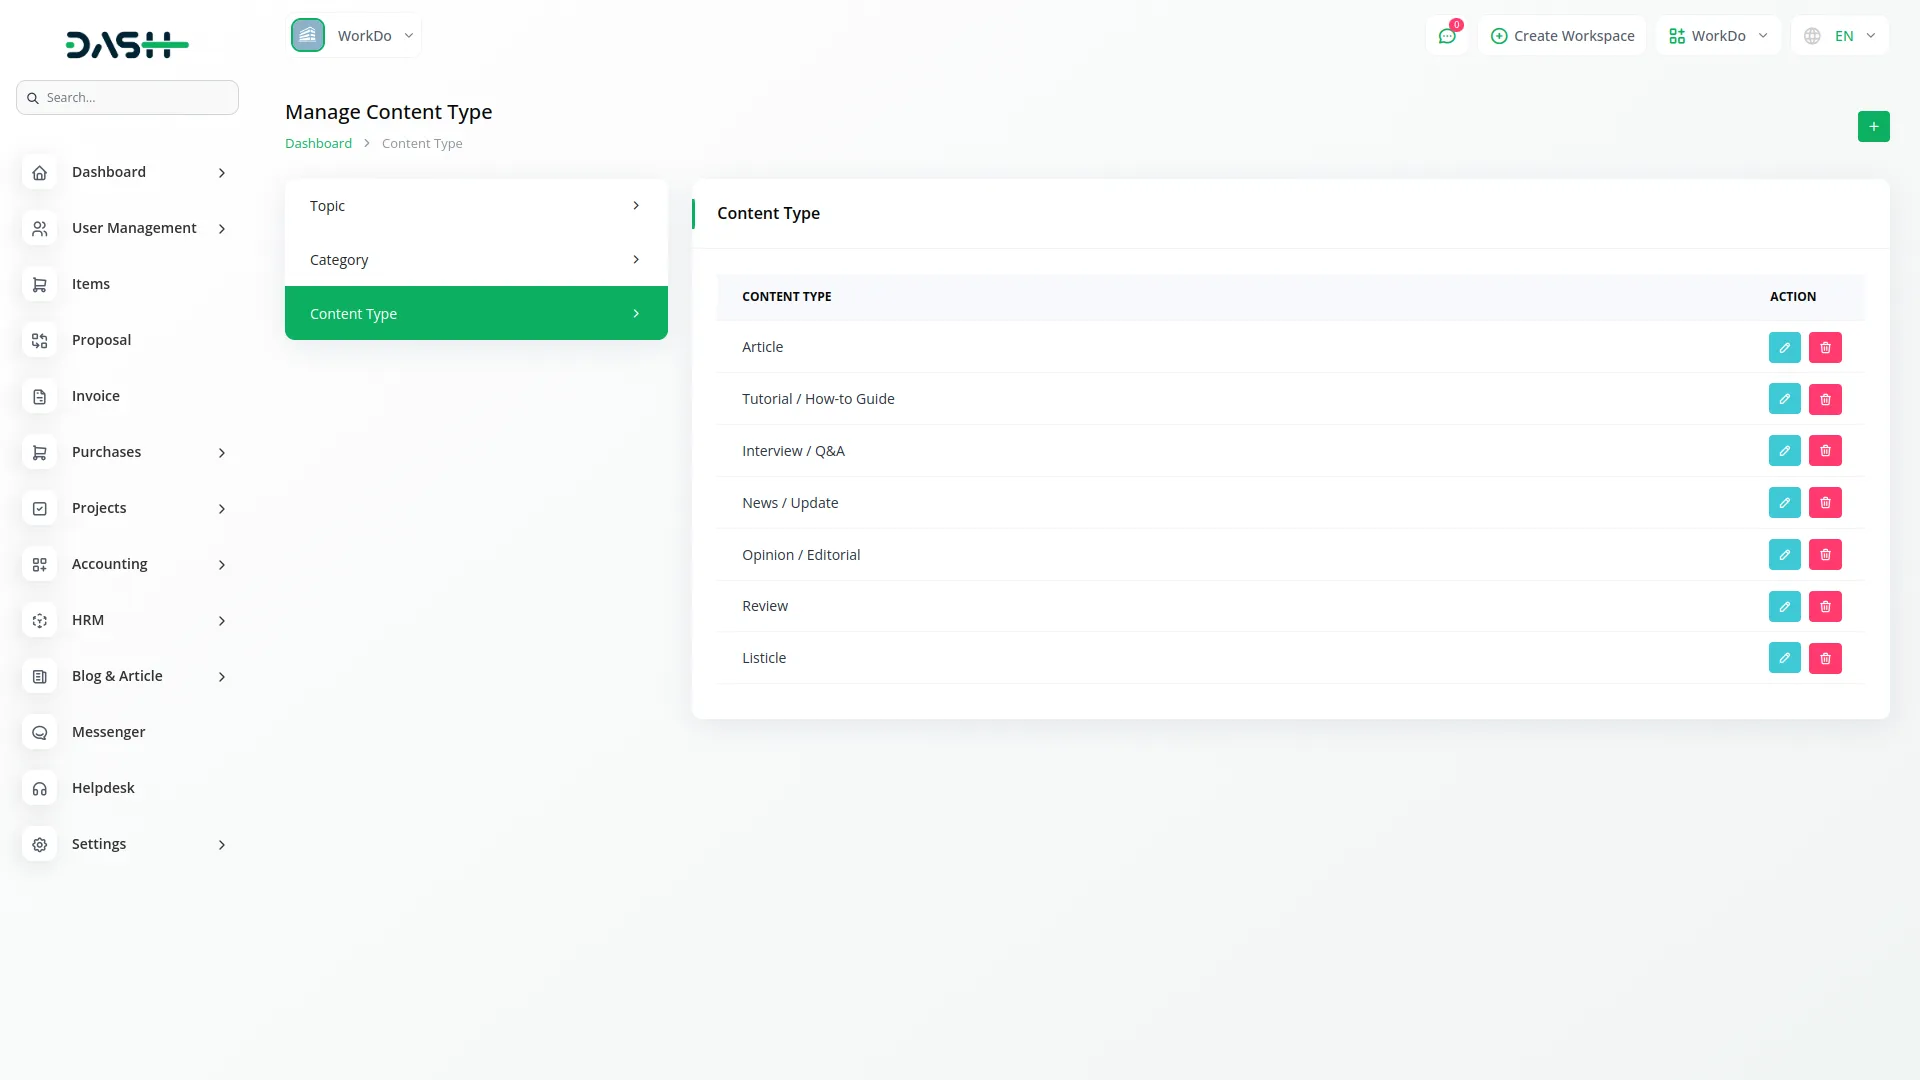
Content Type
- In the Content Type section, click the “Create” button, and you will find fields for Name, such as enter the content type name. The list page displays all content types with available actions you can use to edit to modify, or delete to remove it.
- Once saved, your content types will automatically appear as filter options on your website’s Blog and Article pages, helping visitors organize and find content based on different content formats.
Theme Setting
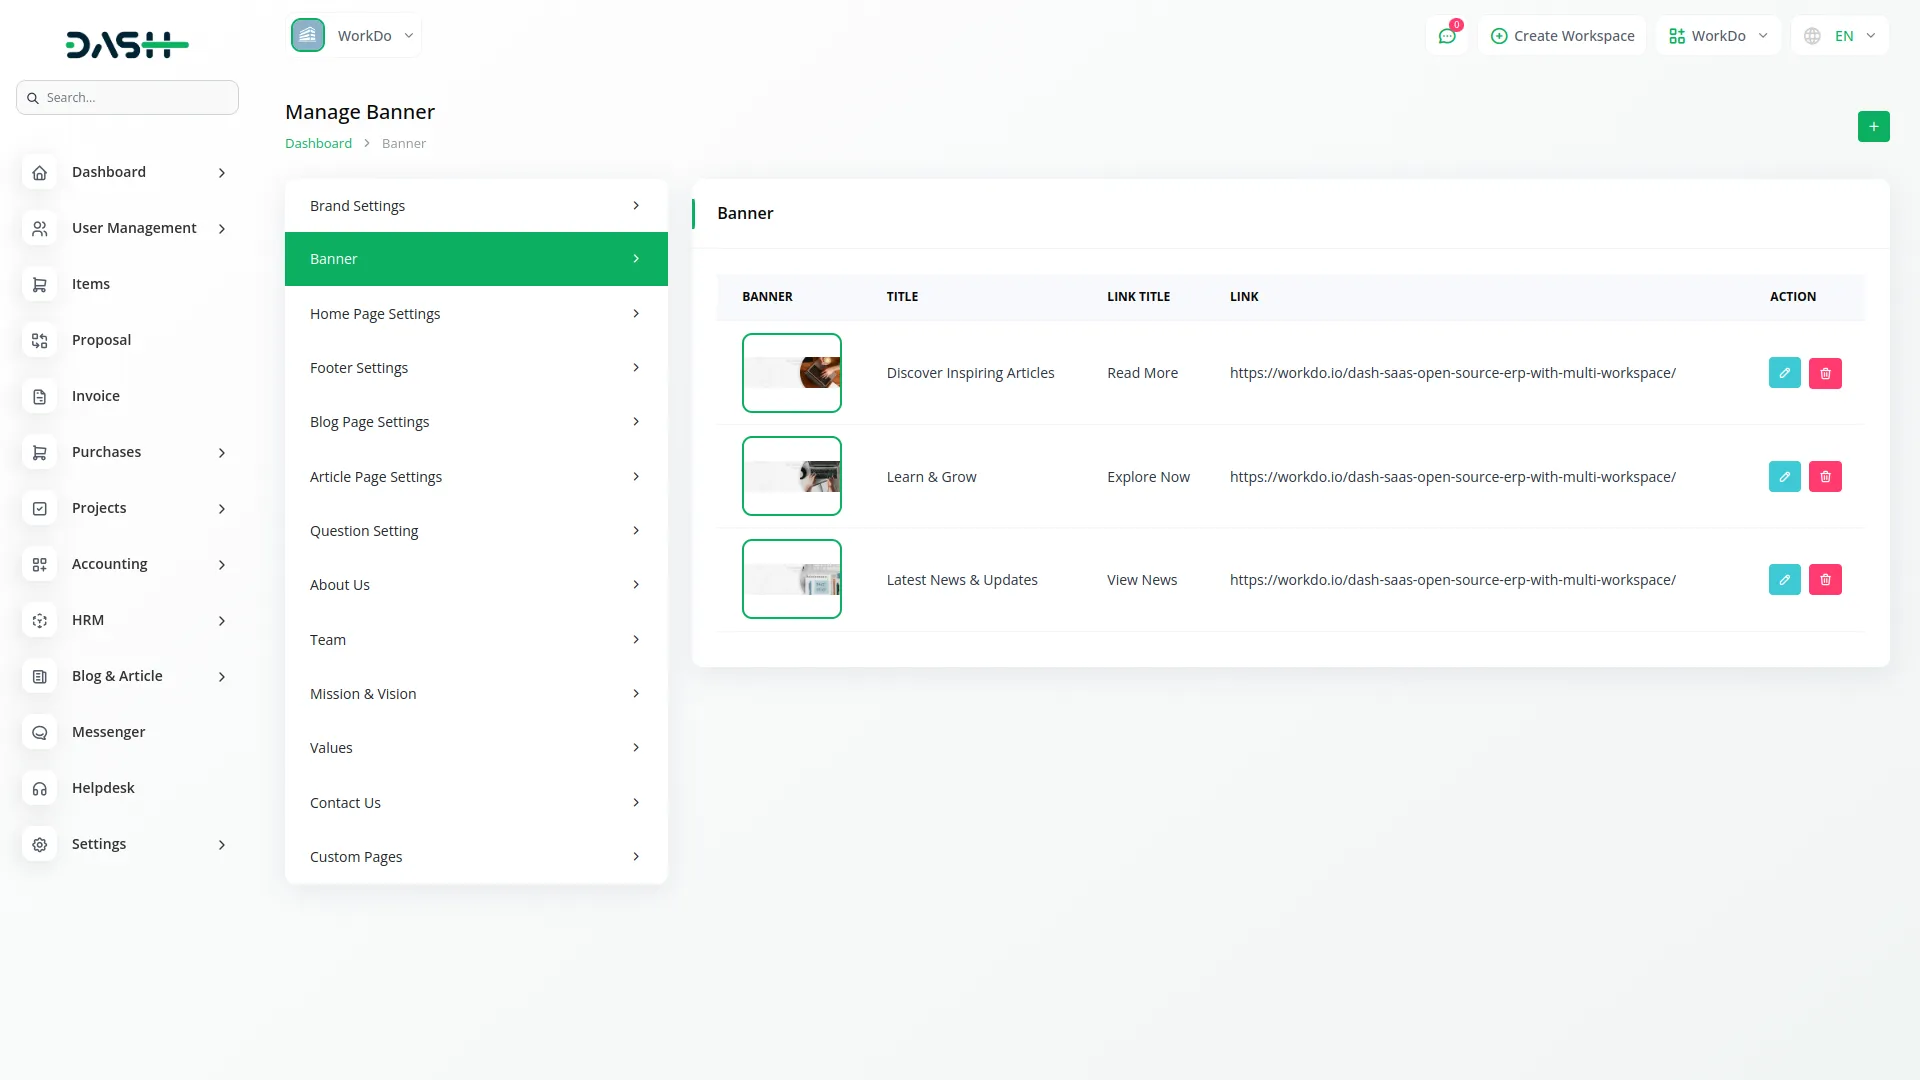
Banner
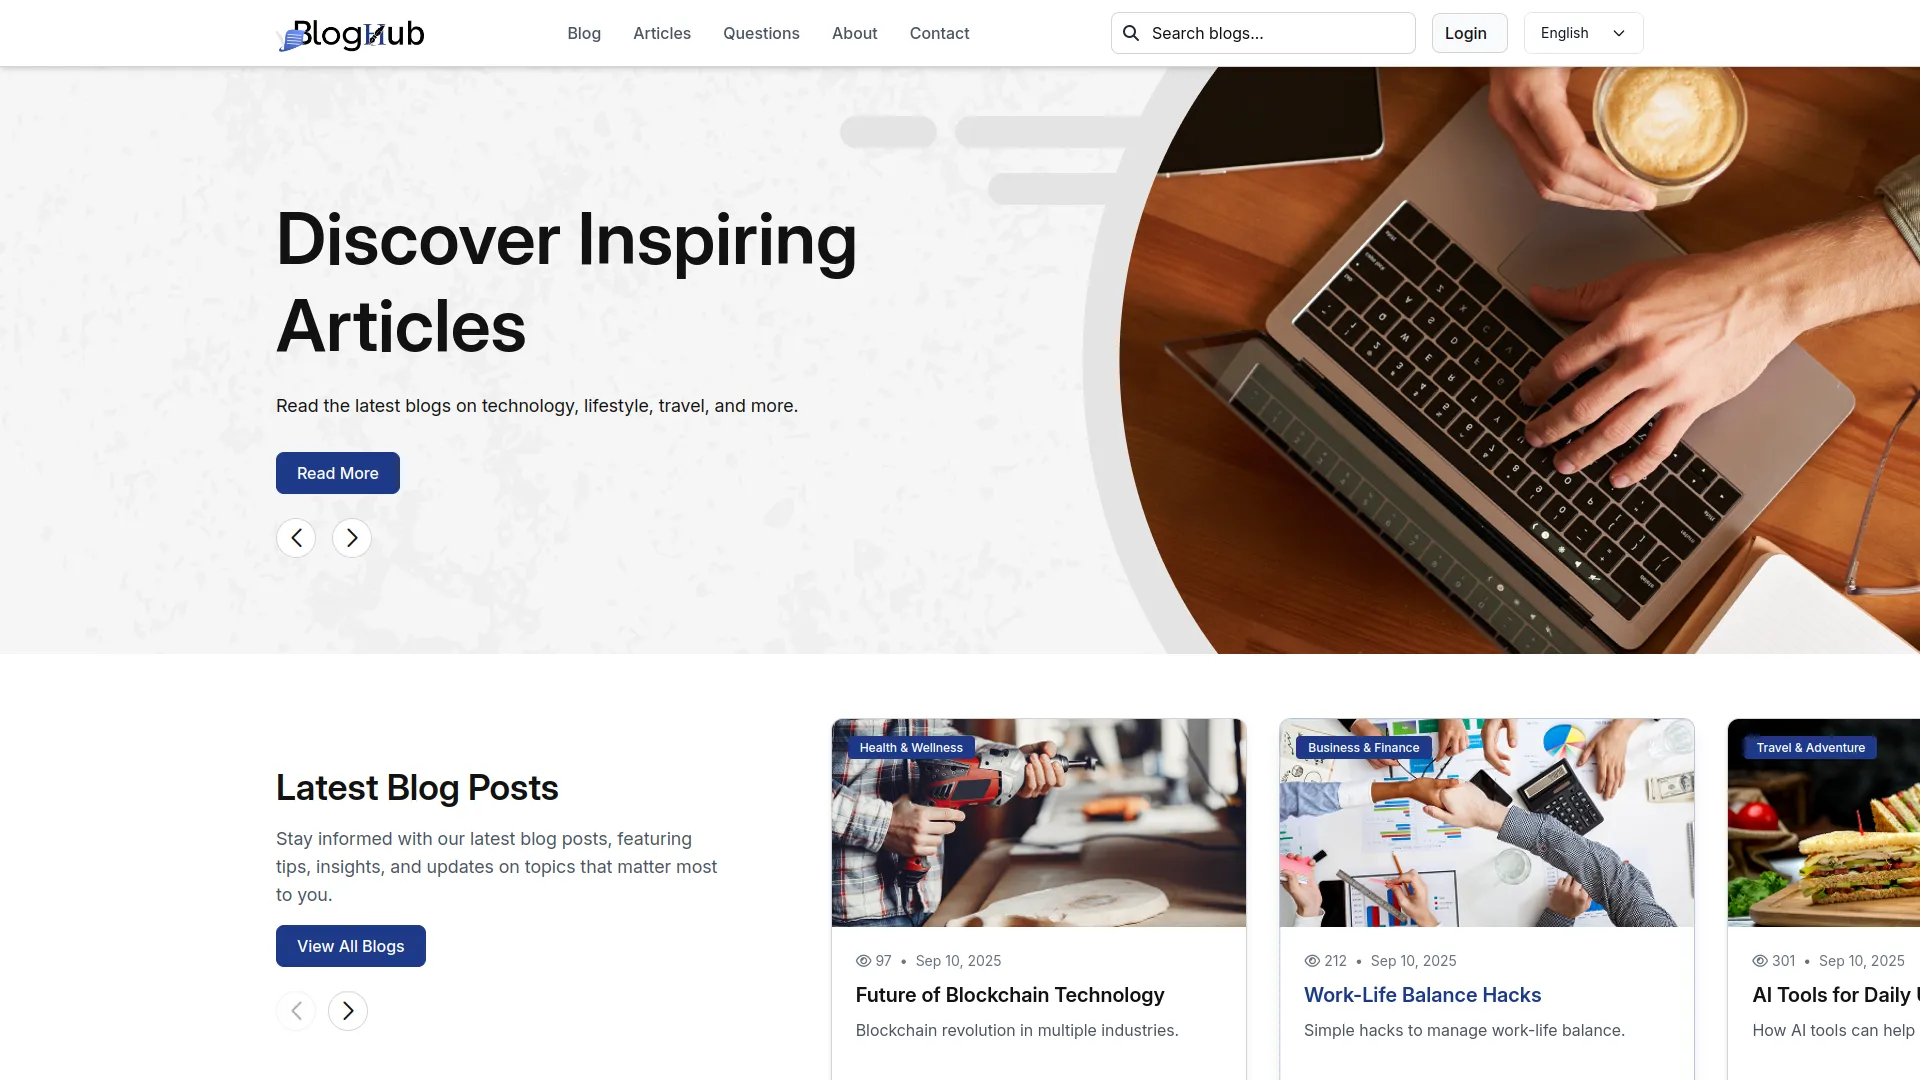
- In the Banner section, click the “Create” button, and you will find fields for Banner Image, Title, Link Title, and Link. Enter the details. The list page displays all data, including banner, title name, link title, and link. With the help of the Action column, you can use edit to modify and delete to remove it.
- Once saved, the entered Banner Image, Title, and Link details will automatically appear in the banner area of your website’s homepage, providing visitors with an engaging first impression and call-to-action.
Brand Setting
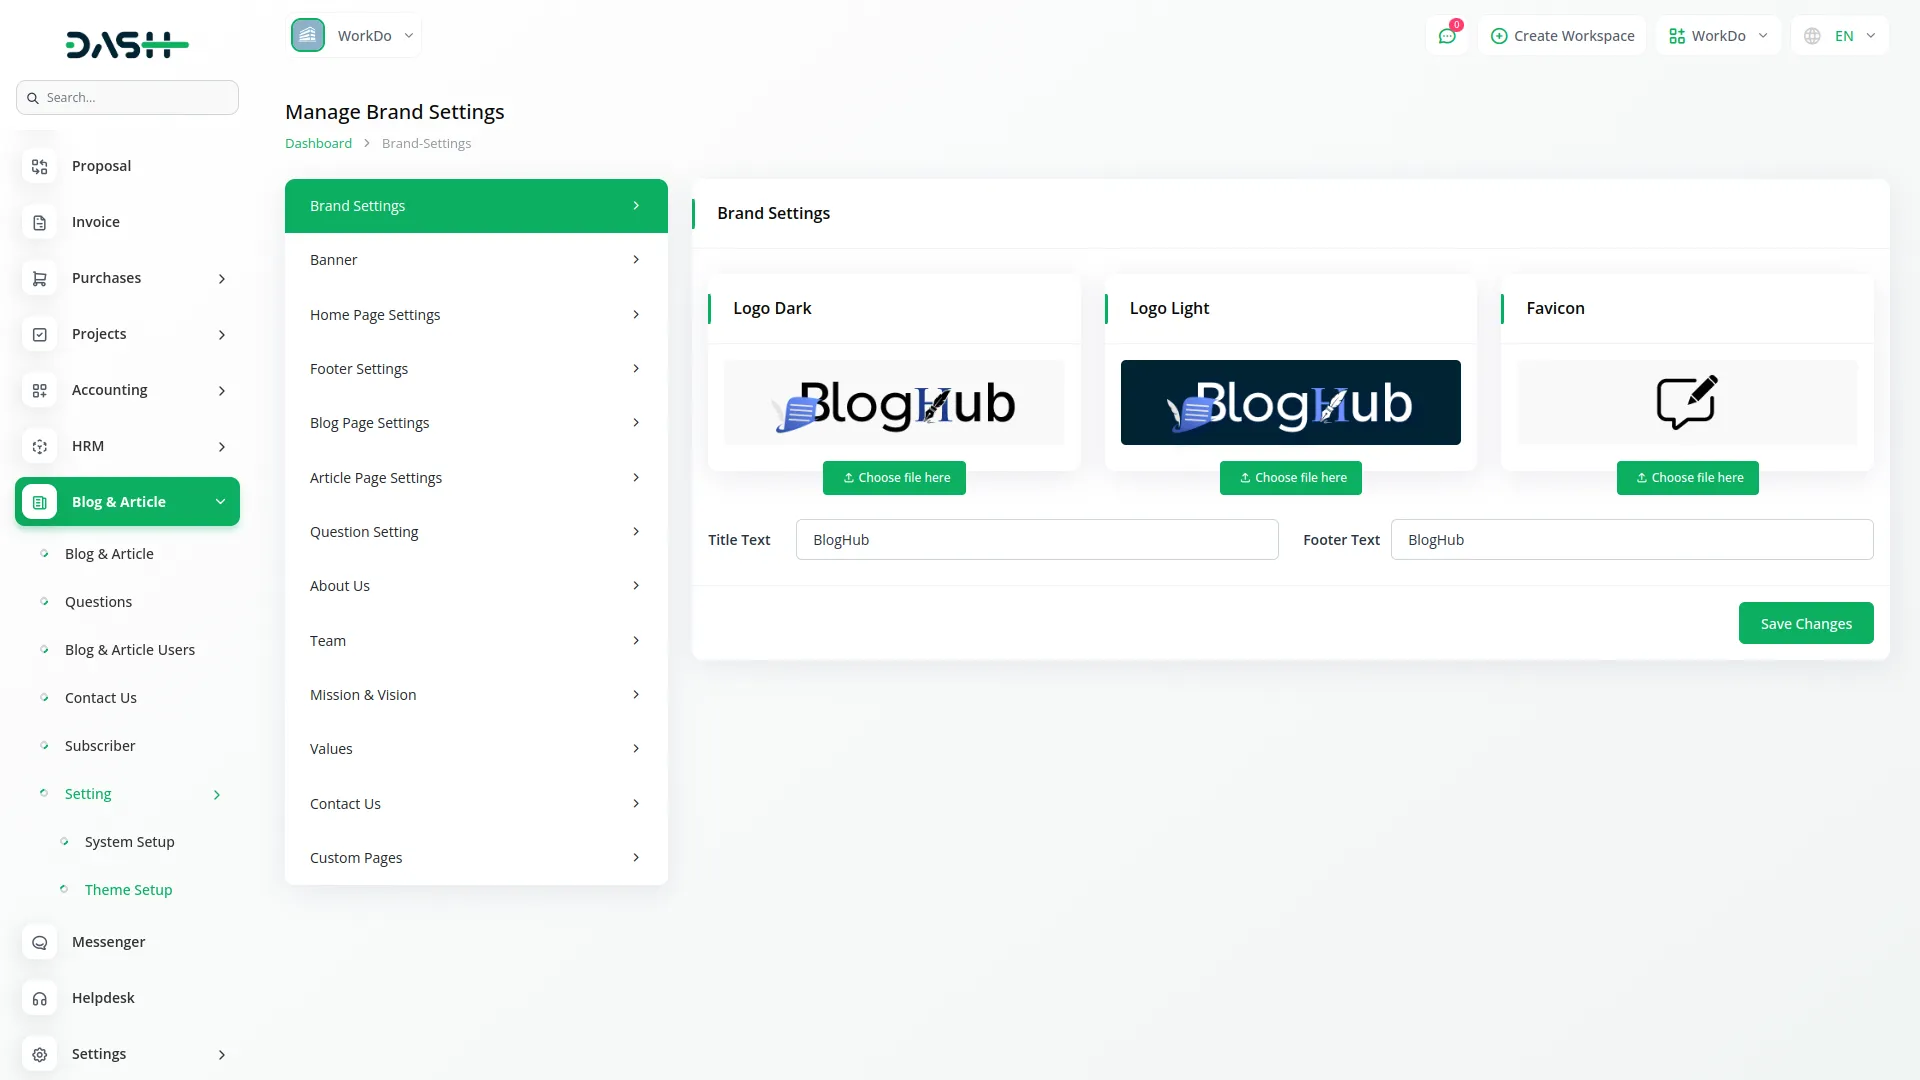
- In the Brand Setting section, you will find fields for Dark Logo, Light Logo, Favicon, Title Text, and Footer Text. Enter the details and click Save.
- Once saved, your Dark and Light logos will appear as clickable homepage links in the website header and footer sections, the Title Text will become your website’s page title, and the Footer Text will display throughout the footer area, creating a consistent branded experience.
Landing Page Setting
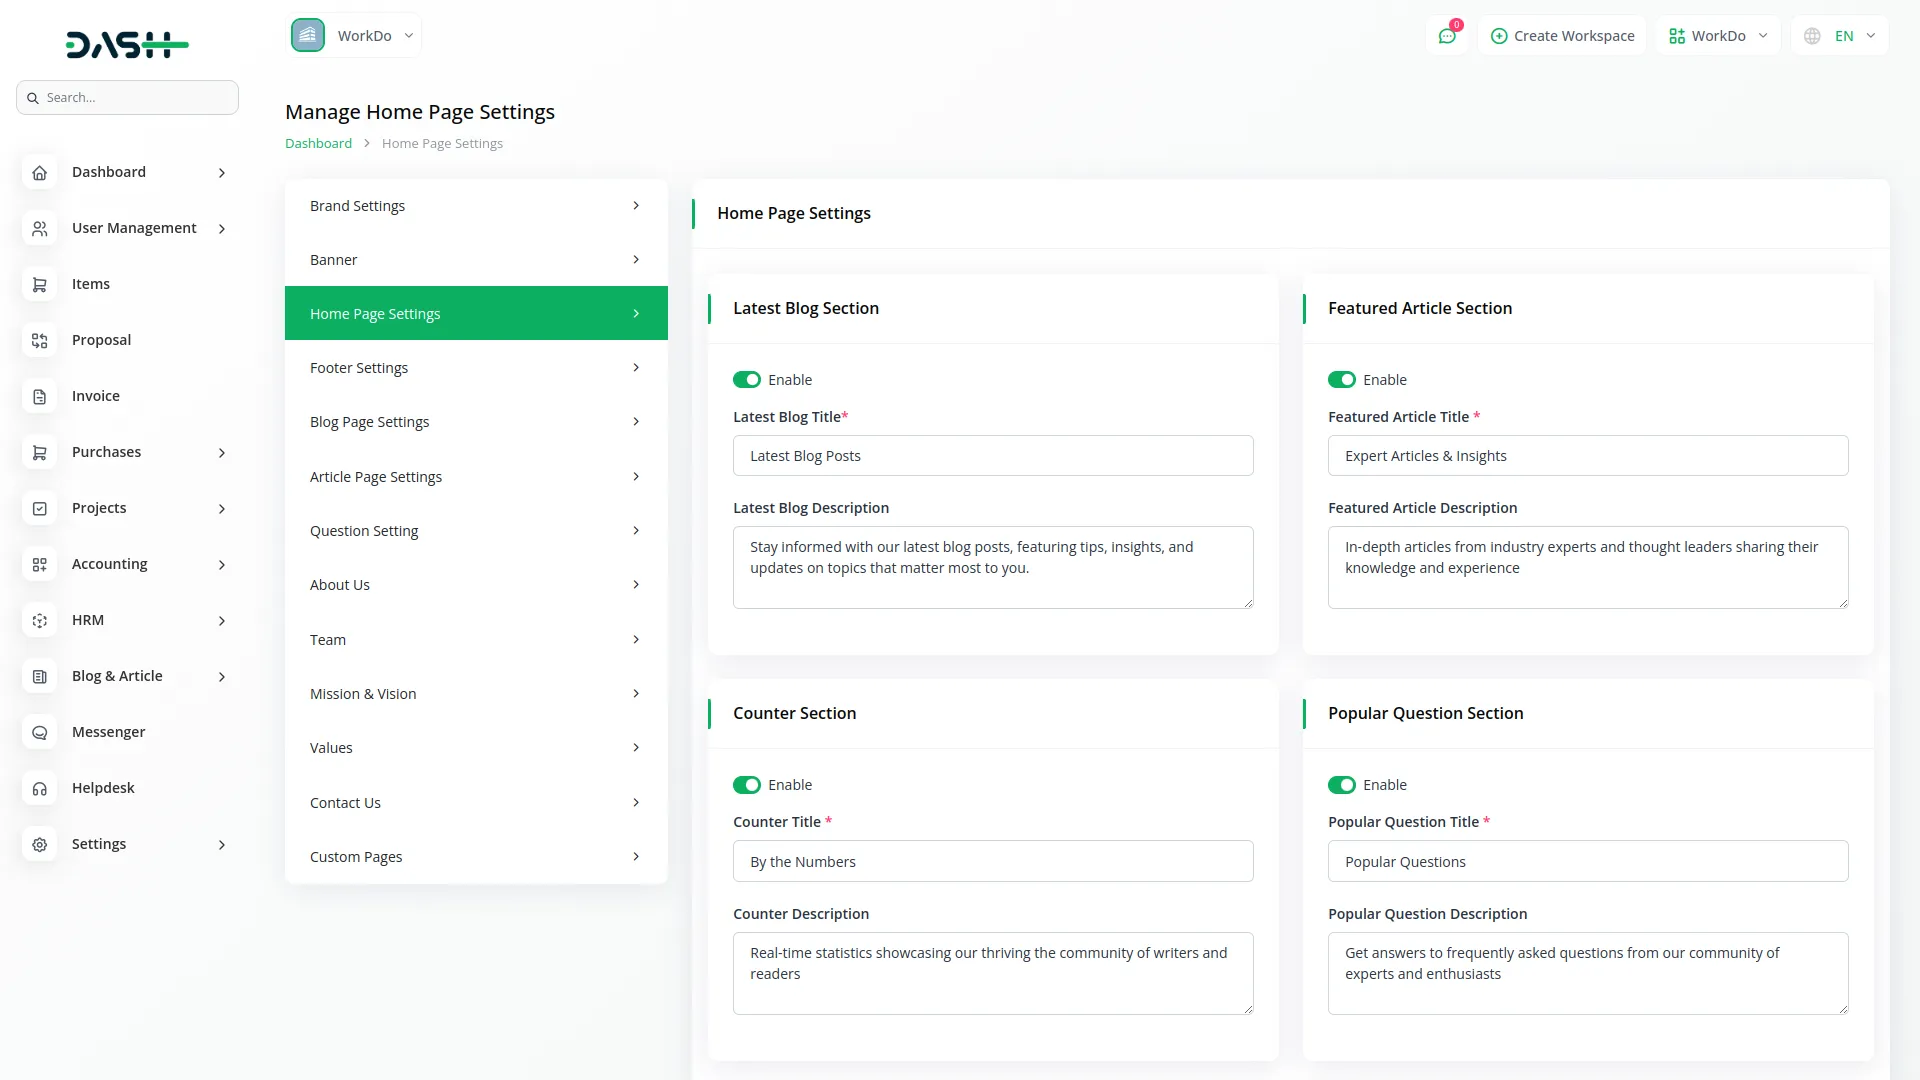
- In the Landing Page Setting section, you will find toggle buttons and content fields for the Latest Blog Section, Featured Article Section, Counter Section, Popular Question Section, and Newsletter Section. For each section, enable the toggle and enter the title and description.
- Once saved, all enabled sections will automatically appear on your website’s homepage with their respective content, headings, and descriptions as configured, creating an engaging landing page experience for visitors.
Footer Settings
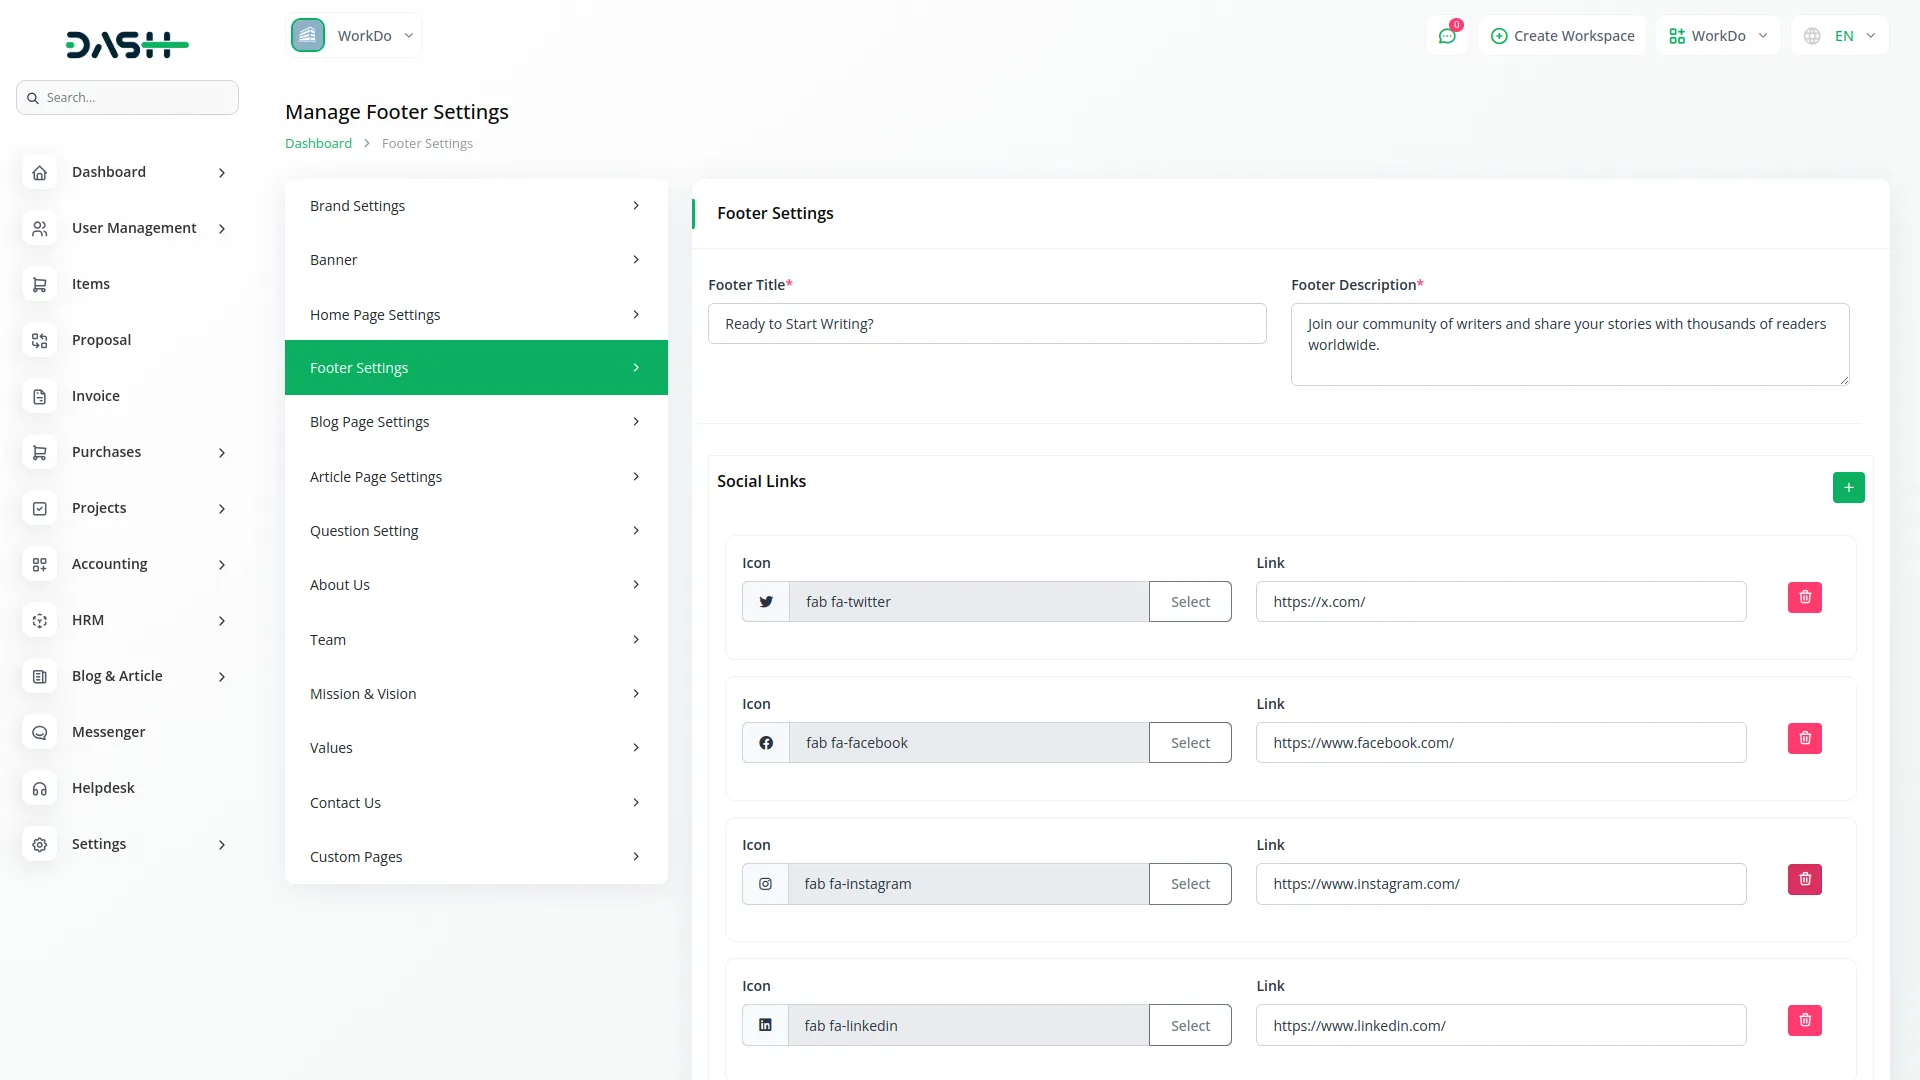
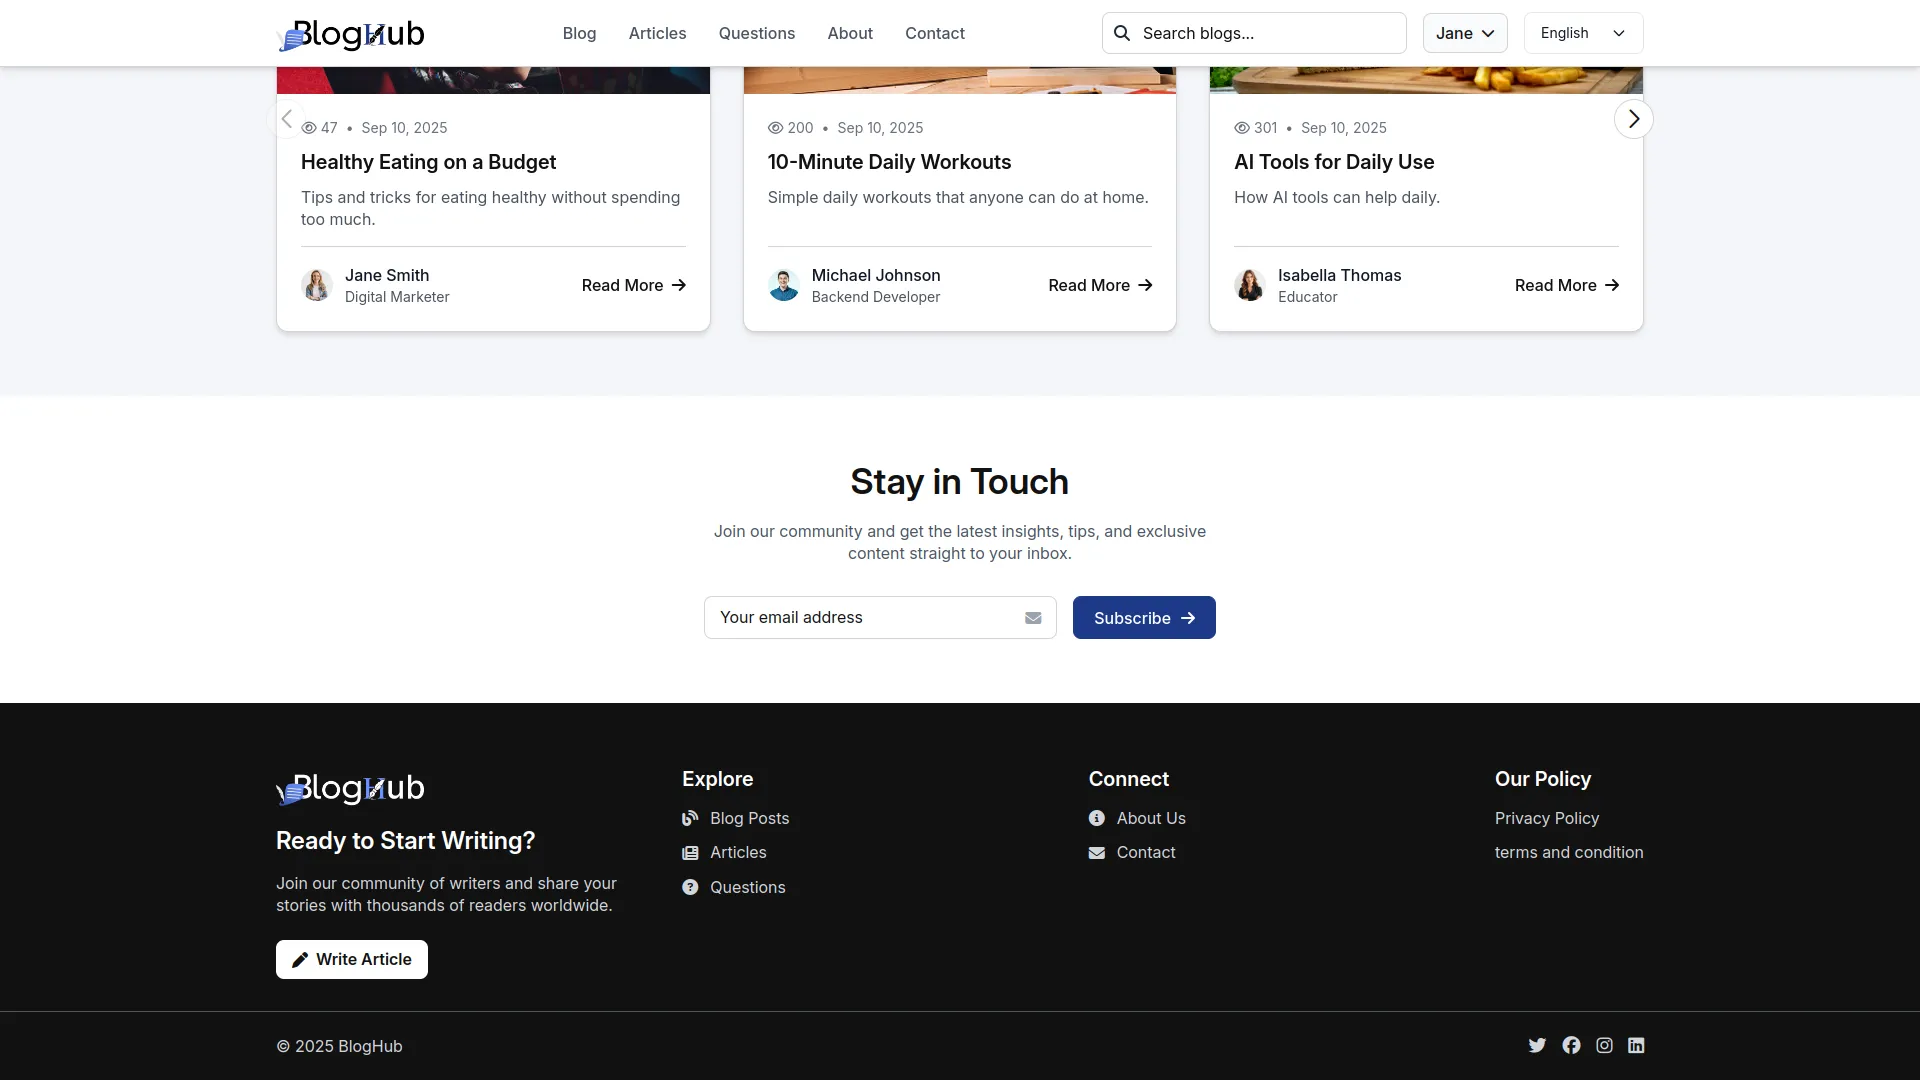
- In the Footer Settings section, you will find fields for Footer Title, Footer Description, and Social Links (Icon and Link). Enter the details for each field and add multiple social media links using the repeater section.
- Once saved, your Footer Title and Footer Description will appear at the bottom of every website page, while the Social Icons and links will display in your website footer along with contact information, providing comprehensive footer content for visitors.
Blog Page Settings
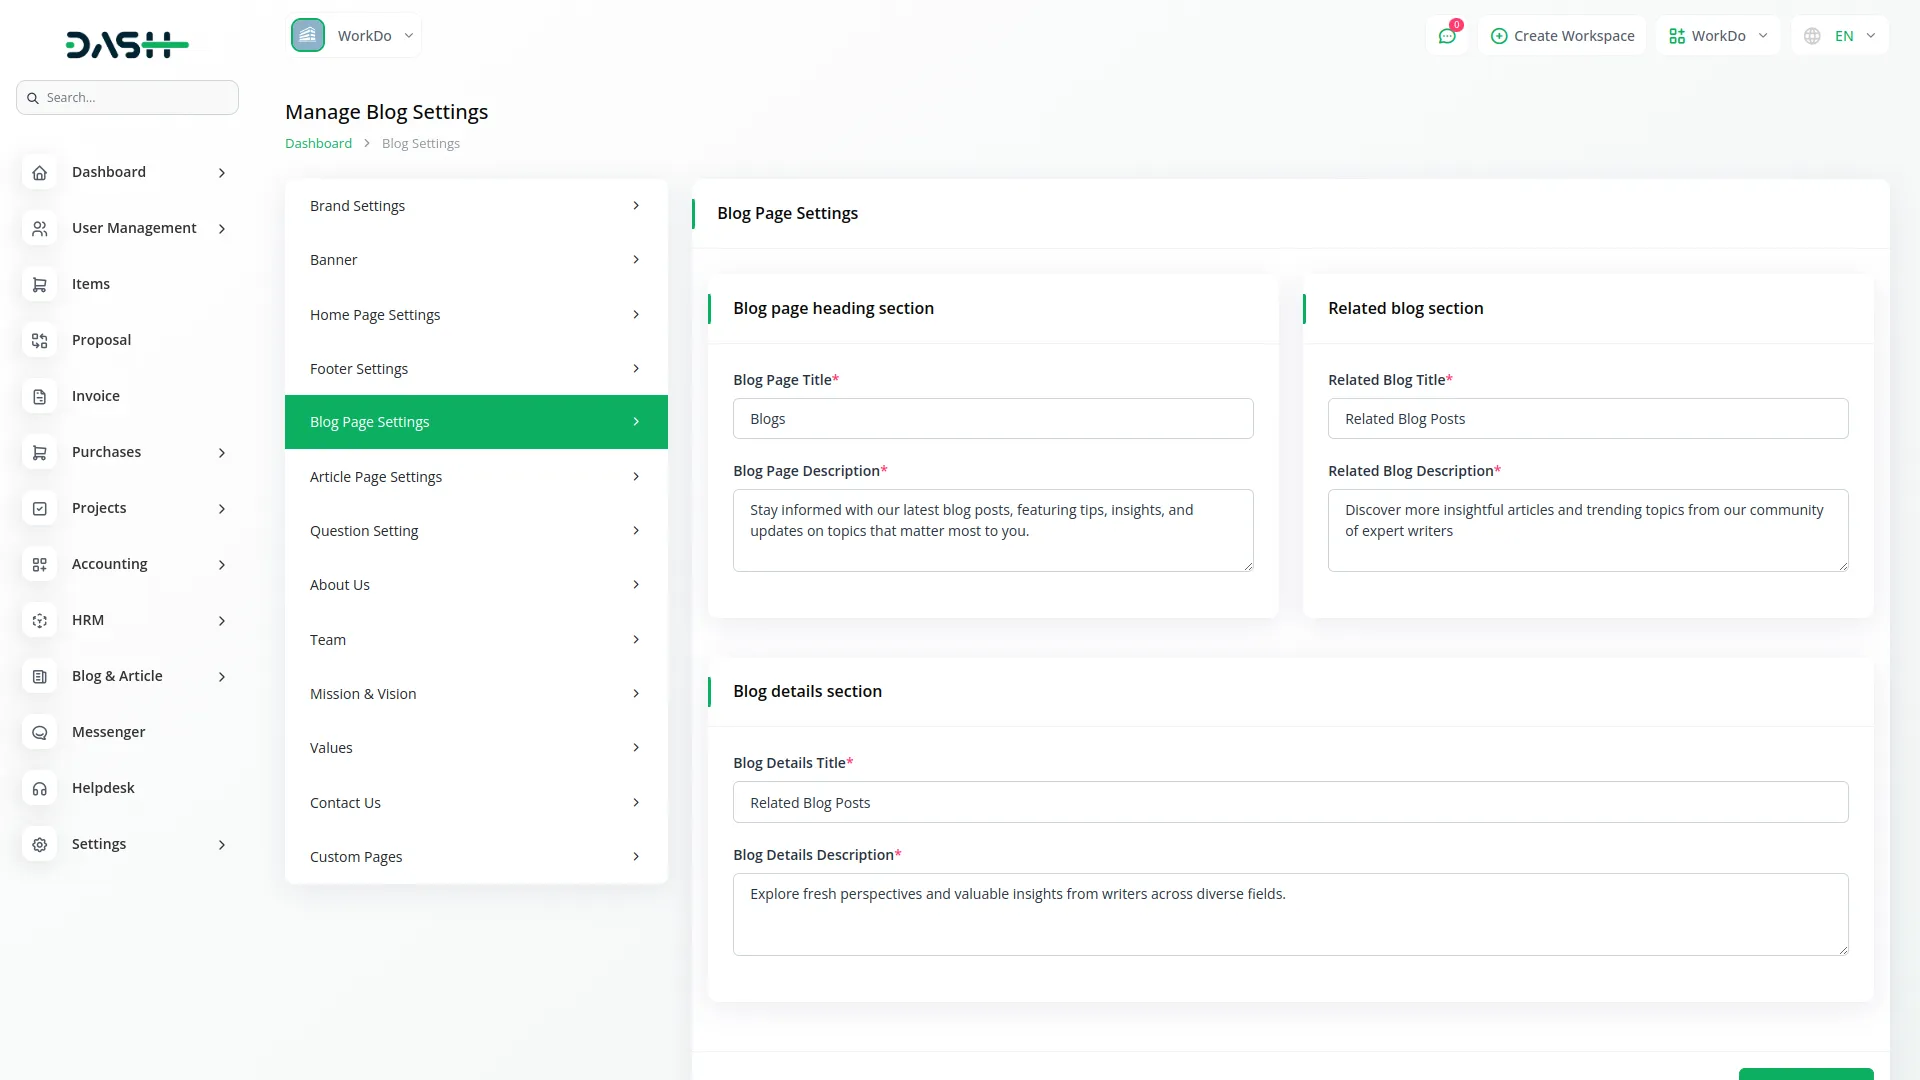
- In the Blog Page Settings section, you will find fields for Blog Page Title, Blog Page Description, Related Blog Title, Related Blog Description, Blog Details Title, and Blog Details Description. Enter the details for each field.
- Once saved, the Blog Page Title and Description will appear as the main page heading on your website’s blog page, while the Related Blog and Blog Details titles and descriptions will display in their respective sections on blog pages and individual blog detail pages.
Article Page Settings
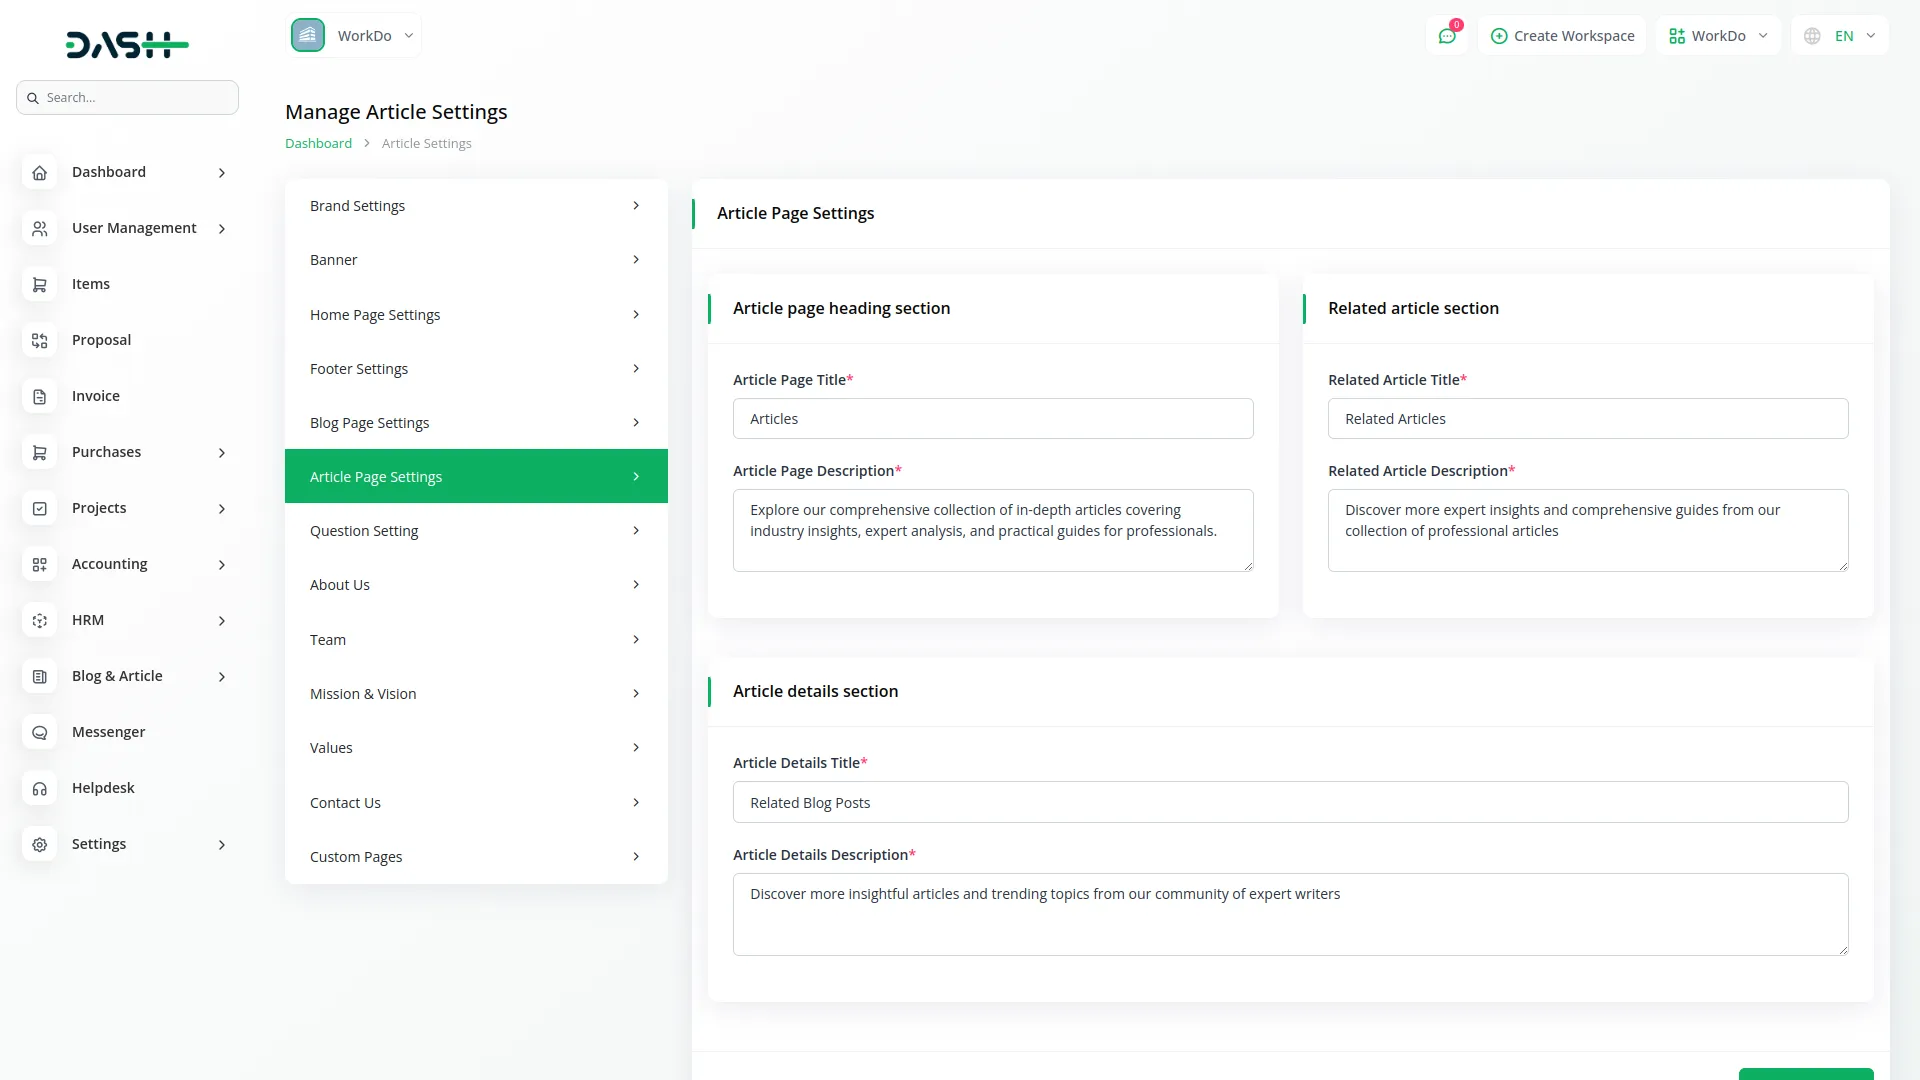
- In the Article Page Settings section, you will find fields for Article Page Title, Article Page Description, Related Article Title, Related Article Description, Article Details Title, and Article Details Description. Enter the details for each field.
- Once saved, the Article Page Title and Description will appear as the main page heading on your website’s article page, while the Related Article and Article Details titles and descriptions will display in their respective sections on article pages and individual article detail pages.
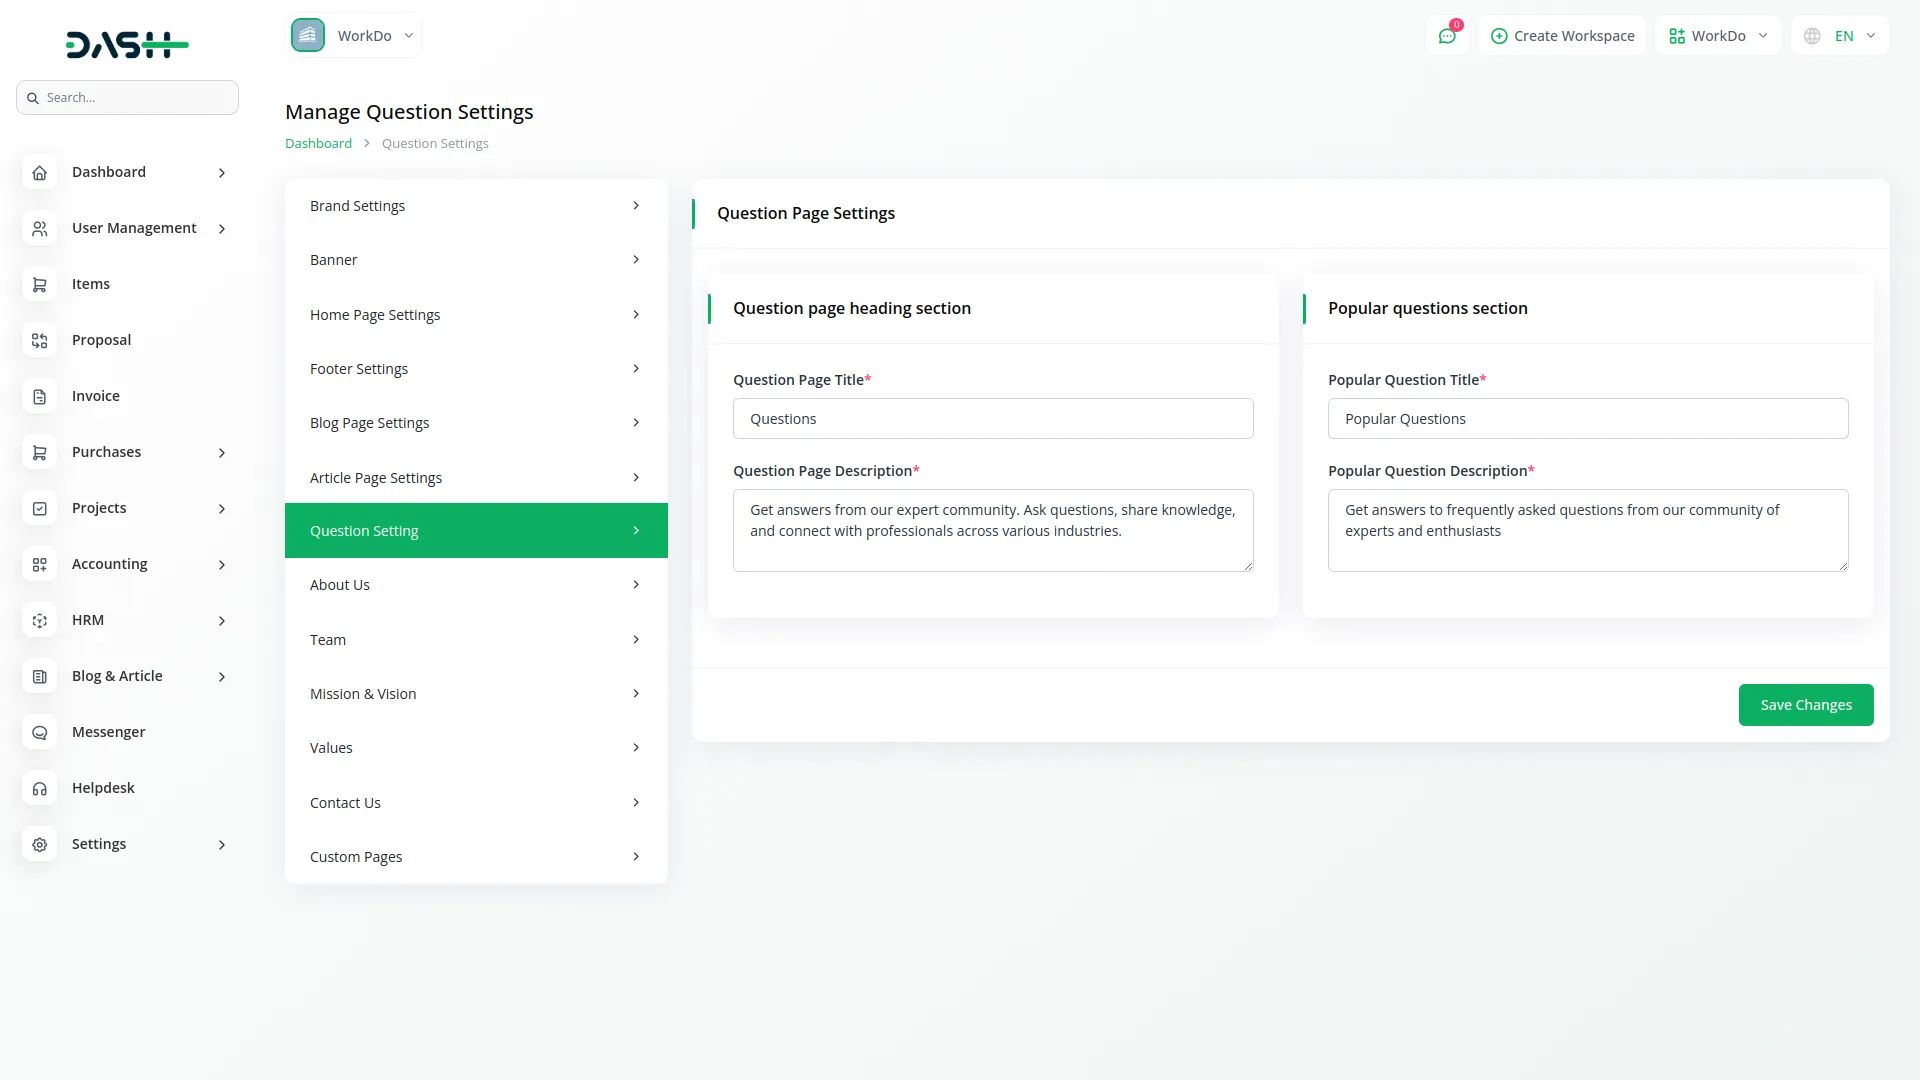
Question Page Settings
- In the Question Page Settings section, you will find fields for Question Page Title, Question Page Description, Popular Question Title, and Popular Question Description. Enter the details for each field.
- Once saved, the Question Page Title and Description will appear as the main page heading on your website’s question page, while the Popular Question Title and Description will display in the featured questions section with search functionality and filtering options.
About Us
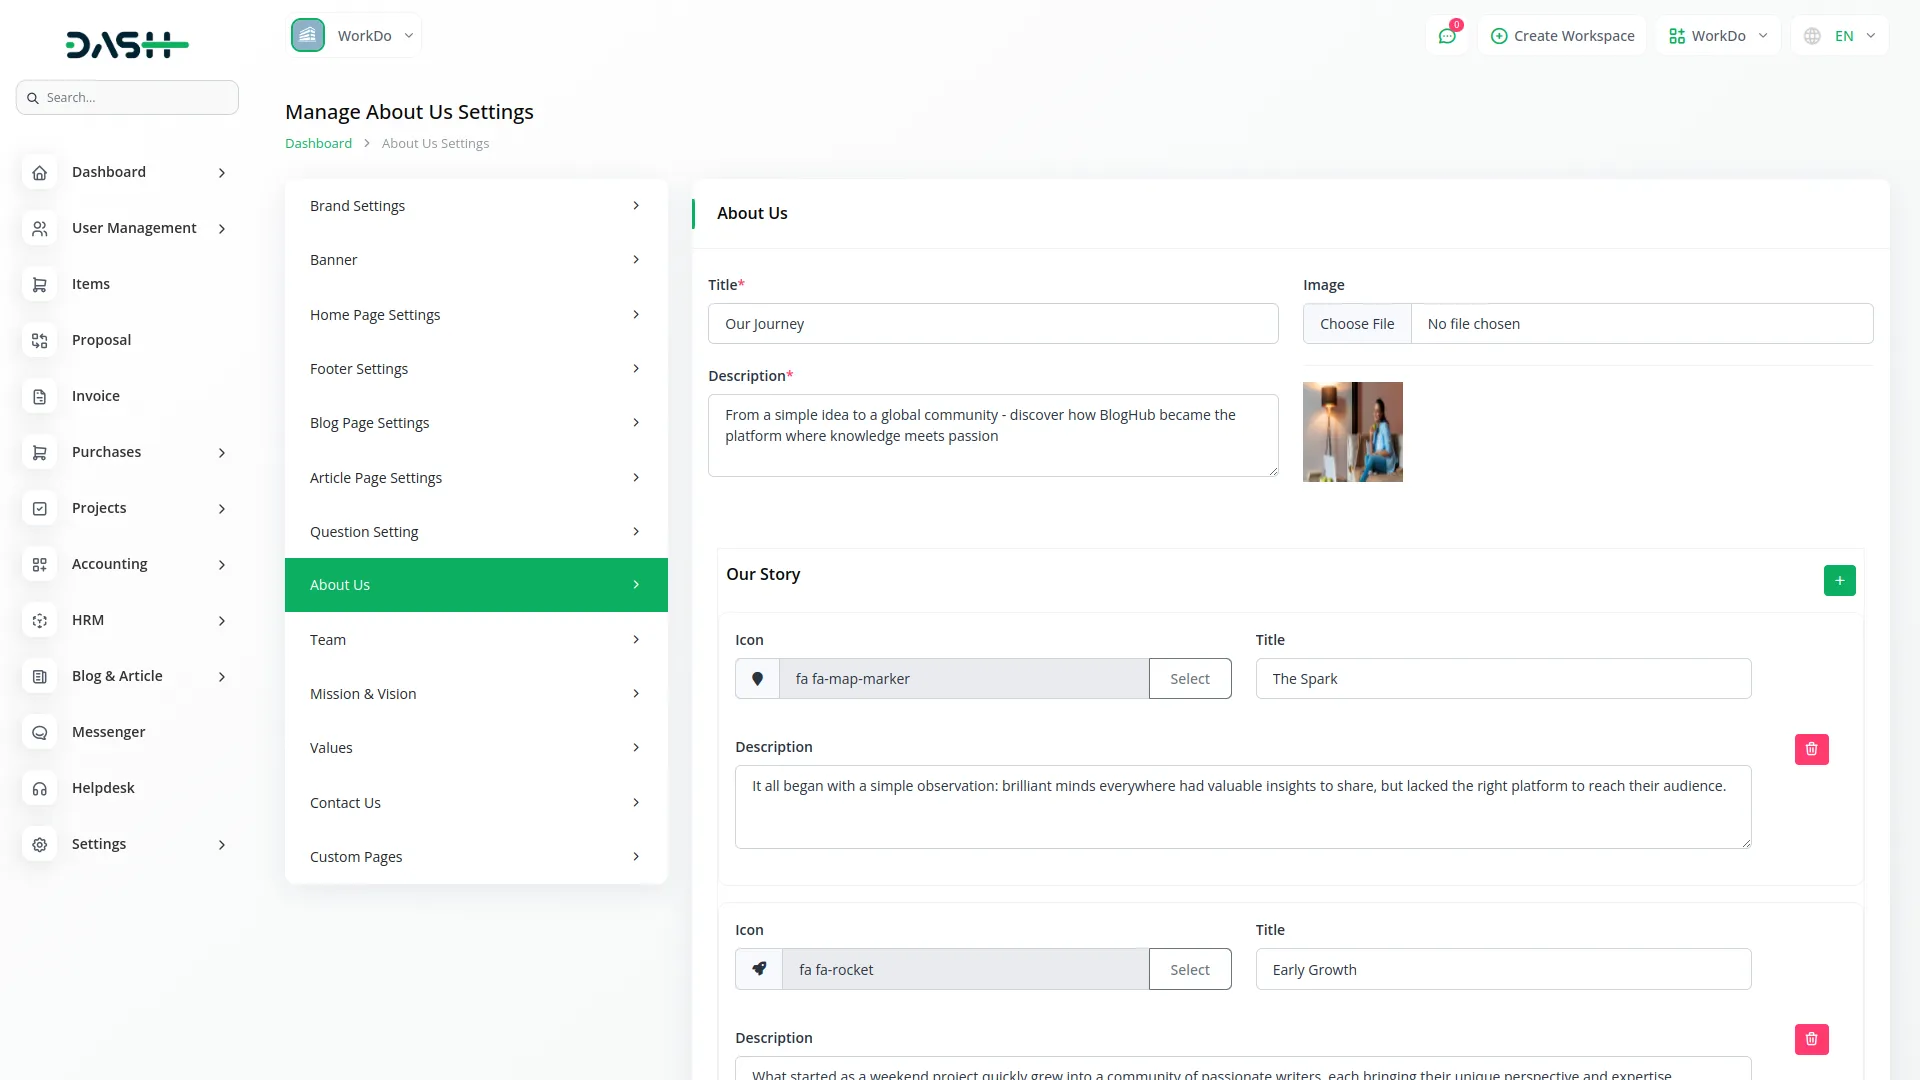
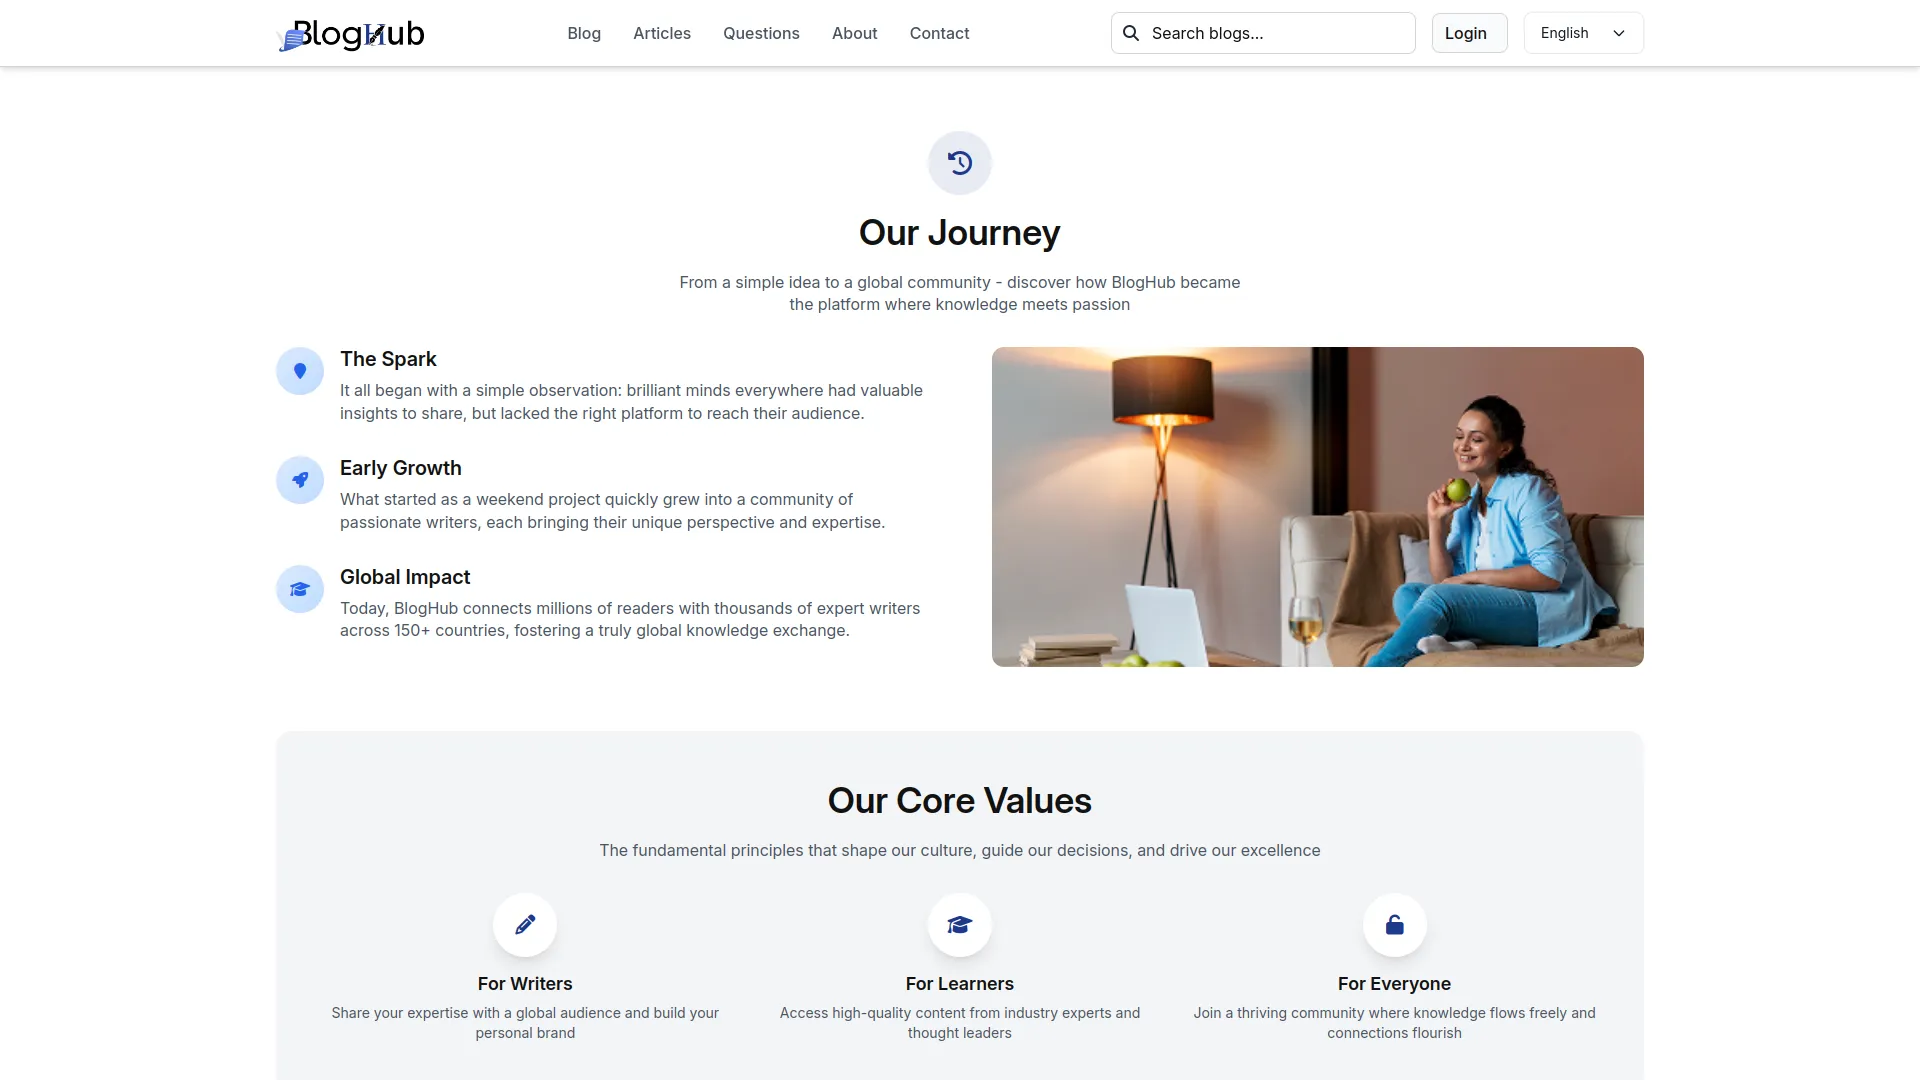
- In the About Us section, you will find fields for Title, Description, Image, and Our Story (Icon and Details). Enter the details and add multiple story points using the repeater section.
- Once saved, your Title, Description, and Image will appear in the banner section of your website’s About page, while the Our Story details with icons will display in the About page content area, providing comprehensive information about your organization.
Team
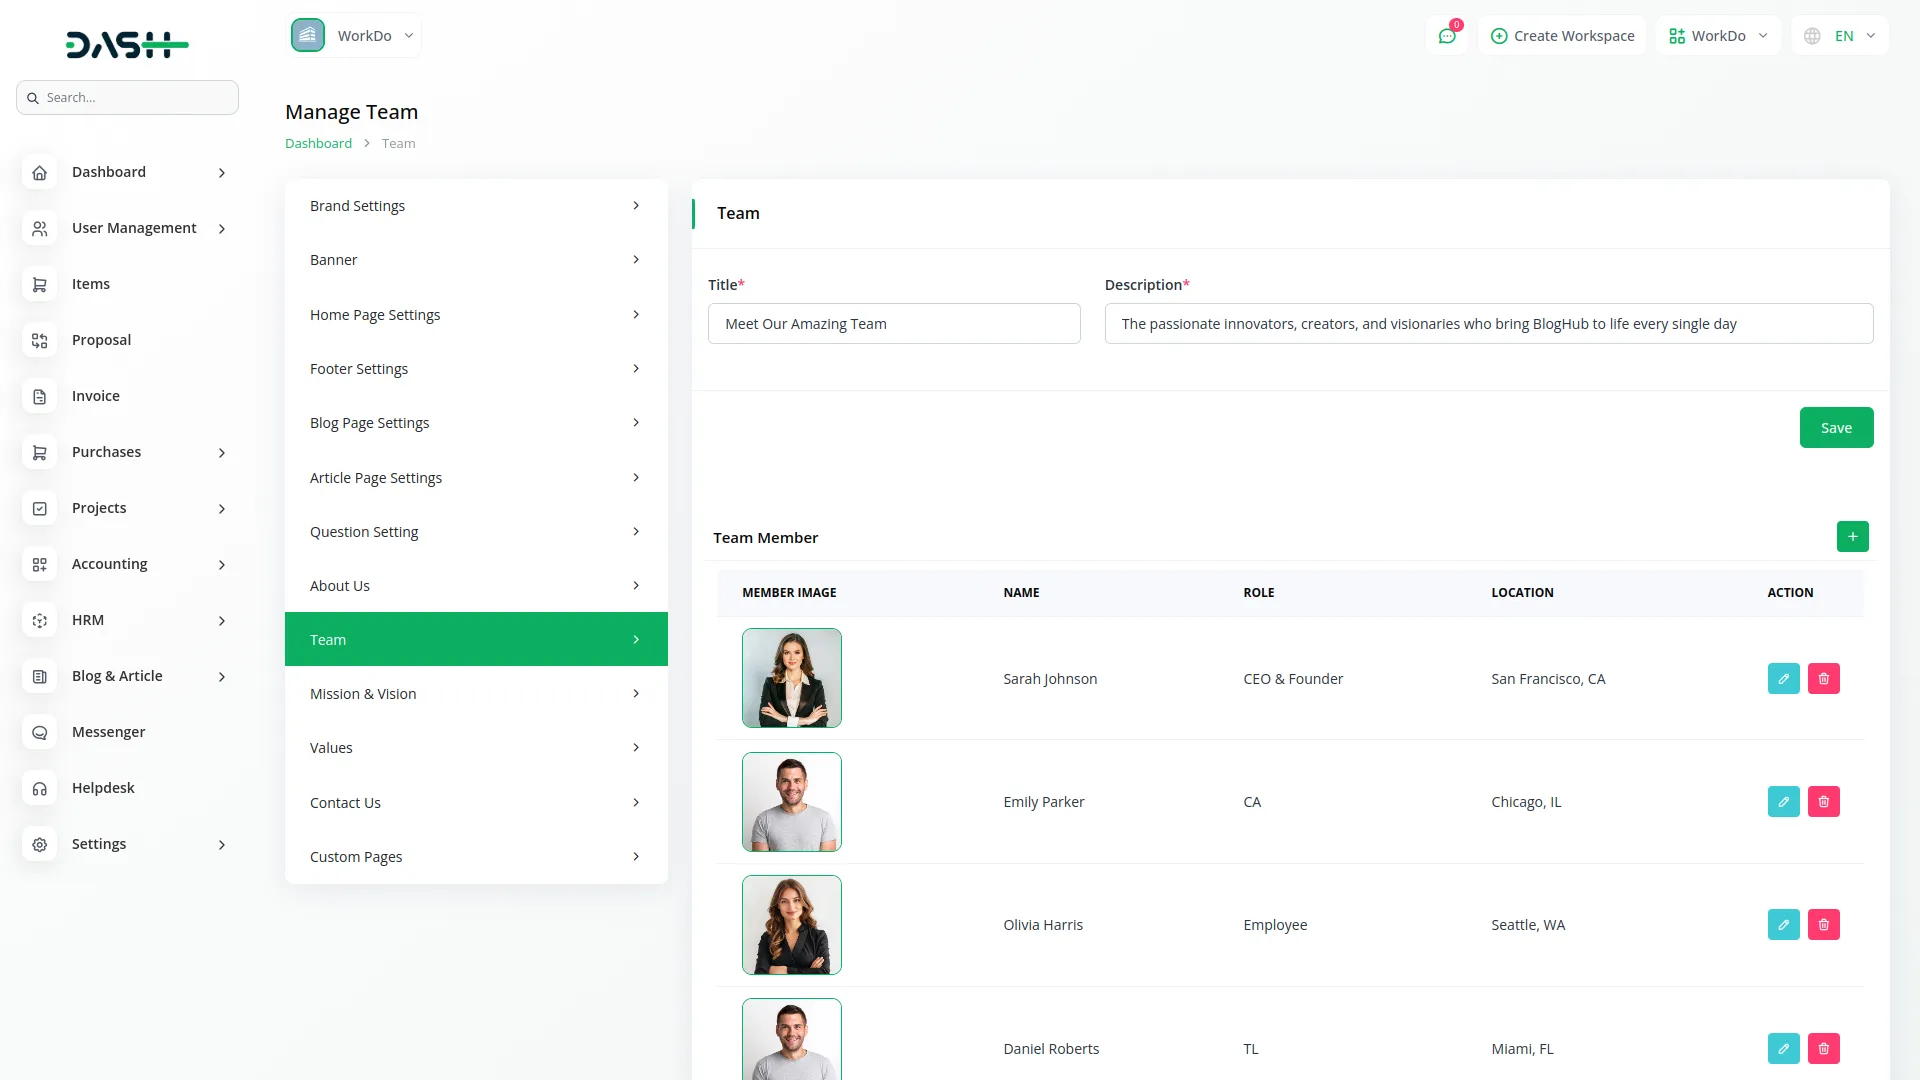
- In the Team section, you will find fields for Title, Description, Image, Member Image, Name, Role, and Location. Enter the main section details and add team members individually.
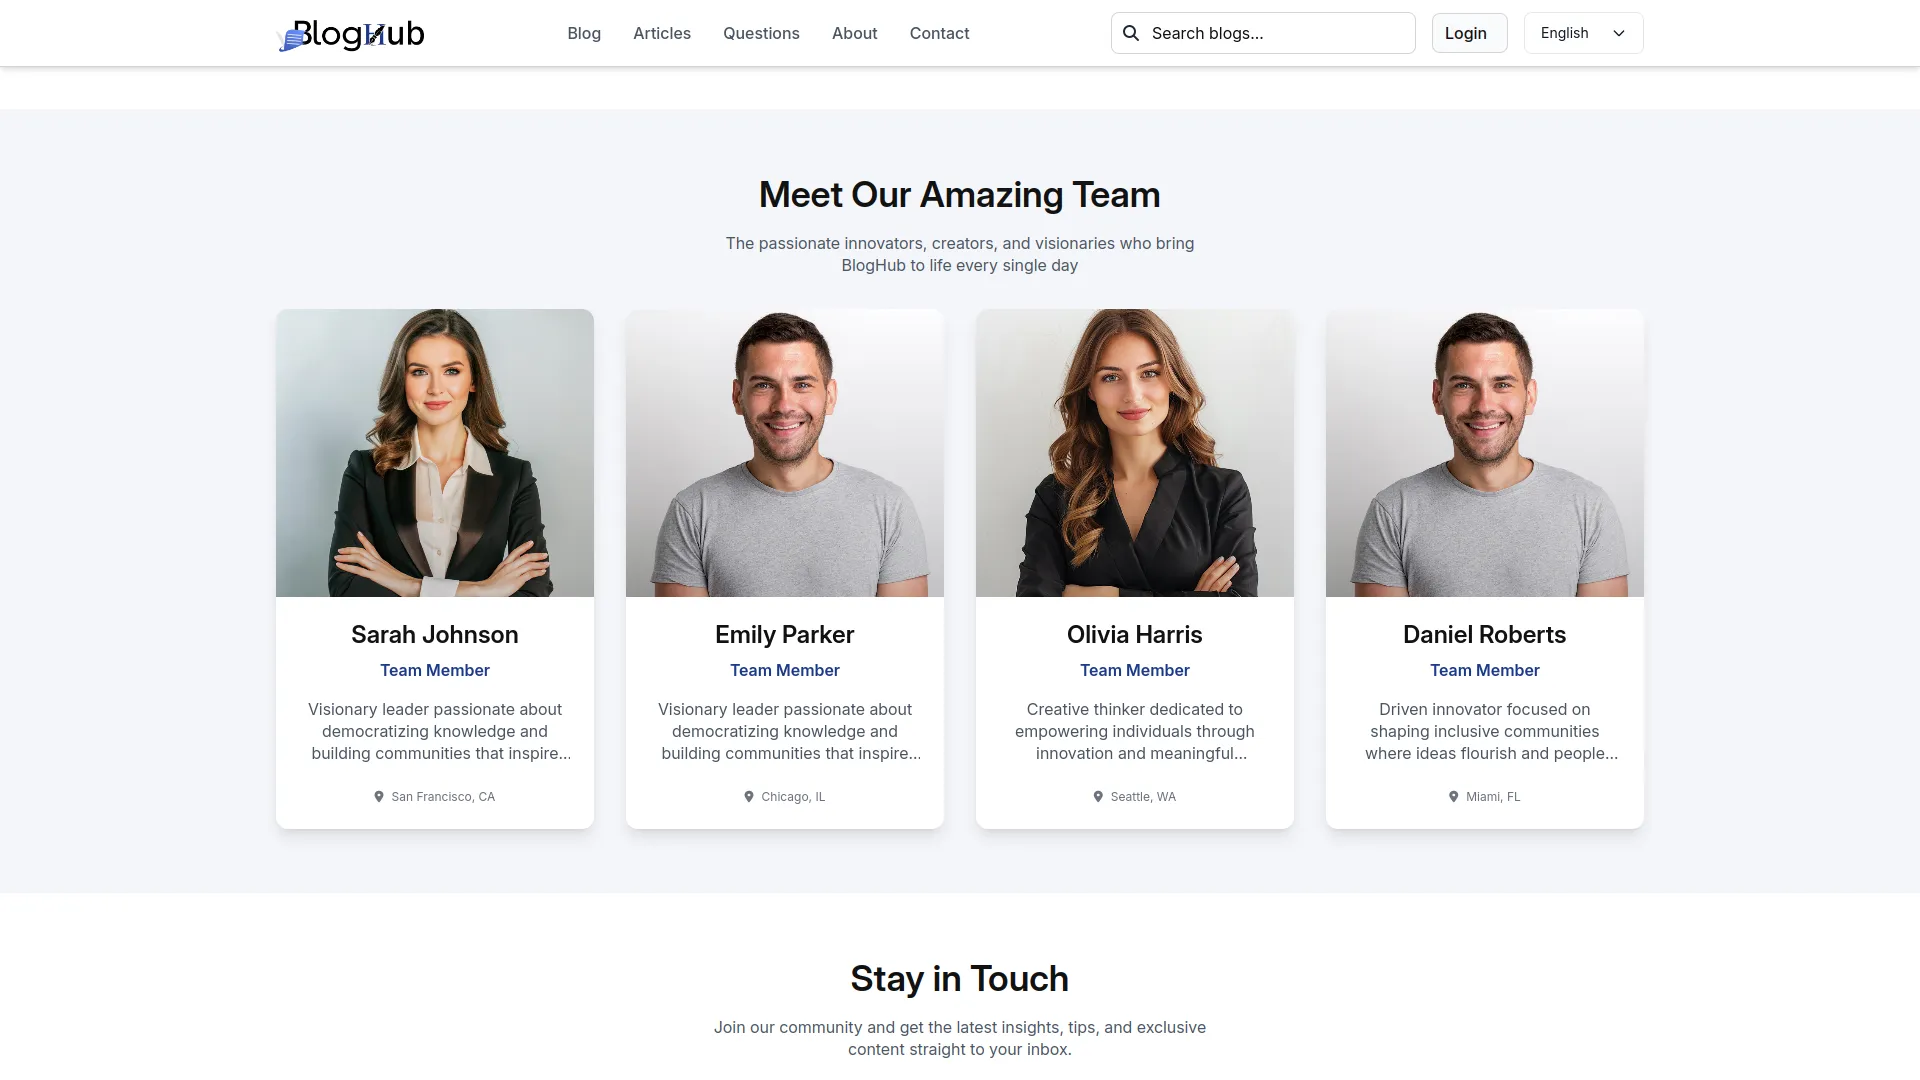
- Once saved, your Team Title, Description, and Image will appear in the team section header on your website’s About page, while individual team member details will display in the team member cards, showcasing your organization’s personnel.
Mission & Vision
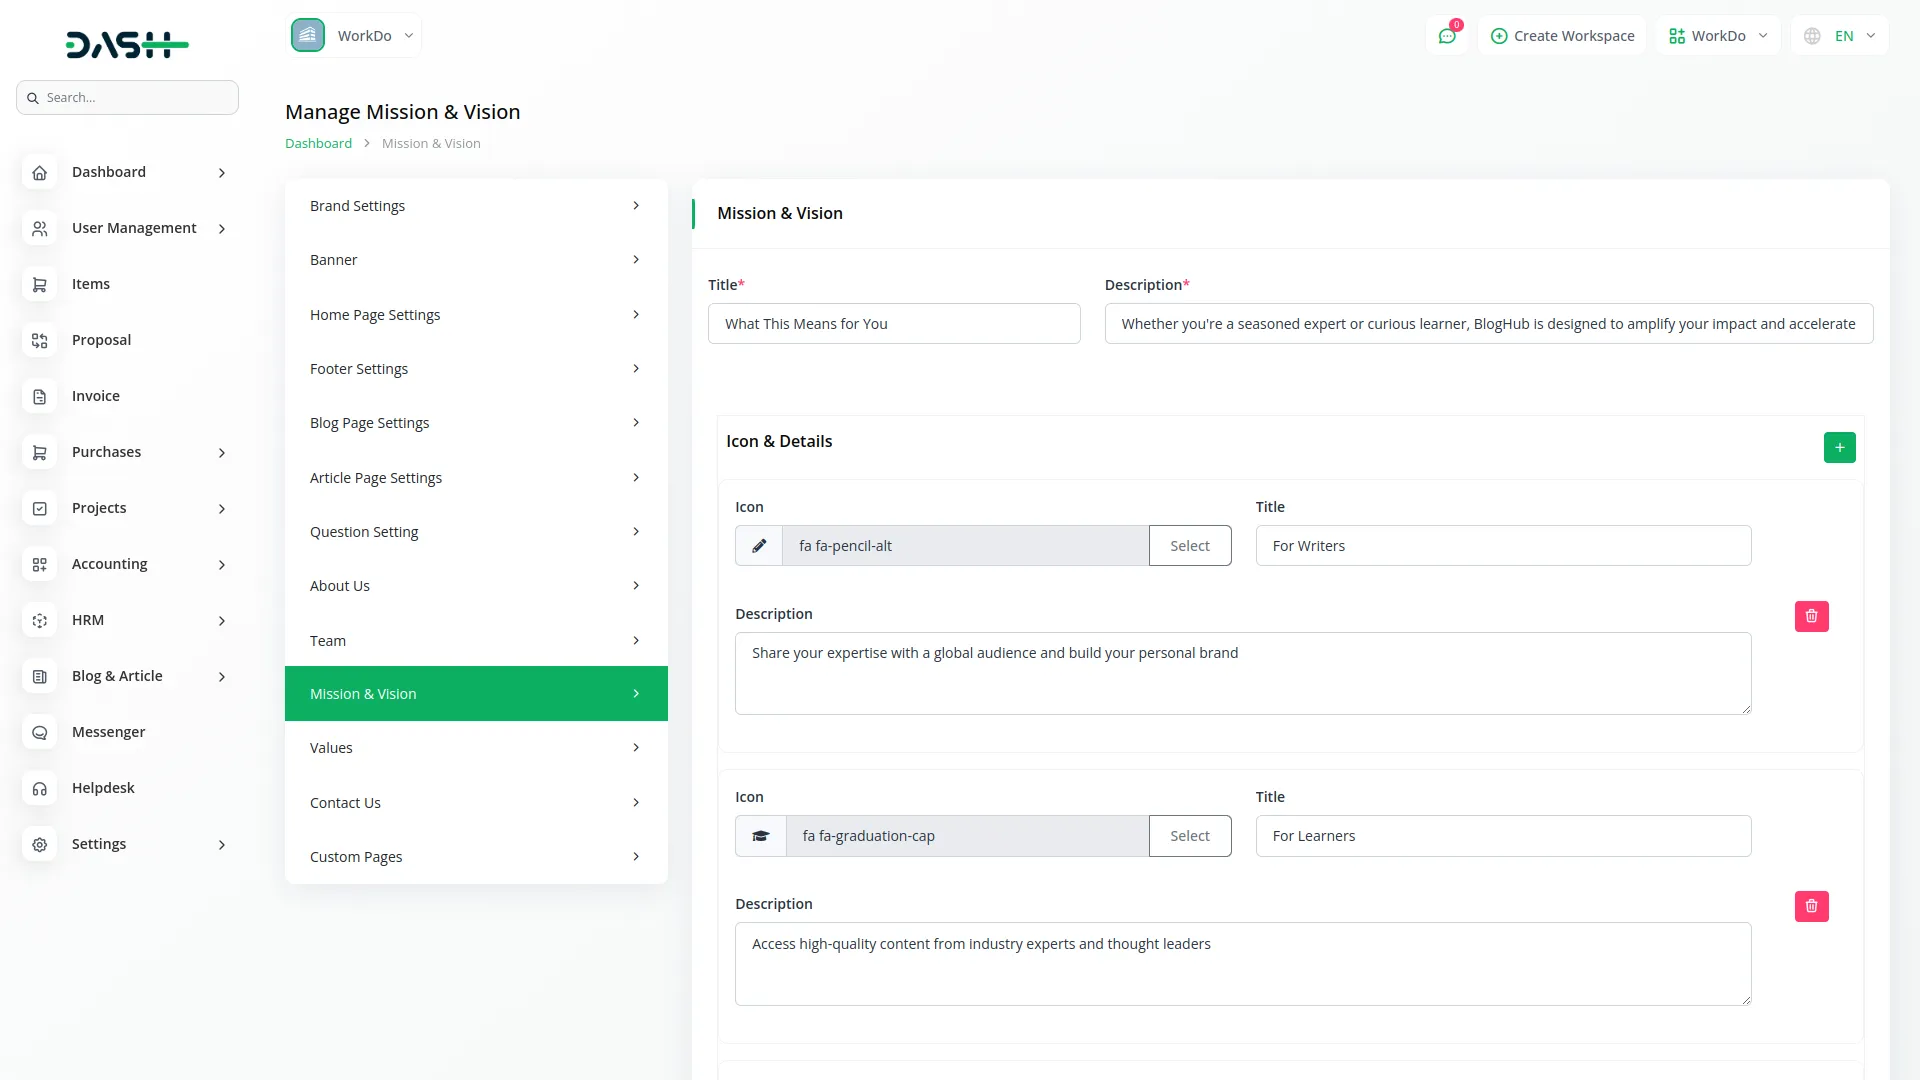
- In the Mission & Vision section, you will find fields for Title, Description, and Mission/Vision details (Icon and Details). Enter the main content and add multiple mission/vision points using the repeater section.
- Once saved, your Title and Description will appear in the mission & vision section header on your website’s About page, while the detailed points with icons will display in the mission & vision content area, communicating your organization’s purpose and goals.
Values
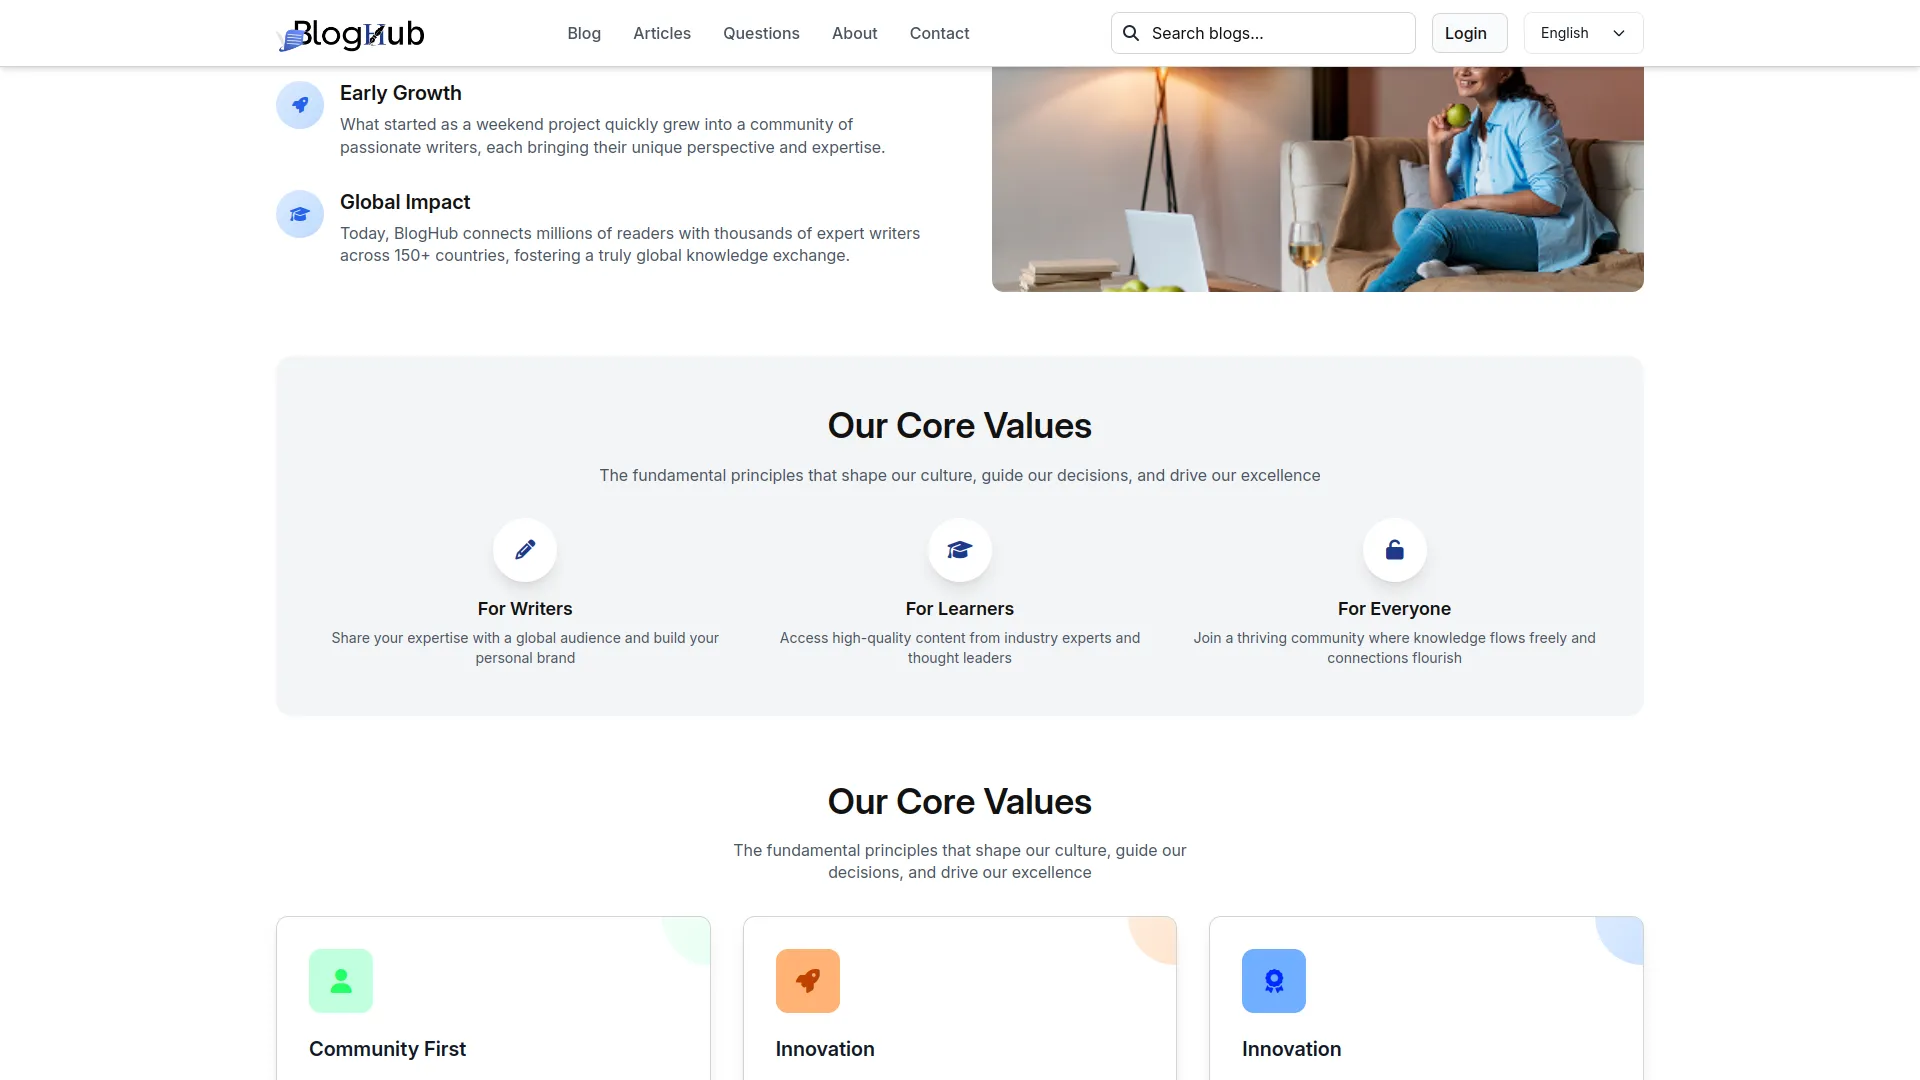
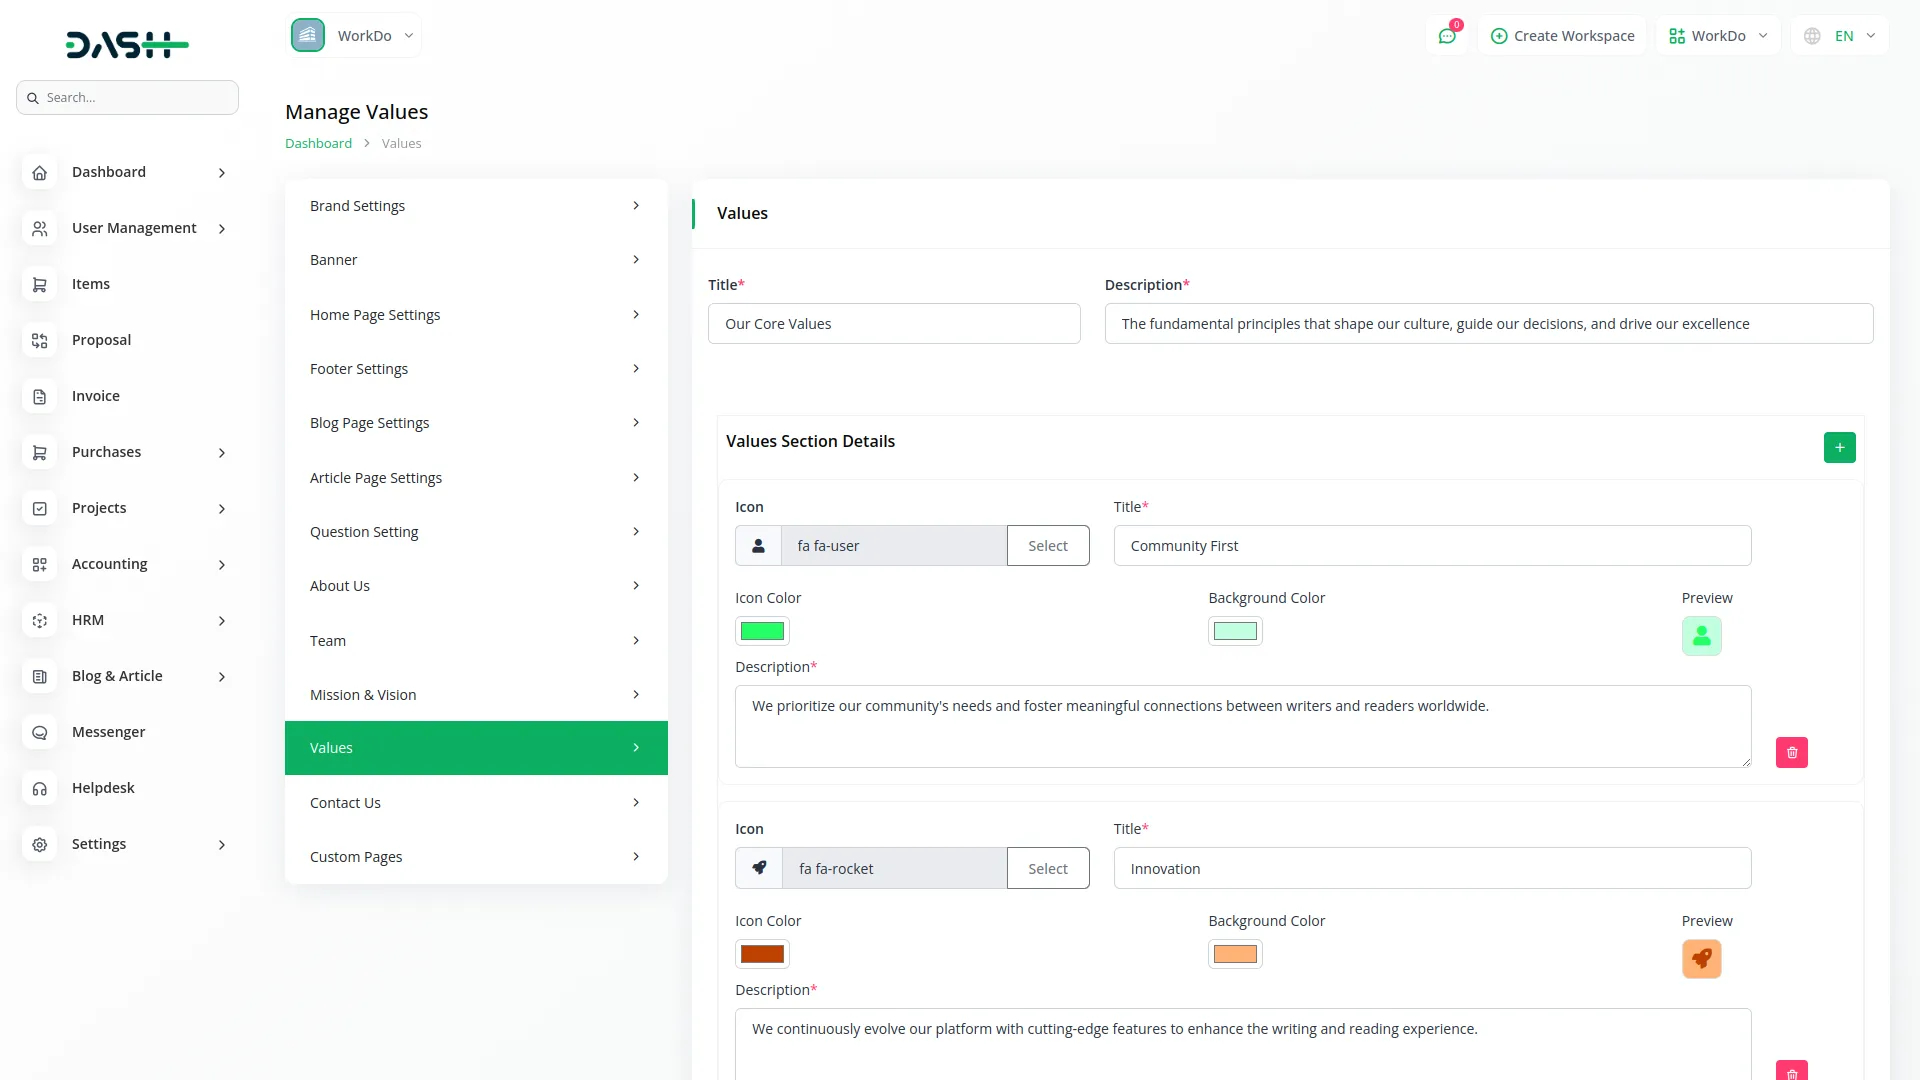
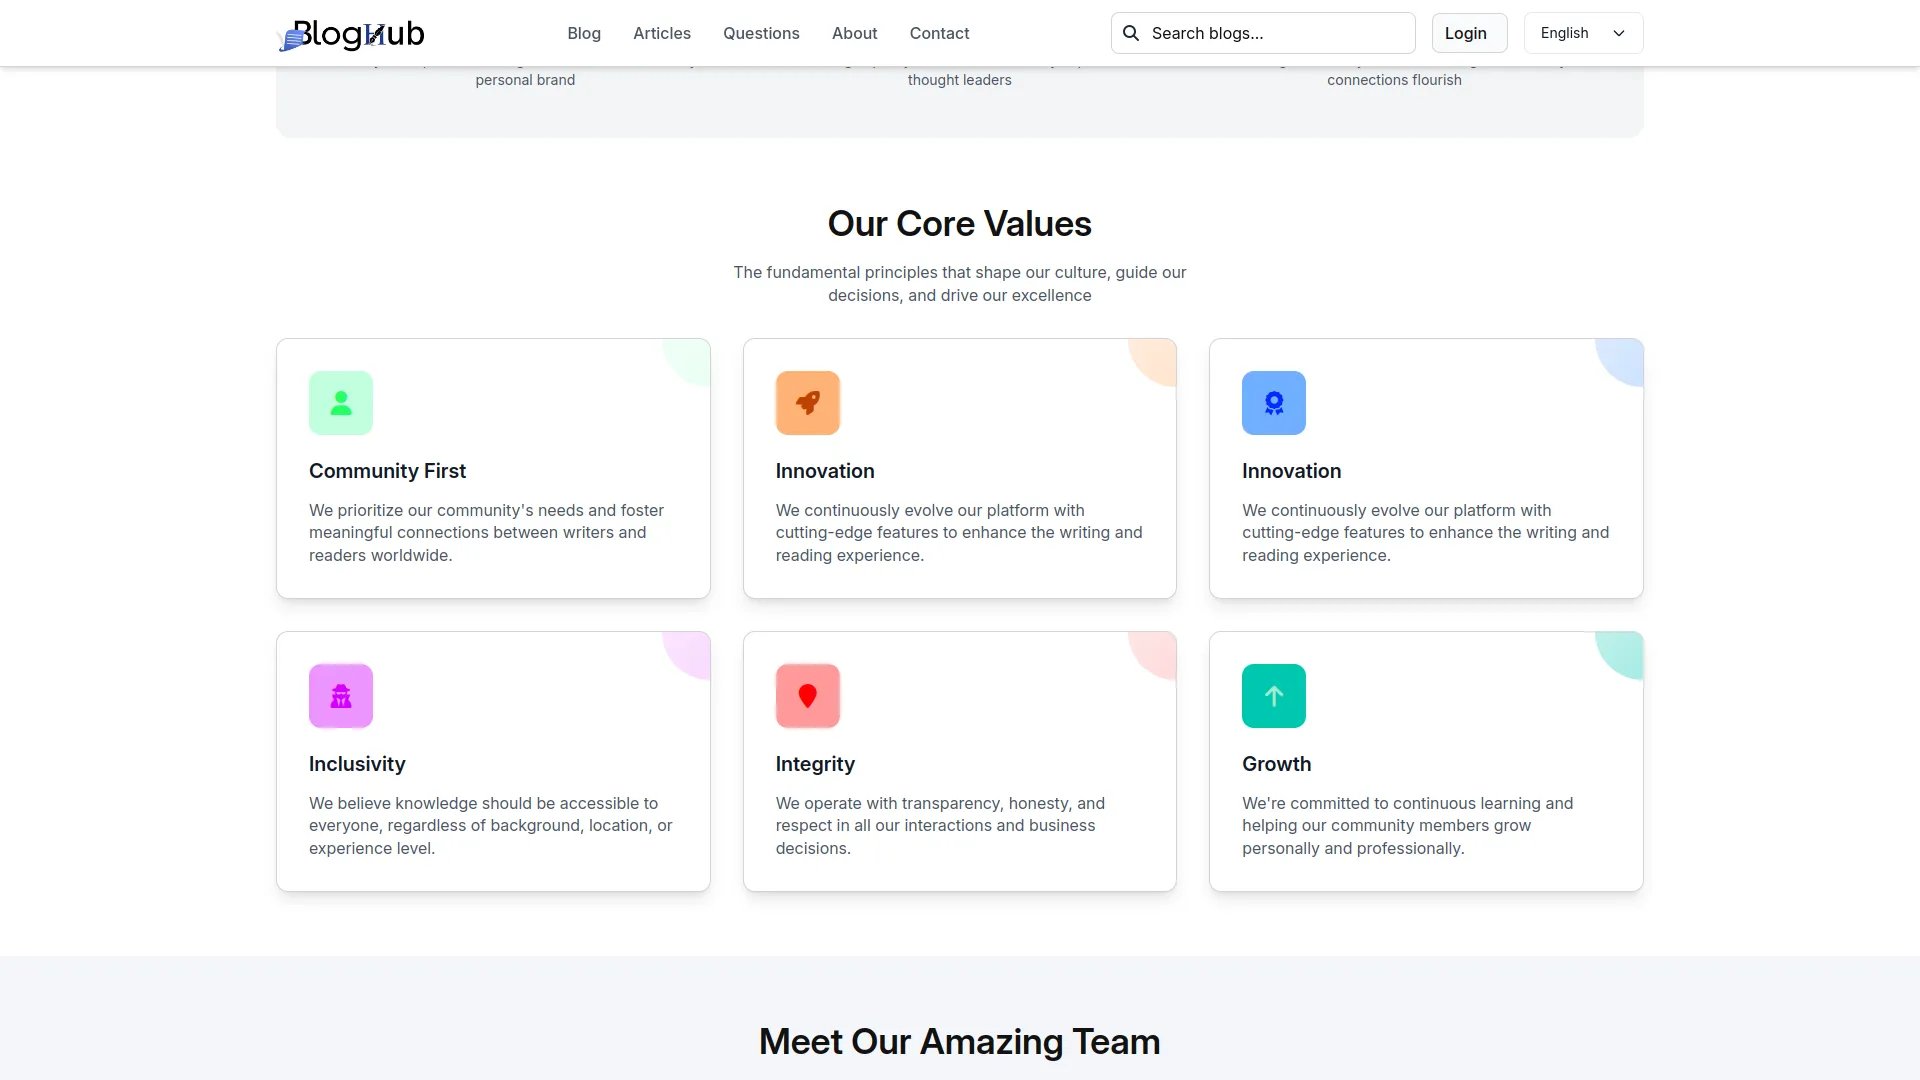
- In the Values section, you will find fields for Title, Description, and Values Section Details (Icon, Details, Background Color, and Icon Color). Enter the main content and add multiple values using the repeater section with color customization.
- Once saved, your Title and Description will appear in the values section header on your website’s About page, while the individual values with customized icons and colors will display in the core values section, highlighting your organization’s principles.
Contact Us Settings
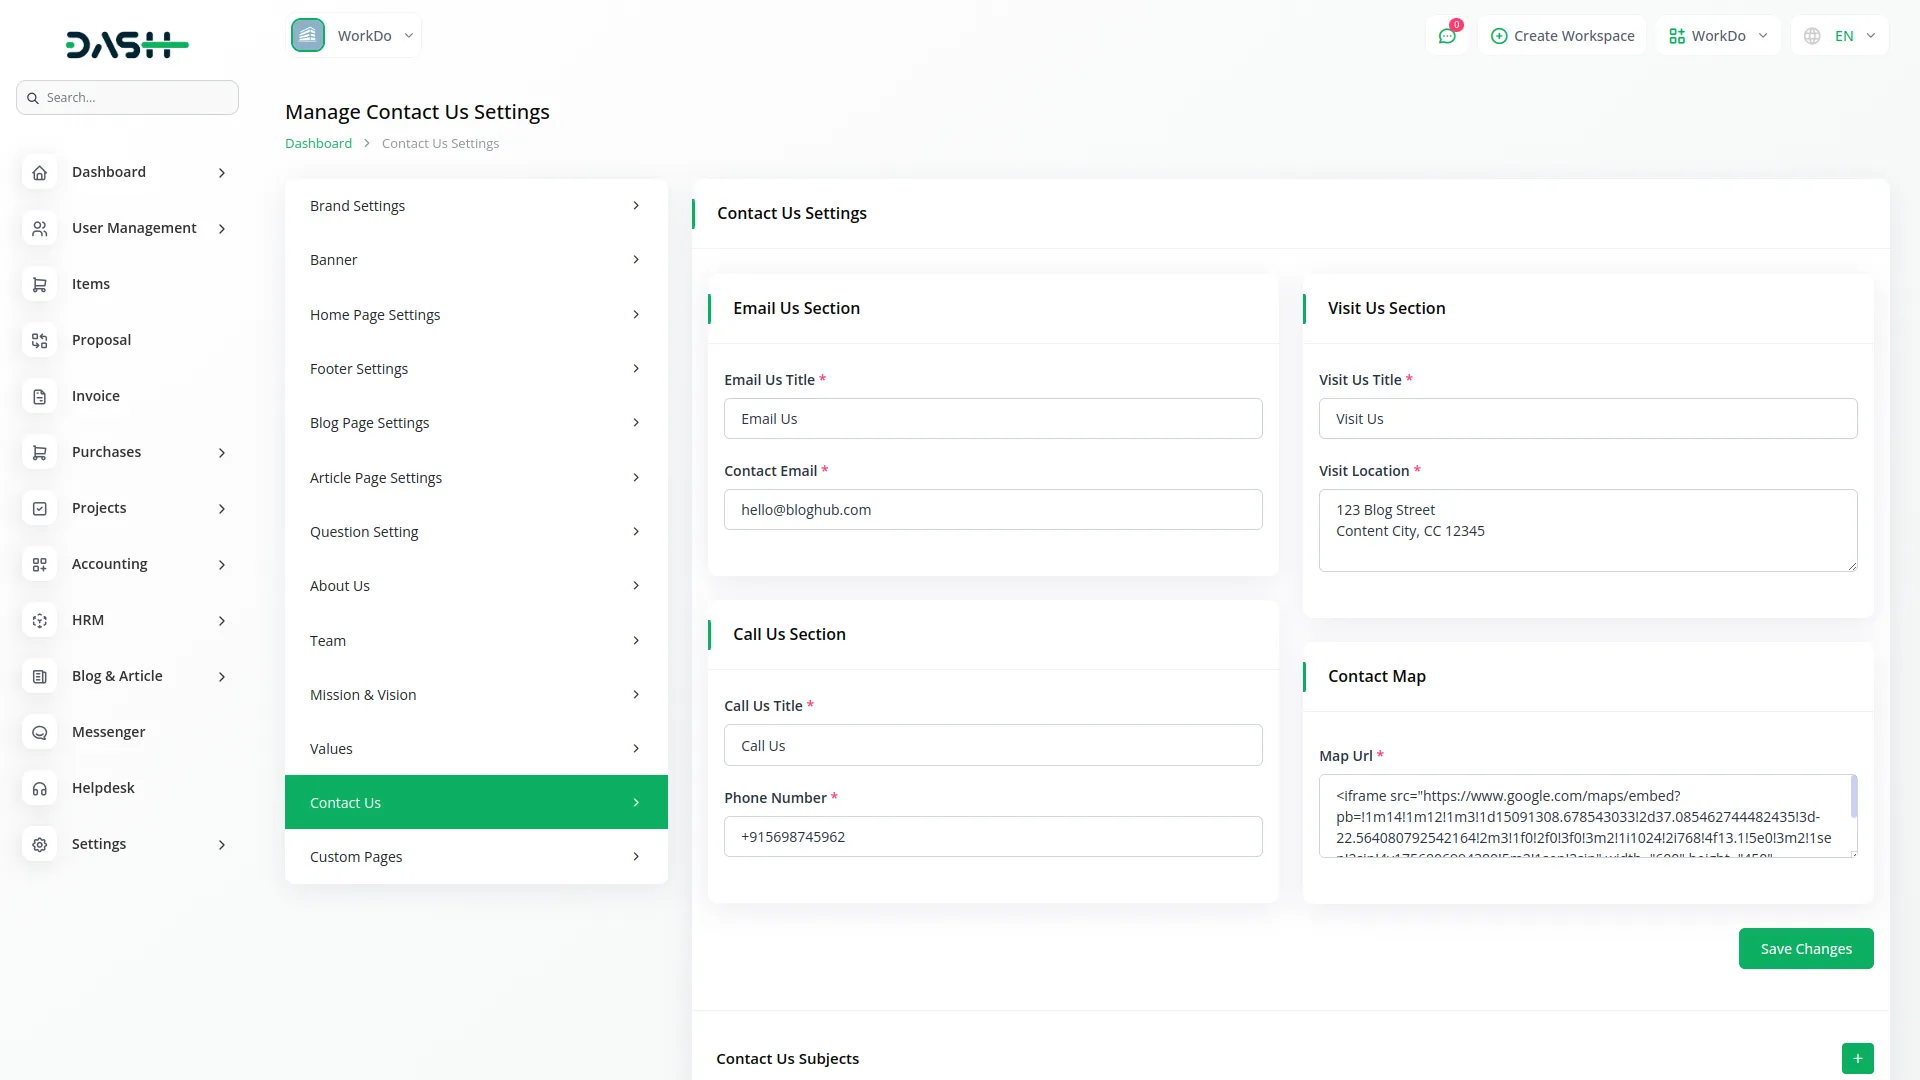
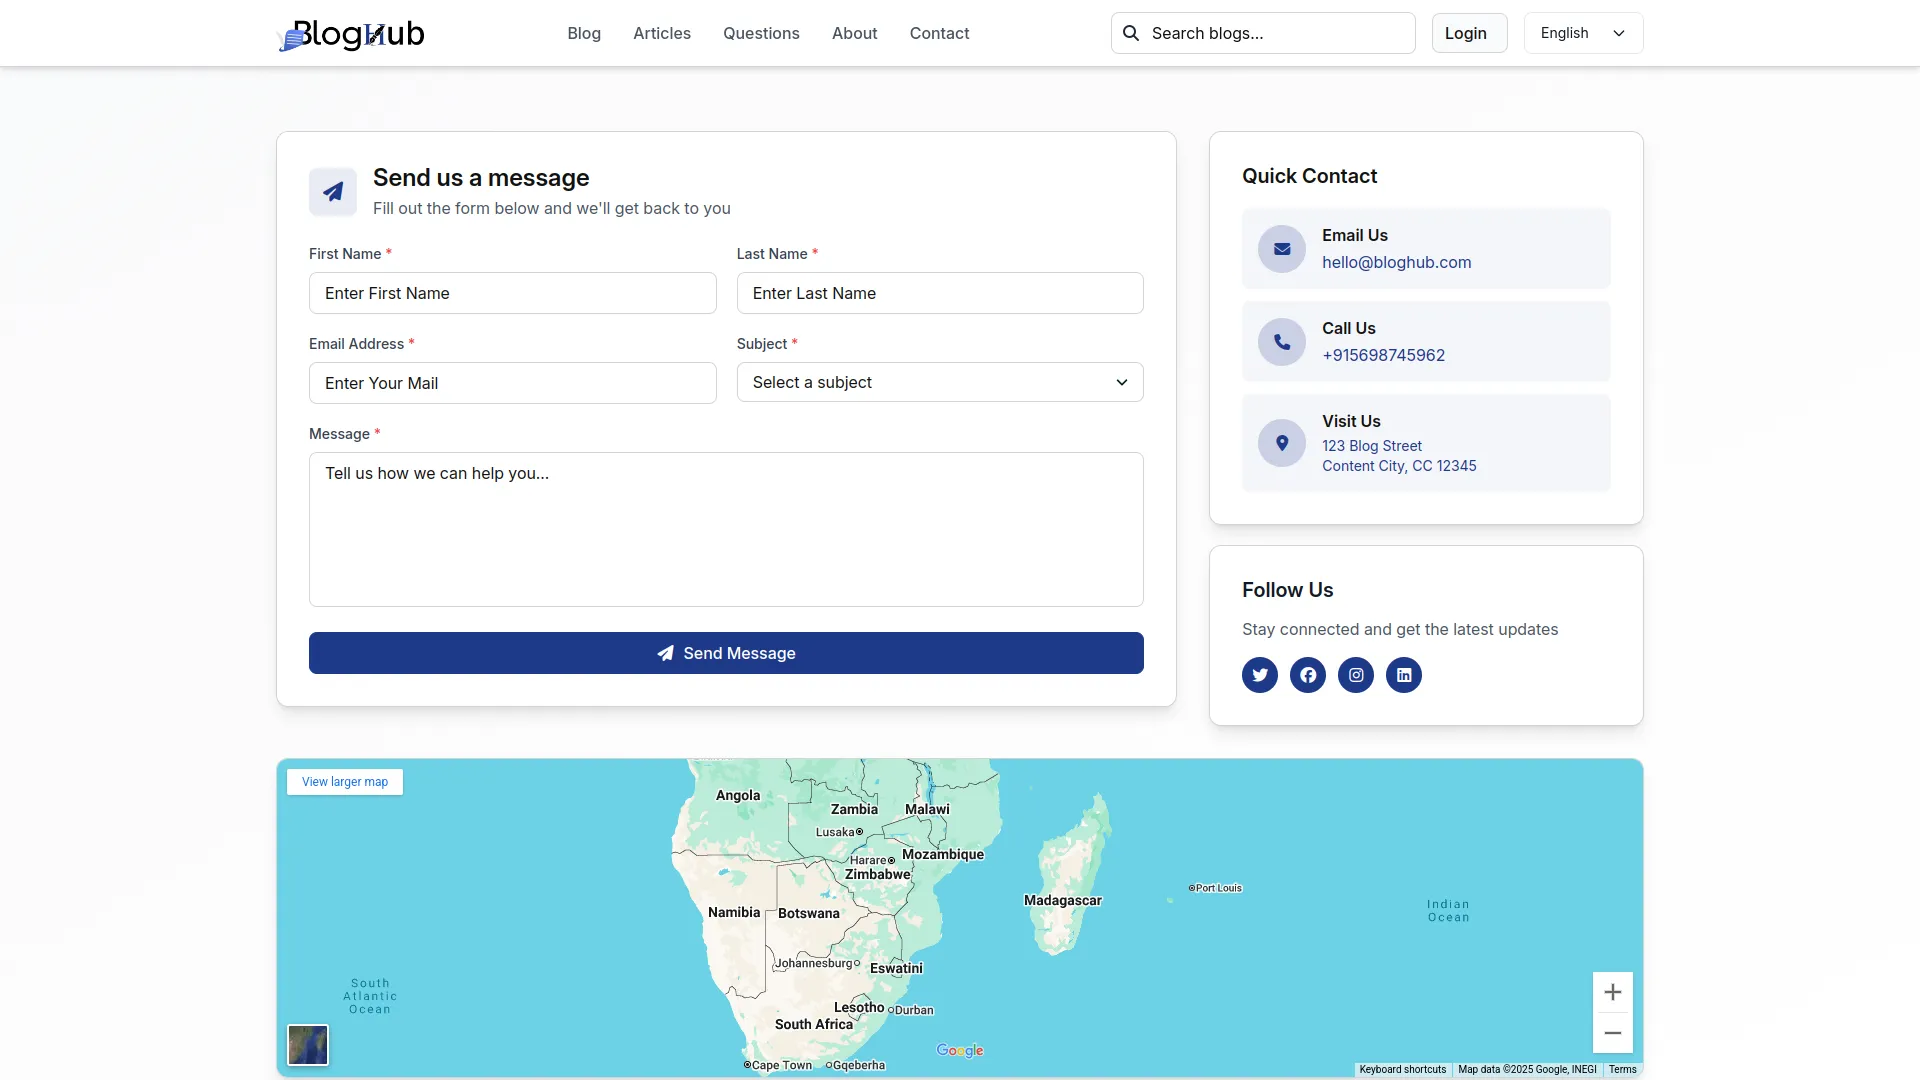
- In the Contact Us Settings section, you will find fields for Email Us Title, Email Address, Visit Us Title, Location, Call Us Title, Phone Number, and Subjects. Enter the details for each contact method and add subjects for the contact form.
- Once saved, your contact information will appear in their respective sections on your website’s Contact page – Email Us details in the quick contact area, Visit Us information with map integration, Call Us details for phone contact, and Subjects will appear as dropdown options in the contact form for visitors to select when submitting messages.
Custom Page
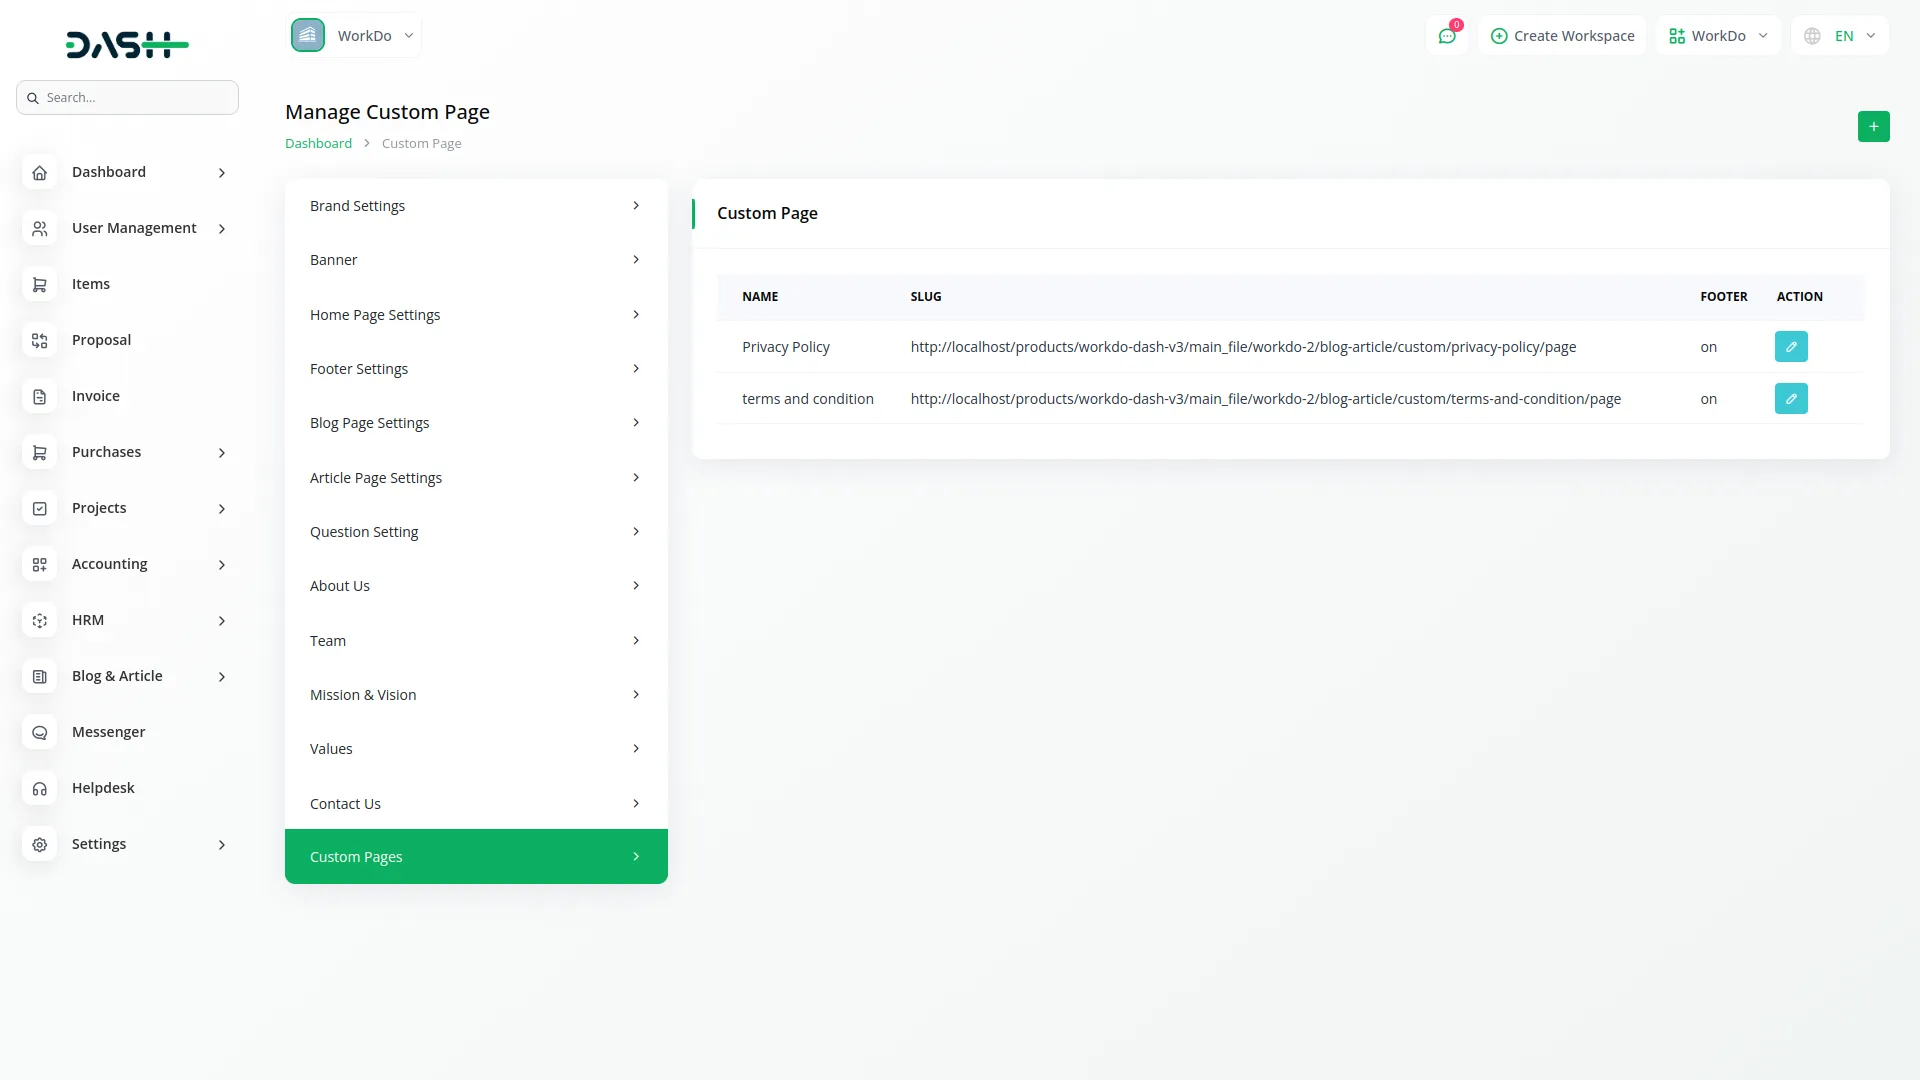
- In the Custom Page section, click the “Create” button, and you will find fields for Title and Content with the footer on/off toggle button. Enter the page title and detailed content. The list displays all the data of the custom page, including name, slug, and footer stat, us On/Off. With the help of the section column, you can use the edit or delete functionality to modify data.
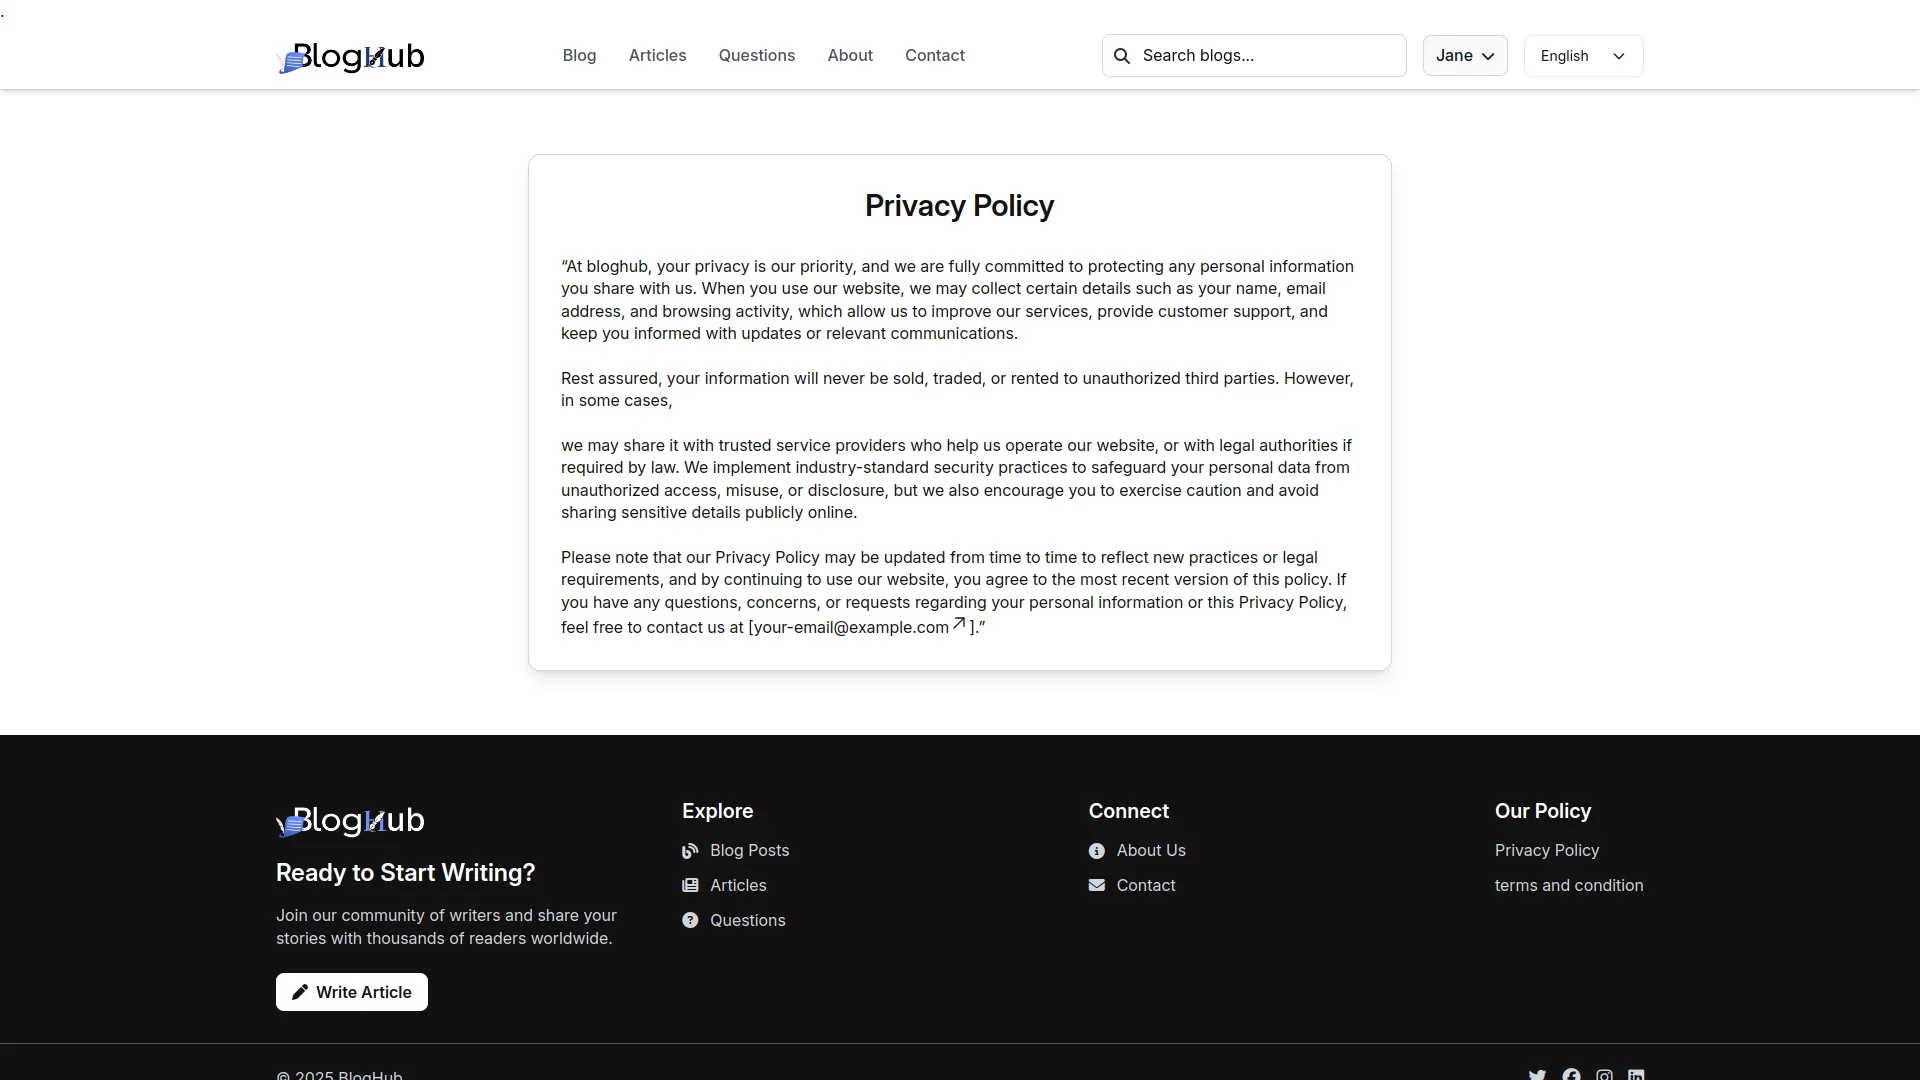
- Once saved, your custom pages will automatically appear as navigation links in your website’s footer section, allowing visitors to access additional information pages you’ve created, expanding your website’s content beyond the standard pages.
BlogAndArticle Dashboard
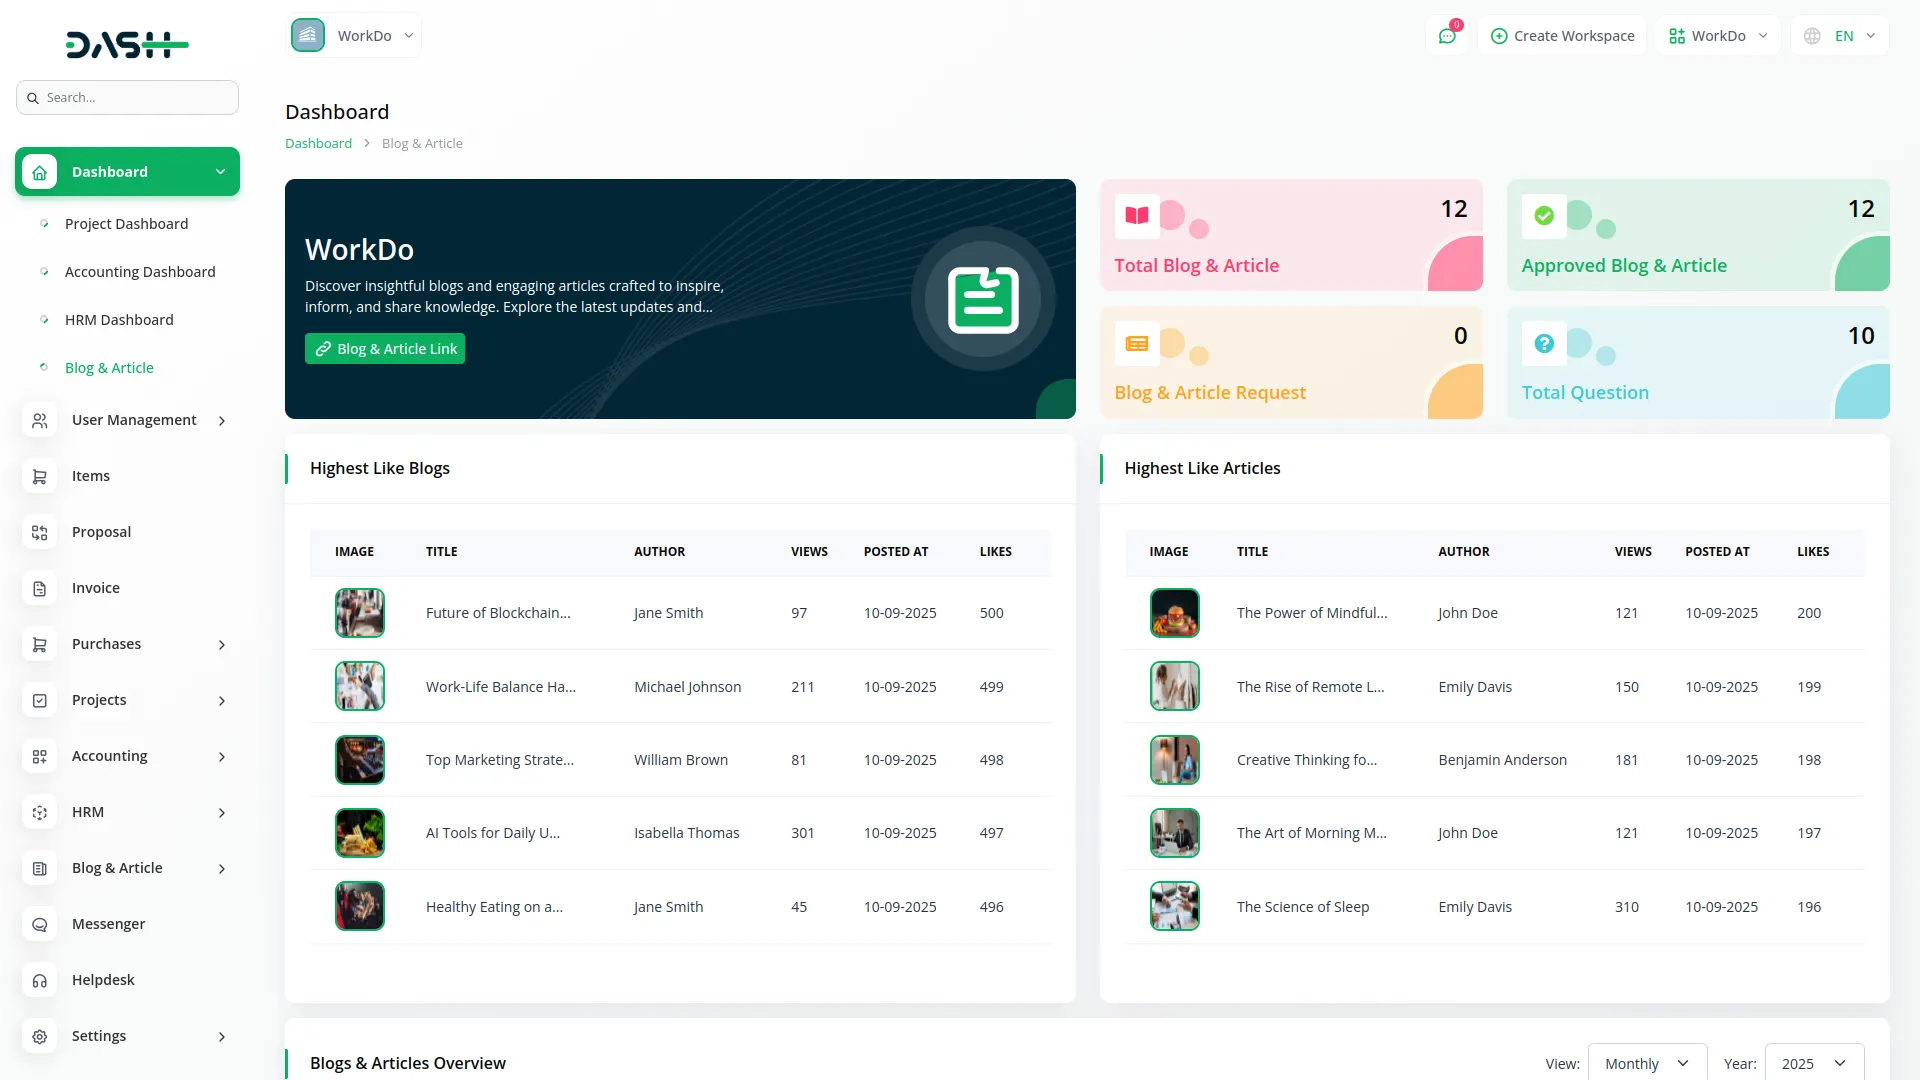
- After purchasing and installing this Add-On, go to the sidebar and search for the BlogAndArticle Management Add-On. First, you will see the BlogAndArticle dashboard.
- At the top of the dashboard, you’ll find a Store Link section where you can copy your website’s URL for sharing. Below that are four summary cards displaying Total Blog & Article count, Approved Blog & Article count, Blog & Article Request count, and Total 3-Question count.
- The dashboard features two tables showing your top-performing content. The first table displays the 5 blogs with the highest likes, while the second table shows the 5 articles with the highest likes, helping you identify your most popular content.
- The Blogs & Articles Overview chart provides visual insights into your content creation patterns. You can view daily data for the last 7 days to see how many blogs and articles were created each day, or switch to monthly view to see the yearly breakdown of content creation for any selected year.
Blog & Article
- To create a new Blog or Article, click the “Create” button at the top of the page. The form is organized into two main tabs.
- In the Details Tab, start by selecting the Type from the dropdown (Blog or Article). Enter the Title, Video URL if applicable, and configure your publishing settings.
- The Post Status toggle button controls whether your content is Published (toggle ON) or saved as Draft (toggle OFF). When set to Draft, the content won’t appear on the website. The Show On Display toggle determines if your content appears in the featured section on the website’s main page.
- Select the Topic from the available options in System Setup, add relevant Tags, choose a Category from System Setup, and select the Content Type from System Setup. Upload an Image and write your Description. In the Social Links section, you can add multiple social media links by clicking the add button for each new link (Icon and Link fields).
- In the Meta Details Tab, enter the Meta Title, Meta Description, and Meta Keywords for SEO optimization.
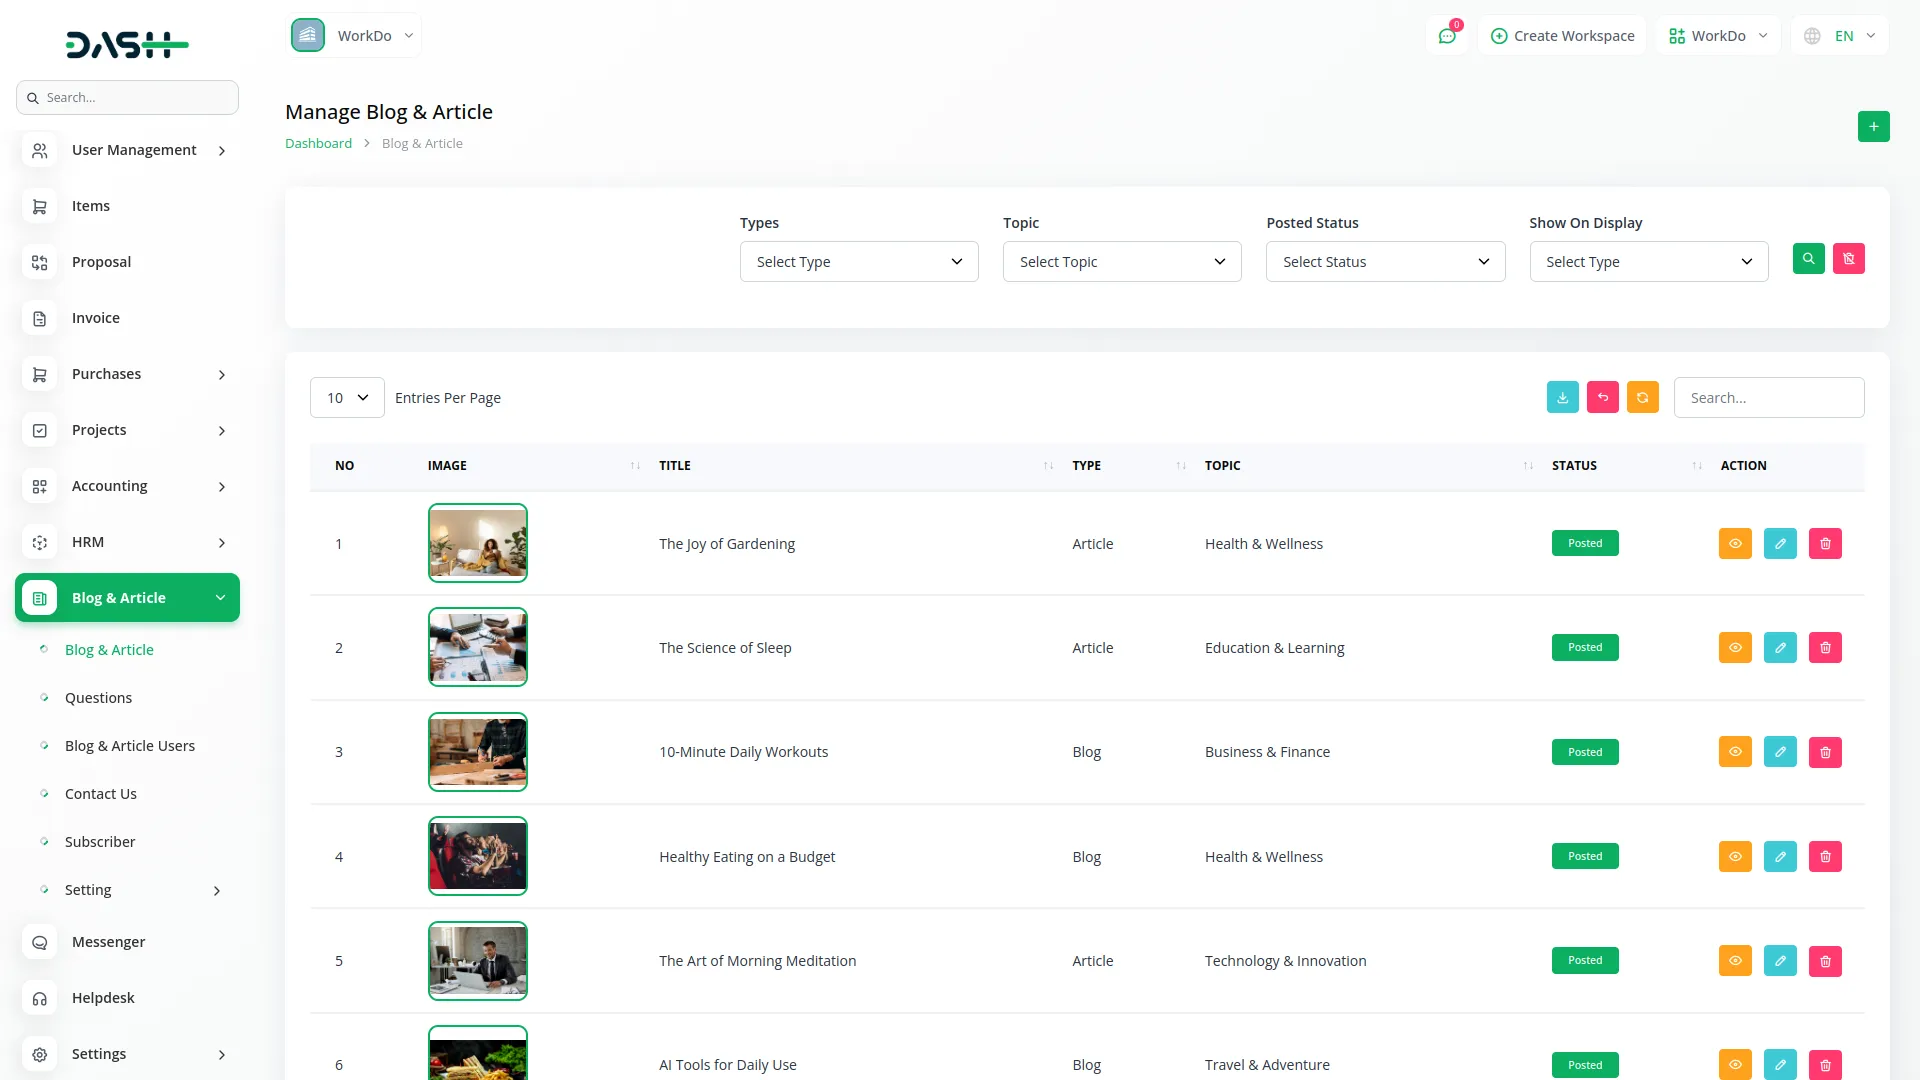
- The list page displays all blogs and articles with Search, Export, and Create buttons at the top. Use the filters to narrow results by Type (Blog/Article), Topic, Post Status (Posted/Draft), and Show On Display status. The table shows columns for Number, Title, Type, Topic, Status, and Actions.
- Available actions include View (to see complete blog or article details), Approve (user-created blog/article company can approve the blog/article), Edit, and Delete. The Edit function opens the same form as Create, with an additional Extra Content section where you can create, edit, and delete supplementary content pieces with their own images and text.
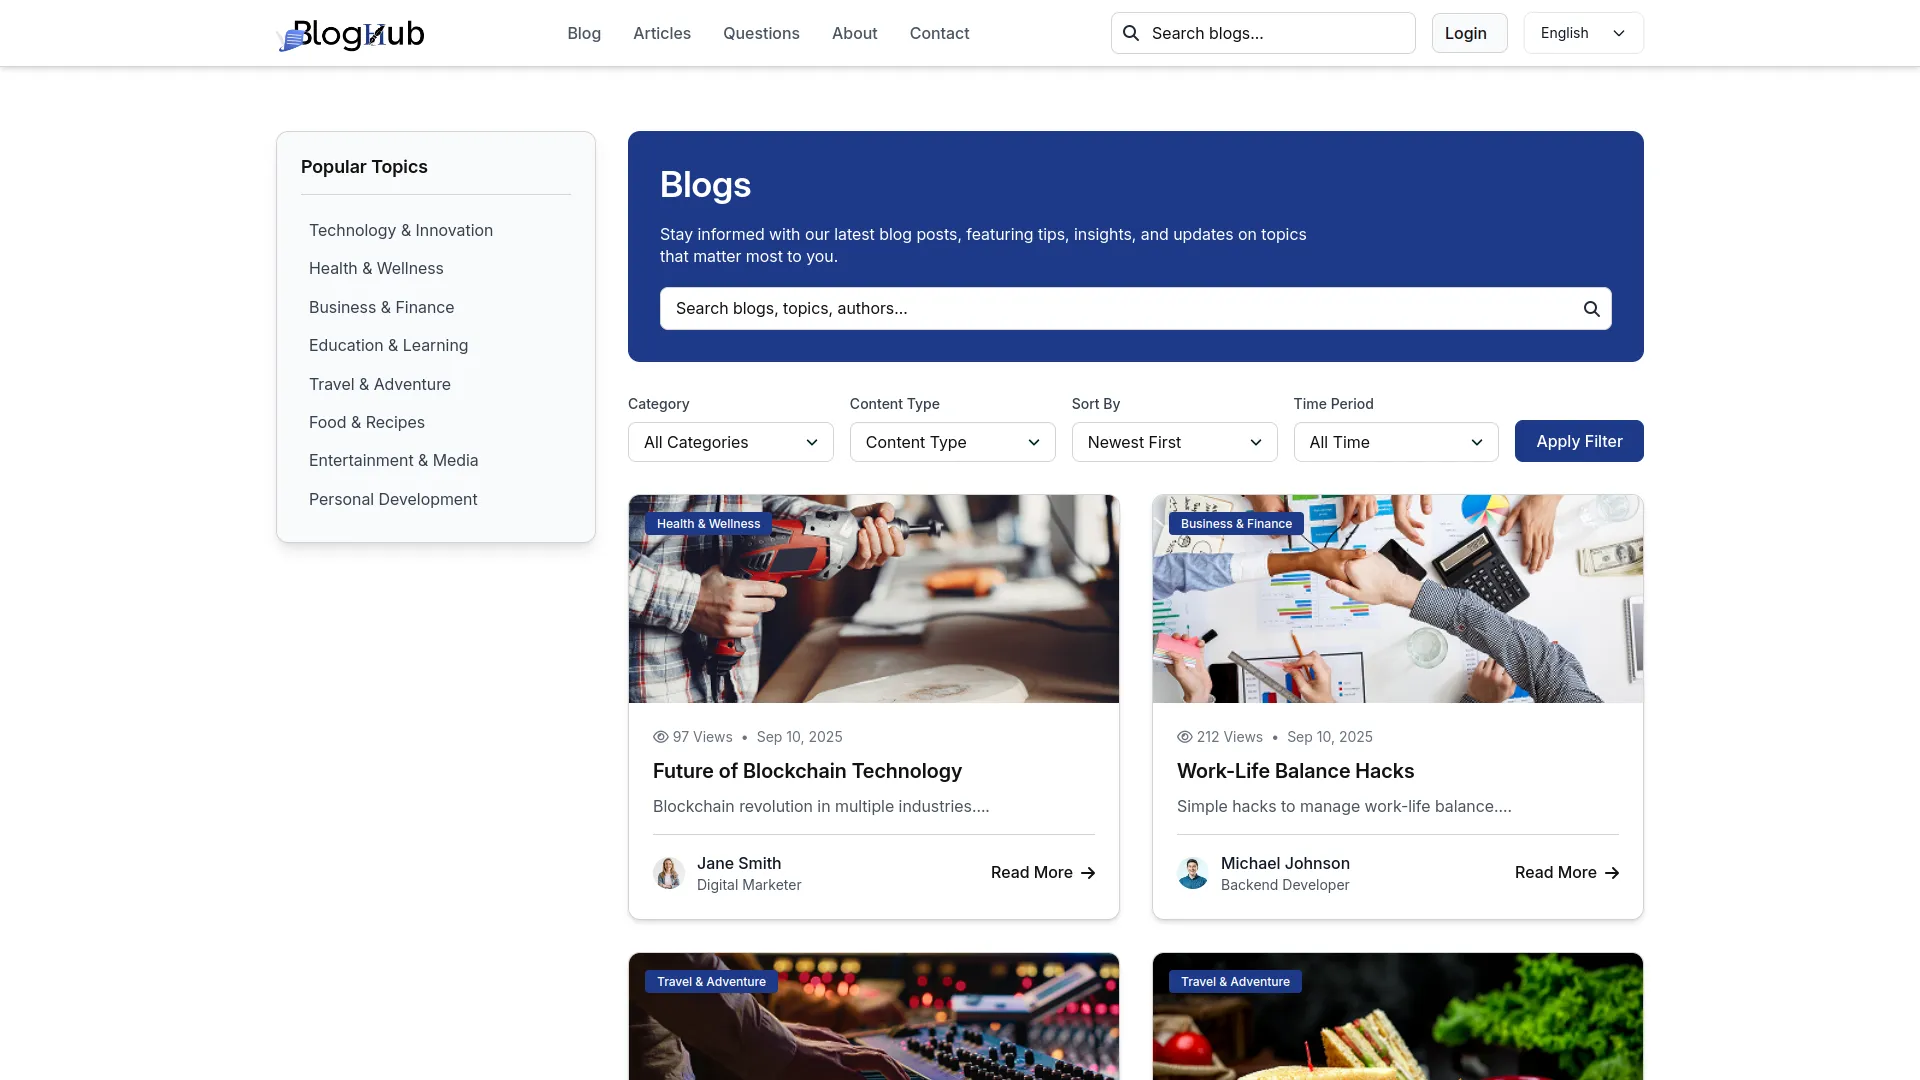
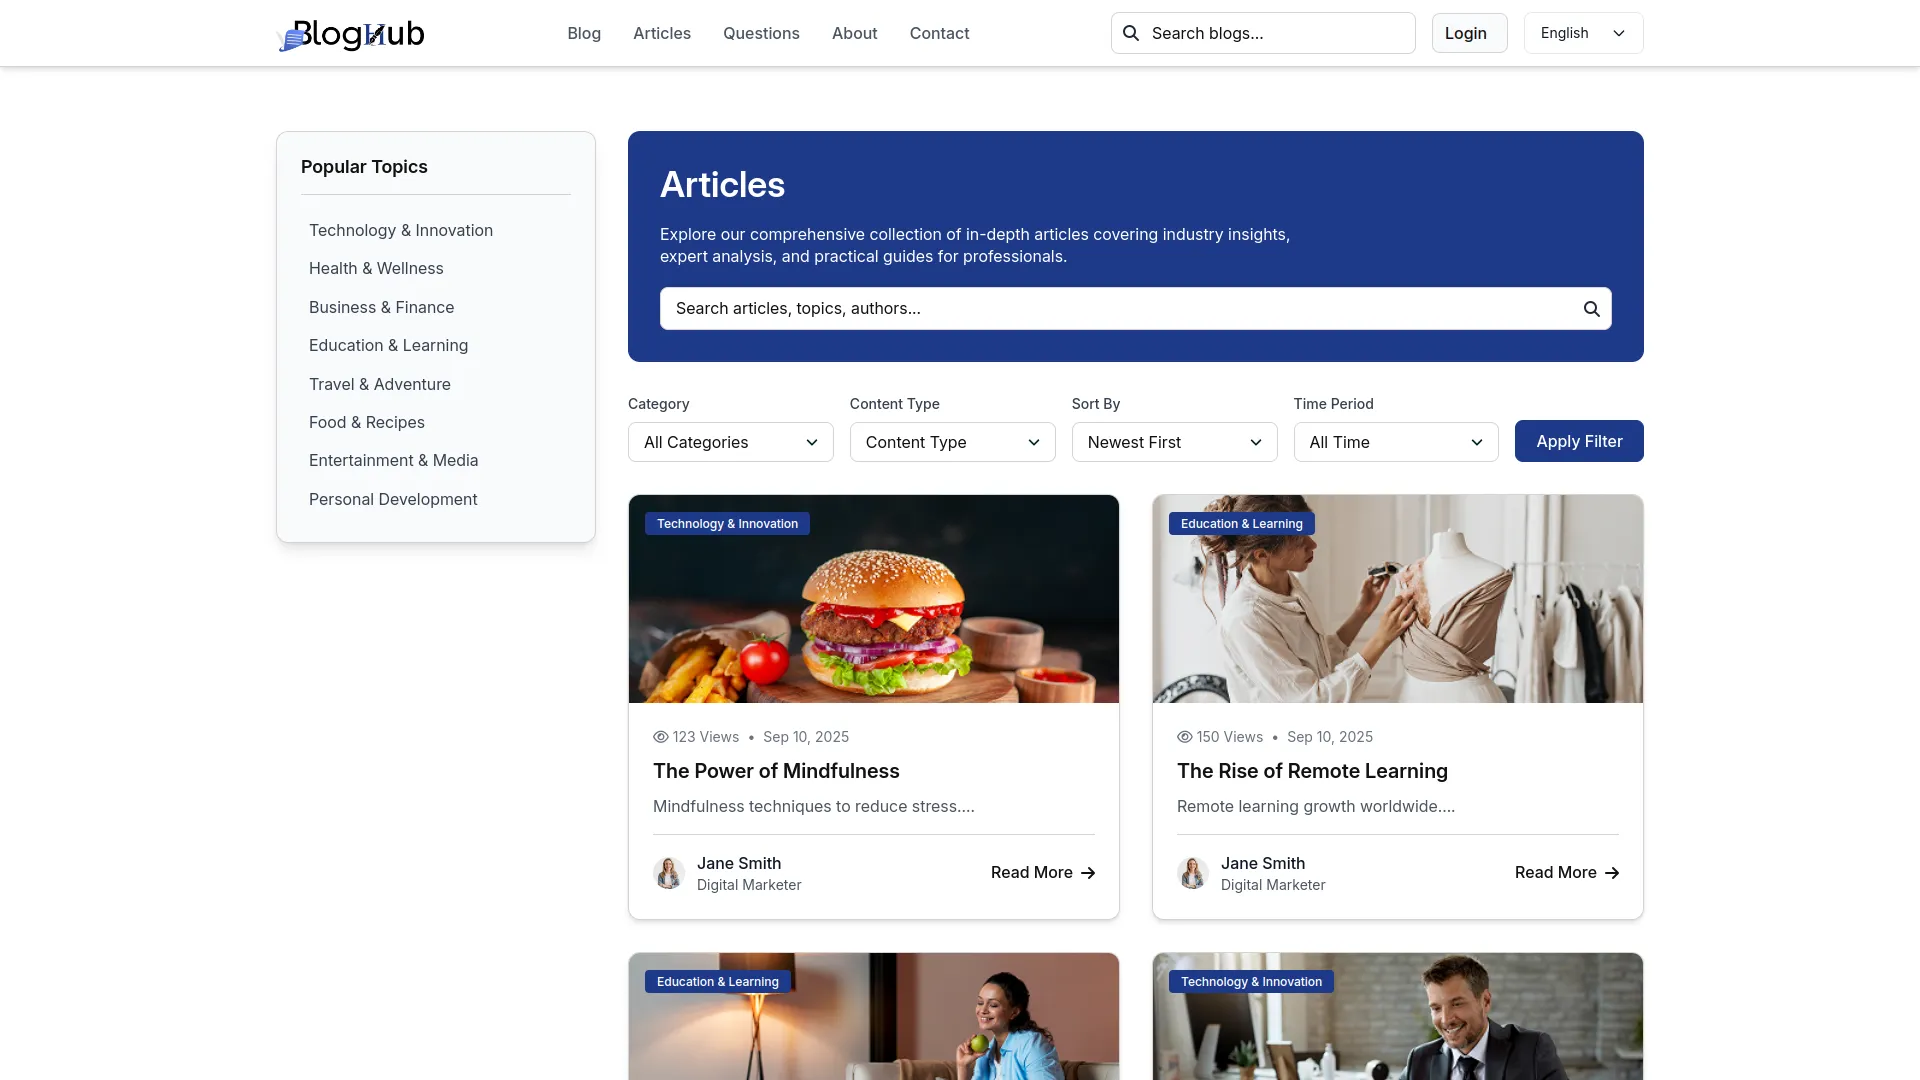
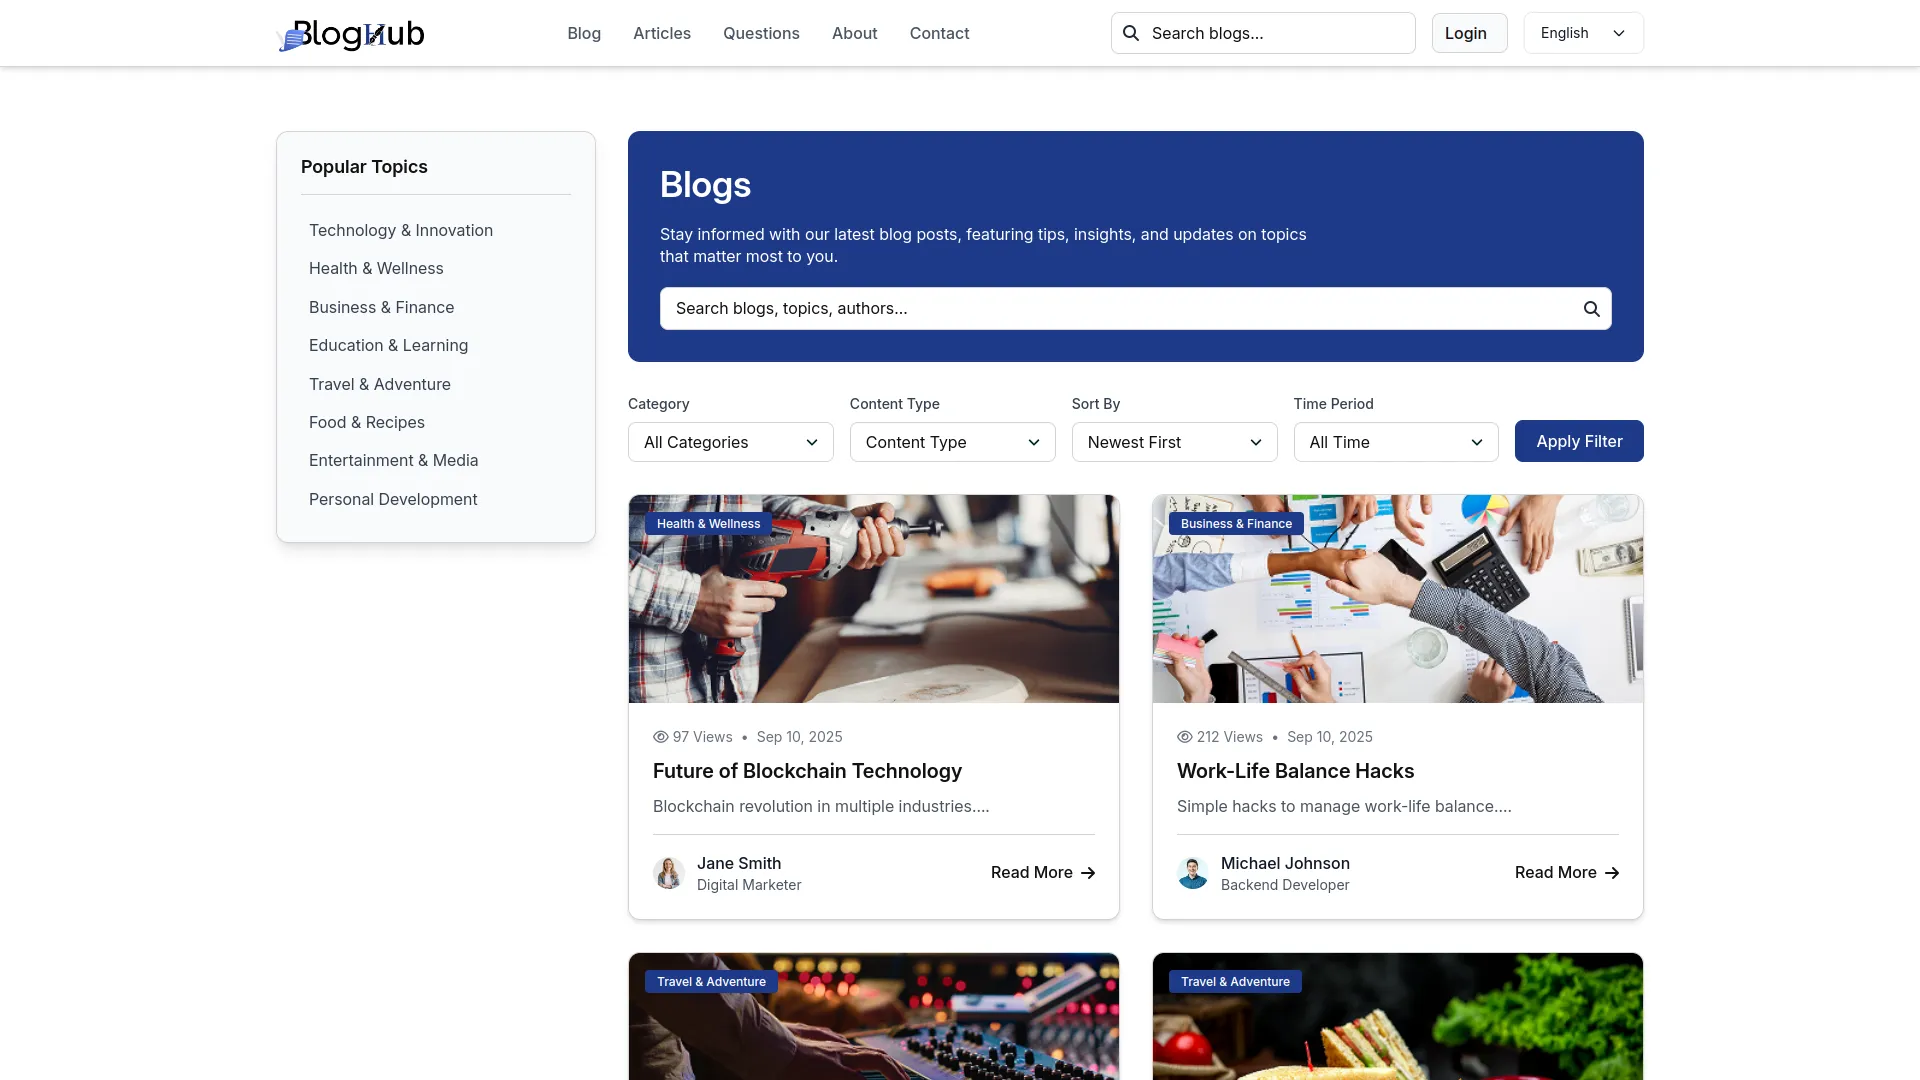
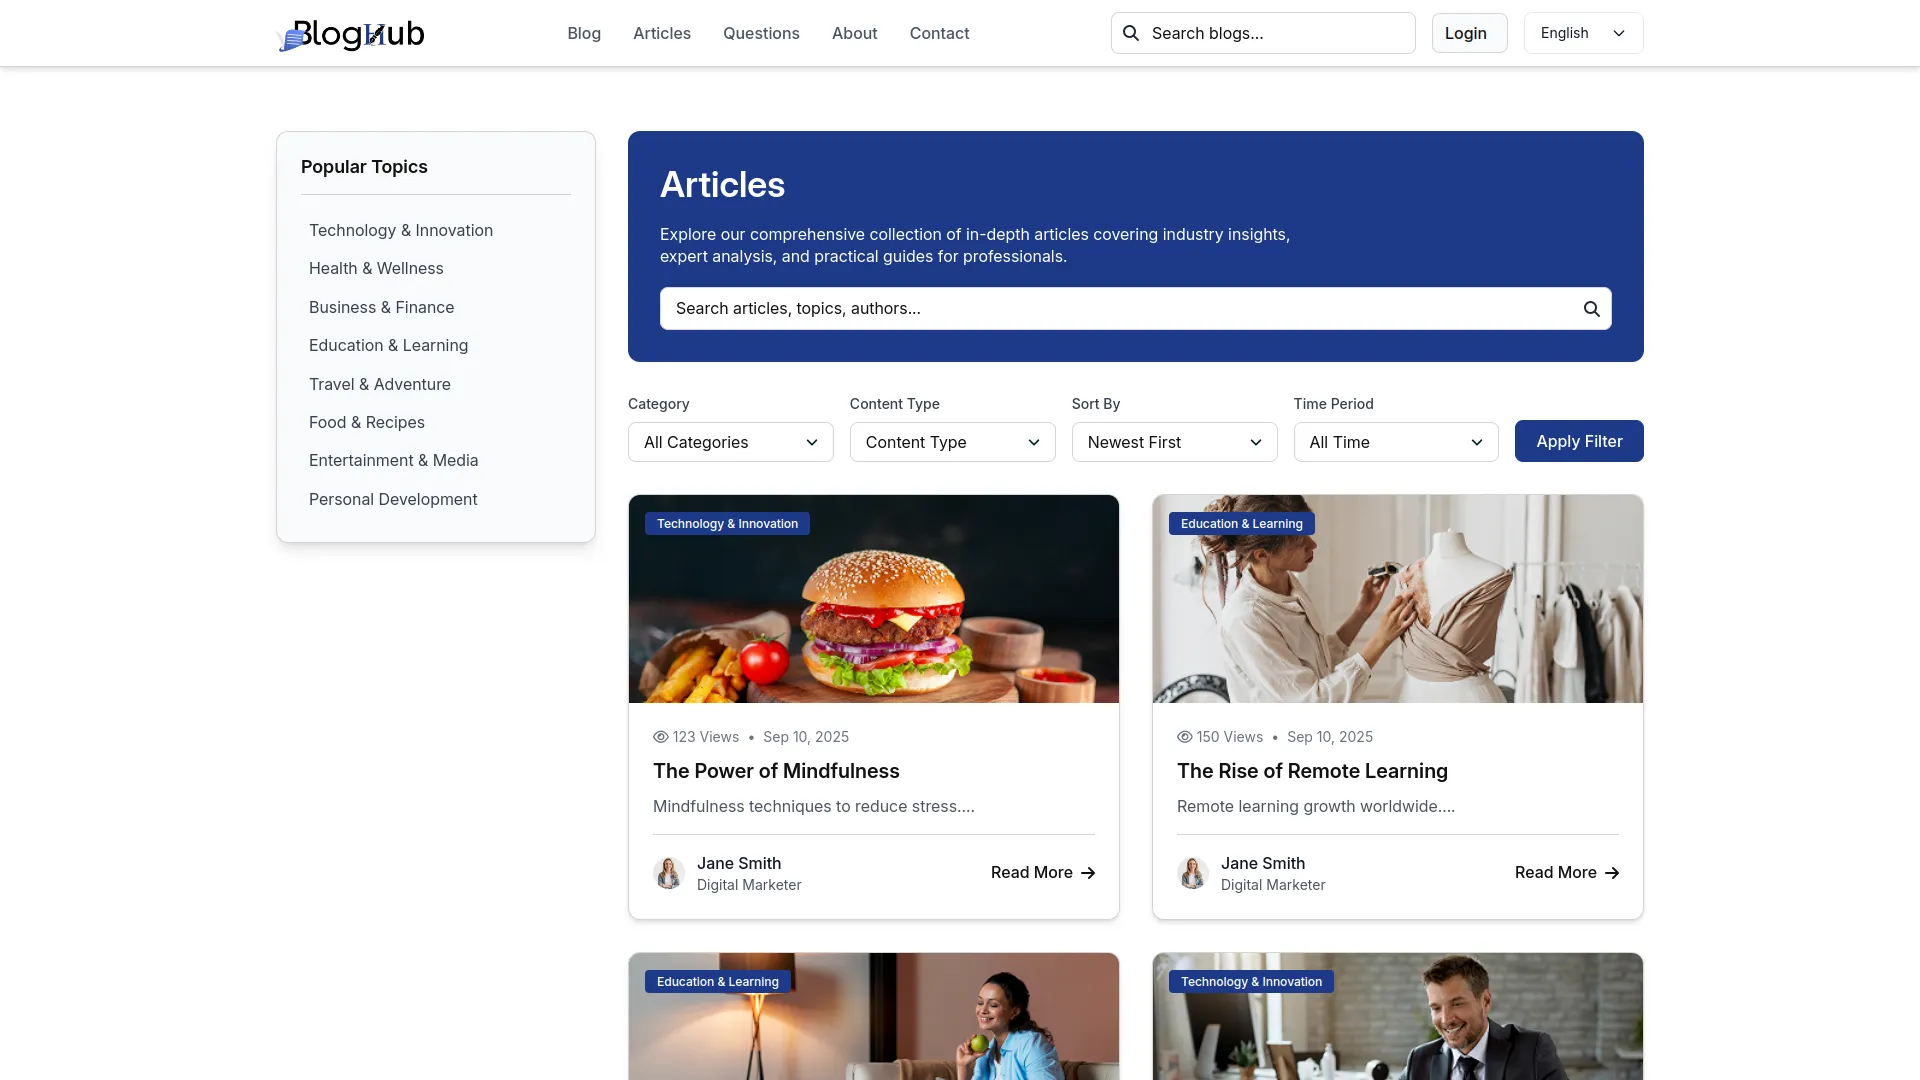
- On the website, your blogs and articles show up on separate Blog and Article pages on your website. At the top of each page, visitors see the title and description you set in Blog Page Settings or Article Page Settings. There’s a search box where people can look for blogs, topics, or authors.
- On the left side, there’s a Popular Topics section that shows all the topics you created in System Setup. People can click these to filter content. Below the search box are four filter options: Category, Content Type, Sort By (like Oldest First or Newest First), and Time Period. There’s an Apply Filter button to use these filters.
- Each blog or article appears as a card with the topic name, image, how many people viewed it, when it was posted, the title, a short preview of the content, the author’s name, and a Read More button. When you click the Read More, you’ll get to see the full content on the detail page, including the content post and video with like and comment options.
- Only blogs and articles marked as Published will show on your website. Draft items stay hidden. If you turn on Show On Display for any content, it will also appear in special sections on your homepage.
Manage Questions
- To create a new Question, click the “Create” button. Select the Topic from System Setup options, enter your Question title, and a detailed Description. The Show On Display toggle controls whether the question appears in the featured section of your website’s landing page. When enabled, the question will be prominently displayed to visitors.
- Complete the SEO fields by entering Meta Title, Meta Description, and Meta Keywords to help your questions rank better in search engines.
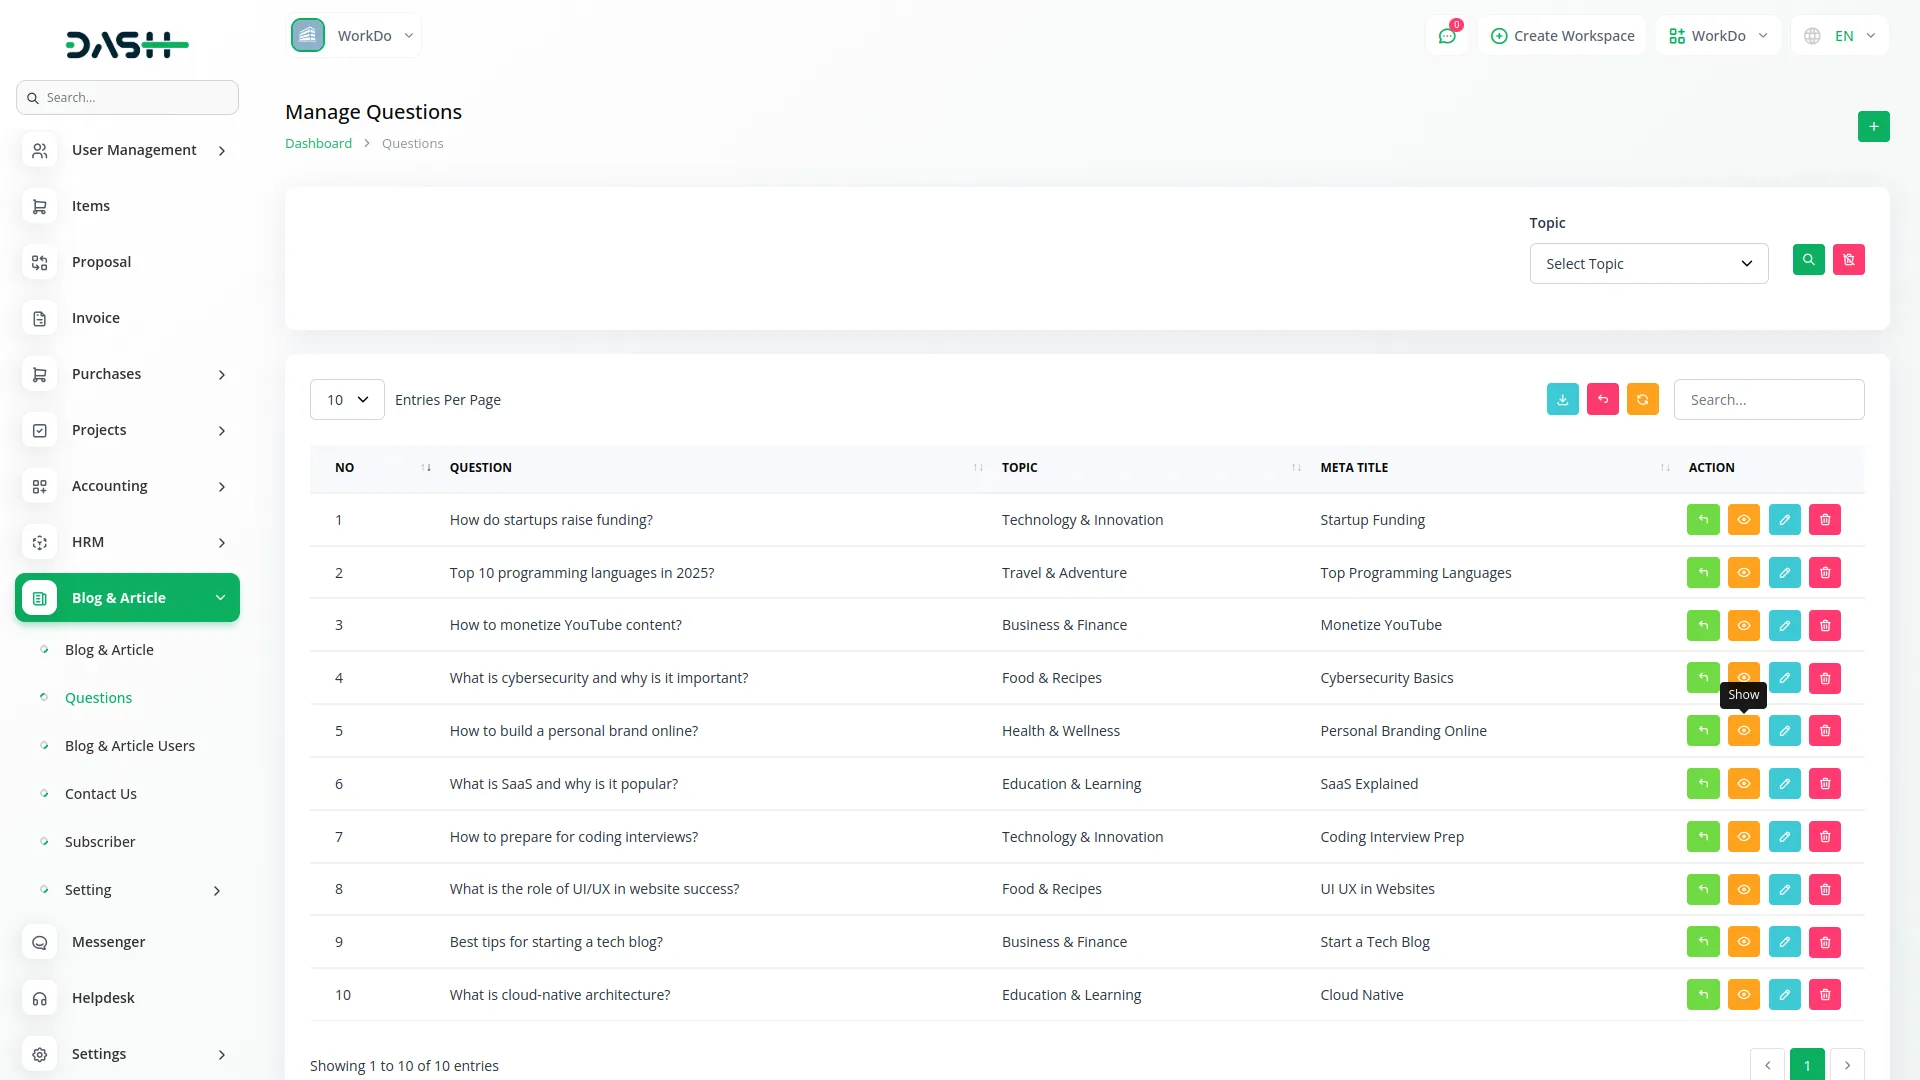
- The list page provides Search, Export, and Create buttons, with filtering options by Topic from System Setup. The table displays Number, Question, Topic, Meta Title, and Actions columns.
- Available actions include Reply (where you can respond to questions – direct replies are called answers, and replies to answers are called comments), View (to see complete question details), Edit, and Delete. When you delete a question, all associated answers and comments are also permanently removed.
- Questions with Show On Display enabled will appear both on the dedicated questions page and the website homepage, making them easily discoverable by your visitors.
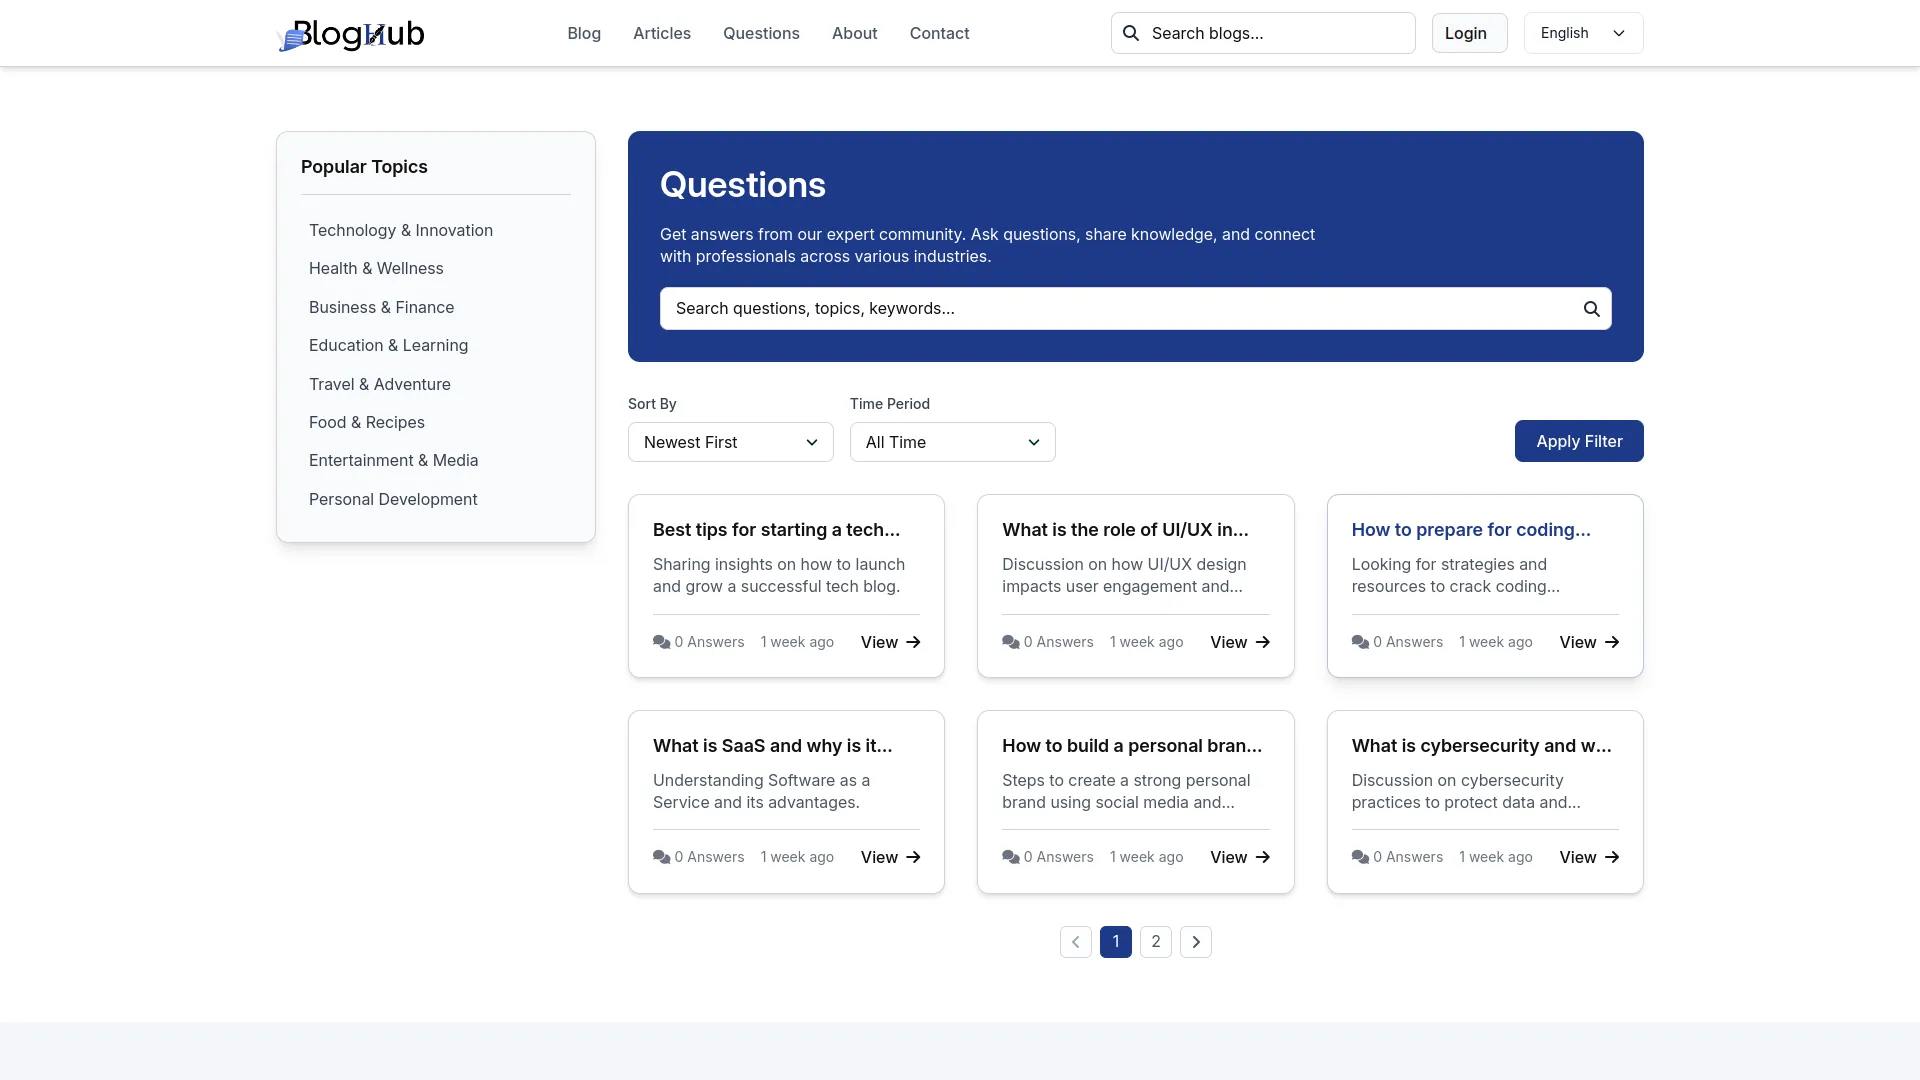
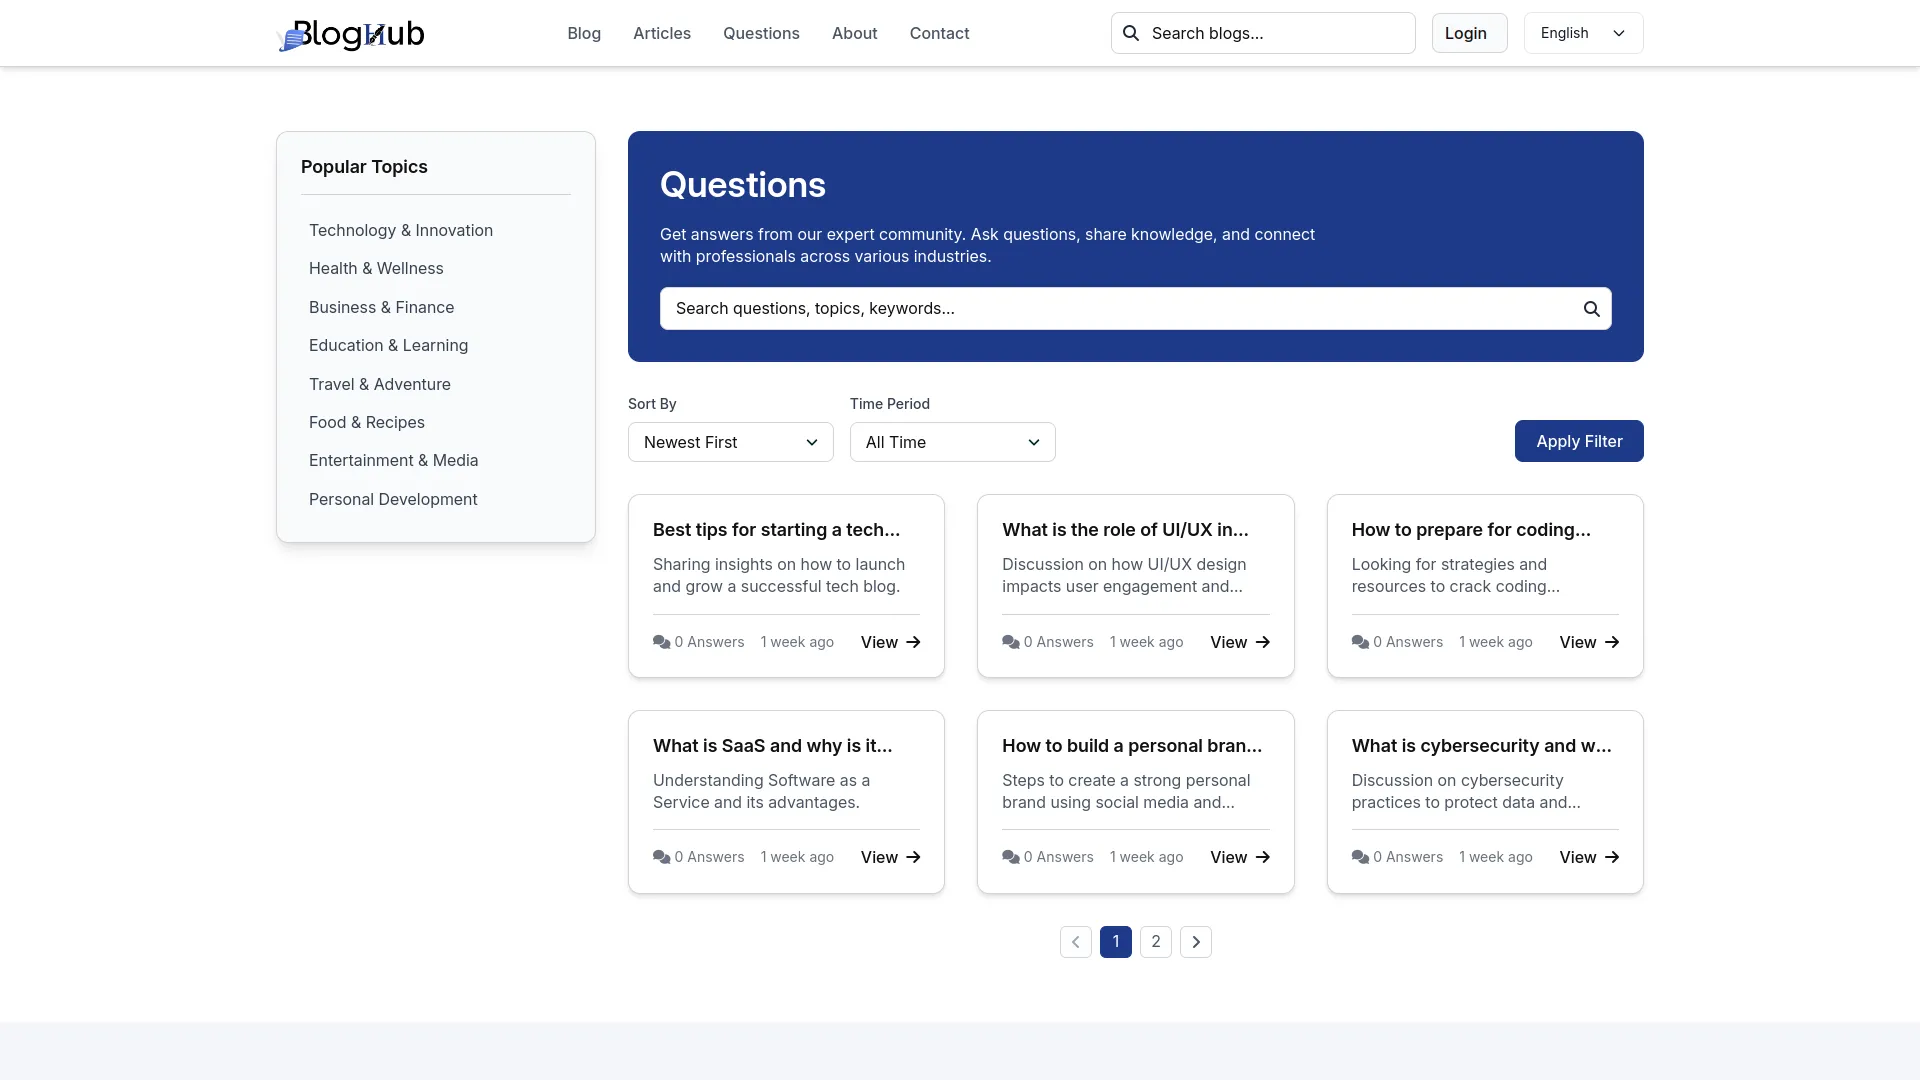
- On the website, your questions show up on a dedicated Question page on your website. At the top, visitors see the title and description you set in Question Page Settings. There’s a search box where you can filter your topic here.
- On the left side, there’s a Popular Topics section that shows all the topics you created in System Setup. People can click these to filter questions. Below the search box are two filter options: Sort By (like Newest First or Oldest First) and Time Period, with an Apply Filter button.
- Each question appears as a card showing a question mark icon, the question title, a short preview of the content, how many answers it has, when it was posted (like “2 hours ago”), and a View button. After clicking the view button, you’ll navigate to the detail page, and you’ll see the question and its answer, where you can also add your answer.
- When people click on a question detail, they see the full question page. This page shows the topic, how many people viewed it, when it was posted (like “1 day ago”), the complete question, and buttons to like, dislike, or save it. It also shows who wrote the question.
- Below the question, there’s a section for answers and comments. People can write answers to the question. Each answer shows who wrote it and has like and dislike buttons. You can sort answers by newest or oldest. People can also reply to answers with comments. When someone clicks on a person’s name, it opens their profile page with their information.


Manage User
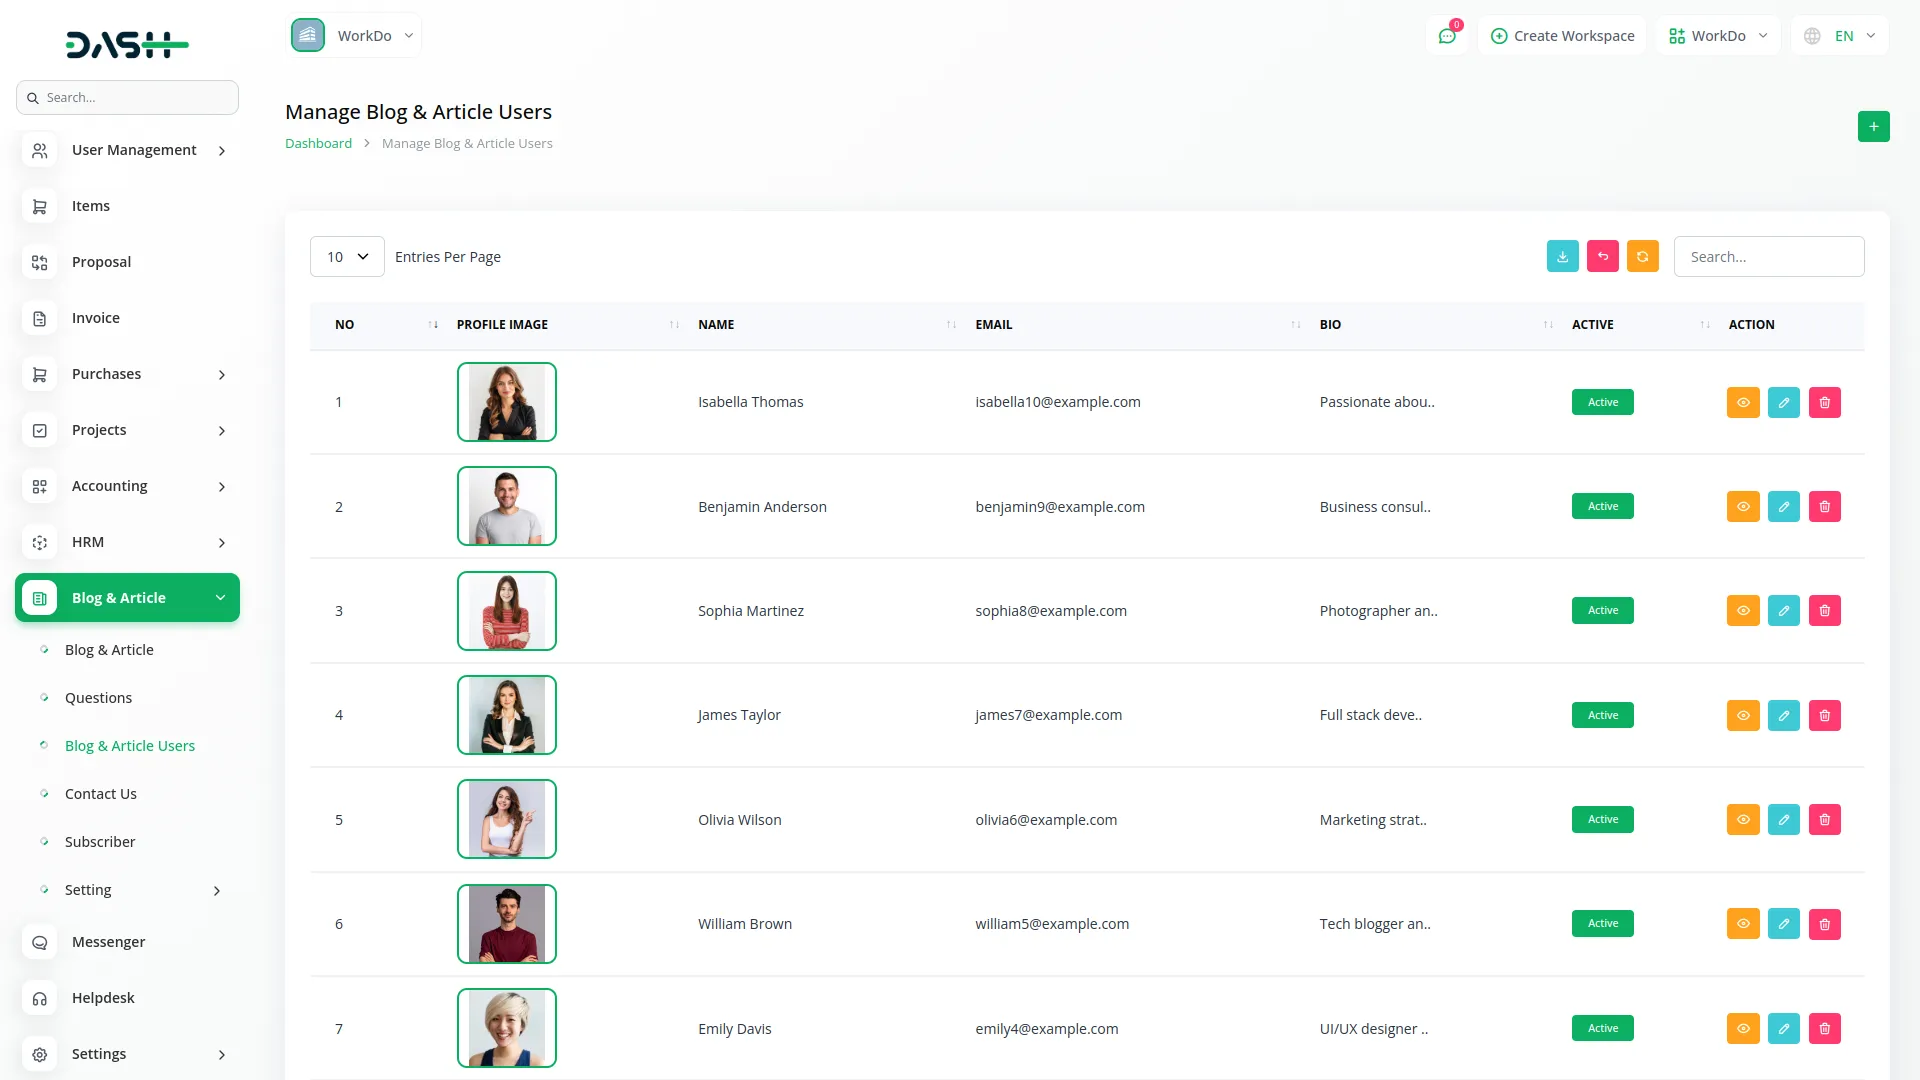
- To create a new User manually, click the “Create” button. Enter the user’s Name, Email, and Password, then upload a Profile Image and write a Bio description. The Active toggle button controls user access – when set to “Yes,” the user can log in to the system, when set to “No,” the user cannot access their account.
- In the Social Links section, add the user’s social media profiles by entering the Icon and corresponding Link for each platform.
- The list page shows all users with Search, Export, and Create buttons. The table displays Number, Profile Image, Name, Email, Bio, Active status (Yes/No), and Actions columns.
- You can view complete user details, edit user information using the same form fields as creation, or delete users permanently. When you delete a user, all their created blogs, articles, and questions are also permanently removed from the system.
- The User section lets you add users yourself and also automatically saves information when people sign up on your website. This way, you can see and manage all your users on the backend side.
Manage Contact
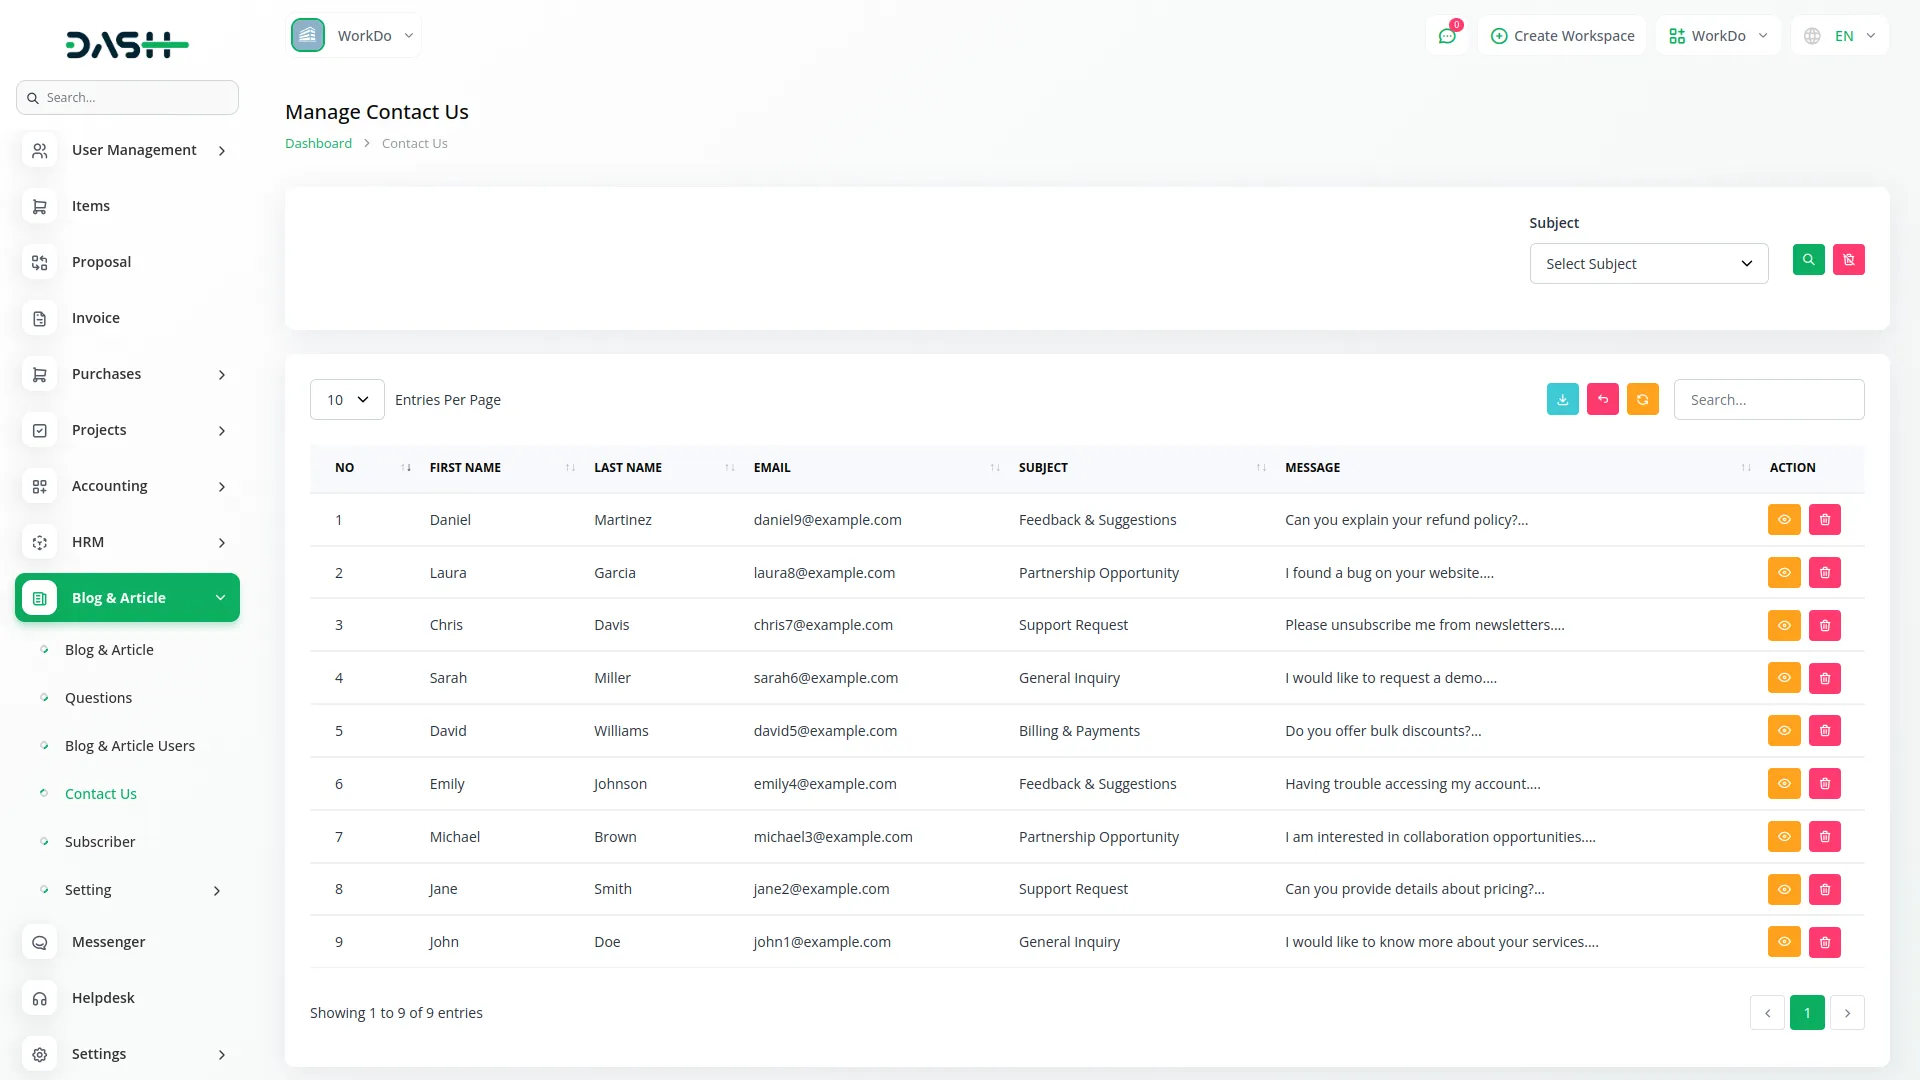
- The Contact section displays messages submitted by visitors through your website’s contact form. This is a view-only section where you can review and manage customer inquiries.
- The list page shows all contact submissions with Search and Export buttons for easy data management. Use the Subject filter to narrow down messages by subject categories from System Setup. The table displays Number, First Name, Last Name, Email, Subject, Message, and Actions columns.
- You can view complete contact details to see the full message and sender information, or delete specific contact entries when they’re no longer needed. All contact data comes from visitors filling out the contact form on your website’s contact page.
Manage Subscriber
- The Subscriber section manages newsletter subscriptions from your website visitors. This data is automatically collected when users subscribe to your newsletter through the frontend.
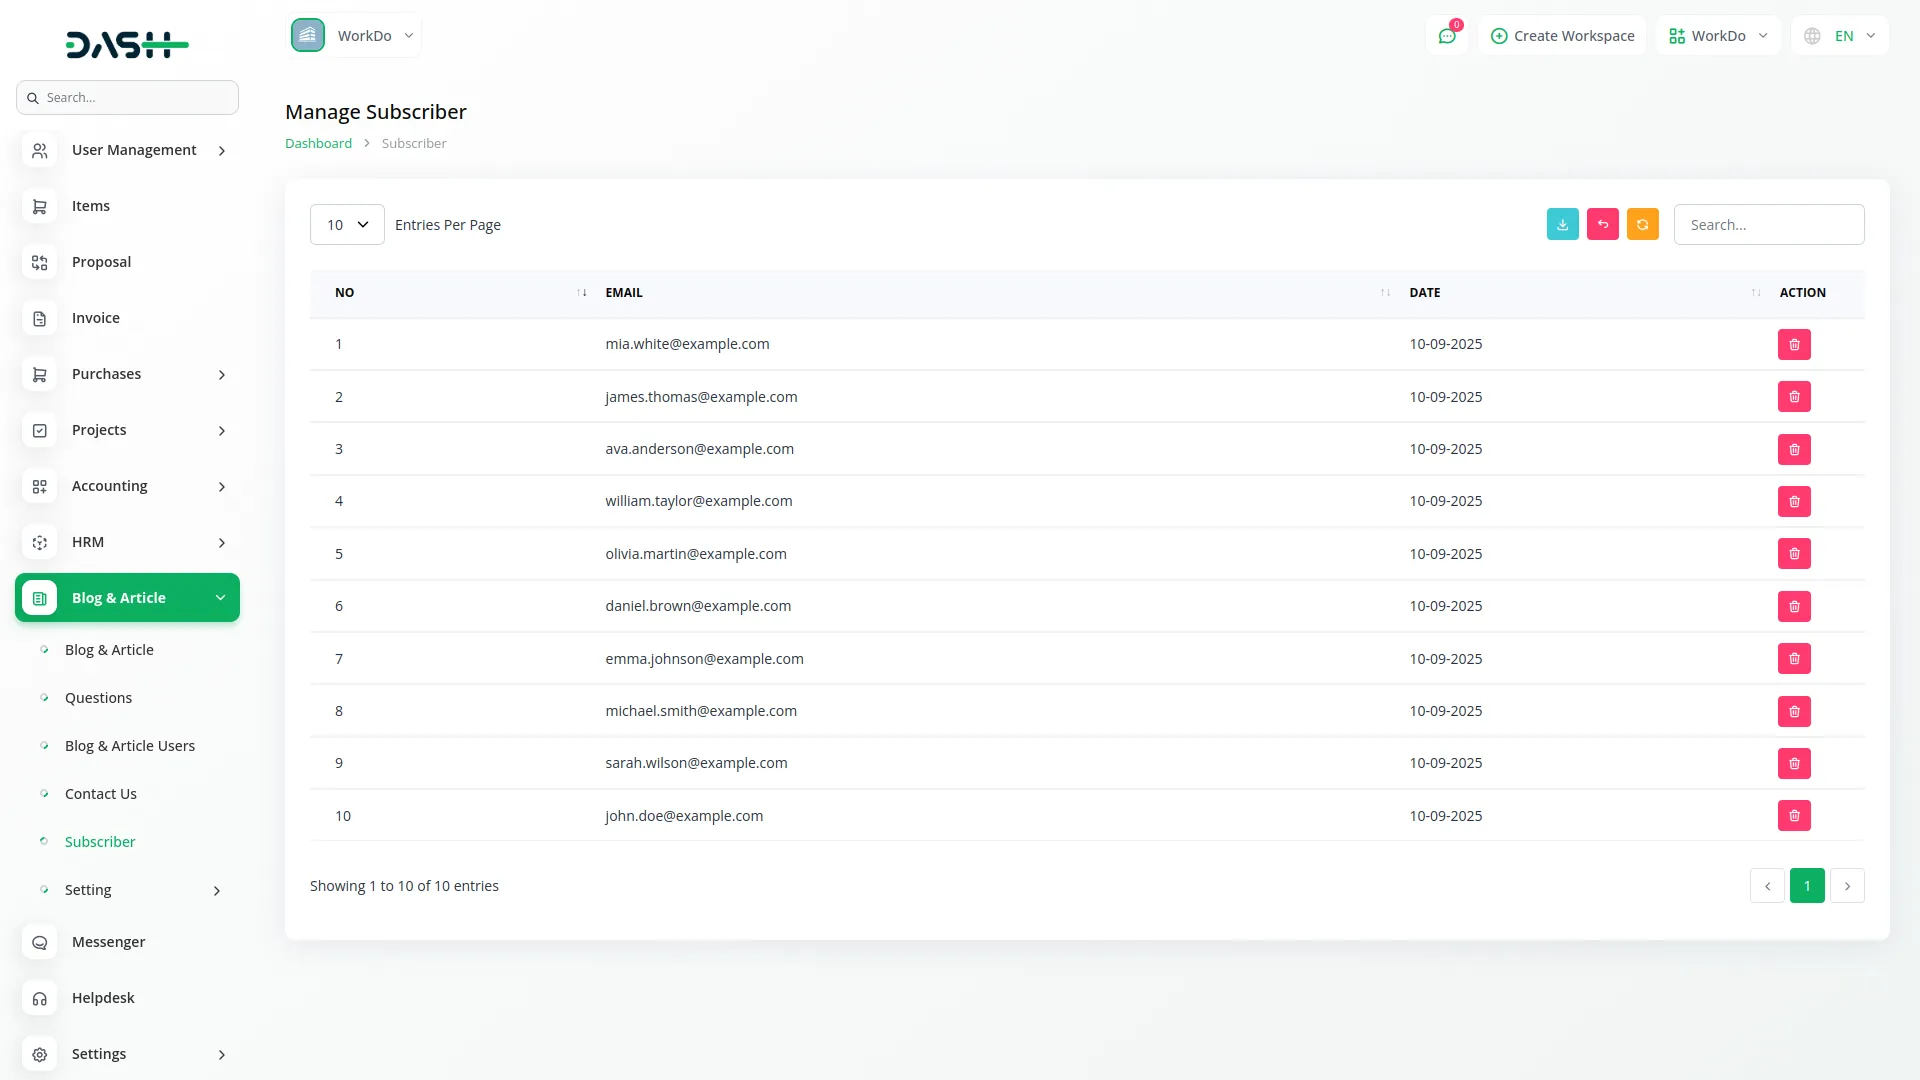
- The list page displays all subscribers with an Export button to download the subscriber data. The table shows Number, Email, Date (when they subscribed), and Actions columns.
- The only available action is Delete, allowing you to remove subscribers from your mailing list when needed. All subscriber data comes from the newsletter section on your website, where visitors can enter their email addresses to stay updated with your content.
Authentication System
- The website provides a complete authentication system that manages user access and account security.
Login and Registration Forms
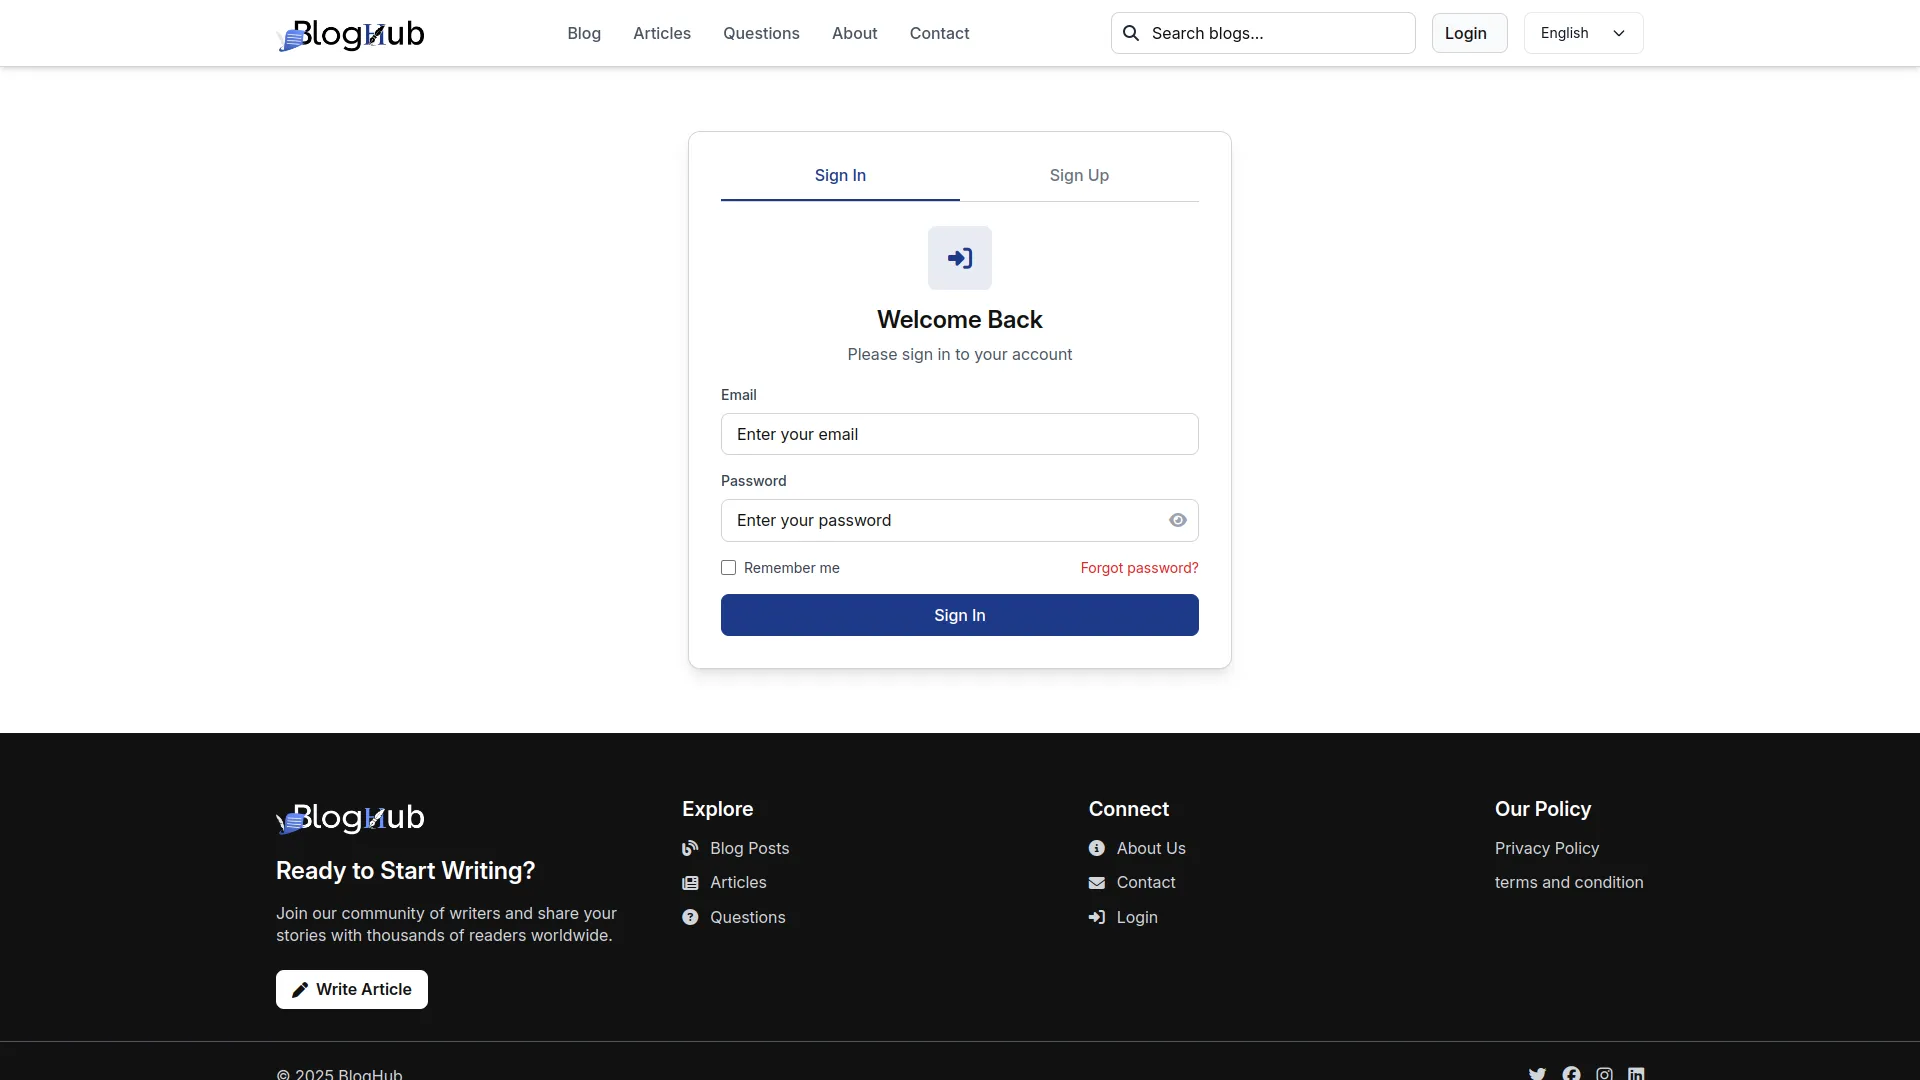
- In the Authentication section, users will find separate Login and Registration forms accessible through the Sign In and Sign Up tabs. The registration form includes Full Name, Email, Password, and Confirm Password fields with clear password requirements displayed.
- The login form includes Email, Password, Remember Me checkbox, and Forgot Password link. Complete the required fields and click the respective button.
- Once registration is completed, an email verification is automatically sent to the registered user’s email address, and they can immediately access their account after email confirmation.
Password Recovery
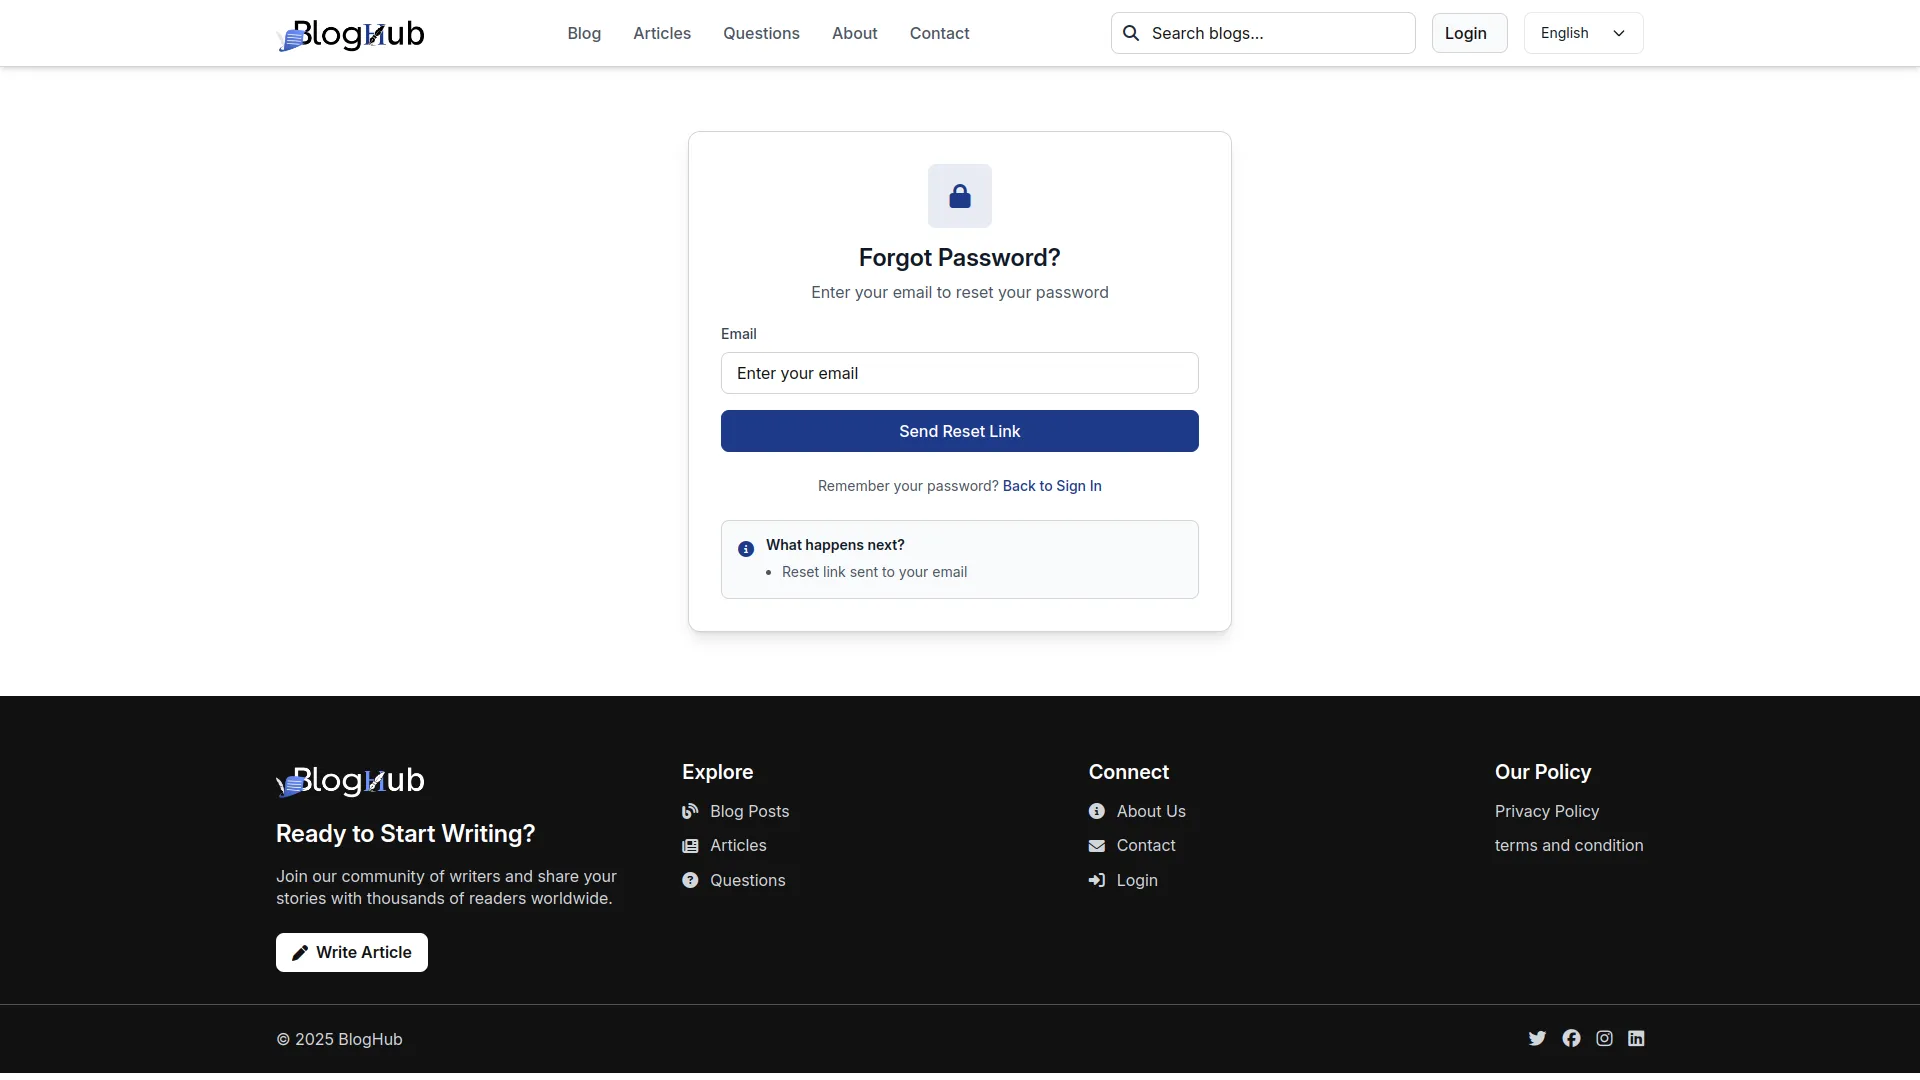
- In the Forgot Password section, users will find an email field to request a password reset. Enter the registered email address and click Submit.
- Once submitted, a password reset link is sent to the user’s email, allowing them to securely create a new password and regain access to their account.
Post-Login Features
- After successful login, users gain access to enhanced website functionality, including content creation (blogs, articles, questions), content interaction (saving, liking, commenting), and profile management.
- Users can create new content through their profile dashboard and interact with existing content throughout the website.
- Once logged in, all user activities are tracked and managed through the backend User section, where administrators can monitor user engagement and manage account permissions.
User Profile System
- The website includes a comprehensive user profile system that allows logged-in users to manage their content and account settings.
Profile Access
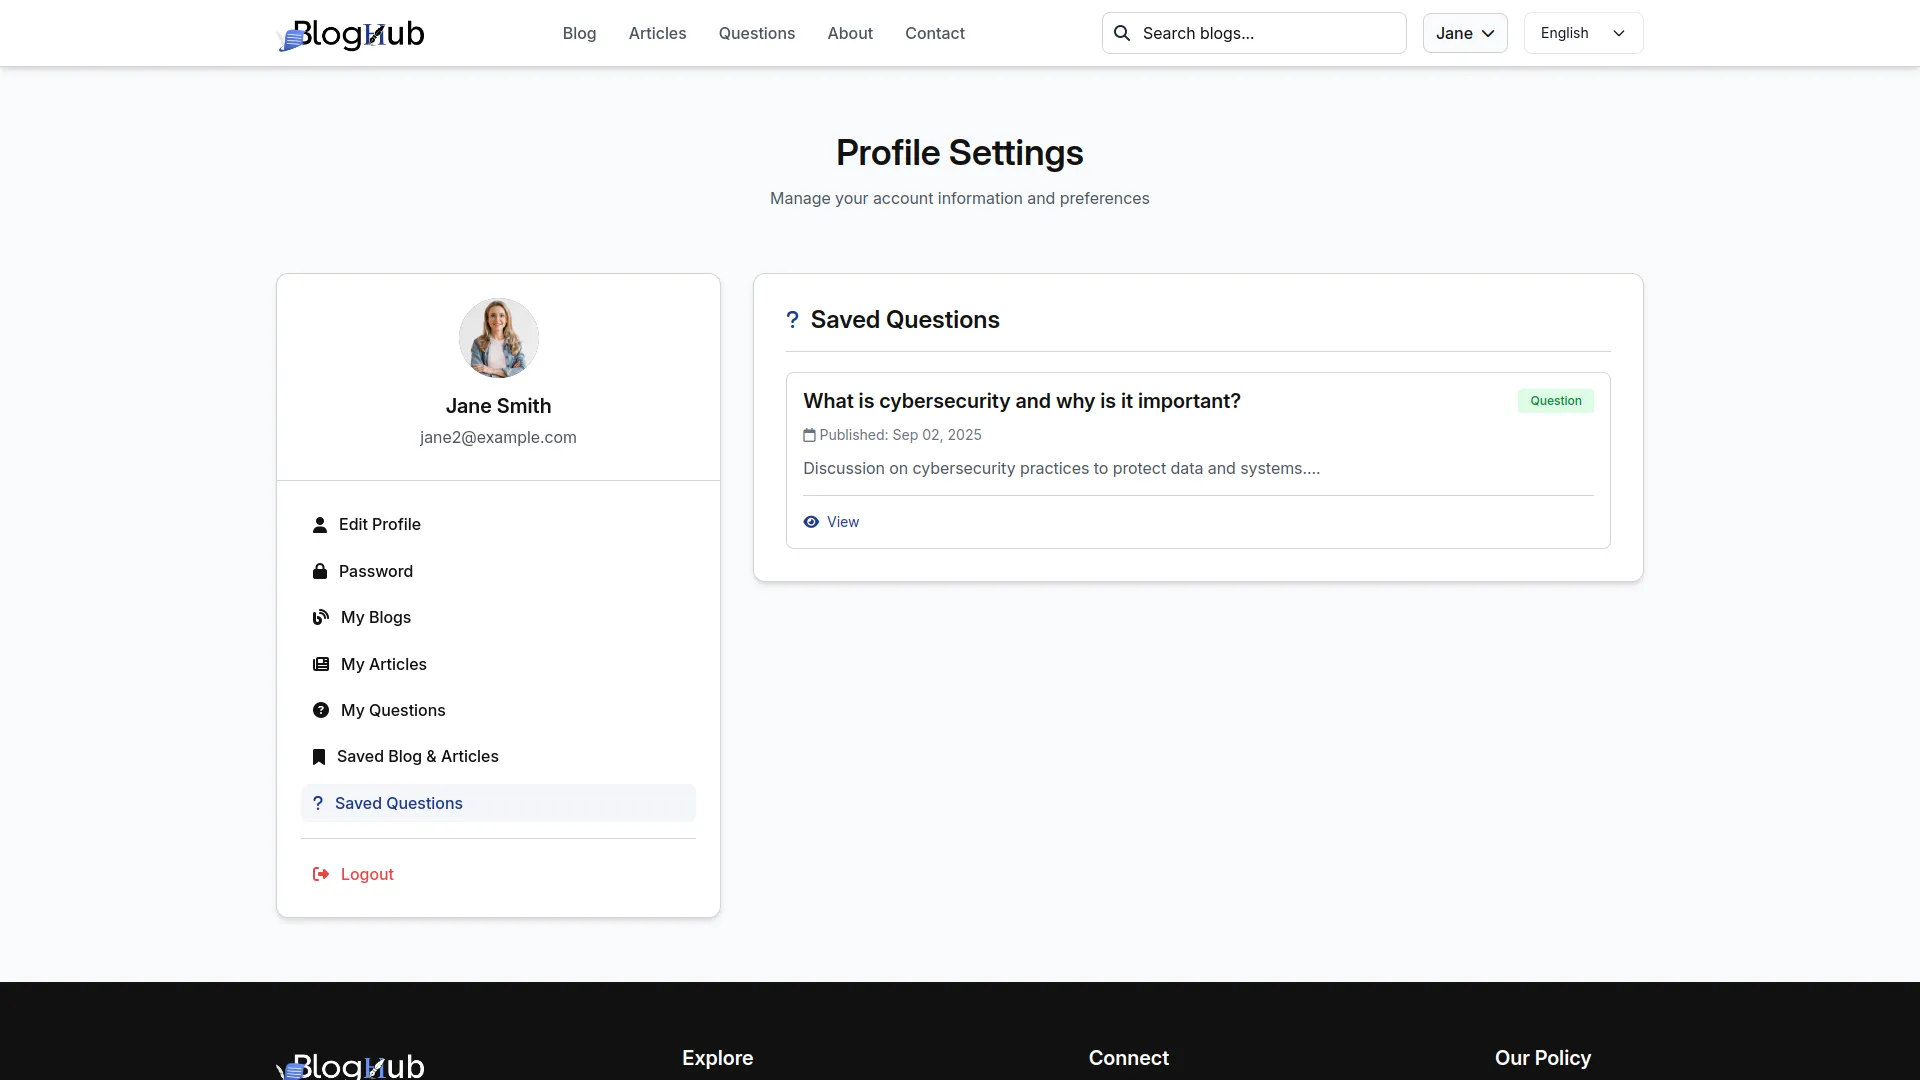
- When users are logged in, they see a profile dropdown in the top right corner of the website with “My Profile” and “Logout” options. The My Profile section includes six main areas: Edit Profile, Password, My Blogs, My Articles, My Questions, Saved Blogs & Articles, and Saved Questions.
Edit Profile
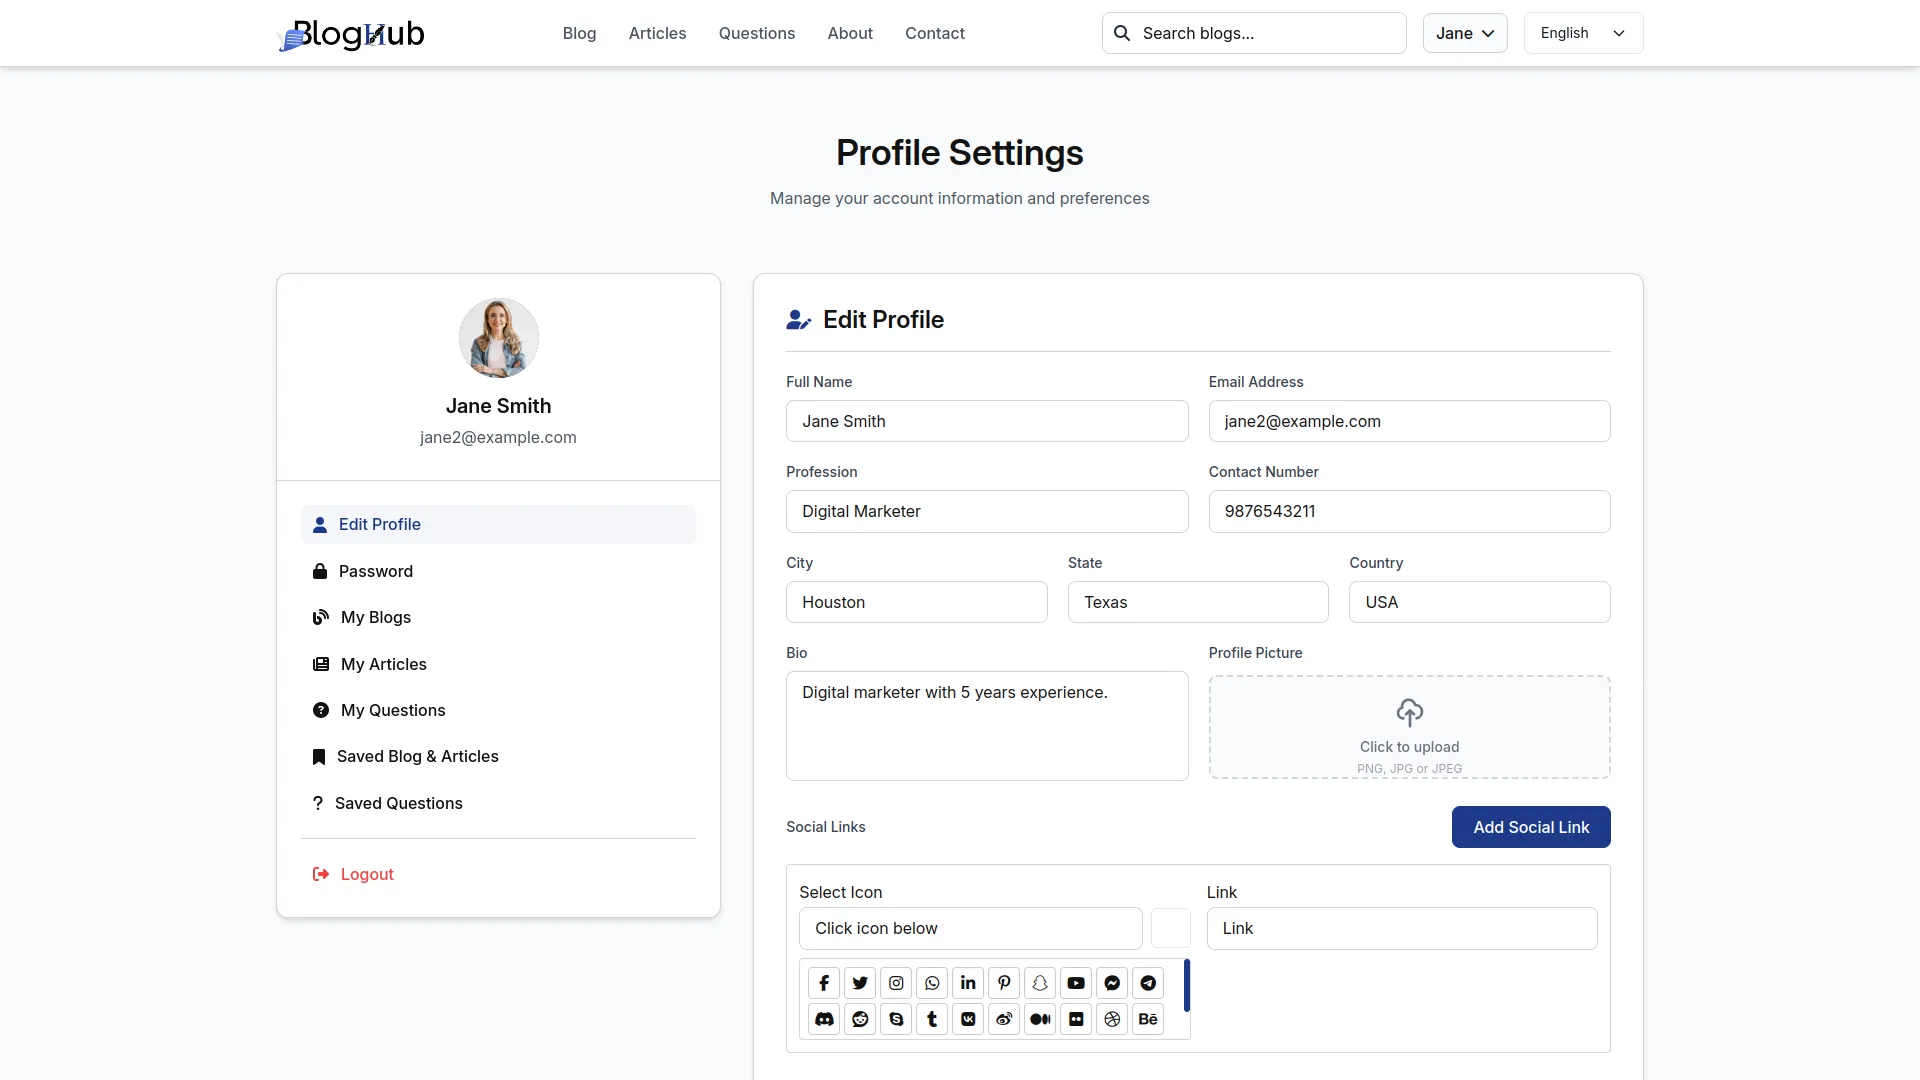
- In the Edit Profile section, users will find fields for Full Name, Email Address, Bio, Contact Number, State, Country, City, Profession, and Social Links. Enter the details and click Save.
- Once saved, this information automatically appears on the user’s author detail page when other visitors click on their profile, creating a complete author biography.
Password Management
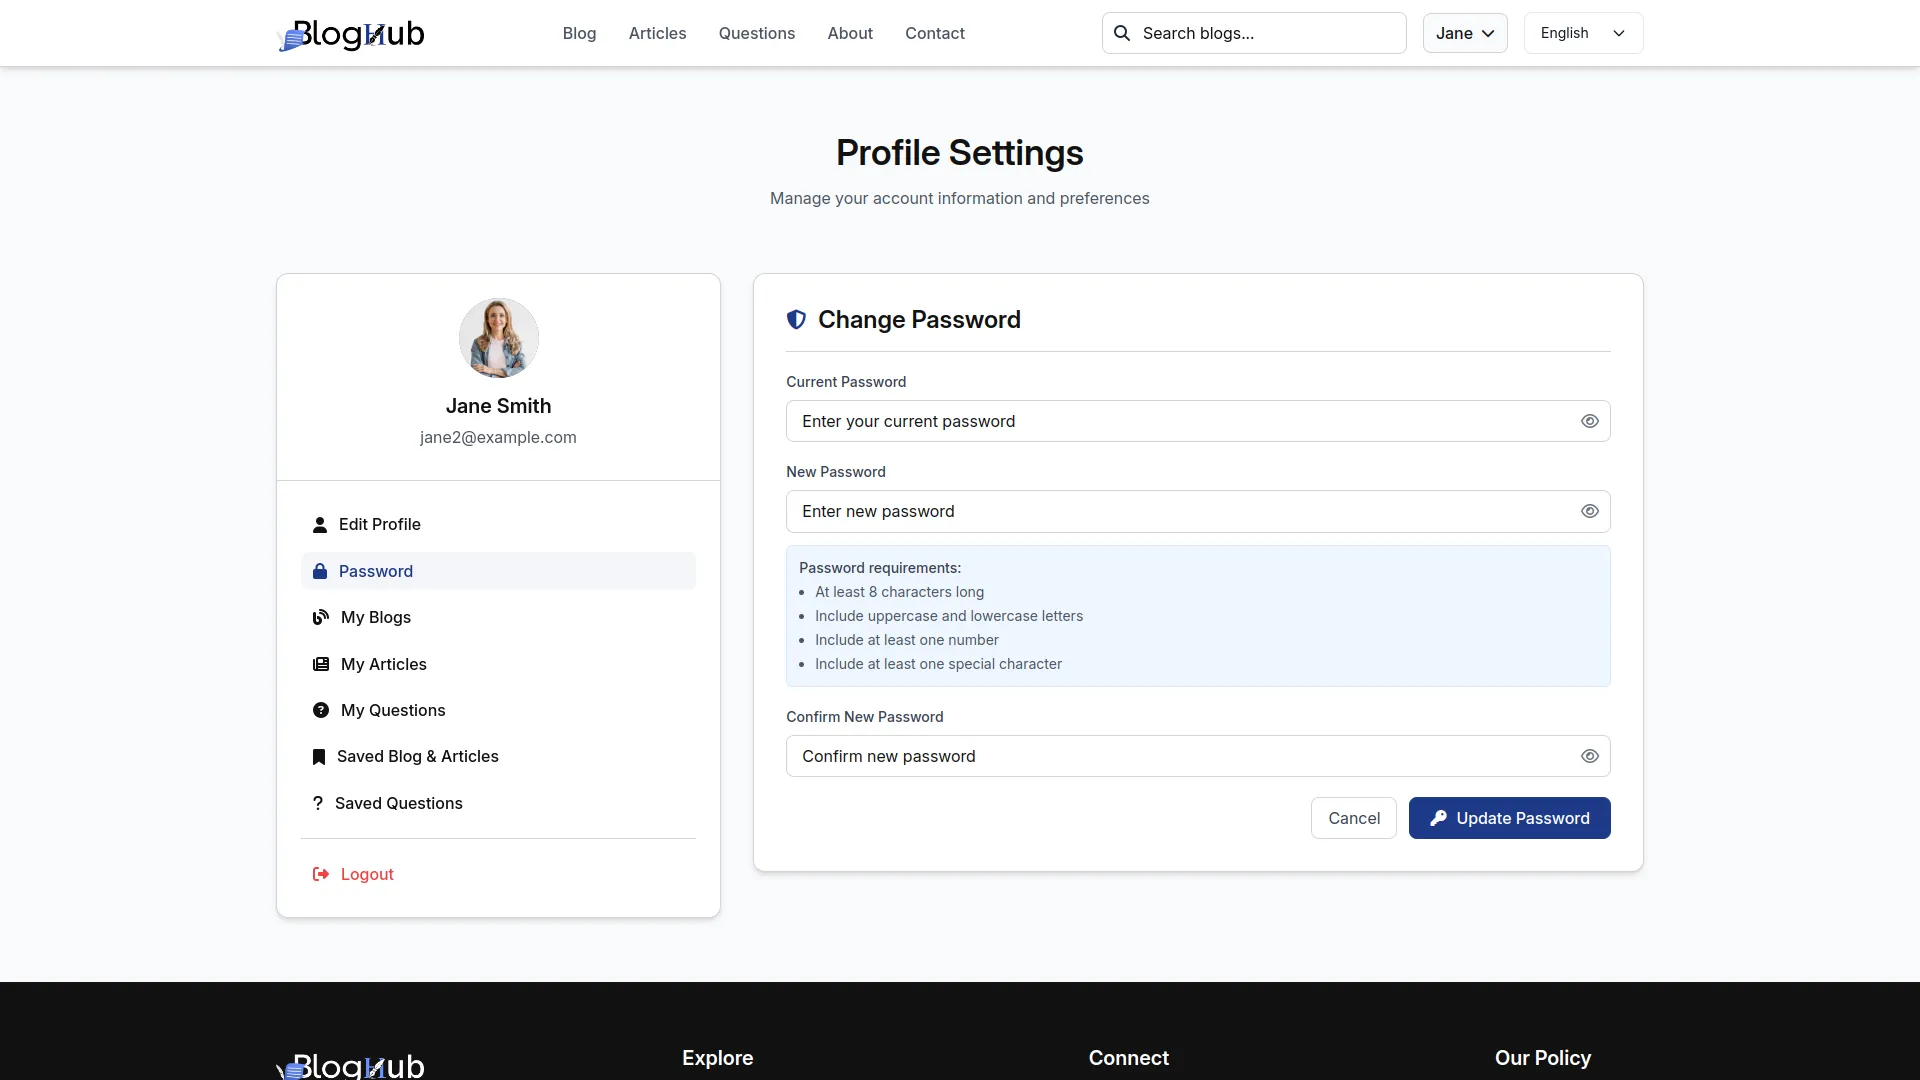
- In the Password section, users will find fields for Current Password, New Password, and Confirm New Password. Enter the details and click Update.
- Once the current password is verified as correct, the new password will be saved, and the user can log in with their updated credentials.
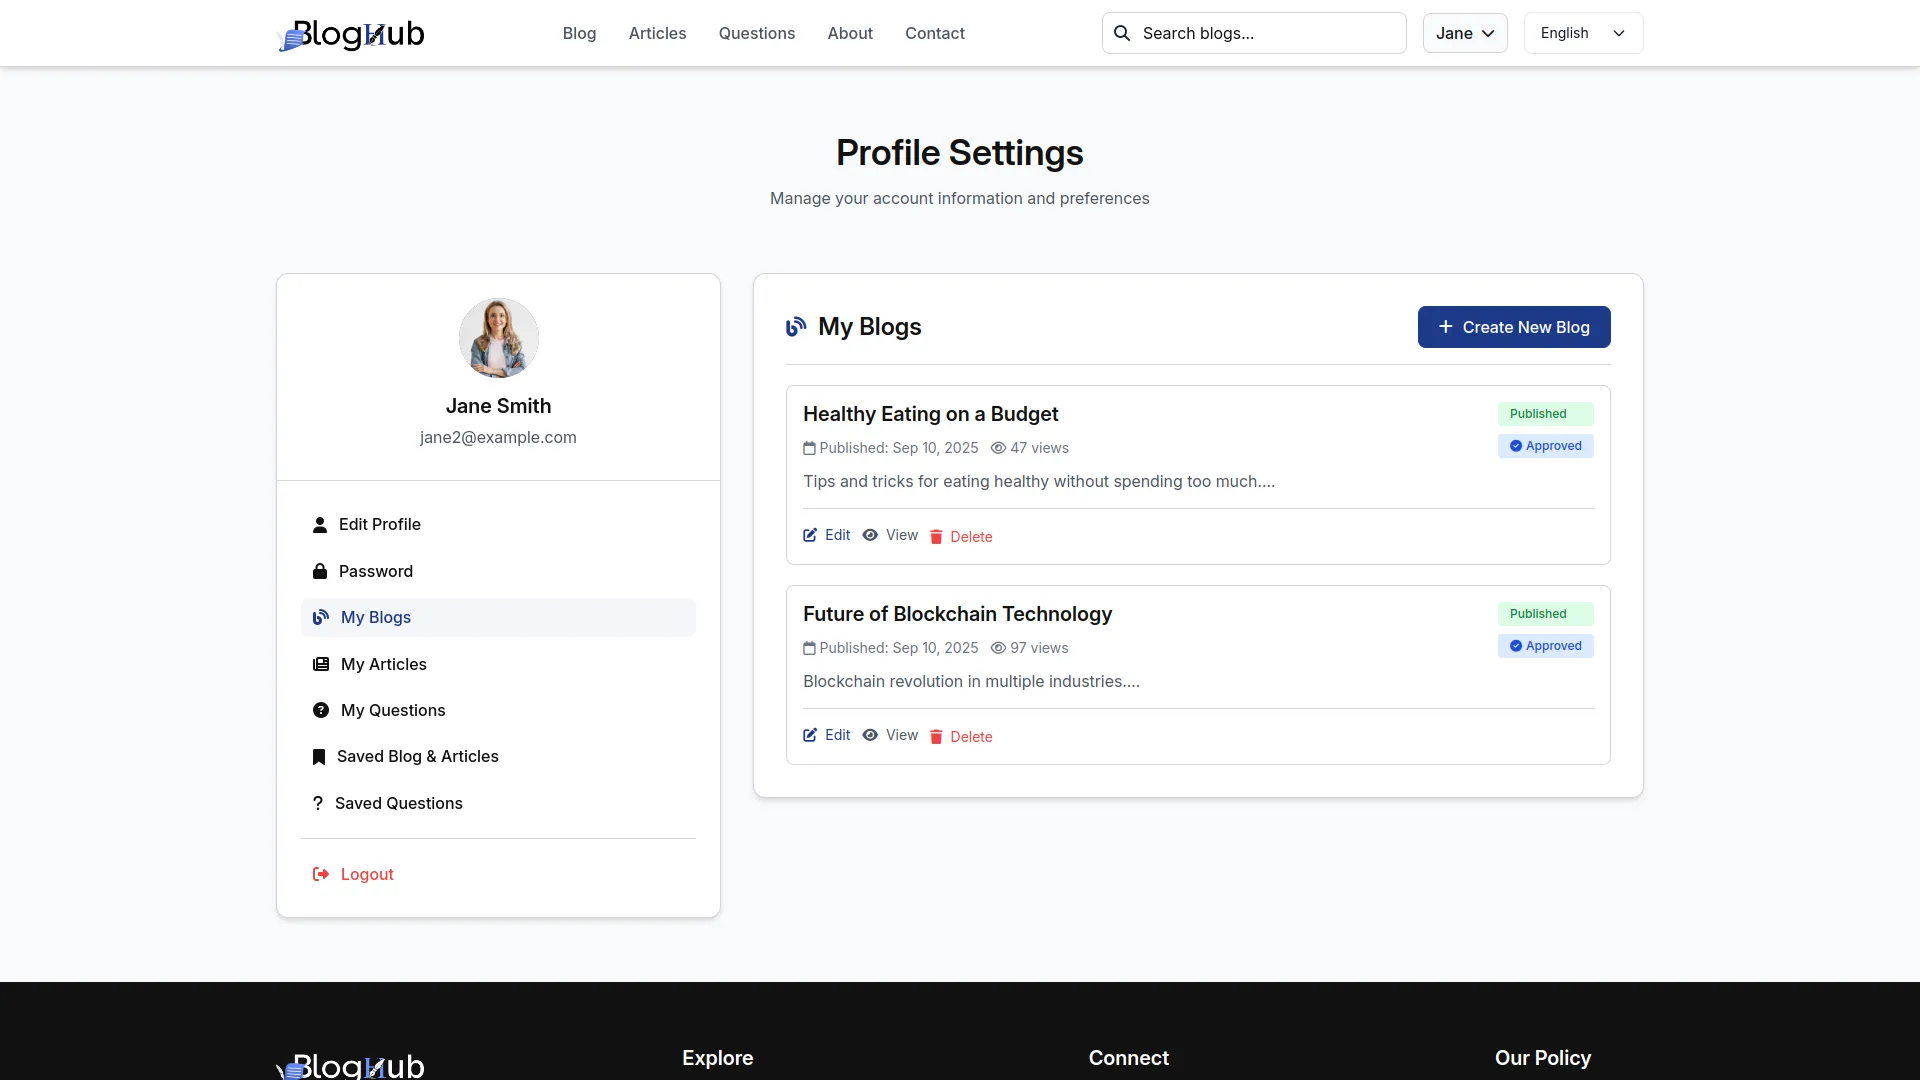
My Blogs
- In the My Blogs section, users can view all their created blogs with Create, Edit, Delete, and View buttons. The create form includes fields for Blog Title, Topic, Content Type, Categories, Blog Content, Video URL, Tags, Blog Image, Social Links, Meta Title, Meta Description, and Meta Keywords.
- The edit form contains the same fields plus an Add Content button for extra content sections with Content and Image fields. Enter the details and click Save.
- Once saved, user-created blogs show as “Pending Wait For approval” until approved by administrators through the Blog & Article Request module, then automatically appear on the website blog pages. Users can also add, edit, or delete additional content sections within their blogs.
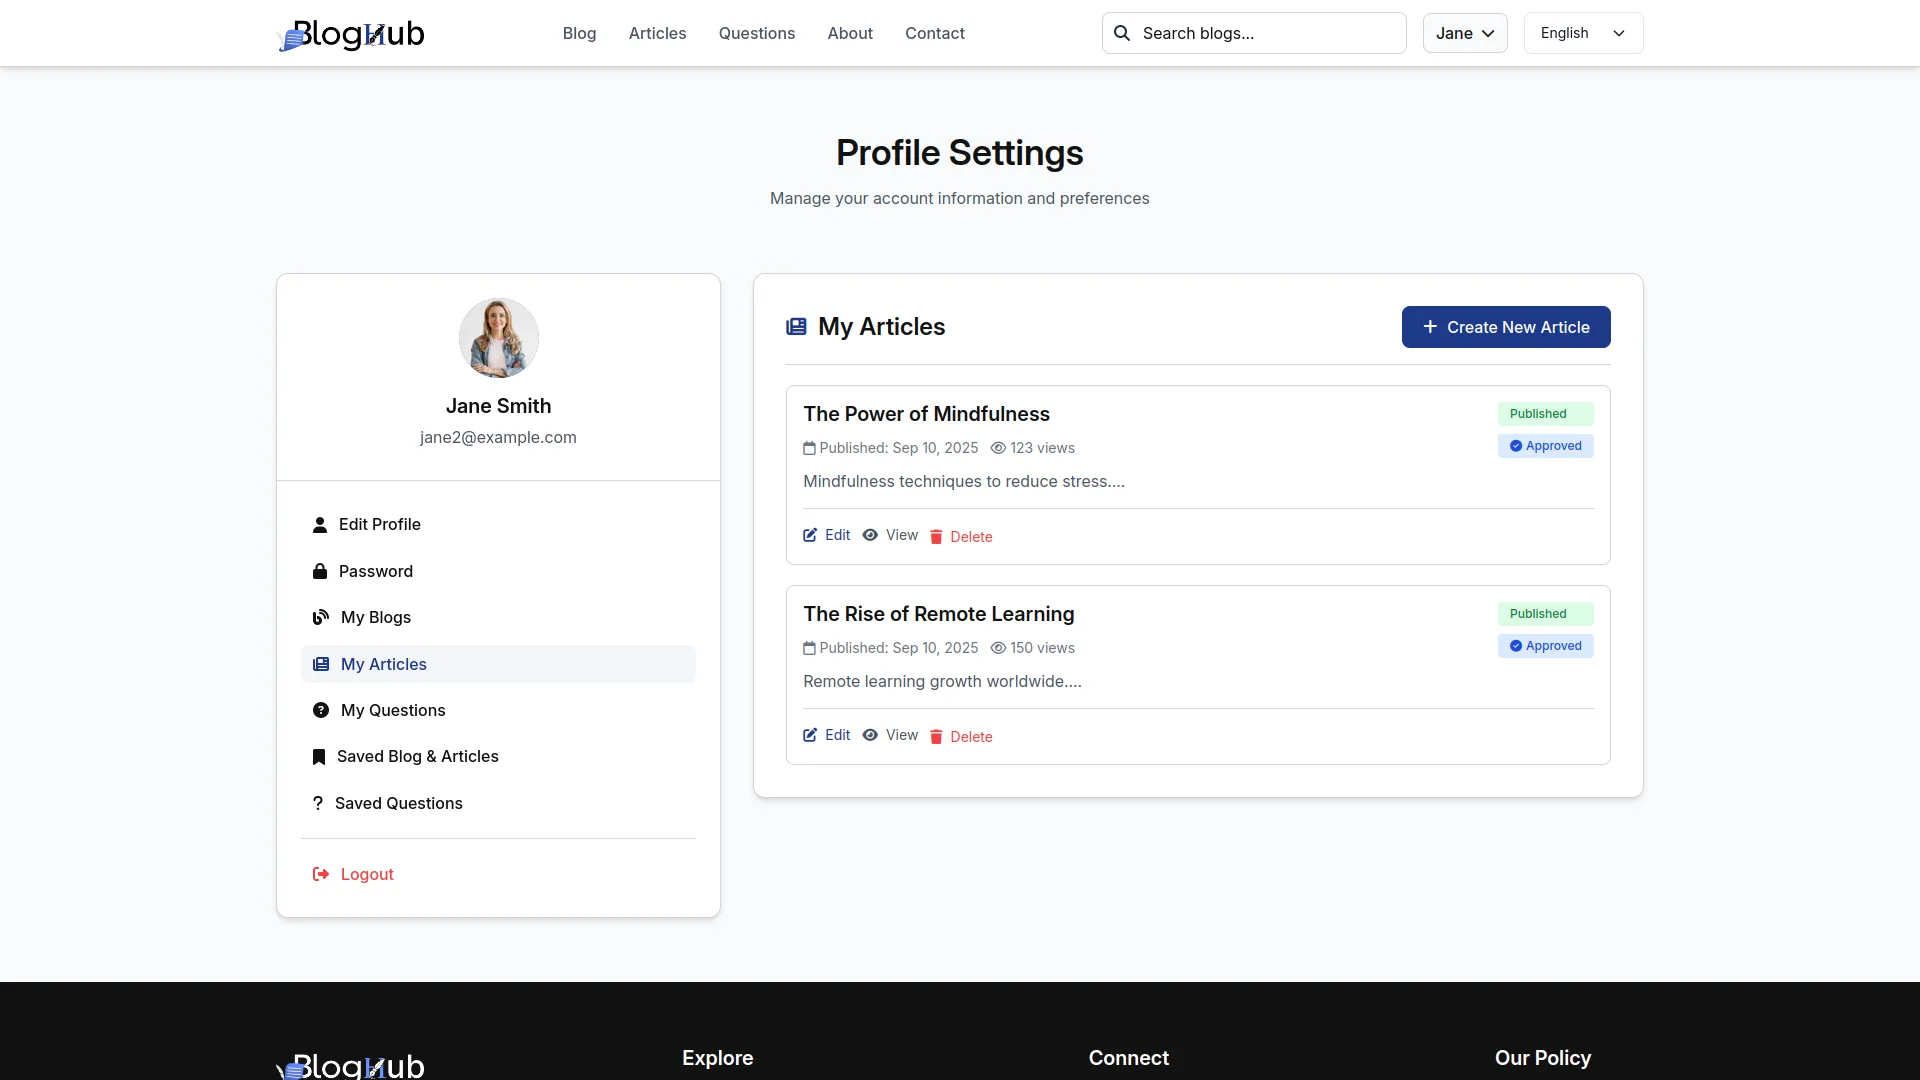
My Articles
- In the My Articles section, users will find the same functionality as My Blogs, but for articles. The create and edit forms include Article Title, Topic, Content Type, Categories, Article Content, Video URL, Tags, Article Image, Social Links, and meta fields.
- Users can also add extra content sections using the Add Content button with Content and Image fields. Enter the details and click Save.
- Once saved, articles follow the same approval process as blogs, appearing as pending until approved by administrators and then displaying on the website article pages. Users can manage additional content sections with edit and delete options.
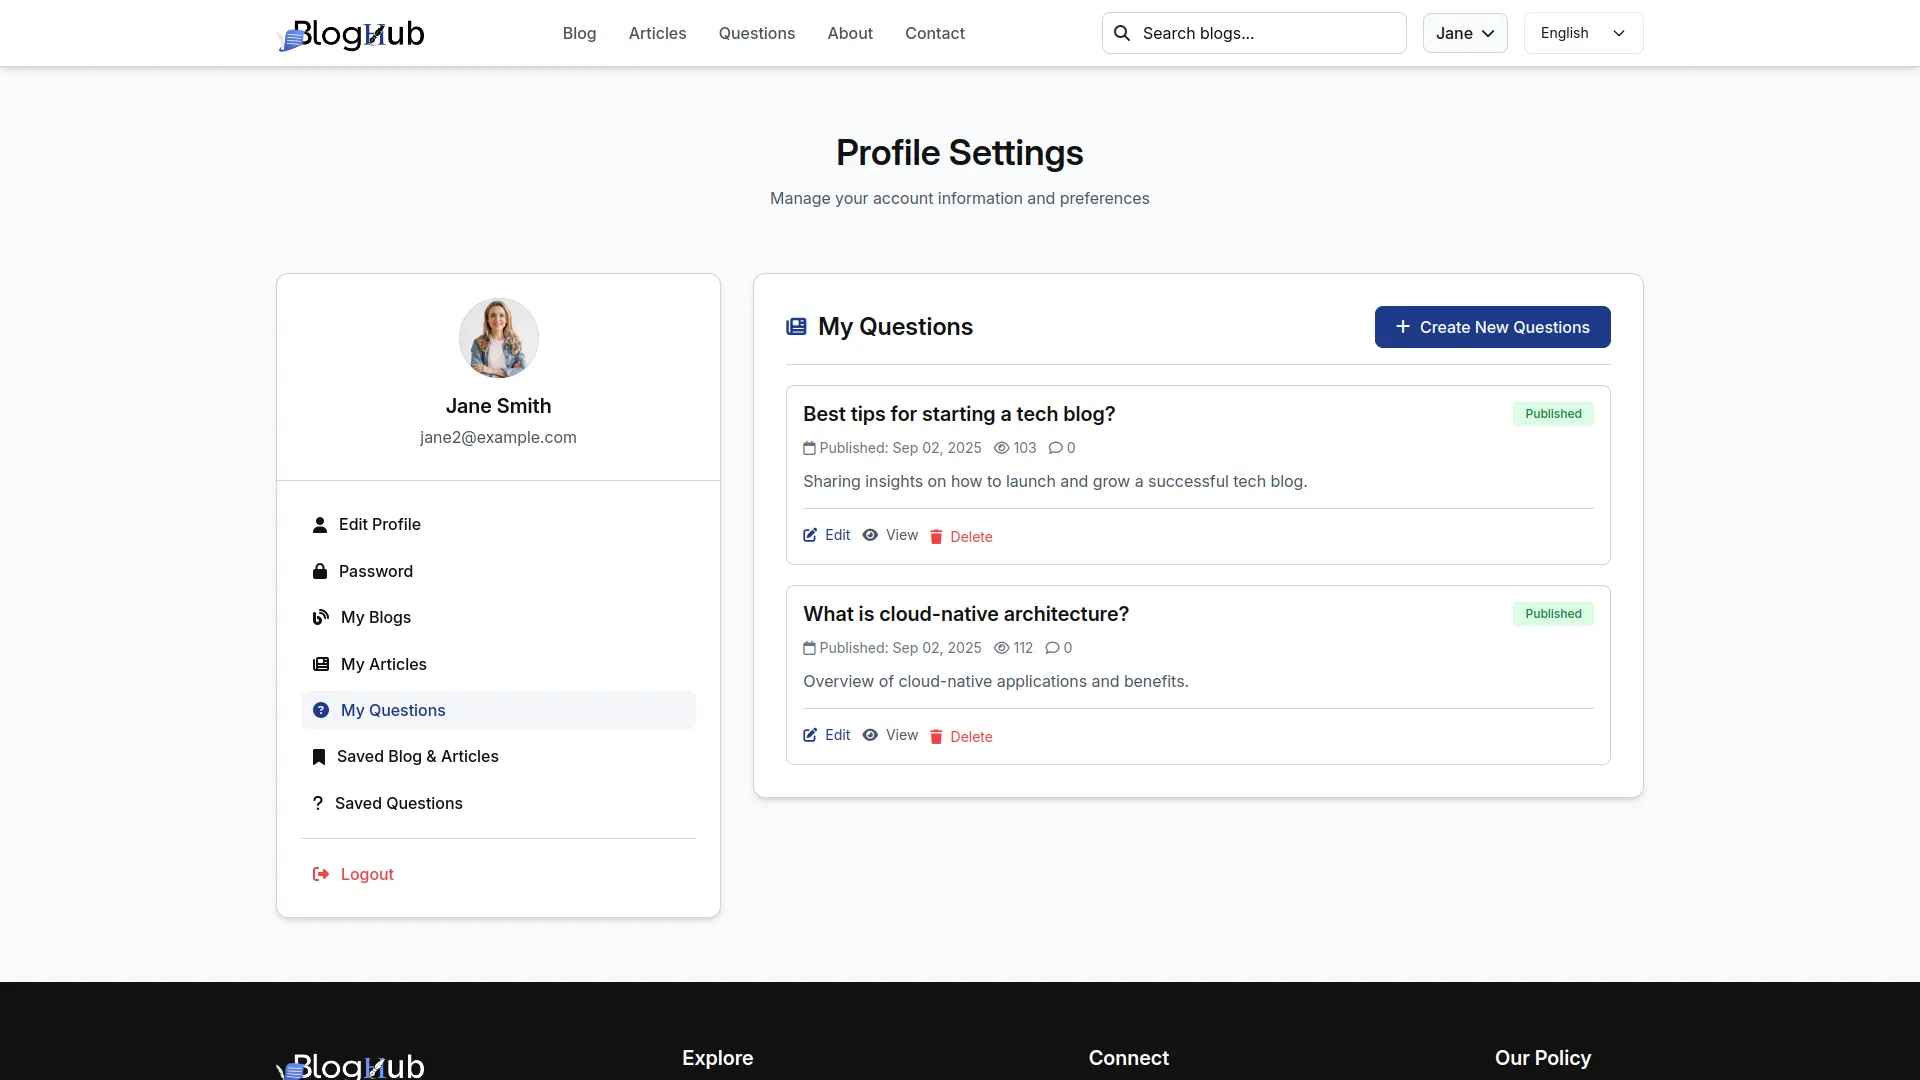
My Questions
- In the My Question section, users can view all their created questions with Create, Edit, Delete, and View buttons. The create form includes fields for Question, Topic (which comes from the System Setup Topic module), Question Content, Meta Title, Meta Description, and Meta Keywords.
- The edit form contains the same fields: Question, Topic (sourced from the System Setup Topic module), Question Content, Meta Title, Meta Description, and Meta Keywords. Enter the details and click Save.
- Once saved, user-created questions are submitted. Users can manage their questions by editing existing content or deleting questions they no longer need. The Topic field connects to the backend System Setup Topic module, ensuring questions are properly categorized according to the predefined topics configured by administrators.
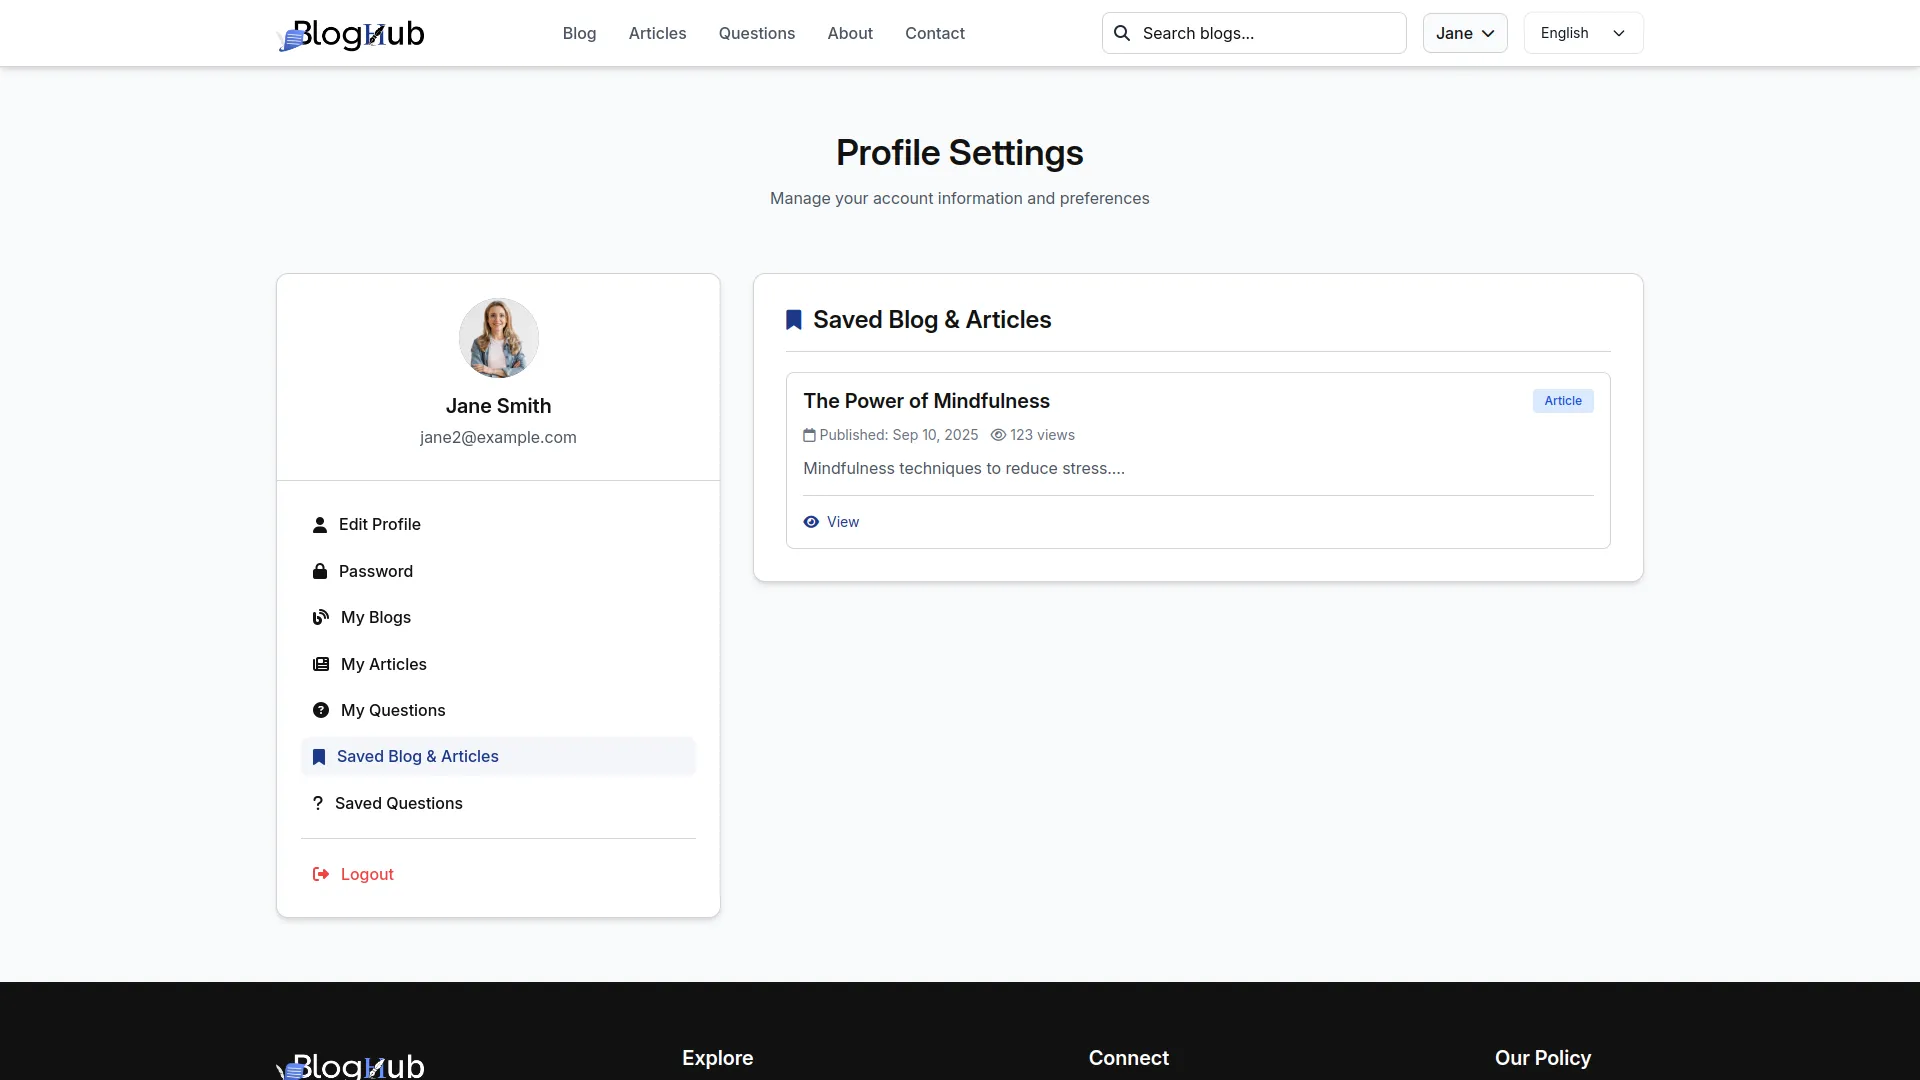
Saved Content
- In the Saved Blogs & Articles and Saved Questions sections, users can view all content they’ve saved while browsing the website. Each item has a View button to access the full content details.
- Once content is saved, users can quickly return to their favorite blogs, articles, and questions through their personal dashboard, creating a personalized reading experience.
Categories
Related articles
- Skip Cart Module Integration in eCommerceGo SaaS
- Catering Management Integration in Dash SaaS
- WhatsApp API Integration in BookingGo SaaS
- Team Workload Integration in Dash SaaS
- User Manual – Taskly SaaS
- Car Dealership Integration in Dash SaaS
- Freight Management System Integration in Dash SaaS
- Newspaper Distribution Management Integration in Dash SaaS
- AI Document Integration in Dash SaaS
- Africa’s Talking Detailed Documentation
- Pipedrive Detailed Documentation
- Bulk Delete Module Integration in eCommerceGo SaaS
Reach Out to Us
Have questions or need assistance? We're here to help! Reach out to our team for support, inquiries, or feedback. Your needs are important to us, and we’re ready to assist you!


Need more help?
If you’re still uncertain or need professional guidance, don’t hesitate to contact us. You can contact us via email or submit a ticket with a description of your issue. Our team of experts is always available to help you with any questions. Rest assured that we’ll respond to your inquiry promptly.
Love what you see?
Do you like the quality of our products, themes, and applications, or perhaps the design of our website caught your eye? You can have similarly outstanding designs for your website or apps. Contact us, and we’ll bring your ideas to life.
