
Sign in with Bitbucket – WorkDo Dash SaaS Add-On Guide
Learn how to configure and manage Bitbucket sign-in integration in WorkDo Dash SaaS easily.
Introduction
The Sign in with Bitbucket Add-On offers a streamlined and secure authentication method, enabling users to log in using their Bitbucket credentials. This integration reduces the need for multiple passwords, enhances user trust, and leverages Bitbucket’s developer-focused network for identity verification. By incorporating this Add-On, businesses can boost user convenience, particularly for users active on Bitbucket, potentially increasing engagement and credibility. This documentation provides a complete guide for implementing and customizing the Sign-in with Bitbucket Add-On to ensure smooth and effective integration tailored to your business requirements.
How To Install the Add-On?
To Set Up the Sign-In with Bitbucket Add-On, you can follow this link: Setup Add-On.
How To Use The Sign-In With Bitbucket Add-On?
After the super admin enables the Add-On, the end users can easily access and use the Add-On.
- After the purchase process, log in to your super admin account and navigate to the settings page in the sidebar.
- In the settings, find and click on the Sign-In With Bitbucket Settings .
- Enter the Bitbucket client ID and client secret. Upload the necessary image, and then click on the save changes button.
- Once these credentials are entered, the end users will be able to sign in to your store using their Bitbucket accounts.
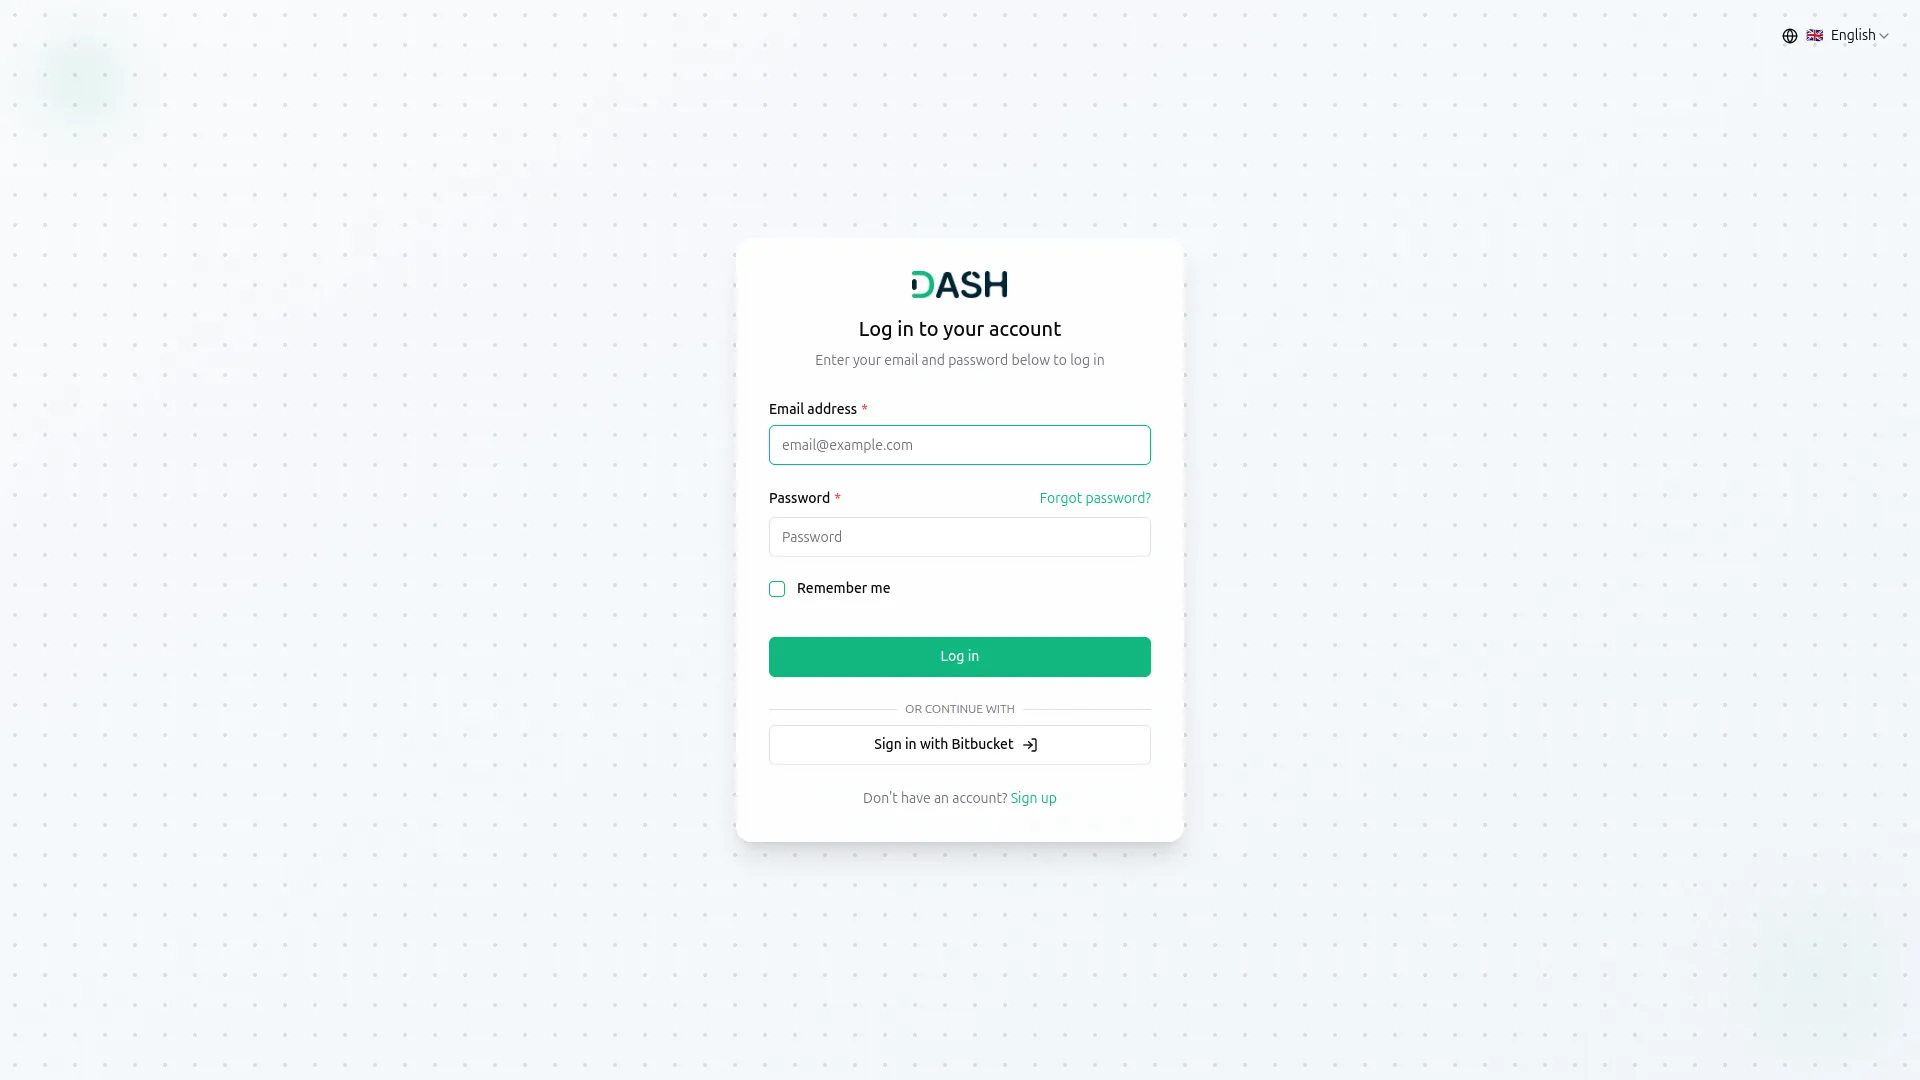
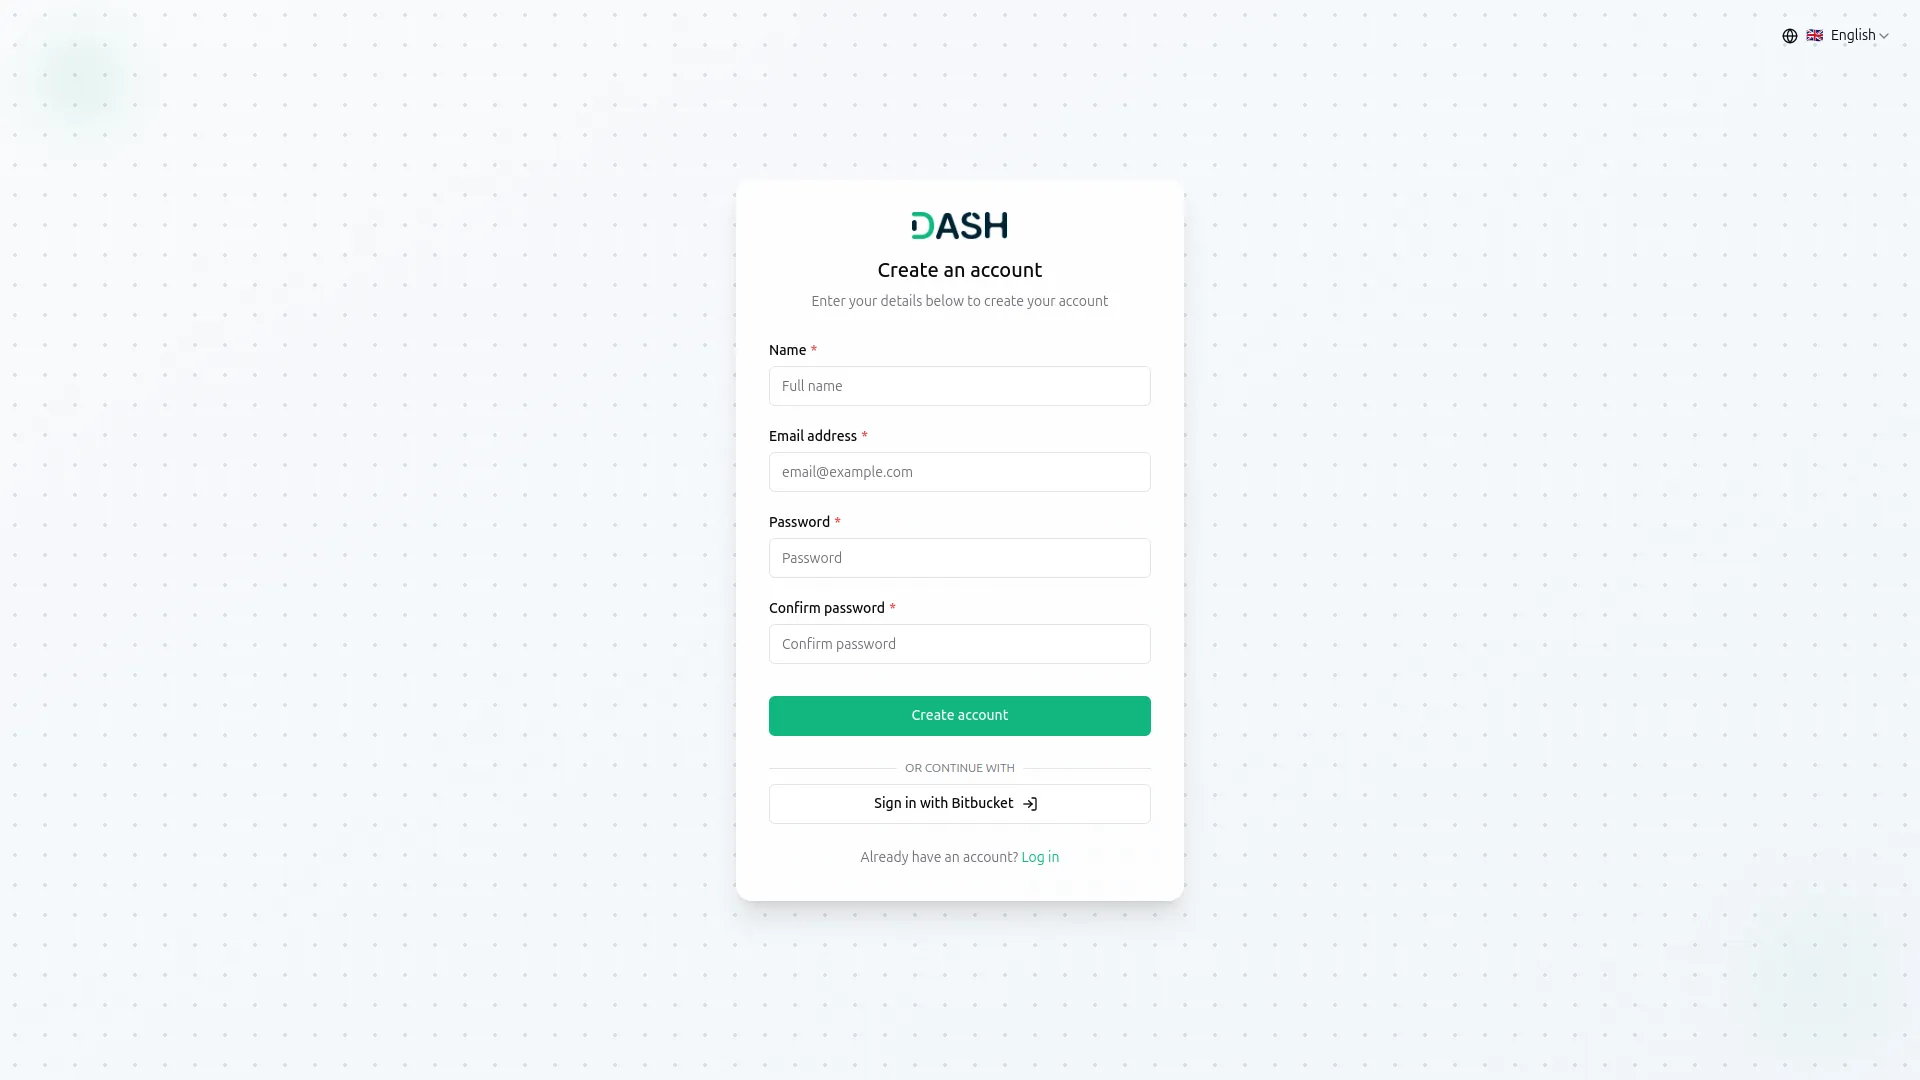
- The image that you upload on the super admin side will be visible on the login and register page in the Sign-In With Bitbucket button.
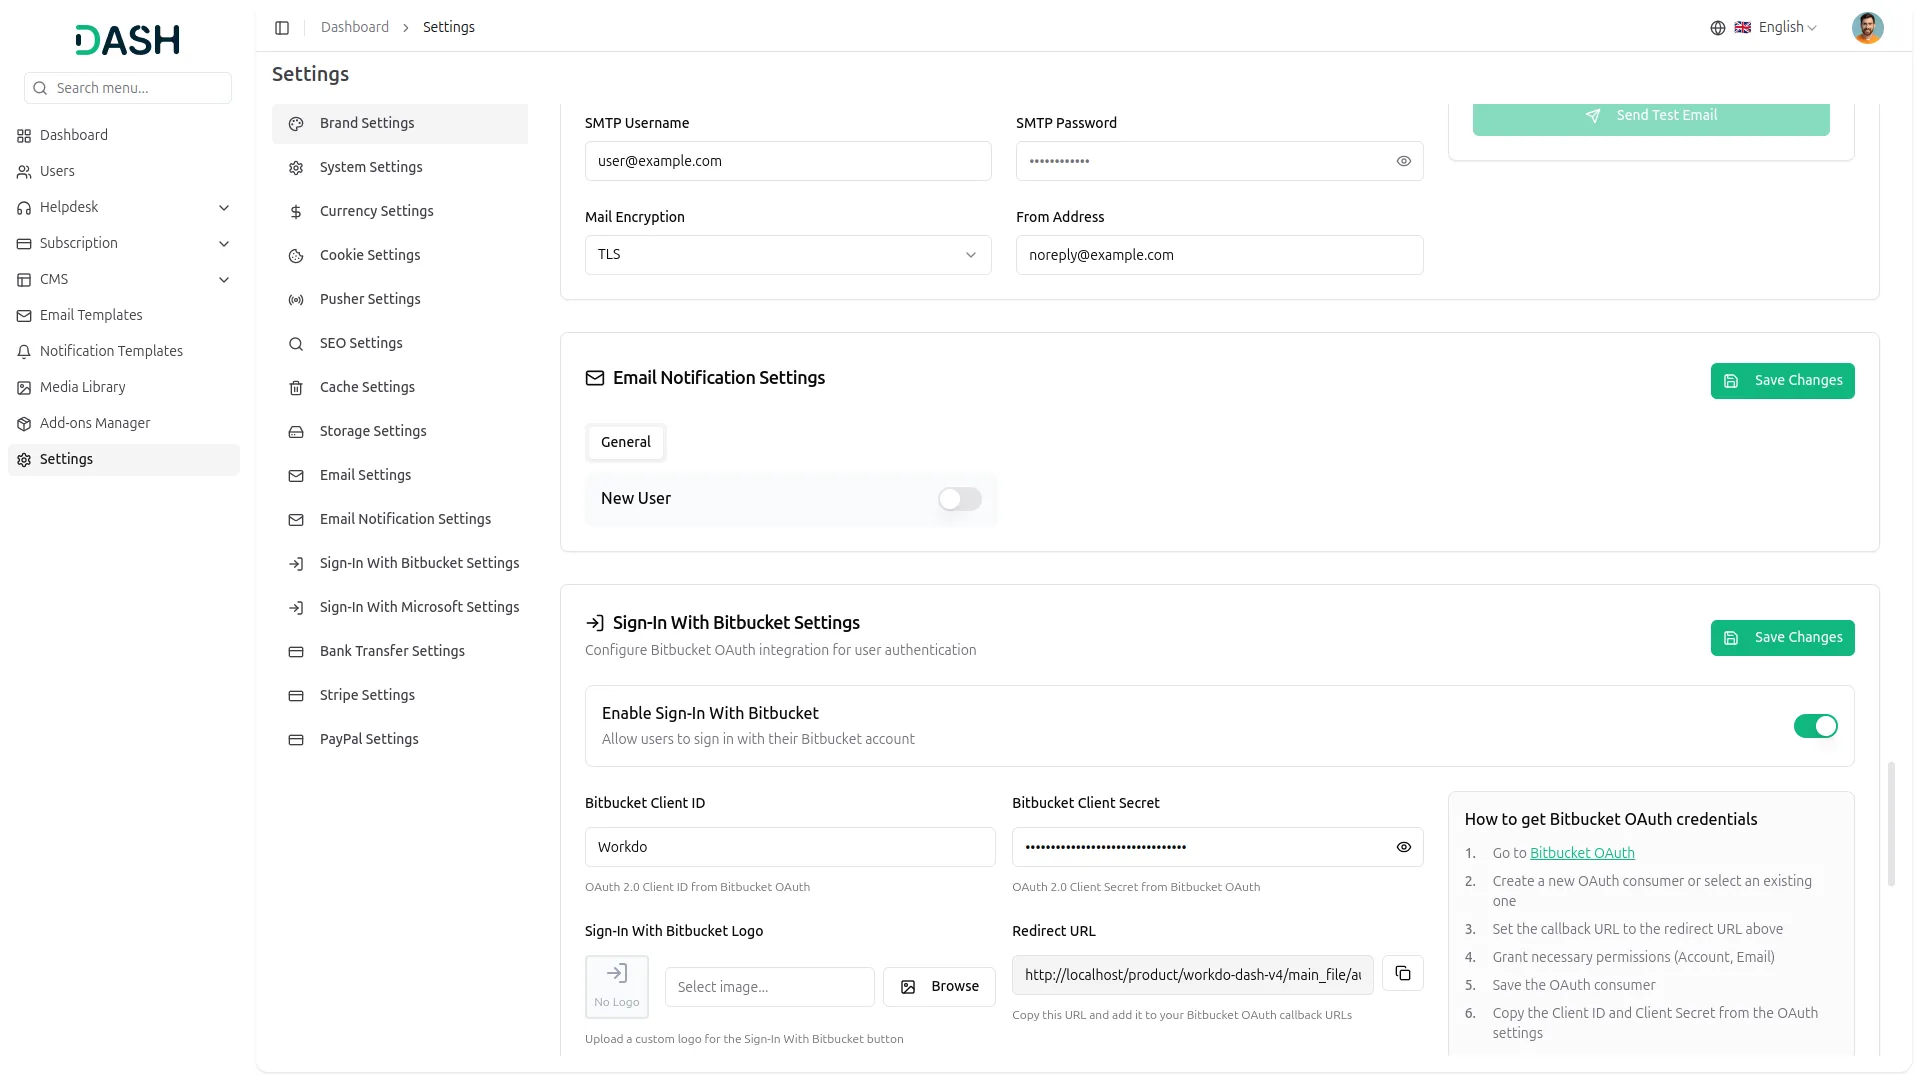
To generate the credentials, you can follow these steps:
Steps to Generate Credentials:
1. Sign In to Bitbucket
- Go to https://bitbucket.org/ and sign in using your Atlassian account credentials.
2. Create a New Project
- After logging in, create a new project as per your requirements.
3. Access Workspace Settings
- Click on the Settings icon.
- Then select Workspace Settings from the dropdown menu.
4. Navigate to OAuth Consumers
- From the left sidebar, select OAuth Consumers.
5. Add a New OAuth Consumer
- Click Add consumer.
- Enter the required details.
- Copy the callback URL from your application settings and paste it into the corresponding field here.
- Assign the necessary permissions based on your use case.
- Save the consumer.
6. Get Client ID and Secret
- After saving, click on the newly created consumer.
You will find the Key and Secret.
- The Key is your Bitbucket Client ID.
- The Secret is your Bitbucket Client Secret.
Once you add the credentials and activate the Sign-in with Bitbucket Add-On, a Bitbucket login button will appear on your register and login pages. By clicking it, the end users can easily log in to your store using their Bitbucket credentials.
Categories
Related articles
- Plisio – BookingGo SaaS Add-On Guide
- Portfolio – WorkDo Dash SaaS Add-On Guide
- Flexible Days – BookingGo SaaS Add-On Guide
- YooKassa – BookingGo SaaS Add-On Guide
- Tip – BookingGo SaaS Add-On Guide
- Fatora – BookingGo SaaS Add-On Guide
- Performance – WorkDo Dash SaaS Add-On Guide
- Medical Lab Management – WorkDo Dash SaaS Add-On Guide
- PowerTranz – WorkDo Dash SaaS Add-On Guide
- Export Conversations – TicketGo Add-On Guide
- AI Content Generation in WorkDo Dash SaaS
- Africa’s Talking – WorkDo Dash SaaS Add-On Guide
We're Here to Help - Let's Talk
Have questions about our solutions, customization services, or business tools? Our team is here to help you. let's talk.