Water Park Management
The Water Park Management Add-On is a comprehensive software solution designed to manage all aspects of water park operations.
Introduction
The Water Park Management Add-On is a powerful software solution designed to manage all aspects of water park operations. This system helps you handle bookings, manage rides, track maintenance, run seasonal promotions, manage clothing sales, and maintain your park’s website. The software provides an easy-to-use dashboard, complete booking management, ride operations, staff coordination, promotional campaigns, and a fully functional website that displays all your park information to customers.
How To Install The Add-On?
To Set Up the water park management Add-On, you can follow this link : Setup Add-On.
How To Use The Water Park Management Add-On?
Water Park Dashboard
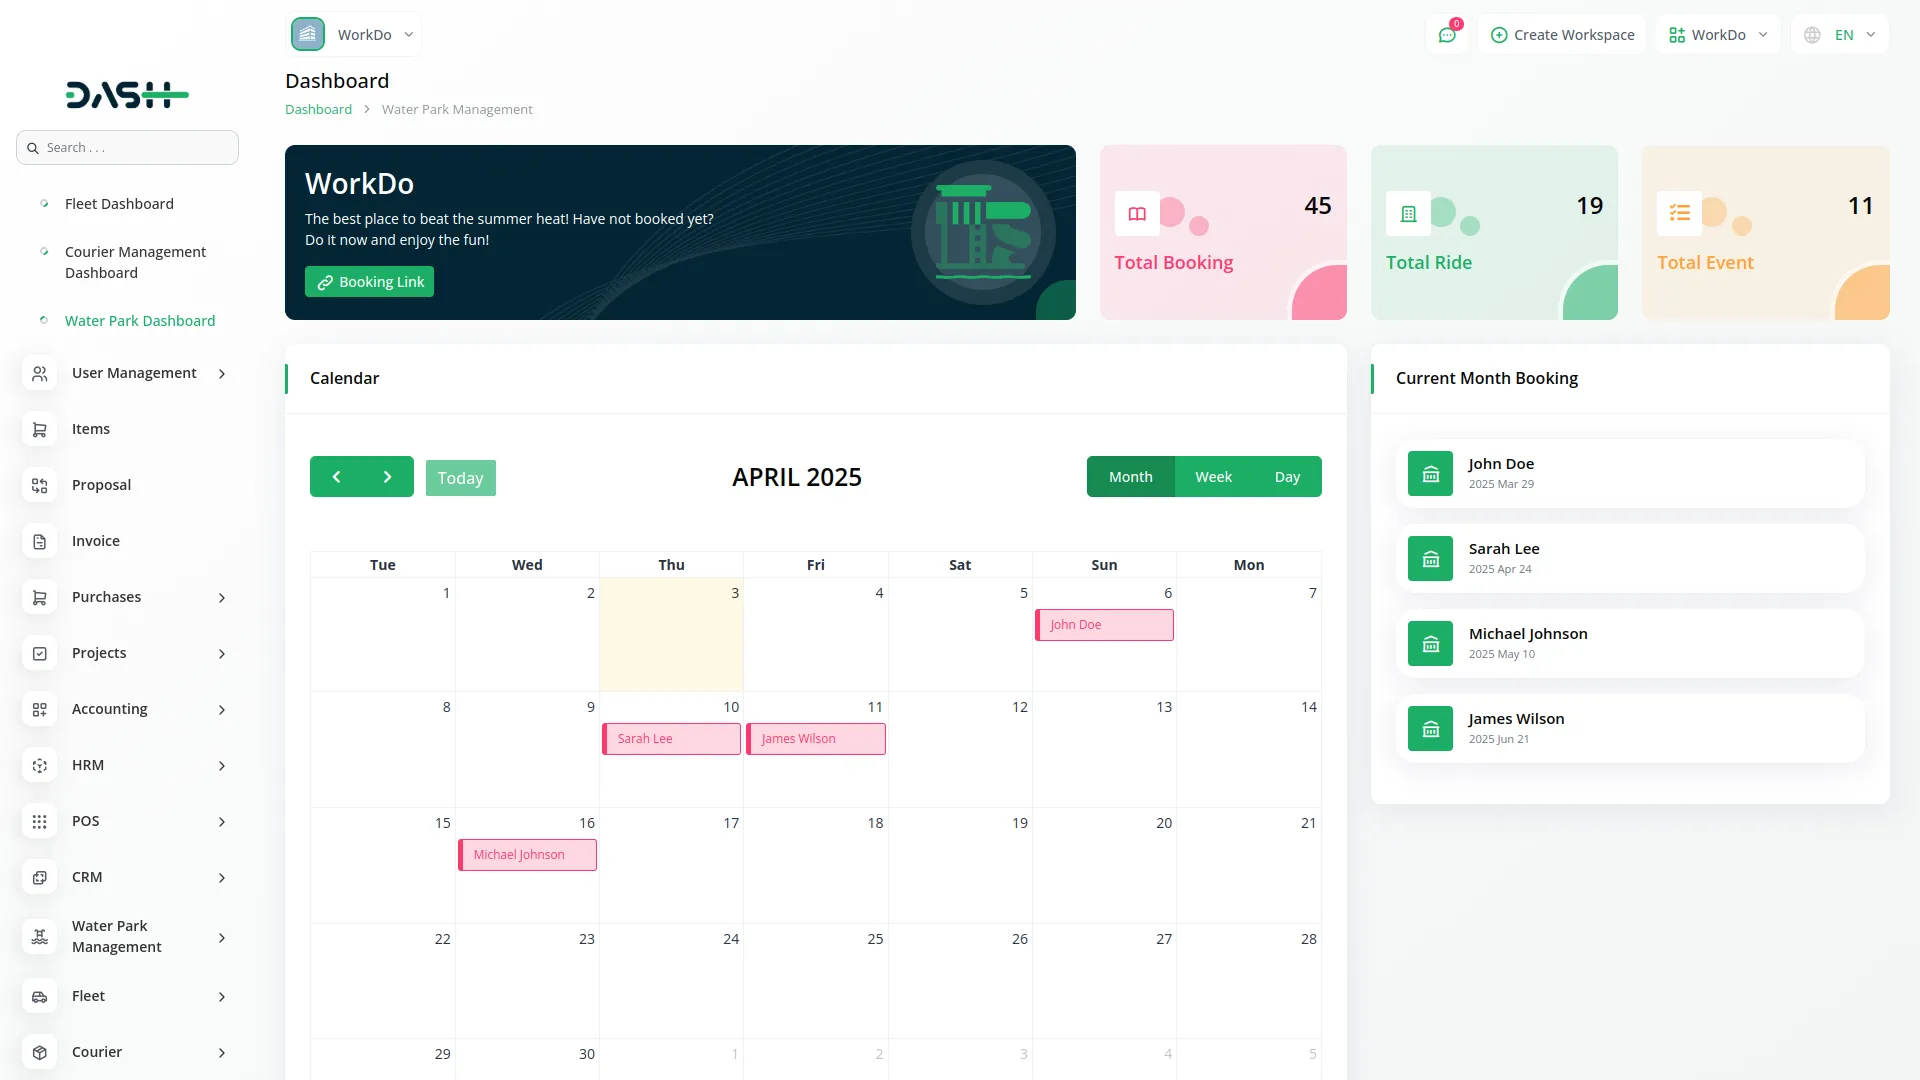
- After purchasing the Add-On, the first thing you will see is the dashboard. At the dashboard, you’ll find a “Copy Link” button. Click this button to copy the booking link, then paste it to open the frontend booking page where customers can create new bookings.
- Besides that, you will see three important matrix cards, including the total number of bookings, total rides, and total events.
- Below these details, the calendar feature lets you see current month bookings in an easy-to-read format. You can change the calendar view to show monthly, yearly, or daily booking data by clicking the view options above the calendar.
Important Note : Only the sections set through System Setup will be displayed on the website. Please ensure the desired sections are properly configured.
Brand Setting & Banner section:
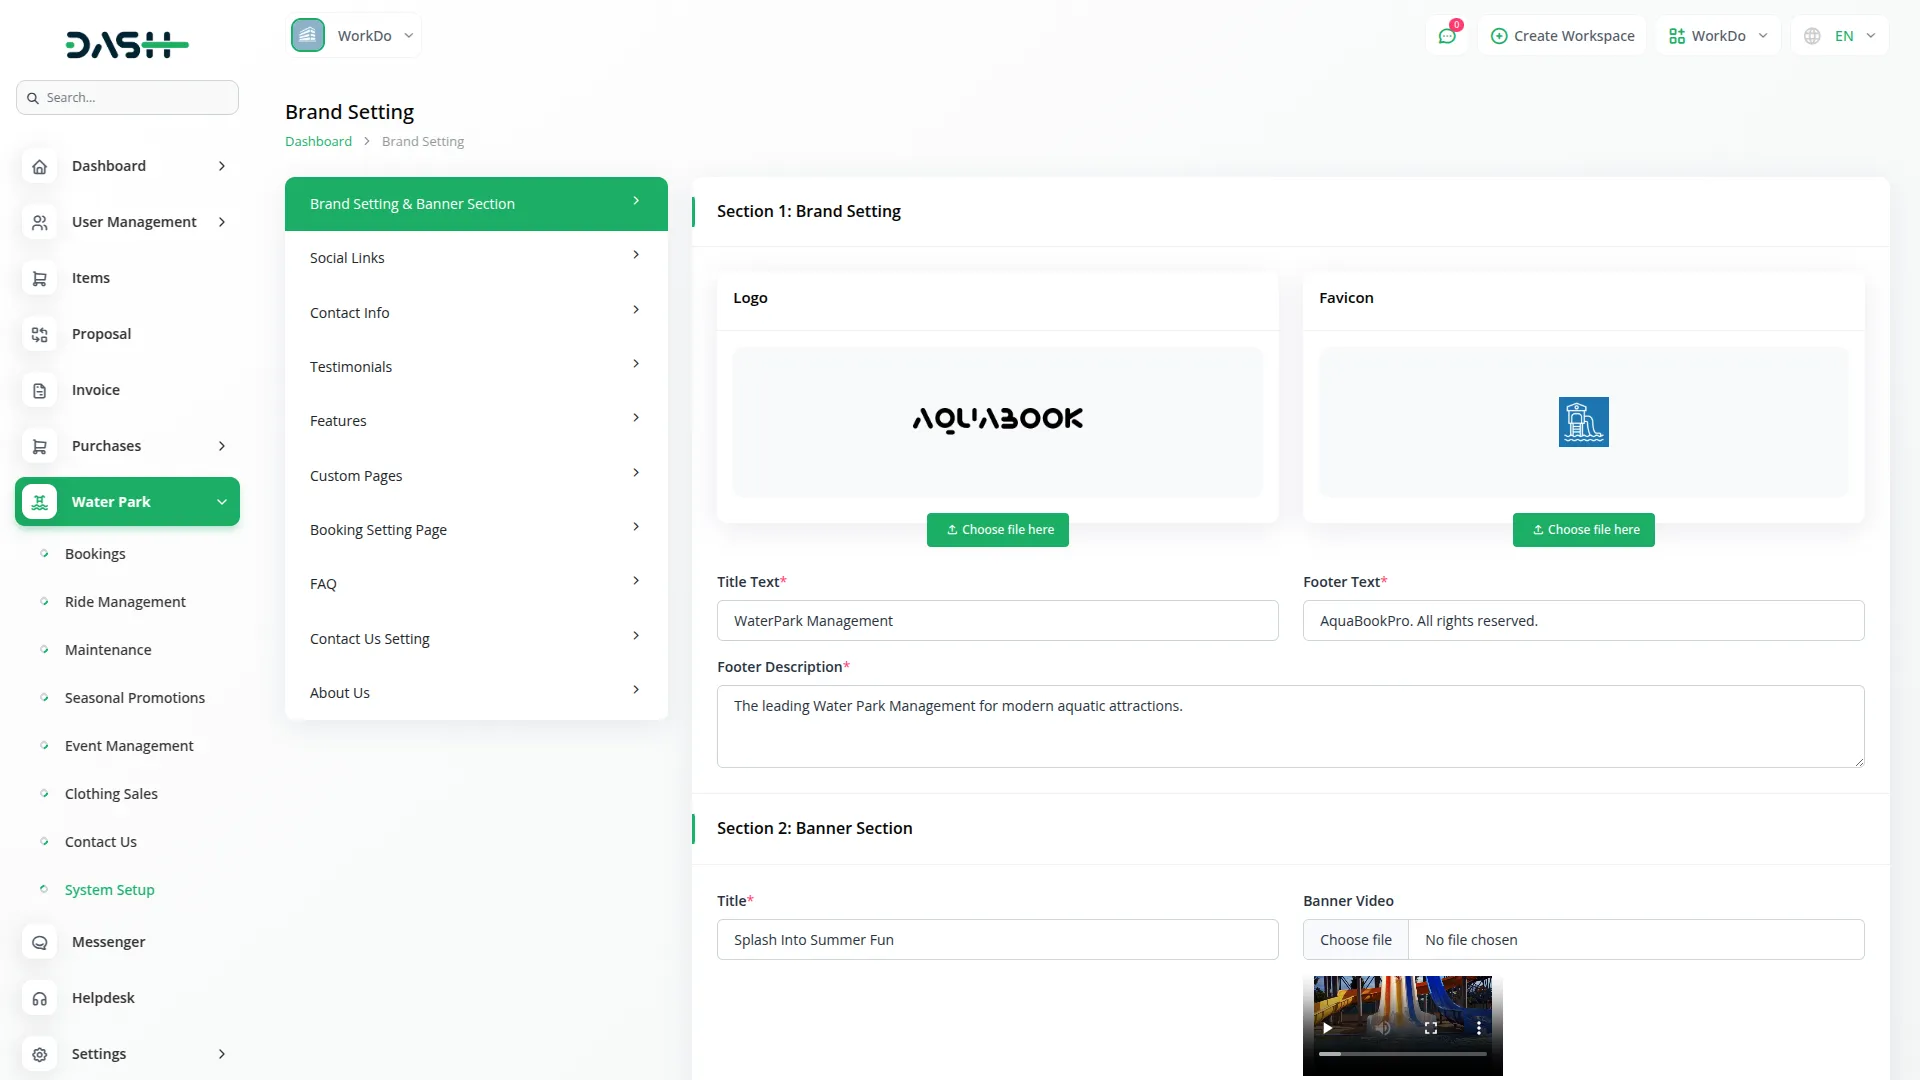
- To configure brand settings, navigate to the Brand Settings & Banner section, Popular attraction to create content.
Brand setting
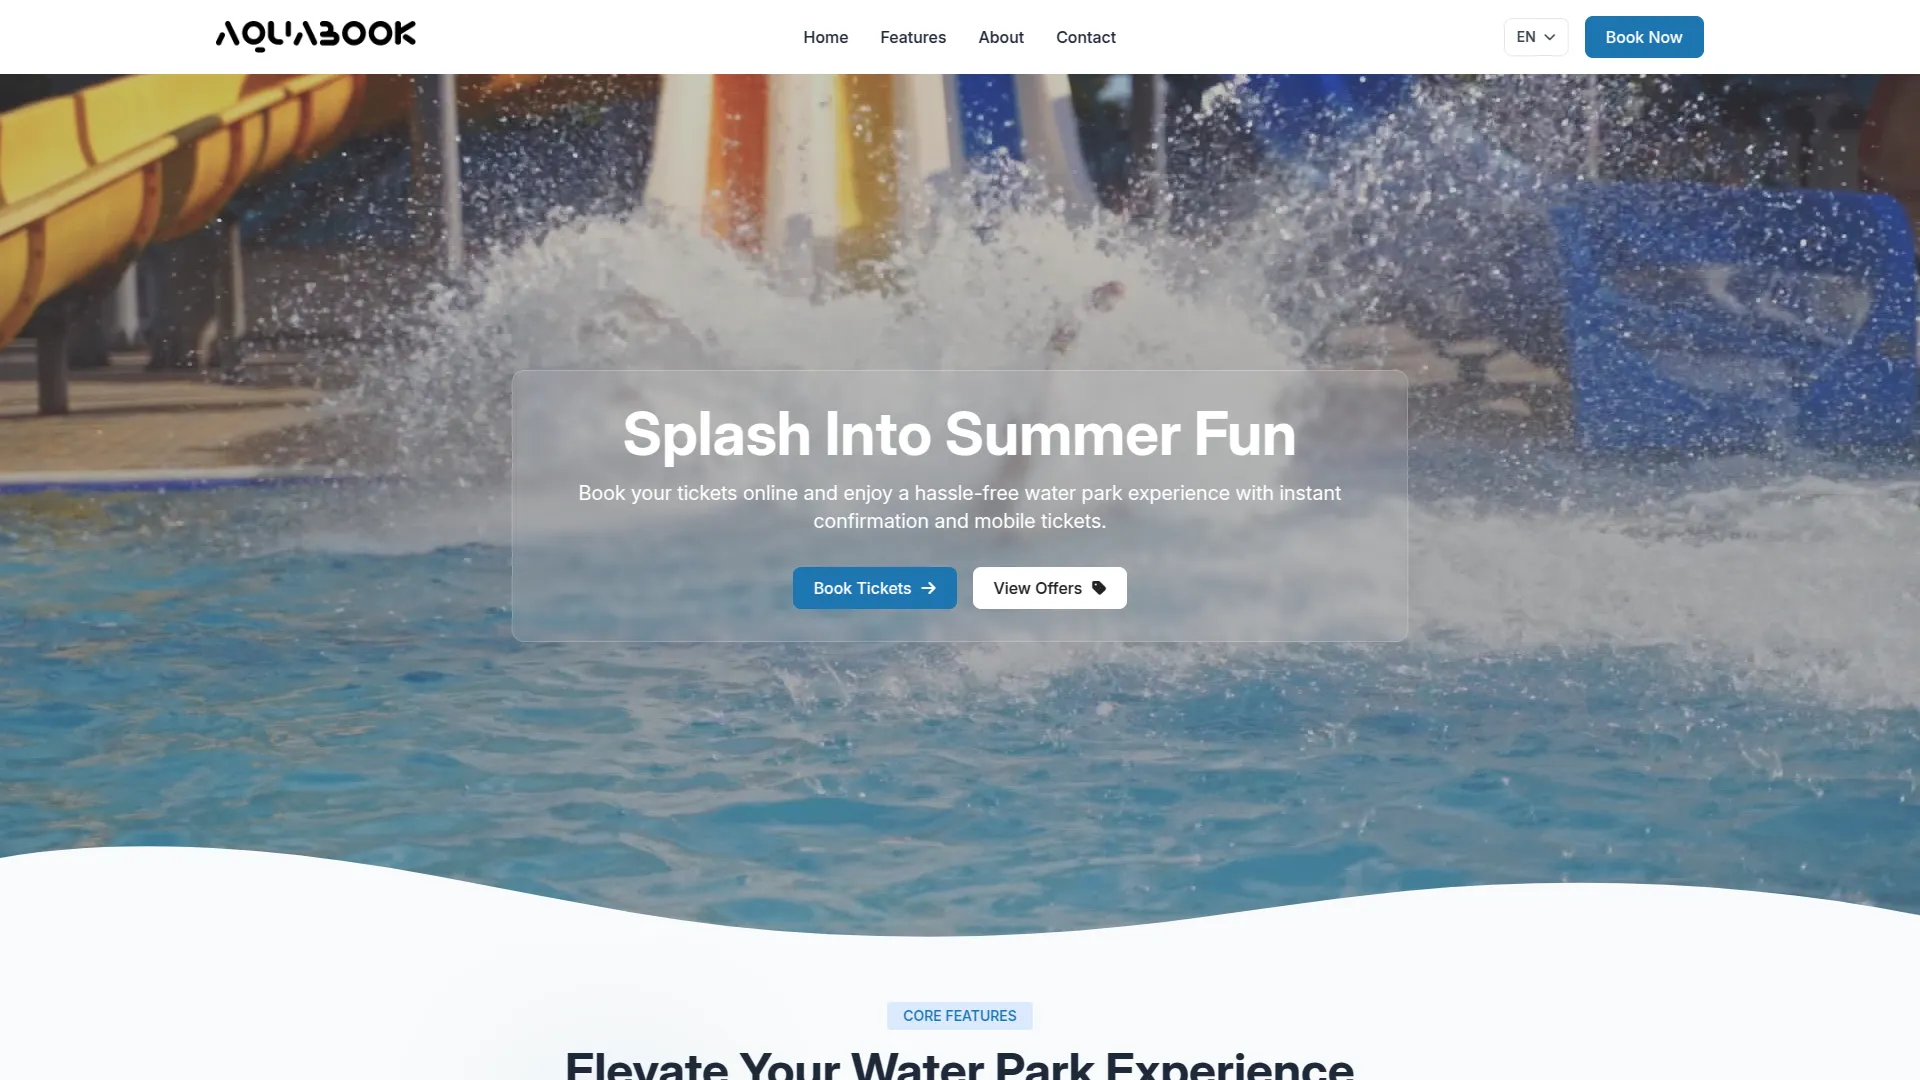
- In the Brand Setting section, you configure your waterpark’s basic branding elements. Upload your logo and favicon files, which will automatically appear in the header section of your website from the backend. As an admin, you can change or update these anytime to match your website’s design and branding needs. Along with this, you can also set your website title text, footer text, and footer description to maintain a consistent brand identity across the entire site. All the footer details you add here will automatically appear in the footer section of your website.
Banner section
- In the Banner section, you can add your banner title, upload a banner video, and write the banner description that visitors will see on your website homepage. If you ever want to make changes, you can easily update these details from the backend, as the control always remains with the admin.
Popular Attractions
- In the Popular Attractions section, you can enter a title and description to highlight your park’s main features. These details will be displayed on the homepage, and as an admin, you can easily update or modify them anytime from the backend.
Social link:
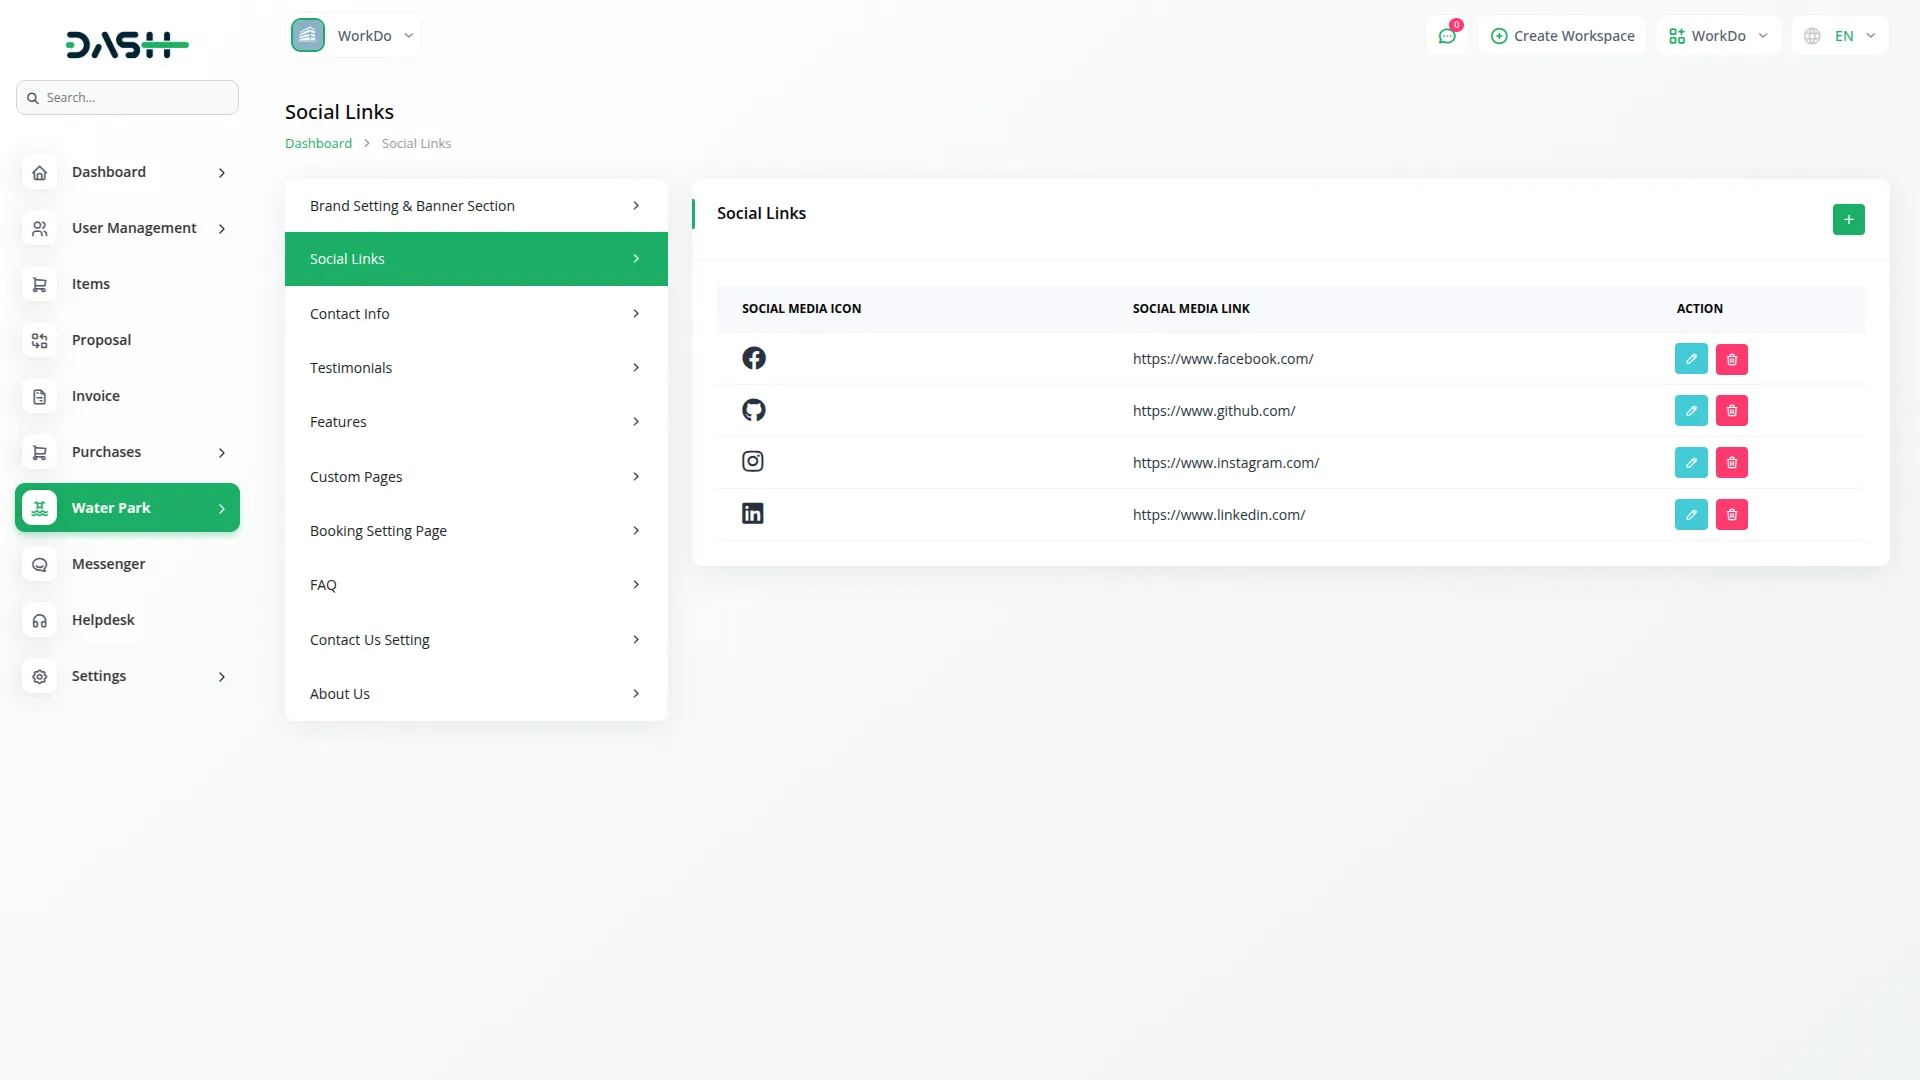
- The Social Links section allows the admin to manage the waterpark’s social media presence directly from the backend. Here, you can add each platform’s icon and URL, making it easy to connect the website with your official accounts. Once added, these links are automatically displayed in the footer section of the website, ensuring visitors can directly access and follow your social media pages.
- This setup ensures that all links entered in the backend are properly reflected on the frontend, helping build trust, improve engagement, and maintain a strong connection with customers through official social platforms.
Contact Information:
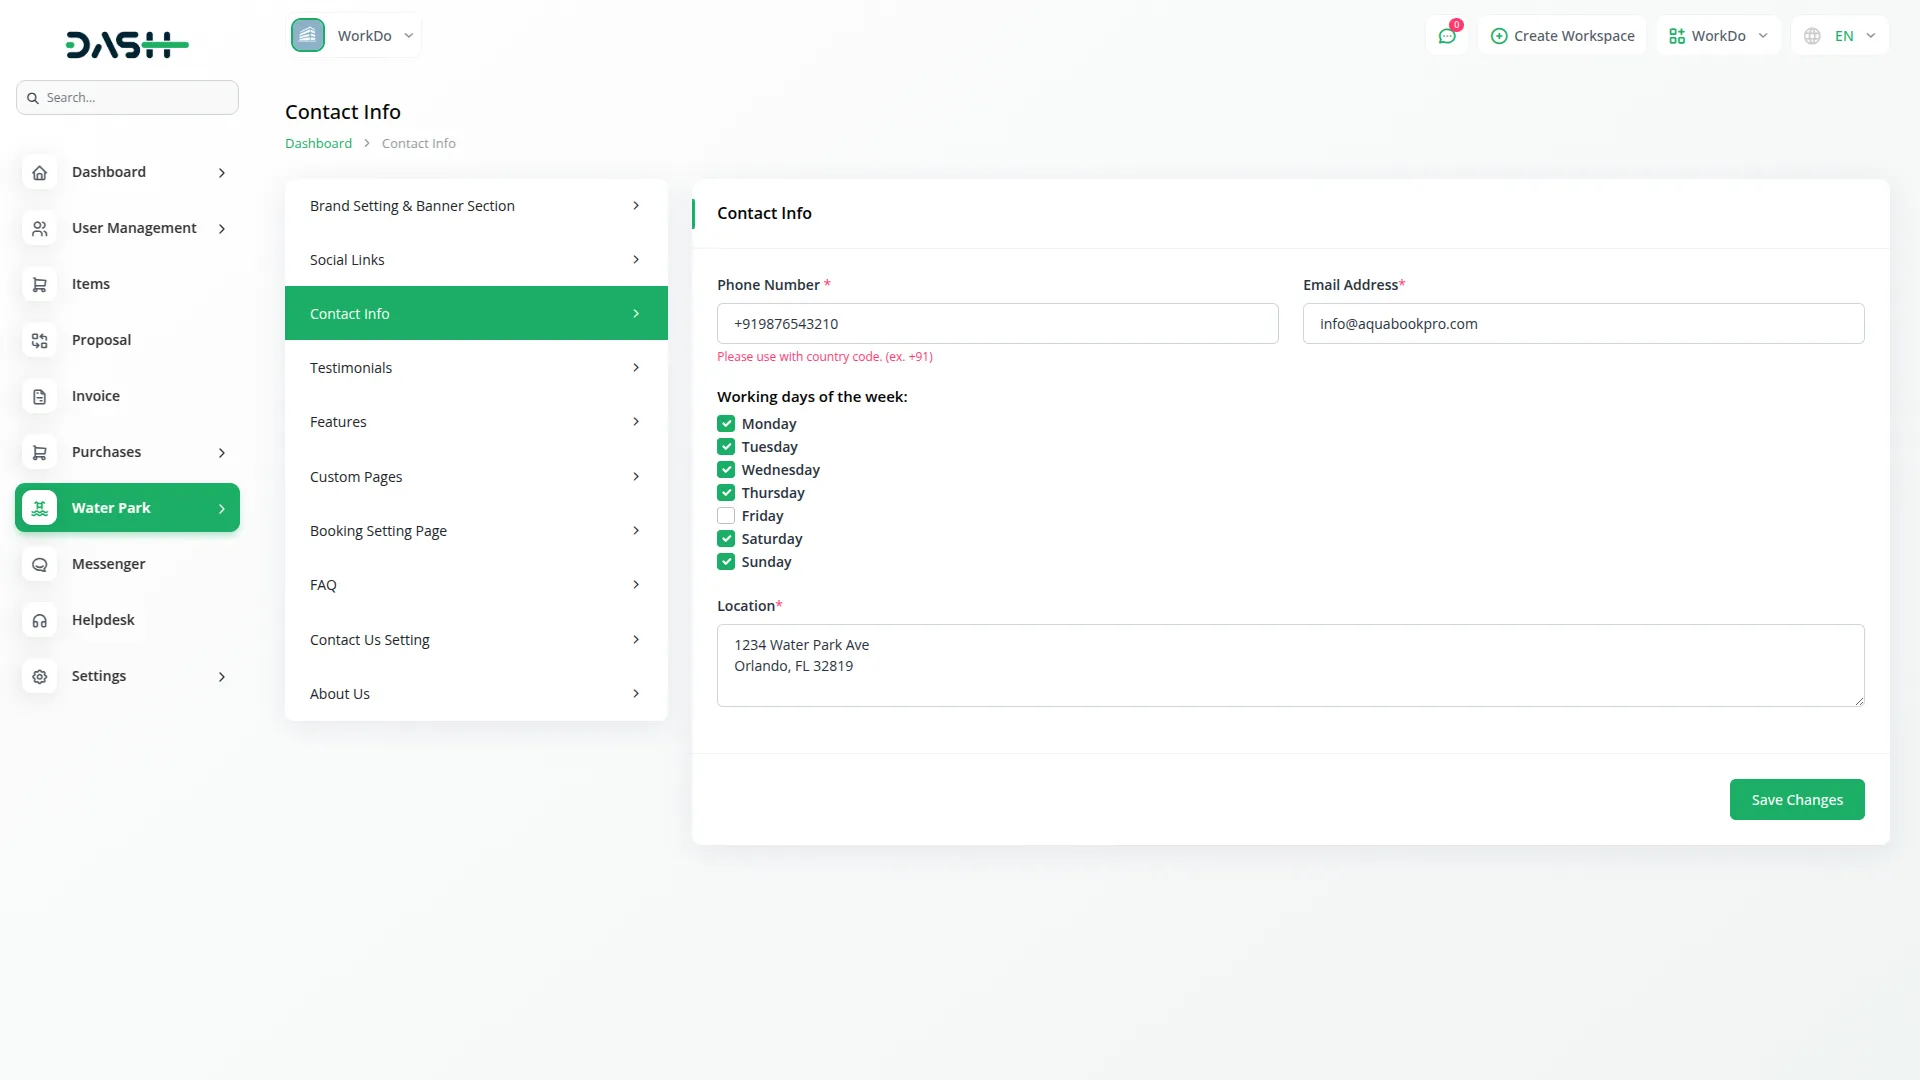
- The Contact Information section allows the admin to enter important details such as phone number, email address, working days of the week, and the location of the park. All details added from the backend are automatically displayed in the website footer as the park’s official contact details.
- This ensures that visitors can easily see the waterpark’s location, working days, and contact information directly from the website footer, making it easy for them to get in touch. The admin can edit these details from the backend at any time.
Testimonials:
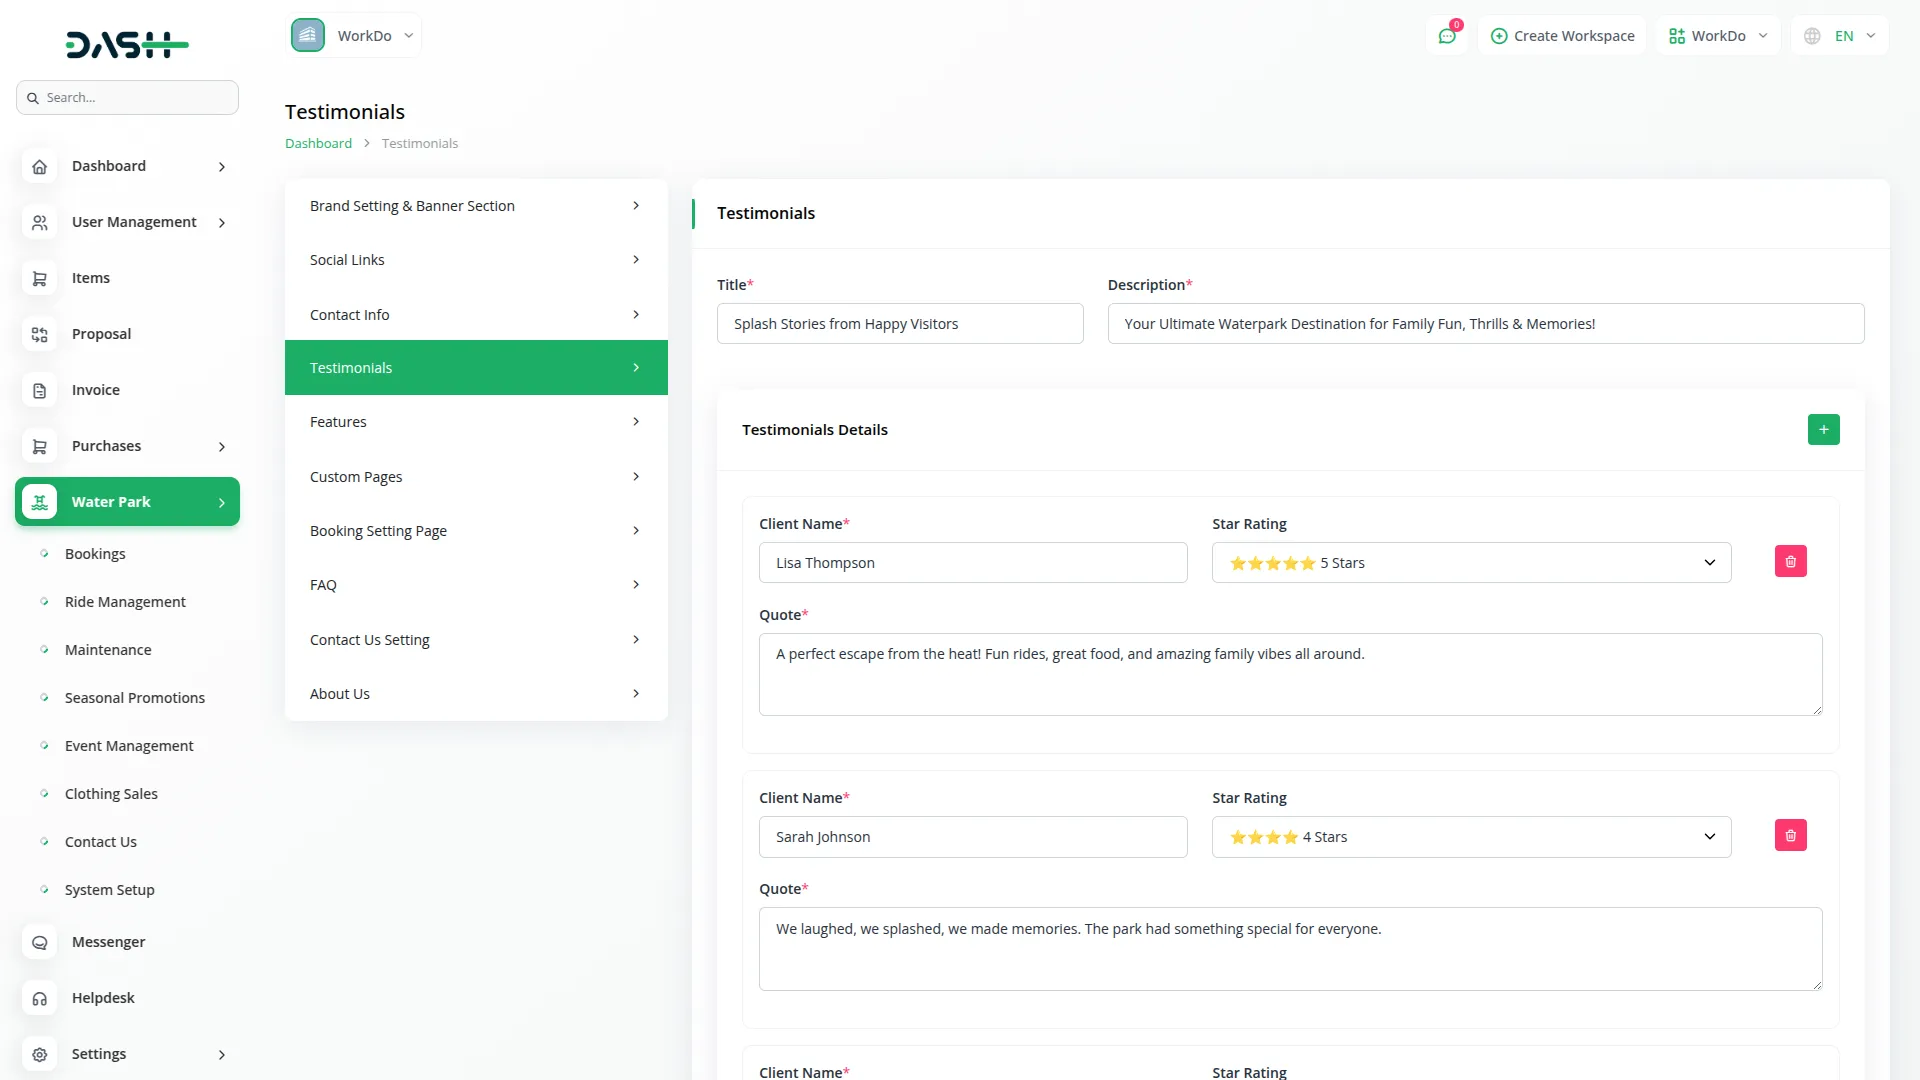
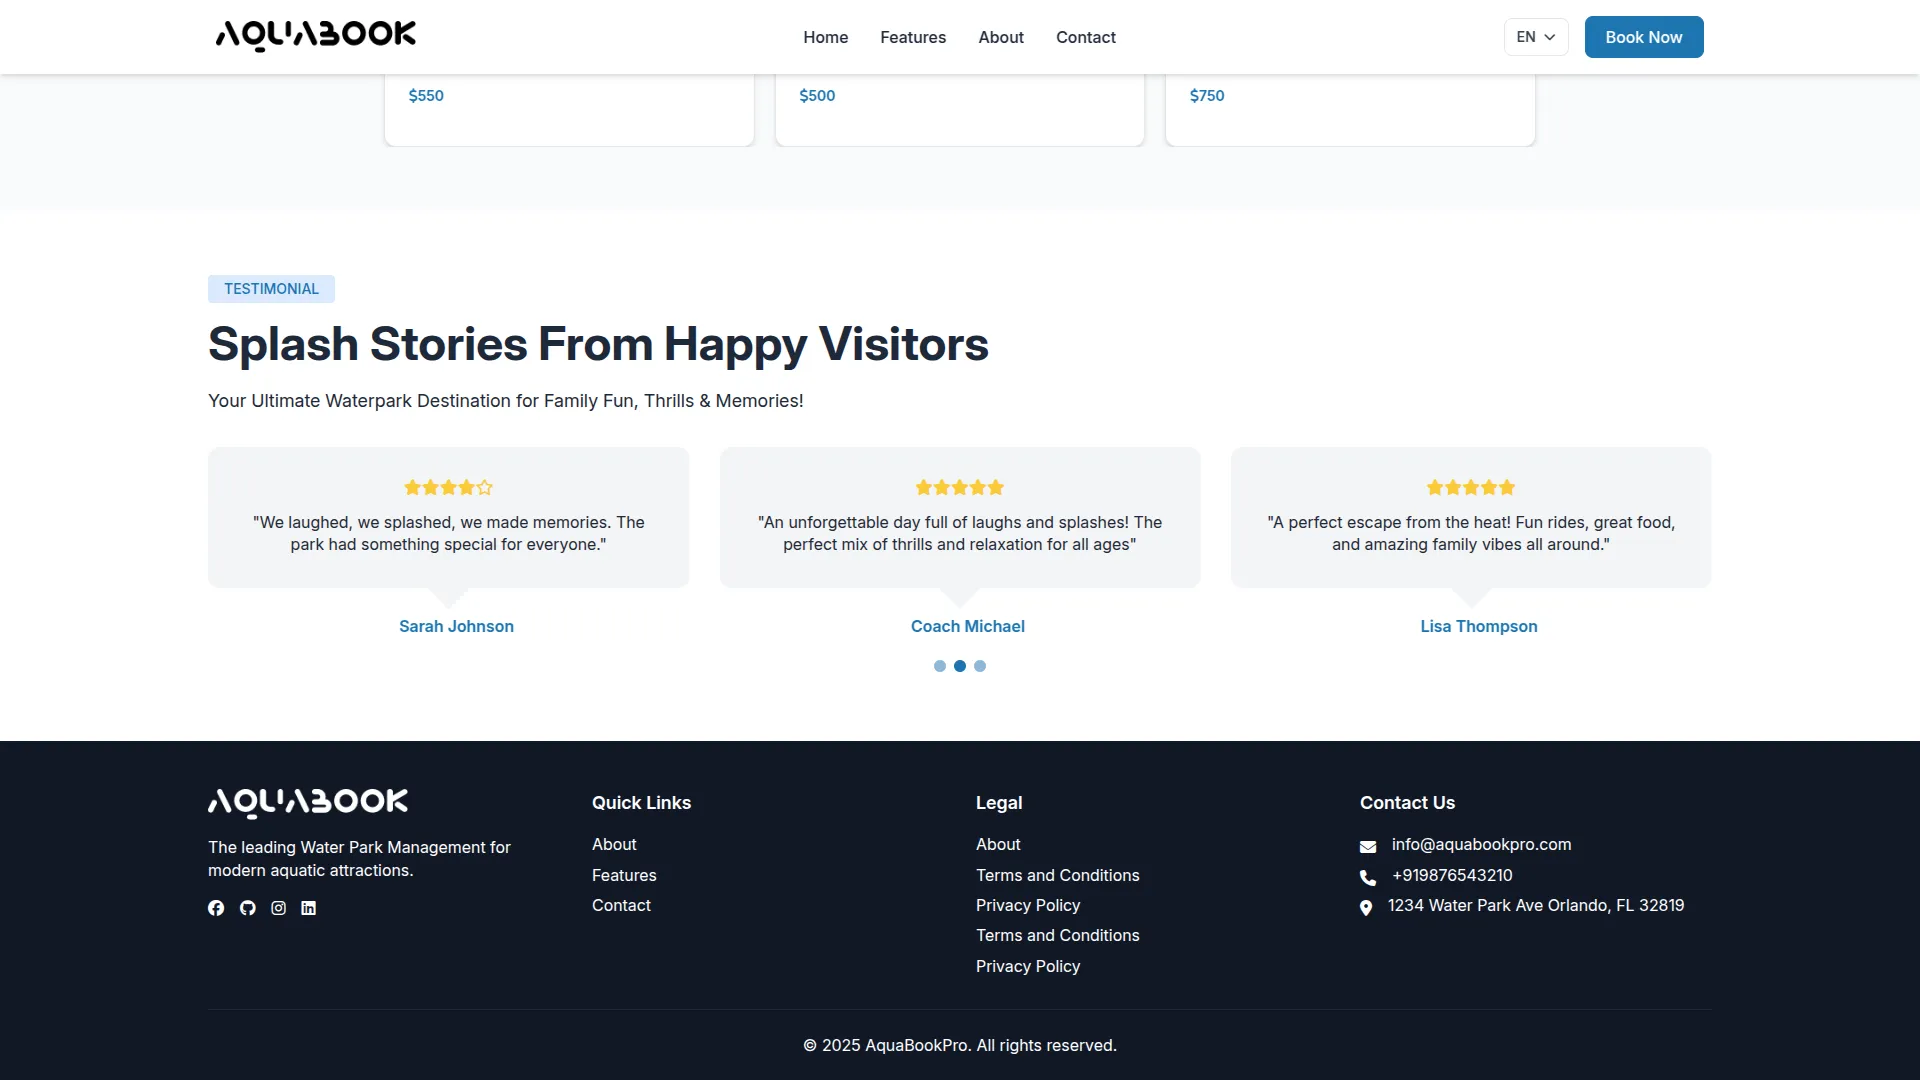
- The Testimonials section allows the admin to add a title, description, client name, star rating, and customer quotes from the backend. Once entered, these details are automatically displayed on the frontend, where visitors can view authentic reviews with the client’s name, rating, and shared feedback. The admin can also easily edit or delete testimonials from the backend at any time. This ensures genuine customer experiences are highlighted, helping to build trust and credibility with new visitors.
Features Setting:
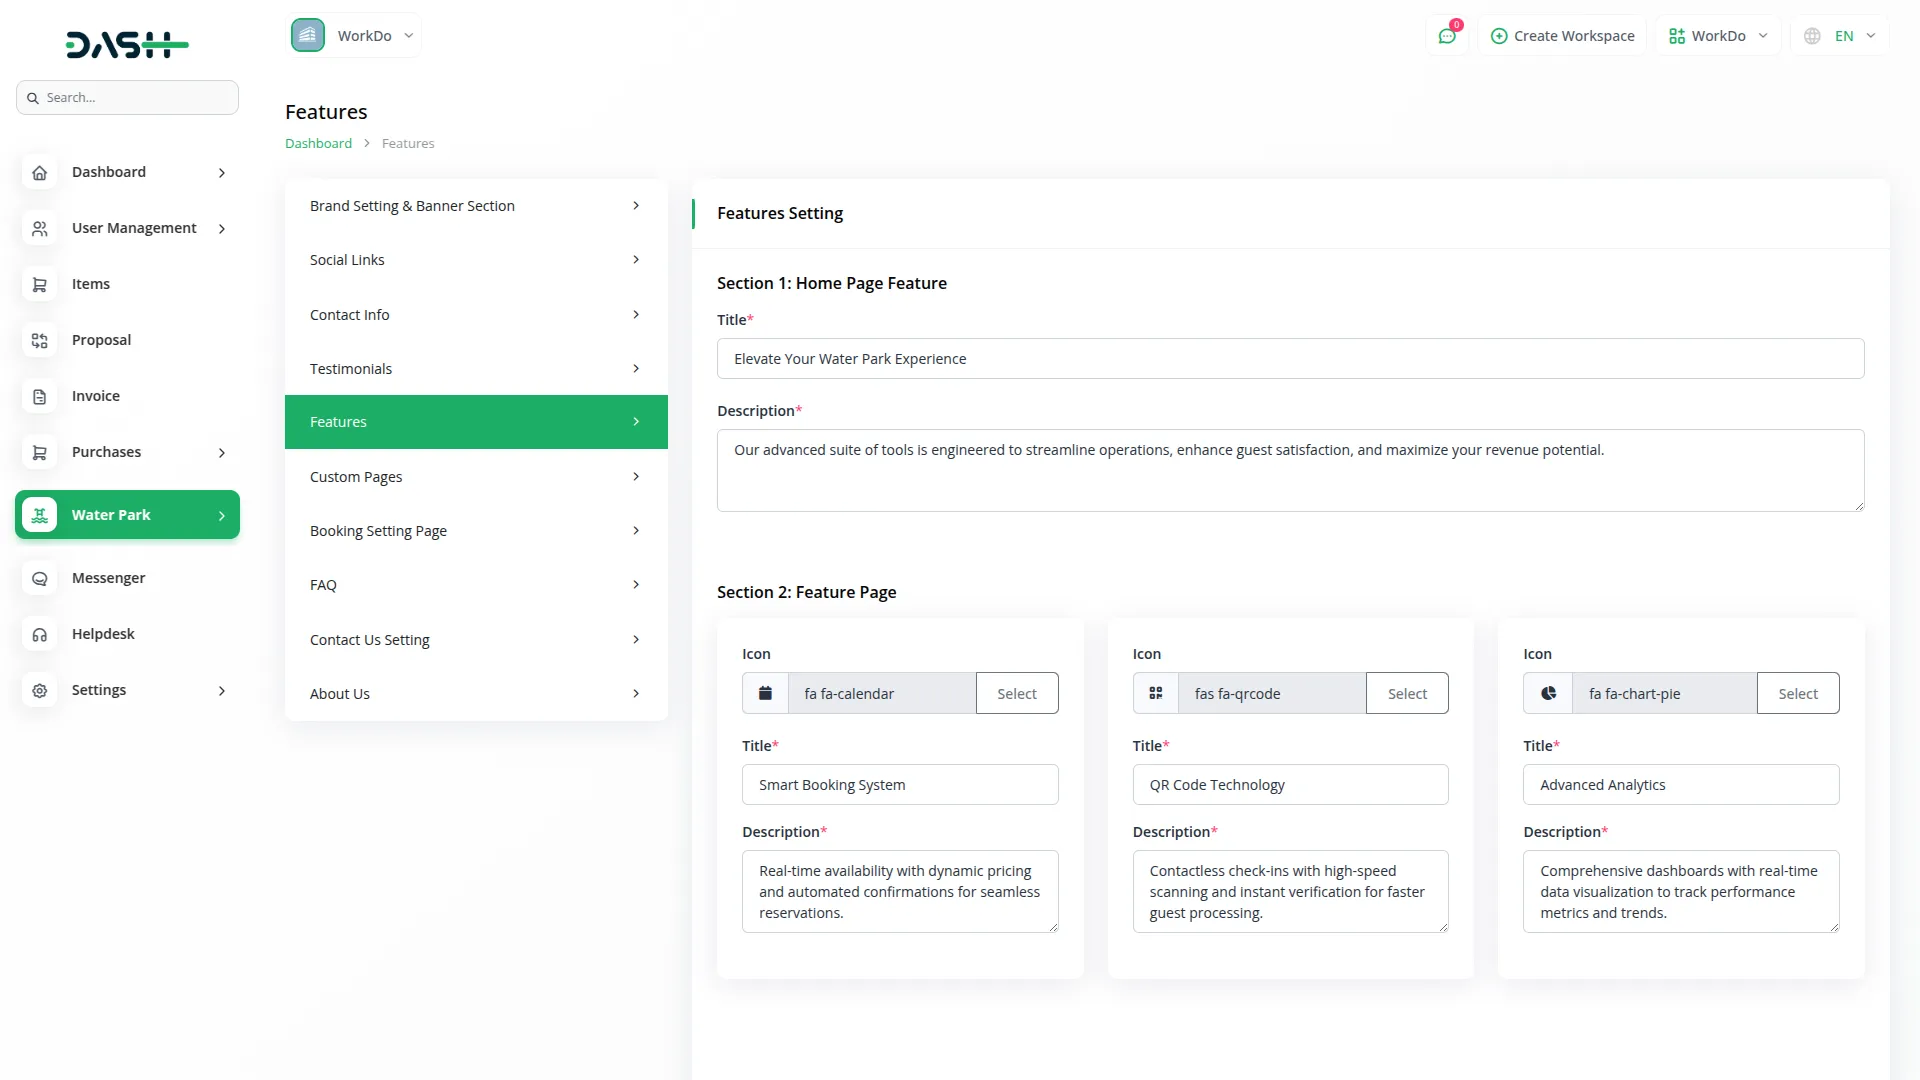
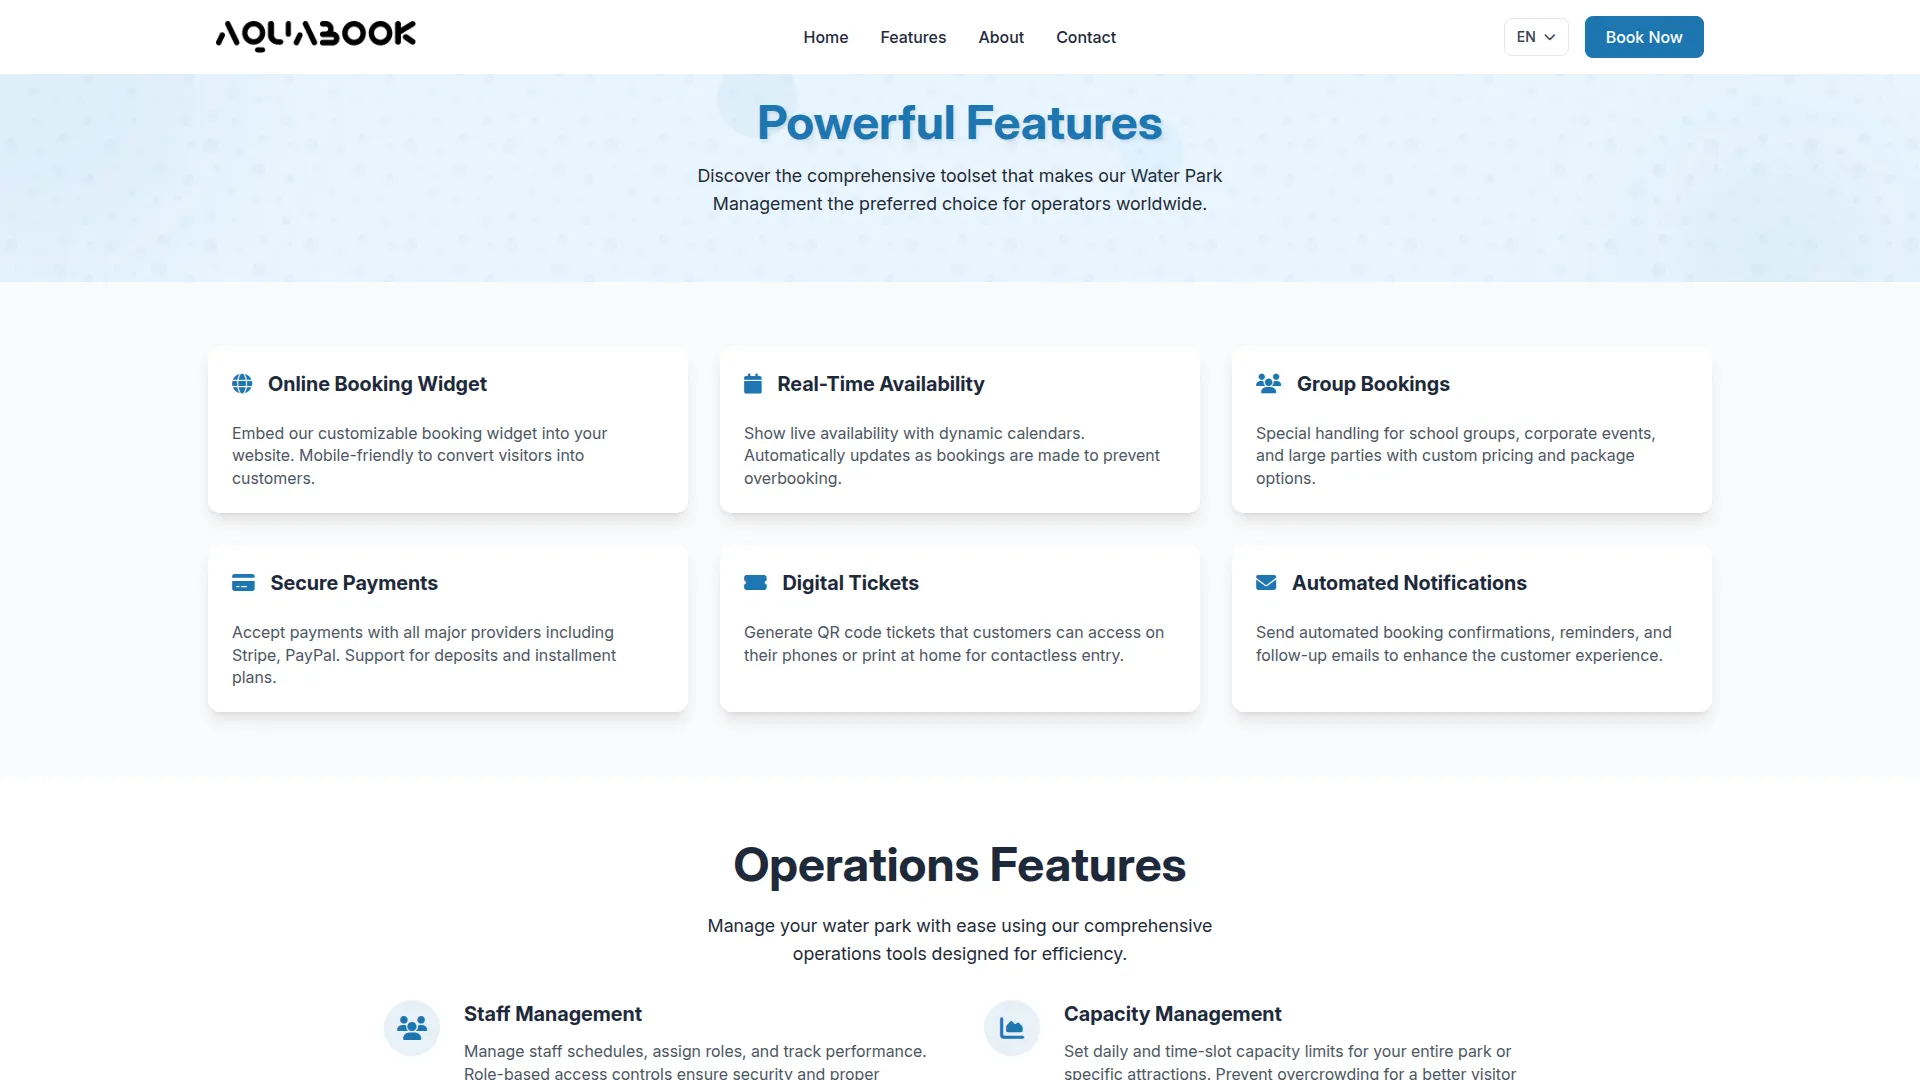
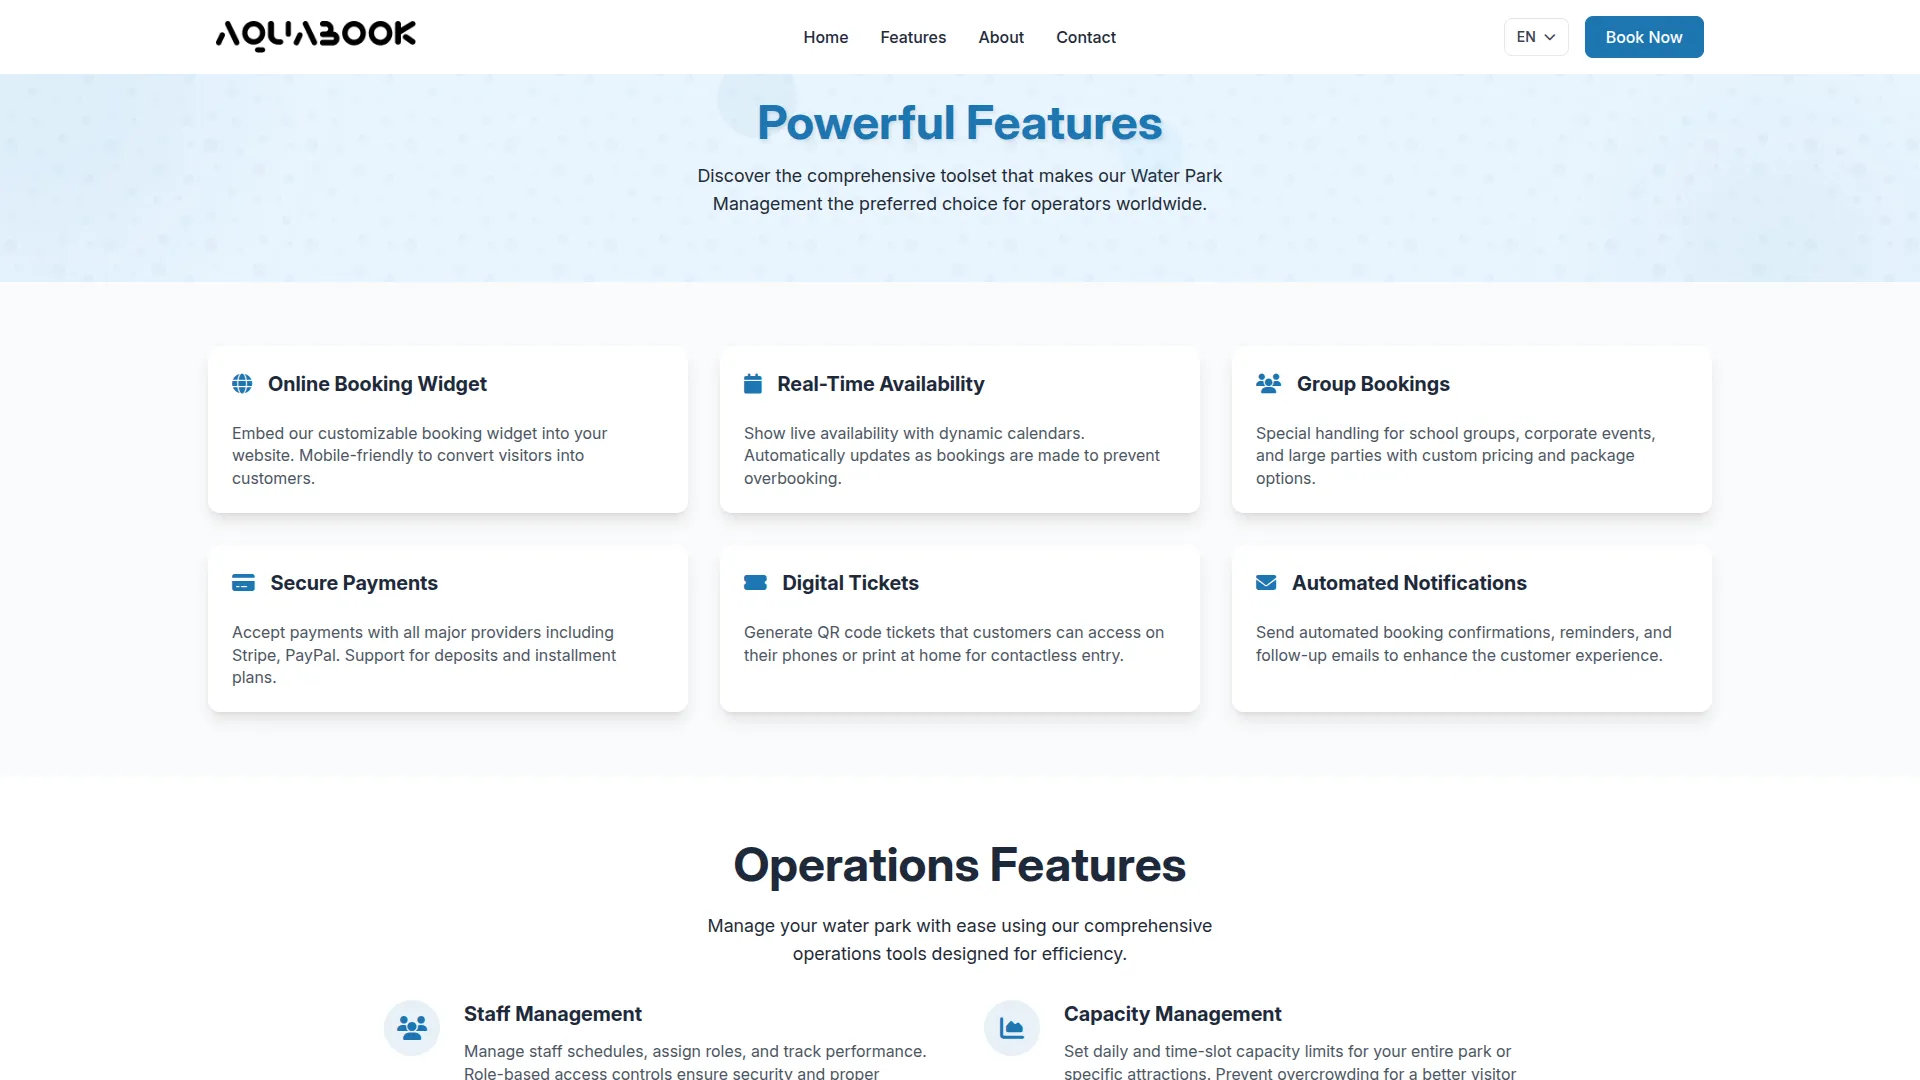
The Features Setting section allows the admin to manage all feature details of the website directly from the backend. From here, the admin can add titles, descriptions, icons, and images for multiple feature sections. Once saved, these details are automatically displayed on the frontend, creating the complete Features page for visitors.
- Home Page & Feature Page : Admin can set a title and description for the homepage features, and configure three feature cards with icons, titles, and descriptions that will be shown at the top of the Features page.
- Feature Bottom & Feature Sub Bottom : Using a repeater, the admin can add multiple feature items with icons, titles, and descriptions. These will appear as additional features on the frontend.
- Feature Section : Admin can upload feature images and add titles and descriptions. Detailed feature information can be added through a repeater with icons, titles, and descriptions. This content is displayed as operational features on the frontend.
- List Page : The backend shows all added features in a table with title and description. The admin can create new features, edit existing ones, or delete them as needed.
Custom page:
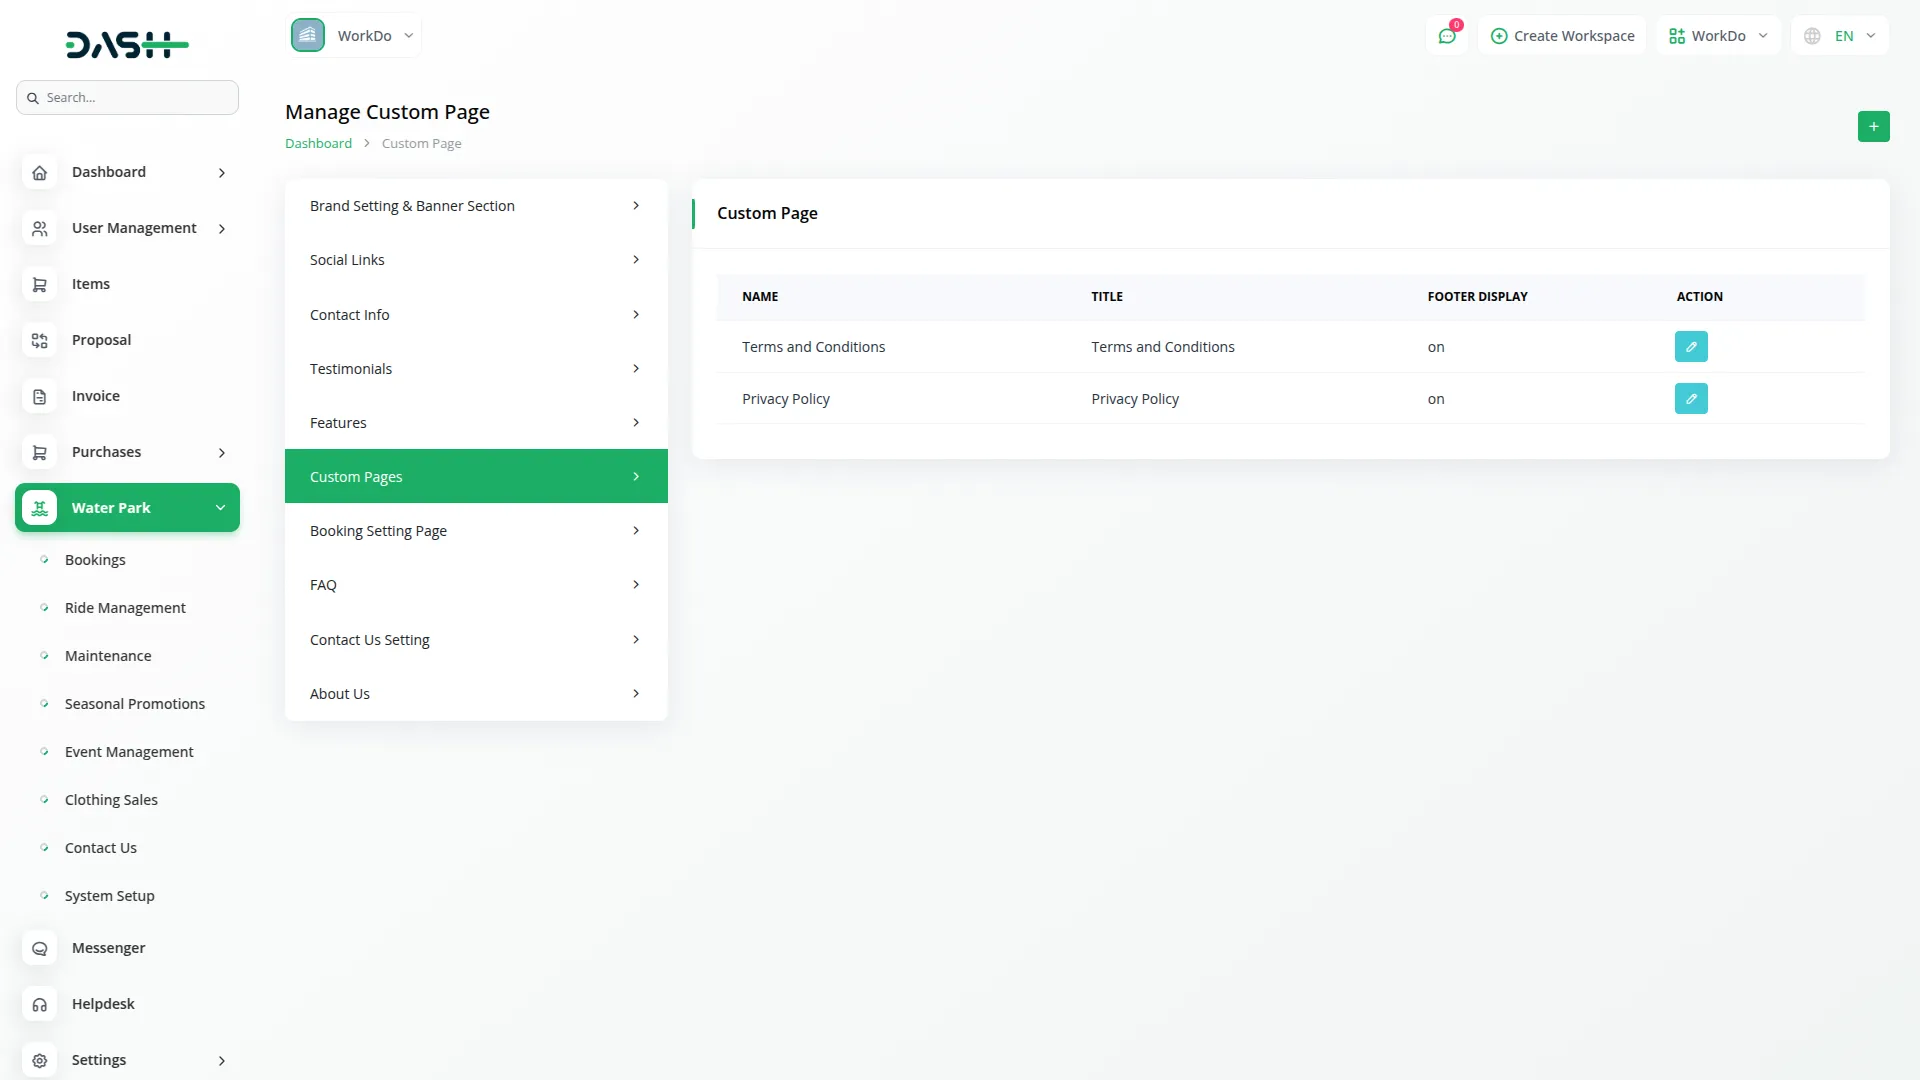
- The Custom Pages feature allows the admin to create and manage additional content pages for the website. From the backend settings, you can enter the name, title, description, content, and choose the Page Footer Display option (toggle enable/disable). If the footer display is enabled, the page will automatically be visible in the website footer; if disabled, it will not appear.
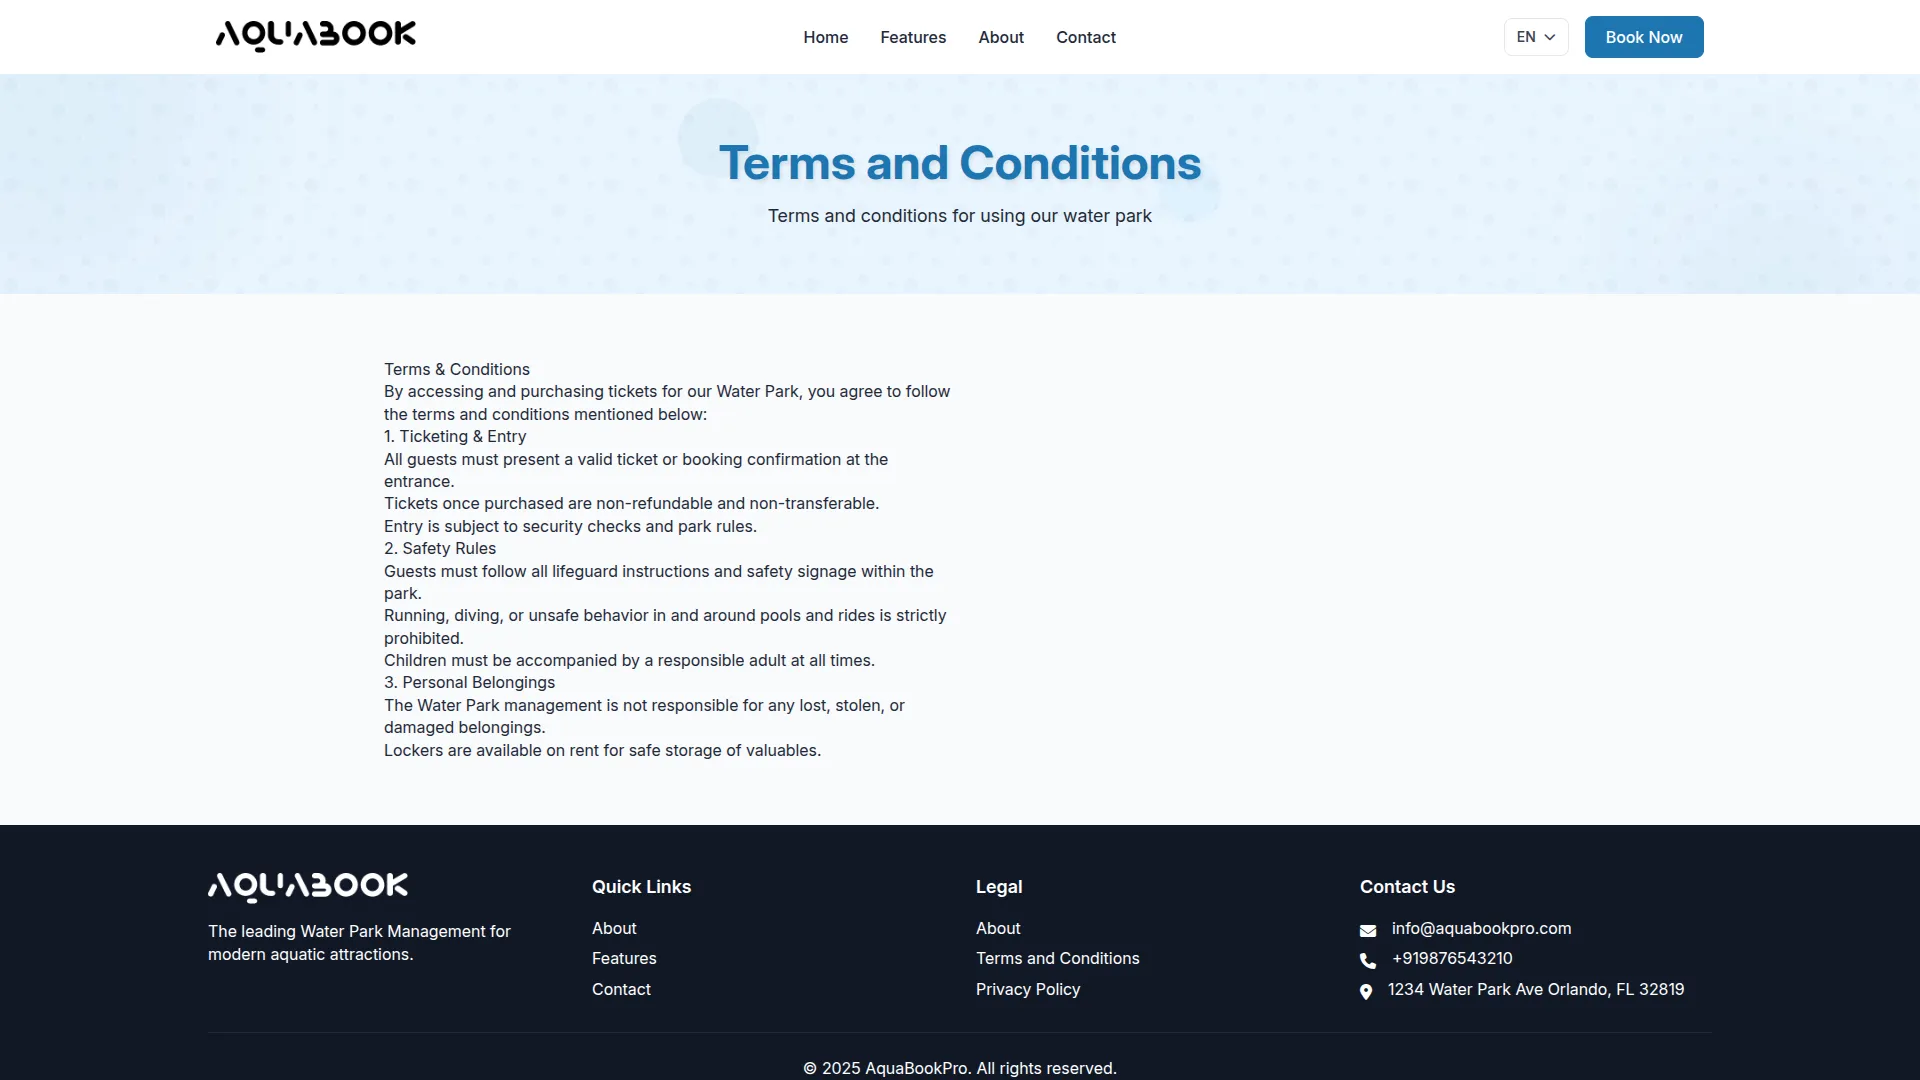
- On the frontend, the details entered in the content section are properly displayed within the custom page, ensuring that visitors can view the information clearly. The list page in the backend shows all created custom pages, including the name, title, footer display status, and actions to edit or delete. This makes it easy to manage, update, or remove pages whenever needed.
- This setup ensures that all custom content added from the backend is properly reflected on the frontend, giving flexibility to display important information to customers as required.
FAQ Setting:
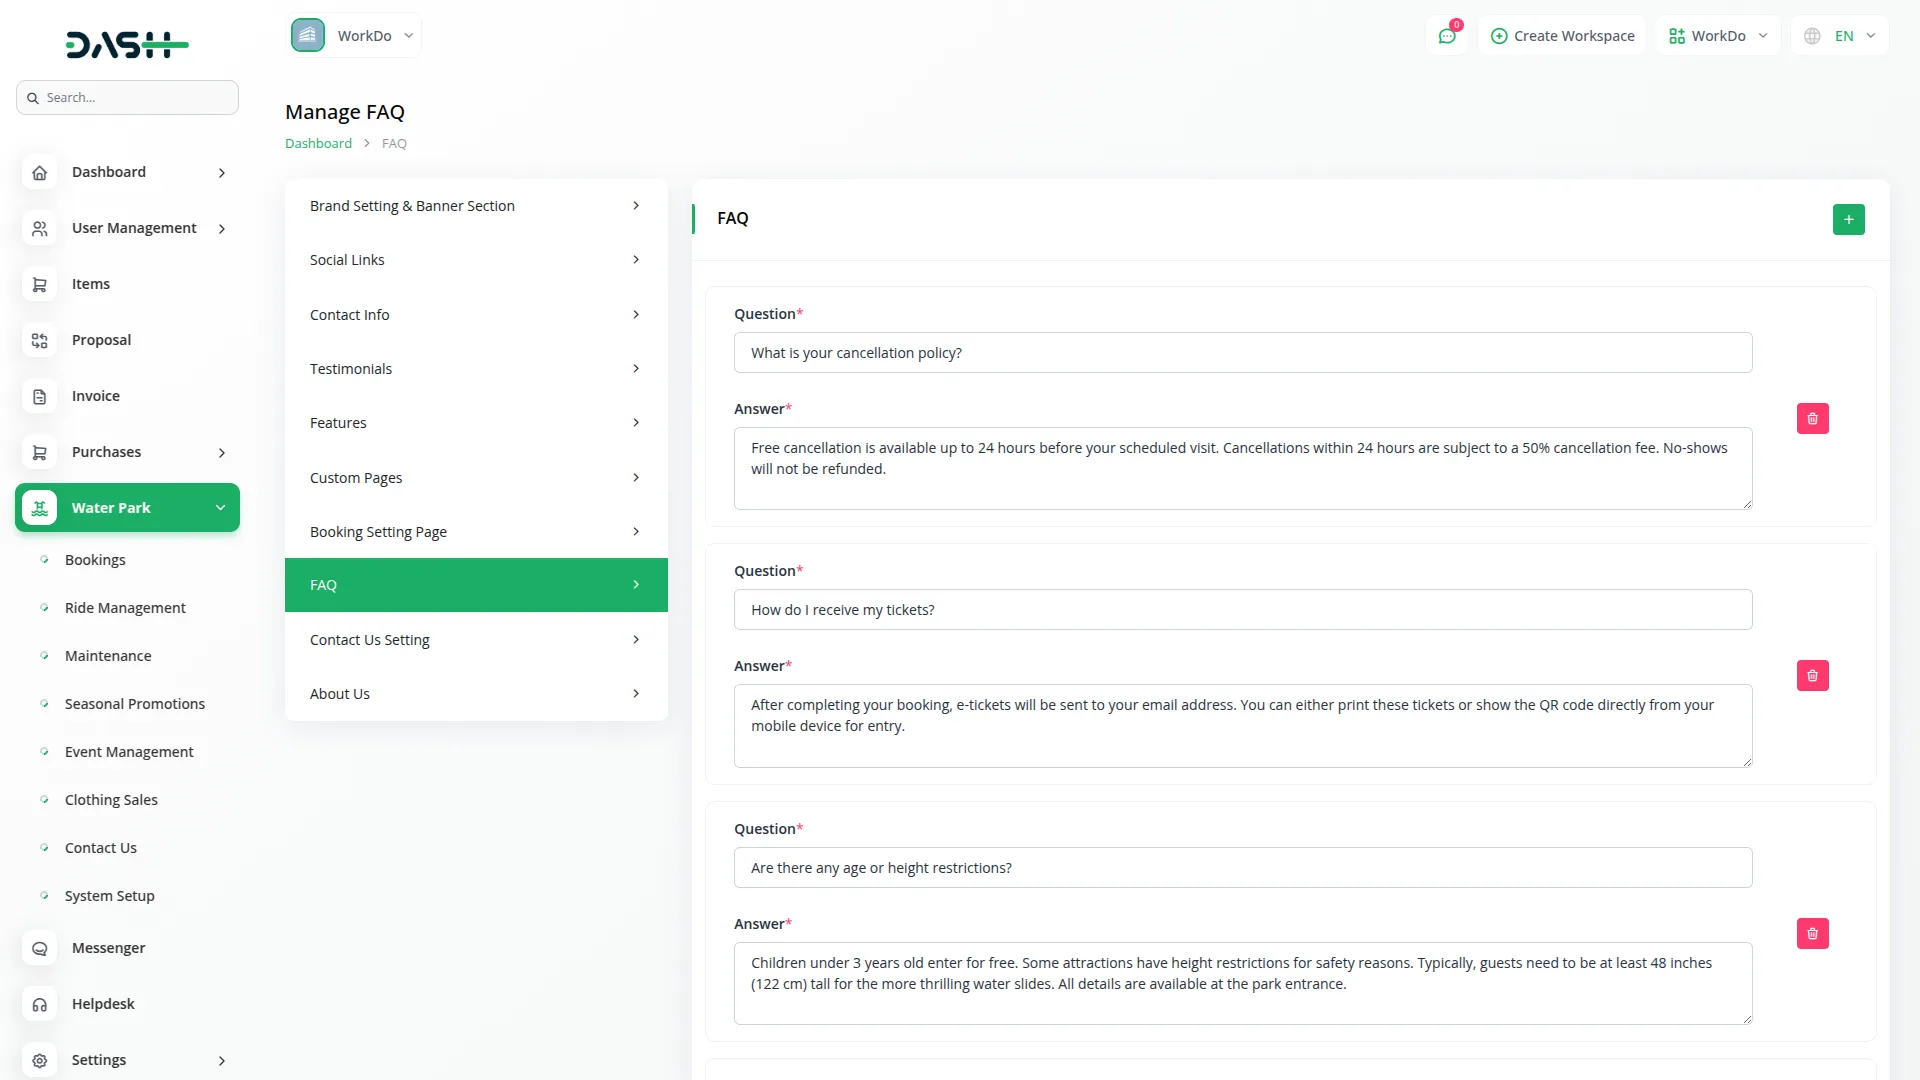
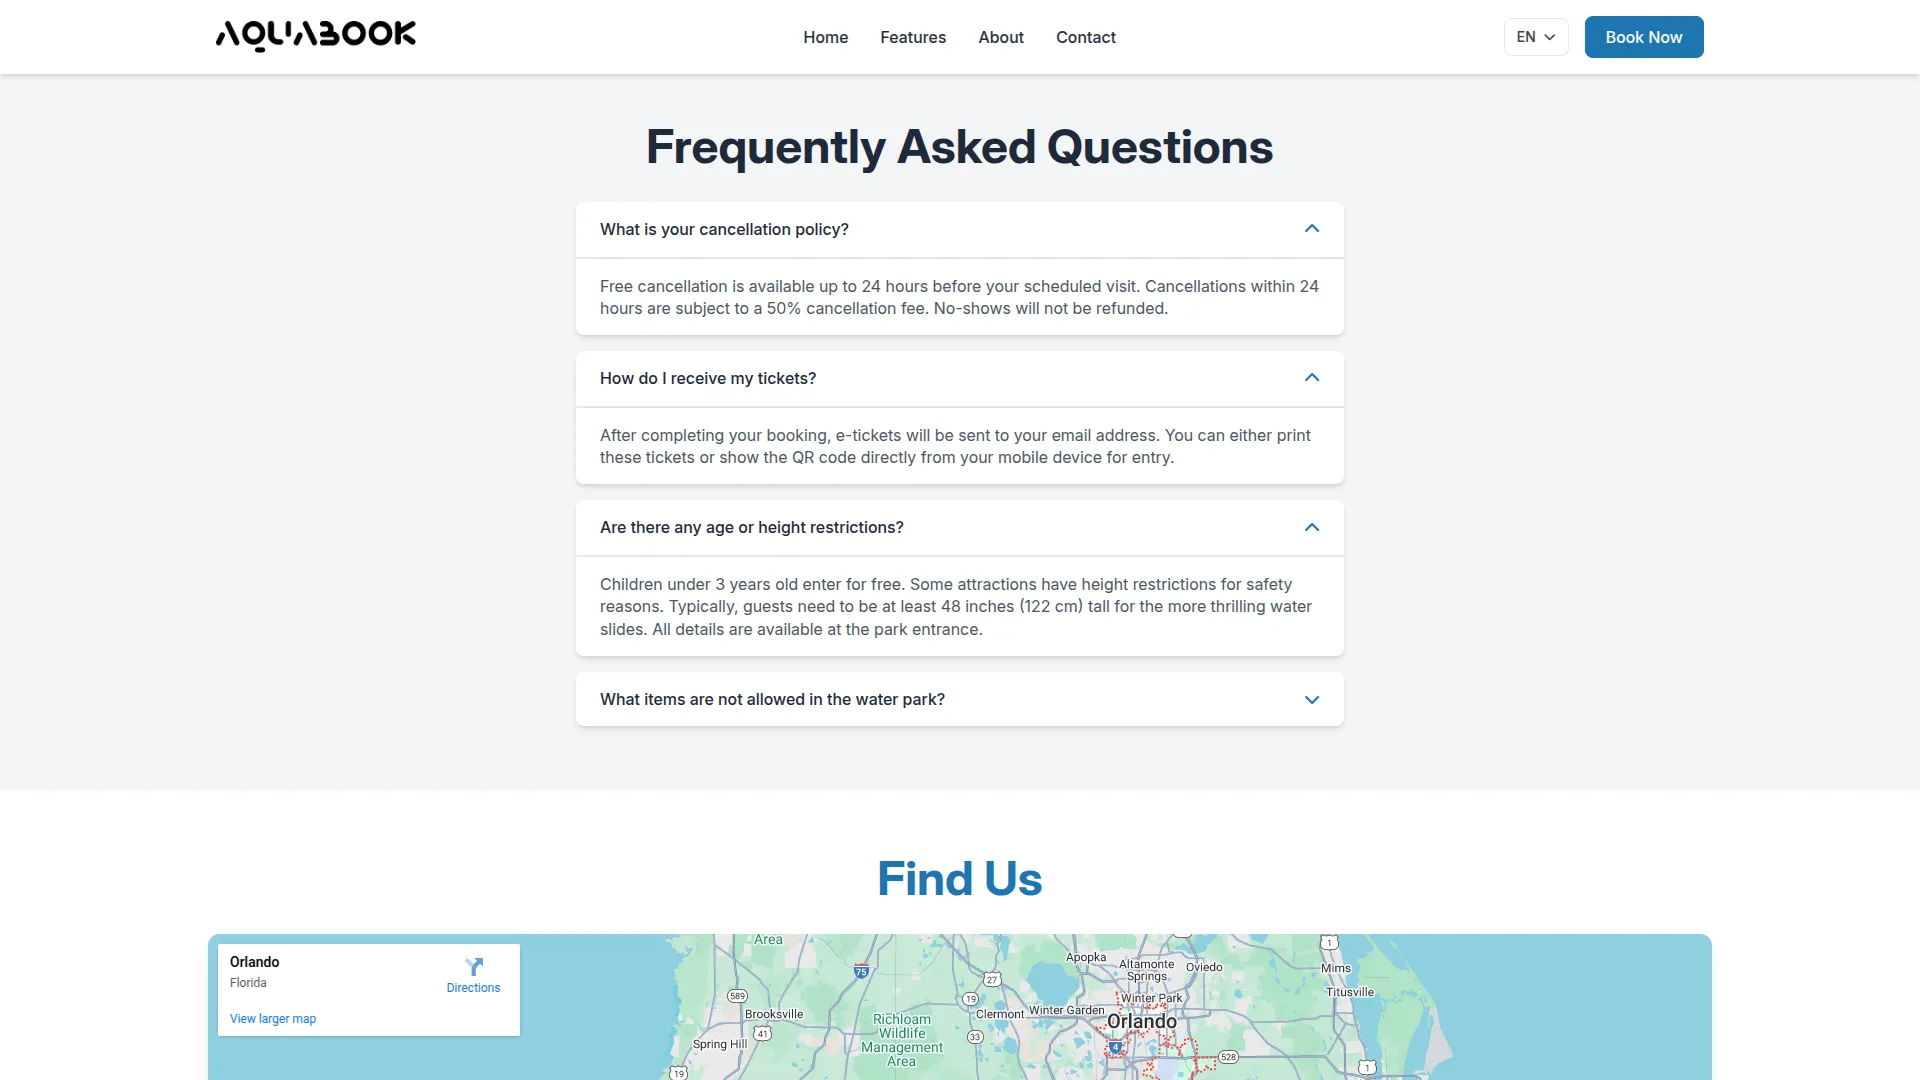
- The FAQ Settings allow the admin to easily create and manage frequently asked questions for the website. From the backend, you can add multiple FAQ entries using the repeater, where each entry contains a question and its corresponding answer. Each FAQ can also be edited or deleted as needed, making it simple to keep the information up to date.
- On the frontend, the FAQs entered in the backend are automatically displayed in the FAQ section of the booking page, showing the exact questions and answers added by the admin. This ensures that visitors can quickly find clear and accurate information, improving their booking experience and reducing common queries.
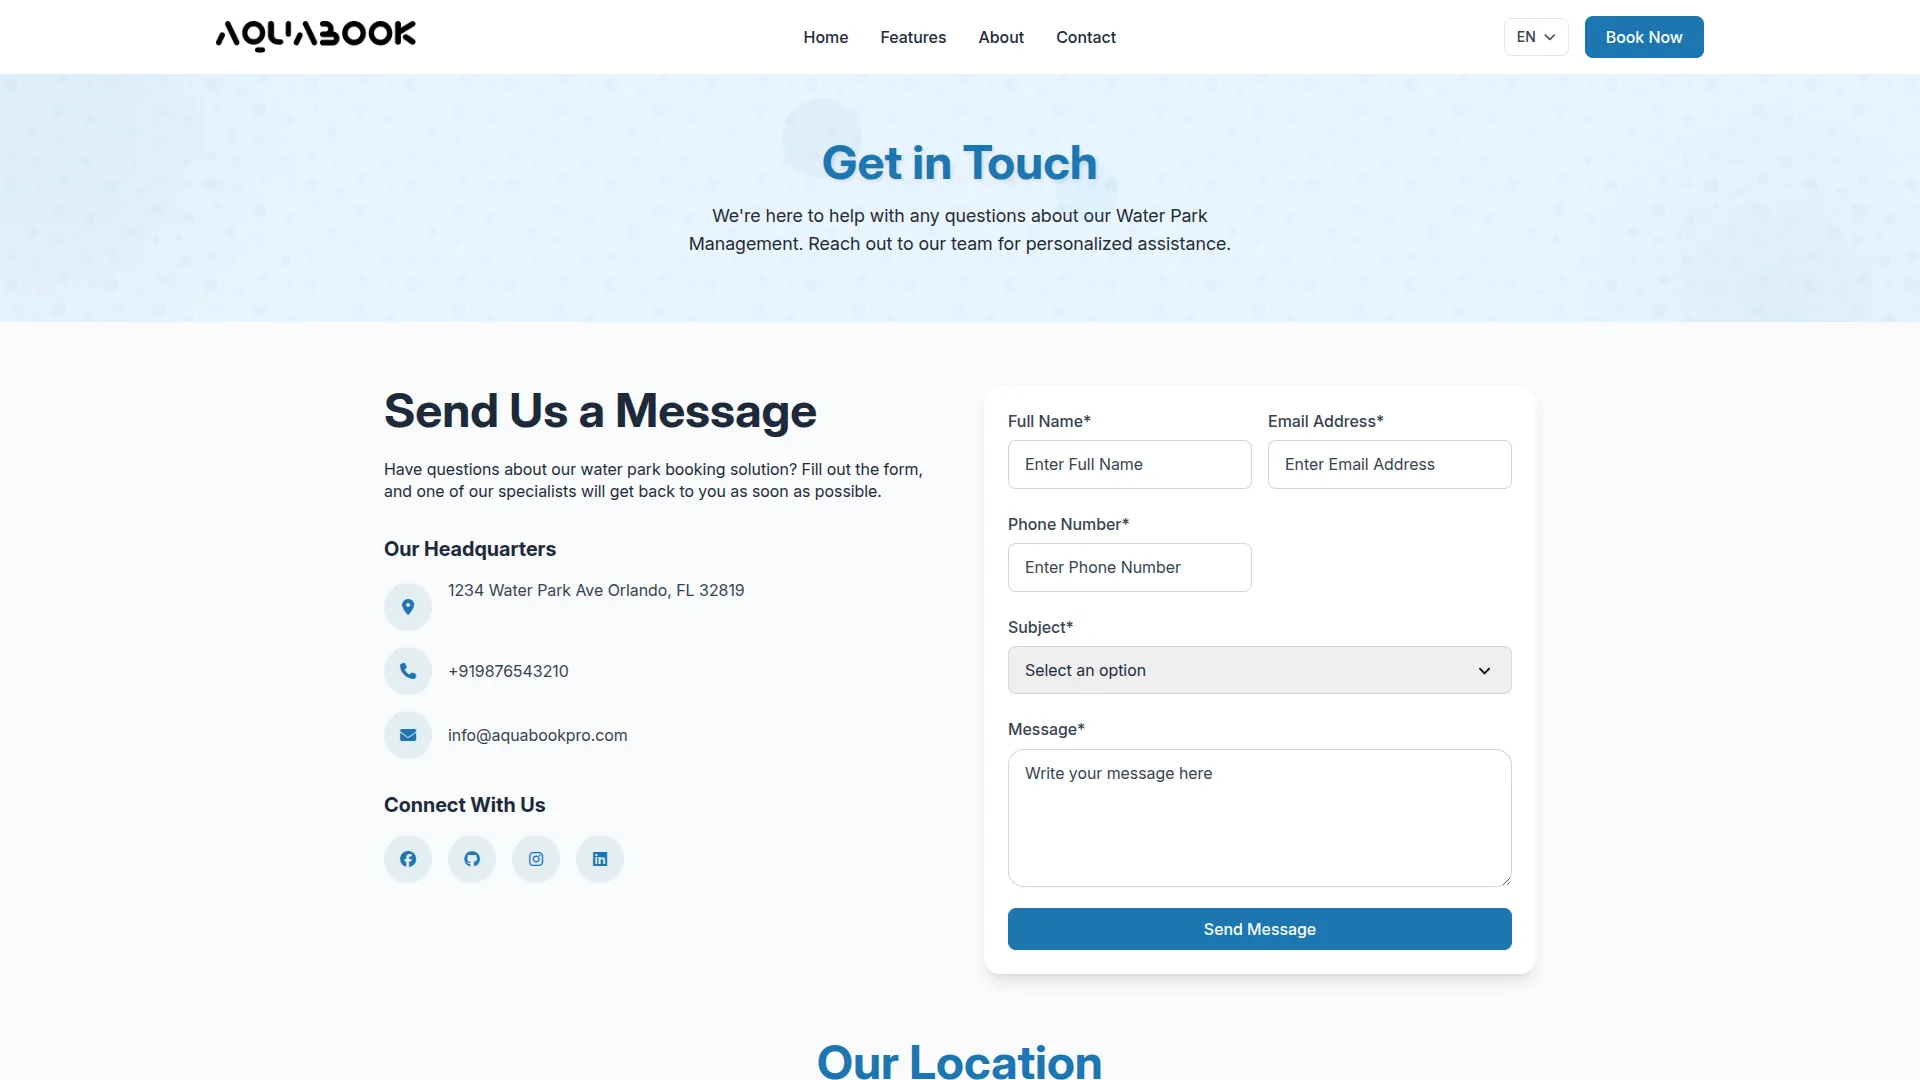
Contact setting:
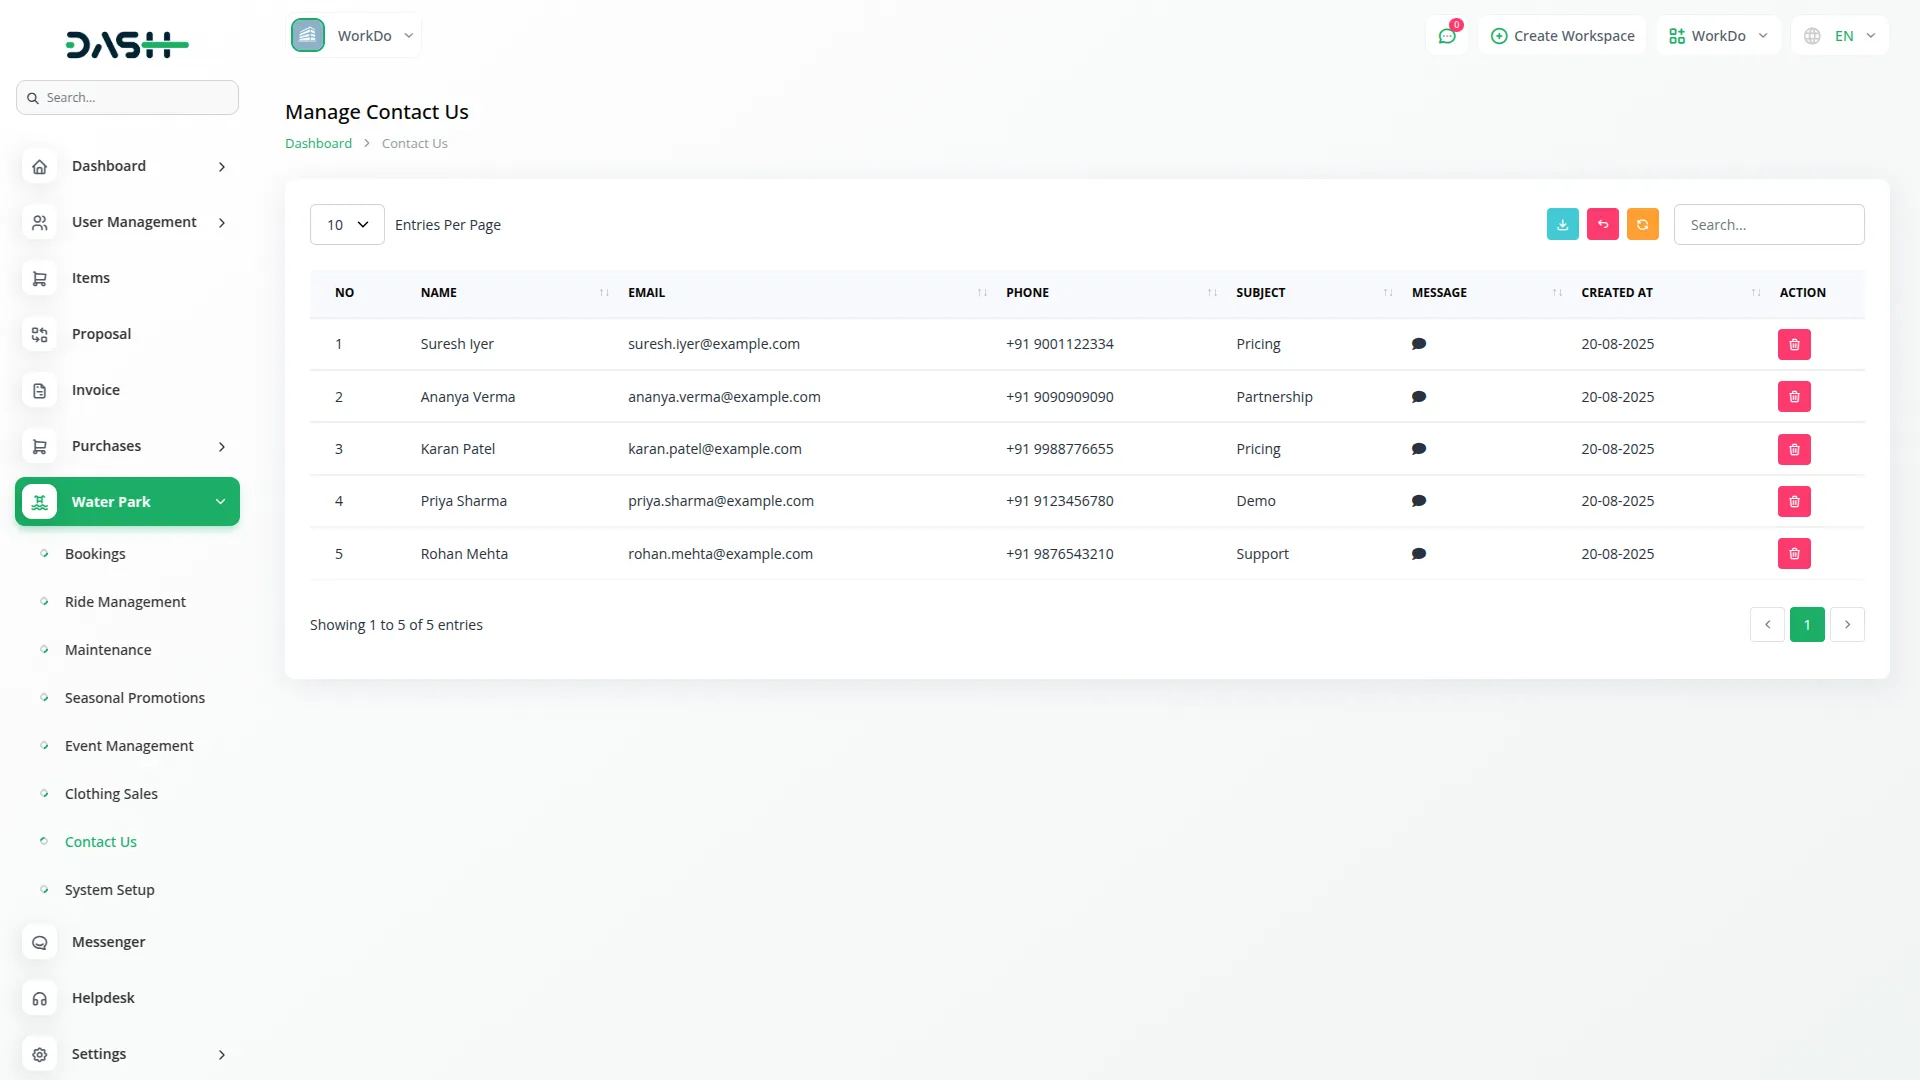
- On the frontend, customers can connect via a contact form, where they provide their full name, email address, phone number, subject (dropdown options: request a demo, pricing information, technical support, partnership opportunities, others), and their message. Once submitted, the information is stored in the backend under the contact section. From there, the admin can view the messages, delete entries if not needed for proper management.
- This setup ensures that all contact details entered by the admin are visible to customers, while all messages submitted by customers are properly recorded and can be managed from the backend.
About Us Setting Page:
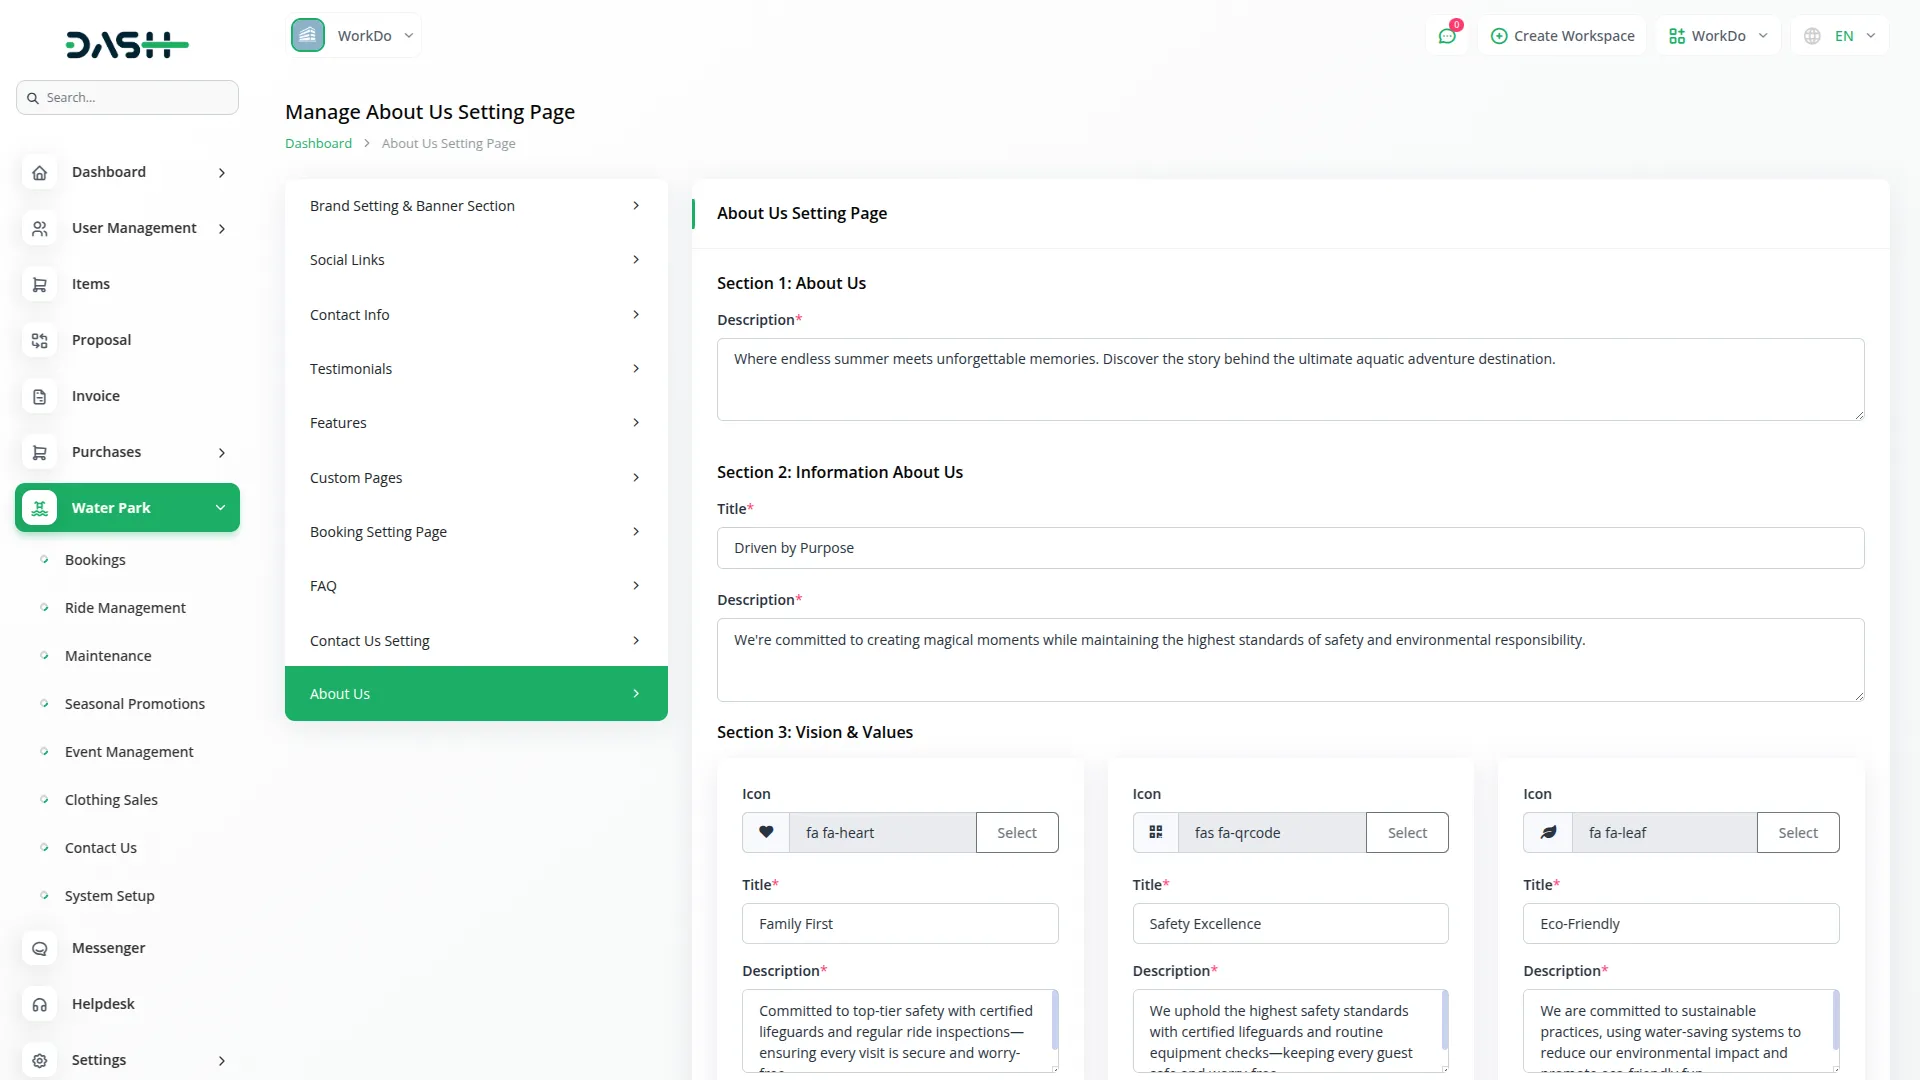
- The About Us section allows the admin to manage and display all information about the waterpark. From the backend, the admin can add a description, configure Information About Us with a title and description, and set up Vision & Values with three cards containing icons, titles, and descriptions. Additionally, the Information Vision & Values/About Us Page section allows the admin to add a title, description, two images, and extra descriptive content for a more detailed presentation.
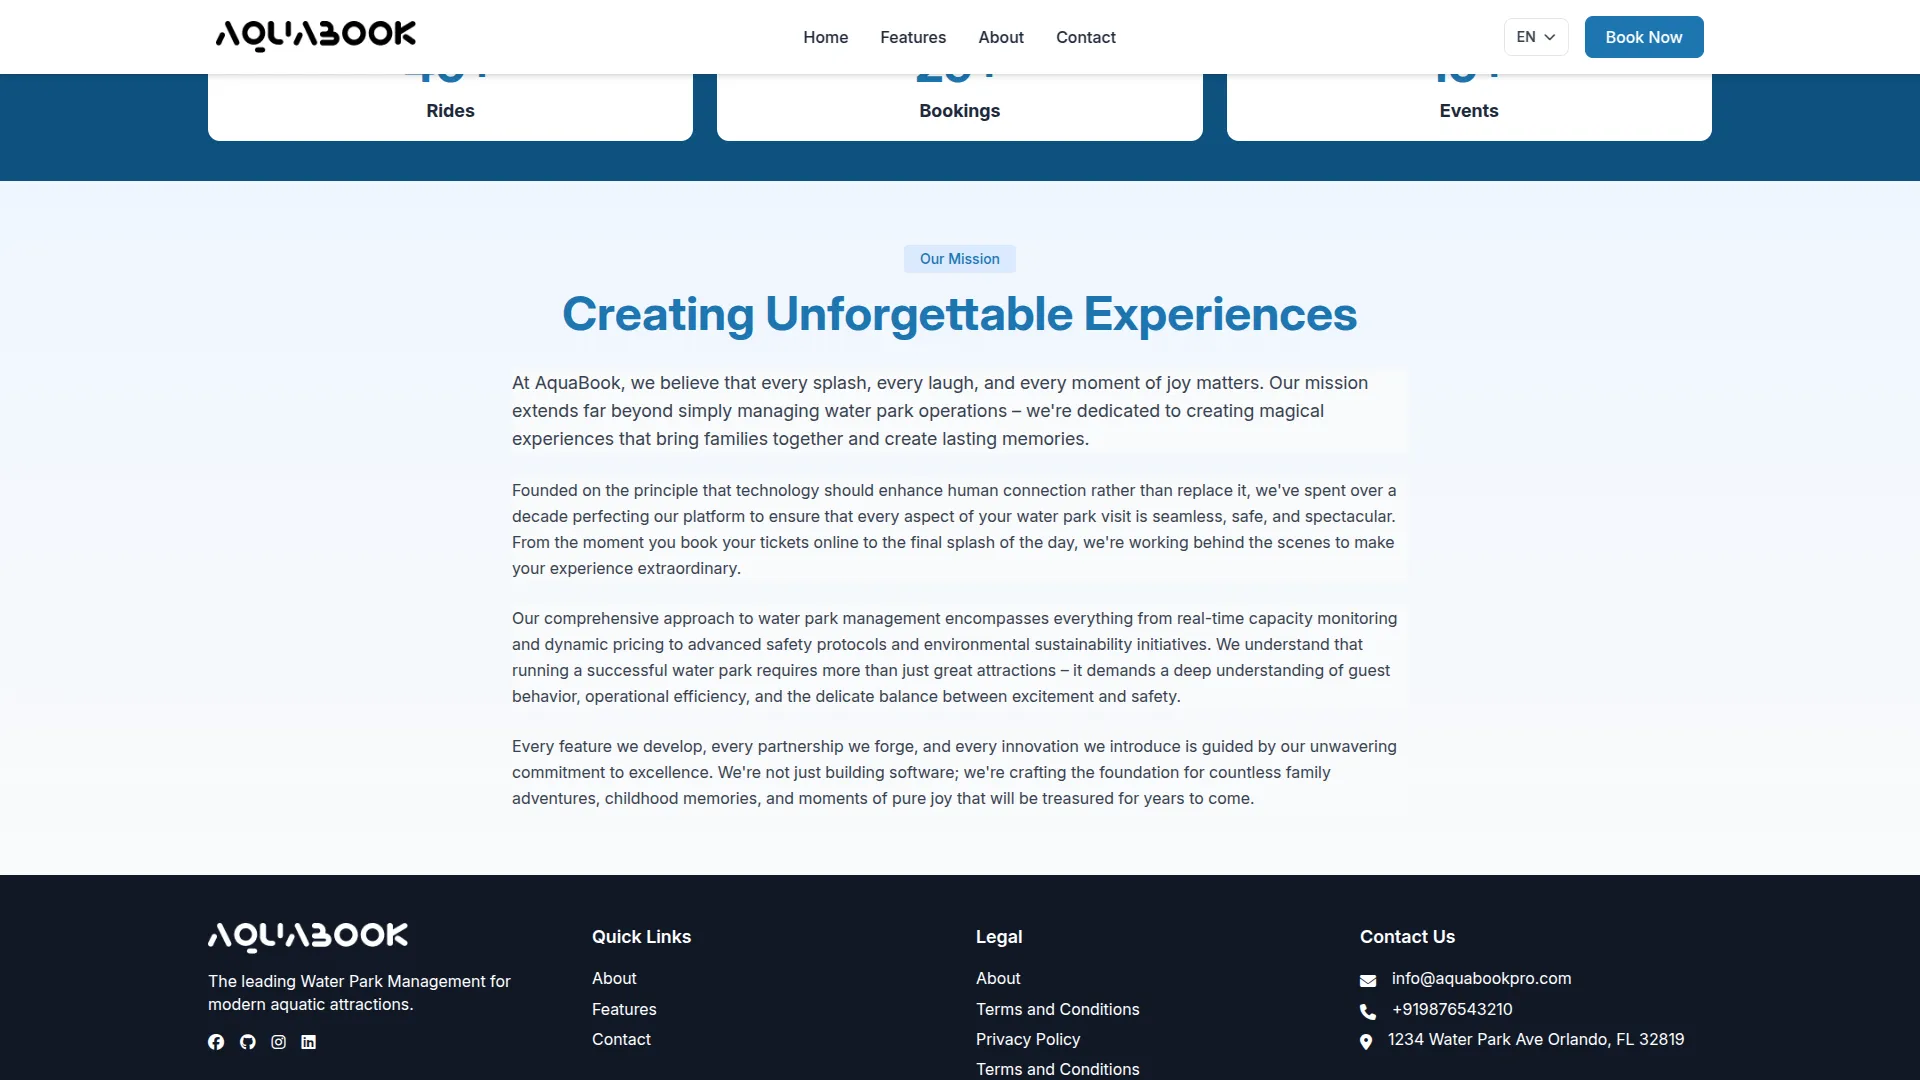
- Once entered, all these details are automatically displayed on the frontend About Us page, where visitors can learn about the park’s background, values, and mission in a structured and engaging way.
Bookings Management
- On the bookings page, you can easily add new bookings with the help of the “create” button given at the top.
- After this, fill in the necessary details like name, email, phone number, the count of children, and the count of adults.
- Select the booking date on which the customers will visit the park, and select the event from the dropdown generated from the events page.
- Besides all these details, you will see the calculation of the price, which will be generated automatically based on the person and the total number of child and adult counts the customer has added. This will also include the price of the event that has been selected by customers. The price of the event will be generated from the event section only. At last, you will see the seasonal price and the total price.
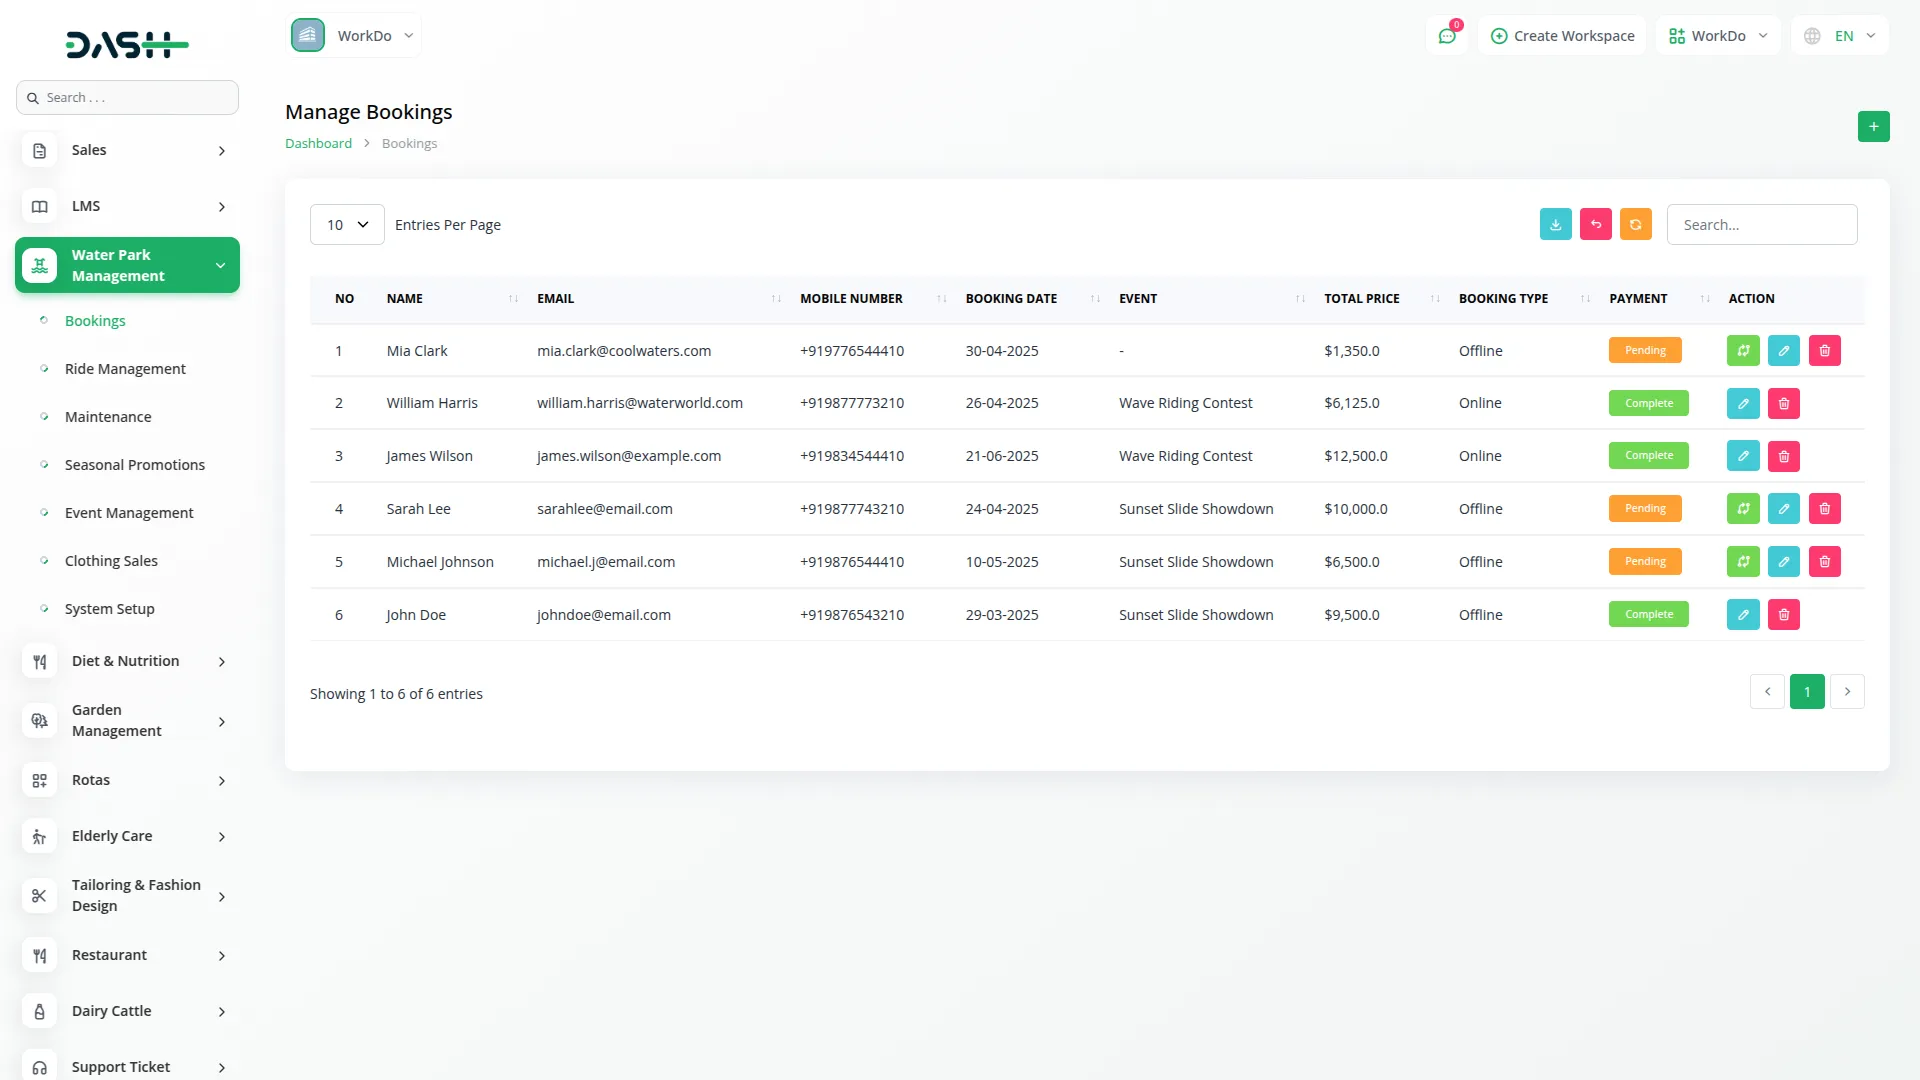
- The list page displays the list of all the bookings, including all the booking details such as name, email, mobile number, booking date, events, total price, booking type, and payment status whether the payment is completed or not.
- Besides all these details, you will see an action column from which you can easily update the status, edit, or delete the booking details. You can also search the bookings from the search tab, and reset, reload, or export the list of bookings whenever you want.
Ride Management
- Once you finish creating the bookings, navigate to the rides page. Here you can start adding rides by clicking the “Create” button given at the top of the ride page.
- You will need to enter details such as the ride’s name, upload a ride image and select types from the dropdown menu, and specify the ride capacity.
- After this, choose the status from the dropdown menu (Available or Unavailable) depending on the ride’s current condition, and add a description.
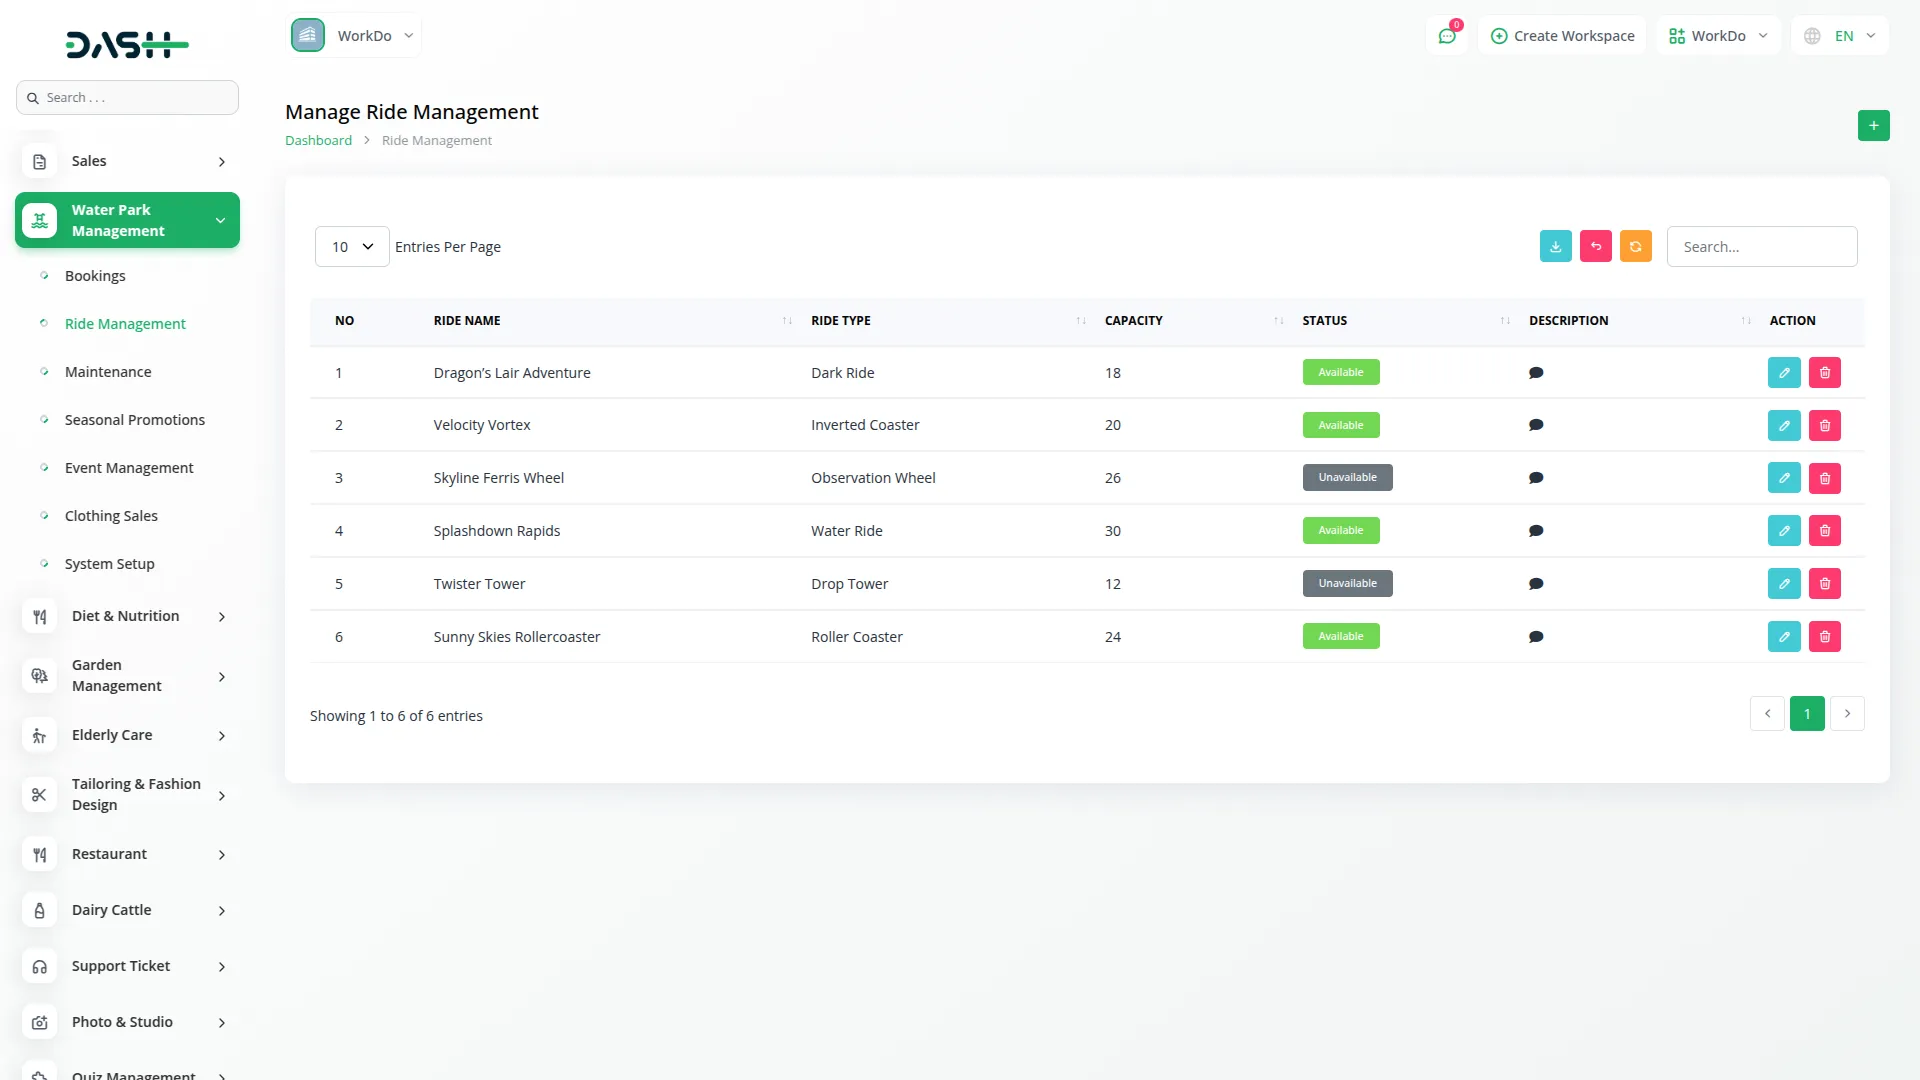
- On the list page, you can view the list of all the rides, including details like Ride Image, Ride Name, Ride Type, Capacity, Status, and Description. Use the Search, Export, Reload, and Reset buttons to manage your rides efficiently.
- Beyond these details, you will see an action column from which you can easily edit or delete the rides.
- When a ride is added from the backend, it will automatically appear on the frontend’s home page, ensuring that all new rides are visible to the users without requiring any manual updates on the homepage.
Maintenance Management
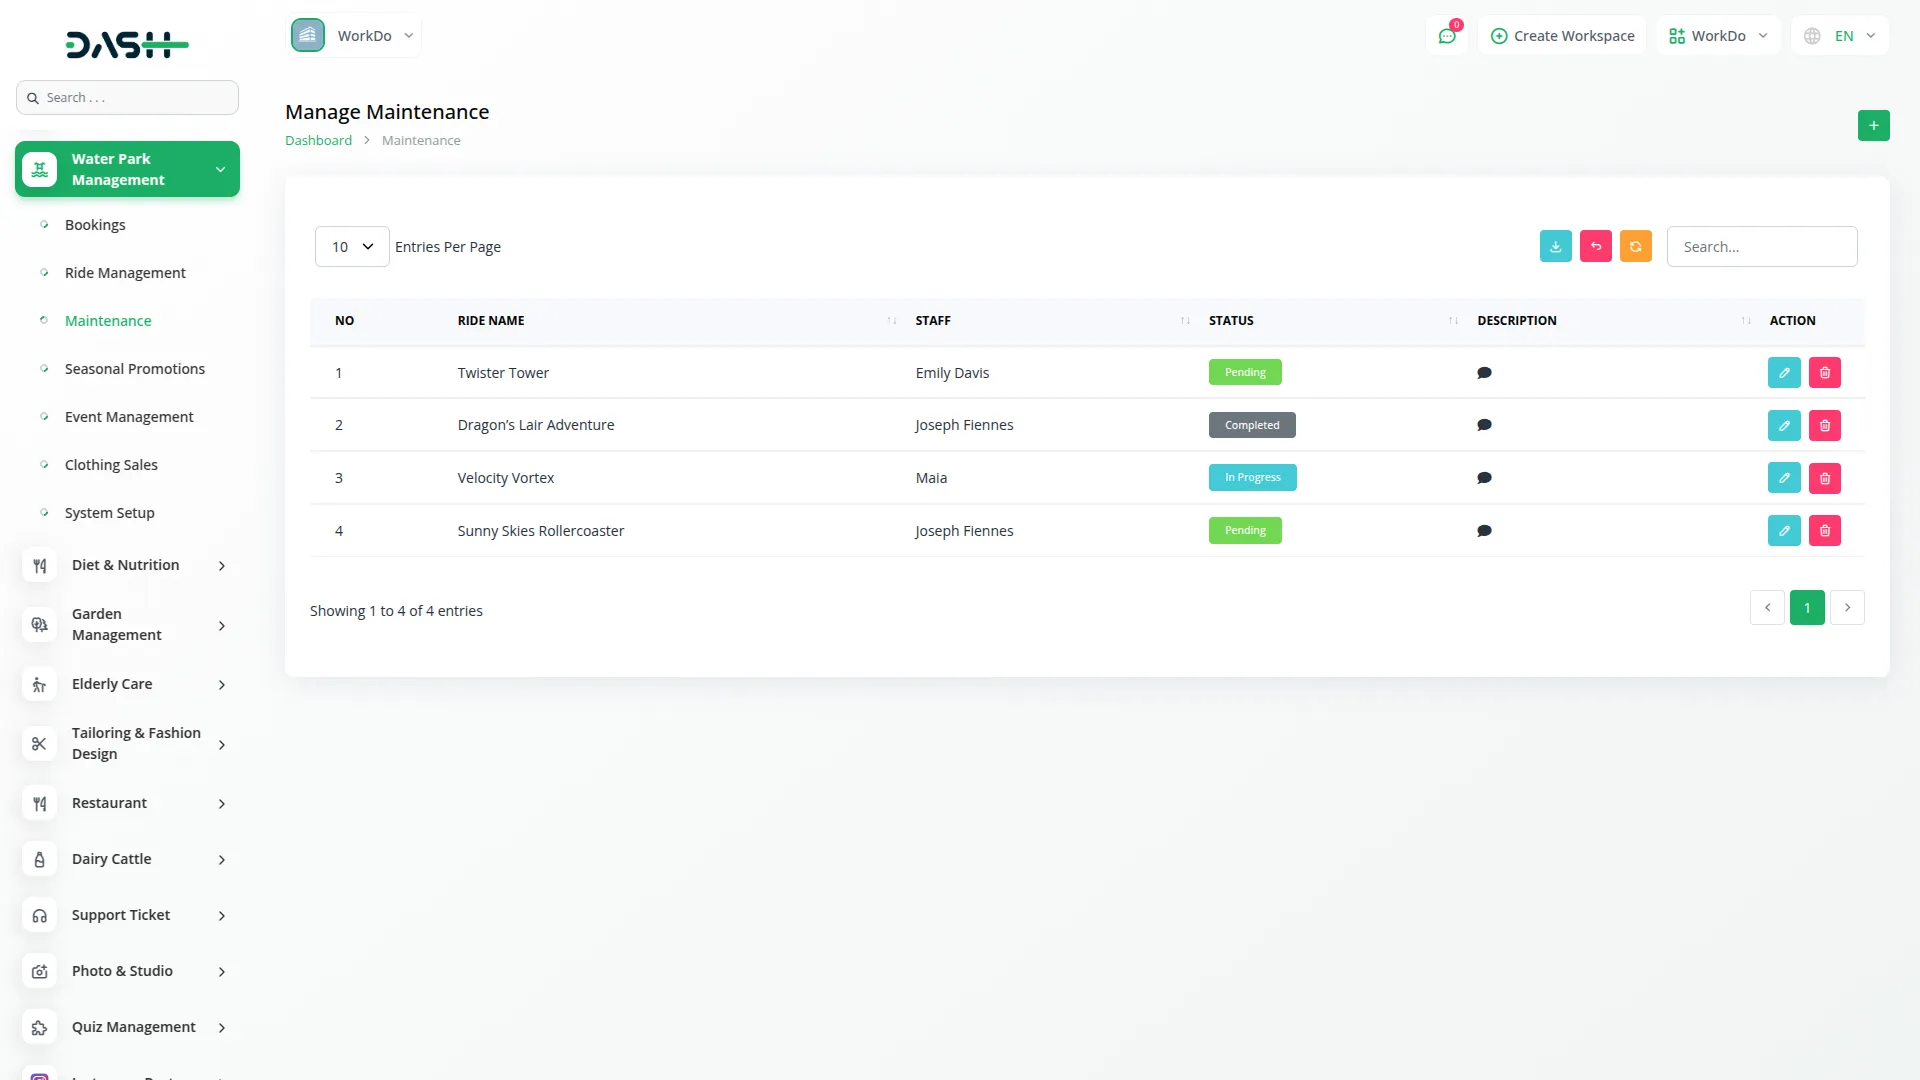
- To schedule maintenance, click the “Create” button on the maintenance page. Then, select the ride name from the dropdown menu (this comes from the ride management section), and choose the staff member from the dropdown menu.
- Choose the status from the dropdown, like Pending, In Progress, or Completed, and write a description.
- The list page shows all maintenance records with columns for Ride Name, Staff, Status, and Description.
- Apart from these details, you will see an action column where you can quickly edit, or delete the maintenance records. You can also search maintenance records using the search, reset, reload, or export buttons to track and manage maintenance activities.
Seasonal Promotions
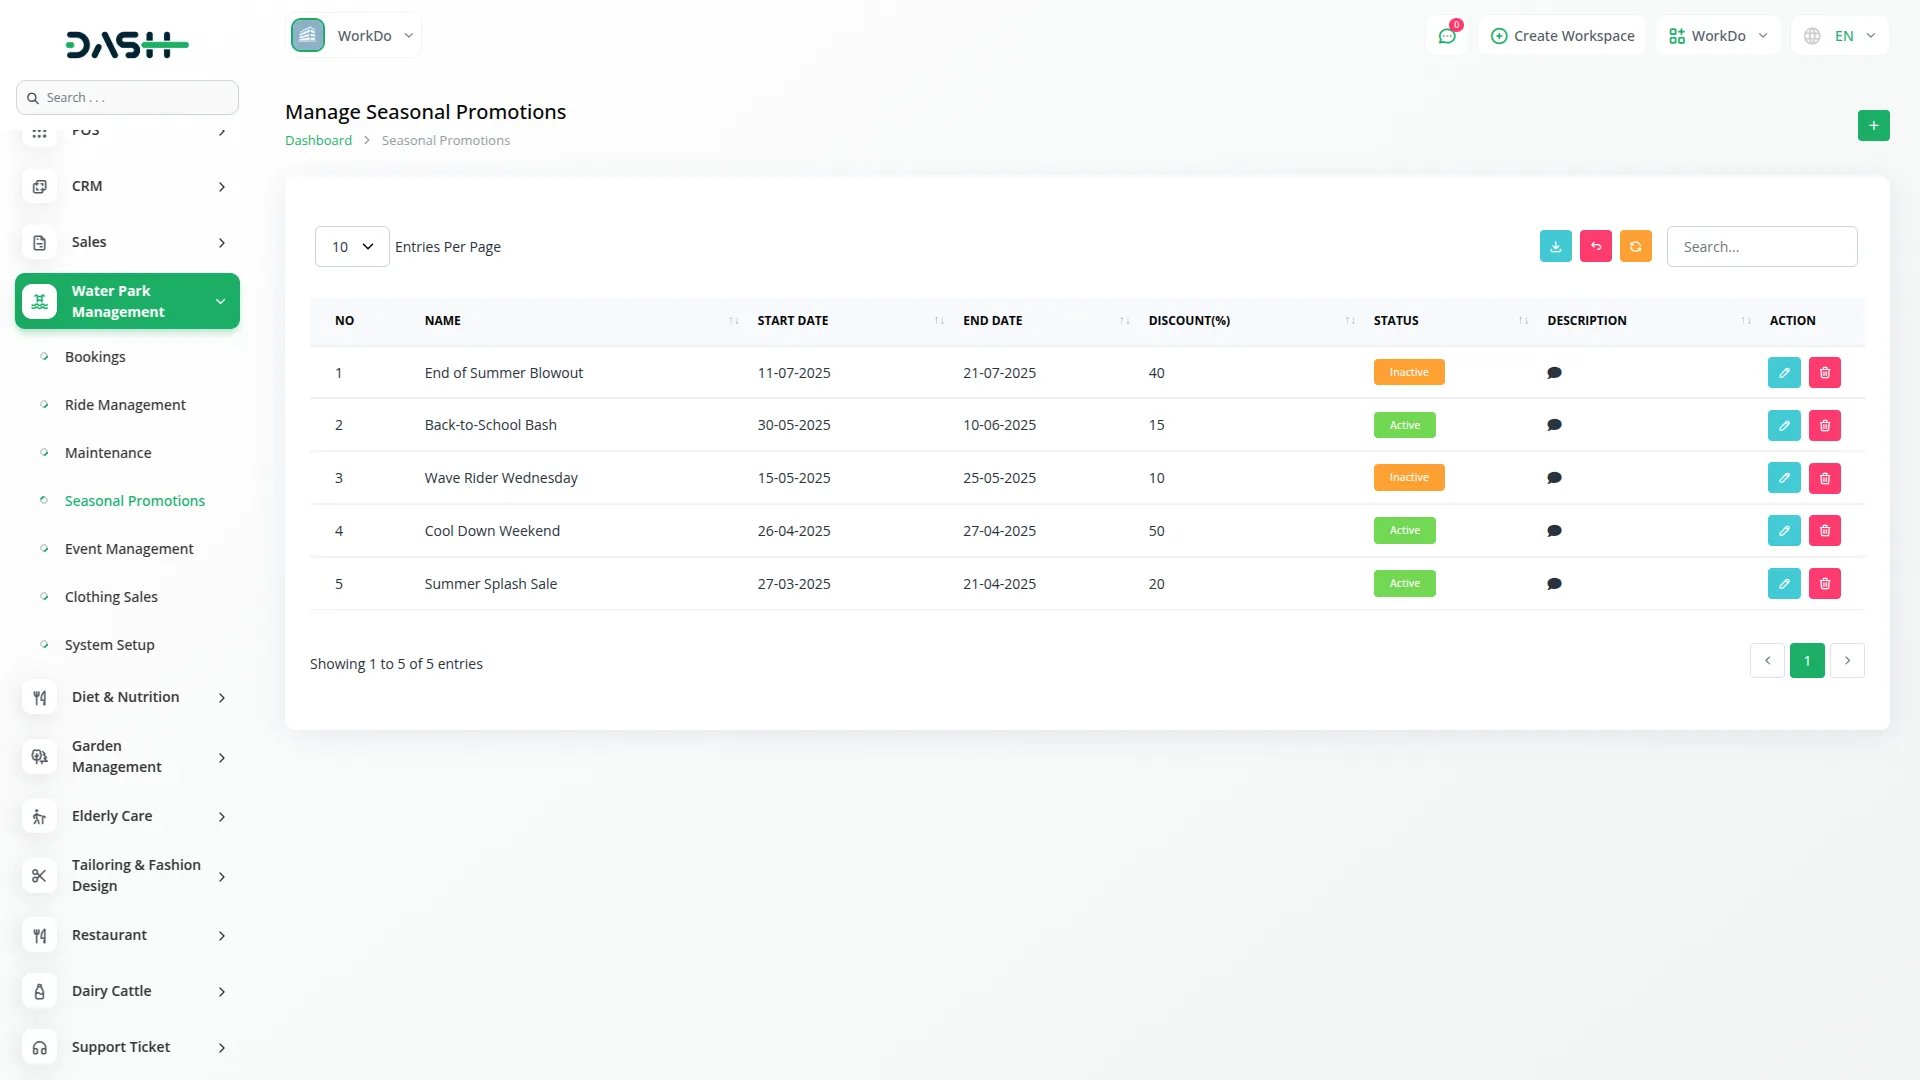
- On the seasonal promotions page, click on the “create” button given at the top of the page to create a new seasonal discount.
- Fill in the required details, like name, set the start or end date, specify the discount percentage, select the status from the dropdown with Active or Inactive options, and add a description last.
- The list page displays all promotions with columns for Name, Start Date, End Date, Discount percentage, Status, and Description. Use the Search, Export, Reload, and Reset buttons to manage your seasonal offers.
- Besides all these details, you will see an action column from where you can easily edit or delete the discounts whenever you want.
- When the current date matches the start date of an active seasonal promotion, bookings made on that day will automatically apply the discount, making the offer active immediately.
Event Management
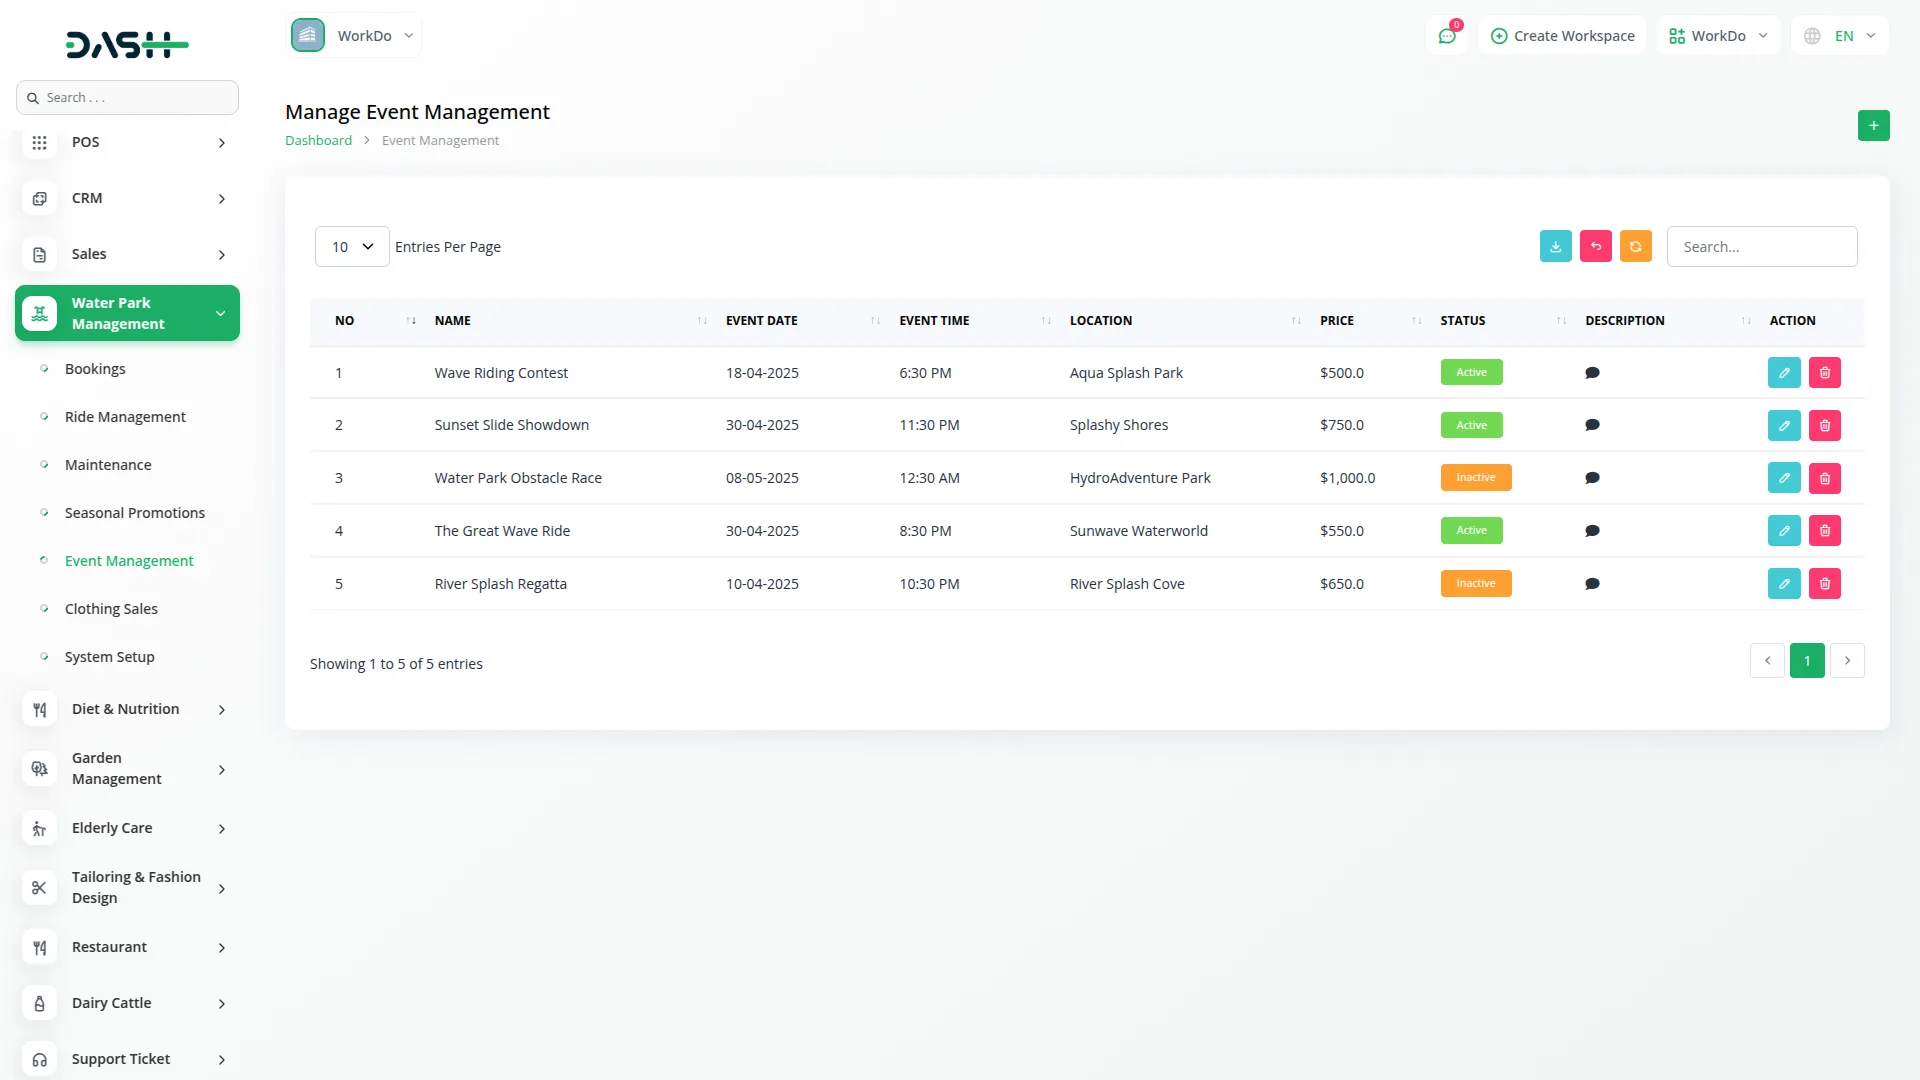
- To add a new event, click the “Create” button given at the top of the event page. Then fill in required details such as event name, set the event date with event time, add event location, and price, select the status from the dropdown with Active or Inactive options, and add description.
- On the list page, you will see the list of all the events including the details like event name, event date, event time, event location, price, status, and Description.
- With the help of the Action column, you can click “Edit” button to make changes to the event information, and “Delete” to remove the event data.You can also filter event record using the search bar, and use the reset, reload, or export buttons to view, update, or download the event data as needed.
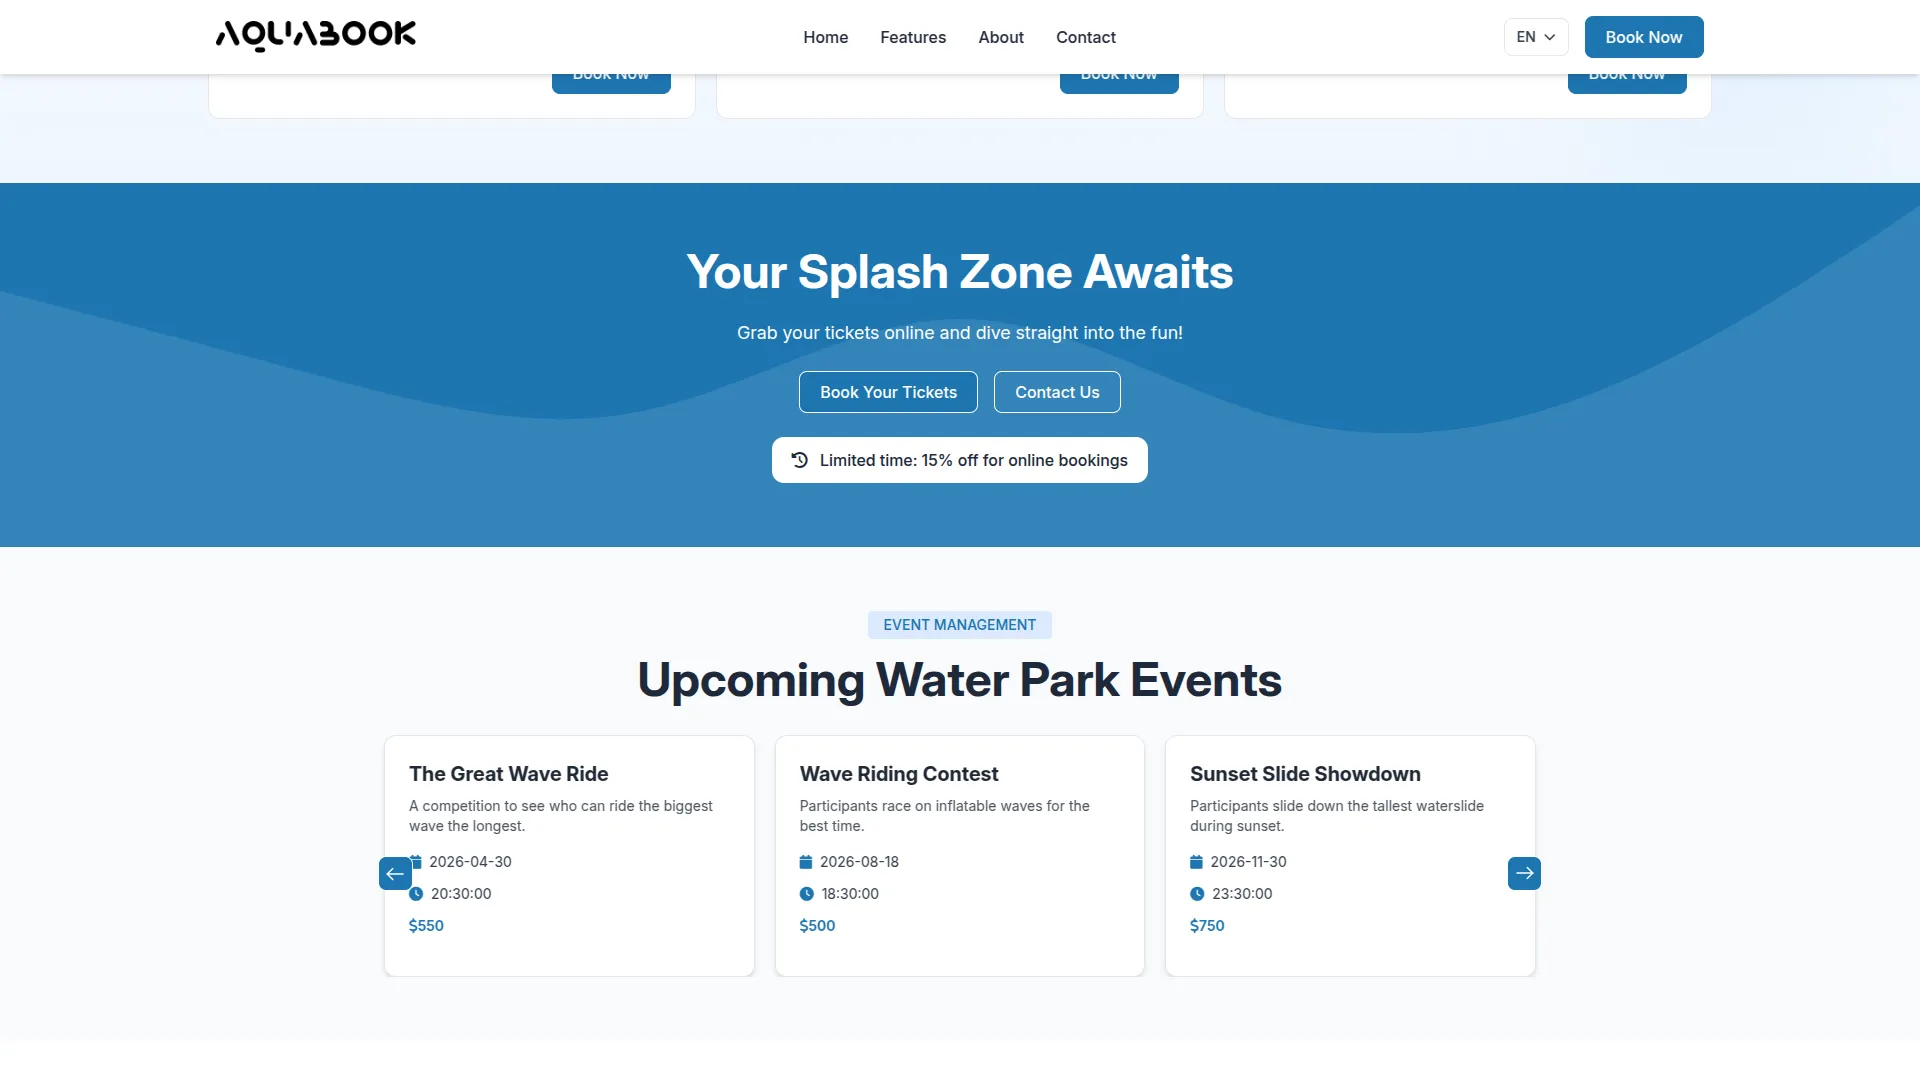
- The latest and active events will automatically be displayed on the frontend’s home page, ensuring that users always see current and upcoming events right away.
Clothing Sales
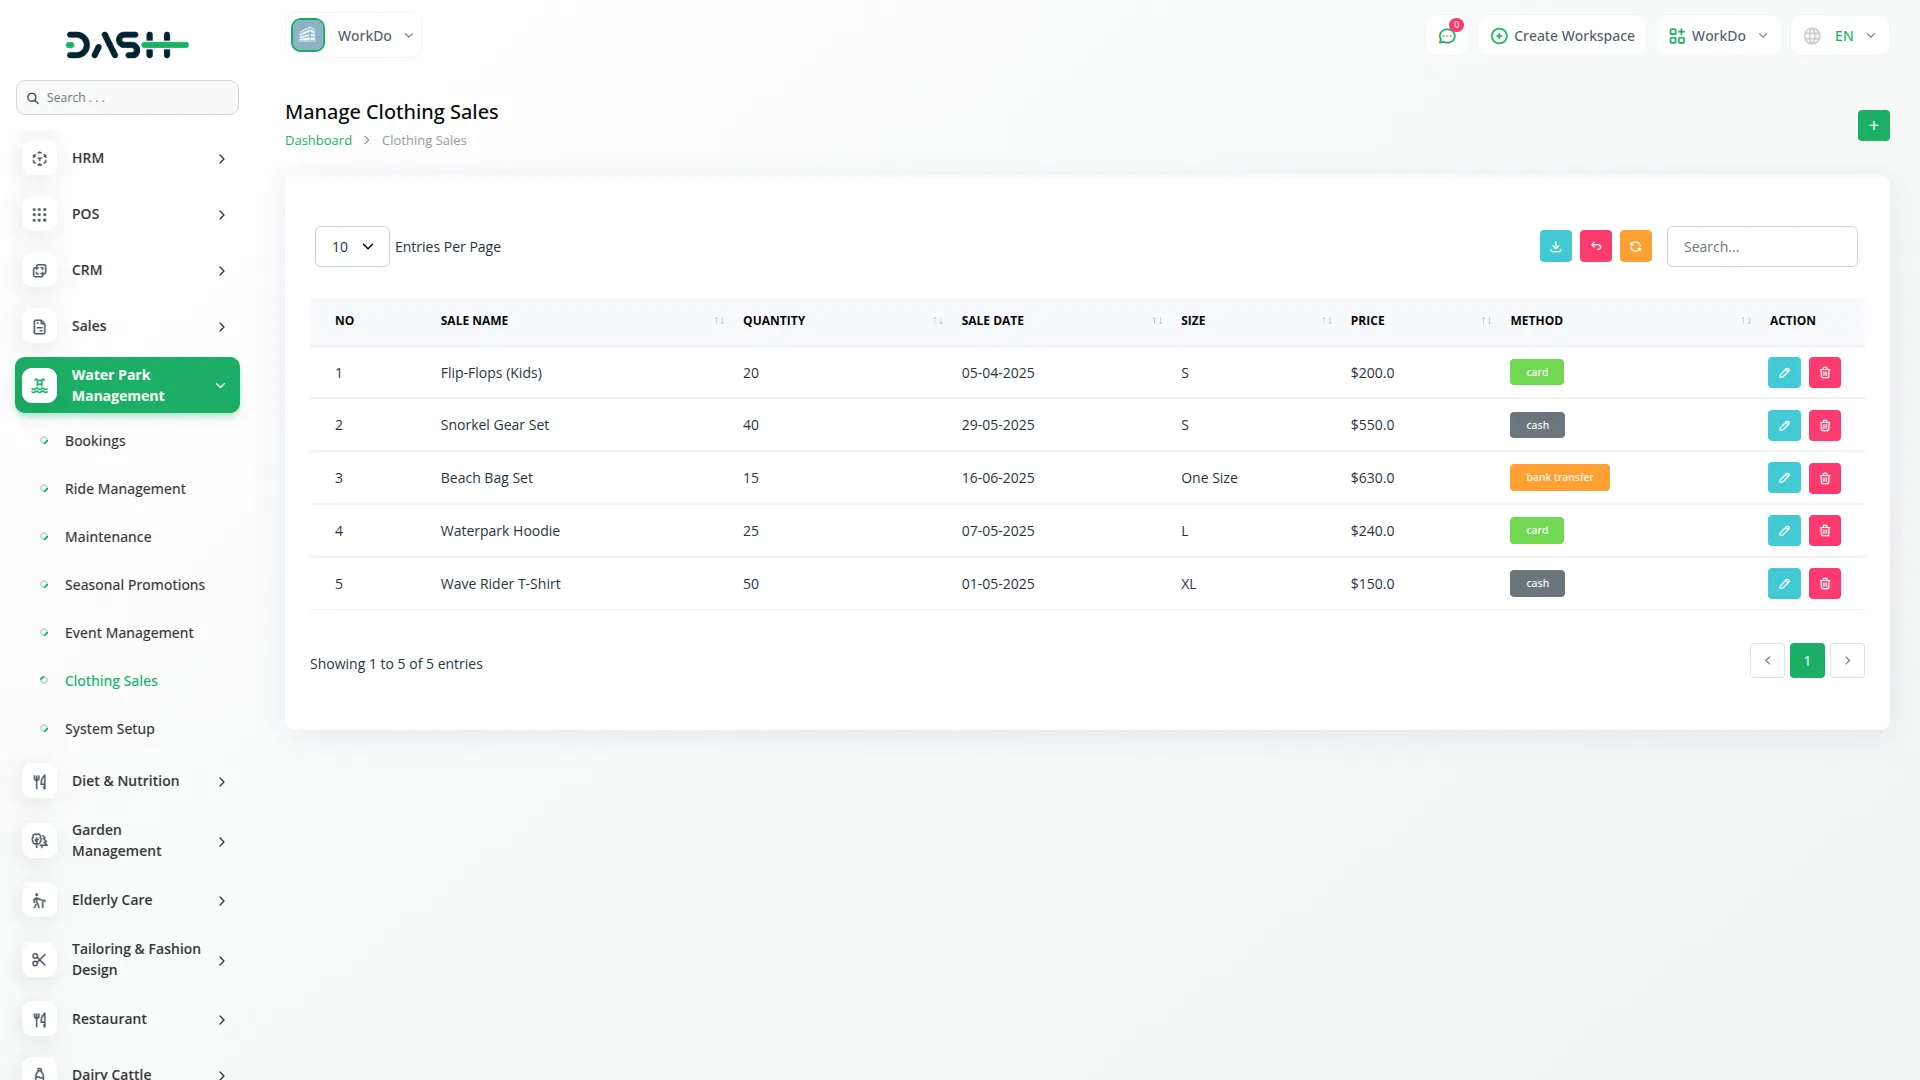
- To add a new clothing sales record, click the “Create” button given at the top of the clothing sales page. Enter the Name of the clothing item, Quantity of items purchased, Set the Sale Date, select the size of clothing item, add a sale price, at the last select the payment method from the dropdown options, which includes card, cash, or bank transfer.
- Select the Size of the clothing item and enter the Price charged for the sale. Choose the Payment Method from the dropdown options, including Card, Cash, or Bank transfer, based on how the customer paid.
- The list page displays all clothing sales in a clear table format. It includes columns for Sale Name to identify the sale, Quantity sold, Sale Date, Size of the items, Price of each sale, and the Payment Method used.
- In addition to these details, there is an action column where you can easily edit or delete clothing sale records. You can also filter sale records using the search bar, and use the reset, reload, or export buttons to view, update, or download the maintenance data as needed.
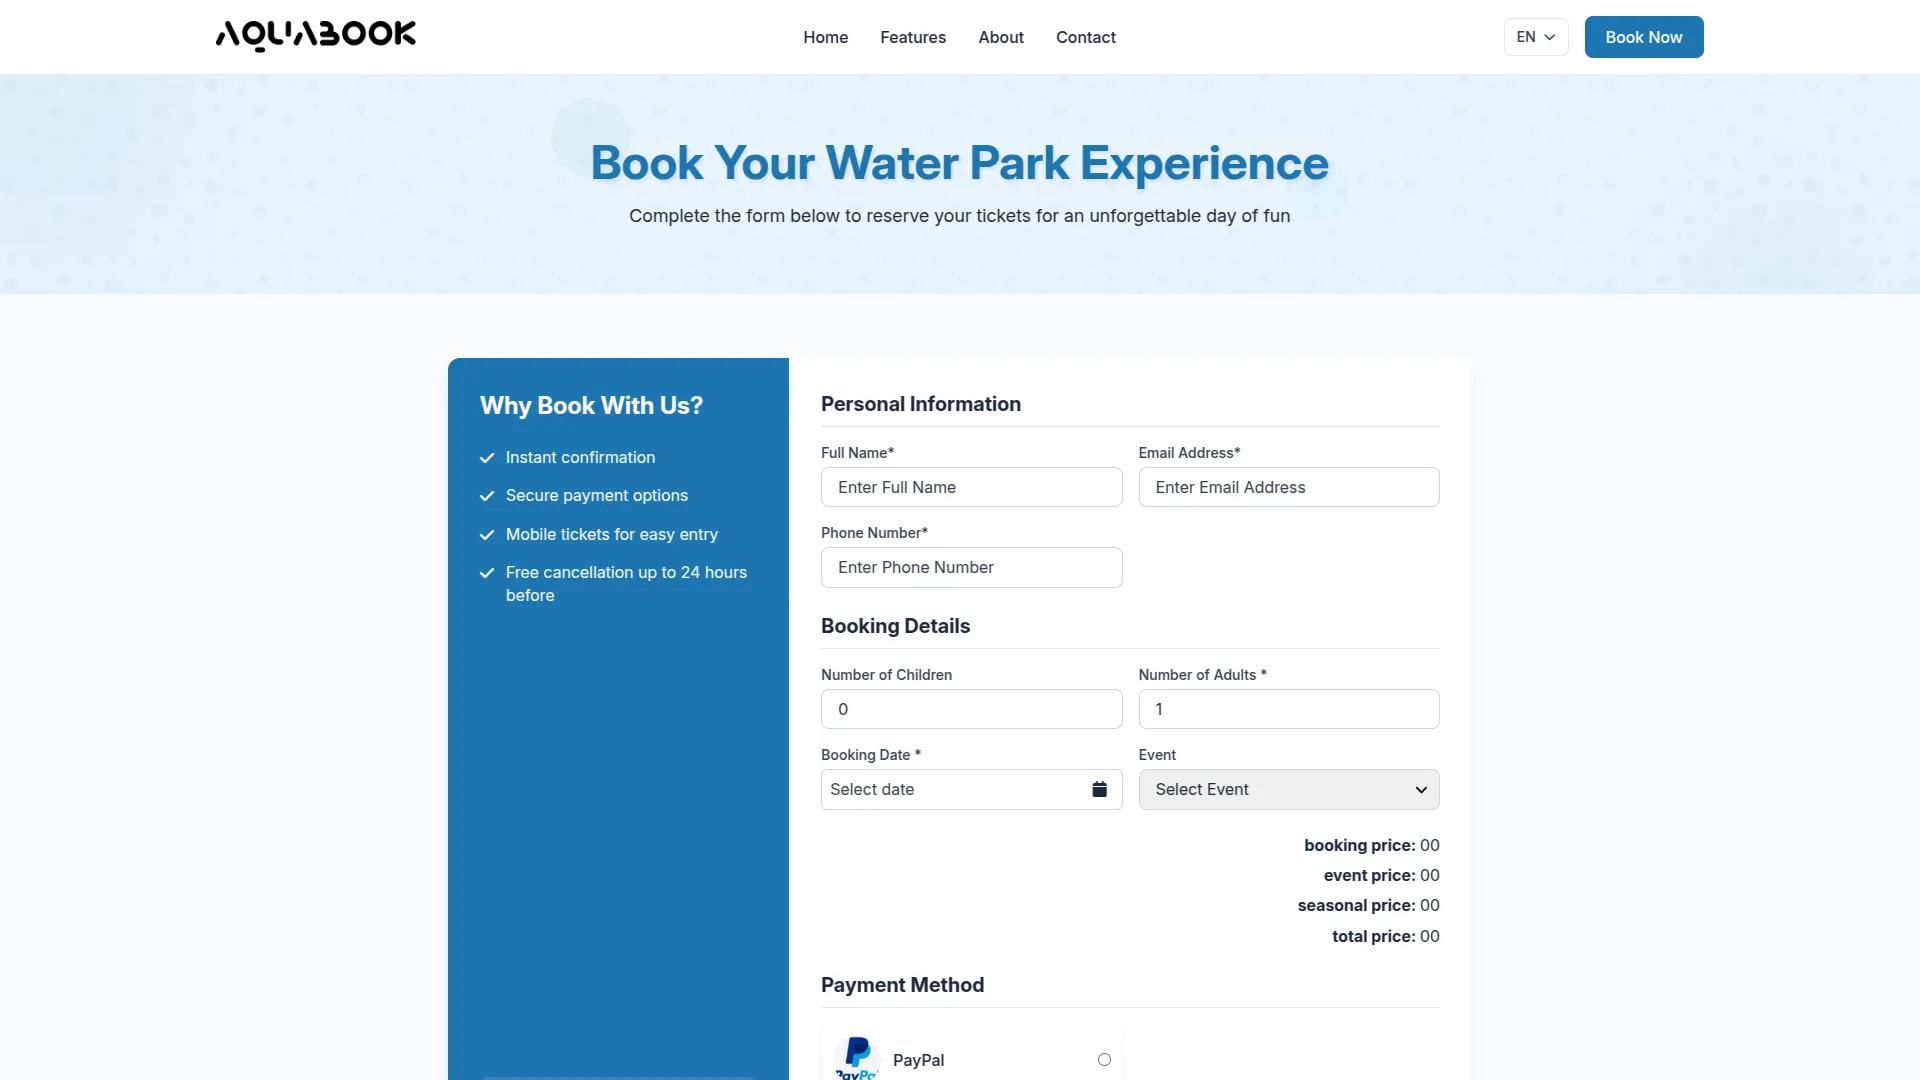
Booking Page
The Booking Page allows visitors to submit their water park booking details, such as visit date, group size, and any special requests. Based on the information provided, the system automatically calculates pricing, including adult price, child price, seasonal or event pricing, and displays the total amount. After submitting the form, customers receive booking confirmation, along with payment processing and contact information details.
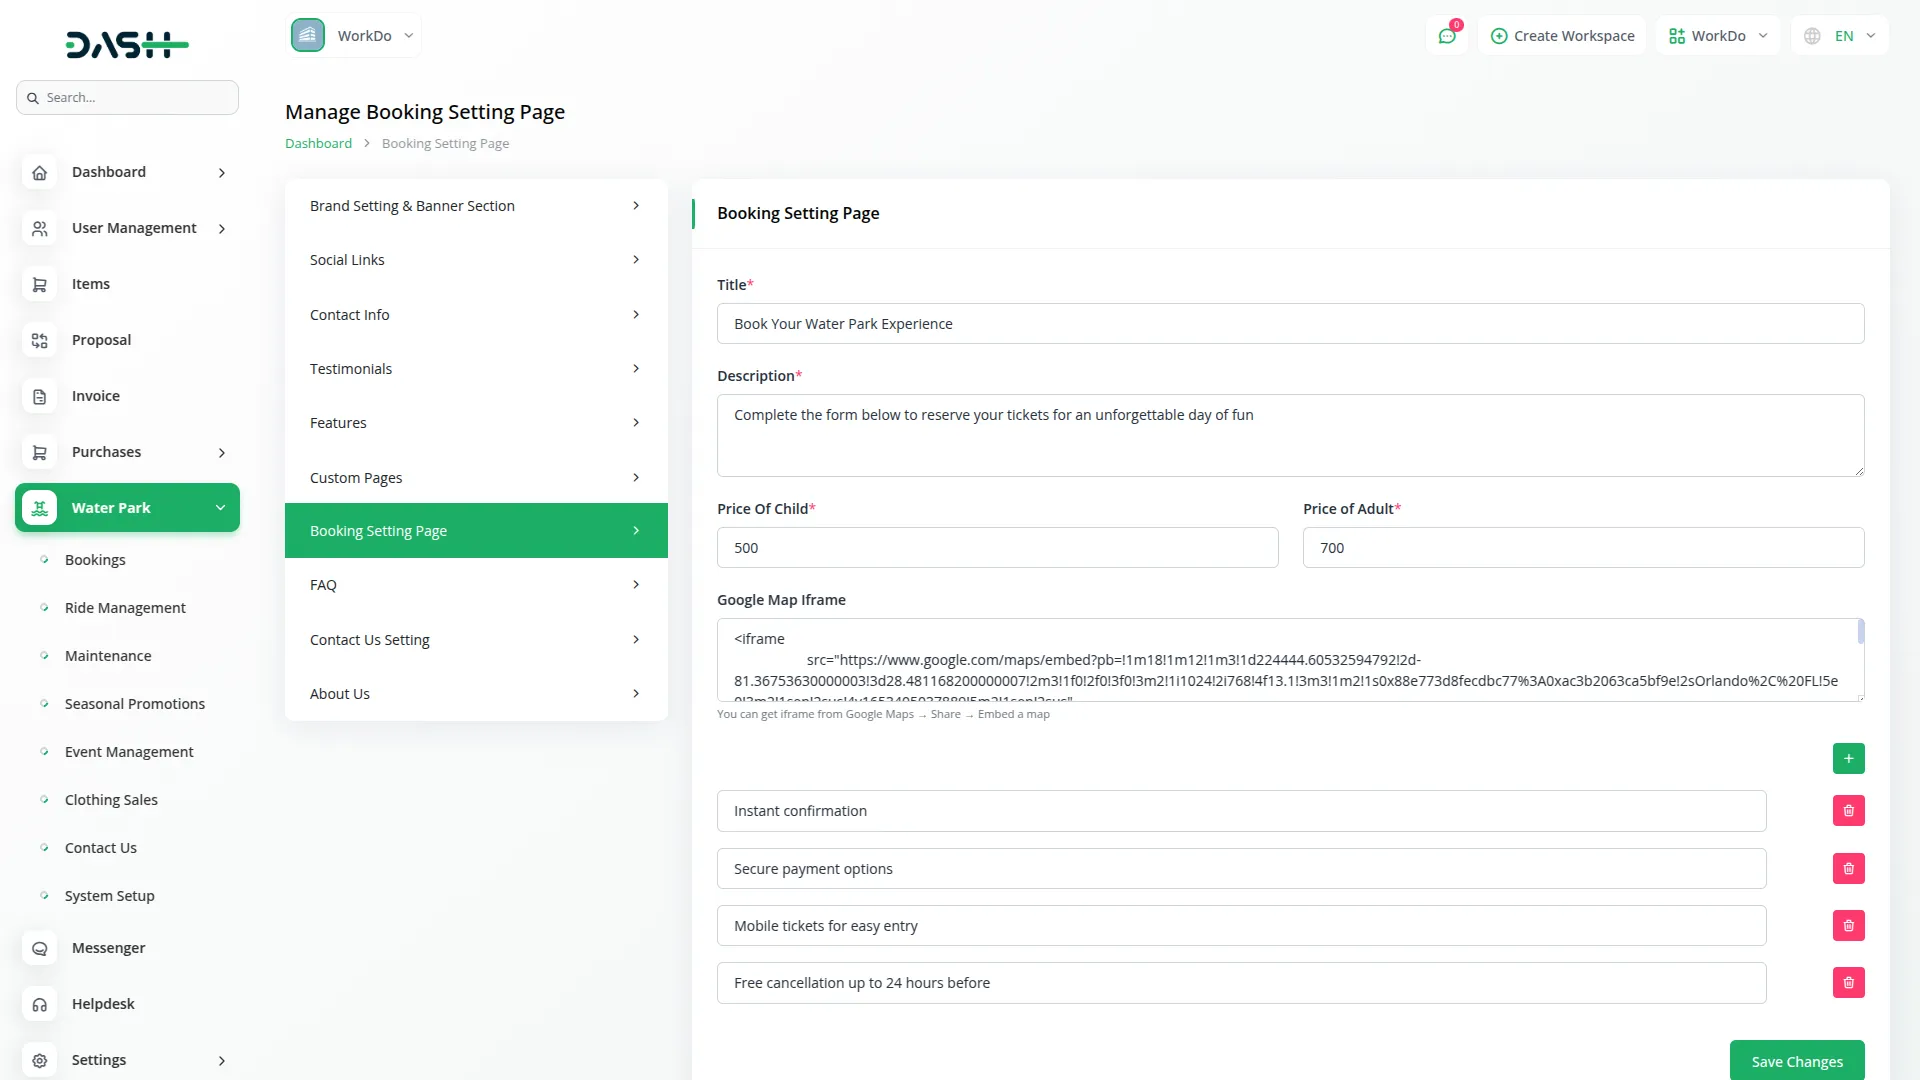
All booking details shown on the frontend are managed through the Booking Settings section in the backend (System Setup → Additional Settings → Section 4: Setting for Booking Page). Here, the admin can configure the booking page by adding the title, description, price for children, price for adults, and Google Map iframe code. Additional booking-related information can also be added using the booking setting repeater. The values entered in the backend automatically reflect on the frontend booking page.
Categories
Related articles
- BookingGo Add-On Setup
- Bundle Products Integration in eCommerceGo SaaS
- Outlook Calendar Integration in Dash SaaS
- WhatsApp API Integration in BookingGo SaaS
- Form Builder Integration in Dash SaaS
- Google Meet Integration in BookingGo SaaS
- Appointment Review Integration in BookingGo SaaS
- Sage Integration in Dash SaaS
- Coupon List Integration in eCommerceGo SaaS
- Newsletter Integration in Dash SaaS
- Automatic Order Printing Integration in eCommerceGo SaaS
- Twilio Integration in BookingGo SaaS
Reach Out to Us
Have questions or need assistance? We're here to help! Reach out to our team for support, inquiries, or feedback. Your needs are important to us, and we’re ready to assist you!


Need more help?
If you’re still uncertain or need professional guidance, don’t hesitate to contact us. You can contact us via email or submit a ticket with a description of your issue. Our team of experts is always available to help you with any questions. Rest assured that we’ll respond to your inquiry promptly.
Love what you see?
Do you like the quality of our products, themes, and applications, or perhaps the design of our website caught your eye? You can have similarly outstanding designs for your website or apps. Contact us, and we’ll bring your ideas to life.
