Parking Management Integration in Dash SaaS
A Parking Management System (PMS) is a smart tool made to help manage parking spaces better in places like malls, offices, homes, and public areas.
Introduction
A Parking Management System (PMS) is a smart tool made to help manage parking spaces better in places like malls, offices, homes, and public areas. It uses modern technology to make parking easier for both the people who use the parking and those who manage it. One of the main features of this system is that it can organize parking spaces by different types, such as for cars, bikes, bicycles, and even big vehicles like trucks or buses. This helps make sure every vehicle is parked in the right spot without confusion or delay. The system is also designed to be simple for users. It has filters that let people quickly find parking spaces that match their vehicle type. Because of this, the system makes parking faster, easier, and more organized. Overall, the Parking Management System helps improve how parking works and makes the whole experience smoother and more convenient for everyone.
How to Install the Add-On?
To Set Up the Parking Management System Add-On, you can follow this link: Setup Add-On.
How to use the Parking Management System Add-on?
Dashboard Overview
- After purchasing the Parking Management Add-On, navigate to the side menu on your main dashboard.
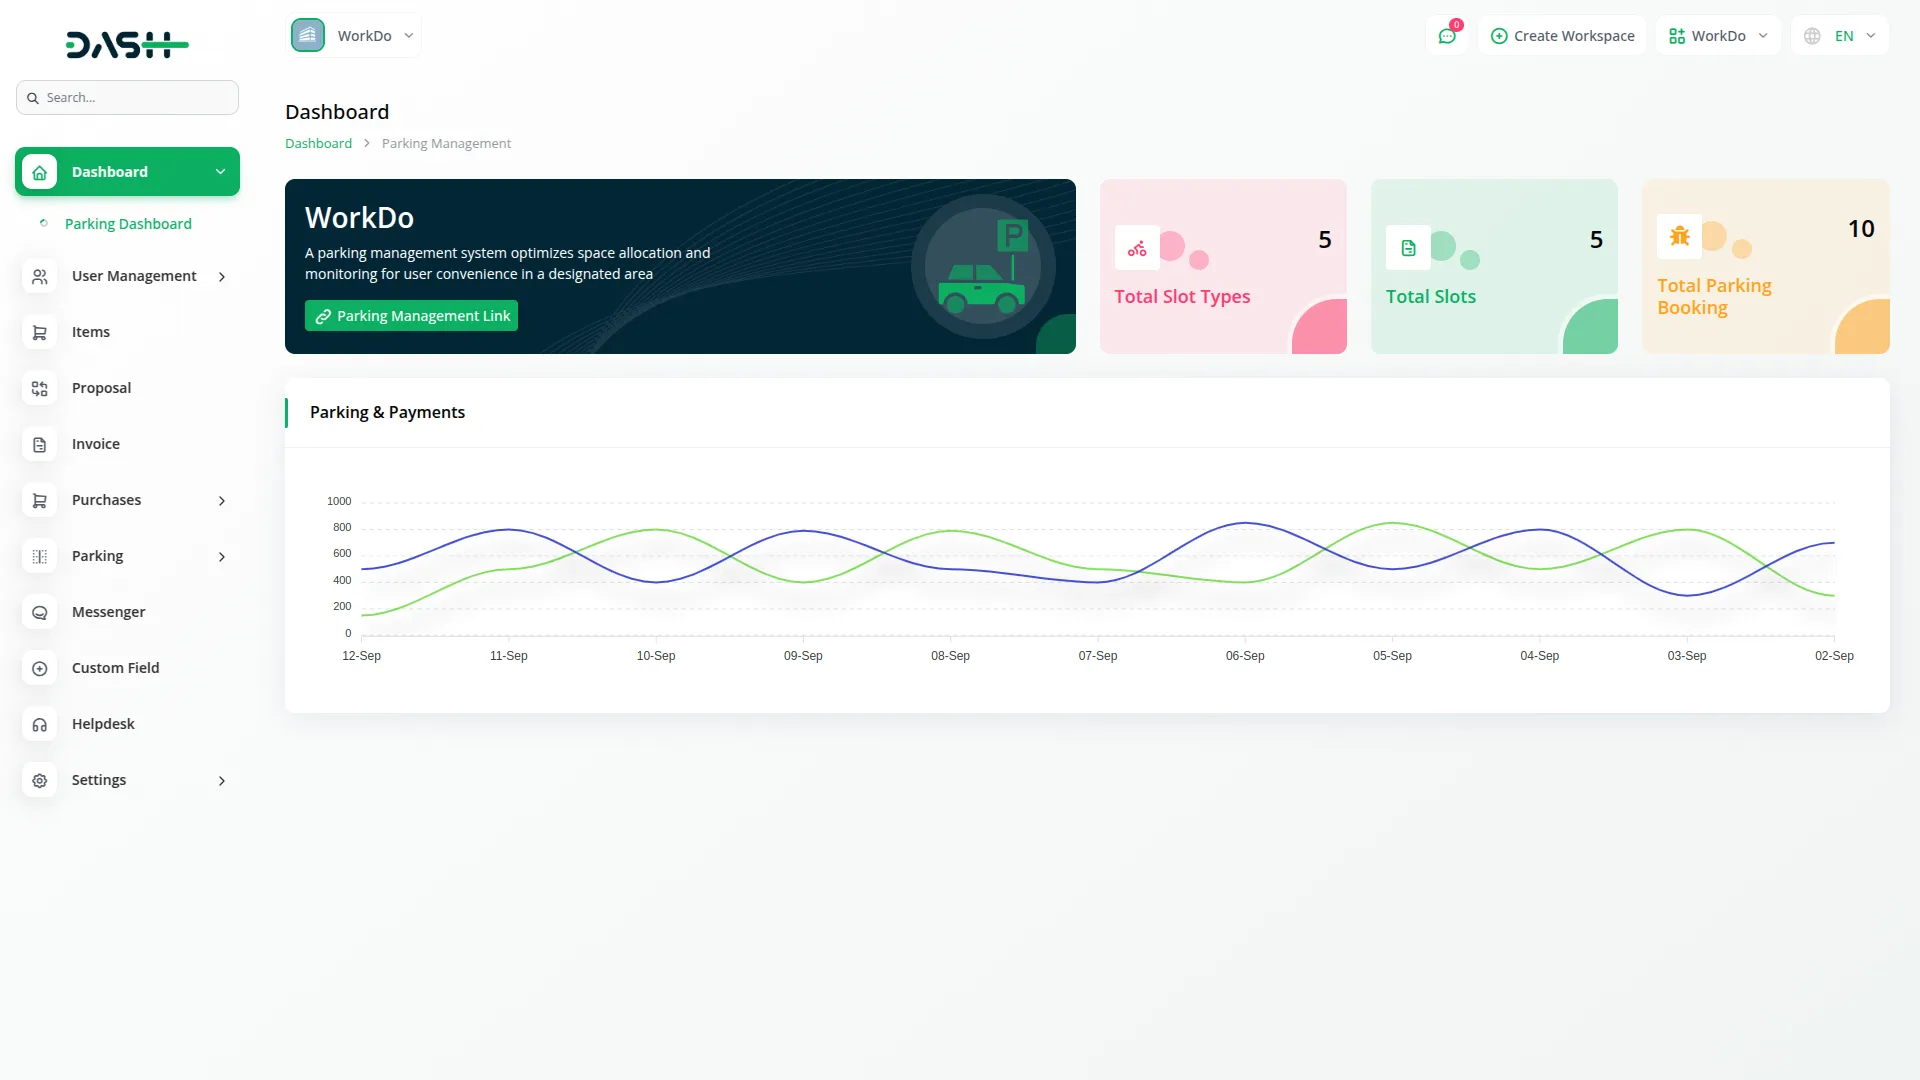
- The Dashboard provides a quick overview of your parking management system. At the top, you’ll find a direct link to “Parking Management Link” for quick access to the parking website.
- Below that, you can see three important summary cards displaying Total Slot Types, Total Slots, and Total Parking Bookings, giving you an instant snapshot of your system’s capacity and usage.
Just below that, you will see three colored boxes showing:
- Total Slot Types (how many types of parking slots you have)
- Total Slots (how many individual slots you have)
- Total Parking Bookings (how many bookings have been made)
- Below the boxes, you will also find a graph section labeled “Parking & Payments.” This helps you track daily trends for both parking usage and payment activities.
System Setup
Slot Types
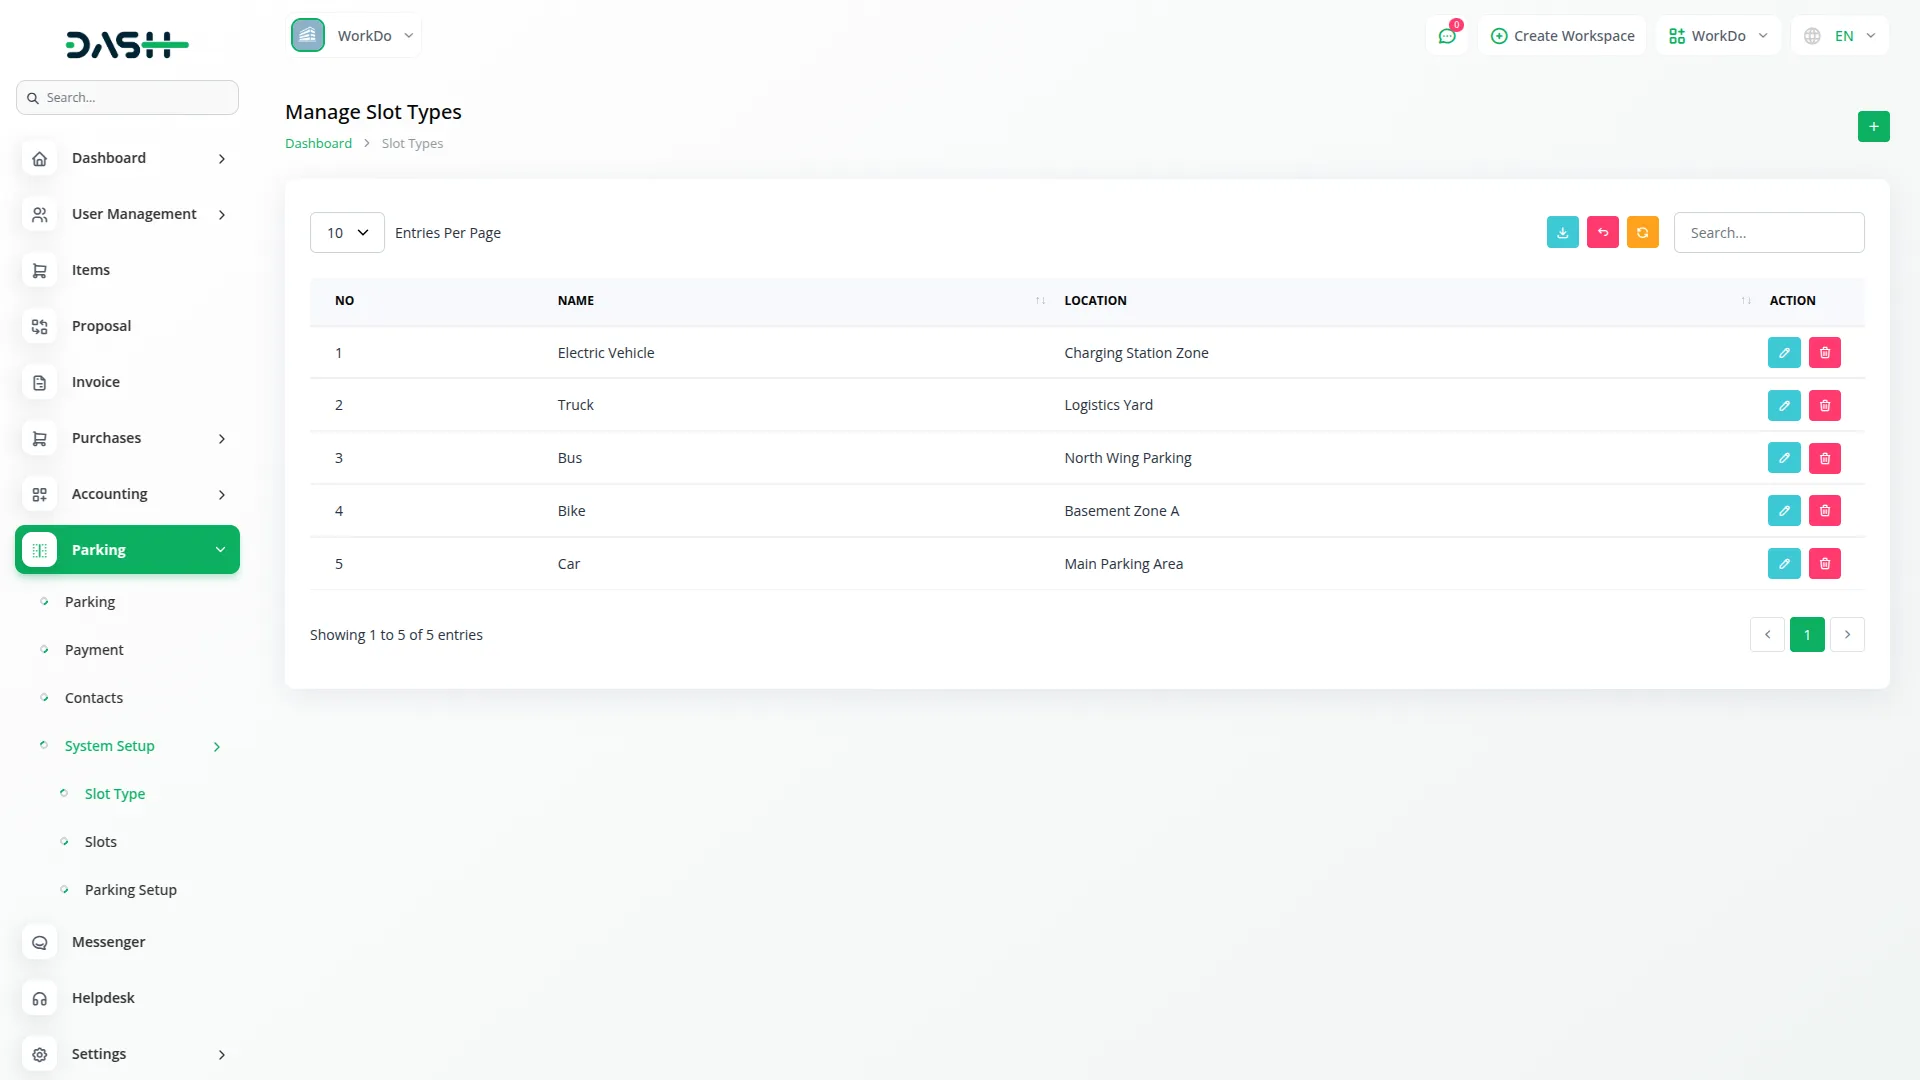
- To create a new Slot Type, click the “Create” button at the top of the page. Fill in the required details, including the Name of the slot type and the Location where it will be available.
- The list page displays all slot types in a table with columns for Name, Location, and Actions. You can use the Edit button to modify existing slot types or the Delete button to remove them from the system.
- These slot types serve as categories for your parking slots and will be used when creating individual slots in the Slots section.
Slots
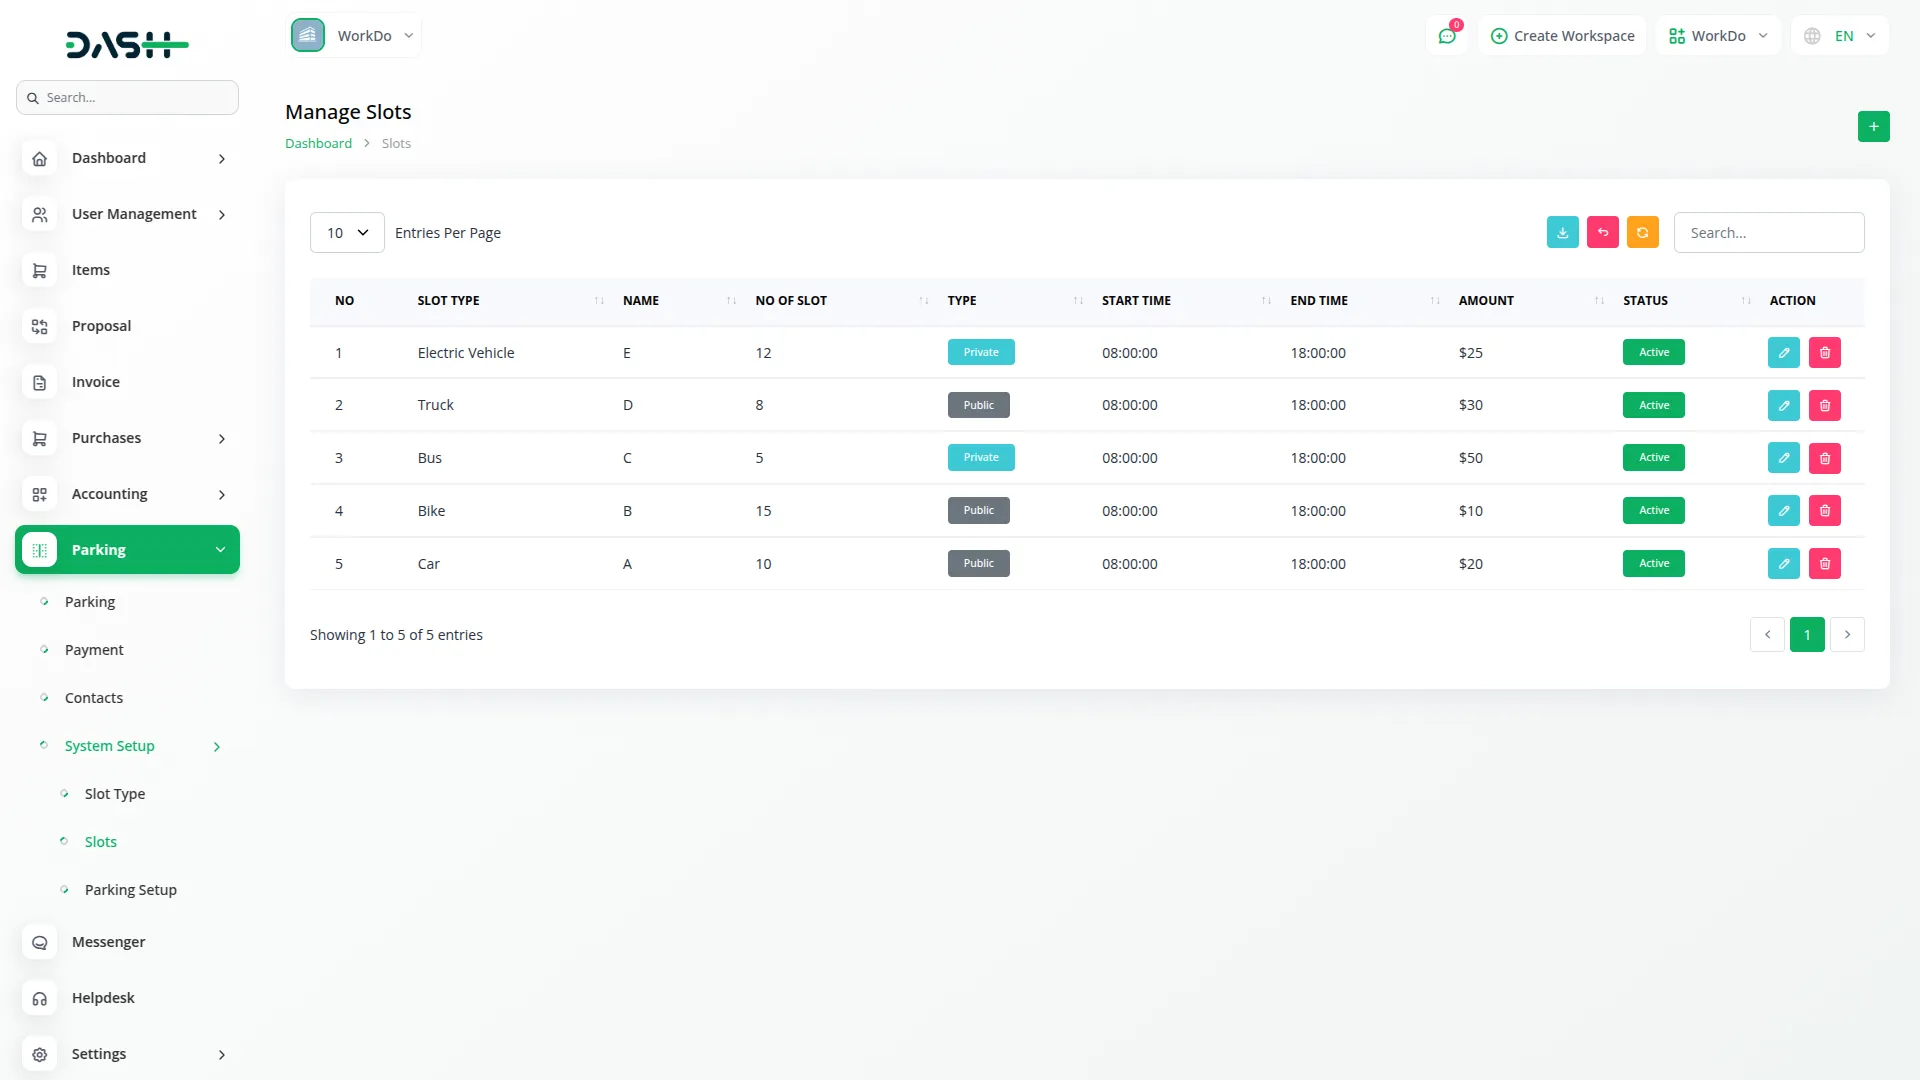
- To create a new Slot, click the “Create” button at the top of the slots page. Begin by selecting the Slot Type from the dropdown menu, which fetches available types from your Slot Types setup.
- Enter the Slot Name (which will be assigned from A to Z), specify the Number of Slots, and choose the Type as either Public or Private. Public slots are free for users, while Private slots charge fees on an hourly basis.
- Set the Start Time and End Time for slot availability, then select the Status as either Active or Inactive to control slot availability.
- The list page shows all slots in a table with columns for No, Slot Type, Name, No of Slot, Type (Public/Private), Start Time, End Time, Amount, Status (Active/Inactive), and Actions. You can edit existing slots or delete them using the action buttons.
Parking Setup
Brand Setting
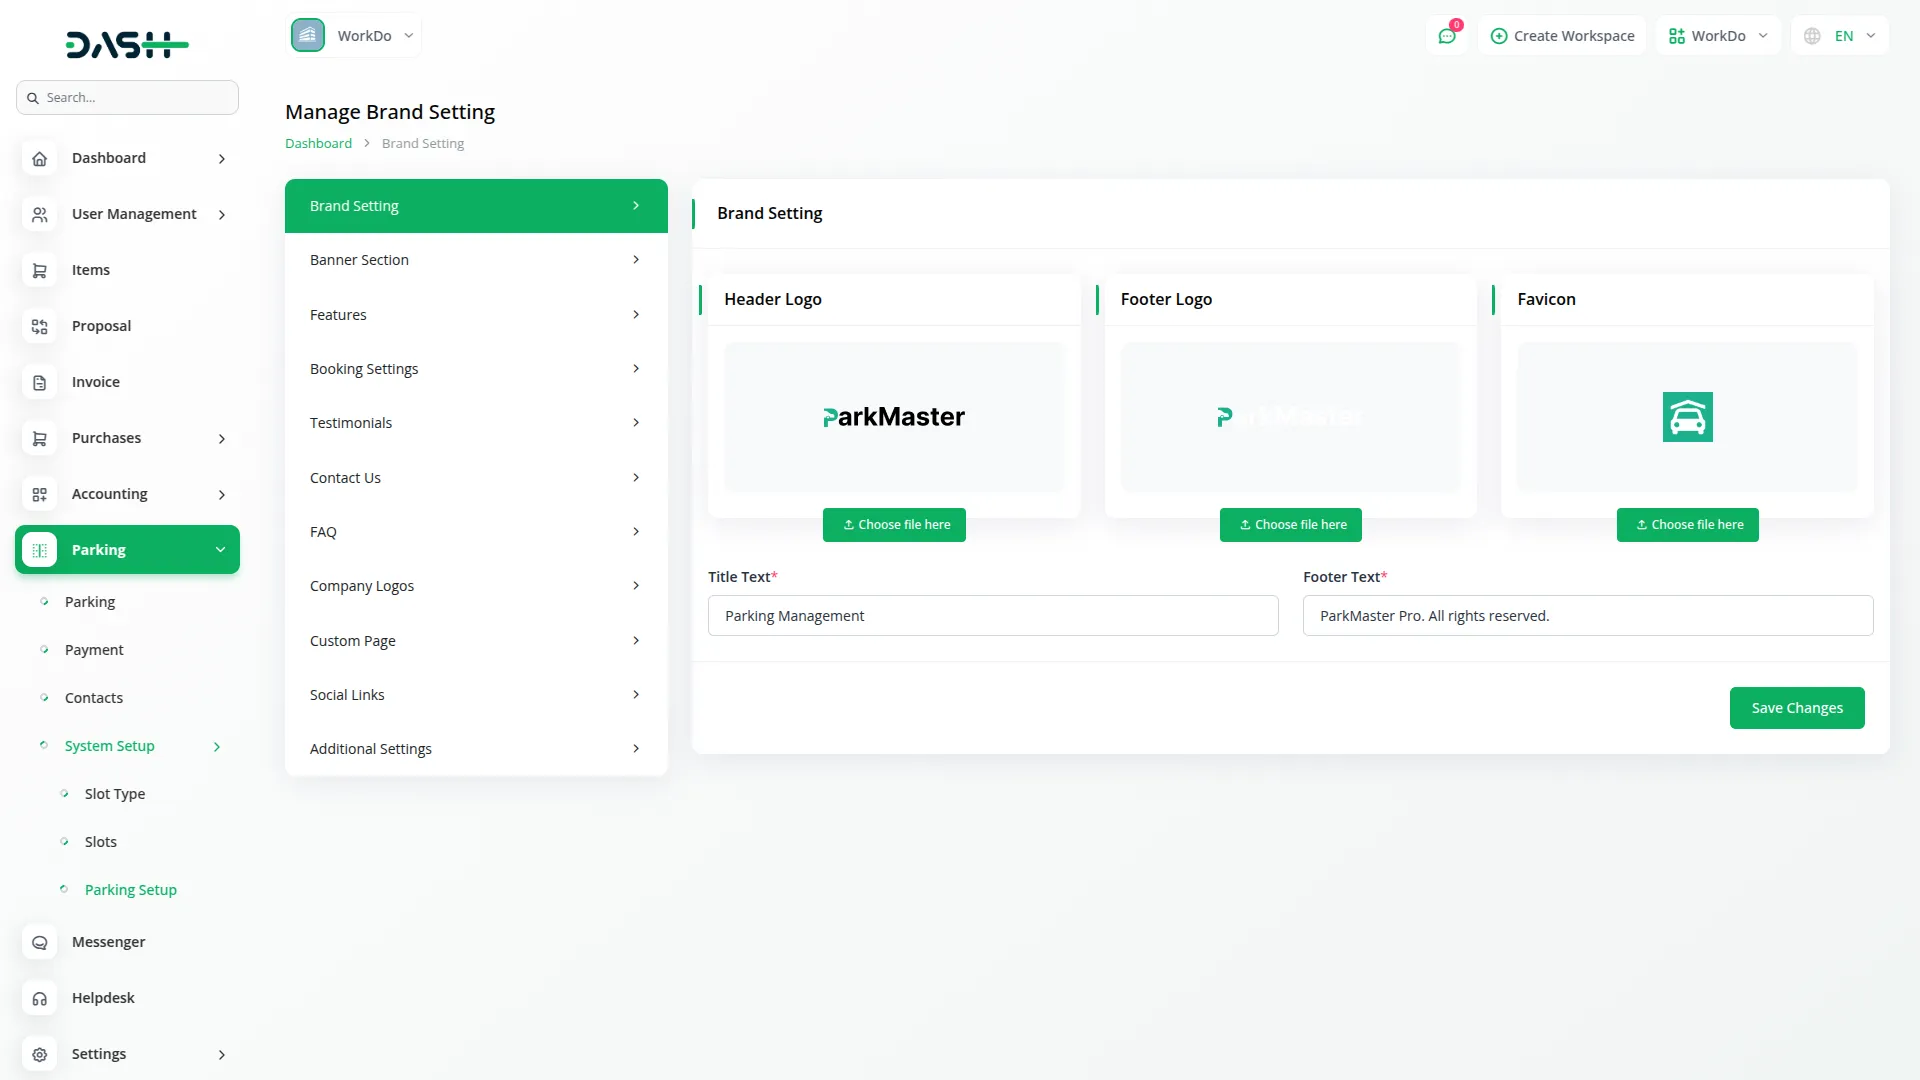
- In the Brand Setting section, you will find fields for the header Logo and footer logo, Favicon (for the website), Title Text, and Footer Text (for the copyright sentence at the bottom of pages).
- Once saved, your Logo will appear in the header and footer sections across your parking booking website, while the Favicon will display in browser tabs. The Title Text and Footer Text will automatically appear in their respective sections on your frontend booking page, creating a professional and branded experience for your customers.
- This brand setting connects directly to the website frontend, ensuring consistent branding throughout the user’s booking experience.
Banner Section
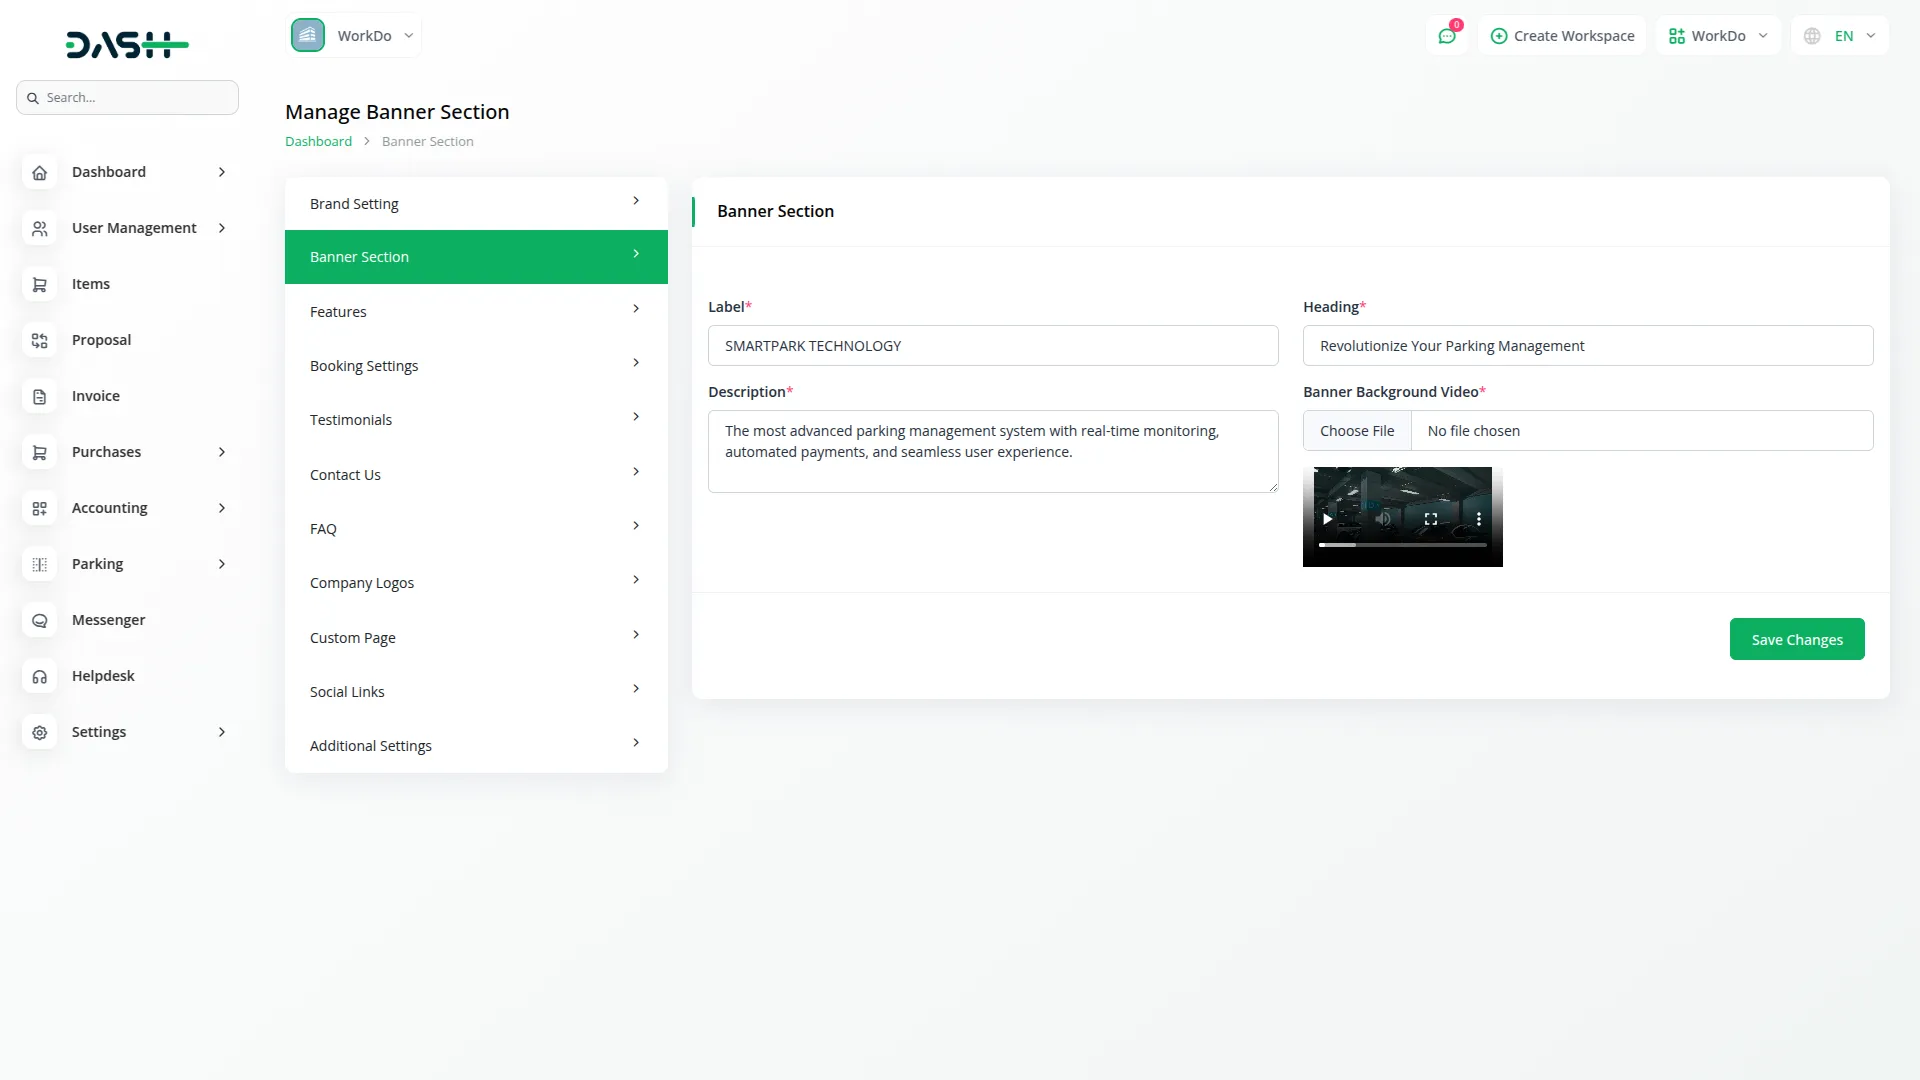
- In the Banner Section, you will find fields for Label, Heading, Description, and Banner Background Video. Enter the details for each field and upload your background video file.
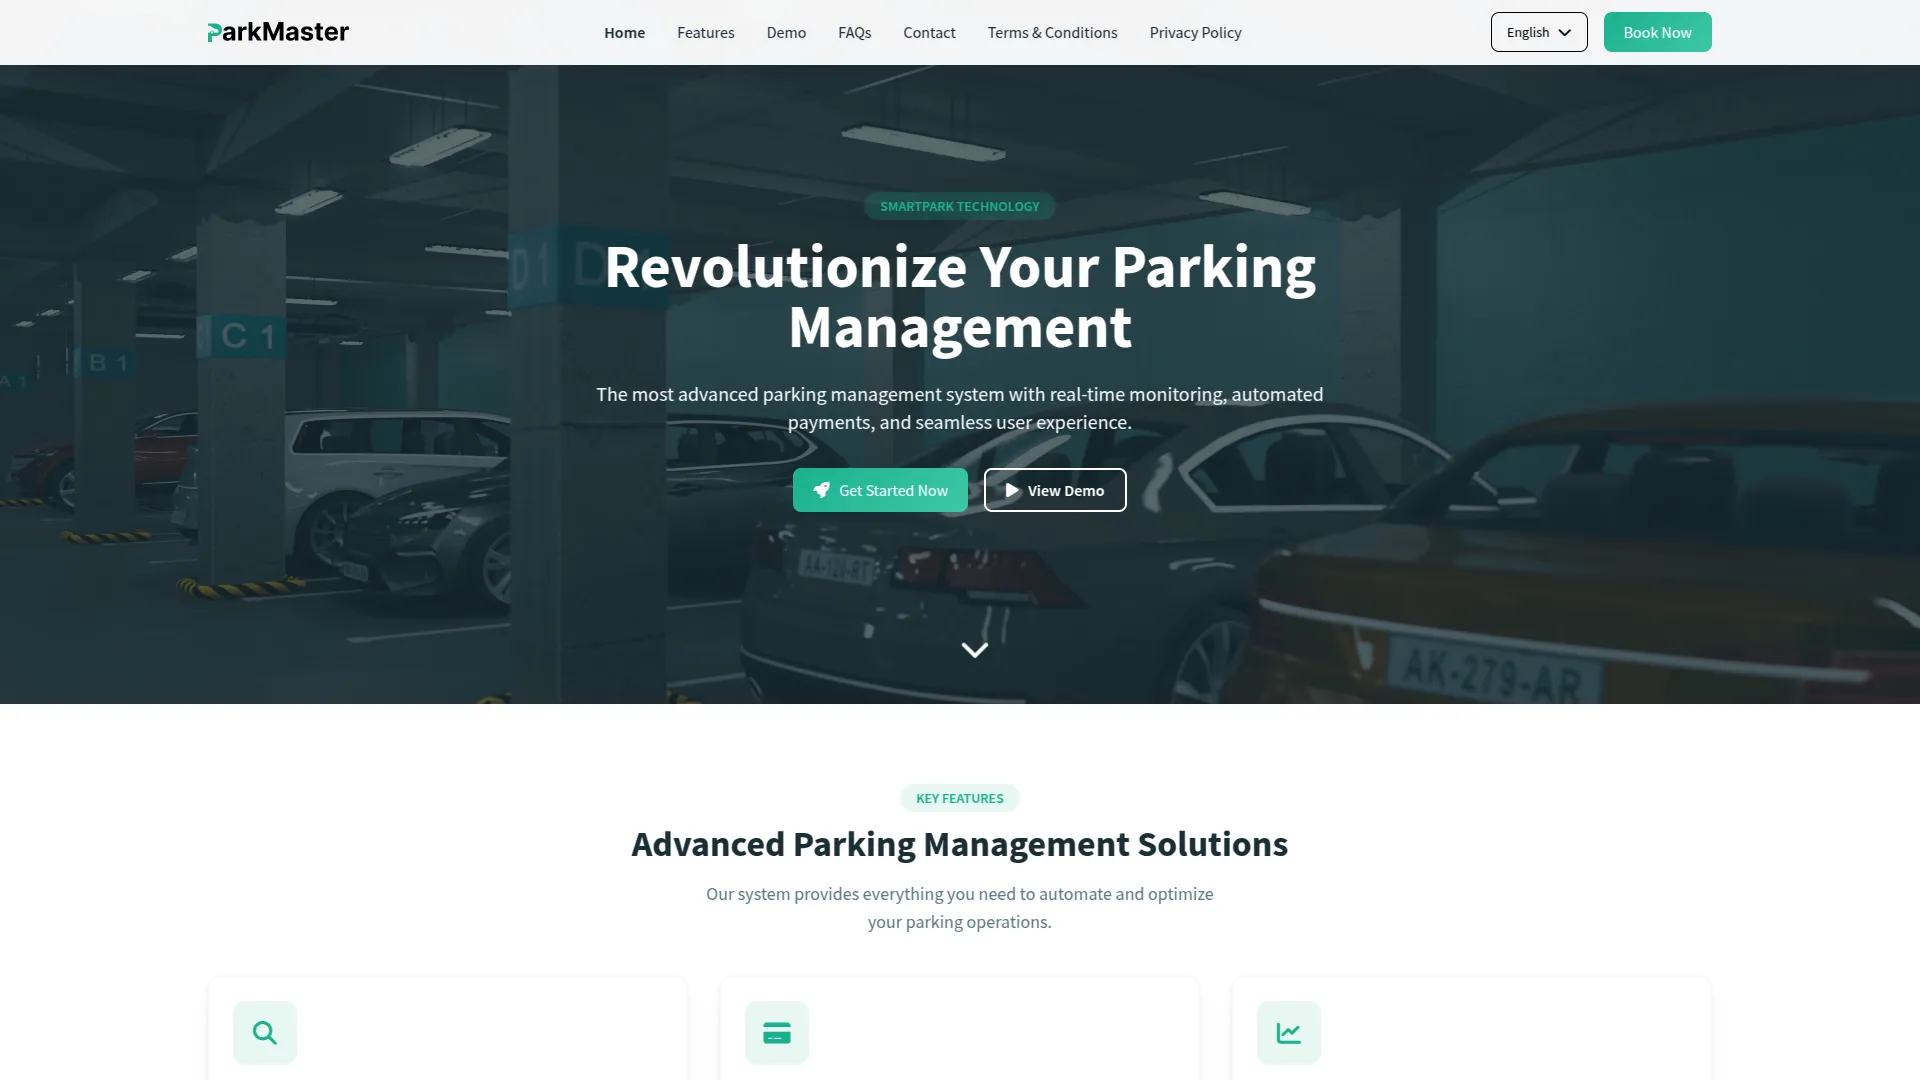
- Once saved, the Label, Heading, Description, and Banner Background Video will automatically appear in the banner section of your website’s homepage, creating an engaging first impression for visitors. This customizable banner section allows you to showcase your parking management services with dynamic visual content.
- The banner content is directly connected to your website’s frontend and will be displayed prominently at the top of your homepage to attract and inform potential customers.
Features
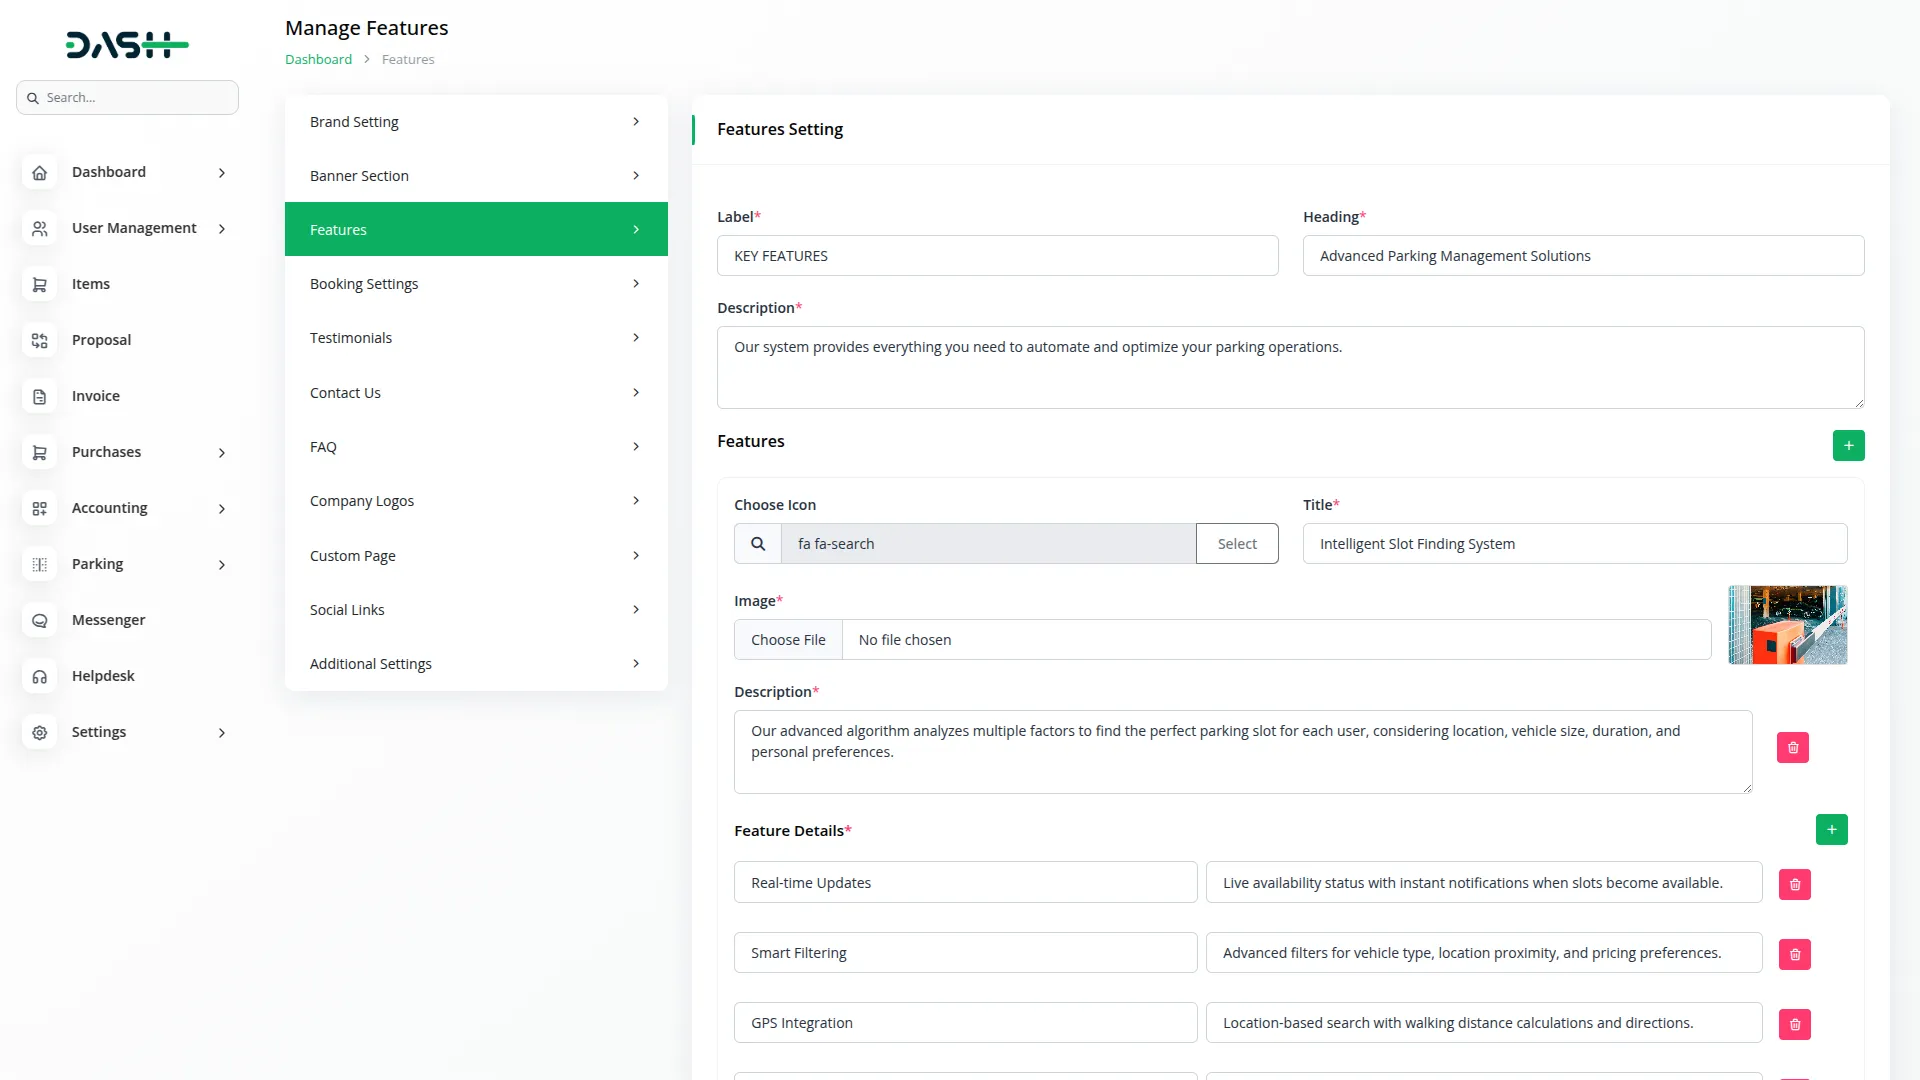
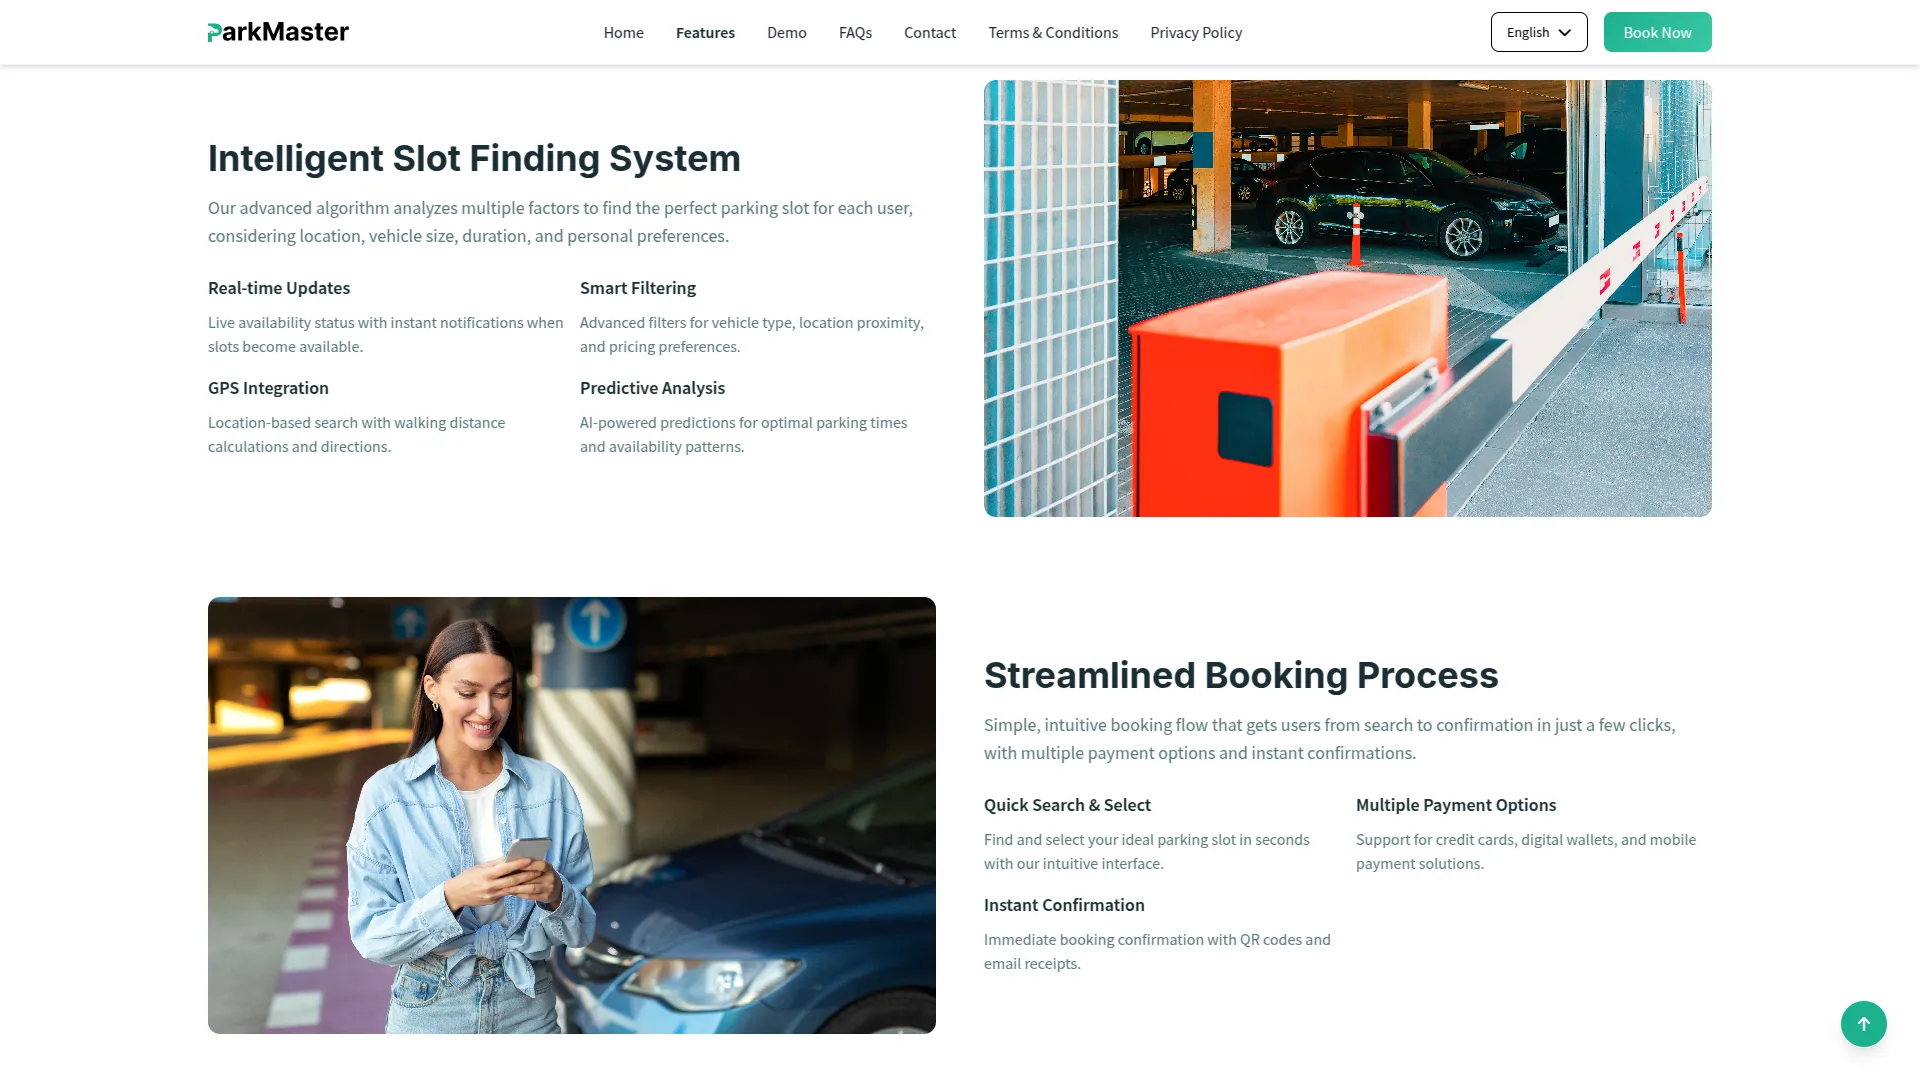
- In the Features section, you will find fields for Label, Heading, and Description for the main features section. Below that, you can add multiple features using the repeater fields.
- For each feature, enter the Icon, Title, Image, and Description. Additionally, you can add feature details using the repeater fields within each feature by entering Text and Description for more detailed information.
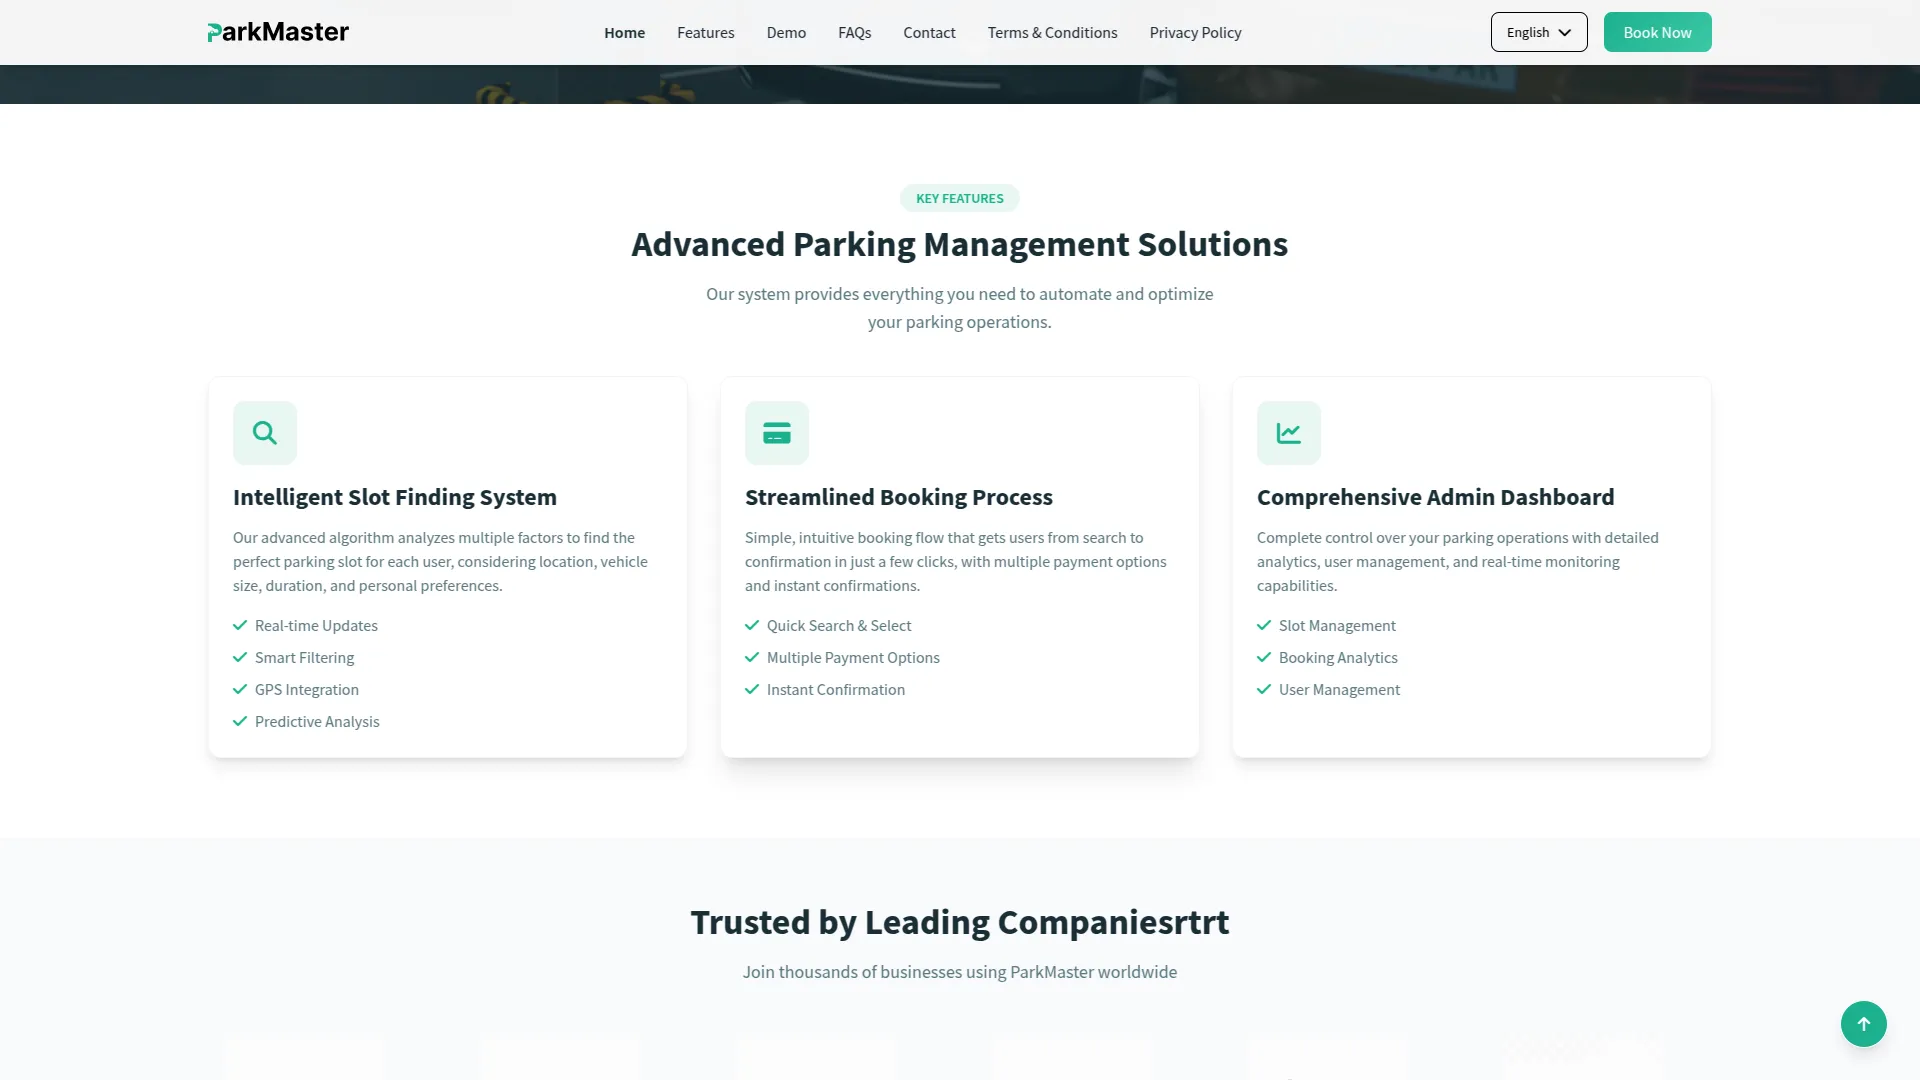
- Once saved, the Label, Heading, and Description will appear in the Features section on both your Home and Feature pages. On the Home page, the icon, title, text, and description will be displayed, while on the Feature page, the title, image, text, description, and short description will be presented in a clean, organized layout. The additional feature details will provide visitors with comprehensive information about your parking management services.
Booking Settings
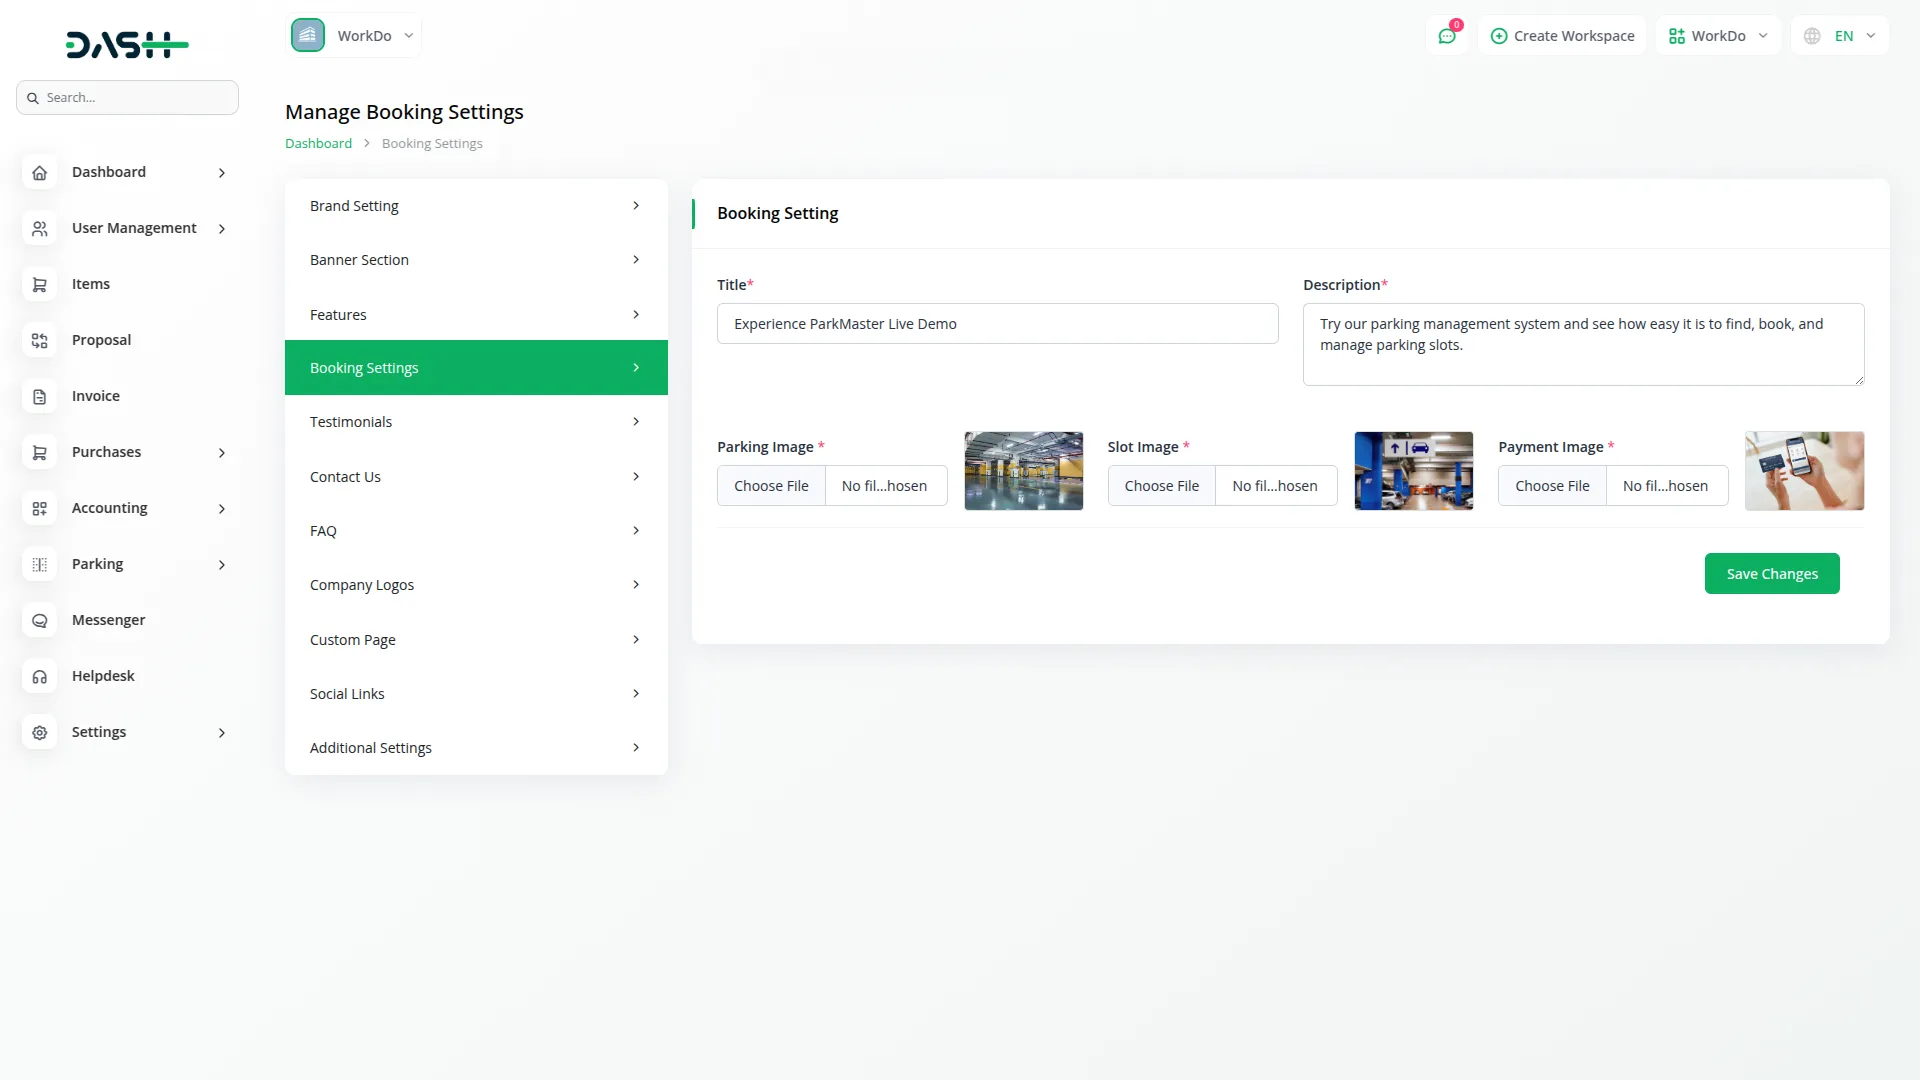
- In the Booking Settings section, you will find fields for Title, Description, Parking Image, Slot Image, and Payment Image. Enter the title and description text, then upload the respective images for each booking step.
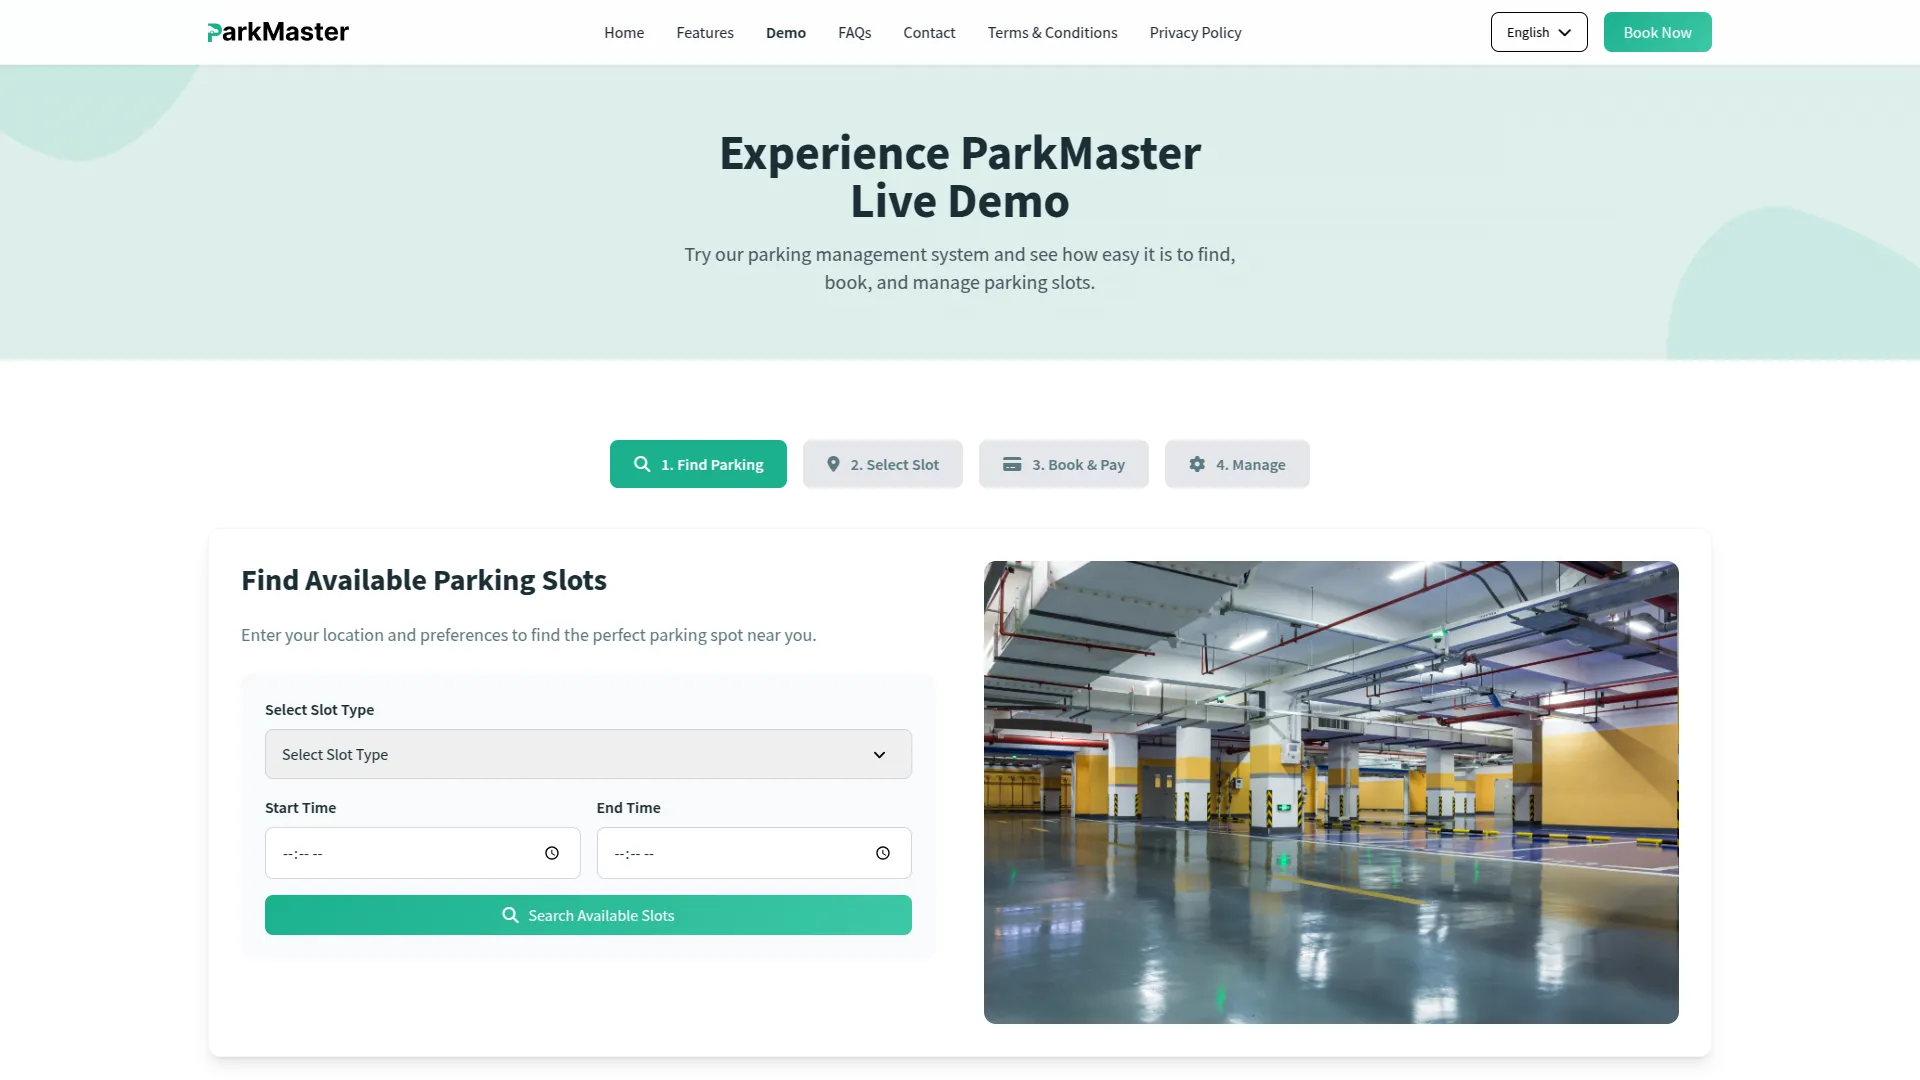
- Once saved, the Title and Description will appear in the demo page of your website, while the Parking Image will be displayed during the “Find Parking” step, the Slot Image during the “Select Slot” step, and the Payment Image during the “Book & Pay” step. These images help guide users through the booking process on your frontend demo page.
Testimonial
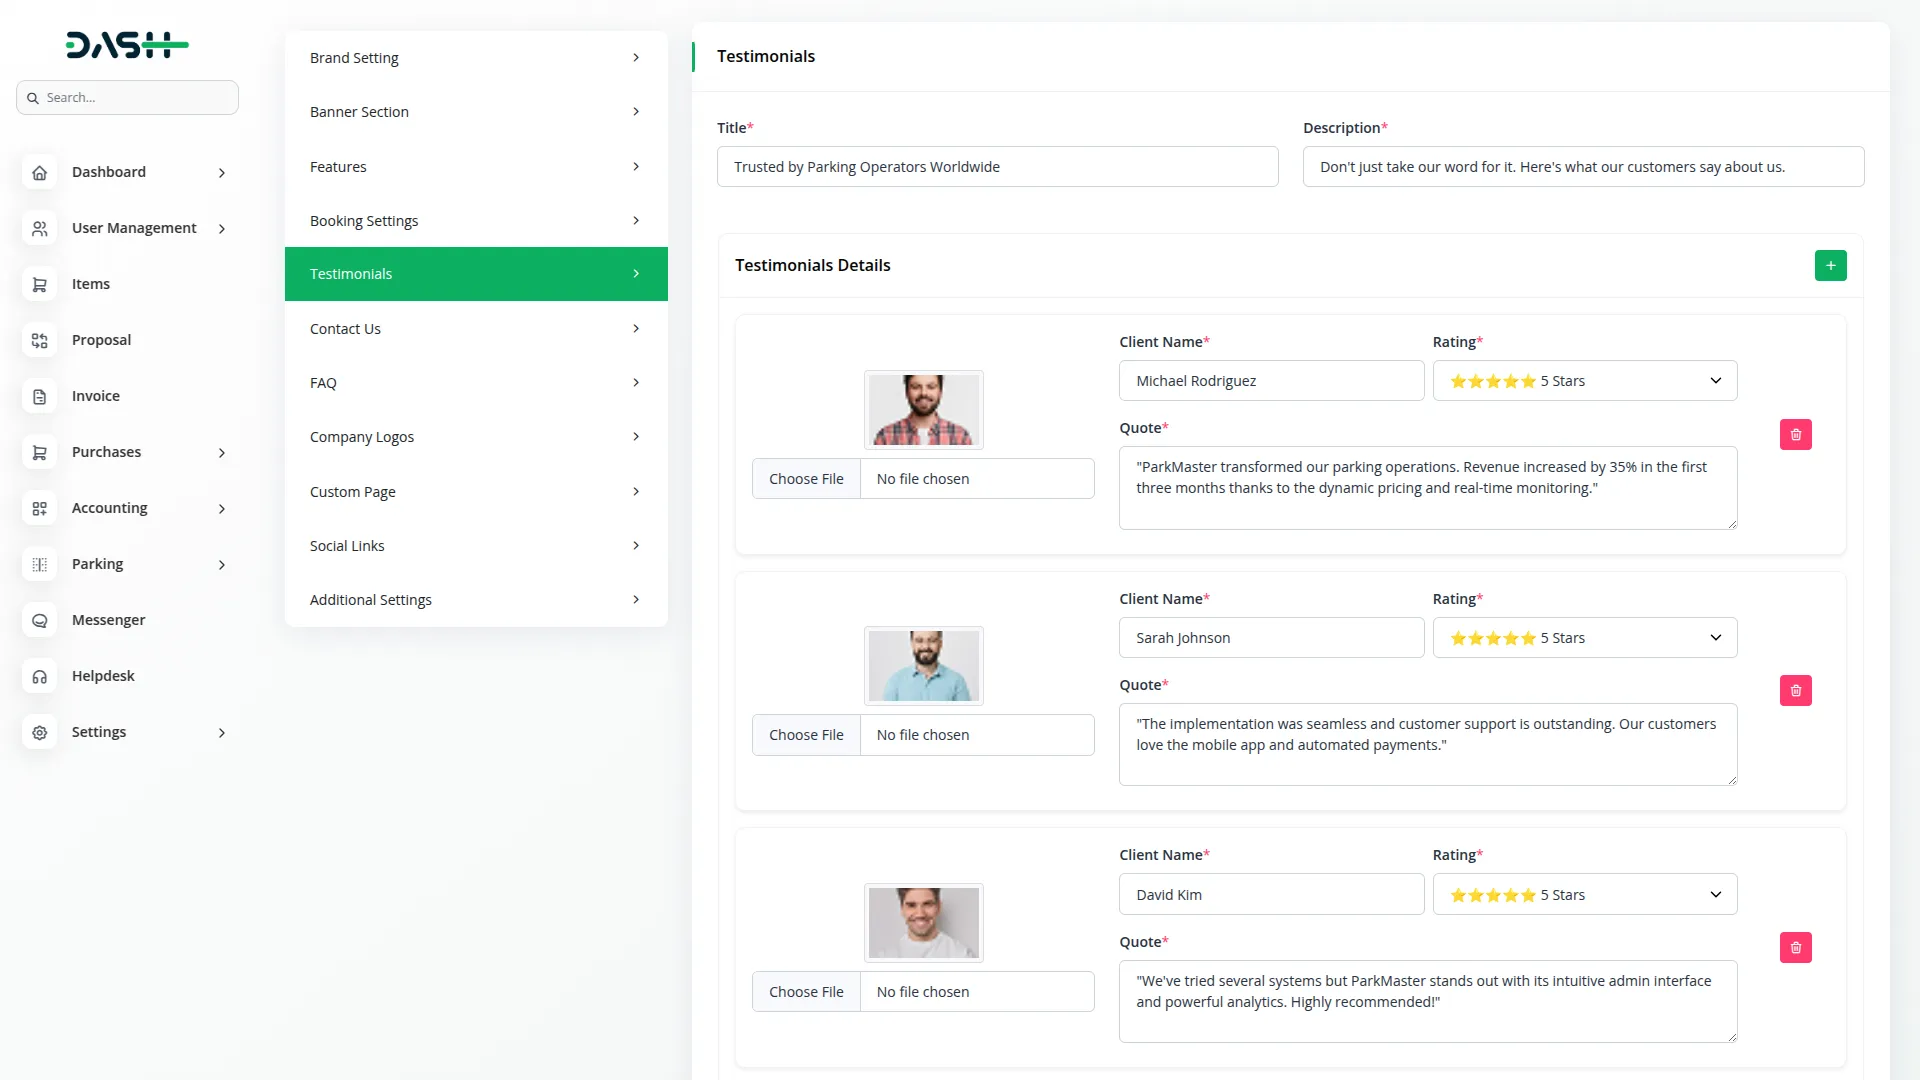
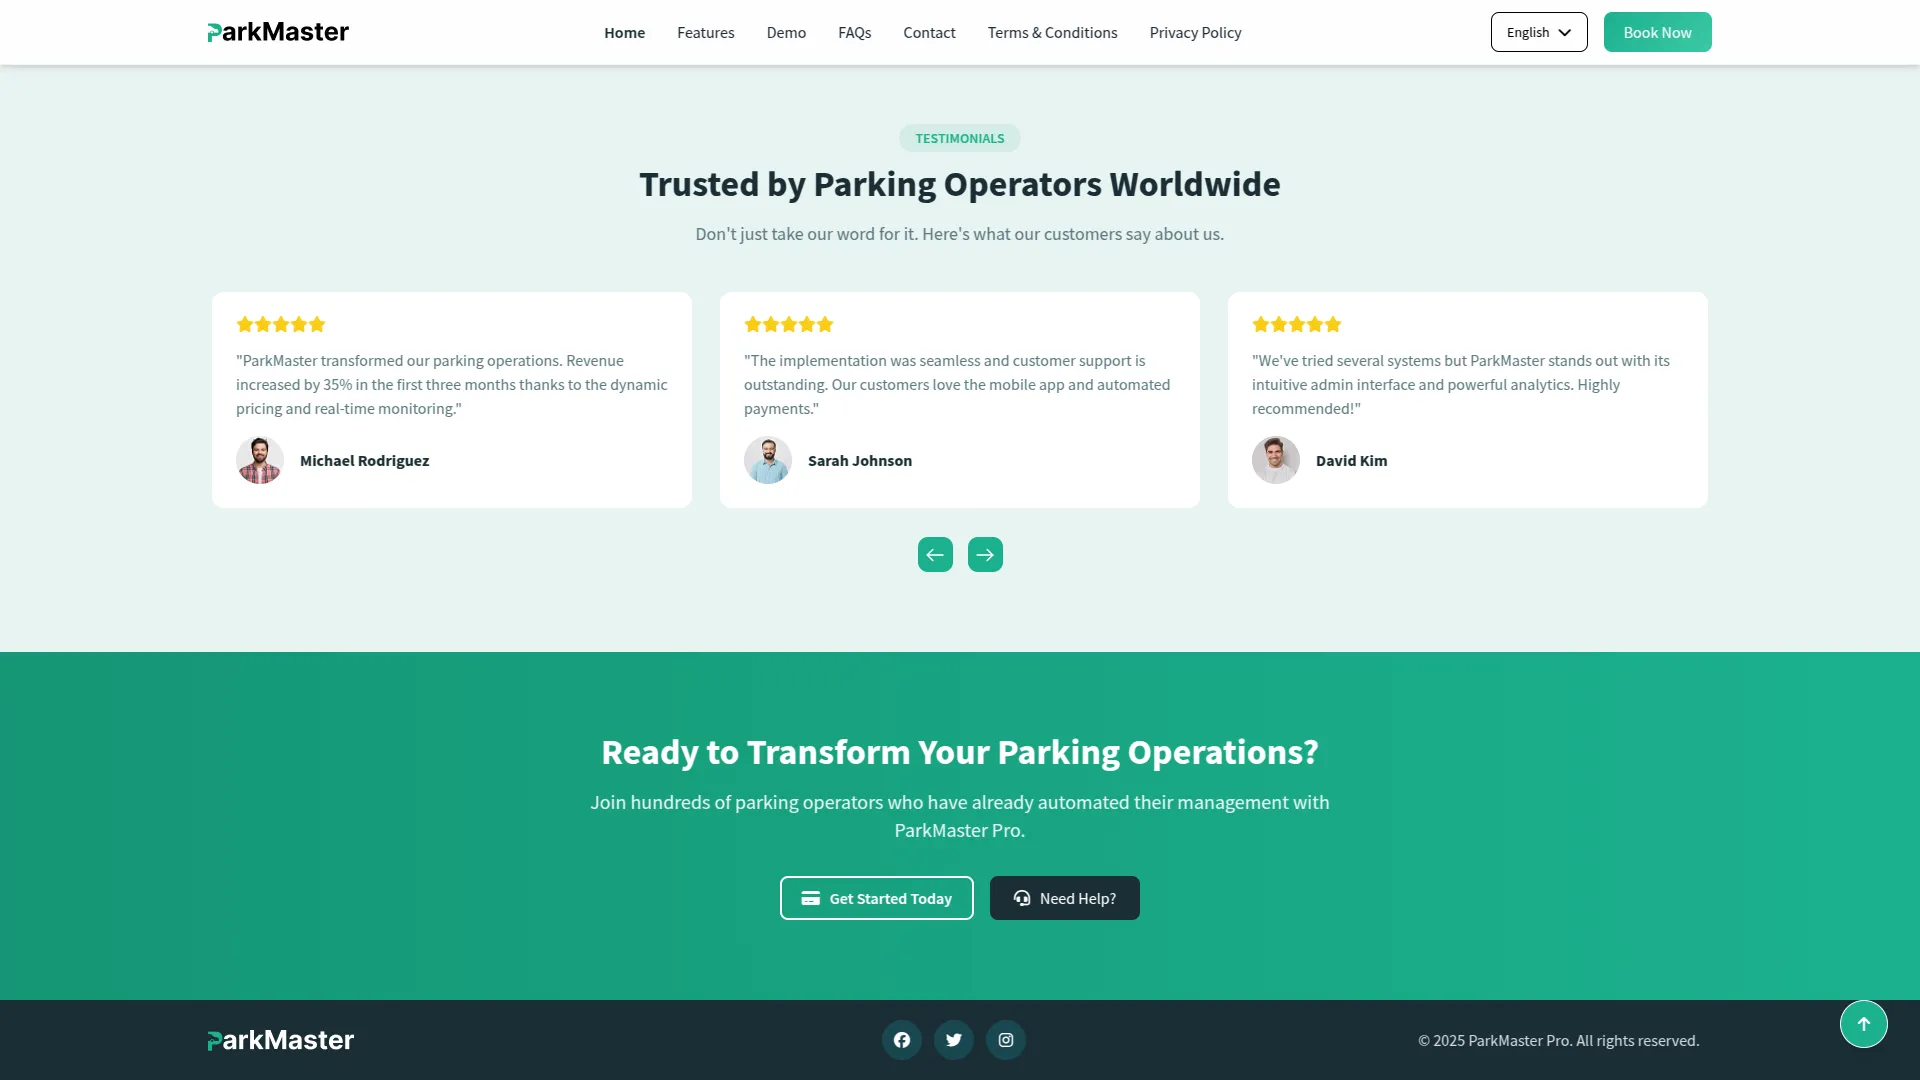
- In the Testimonial section, you will find fields for Title and Description for the main testimonial section. Below that, you can add multiple testimonials using the repeater fields.
- For each testimonial, enter the Client Name, Rating, Quote, and upload the Client Image. You can add as many testimonials as needed to showcase customer feedback.
- Once saved, the Title and Description will appear in the testimonial section of your website homepage, while each individual testimonial with Client Name, Rating, Quote, and Client Image will be displayed in a slider format, allowing visitors to see multiple customer reviews and build trust in your parking management services.
Contact Us
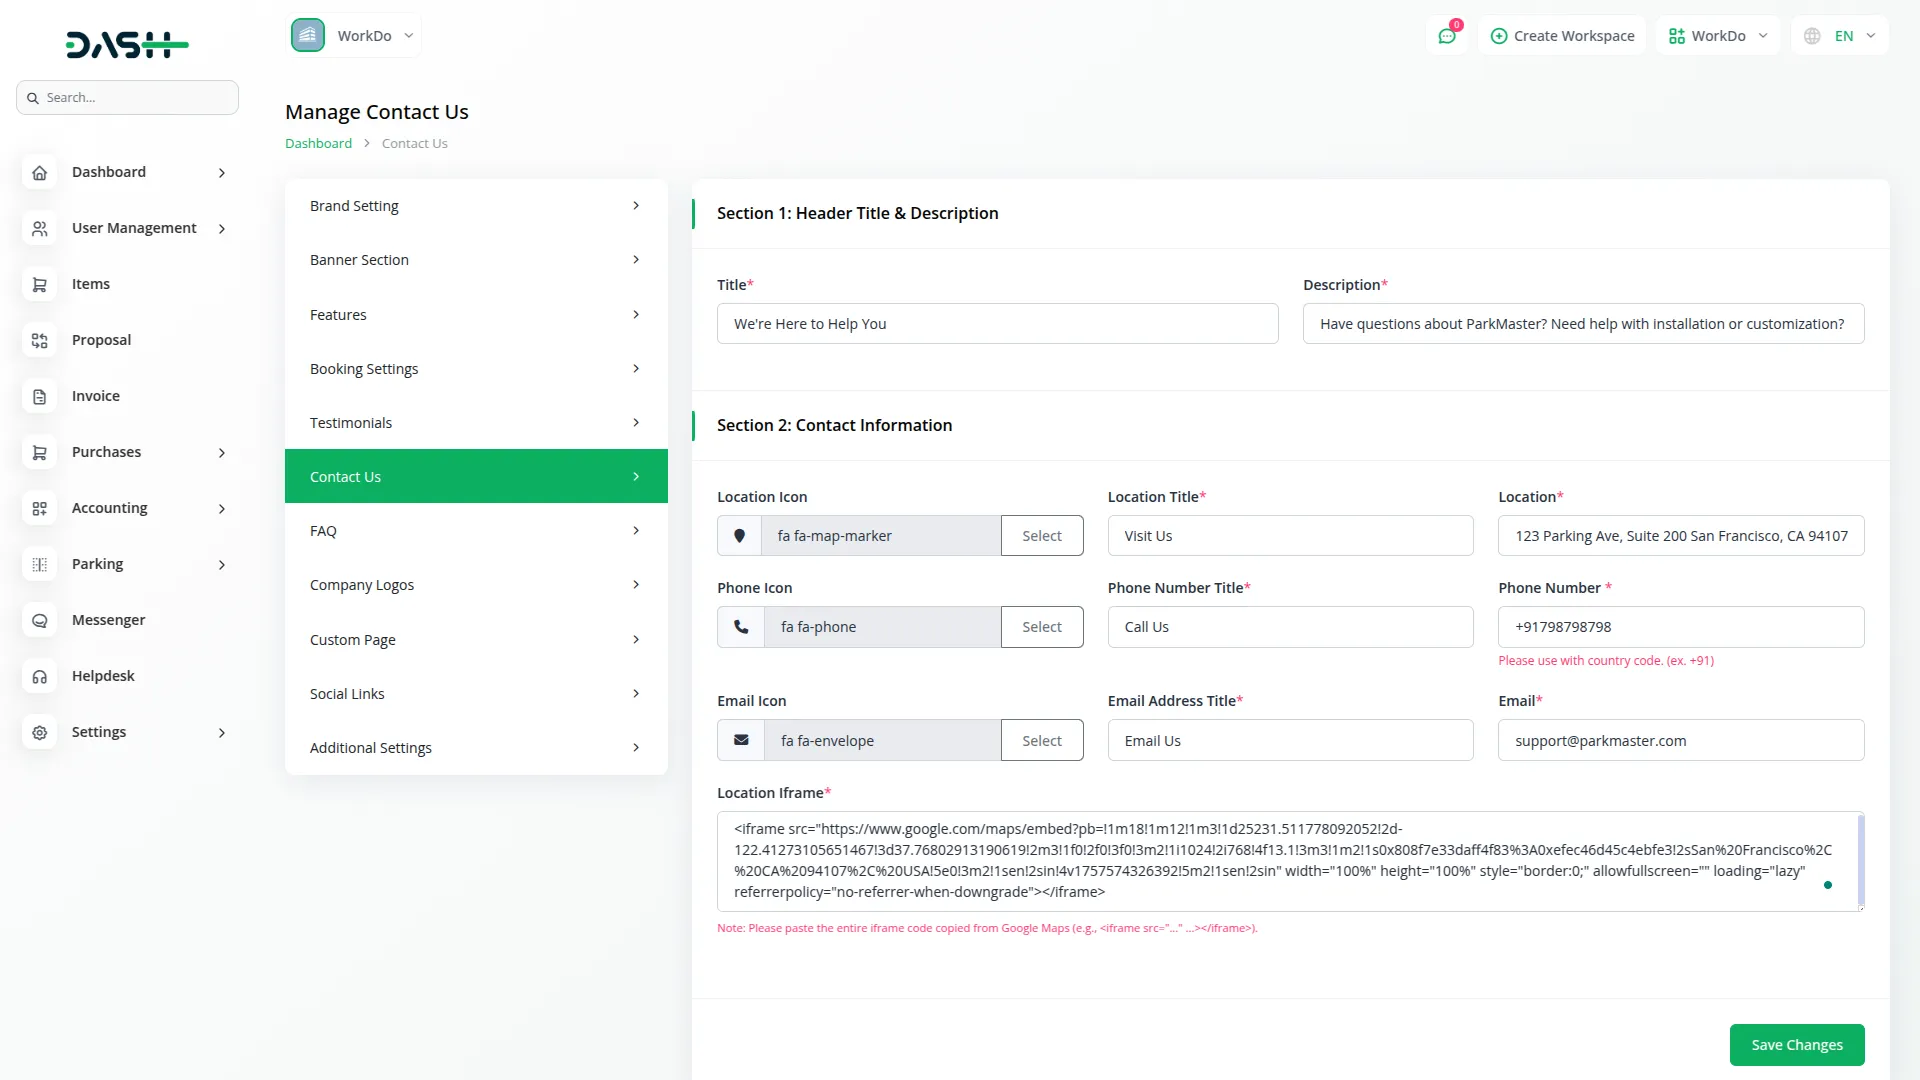
- The Contact Us section is divided into two main parts that you need to configure.
- In Section 1 (Header Title & Description), enter the Title and Description for the contact section header.
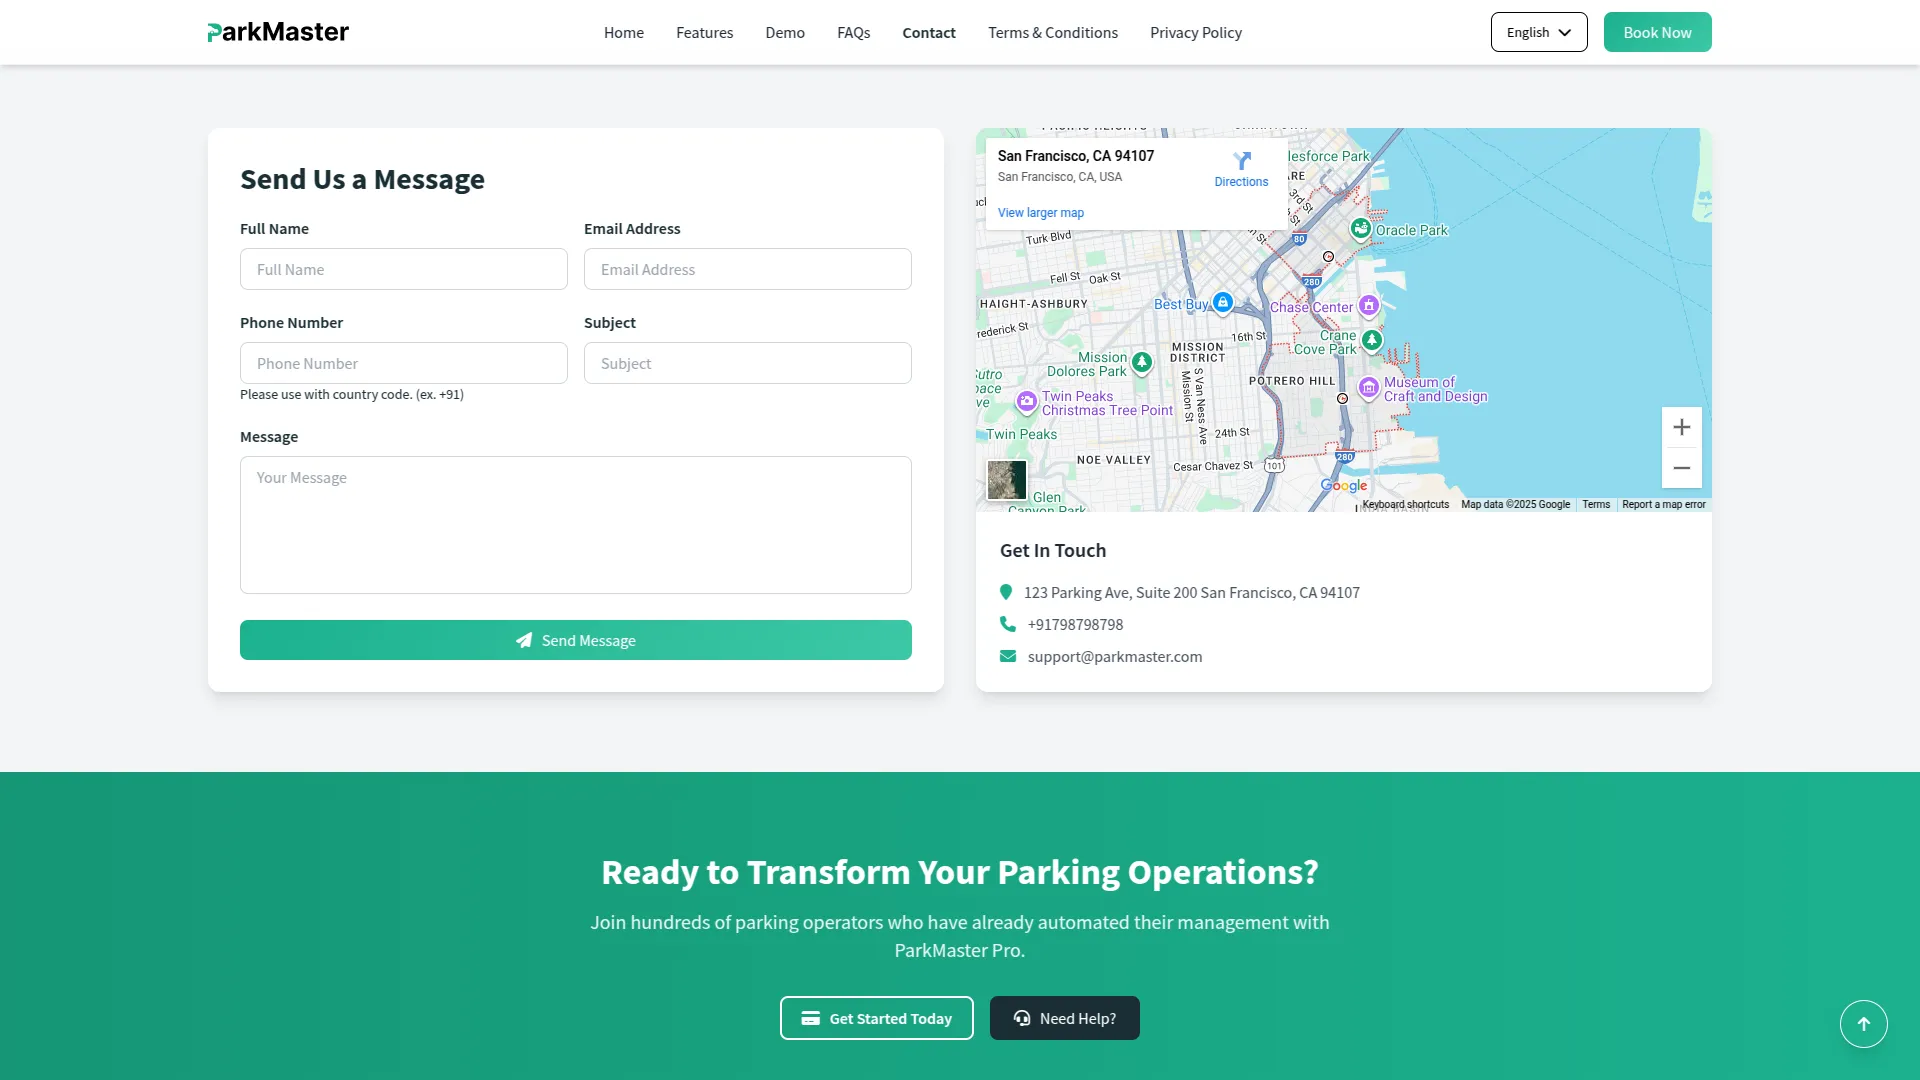
- In Section 2 (Contact Information), you’ll need to fill in multiple contact details. Enter the Location Icon Picker, Location Title, and Location address. Then add the Phone Icon Picker, Phone Number Title, and Phone Number. Next, enter the Email Icon Picker, Email Address Title, and Email Address. Finally, paste the Google Map iframe code for your location.
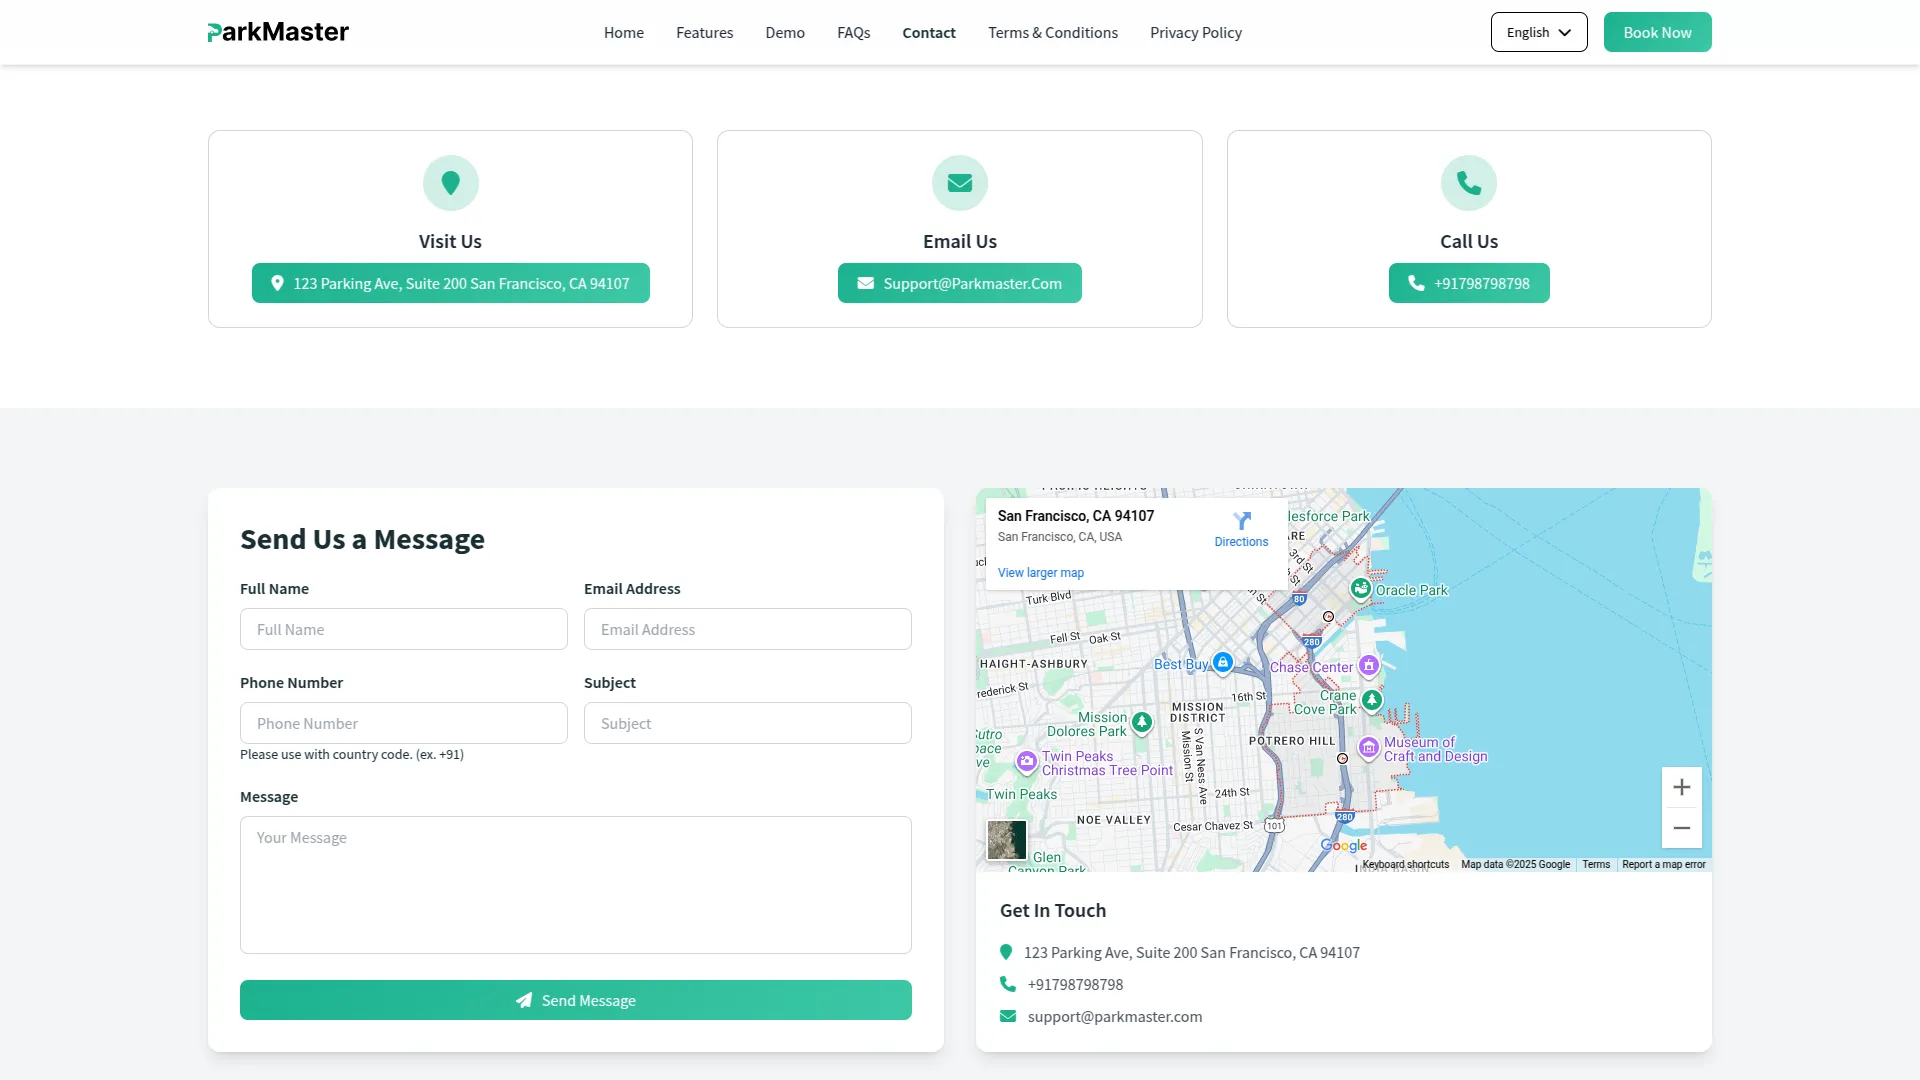
- Once saved, the Header Title and Description will appear at the top of the contact page on your website. All contact information, including location, phone, and email details with their respective icons, will be displayed in an organized format, and the Google Map will show your exact location, and send us a message form to help customers find you easily.
FAQ
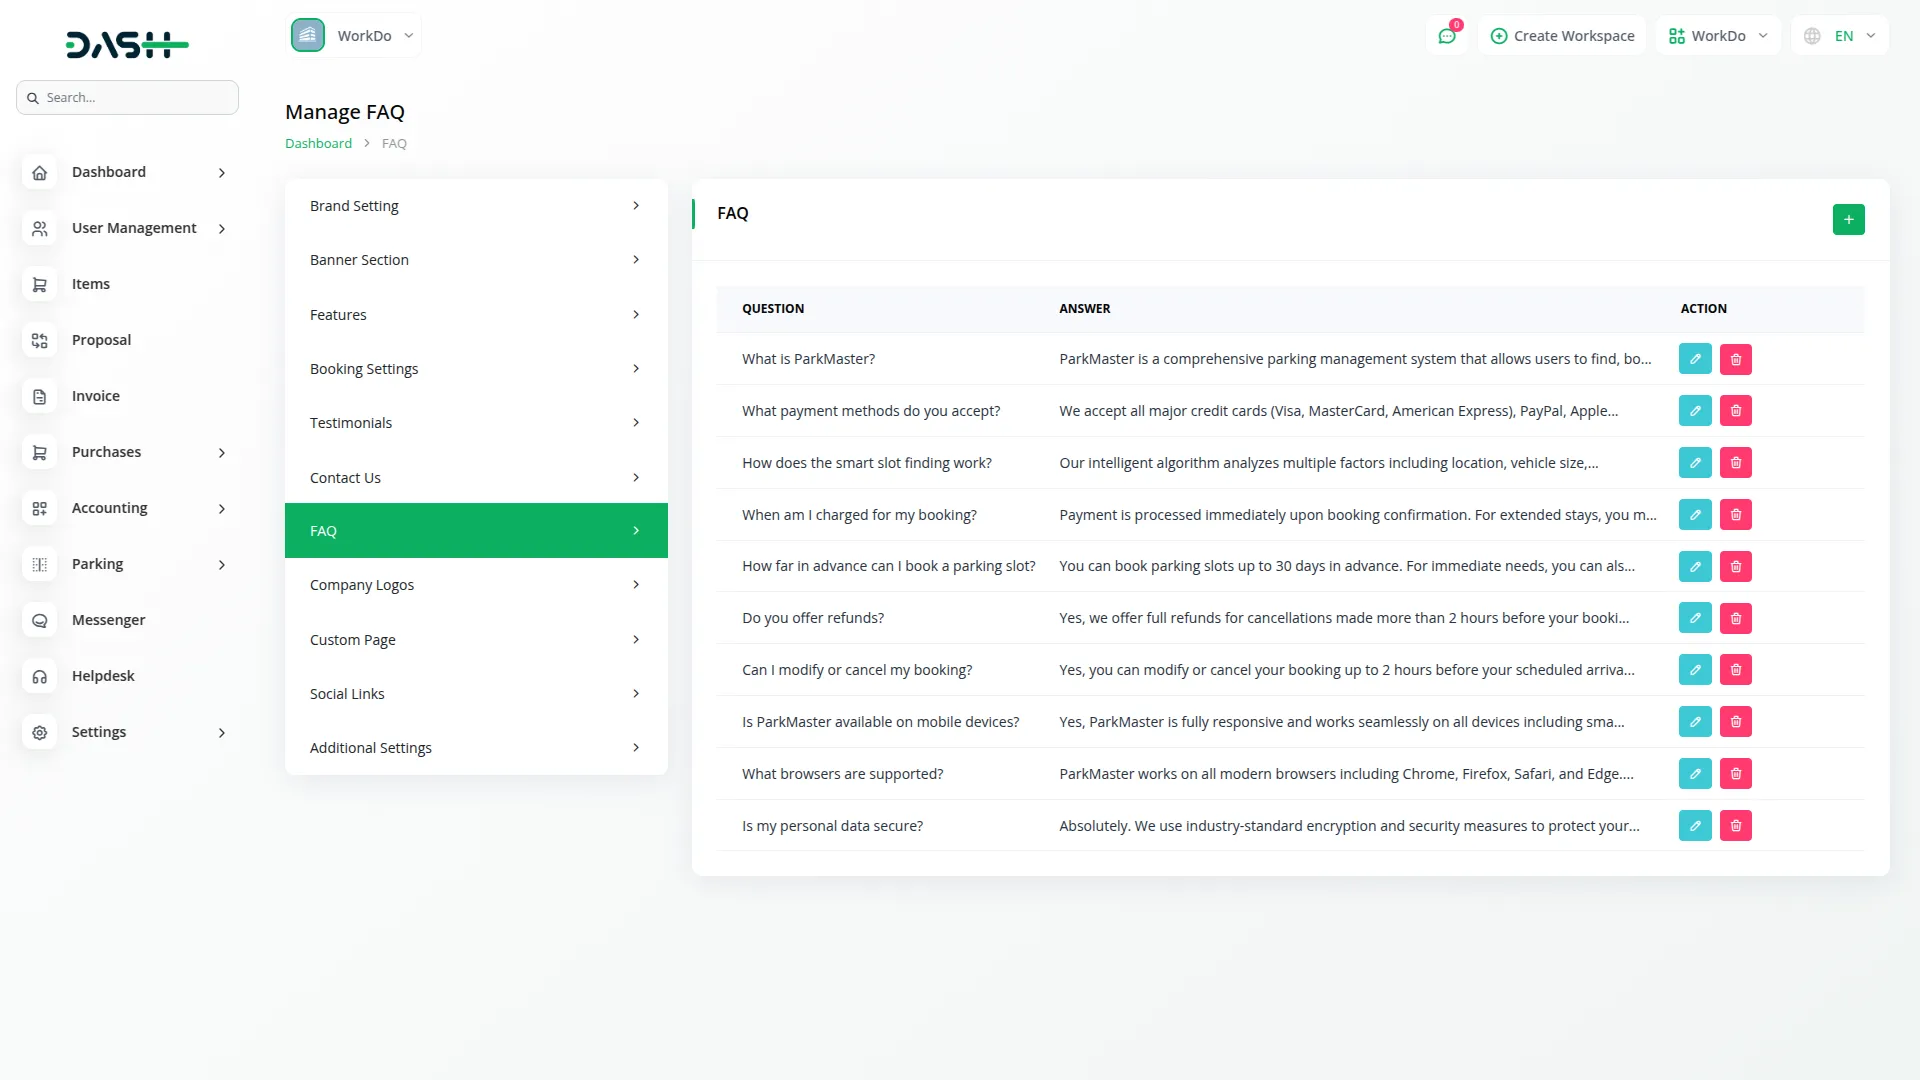
- To create a new FAQ, click the “Create” button at the top of the FAQ page. Enter the Question and provide a detailed Answer for each frequently asked question.
- The list page displays all FAQs in a table with columns for Question and Answer. You can use the Edit button to modify existing FAQs or the Delete button to remove them from the system.
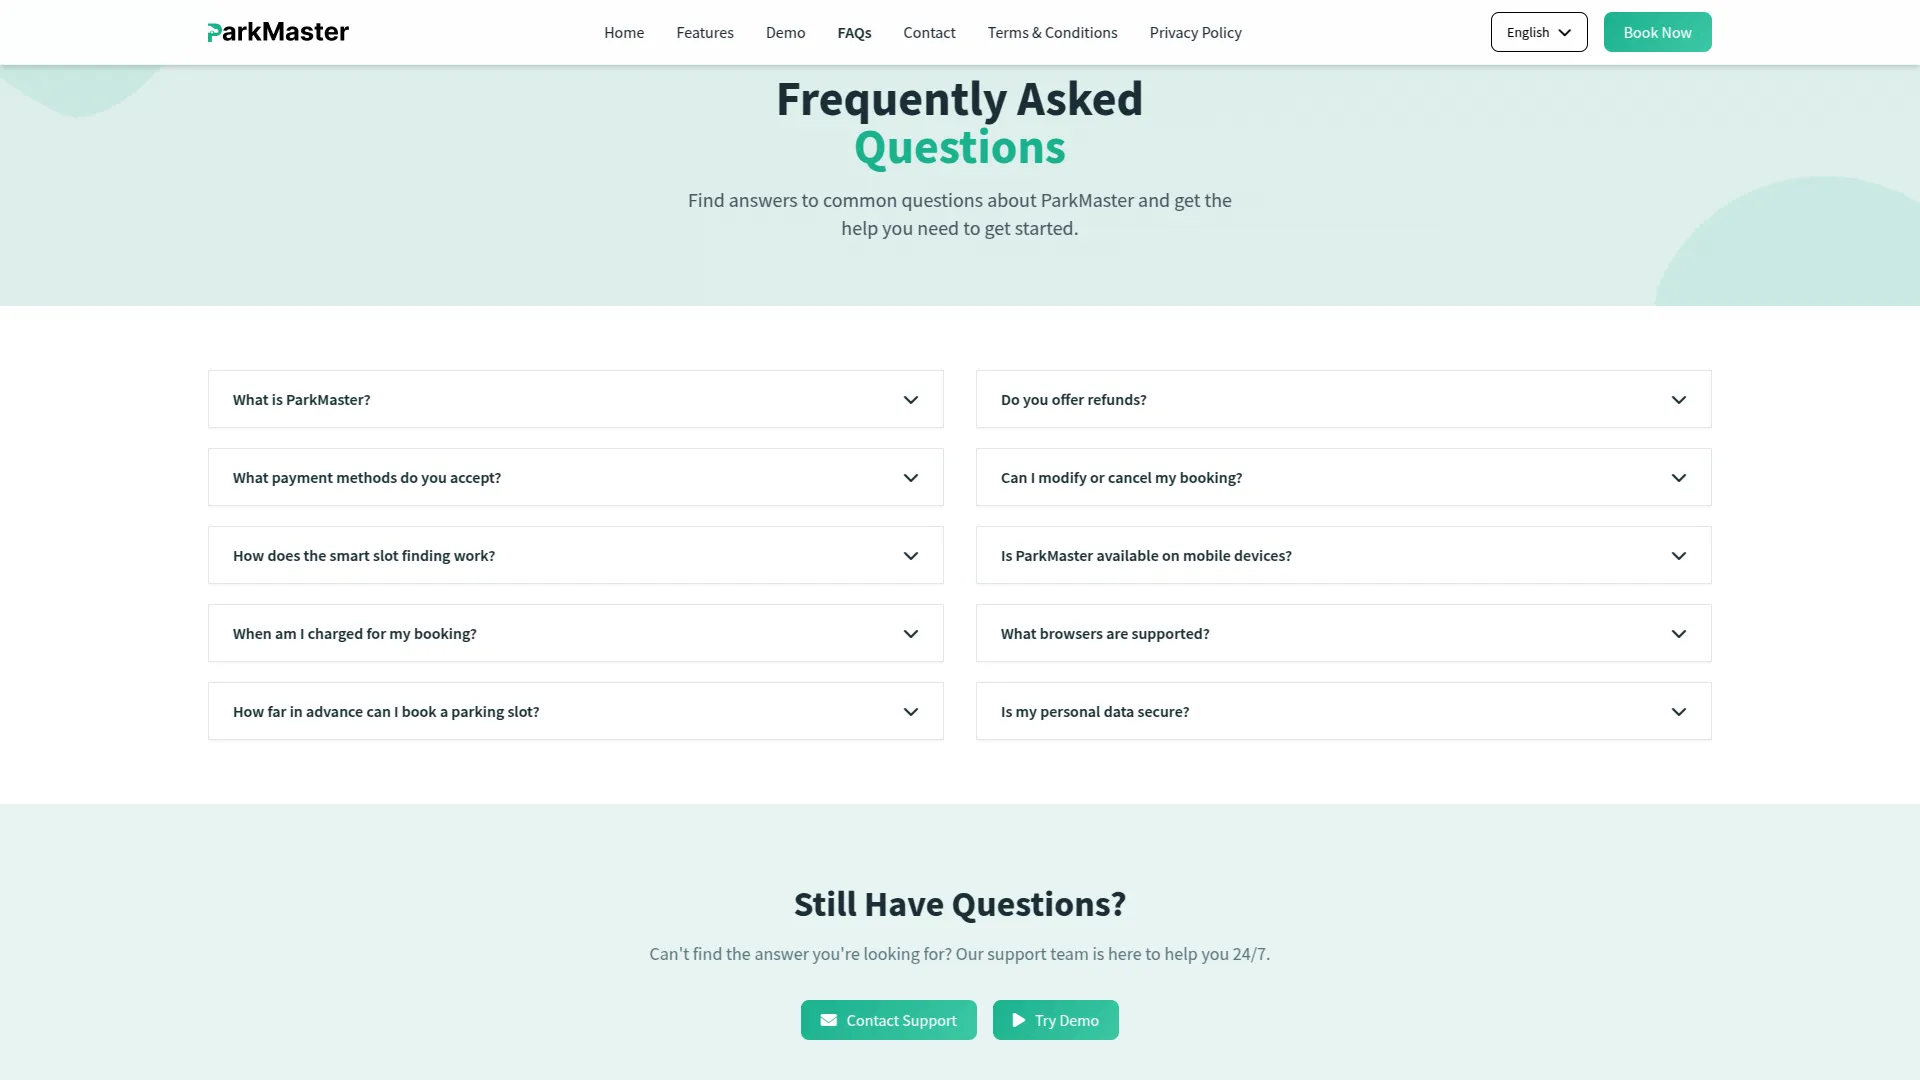
- Once saved, these FAQs will automatically appear on the FAQ page of your website, where visitors can click on any question to reveal the answer, helping them find quick solutions to common queries about your parking management services.
Company Logos
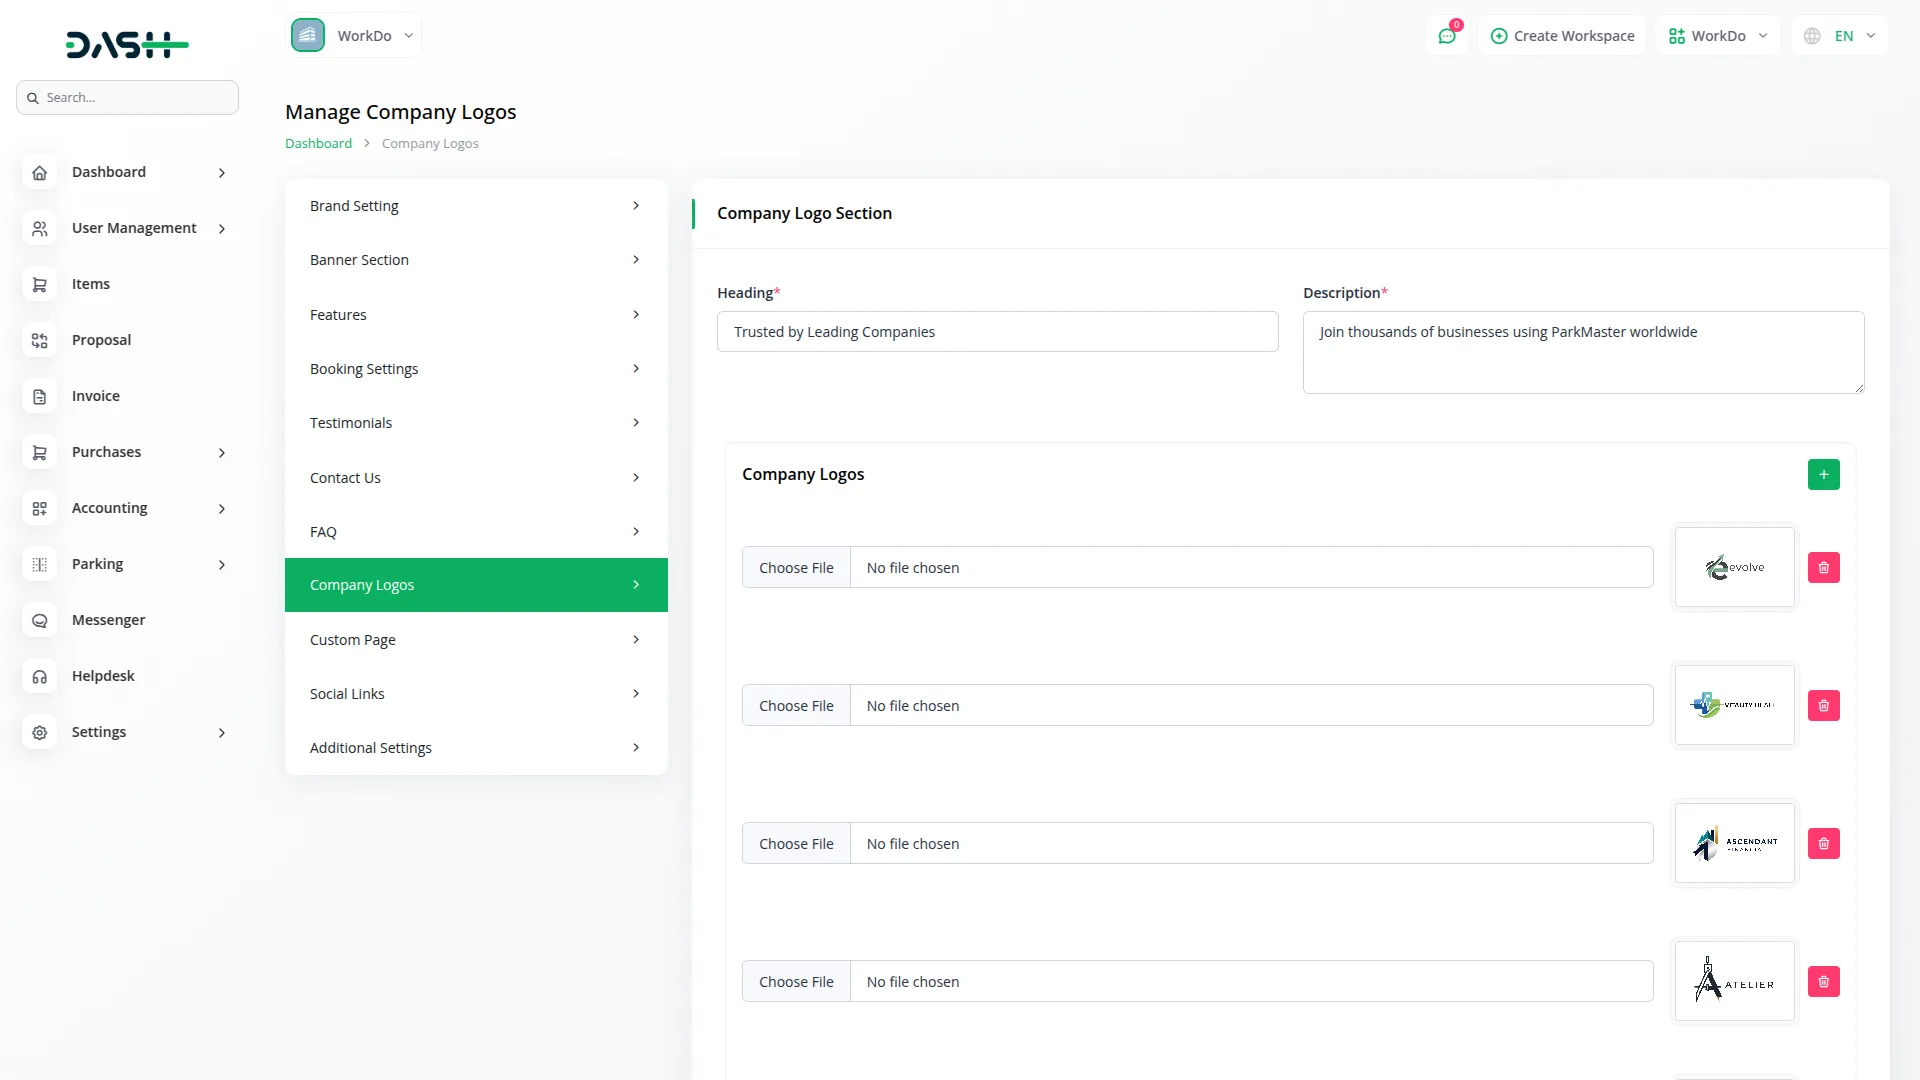
- In the Company Logos section, you will find fields for Heading and Description to customize the company logo section of your website. Below that, you can add multiple company logo images using the repeater fields.
- For each company logo, upload the Company Logo Image. You can add as many company logos as needed to showcase your business partnerships or affiliations.
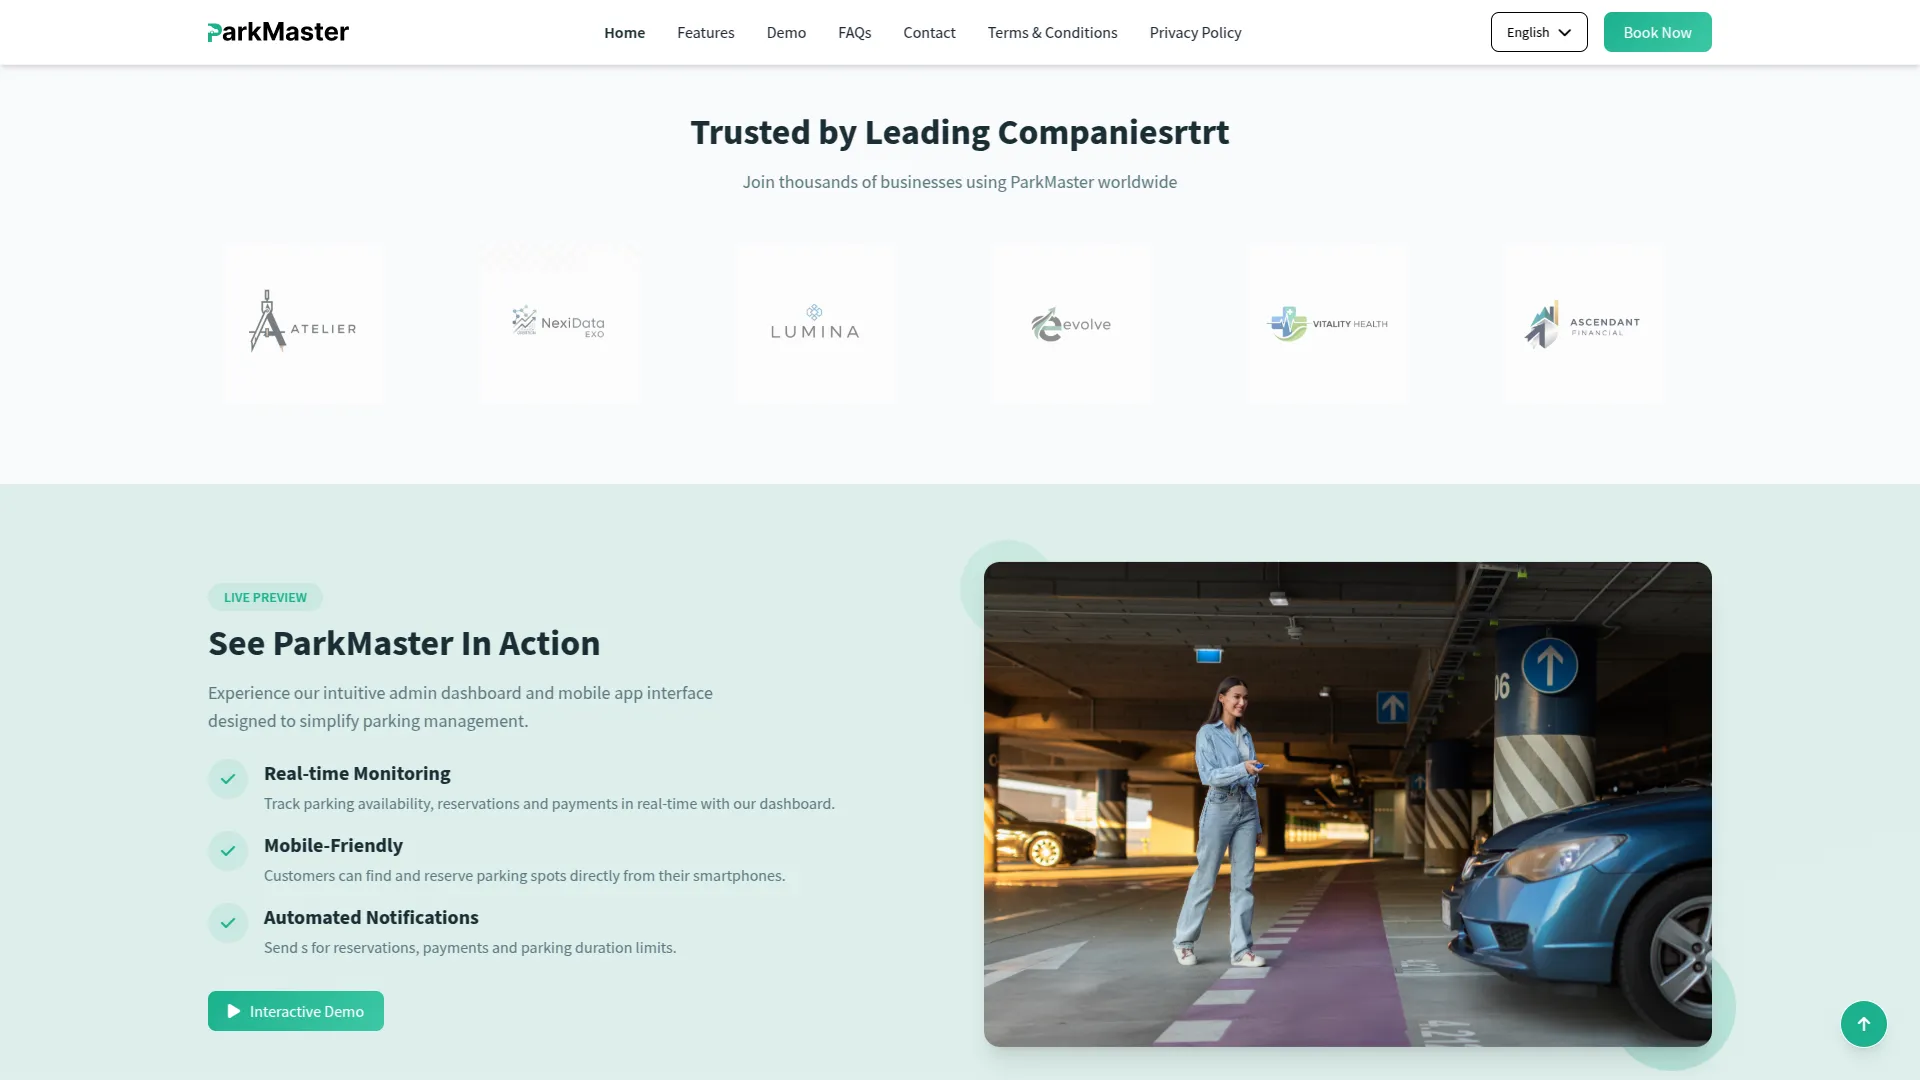
- Once saved, the Heading and Description will appear in the company logos section of your website homepage, while all the Company Logo Images will be displayed in a slider format, allowing visitors to see the various companies associated with your parking management services.
Custom Page
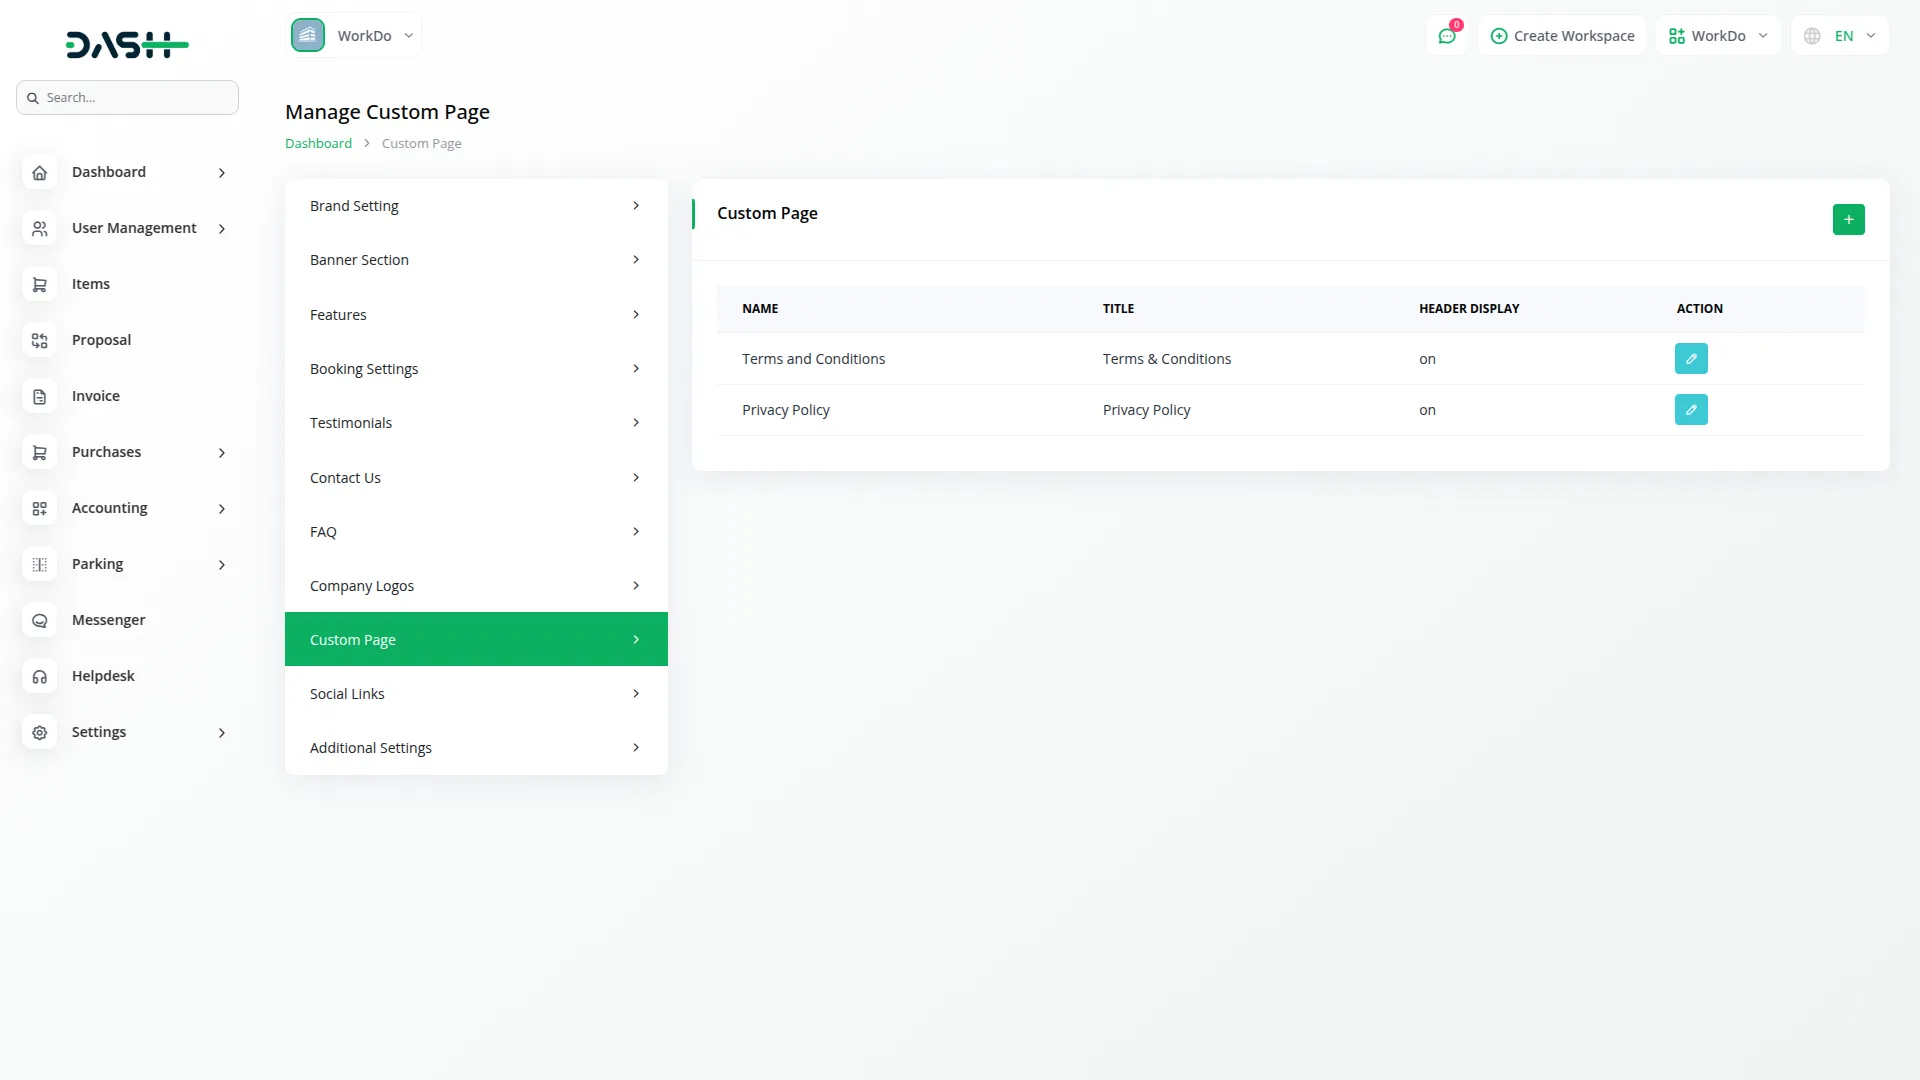
- To create a new Custom Page, click the “Create” button at the top of the Custom Pages section. Enter the Name, Title, page display in header(toggle on/off), and Description for the custom page you want to create.
- The list page displays all custom pages in a table with columns for Name, Title, and Header Display. You can use the Edit button to modify existing custom pages or the Delete button to remove them from the system.
- Once saved, these custom pages will be available in the header menu section of your website, allowing visitors to access additional information pages that you’ve created for your parking management services.
Social Links
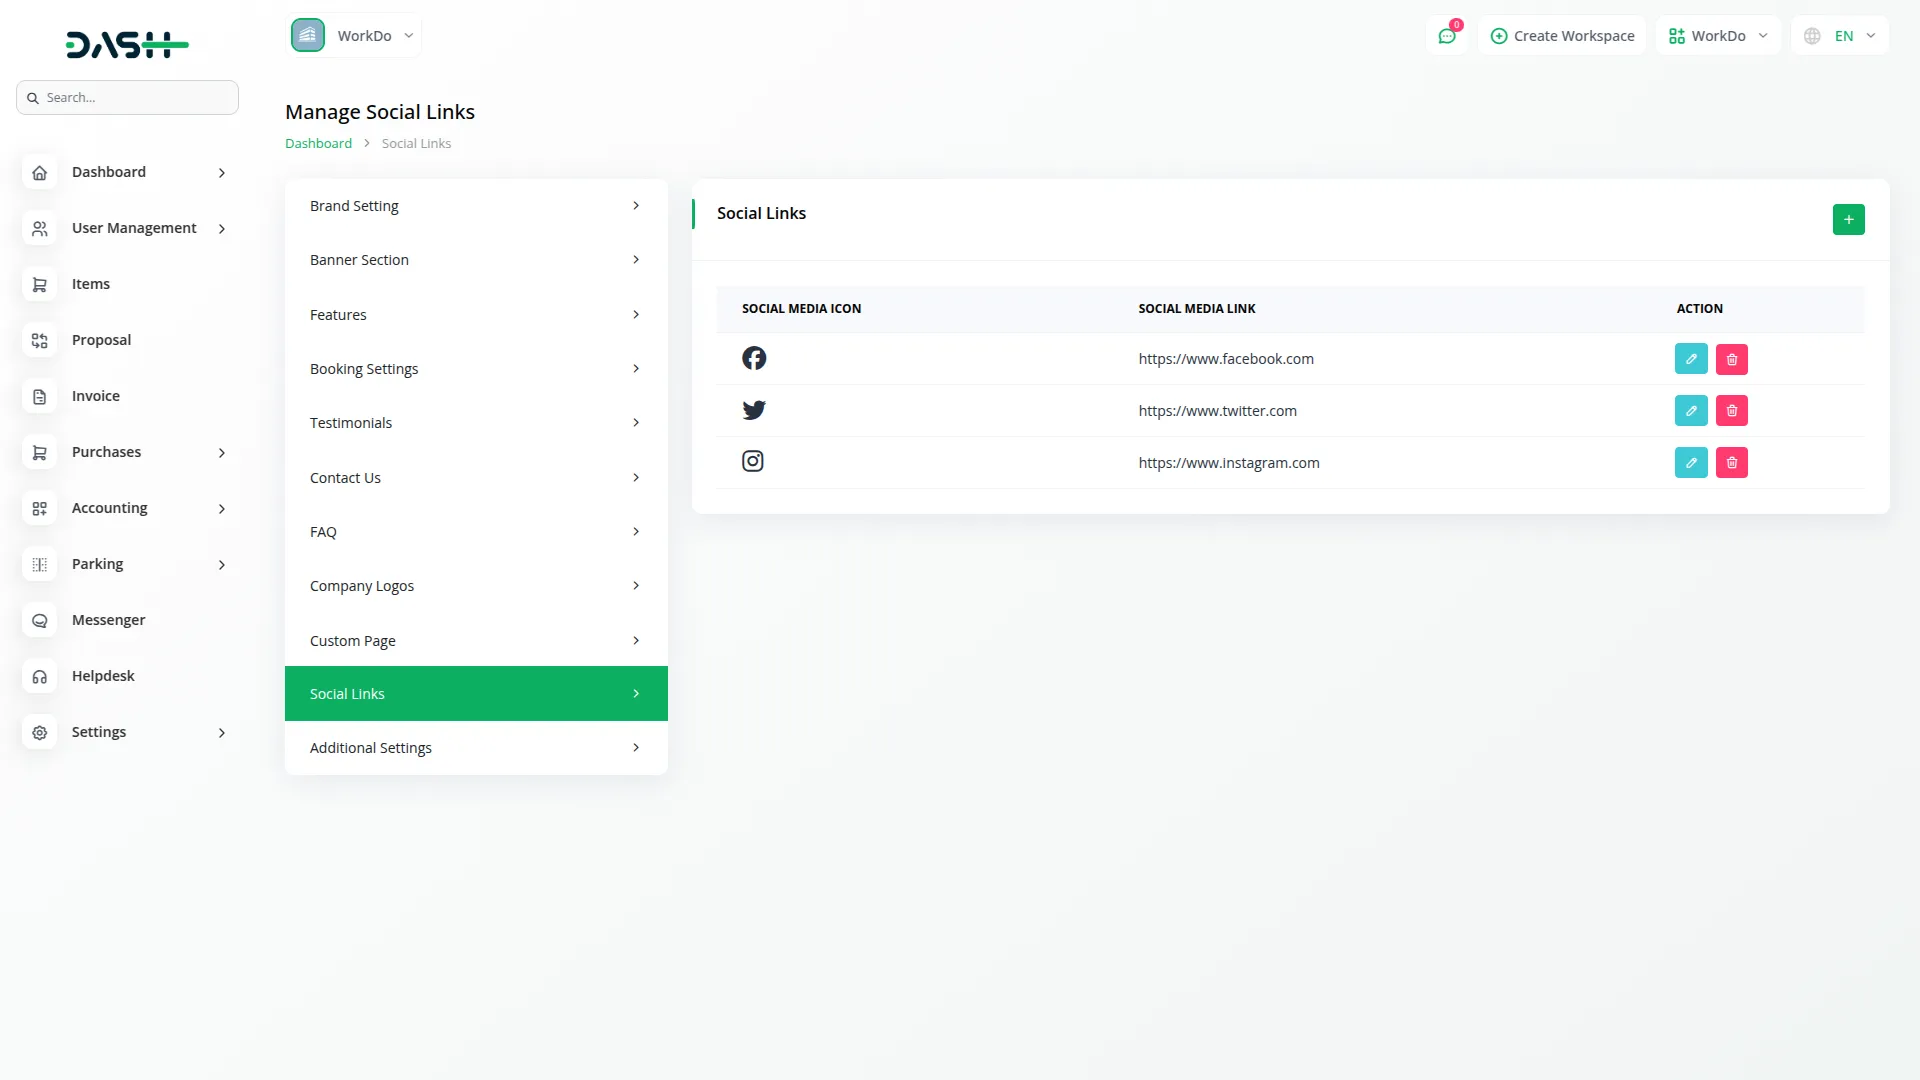
- To add a new Social Link, click the “Create” button at the top of the social links page. Select the Social Media Icon from the available options and enter the Social Media Link URL for your social media profile.
- The list page displays all social links in a table with columns for Social Media Icon and Social Media Link. You can use the Edit button to modify existing social links or the Delete button to remove them from the system.
- Once saved, these social media icons and links will automatically appear in the footer section of your website, allowing visitors to connect with your parking management business on various social media platforms.
Additional Settings
Showcase
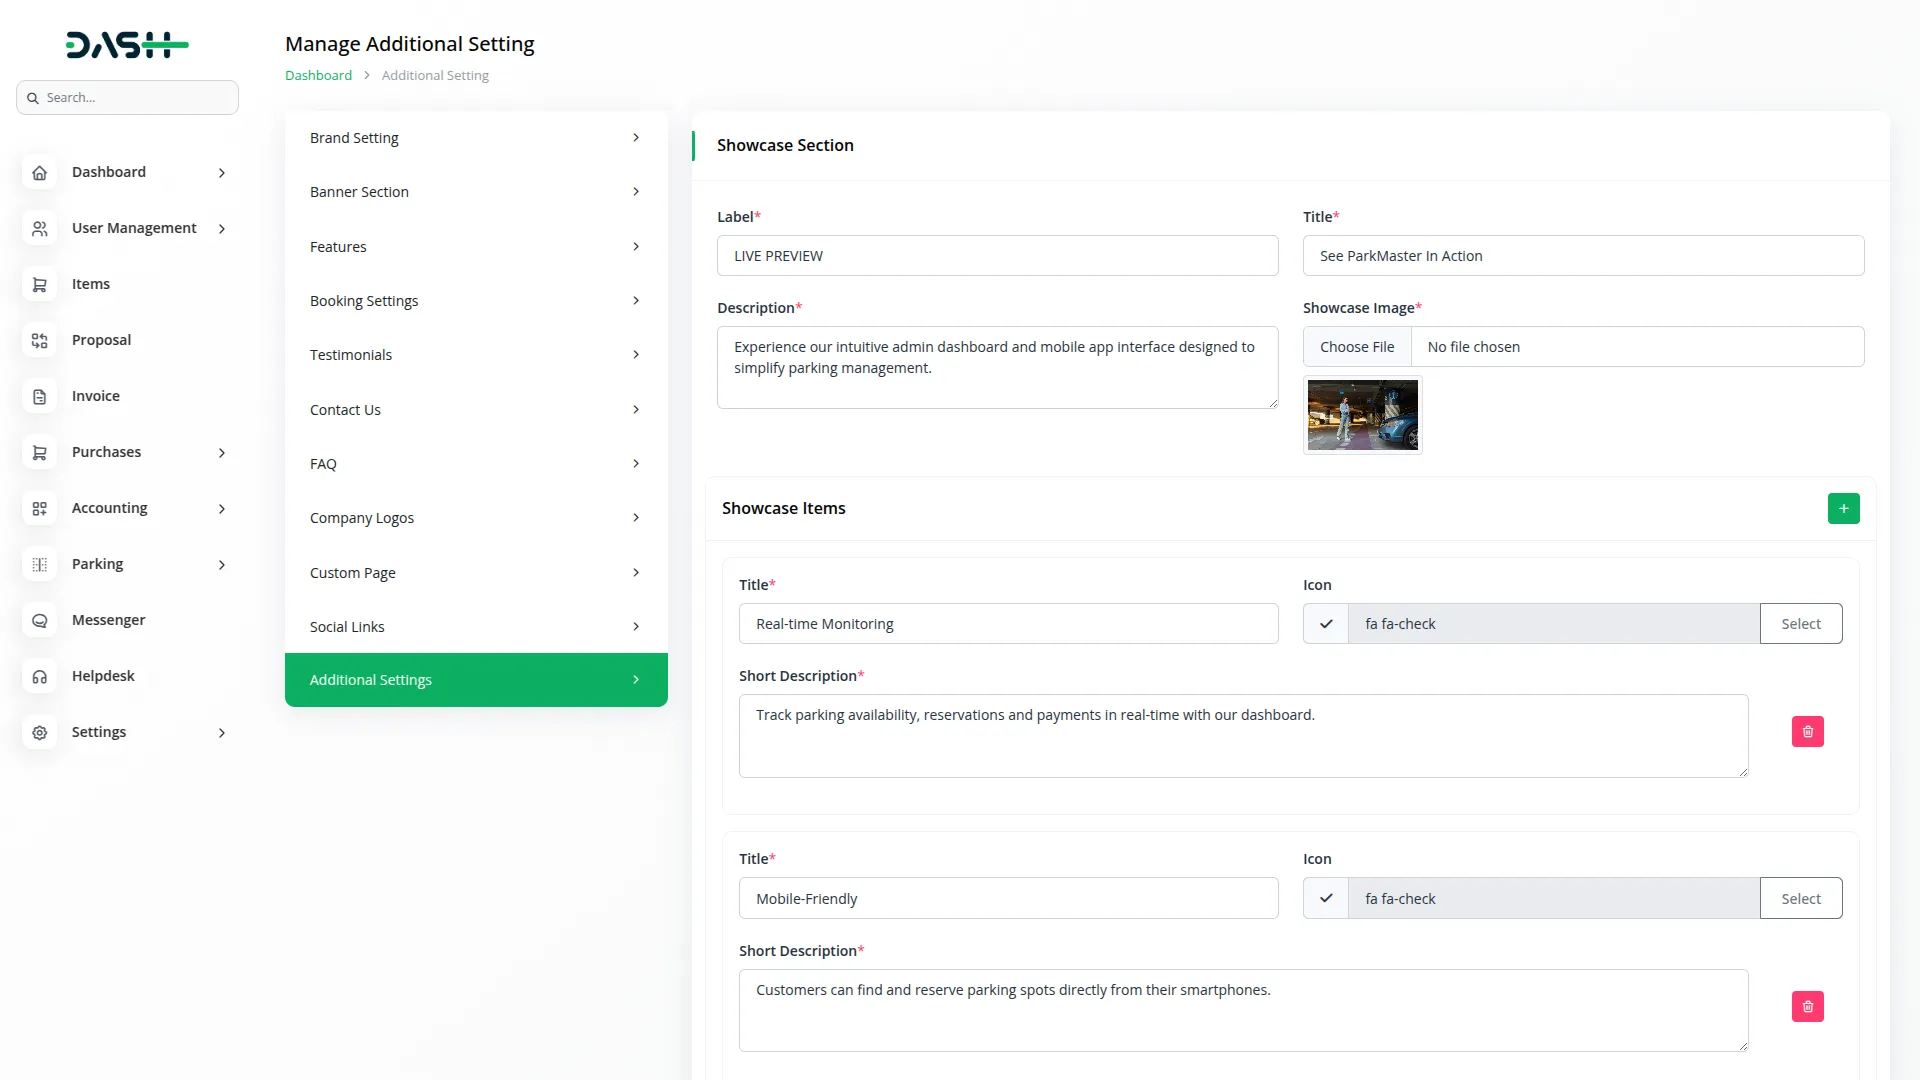
- In the Showcase Section, you will find fields for Label, Title, Description, and showcase Image for the main showcase area. Below that, you can add multiple showcase items using the repeater fields.
- For each showcase item, enter the Title, Icon, and Short Description to highlight different aspects of your parking services.
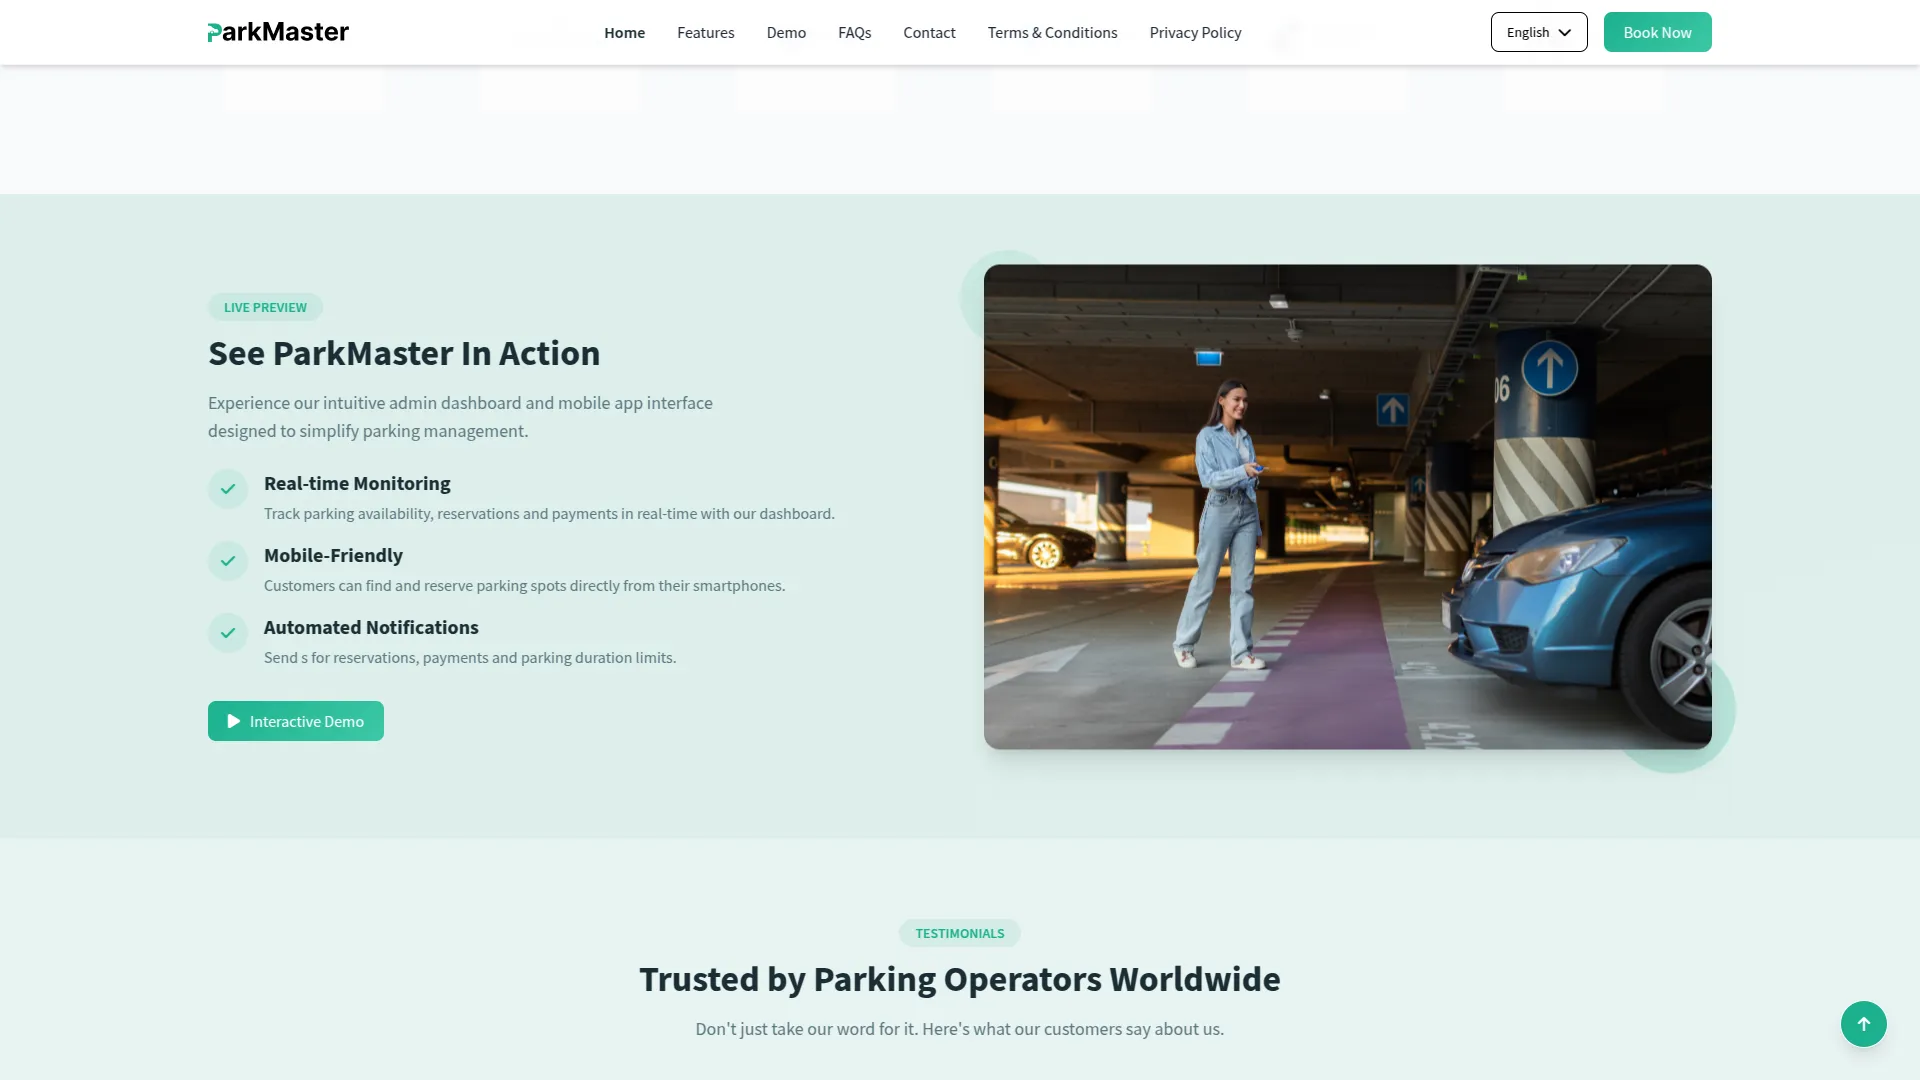
- Once saved, the Label, Title, Description, and Image will appear in the showcase section of your website homepage. Each individual showcase item with its Title, Icon, and Short Description will be displayed alongside the main image, and an “Interactive Demo” button will be included that opens the demo page where visitors can book parking.
Newsletter & Additional Features
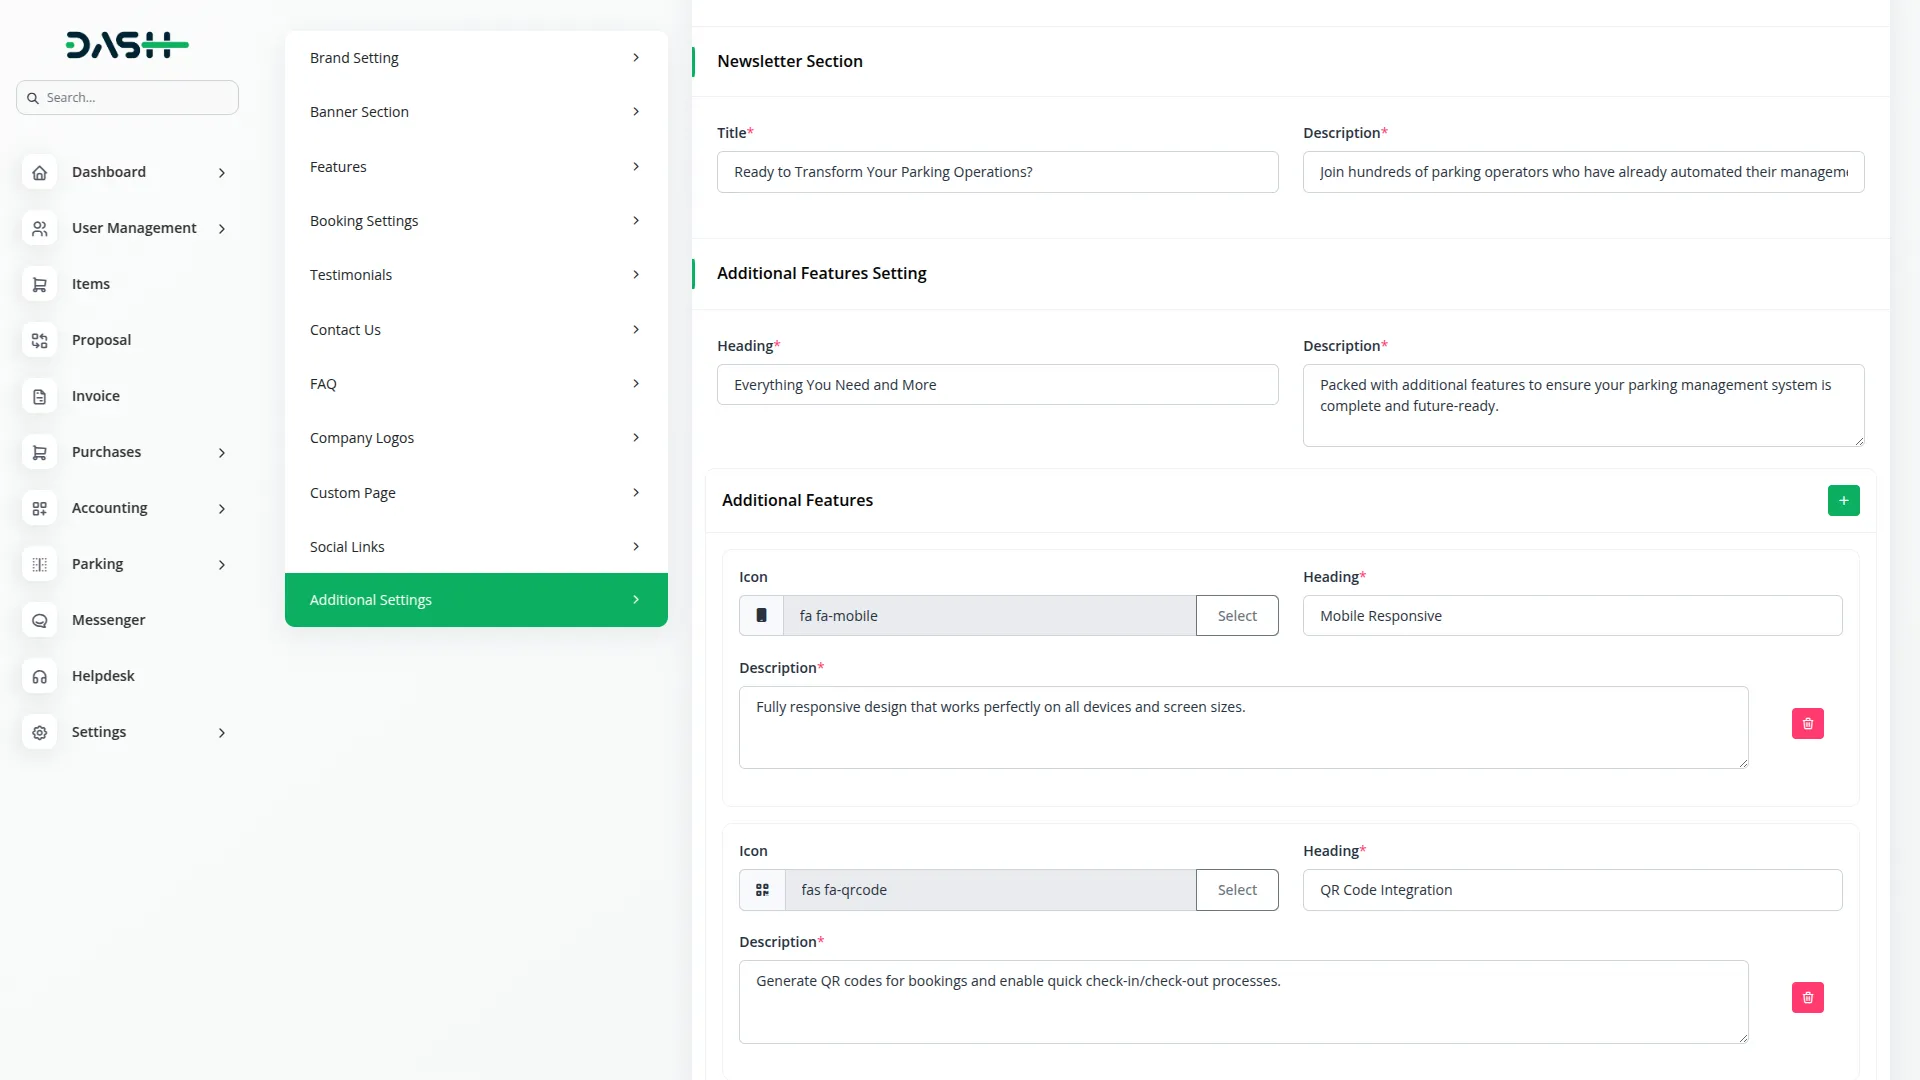
- In the Newsletter Section, you will find fields for Title and Description. Enter the content you want to display in your newsletter area.
- In the Additional Features Setting section, enter the Heading and Description for the additional features area. Below that, you can add multiple additional features using the repeater fields by entering Icon, Heading, and Description for each feature.
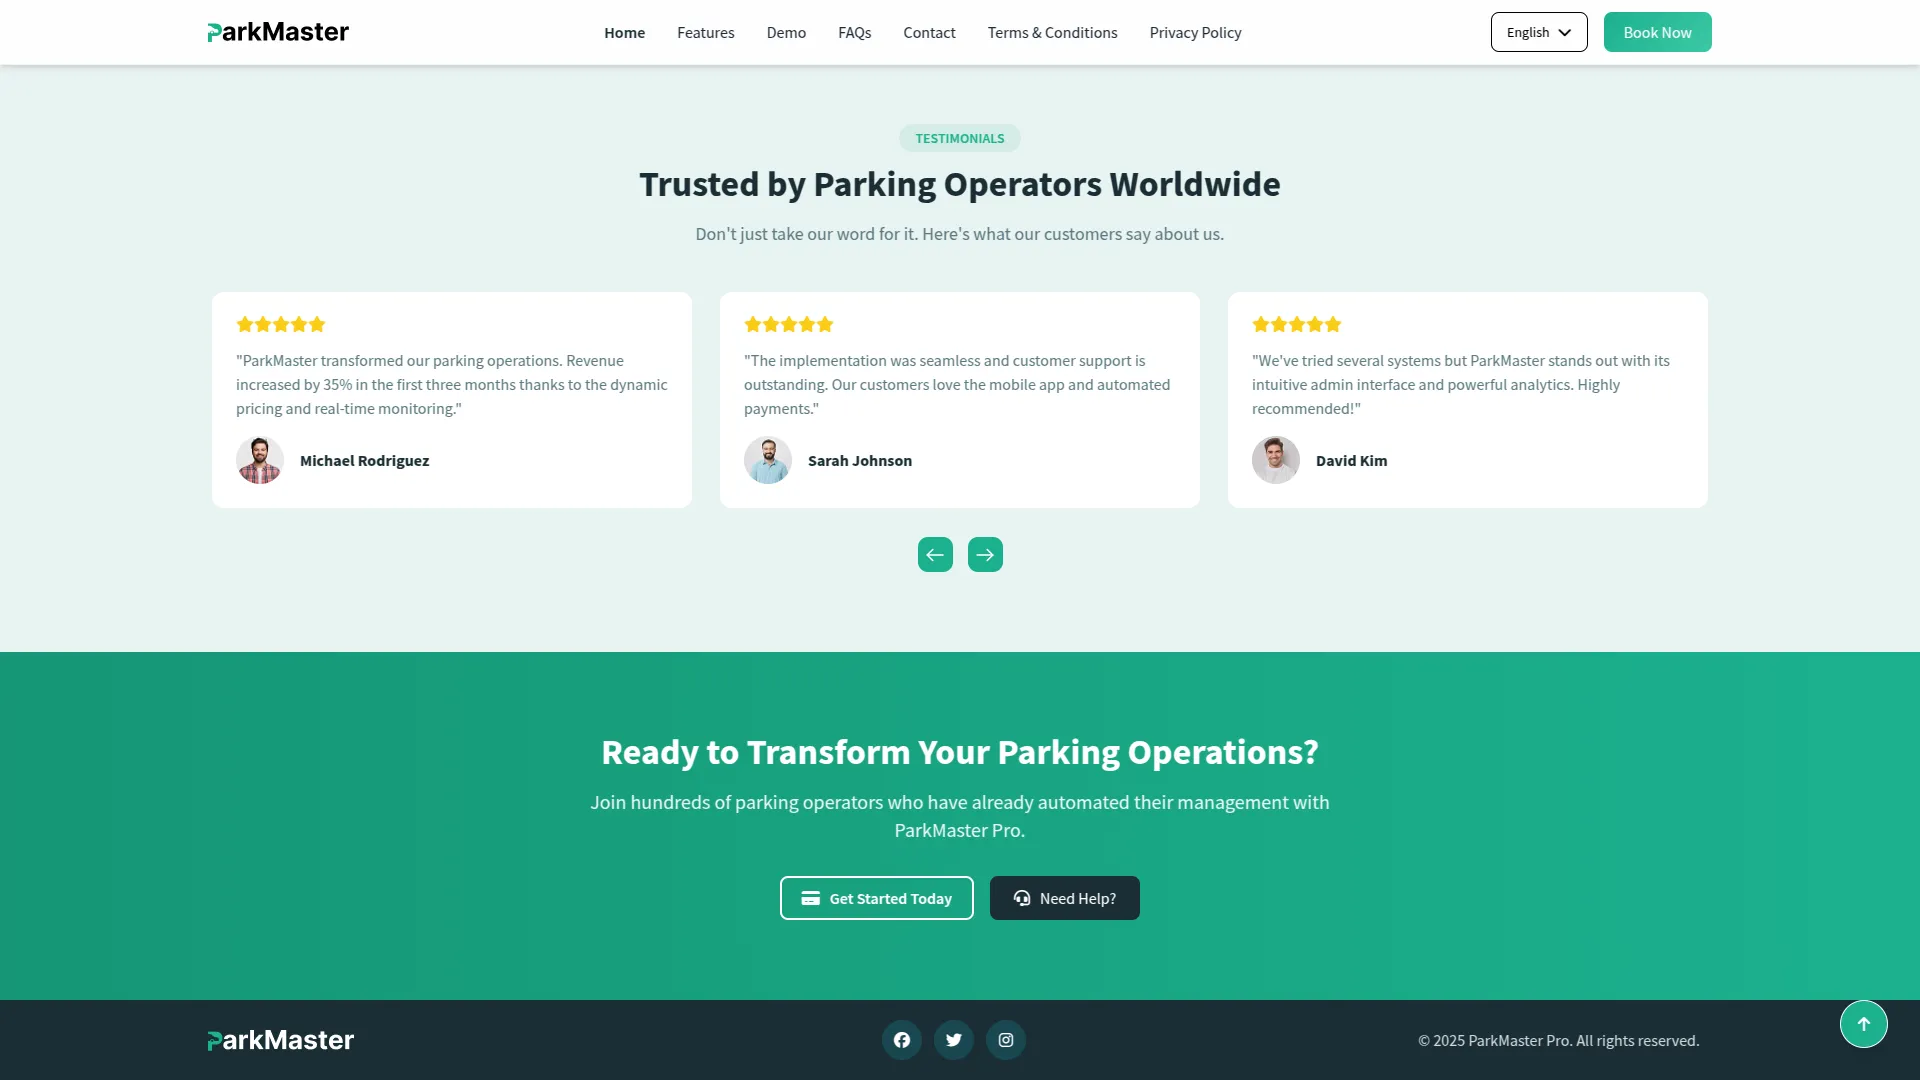
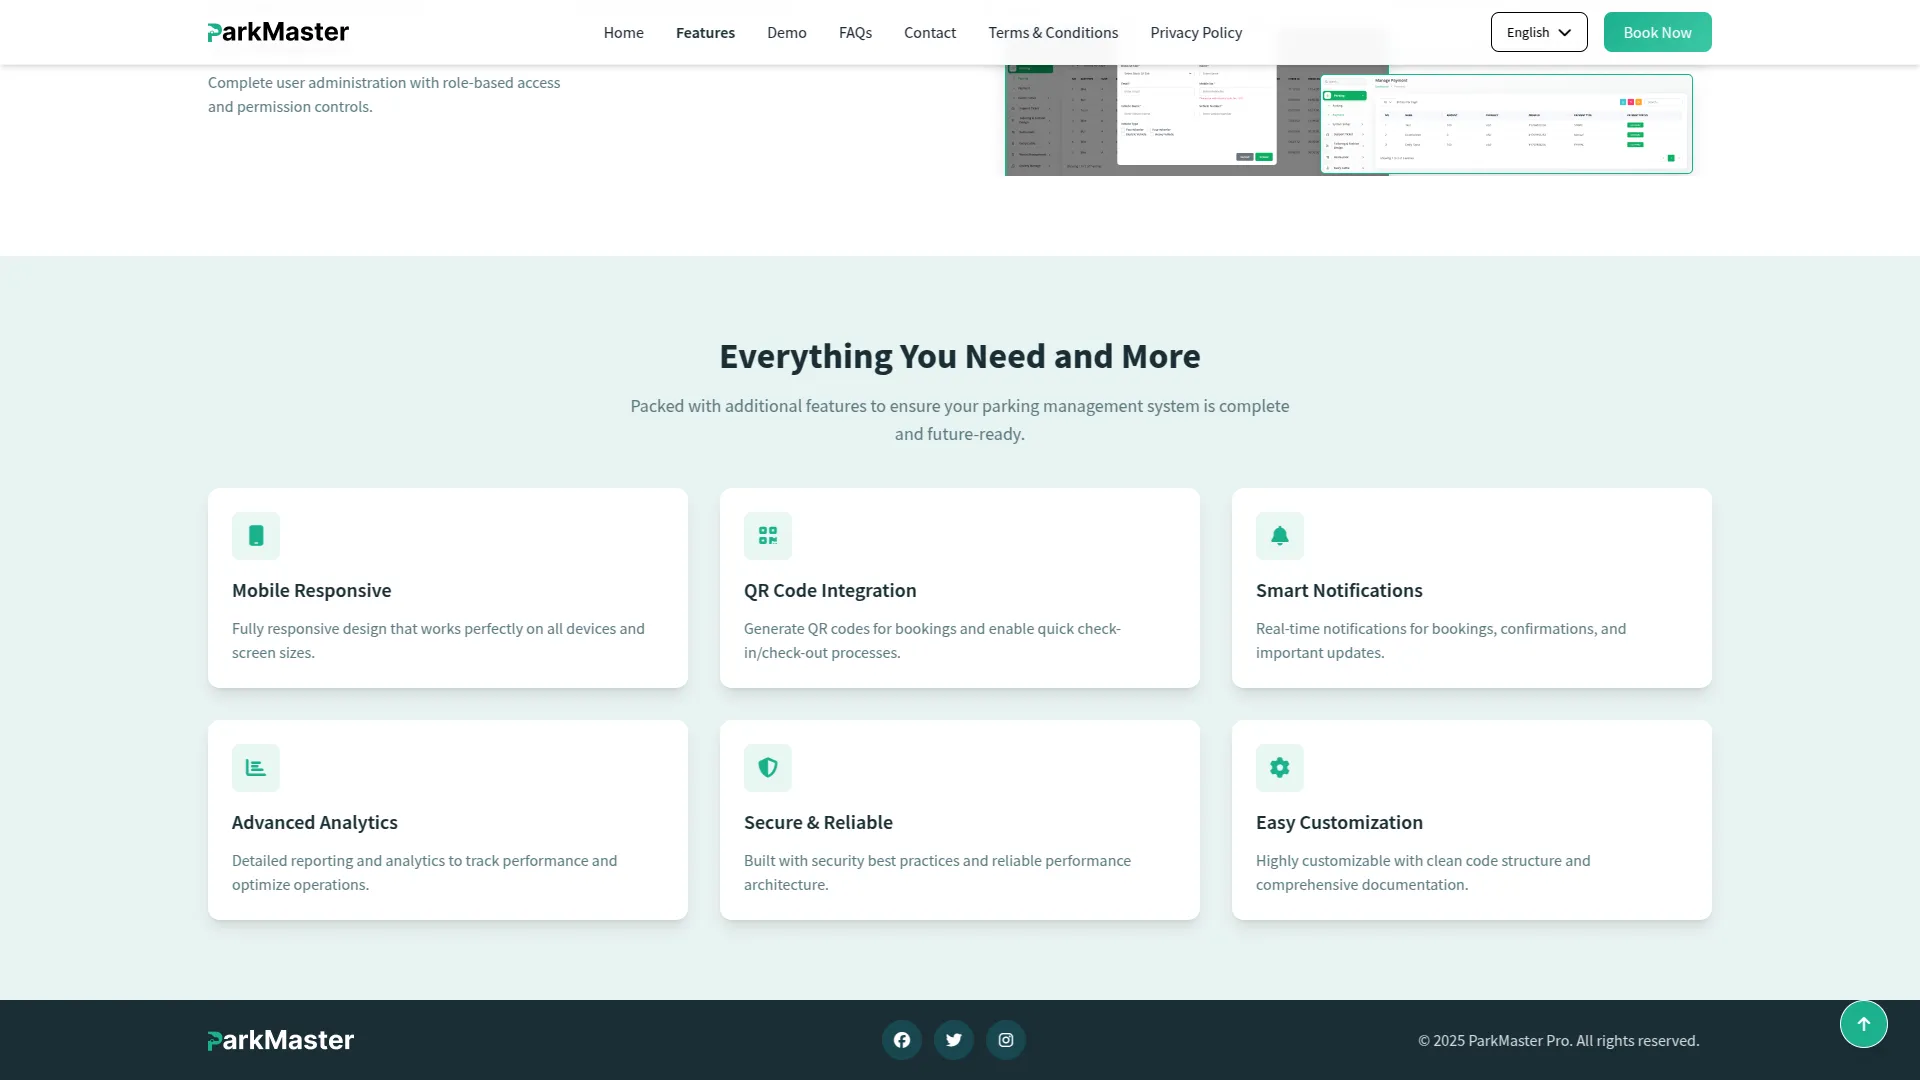
- Once saved, the Newsletter Title and Description will appear in the newsletter section of your website with “Get Started Today” and “Need help?” buttons. The Additional Features will be displayed on the Features page of your website, showing visitors comprehensive information about all the advanced capabilities of your parking management system.
Parking Management
- To create a new parking booking, click the “Create” button at the top of the parking page. Start by selecting the Slot Type from the dropdown menu, which fetches available types from your System Setup slot types.
- Based on your slot type selection, the Slot dropdown will load with available options. Then select the Block of Slot based on your chosen slot. Fill in the customer details, including Name, Email, Mobile No, Vehicle Name, and Vehicle Number.
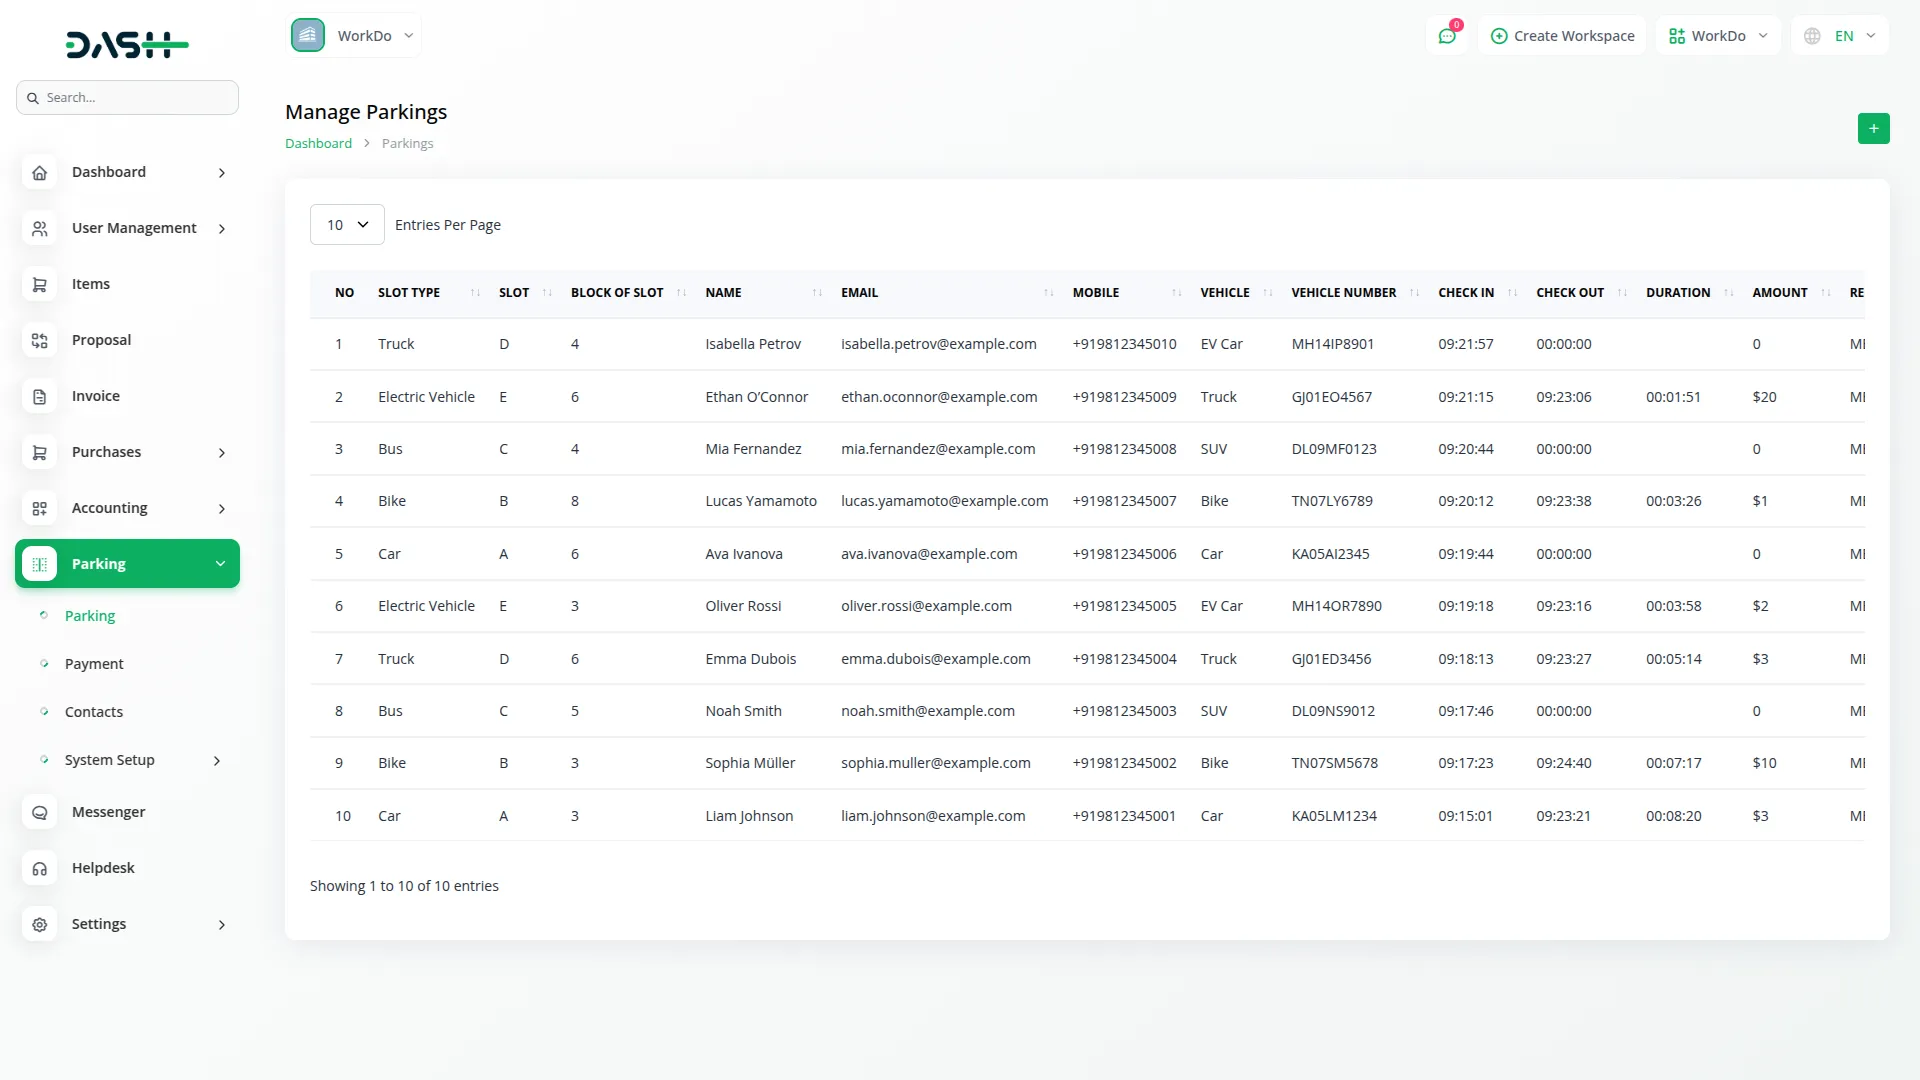
- The list page displays all parking bookings in a table with columns for No, Slot Type, Slot, Block of Slot, Name, Email, Mobile, Vehicle, Vehicle Number, Check In, Check Out, Duration, Amount, Reference, Status, and Actions. The Actions column shows different buttons based on the booking status: Checkout, Payment, or Delete.
- When you book parking from the company side, the check-in time is automatically set to the current time based on your timezone, and the status shows as “Check In” with only the “Check Out” button available in actions.
- Once you click Check Out, the current time is stored in the checkout column, status updates to “Check Out,” and the duration is calculated automatically. After checkout, only the “Payment” button appears in actions. Once payment is completed through the pop-up, the status updates to “Paid” and only the “Delete” button remains visible.
Frontend Parking Booking Process
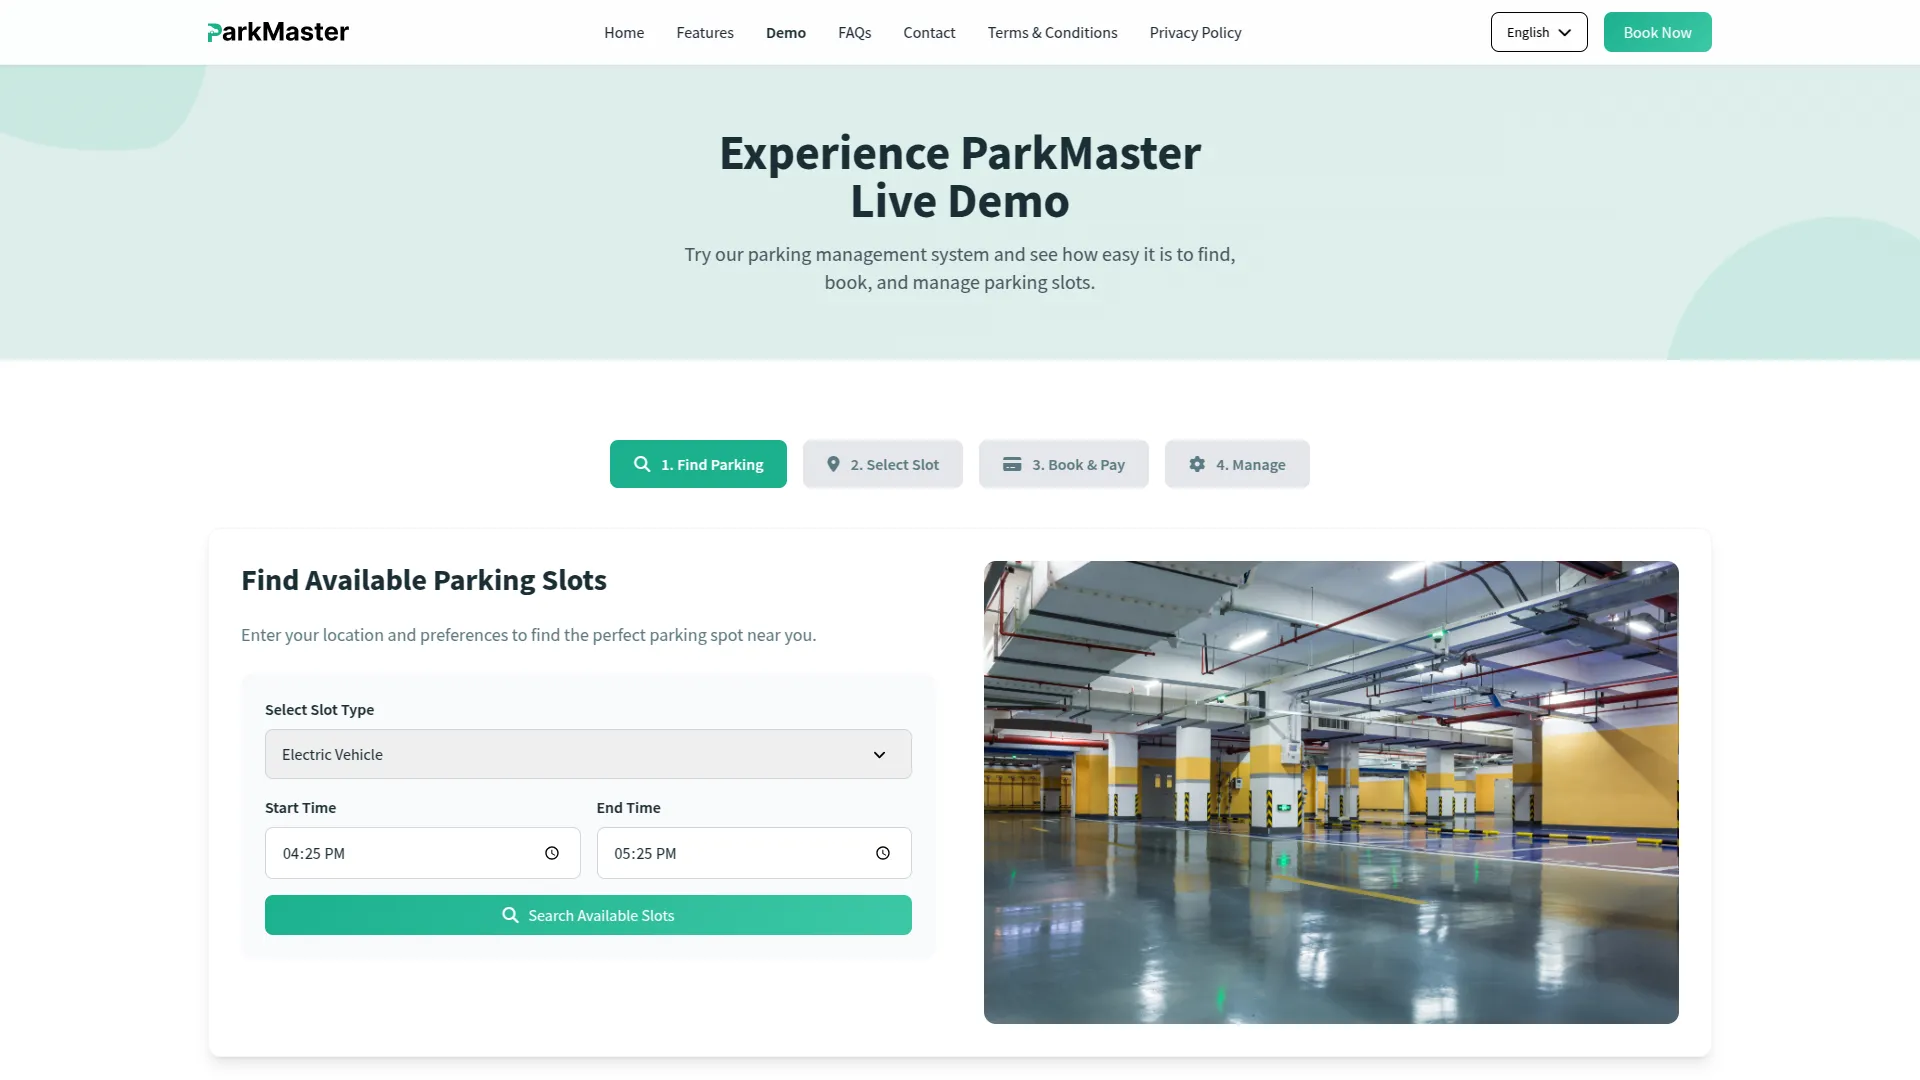
- When users book parking from your website frontend, they follow a streamlined process. First, users select the Slot Type and input their desired Start Time and End Time for parking duration.
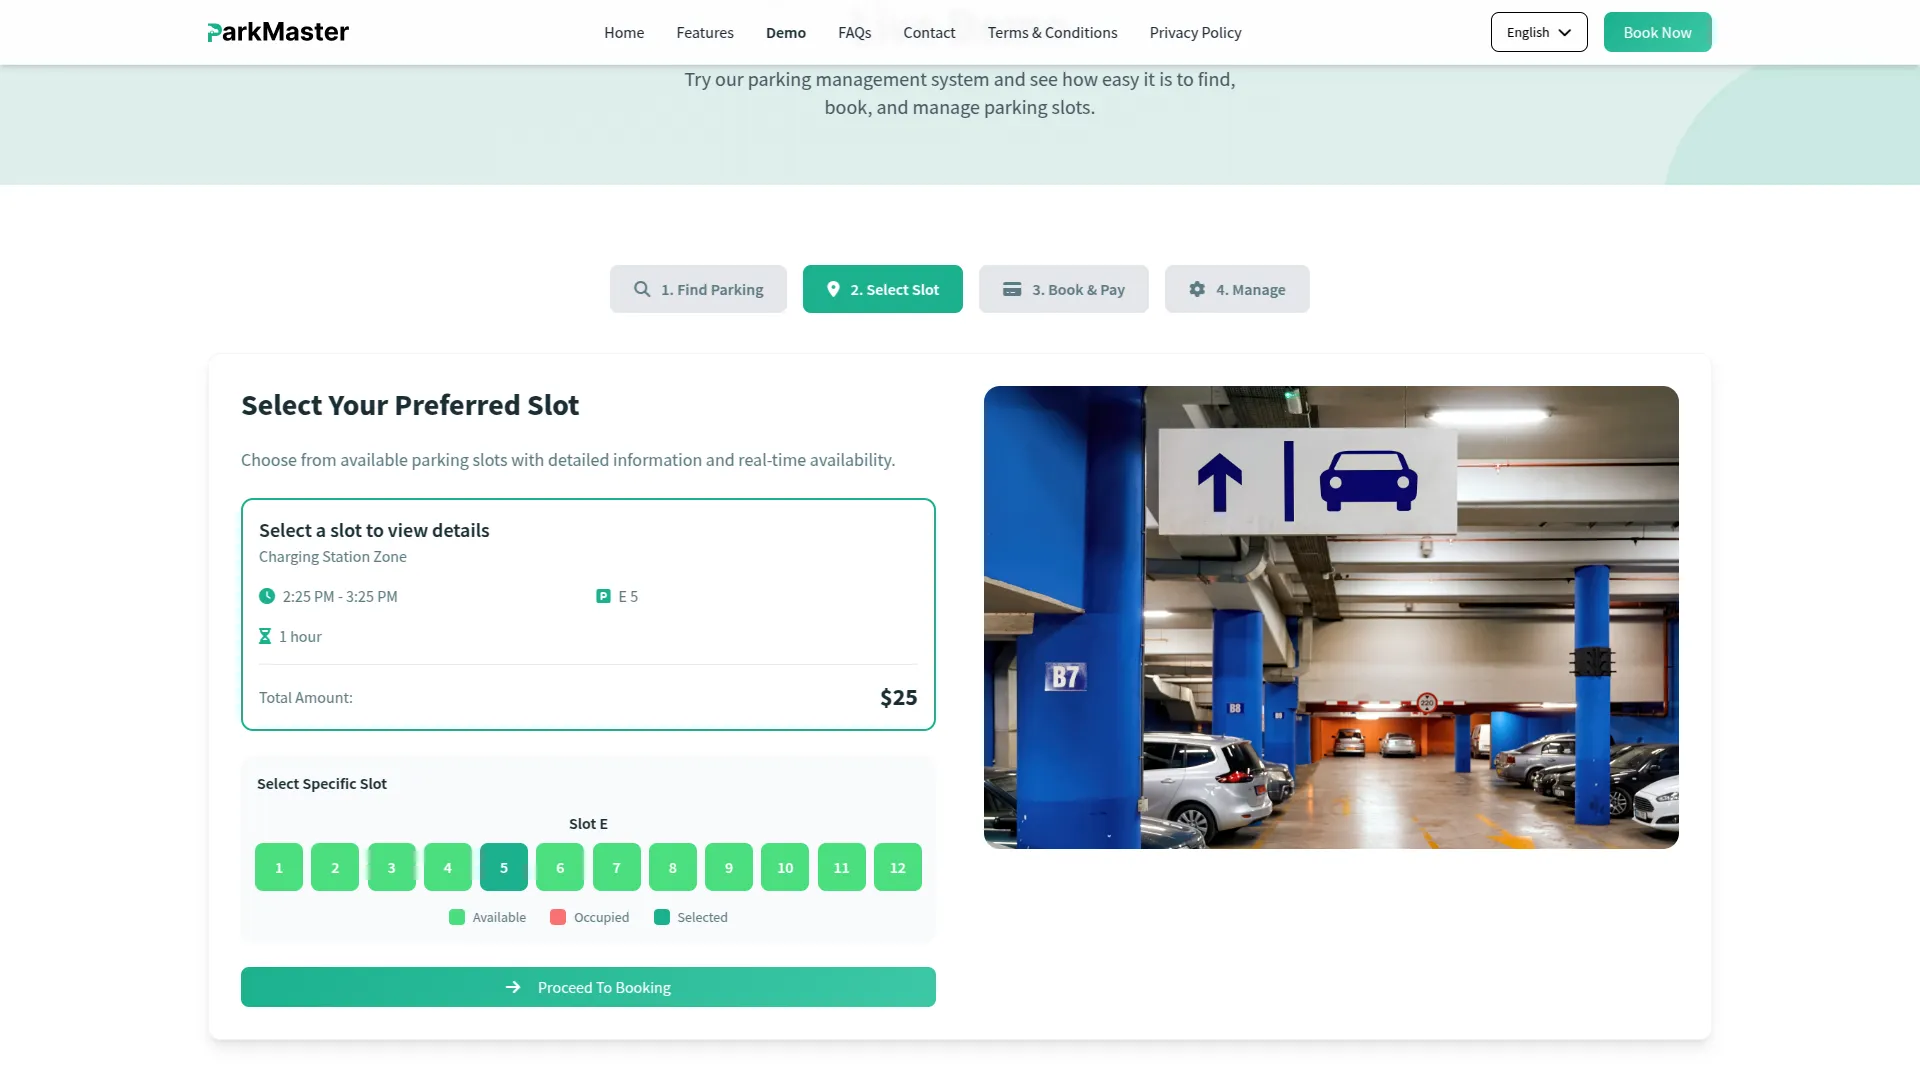
- After clicking the Search available slots button, Users can then select an available slot, after which the system shows the location, time duration, slot details, and the total amount based on the chosen slot. Once they review this information, they proceed by clicking the Proceed to Payment button.
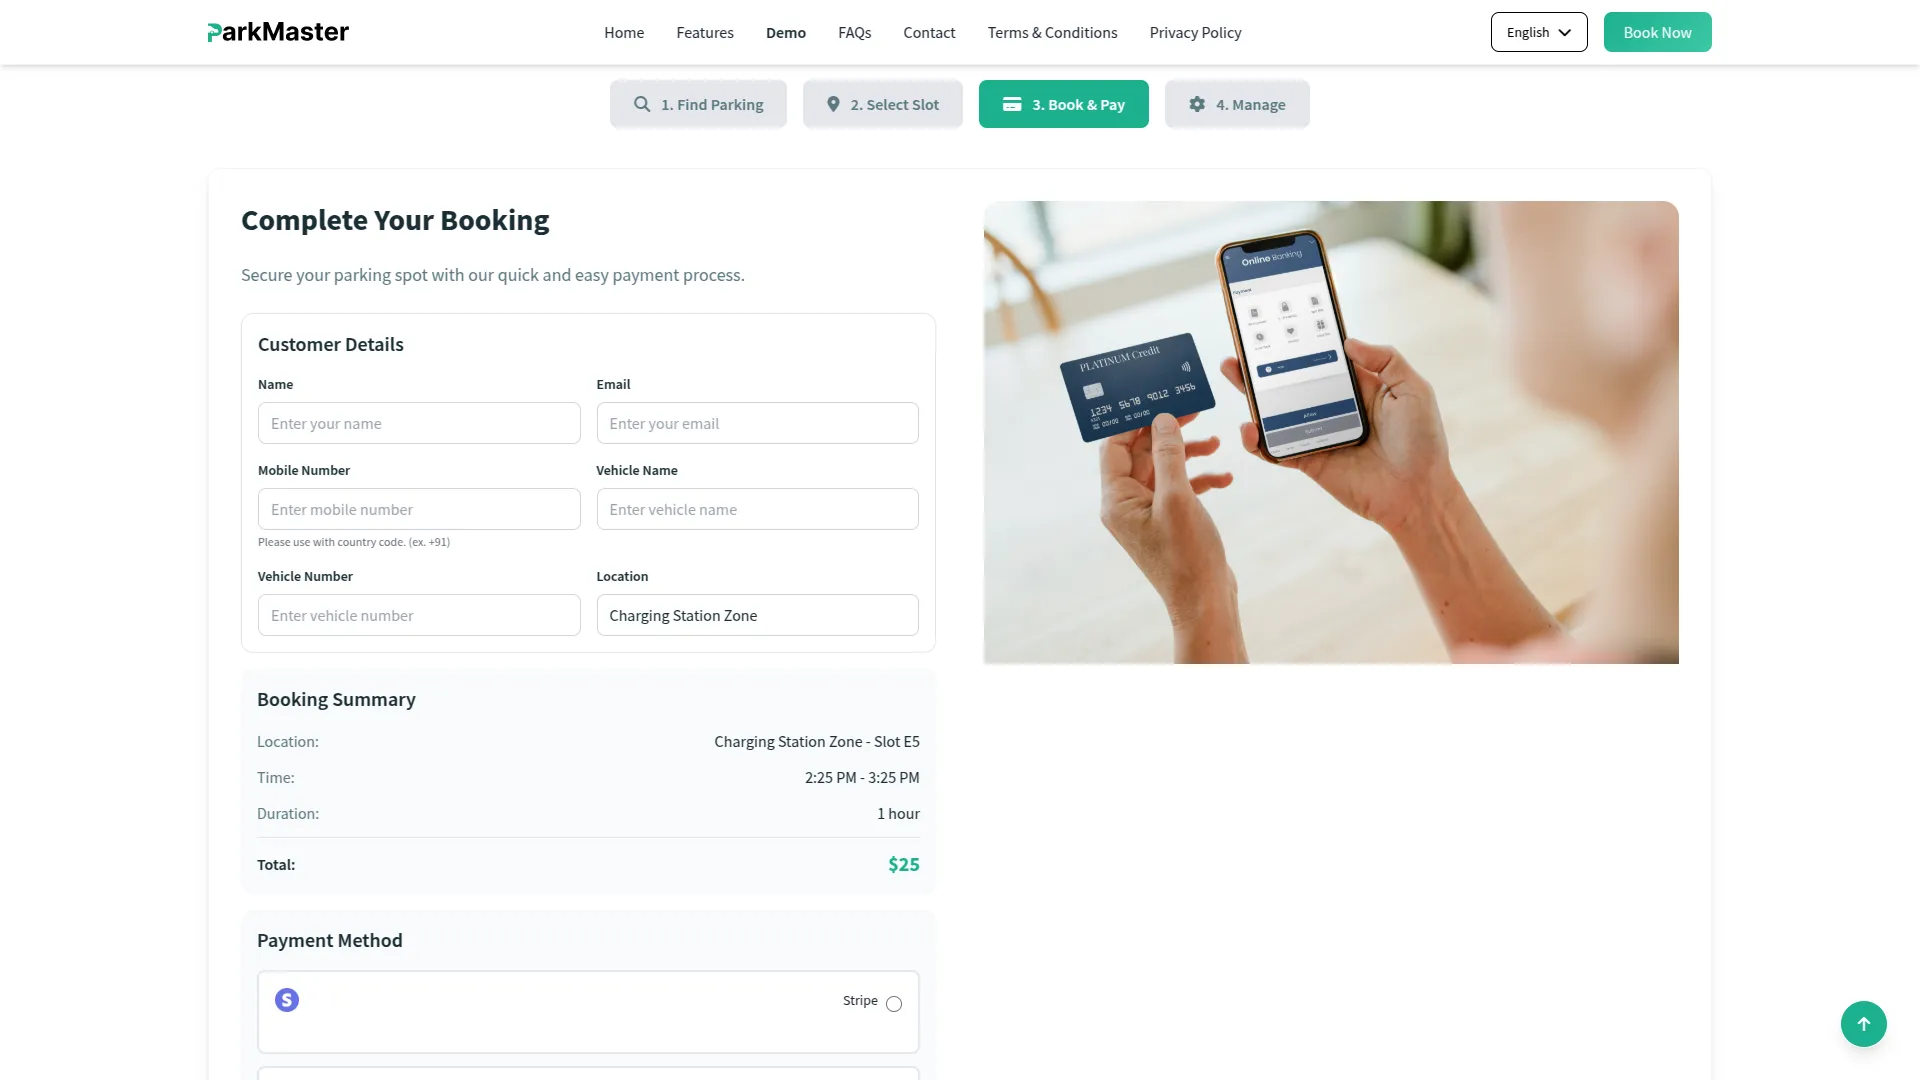
- On the next step, users fill out the booking form on the right side, which includes fields for Name, Email, Mobile Number, Vehicle Name, Vehicle Number, Location, and payment methods.
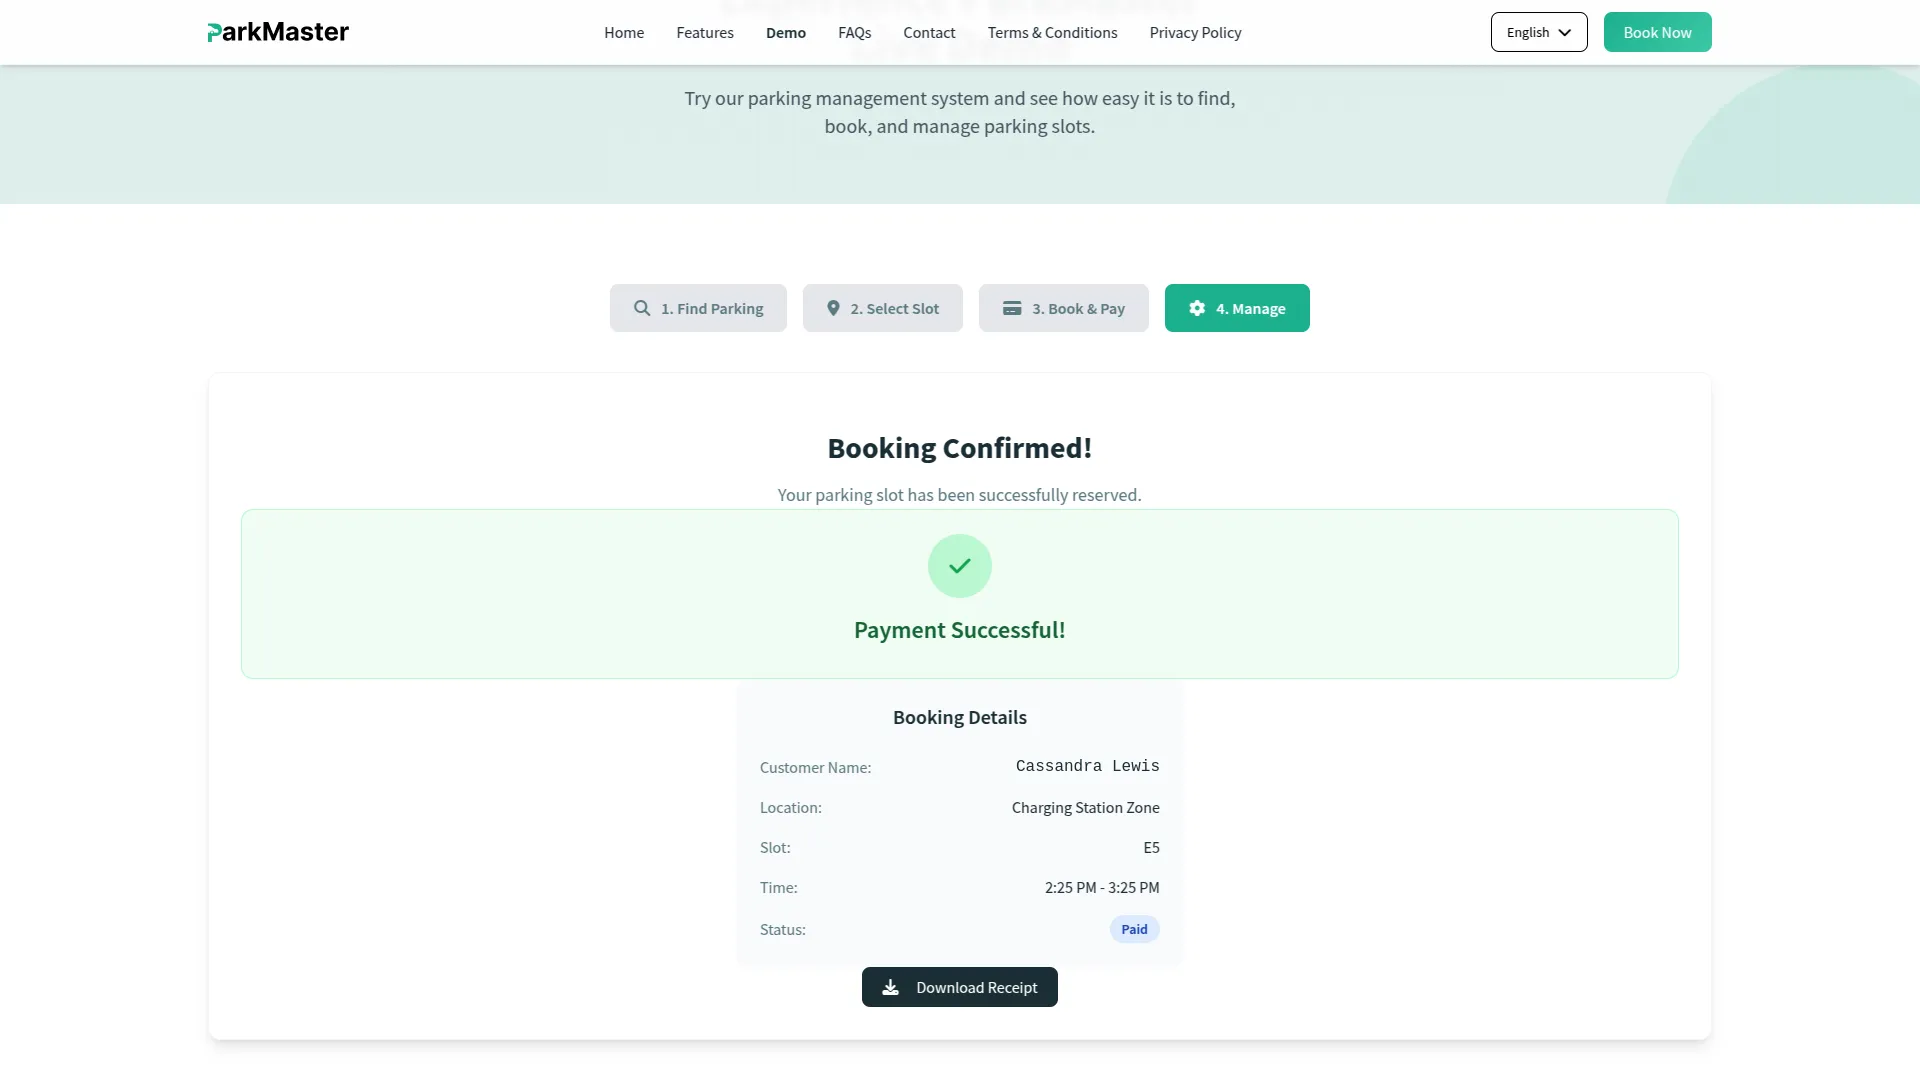
- Unlike company-side bookings, frontend bookings automatically store Check In and Check Out times along with duration calculation since users specify their parking timeframe during booking. The system provides various online payment options, and once payment is completed, the booking status automatically updates to “Paid” with only the delete option available in the actions column.
Payment Management
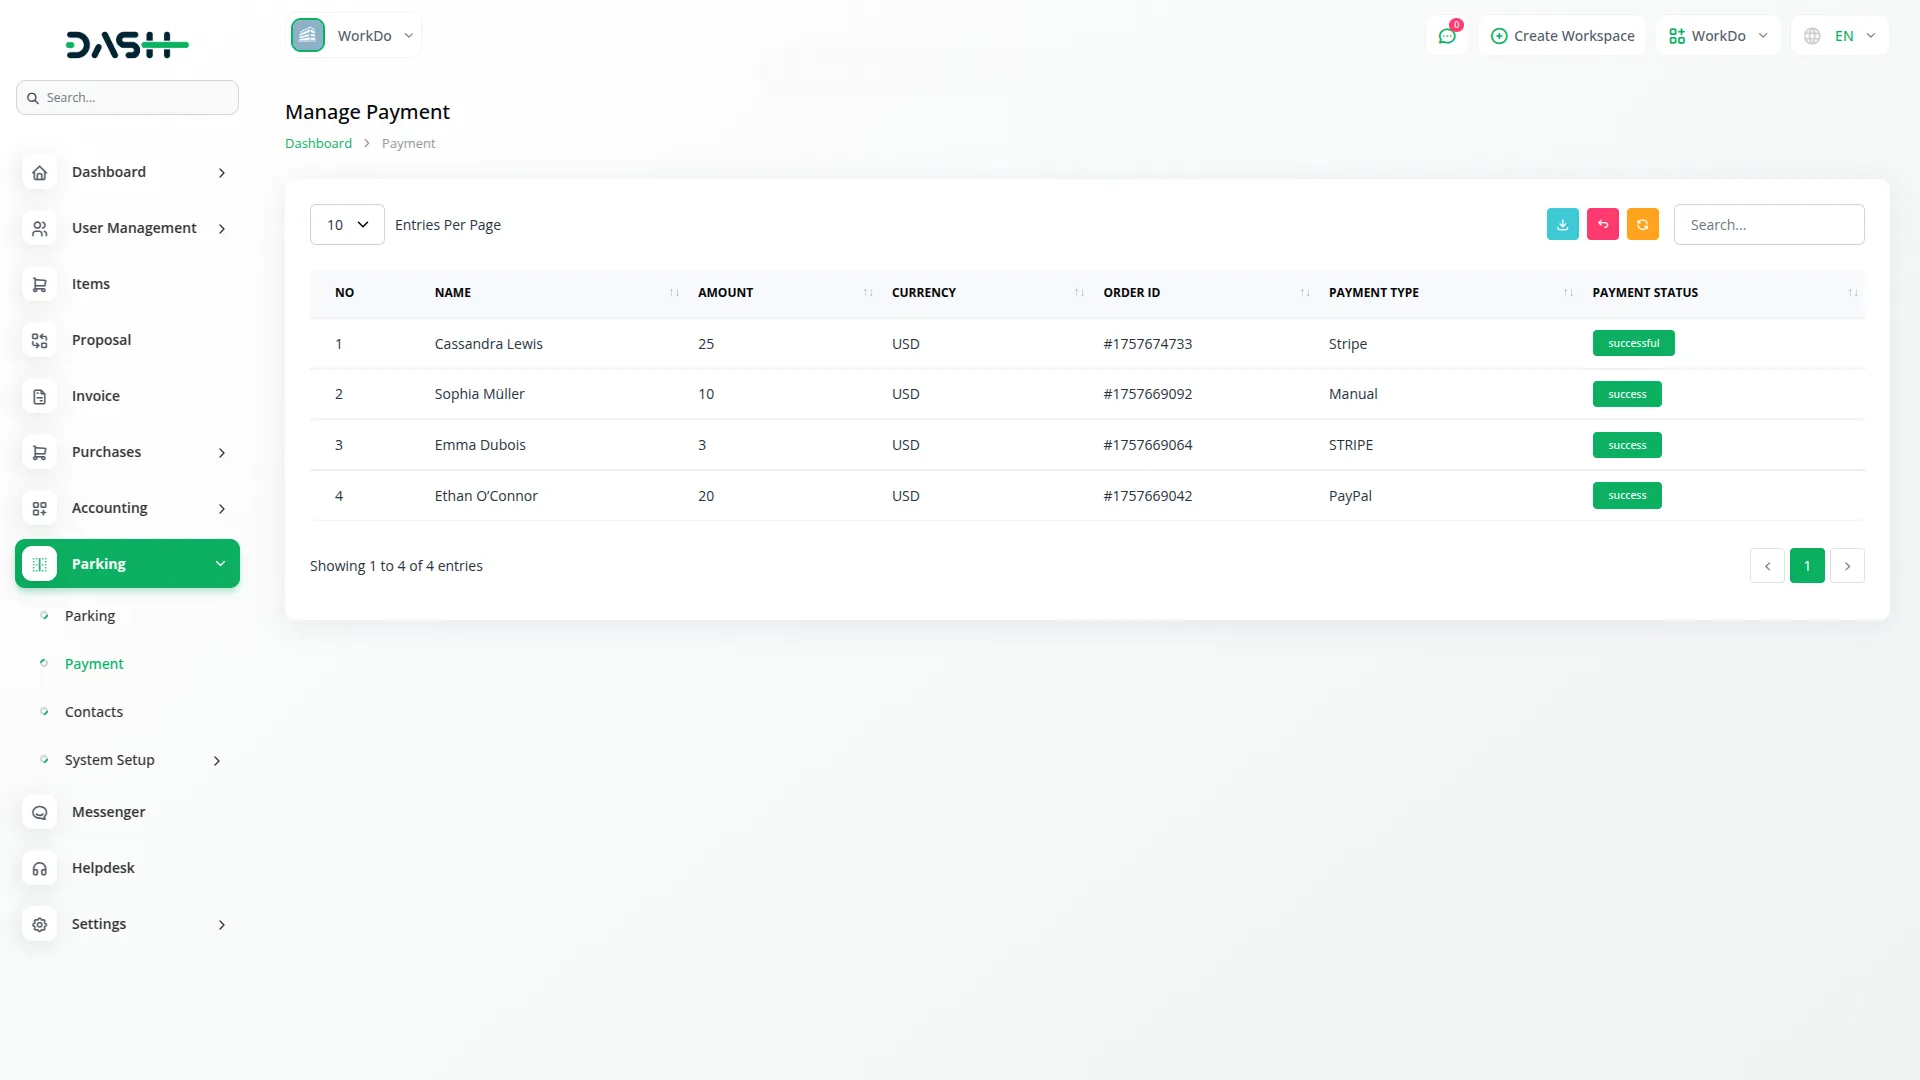
- The Payment section displays all payment transactions related to parking bookings in a comprehensive list format. You can view payment records through the main payment page without needing to create new entries, as payments are automatically generated when bookings are processed.
- The list page shows all payment records in a table with columns for No, Name, Amount, Currency, Order ID, Payment Type (such as Manual, Stripe, PayPal, etc.), and Payment Status. This gives you a complete overview of all financial transactions.
- Once a user or company makes a payment while booking parking for a vehicle, the payment record automatically appears in this section. You can track whether payments were made manually through the company system or online through various payment gateways, helping you maintain accurate financial records and monitor payment processing across different channels.
Contact Management
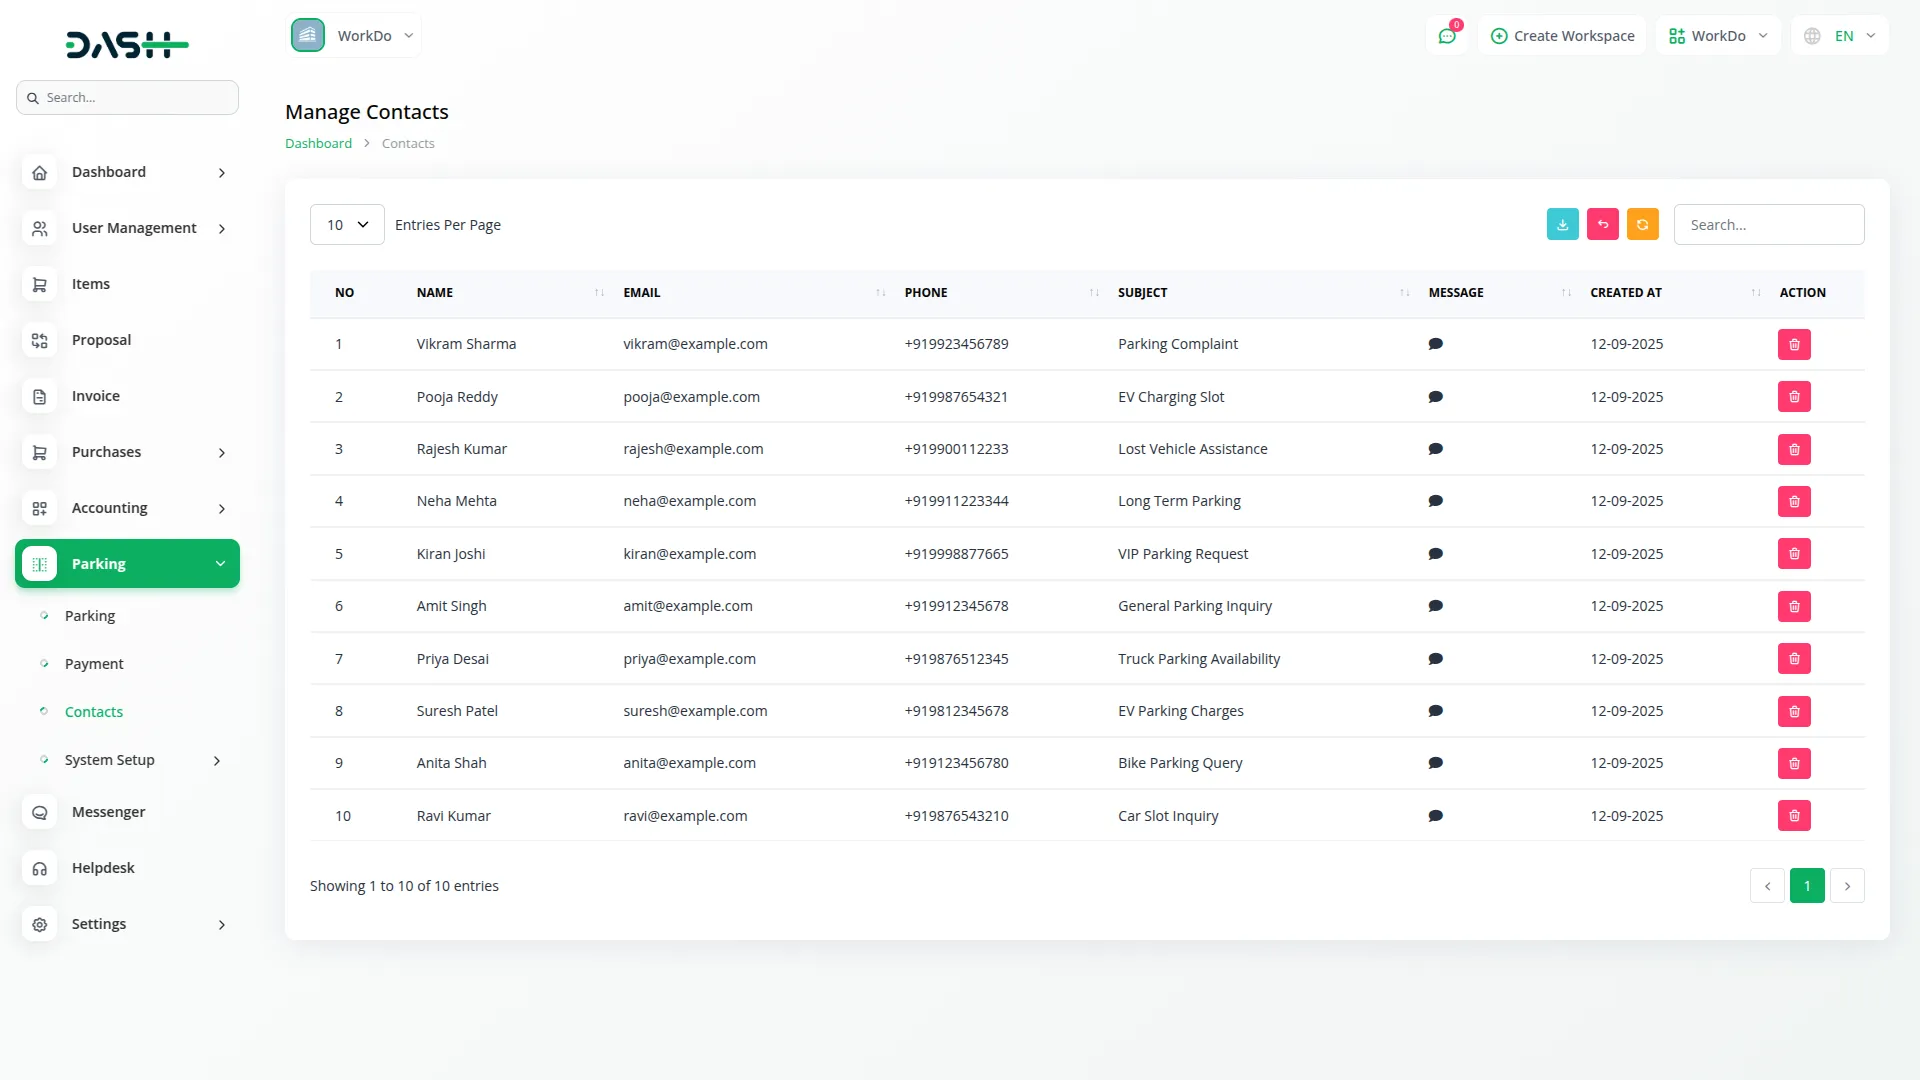
- The Contact section manages all inquiries submitted through your website’s contact form. You cannot create contacts manually as they are automatically generated when visitors submit the contact form on your website.
- The list page displays all contact submissions in a table with columns for No, Name, Email, Phone, Subject, Message (with a click icon to show the full message), and Created At. You can use the Search function to find specific contacts or the Export button to download contact data.
- The only action available is Delete, which allows you to remove contact entries from the system. All contact information comes directly from your website’s contact form, ensuring you receive and can manage all customer inquiries in one centralized location.
Categories
Related articles
- WhatsApp Twilio Integration Dash SaaS
- Contract Template Integration in Dash SaaS
- LinePay Payment Detailed Documentation
- How To Generate The YouTube Credentials
- Visitor Management Integration in Dash SaaS
- Coin Integration in Dash SaaS
- Project Template Integration in Dash SaaS
- Dash SaaS Setup Guide
- Zulip Chat Add-On Detailed Documentation
- Car Dealership Integration in Dash SaaS
- BlueSnap Integration in Dash SaaS
- Petty Cash Management Integration in Dash SaaS
Reach Out to Us
Have questions or need assistance? We're here to help! Reach out to our team for support, inquiries, or feedback. Your needs are important to us, and we’re ready to assist you!


Need more help?
If you’re still uncertain or need professional guidance, don’t hesitate to contact us. You can contact us via email or submit a ticket with a description of your issue. Our team of experts is always available to help you with any questions. Rest assured that we’ll respond to your inquiry promptly.
Love what you see?
Do you like the quality of our products, themes, and applications, or perhaps the design of our website caught your eye? You can have similarly outstanding designs for your website or apps. Contact us, and we’ll bring your ideas to life.
