Jitsi Meet Detailed Documentation
Jitsi Meet is a comprehensive video conferencing software that allows you to create, manage, and host online meetings. The software provides flexible meeting solutions through different hosting options, including JaaS (Jitsi as a Service) and self-hosted configurations.
Introduction
Jitsi Meet is a comprehensive video conferencing software that allows you to create, manage, and host online meetings. The software provides flexible meeting solutions through different hosting options, including JaaS (Jitsi as a Service) and self-hosted configurations. You can schedule meetings, invite participants, track meeting status, and view meetings in both list and calendar formats. The system requires proper configuration through System Settings before you can create and manage meetings.
How To Install Jitsi Meet Add-On?
To Set Up the Jitsi Meet Add-On you can follow this link: Setup Add-On
System Settings
- Before using the Jitsi Meet functionality, you need to configure your meeting settings. The System Settings Section provides two configuration options for your meeting setup.
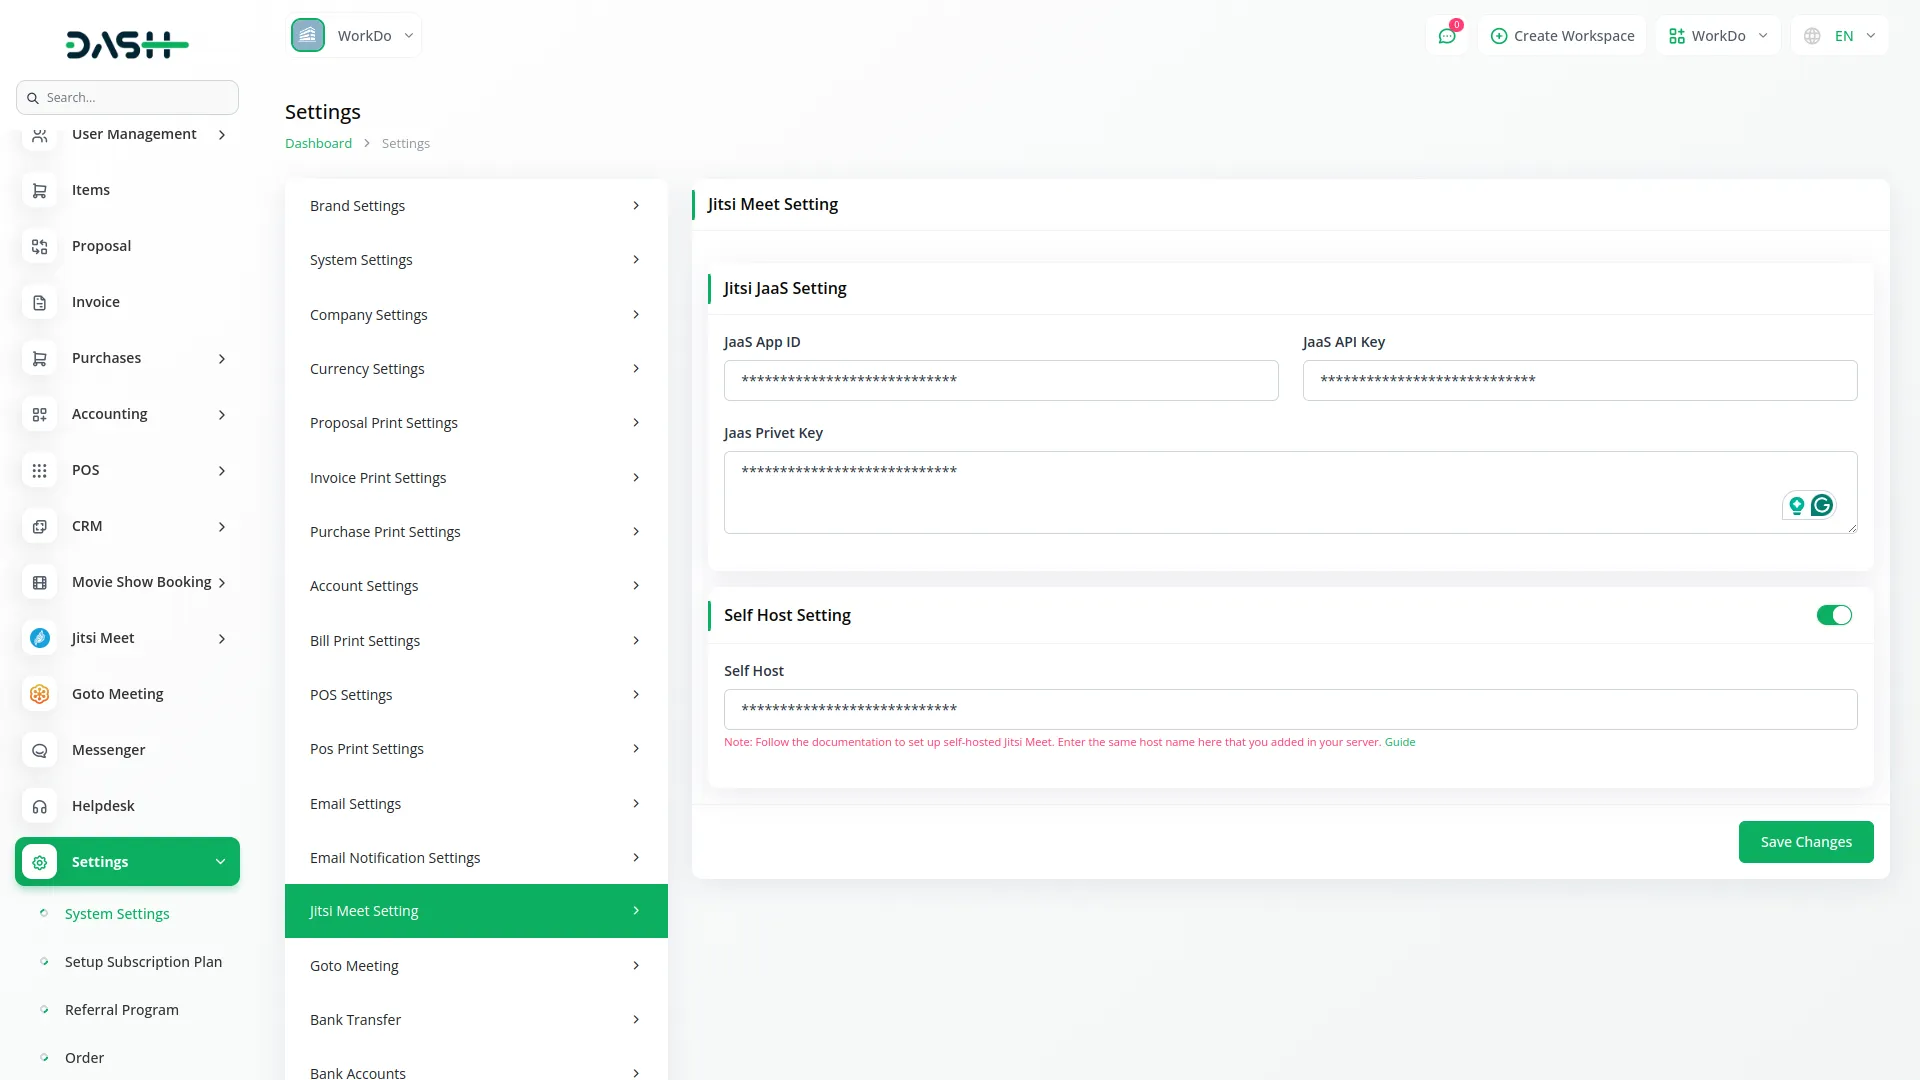
- To configure Jitsi Meet, navigate to System Settings and select Jitsi Meet Setting. You will see two configuration forms: Jitsi JaaS and Self Host.
- For Jitsi JaaS configuration, fill in the JaaS App ID, JaaS API Key, and JaaS Private Key fields. These credentials connect your system to Jitsi’s cloud service.
- To generate your JaaS credentials, you can follow this link https://jaas.8×8.vc/
- For Self Host configuration, enable the Self Host toggle and complete the Self Host field that appears when the mode is activated. This option allows you to use your own Jitsi server.
- To learn how to configure and set up a self-hosted Jitsi server, refer to this guide and follow the steps provided: https://jitsi.github.io/handbook/docs/devops-guide/devops-guide-quickstart/.
Jitsi Meet Management
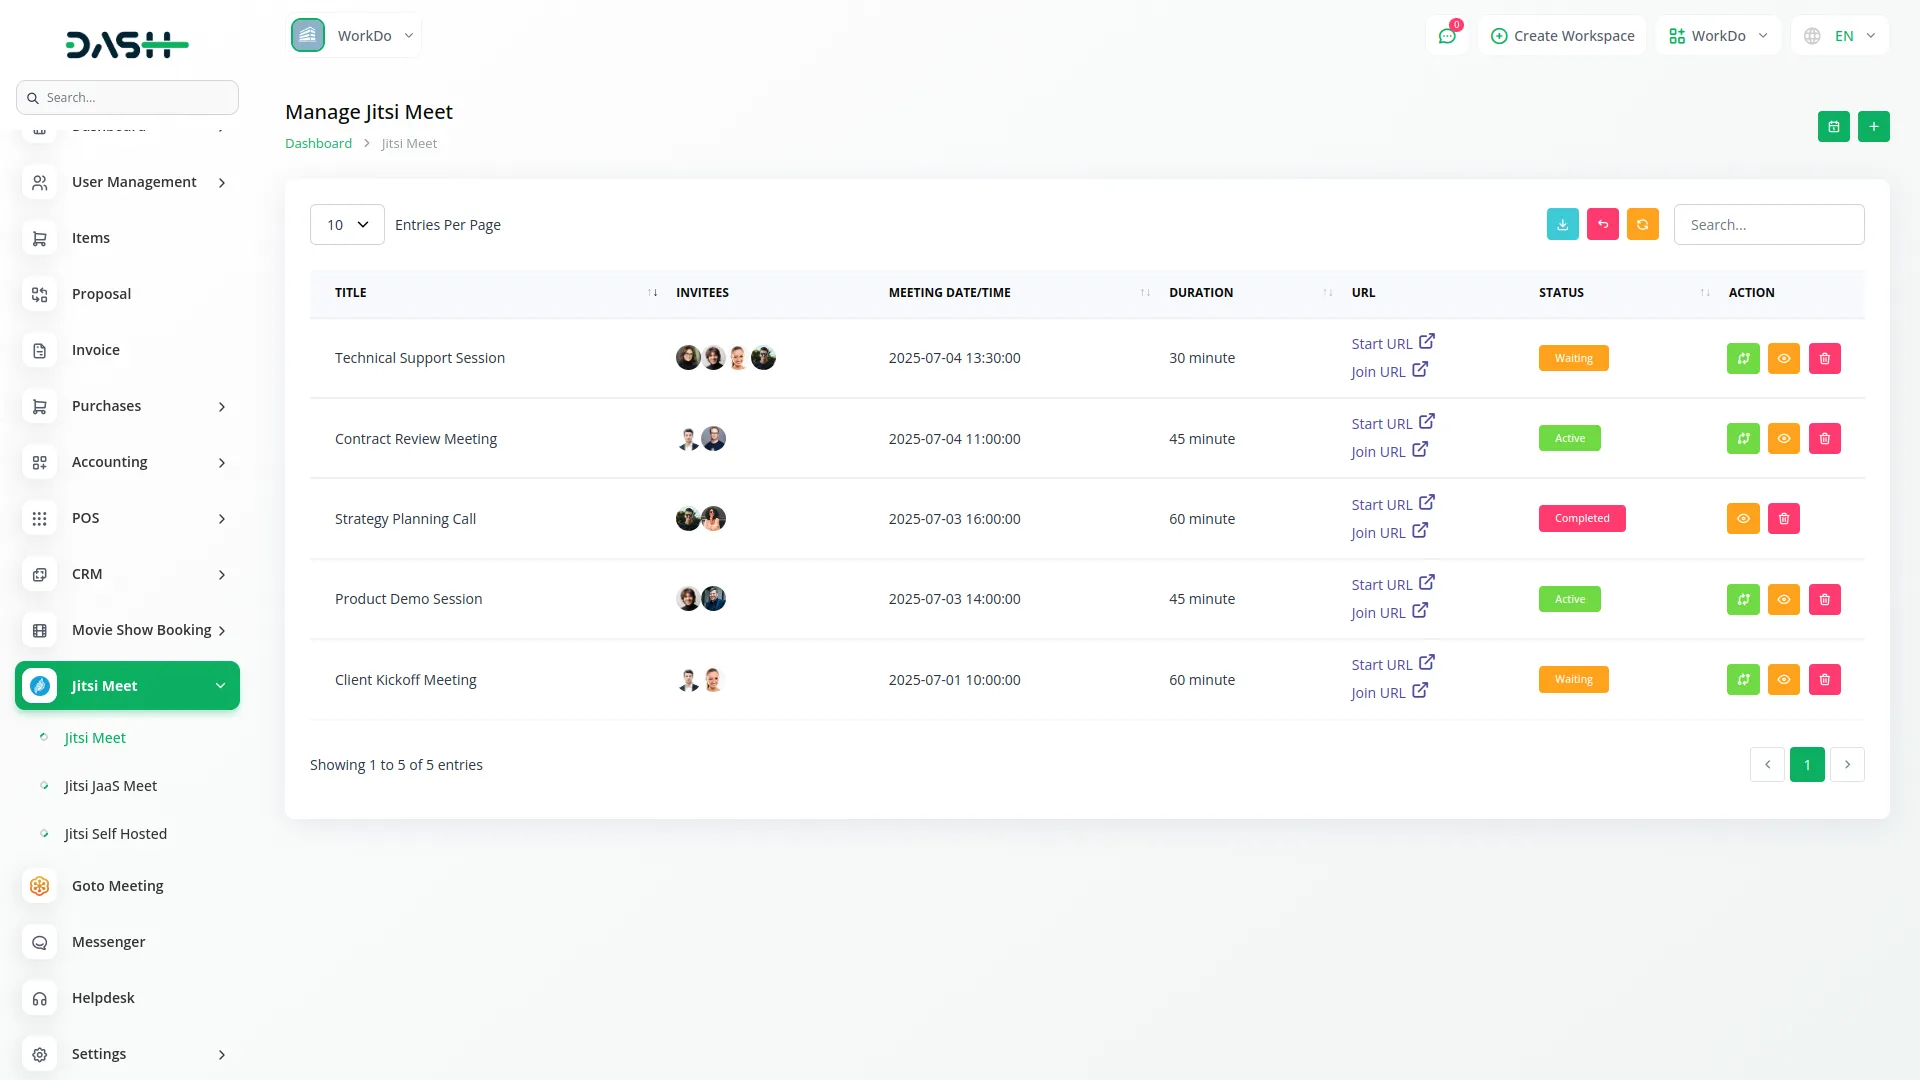
- To create a new meeting, click the “Create” button at the top of the page. Enter the meeting title, select users from the multi-select dropdown for invitees, set the start date and time, and specify the duration in minutes. After saving the meeting, the system automatically generates a Start URL for the host and a Join URL for all invitees.
- The list page displays all meetings in a table format with columns for Title, Invitees, Meeting Date/Time, Duration, URL (showing Start URL and Join URL), Status (Waiting, Active, Complete), and Action. You can use the Search button to find specific meetings or the Export button to download meeting data.
- In the Action column of the table, you can view detailed information about a meeting, delete a meeting, or change its status. The option to change status is only available when the meeting is marked as Complete.
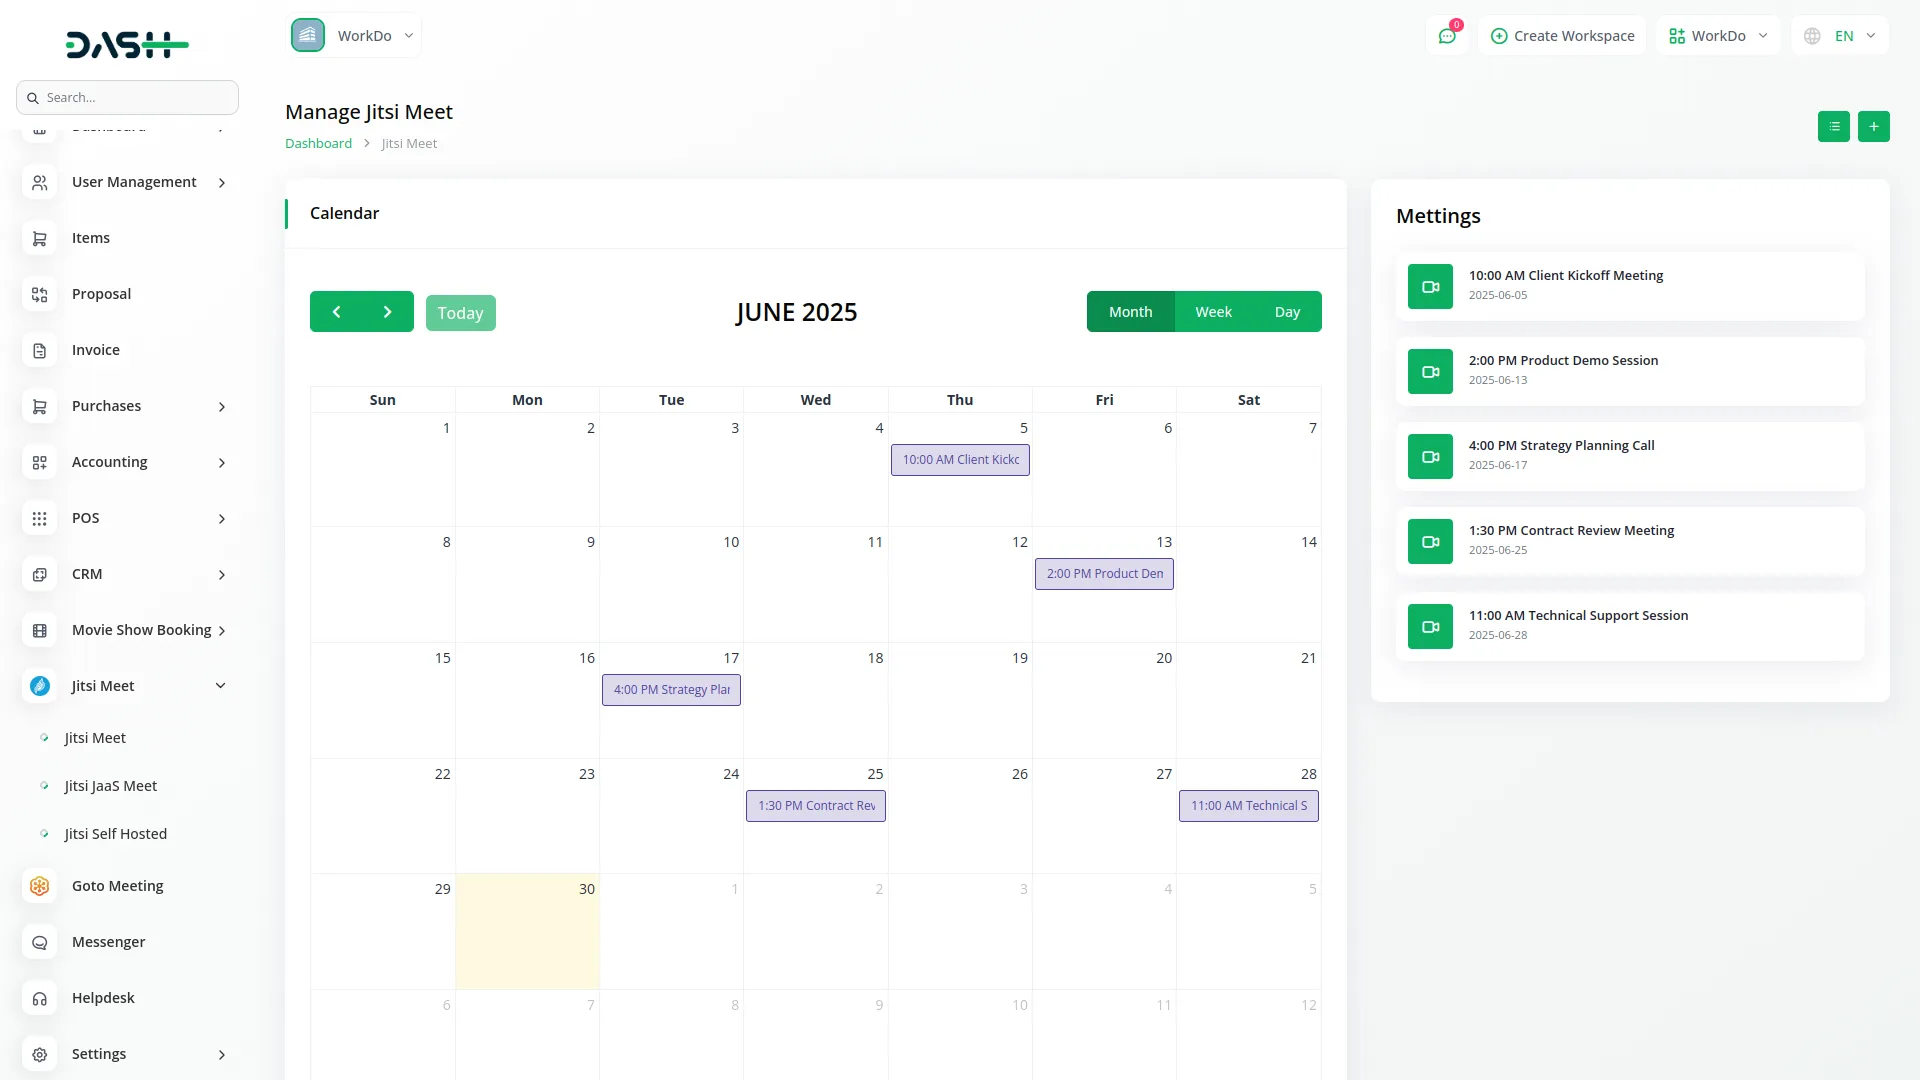
- Click the “Calendar View” button to see your meetings displayed in Month, Week, or Day view. The calendar shows meeting details scheduled for the selected period. Each meeting box displays the current month, the meeting time, and the title. Click on any meeting in the calendar to open a details popup or side panel with complete meeting information.
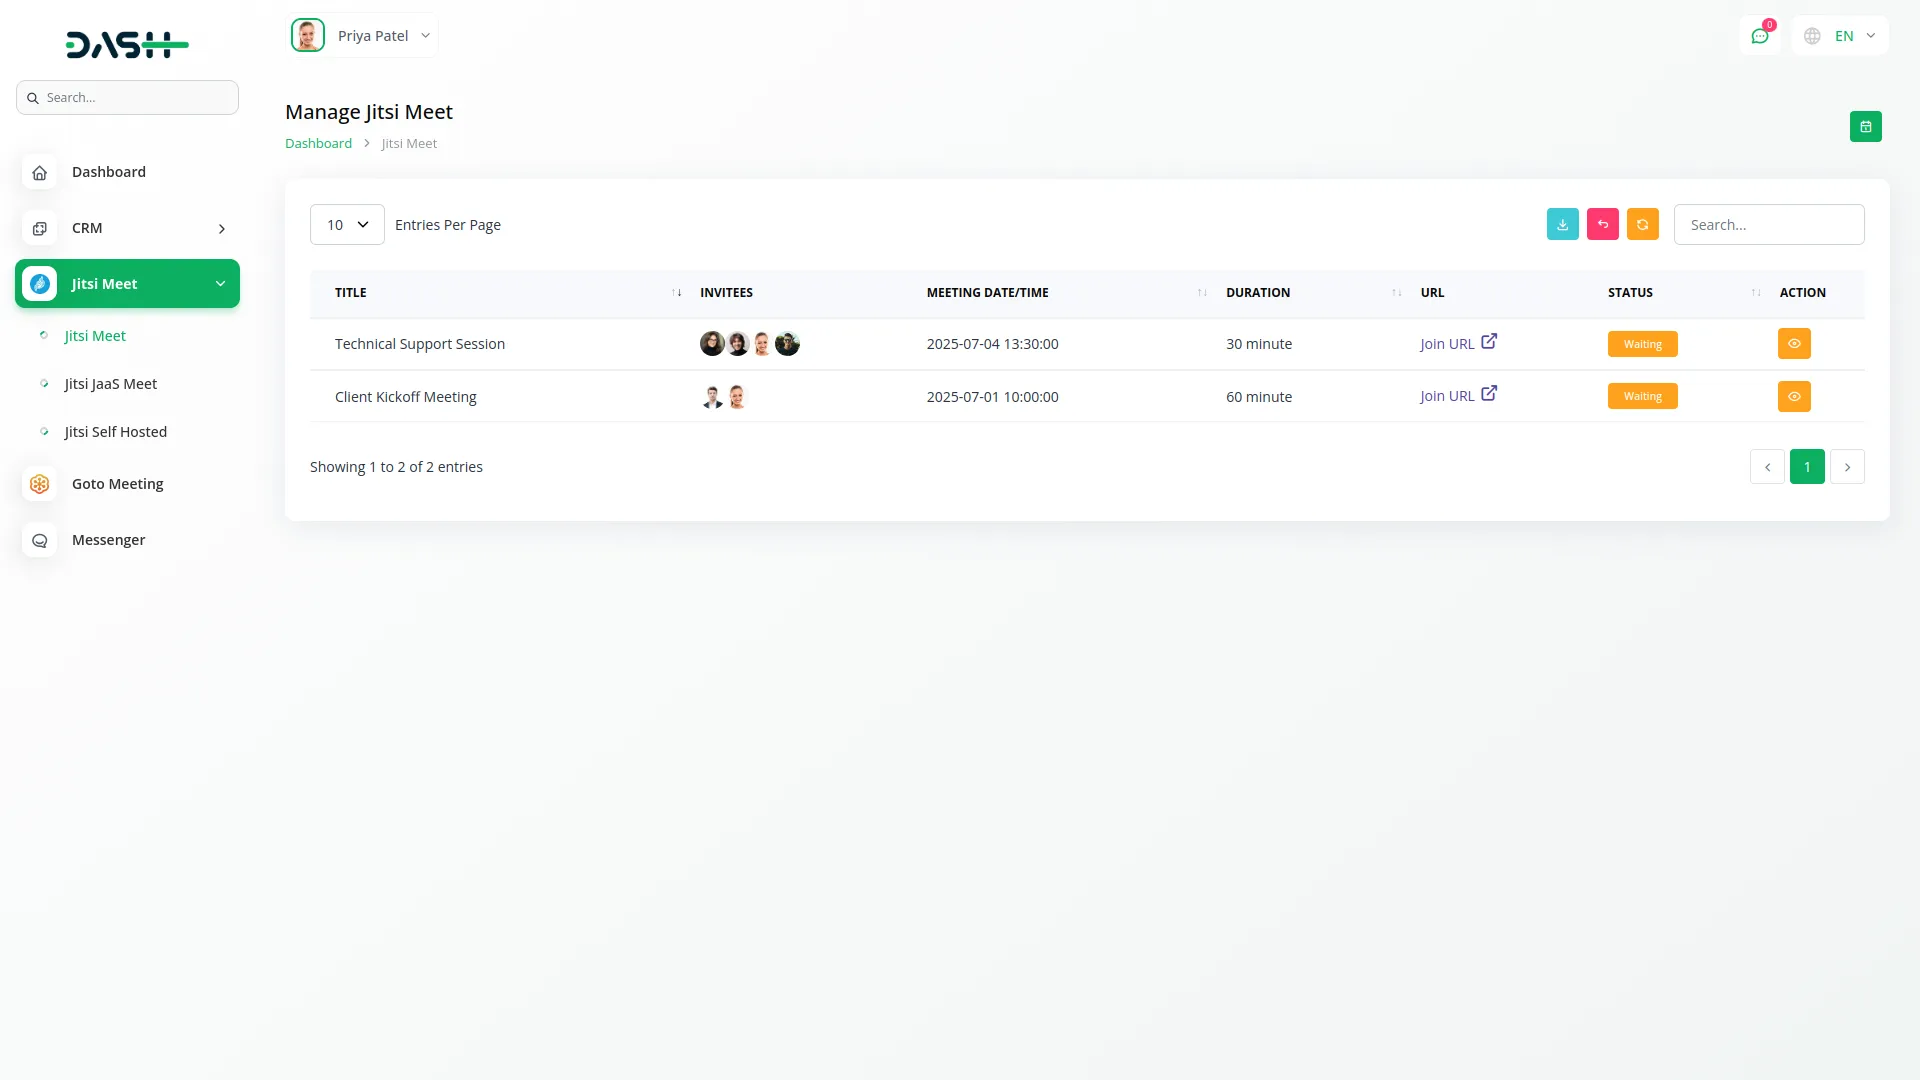
- When you select a specific user, the system displays all meetings that include that user as an invitee. For each of these meetings, the Join URL is shown, allowing the user to quickly access their meeting link. This view also shows the status and details of each meeting the user is associated with.
- The Start URL is intended for the meeting host to start the session, while the Join URL is provided to all invited participants. Both URLs are generated automatically when the meeting is created and can be copied or shared as needed.
Creating Jitsi JaaS Meet
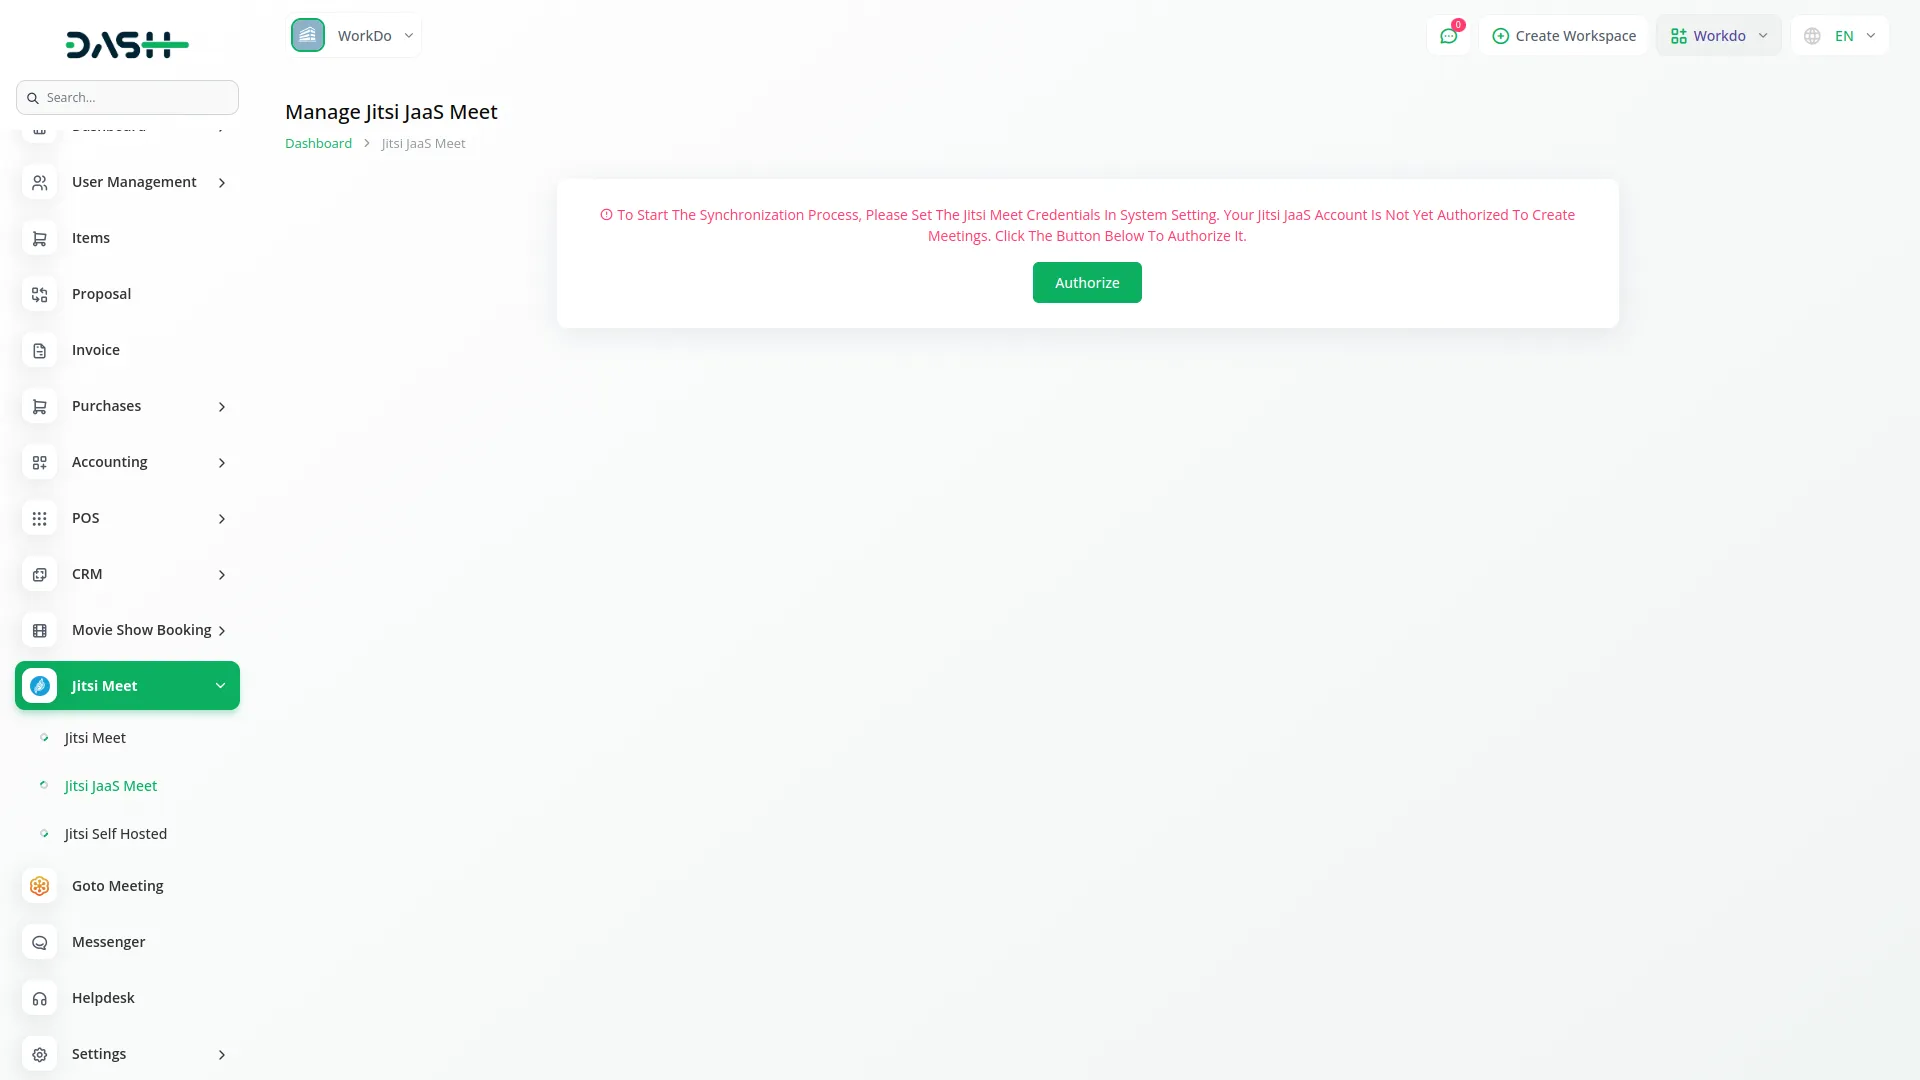
- Before using Jitsi JaaS Meet, you need to authorize your Jitsi JaaS account. If you haven’t authorized your account, you will see an instruction message: “You haven’t authorized your Jitsi JaaS account to create a Jitsi Meeting. Click the button below to authorize.” Complete the authorization process first.
- Once authorized, click the “Create” button to schedule a new meeting. Fill in the meeting title, select users from the multi-select dropdown, set the start date and time, and enter the duration in minutes.
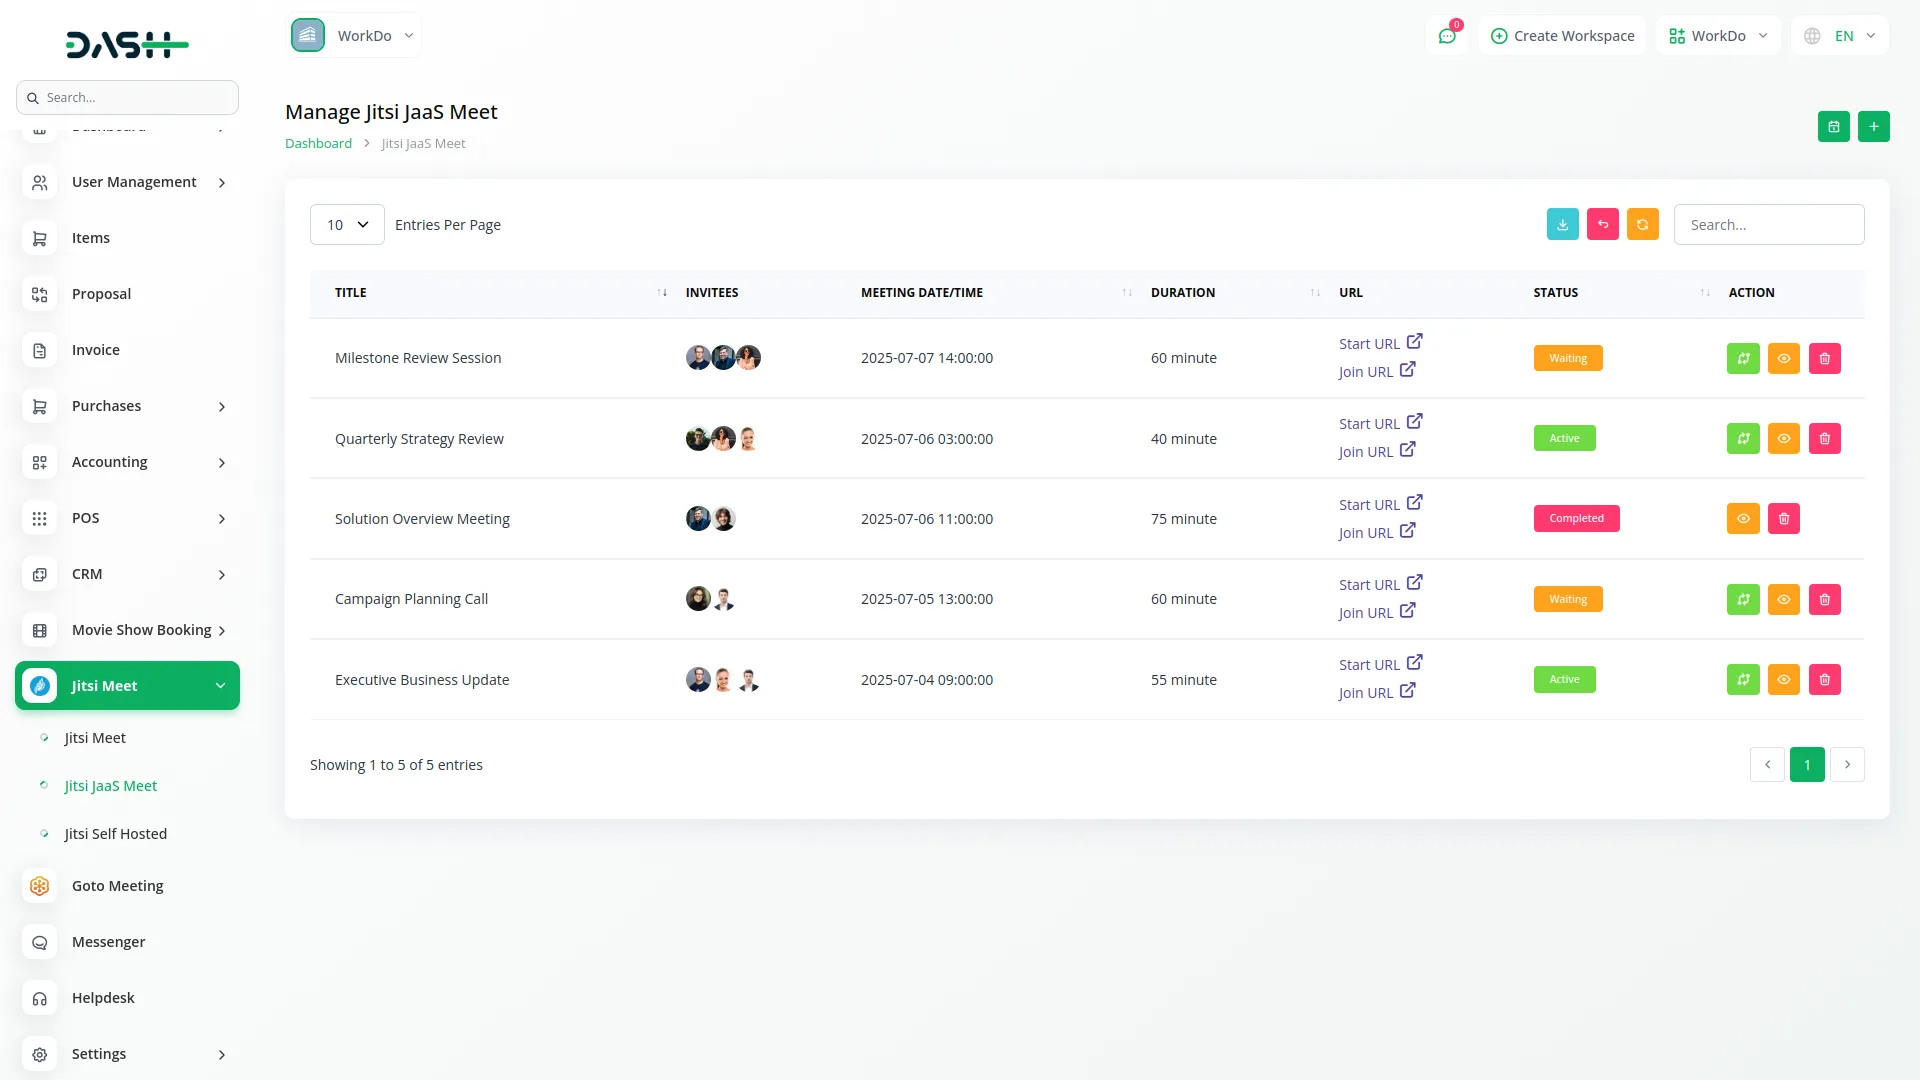
- The list page shows all JaaS meetings with columns for Title, Invitees, Meeting Date/Time, Duration, URL (Start URL and Join URL), Status (Waiting, Active, Complete), and Action. Use Search to find meetings or Export to download data.
- Available actions include View to see meeting details, Delete to remove meetings, and Change Status (available only when status is “Complete”).
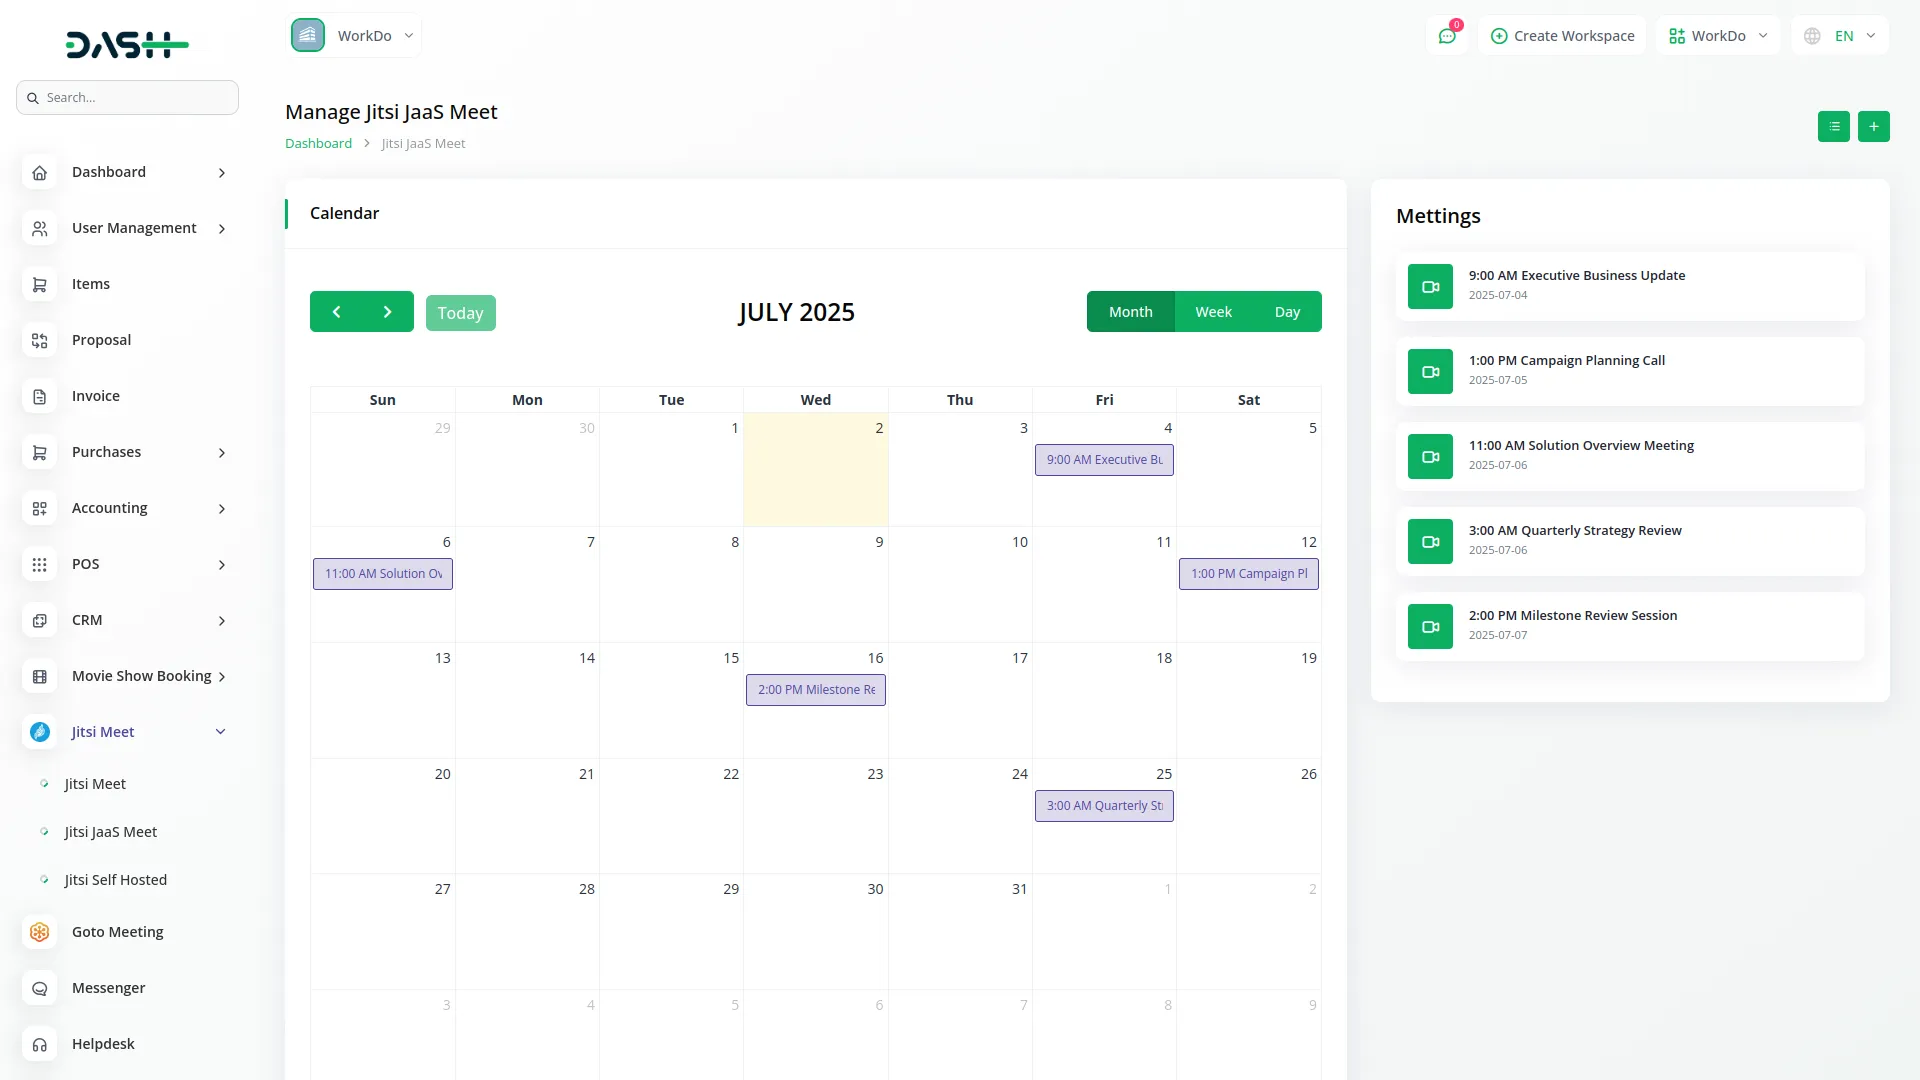
- The Calendar View button displays meetings in Month, Week, or Day format. Each meeting shows time and title information. Click on any calendar meeting to view detailed information in a pop-up or side panel.
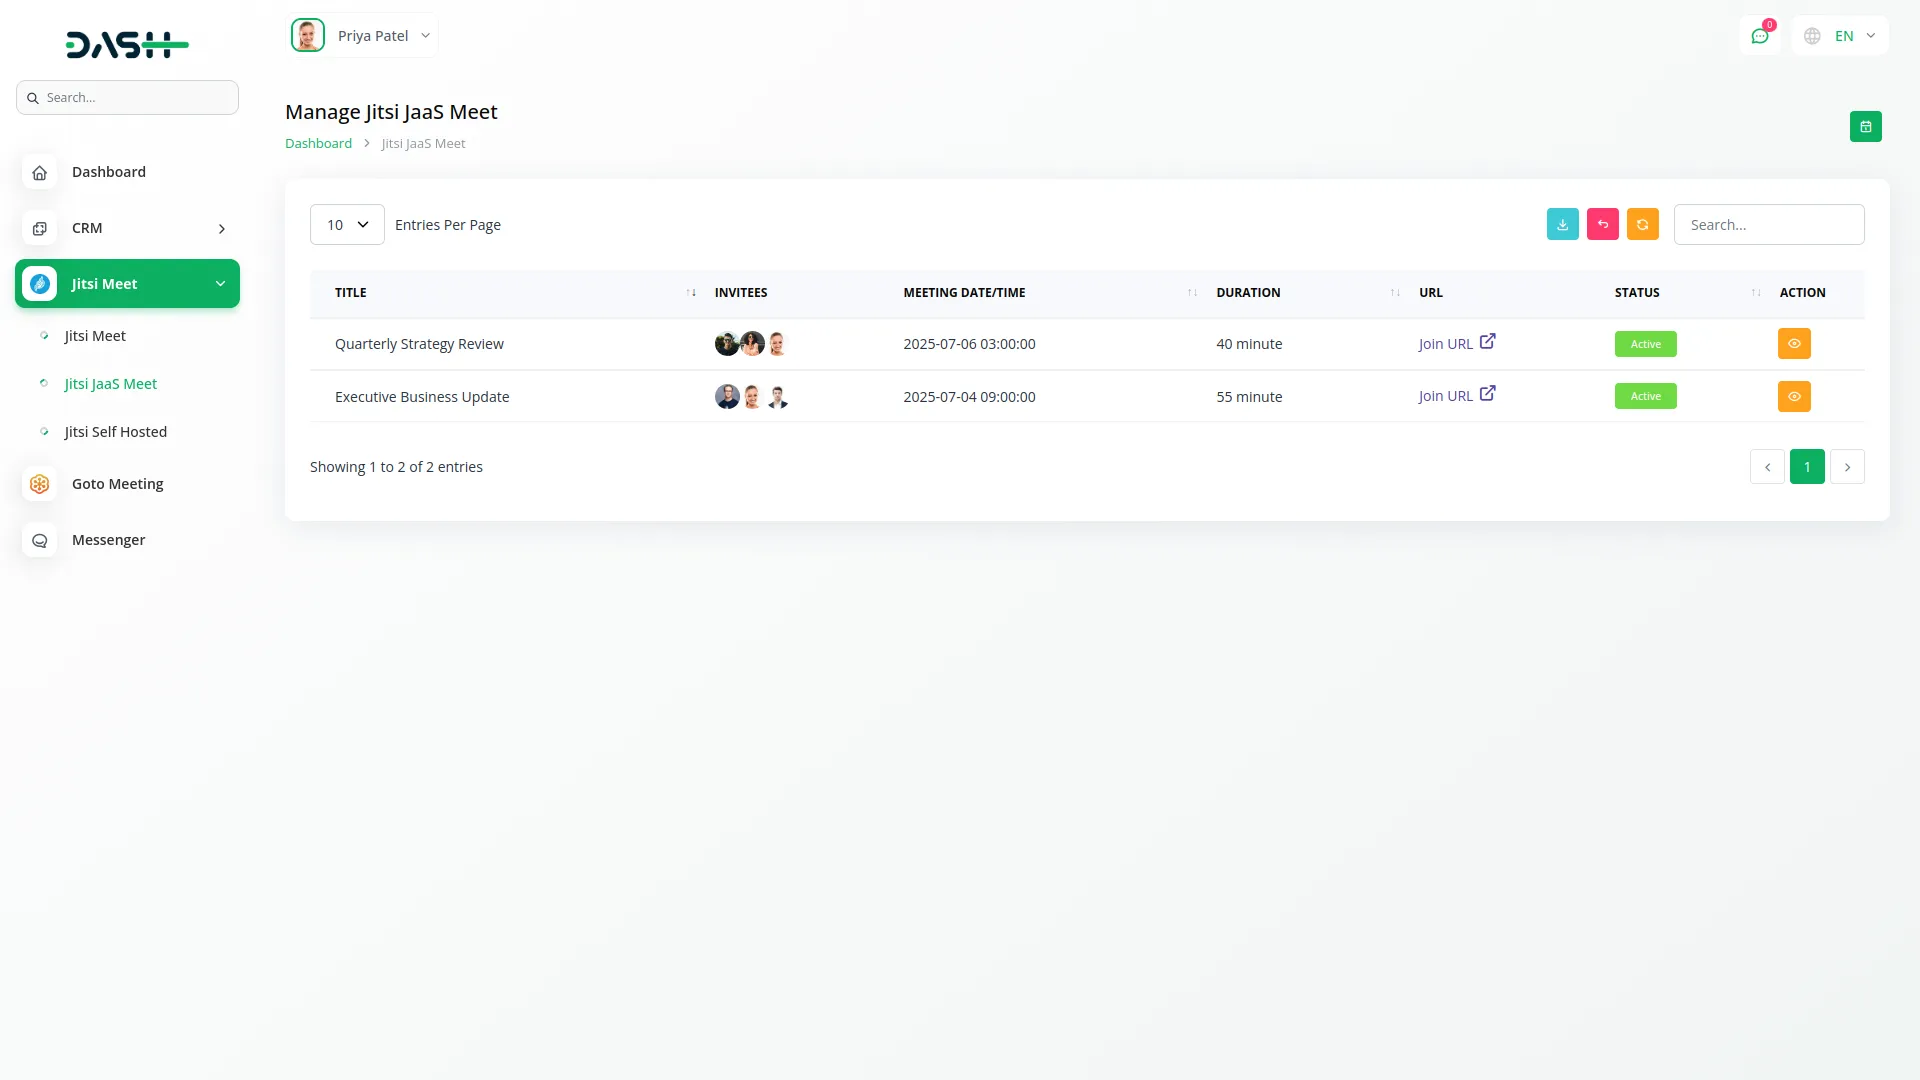
- When you select a specific user in the system, you can view a list of all meetings that include that user as an invitee. For each of these meetings, the Join URL is displayed, allowing you to quickly access and share the link that the user can use to join the meeting. This makes it easy to track and manage meeting participation for individual users.
Managing Jitsi Self Hosted
- To use self-hosted Jitsi meetings, you must first configure your Jitsi server. If it isn’t set up, you’ll see the message: “You haven’t set up your Jitsi self-hosted configuration to create a meeting.” Complete the server setup in System Settings to enable meeting creation.
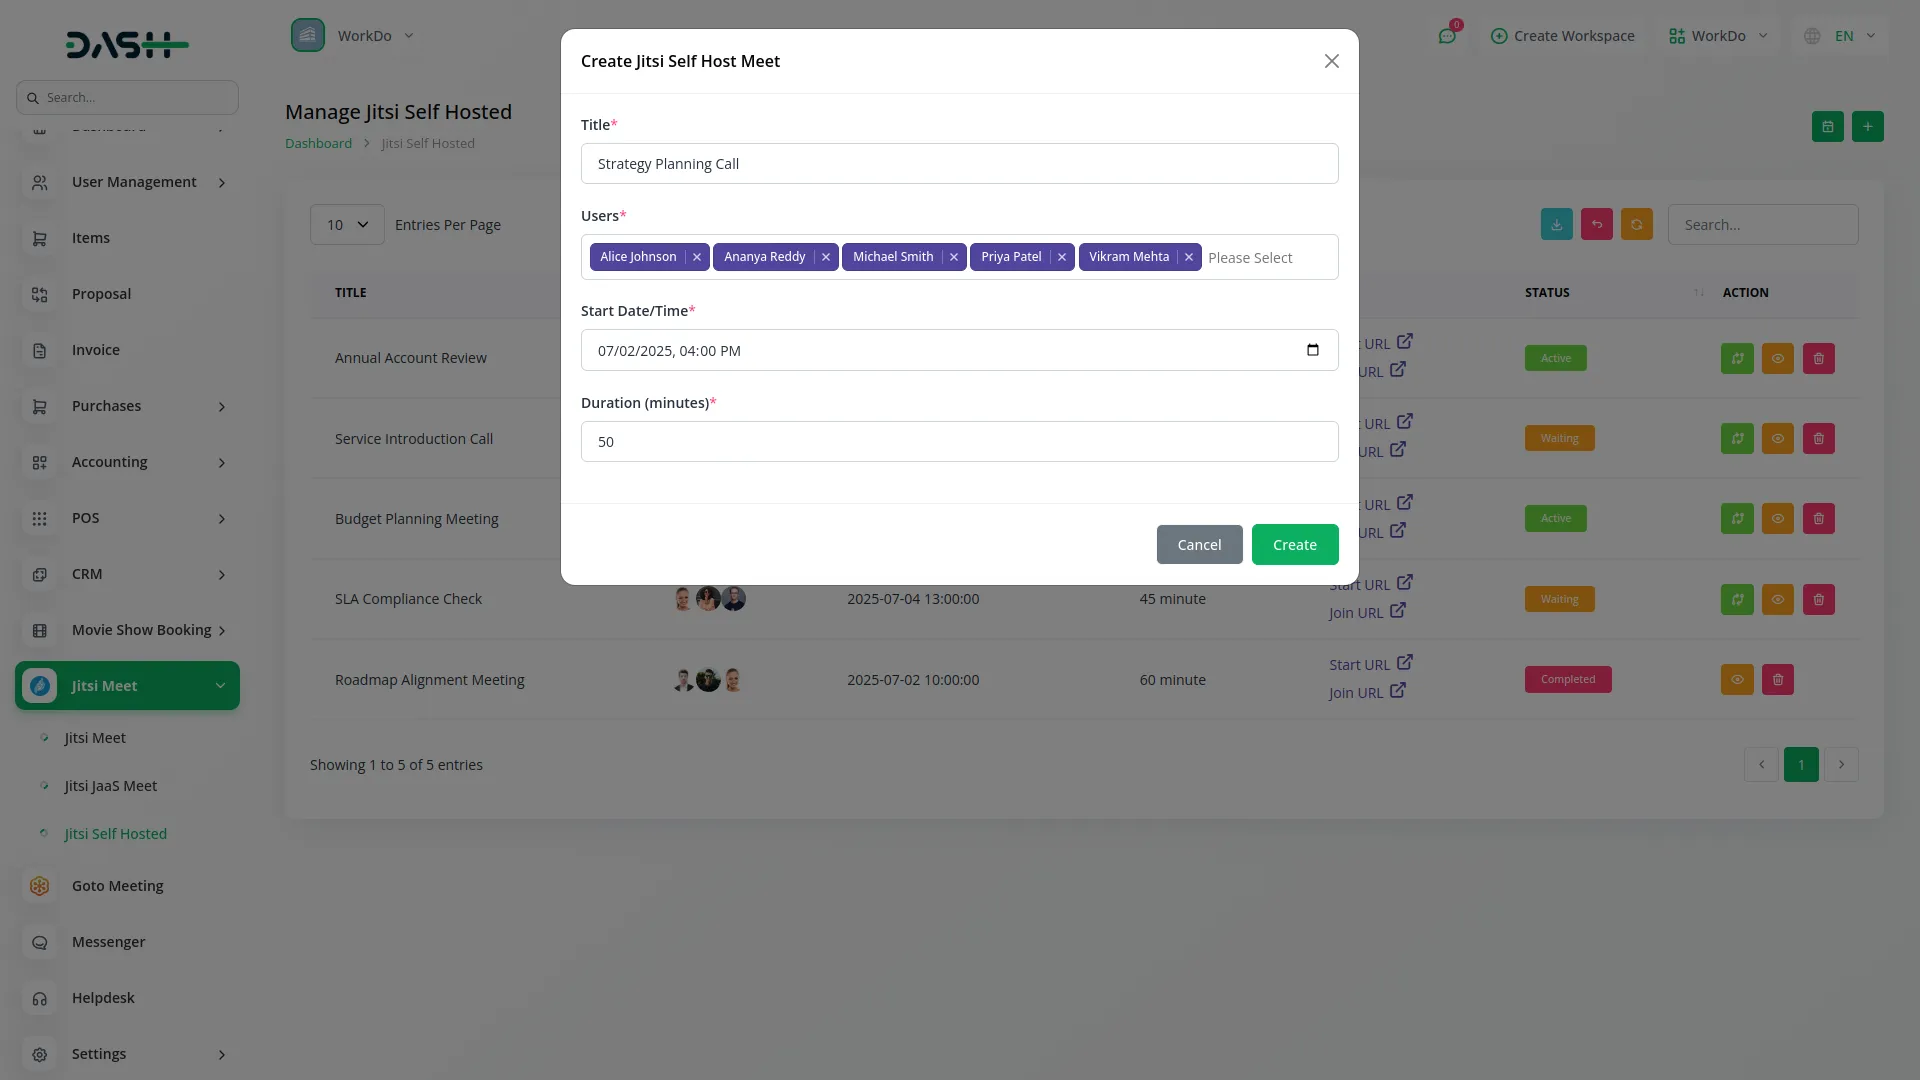
- After setup, click “Create” to schedule a meeting. Enter the title, select users from the multi-select field, choose start date and time, and set duration in minutes.
- The list page displays meetings with Title, Invitees, Meeting Date/Time, Duration, URL (Start URL and Join URL), Status (Waiting, Active, Complete), and Action columns. Search and Export buttons help you find and download meeting information.
- Action options include View for meeting details, Delete to remove meetings, or Change Status, which becomes available only when a meeting’s status is marked as Complete.
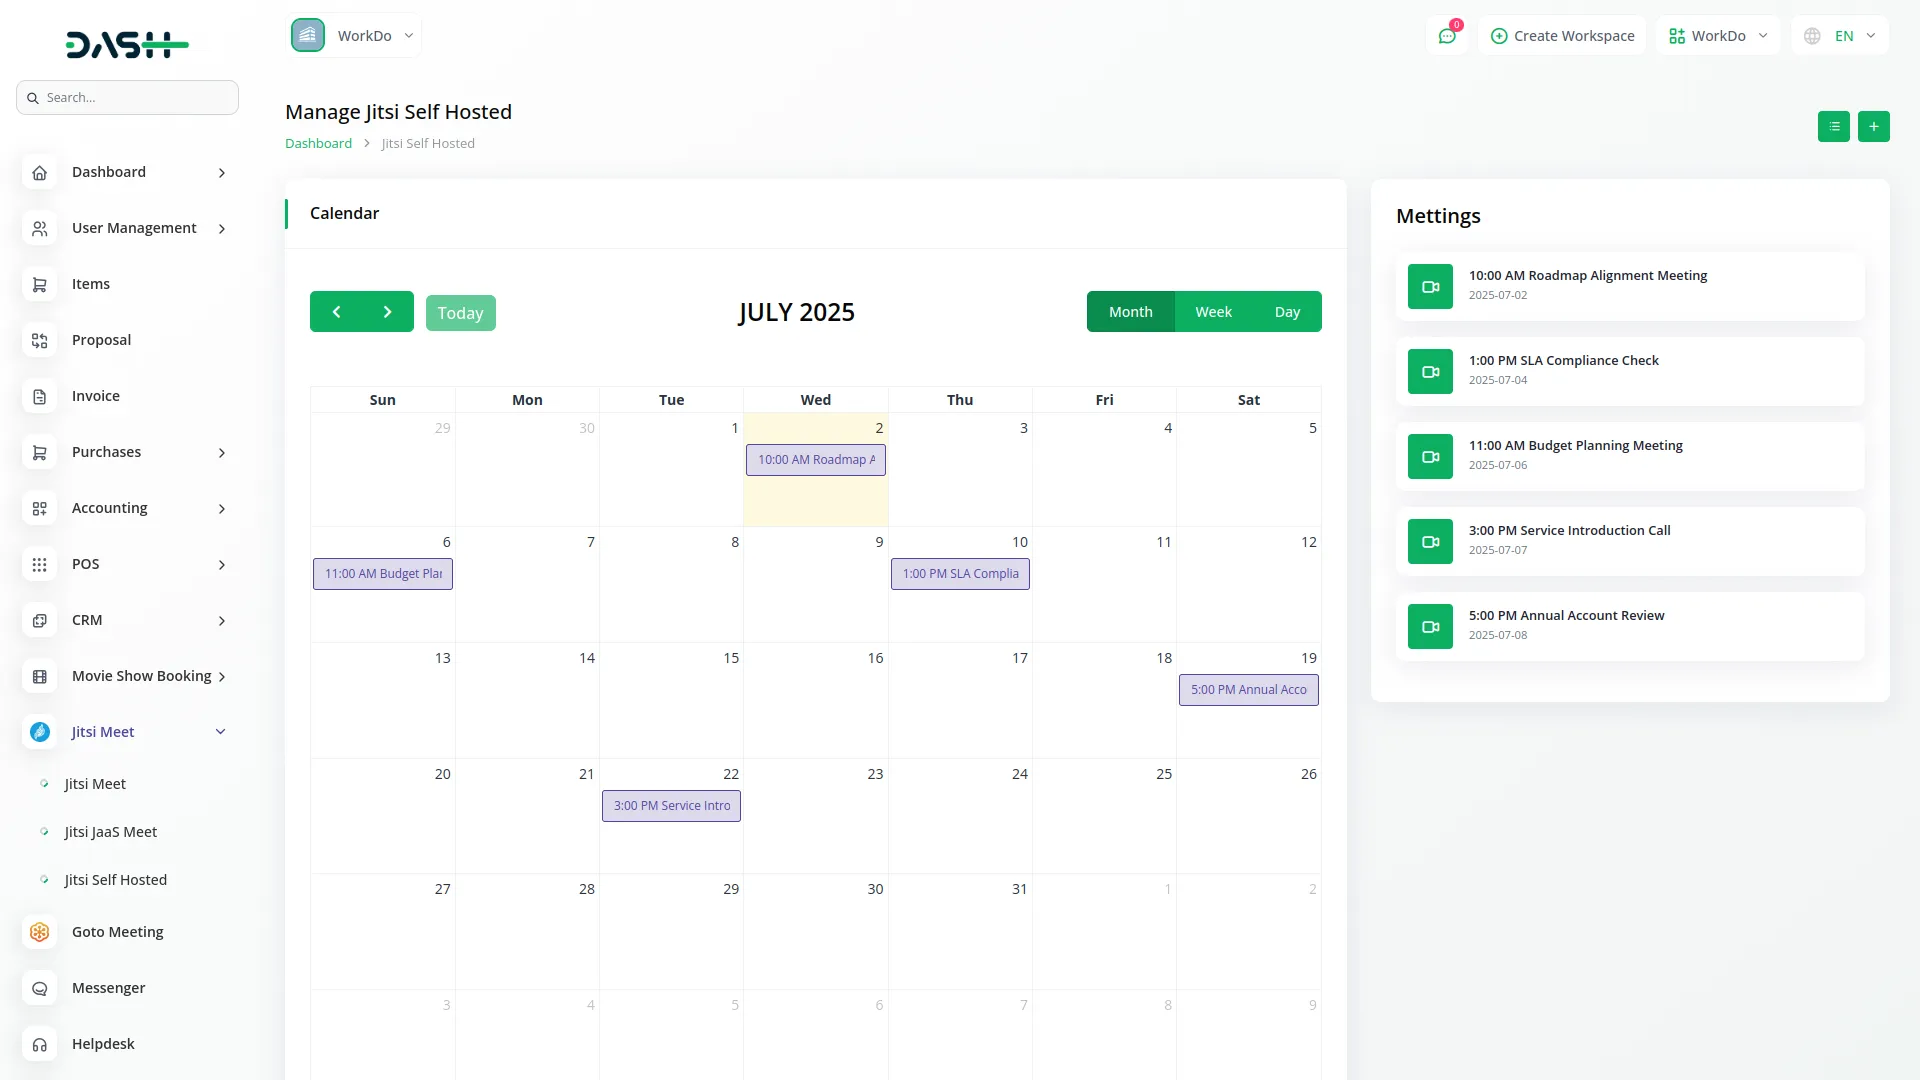
- Use Calendar View to see meetings in Month, Week, or Day layouts. Meeting boxes show time and title details. Click any meeting on the calendar to open detailed information in a pop-up or side panel.
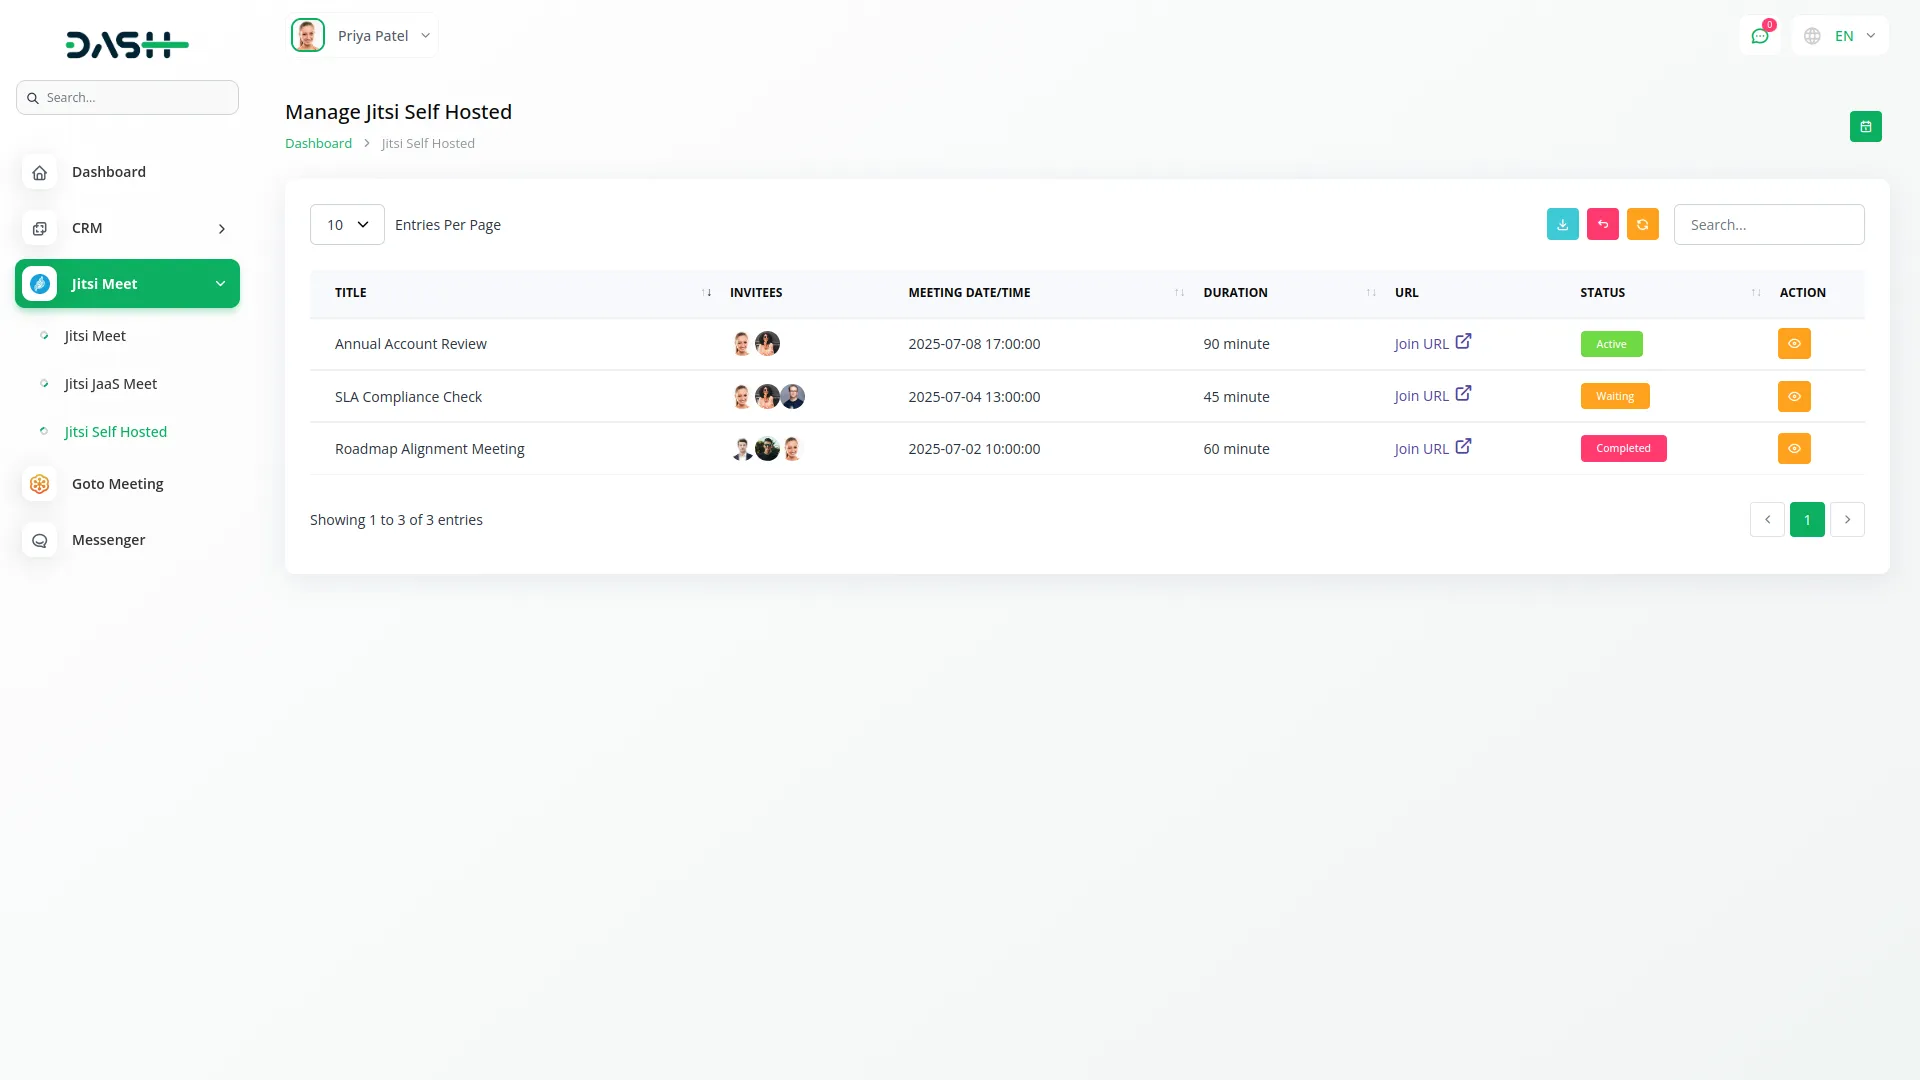
- When you select a specific user in the system, you will see a list of all meetings that include that user as an invitee. For each of these meetings, the Join URL is displayed so you can easily access and share the link that the user can use to join the meeting.
Categories
Related articles
- Laundry Management Integration in Dash SaaS
- Freelancing Platform Integration in Dash SaaS
- Rotas Integration in Dash SaaS
- Job Search Detailed Documentation
- Business Model Integration in Dash SaaS
- Sign-In with LinkedIn Add-On Integration in Dash SaaS
- Pharmacy Management Integration in Dash SaaS
- Vonage SMS Module Detailed Documentation
- Insurance Management Integration in Dash SaaS
- Google Meet Integration in Dash SaaS
- Society Management Detailed Documentation
- Audit Inspection Integration in Dash SaaS
Reach Out to Us
Have questions or need assistance? We're here to help! Reach out to our team for support, inquiries, or feedback. Your needs are important to us, and we’re ready to assist you!


Need more help?
If you’re still uncertain or need professional guidance, don’t hesitate to contact us. You can contact us via email or submit a ticket with a description of your issue. Our team of experts is always available to help you with any questions. Rest assured that we’ll respond to your inquiry promptly.
Love what you see?
Do you like the quality of our products, themes, and applications, or perhaps the design of our website caught your eye? You can have similarly outstanding designs for your website or apps. Contact us, and we’ll bring your ideas to life.
