
Form Builder – WorkDo Dash SaaS Add-On Guide
Learn how to create, customize, and manage forms and submissions in WorkDo Dash SaaS.
Introduction
Form Builder is a versatile tool that simplifies the creation and sharing of custom forms for websites and applications. With its user-friendly click-to-add field interface, users can easily add elements like Text, Email, Date Pickers, Numeric Inputs, Phone, URL, Password, Textarea, Select Dropdown, Radio Buttons, Checkbox, and Time fields to design forms that match their branding and needs. These forms are perfect for generating leads, collecting data, and managing various types of inquiries. The system supports multiple layout options, including single column, two column, and card layouts for optimal user experience. Once the form is created, users get a shareable link with secure access, making it easy to integrate into any website or app. The advanced conversion feature allows automatic integration with other WorkDo modules, creating records based on form submissions for seamless workflow automation.
How to Install the Add-On?
To Set Up the Form Builder Add-On you can follow this link: Setup Add-On.
How to use the Form Builder Add-On?
Manage Form Builder
- To configure the new form, click on the “Create” button located at the top right of the page to open the Form Builder screen. Enter a Form Name, select Default Layout from the dropdown (Single Column, Two Column, Card Layout).
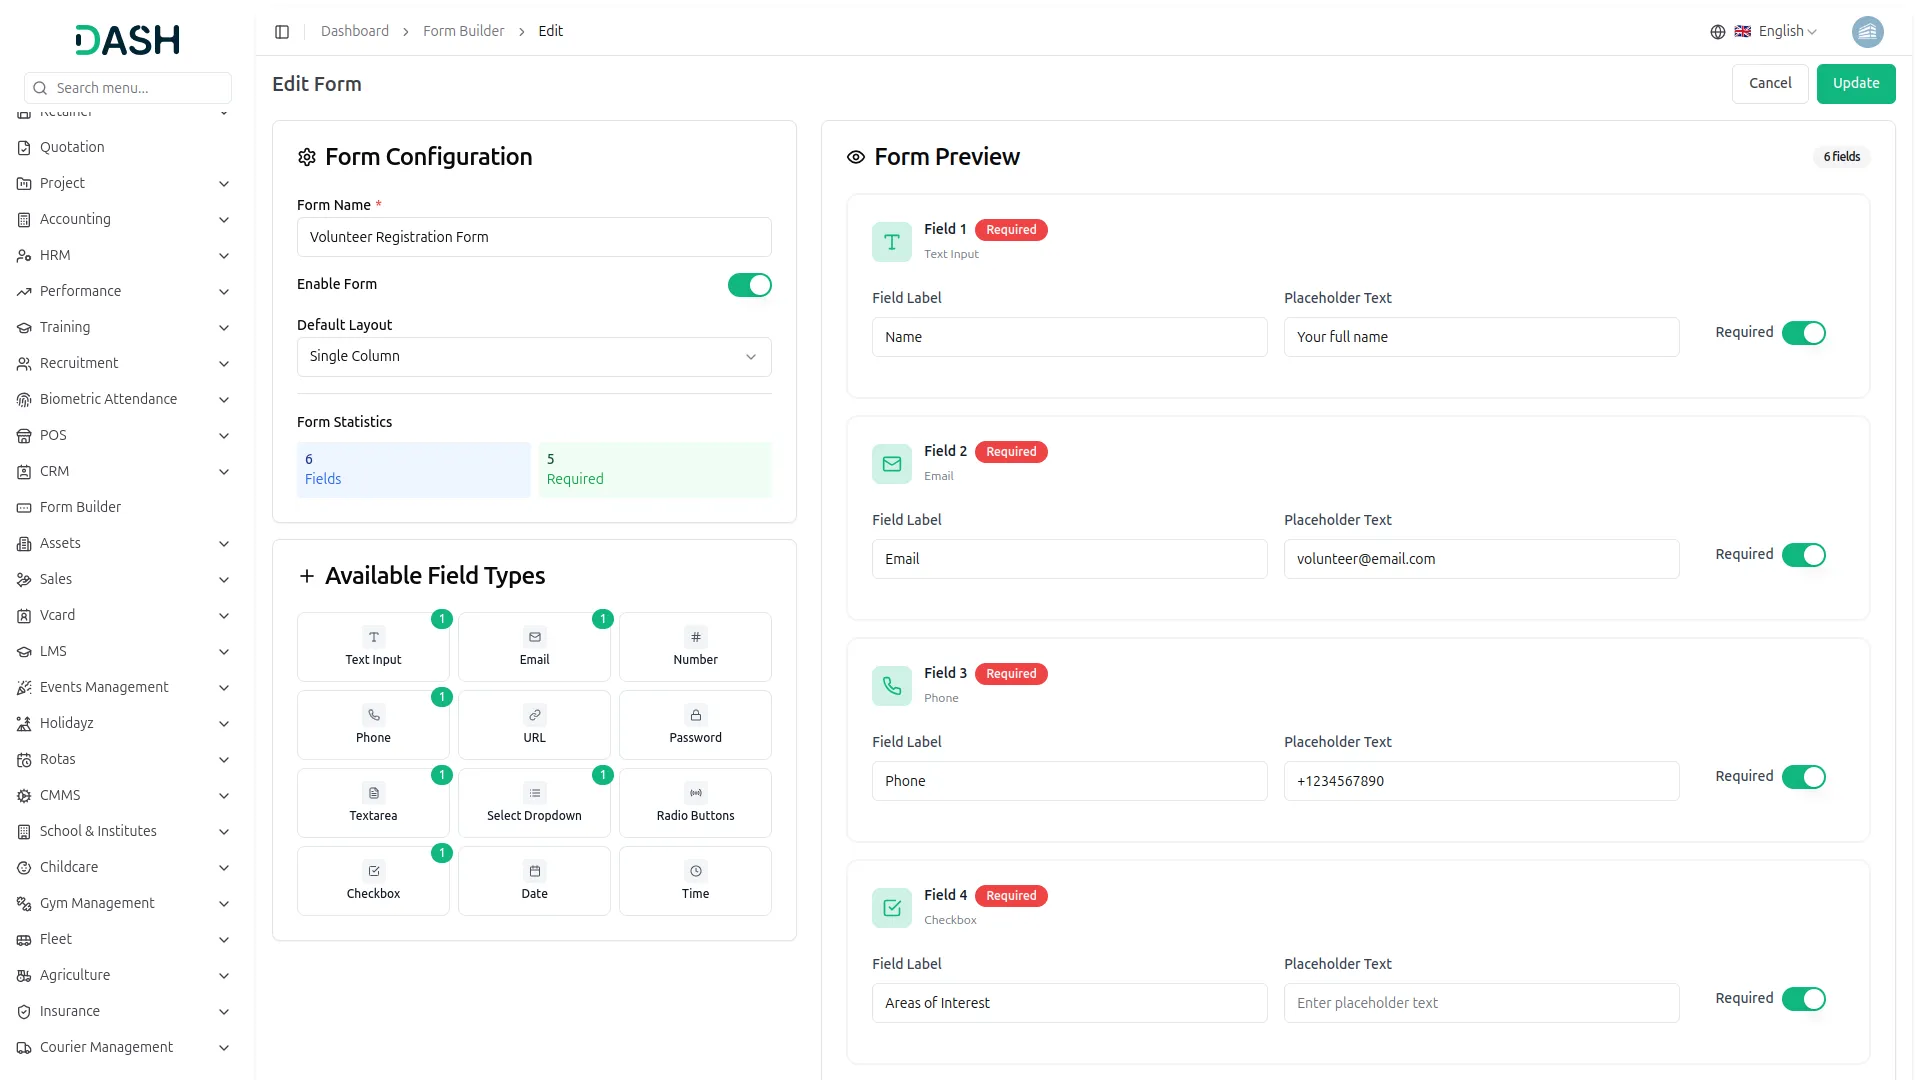
- Use the Active Toggle to control form availability (Active/Inactive), and view Form Statistics to see the real-time count of the total fields added and how many are marked as Required.
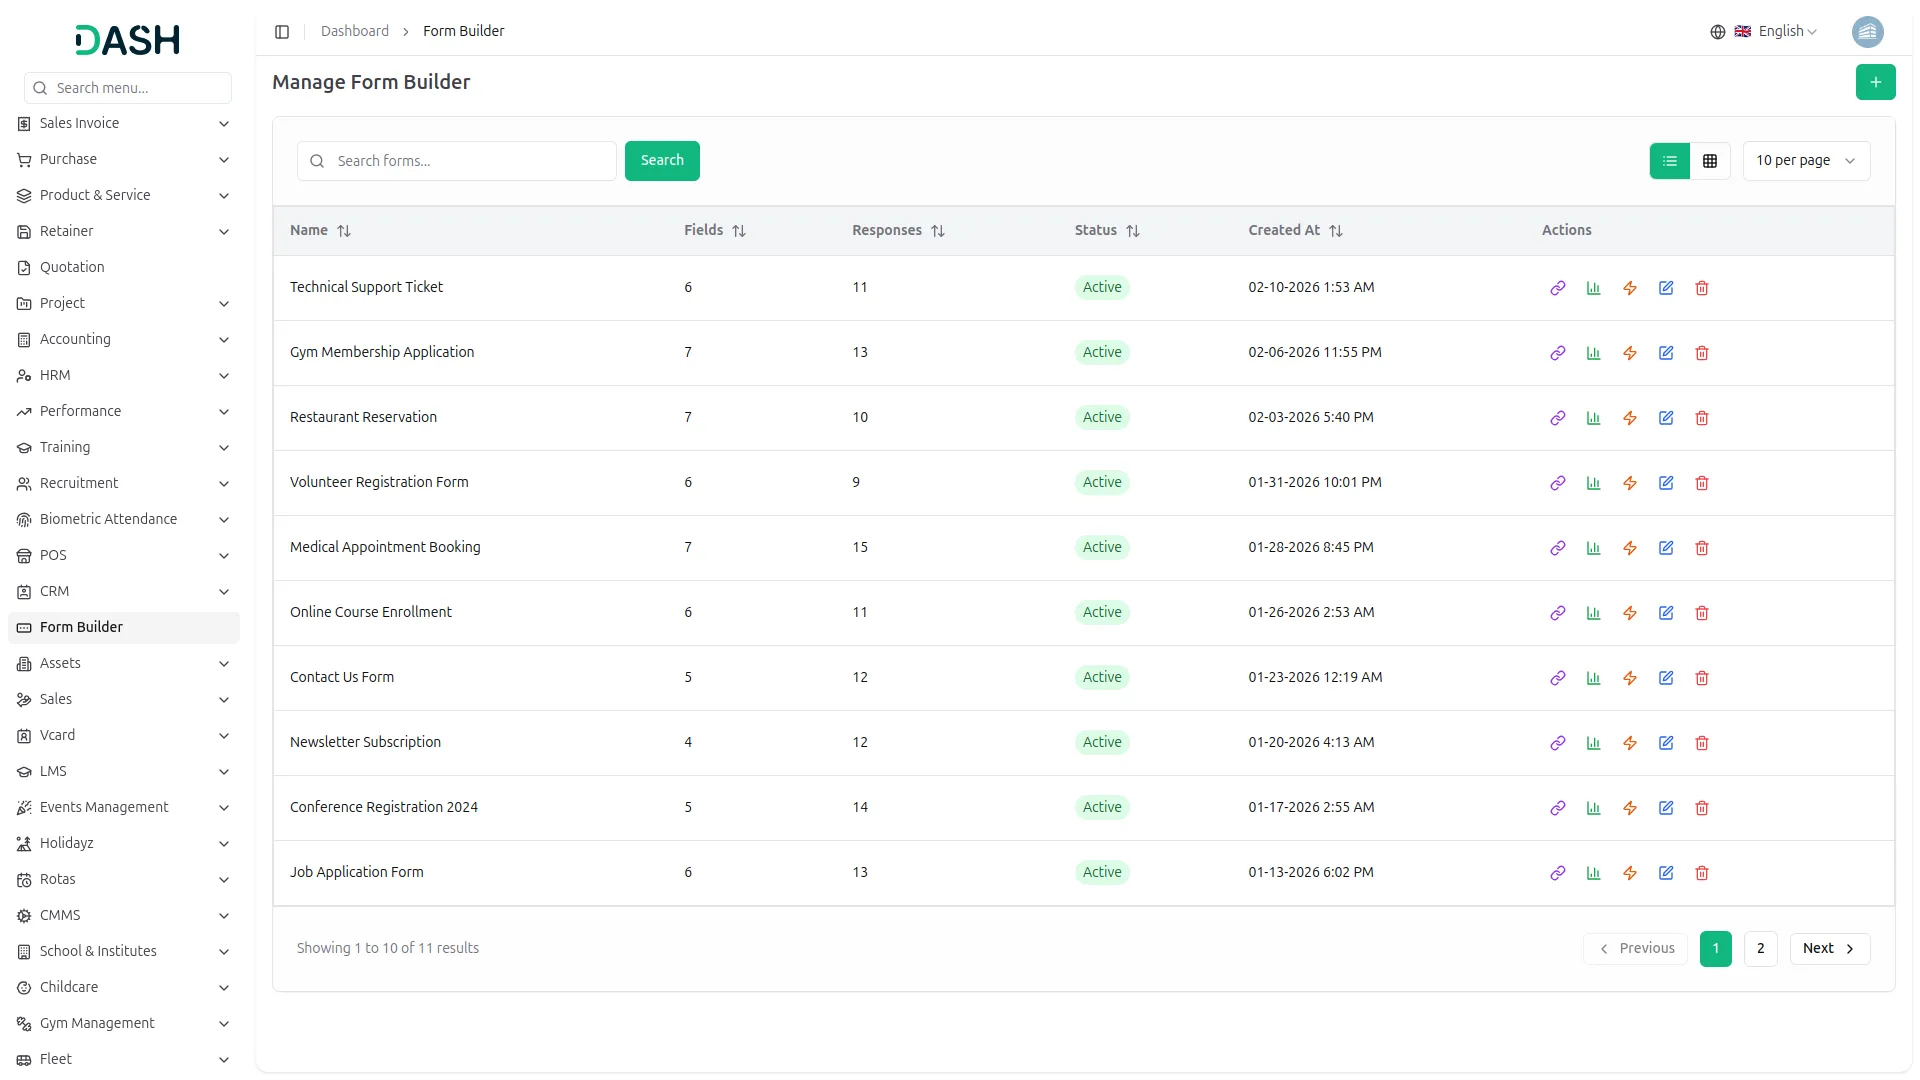
- The Manage Form Builder page displays four summary cards at the top: Total Forms, Active Forms, Converted Forms, and Total Responses, giving you a quick overview of your form activity.
- Below that, the page shows a table of your forms with columns for Name, Fields, Responses, Created At, Status (toggle to activate or deactivate the form), and Actions. Use the Search bar to find a specific form by name, and use the All / Active / Inactive tabs to filter forms by status.
- In the Actions column, you can click the “Copy URL” option to copy the form’s URL, click the “Convert” option to change the form type, use the “Edit” option to modify the form, or use the “Delete” option to remove it.
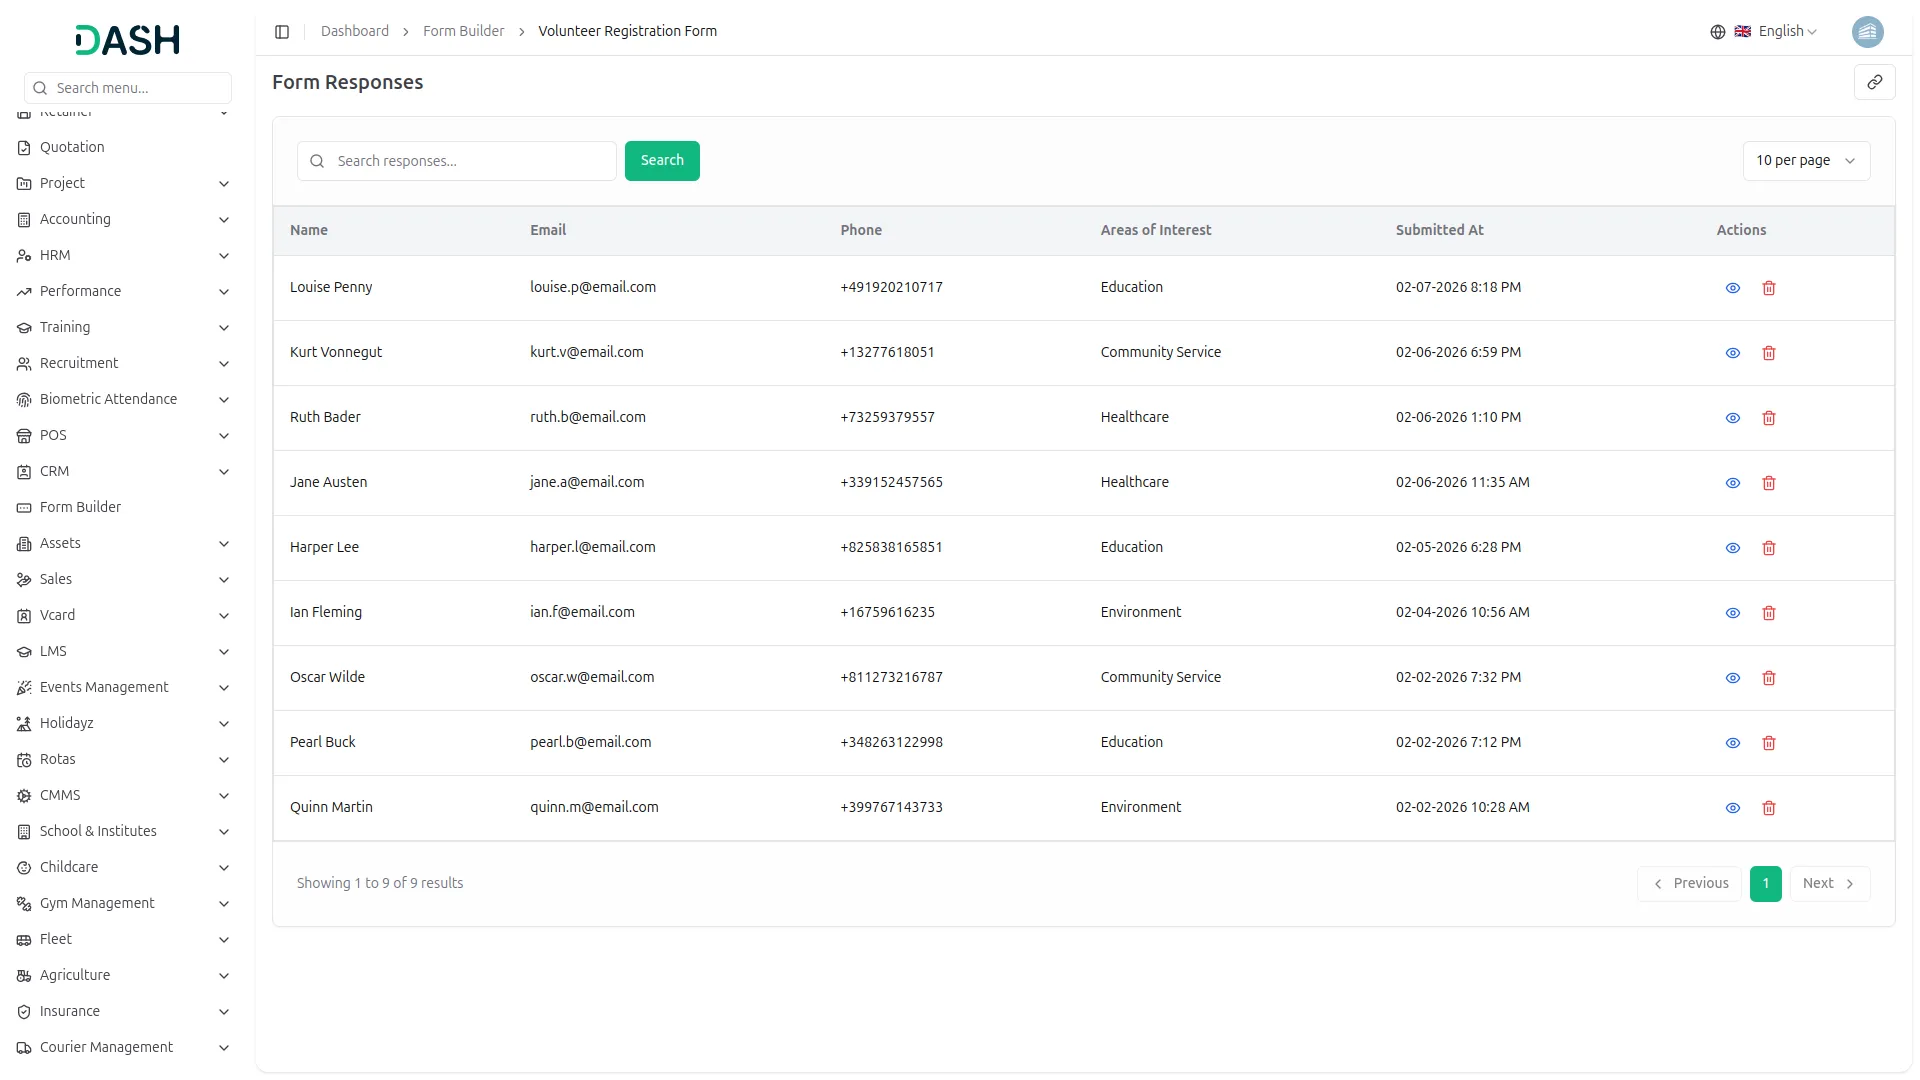
- When you click on a form’s response count, it opens the Form Responses page for that form. Here, you can click “Mark all as read” to clear the unread badge, or click the copy icon to copy the form’s link. Use the Back button to return to the Manage Form Builder page.
- The Form Responses page displays a table with columns for Status, along with the submitted answers: Name, Email, Rating, Comments, Submitted At (with a relative time shown below the date), and Actions, where you can view a response in detail or delete it. Use the Search bar to find a specific response.
- When you click Convert, open the Convert To page for that form. First, turn on Enable Conversion so the system knows to create records automatically whenever someone submits your form.
- Next, pick where those records should be, select a Module, and then a sub-module within it, depending on your selected module. The Field Mapping section appears below, showing all the fields available in that module.
Managing and Sharing Forms
Next to each form, you’ll find a “Copy Link” button. Clicking this copies the form’s public link to your clipboard.
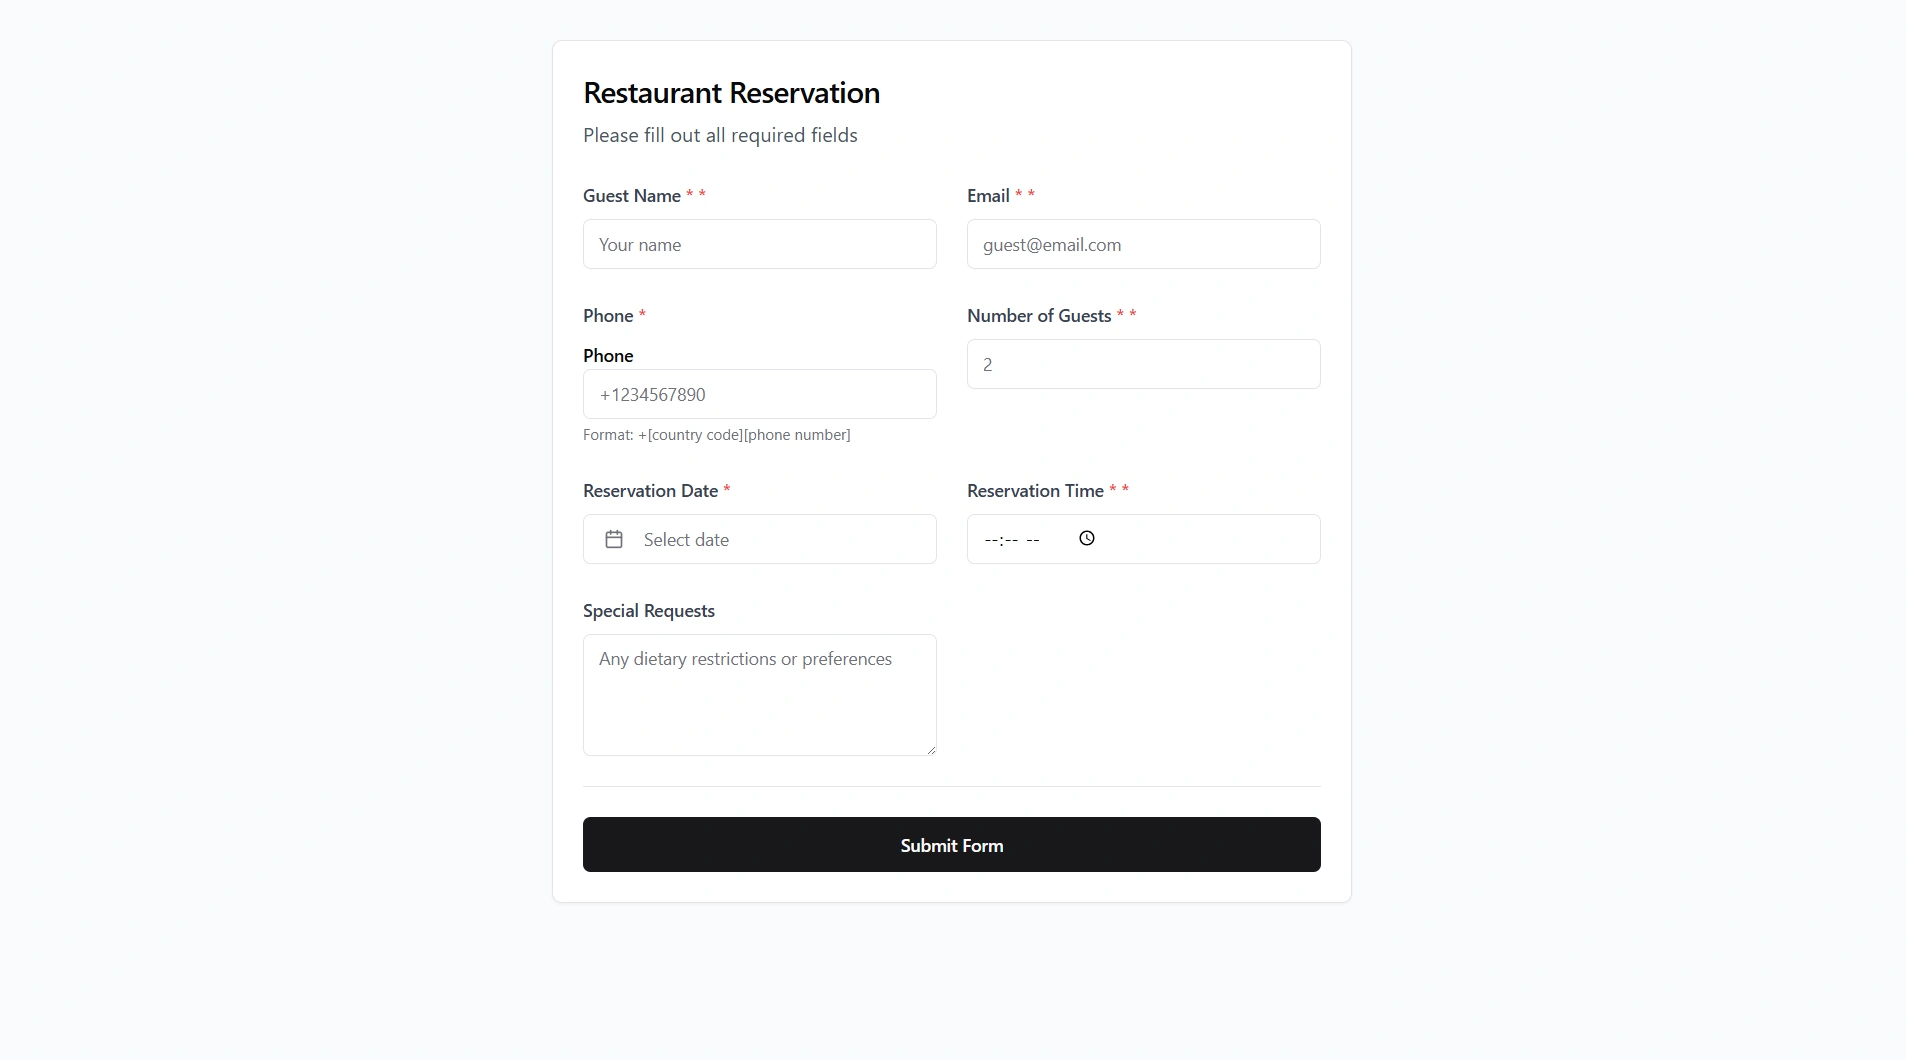
- If the form is activated, users with the link can view and fill out the form.
- If the form is deactivated, users will see a message indicating the form is currently unavailable.
Adding Form Fields
To build the content of your form, use the Available Field Types panel:
- Select from field types:
– Text Input, Email, Number, Phone, URL, Password, Textarea, Select Dropdown, Radio Buttons, Checkbox, Date, Time fields
- You can add multiple fields, as well as edit or delete them anytime.
This flexible field management lets you fully customize what data your form collects.
Viewing Form Responses
- Click the “Responses” button next to each form’s responses.
- View all form submissions in tabular format
- You can see the response of form in tabular format easily.
Converting Forms into Add-Ons
Form Builder allows you to convert your custom forms into other Add-Ons within the platform through advanced field mapping:
- Click the “Convert To” button.
- Module Selection: Choose target module from available modules
- Submodule Selection: Select specific entity within chosen module
- Field Mapping: Map form fields to target module fields
- Enable/Disable Toggle: Control automatic conversion
- Validation: Ensure required mappings are configured
- Suppose if you select the lead feature from the CRM Add-On, then the response that you have got in this form can be added on the lead page of CRM Add-On.
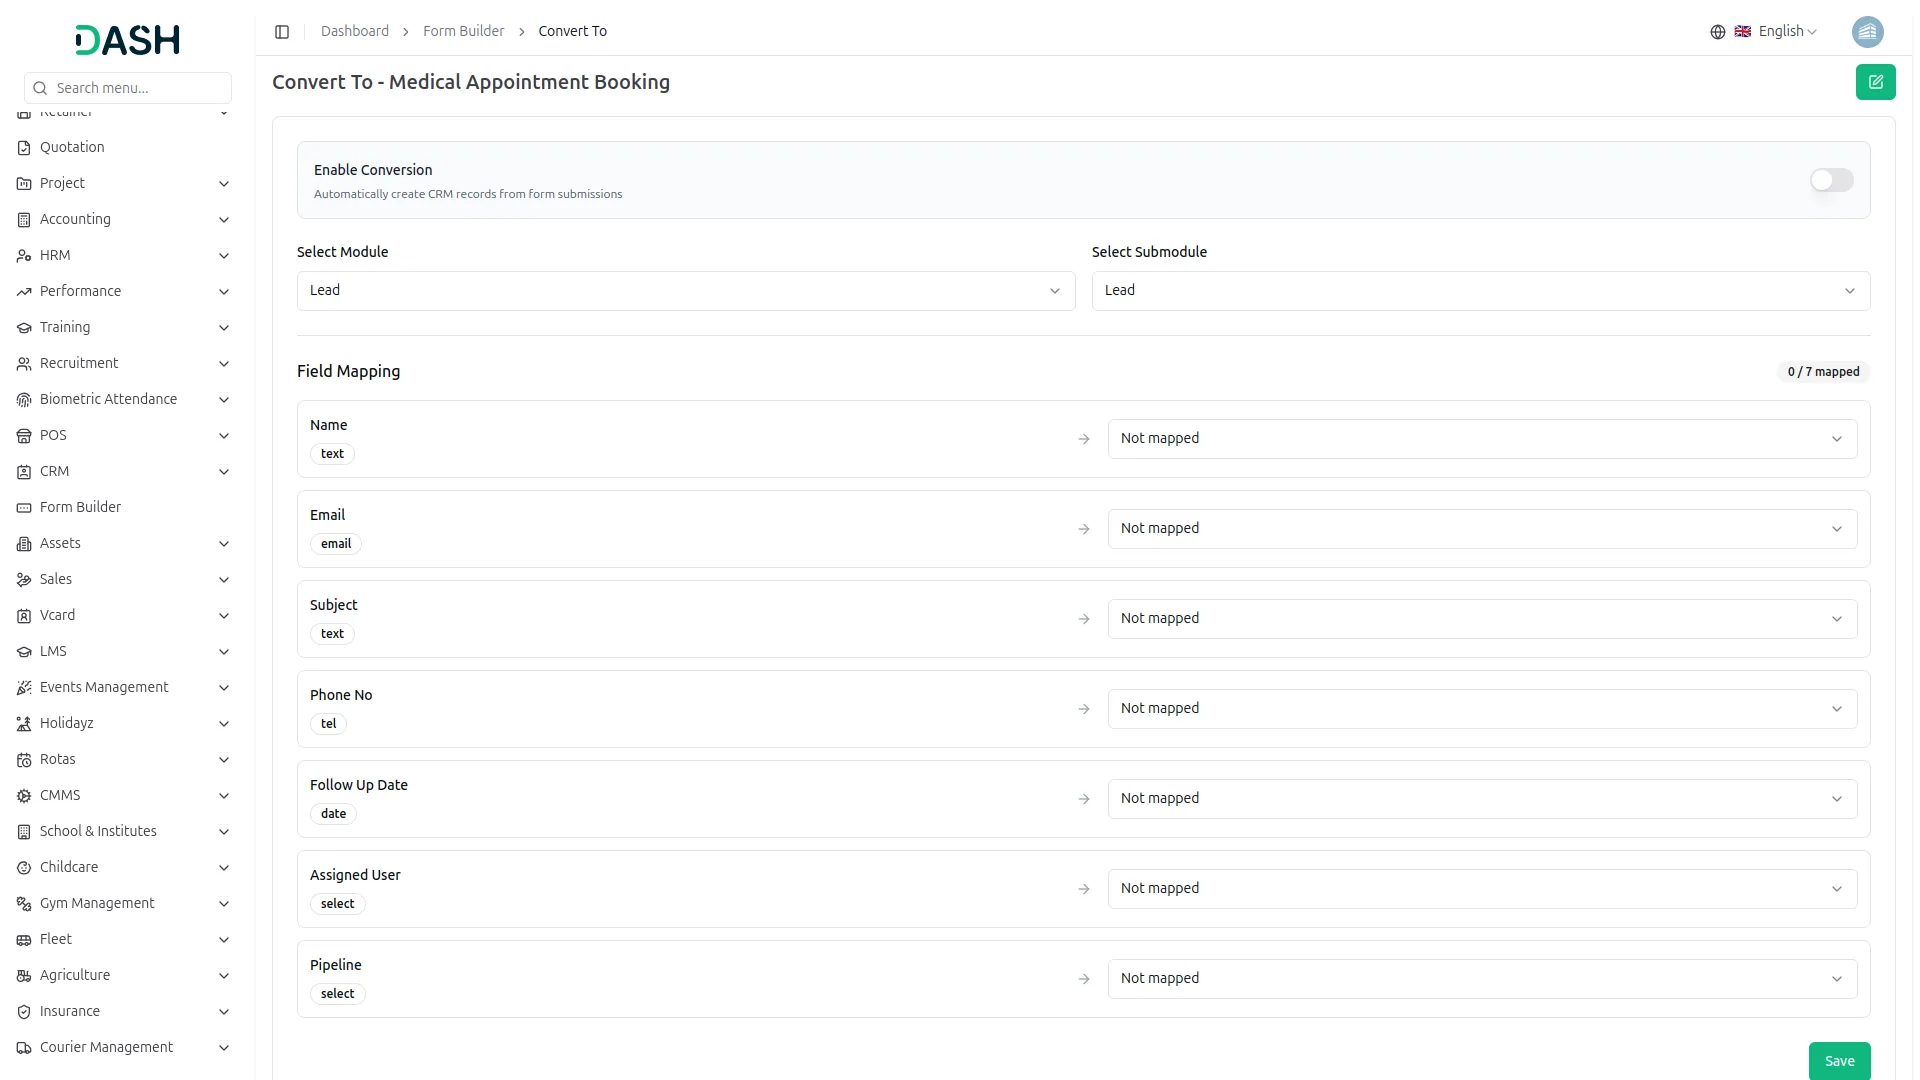
Some of the Add-Ons you can convert forms into include:
Project Management
- Project
CRM
- Lead
- Deal
Sales
- Contact
- Opportunities
CMMS
- Location
Machine Repair Management
- Machine
Note: This is not the complete list. The drop down includes additional Add-Ons you can select from based on your platform setup.
Categories
Related articles
- Construction Management – WorkDo Dash SaaS Add-On Guide
- Google Login – eCommerceGo SaaS Add-On Guide
- Audit & Inspection – WorkDo Dash SaaS Add-On Guide
- Promo Codes – BookingGo SaaS Add-On Guide
- Monnify – WorkDo Dash SaaS Add-On Guide
- Report Abuse – BookingGo SaaS Add-On Guide
- Agriculture Management – WorkDo Dash SaaS Add-On Guide
- Document Template – WorkDo Dash SaaS Add-On Guide
- Hospital Management – WorkDo Dash SaaS Add-On Guide
- Beverages Production System – WorkDo Dash SaaS Add-On Guide
- User Management, Roles & Permissions Guide
- Backup & Restore – eCommerceGo SaaS Add-On Guide
We're Here to Help - Let's Talk
Have questions about our solutions, customization services, or business tools? Our team is here to help you. let's talk.