
Requests – WorkDo Dash SaaS Add-On Guide
Learn how to create and manage service requests in WorkDo Dash SaaS easily.
Introduction
The Requests Add-On is a comprehensive system designed to help organizations manage incoming requests efficiently. It allows you to create customizable request forms, organize them by categories and subcategories and track responses when appropriate. The platform streamlines the entire request management process, from form creation to final resolution.
How to Install the Add-On?
To Set Up the Requests Add-On you can follow this link: Setup Add-On.
How to use Requests Add-On?
Manage Requests
- To create a new request, click the “Create” button at the top of the Manage Requests page. Enter important details such as Name. Choose the Category from the dropdown (comes from the system setup category).
- After selecting a category, the Sub Category dropdown will appear (fetched from the System Setup Sub Category). Then, choose the appropriate Sub Category, Form Layout Style, Color Theme, and Website Theme.
- Toggle the Active checkbox to make the request active or inactive. Then set up the form layouts as needed.
- The list page shows all requests with columns like Name, Category, Sub Category and Is Active. You can search, filter, or add new requests using the buttons at the top.
- At the top of the page, you will see a filter search button, where you can easily search for the forms easily.
- To create a new request type, click the “Create” button on the Manage Requests page. Enter a Name for the request, select a Category from the dropdown (or click “Create category” to add a new one), and select a Sub Category from the dropdown, which becomes available once a Category is chosen (or click “Create sub category” to add a new one).
- Under Form Layout Style, choose how your request form will appear to users, Website Style, Card Stack, or Sidebar Steps. Under Color Theme, select your preferred color scheme from the available swatches, and under Website Theme, choose a style from the dropdown (Modern, Minimal, Corporate, Creative, or Tech).
- Finally, toggle Activate Request on to enable this request type for users, and click Create to save it, or Cancel to discard your changes.
- The Manage Requests page displays a table of request types with columns for Name, Category Name, Sub Category Name, Responses, Is Active, and Actions. Use the Search bar to find a specific request, and use the All / Active / Inactive tabs to filter by status. You can also filter using the All Categories and All Sub Categories dropdowns; click “All Responses” to view responses across every request.
- In the Actions column, you can click the “Copy Form Link” option to copy the form’s URL, click the “Form Fields” option to manage the form’s fields, and use the “Edit” option to modify the request, or use the “Delete” option to remove it.
- When you click the Form Fields option next to a request to open its Manage Form Fields page. Under Available Field Types, you can choose from twelve different field types, including Text, Email, Number, Textarea, Date, Time, Phone, URL, Password, Select, Radio, and Checkbox.
- Click on any field type to add it to your form; a small counter badge appears on the field type once it has been added, showing how many times it’s been used.
- Each field you add appears under Form Preview, where you can set its Field Label, toggle Required on or off, reorder it using the up and down arrows, or remove it using the delete icon. As you build your form, the Live Preview panel on the right updates in real time, showing exactly how the form will appear to users step by step, along with a progress indicator showing the current step and completion percentage.
- Available actions include Copy Link (shows the request form after copying the link), Form Field button, View Responses (click to show Forms Responses Details), Edit, and Delete.
Form Field Management
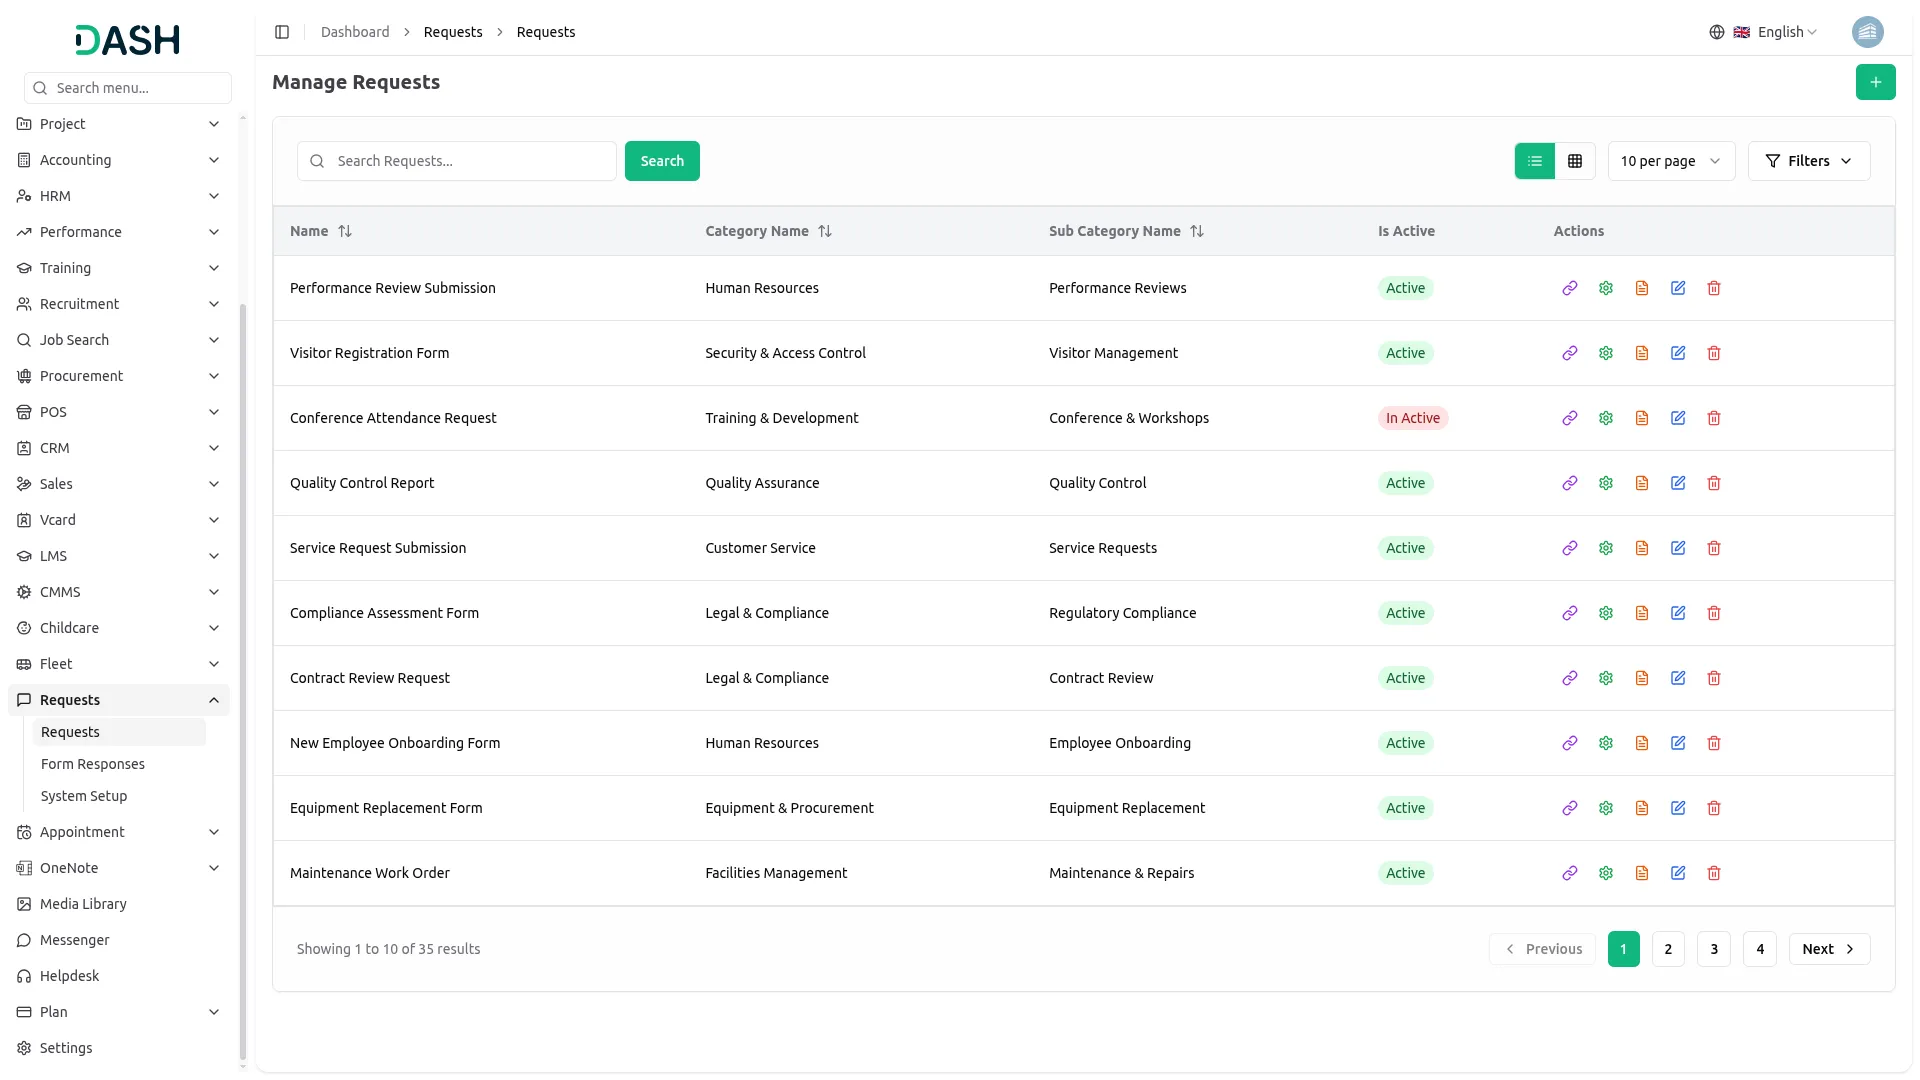
- To manage form fields, click the Form Field button on any request form to open the Form Fields management interface. The page displays all configured fields with the title “Manage Form Fields – [Form Name]” at the top.
- To add a new field, click the “create” button in the top right corner. Enter the Field Name which is the label users will see. This is a required field marked with a red asterisk.
- Select the Field Type from the dropdown menu. Available options include Text for single-line input, Textarea for multi-line input, Email for email validation, Date for date selection, Select for dropdown options, Checkbox for multiple selections, and other field types configured in your system.
- Check the Required Field checkbox to make the field mandatory for form submission. Click “Create” to add the field or “Cancel” to discard changes.
- The field list displays columns for Field Name, Type, Required (Yes/No), and Actions. Use the Search bar to find specific fields, and the Filter button for advanced options.
- Available actions include Edit to modify field properties and Delete to permanently remove the field. Note that deleting fields may affect historical data from previous submissions.
Manage Form Responses
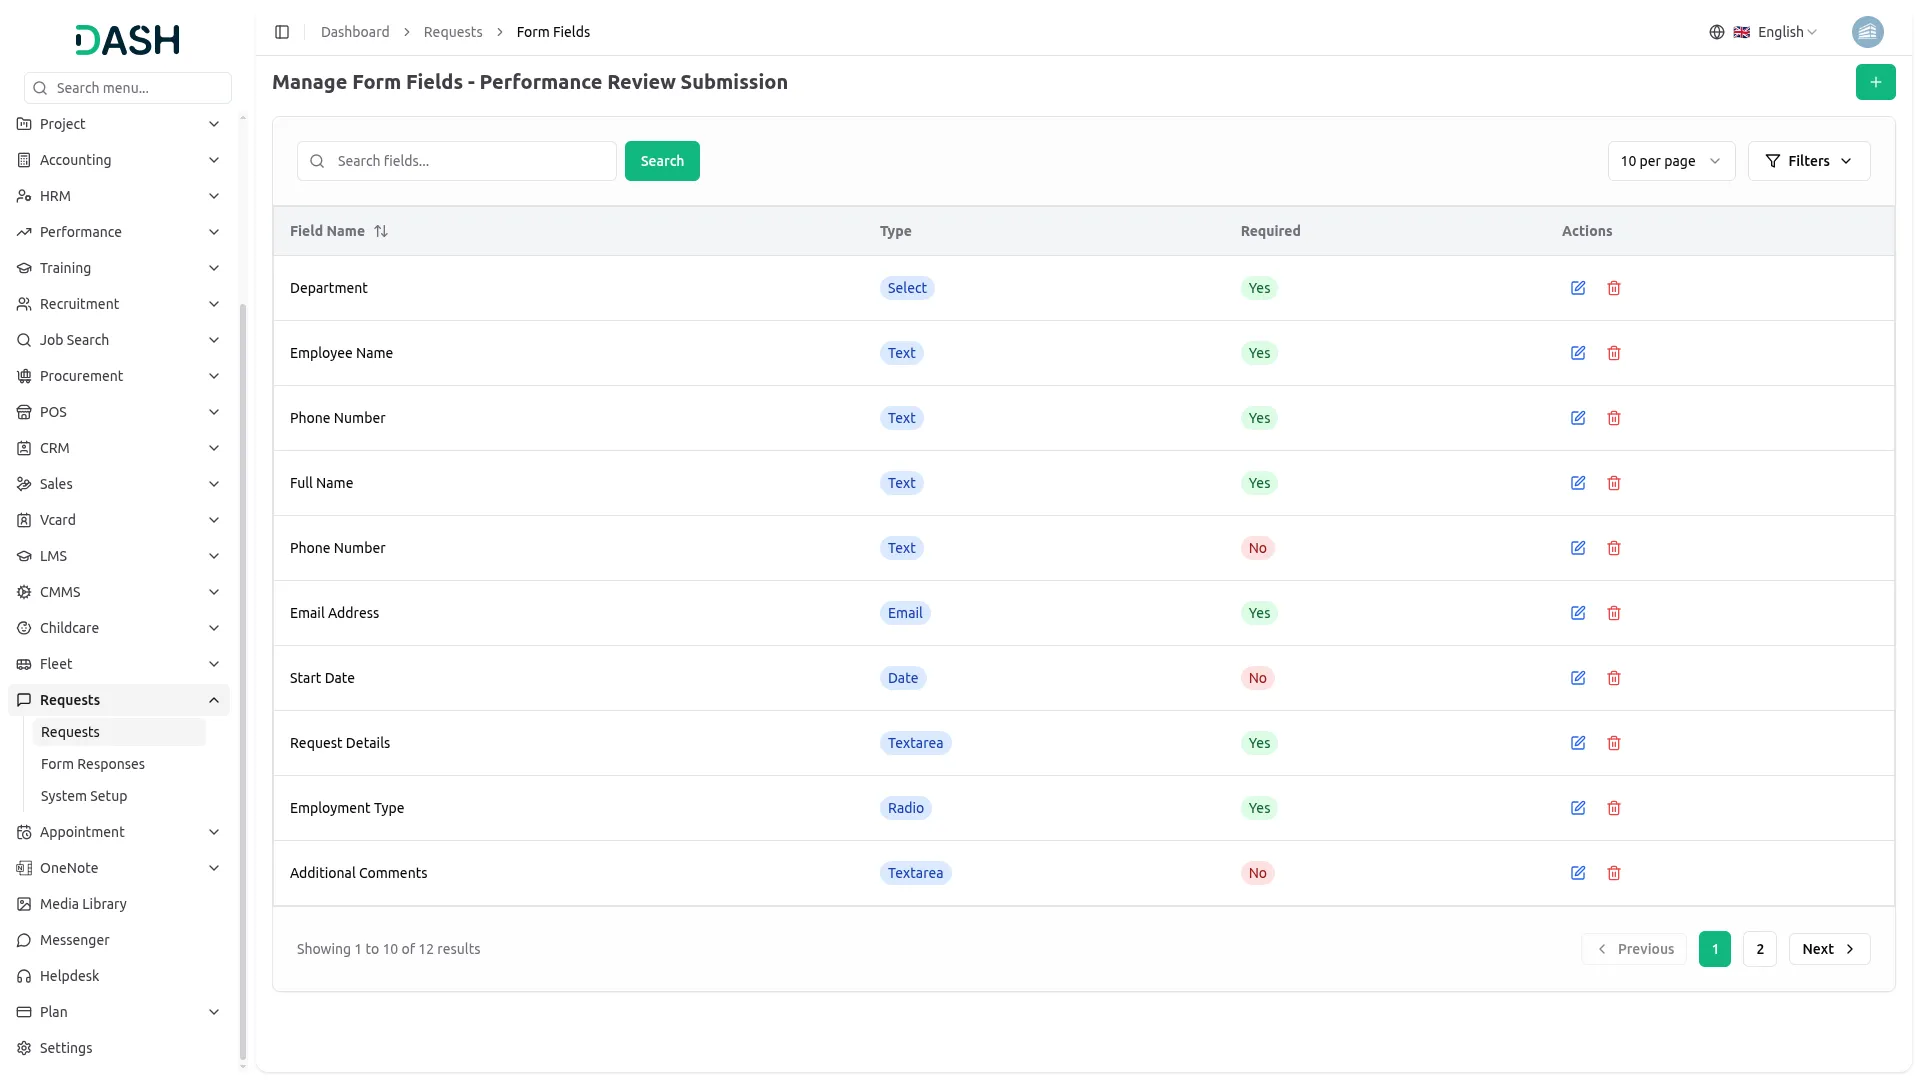
- To view responses, click on Form Responses in the sidebar. A grid view of all responses will appear.
- This view displays the request name, submission time, number of fields submitted, and a View Response button.
- To see the detailed response, click on the View Response button. The information will then be displayed in an accordion format under the respective request.
Manage Category
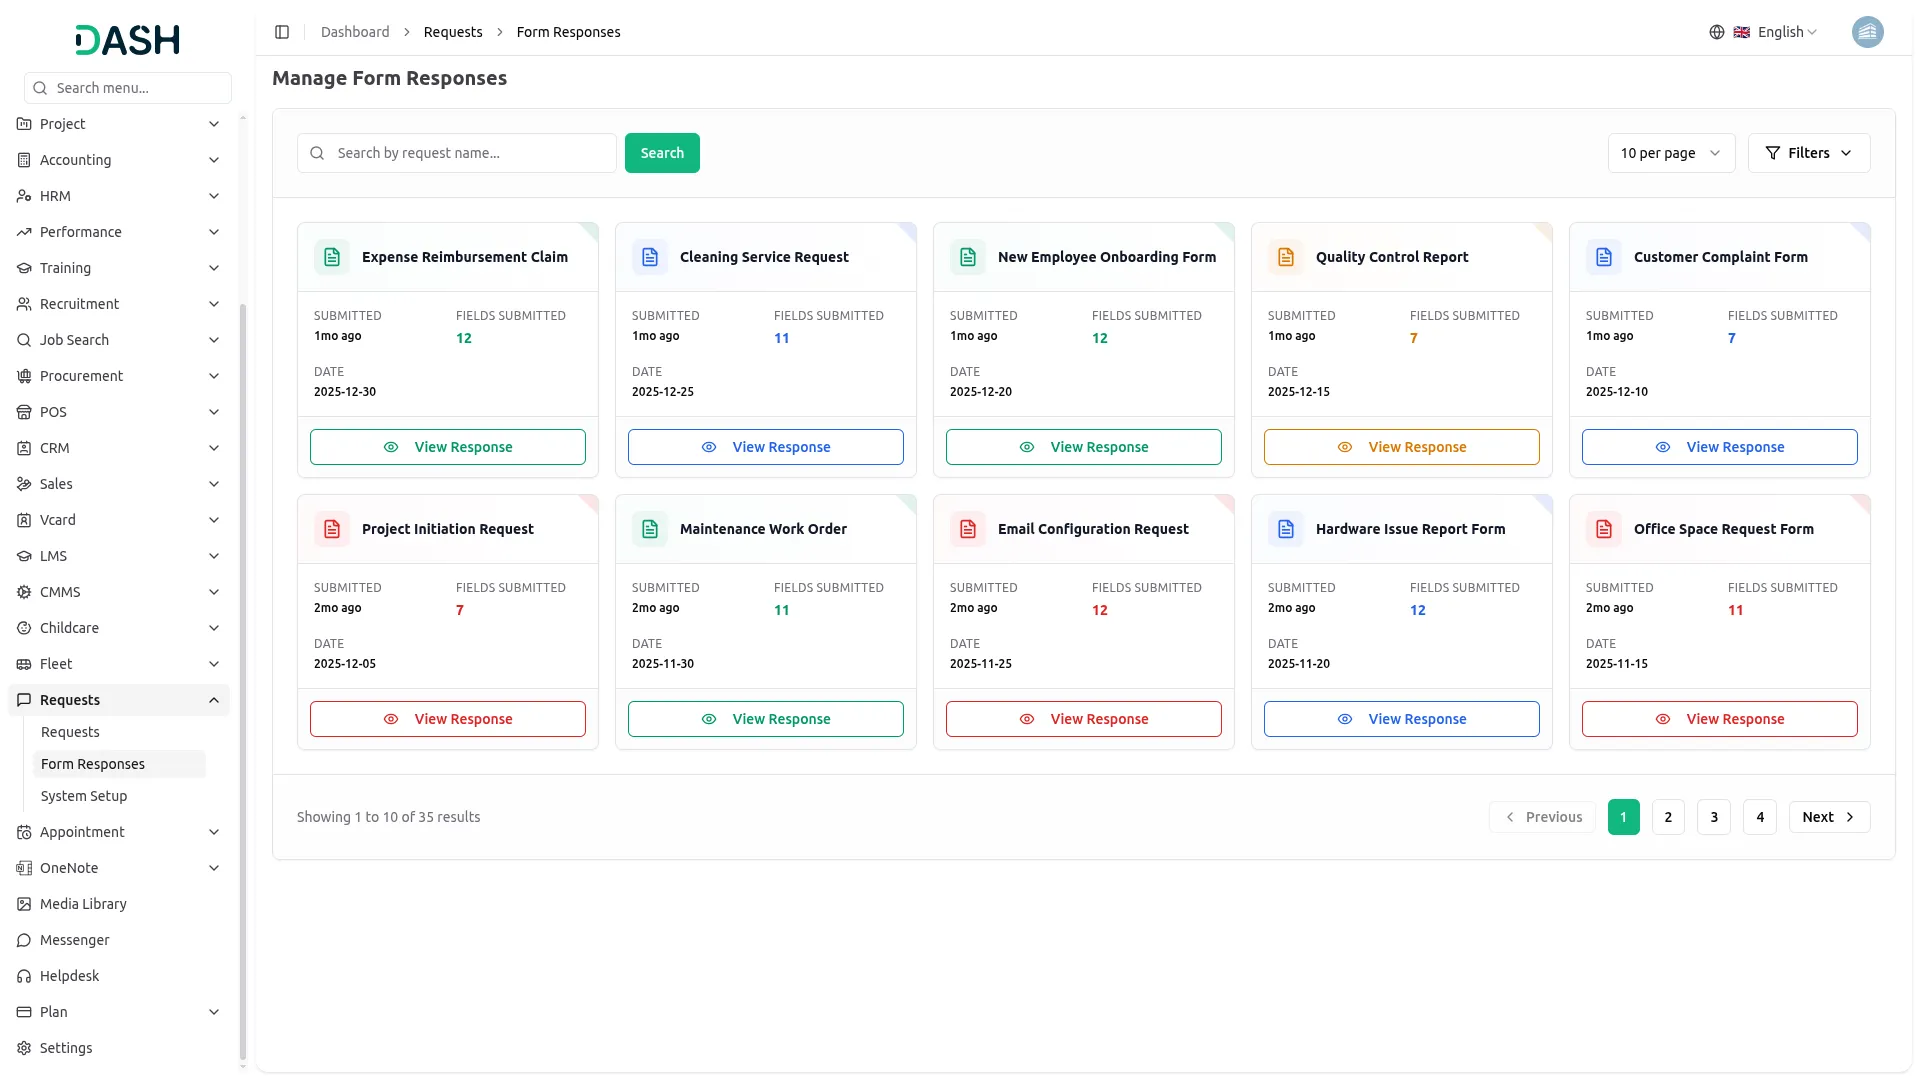
- To create a new category, click the “Create” button at the top of the Manage Category page. Enter the Name of the category and click “Submit” to create.
- The list page shows all categories in a table with No and Name columns. Options include Edit and Delete.
- This section is connected to the Manage Requests section, as categories created here will be available in the Category dropdown when creating a request.
Manage Sub Category
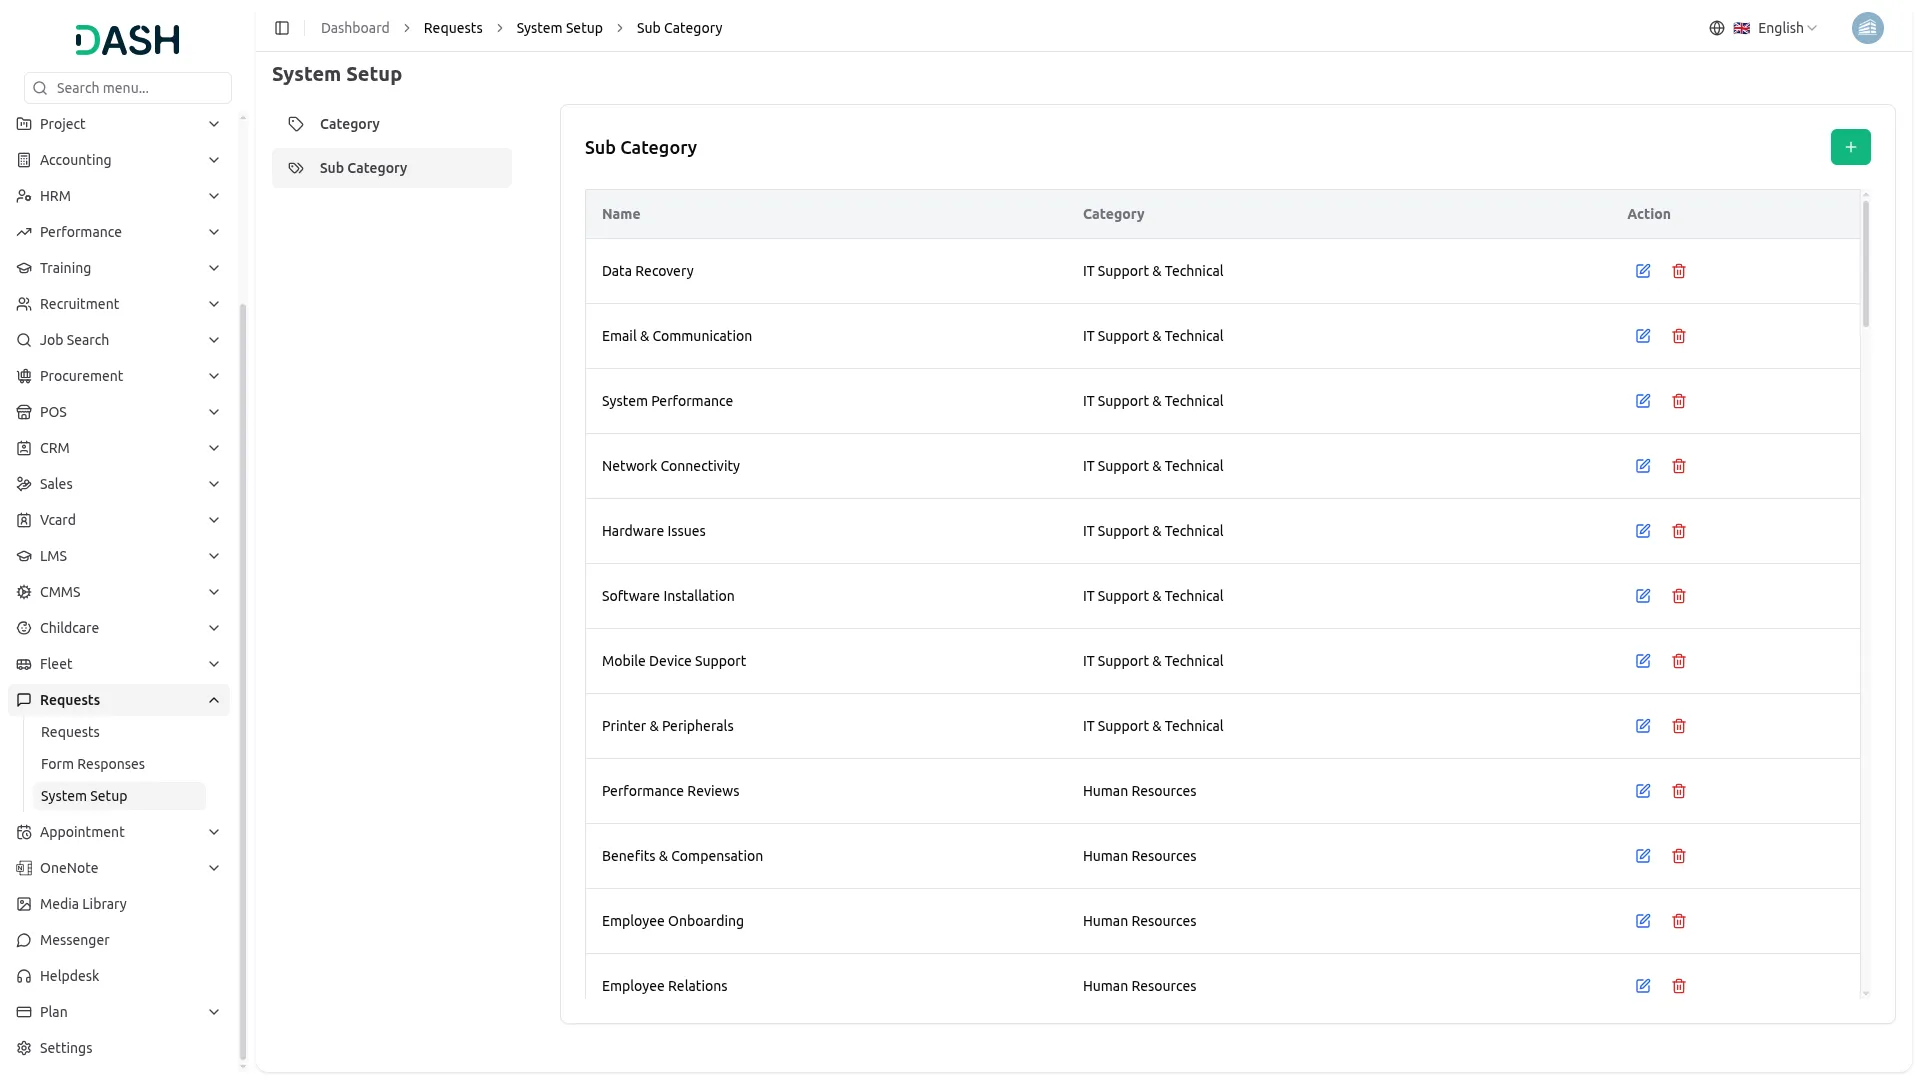
- To create a new sub category, click the “Create” button at the top of the Manage Sub Category page. Enter the Name of the sub category and select the parent Category from the dropdown (comes from the system setup category section).
- The list page shows all sub categories in a table with No, Name, and Category columns. Options include Edit and Delete.
- This section is connected to both the Manage Category and Manage Requests sections. The parent Category must be selected from categories created in the Manage Category section, and the sub categories created here will be available in the Sub Category dropdown when creating a request.
Request Form (Frontend)
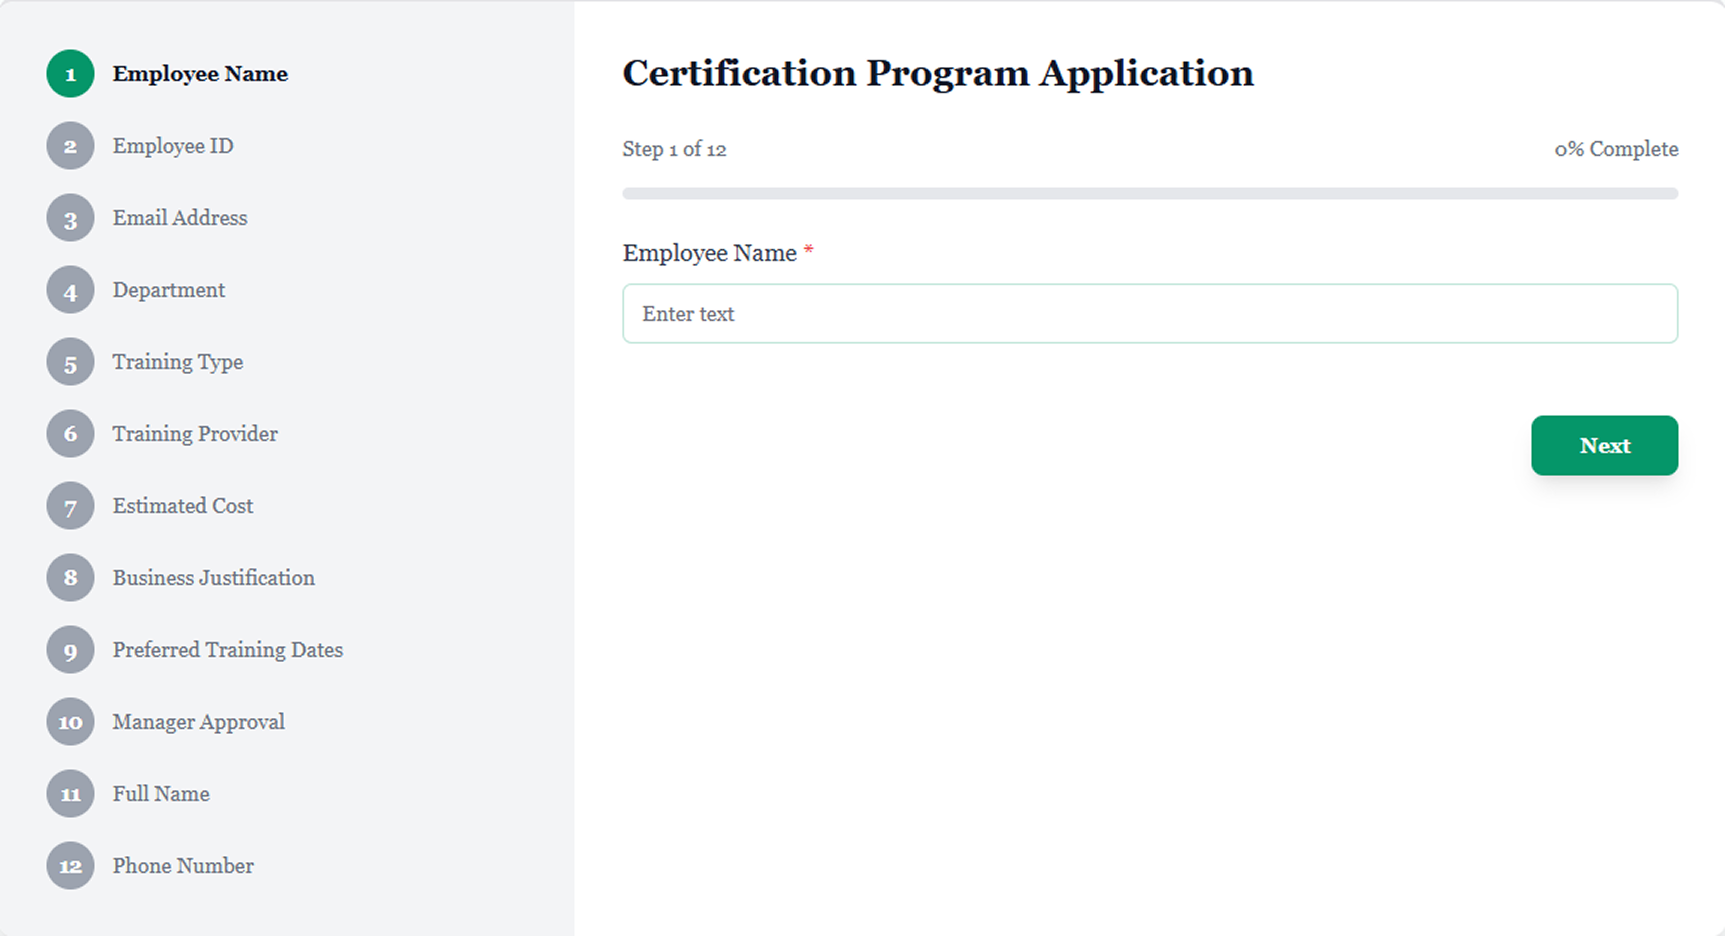
- The Requests Form section handles how users submit requests through the website or application interface (the frontend). This is where your customers or clients fill out and send request information directly.
- When you create or manage requests in the Manage Requests section, you can add custom fields using the Form Field button. These custom fields define exactly what information you want to collect from the users in the request form.
- All these custom fields will appear automatically on the frontend request form. Users will see the updated form with the relevant fields when they open the request form link.
- Users fill in the form with their details and submit it. After submission, the request data is saved and can be managed in the Manage Requests section.
Categories
Related articles
- Vehicle Inspection Management – WorkDo Dash SaaS Add-On Guide
- Partial Payment – eCommerceGo SaaS Add-On Guide
- AamarPay – BookingGo SaaS Add-On Guide
- Auction Product – eCommerceGo SaaS Add-On Guide
- Plivo – TicketGo Add-On Guide
- PayHere – WorkDo Dash SaaS Add-On Guide
- User Manual – Task
- Easebuzz – WorkDo Dash SaaS Add-On Guide
- Porter’s Five Forces – WorkDo Dash SaaS Add-On Guide
- Payfort – WorkDo Dash SaaS Add-On Guide
- Backup & Restore – eCommerceGo SaaS Add-On Guide
- SenangPay – WorkDo Dash SaaS Add-On Guide
Get in Touch
We're Here to Help - Let's Talk
Have questions about our solutions, customization services, or business tools? Our team is here to help you. let's talk.