Gym Management Integration in Dash SaaS
The Gym Management System is a comprehensive software solution designed to streamline gym operations and member management.
Introduction
The Gym Management System is a comprehensive software solution designed to streamline gym operations and member management. This system helps gym owners and staff manage trainers, members, workout plans, class schedules, attendance tracking, personal training sessions, nutritional plans, and health assessments. The system also includes essential setup sections for skills, equipment, body parts, exercises, and diet meals, along with customizable system settings for trainer and member prefixes.
How To Install the Gym Management Add-On?
To Set Up the Gym Management Add-On, you can follow this link: Setup Add-On
How to Use the Gym Management System Add-On?
Dashboard
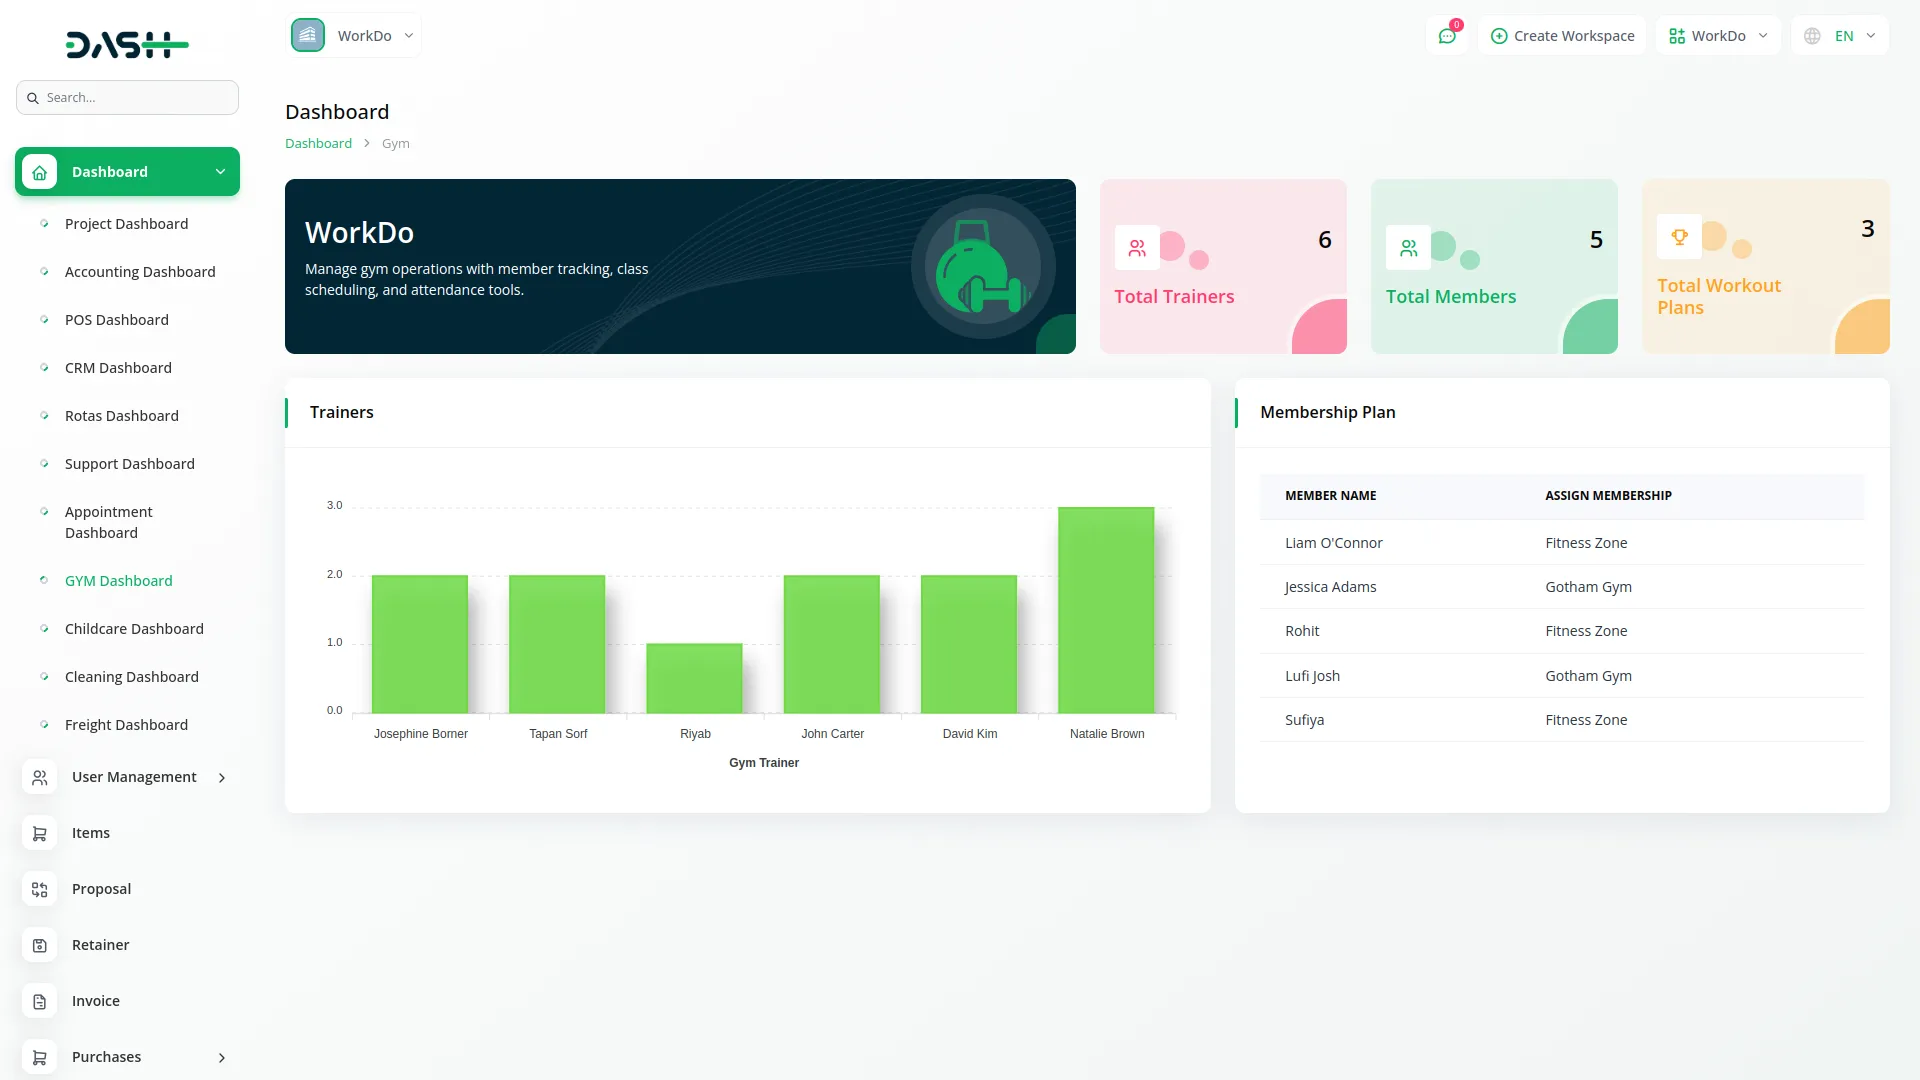
- The Dashboard provides a quick overview of your gym’s key metrics and current status. It displays three main statistics: Total Trainers showing the complete number of trainers in your system, Total Members displaying the total registered members, and Total Workout Plans showing all available workout plans.
- The Trainers graph helps you visualize member distribution by showing how many members are assigned to each trainer.
- The Membership Plan section displays member names along with their assigned membership details, giving you instant access to membership information.
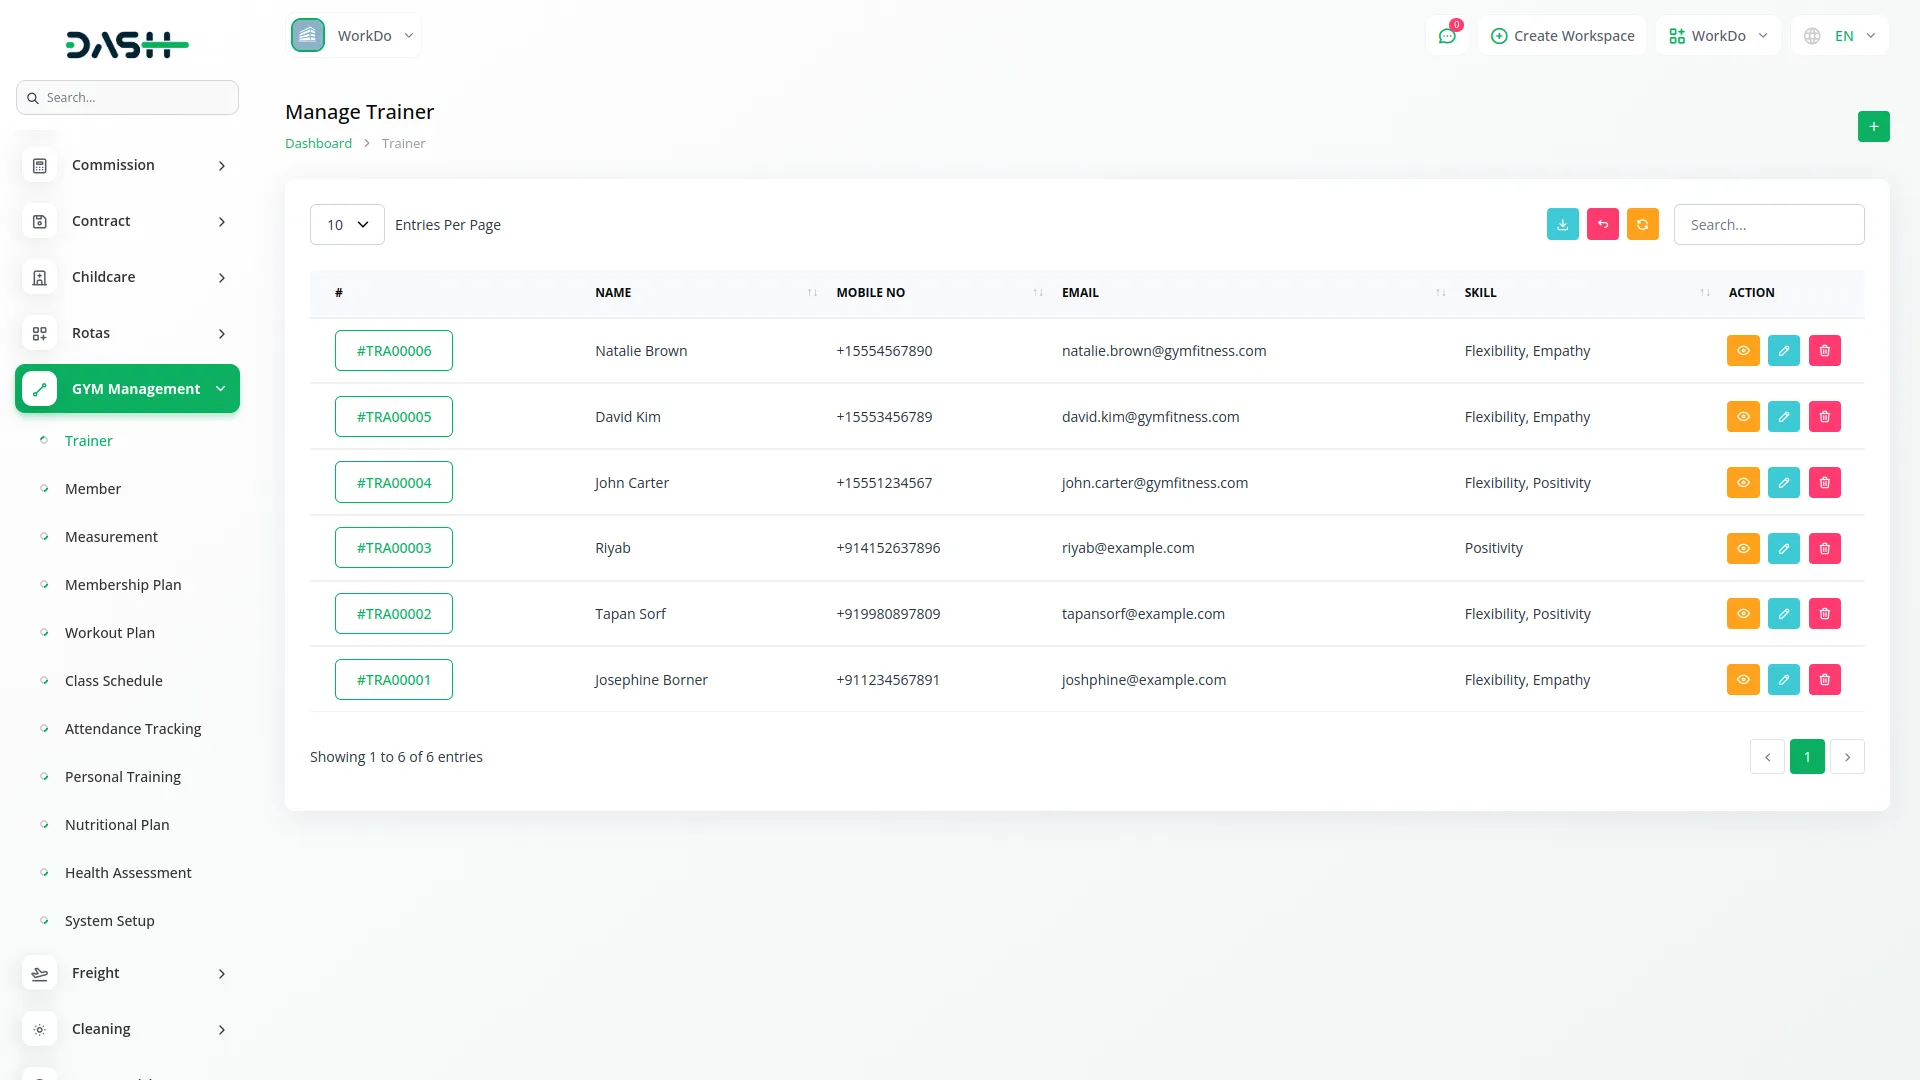
Manage Trainer
- To add a new trainer, click the “Create” button on the trainers page. Fill in the trainer’s name, email, password, and mobile number. Select their skill from the dropdown menu which comes from the System Setup.
- Choose the member from the member dropdown if assigning them immediately. Complete the address information including country, city, state, and zip code. Click “Submit” to create the trainer profile.
- The list page shows all trainers in a table with columns for serial number, name, mobile number, email, and skill. You can use the Search button to find specific trainers or Export button to download trainer data.
- In the Actions column, click the “View” button to show trainer details and assign member information. Use the “edit” button to modify trainer information or “Delete” to remove a trainer from the system.
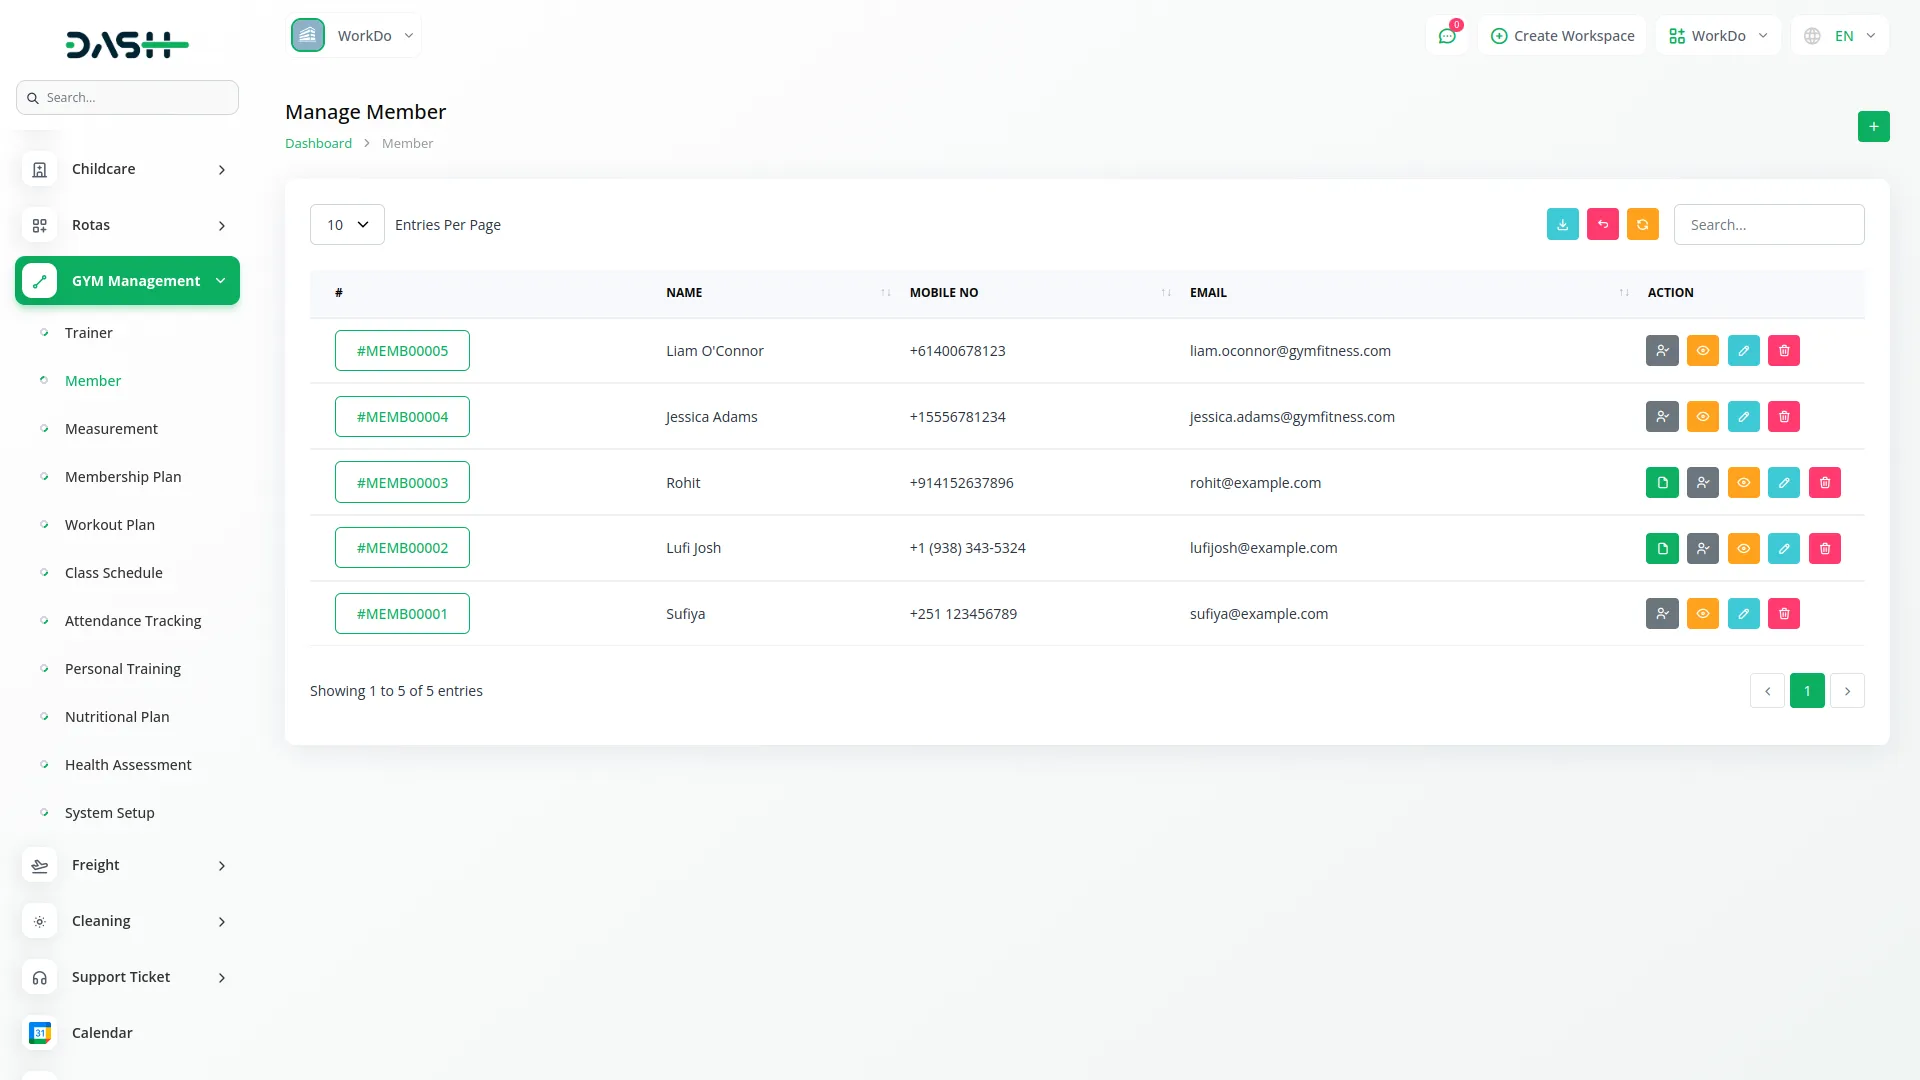
Manage Member
- To create a new member, click the “Create” button on the members page. Enter the member’s name, email, password, and mobile number.
- Fill in their complete address including country, city, state, and zip code. Click “Submit” to create the member profile.
- The list page displays all members with columns showing serial number, name, mobile number, and email. Use the Search and Export buttons for finding and downloading member data.
- The Actions column provides several options: “Copy” for payment of the assigned membership plan, “Assign Membership Plan” to assign a membership plan to the member, the “View” button to show member details where you can also assign workout plans, view exercise lists, and add exercises. The “edit” button and “Delete” options are also available for managing member information.
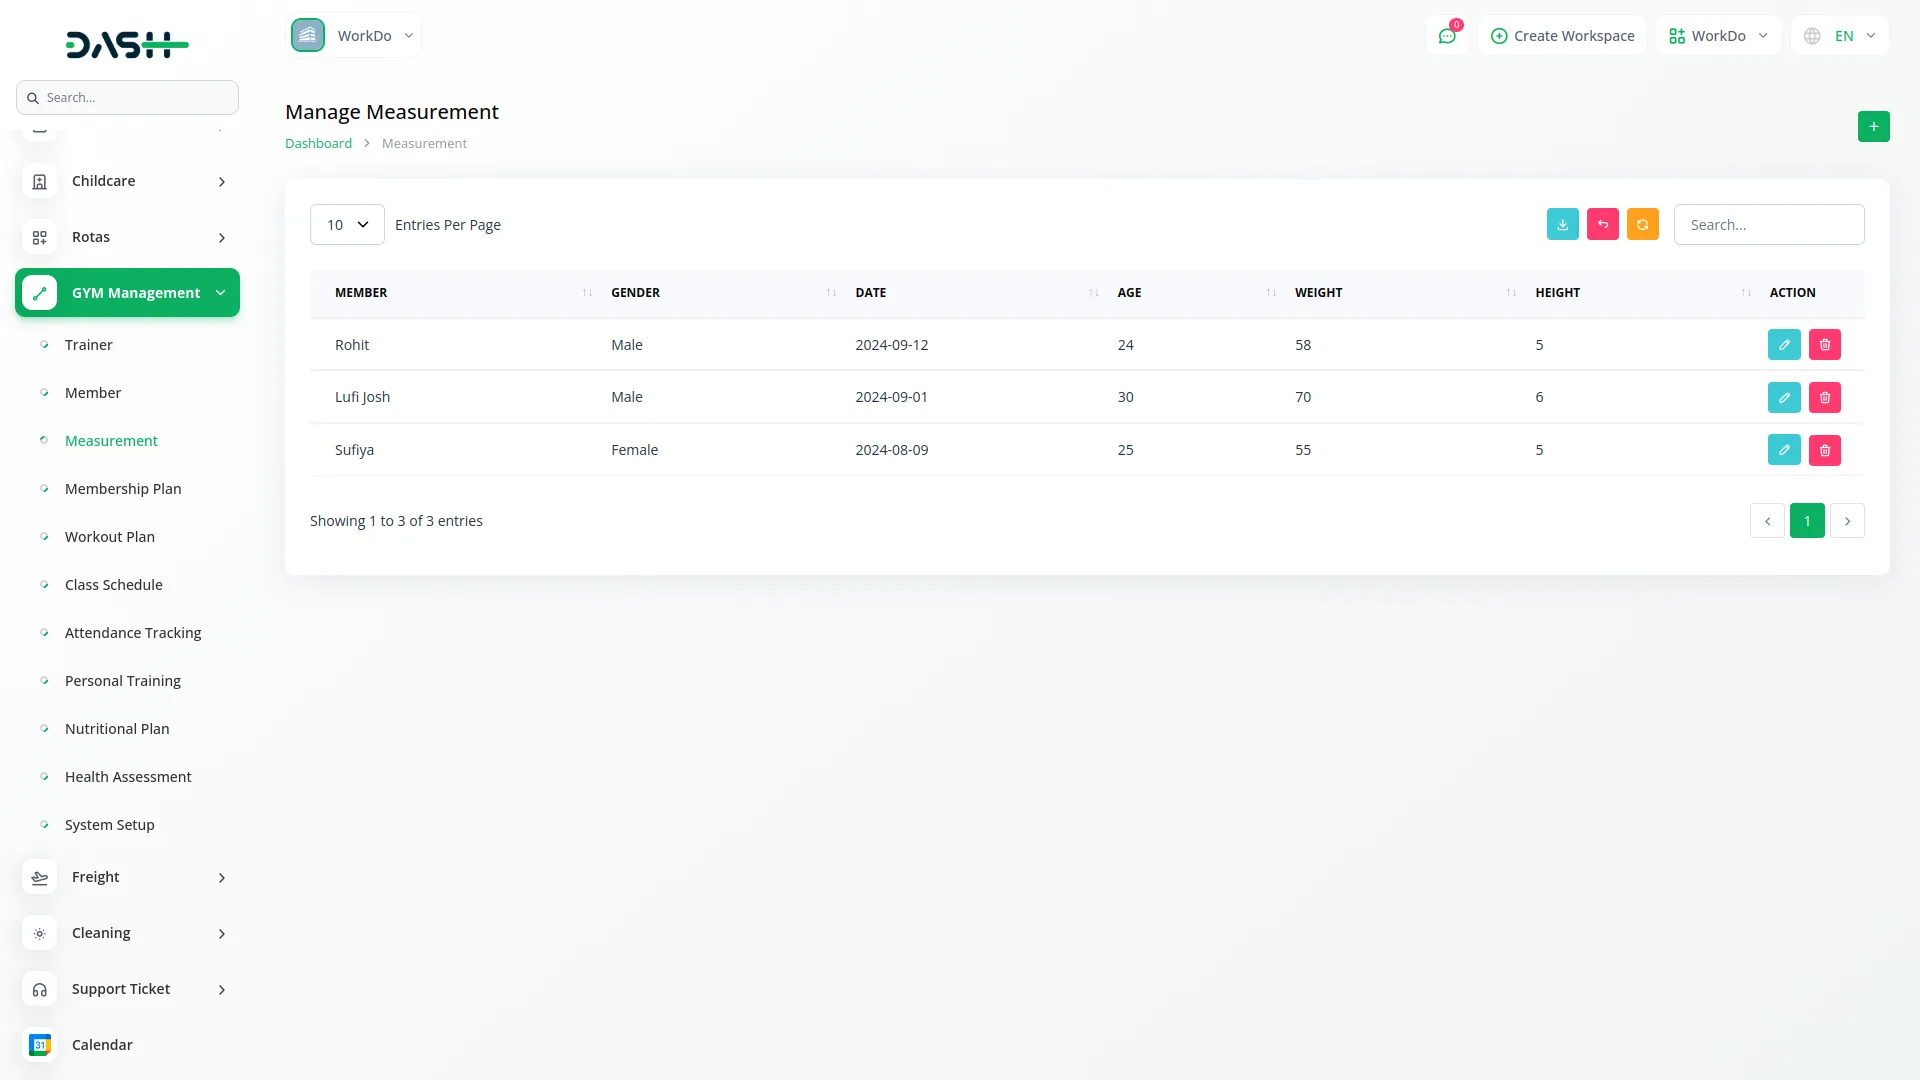
Manage Measurement
- To record member measurements, click the “Create” button on the measurements page. Select the member from the dropdown menu, choose their gender (Male or Female), and enter the measurement date.
- Fill in their age, weight, height, neck measurement, chest measurement, calf measurement, waist measurement, BMI, and BMR values. Click “Submit” to save the measurements.
- The list page shows all measurement records with columns for member name, gender, date, age, weight, and height. Use Search and Export buttons to manage the measurement data.
- In the Actions column, click the “View” button to show complete measurement details, the “edit” button to modify existing measurements, or the “Delete” button to remove measurement records.
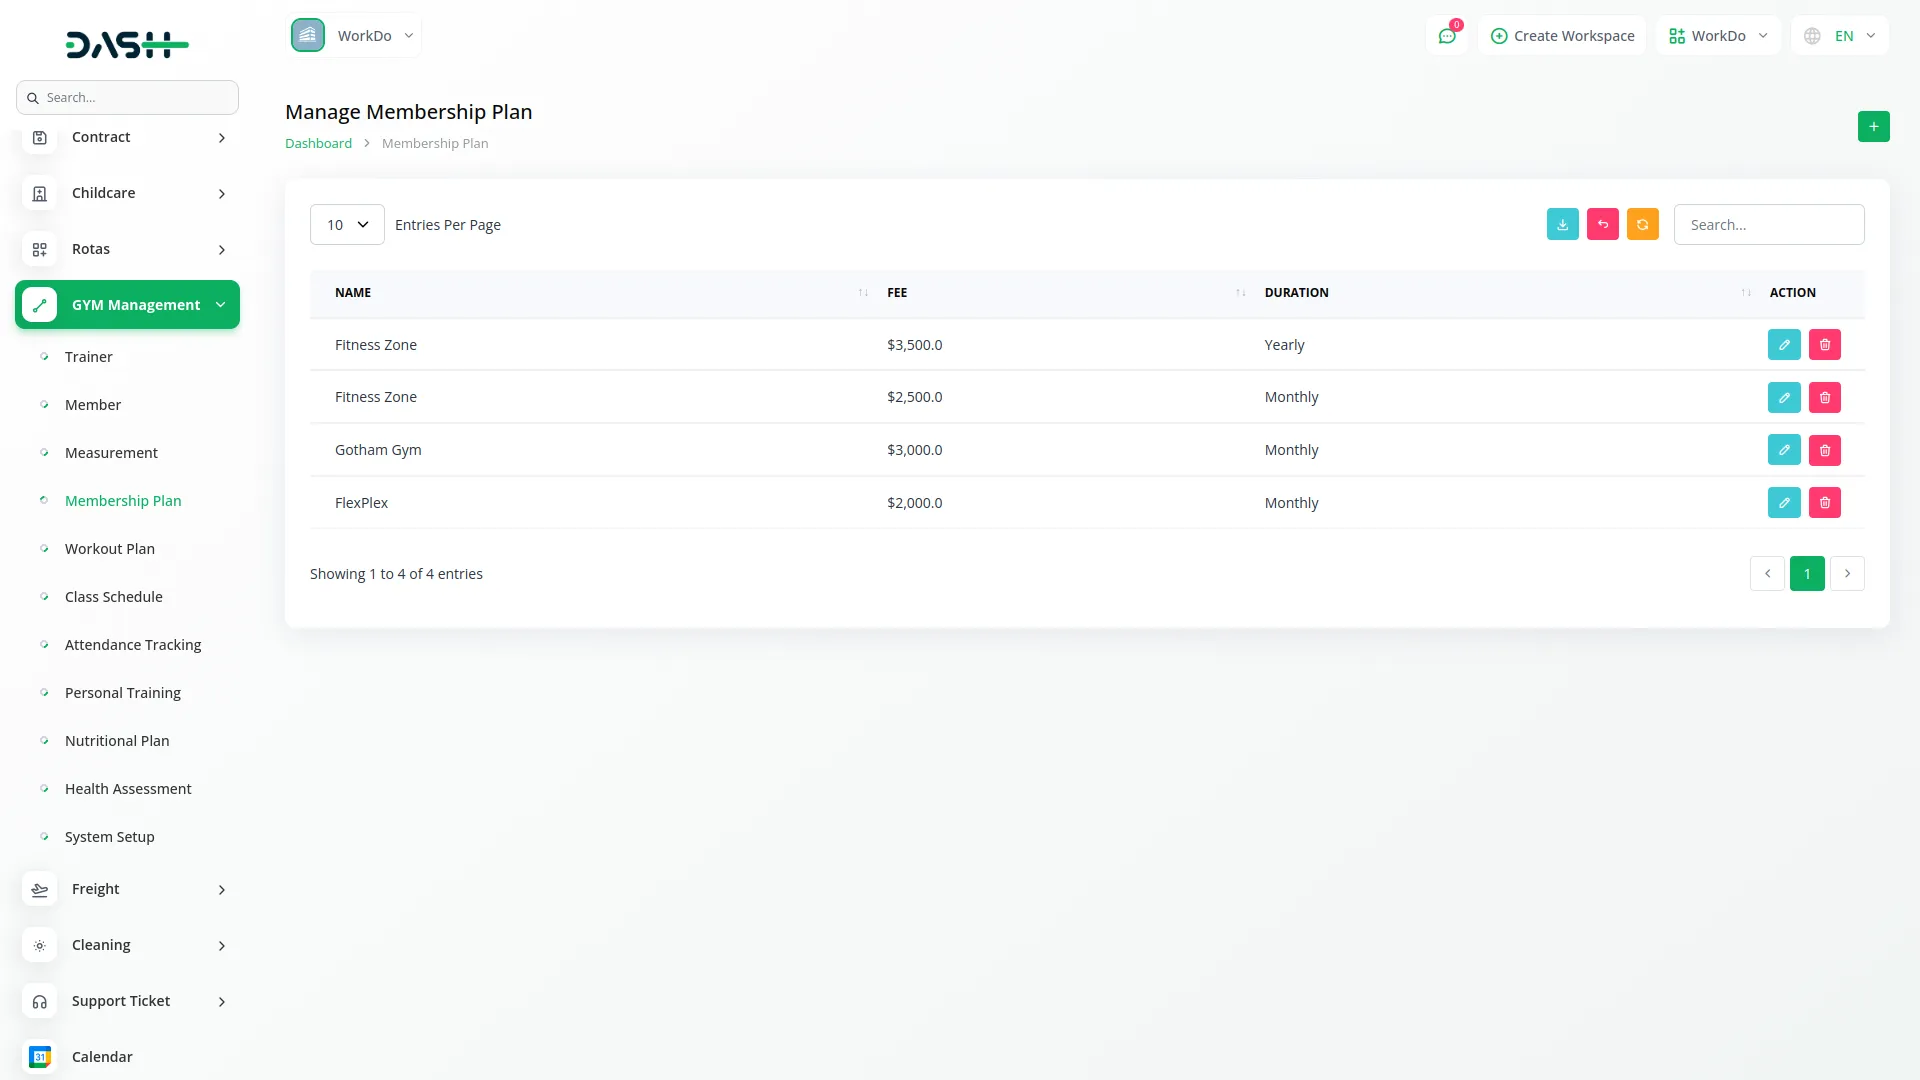
Manage Membership Plan
- To create a new membership plan, click the “Create” button on the membership plans page. Enter the plan name and fee amount. Select the duration from the dropdown menu choosing either Monthly or Yearly options. Click “Submit” to create the membership plan.
- The list page displays all membership plans with columns showing the plan name, fee, and duration. Use Search and Export buttons for managing plan data.
- The Actions column provides the “edit” button to modify existing plans and the “Delete” button to remove membership plans from the system.
Manage Workout Plan
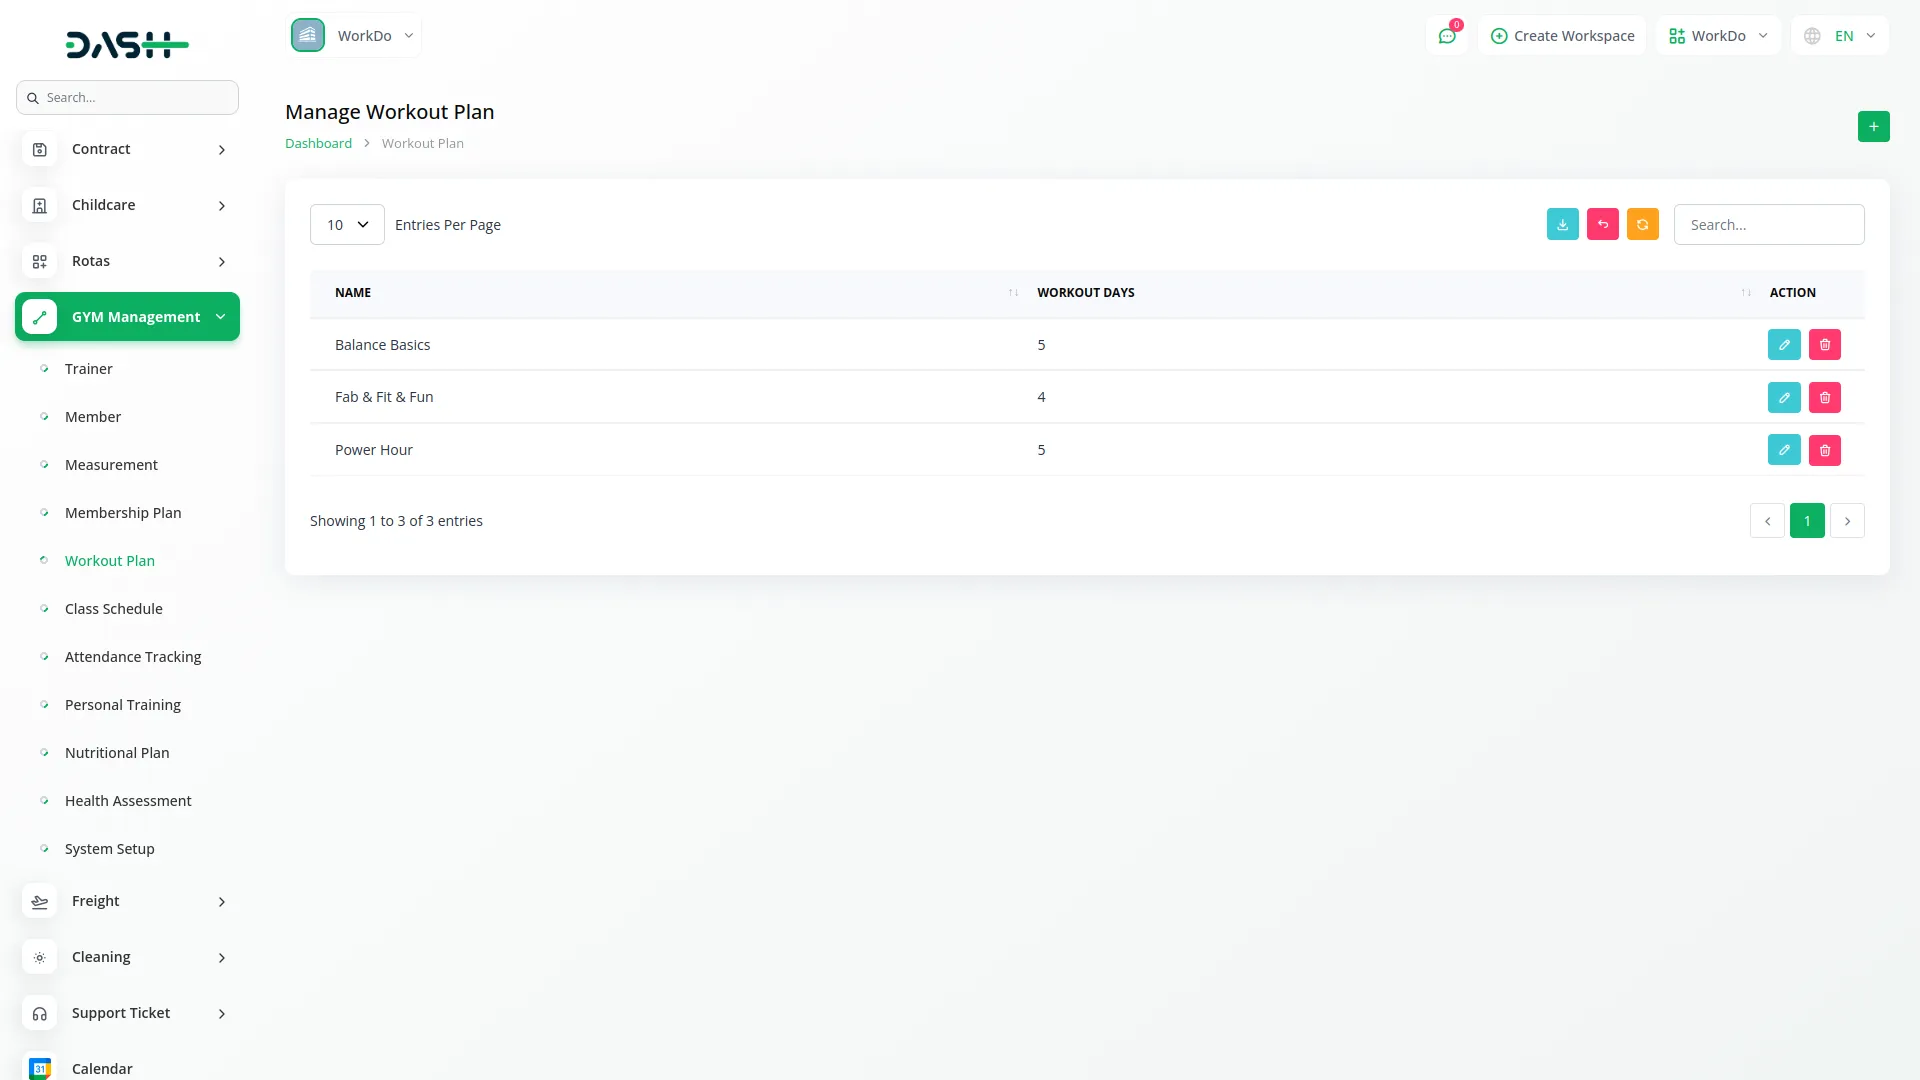
- To create a new workout plan, click the “Create” button on the workout plans page. Enter the plan name and specify the workout days for the plan. Click “Submit” to create the workout plan.
- The list page shows all workout plans with columns displaying the plan name and workout days. Use Search and Export buttons to manage workout plan data.
- The Actions column provides the “edit” button to modify existing workout plans and the “Delete” button to remove workout plans from the system.
Manage Class Schedule
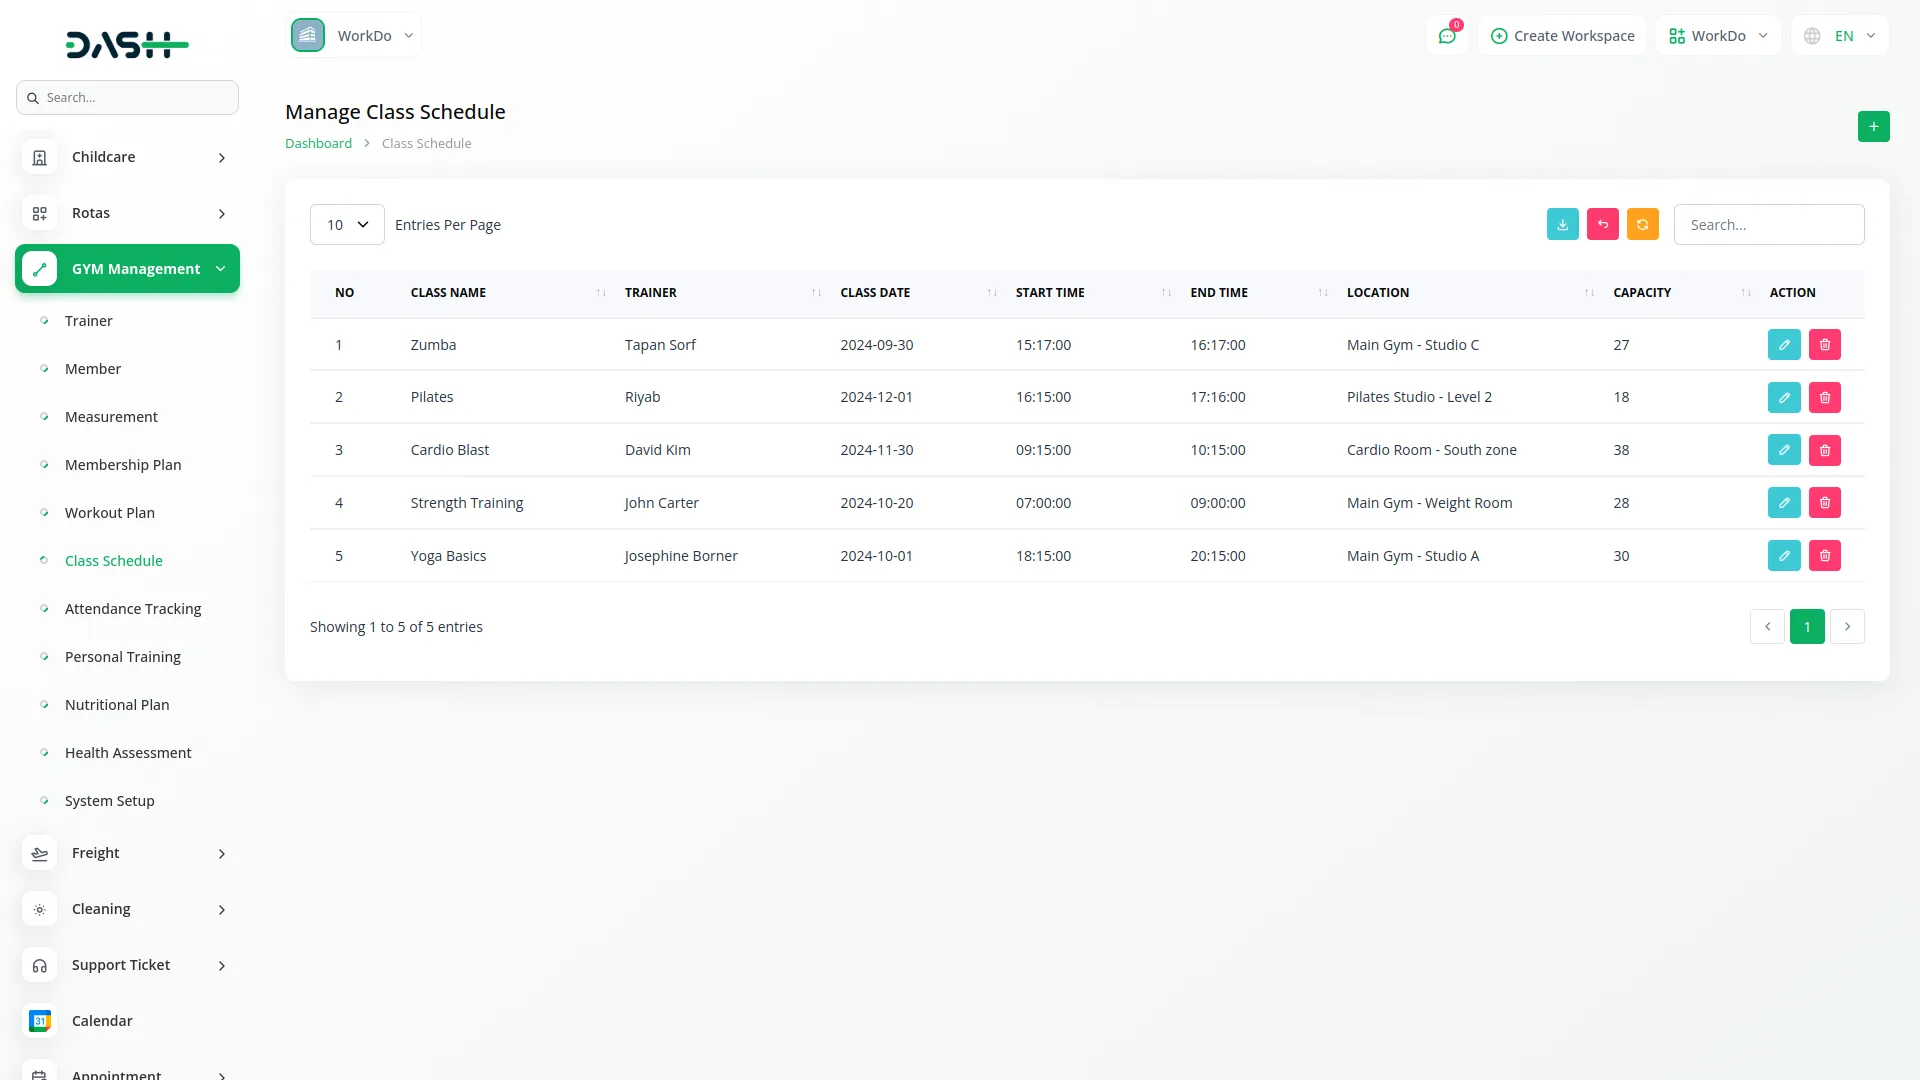
- To schedule a new class, click the “Create” button on the class schedule page. Enter the class name and select the trainer from the dropdown menu which comes from the Trainer section.
- Choose the class date using the date picker, then set the start time and end time using the time selectors. Enter the class capacity and specify the location. Click “Submit” to create the class schedule.
- The list page displays all scheduled classes with columns showing serial number, class name, trainer, class date, start time, end time, location, and capacity. Use Search and Export buttons for managing schedule data.
- In the Actions column, click the “View” button to show medical record details, the “edit” button to modify class schedules, or the “Delete” button to remove scheduled classes.
Manage Attendance Tracking
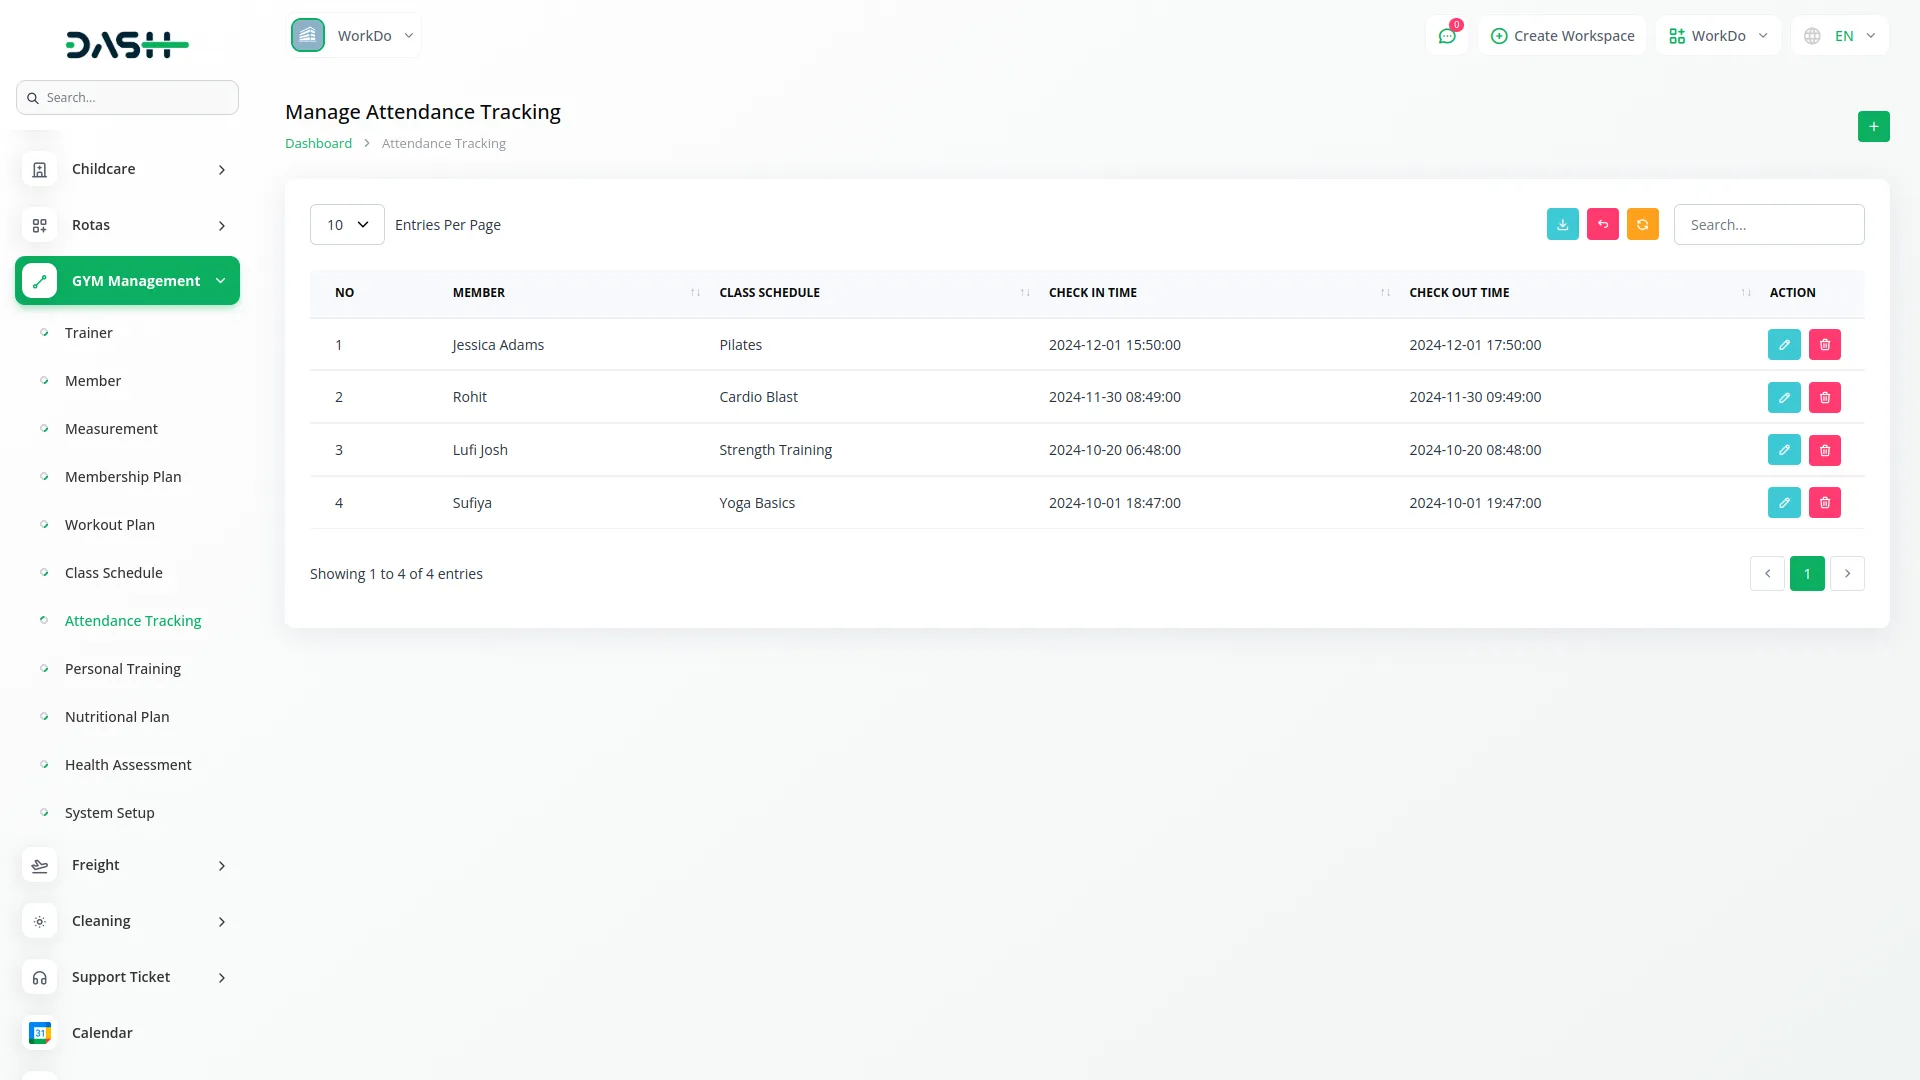
- To track member attendance, click the “create” button on the attendance tracking page. Select the member from the dropdown menu that comes from the Member section.
- Choose the class schedule from the dropdown which comes from the Class Schedule section. Enter the check-in time and check-out time using the date selectors. Click “Submit” to record the attendance.
- The list page shows all attendance records with columns for serial number, member name, class schedule, check-in time, and check-out time. Use Search and Export buttons to manage attendance data.
- The Actions column provides the “edit” button to modify attendance records and the “Delete” button to remove attendance entries.
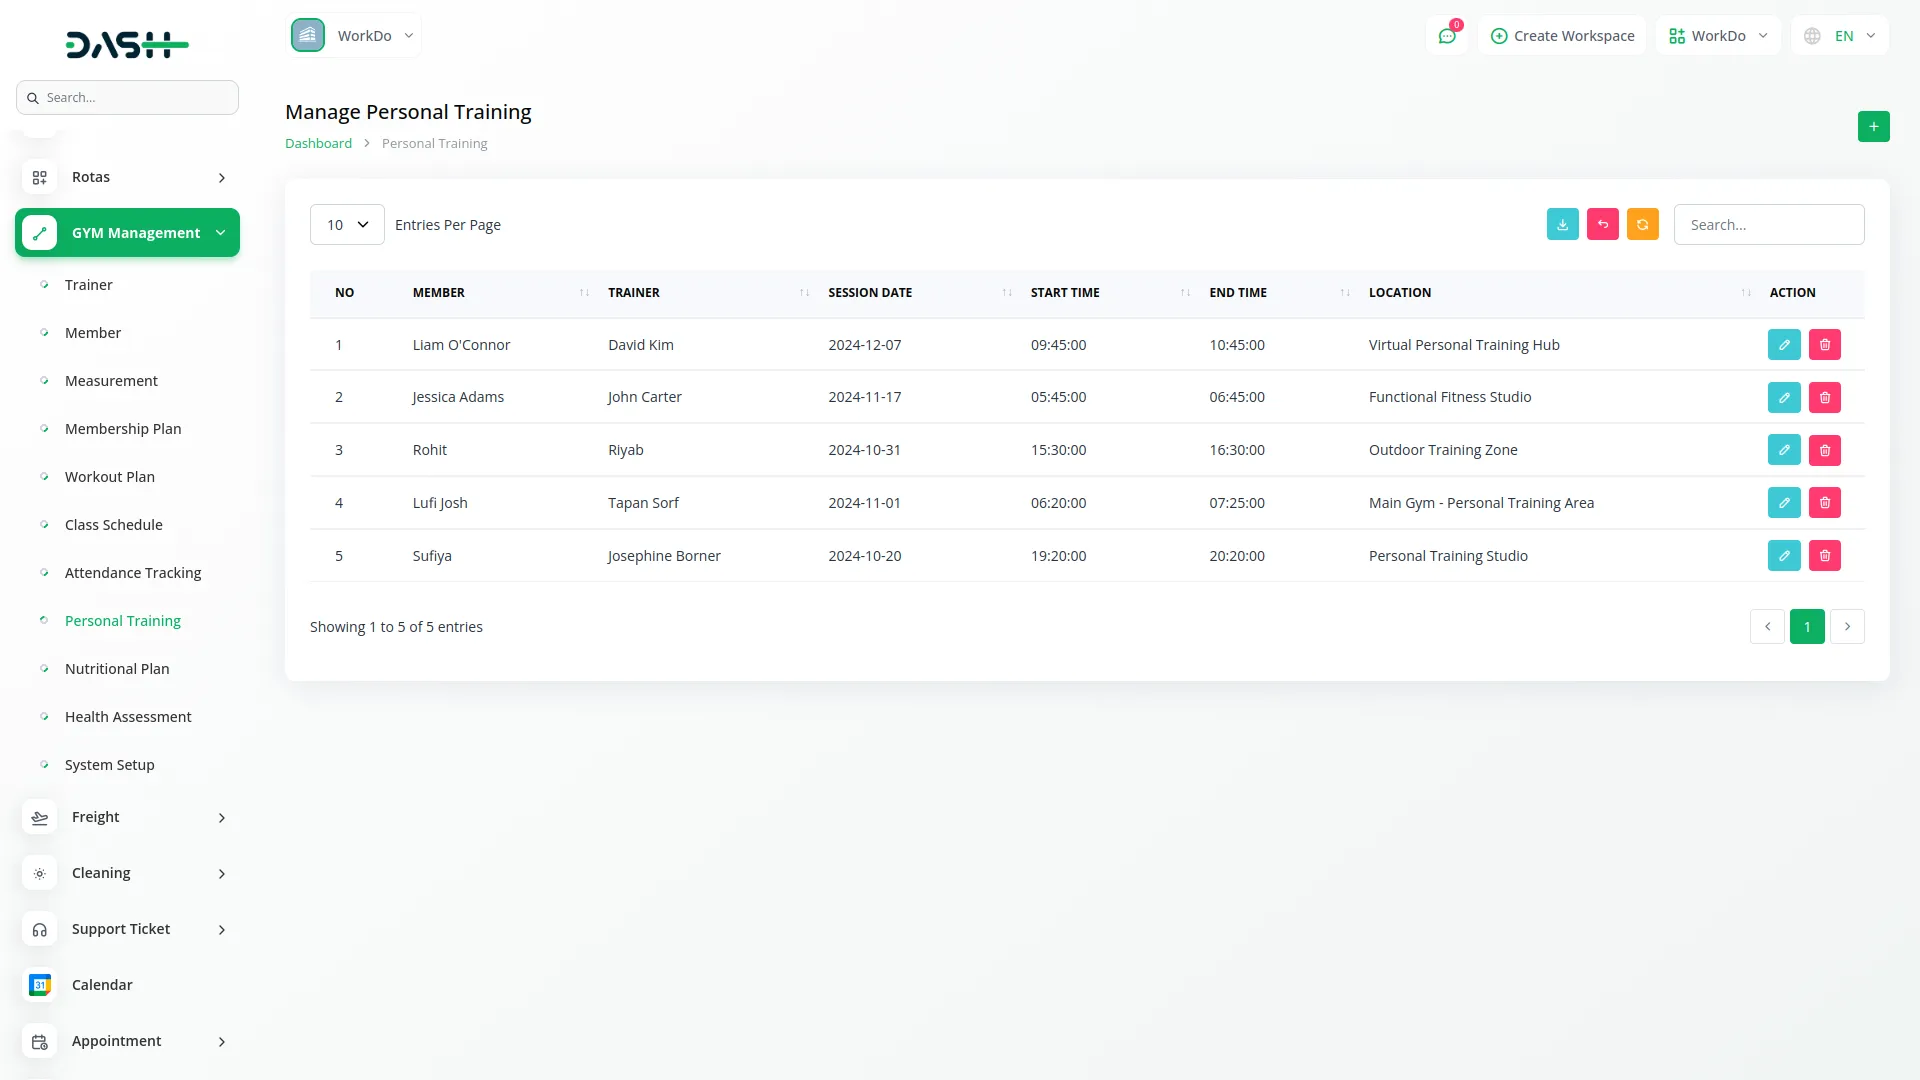
Manage Personal Training
- To schedule personal training sessions, click the “create” button on the personal training page. Select the member from the dropdown menu which comes from the Member section.
- Choose the trainer from the dropdown which comes from the Trainer section. Set the session date using the date picker, then enter the start time and end time using the date selectors. Specify the training location. Click “Submit” to schedule the personal training session.
- The list page displays all personal training sessions with columns showing serial number, member name, trainer name, session date, start time, end time, and location. Use Search and Export buttons for managing session data.
- The Actions column provides the “edit” button to modify training sessions and the “Delete” button to remove scheduled sessions.
Manage Nutritional Plan
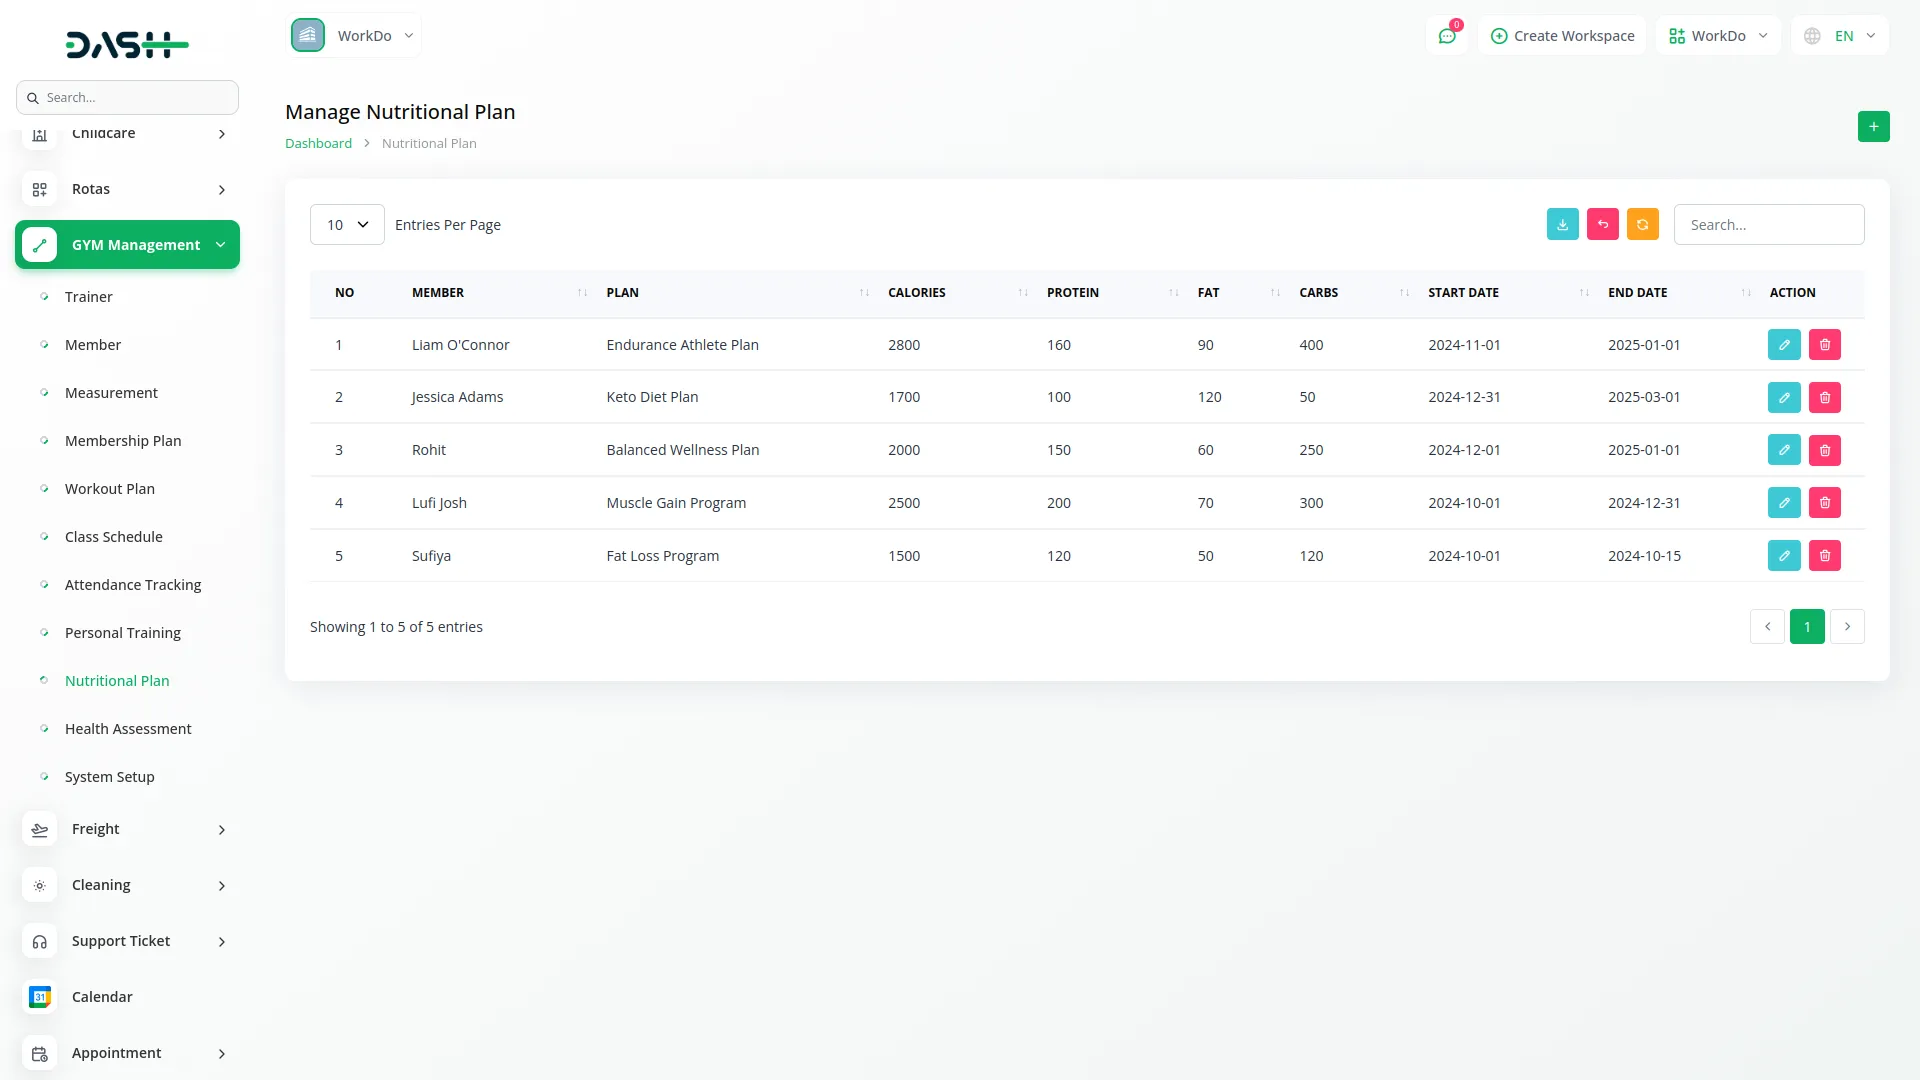
- To create a nutritional plan, click the “create” button on the nutritional plans page. Select the member from the dropdown menu which comes from the Member section.
- Enter the plan name and specify the nutritional values including calories, protein, fat, and carbs. Set the start date and end date using the date pickers. Click “Submit” to create the nutritional plan.
- The list page shows all nutritional plans with columns for serial number, member name, plan name, calories, protein, fat, carbs, start date, and end date. Use Search and Export buttons to manage nutritional plan data.
- The Actions column provides the “edit” button to modify existing plans and the “Delete” button to remove nutritional plans from the system.
Manage Health Assessment
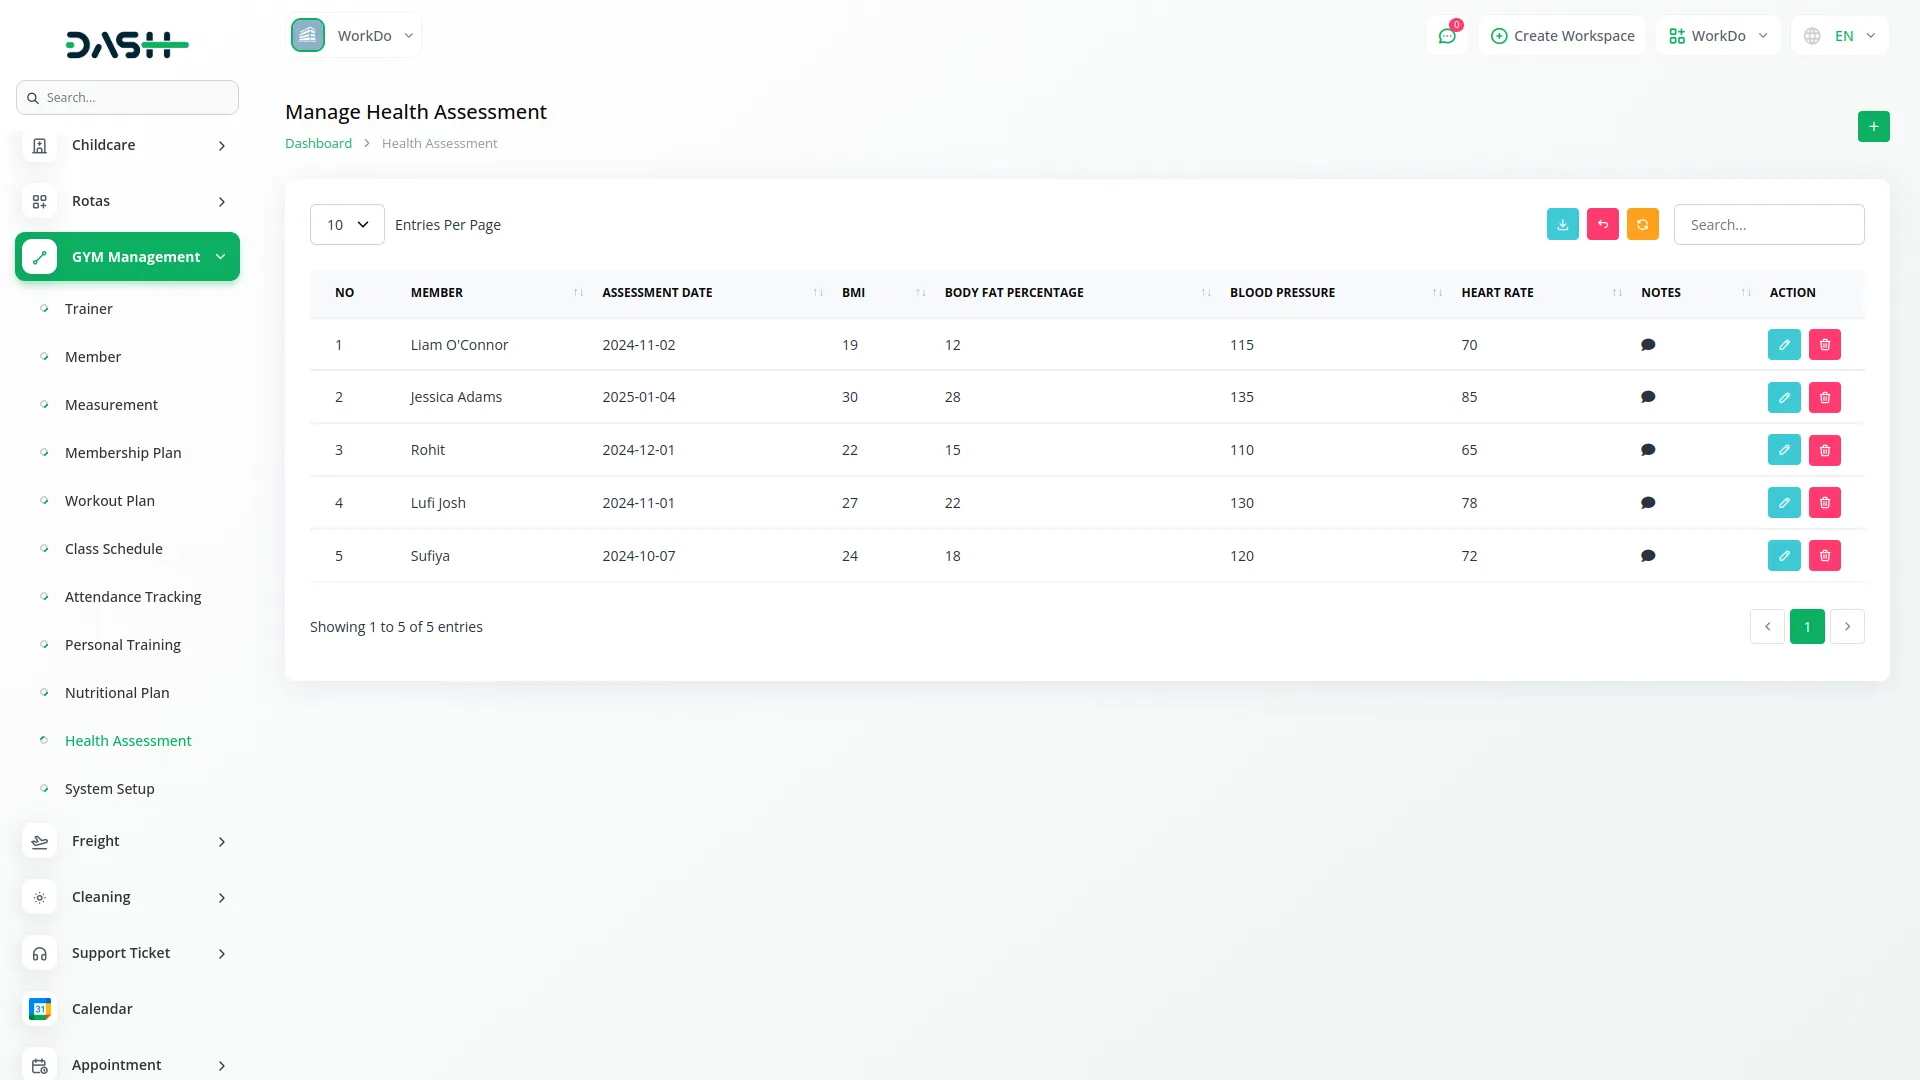
- To create a health assessment, click the “create” button on the health assessment page. Select the member from the dropdown menu which comes from the Member section. Choose the assessment date using the date picker.
- Enter the BMI value, body fat percentage, blood pressure, and heart rate measurements. Add any relevant notes in the notes field. Click “Submit” to save the health assessment.
- The list page displays all health assessments with columns showing serial number, member name, assessment date, BMI, body fat percentage, blood pressure, heart rate, and notes. When you click the notes icon, a popup opens displaying all the related notes. Use Search and Export buttons to manage assessment data.
- The Actions column provides the “edit” button to modify existing assessments and the “Delete” button to remove health assessment records.
System Setup
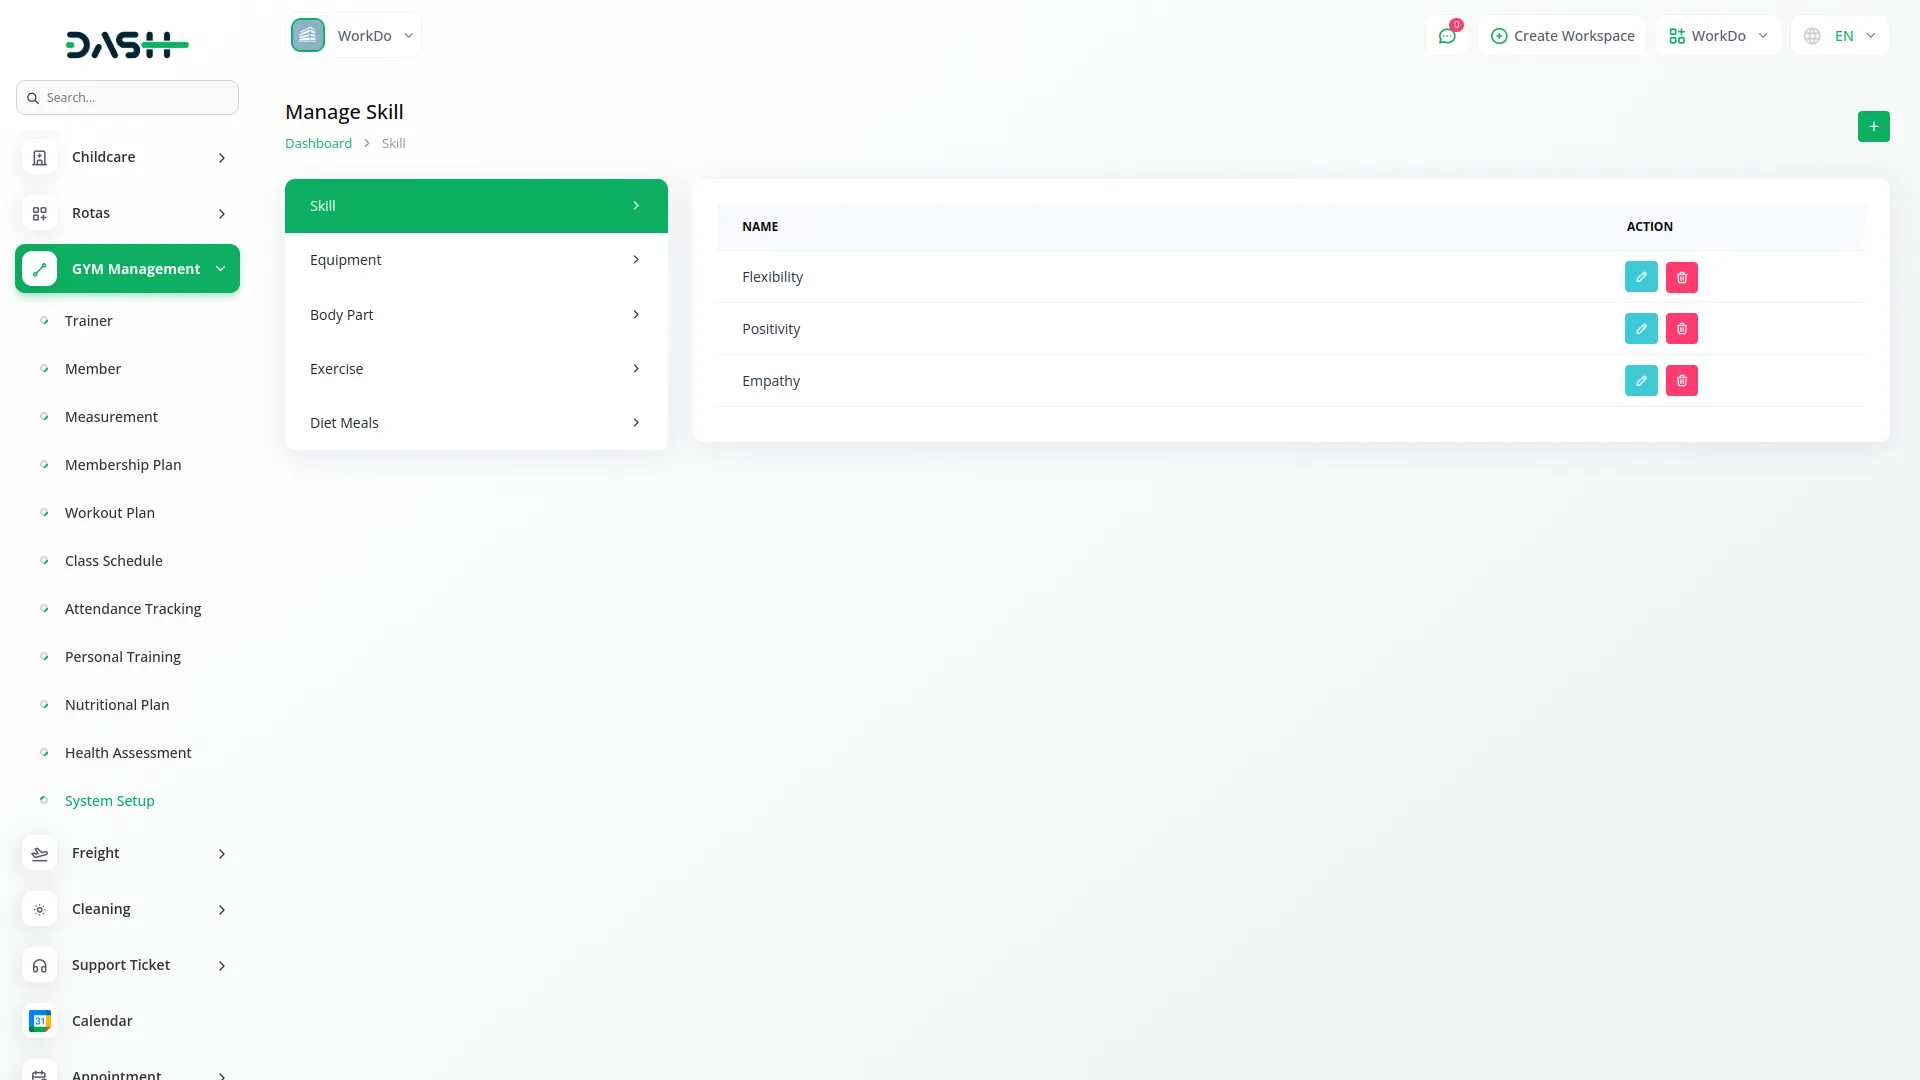
Manage Skill
- To add a new skill, click the “create” button on the skills page. Enter the skill name in the provided field. Click “Submit” to create the skill entry.
- The list page shows all skills with the skill name column. The Actions column provides the “edit” button to modify existing skills and the “Delete” button to remove skills from the system.
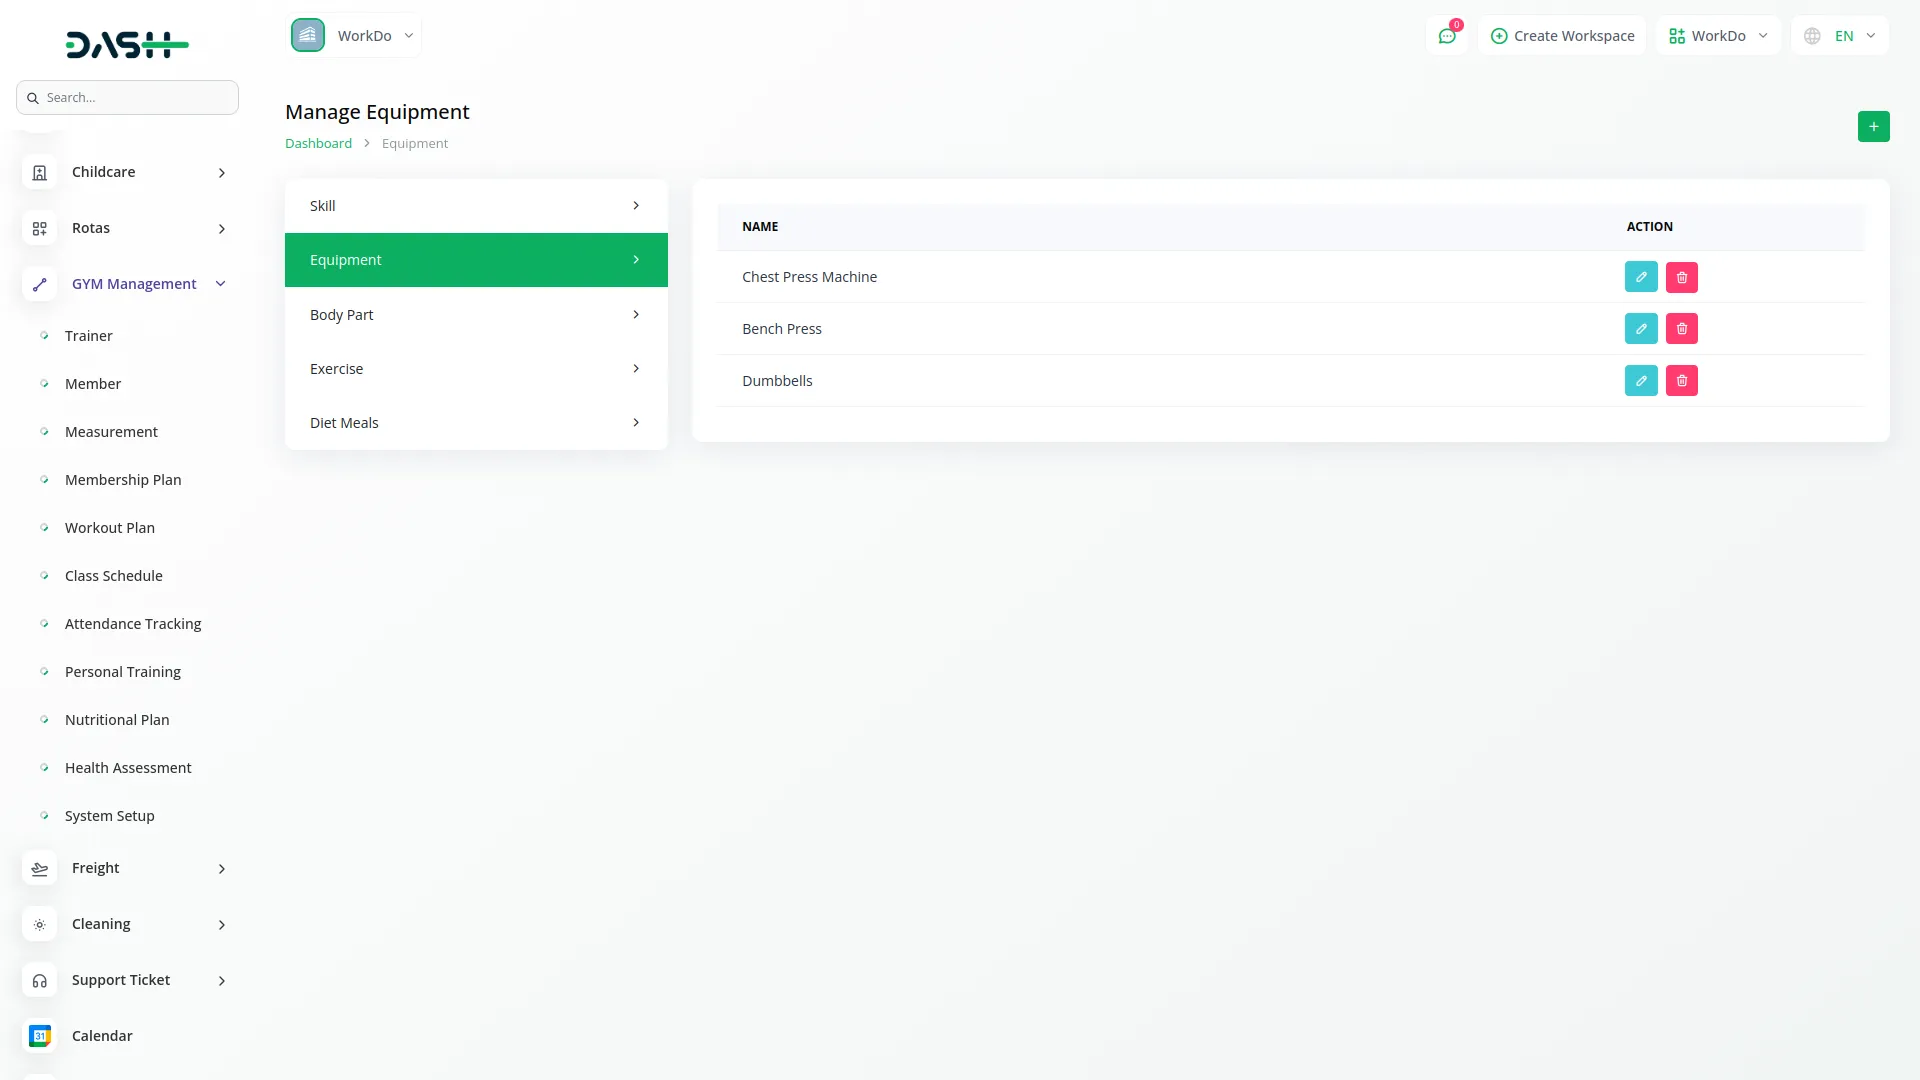
Manage Equipment
- To add new equipment, click the “Create” button on the equipment page. Enter the equipment name in the provided field. Click “Submit” to create the equipment entry.
- The list page displays all equipment with the equipment name column. The Actions column provides the “edit” button to modify existing equipment and the “Delete” button to remove equipment from the system.
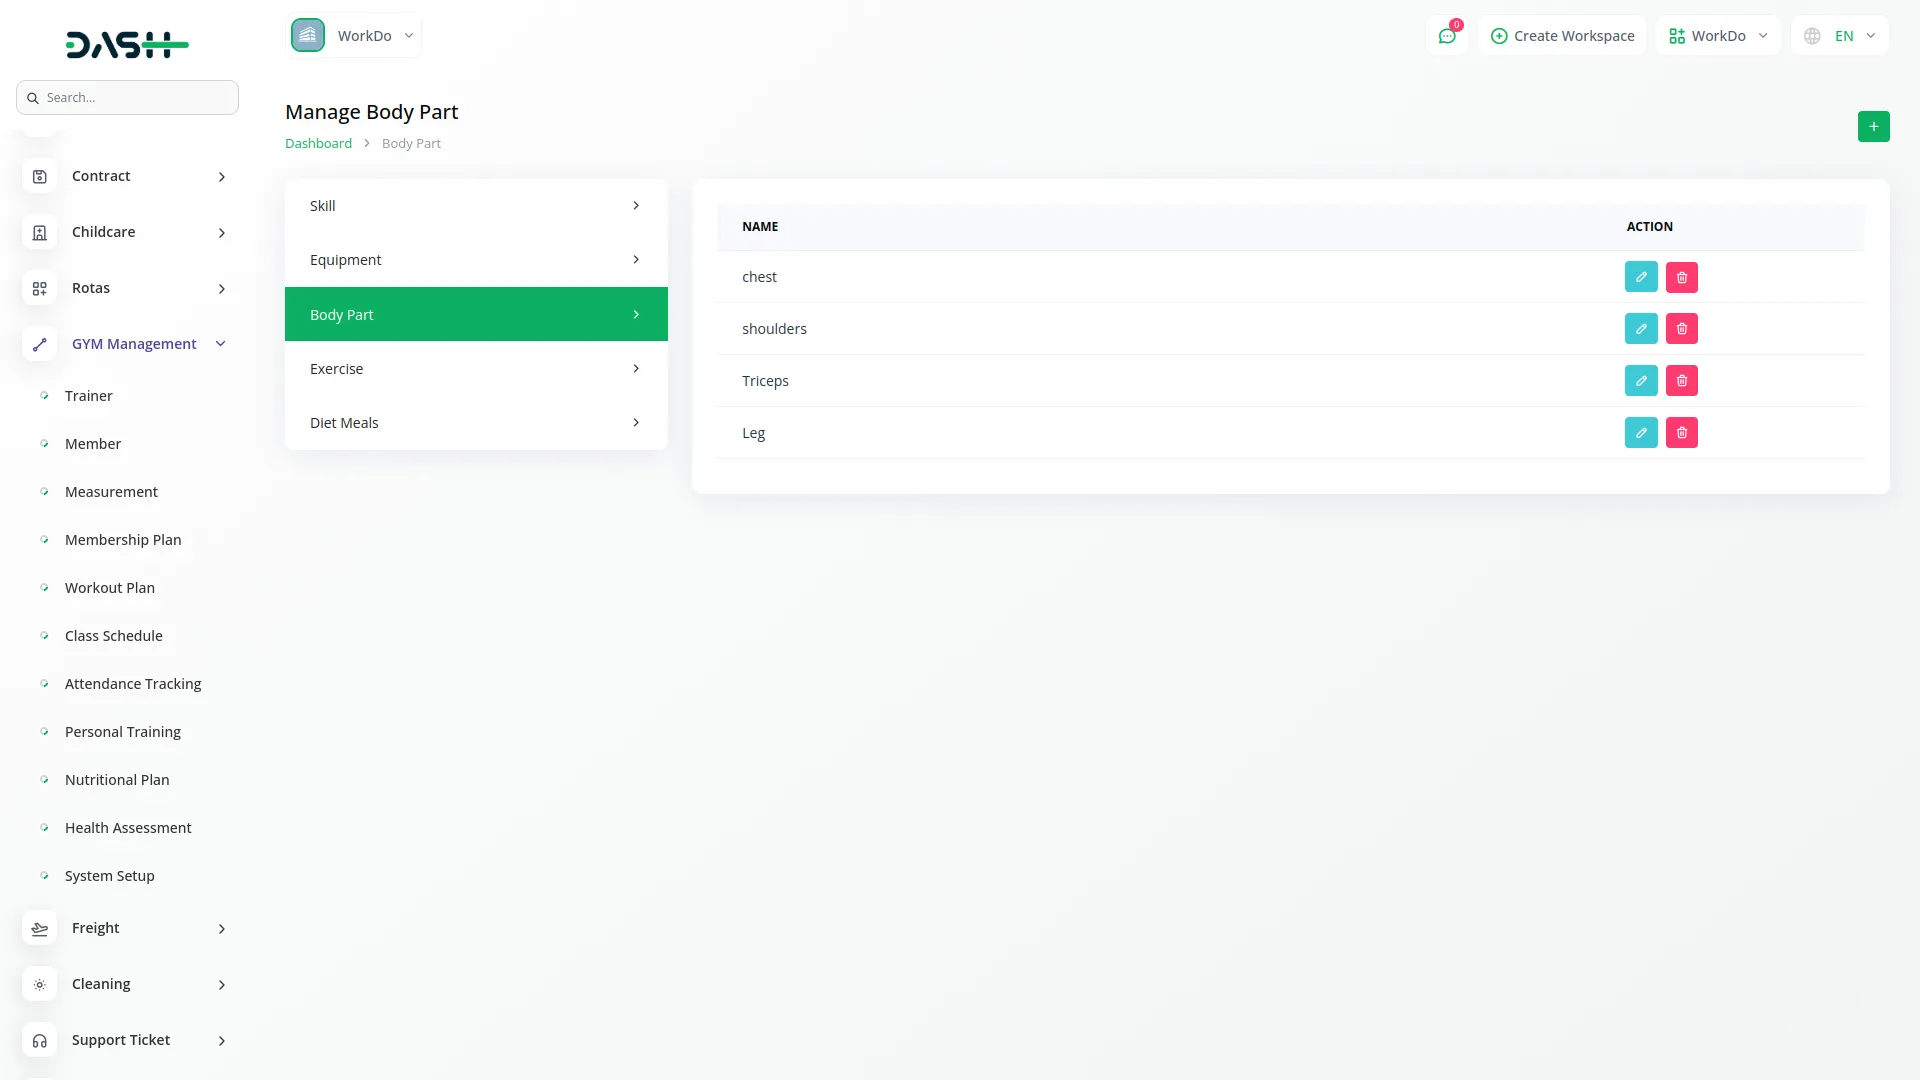
Manage Body Part
- To add a body part, click the “Create” button on the body parts page. Enter the body part name in the provided field. Click “Submit” to create the body part entry.
- The list page shows all body parts with the body part name column. The Actions column provides the “edit” button button to modify existing body parts and the “Delete” button to remove body parts from the system.
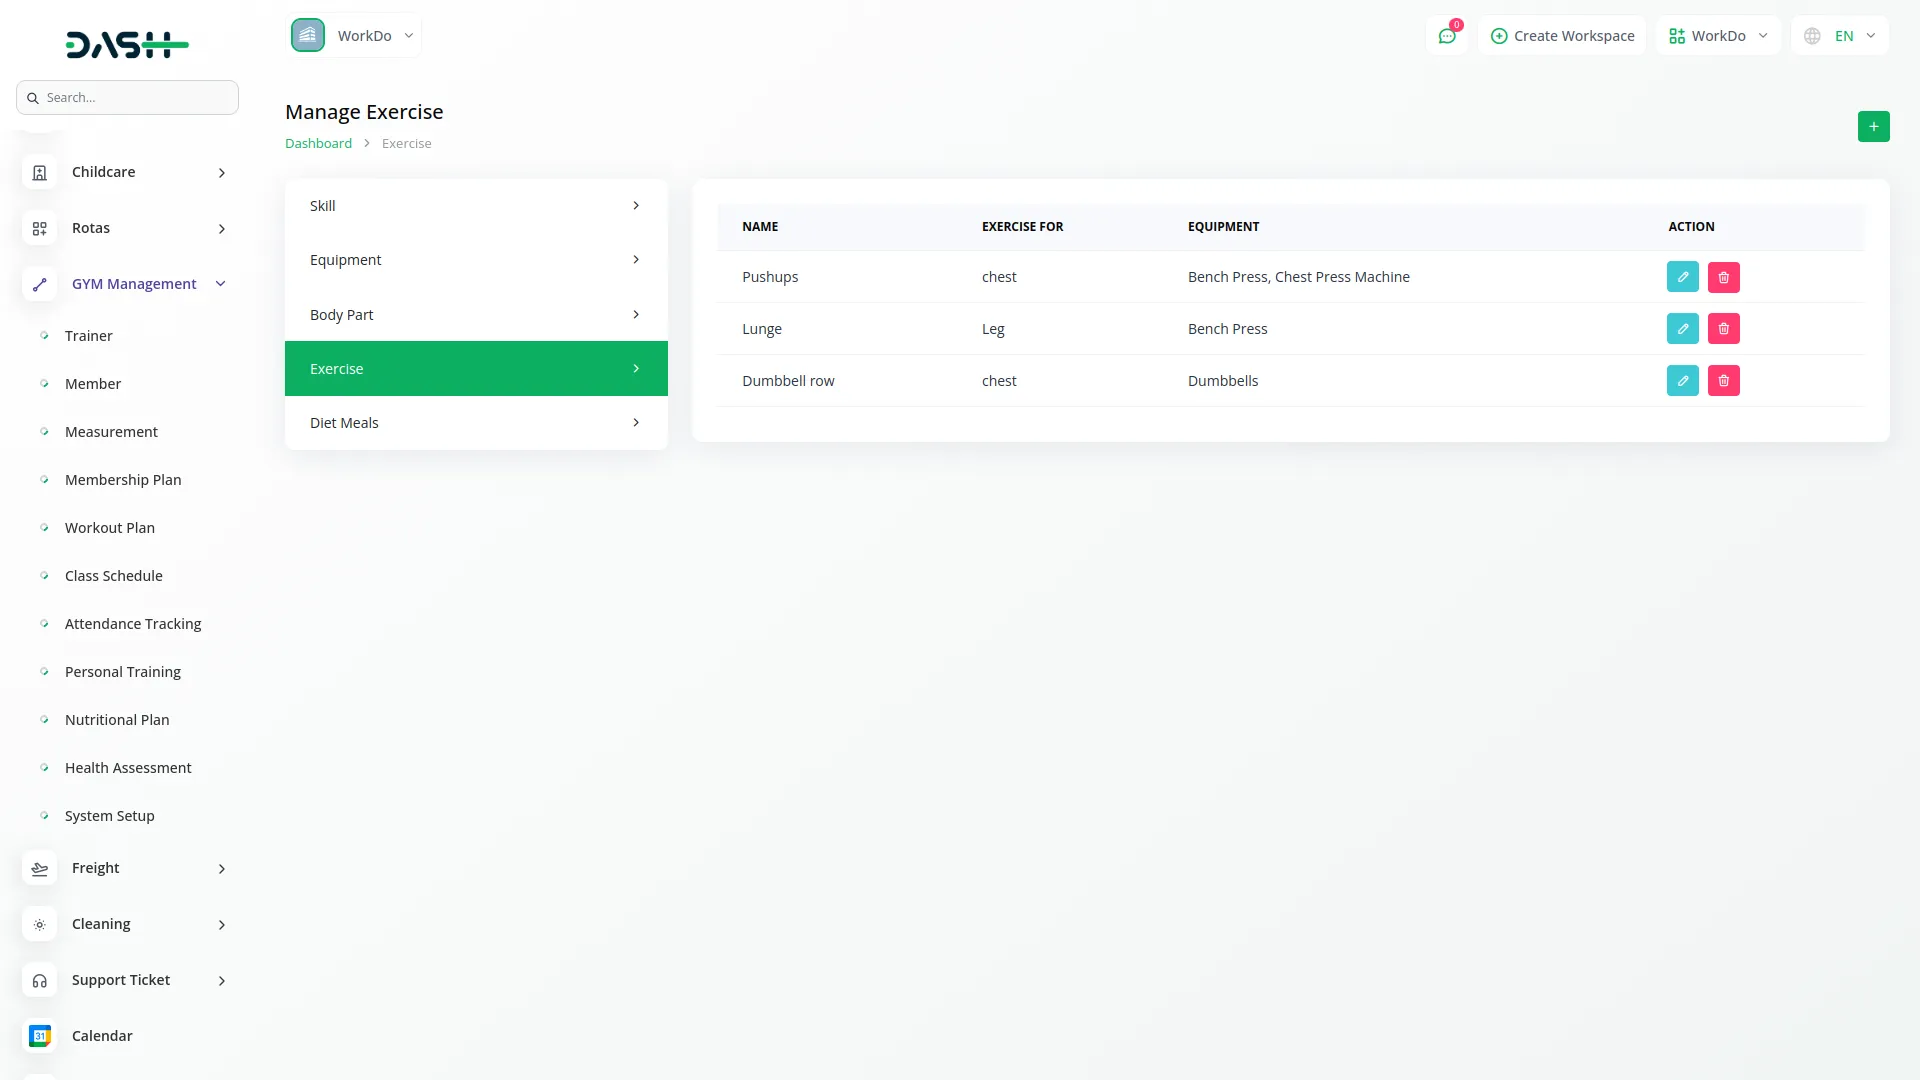
Manage Exercise
- To create a new exercise, click the “Create” button on the exercises page. Enter the exercise name and select the body part from the “Exercise For” dropdown which comes from the Body Part section. Choose the required equipment from the equipment dropdown which comes from the Equipment section. Click “Submit” to create the exercise.
- The list page displays all exercises with columns showing exercise name, exercise for (body part), and equipment. The Actions column provides the “edit” button to modify existing exercises and the “Delete” button to remove exercises from the system.
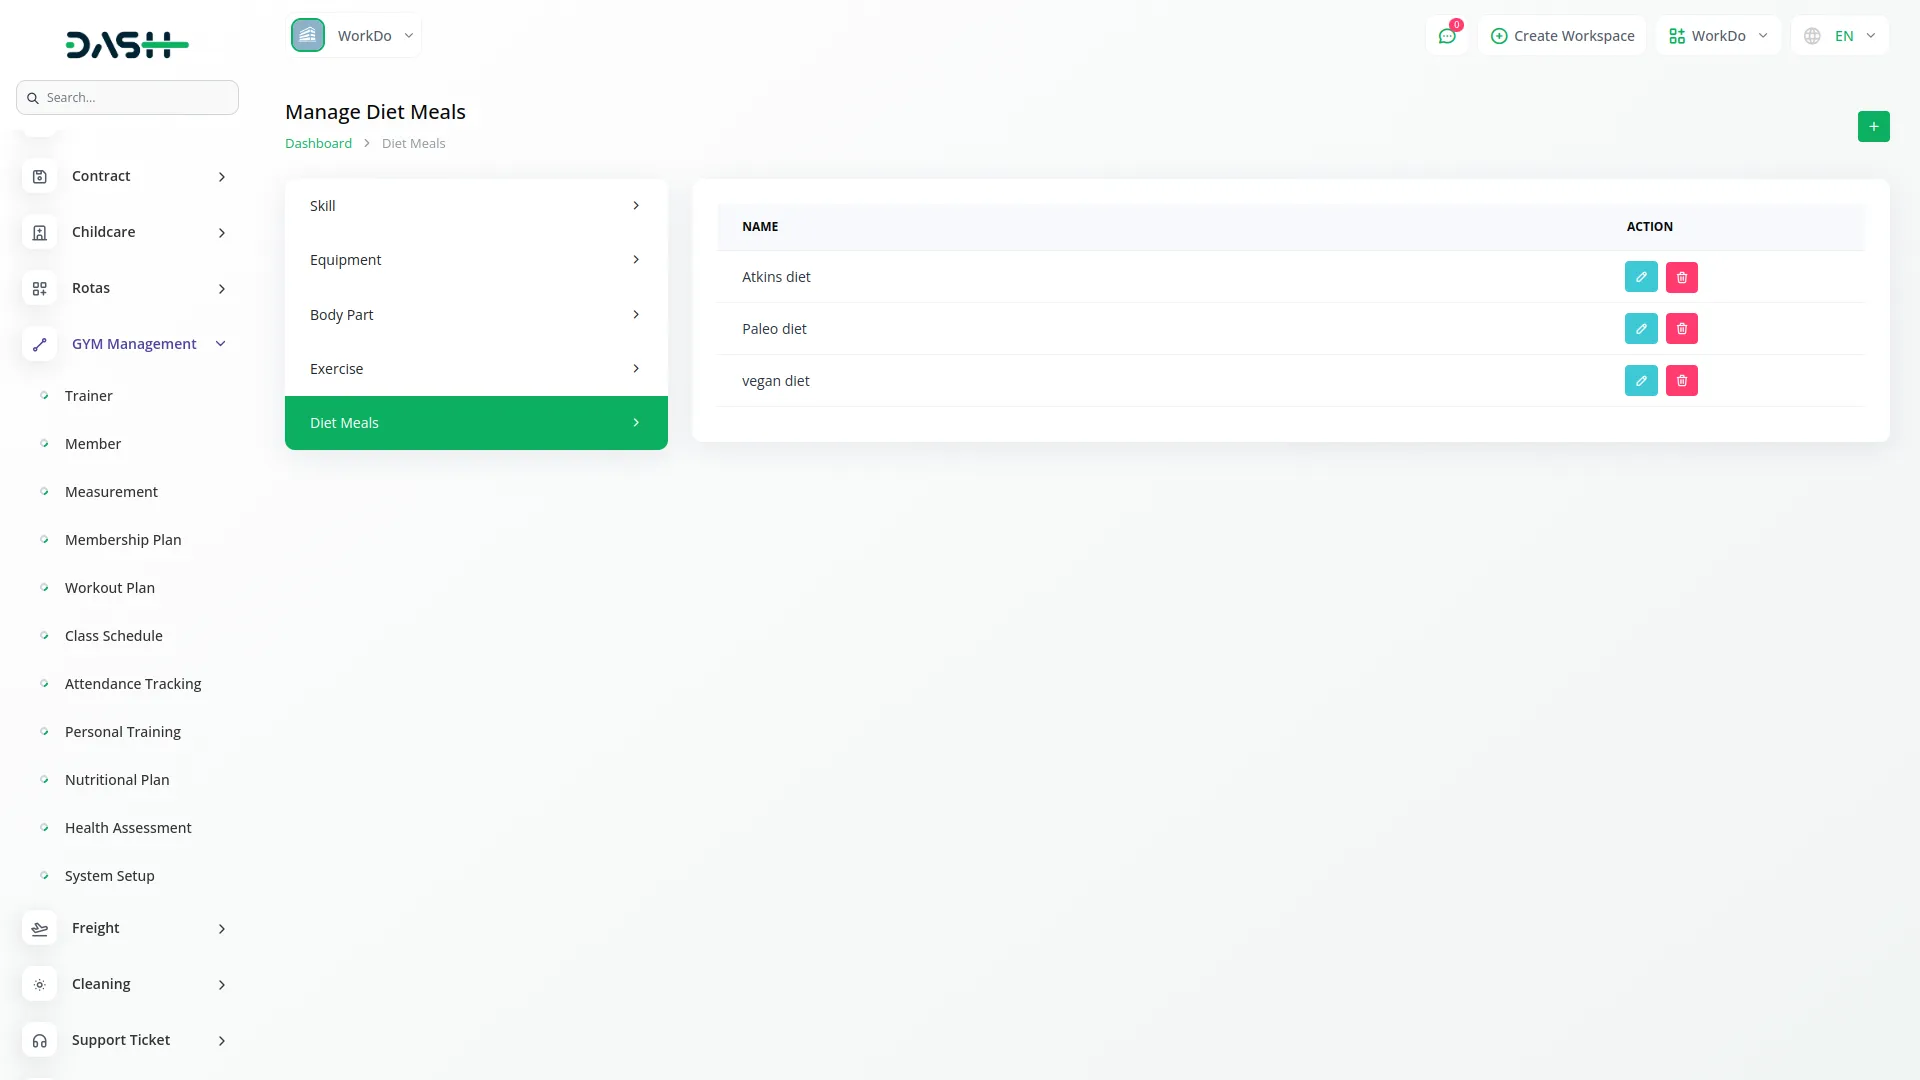
Manage Diet Meals
- To add a diet meal, click the “Create” button on the diet meals page. Enter the diet meal name in the provided field. Click “Submit” to create the diet meal entry.
- The list page shows all diet meals with the meal name column. The Actions column provides the “edit” button to modify existing diet meals and the “Delete” button to remove diet meals from the system.
System Settings
Gym Management Settings
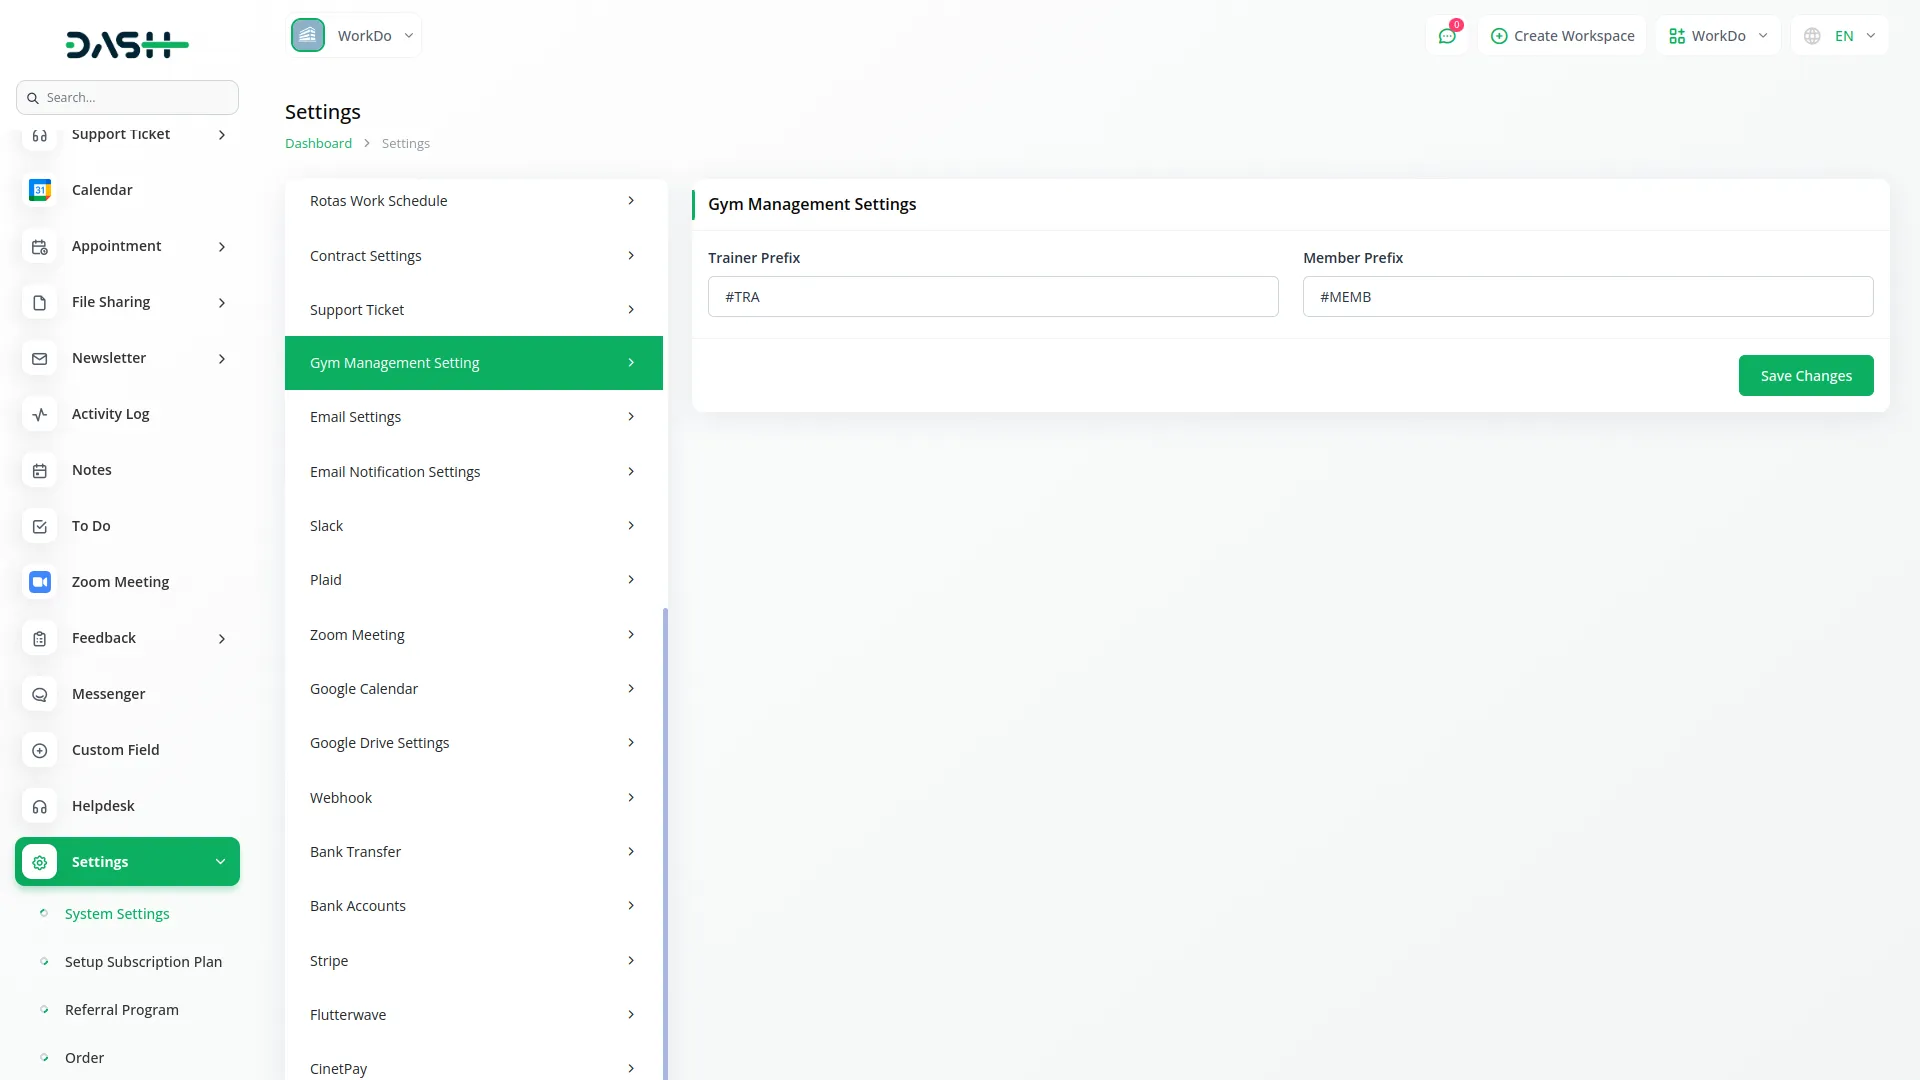
- To configure system settings, navigate to Setting, then System Setting, and select Gym Management Settings. Here you can customize two important prefixes for your gym management system.
- The Trainer Prefix allows you to set and display a custom prefix for all trainers in your system. Enter your desired prefix in the trainer prefix field.
- The Member Prefix allows you to set and display a custom prefix for all members in your system. Enter your desired prefix in the member prefix field.
- These prefixes will be automatically applied to trainer and member identifications throughout the system to maintain consistency and organization.
Categories
Related articles
- Peach Payment Integration in Dash SaaS
- Visitor Management Integration in Dash SaaS
- SMS Integration in Dash SaaS
- Sign-in With Bitbucket Detailed Documentation
- Hotel and Room management in Dash SaaS
- Moneris Integration in Dash SaaS
- Discord Module Detailed Documentation
- Hospital Management Integration in Dash SaaS
- Bakery Store Detailed Documentation
- Security Guard Management Integration in Dash SaaS
- Vonage SMS Module Detailed Documentation
- ZitaSMS Integration in Dash SaaS
Reach Out to Us
Have questions or need assistance? We're here to help! Reach out to our team for support, inquiries, or feedback. Your needs are important to us, and we’re ready to assist you!


Need more help?
If you’re still uncertain or need professional guidance, don’t hesitate to contact us. You can contact us via email or submit a ticket with a description of your issue. Our team of experts is always available to help you with any questions. Rest assured that we’ll respond to your inquiry promptly.
Love what you see?
Do you like the quality of our products, themes, and applications, or perhaps the design of our website caught your eye? You can have similarly outstanding designs for your website or apps. Contact us, and we’ll bring your ideas to life.
