Blood Bank Integration in Dash SaaS
The Blood Bank software is a comprehensive management Add-On designed to streamline all blood donation and distribution activities.
Introduction
The Blood Bank software is a comprehensive management Add-On designed to streamline all blood donation and distribution activities. This Add-On helps blood banks efficiently manage donor records, track blood donations, maintain inventory levels, process blood requests from hospitals, and handle billing operations. The software ensures proper tracking of blood components from donation to distribution while maintaining safety standards and regulatory compliance. Key features include donor management, blood testing records, inventory tracking, request processing, and financial management through automated invoicing.
How to Install the Add-On?
To Set Up the Blood Bank Management Add-On, you can follow this link: Setup Add-On.
How to use the Blood Bank Management Add-On?
Hospital Dashboard
- After purchasing and installing this Add-On, first, you go to the sidebar and search for the Blood Bank Add-On.
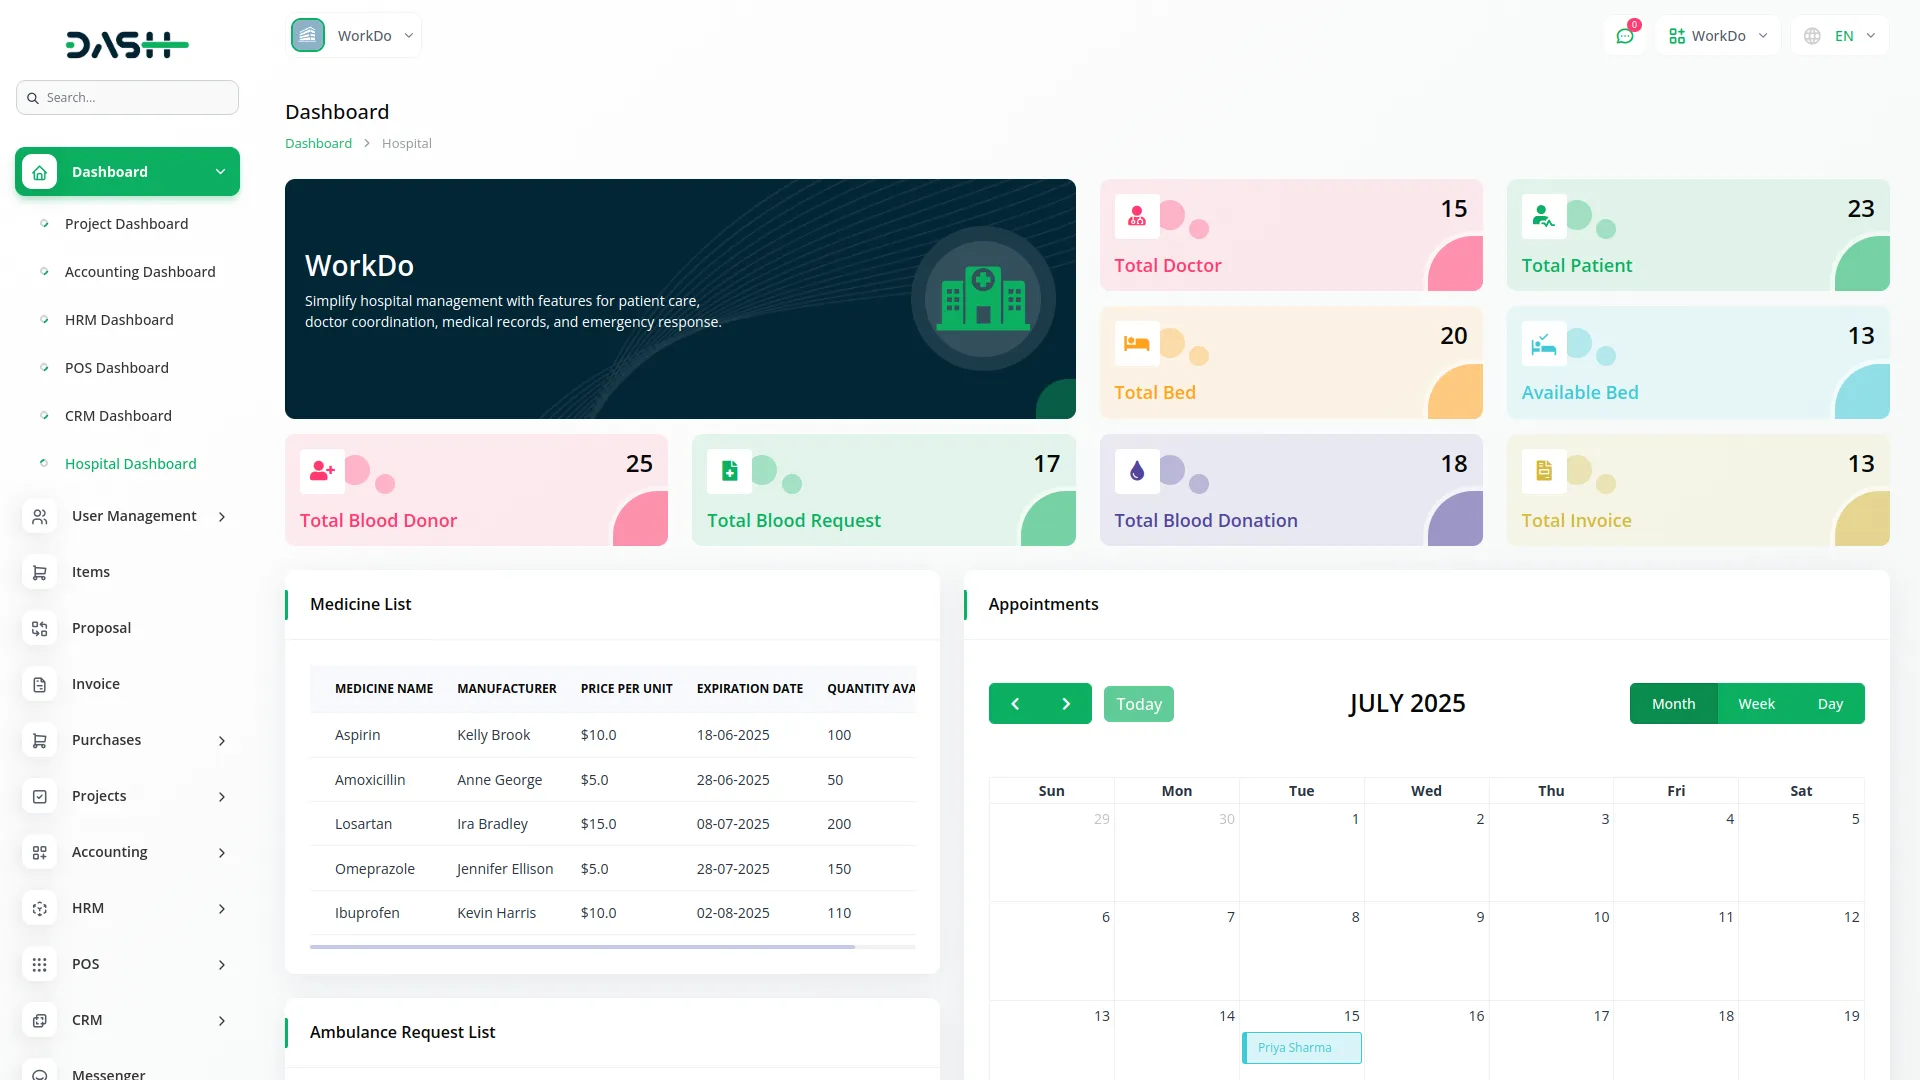
- On the dashboard, you will get to see four main metric cards displaying Total Blood Donor count, Total Blood Requests received, Total Blood Donations collected, and Total Invoices.
- Below the metrics cards, you can view the Blood Requests by Blood Group pie chart, which shows the distribution of blood requests across different blood groups.
- The dashboard also displays a month-wise Blood Donations Record bar chart that shows donation trends over time.
System Setup
Manage Blood Group
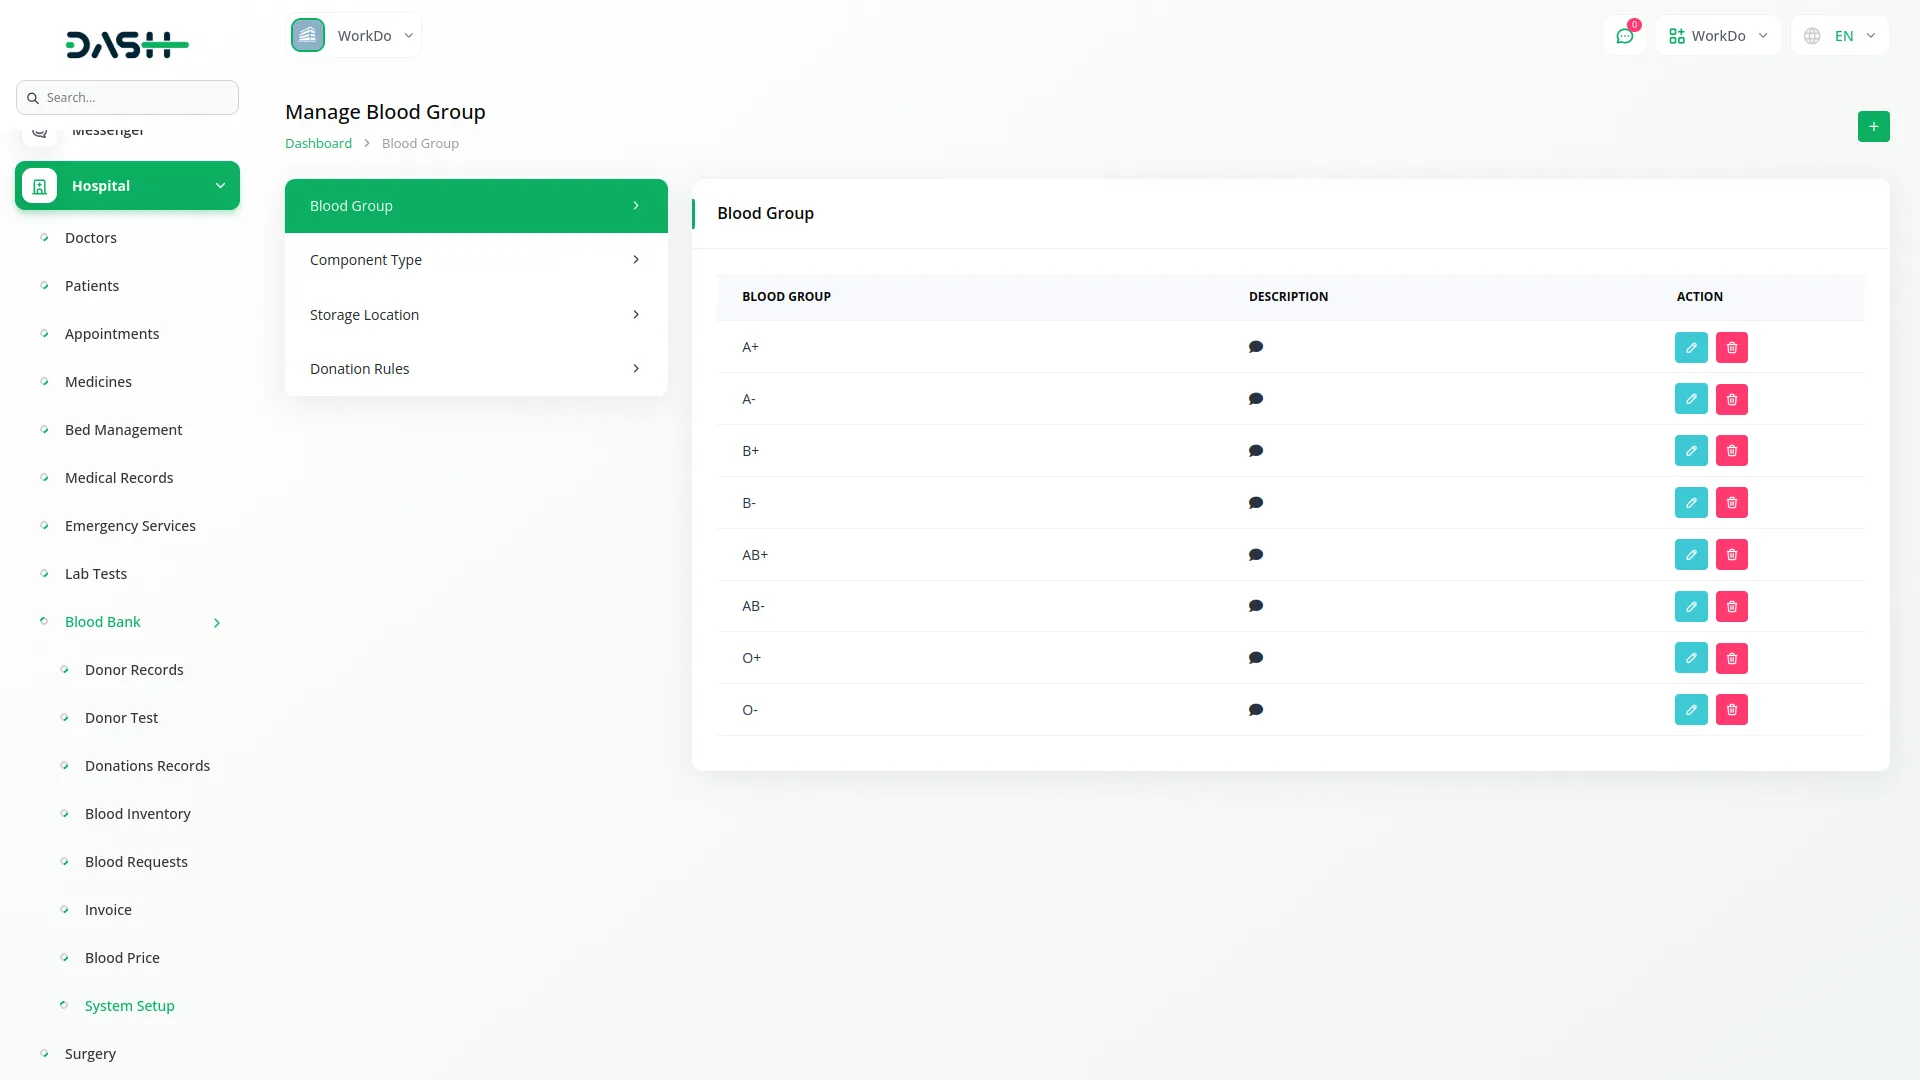
- Once, at the top of the page, click the “Create” button to create a new Blood Group record on this page. Enter the blood group name, and add a description.
- On this page, you can see all blood group records in a table with columns including Blood Group name, Description. You can use a search bar to filter your data. In the actions columns, you can easily edit your record, while deleting to permanently remove your record.
Manage Component Type
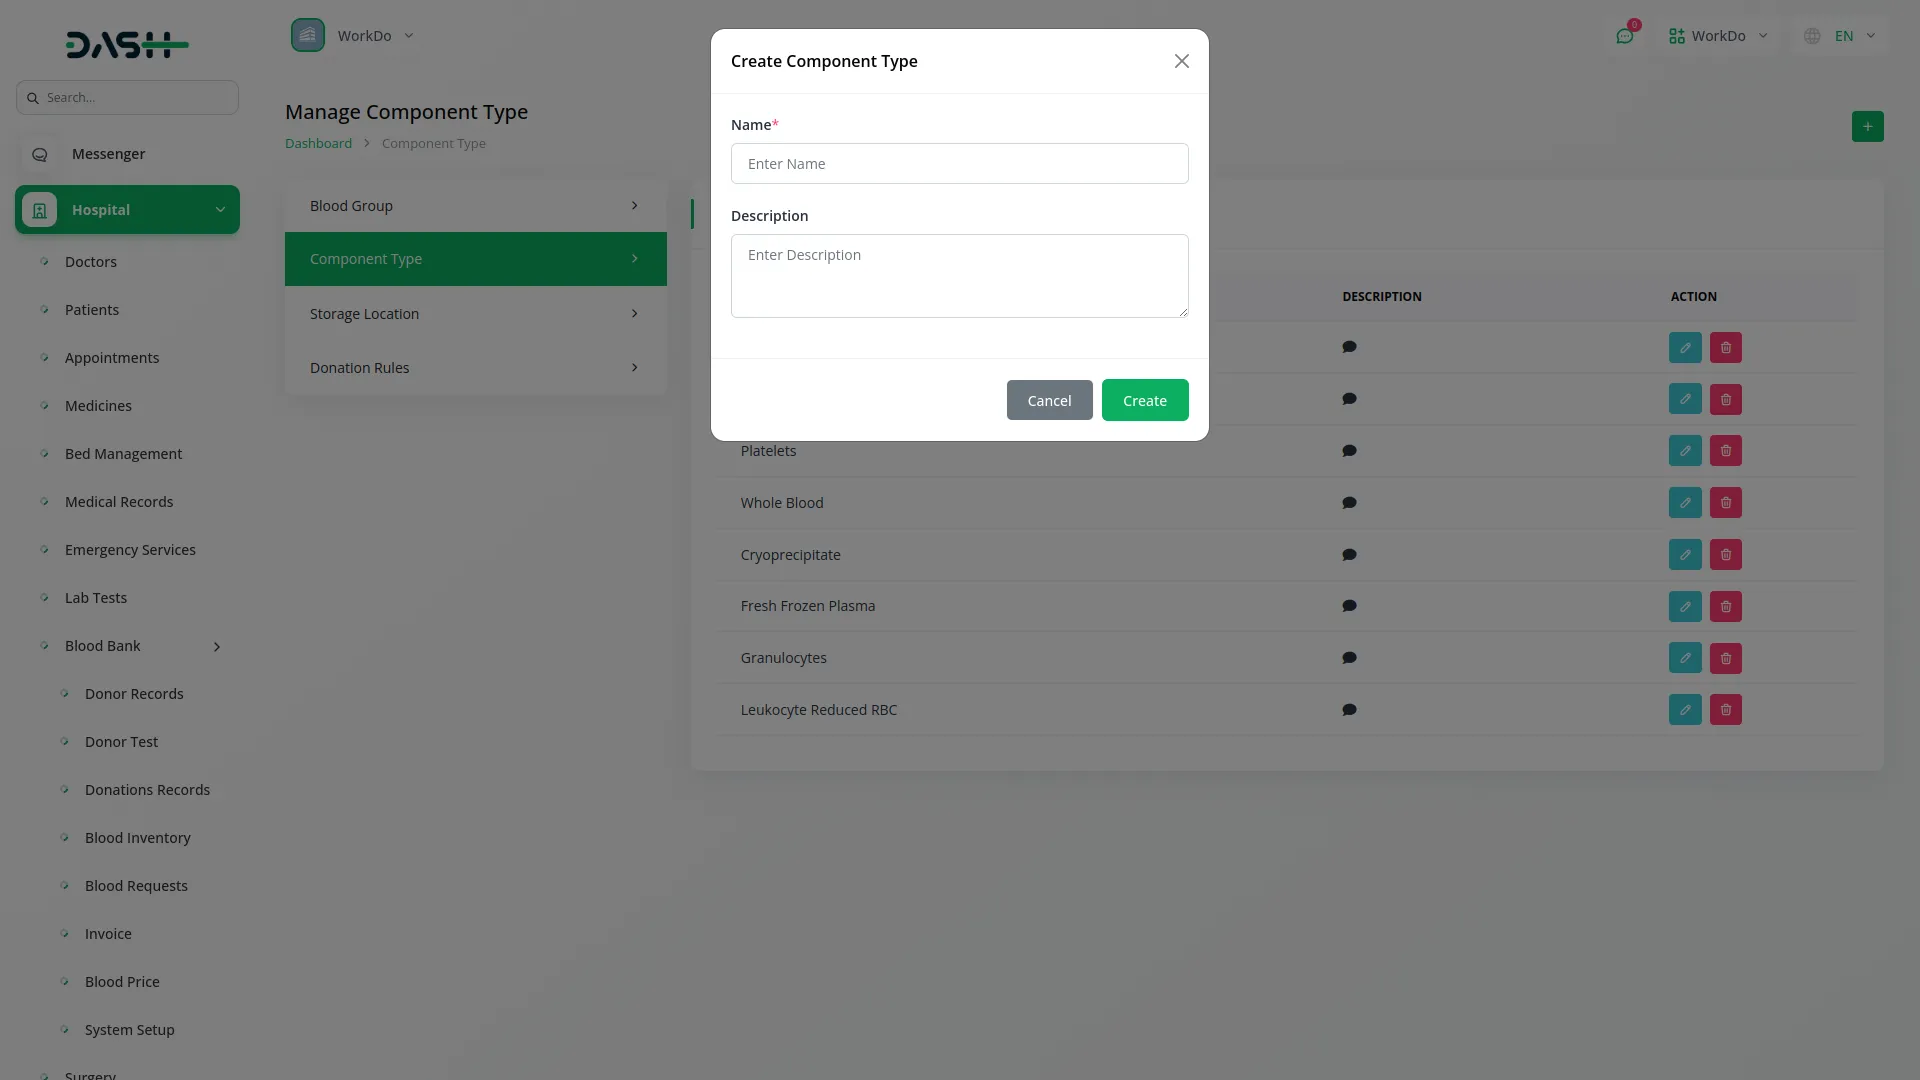
- After completing the blood group record, navigate to the component type page to create a new component type record, and click the “Create” button at the top of the page. Start by filling in the component name and enter a description.
- The list page displays all component types with columns showing Component Type name, Description, and Action options. Available actions include Edit to modify it, and Delete to remove it.
Manage Storage Location
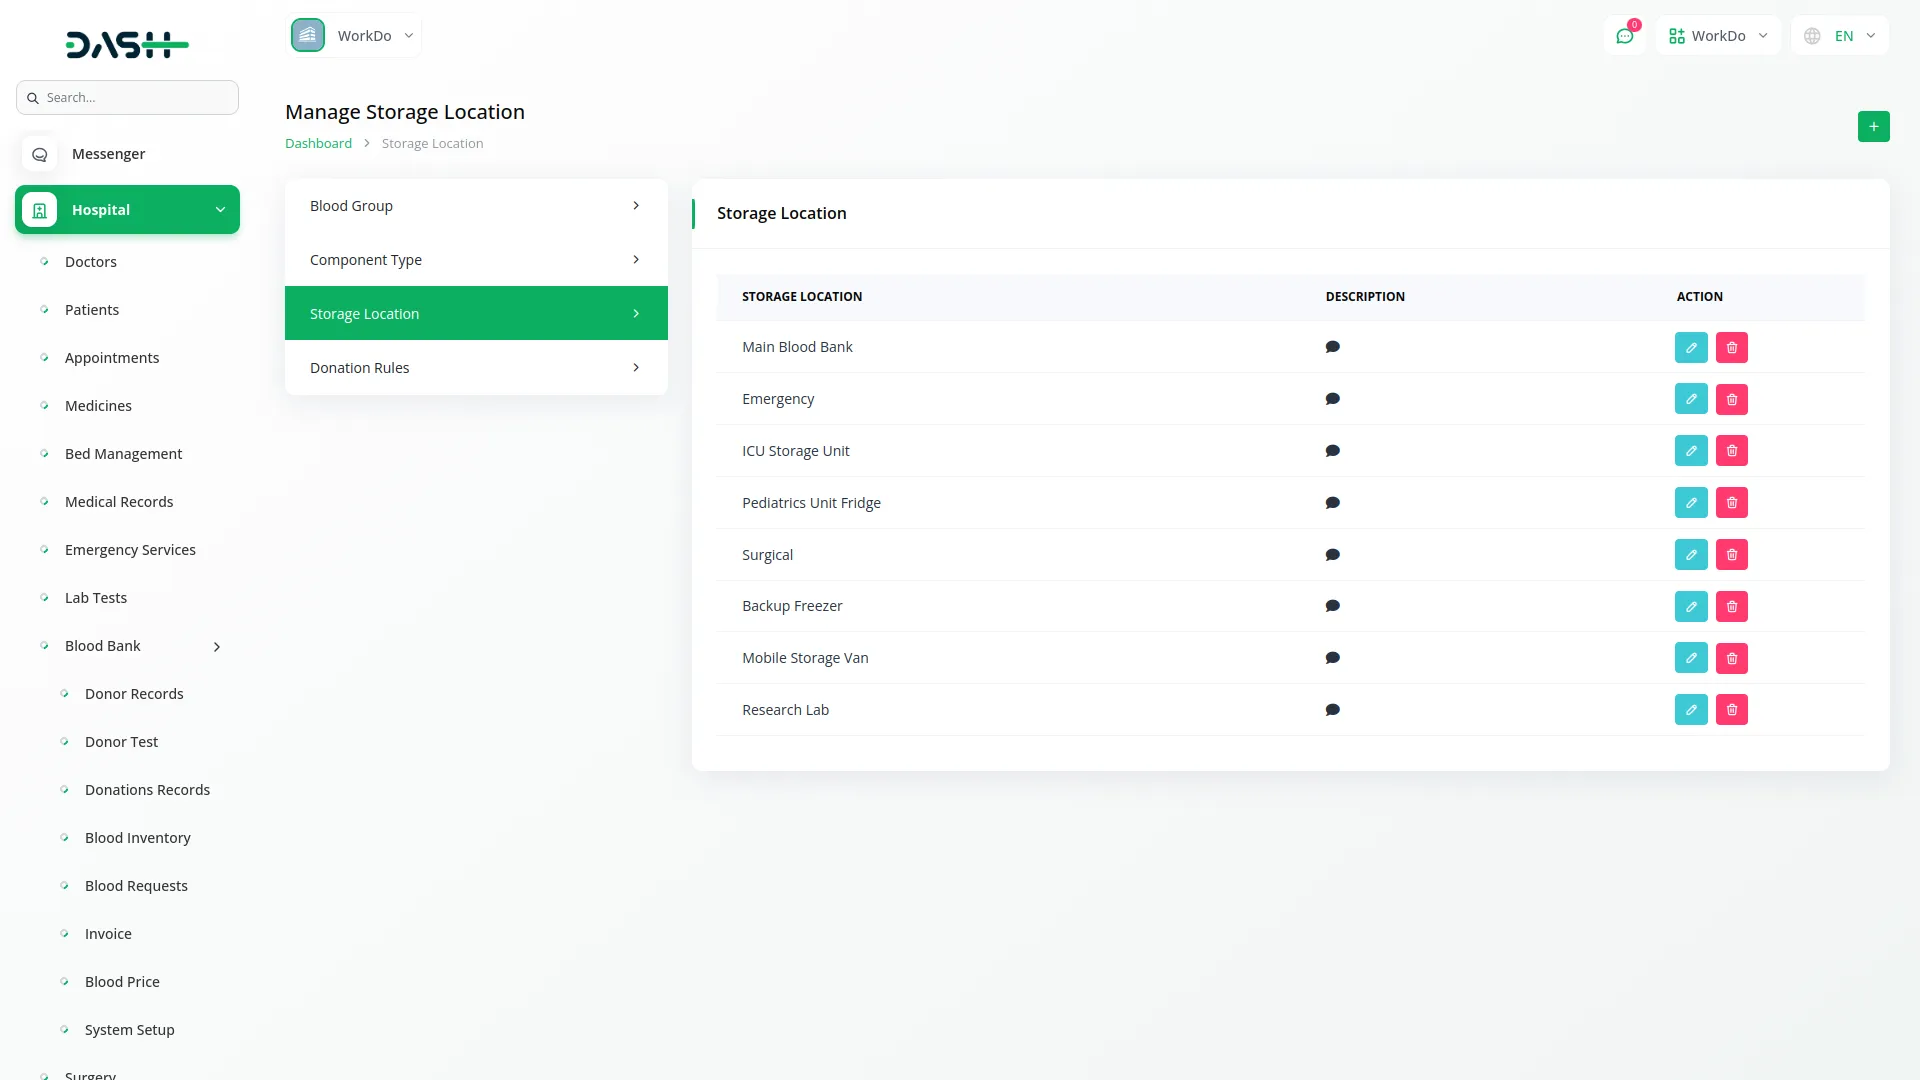
- On the Storage page, you can easily create a new Storage Location by clicking the “Create” button at the top of the Storage Location page. Enter the location name and write a description.
- The list page provides all storage locations in a table format with Storage Location name, Description. With Action column help you can easily edit your storage location data, and delete whenever you need.
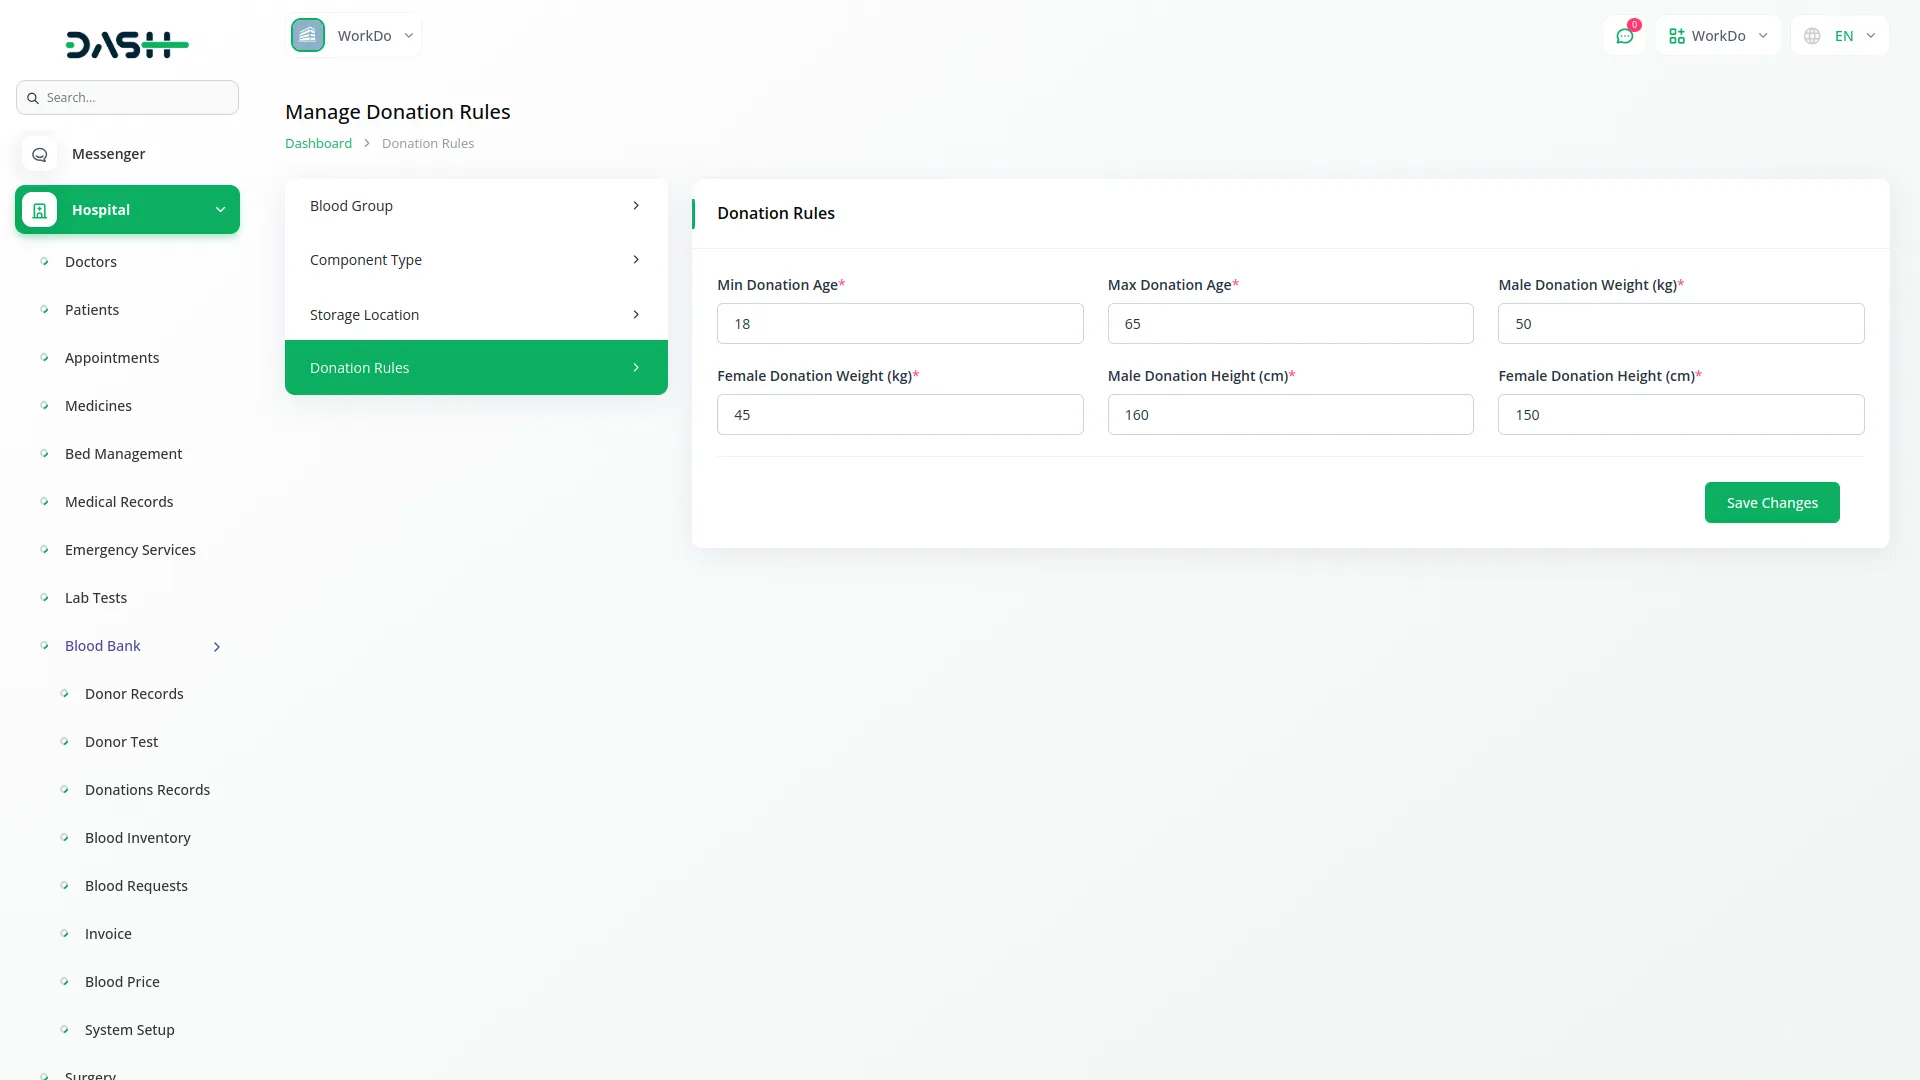
Manage Donation Rules
- After creating the storage location, to configure Donation Rules, click the “Edit” button on the donation rules page.
- Enter the minimum and maximum donation ages. Set the male or female donation weight requirement in kilograms. Also specify the male or female donation height requirement in centimeters.
Manage Donor Records
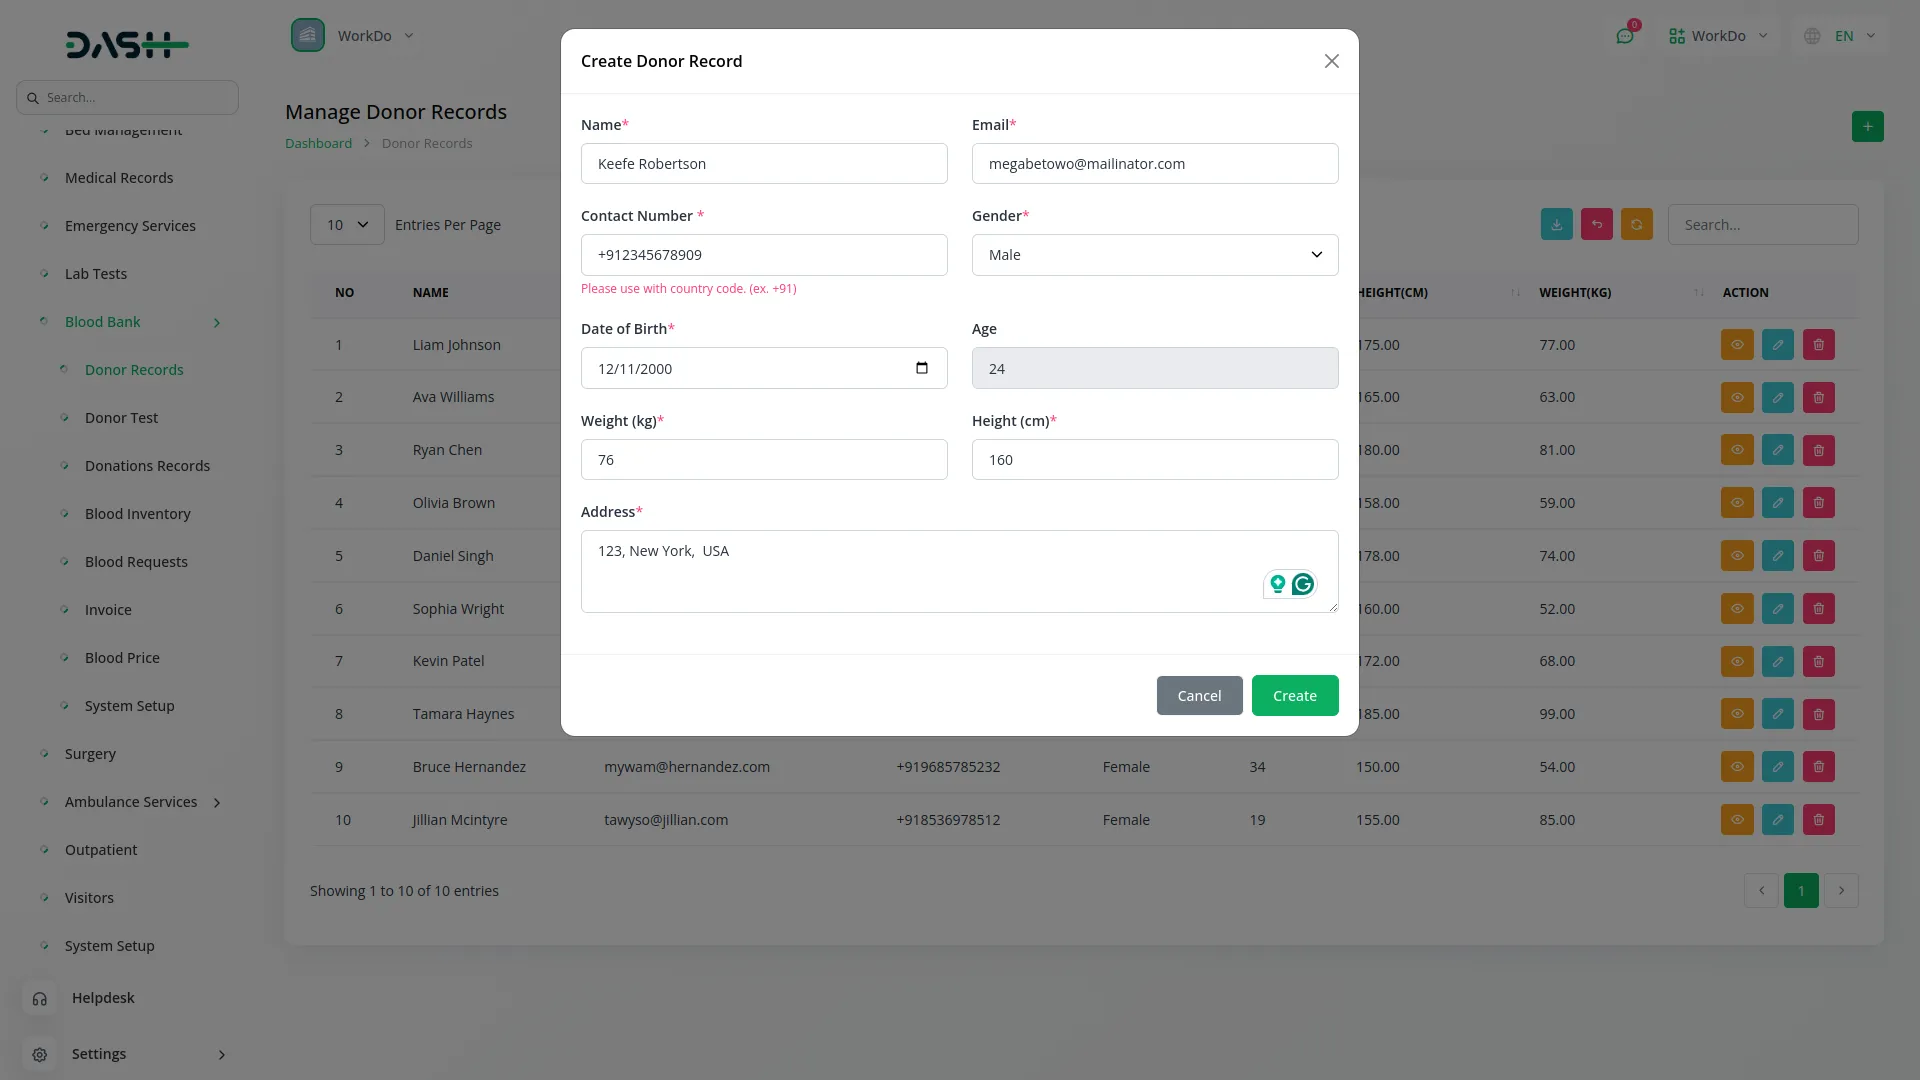
- To create a new Donor Record, click the “Create” button at the top of the donor records page. First, you need to enter the donor’s full name, email address, and contact number.
- Select the gender and enter the date of birth, which will automatically calculate and display the age. Record the donor’s weight in kilograms and height in centimeters, then enter their complete address information.
- The Add-On will automatically validate the donor information against the donation rules configured in the System Setup section to ensure eligibility criteria are met.
- On the list page, you can see all donor records in a table displaying columns including record number, Name, Email, Contact number, Gender, Age, Height in centimeters, and Weight in kilograms.
- Along with that, you can use the search, export, reset, and reload buttons to manage your donor record. In the available Action column, you can click the “View” to see complete donor details, or you can use edit to modify donor information, and delete to remove donor records permanently.
Blood Donor Test
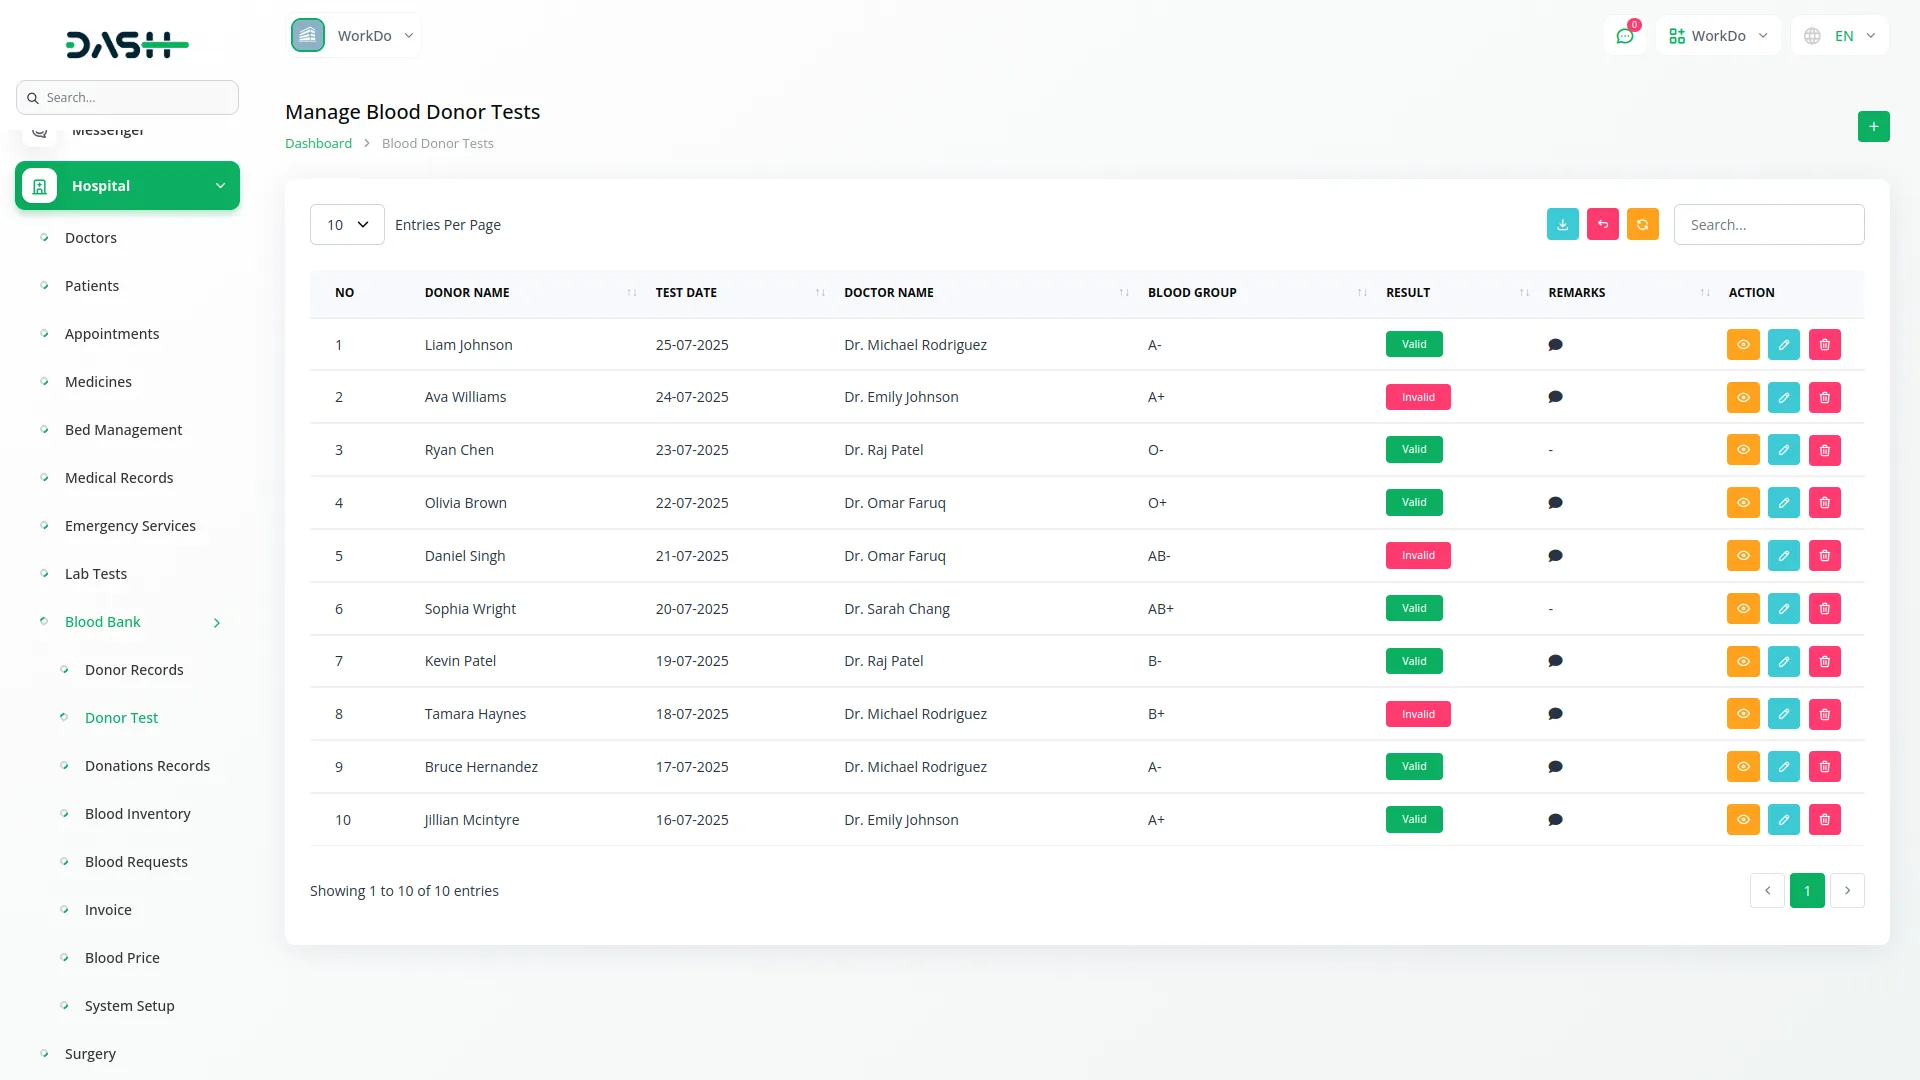
- After creating a donor record, to create a new blood donor record, click the “Create” button at the top of the blood donor test page.
- After that, select the Donor Name from the dropdown(comes from the donor record section). Enter the test date. Choose the Doctor Name from the dropdown(comes from the hospital doctor section)
- Select the appropriate Blood Group from the dropdown(comes from the system setup section). Choose the test Result (Valid/Invalid) based on the test outcomes. And at last, add notes.
- The Blood Donor Test list page displays all test records in a table of columns, including record number, Donor Name, Test Date, Doctor Name, Blood Group, Result showing Valid or Invalid status, and Remarks.
- Apart from that, you can use search, export, reset, and reload buttons to manage a blood donor test record. In the available action column, you can click the “View” to see complete test details, or edit, or delete options.
Donation Records Management
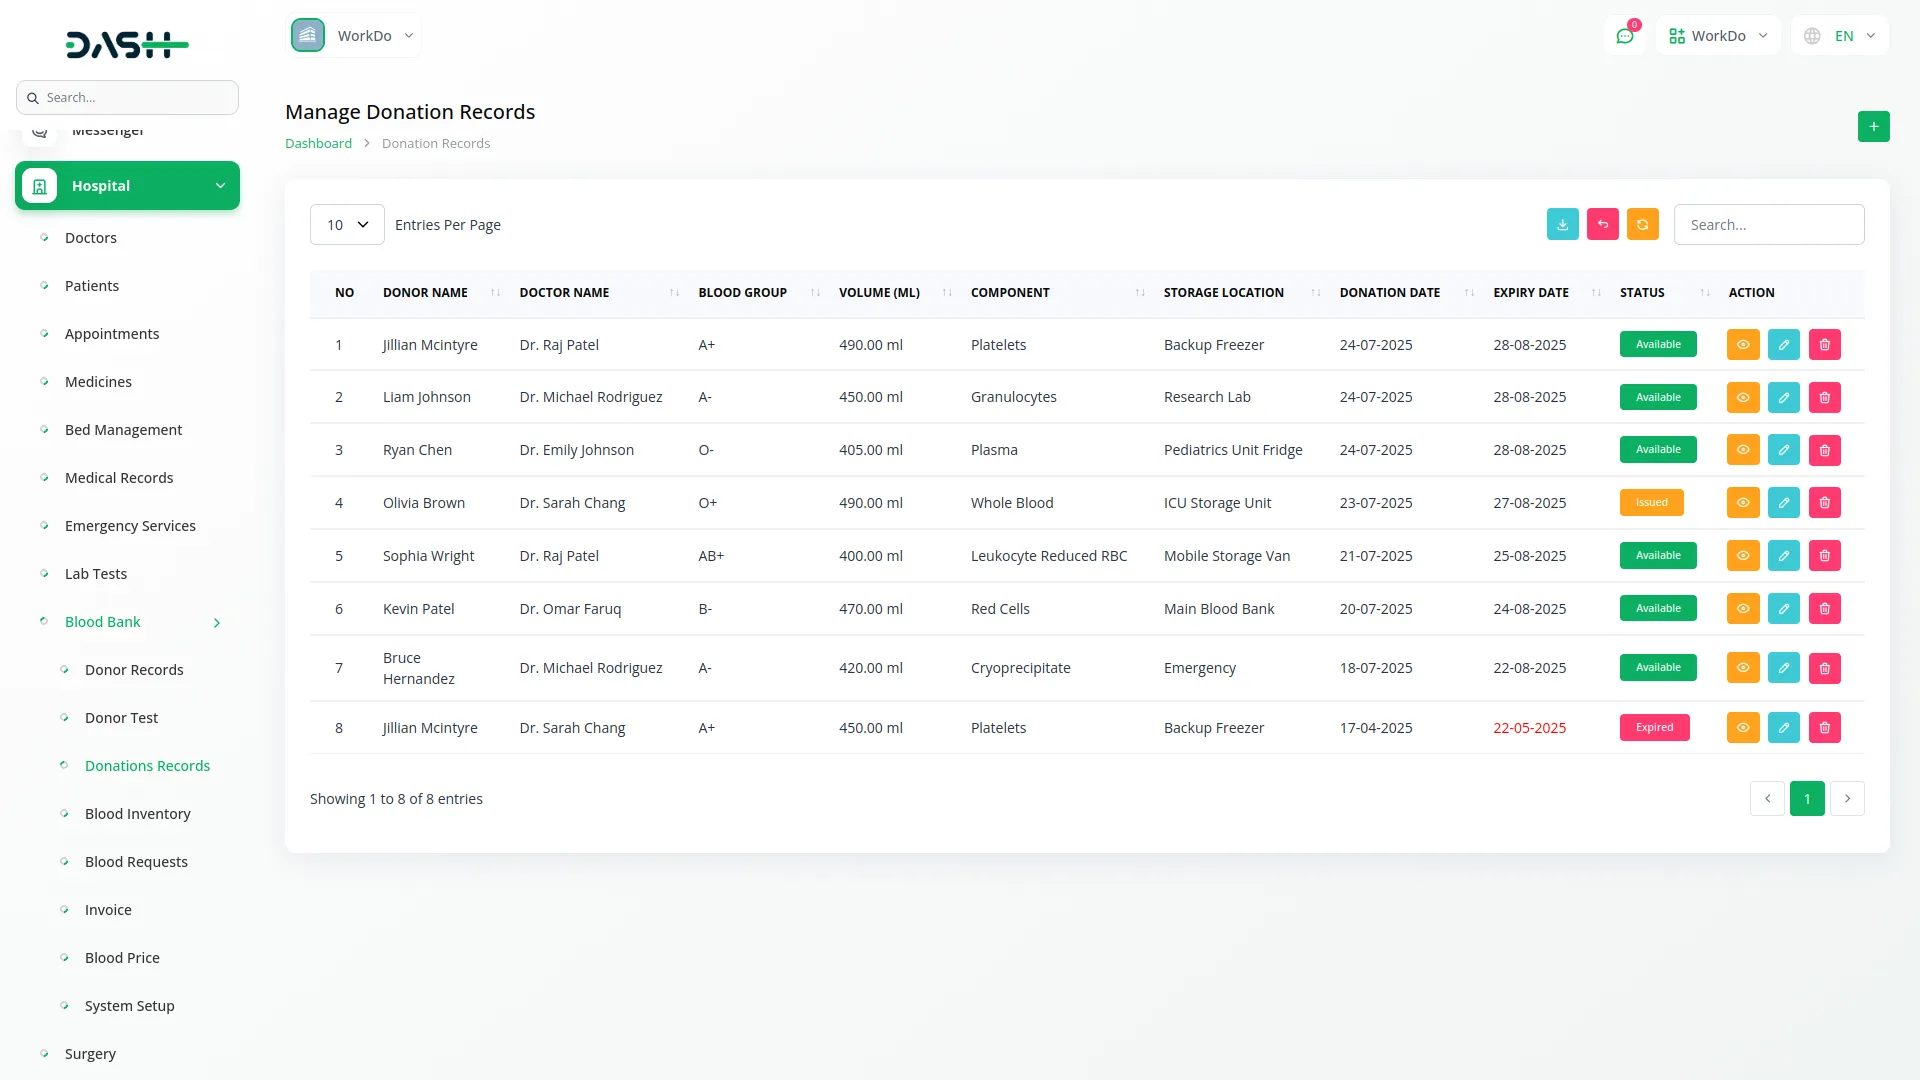
- To create a new Donation Record, click the “Create” button at the top of the donation records page. Select the Donor Name from the Come Donor Test section.
- After this, the blood test result is valid. The Test Date will automatically fill based on the selected donor name. Choose the Doctor Name from the dropdown that comes from the Hospital Doctor section. Select the Blood Group from the options configured in the System Setup section.
- Choose the Component Type from the dropdown (comes from the system setup section), and select the appropriate Storage Location where the blood will be stored. Enter the Donation Date and specify the Volume. Select the Status (Available, Expired, or Issued) from the dropdown. The Add-On will automatically calculate and fill the Expire Date as 35 days after the donation date. And at last, add notes.
- The system will also set the Next Eligible Donation Date, which is 3 months after the current Donation Date. This ensures that the donor is restricted from making another donation until 3 months have passed, in compliance with medical guidelines. Finally, add any relevant Notes.
- The list page displays all donation records in a table with columns for record number, Donor Name, Doctor Name, Blood Group, Volume in milliliters, Component type, Storage Location, Donation Date, Expiry Date, and Status showing Available, Expired, or Issued.
- Besides all these details, you can use the search, reset, and reload buttons to manage donation records. With the help of the Action column, click the “view” button to see complete donation details, or you can also use the edit or delete button to modify your donation data.
Manage Blood Inventory
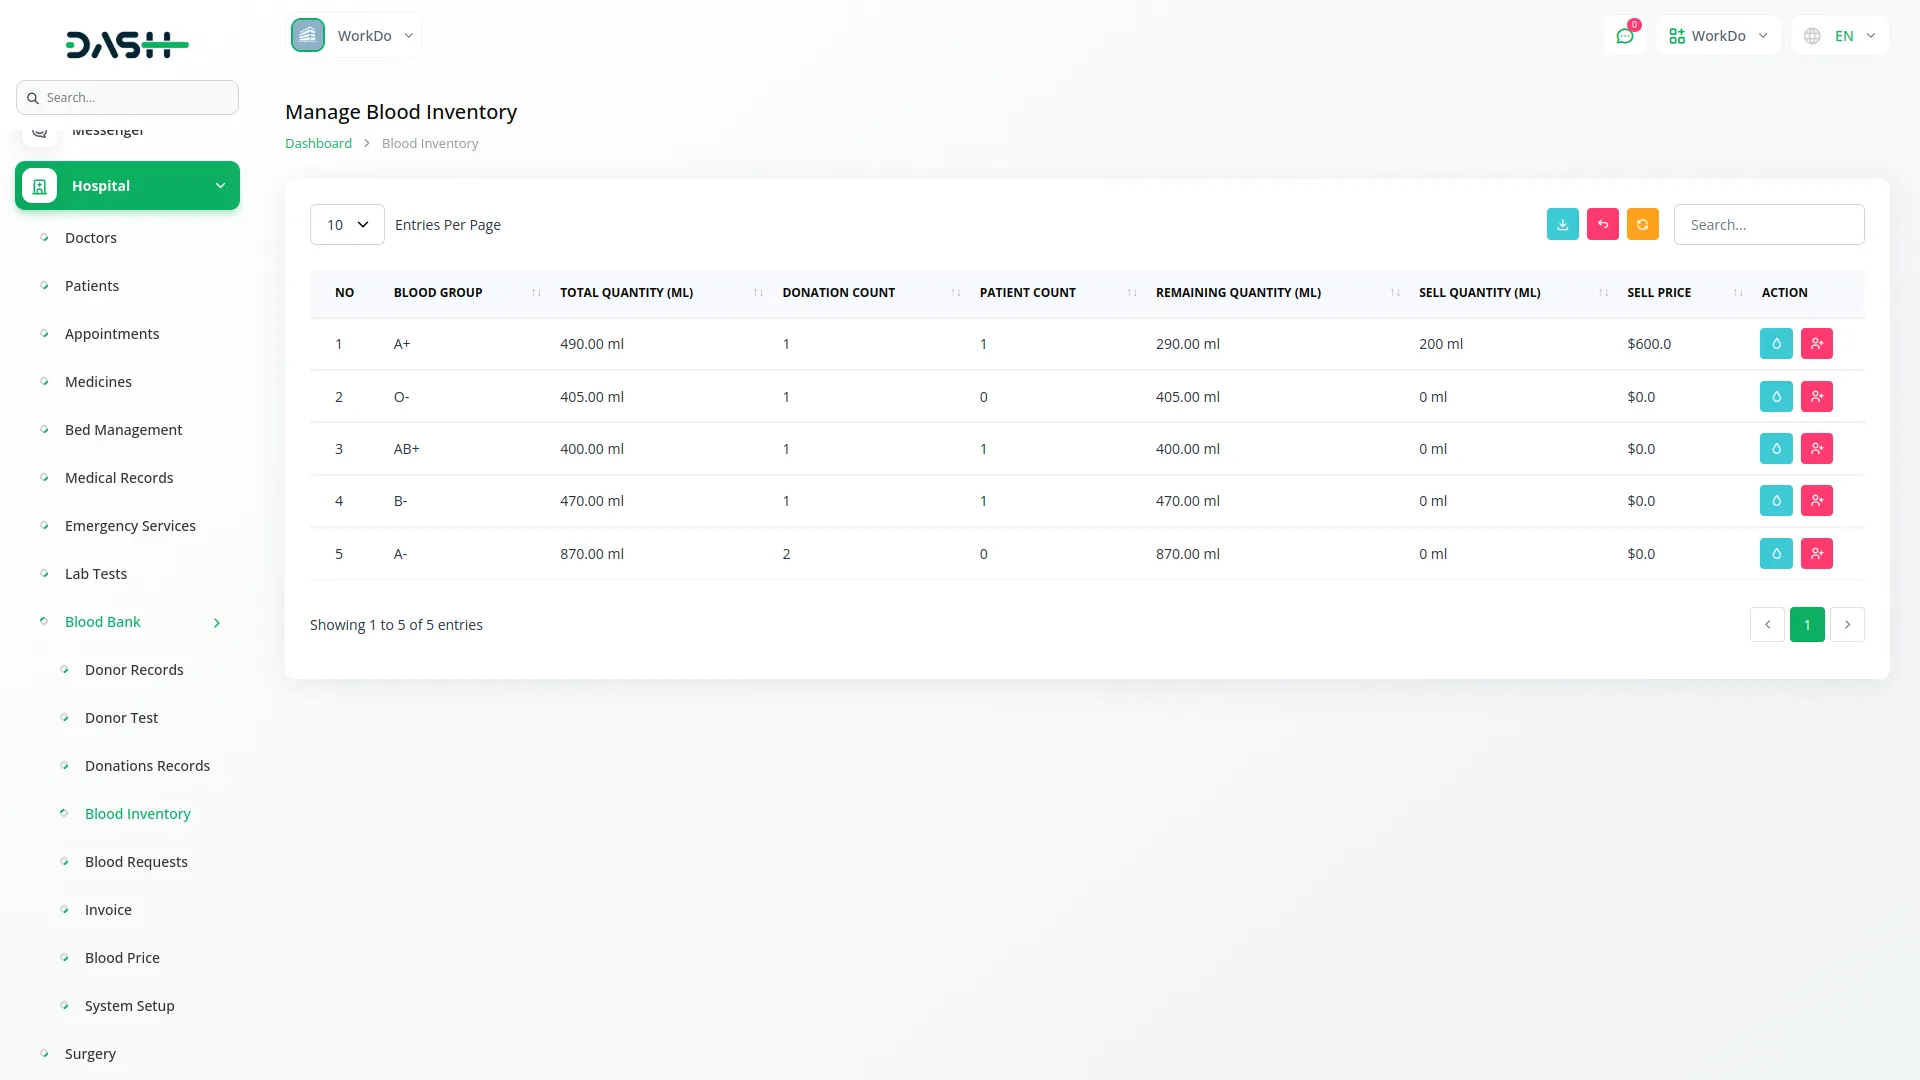
- The Blood Inventory section provides an overview of all blood stock available in the blood bank system.
- On this page, you’ll see all blood inventory records in a table with a column including record number, Blood Group, Total Quantity in milliliters, Donation Count, Patient Count, Remaining Quantity in milliliters, Sell Quantity in milliliters, Sell Price, and Action options.
- Beyond these details, use the search, export, reset, and reload buttons, view blood donors, and view patients.
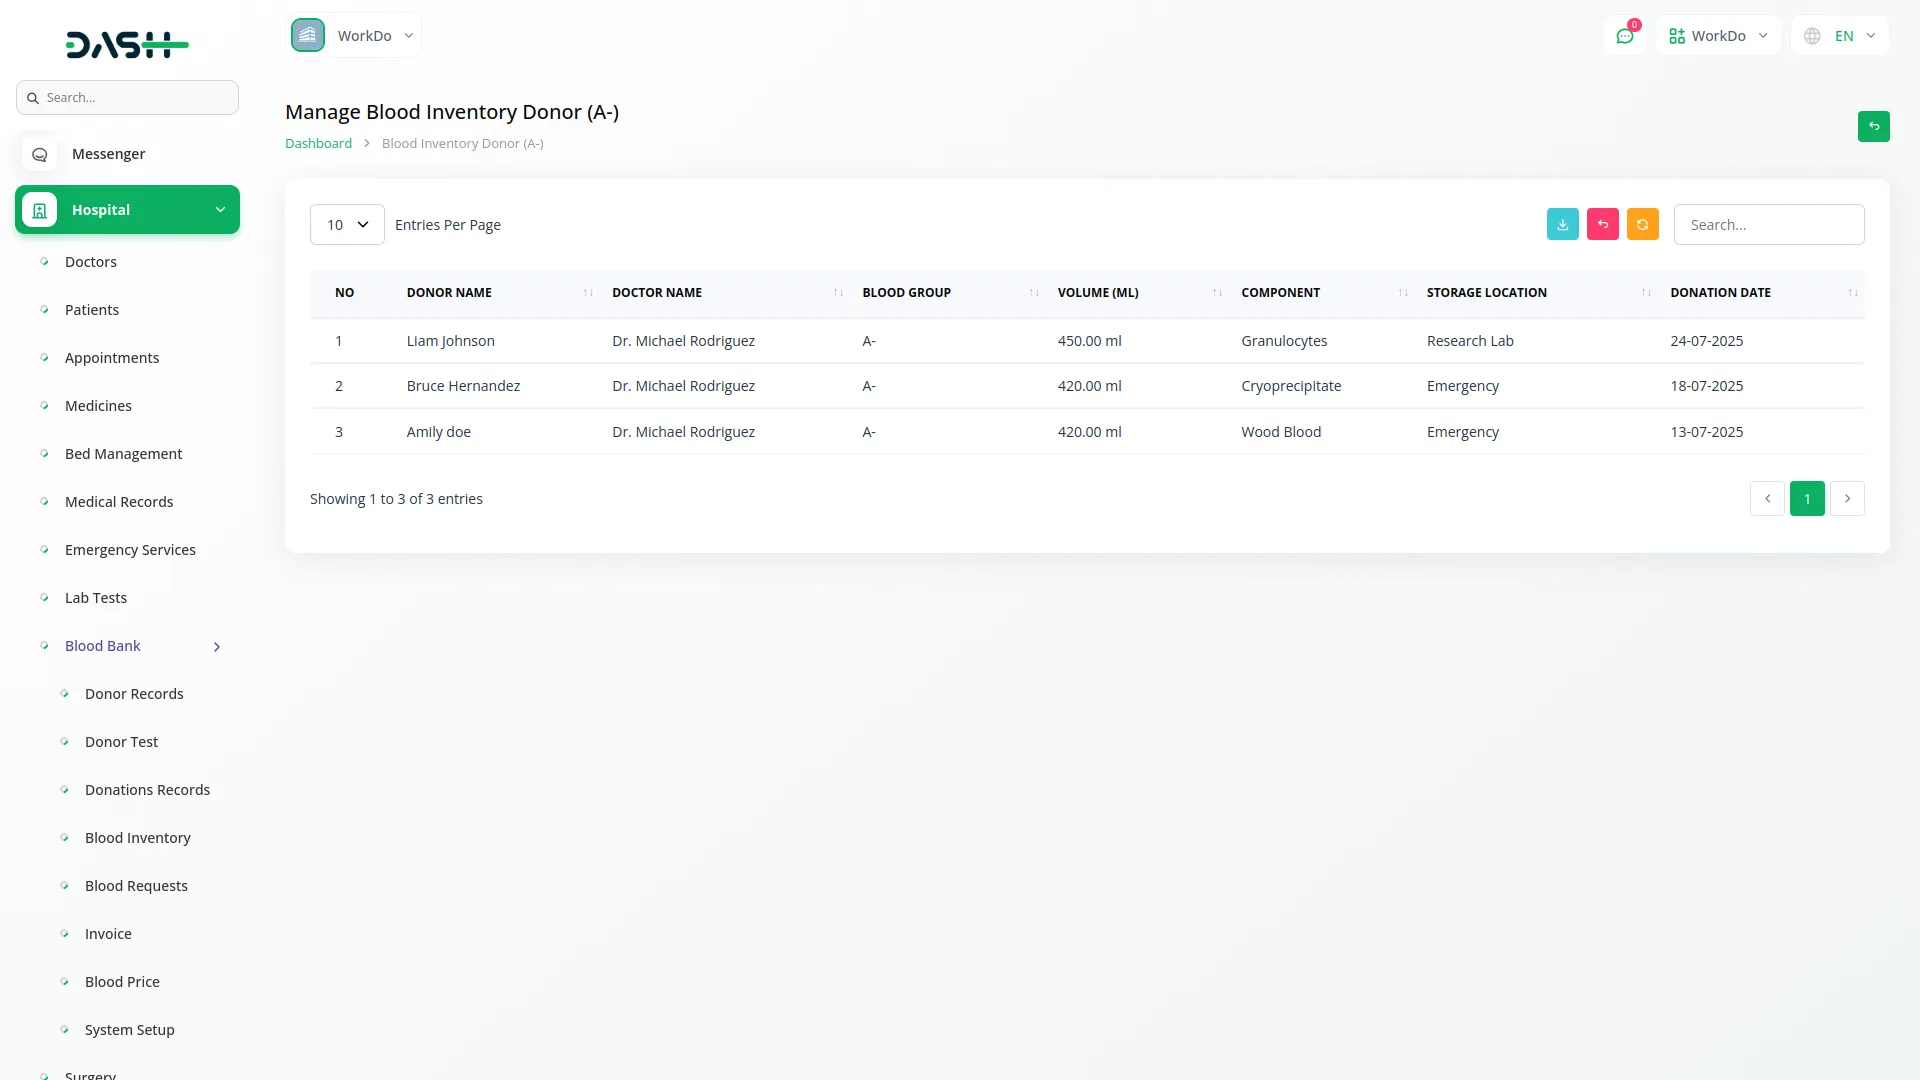
- When you click View Donor for a specific blood group, you will see a detailed list page showing all donors for that blood group. This page displays a table with columns for record number, Donor Name, Doctor Name, Blood Group, Volume in milliliters, Component type, Storage Location, and Donation Date. With search, export, reset, reload, and create buttons to manage your data.
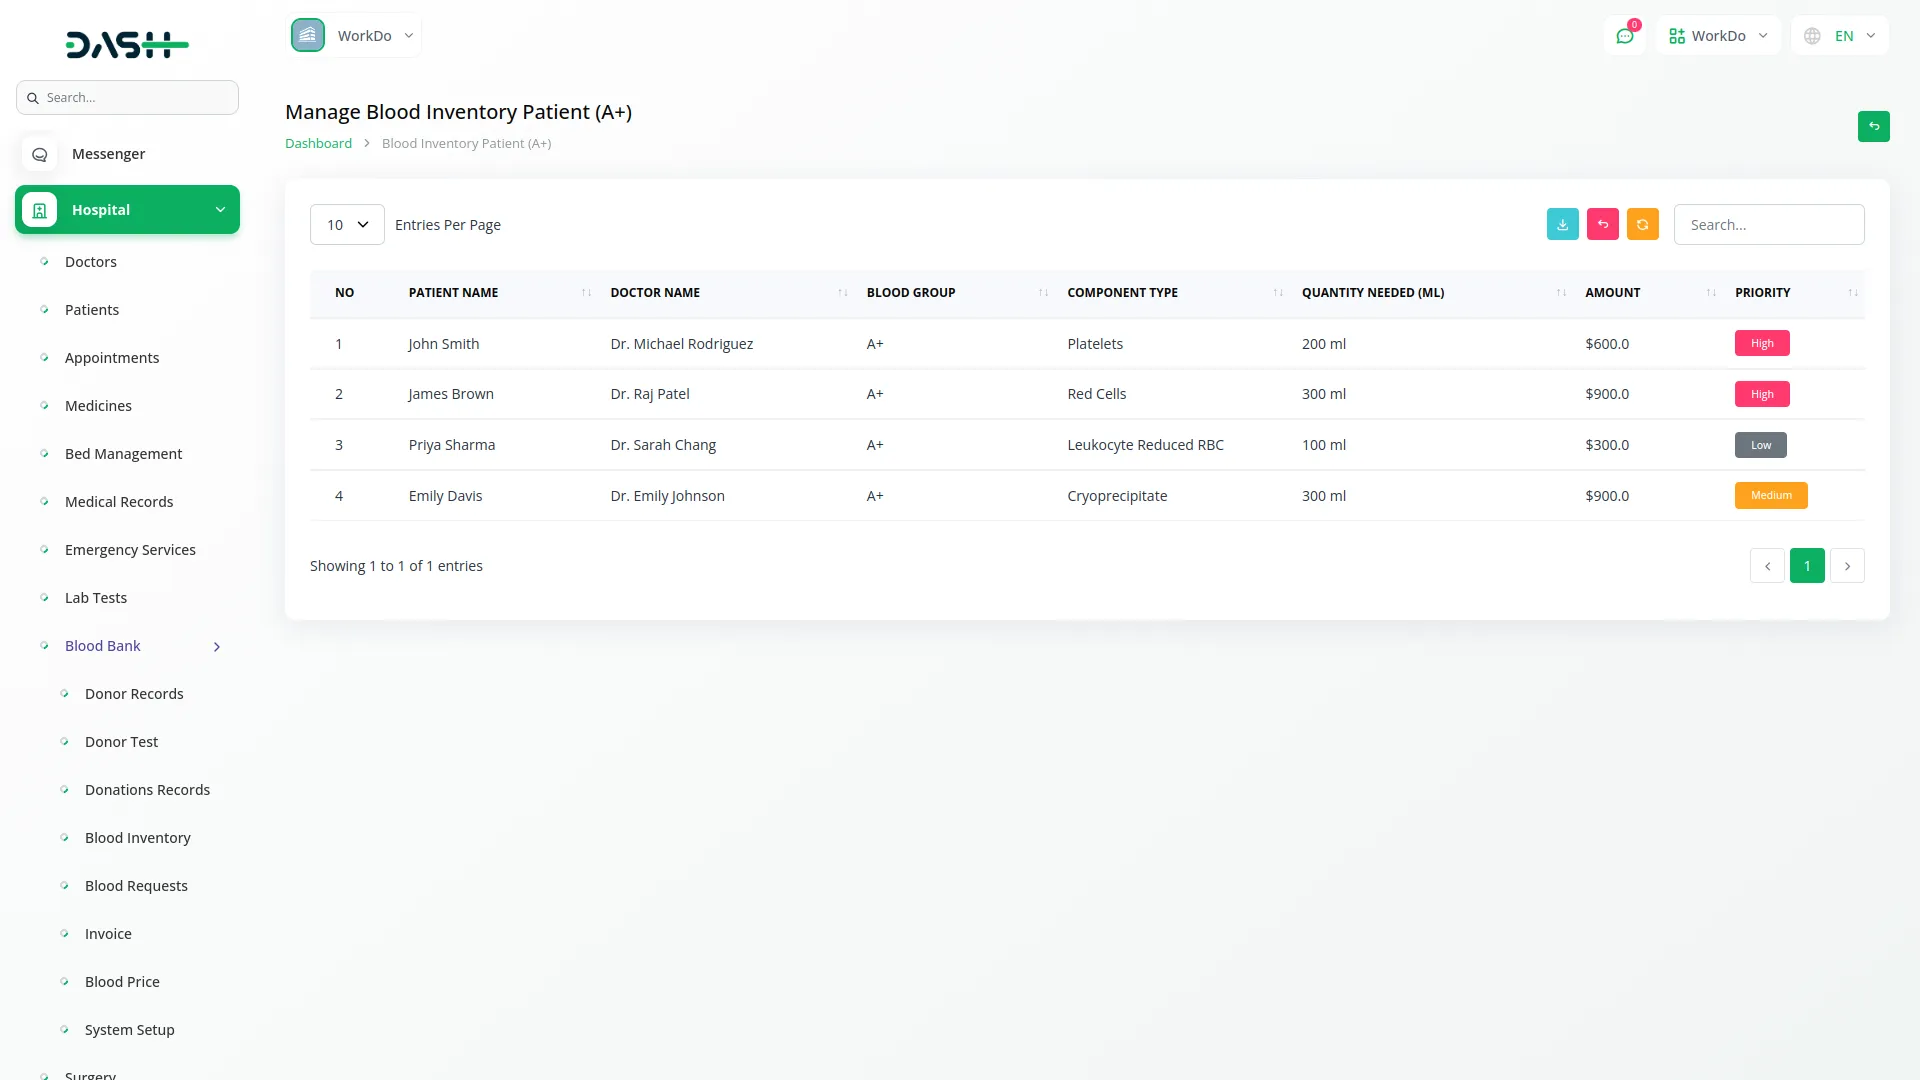
- When you click View Patient for a specific blood group, you will see all patient requests for that blood group. The list page includes a table with columns for record number, Patient Name, Doctor Name, Blood Group, Component Type, Quantity Needed in milliliters, Amount, and Priority level, showing Low, Medium, or High. with search, export, reset, reload, and create button to manage your data.
Manage Blood Price
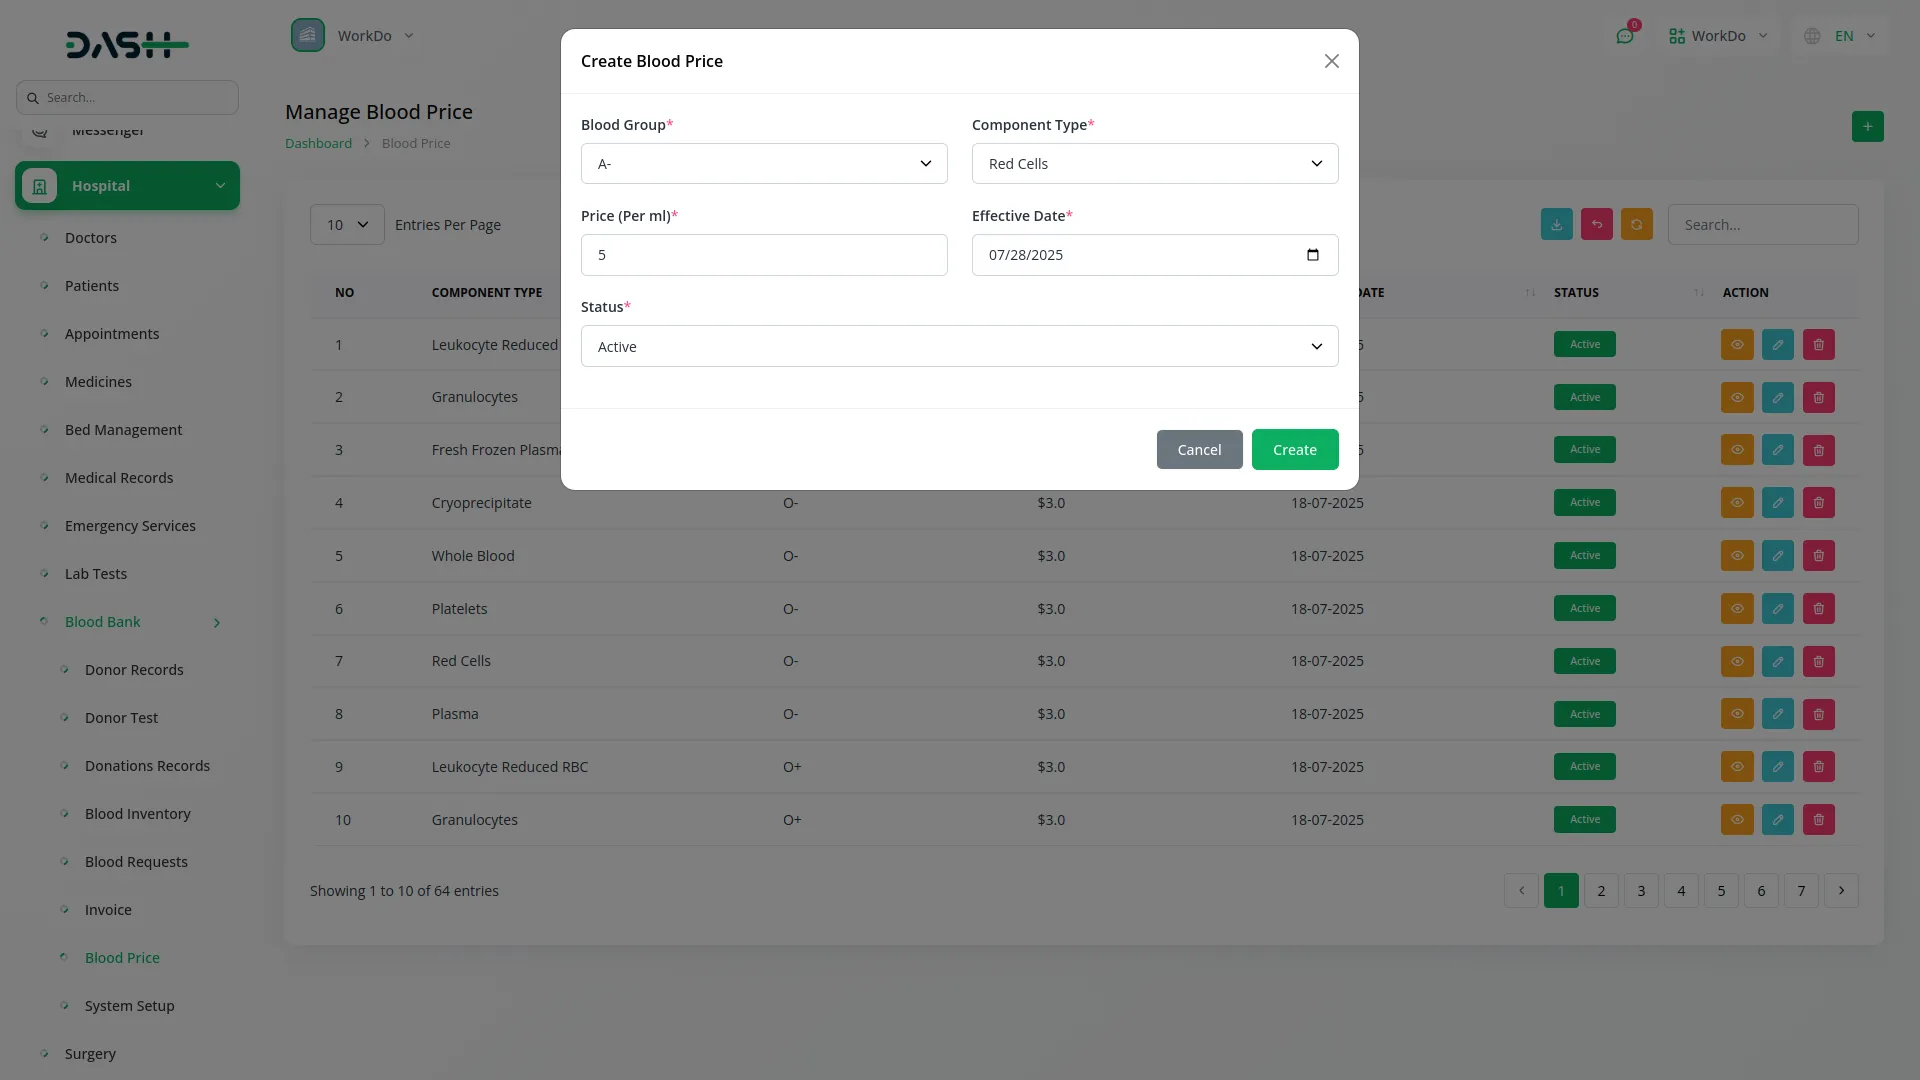
- On this page, you can create a new Blood Price record by clicking the “Create” button at the top of the Blood Price page.
- After this, select the Blood Group from the dropdown (comes from the System Setup section). Choose the Component Type from the dropdown (comes from the system setup section). Enter the Price Per milliliter. Set the Effective Date. Select the Status as either Active or Inactive.
- On the list page, display all price records in a table with columns for record number, Component Type, Blood Group, Price Per milliliter, Effective Date, and status showing Active or Inactive. Use the search, export, reset, and reload buttons to manage your blood price record.
- Apart from this detail, you can see available Actions include clicking the View to see complete pricing details, Edit to modify price information, and Delete to remove pricing records from the system.
Blood Requests Management
- To create a new Blood Request, click the “Create” button at the top of the blood requests page. Then, fill in the required details, like selecting the Patient Name from the dropdown that comes from the Hospital Patient section. Choose the Doctor Name from the dropdown that comes from the Hospital Doctor section.
- After that, enter the Hospital Name. Select the Blood Group from the dropdown (comes from the System Setup section). Choose the Component Type from the dropdown (comes from the system setup section).
- Next, enter the quantity. The Total Amount will automatically calculate based on the selected Blood Group and Component Type pricing from the Blood Price section multiplied by the Quantity Needed.
- Enter the Request Date. Select the Priority level as Low, Medium, or High based on the urgency of the request. Enter the delivery Address and finally write a note.
- The list page displays all blood requests in a table of columns, include record number, Blood Group, Component Type, Patient Name, Doctor Name, Request Date, Quantity Needed in milliliters, Amount, Status showing Pending, Approved, Rejected, or Issued, Priority showing Low, Medium, or High. Use the search, export, reset, and reload features to function your record.
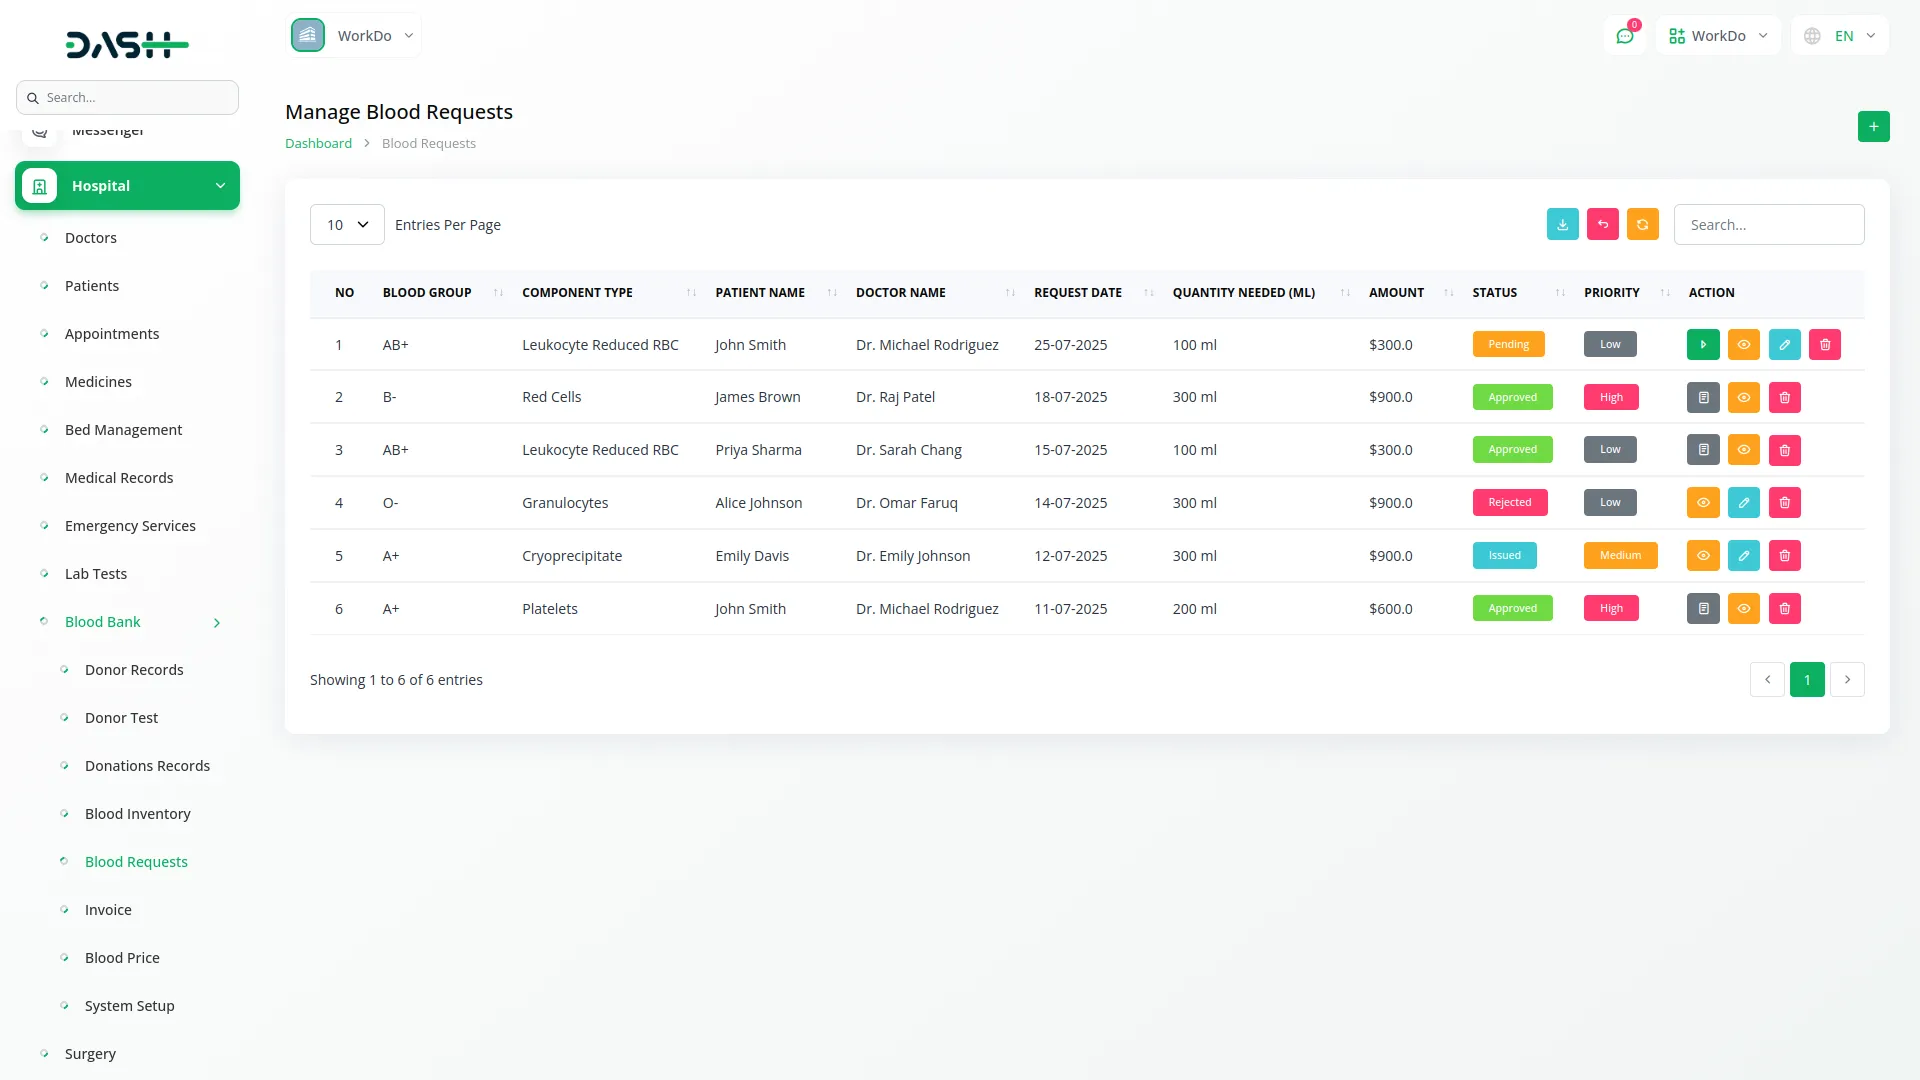
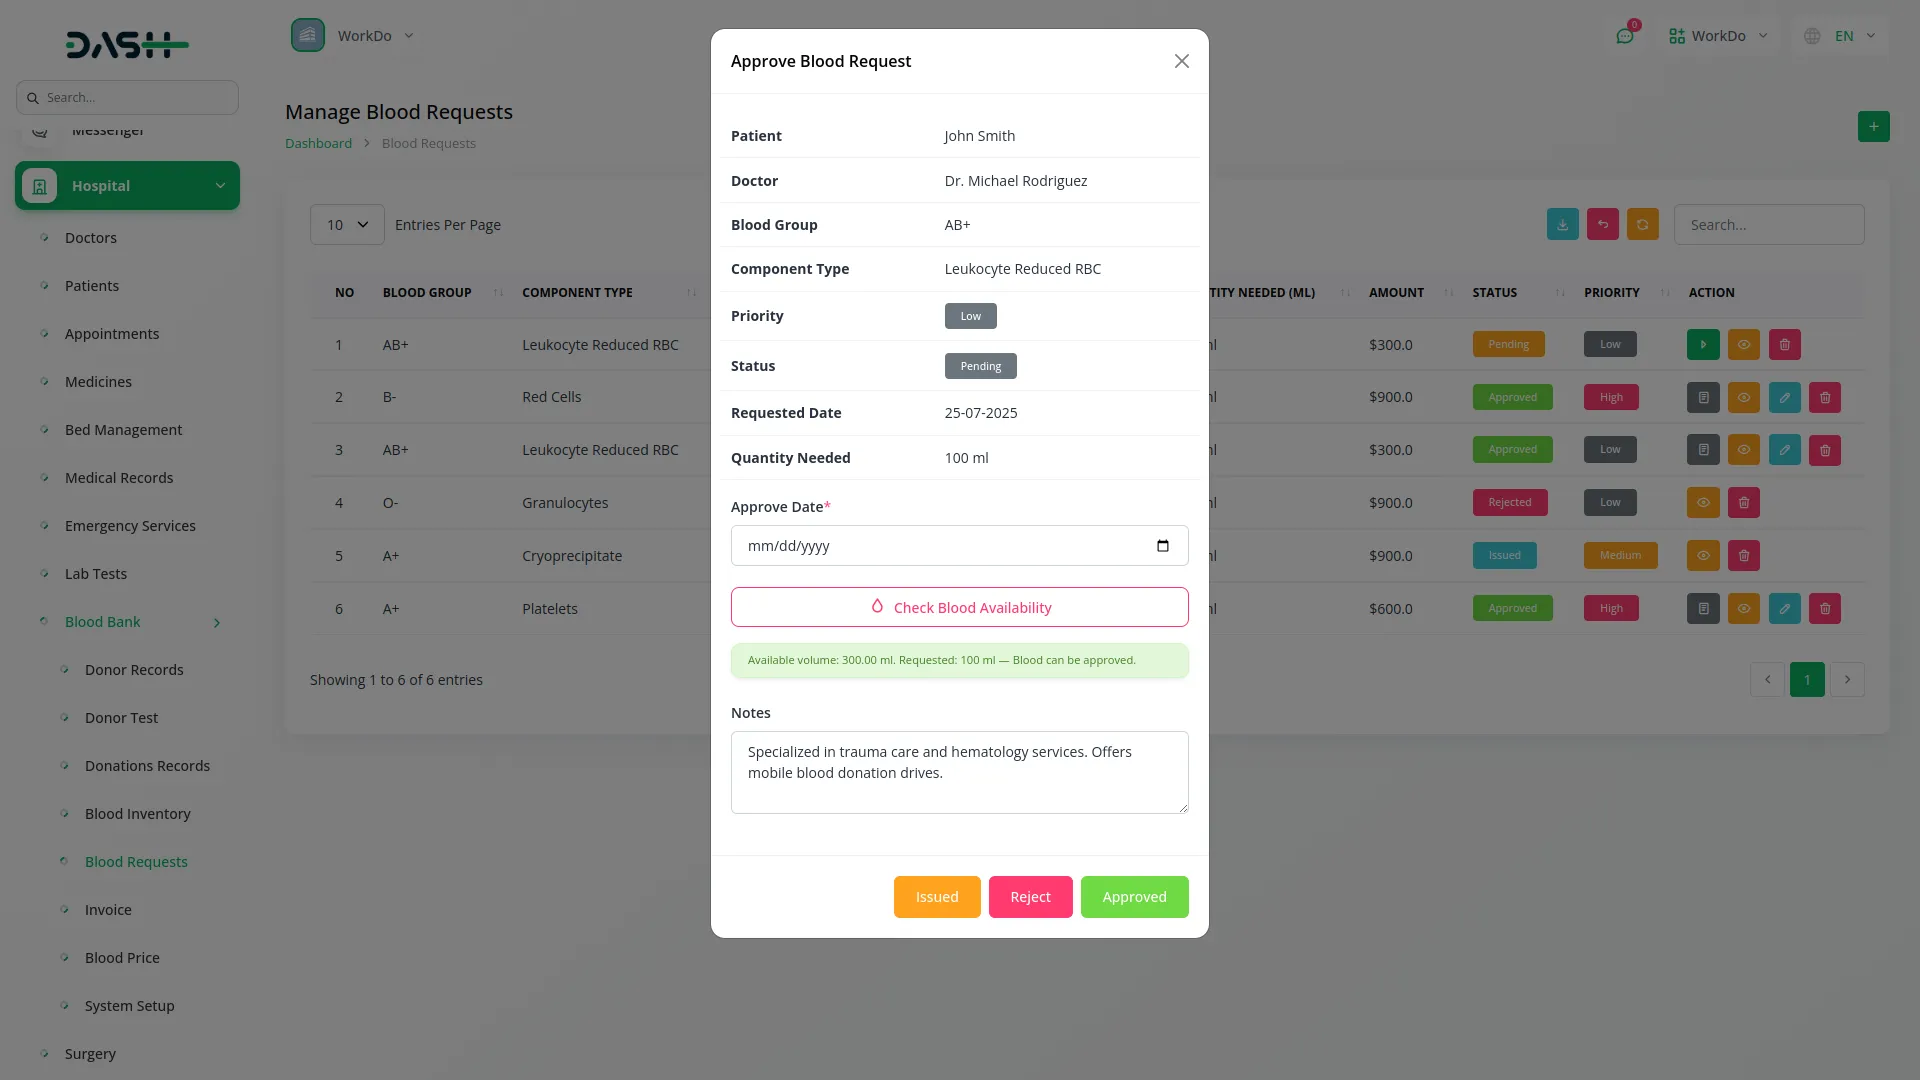
- In the Action column click the action button to set status which will be only visible if you click the check blood availability button (Approved, Rejected, or Issued), Invoice which appears when status is set to Approved, then click the invoice button to create a new invoice, View to see complete request details, Edit to modify request information, and Delete to remove requests from the system.
In the Action column, you can manage each blood request using several options. To begin, click the check blood availability button; once this is done, the status options will become visible, allowing you to set the request as Approved, Rejected, or Issued. If a request is marked as Approved, the Invoice button will appear, enabling you to create a new invoice for the transaction. You can also click the View button to see the complete request details. The Edit button allows you to modify request information such as patient details, blood group, or the quantity needed, while the Delete button can be used to permanently remove a request from the system.
Manage Invoice
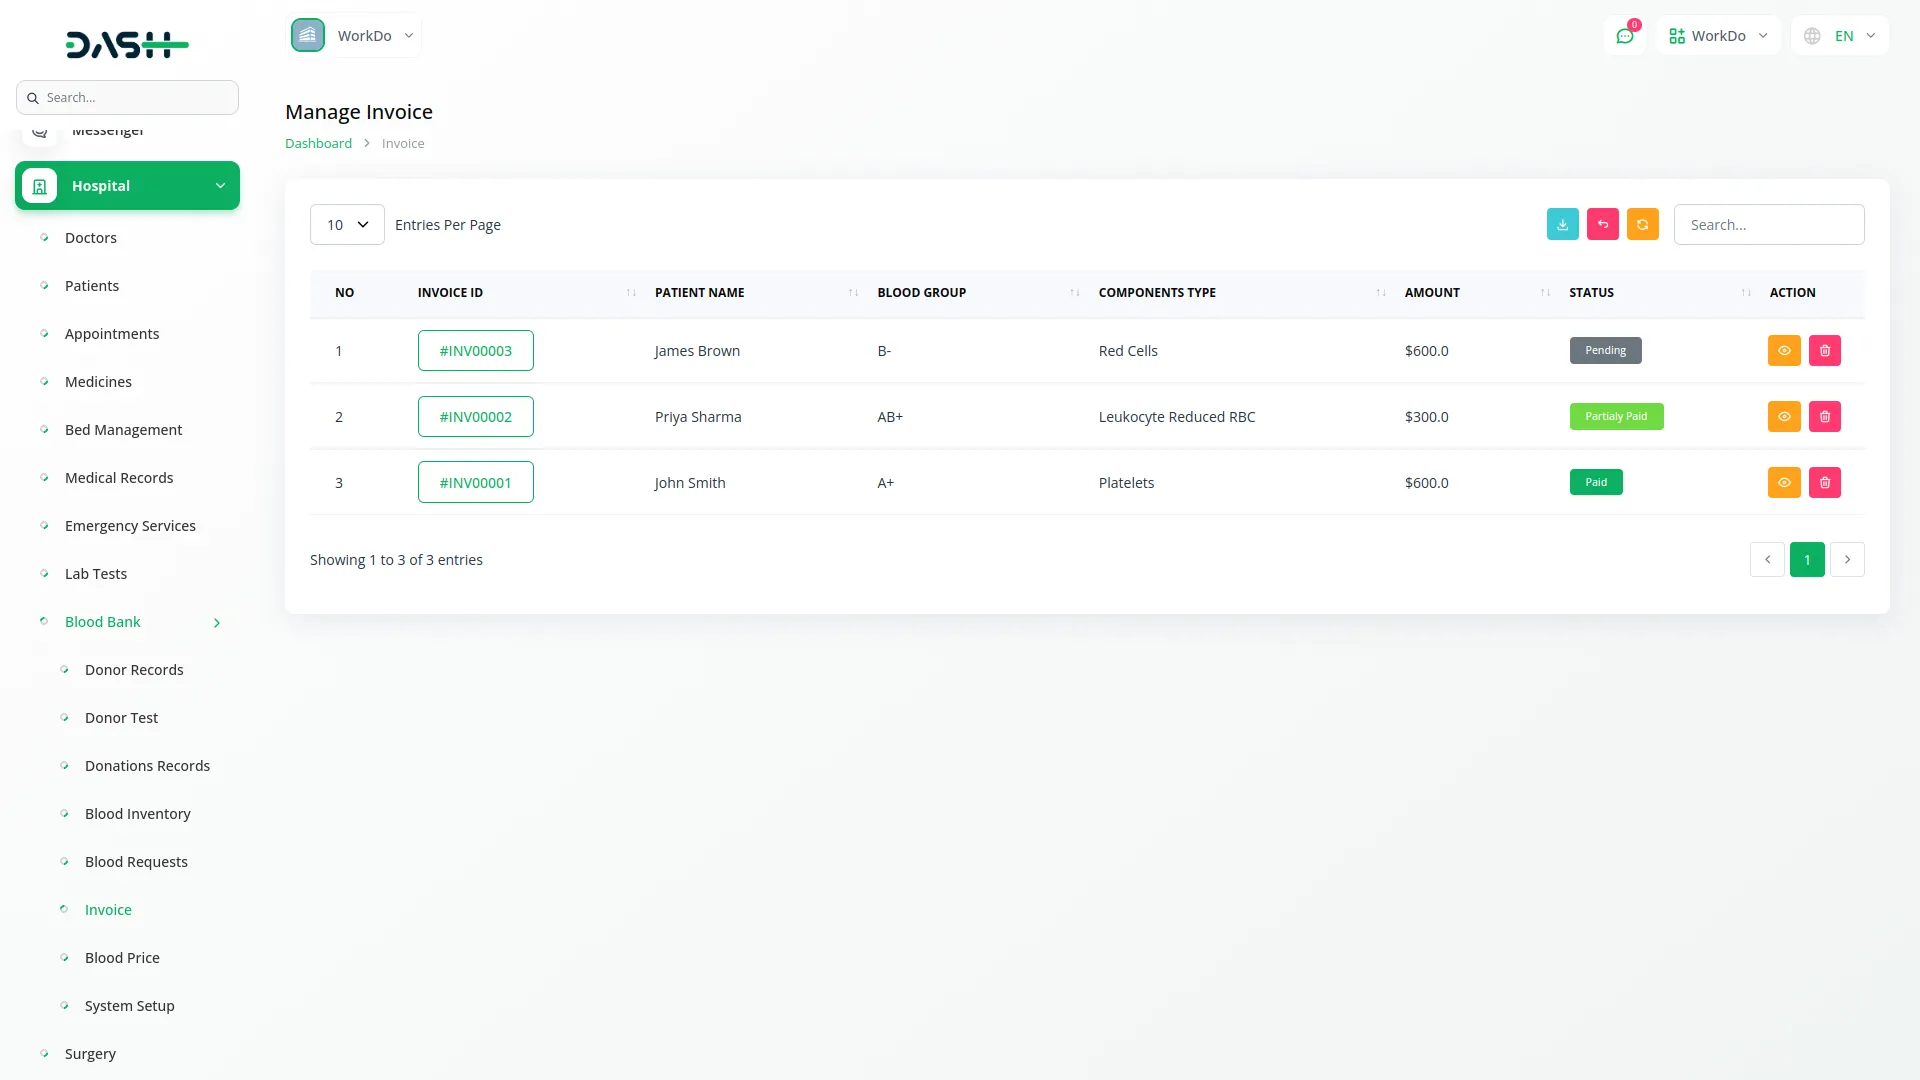
- The invoice you created on the blood request page will be visible on the invoice page. The Invoice section manages all billing and payment records for blood requests that have been approved.
- On this page, you’ll see all invoice records in a table showing columns for record number, Invoice ID, Patient Name, Blood Group, Component Type, Amount, and Status, showing Pending, Partially Paid, or Paid.
- Besides all these details, you’ll see search, export, reset, and reload buttons to manage your data. In the actions column, click View to see complete invoice details, and Delete to remove invoice records.
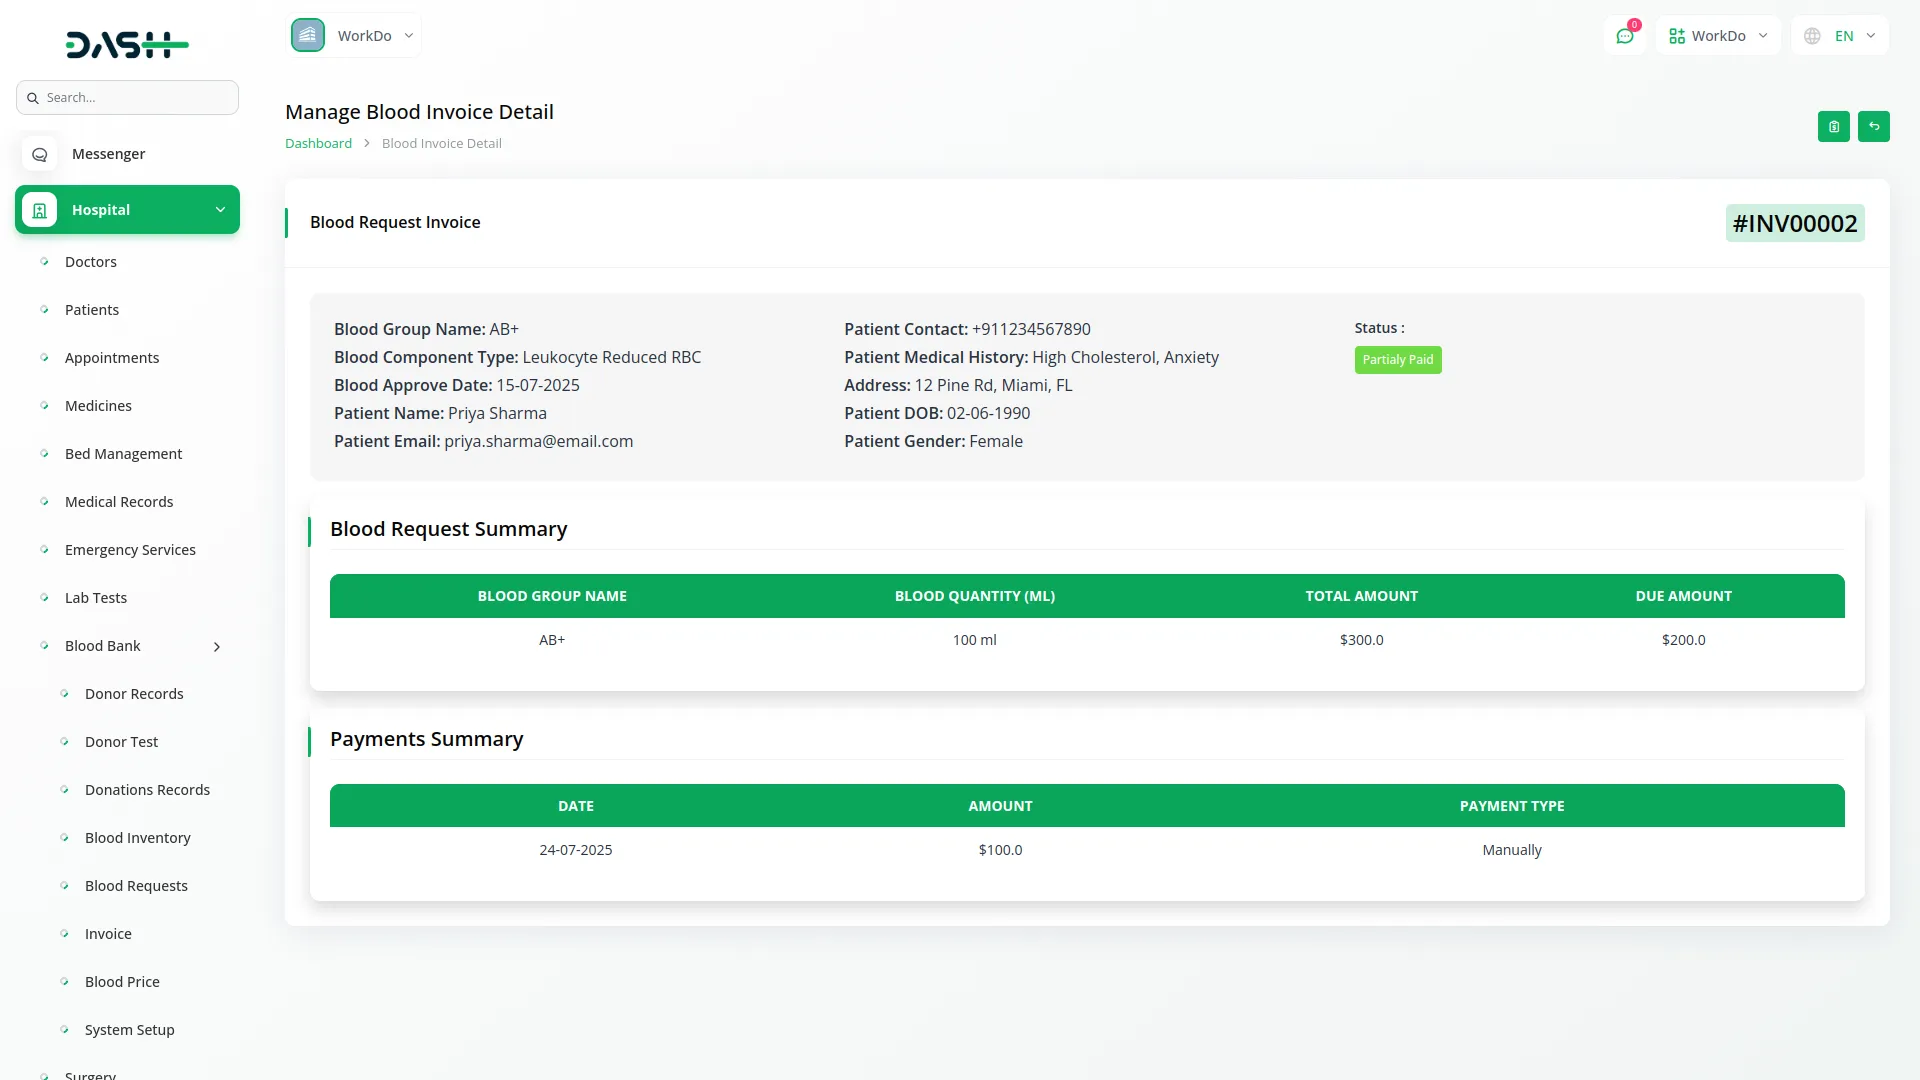
- When you click View for an invoice, the action page opens, showing detailed invoice information. At the top of the page, you will find a “Pay Now” button to process payments.
- When you click “Pay Now”, a pop-up form appears with a Blood Charge where you can enter the payment amount being processed.
- The invoice view page displays complete patient invoice data along with two summary sections. The Blood Request Summary shows a table with columns for Blood Group Name, Blood Quantity in milliliters, Total Amount, and Due Amount for all blood components included in the invoice.
- The Payments Summary section shows a table with columns for Date, Amount, and Payment Type, displaying the complete payment history for the invoice.
Categories
Related articles
- Sign-In With Twitter – eCommerceGo Addon
- Campaign Integration in eCommerceGo SaaS
- Notes Integration in Dash SaaS
- Franchise Management Integration in Dash SaaS
- Steps of how to install your PWA Application.
- Store Locator Module Integration in eCommerceGo SaaS
- Fast2SMS Add-On Integration in Dash SaaS
- Events Management Integration in Dash SaaS
- Fix Equipment Integration in Dash SaaS
- API WorkDo Dash SaaS Add-On
- Checkout Attachment – eCommerceGo Addon
- Training Integration in Dash SaaS
Reach Out to Us
Have questions or need assistance? We're here to help! Reach out to our team for support, inquiries, or feedback. Your needs are important to us, and we’re ready to assist you!


Need more help?
If you’re still uncertain or need professional guidance, don’t hesitate to contact us. You can contact us via email or submit a ticket with a description of your issue. Our team of experts is always available to help you with any questions. Rest assured that we’ll respond to your inquiry promptly.
Love what you see?
Do you like the quality of our products, themes, and applications, or perhaps the design of our website caught your eye? You can have similarly outstanding designs for your website or apps. Contact us, and we’ll bring your ideas to life.
