How To Generate Token of Meta
Create App WhatsApp setup live mode Instagram and facebook setup 1. Go to https://developer.facebook.com/apps and […]
1. Go to https://developer.facebook.com/apps and click on the Create App button.

2. Add the App Name and Contact Email, then click on the Next button.

3. Select the Other option and click on the Next button.

4. On the Select an App Type page, select the Business option and click on the Next button.

5. Enter the App Name and Email, then click on the Create App button given below.

6. Click on the Set Up App button.

7. Once you set up the app, you will see a section for WhatsApp Configuration in the sidebar. Here, you will see three options. Click on the Quickstart option, select the Business Portfolio from the dropdown, and then click on the Continue button.

8. Once you do that, click on the Start Using the API button.

9. Once you click on this button, you will be redirected to the API Setup page. Here, you will see a button for generating an Access Token. Click on that button, and your new access token will be generated. Once your token is generated, copy it and store it in your web application’s settings.

10. After this, you will need to configure webhooks, so click on the Configure Webhooks button given over there.

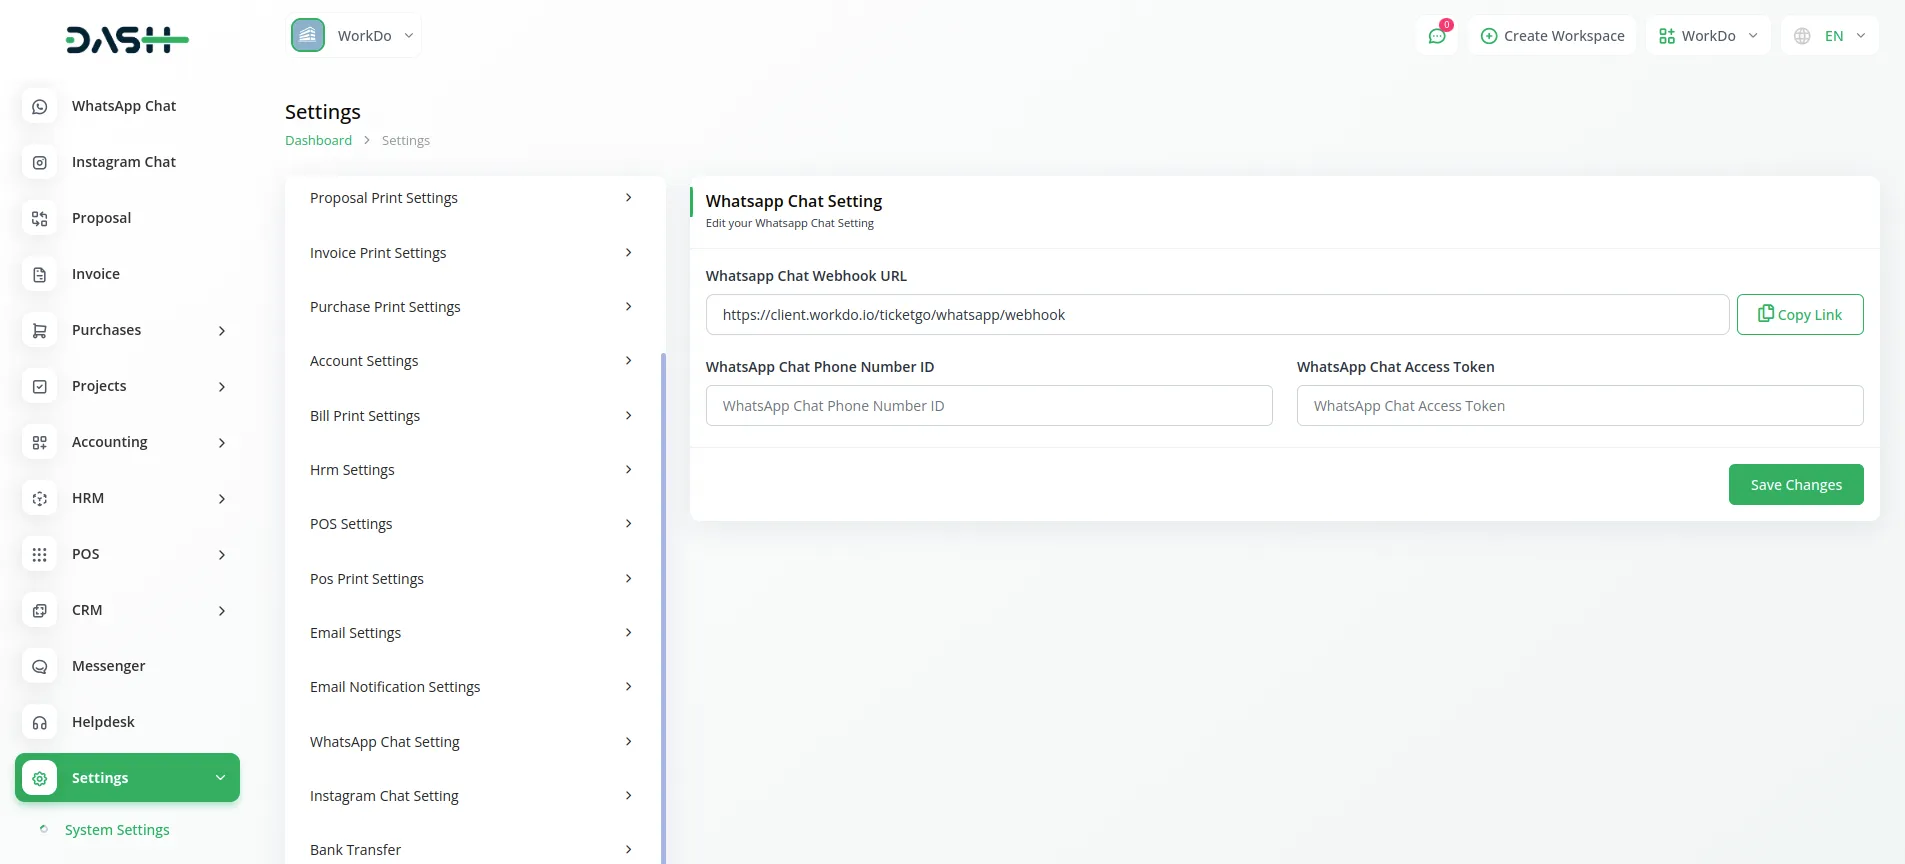
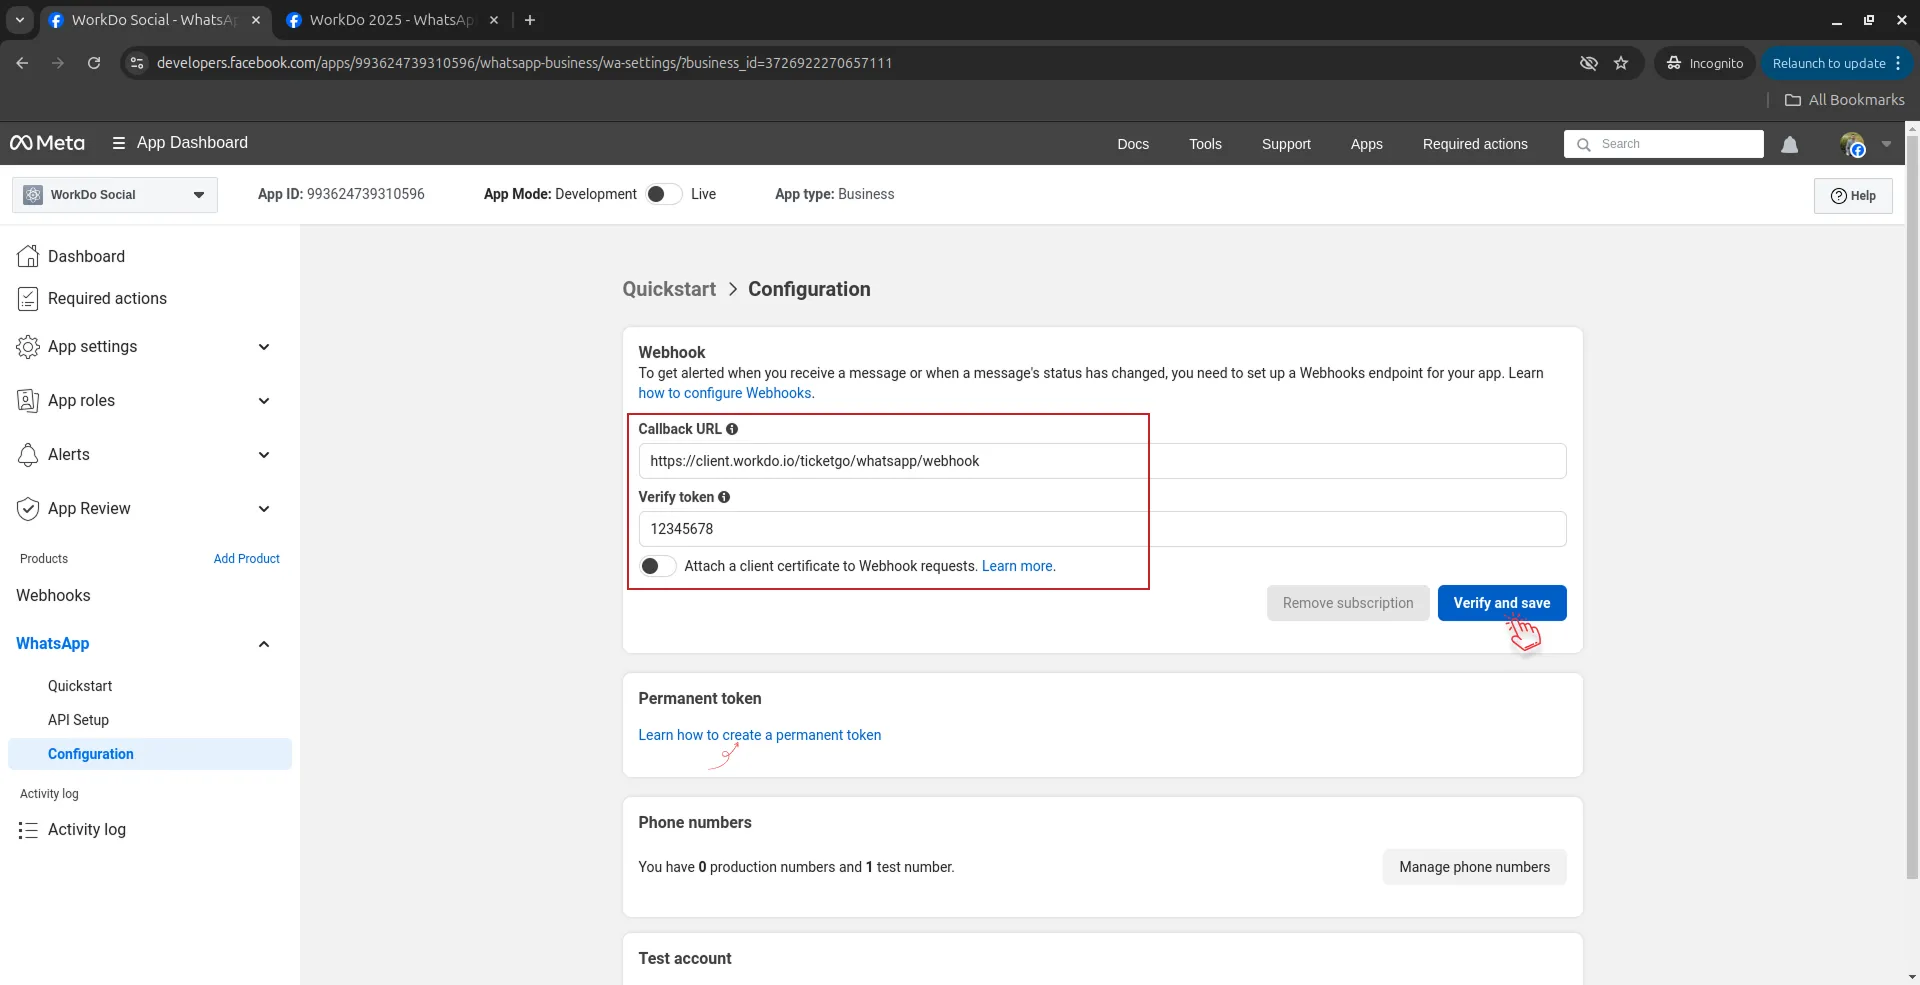
11. Once you click on that button, you will be navigated to a page. On that page, you have to copy the WhatsApp Chat Webhook URL from your web application and paste it into the Callback URL section of the configuration page. Below that, there is a field for Verify Token. Enter 12345678 and click on the Verify and Save button.


12. After clicking on that button, you will be navigated to a Subscription section, where you have to subscribe to Messages.

13. After completing this process, you will see a button named App Mode at the top. Enabling that button is mandatory to use the WhatsApp API, so do not forget to enable it. You can also generate a Permanent Access Token if you need long-term access to the WhatsApp API.

14. When you try to enable this button, you will see a popup. Click on the Basic Settings button over there.

15. On the Basic Settings page, you have to add the necessary details like Display Name, App Domains, Contact Email, Privacy Policy URL, Terms of Service URL, and App Icon. Once you add these details, click on the Save Changes button.

16. After completing this process, you will see that the Live Mode is displayed at the top.

17. After setting up the WhatsApp API, you can also set up Messenger and Instagram from the Add Products page given in the sidebar.

18. After you click on the Set Up App button, click on the Messenger button given in the sidebar. Click on the Messenger API Settings button and add the Callback URL copied from the Facebook Chat Settings or Instagram Chat Settings section of your web application, along with the Verify Token number 12345678. Finally, click on the Verify and Save button.

19. You will also see the Generate Access Token section. Over there, click on the Connect button.

20. After clicking on the Connect button, you will be redirected to a new page, where you have to click on the Add Subscriptions button.

21. After clicking on that button, you will see a popup where you have to select the particular Page Subscriptions given. Once you check them, click on the Confirm button.

22. After that, go to the Instagram Settings and click on the Add or Remove button given over there.

23. Once you click on that button, a Page List of Facebook will be displayed in front of you. Select the page and click on the Continue button.

24. Once you click on the Continue button, a Page List of Instagram will be displayed in front of you. Select the page and click on the Continue button.

25. Once you click on this button, you will be directed to a page where you have to click on the Generate Token button.

26. After you click on that button, a popup will be displayed, where you can see your Access Token. Copy your access token from there and paste it into the Facebook/Instagram Chat Settings of your web application.

27. You will also see a section for Callback URL and Verify Token. Paste the Callback URL from the Facebook Chat Settings or Instagram Chat Settings section of your web application and enter the Verify Token number 12345678. Finally, save the settings.

Your Facebook app is now fully configured for WhatsApp, Messenger, and Instagram integrations.
Categories
Related articles
- McKinsey 7-S Model Integration in Dash SaaS
- Dropbox Integration in Dash SaaS
- BlueSnap Integration in Dash SaaS
- n8n Detailed Documentation
- Google Calendar Integration in Dash SaaS
- Microsoft To Do Integration in Dash SaaS
- Vonage SMS Module Detailed Documentation
- WhatsApp API Integration Dash SaaS
- Pharmacy Management Integration in Dash SaaS
- Performance Integration in Dash SaaS
- Tattoo Studio Management Detailed Documentation
- Hospital Management Integration in Dash SaaS
Reach Out to Us
Have questions or need assistance? We're here to help! Reach out to our team for support, inquiries, or feedback. Your needs are important to us, and we’re ready to assist you!


Need more help?
If you’re still uncertain or need professional guidance, don’t hesitate to contact us. You can contact us via email or submit a ticket with a description of your issue. Our team of experts is always available to help you with any questions. Rest assured that we’ll respond to your inquiry promptly.
Love what you see?
Do you like the quality of our products, themes, and applications, or perhaps the design of our website caught your eye? You can have similarly outstanding designs for your website or apps. Contact us, and we’ll bring your ideas to life.
