Beauty Spa Integration in Dash SaaS
Beauty Spa Management is a complete software solution designed to help beauty spas and wellness centers manage their daily operations efficiently.
Introduction
Beauty Spa Management is a complete software solution designed to help beauty spas and wellness centers manage their daily operations efficiently. This Add-On handles everything from booking appointments and managing services to tracking customer information and processing payments. The software includes a customer-facing website for online bookings, an admin dashboard for business management, and various sections for different aspects of spa operations like services, bookings, receipts, training, certifications, and customer management.
How to Install the Add-On?
To Set Up the Beauty Spa Management Add-On, you can follow this link: Setup Add-On.
How to use the Beauty Spa Management Add-On?
Beauty Spa Dashboard
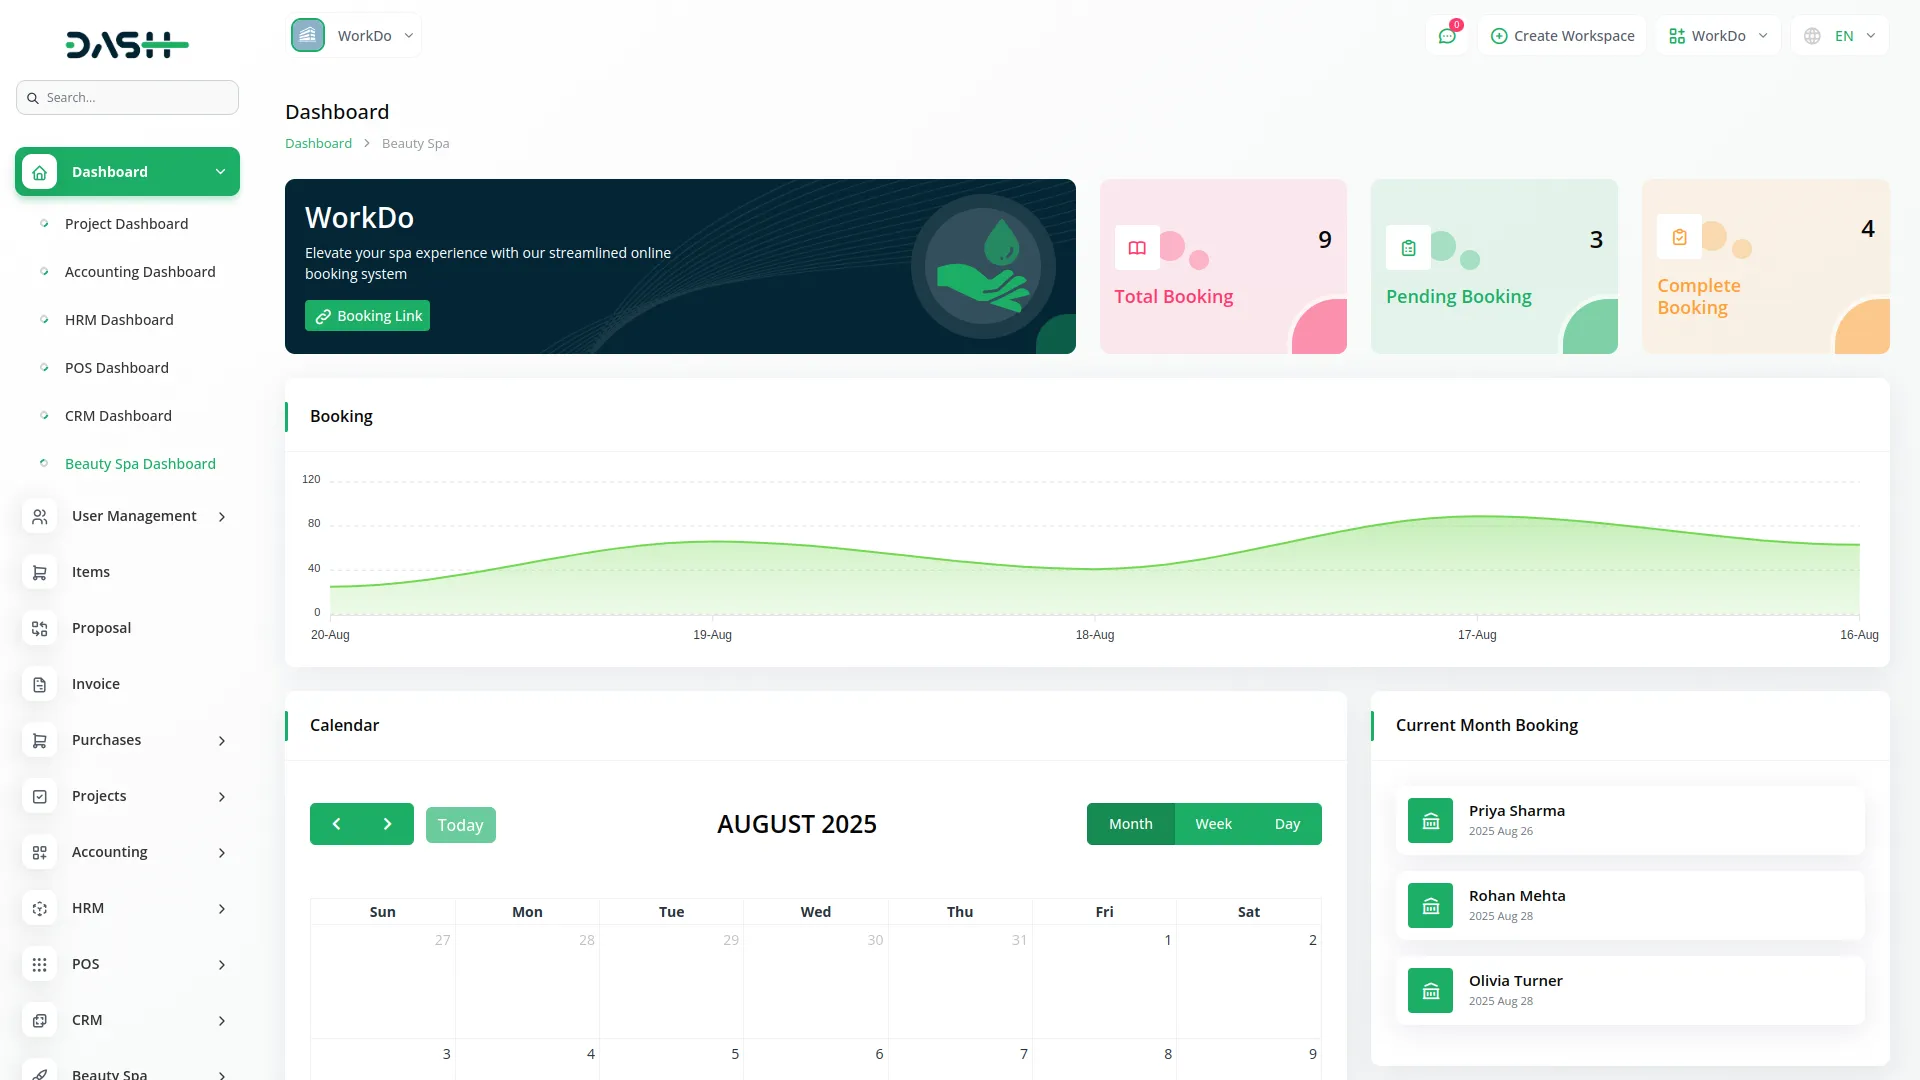
The dashboard is your main control center that provides a quick overview of your spa’s performance and current status.
When you access the dashboard, you will see a booking link button at the top that allows you to paste a link and open it to create bookings on the frontend website. Below this, you’ll find cards displaying important statistics including Total Bookings, Pending Bookings, and Complete Bookings.
The dashboard also features a chart that shows booking data from the last week, giving you a visual representation of your recent business activity. Additionally, there’s a calendar where you can view current month bookings. You can change the calendar view to display data monthly, yearly, or day-wise depending on your needs.
System Setup
Service Type
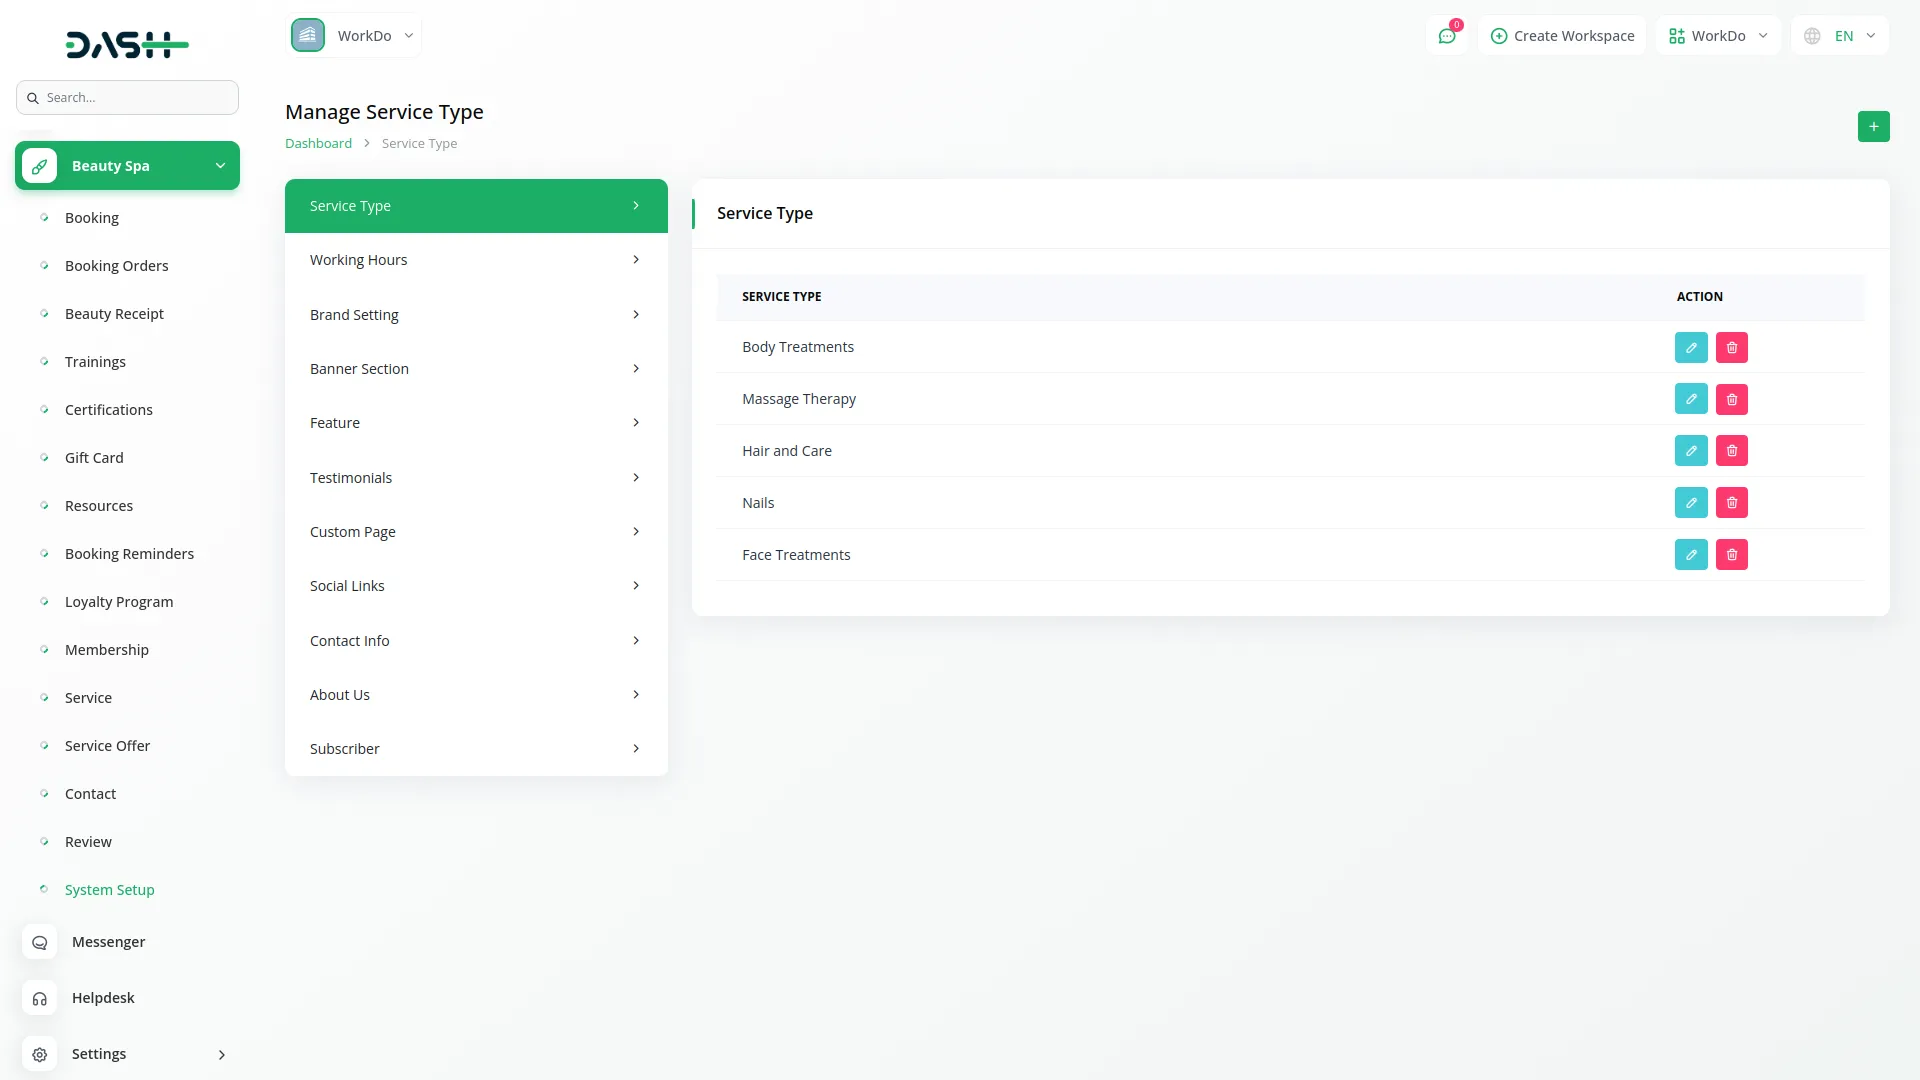
To create a new Service Type, click the “Create” button at the top of the service type page. Enter the service type name in the provided field.
The list page shows all service types in a table with the Service Type column. You can perform actions like Edit or Delete on each entry using the action buttons.
Working Hours
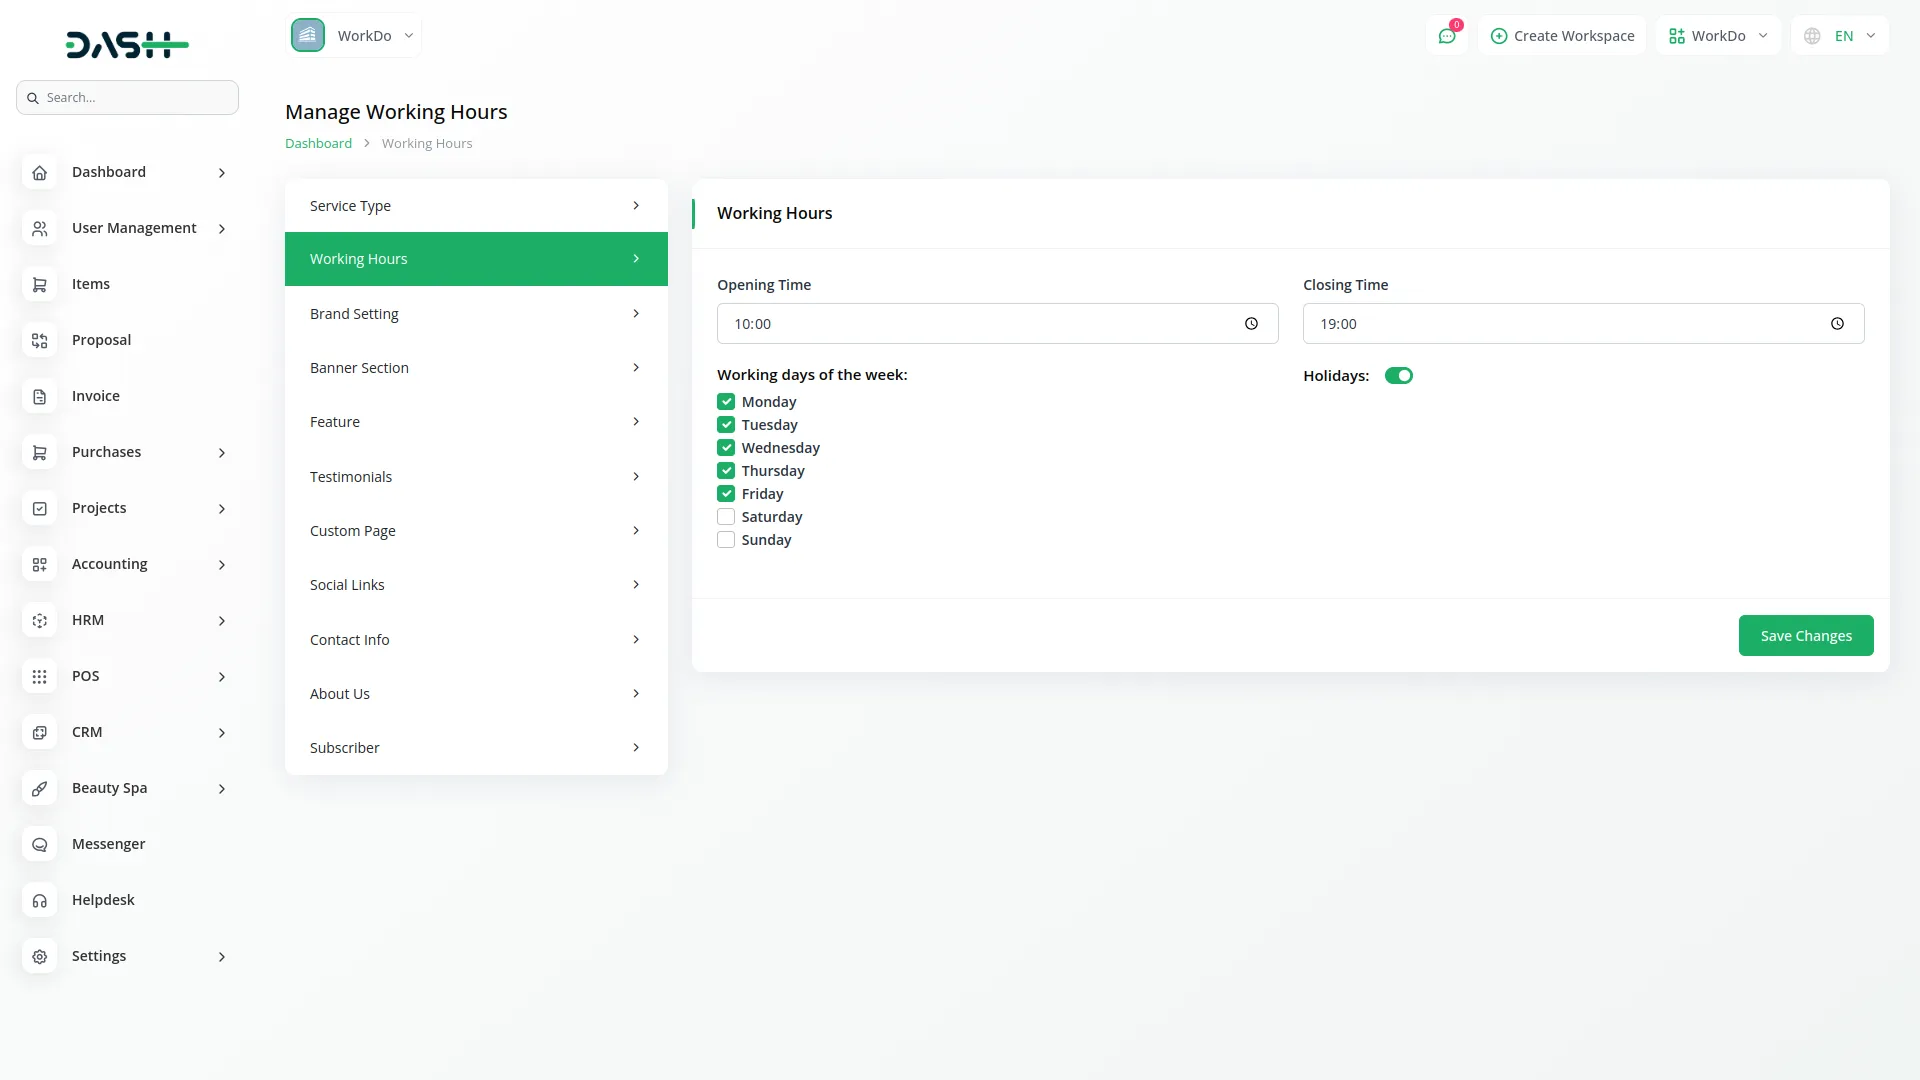
To set up your spa’s working hours, you need to configure three main sections.
First, set the Opening and Closing Time by selecting the start and end time for each working day (for example, 9:00 AM to 6:00 PM). The time input allows you to select both hours and minutes. Both opening and closing times are required for a day to be marked as active.
Next, use the Day Selection checkboxes for Monday through Sunday to choose which days your business operates. Only selected days will be available for customer bookings. Days that are unchecked are considered non-working days and will not show available time slots.
Finally, use the Holidays button to toggle holiday settings ON or OFF. When enabled, all holidays from the HRM Add-On will automatically apply to your booking system. Manual holiday entry becomes optional when the HRM Add-On is activated.
Brand Setting
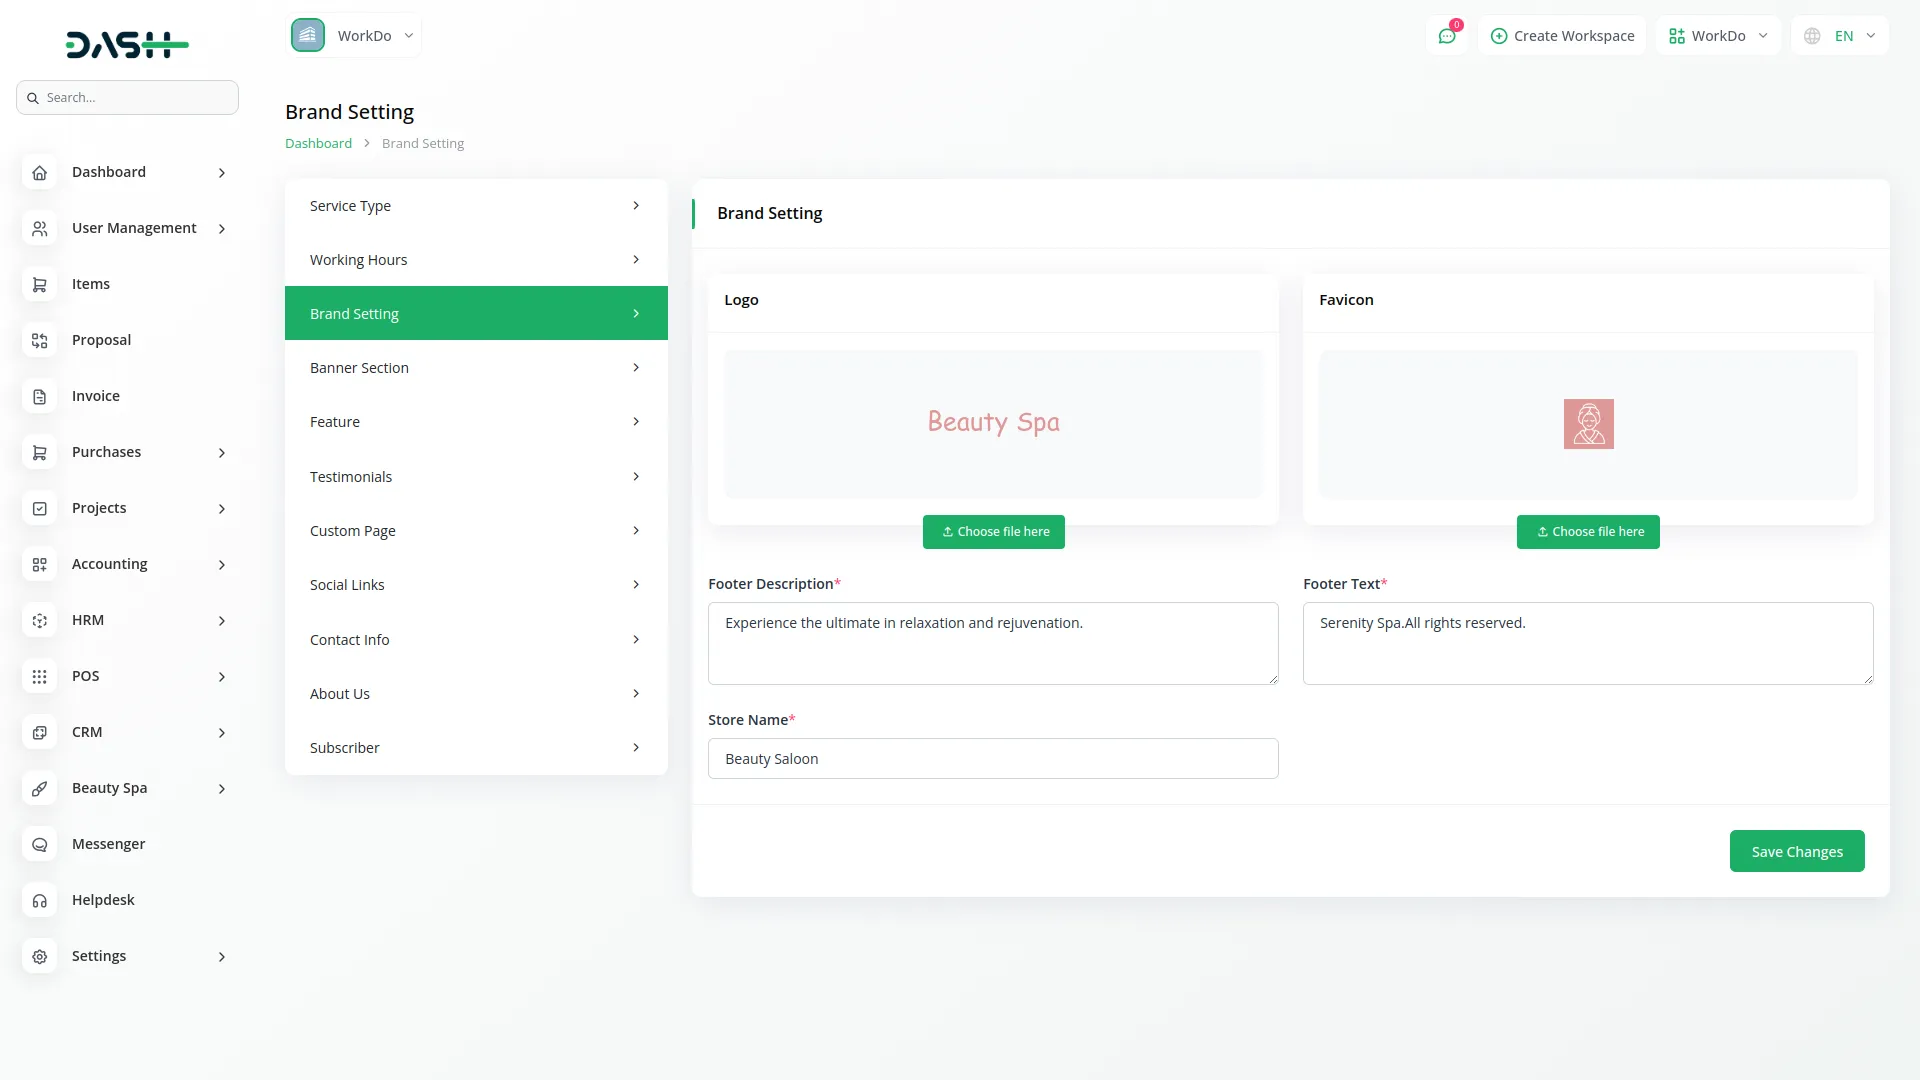
In the Brand Setting section, you can add and update important details such as logo, favicon, store name, footer description, and footer text. From the backend, you can easily manage these settings as per your brand identity. Once the details are added from the backend, they will automatically display on the frontend across all pages — the logo in the header and footer, along with the footer text and description at the bottom of the site.
Banner Section
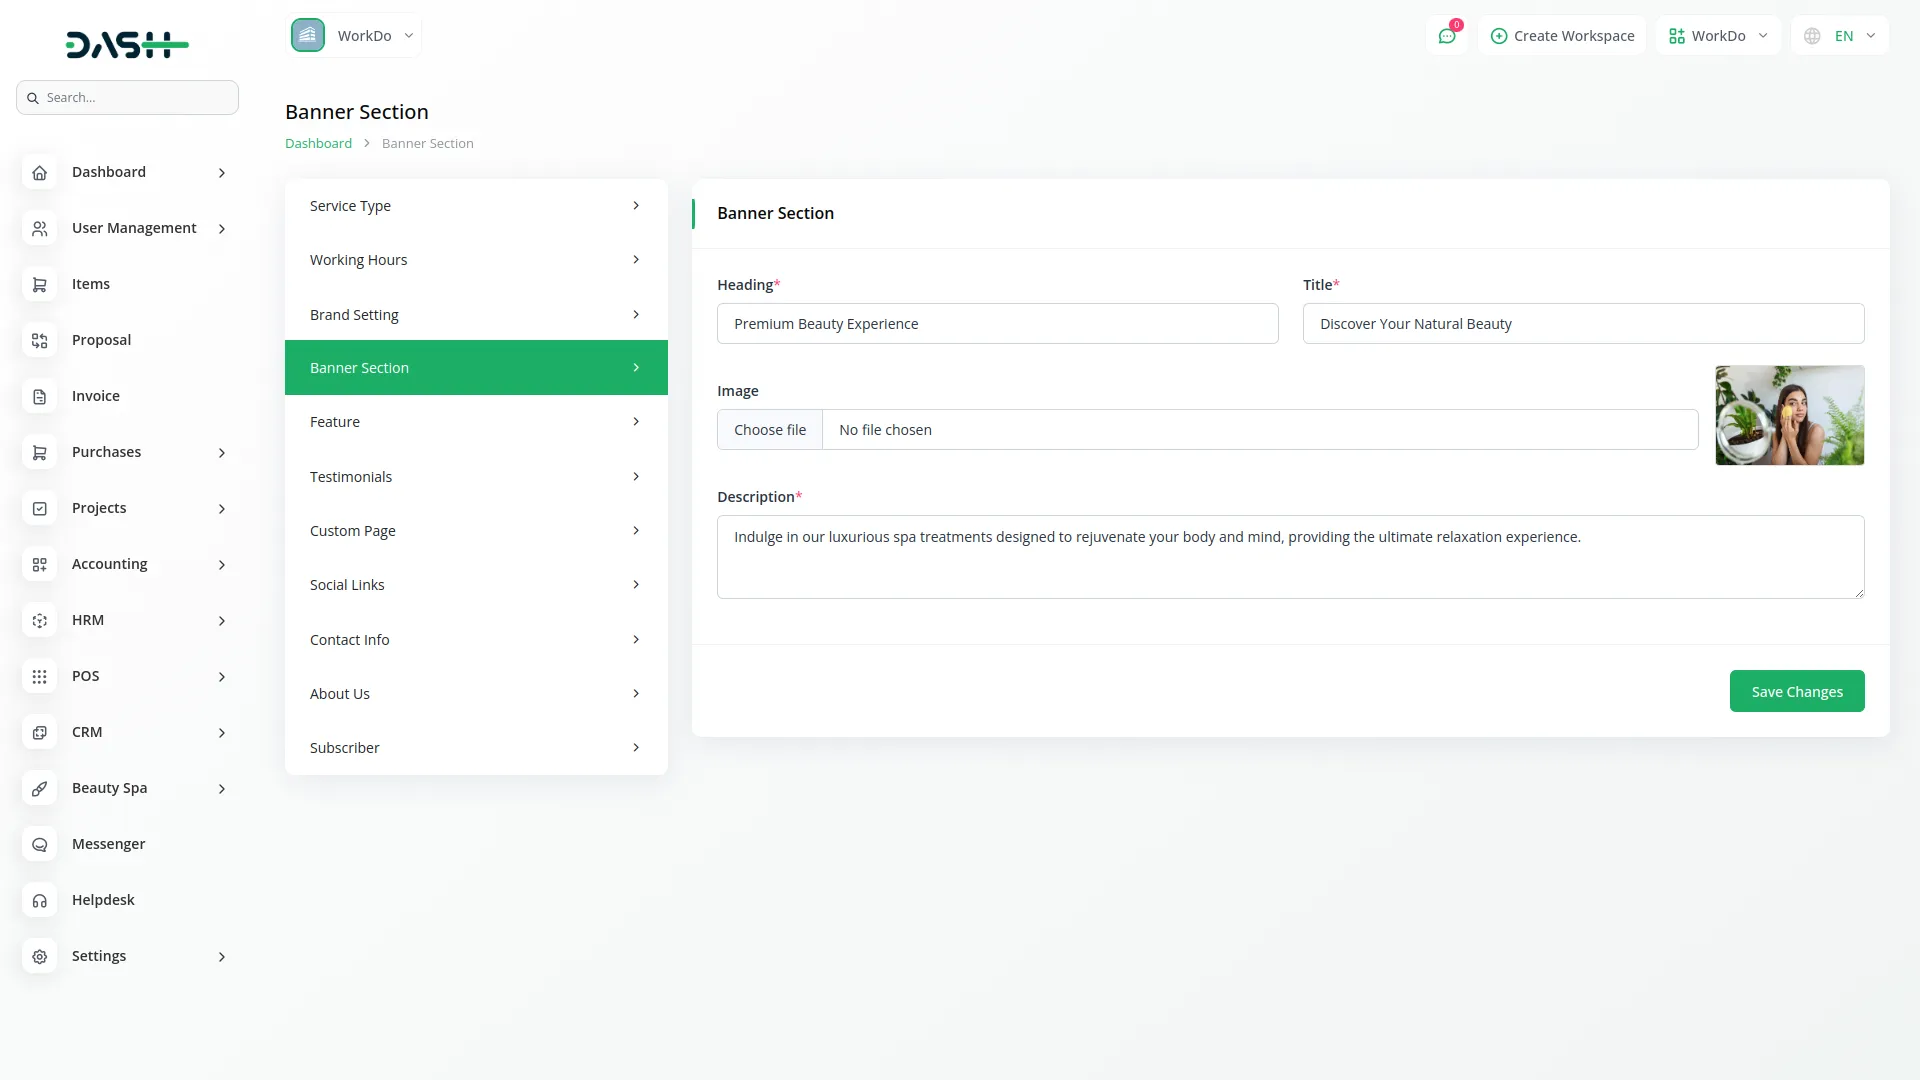
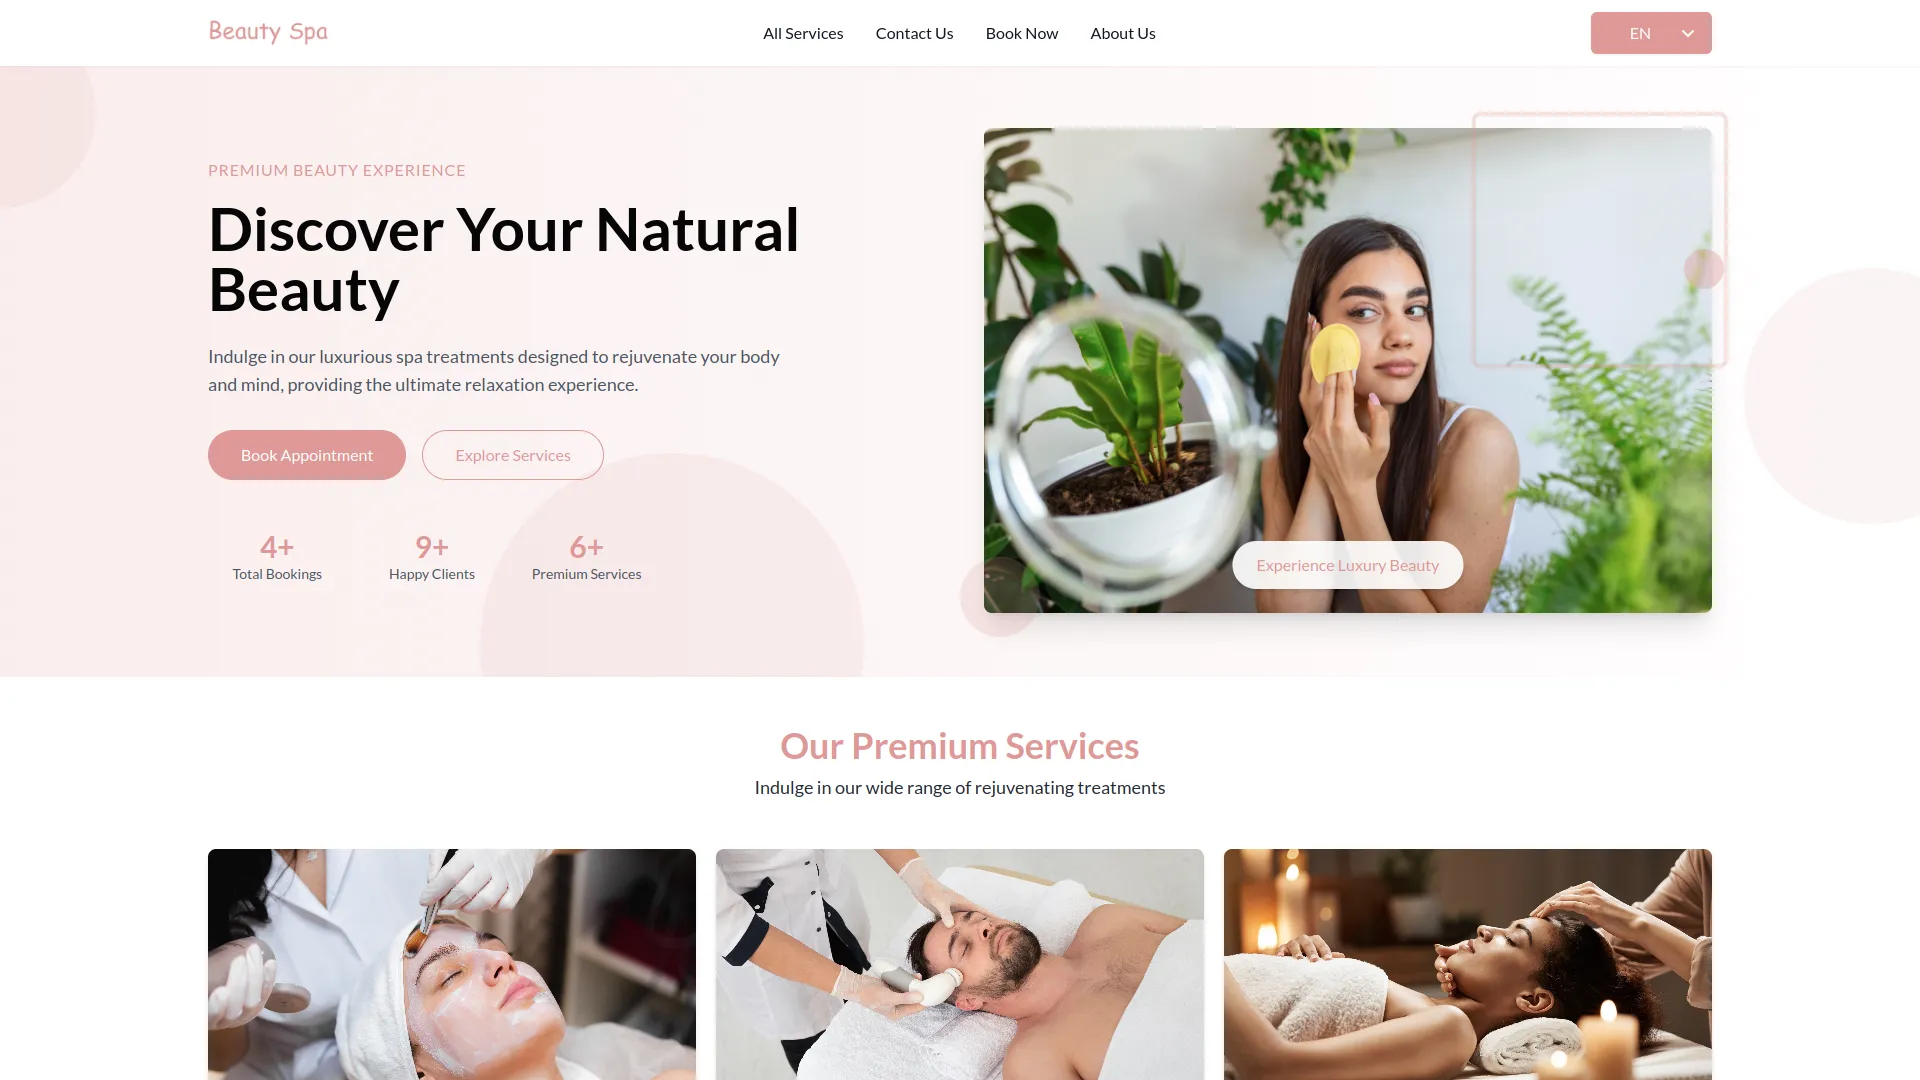
In the Banner Section, you can add a heading, title, image, and description to highlight important content on your website. From the backend, you can easily update all these details as per your requirement. Once the banner details are added from the backend, they will automatically display on the frontend homepage, giving visitors an attractive first impression of your site.
Feature
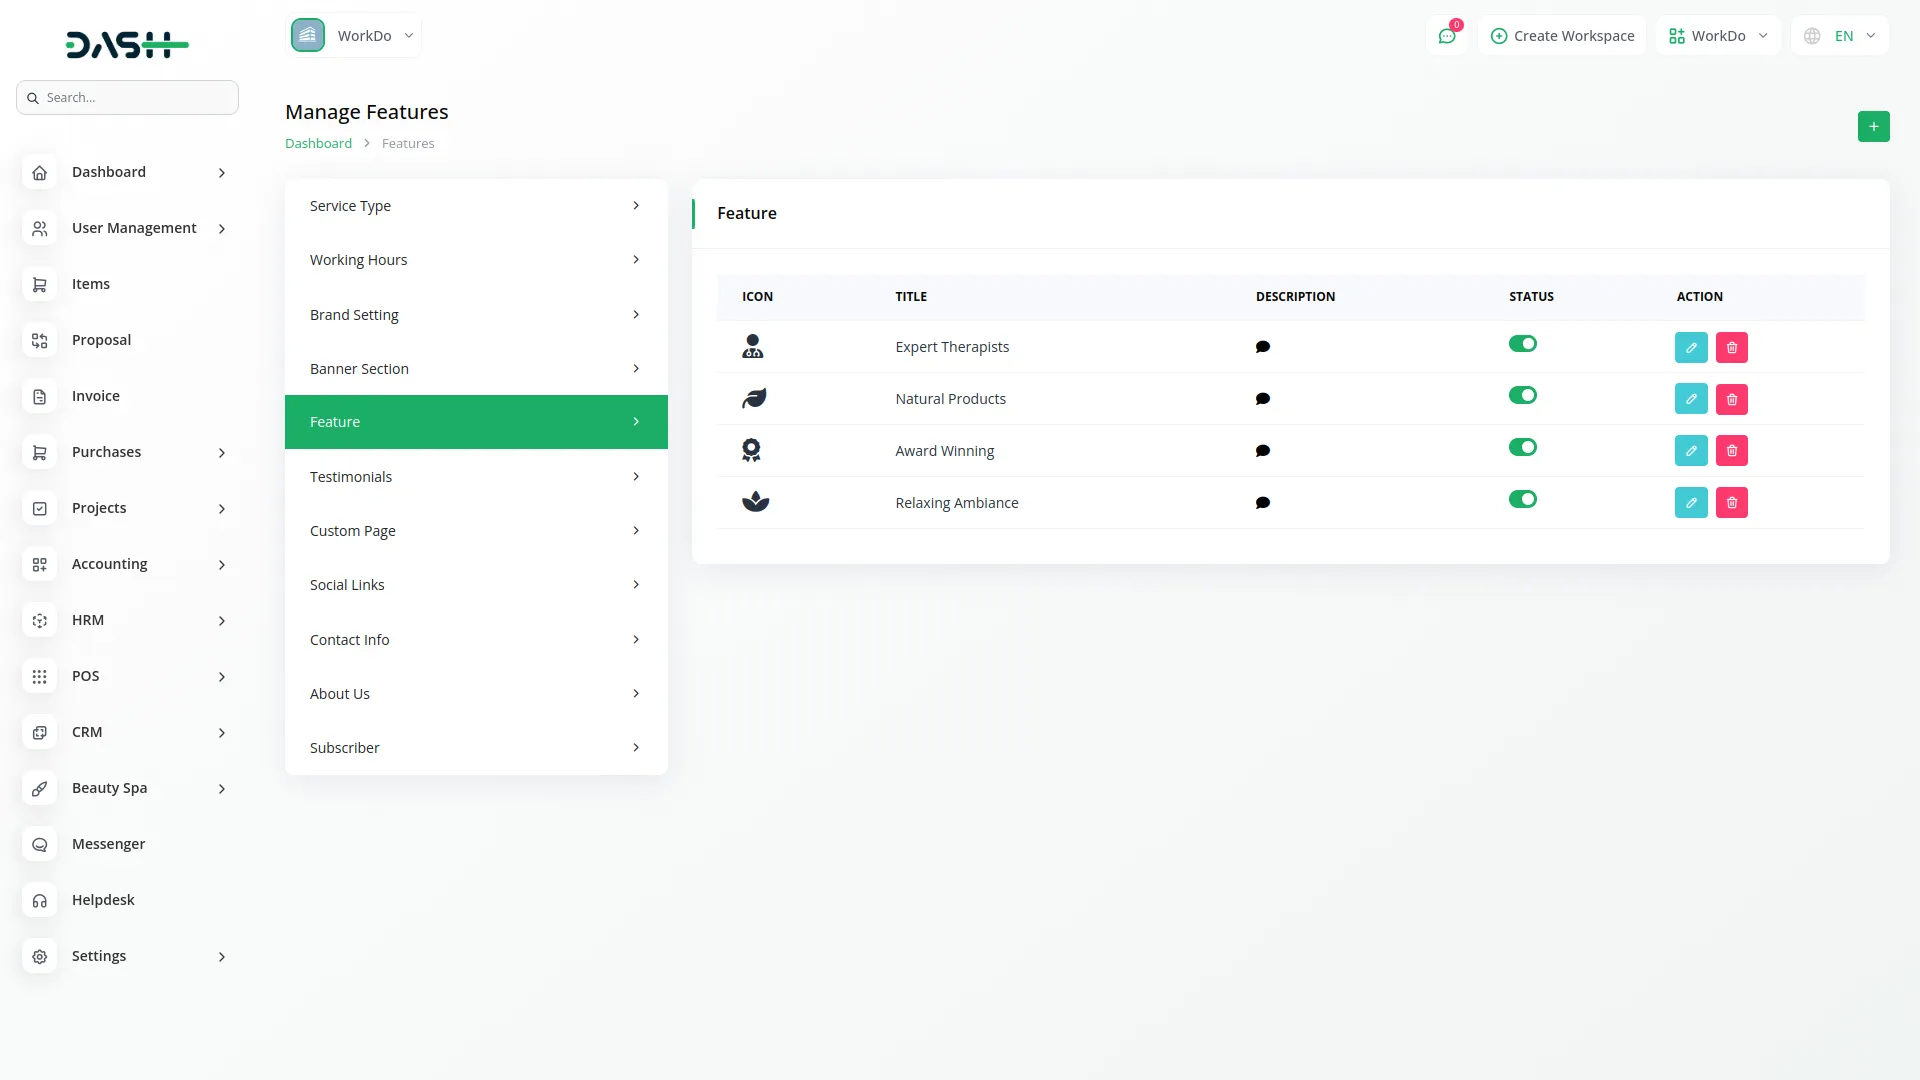
To create a new Feature, click the “Create” button at the top of the feature page. Enter the Title, select an Icon, and write a Description for the feature you want to highlight on your website.
The list page displays all features in a table with columns for Icon, Title, Description, and Status (on/off toggle). You can Edit or Delete features using the action buttons. These features will be displayed in the feature section of your website.
Testimonials
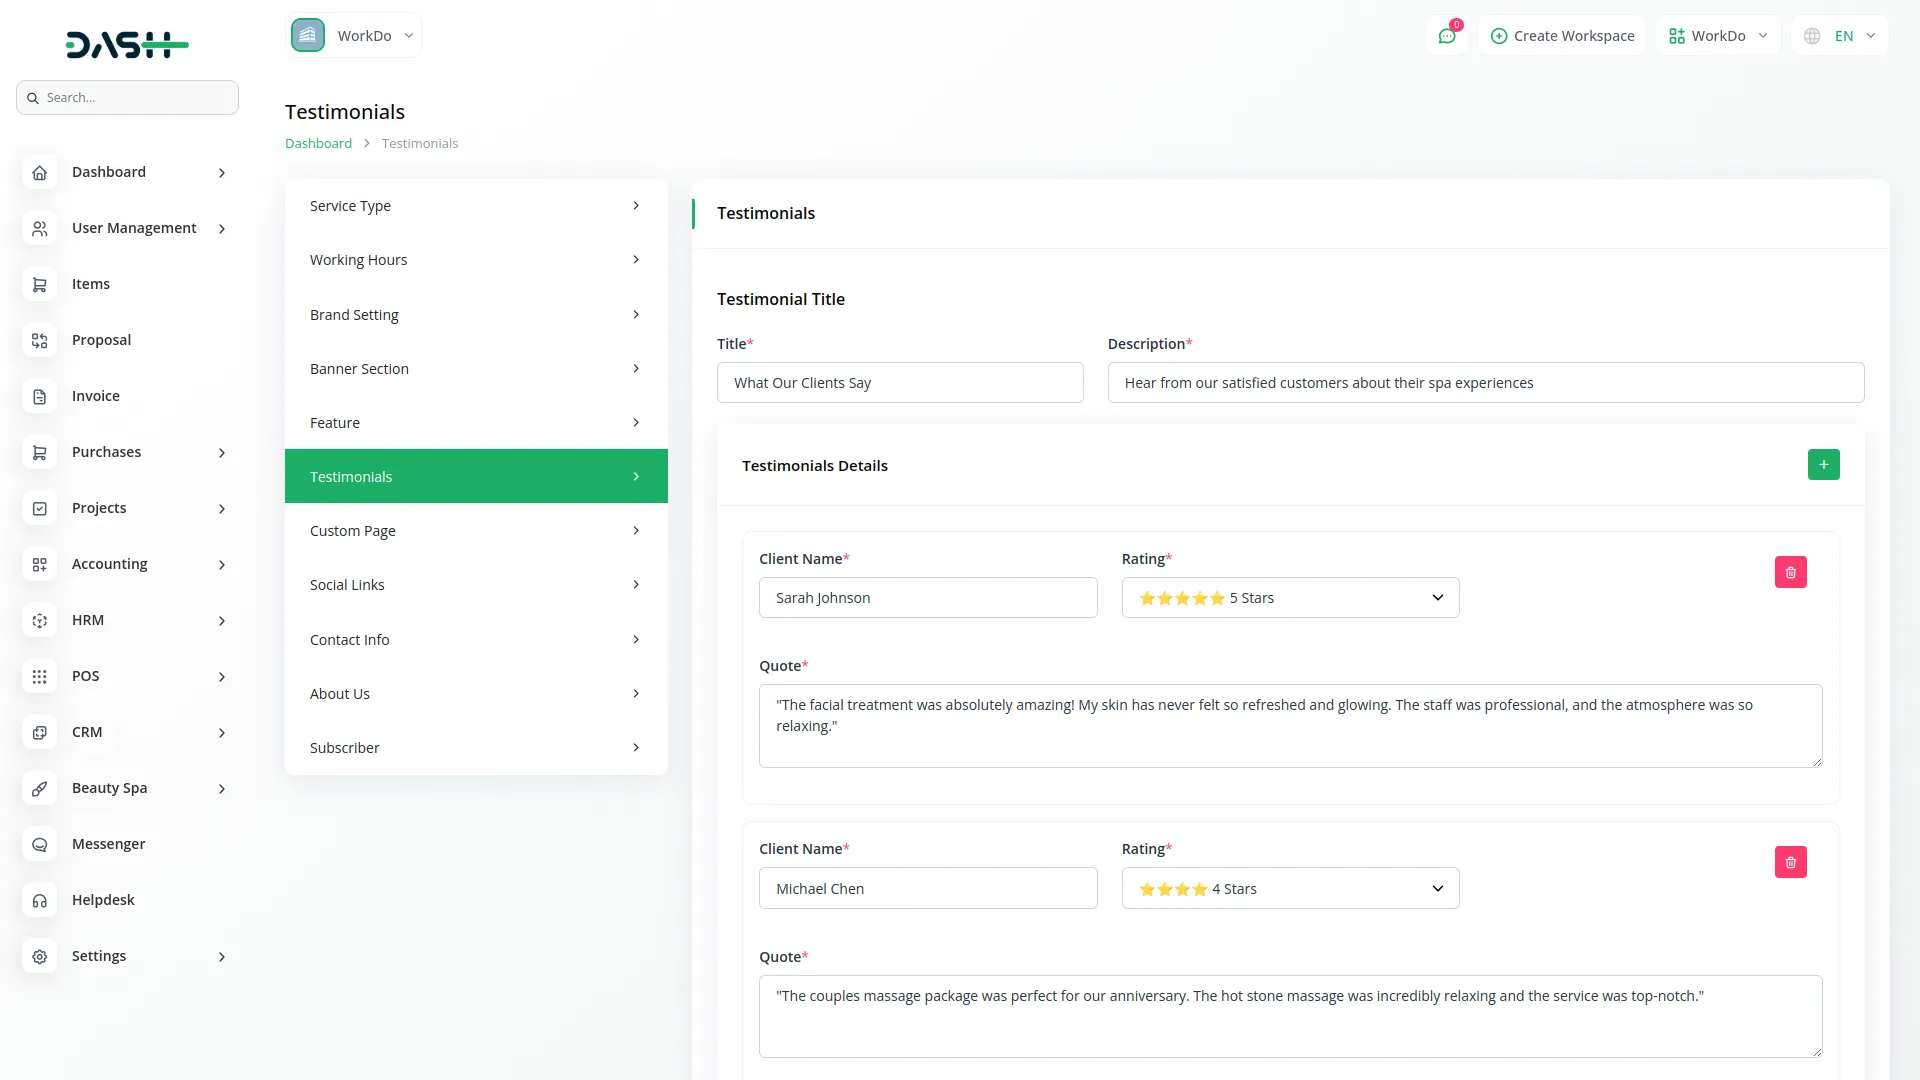
In the Testimonials section, you can add a title and description to introduce customer feedback. From the backend, you can easily add multiple testimonials, including the customer’s name, star rating, and their quotes. Once added from the backend, these testimonials will automatically display on the testimonials section of the home page of your website.
Custom Page
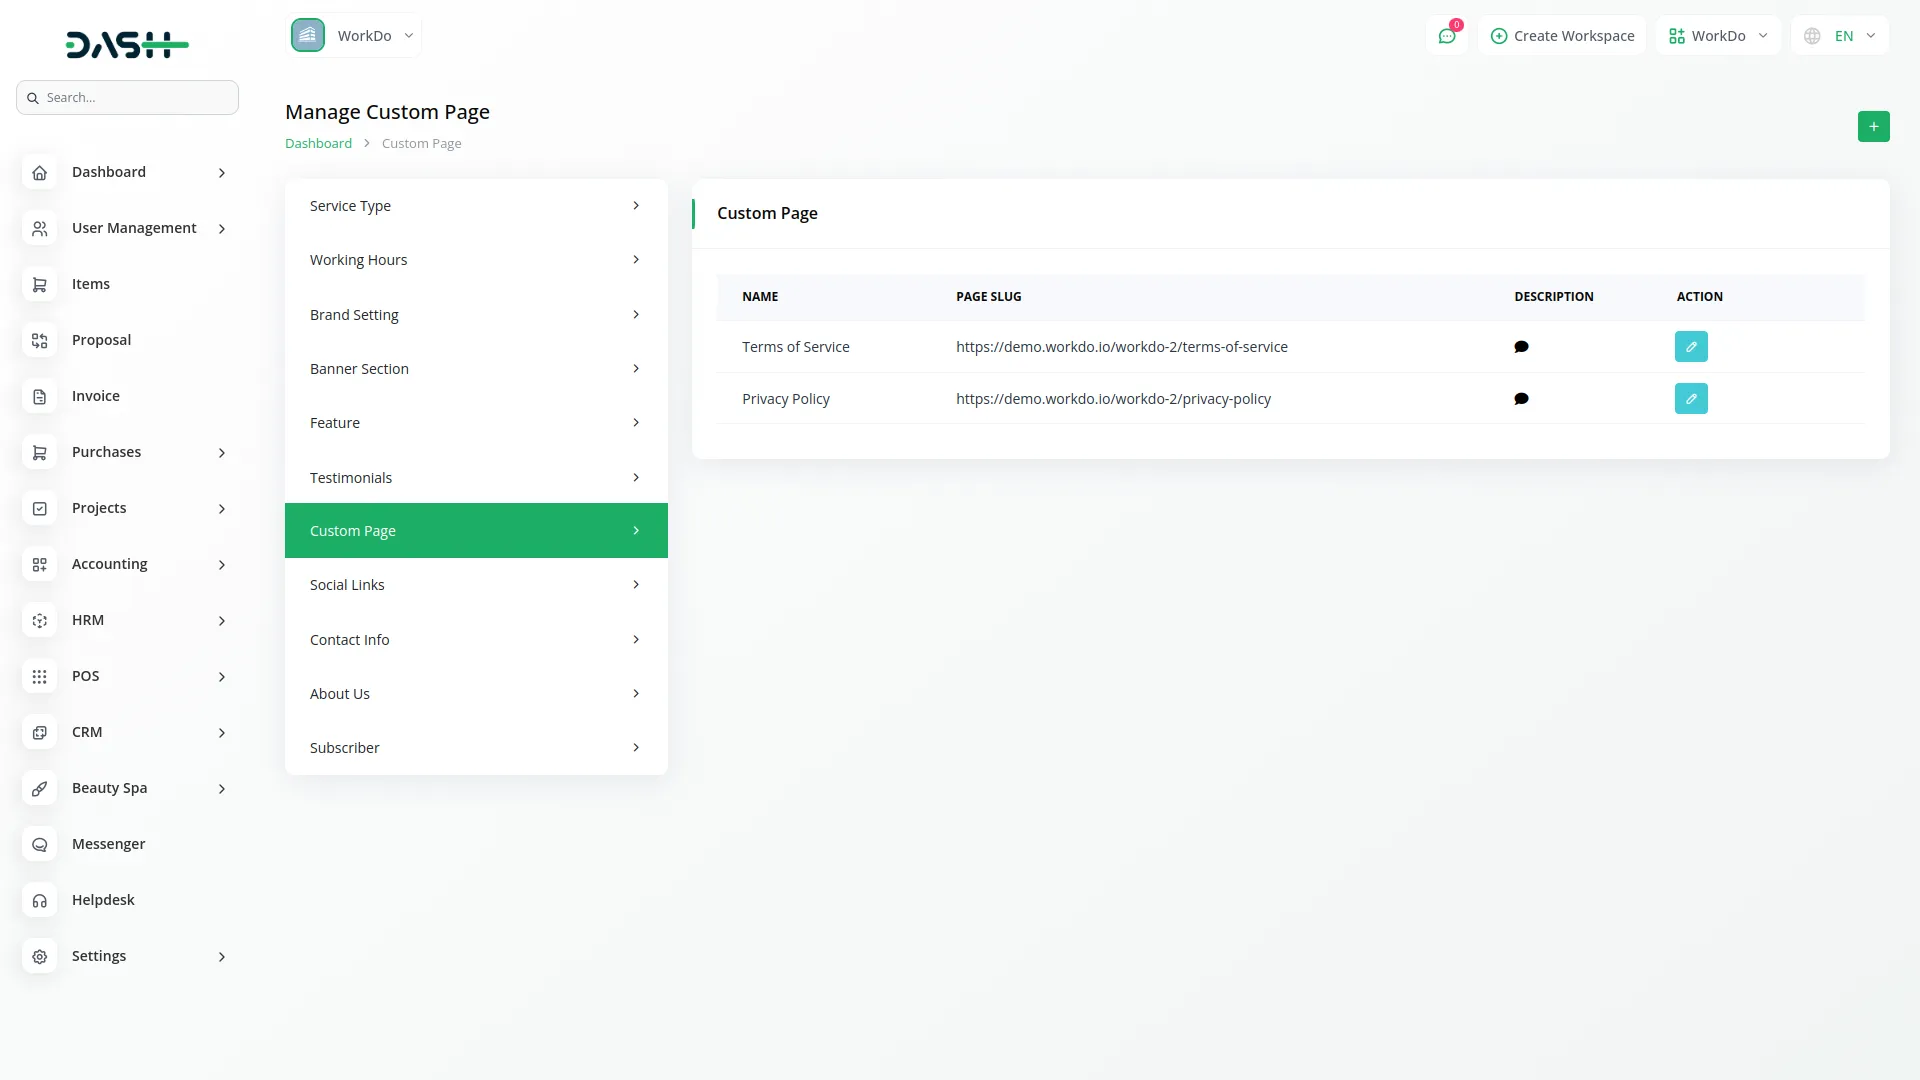
To create a new custom page, click the “Create” button at the top of the custom page. Enter the Name, Title, and write the Content for the custom page you want to highlight on your website.
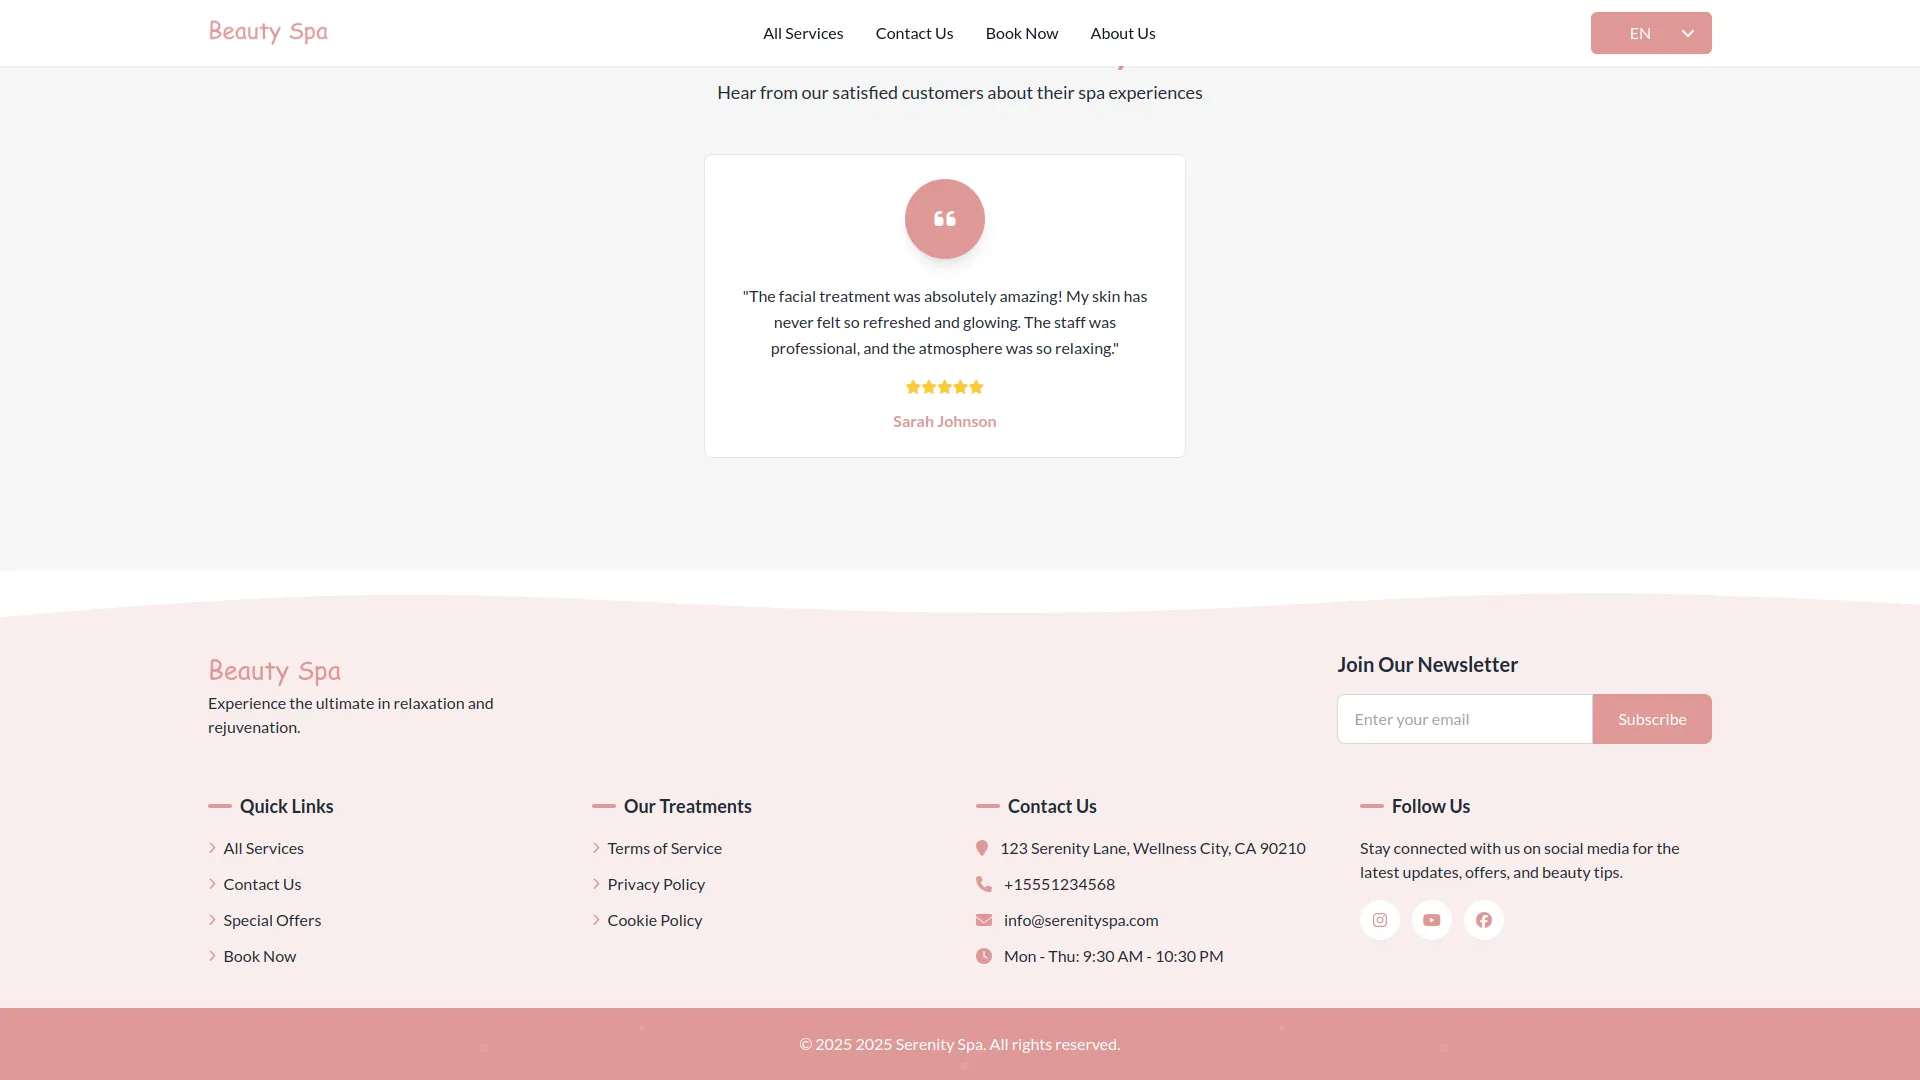
The list page displays all features in a table with columns for Name, Page Slug, and Description.You can Edit or Delete features using the action buttons. These custom pages will be displayed in the footer section of your website.
Social Links
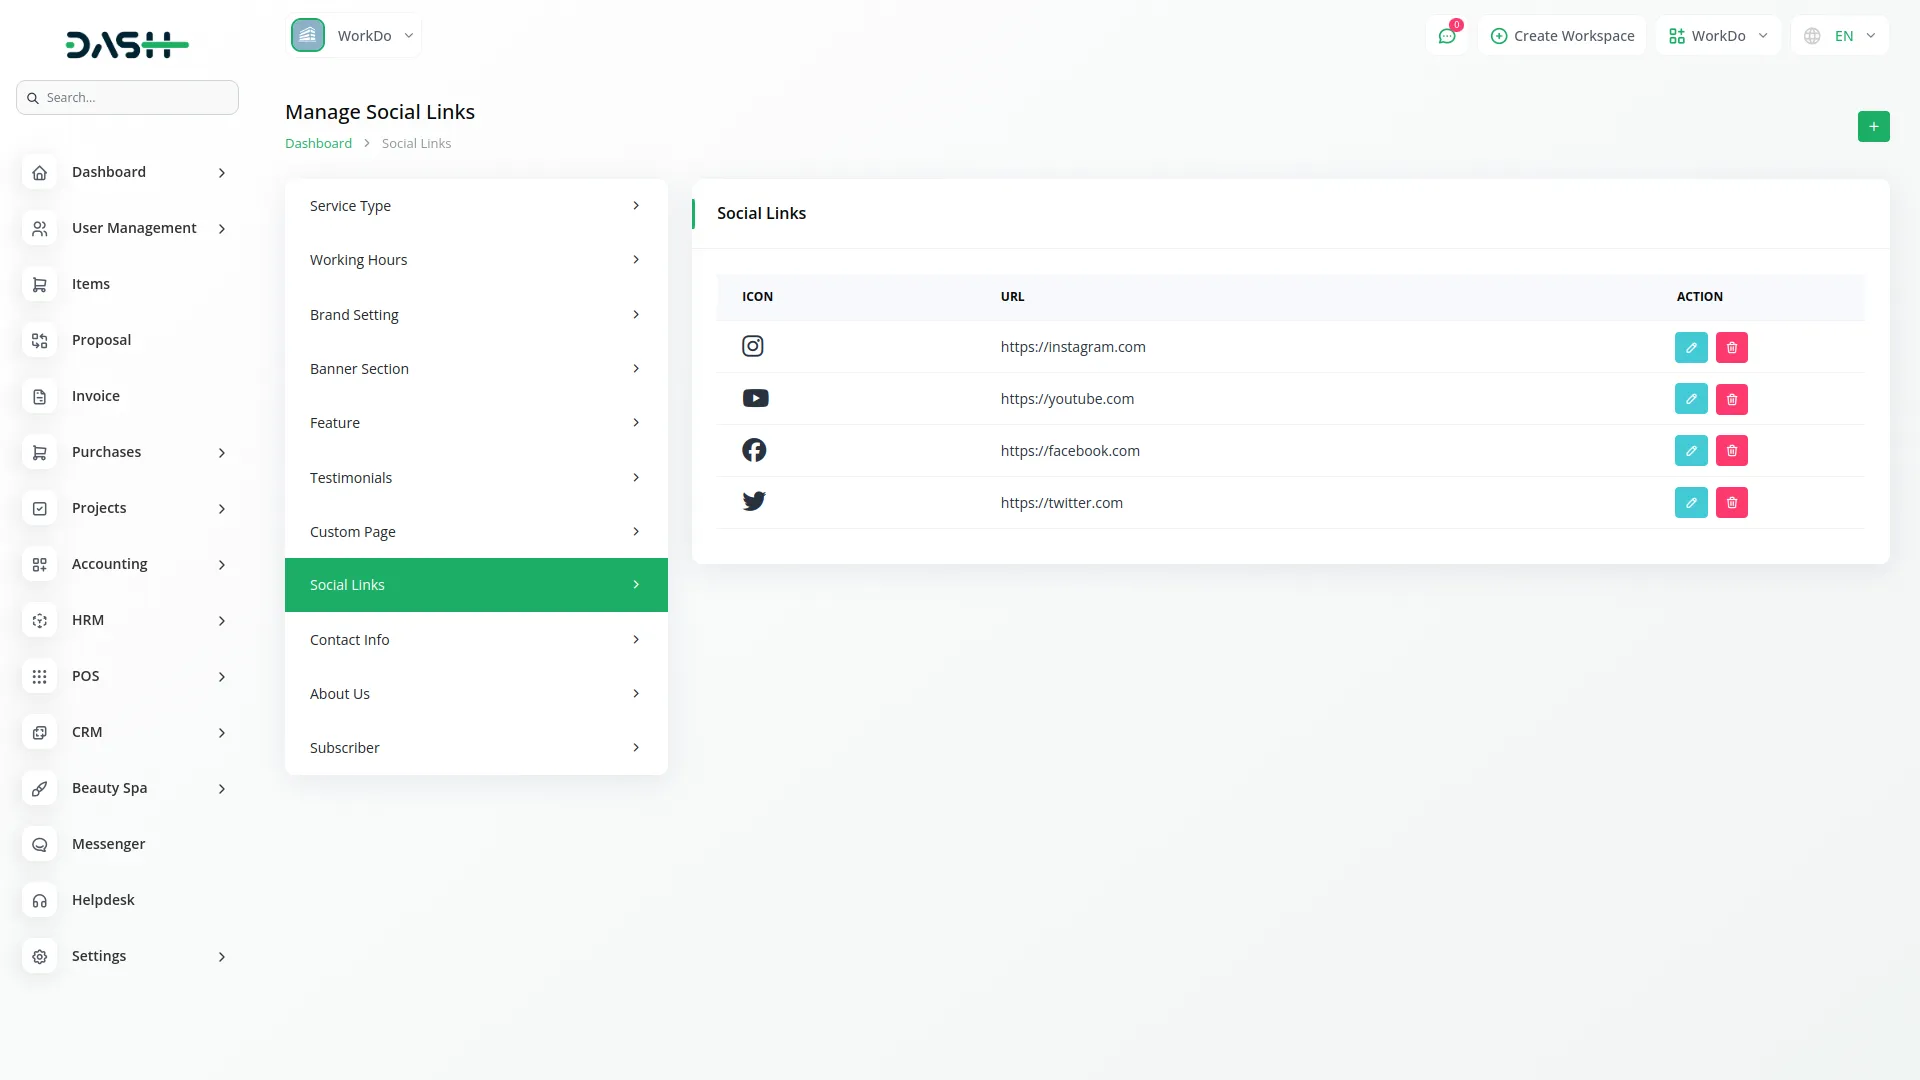
To create a new social link, click the “Create” button at the top of the social link page. Enter the Choose Icon, and the URL for the social link you want to highlight on your website.
The list page displays all social links in a table with columns for Icon and URL.You can Edit or Delete social links using the action buttons. These social links will be displayed in the footer section of your website.
Contact Info
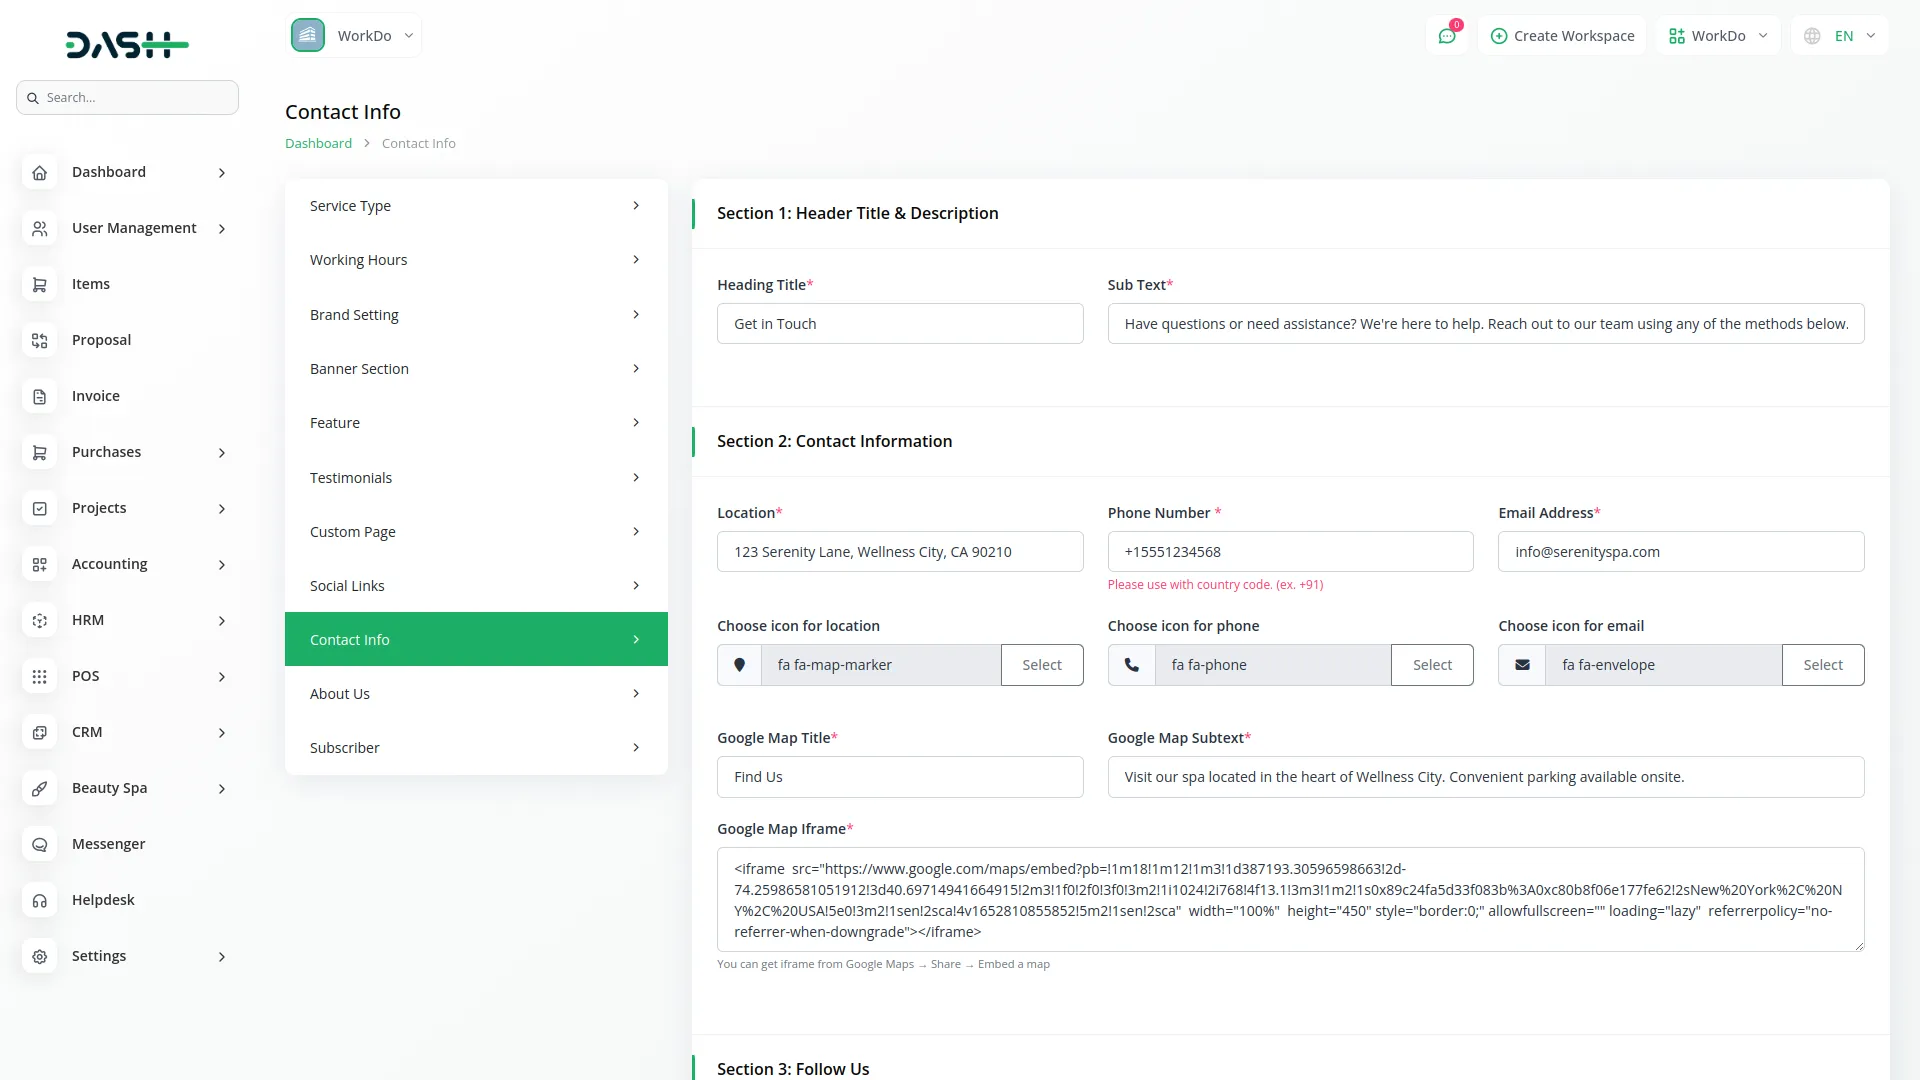
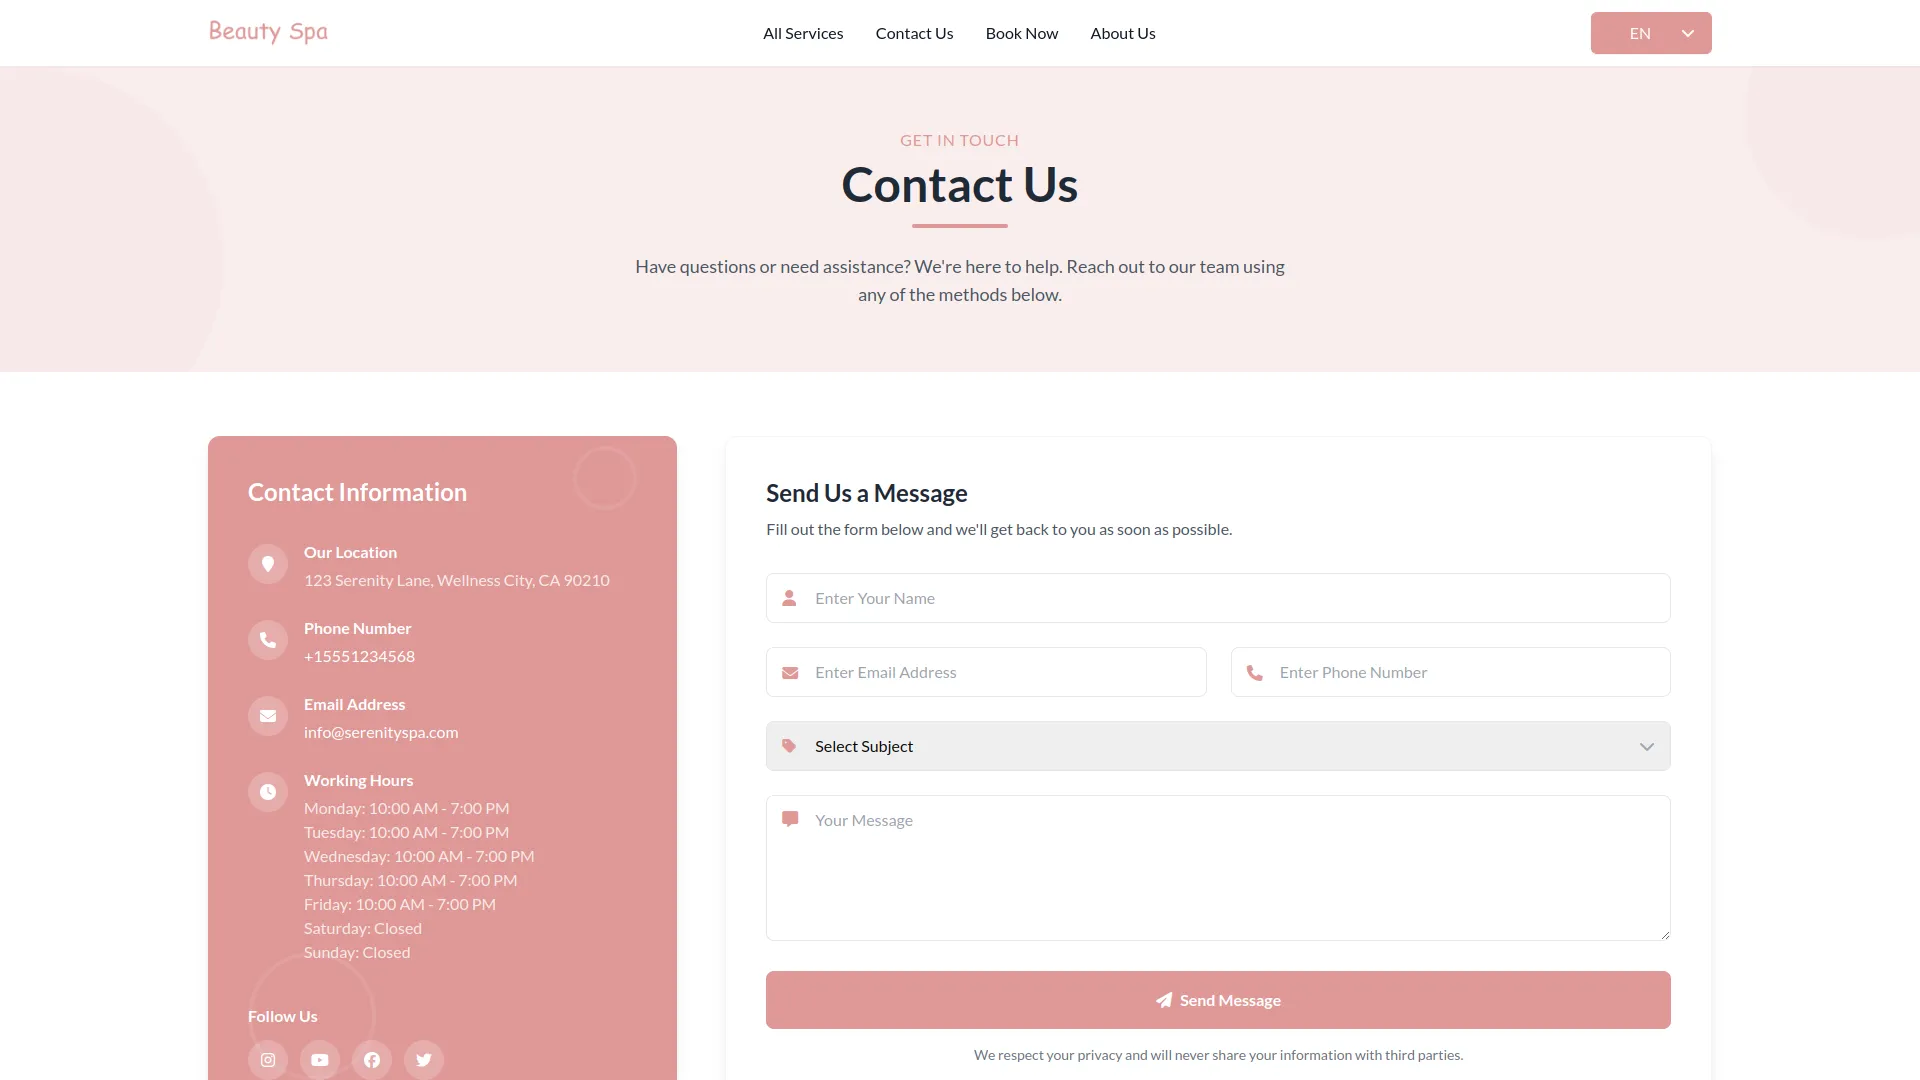
In the Contact Info section, you can add a heading title and sub text to introduce the contact details. From the backend, you can enter information such as location, email, and phone number, along with choosing icons for each detail. You can also add a Google Map title, subtext, and embed a Google Map iframe for location display. Additionally, you can provide Follow Us details with a short description. Once added from the backend, all these contact details will automatically display on the frontend under the Contact Us page as well as in the footer section.
About Us
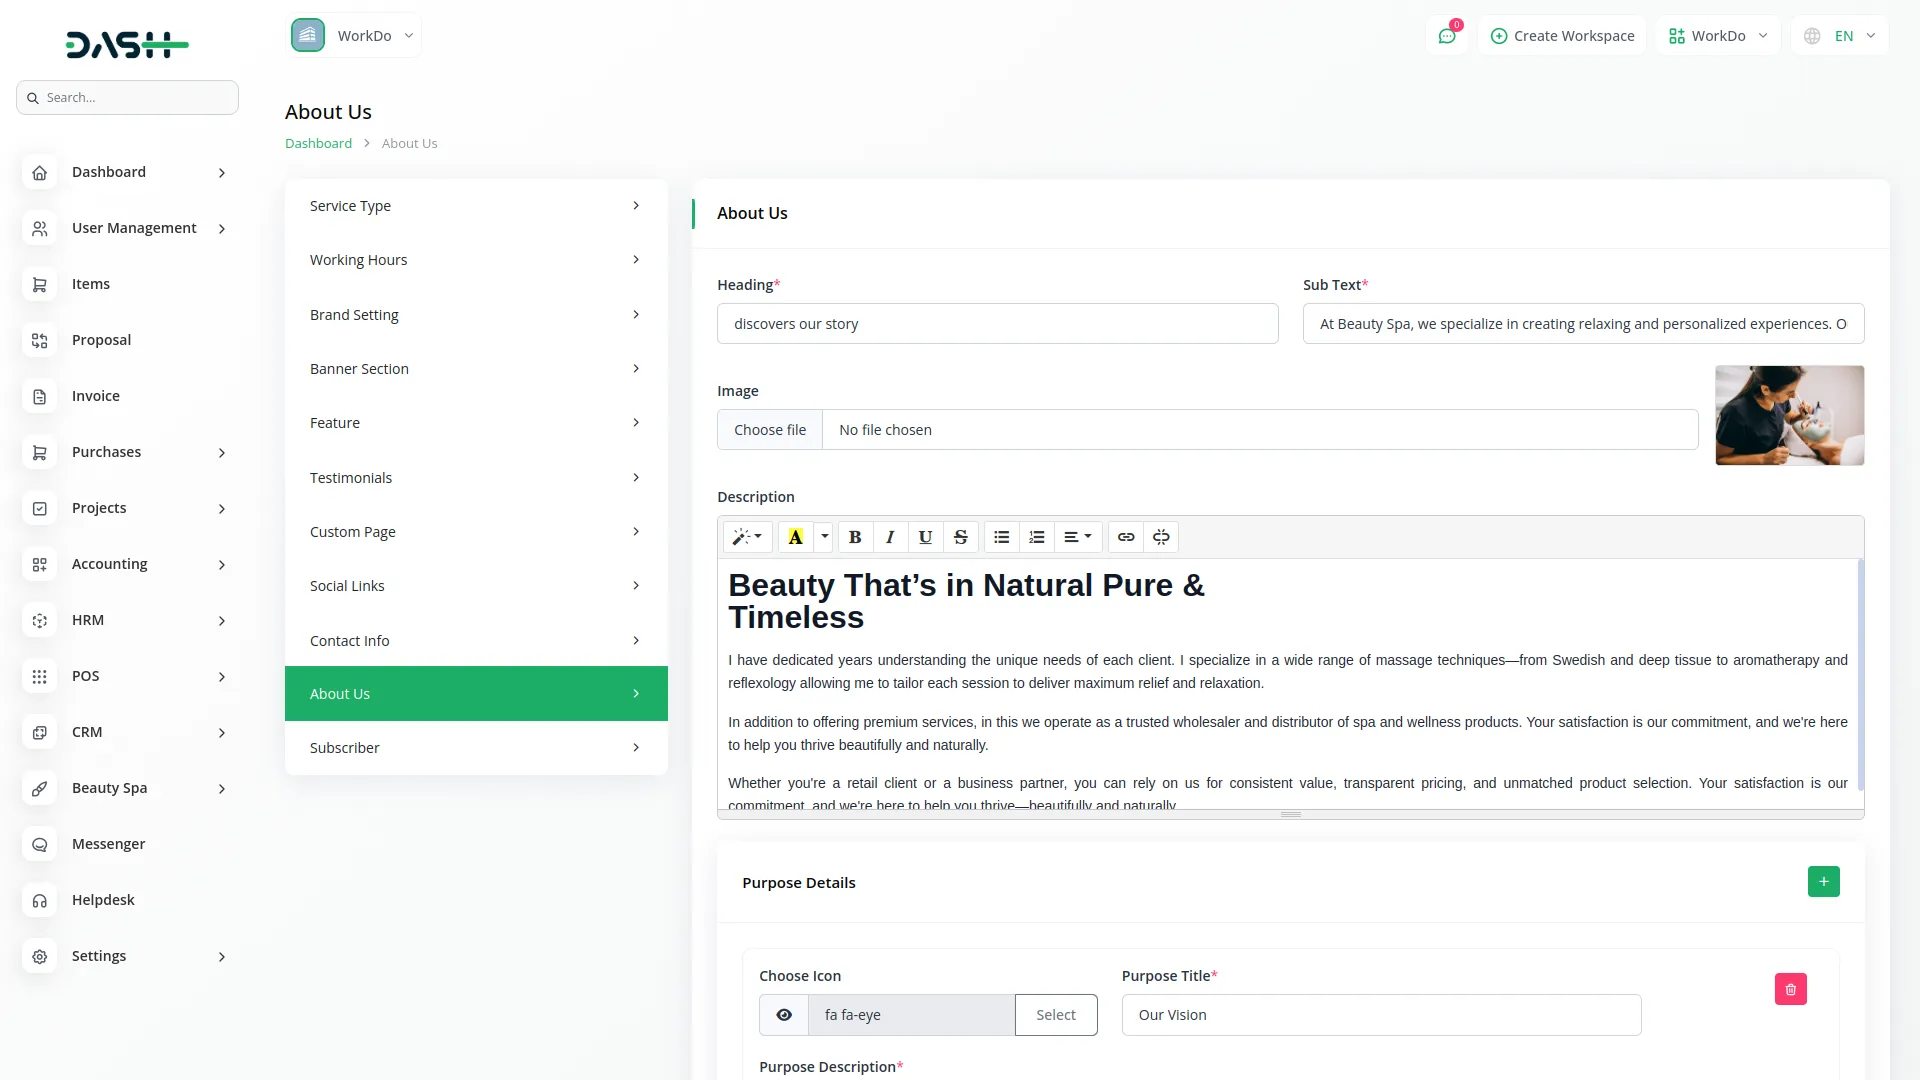
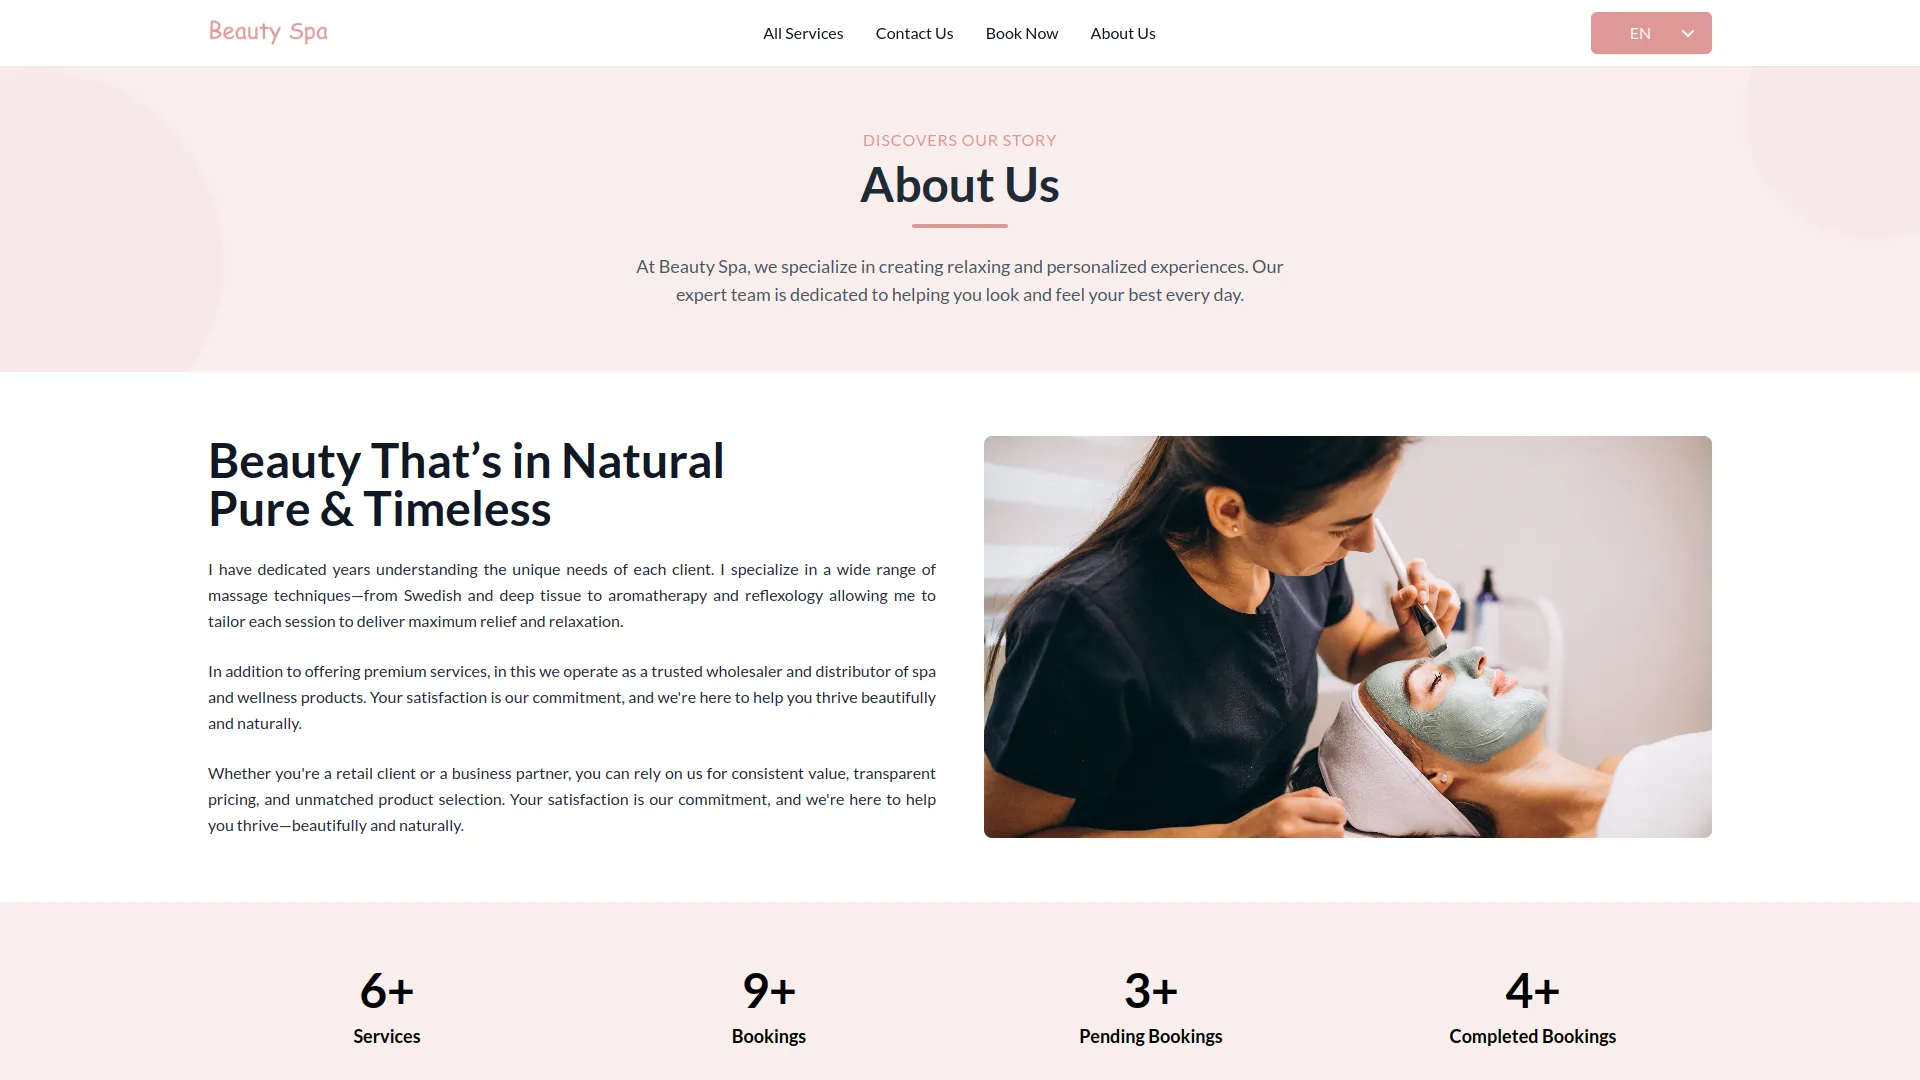
In the About Us section, you can add a heading title, sub text, image, and a detailed description to introduce your company or brand. From the backend, you can also add individual purpose details, including an icon, purpose title, and purpose description. Once these details are added from the backend, they will automatically display on the frontend under the About Us page, helping visitors understand your mission, values, and overall purpose.
Service
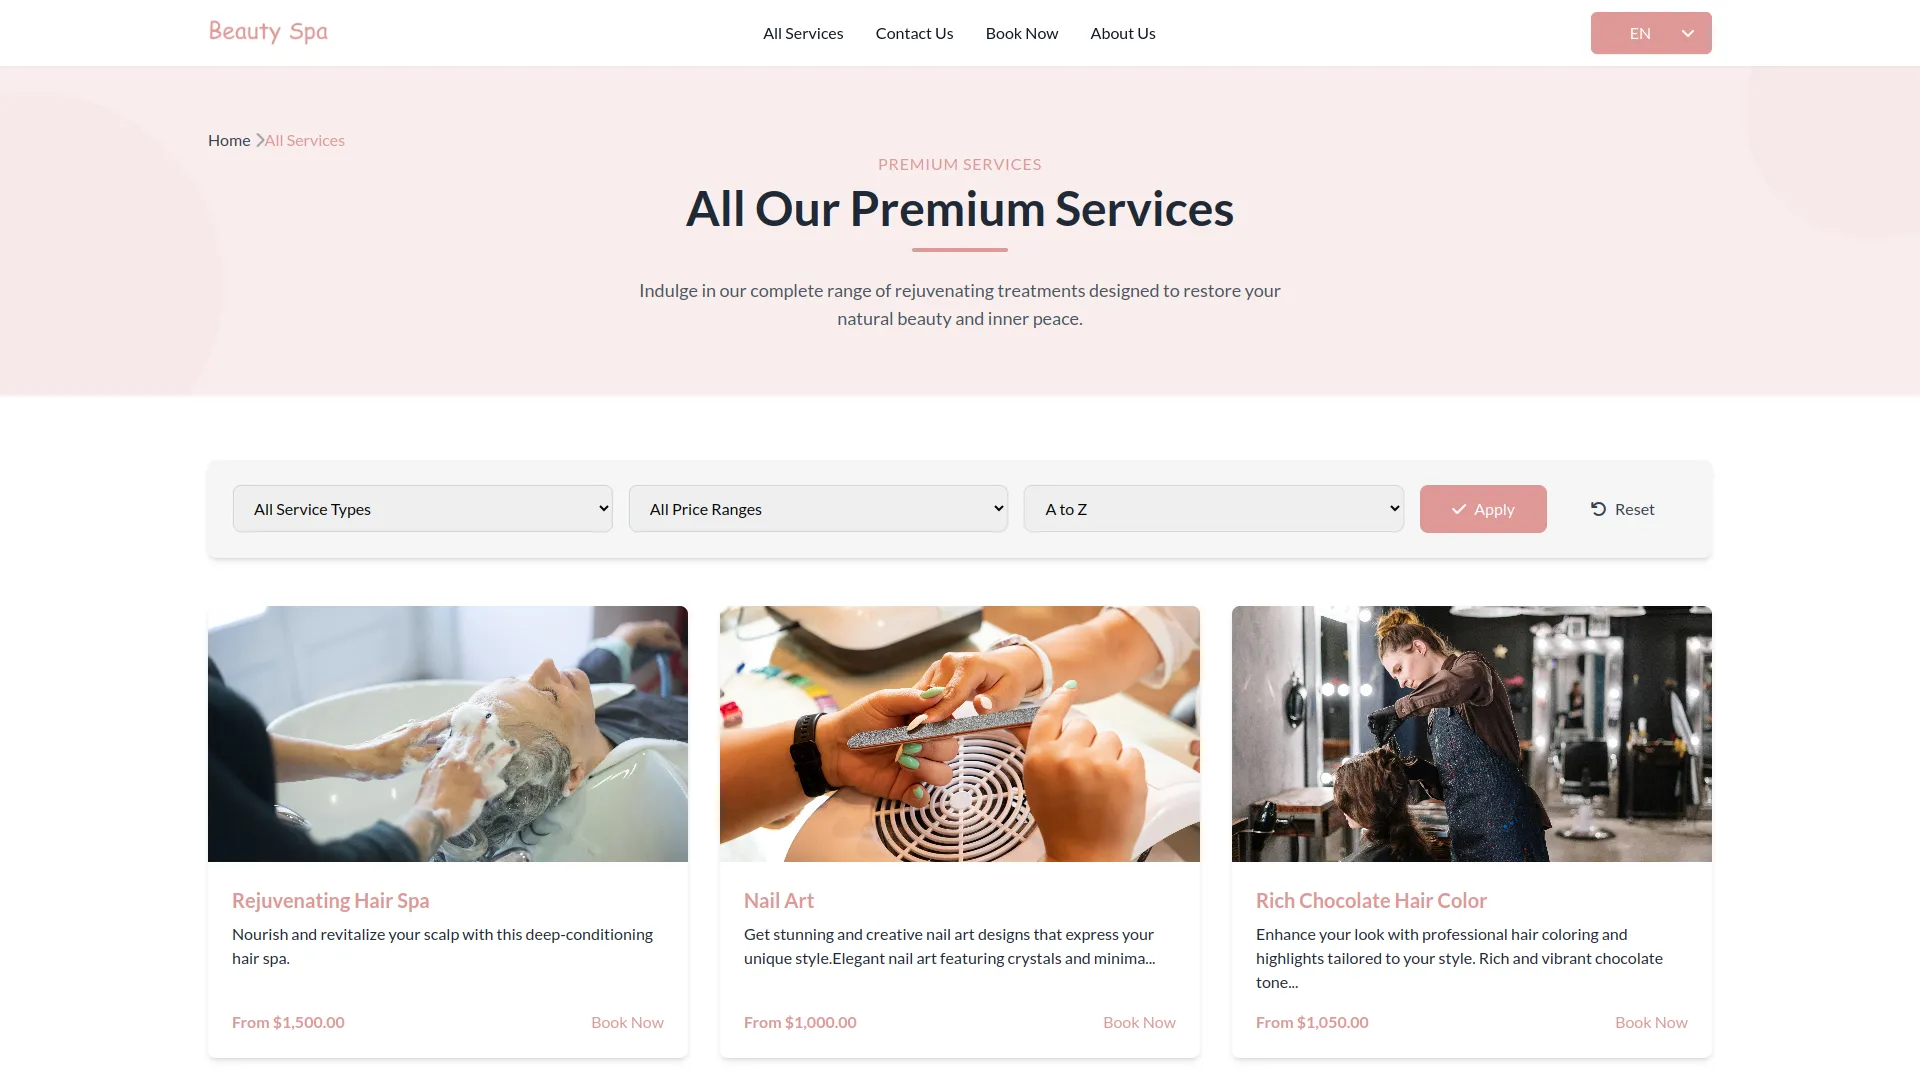
To create a new Service, click the “Create” button at the top of the service page. Enter the service Name and select the Service Type from the dropdown menu (this connects to the Service Types you created in System Setup). Upload a Service Image that represents your service.
Enter the Max Bookable Persons allowed for this service, set the Price, and specify the Time duration required. Write a detailed Description of the service. You can also add Included Services using the repeater feature to list what’s included with this service.
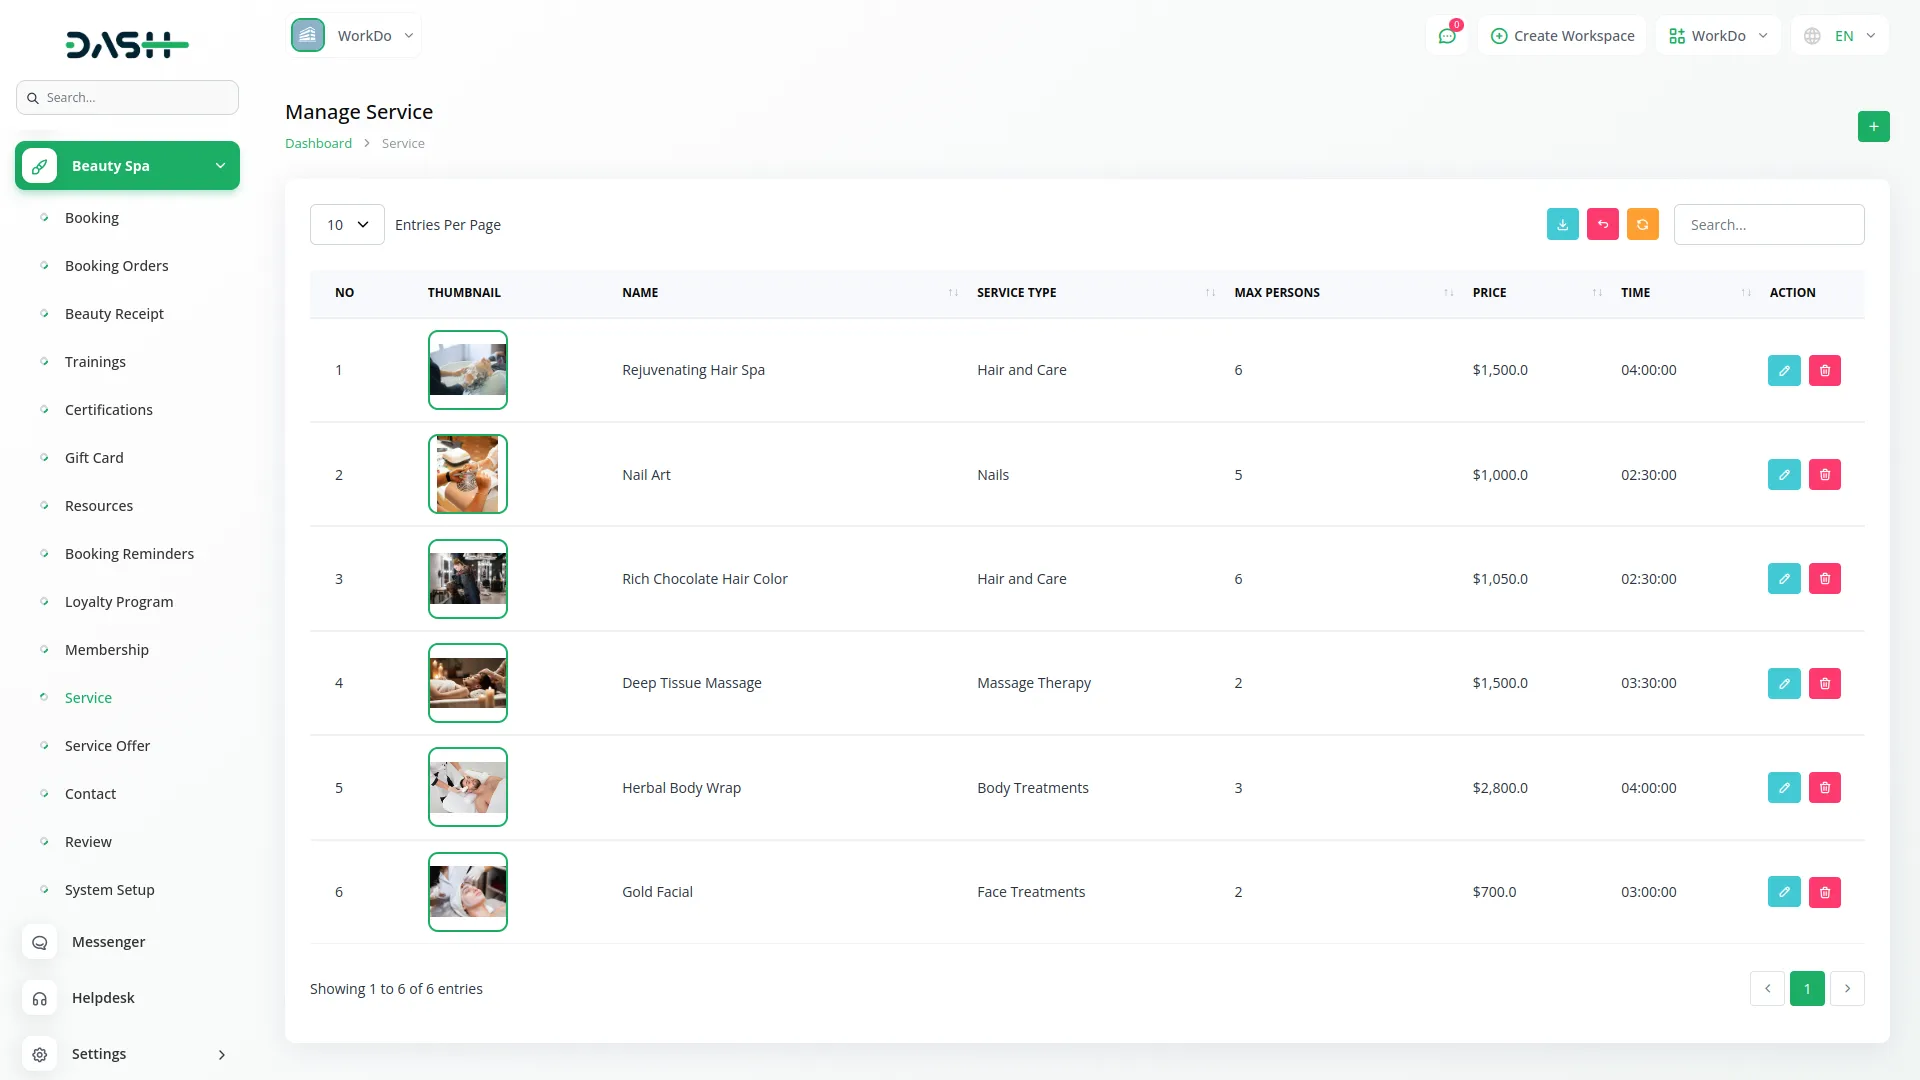
The list page shows all services with columns for No, Thumbnail, Name, Service Type, Max Persons, Price, Time, and Action. You can use the Search, Export, Reload, and Reset buttons at the top. Actions available include Edit and Delete for each service entry.
All the services you add from the backend will automatically be displayed on the frontend side of the website.
Booking
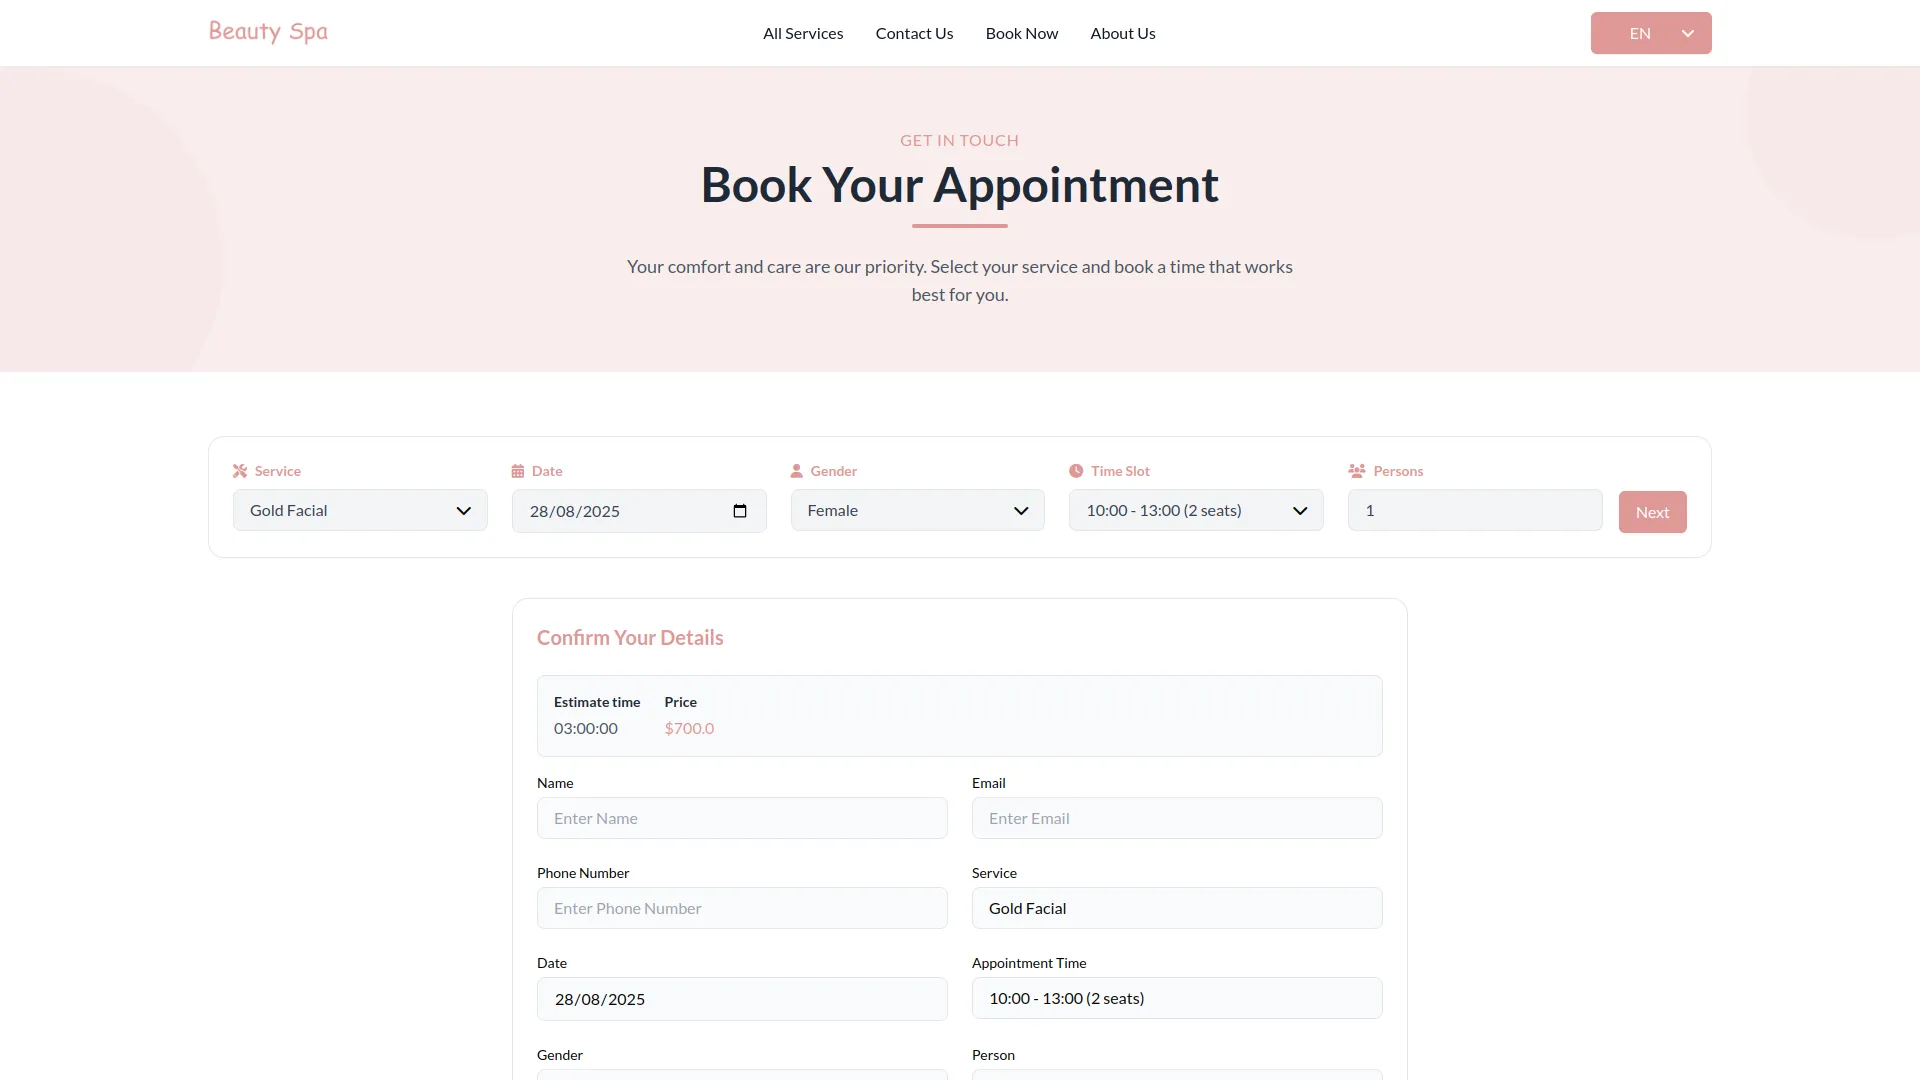
To create a new Booking, click the “Create” button. Select the Service from the dropdown menu (this connects to services you created in the Service). Choose the Date for the appointment and specify the number of Persons.
Select the customer’s Gender (Male or Female) and choose an available Time Slot. Enter the customer’s Name, Mobile Number, and Email address. When you create a booking, it automatically gets added to the booking order system with draft status.
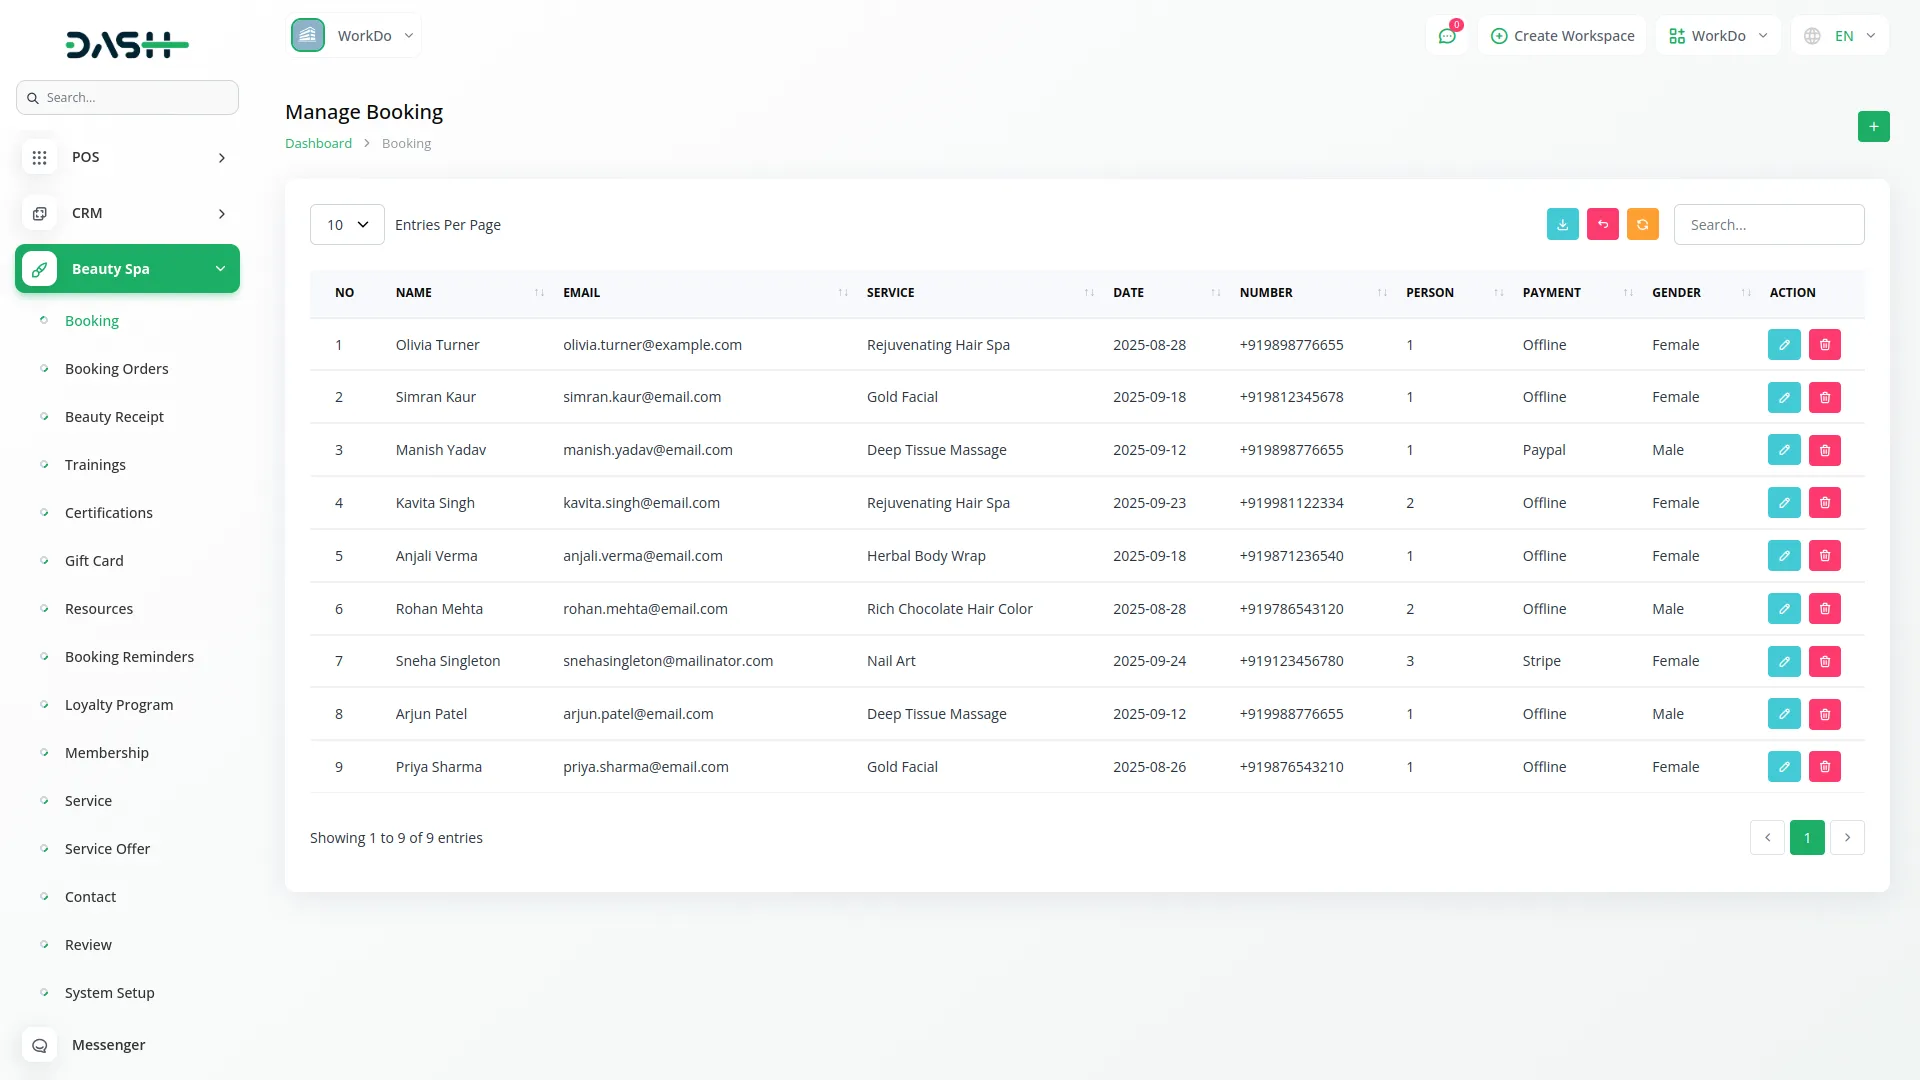
Users can also create bookings directly from the frontend side, and those bookings will automatically appear on this Booking page in the backend for management.
The list page displays all bookings in a table with columns for No, Name, Service, Date, Number, Email, and Gender. You can use Search, Export, Reload, and Reset buttons for easy management. Actions include Edit and Delete for each booking entry.
Booking Order
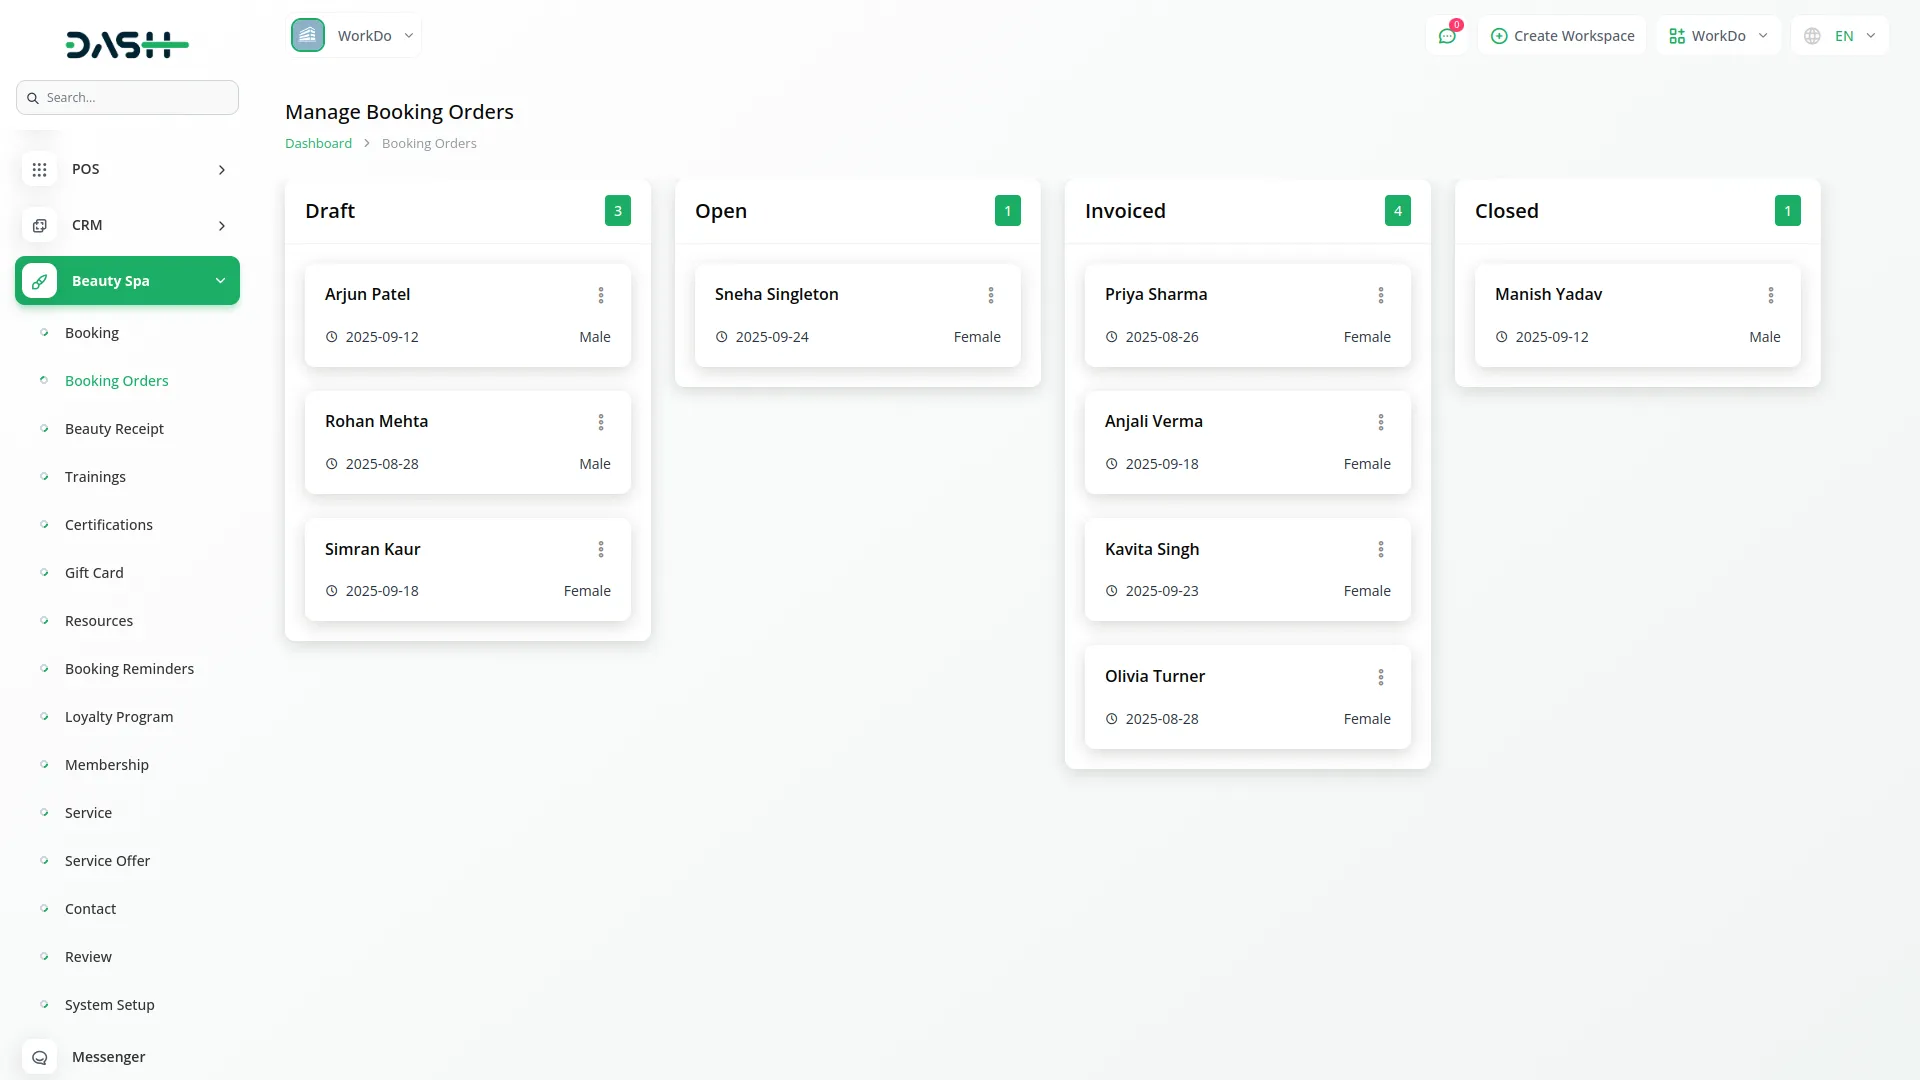
The Booking Order uses a visual kanban board system where you can see all booking data organized by status. The four status columns are Draft, Open, Invoiced, and Closed.
You can easily change a booking’s status by dragging and dropping cards between columns. Each booking card displays essential information and can be moved to reflect its current stage in the process.
Edit and Delete options are available for each booking order. When you drag a booking card to the Invoiced status, it automatically appears in the Beauty Receipt Section for payment processing and receipt generation.
Booking Receipt
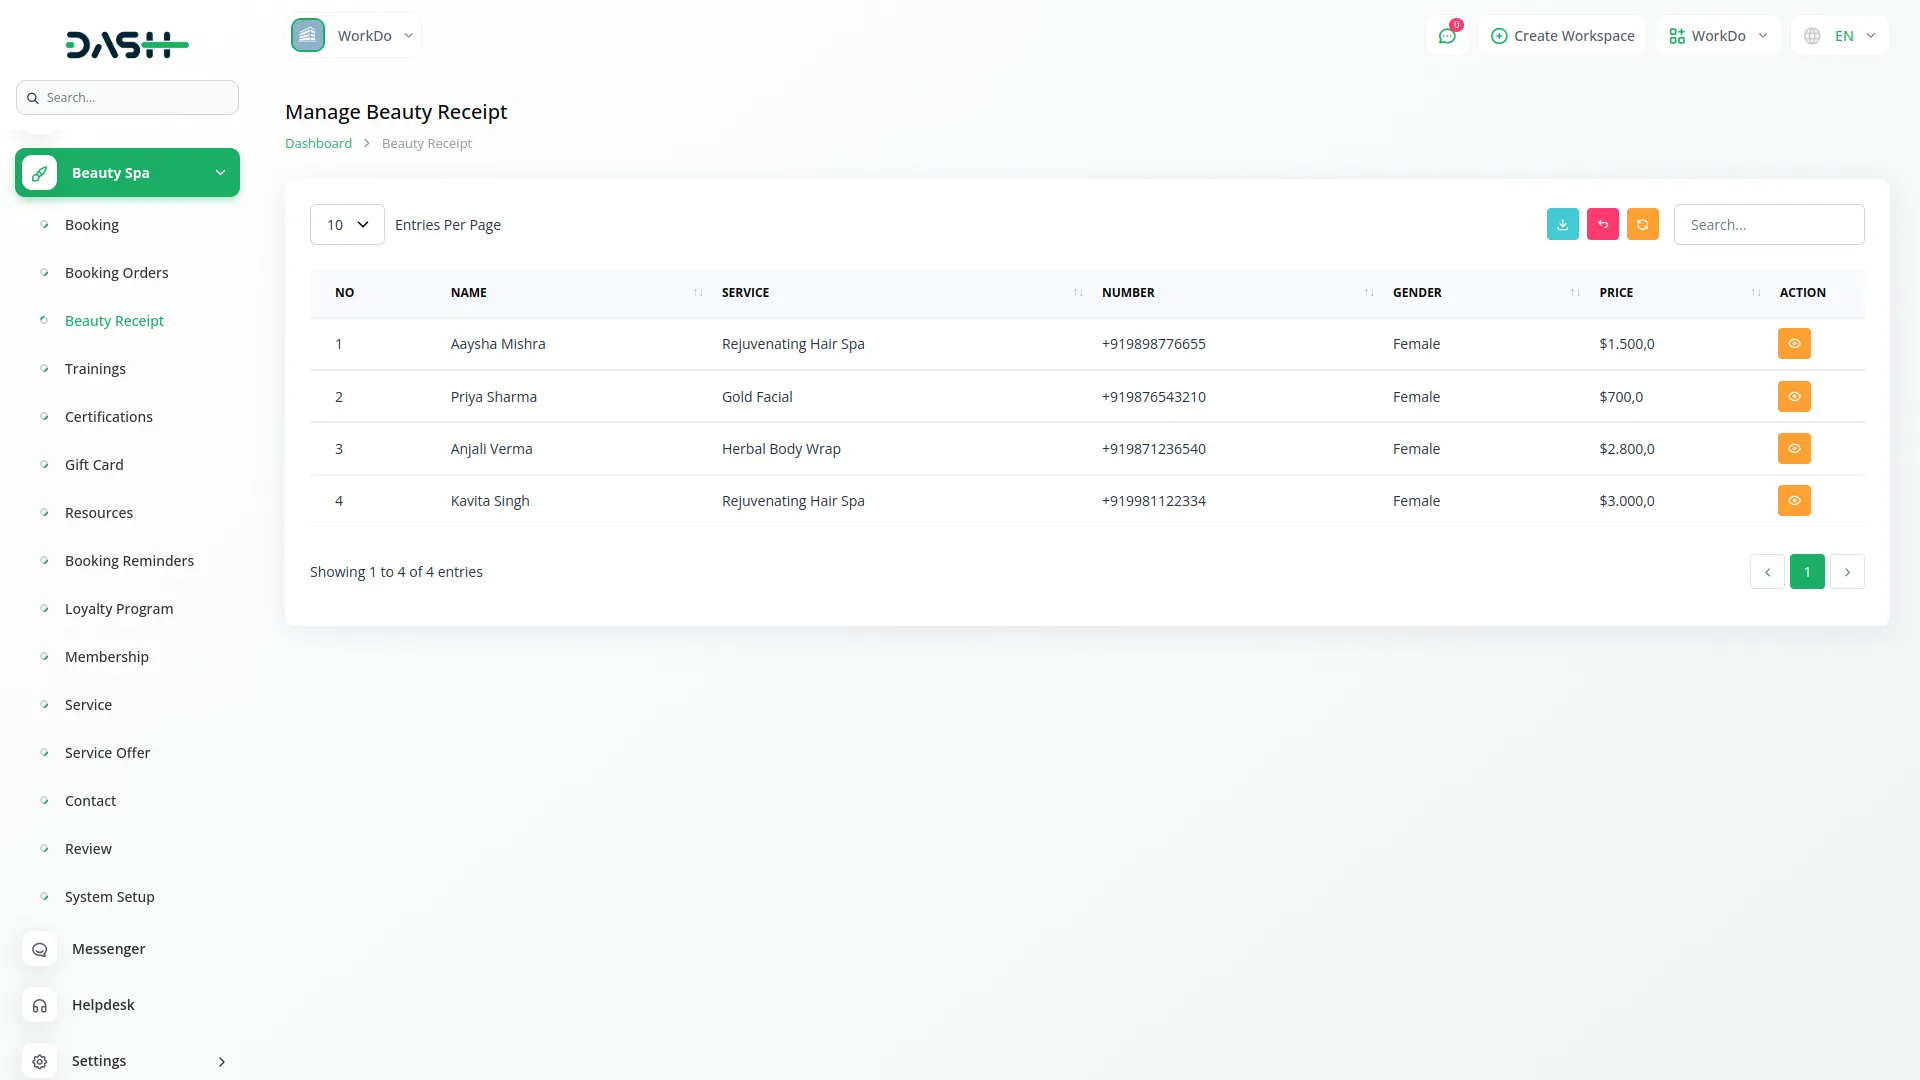
The Booking Receipt section automatically manages payment records and receipt generation. The Booking Receipt section is directly connected to the Booking Order section and receives data when bookings are moved to “Invoiced” status.
Entries in the Beauty Receipt are created automatically when you drag and drop a booking card to the “Invoiced” status in the Booking Orders kanban board. This ensures all invoiced bookings have corresponding receipt records.
The list page provides Search, Export, Reload, and Reset buttons for managing receipt data. The table displays No, Name, Service, Number, Gender, and Price columns showing all invoiced booking information.
Use the View action to see detailed receipt information. The View option includes a Download receipt feature, allowing you to generate and save PDF receipts for customer records or printing.
Trainings
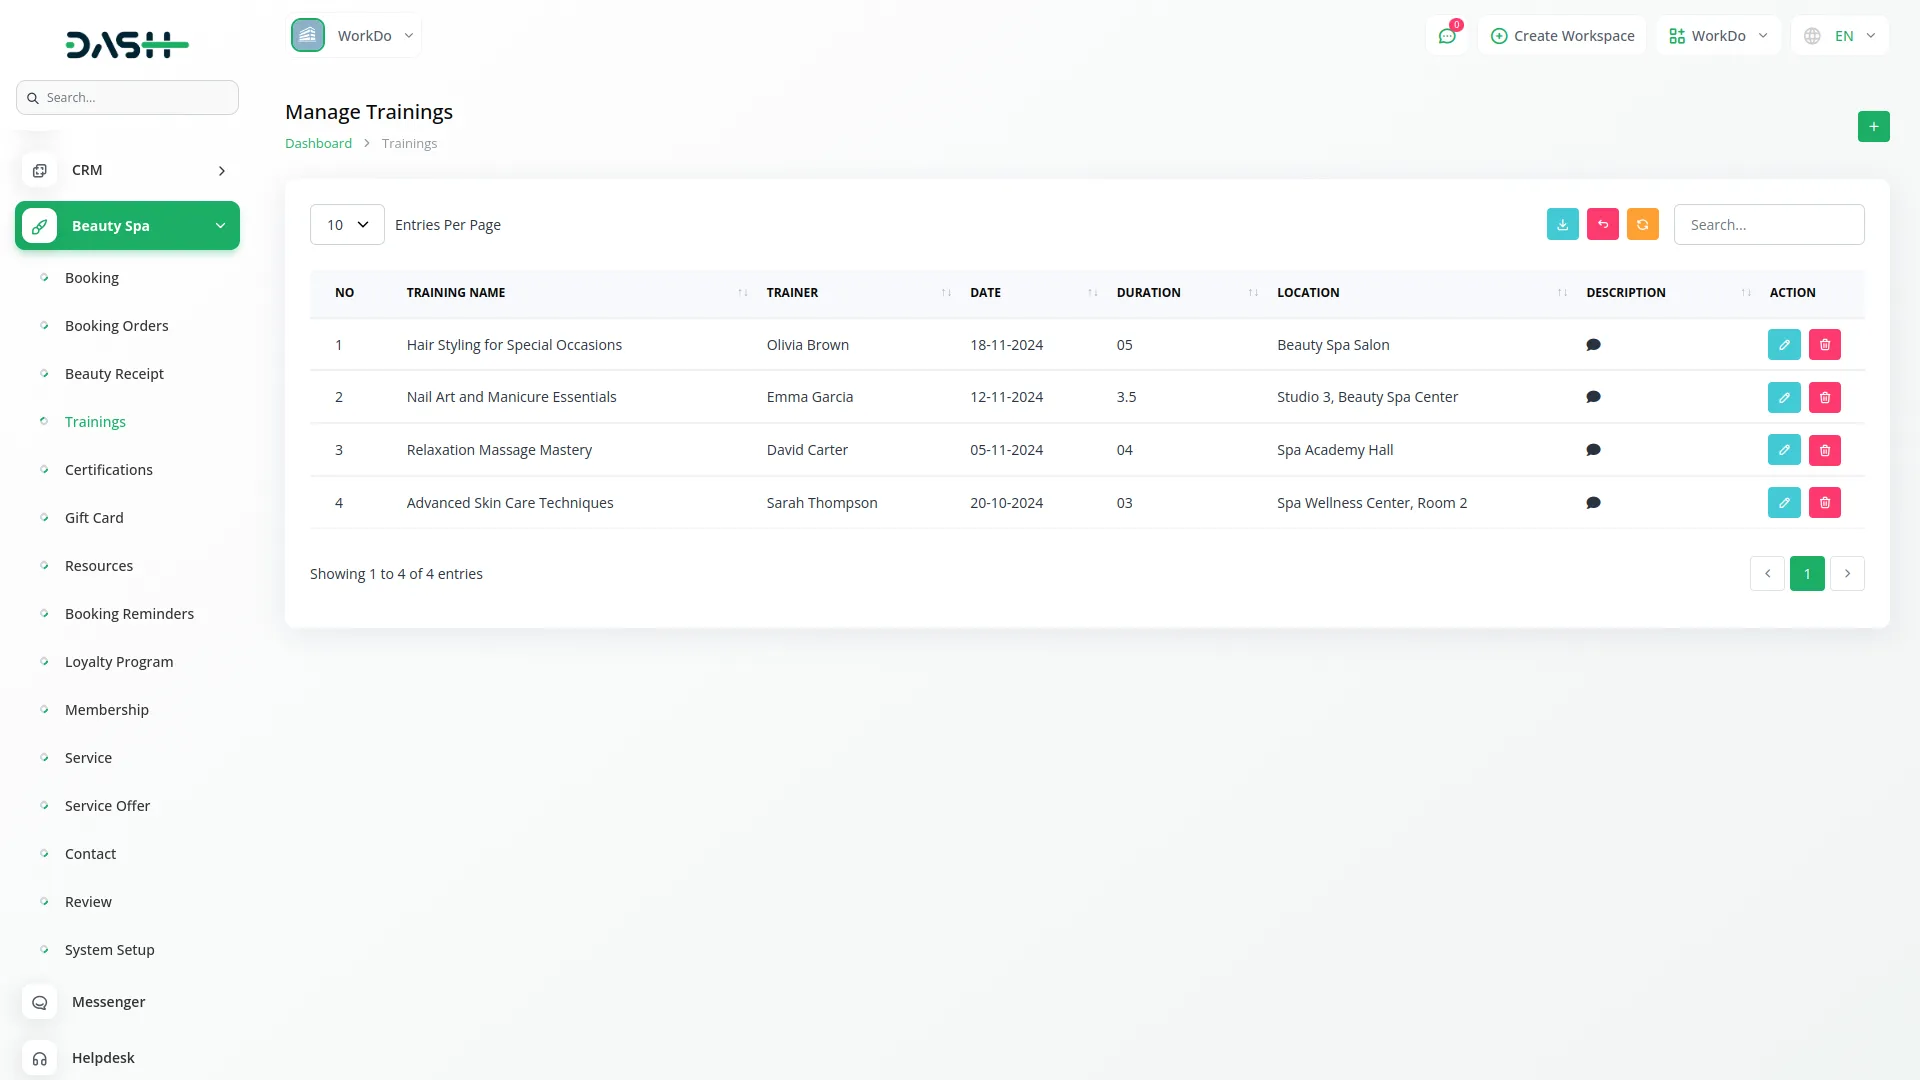
To create a new training, click the “Create” button at the top of the training page. Enter the Training Name and specify the Trainer who will conduct the session. Select the Date when the training will take place and set the Duration of the session.
Enter the Location where the training will be held and write a Description explaining the training content, objectives, and expected outcomes.
The list page includes Search, Export, Reload, and Reset buttons for easy training management. The table shows No, Training, Trainer, Date, Duration, Location, and Description columns with all training session details. You can Edit or Delete training sessions using the action buttons.
Certifications
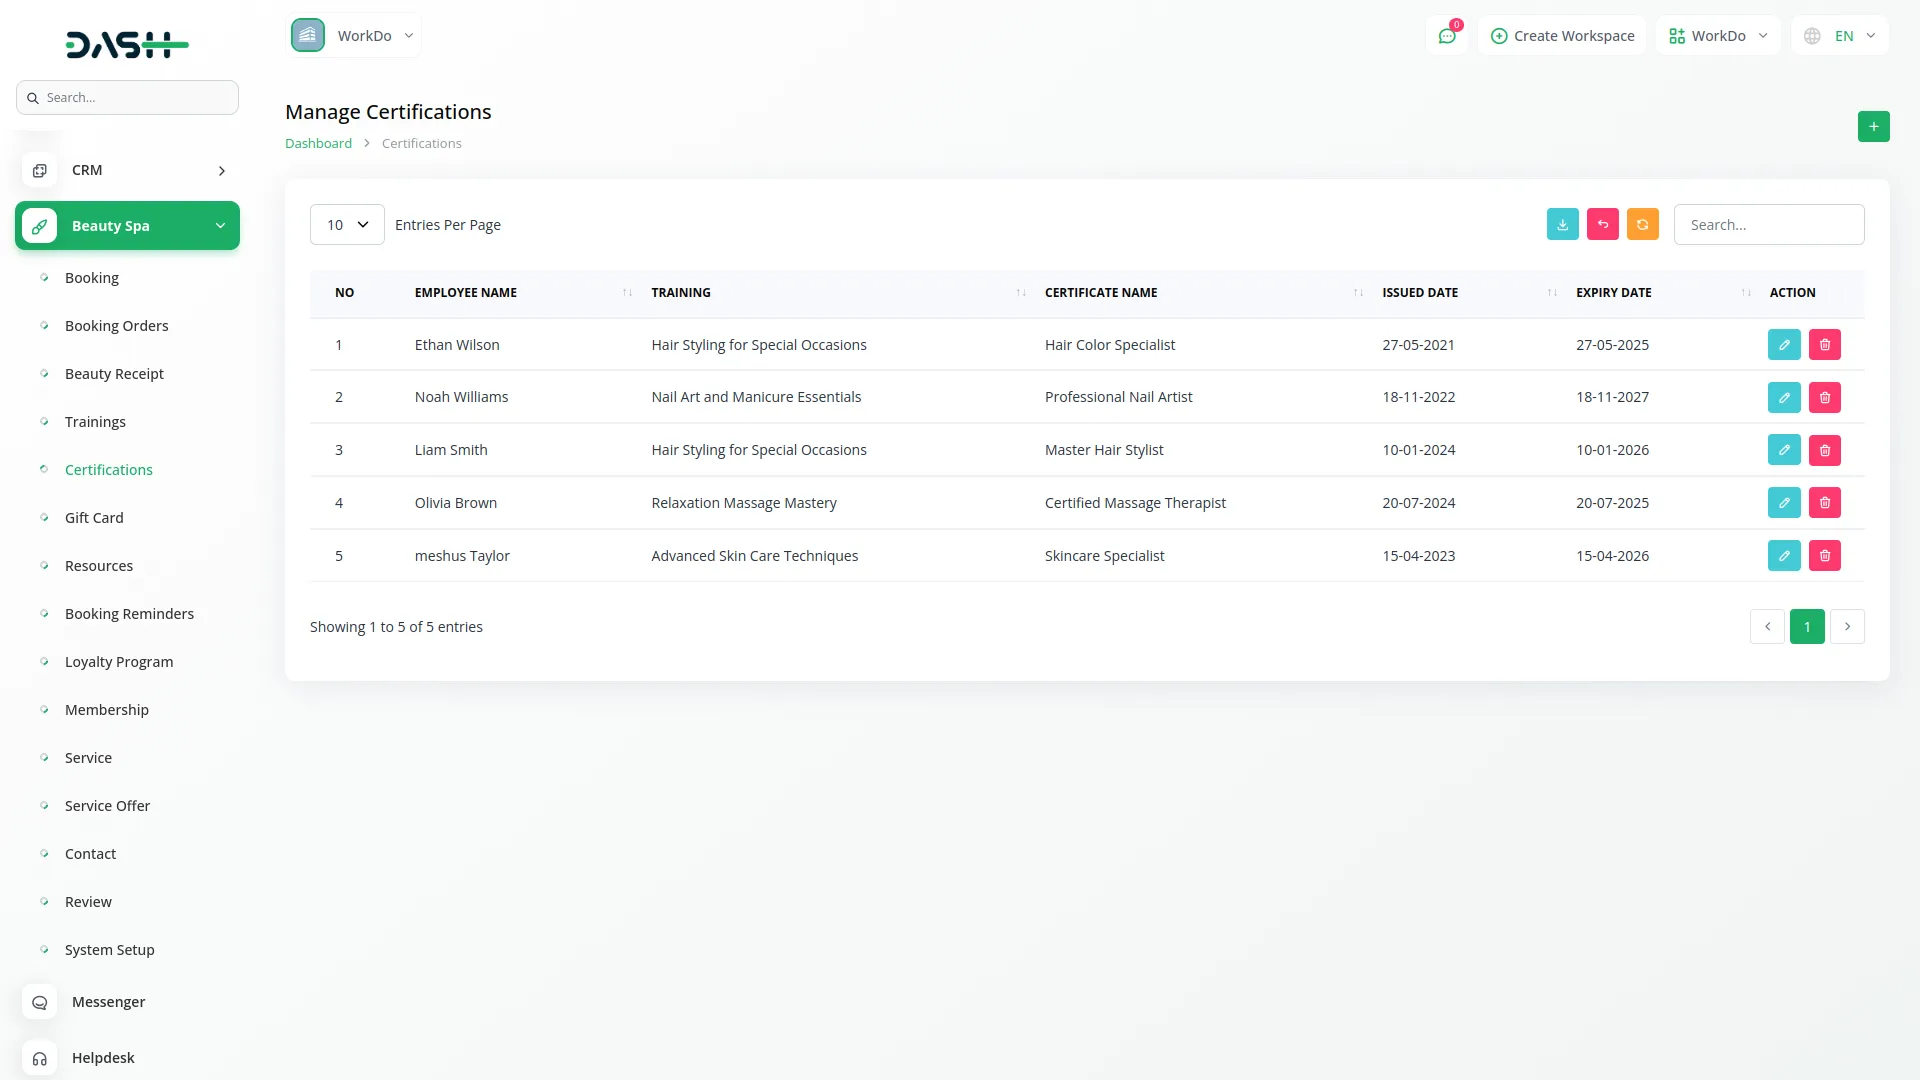
To create a new certification, click the “Create” button at the top of the certification page.Select the Employee Name from the available staff list and choose the related Training from the dropdown (this uses training data from the Trainings Section).
Enter the Certificate Name and specify the Issued Date when the certification was granted. Set the Expiry Date to track when the certification needs renewal.
The list page provides Search, Export, Reload, and Reset buttons for certification management. The table displays No, Employee Name, Training, Certificate Name, Issued Date, and Expiry Date columns. Use Edit or Delete actions to modify or remove certification records.
Gift Cards
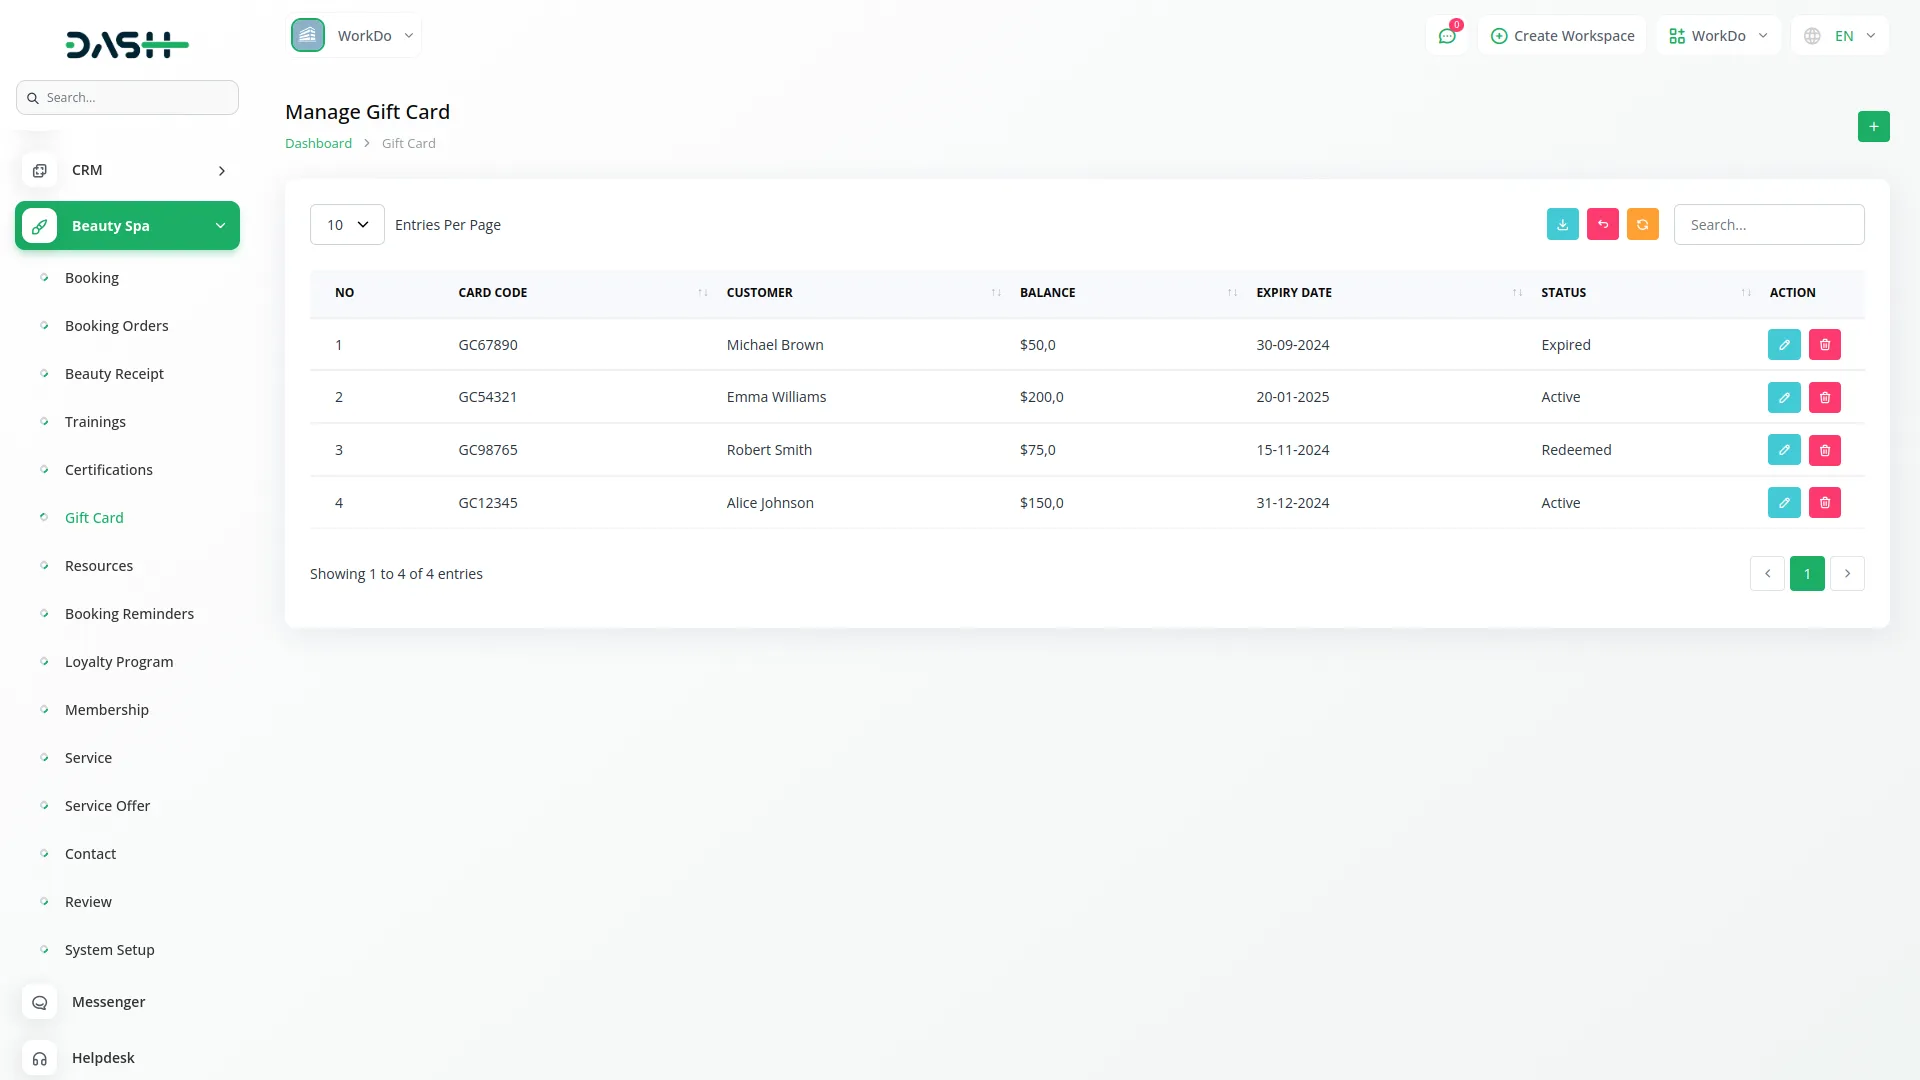
To create a new gift card, click the “Create” button at the top of the gift card page. Enter a unique Card Code that customers will use to redeem the card. Select the Customer who will receive or use the gift card.
Set the Balance amount available on the card and choose the Expiry Date when the card will no longer be valid. Select the Status to indicate whether the card is active, used, or expired.
The list page includes Search, Export, Reload, and Reset buttons for gift card management. The table shows No, Card Code, Customer, Balance, Expiry Date, and Status columns. You can Edit or Delete gift cards using the action buttons to update balances or modify card details.
Resource
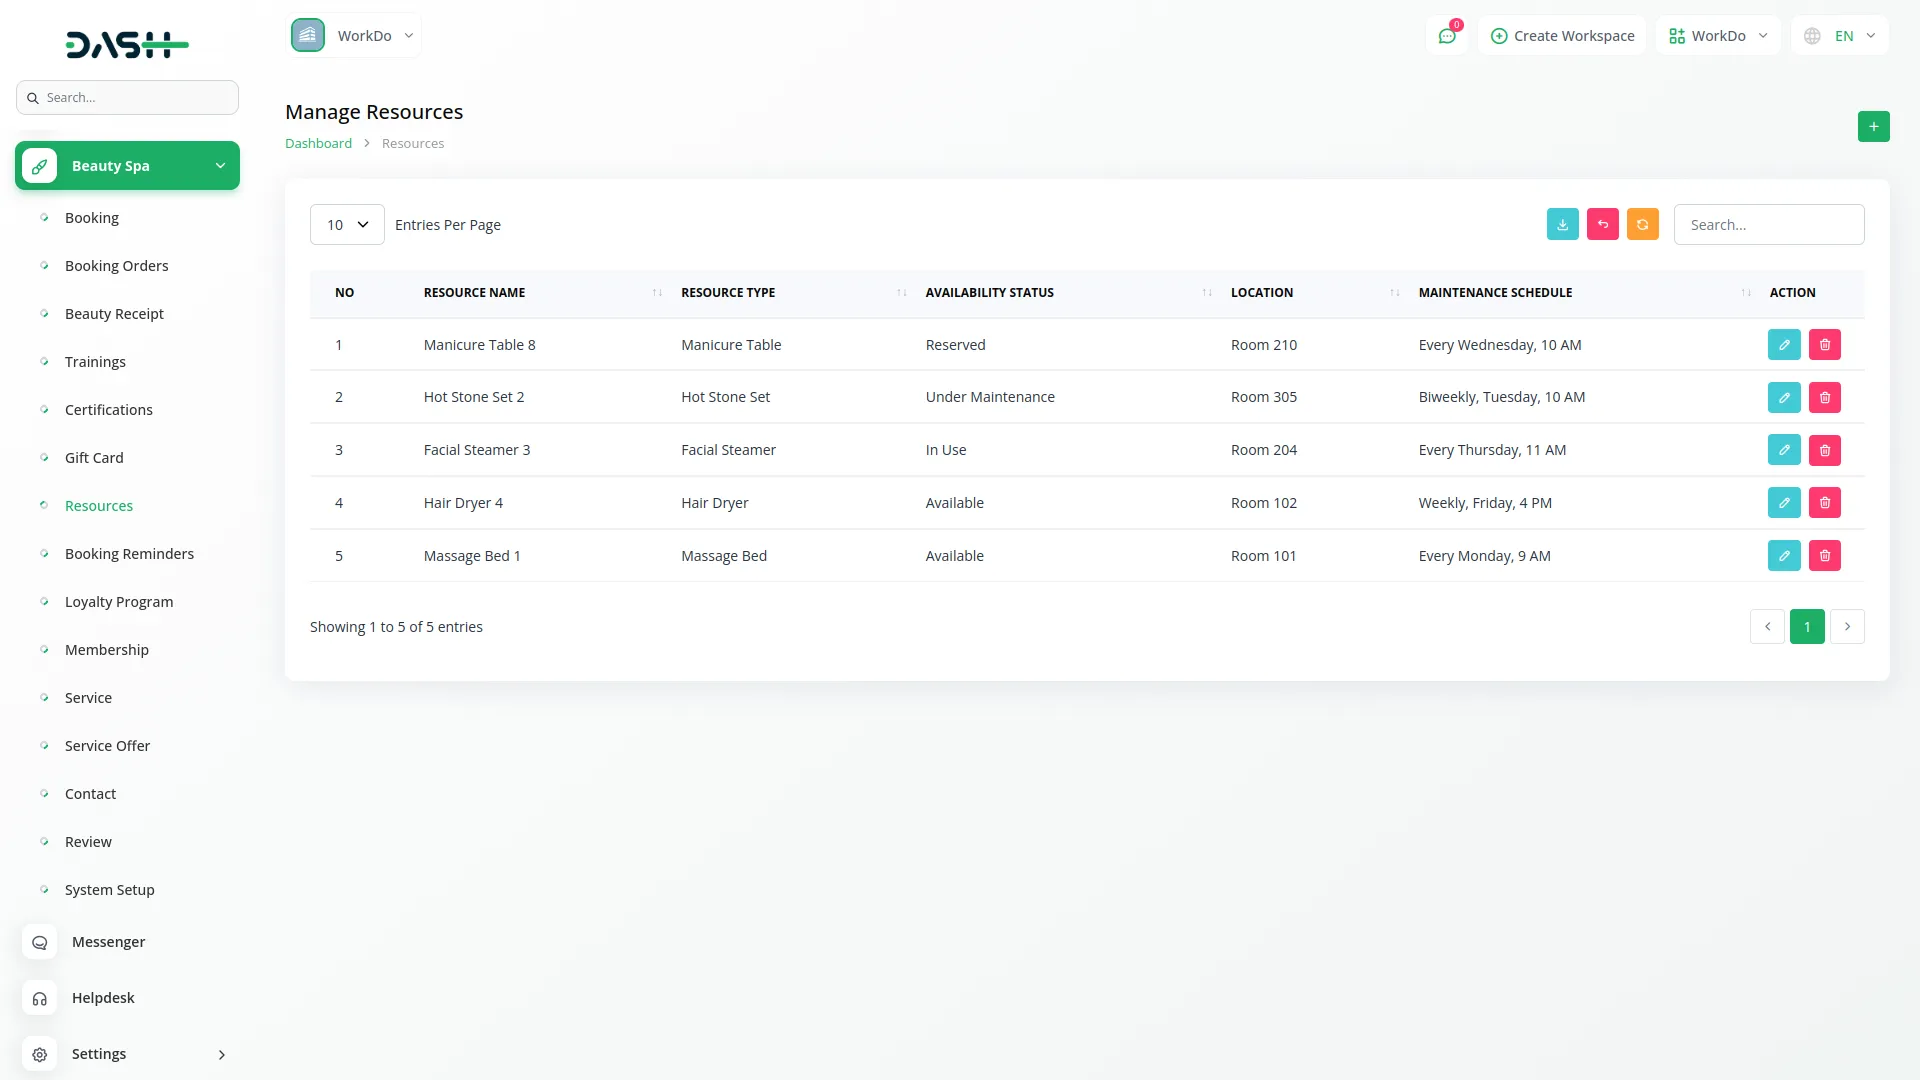
To create a new resource, click the “Create” button at the top of the resource page. Enter the Resource Name and select the Resource Type to categorize the equipment or facility. Set the Availability Status to indicate whether the resource is currently available for use.
Specify the Location where the resource is situated within your spa and enter the Maintenance Schedule to track when the resource needs servicing or inspection.
The list page provides Search, Export, Reload, and Reset buttons for resource management. The table displays No, Resource Name, Resource Type, Availability Status, Location, and Maintenance Schedule columns. Use Edit or Delete actions to modify resource information or remove outdated equipment records.
Booking Reminders
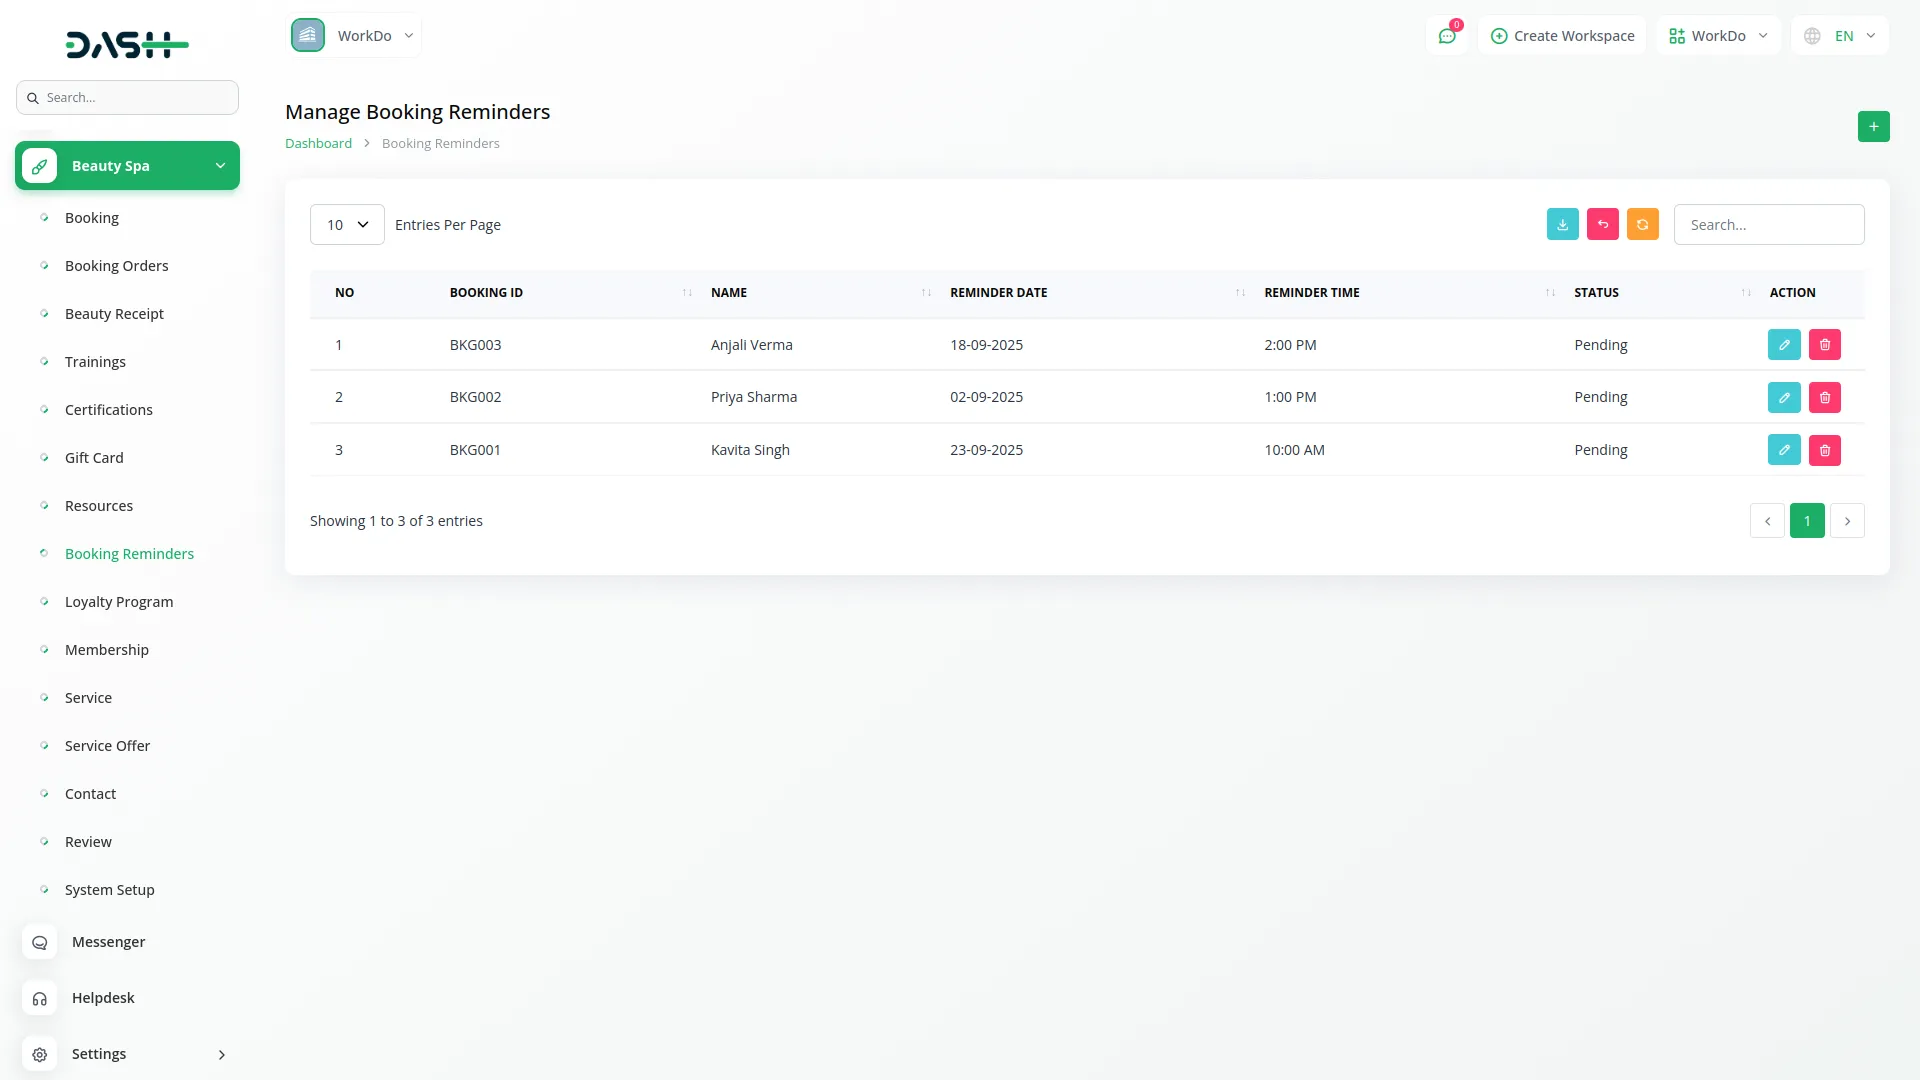
To create a new booking reminder, click the “Create” button at the top of the booking reminder page. Enter the Resource Name and select the Resource Type to categorize the reminder. Set the Availability Status to control when the reminder should be active.
Specify the Location where the service will take place and enter the Maintenance Schedule for reminder timing.
The list page includes Search, Export, Reload, and Reset buttons for reminder management. The table shows No, Booking ID, Name, Reminder Date, Reminder Time, and Status columns. The Name field is a dropdown showing customers who made bookings from the frontend website. Use Edit or Delete actions to modify or remove reminder schedules.
Loyalty Program
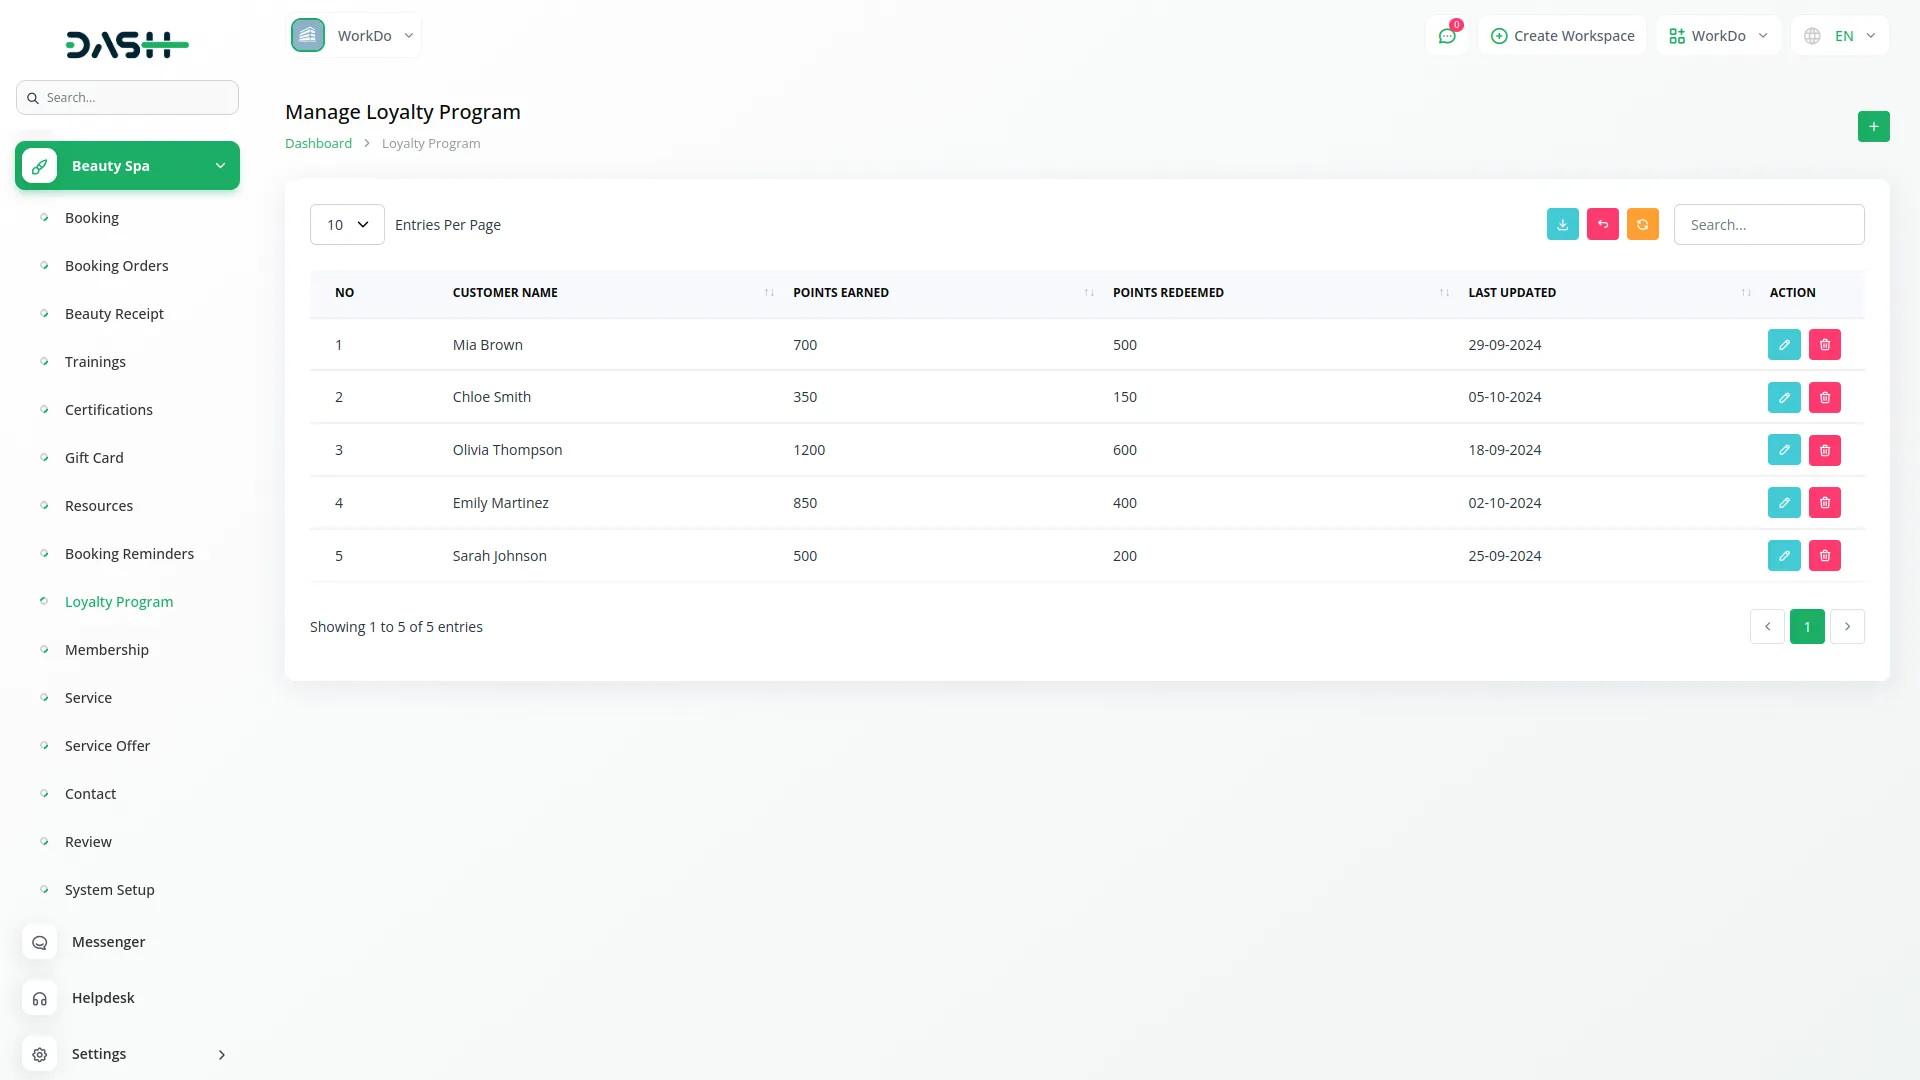
To create a new loyalty program, click the “Create” button at the top of the loyalty program page. Select the Customer Name from your client database and enter the Points Earned based on their purchases or visits.
Record Points Redeemed when customers use their accumulated points for services or discounts. The Last Updated field automatically tracks when the loyalty record was modified.
The list page provides Search, Export, Reload, and Reset buttons for loyalty program management. The table displays No, Customer Name, Points Earned, Points Redeemed, and Last Updated columns. You can Edit or Delete loyalty records using the action buttons to adjust point balances or remove inactive accounts.
Membership
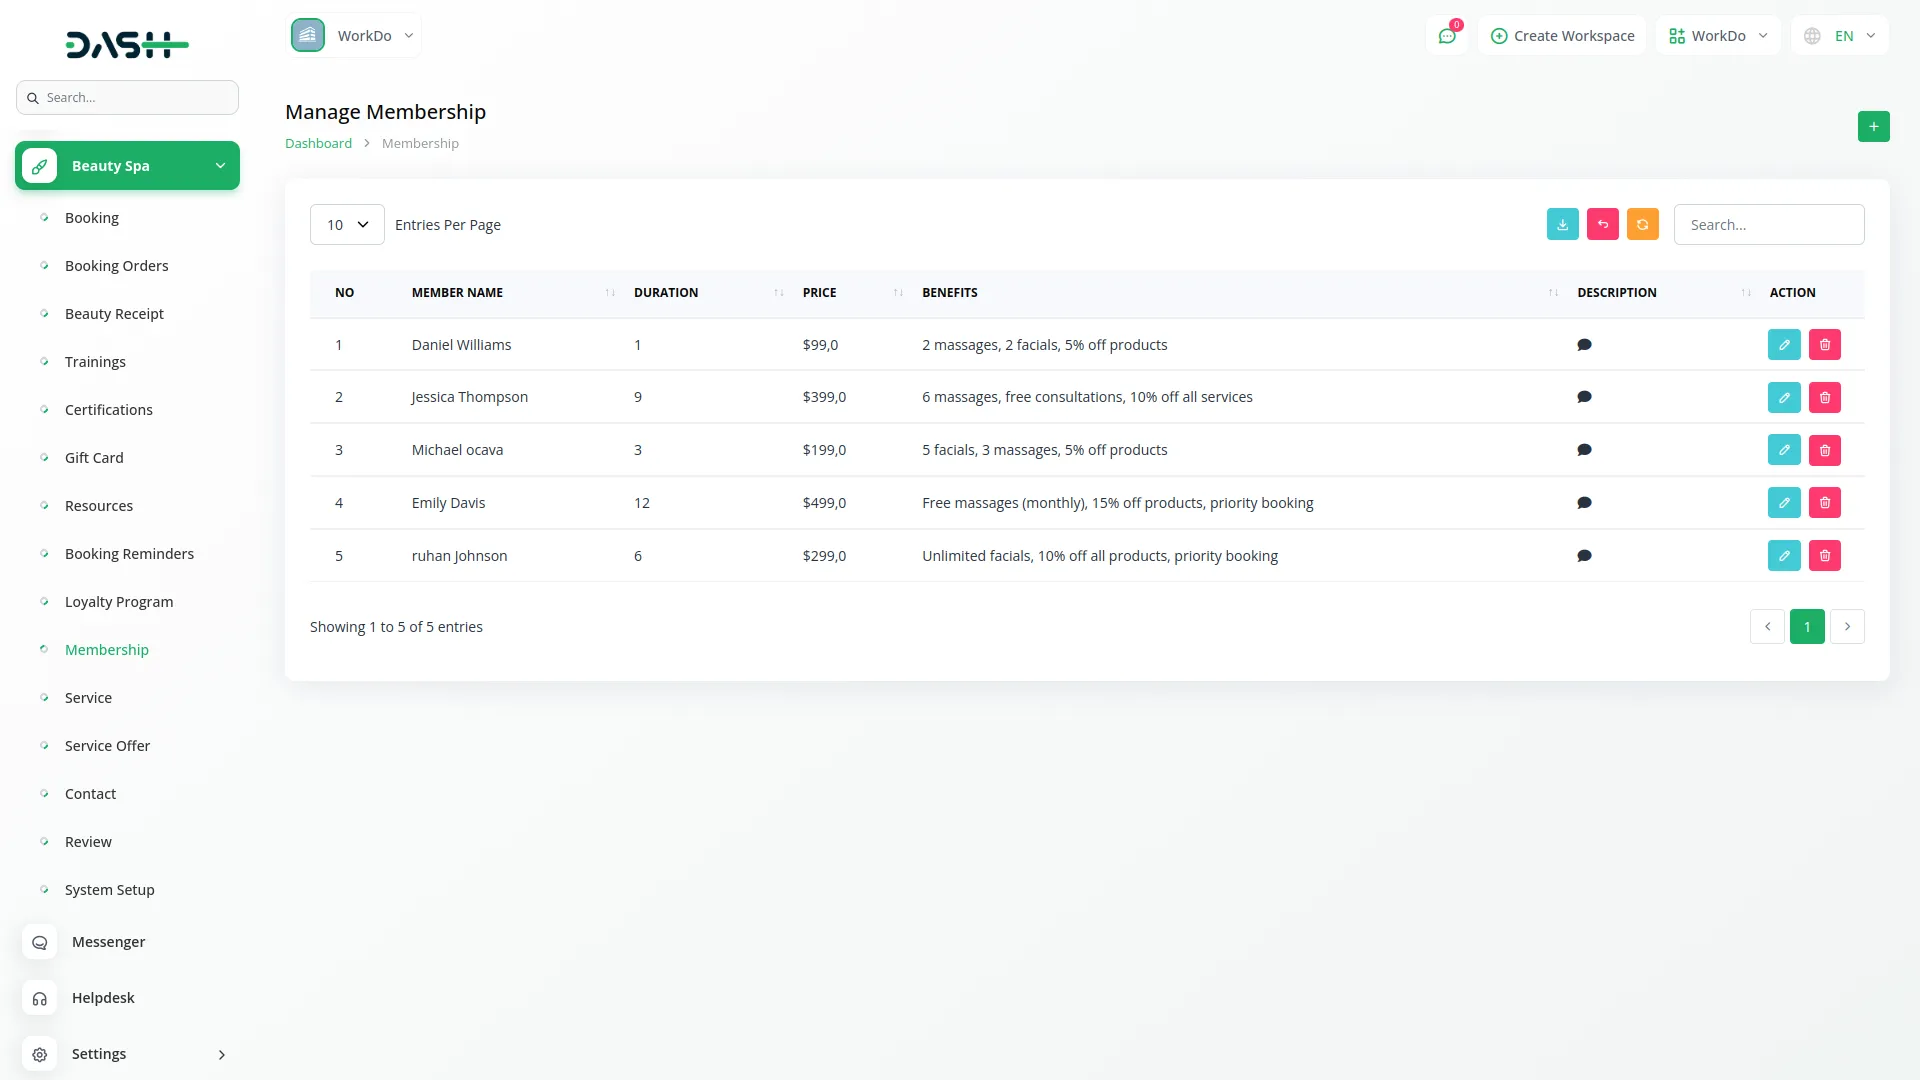
To create a new membership, click the “Create” button at the top of the membership page. Enter the Member Name and set the Duration of the membership period. Specify the Price customers will pay for the membership.
List the Benefits that members will receive, such as discounts, priority booking, or exclusive services. Write a detailed Description explaining the membership features and terms.
The list page includes Search, Export, Reload,and Reset buttons for membership management. The table shows No, Member Name, Duration, Price, Benefits, and Description columns. Use Edit or Delete actions to modify membership plans or remove outdated offerings.
Service Offer
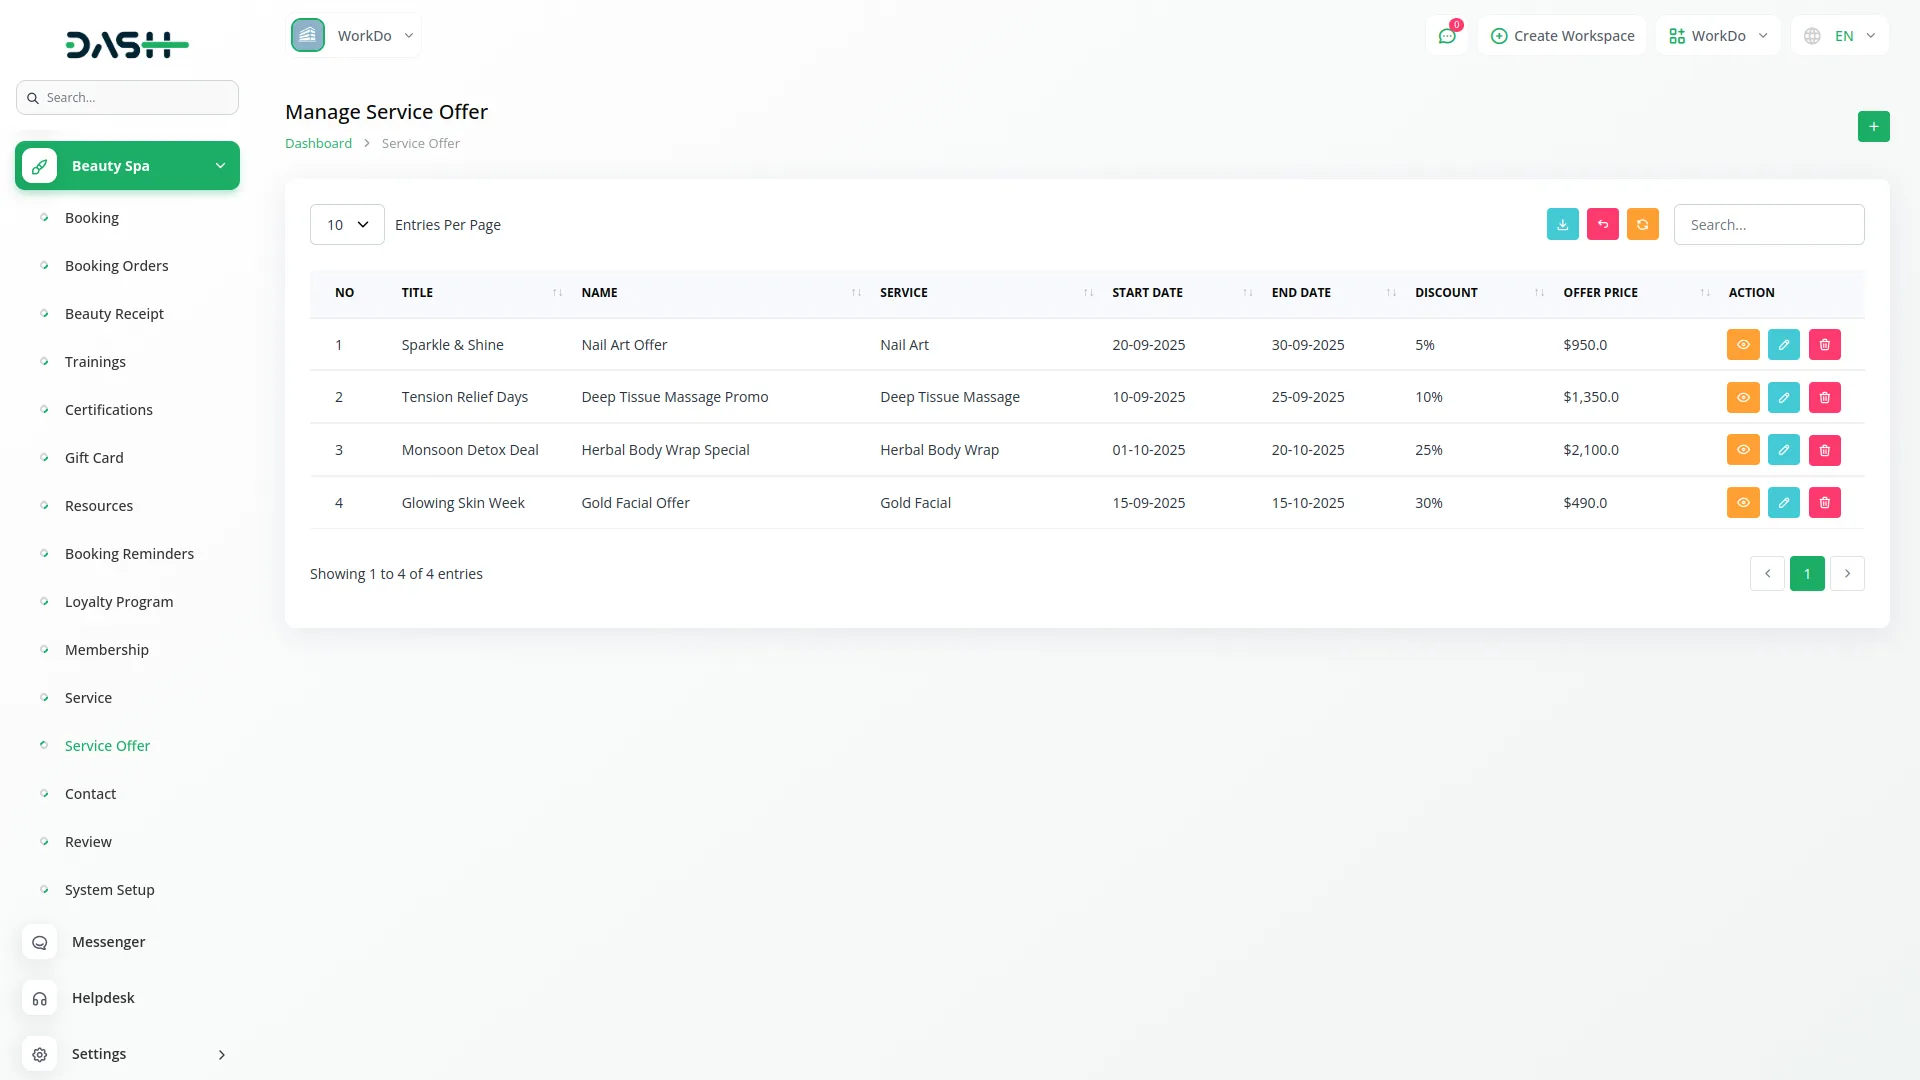
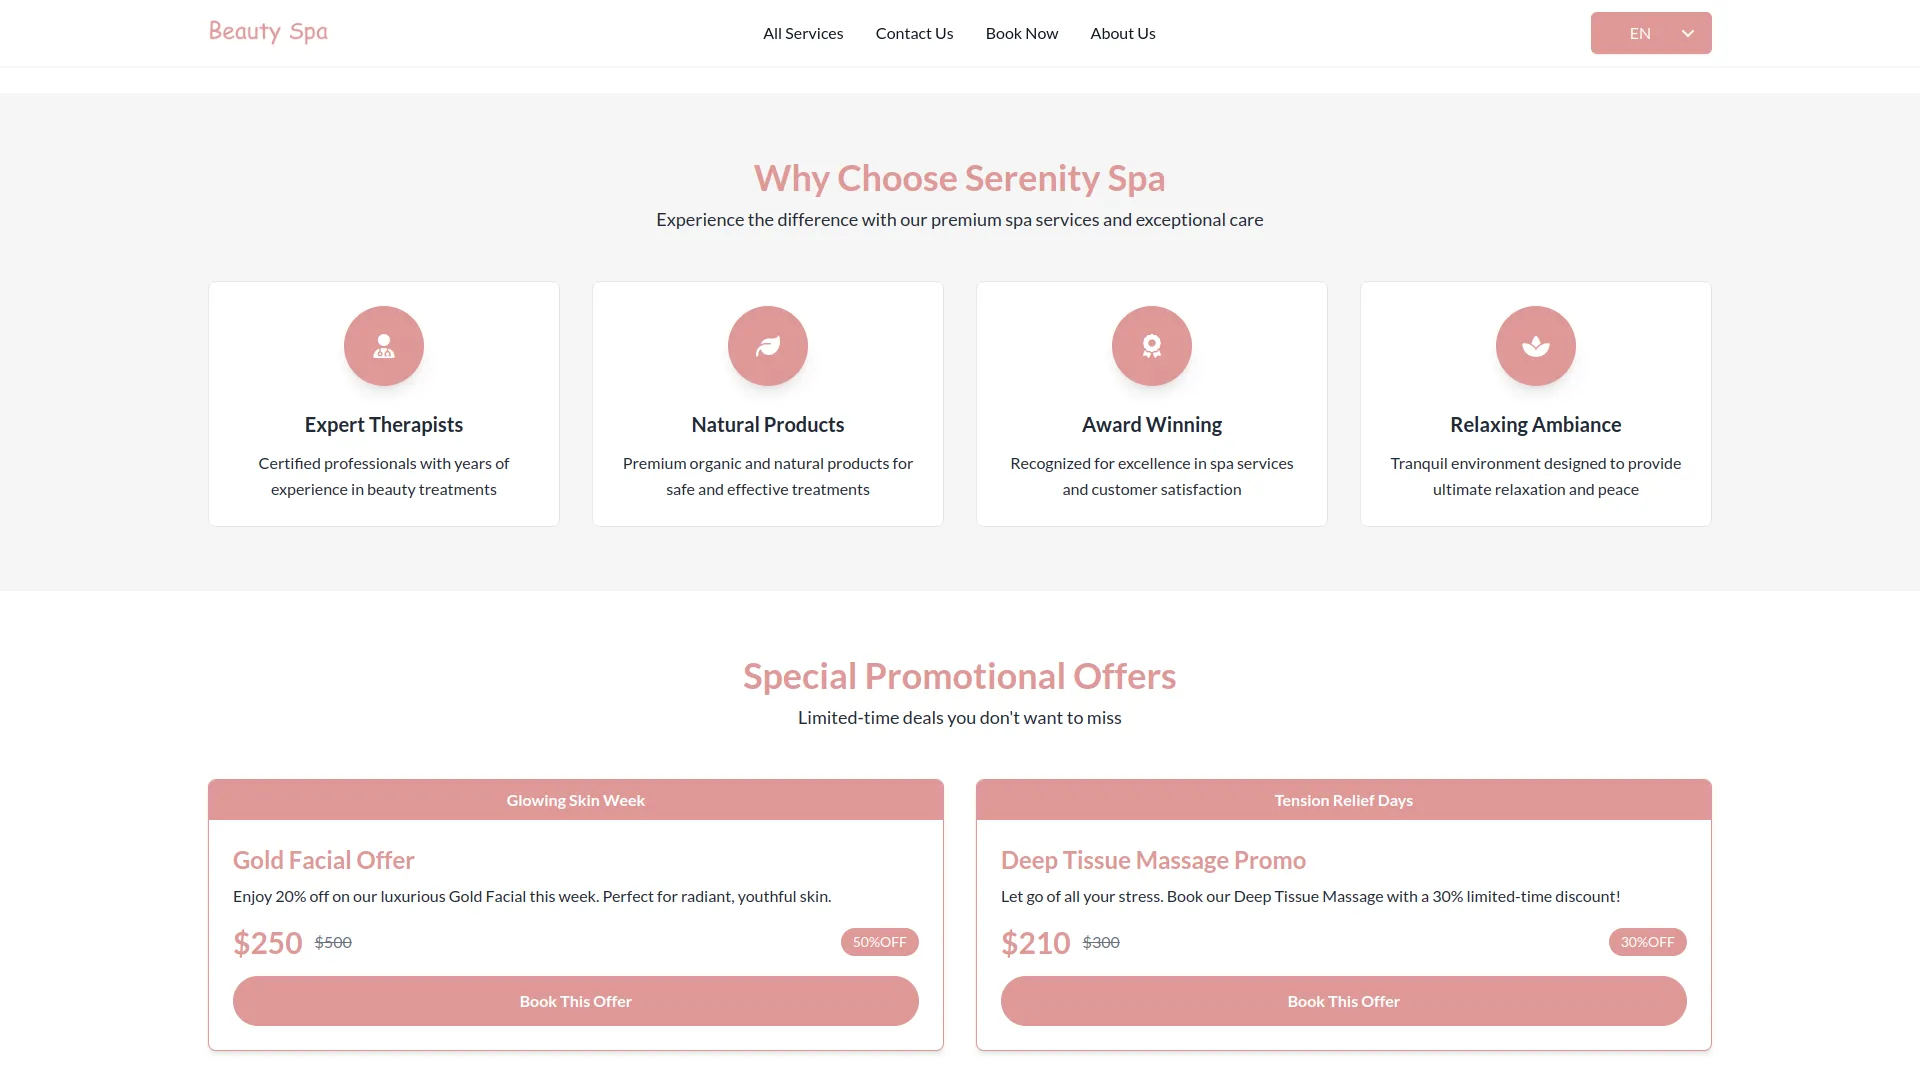
To create a new service offer, click the “Create” button at the top of the service page. Enter the Title and Name for your promotional campaign. Select the Service from the dropdown (this uses services from the Service section) and enter the original Price.
Set the From Date and End Date to define the promotional period. Enter the Offer Price showing the discounted amount and specify the Discount percentage or amount. Write a Description explaining the offer details and terms.
The list page provides Search, Export, Reload, and Reset buttons for offer management. The table displays No, Title, Name, Service, Offer Price, Discount, and Action columns. You can Edit or Delete service offers using the action buttons to modify promotions or remove expired deals.
Contacts
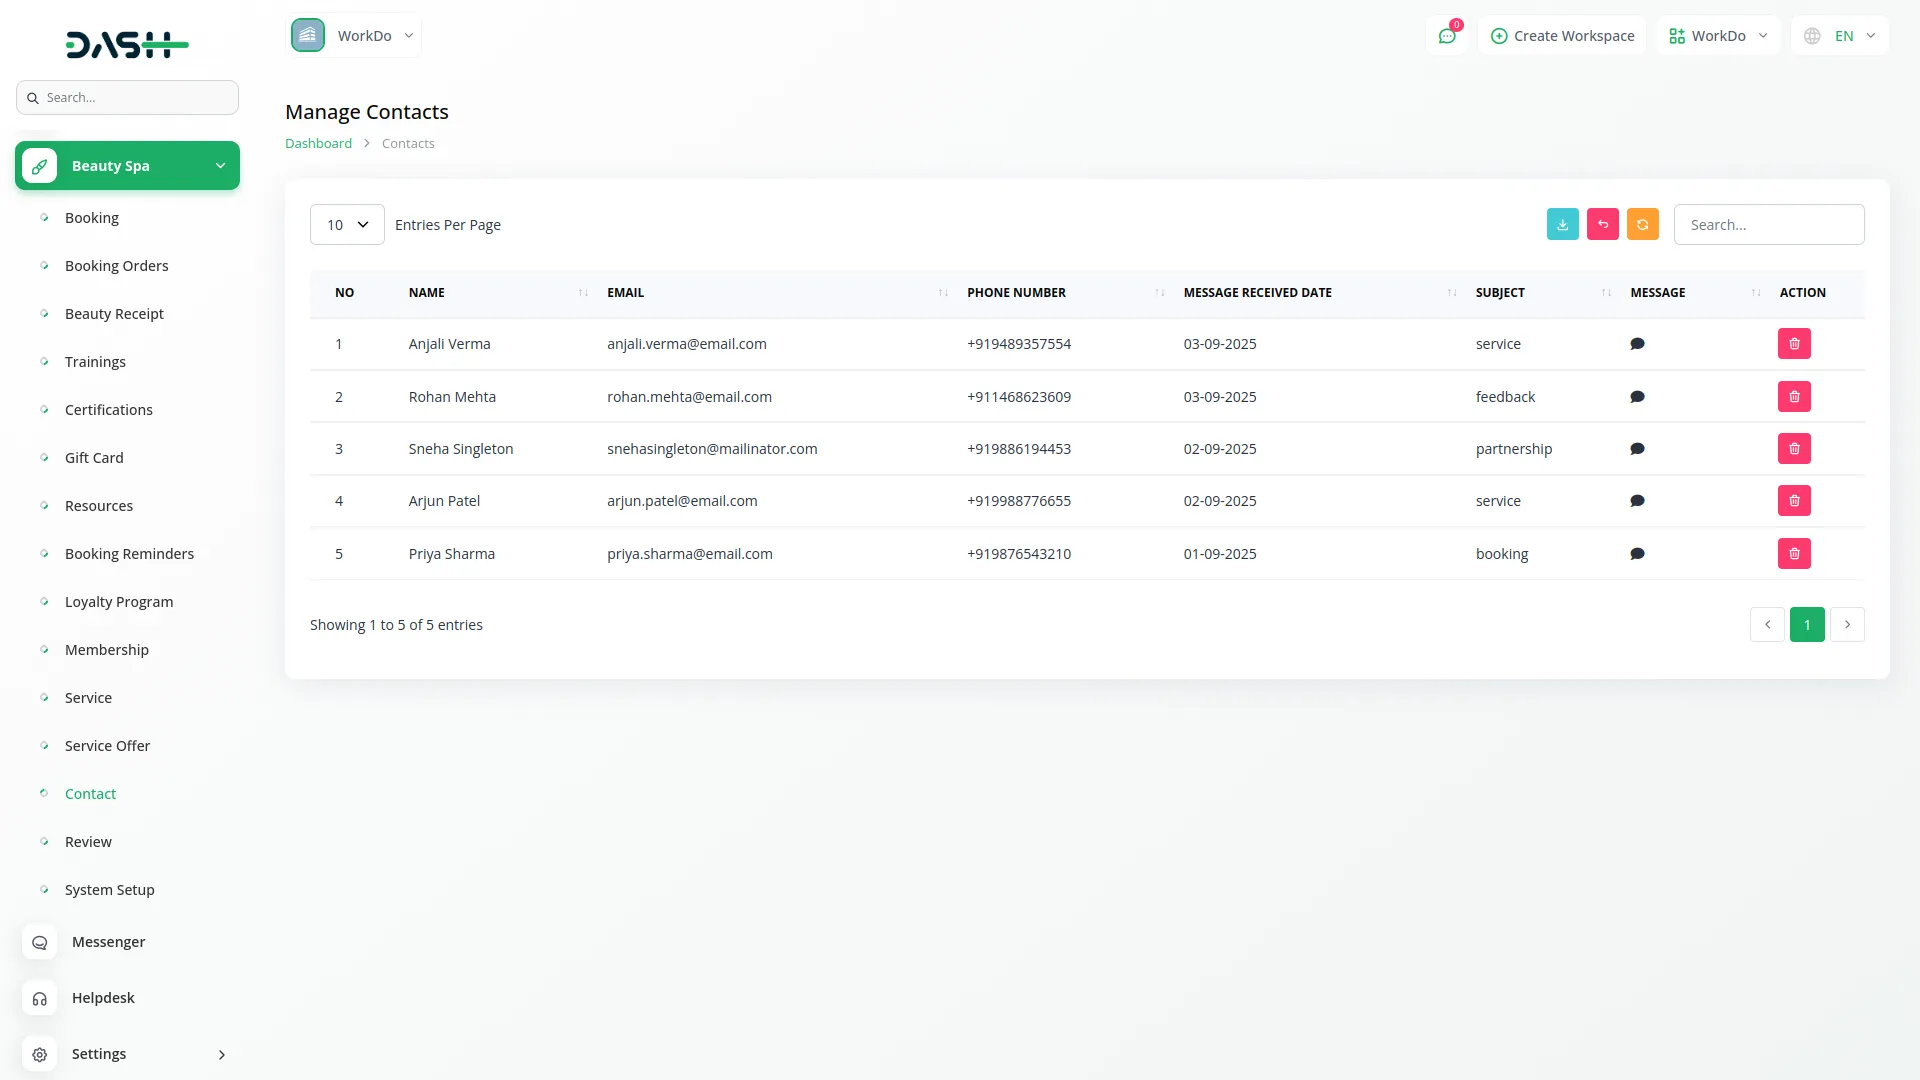
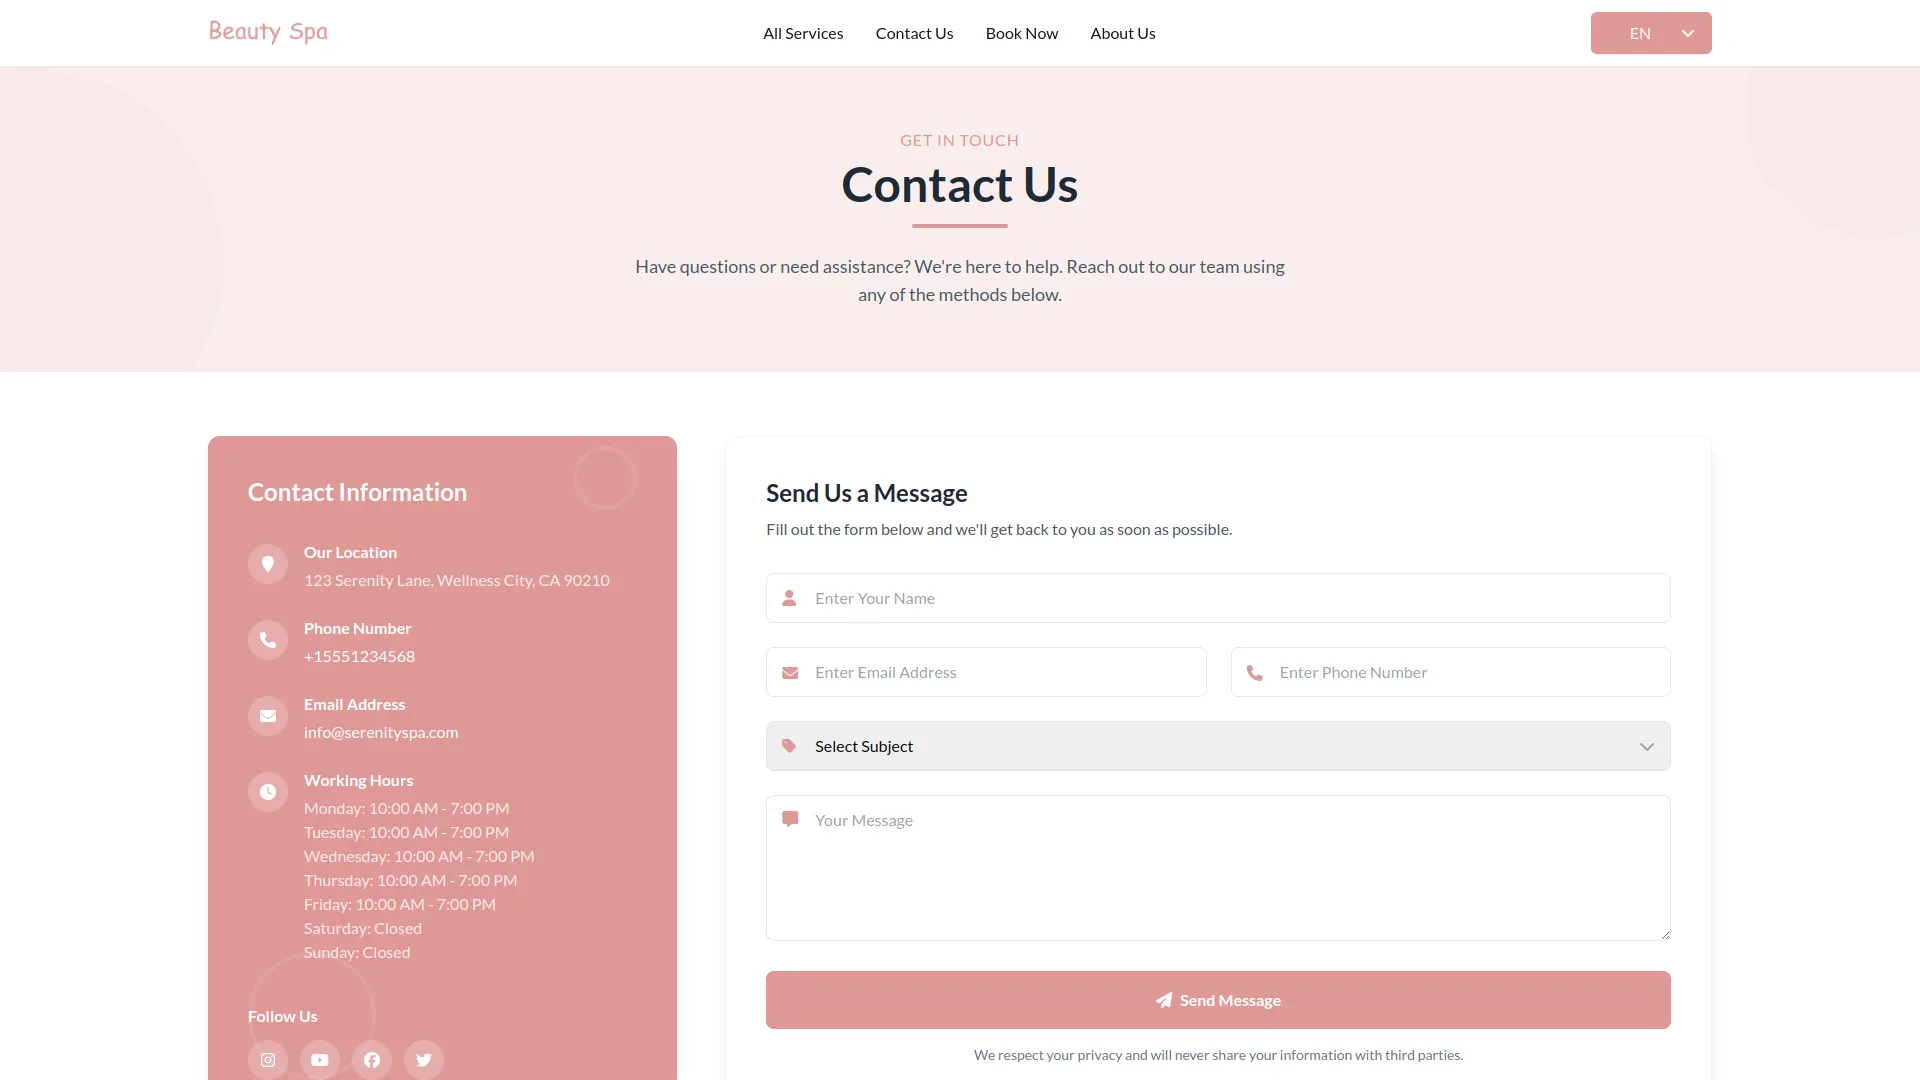
Customers can also reach out from the frontend side of the website by submitting the form on the Contact Us page, and all such submissions will automatically appear here in the Contacts section for easy management.
The list page shows all customer contact submissions with Search, Export, Reload, Reset, and Create buttons for message management. The table displays No, First Name, Email, Phone Number, Message Received Date, Subject, Message, and Action columns.
You can view complete customer messages, including their contact information, inquiry subject, and detailed message content. Use the Delete action to remove old or resolved contact inquiries from the system.
Reviews
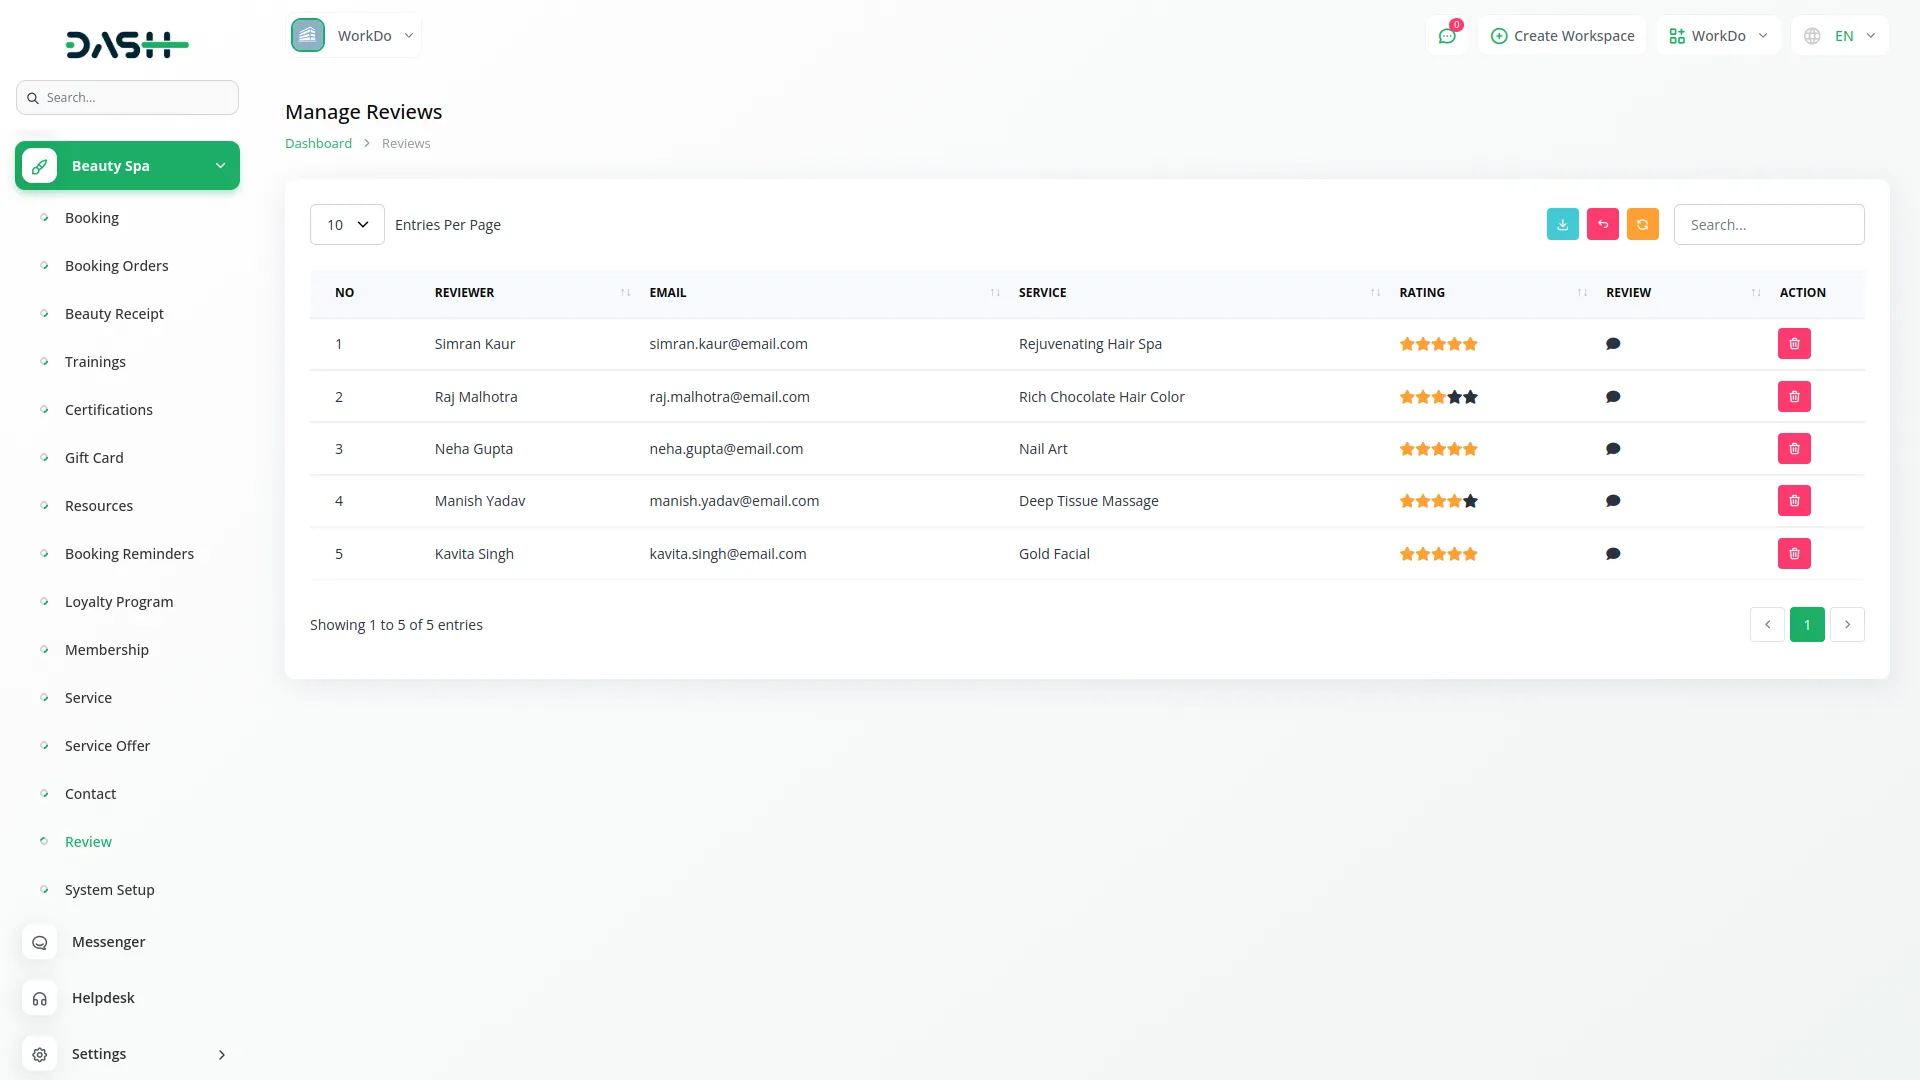
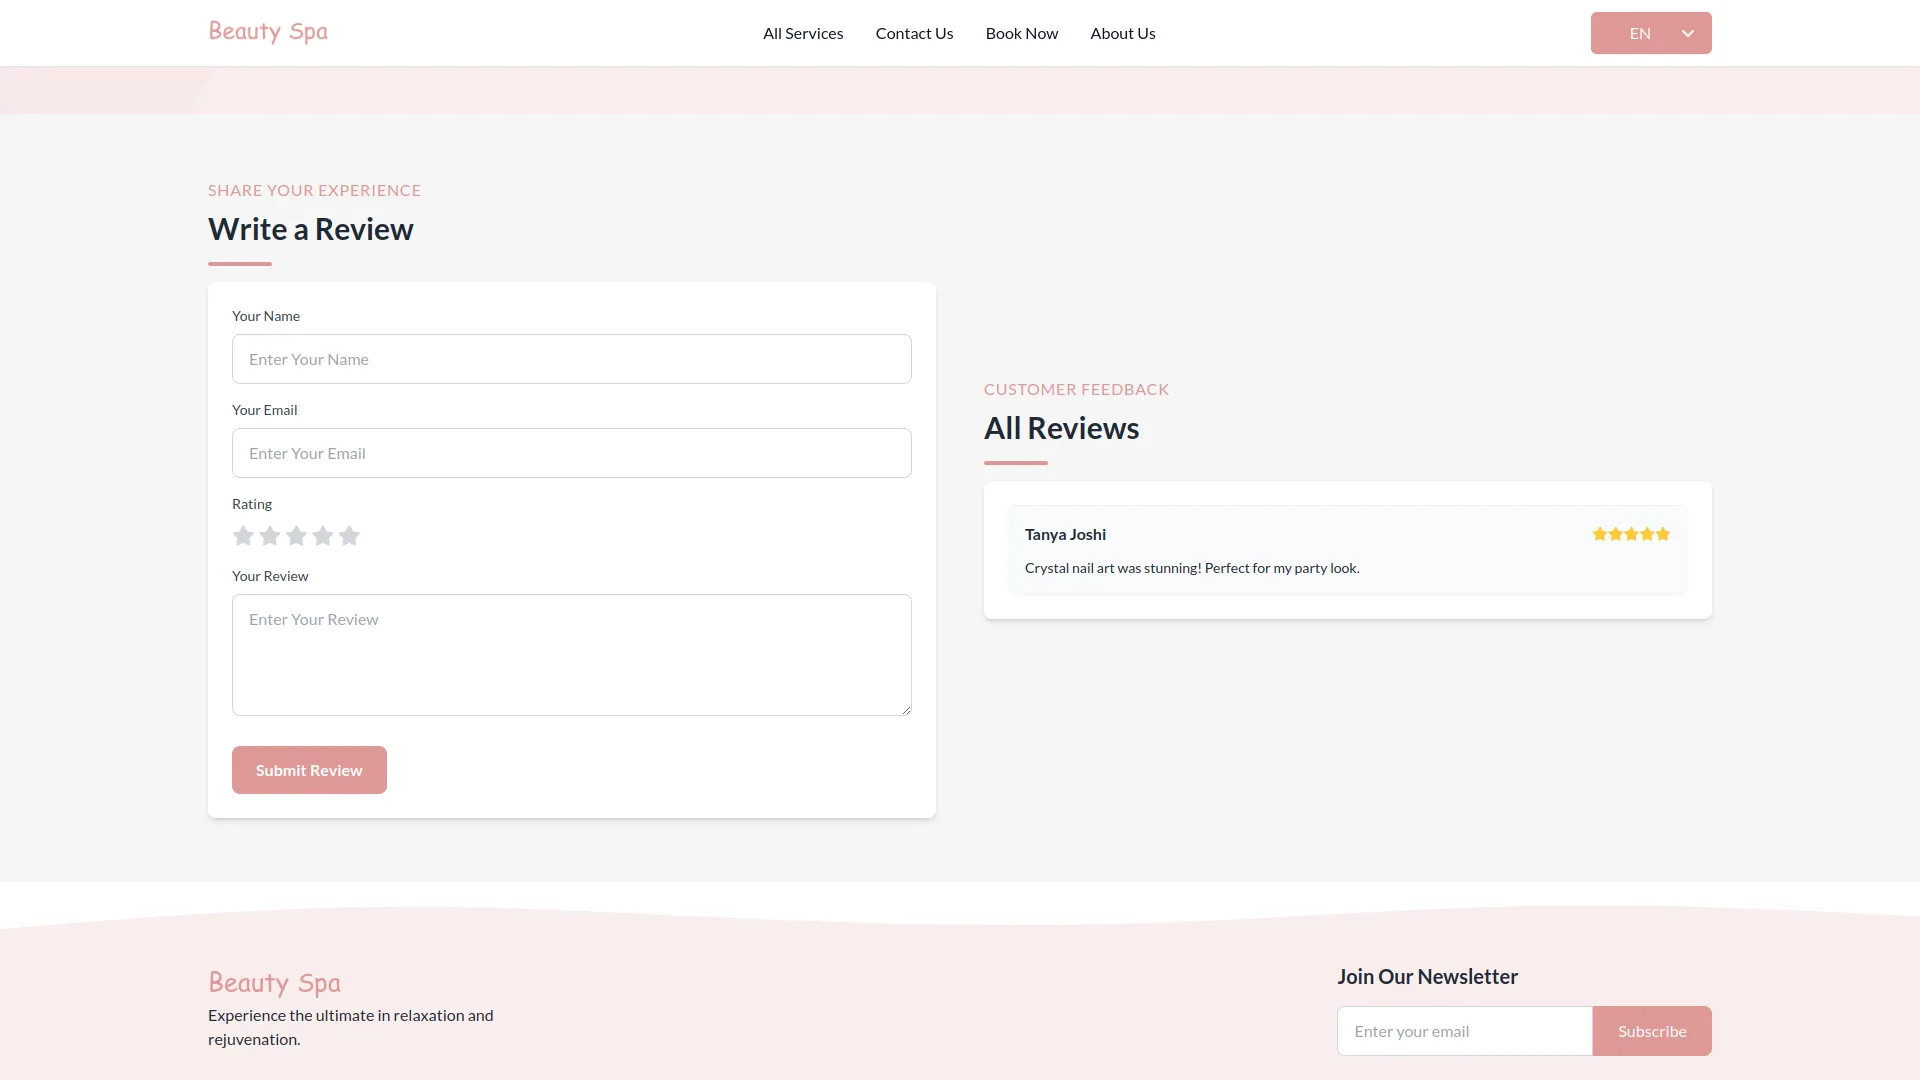
All reviews submitted by customers from the frontend side of the website for any service will automatically appear here in the Review section for easy tracking and management.
The list page displays all customer reviews with Search, Export, Reload, Reset, and Create buttons for review management. The table shows No, Reviewer, Email, Service, Rating, Review, and Action columns.
You can see detailed customer feedback, including the reviewer’s name and email, which service they reviewed, their star rating, and their written review comments. Use the Delete action to remove inappropriate or outdated reviews from the system.
Categories
Related articles
- Fleet Integration in Dash SaaS
- SalesForce Integration in Dash SaaS
- Restaurant Menu Integration in Dash SaaS
- Indiamart Integration in Dash SaaS
- Hospital Management Integration in Dash SaaS
- Repair Management Integration in Dash SaaS
- School/Institute Management Integration in Dash SaaS
- Quickbooks Integration in Dash SaaS
- Equipment Rental Detailed Documentation
- Email Box Integration in Dash SaaS
- WhatsApp Twilio Integration Dash SaaS
- Google Wallet Integration in Dash SaaS
Reach Out to Us
Have questions or need assistance? We're here to help! Reach out to our team for support, inquiries, or feedback. Your needs are important to us, and we’re ready to assist you!


Need more help?
If you’re still uncertain or need professional guidance, don’t hesitate to contact us. You can contact us via email or submit a ticket with a description of your issue. Our team of experts is always available to help you with any questions. Rest assured that we’ll respond to your inquiry promptly.
Love what you see?
Do you like the quality of our products, themes, and applications, or perhaps the design of our website caught your eye? You can have similarly outstanding designs for your website or apps. Contact us, and we’ll bring your ideas to life.
