Warranty Add-On Detailed Documentation
The Warranty Add-On is used to manage product warranties, track claims, and handle warranty extensions. It connects with the Item, Invoice, and Customer models. Warranties are set at the item level and can be attached during invoice creation.
Introduction
The Warranty Add-On is used to manage product warranties, track claims, and handle warranty extensions. It connects with the Item, Invoice, and Customer models. Warranties are set at the item level and can be attached during invoice creation. Users can claim or extend warranties based on the rules set in the system. This Add-On includes three parts: Manage Warranty, Manage Claim Warranty, and Manage Extended Warranty.
How To Install the Warranty Add-On?
To Set Up the Warranty Add-On, you can follow this link: Setup Add-On
How To Use the Warranty Add-On?
Item Setup for Warranty
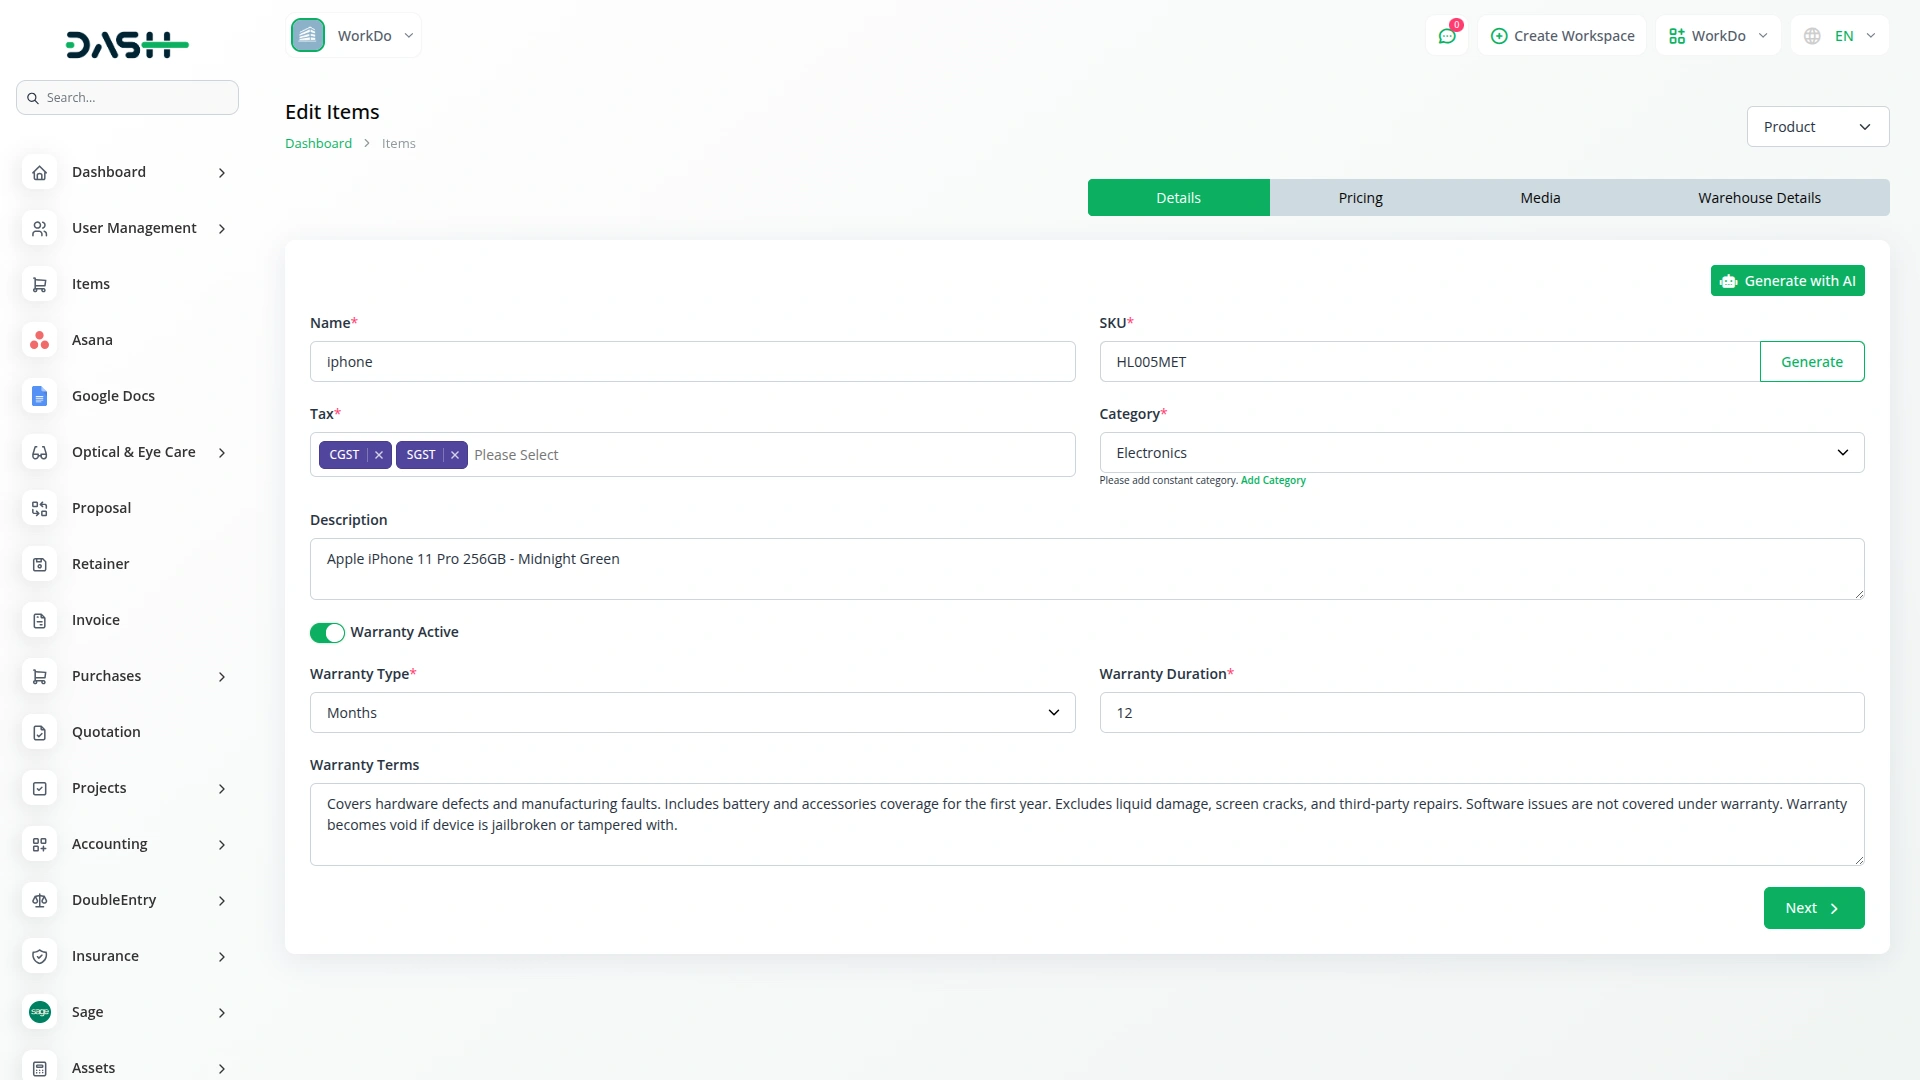
- To enable a warranty for an item, go to the item add or edit page. Select the item type as product or part. Once selected, a “Warranty Active” toggle will appear. Turn it on to activate warranty settings.
- Then select the “Warranty Type” (Years, Months, or Days), enter the “Warranty Duration” in number format, and fill in the “Warranty Terms”. These details help manage the warranty for the item.
-
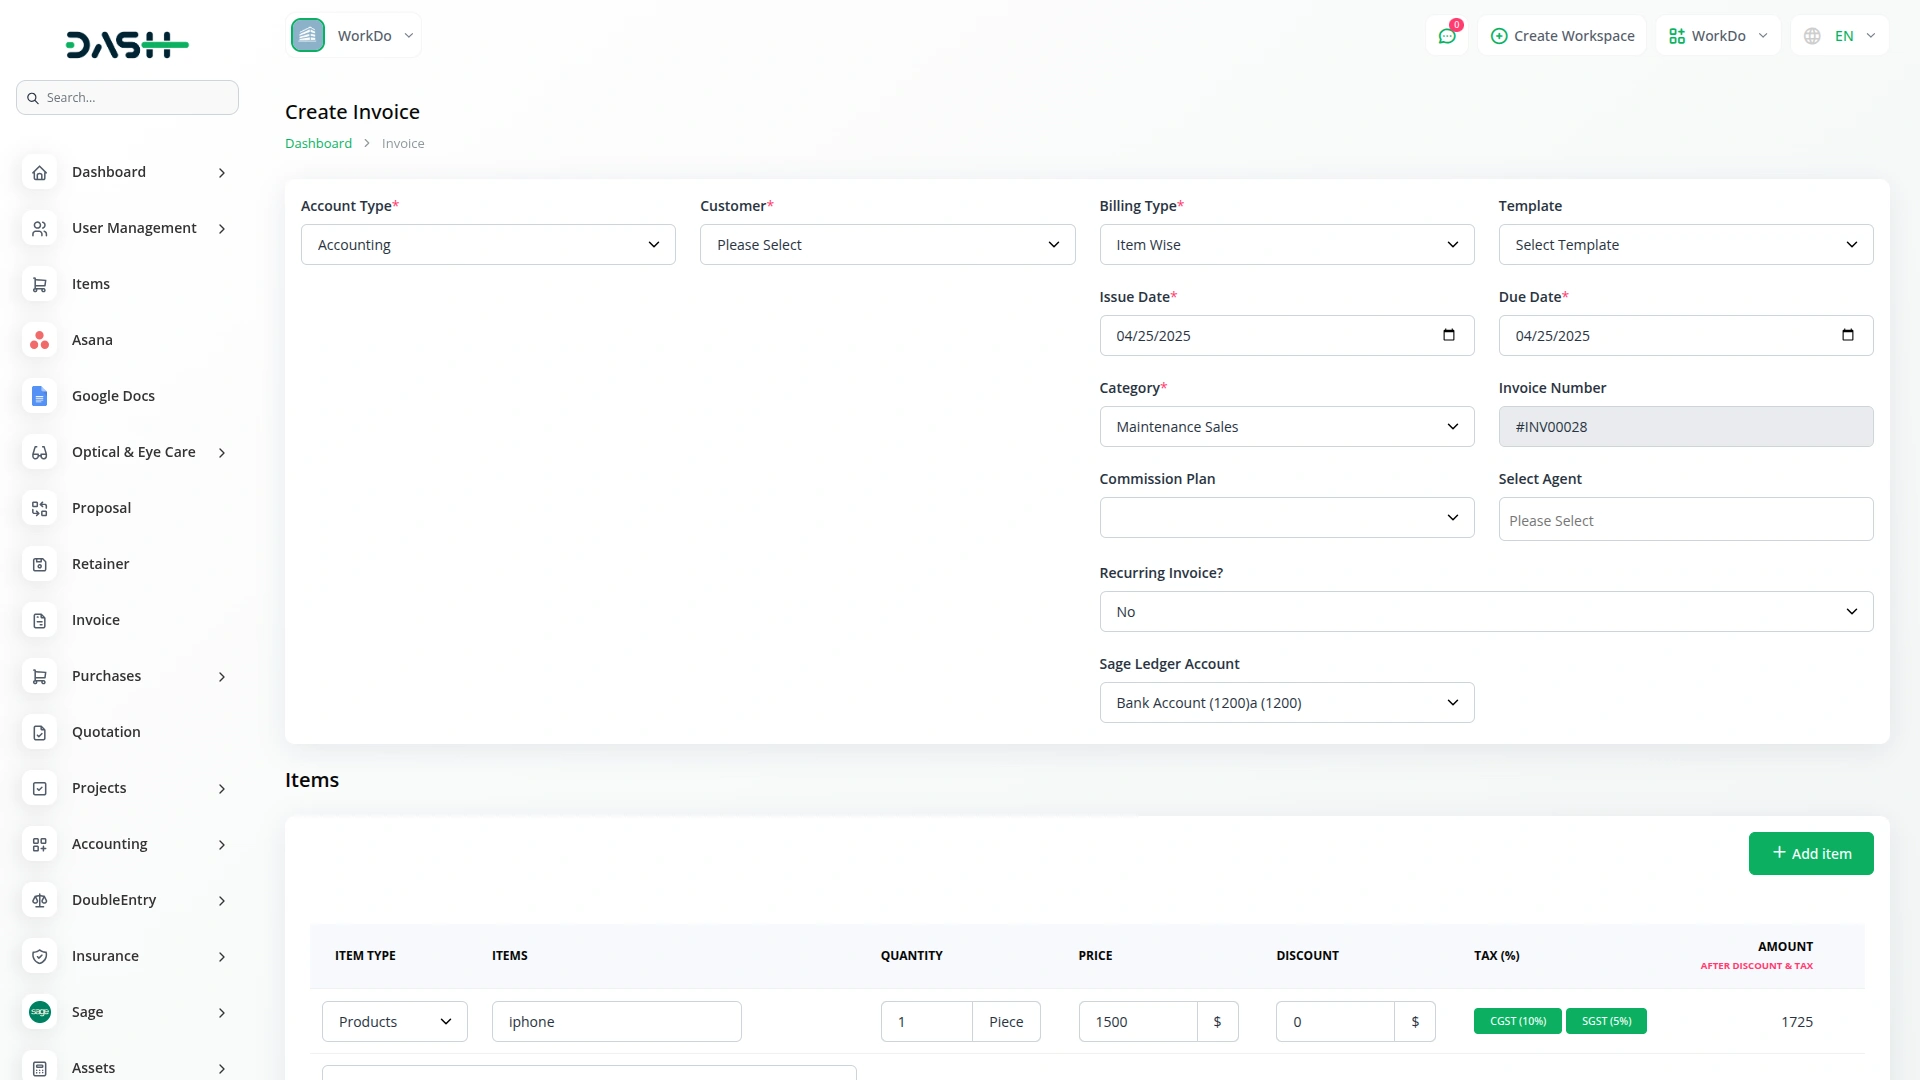
Invoice with Warranty Sync
- To link a warranty during invoice creation or editing, make sure the “Account Type” is set to Accounting.
- Then select the item that has warranty active. The system will then allow you to manage the warranty by adding the warranty to that item through the invoice.
-
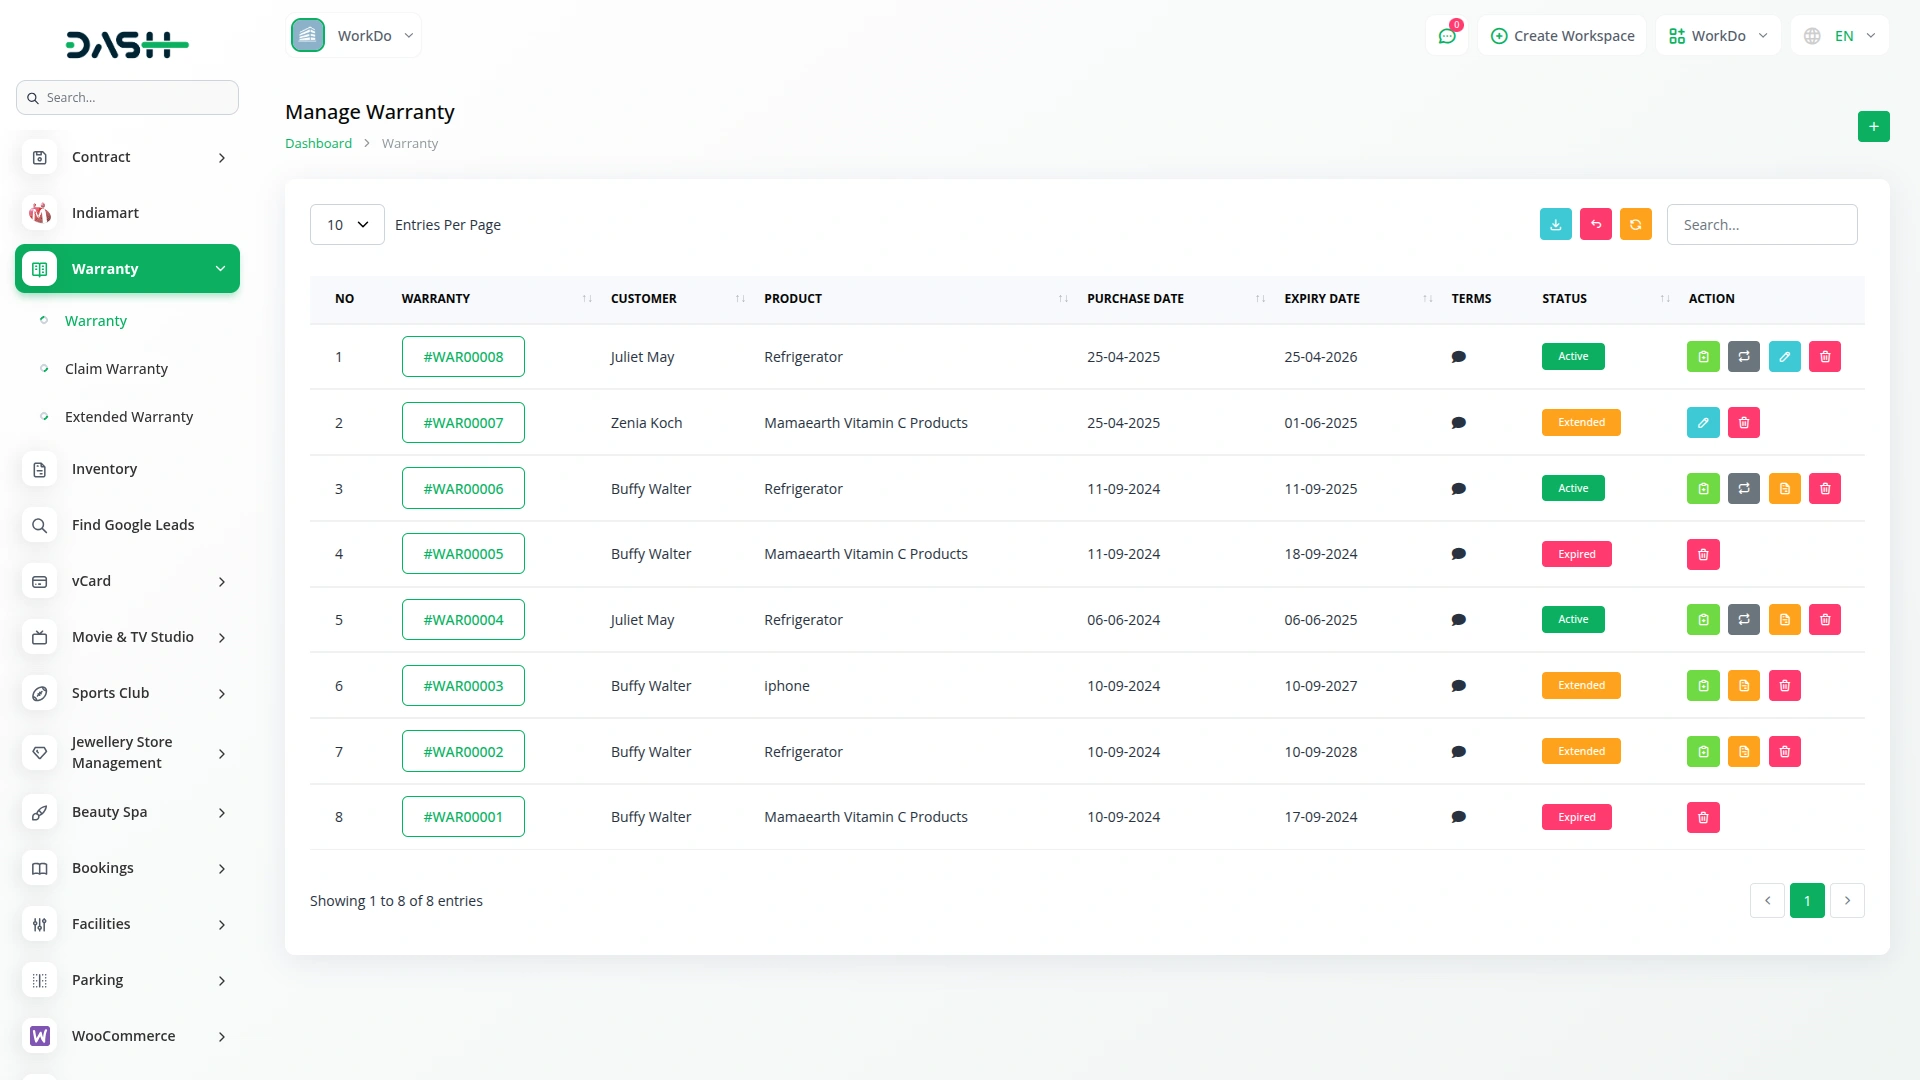
Manage Warranty
- To add a new warranty, click the “Create” button. Select the product (only items with warranty active will appear), select the customer, and enter the purchase date. The expiry date will be automatically calculated based on the product’s warranty settings, and click “Save” to add a warranty.
- On the list page, you will see all added warranties. The table shows columns like No, Warranty, Customer, Product, Purchase Date, Expiry Date, Terms, and Status. Status values include Active, Expired, or Extended.
- You can use the “Search” and “Export” buttons to find or download warranty records.
- Actions available are Claim, Extend, Edit or Show Invoice, and Delete.
- If the warranty was created from an invoice, the invoice option will be shown. If created manually, only an edit option will be available.
- After the warranty expires, the user cannot claim or extend the warranty.
- The Status will automatically change to Expired when the expiry date is older than today’s date.
-
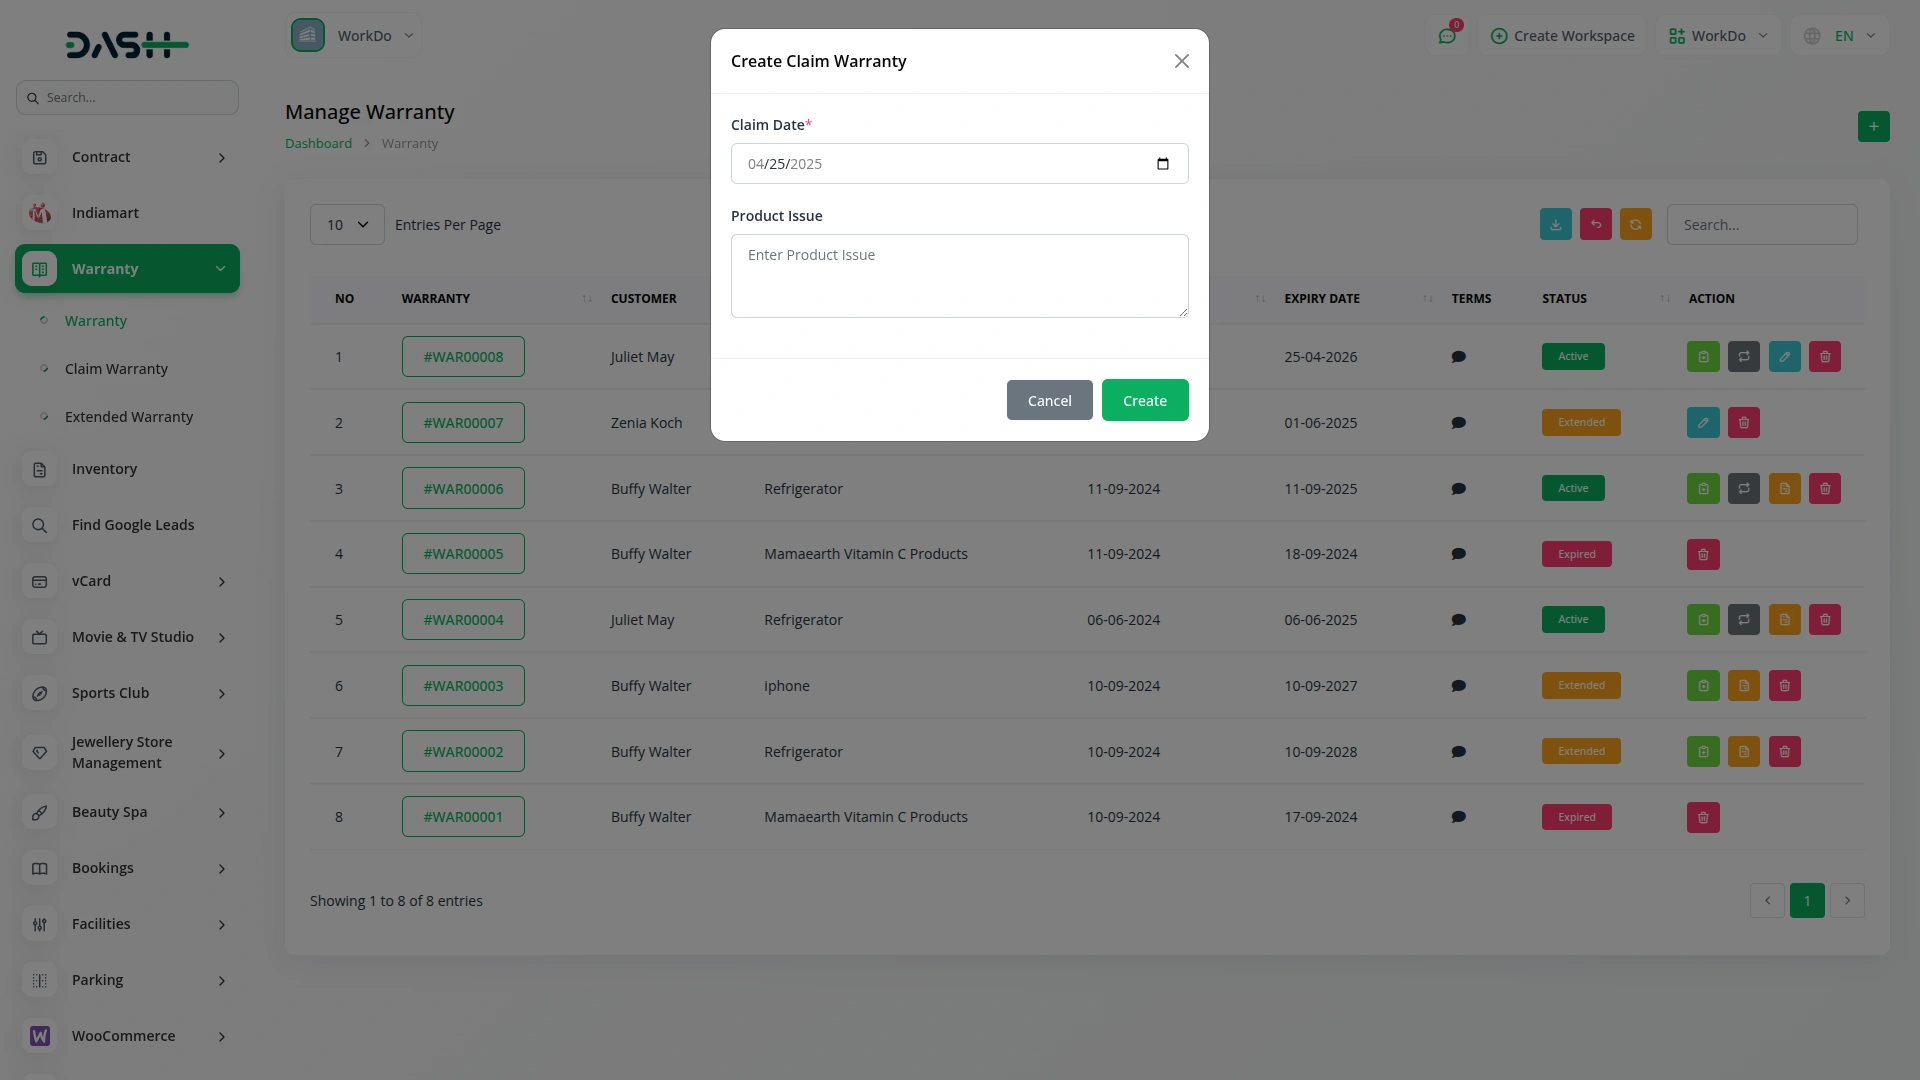
- To claim a warranty, click the “Claim” button. Enter Claim Date, Product Issue, and click “Save”
- Claims can be made multiple times during the warranty period, but if a previous claim is still not approved or rejected, new claims cannot be submitted.
-
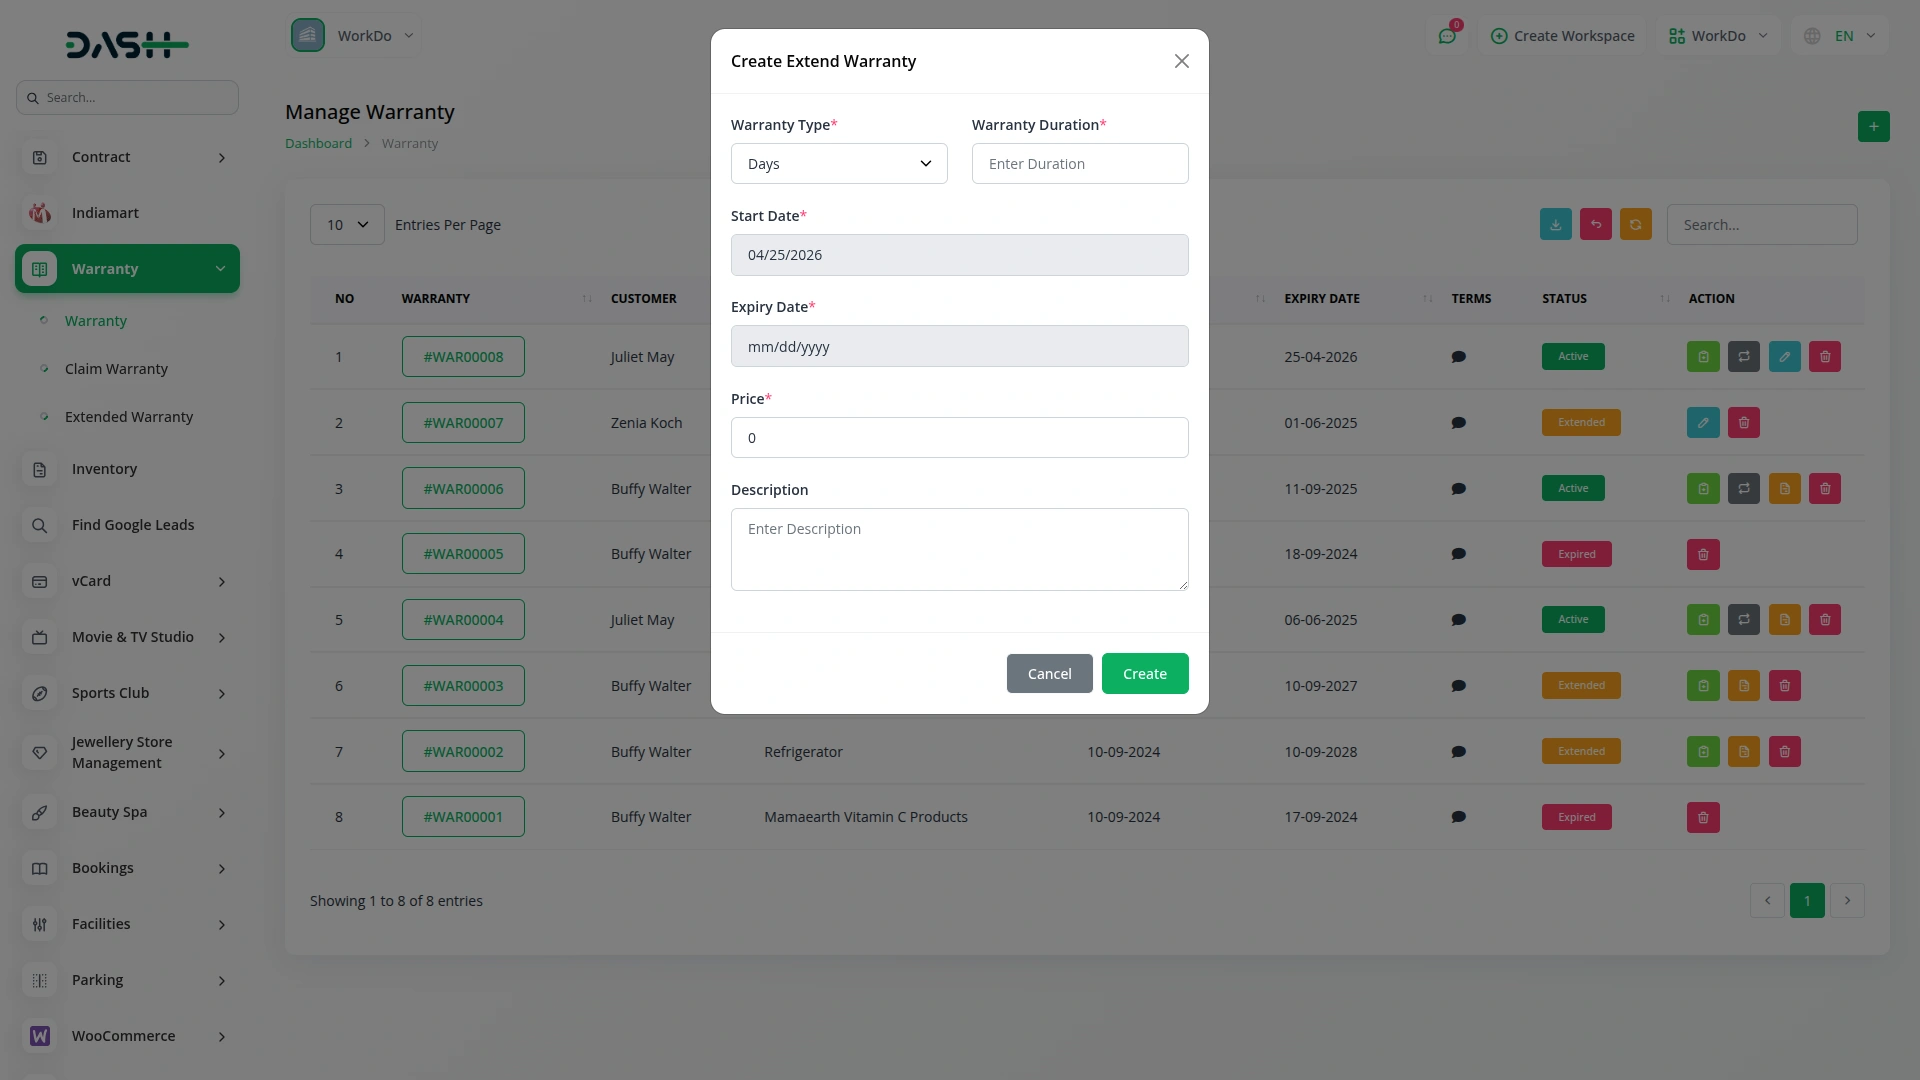
- To extend a warranty, click the “Extend” button. Enter Warranty Type, Warranty Duration, Start Date (which is the previous expiry date), Price, and Description. The expiry date will be calculated automatically. and click “Save”.
- Only one time extension of a warranty is allowed.
-
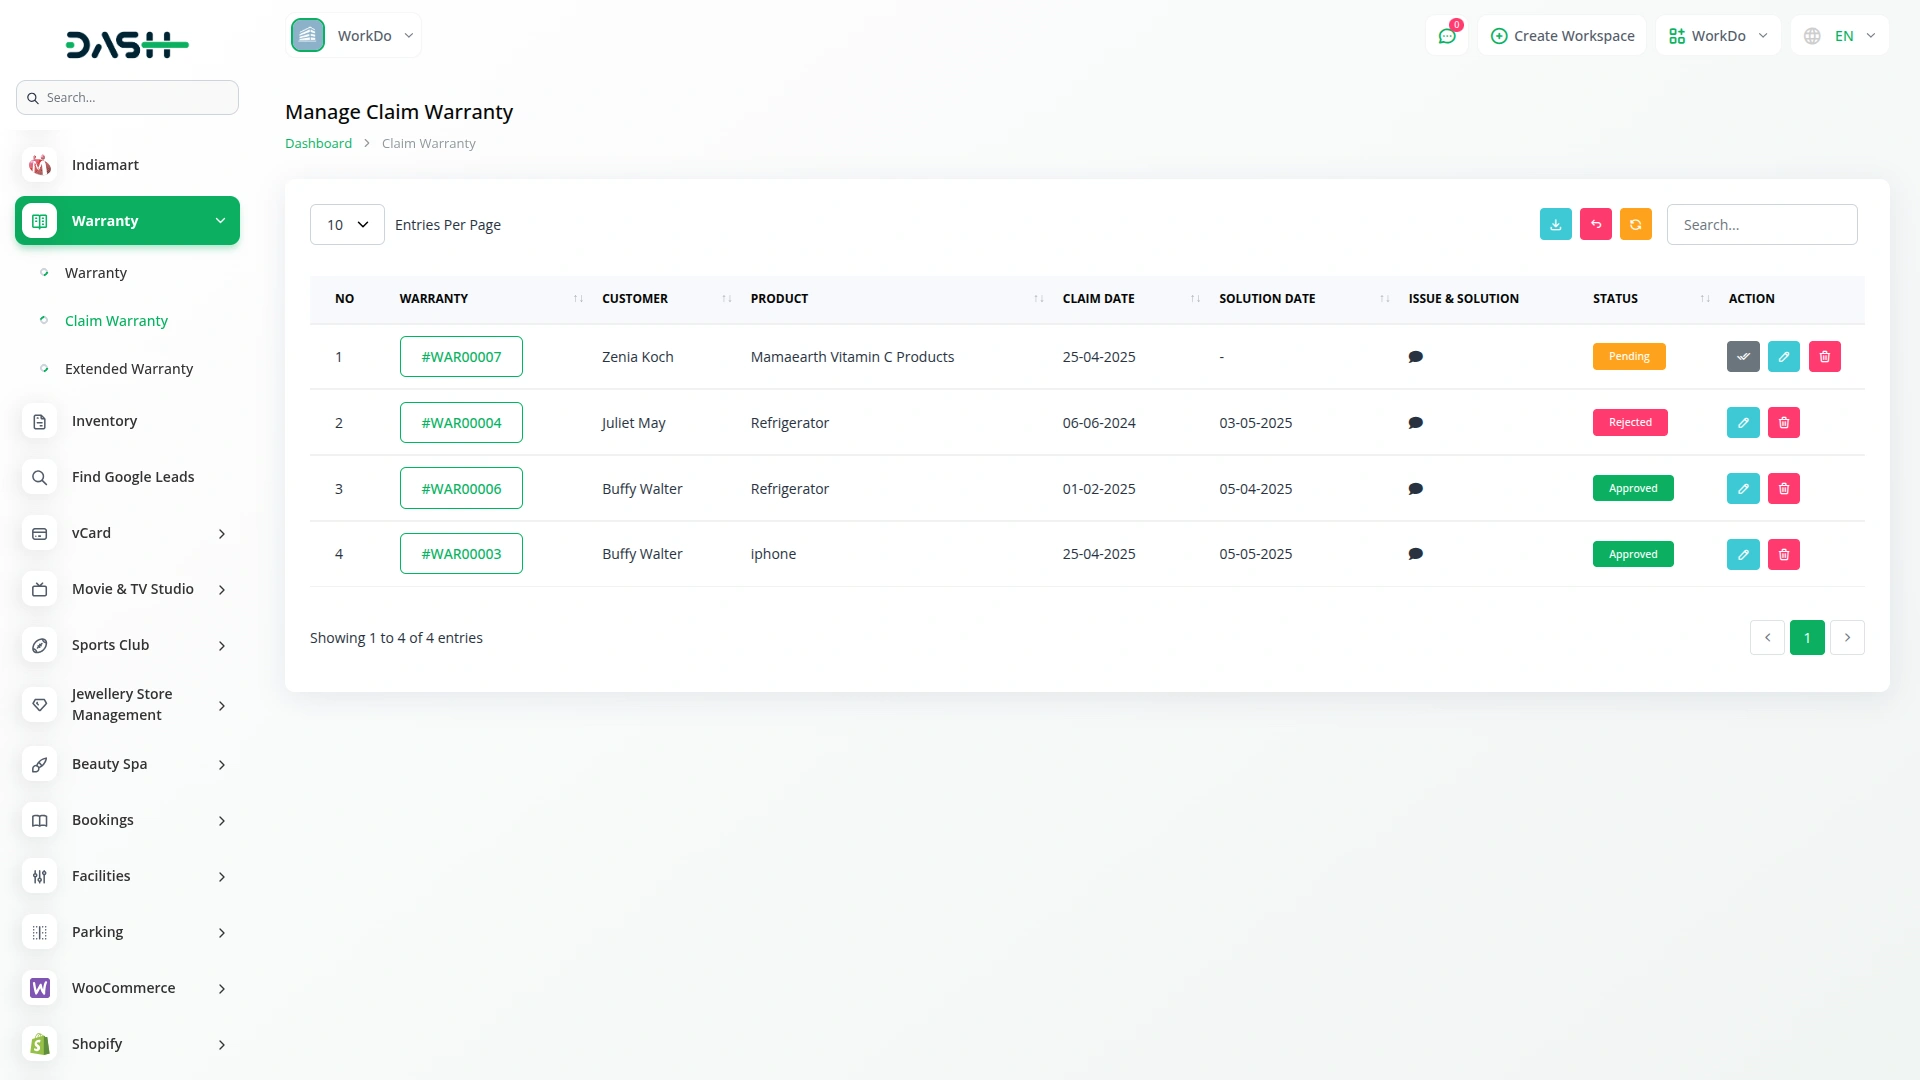
Manage Claim Warranty
- On the Manage Claim Warranty page, you can search and view all warranty claims. The list table includes No, Warranty, Customer, Product, Claim Date, Solution Date, Issue & Solution, and Status.
- You can use the “Search” and “Export” buttons to find or download claim warranty records.
- Available actions are Approve or Reject, Edit, and Delete.
-
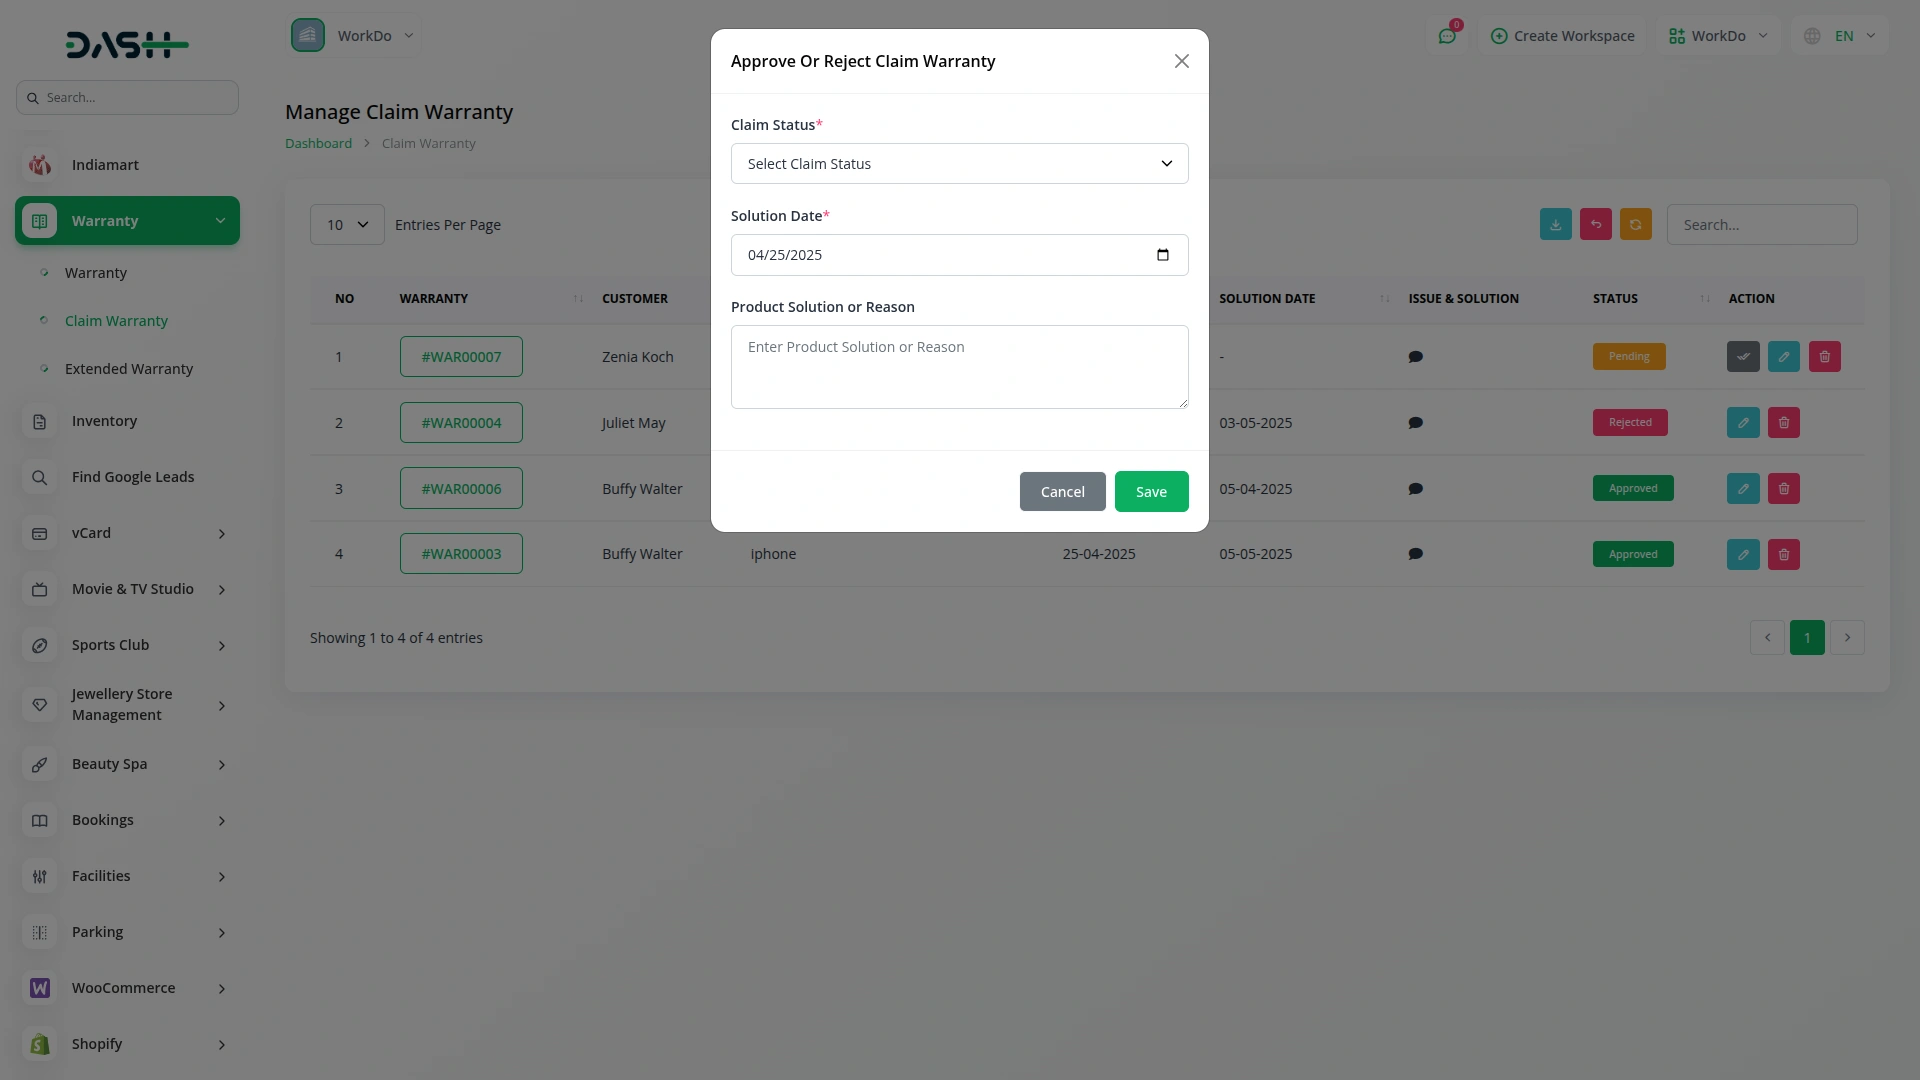
- To approve or reject a claim, click the “Approve or Reject” button. Select the Claim Status (Approved or Rejected), enter the Solution Date, and provide the Product Solution or Reason. and click “Save”. Once approved or rejected, the claim status will update accordingly.
-
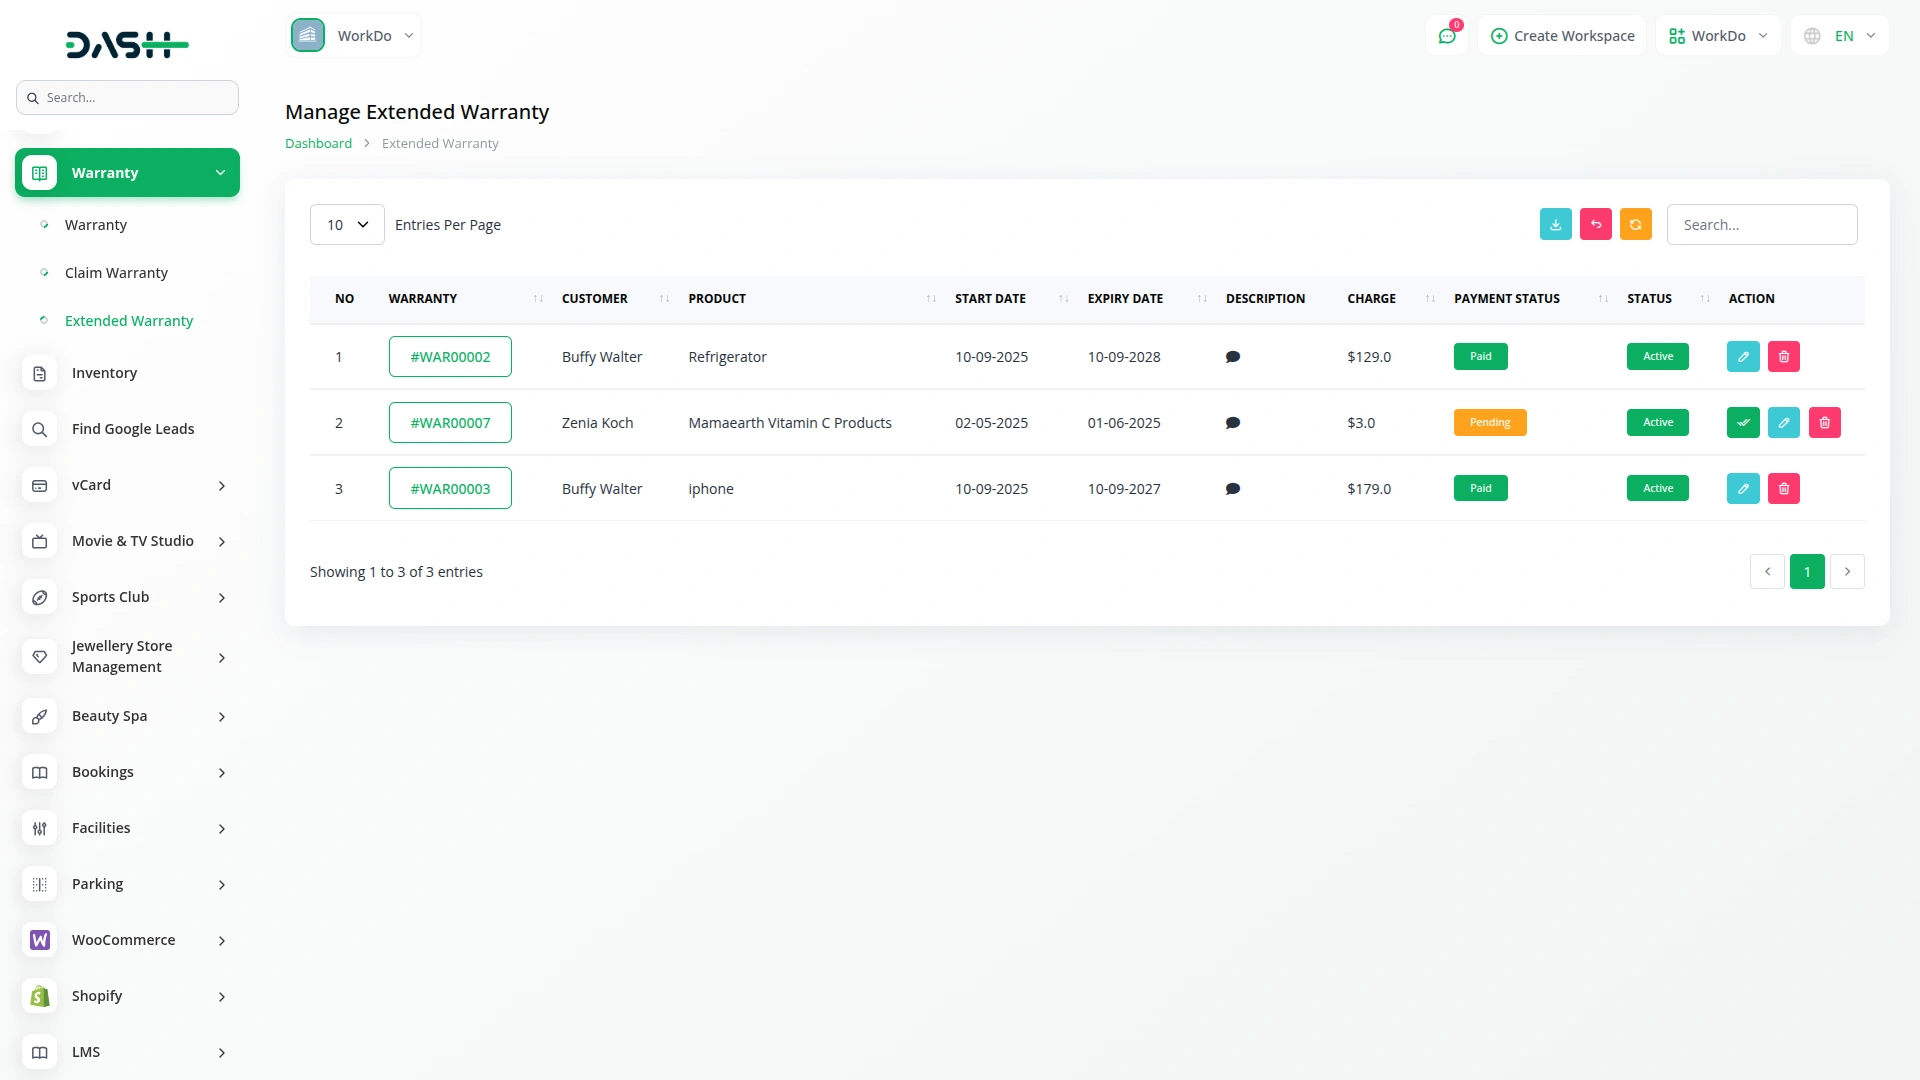
Manage Extended Warranty
- On the Manage Extended Warranty page, all extended warranties are listed. The table displays No, Warranty, Customer, Product, Start Date, Expiry Date, Description, Charge, Payment Status (Pending or Paid), and Status (Active or Expired).
- You can use the “Search” and “Export” buttons to find or download extended warranty records.
- Available actions are Paid, Edit, and Delete.
- Click the “Paid” button to update the payment status from Pending to Paid.
- The Status will automatically change to Expired when the expiry date is older than today’s date.
-
Categories
Related articles
- Custom Field Integration in Dash SaaS
- Braintree Payment Gateway Detailed Documentation
- Google Meet Integration in Dash SaaS
- Indiamart Integration in Dash SaaS
- Sign in with Microsoft Detailed Documentation
- Tailoring and Fashion Design Detailed Documentation
- School/Institute Management Integration in Dash SaaS
- Yoga Classes Integration in Dash SaaS
- User Manual – WorkDo Dash SaaS
- RoadMap Central Integration in Dash SaaS
- Elderly Care Detailed Documentation
- Budget Planner Integration in Dash SaaS
Reach Out to Us
Have questions or need assistance? We're here to help! Reach out to our team for support, inquiries, or feedback. Your needs are important to us, and we’re ready to assist you!


Need more help?
If you’re still uncertain or need professional guidance, don’t hesitate to contact us. You can contact us via email or submit a ticket with a description of your issue. Our team of experts is always available to help you with any questions. Rest assured that we’ll respond to your inquiry promptly.
Love what you see?
Do you like the quality of our products, themes, and applications, or perhaps the design of our website caught your eye? You can have similarly outstanding designs for your website or apps. Contact us, and we’ll bring your ideas to life.
