Sage Integration in Dash SaaS
Integrating Sage revolutionizes financial management by providing a seamless experience in handling accounting and business operations.
Introduction
Integrating Sage revolutionizes financial management by providing a seamless experience in handling accounting and business operations. Through automated data synchronization, users eliminate manual entry tasks, ensuring accuracy and saving valuable time. This integration extends to various financial transactions, including invoicing and payment reconciliation, facilitating effortless maintenance of up-to-date and precise financial records. Moreover, Sage integration enhances visibility and transparency, offering real-time insights into key financial metrics like revenue, expenses, and cash flow. With easy synchronization of invoices and charts of accounts between Dash SaaS and Sage, businesses can efficiently manage their finances, make informed decisions, and drive growth effectively.
How To Install the Add-On?
To install the Sage Add-On you can follow this link: Setup Add-On
How To Use the Sage Add-On?
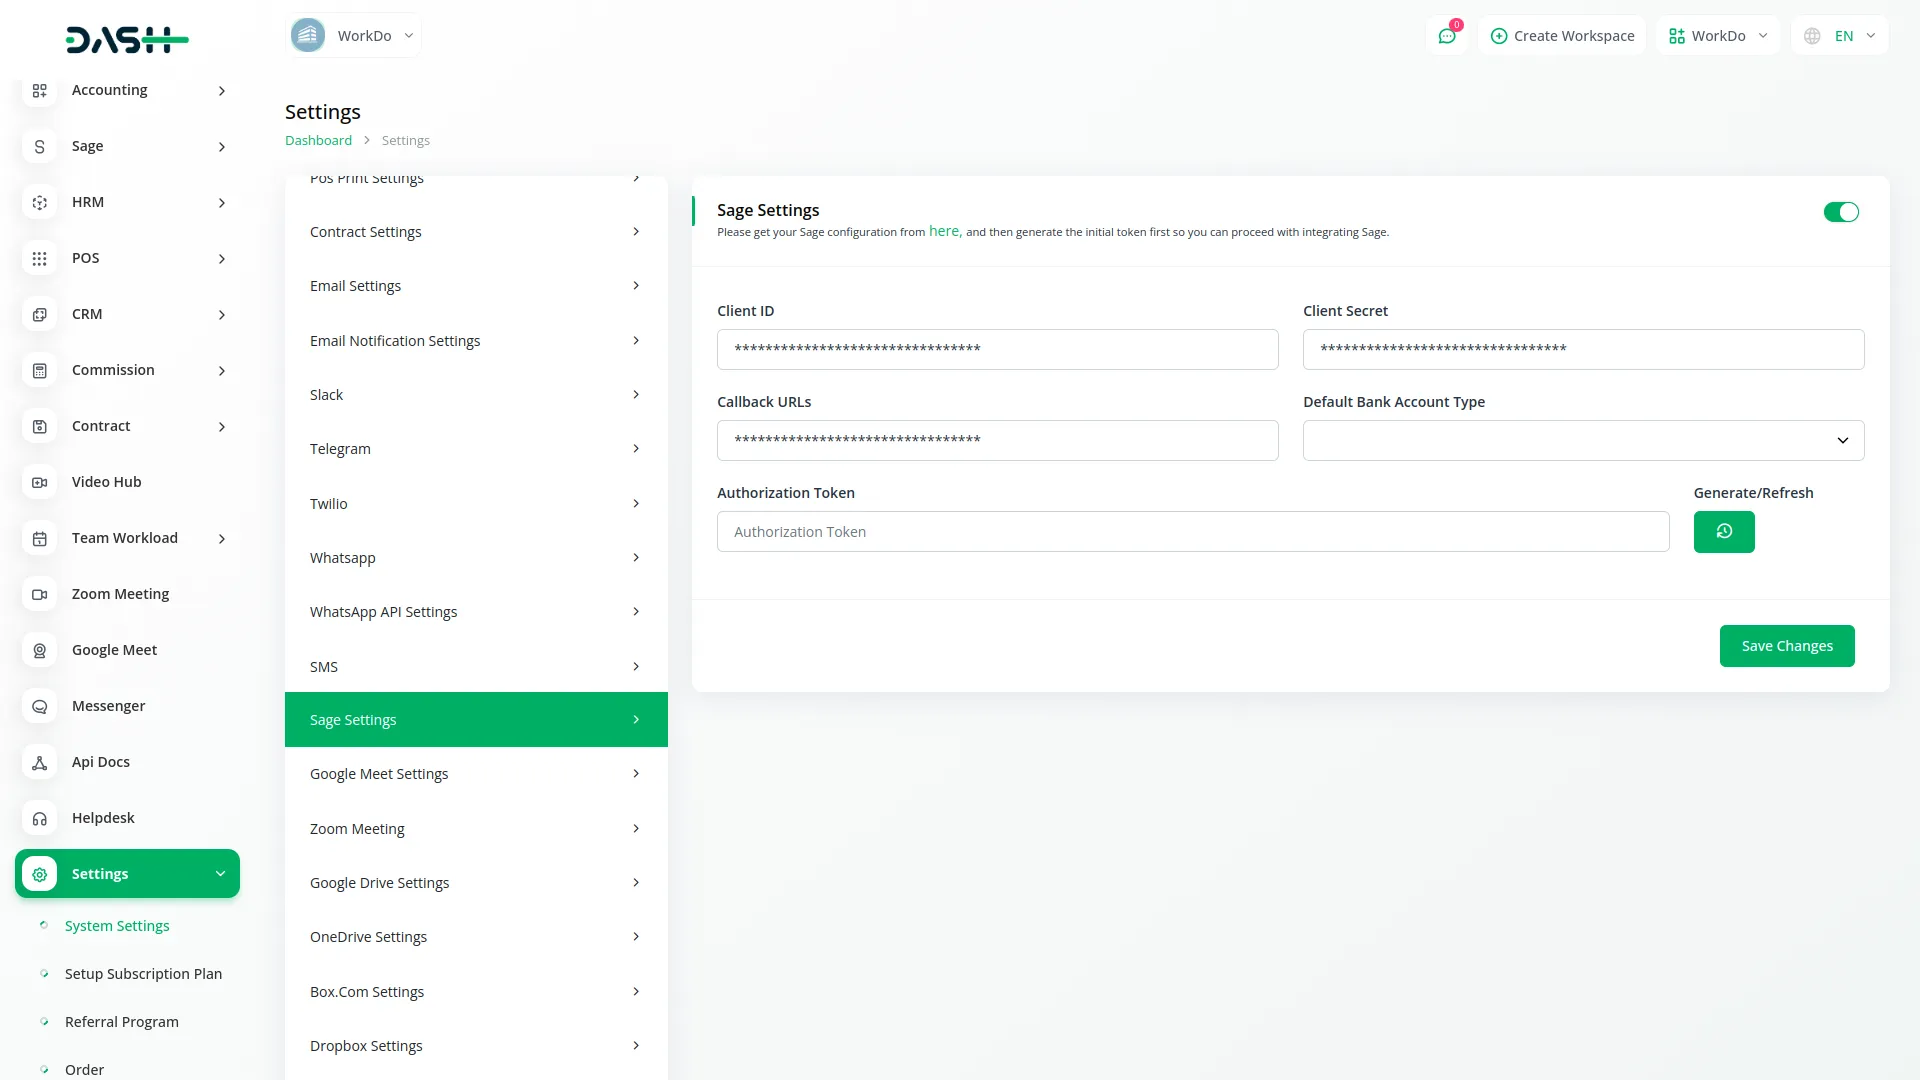
- After enabling the Add-On, go to the System Settings page and look for the Sage section.
You will be required to enter key credentials, including:
- 1. Client ID
- 2. Client Secret
- 3. Callback URLs
- 4. Default Bank Account Type
- 5. Authorization Token (can be refreshed or generated anytime)
- To generate these credentials, use this link: https://www.sage.com/en-gb/sage-business-cloud/sage-accounting/
- After saving the credentials, you’ll find Sage Add-On in the sidebar of your platform.

Managing Ledger Accounts and Syncing Data
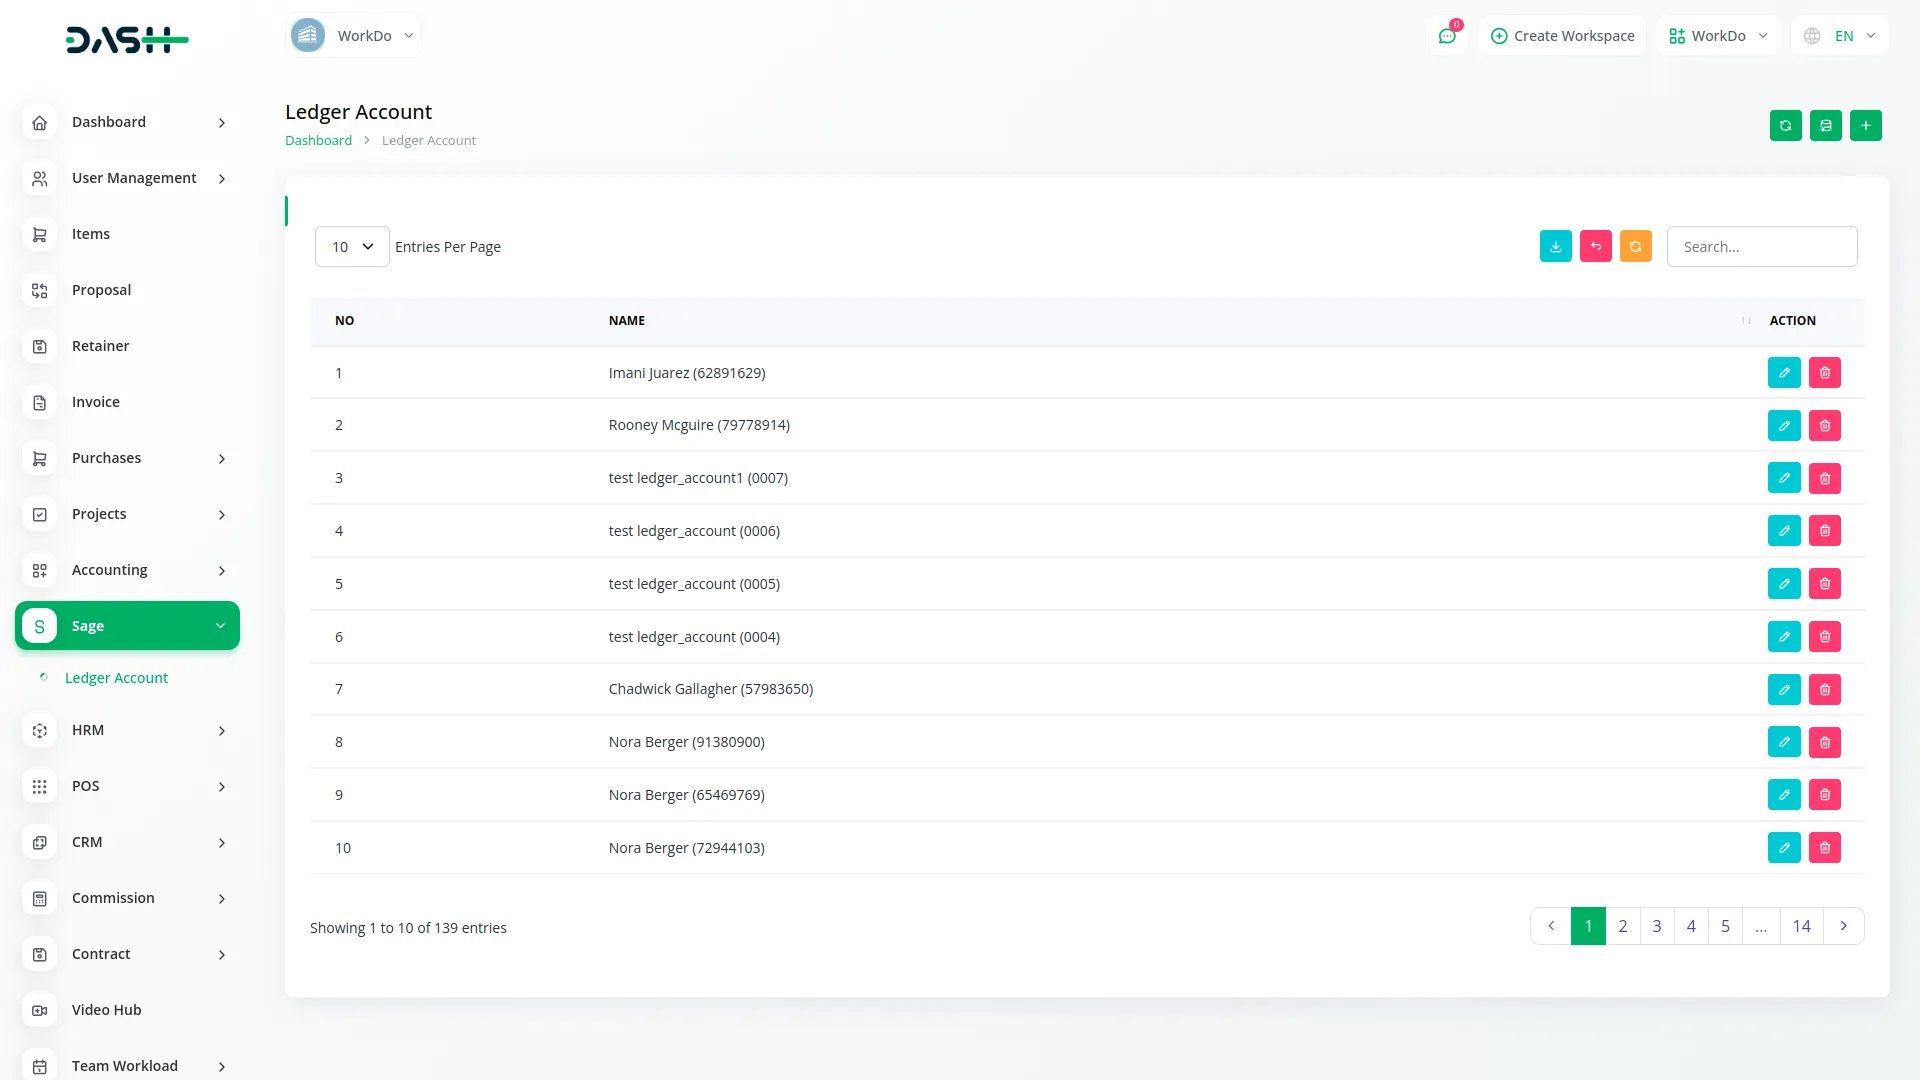
- In the Sage Add-On section, you will see a list of ledger accounts already created in your Sage account.
- You can create new ledger accounts using the Create button.
- Next to the Create button, you’ll find a Sync Data button that syncs your accounts between Dash SaaS and Sage.
- When you click Sync, the platform will push created accounts to Sage and fetch updates from Sage as well.
- Any changes made on either system will be reflected on the other after syncing, maintaining accuracy across platforms.
- Then comes the refresh token button, if you click on that button you can also refresh the token easily.

Invoice Creation and Payment Tracking
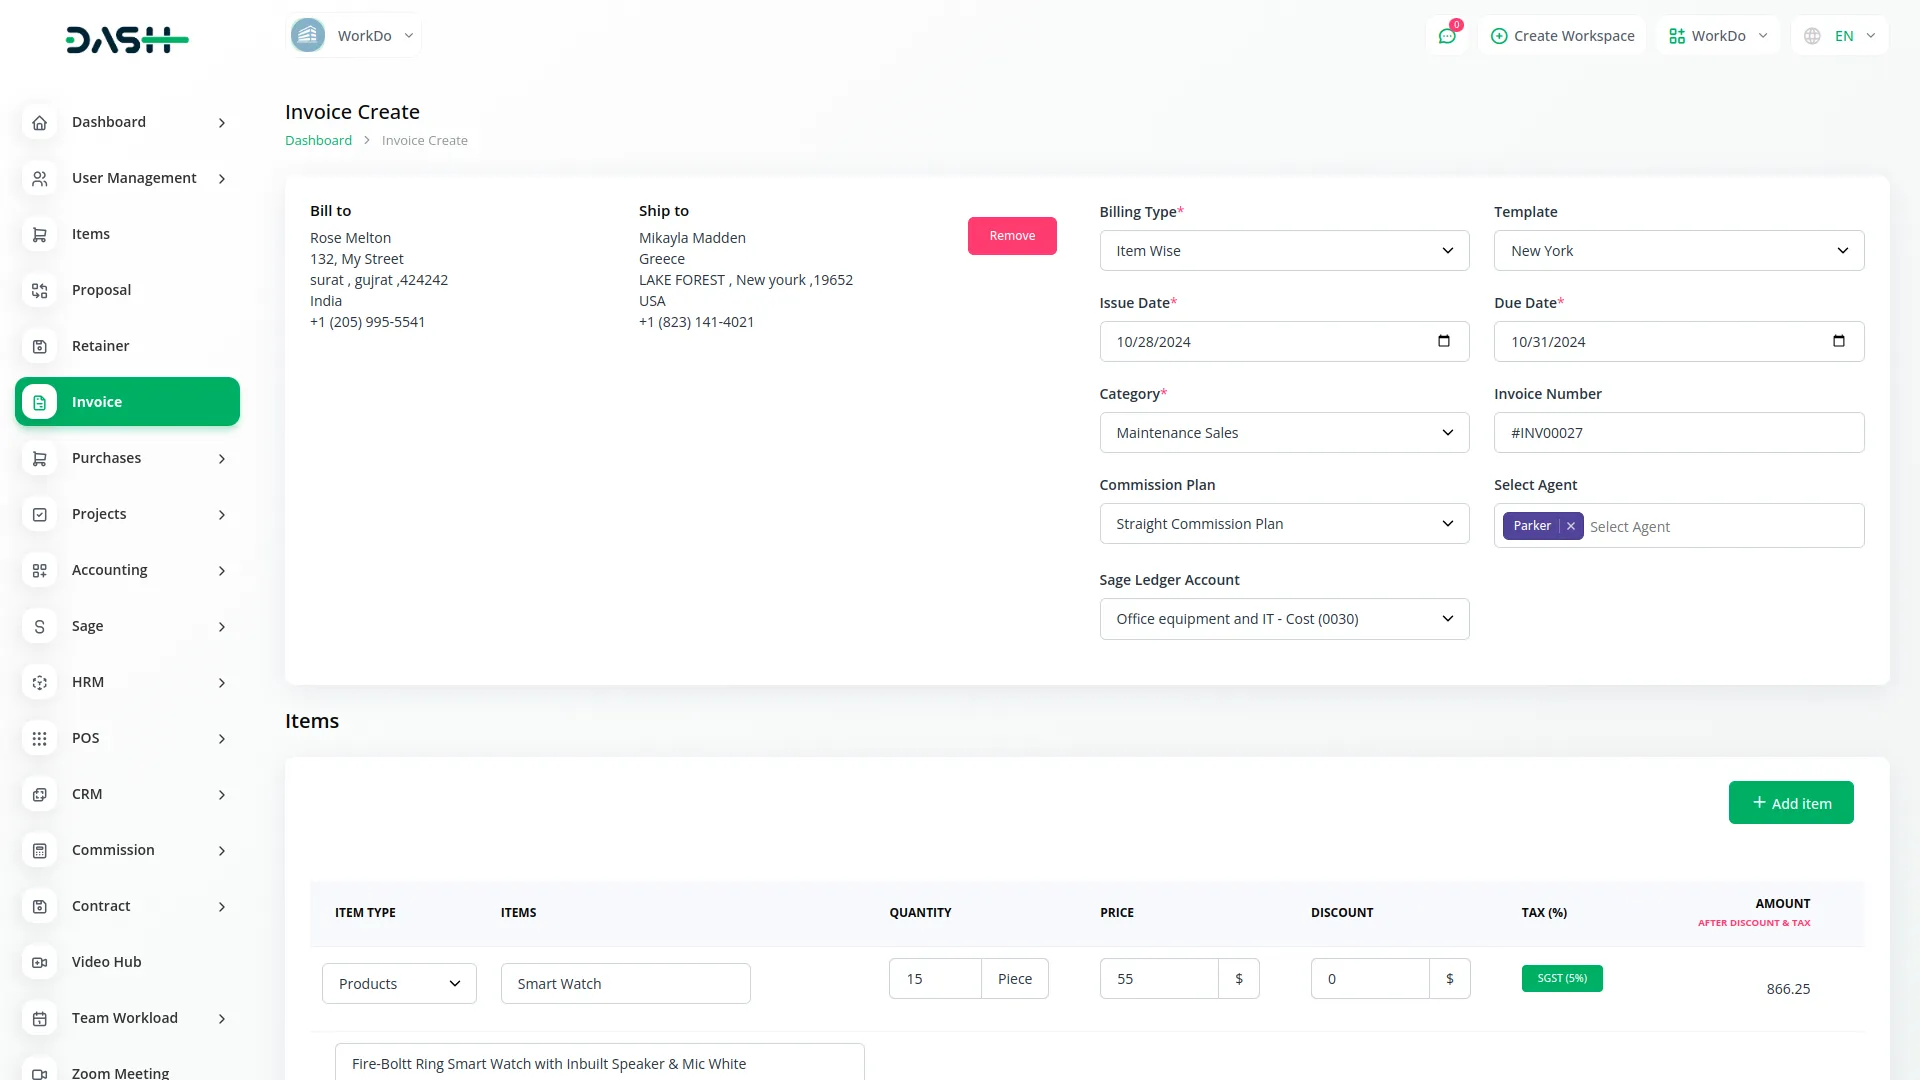
- Once the Add-On is active, while creating an invoice, you can select a Sage ledger account from a dropdown menu.
- This ensures that your invoice is linked directly to an appropriate Sage account at the time of creation.
- When the invoice payment is completed, the system will automatically record a payment entry in Sage.
- This removes the need for double-entry and ensures that both systems always reflect the latest transaction status.

Categories
Related articles
- MyFatoorah Payment Gateway in Dash SaaS
- Movie & Tv Studio Integration in Dash SaaS
- Telegram Integration in Dash SaaS
- n8n Detailed Documentation
- Blood Bank Integration in Dash SaaS
- Plivo SMS Integration in Dash SaaS
- Feedback Integration in Dash SaaS
- Backup & Restore Integration in Dash SaaS
- Diagram Add-On Detailed Documentation
- Audit Inspection Integration in Dash SaaS
- Vonage SMS Module Detailed Documentation
- Freelancing Platform Integration in Dash SaaS
Reach Out to Us
Have questions or need assistance? We're here to help! Reach out to our team for support, inquiries, or feedback. Your needs are important to us, and we’re ready to assist you!


Need more help?
If you’re still uncertain or need professional guidance, don’t hesitate to contact us. You can contact us via email or submit a ticket with a description of your issue. Our team of experts is always available to help you with any questions. Rest assured that we’ll respond to your inquiry promptly.
Love what you see?
Do you like the quality of our products, themes, and applications, or perhaps the design of our website caught your eye? You can have similarly outstanding designs for your website or apps. Contact us, and we’ll bring your ideas to life.
