RoadMap Central Integration in Dash SaaS
Discover how to integrate RoadMap Central into Dash SaaS to enhance user engagement and streamline your project management. Try it now!
Introduction
RoadMapCentral is a comprehensive roadmap management software designed to help teams and organizations plan, track, and share their project roadmaps with stakeholders. The system allows you to create multiple roadmaps with customizable tabs, categories, and statuses to organize your ideas and projects effectively. Each roadmap can be configured with unique branding, SEO settings, cookie policies, and progressive web app features. The software includes a public-facing website where visitors can view roadmaps, submit new ideas, and track progress. You can manage ideas through different approval workflows, organize content using drag-and-drop functionality, and generate shareable links for easy collaboration and stakeholder communication.
How to Install the Add-On?
To Set Up the Roadmap Central Add-On, you can follow this link: Setup Add-On
Roadmap Dashboard
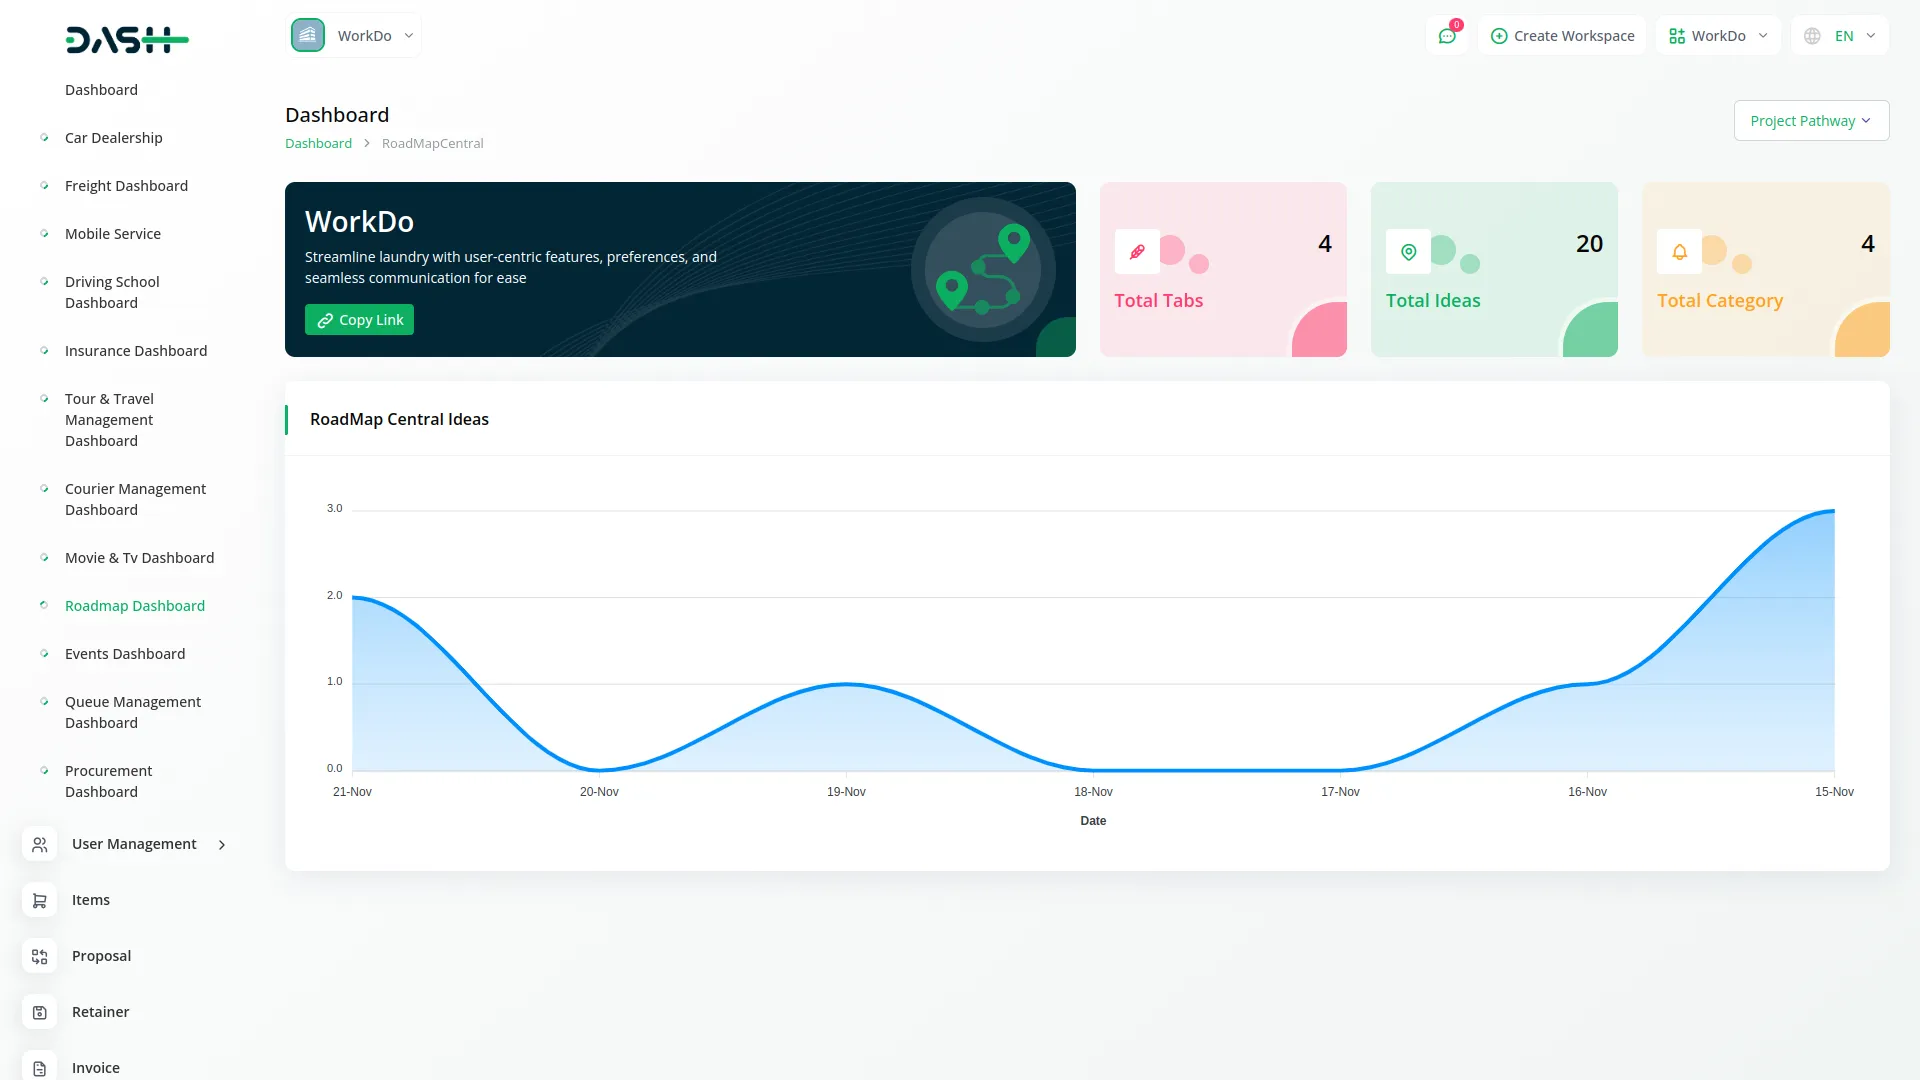
- The Roadmap Dashboard provides a comprehensive overview of your selected roadmap’s performance and content. Use the roadmap dropdown to select from all available roadmaps created in the roadmap module.
- Once you select a roadmap, click the copy link button to generate a shareable link for that specific roadmap.
- The dashboard displays key metrics including total tabs, total ideas, and total categories for your selected roadmap.
- View the RoadMap Central Ideas chart that shows the total ideas organized by date, providing a visual representation of idea submission trends over time. This dashboard helps you monitor the activity and growth of your roadmap content at a glance.
-
Roadmap Management
- To create a new roadmap, click the “Create” button on the roadmap management page. Enter the roadmap name in the form field” to establish your new roadmap. The list page displays all roadmaps in a table with columns for Number, Roadmap Logo, Roadmap name, and Generate Date.
-
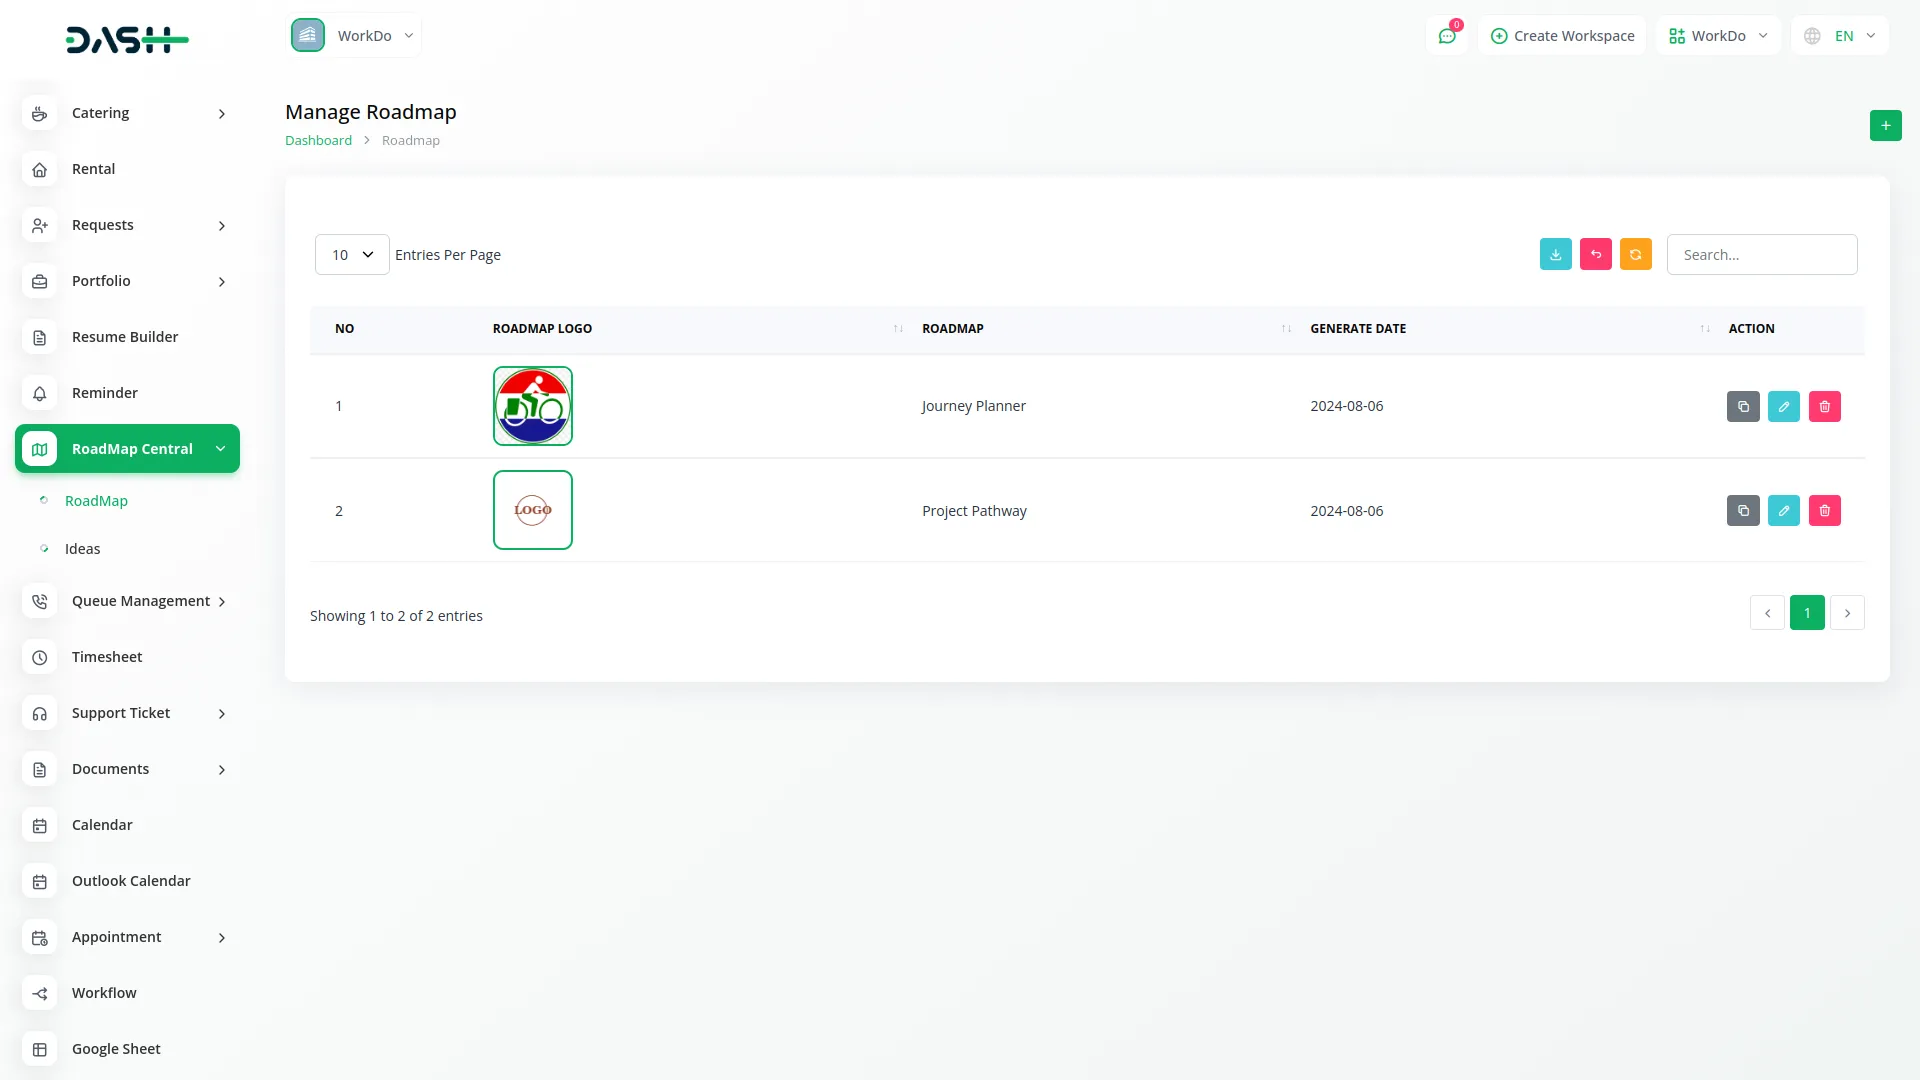
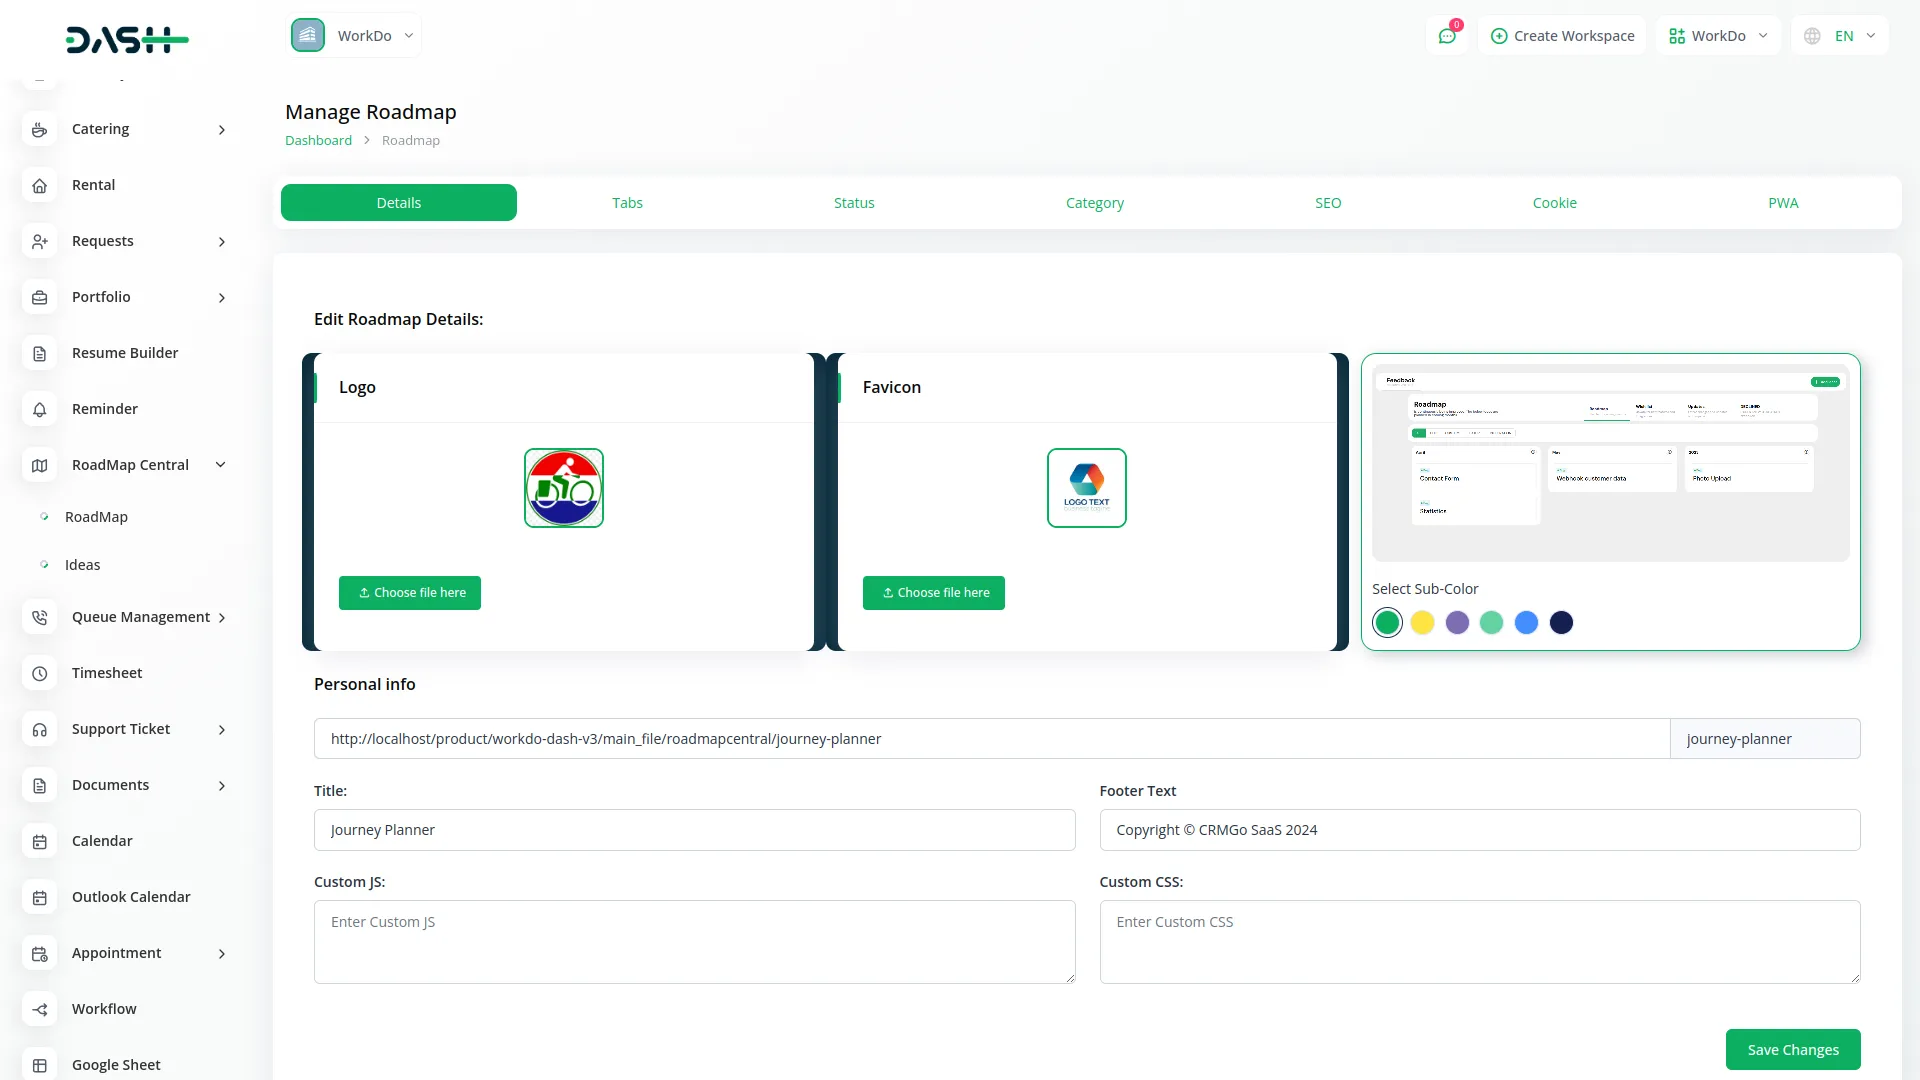
- Available actions include clicking to copy the card link, which copies the roadmap link for sharing, editing to modify roadmap details, and deleting to remove roadmaps from the system. When you click Edit, you access seven main configuration sections: Details, Tabs, Status, Category, SEO, Cookie, and PWA settings.
- In the Details section, you can edit roadmap-specific specific, including logo upload, favicon selection, and sub-color customization. Configure personal information such as roadmap link, title, footer text, custom JavaScript, and custom CSS to personalize your roadmap appearance and functionality.
-
Tab Configuration and Management
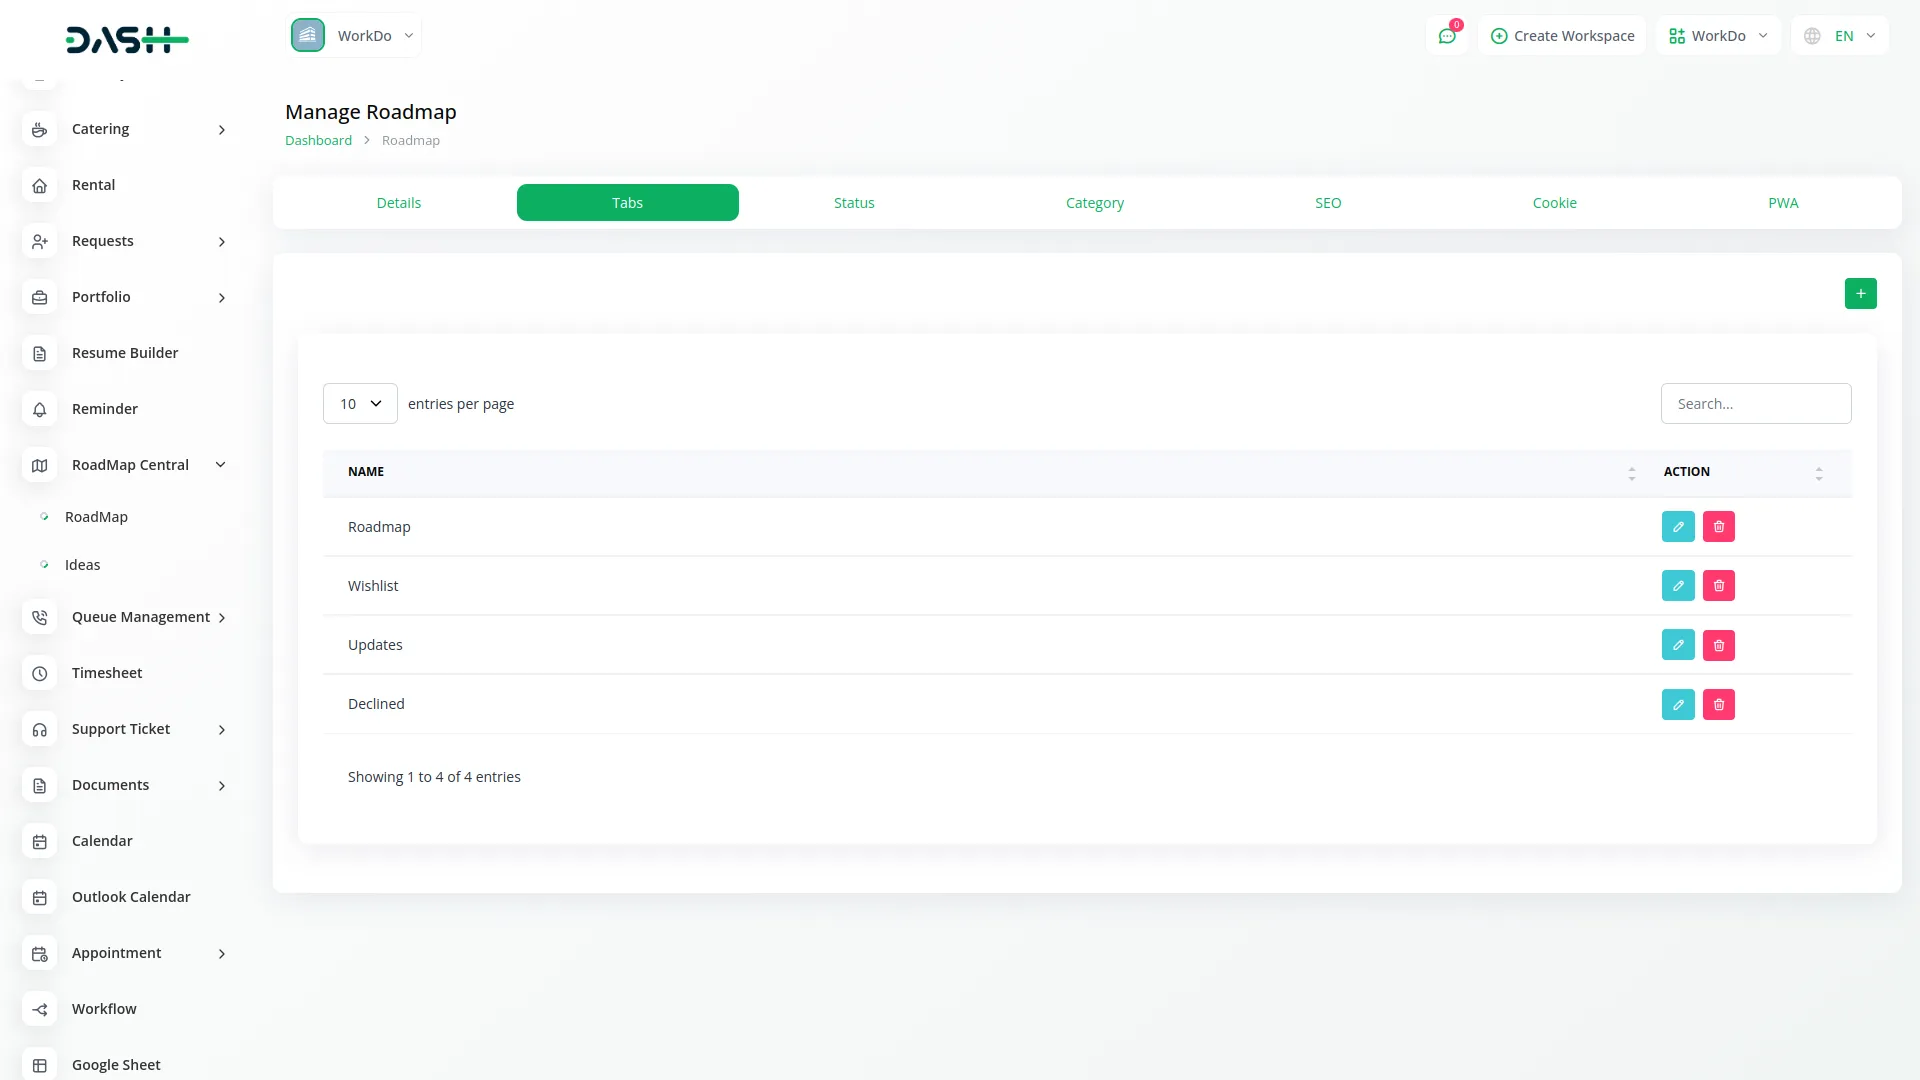
- The Tabs section allows you to organize your roadmap content into different categories or phases. To create a new tab, click the “Create” button and enter the tab name in the form field. The list page shows all tabs with the Name column, and you can use Search functionality to find specific tabs quickly.
- Available actions include Edit to modify tab settings and Delete to remove tabs from your roadmap. When you click Edit on a tab, you access the Settings for Tab configuration page. Here you can set the page title and page subtitle that appear on the public roadmap.
- Configure the menu title and menu description for navigation purposes. Choose the display format as either List or Kanban view for idea presentation. Set sorting options including Title A-Z, Title Z-A, Date old to new, or Date new to old. Use the Hide toggle to make tabs visible only to admins, restricting public access when needed.
-
Status and Category Management
- The Status section helps you define workflow stages for your ideas and projects. To create a new status, click the “Create” button and fill in the status name, select a color for visual identification, and choose which tabs this status applies to from the tab dropdown. The list page displays all statuses with the Name column.
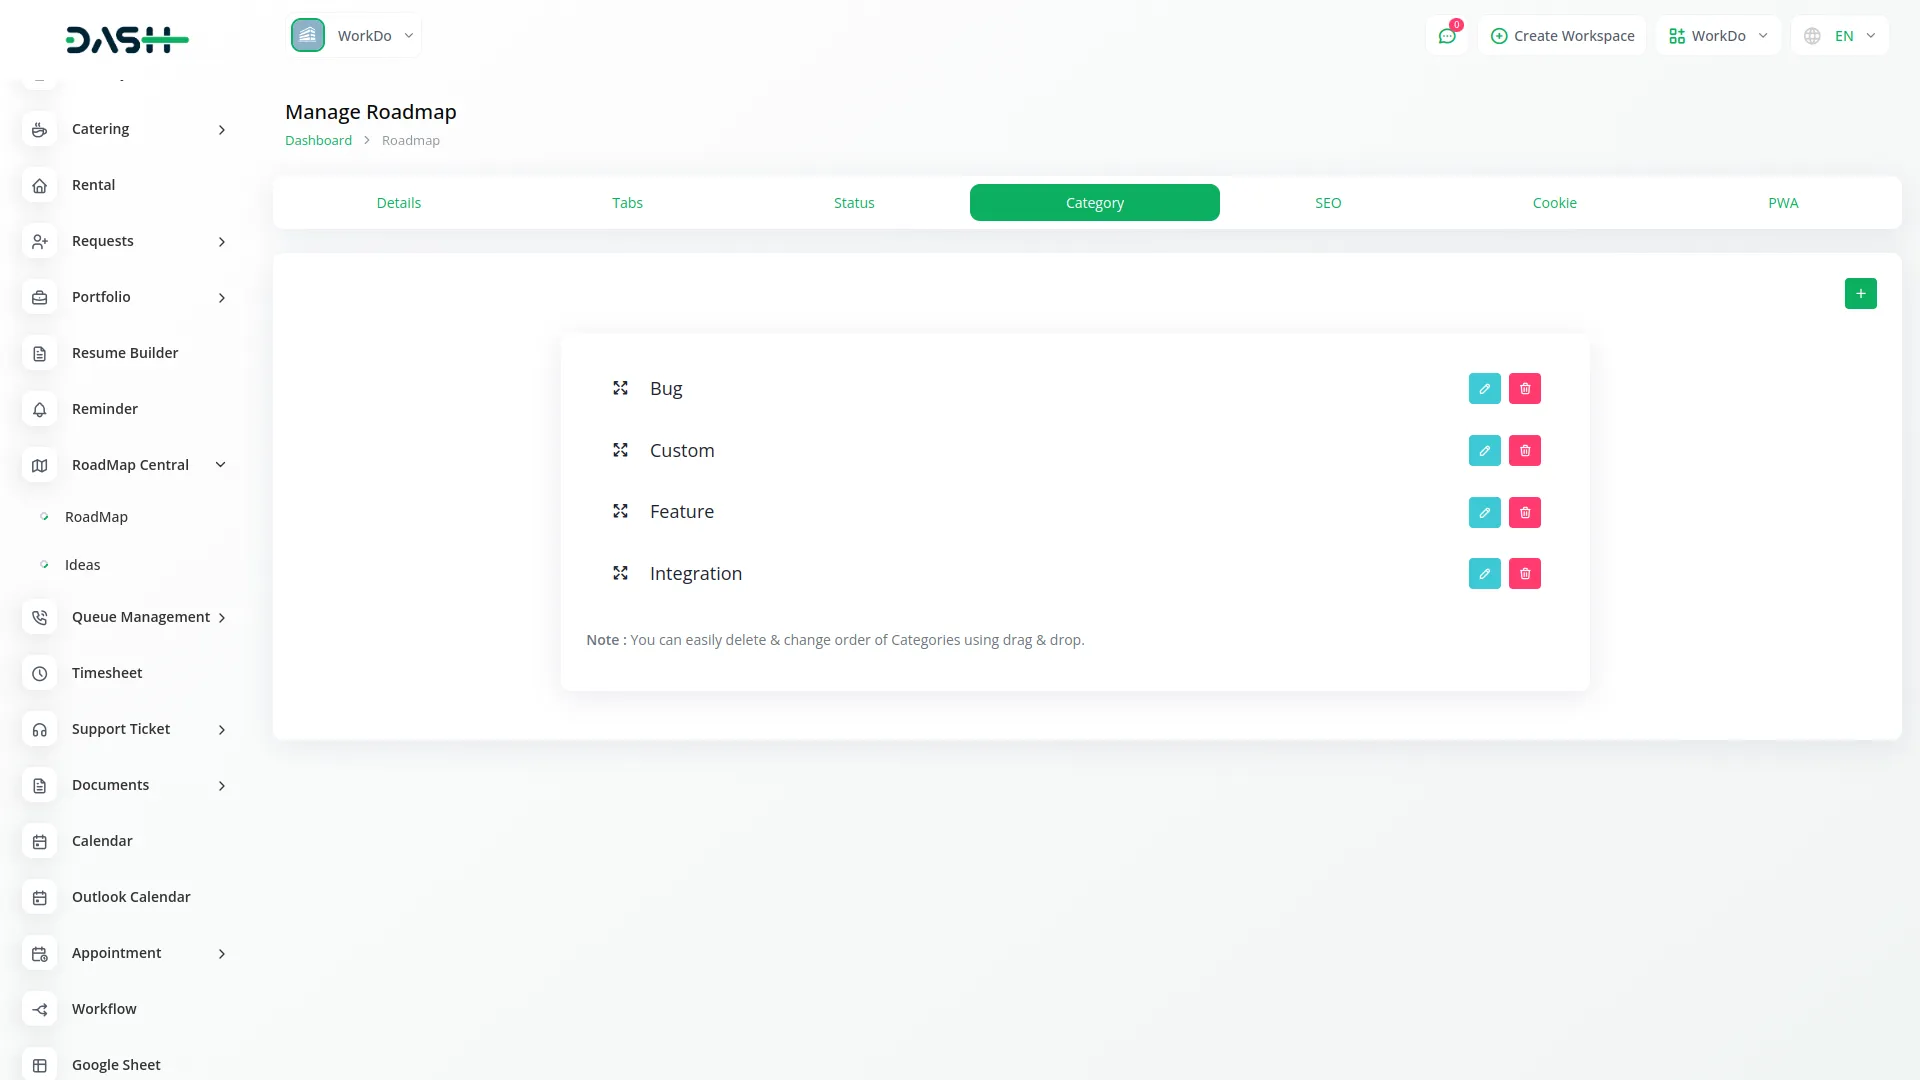
- You can use drag and drop functionality to change the order of statuses, which affects how they appear in workflows and displays. Available actions include Edit to modify status details and Delete to remove statuses from the system.
- In the Category section, create organizational categories for your ideas by clicking the “Create” button. Enter the category name and select a color for visual distinction. The list page shows all categories with the Name column. Use drag and drop functionality to reorder categories as needed, and utilize Edit or Delete actions to manage existing categories.
-
SEO and Configuration Settings
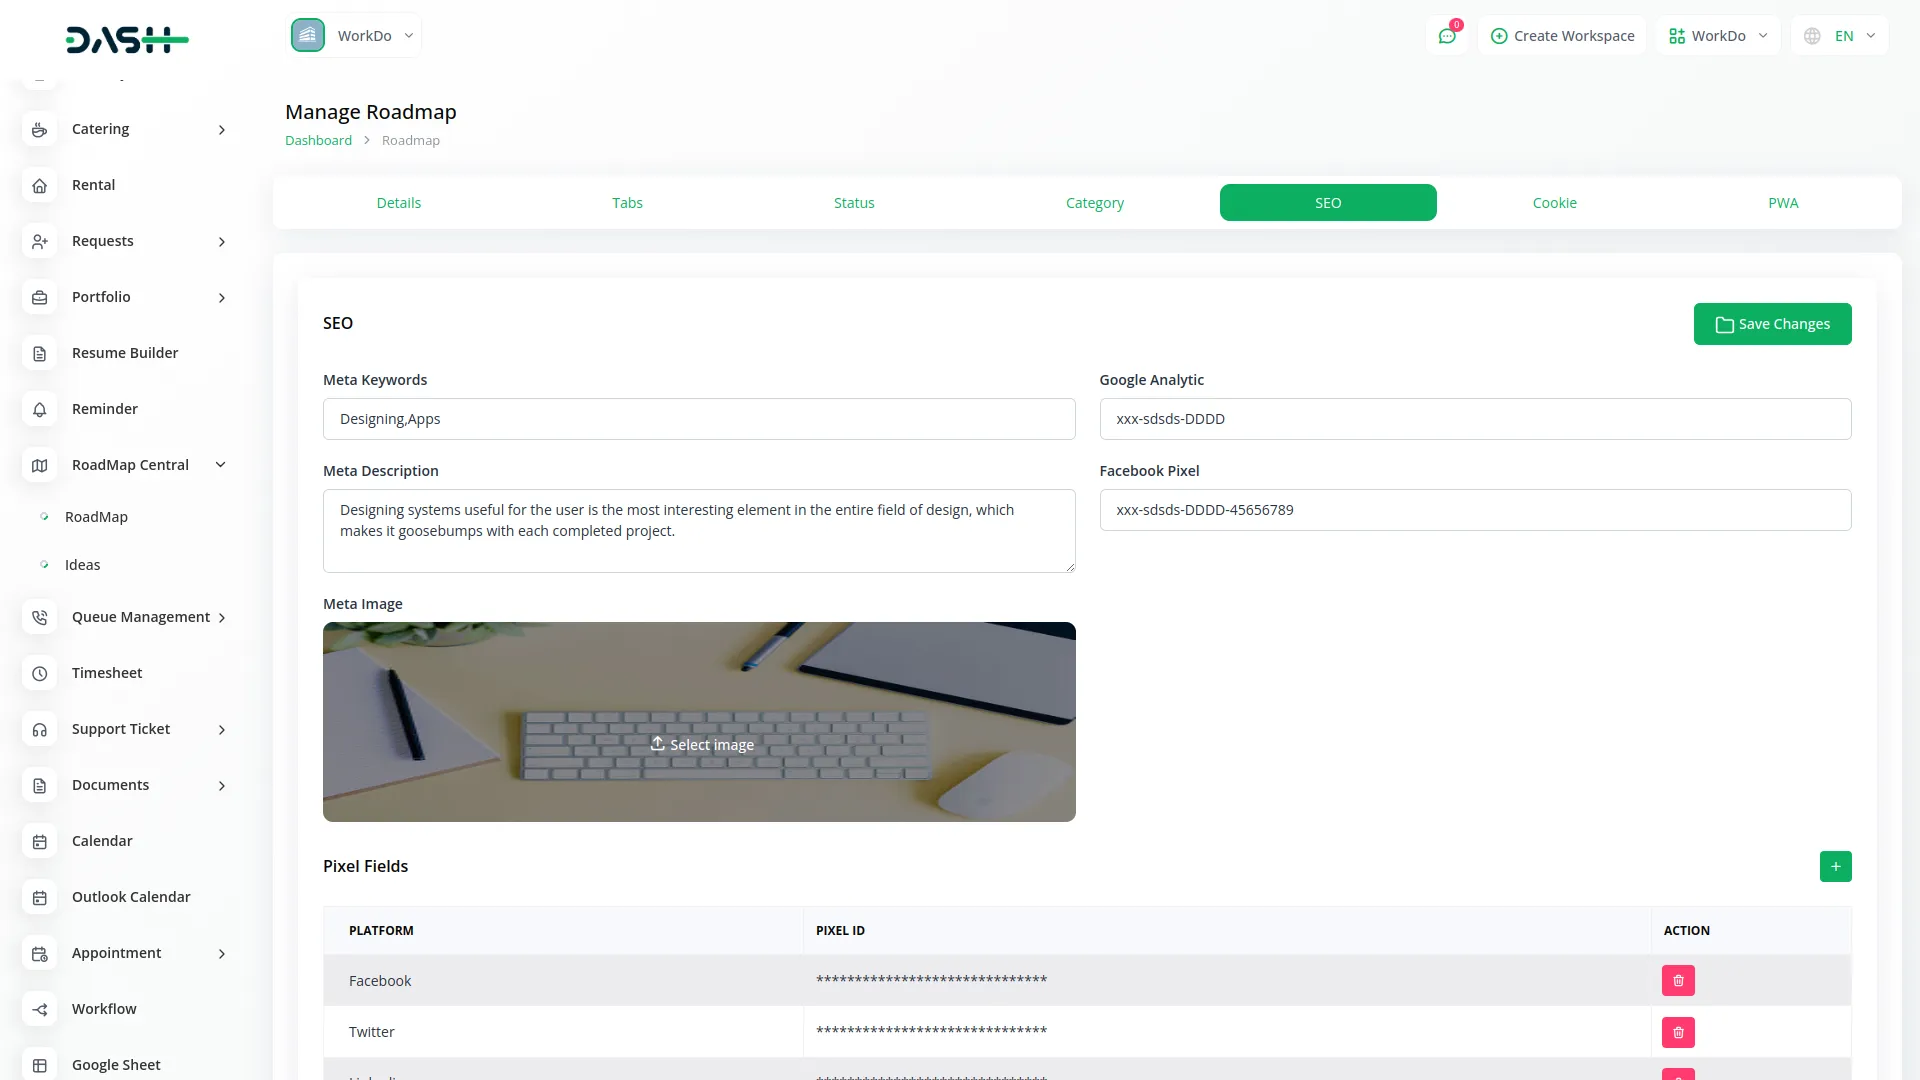
- The SEO section provides comprehensive website optimization and tracking tools. Configure meta keywords, Google Analytics integration, meta description, Facebook Pixel tracking, and upload a meta image for social media sharing. These settings help improve your roadmap’s visibility and tracking across search engines and social platforms.
- In the Pixel Fields subsection, click “Create” to add tracking pixels from various platforms. Enter the platform name and corresponding Pixel ID for each tracking service you want to integrate. The list page displays Platform and Pixel ID columns, with Delete action available to remove tracking pixels when no longer needed.
- The Cookie section manages website compliance and user data preferences. Configure cookie settings with enable logging toggle and strictly necessary cookies on/off control. Set up cookie title, strictly cookie title, cookie description, and strictly cookie description for user notifications. Add contact us description and contact us URL for user inquiries, and enable download cookie accepted data functionality for compliance reporting.
- The PWA section enables Progressive Web App functionality with an on/off toggle. When enabled, configure app title, app name, app background color, and app theme color to create a mobile app-like experience for your roadmap visitors.
-
Ideas Management
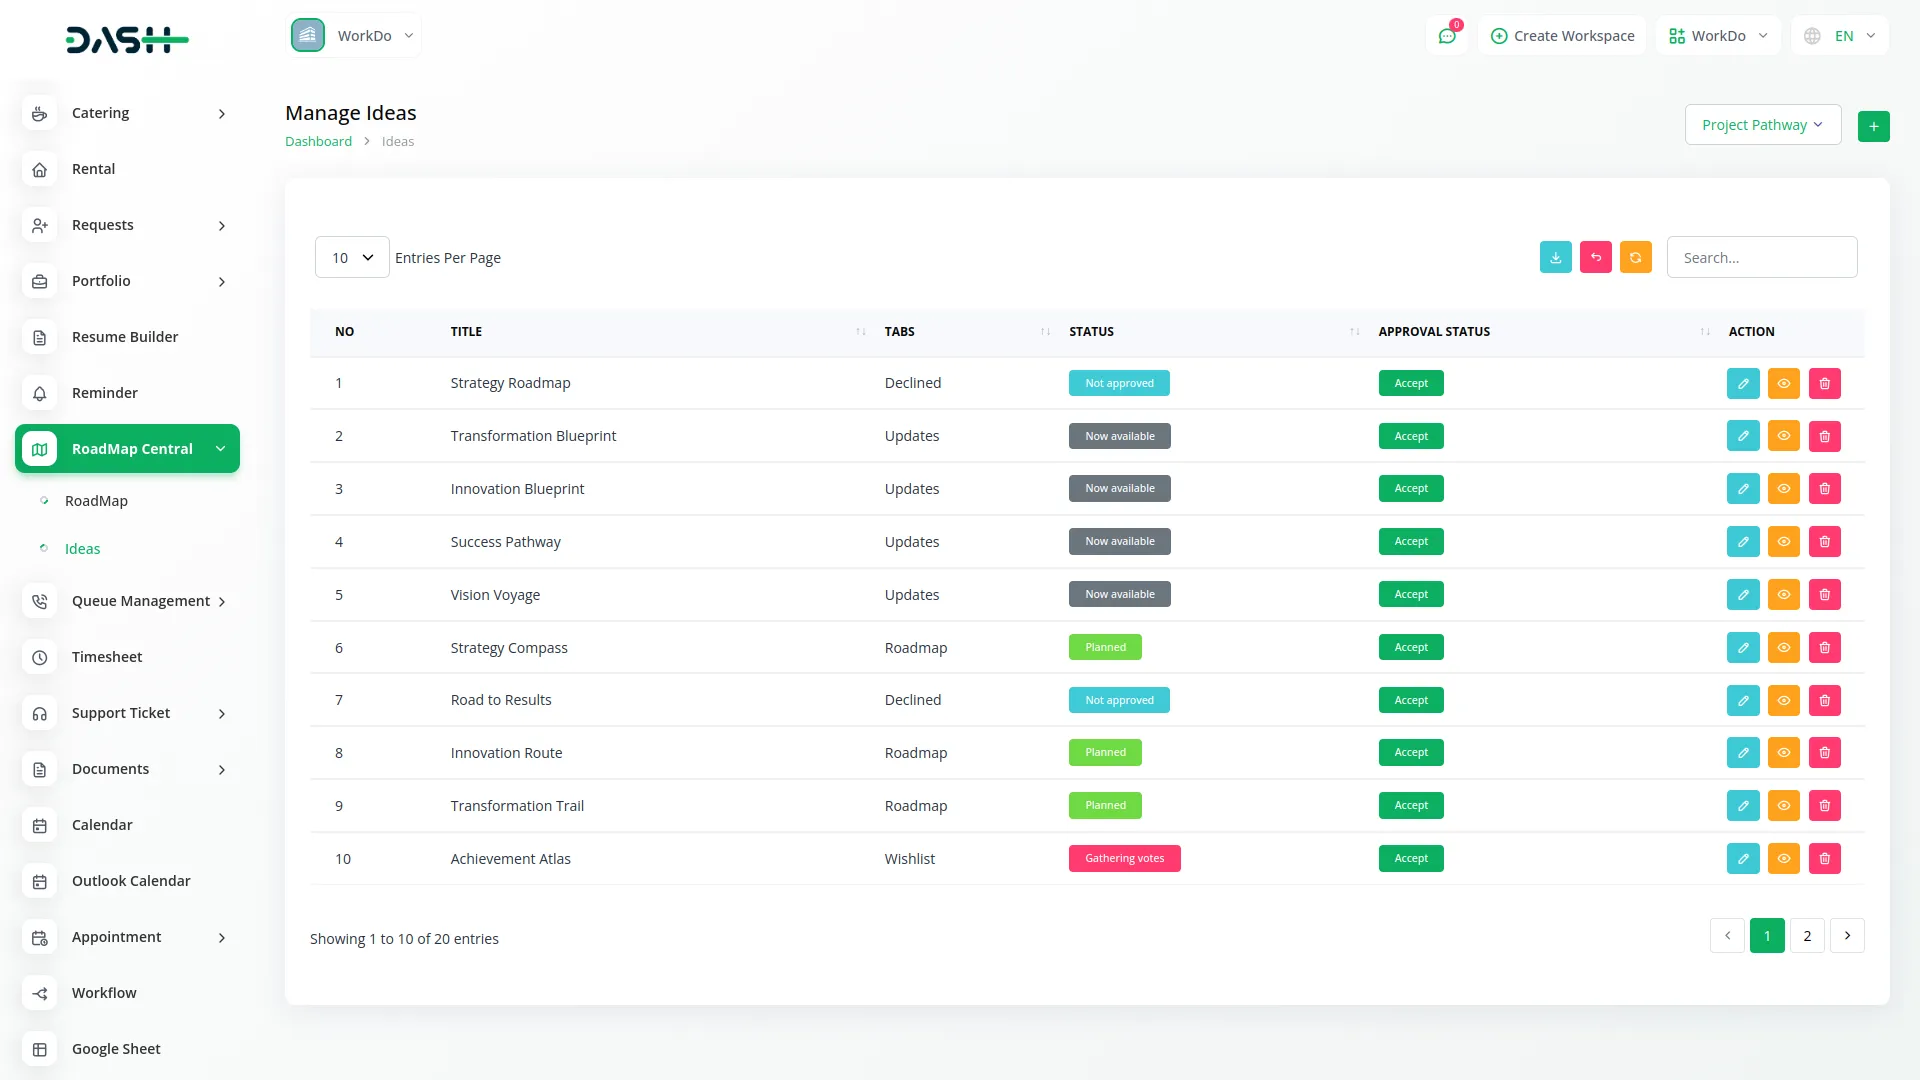
- To create a new idea, click the “Create” button on the ideas management page. Fill in the idea title, select the appropriate tab from the tabs created in the roadmap module, choose a category from the available categories, and enter a detailed description of the idea.
- The list page displays all ideas with columns for Number, Title, Tabs, Status, and Approval Status. Use the Search and Export buttons to find specific ideas or export data. Select a specific roadmap using the roadmap dropdown from the roadmap module to filter ideas by roadmap. Available actions include View to see idea details, Edit to modify idea information, and Delete to remove ideas from the system.
-
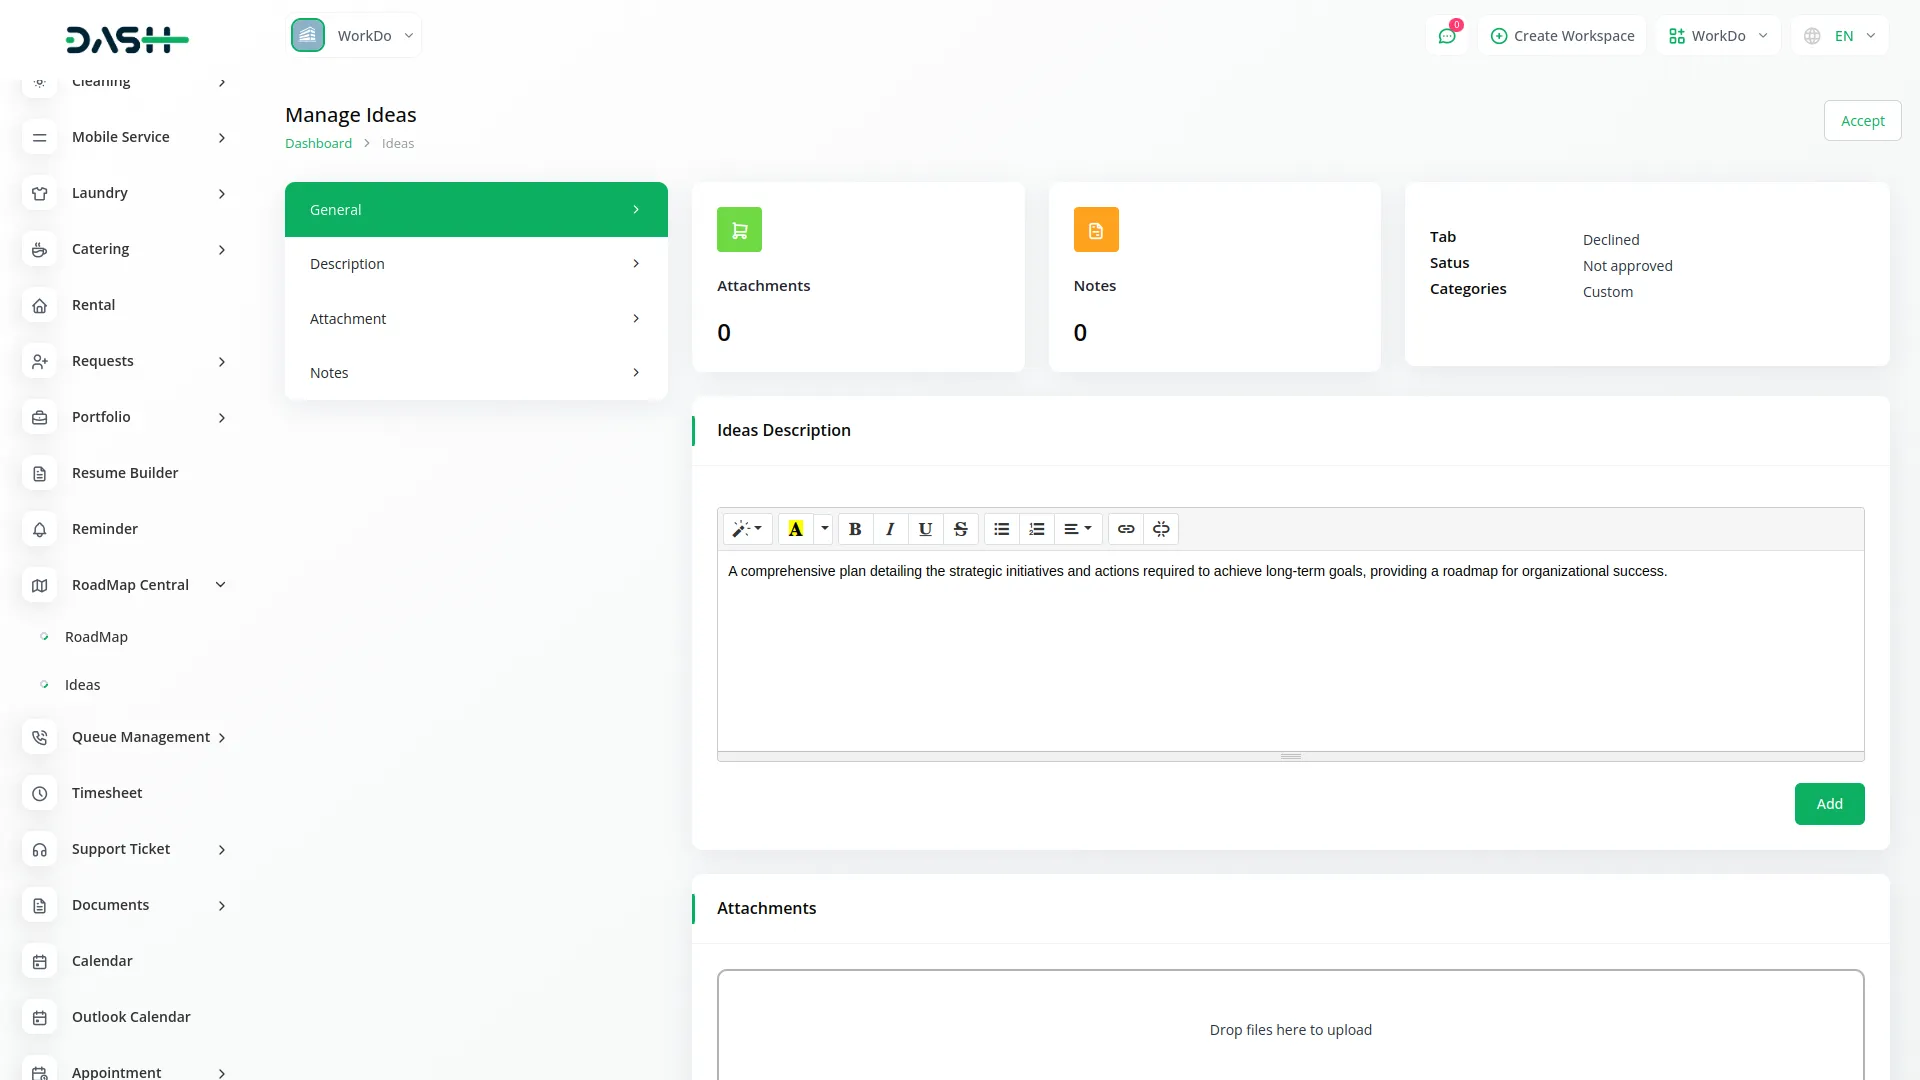
- When you click View on an idea, you access the complete idea details page. At the top, use the idea status dropdown to change the status between pending and accept for the approval workflow management. The view page contains four main sections: General, Description, Attachment, and Notes.
- In the General section, view the count of attachments and notes associated with the idea. See the attached files that were uploaded when the idea was created from the frontend side. Review the assigned tab, current status, and selected categories for organizational reference. The Description section displays the full idea description as entered during creation. The Attachment section shows all files related to the idea, and the Notes section displays any additional comments or updates added to the idea.
-
RoadMap Central Website
- To open this page, you can copy the link either from the dashboard or from the roadmap section. The RoadMap Central website provides a public-facing interface where visitors can interact with your roadmaps and submit new ideas. The header section displays your configured logo and includes an “Add Ideas” feature for public idea submission. When visitors click Add Ideas, they can fill out a form with title, description, status selection from the roadmap section, category selection from the roadmap section, and file upload capability.
-
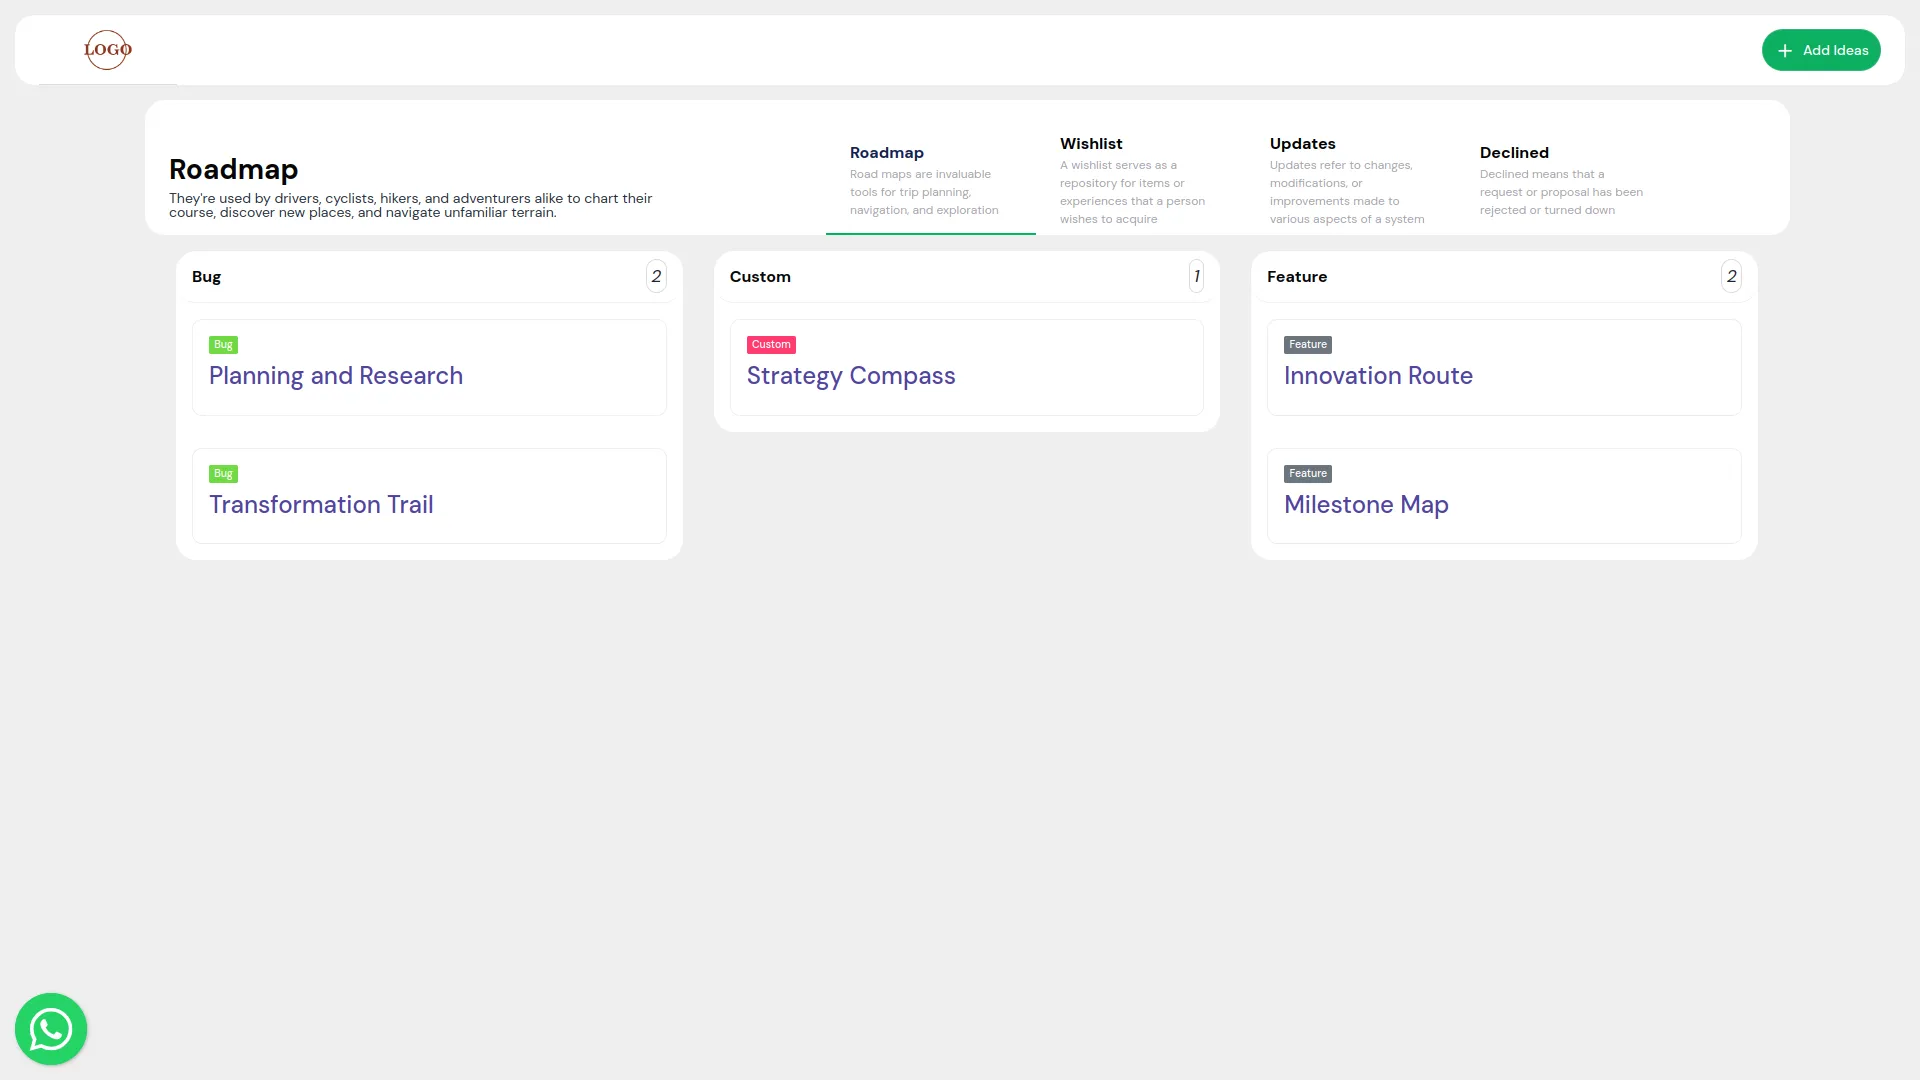
- The website displays tabs that come from the tab configuration in the roadmap module, allowing visitors to navigate between different sections of your roadmap. Categories appear from the category settings in the roadmap module, helping users filter and organize the content they want to view.
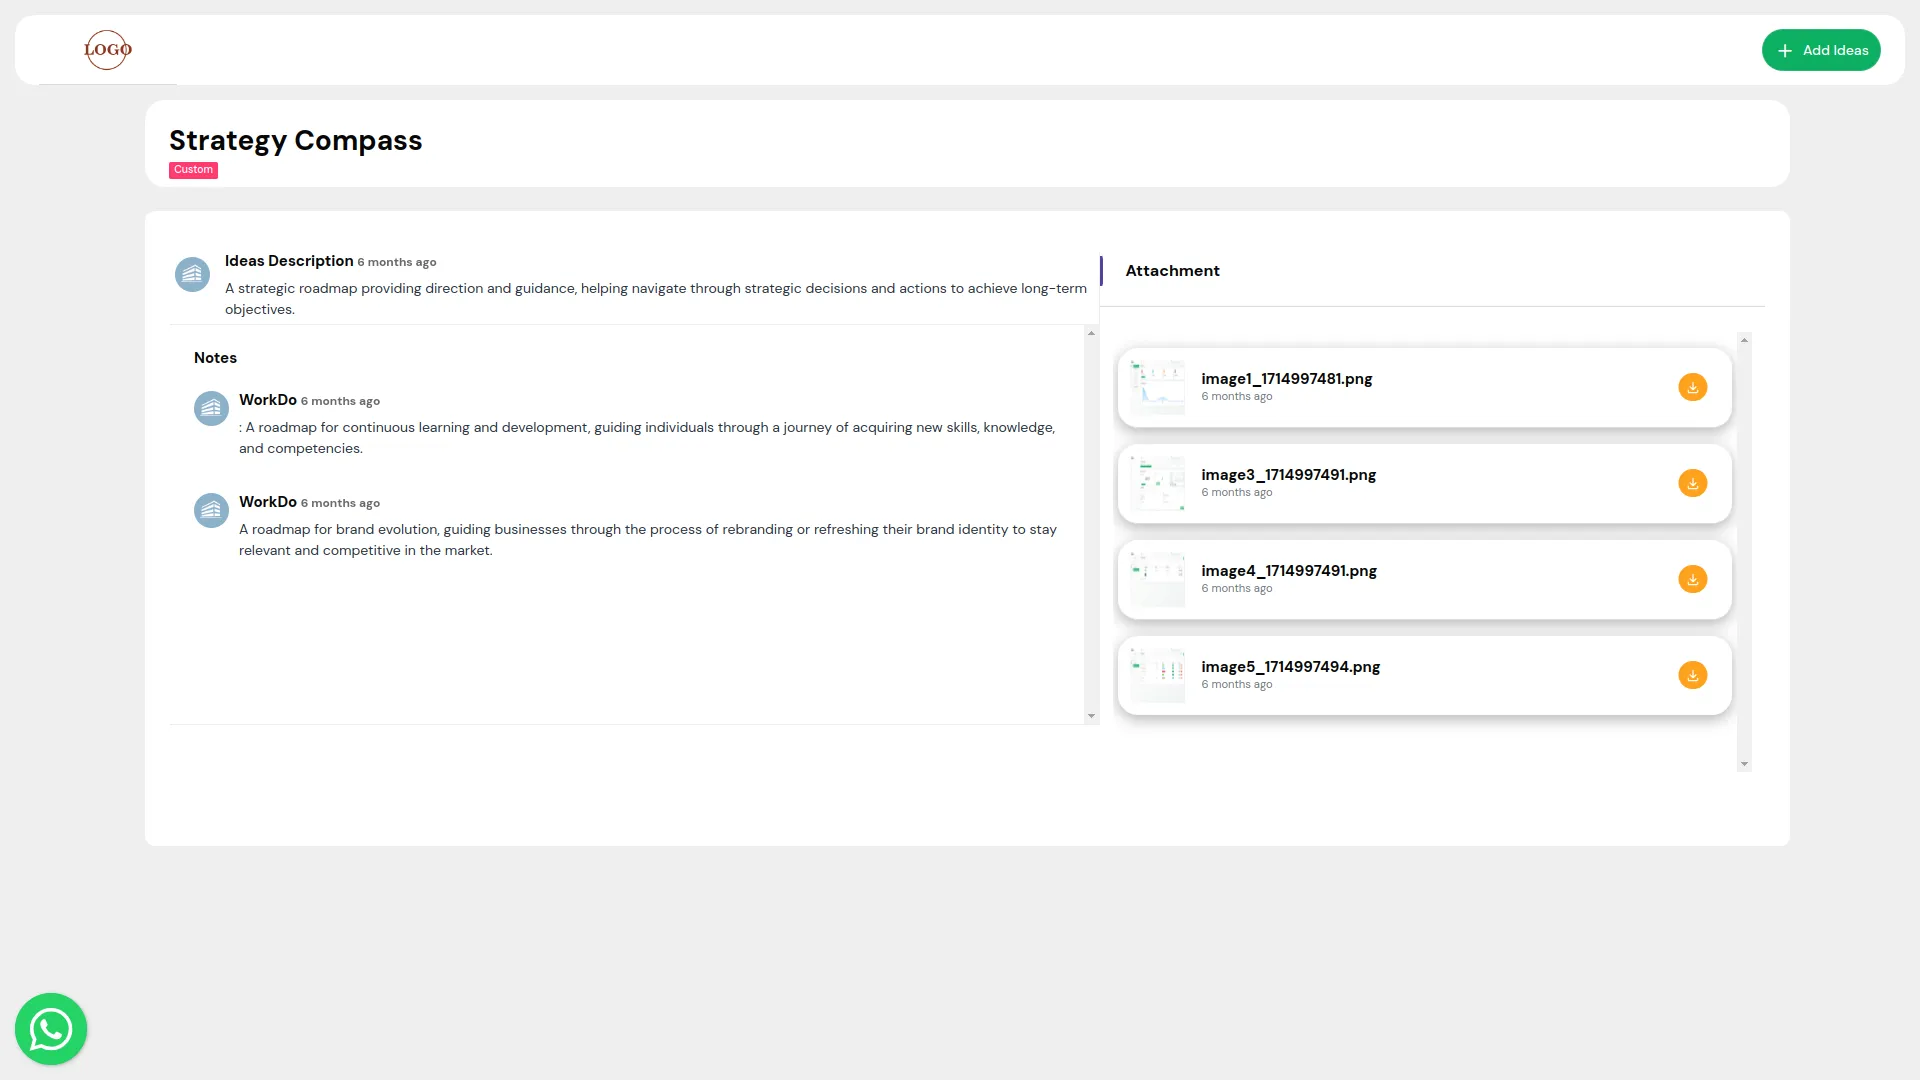
- Ideas are displayed according to your configured settings, showing the idea name, idea description, attached files, and associated notes. Visitors can click “View Idea” to see complete details including all attachments and notes.
- The website layout and functionality depend entirely on the configurations you set up in the roadmap management sections, ensuring consistency between your admin settings and public presentation.
-
Categories
Related articles
- Childcare Management Integration in Dash SaaS
- Fire Safety Detailed Documentation
- Google Calendar Credentials Generate
- File Sharing Integration in Dash SaaS
- Goto Meeting Integration in Dash SaaS
- Vehicle Booking Management Integration in Dash SaaS
- StoreGo – Product Features
- Procurement Integration in Dash SaaS
- Bookings Integration in Dash SaaS
- CMMS Integration in Dash SaaS
- Zoom Meeting integration in BookingGo SaaS
- Mobile Service Management Integration in Dash SaaS
Reach Out to Us
Have questions or need assistance? We're here to help! Reach out to our team for support, inquiries, or feedback. Your needs are important to us, and we’re ready to assist you!


Need more help?
If you’re still uncertain or need professional guidance, don’t hesitate to contact us. You can contact us via email or submit a ticket with a description of your issue. Our team of experts is always available to help you with any questions. Rest assured that we’ll respond to your inquiry promptly.
Love what you see?
Do you like the quality of our products, themes, and applications, or perhaps the design of our website caught your eye? You can have similarly outstanding designs for your website or apps. Contact us, and we’ll bring your ideas to life.
