Quickbooks Integration in Dash SaaS
Integrating QuickBooks with Dash SaaS revolutionizes financial management by providing a seamless experience in handling accounting and business operations.
Introduction
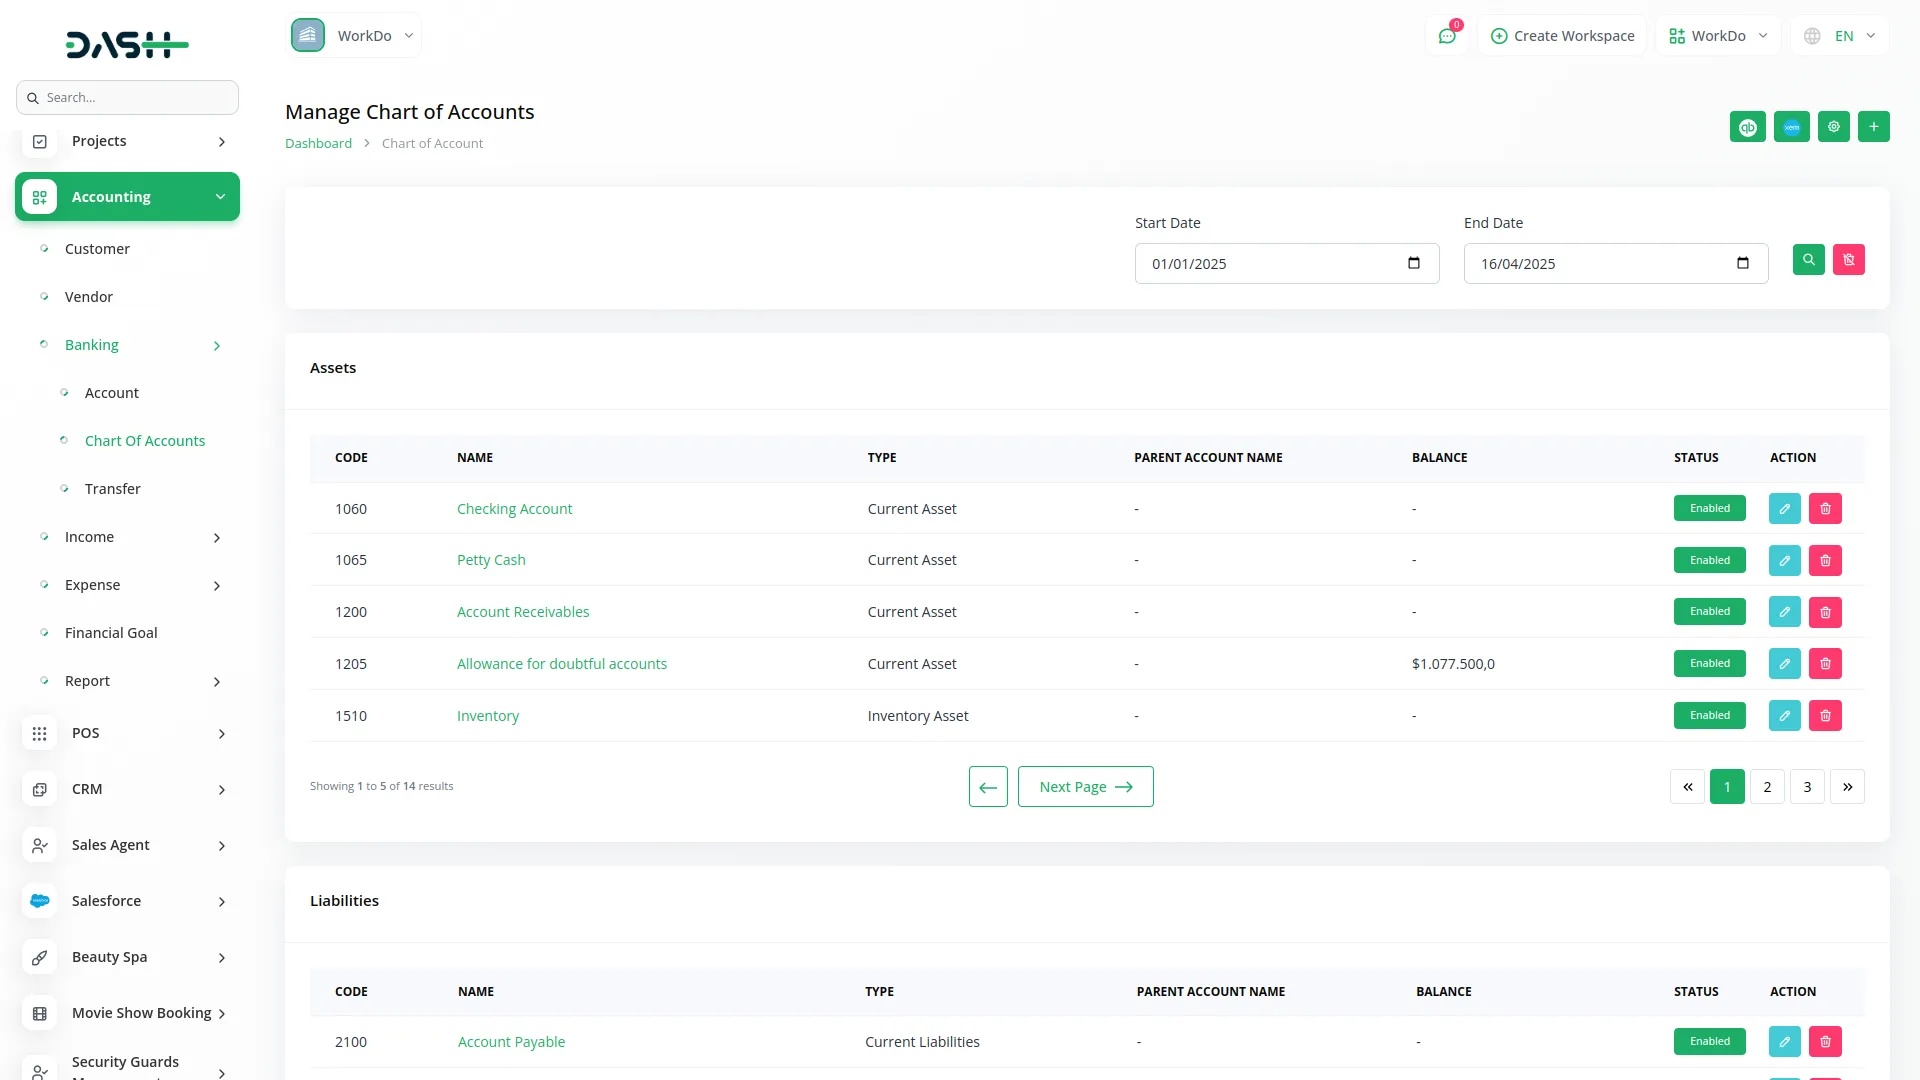
Integrating QuickBooks with Dash SaaS revolutionizes financial management by providing a seamless experience in handling accounting and business operations. Through automated data synchronization, users eliminate manual entry tasks, ensuring accuracy and saving valuable time. This integration extends to various financial transactions, including invoicing and payment reconciliation, facilitating effortless maintenance of up-to-date and precise financial records. Moreover, QuickBooks integration enhances visibility and transparency, offering real-time insights into key financial metrics like revenue, expenses, and cash flow. With easy synchronization of invoices and charts of accounts between Dash SaaS and QuickBooks, businesses can efficiently manage their finances, make informed decisions, and drive growth effectively.
How to Install the Add-On?
To Set Up the QuickBooks Add-On, you can follow this link: Setup Add-On
1. Setting Up the QuickBooks Add-On
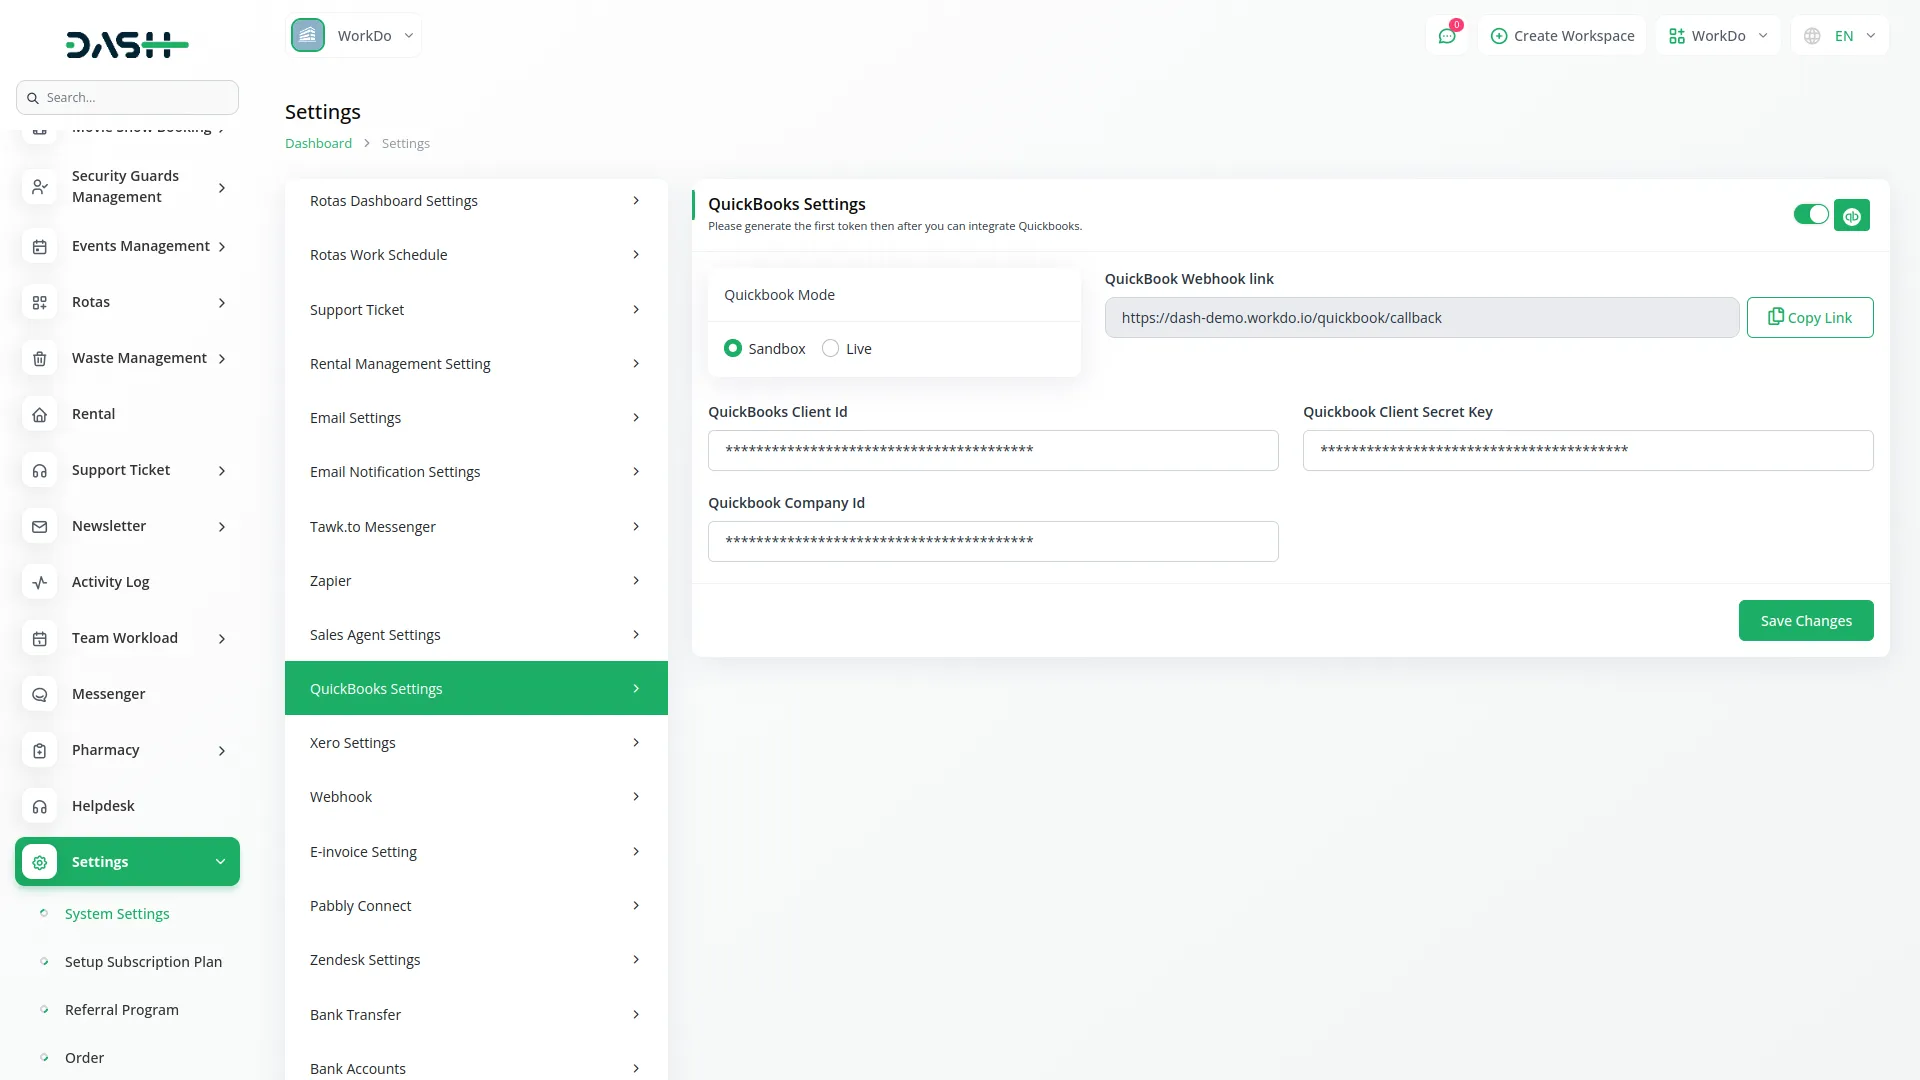
To start using the QuickBooks Add-On, you need to configure it through the system settings:
- Go to the Company login page.
- Scroll down to the Settings section.
- Click on System Settings.
- Scroll through the available add-ons until you find QuickBooks Add-On.
- Click on QuickBooks Add-On to open the configuration panel.
In the configuration form, you’ll need to complete the following steps:
- Select QuickBooks Mode: Choose between
- Sandbox – For testing and trial purposes.
- Live – For using QuickBooks with real data
- Enable Integration: Use the toggle button to activate or deactivate the QuickBooks integration.
- Generate Access Token: Click the “Generate Token” button to create the required token for authorization.
- Enter Required Credentials:
- Webhook Link: Provided by your QuickBooks account.
- Client ID – Found in your QuickBooks developer portal.
- Client Secret Key – Also available in your QuickBooks developer account.
- Company ID – This ID is linked to your QuickBooks company profile.
Once all fields are filled in correctly, click Save to complete the setup.
- To generate the API Credentials you can follow this link: https://quickbooks.intuit.com/au/learn-and-support/user-guide/
-

2. Connecting to QuickBooks
After the configuration is complete:
- Open the QuickBooks dashboard.
- Log in with your QuickBooks account credentials.
- Once logged in, the system will be connected, and data can be shared between both platforms.
3. Syncing Invoices from the System to QuickBooks
Once integration is successful:
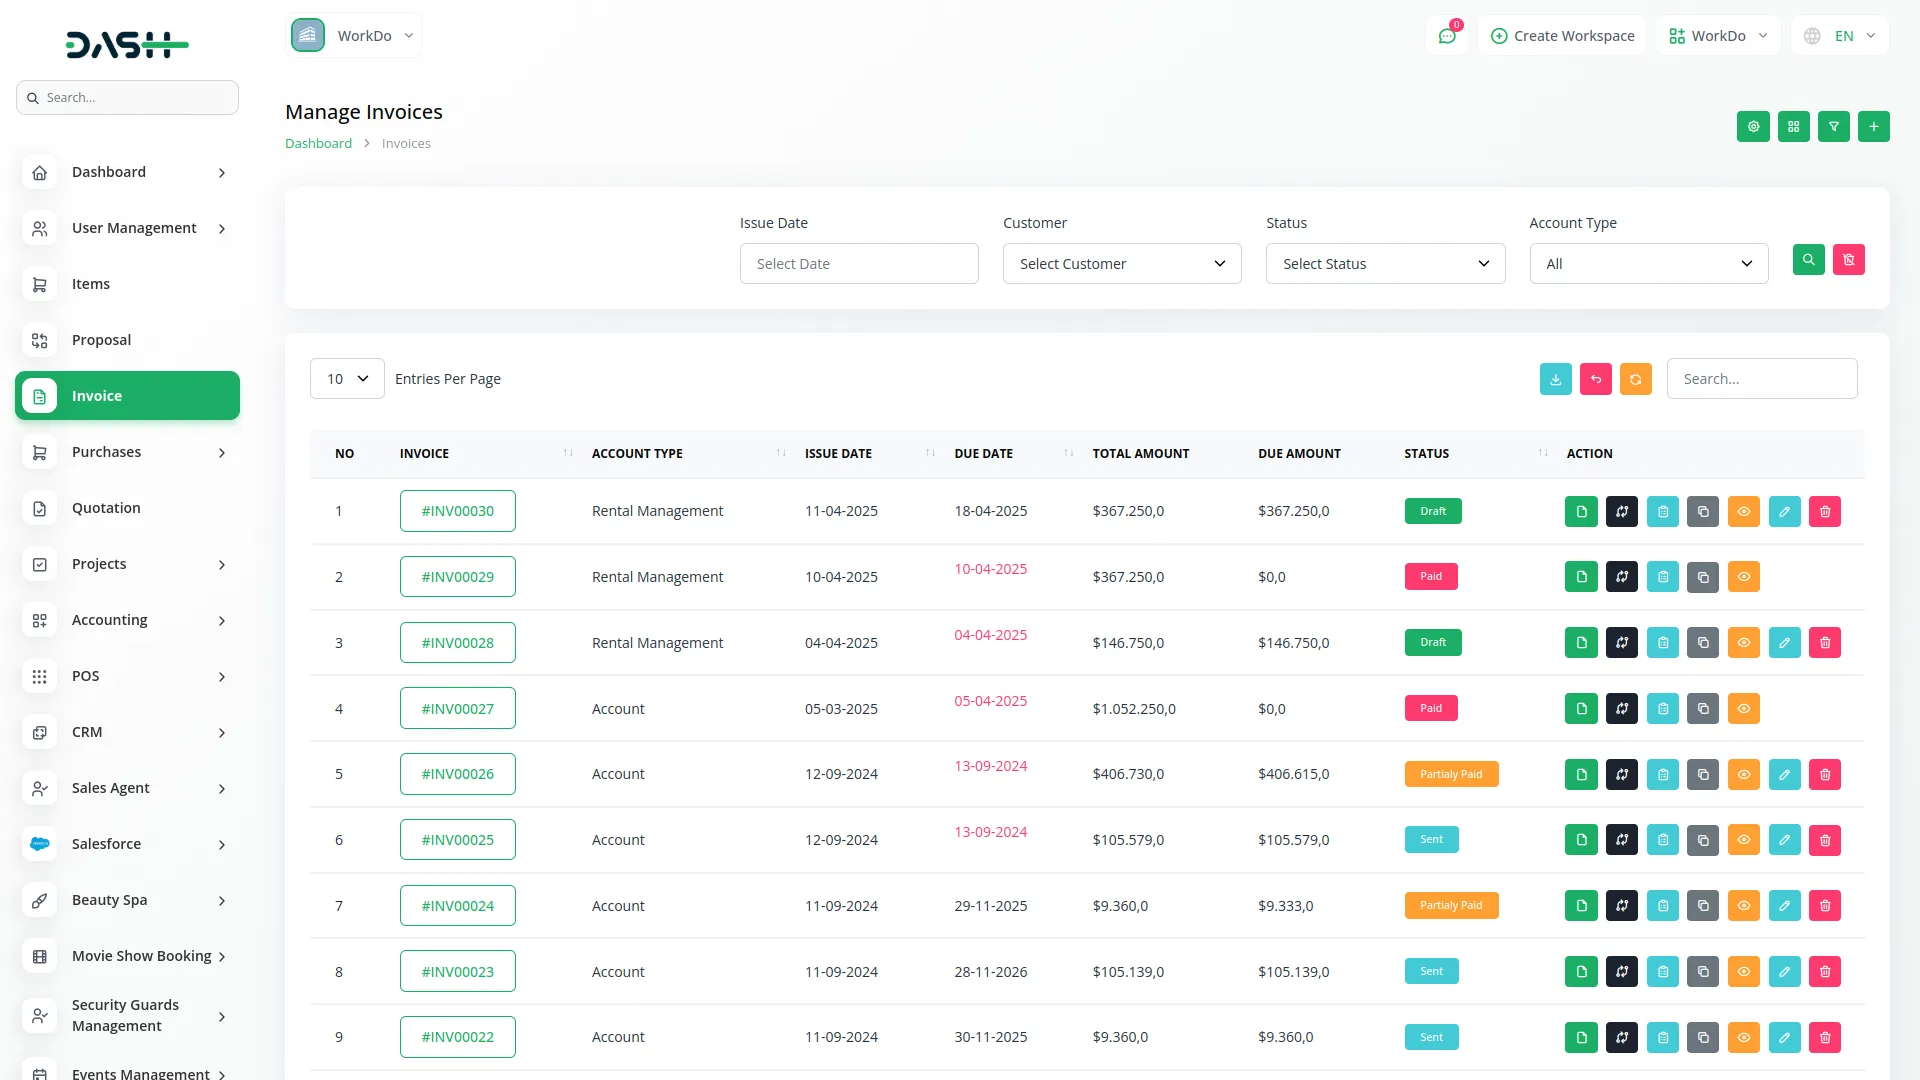
- Every time you create an invoice in your system, it will automatically be pushed to your QuickBooks dashboard.
- This ensures that all financial records are centrally available in QuickBooks for accounting and tax purposes.
-

-

Categories
Related articles
- Photo & Studio management Integration in Dash SaaS
- eSewa Payment Gateway in Dash SaaS
- Tour & Travel Management Integration in Dash SaaS
- Diet & Nutrition Consultant Integration in Dash SaaS
- Zoom Meeting Integration in Dash SaaS
- Security Guard Management Integration in Dash SaaS
- Sign-in With Bitbucket Detailed Documentation
- Form Builder Integration in Dash SaaS
- Construction Management Integration in Dash SaaS
- Garage/Workshop Management Integration in Dash SaaS
- Cleaning Management Integration in Dash SaaS
- Sendinblue Integration in Dash SaaS
Reach Out to Us
Have questions or need assistance? We're here to help! Reach out to our team for support, inquiries, or feedback. Your needs are important to us, and we’re ready to assist you!


Need more help?
If you’re still uncertain or need professional guidance, don’t hesitate to contact us. You can contact us via email or submit a ticket with a description of your issue. Our team of experts is always available to help you with any questions. Rest assured that we’ll respond to your inquiry promptly.
Love what you see?
Do you like the quality of our products, themes, and applications, or perhaps the design of our website caught your eye? You can have similarly outstanding designs for your website or apps. Contact us, and we’ll bring your ideas to life.
