
Petty Cash Management – WorkDo Dash SaaS Add-On Guide
Learn how to track petty cash, expenses, and cash transactions in Dash SaaS.
Introduction
The Petty Cash Management Add-On helps businesses efficiently track and manage small daily expenses. This documentation provides a step-by-step guide on how to set up the Add-On, record transactions, set spending limits, and monitor cash flow. Whether you’re handling office supplies, travel expenses, or other minor costs, this module ensures transparency and better financial control. By following this guide, you’ll learn how to streamline petty cash handling and maintain accurate records without relying on complex accounting tools.
How to Install the Add-On?
To Set Up the Petty Cash Management Add-On, you can follow this link: Setup Add-On.
How to use the Petty Cash Management Add-On?
Once the Petty Cash Management Add-On is purchased, it will automatically appear in the sidebar of your platform, making it easy for staff and admin users to access.
Any staff member who wants to use the petty cash features must first log into their account, as only authenticated users can access the Add-On.
Manage Petty Cashes
- To create a new petty cash entry, click the “Create” button and fill in the form. Enter the Date, specify the Amount, select the Bank Account from the dropdown (which comes from the accounts section), and optionally add Remarks. Click “Create” to save.
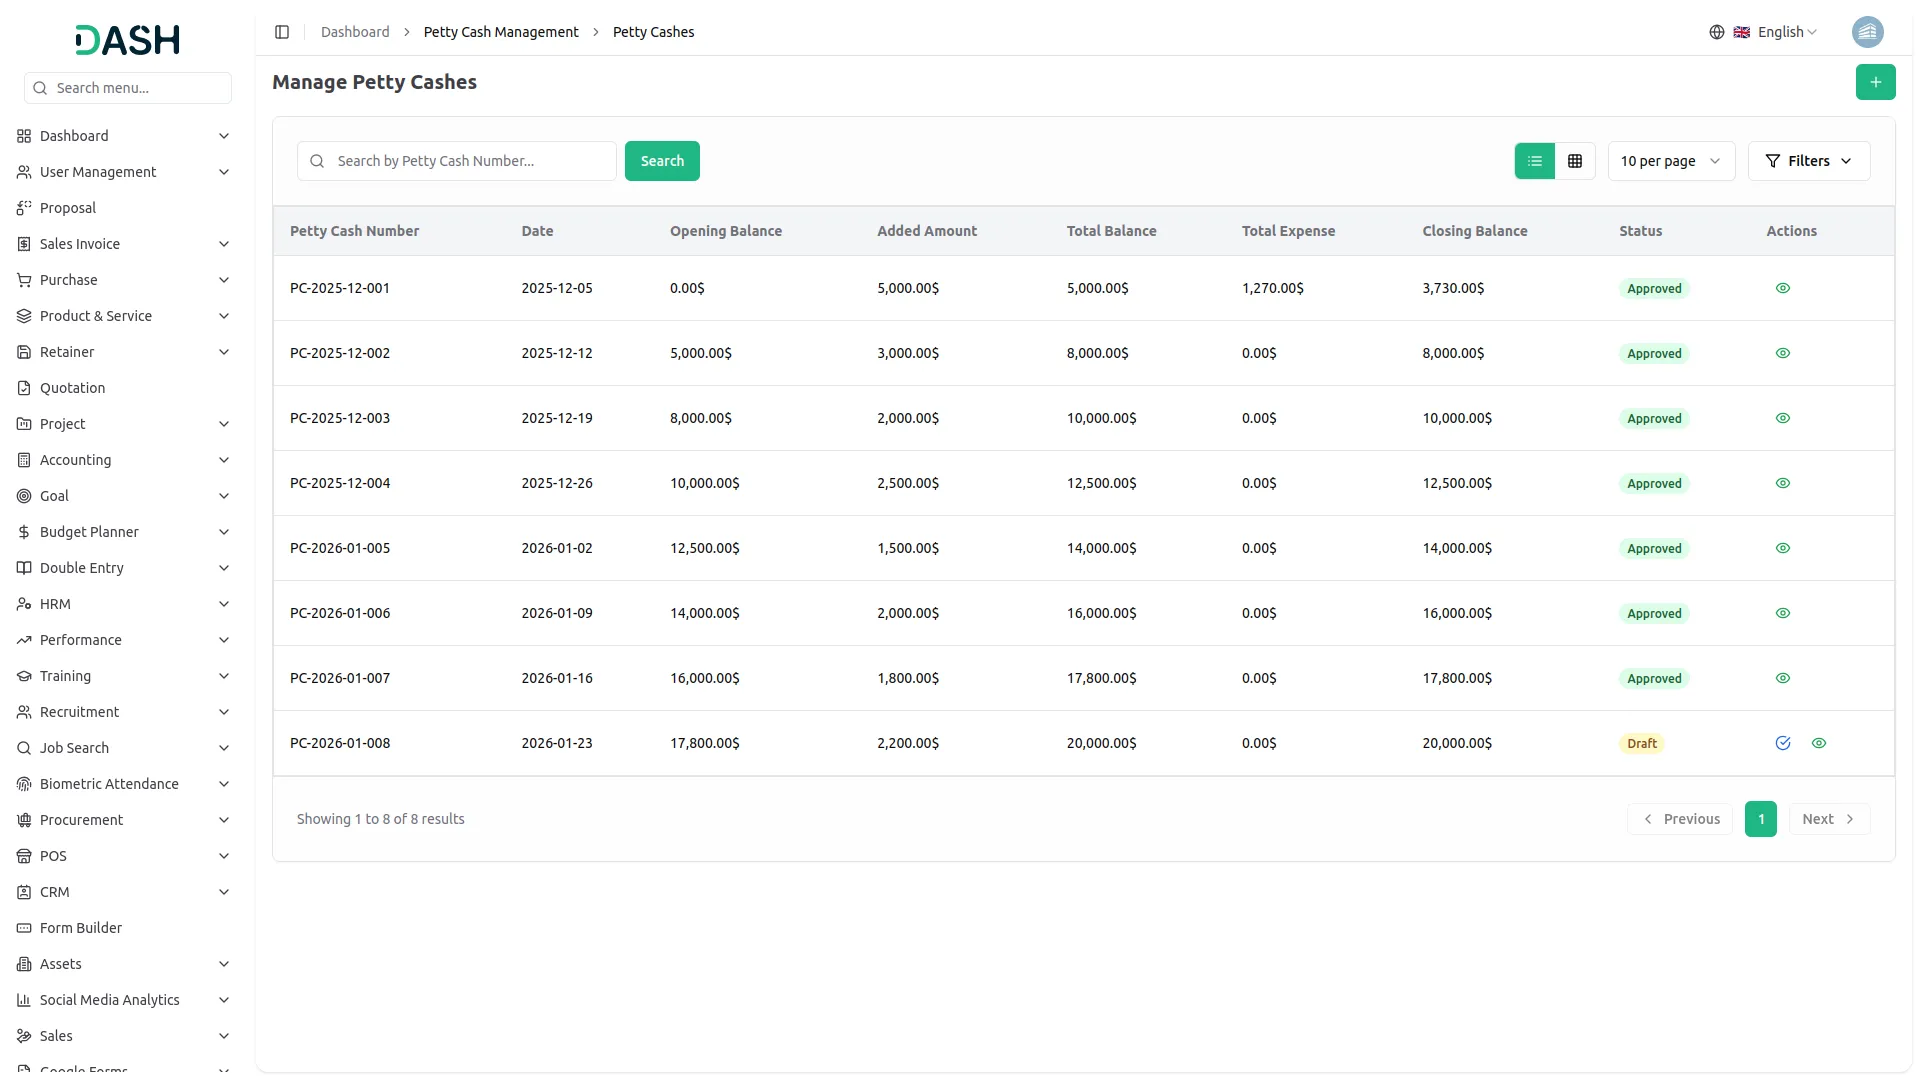
- The list page displays a table of the Petty Cash Number, Date, Opening Balance, Added Amount, Total Balance, Total Expense, Closing Balance, Status, and Action columns, showing each petty cash record along with its financial details. Use the search bar to find a specific petty cash record by its number.
- Click the Filters button to filter data by Status using the dropdown, then click Apply to filter the data or Clear to reset it.
- In the Action column, you can use the View button to see the full details of a petty cash record or the Approve button (available for records in Draft status) to confirm and finalize the entry. Once approved, only the View button remains available.
Manage Categories
- To create a new category, click the “Create” button and fill in the form. Enter the Name of the category, then click “Create” to save.
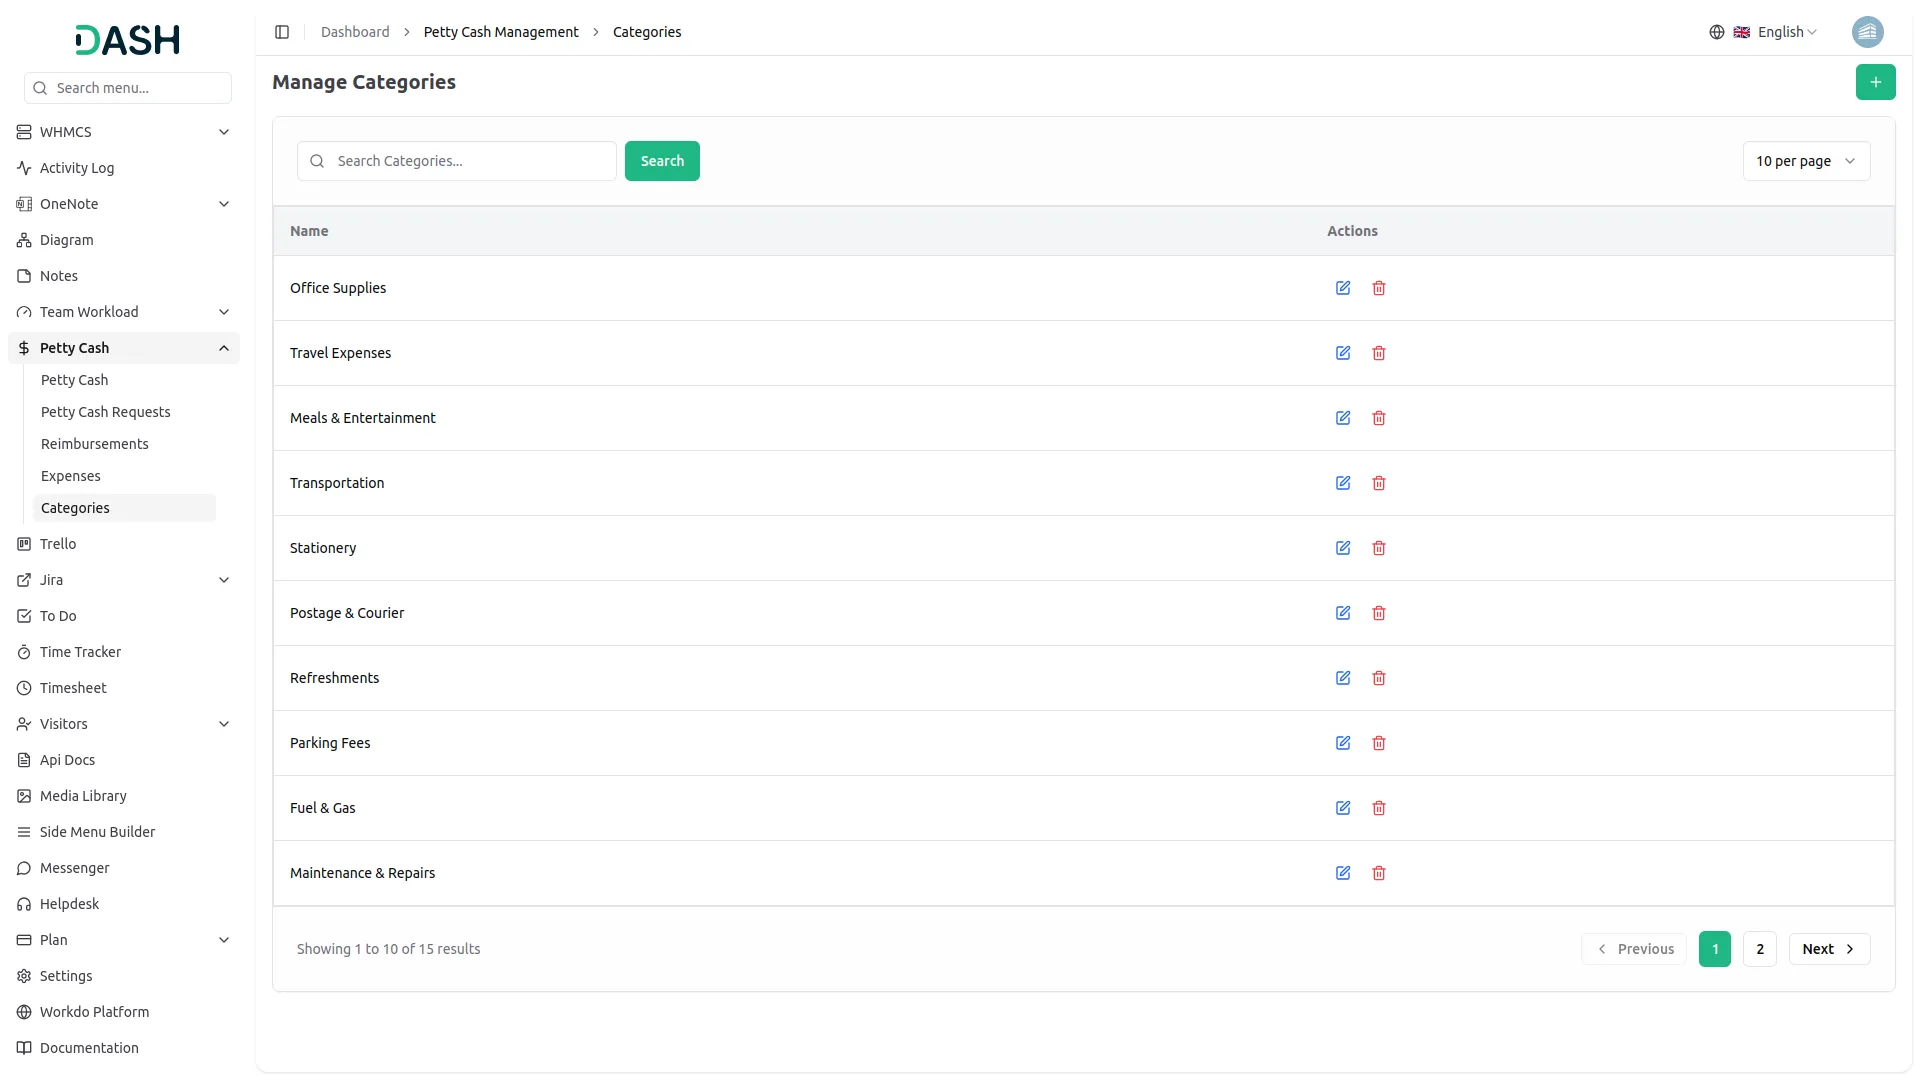
- The list page displays a table of the Name and Action columns, showing each category used for organizing petty cash expenses. Use the search bar to find a specific category.
- In the Action column, you can use the Edit button to update the category’s name or the Delete button to remove the record.
Petty Cash Request
- To create a new request, click the “Create” button and fill in the form. Select the User from the dropdown (comes from the User Management), select the Category from the dropdown (comes from the categories section), enter the Amount, and optionally add Remarks. Click “Create” to save.
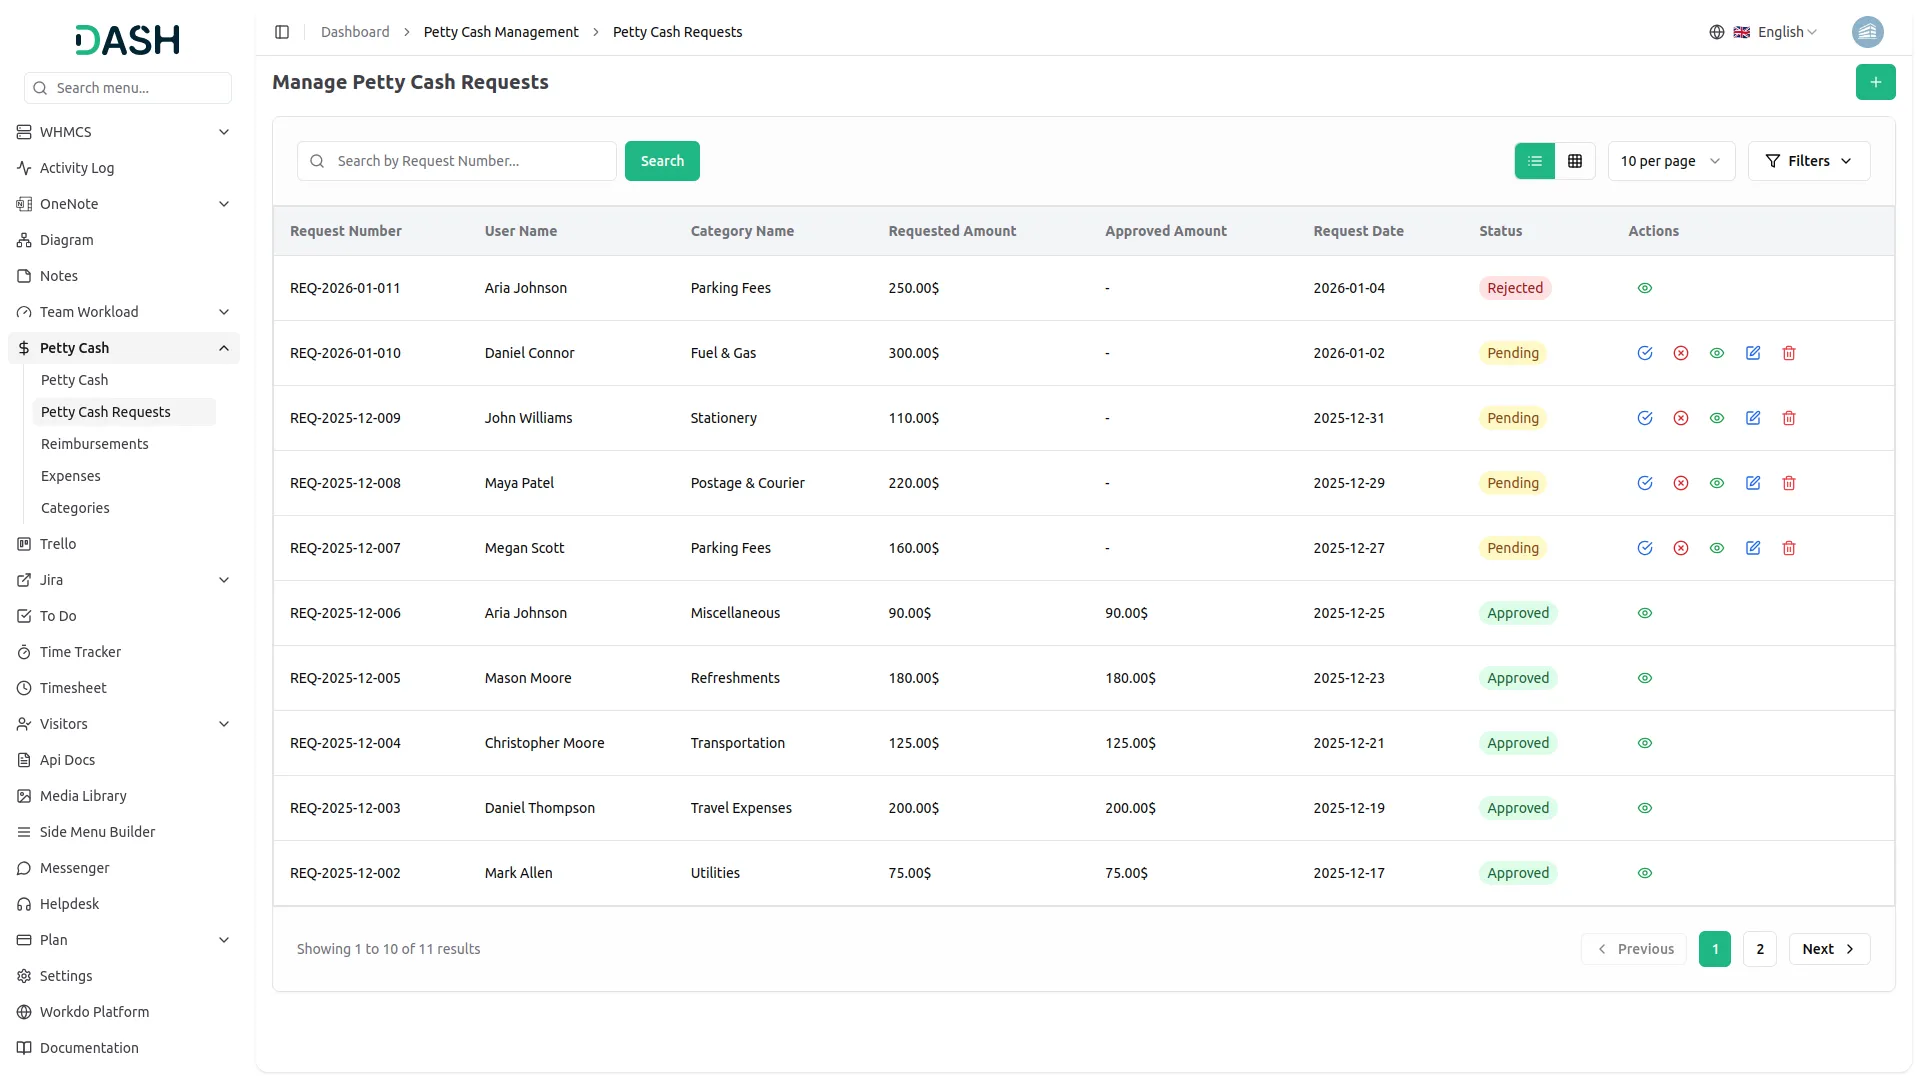
- The list page displays a table of the Request Number, User Name, Category Name, Requested Amount, Approved Amount, Request Date, Status, and Action columns, showing each petty cash request submitted by users. Use the search bar to find a specific request by its number.
- Click the Filters button to filter data by User, Category, or Status using the dropdowns, then click Apply to filter the data or Clear to reset it.
- The Status column shows whether a request is Pending, Approved, or Rejected. Pending requests are awaiting a decision, Approved requests have been confirmed with a final amount, and Rejected requests have been declined with a reason.
- In the Action column, Pending requests show the Approve, Reject, view to see the details; Edit to update details, and Delete to remove it; Approved and Rejected requests show only the View button since the decision is already final.
- Clicking the approve button opens a form showing the User, Category, and Requested Amount as reference, where you enter the Approved Amount and click “Approve” to confirm.
- Clicking the reject button opens a form where you must enter a Rejection Reason, then click “Reject” to confirm.
Manage Reimbursement
- To create a new reimbursement, click the “Create” button and fill in the form. Select the User from the dropdown (comes from the User Management), select the Category from the dropdown (comes from the categories section), enter the Amount, upload the Payment Receipt, and optionally add a Description. Click “Create” to save.
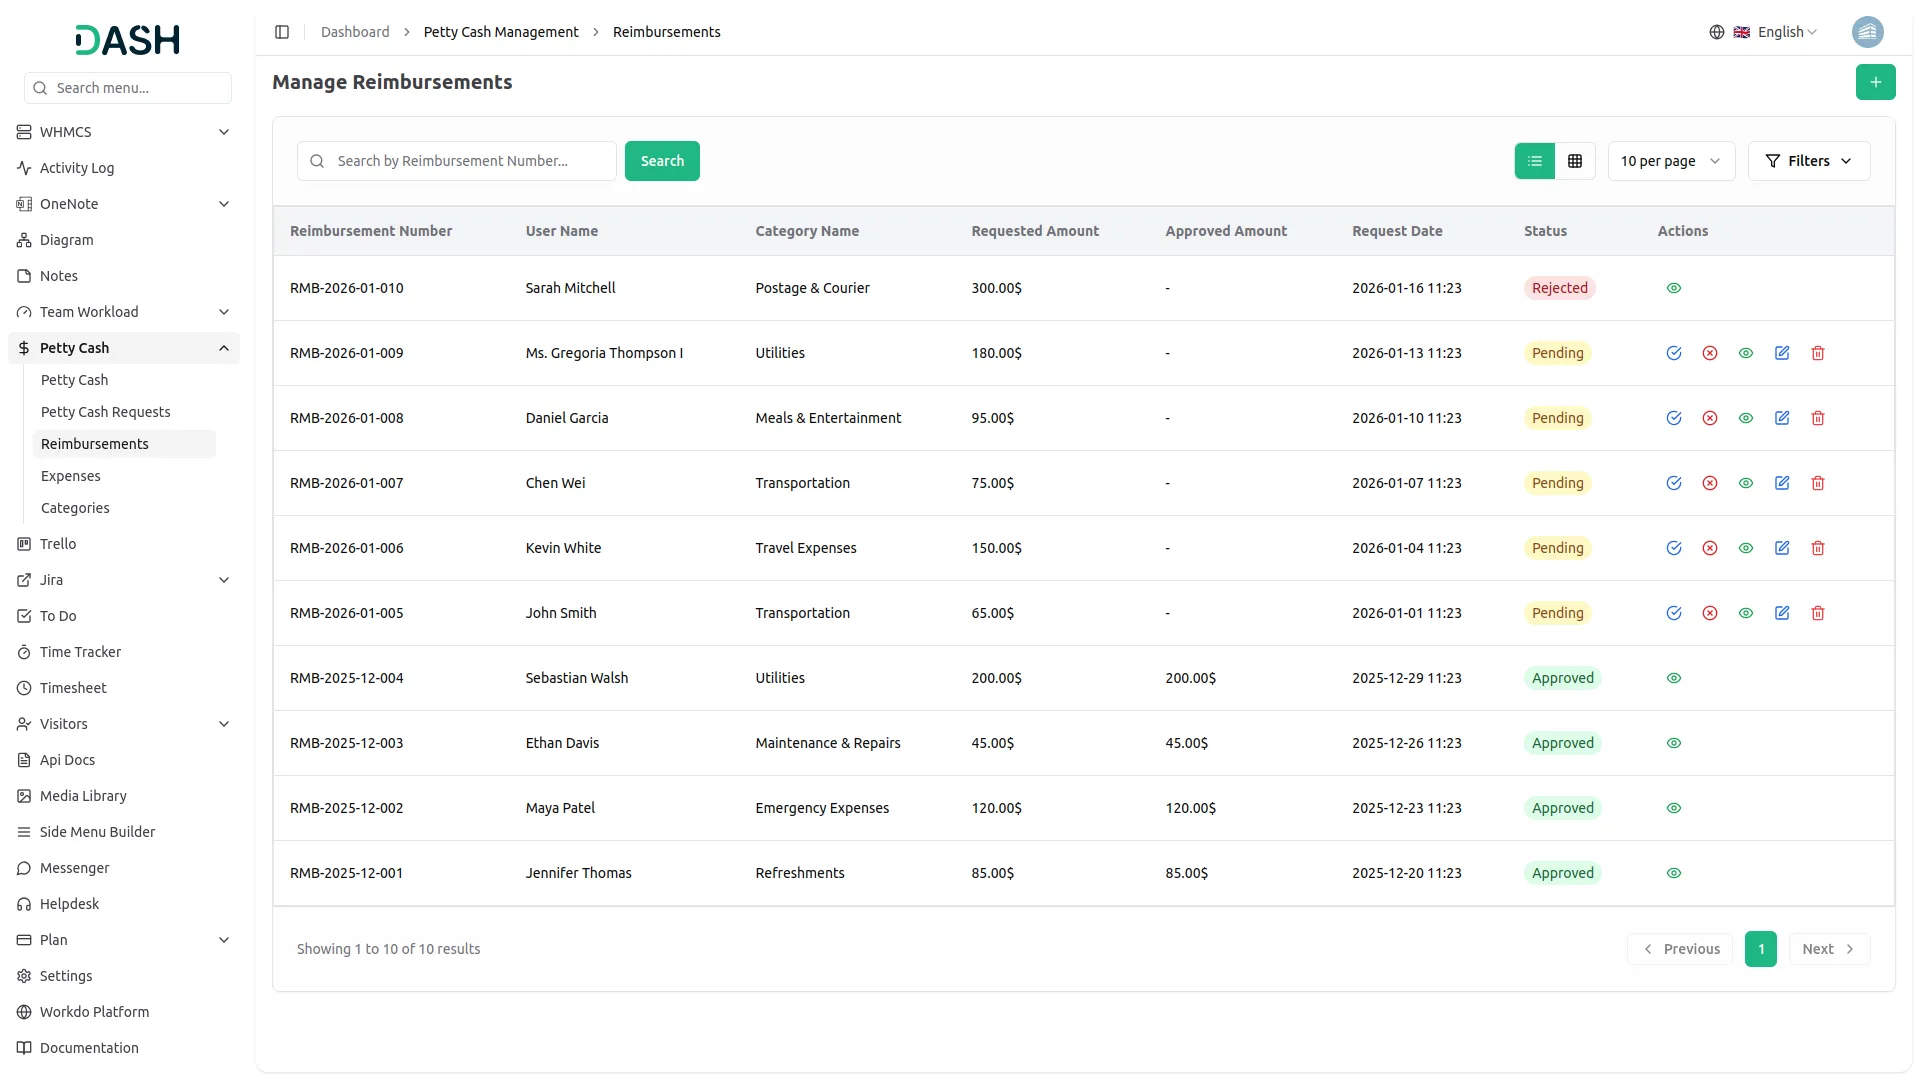
- The list page displays a table of the Reimbursement Number, User Name, Category Name, Requested Amount, Approved Amount, Request Date, Status, and Action columns, showing each reimbursement submitted by users. Use the search bar to find a specific reimbursement by its number.
- Click the Filters button to filter data by User, Category, or Status using the dropdowns, then click Apply to filter the data or Clear to reset it.
- The Status column shows whether a reimbursement is Pending, Approved, or Rejected. Pending reimbursements are awaiting a decision, Approved reimbursements have been confirmed with a final amount, and Rejected reimbursements have been declined with a reason.
- In the Action column, Pending reimbursements show Approve, Reject, and View to see the details; Edit to update details, and Delete to remove it; Approved and Rejected reimbursements show only the View button since the decision is already final.
- Clicking the Approve button opens a form showing the User, Category, and Requested Amount as reference, where you enter the Approved Amount and click “Approve” to confirm.
- Clicking the Reject button opens a form where you must enter a Rejection Reason, then click “Reject” to confirm.
Manage Expenses
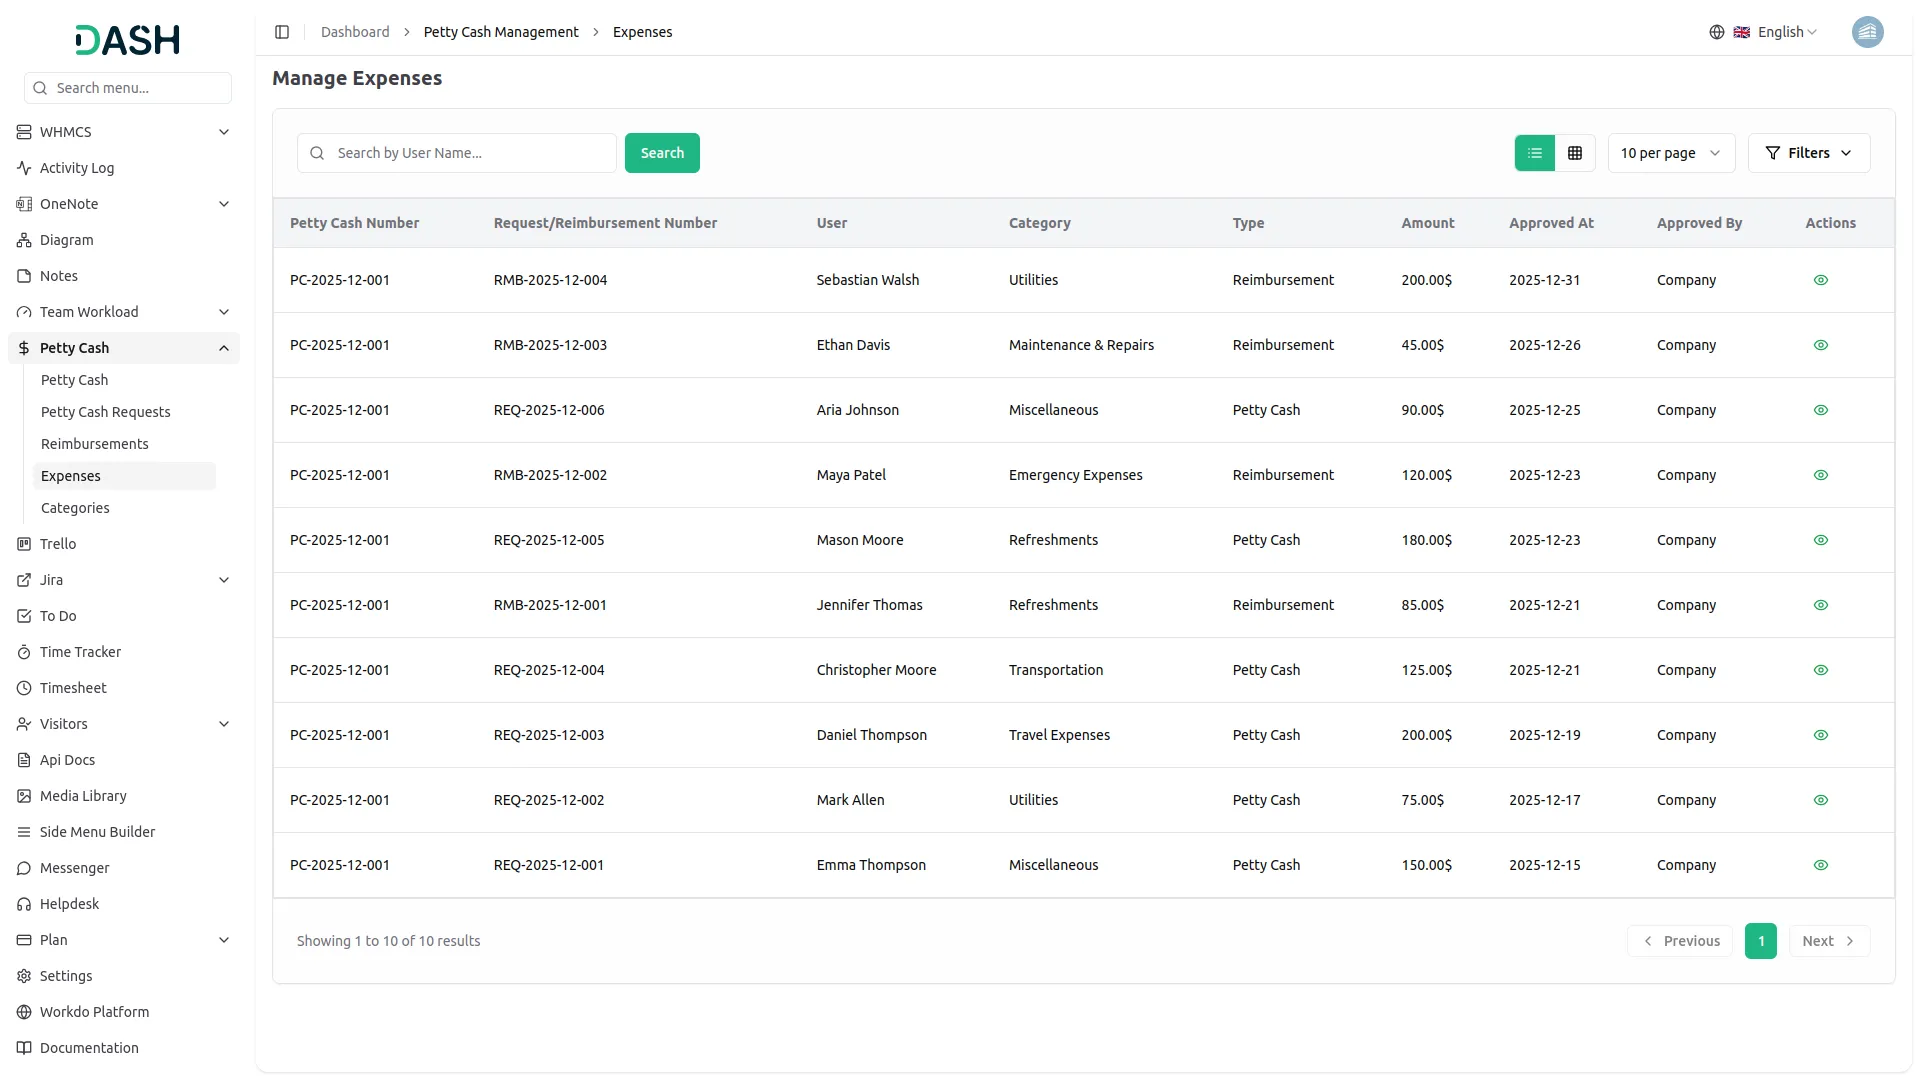
- This page shows a consolidated, read-only list of all approved petty cash requests and reimbursements. The list page displays a table of the Petty Cash Number, Request/Reimbursement Number, User, Category, Type, Amount, Approved At, Approved By, and Action columns. Use the search bar to find records by User Name.
- Click the Filters button to filter data by Type, Request Number, Reimbursement Number, or Petty Cash Number using the dropdowns, then click Apply to filter the data or Clear to reset it.
- The Type column shows whether the expense came from a Petty Cash request or a Reimbursement, helping you distinguish the source of each entry.
- In the Action column, only the View button is available to see the full details of each expense record.
Categories
Related articles
- Performance Indicator – WorkDo Dash SaaS Add-On Guide
- Vehicle Inspection Management – WorkDo Dash SaaS Add-On Guide
- Zoho Credentials Generation Guide
- Iyzipay – BookingGo SaaS Add-On Guide
- User Management, Roles & Permissions Guide
- PrintPress Management – WorkDo Dash SaaS Add-On Guide
- Biometric Attendance Documentation Guide
- Tawk.to Messenger – eCommerceGo SaaS Add-On Guide
- Skrill – WorkDo Dash SaaS Add-On Guide
- Pabbly Connect – TicketGo Add-On Guide
- Events Management – WorkDo Dash SaaS Add-On Guide
- Backup & Restore – WorkDo Dash SaaS Add-On Guide
We're Here to Help - Let's Talk
Have questions about our solutions, customization services, or business tools? Our team is here to help you. let's talk.