
Documents – WorkDo Dash SaaS Add-On Guide
Learn how to upload, organize, and manage documents in WorkDo Dash SaaS.
Introduction
The Documents Add-On lets you create, organize, and manage all your business documents in one place. You can sort documents by type, keep them private or public, and assign specific users when needed. It also supports templates, so you can save time by converting documents into reusable templates or creating new documents from them. Each document supports attachments, comments, notes, and e-signatures, making it easy to manage your documents from start to finish.
How to Install the Add-On?
To Set Up the Document Add-On, you can follow this link: Setup Add-On.
How To Use the Document Add-On?
Settings Configuration
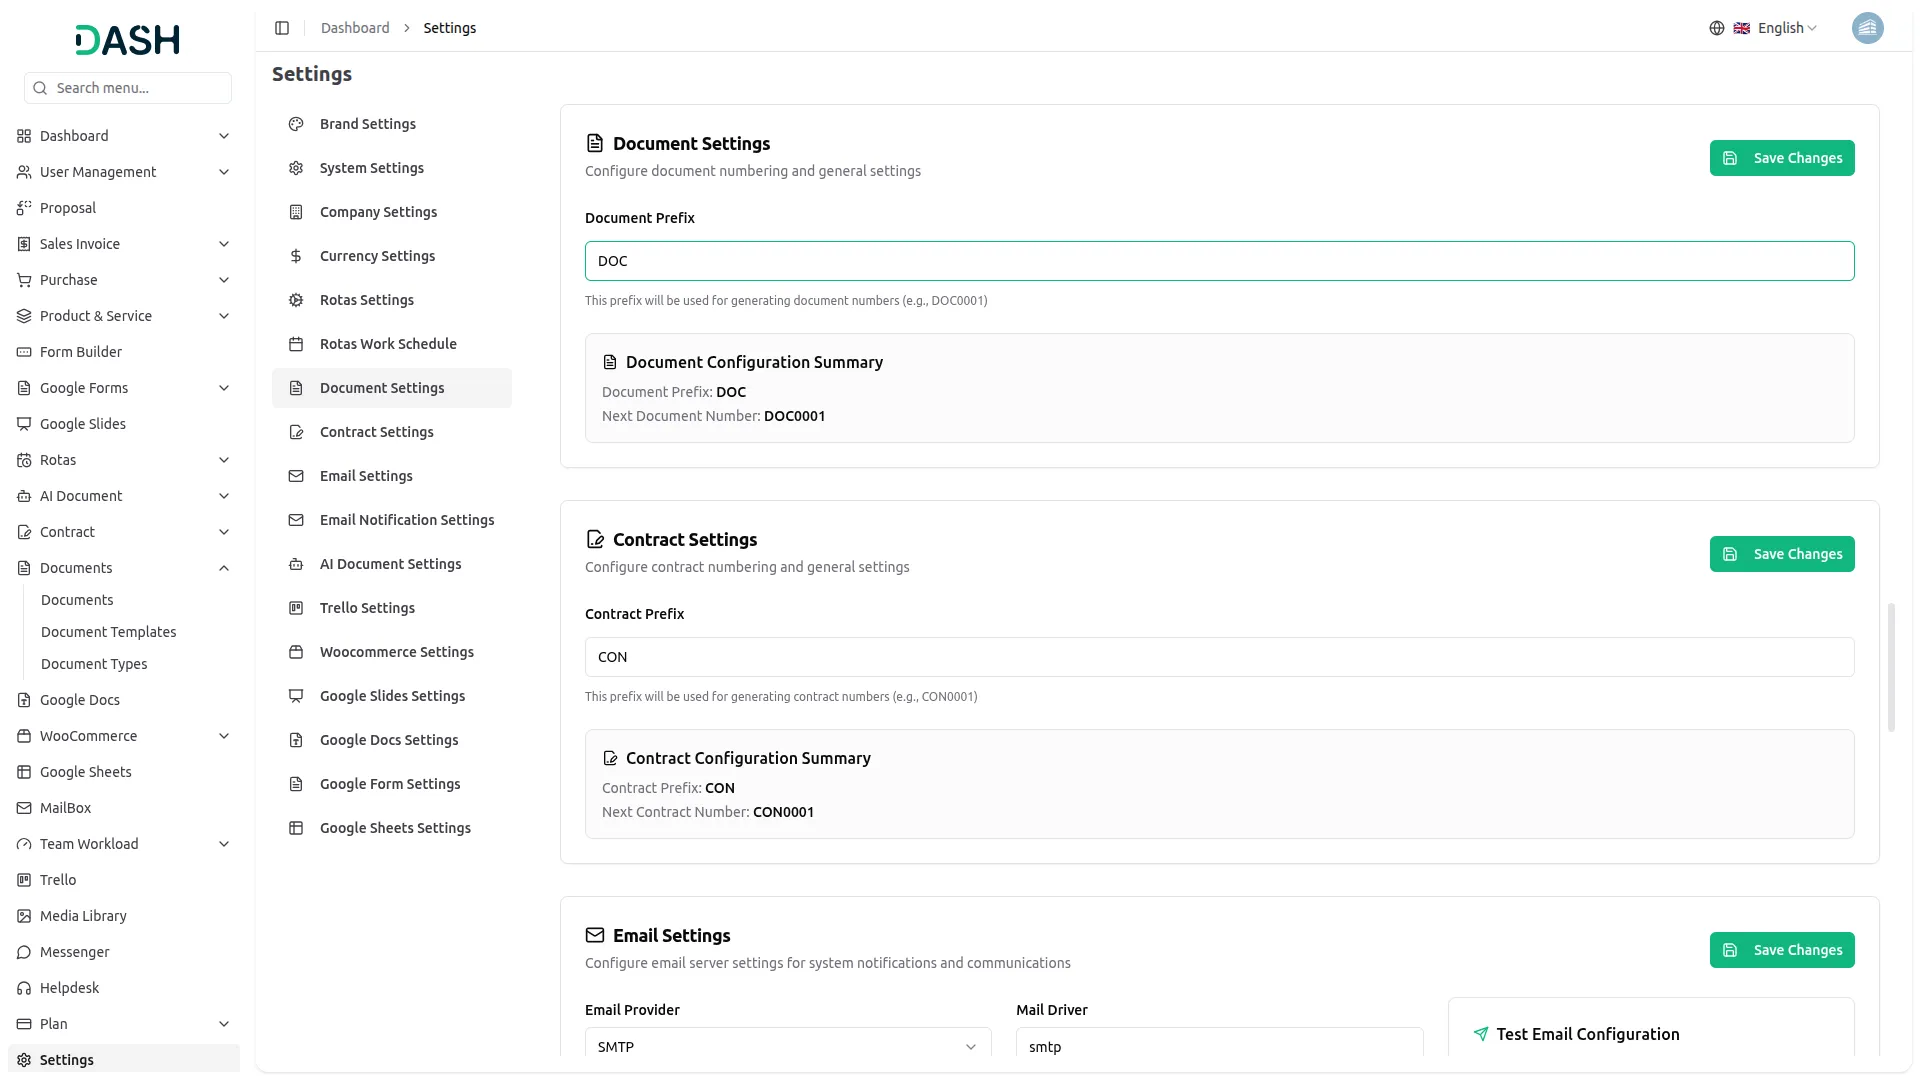
- Navigate to Settings and then Documents Settings to configure the system. Enter the Documents Prefix that will be used for generating document numbers automatically.
- This prefix helps maintain consistent document numbering across your organization. Click “Save” to apply the configuration.
Manage Document Type
- To create a new document type, click the “Create” button on the document type page. Enter a name for the document type. Use the Active toggle to set the status as active or inactive. Click Create to save the new document type.
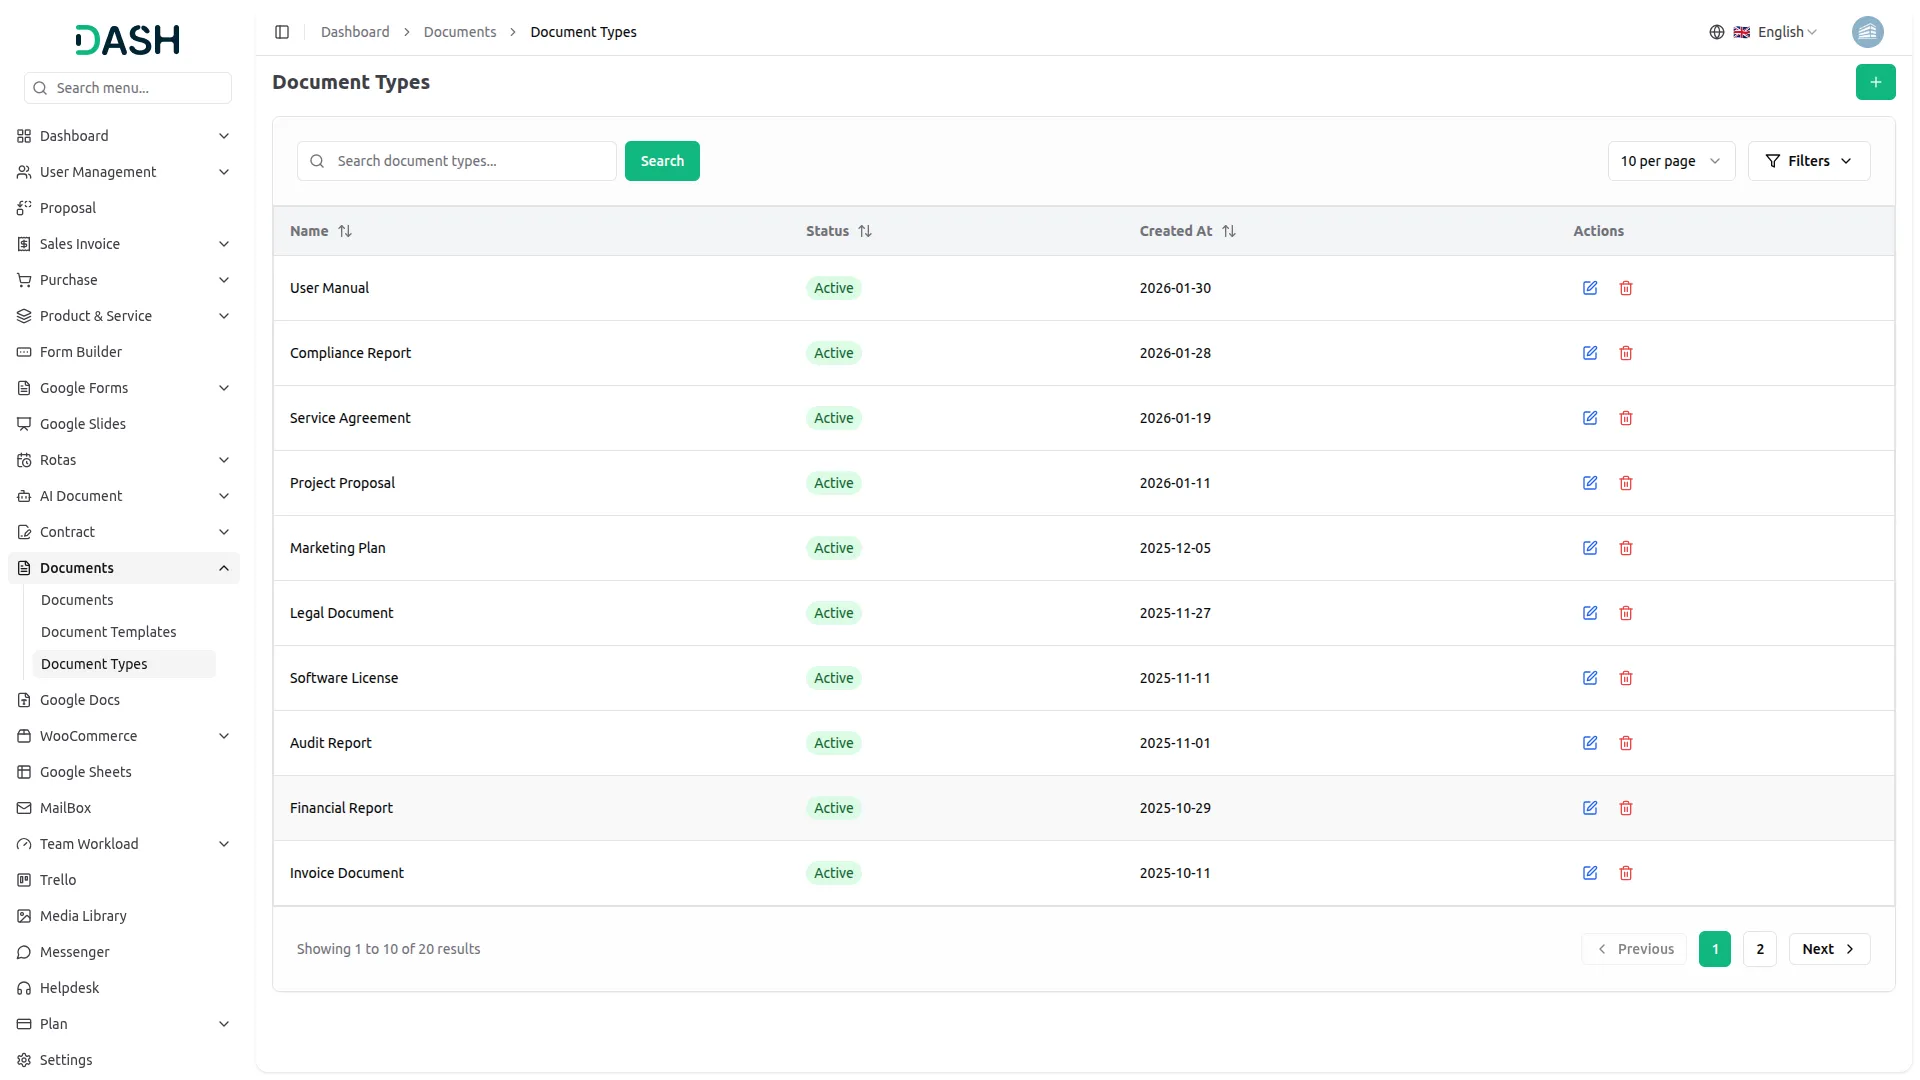
- The Document Types list page displays a table of the document type’s Name, Status, and Created At columns, along with an Action column. Use the search bar to find a specific document type.
- Click the All Status dropdown to filter data by status, Active or Inactive. In the Action column, you can use the edit option to update the document type’s details or the delete option to permanently remove it from the system.
Manage Documents
- To create a new document, click the “Create” button on the Manage Documents page. This opens the Create New Document form. Enter the document title in the Subject.
- Select the Document Type from the dropdown; if the required type doesn’t exist yet, click “Create document type” to add one (configure from the document type section). Set the Status of the document.
- Toggle Private Document on to restrict access; enabling this makes the Assigned Users field active, where you can select a user from the dropdown. If you need to add new users, click “Create users” (populated from the user management).
- Add any internal remarks in the Notes, and use the rich text editor to write a Document Description and an Additional Description. Click Create to save the document
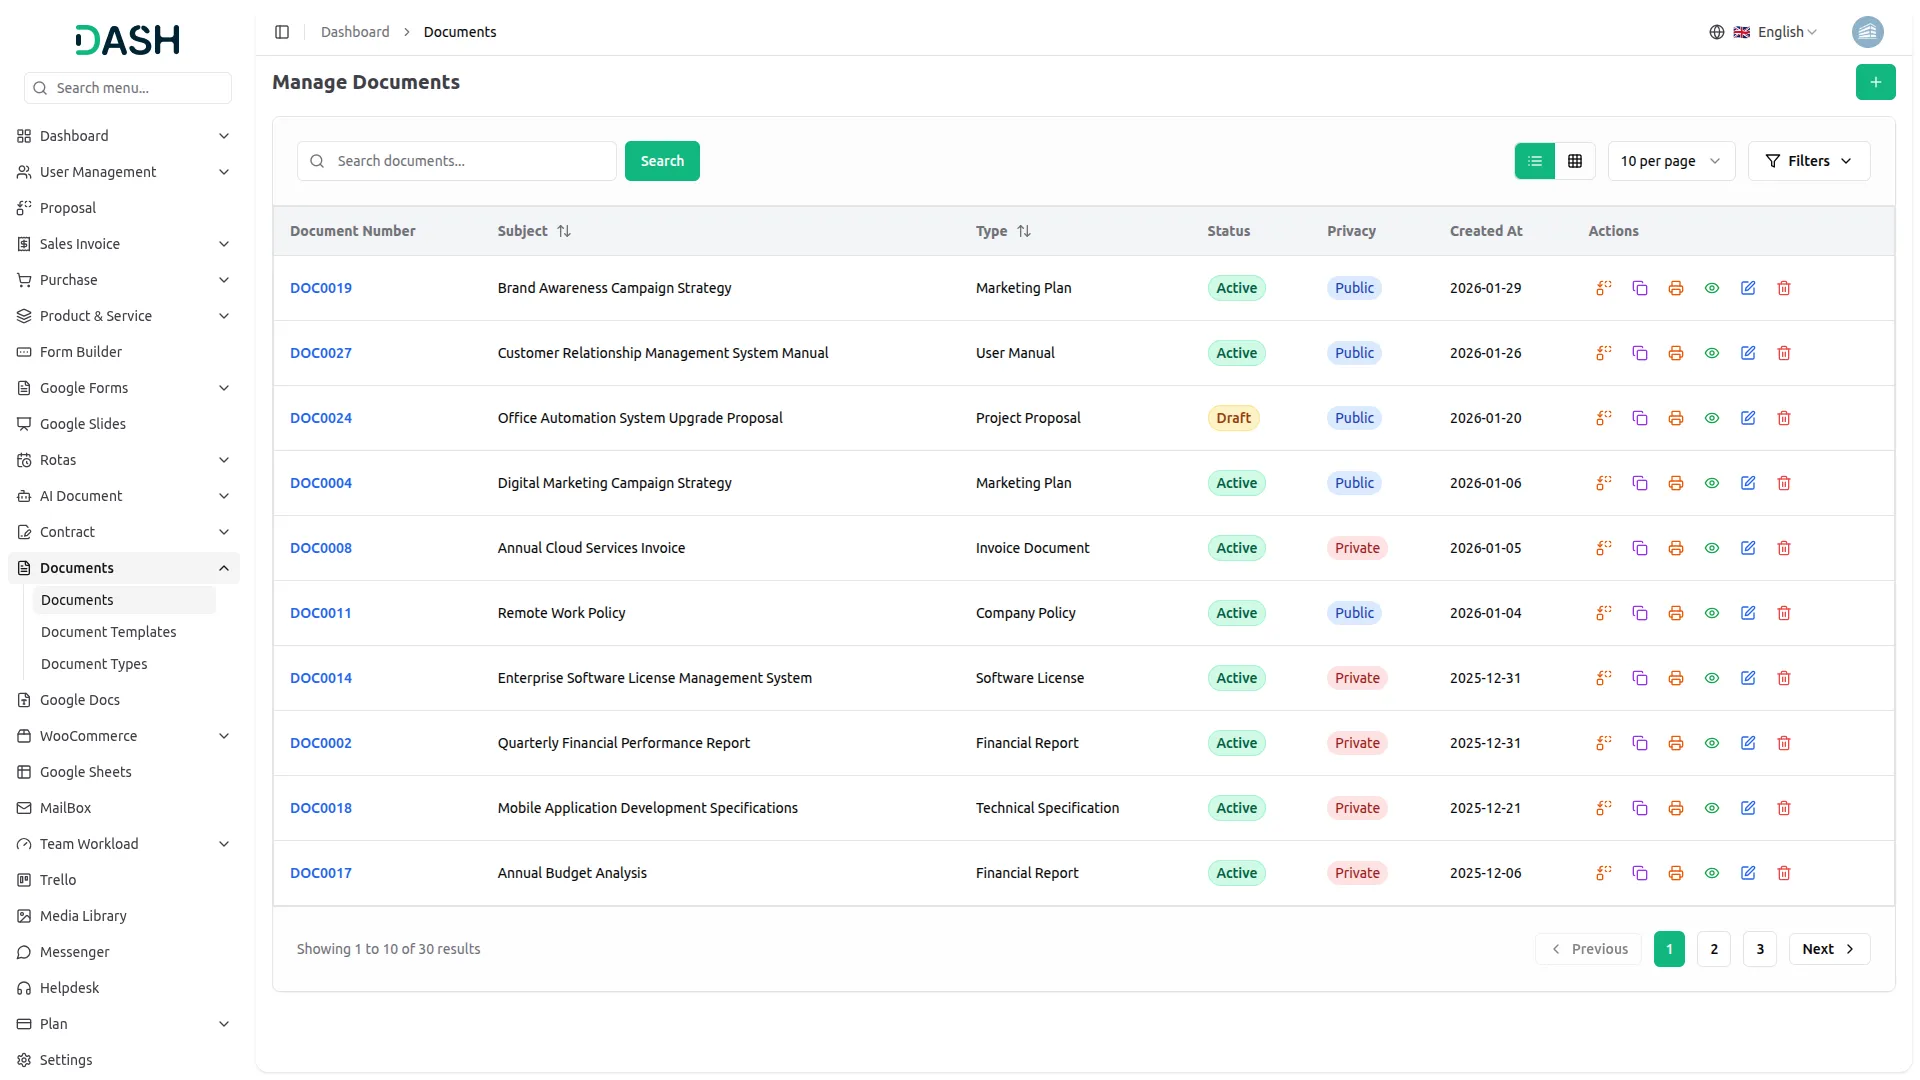
- The Manage Documents page displays summary cards at the top showing the Total, Private, Public, Active, Draft, Archived, Pending, and Approved document counts.
- The list page displays a table of the document’s Document Number, Subject, Type, Status, Privacy, Created At, and Actions columns. Use the search bar to find a specific document. Filter records using the All Types, All Status, and All Privacy dropdowns. Toggle between list view and grid view using the option next to the filters.
- The Action column provides the following options:
- Add Signature: Opens a popup where you can draw a Company Signature in the signature box. Click “Save Signature” to attach it to the document, “Clear” to erase the drawing, or “Cancel” to close without saving.
- Convert to Template: Opens a popup pre-filled with the document’s Subject. Select a Document Type and add Template Notes describing the template, and optionally assign users under Assigned Users. Toggle Privacy, Duplicate Comments, and Duplicate Notes on if you want the new template to carry over that data. Click “Convert” to create the template or “Cancel” to close.
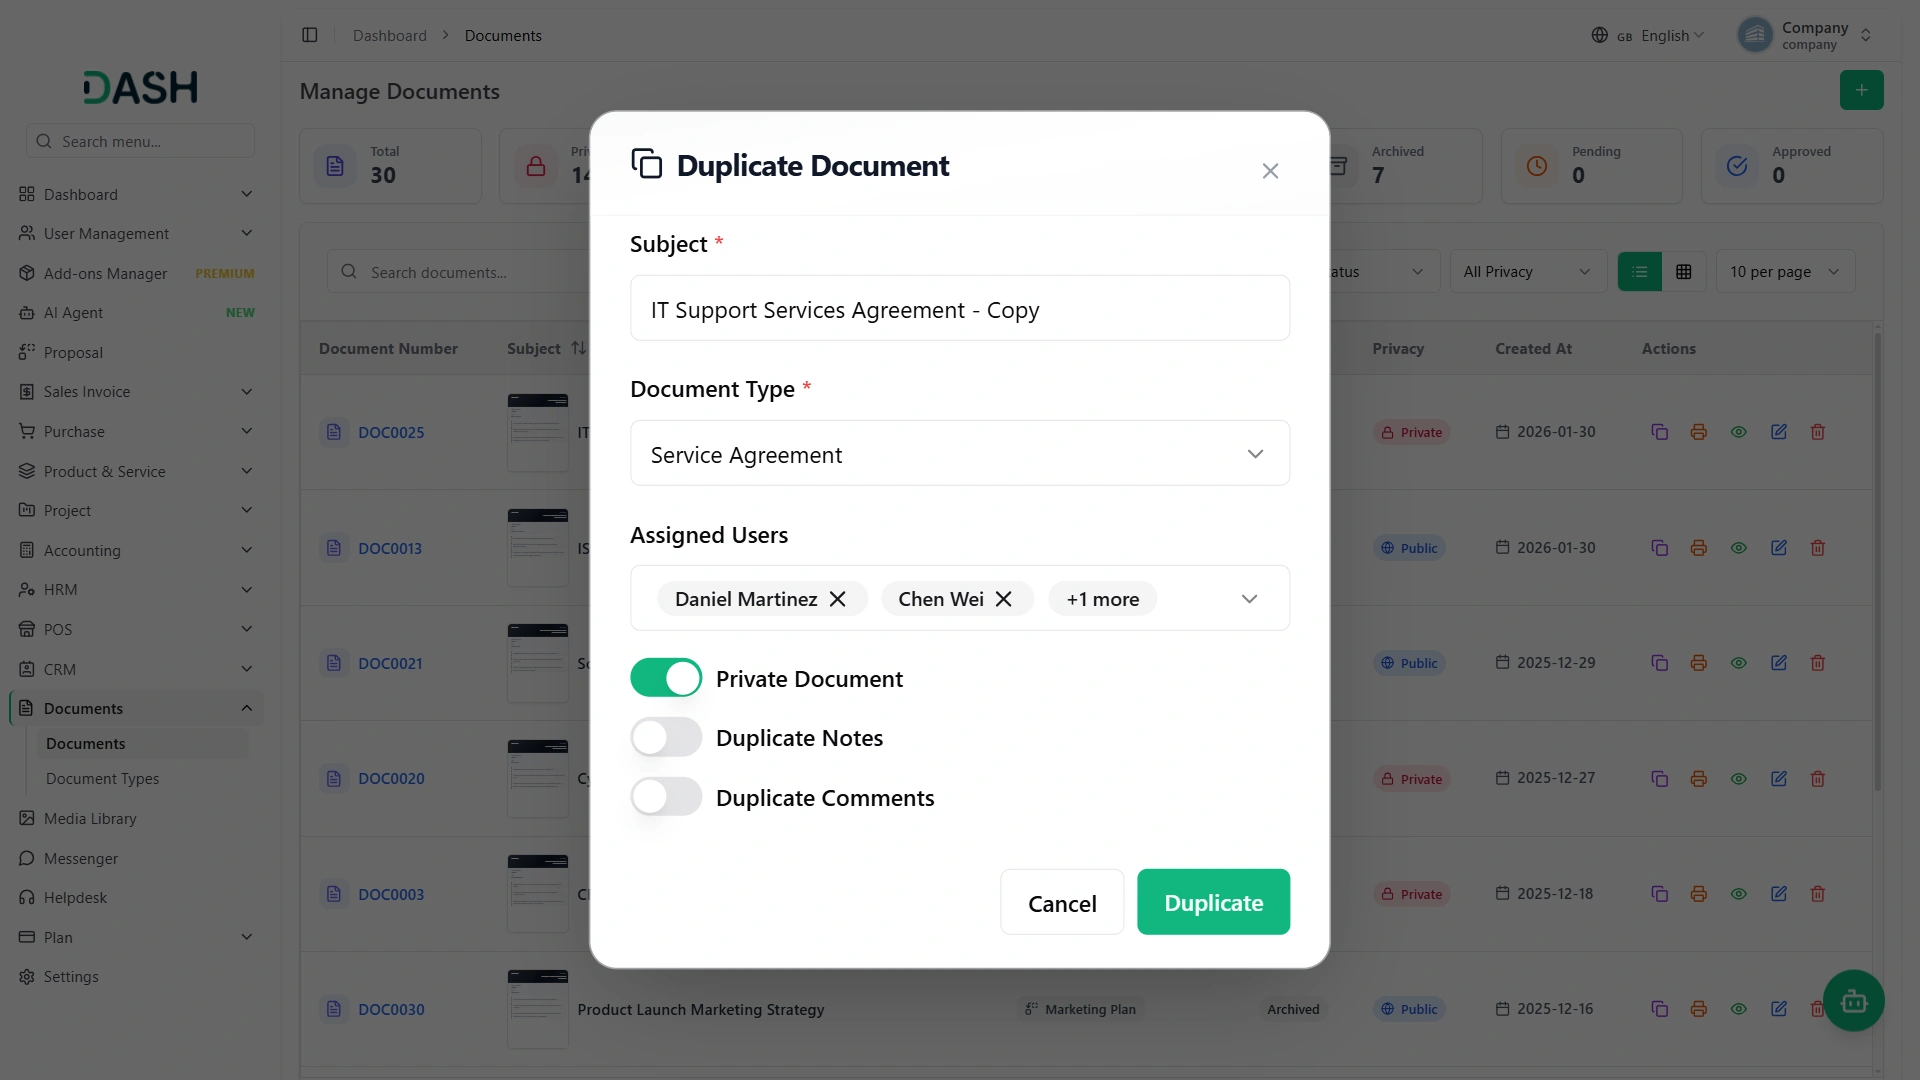
- Duplicate: Opens a popup with the Subject pre-filled as a copy. Select a Document Type, and optionally assign users under Assigned Users. Toggle Private Document, Duplicate Notes, and Duplicate Comments as needed. Click “Duplicate” to create the copy or “Cancel” to close.
- Download: Downloads the document directly, while View opens the document details page, where you can update its information using the Edit option or remove it from the system using the Delete option.
- When you click a View button opens the Details Document page, split into two panels: the left panel shows document data across four tabs, and the right panel shows a Document Preview with print, expand, zoom, and page navigation controls.
Details Tab
Displays the document’s core information under Document Information: Document Number, Document Type, Created By, Created Date, Updated Date, Category, Status, and Privacy, followed by Notes, Document Description, and Additional Description sections.
Attachments Tab
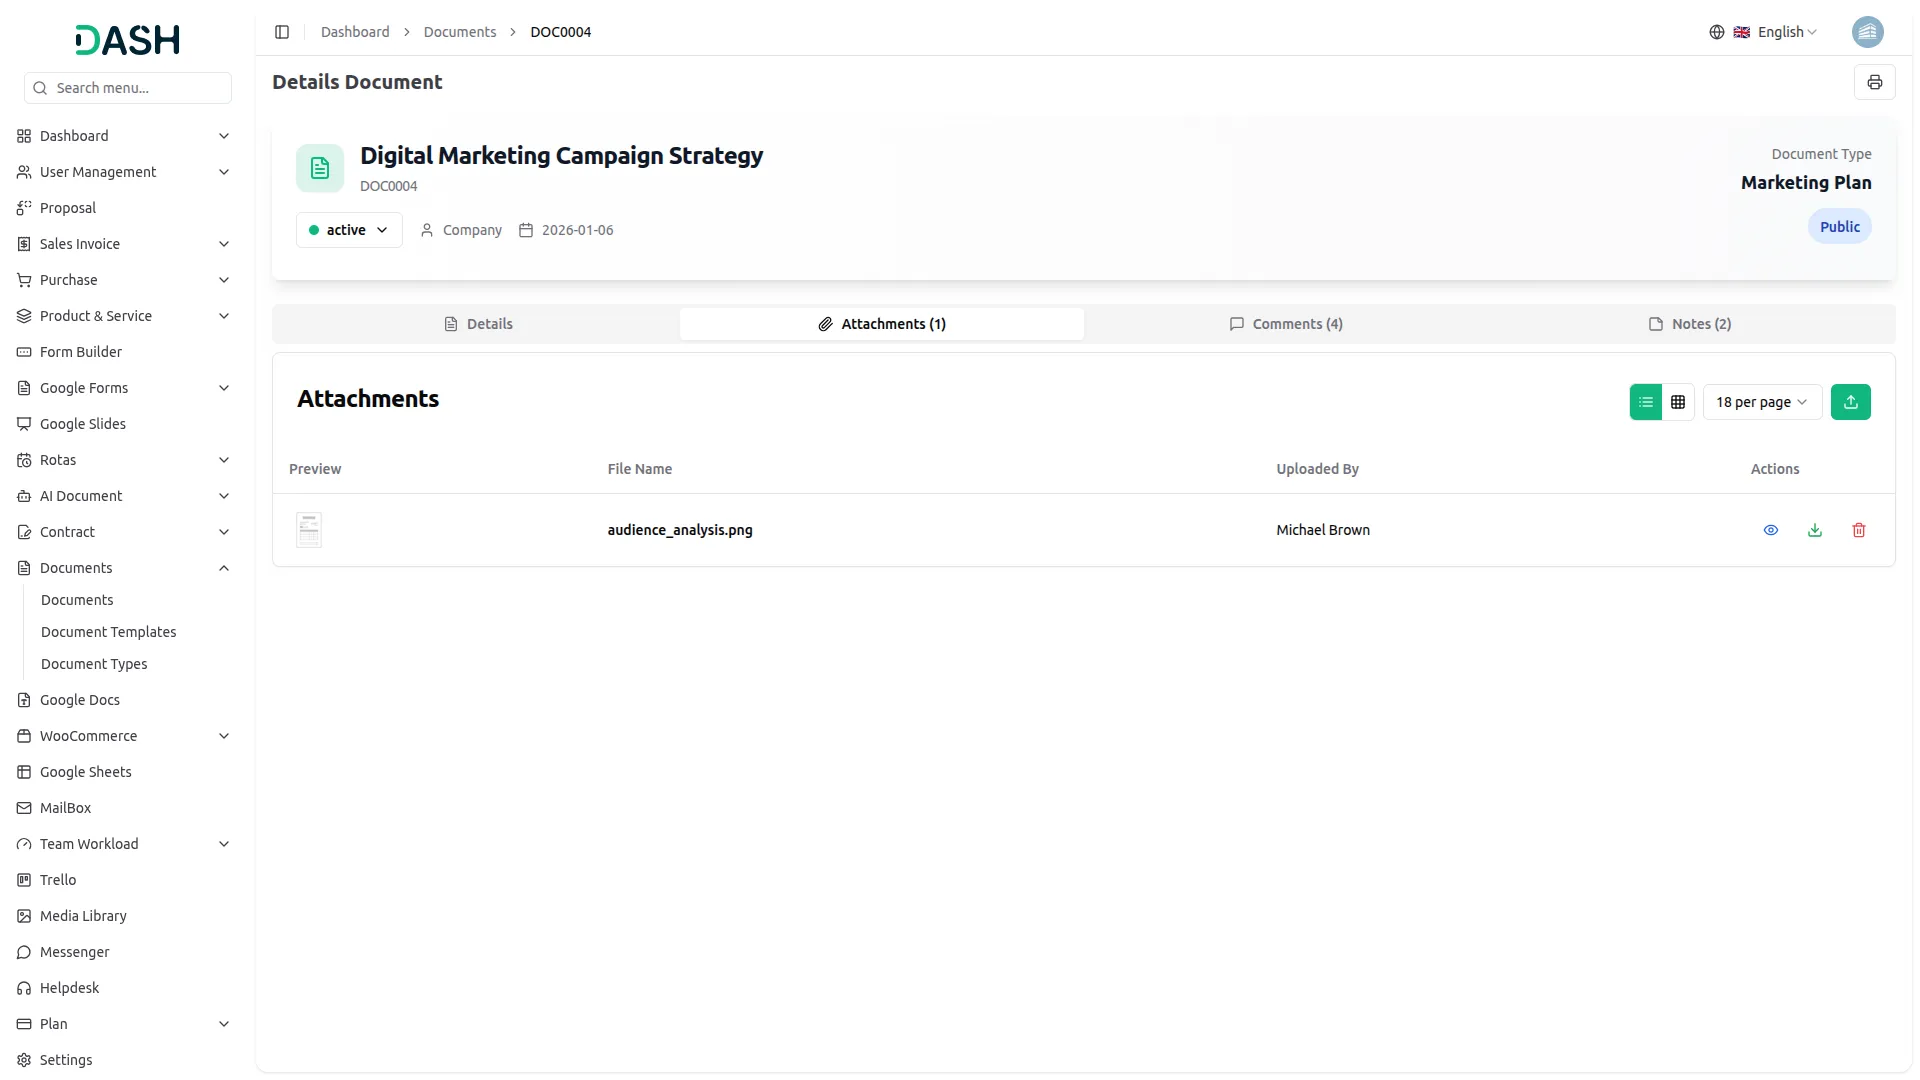
Lists uploaded files in a table with Preview, File Name, Uploaded By, and Actions columns. In the Actions column, you can view, download, or delete each attachment.
Comments Tab
Displays a comment thread for the document. Use the search bar. Type in the “Write your comment…” box and click “Create” to post a new comment. Each comment shows the commenter’s name and timestamp.
Notes Tab
Works the same way as the Comments tab: write a new note in the “Write your note…” box, and click “Create” to save it. Each note displays the author’s name and timestamp.
- When clicking Show, you will see the document details page with several options. Use the Duplicate button to create a copy of the document with options to include or exclude notes and comments.
- When duplicating documents, you can choose which elements to copy by checking the Notes Duplicate and Comments Duplicate checkboxes. This allows you to create document copies with or without the original collaborative content.
-
- Document scope determines visibility – Private documents can be assigned to multiple users and are visible only to the assigned users, while Public documents are visible to all Staff users, even if no specific staff is assigned, as long as the document is Active.
- Note that when duplicating documents, attachments cannot be converted to the new document and must be uploaded separately.
- Click Download to get a PDF version of the document. Use Preview to view the document before downloading. The Status Drop Down allows you to change the document status as needed.
- The document details page displays cards showing counts for Attachments, Comments, and Notes, along with Document Details including Subject, Type, Scope, User information.
- You can update Document Notes, Document Description, and Additional Description in the form section and click “Save” to update the information.
- In the Attachments section, upload files by selecting them from your computer. View the list of uploaded attachments with file path and size information. Use Preview to view files, Download to save files locally, or Delete to remove attachments.
-
- The Comments section provides a textarea where you can type comments and click “Send” to post them. View all comments with user profiles, comment text, timestamps, and usernames. Comments marked as “edited” show modification history. Use Edit to modify your comments or Delete to remove them.
- In the Notes section, write notes in the textarea and click “Send” to add them. See all notes with user profiles, note content, timestamps, and usernames. Notes show “edited” status when modified. Use Edit to update notes or Delete to remove them.
Categories
Related articles
- Porter’s Five Forces – WorkDo Dash SaaS Add-On Guide
- Bakery Store – WorkDo Dash SaaS Add-On Guide
- Discord – TicketGo Add-On Guide
- Instagram Follow – vCard SaaS Add-On Guide
- QuickBooks – WorkDo Dash SaaS Add-On Guide
- Support Ticket Guide – eCommerceGo SaaS
- Collaborative Services – BookingGo SaaS Add-On Guide
- Google Wallet Settings – vCard SaaS Guide
- Checkout Attachment – eCommerceGo SaaS Add-On Guide
- Chat Pin – TicketGo Add-On Guide
- Checkout – BookingGo SaaS Add-On Guide
- BlueSnap – BookingGo SaaS Add-On Guide
We're Here to Help - Let's Talk
Have questions about our solutions, customization services, or business tools? Our team is here to help you. let's talk.