Marketing Plan Integration in Dash SaaS
The Marketing Plan Add-On is designed to help users build, manage, and execute comprehensive marketing strategies directly within the platform.
Introduction
The Marketing Plan Add-On is designed to help users build, manage, and execute comprehensive marketing strategies directly within the platform. This add-on allows users to structure their marketing goals, define their target audiences, allocate resources, track performance, and align their marketing efforts with overall business objectives. With a clean interface and detailed input fields, it ensures that every aspect of a marketing plan from campaign objectives to channel strategies is clearly documented and accessible. This documentation provides a step-by-step guide to help you understand how to access the Marketing Plan Add-On, create new plans, manage existing ones, and make the most out of its features for effective marketing execution.
How to Install the Add-On?
To Set Up the Marketing Plan Add-On, you can follow this link: Setup Add-On
Note: This Add-On is dependent on the Planning Add-On, so you need to purchase it first.
How to Use the Marketing Plan Add-On?
Managing the Marketing Plan
- The default list view displays all Marketing Plans in a table format with columns showing Thumbnail Image, Creativity Name, Status, Stage, Challenge, total number of assigned Users, Roles, Rating, total number of Comments, End Time, and Actions. Use the search function to find specific plans quickly, and use the export function to download data in various formats when needed.
- In the Actions column, you can click “Print” to generate a PDF version of the Marketing Plan, “View” to see all details. “Edit” to modify any information in the plan, or “Delete” to remove the plan permanently.

Creating a Marketing Plan
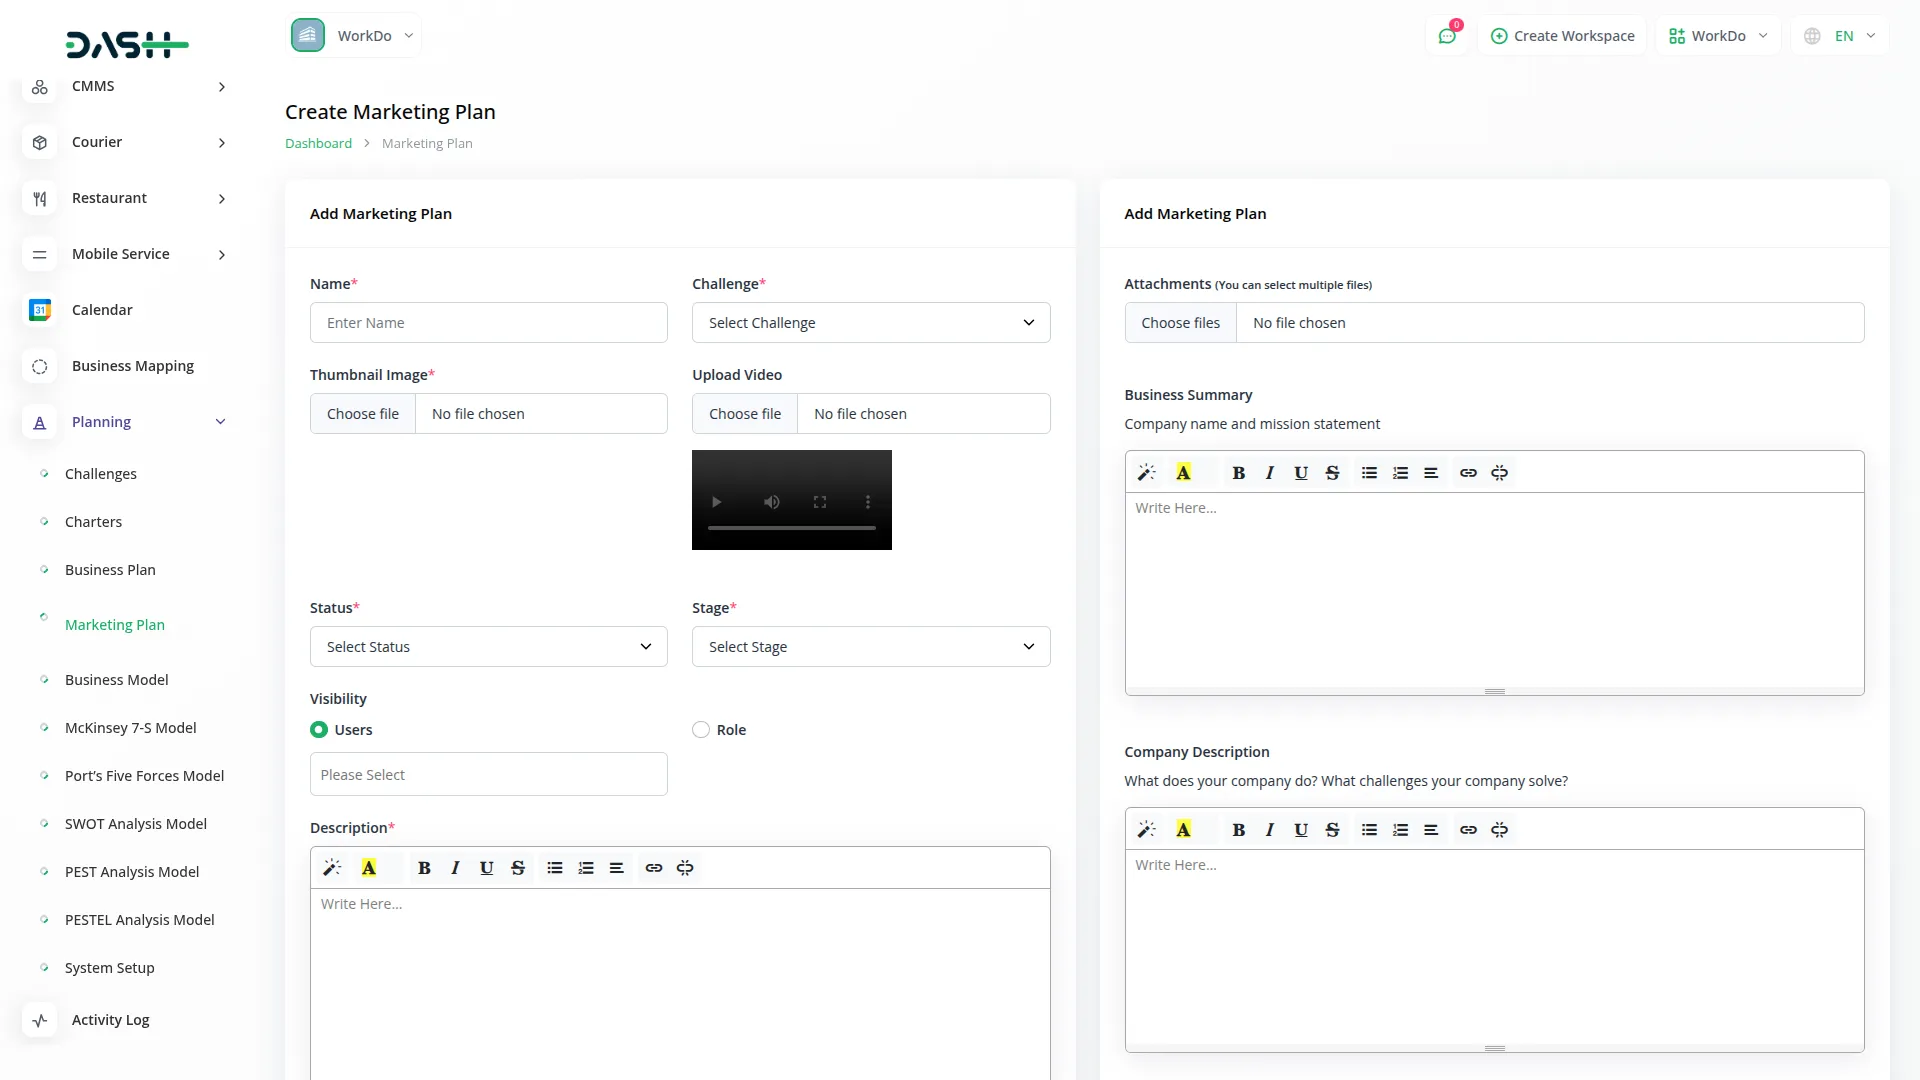
- To create a new Marketing Plan, click the “Create” button at the top of the page. Enter the name of your marketing plan and select a challenge from the Challenge. Note that you can only create a Marketing Plan if the current date is before the challenge end date.
- Upload a thumbnail image to represent your marketing plan visually, then upload a video file if needed for additional context or presentations. Select the status from the system setup options and choose the appropriate stage from the available system setup stages.
- Next, assign users from the Users who will be involved in this marketing plan and select their roles from the Roles. Add a detailed description explaining the purpose and scope of your marketing plan.
- Upload any supporting attachments that might be helpful for the plan. Fill in the business summary section with key business information, then add your company description. Enter details about your team members and their responsibilities in the Team field.
- Define your business initiative and identify your target market in the respective fields. Select your marketing channels from the available options and enter your budget information. Add any additional notes in the Notes section and click “Create” to save your Marketing Plan.

View Marketing Plan Details
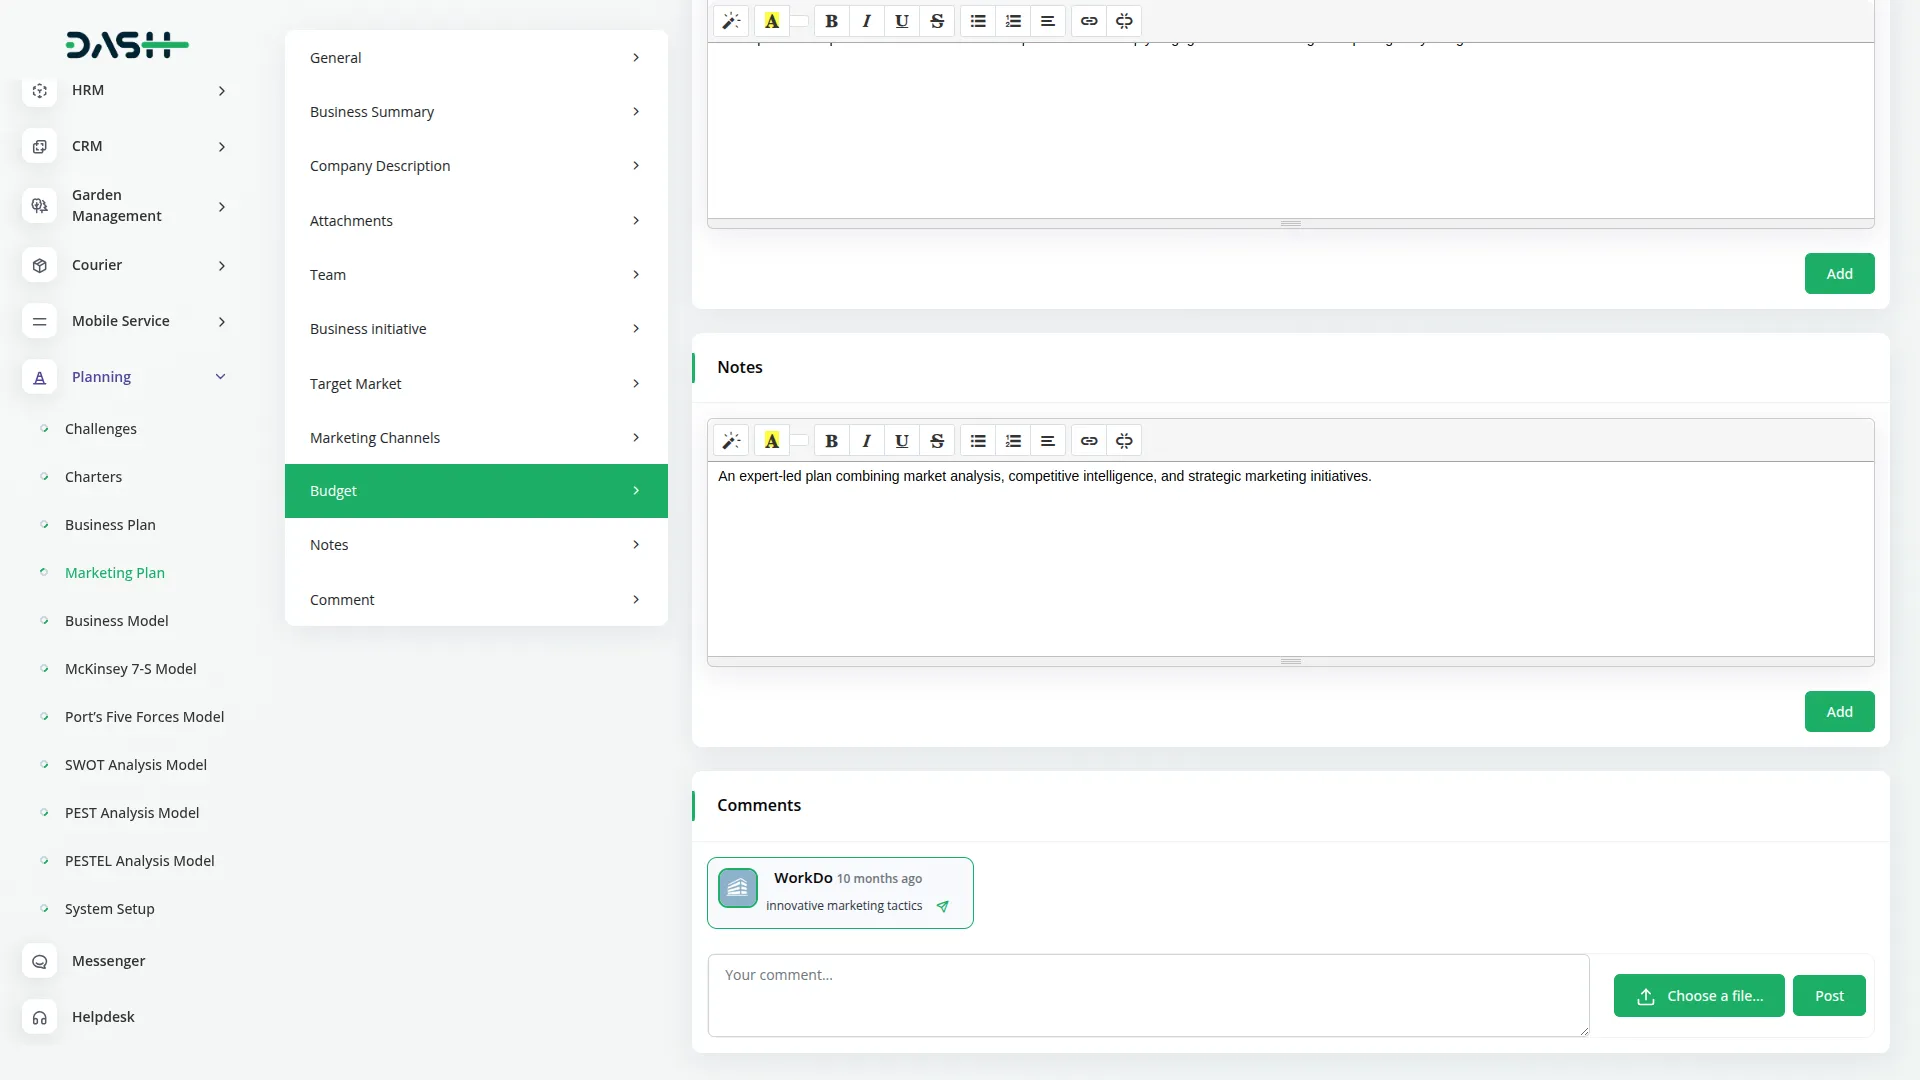
- When you click the “View” button in the Actions column, you will see a detailed page with expandable sections. The “General” section is highlighted in green and contains basic information like name, associated challenge, thumbnail image, uploaded video, current status, stage, assigned users, and their roles.
- Click on “Business Summary” to expand and view the complete business summary of the marketing plan. You can use the “Add” button below this section to add additional business summary content. The “Company Description” section shows company information with an “Add” button for additional company details.
- The “Attachments” section shows all uploaded supporting files, with an “Add” button to upload more attachments. Expand “Team” to review team member information and use the “Add” button to add more team details.
- The “Business Initiative” section displays business initiatives and goals with an “Add” button to add more initiative information. “Target Market” shows target market analysis with an “Add” button to include more market data.
- Expand “Marketing Channels” to view selected marketing channels and strategies with an “Add” button to include additional channel information. The “Budget” section displays budget information with an “Add” button to add more budget details.
- The “Notes” section contains any additional notes added during creation, with an “Add” button to include more notes. In the “Comment” section, you can add new comments related to the marketing plan and attach files to your comments using the “Add” button.

Kanban View
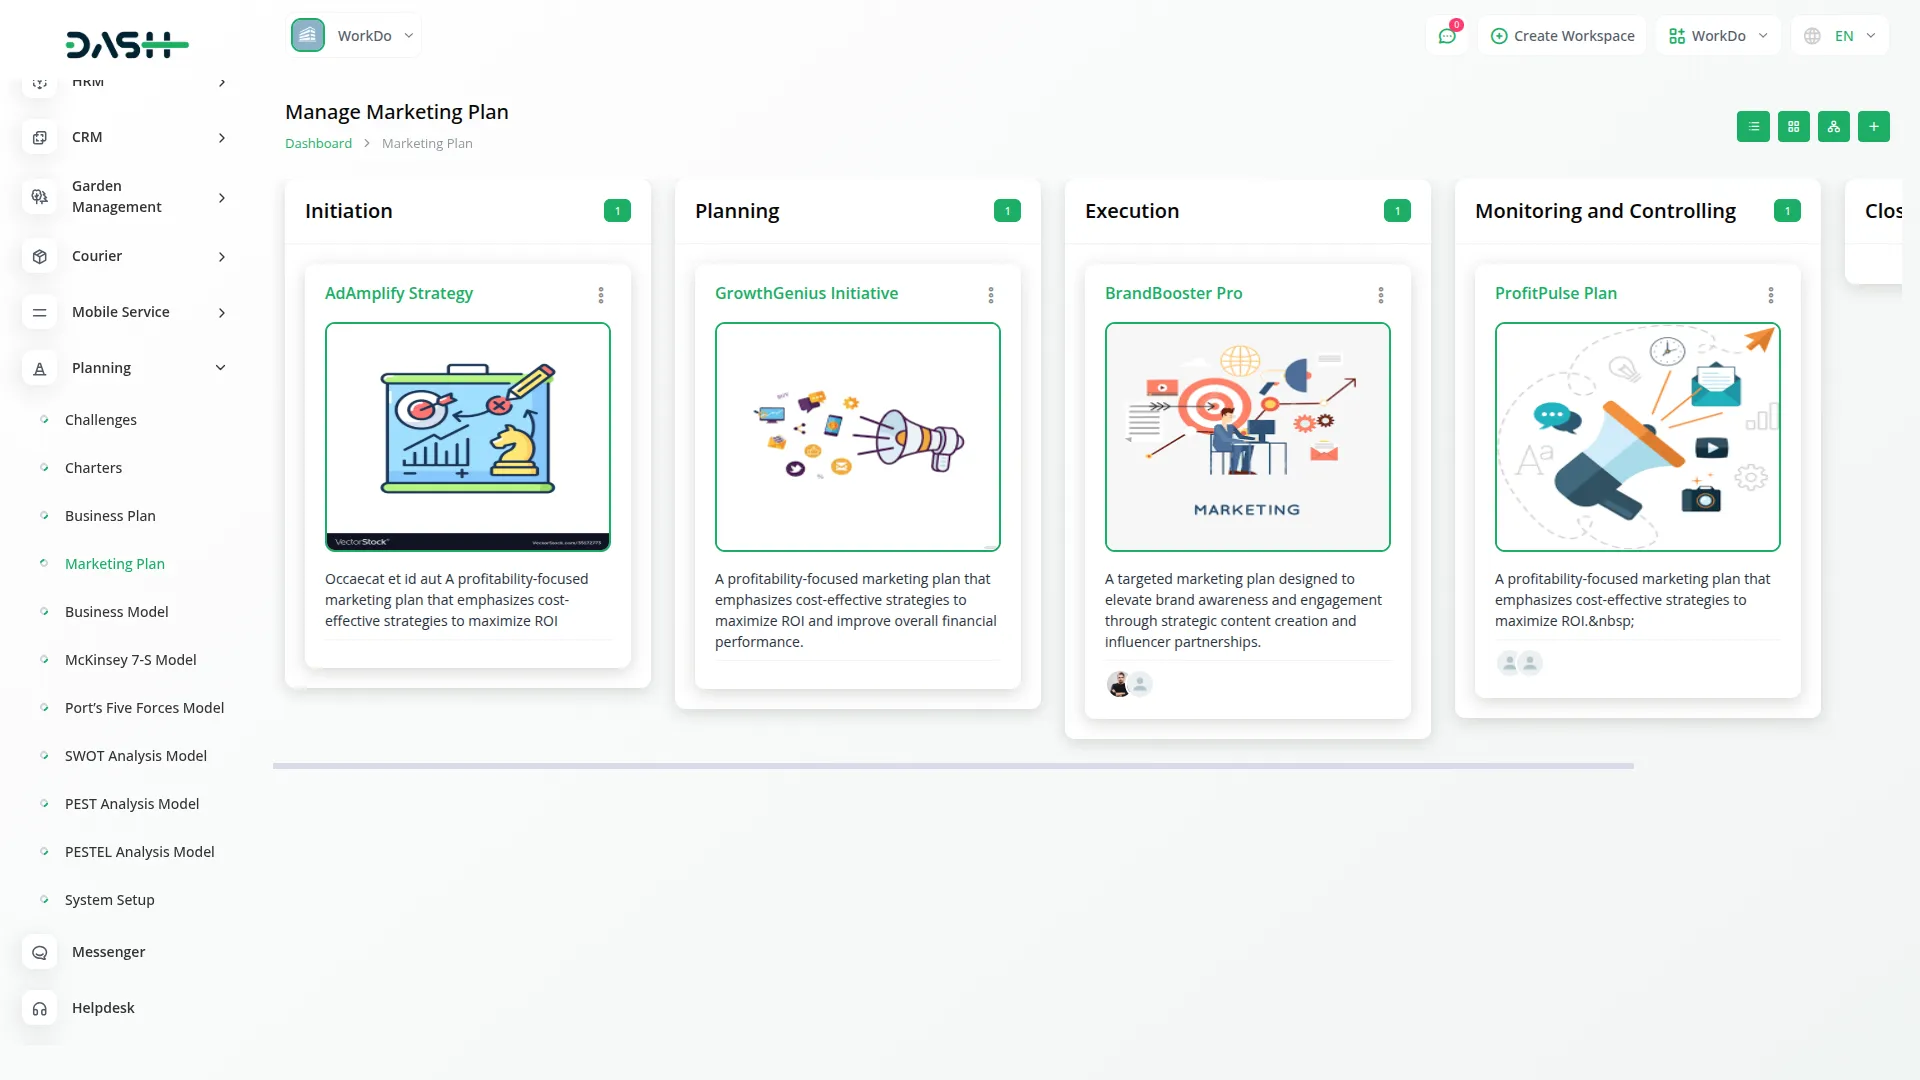
- Click the “Kanban View” button to display your Marketing Plans in a board layout with columns representing different stages. Each plan appears as a card showing the thumbnail image, creativity name, status, challenge, total number of assigned users.
- Each card also includes action buttons for Print, View, Edit, and Delete. You can drag and drop cards between columns to update their stage status easily. This view is perfect for tracking the progress of multiple marketing plans and managing workflow stages visually.

Grid View
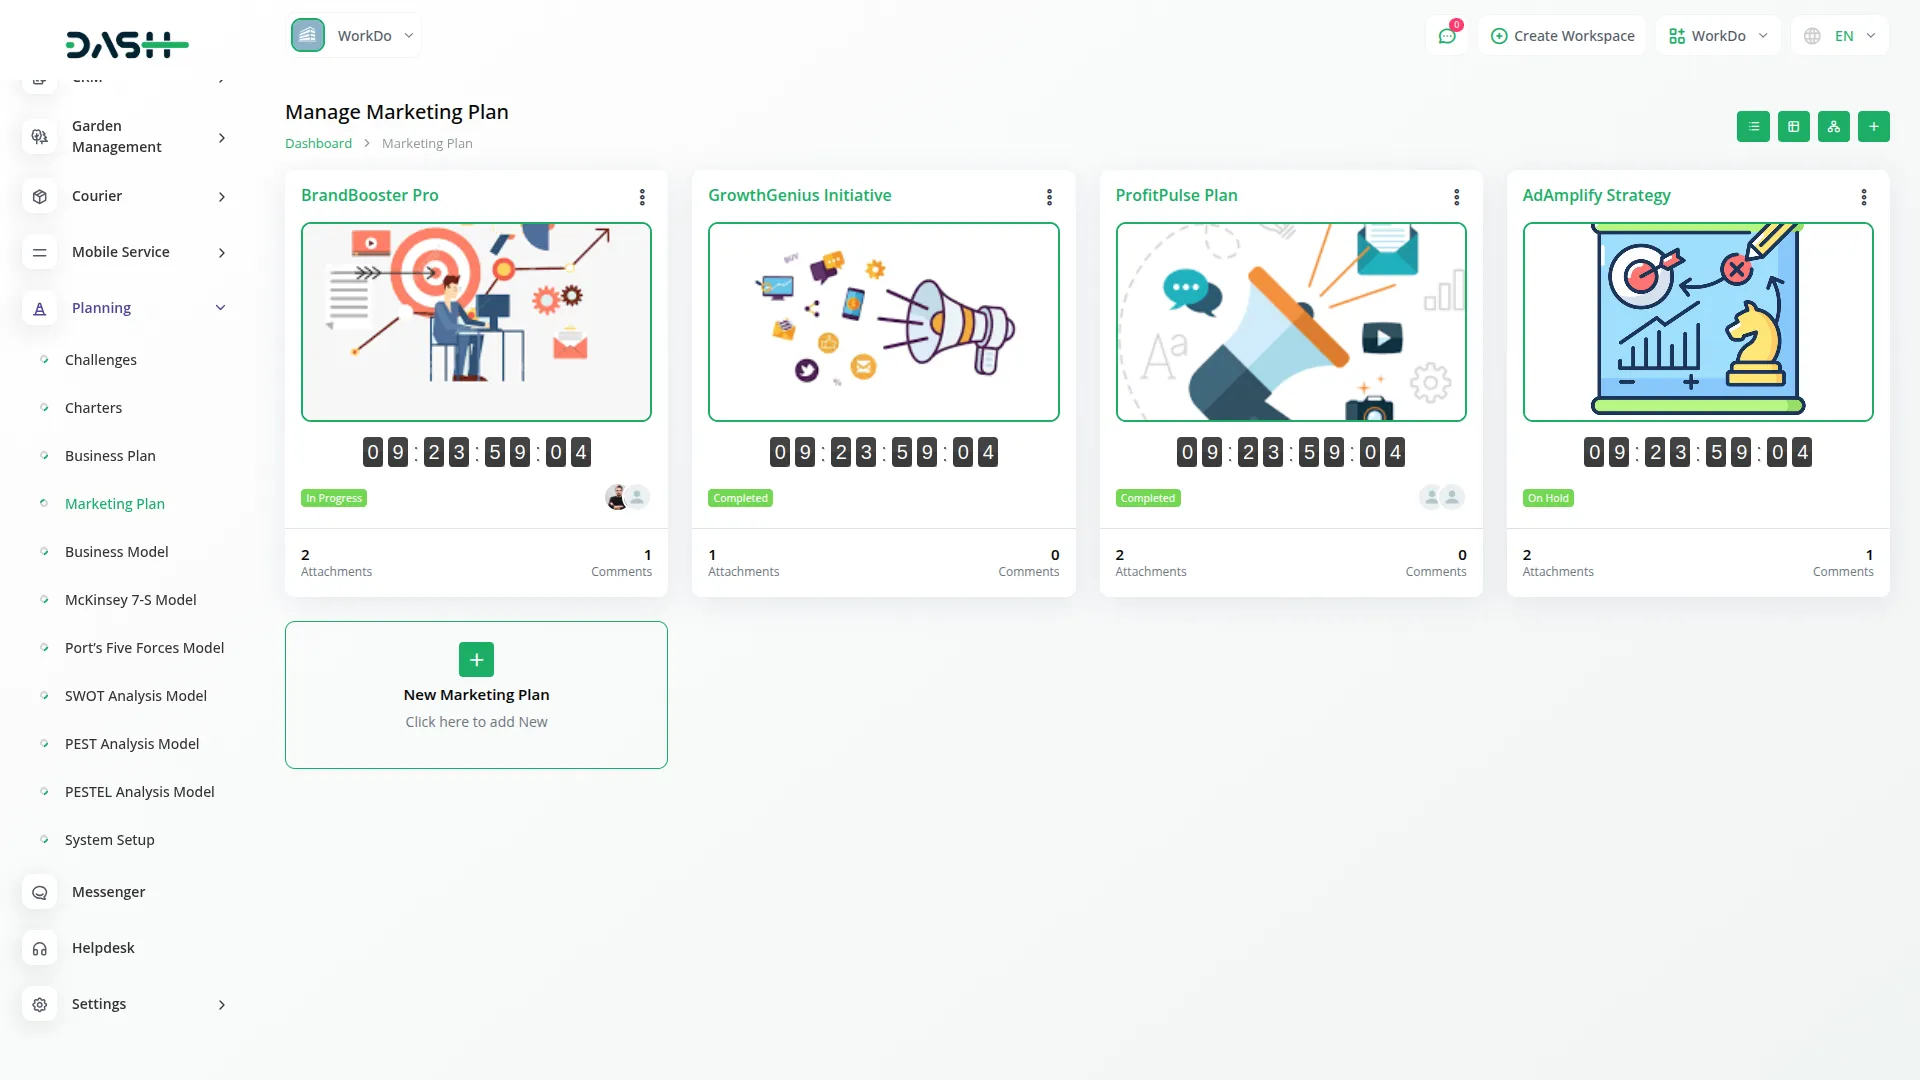
- Click the “Grid View” button to see all Marketing Plans displayed in a card-based layout. Each plan appears as an individual card showing the thumbnail image, creativity name, status, stage, challenge, total number of assigned users, roles, rating, total number of comments as well as total number of attachments, and end time.
- Each card also includes action buttons for Print, View, Edit, and Delete. This view provides a visual overview of all your marketing plans in an organized grid format, making it easy to browse and compare different plans at a glance.

Tree Structure View
- To access Tree Structure View, click the “Tree Structure View” button at the top of the page. This view presents your Marketing Plans in a hierarchical format based on their associated Challenges, offering a structured visualization of how each plan aligns with your broader marketing goals.
- In the tree structure, overarching campaigns or objectives appear as parent nodes, while the associated individual Marketing Plans are displayed as child nodes beneath them.
- This organization helps you clearly understand how different marketing strategies contribute to specific goals, allowing you to trace the alignment of tactics with outcomes. It enhances strategic oversight, ensures that all critical initiatives are covered, and highlights areas where additional planning or support may be needed.

Categories
Related articles
- Product CSV – eCommerceGo Addon
- Tour & Travel Management Integration in Dash SaaS
- eBook Integration in Dash SaaS
- Fatora Integration in Dash SaaS
- Email Box Integration in Dash SaaS
- Microsoft To Do Integration in Dash SaaS
- Double Entry Integrational Entry Integration
- Inventory Integration in Dash SaaS
- CCTV & Security System Integration in Dash SaaS
- Flexible Duration Integration in BookingGo SaaS
- How To Generate Token of Meta
- Rotas Integration in Dash SaaS
Reach Out to Us
Have questions or need assistance? We're here to help! Reach out to our team for support, inquiries, or feedback. Your needs are important to us, and we’re ready to assist you!


Need more help?
If you’re still uncertain or need professional guidance, don’t hesitate to contact us. You can contact us via email or submit a ticket with a description of your issue. Our team of experts is always available to help you with any questions. Rest assured that we’ll respond to your inquiry promptly.
Love what you see?
Do you like the quality of our products, themes, and applications, or perhaps the design of our website caught your eye? You can have similarly outstanding designs for your website or apps. Contact us, and we’ll bring your ideas to life.
