Jira Add-On WorkDo Dash Detailed Documentation
The Jira Integration System is a comprehensive software solution designed to seamlessly connect and manage your Jira projects, boards, issues, and sprints from within your application.
Introduction
The Jira Integration System is a comprehensive software solution designed to seamlessly connect and manage your Jira projects, boards, issues, and sprints from within your application. This system enables organizations to efficiently track project progress, manage development workflows, and coordinate team activities by integrating directly with Atlassian Jira. The system provides complete project management capabilities, including project categorization, board management, issue tracking, sprint planning, and user management. It supports both Kanban and Scrum methodologies, allowing teams to work with their preferred agile framework while maintaining centralized oversight and reporting capabilities.
How to Install the Add-On?
To Set Up the Jira Add-On, you can follow this link: Setup Add-On
How to Use the Jira Add-On?
Settings Configuration
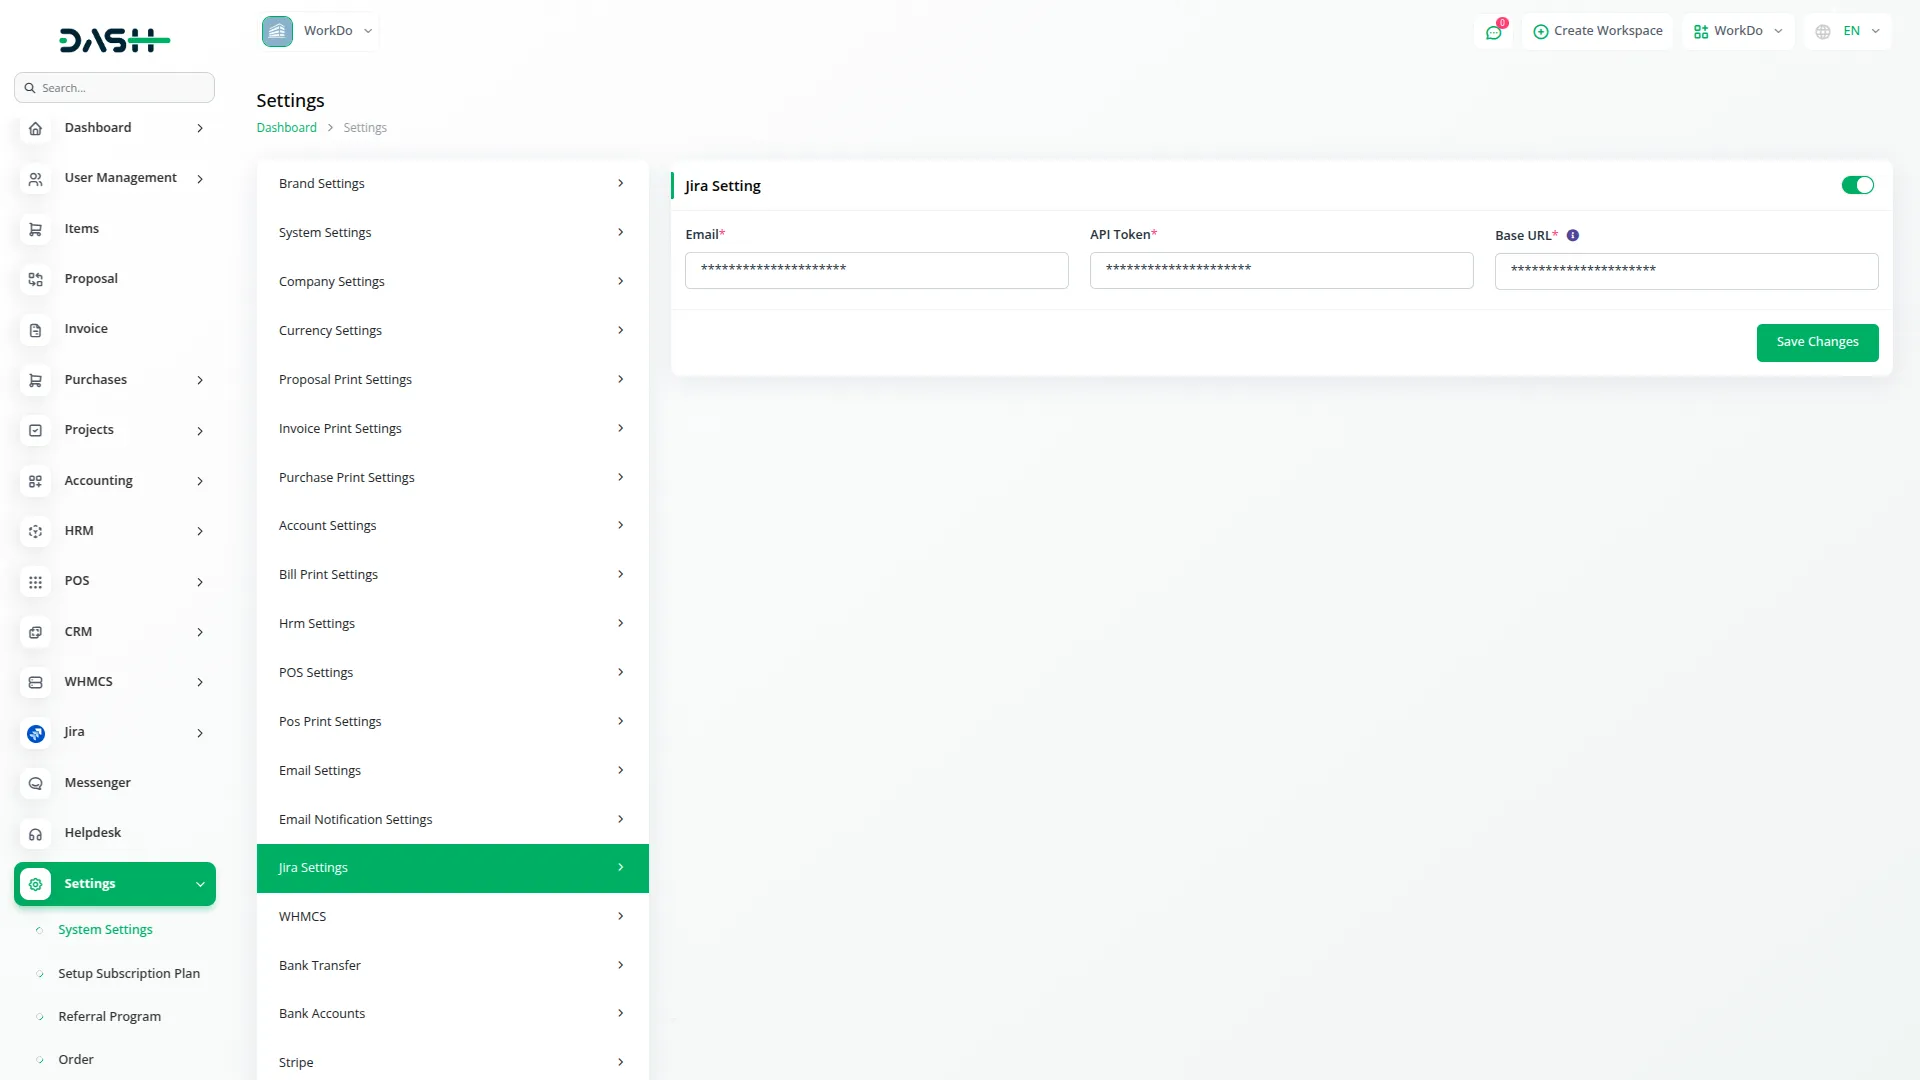
- The Settings Configuration section allows you to establish the connection between your application and your Jira instance by configuring the necessary authentication credentials.
- To set up the Jira integration, navigate to Settings and then select Jira. You will need to configure three essential fields: Email, API Token, and Base URL.
- For the Email field, enter the email address associated with your Jira account. This should be the same email you use to log into your Atlassian account.
- To generate an API Token, follow these steps: Log in to your Atlassian account at https://id.atlassian.com/manage-profile/security
- Under the “API token” section, click “Create and manage API tokens” or go directly to https://id.atlassian.com/manage-profile/security/api-tokens.
- Click “Create API token”, give it a meaningful label for identification, and click “Create”. Copy the generated token and paste it into the API Token field in your application.
- For the Base URL, go to your Jira instance in your browser and copy the URL from the address bar, such as https://yourdomain.atlassian.net. Paste this URL into the Base URL field to complete the configuration.
- Once all fields are filled, save the configuration to establish the connection with your Jira instance.

System Setup
The System Setup section provides essential configuration options for organizing your Jira integration, including project categories and custom filters.
Manage Project Categories
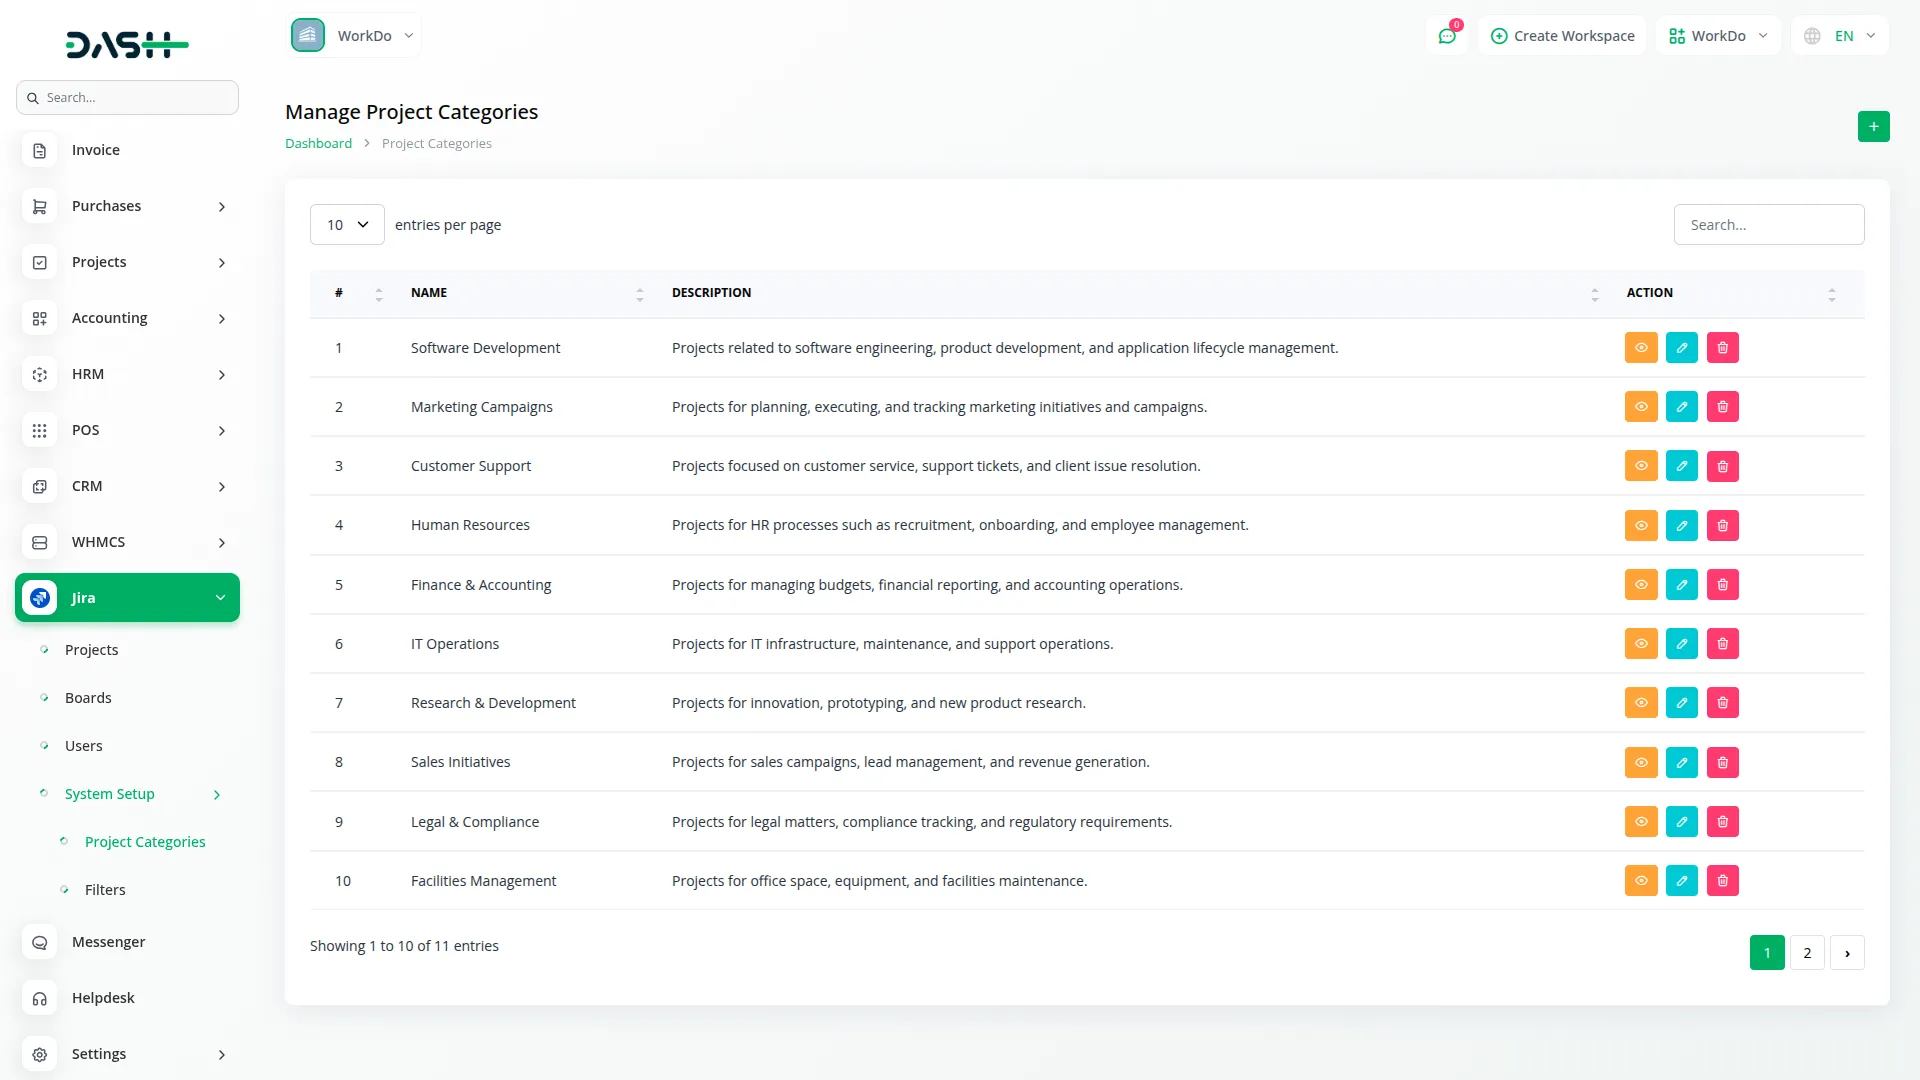
- To create a new project category, click the “Create” button on the Project Categories page. Fill in the category name and provide a description that explains the purpose or scope of this category.
- The list page includes Add and Search buttons for easy management. The table displays columns for Name, Description, and Actions.
- Available actions include the View button to view category details, Edit to modify the category information, and Delete to remove the category from the system.

Manage Filters
- To create a new filter, click the “Create” button on the Filters page. Enter the filter name and description. In the JQL Query field, write your Jira Query Language statement to define what issues this filter should return. You can also check the “Add to favorites” checkbox to make this filter easily accessible.
- The list page features Add and Search buttons for filter management. The display columns for Name, Description, and Actions. You can use the View button to view filter details, Edit to modify the filter settings, or Delete to remove the filter.

Manage Projects
- To create a new project, click the “Create” button on the projects page. Enter the project name and provide a unique project key that will identify your project. Select a category from the available project categories and assign a project lead who will be responsible for managing the project.
- Add a detailed description explaining the project’s purpose and scope. The list page displays all projects with columns showing No, Avatar, Name, Key, Private, Project Type, and Actions. You can search for specific projects, export the project list, or perform various actions.
- Available actions include Show to view complete project details, Edit to modify project information, and Delete to remove the project. When you click Show, the project details page displays a comprehensive header section with the project avatar, project name, and description.
- The header also shows important project information including Key, Type, Style, Assignee Type, Private status, Simplified, and Project Lead details with avatar and name. Below the header, there is an Issue Types section that displays a detailed table with columns for Icon, Name, Description, Type, and Hierarchy Level.
- This table shows all available issue types including Task, Bug, Story (stories track functionality or features expressed as user goals), Epic (epics track collections of related bugs, stories, and tasks), and Subtask (subtasks track small pieces of work that are part of a larger task).

- When you click the view button, below the header, there is an Issue Types section that displays a detailed table with columns for Icon, Name, Description, Type, and Hierarchy Level. This table shows all available issue types, including Task, Bug, Story, Epic, and Subtask. Each issue type shows its specific icon, detailed description, type classification, and hierarchy level. The page also includes a Task Types and Progress Stages section that provides expandable configurations for managing different task types and their workflow stages.

Manage Boards
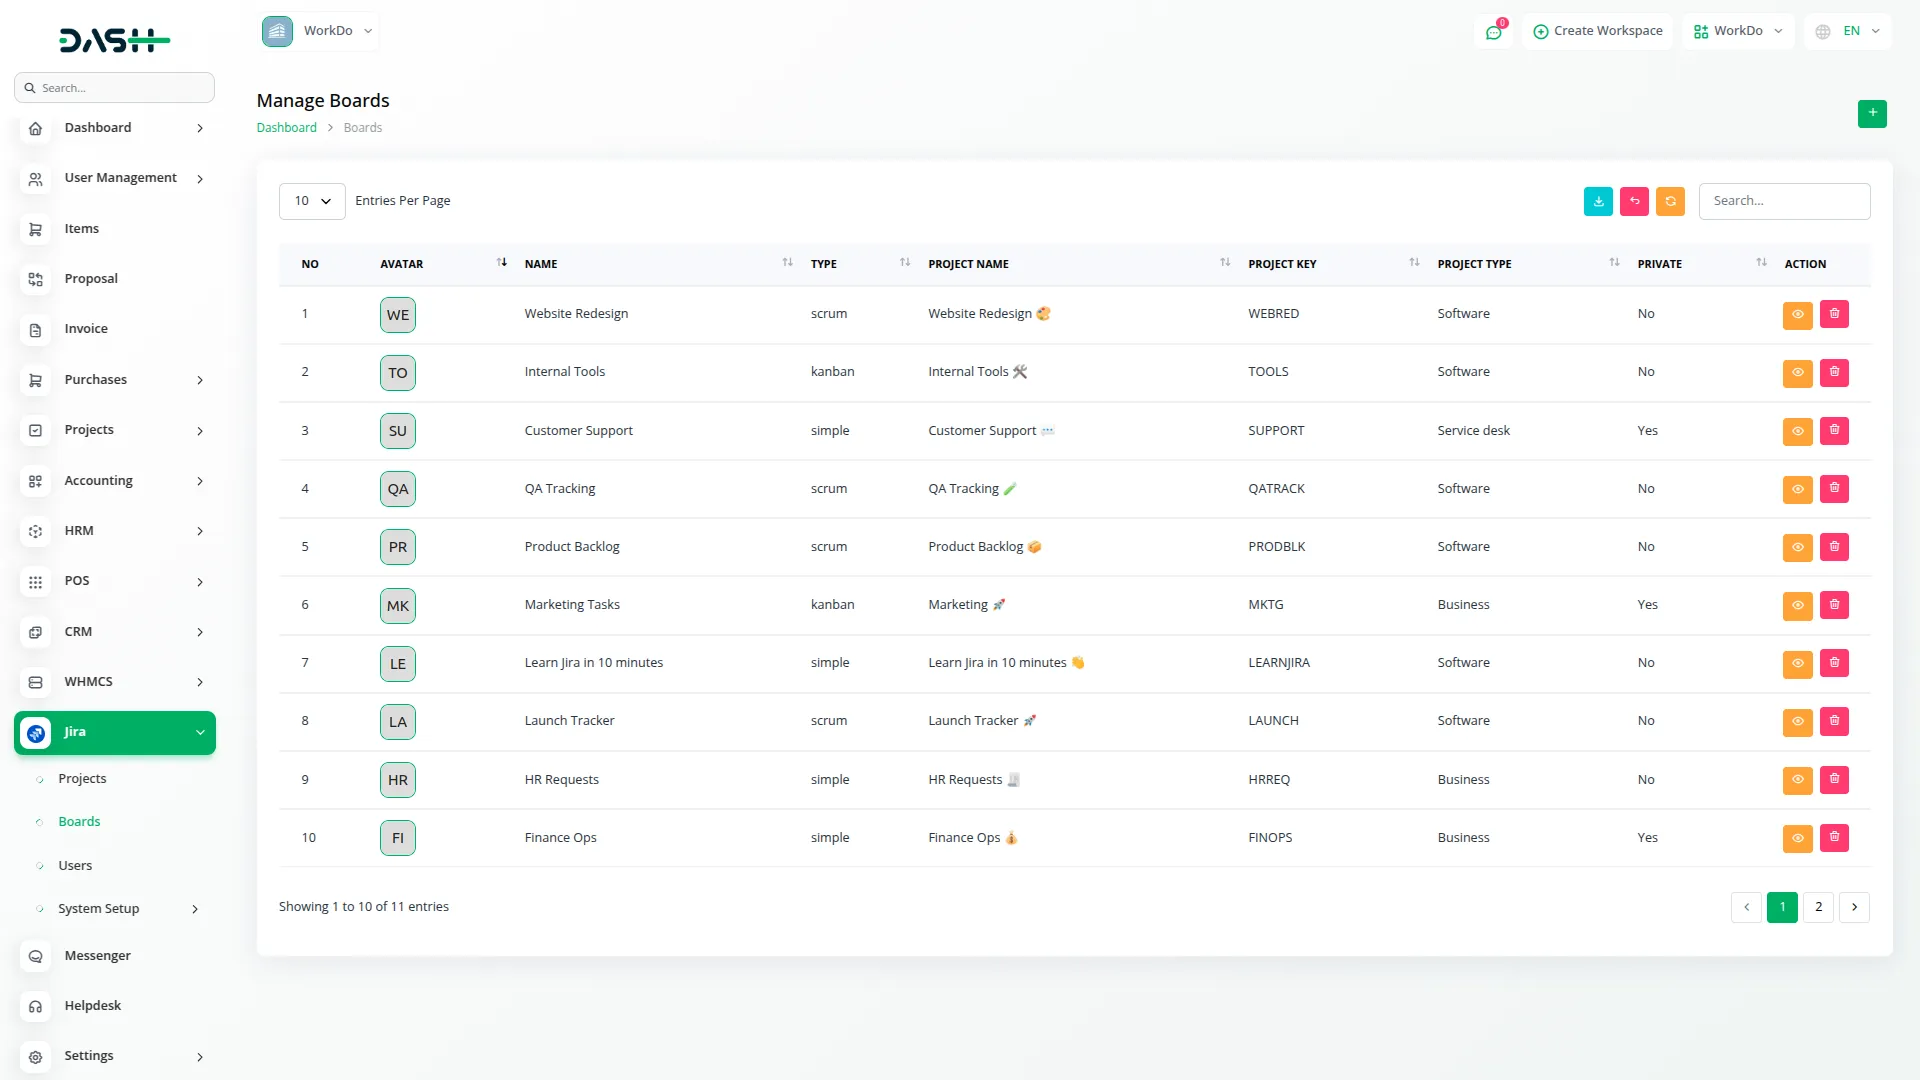
- To create a new board, click the “Create” button on the boards management page. Enter the board name and select the project this board will belong to. Choose the board type from either Kanban or Scrum based on your workflow requirements. Provide a description that explains the board’s purpose and usage.
- The list page shows all boards with columns displaying No, Avatar, Name, Type, Project Name, Project Key, Project Type, Private, and Actions. You can search for specific boards, export the board list, or perform management actions. Available actions include Show to view complete board information, and Delete to remove the board.
- When you click the View button, the board details page displays comprehensive information including the board name, a unique board ID number, project key , project type key, and board type.
- The page shows a detailed Issues section with a table containing columns for Key, Summary, Status, Priority, Assignee, Reporter, Created date, and Actions. Each issue displays, issue summary or title, current status (To Do, In Progress, Done, QA test), priority level (Medium), assigned user , reporter information, creation date, and action buttons for Show and Estimation. Additionally, the page includes tabs for Sprints and Epics which display relevant information when the board type is Scrum.
- The Issues section provides tools for managing and tracking individual work items within your Jira projects.
- The main functionality in this section focuses on issue estimation. You can update the Estimation Value for issues to help with project planning and resource allocation.
- The list page includes a Search button to help you find specific issues. The table displays columns for Key, Summary, Assignee, Status, Priority, and Actions. Available actions include the View button to view detailed issue information and Estimation to update the issue’s estimation value.

- When you click the View Button, you can view comprehensive issue details including all relevant information about the work item.
- When you click the Estimation action, you can access the estimation page where you can view the current estimation value and update it as needed. This feature is particularly useful for sprint planning and tracking project progress.
- The Sprints section enables you to manage sprint cycles for your Scrum-based projects.
- To create a new sprint, click the “Create” button on the sprints page. Enter the sprint name and define the sprint goal, which should clearly describe what the team aims to accomplish during this sprint cycle.
- The list page features Add and Search buttons for sprint management. The table displays columns for Name, Status, and Actions. You can use the Edit action to modify sprint details such as the name and goal, or use the Delete action to remove the sprint from the system.
- The sprint status is automatically managed by Jira and reflects the current state of the sprint cycle.

Users
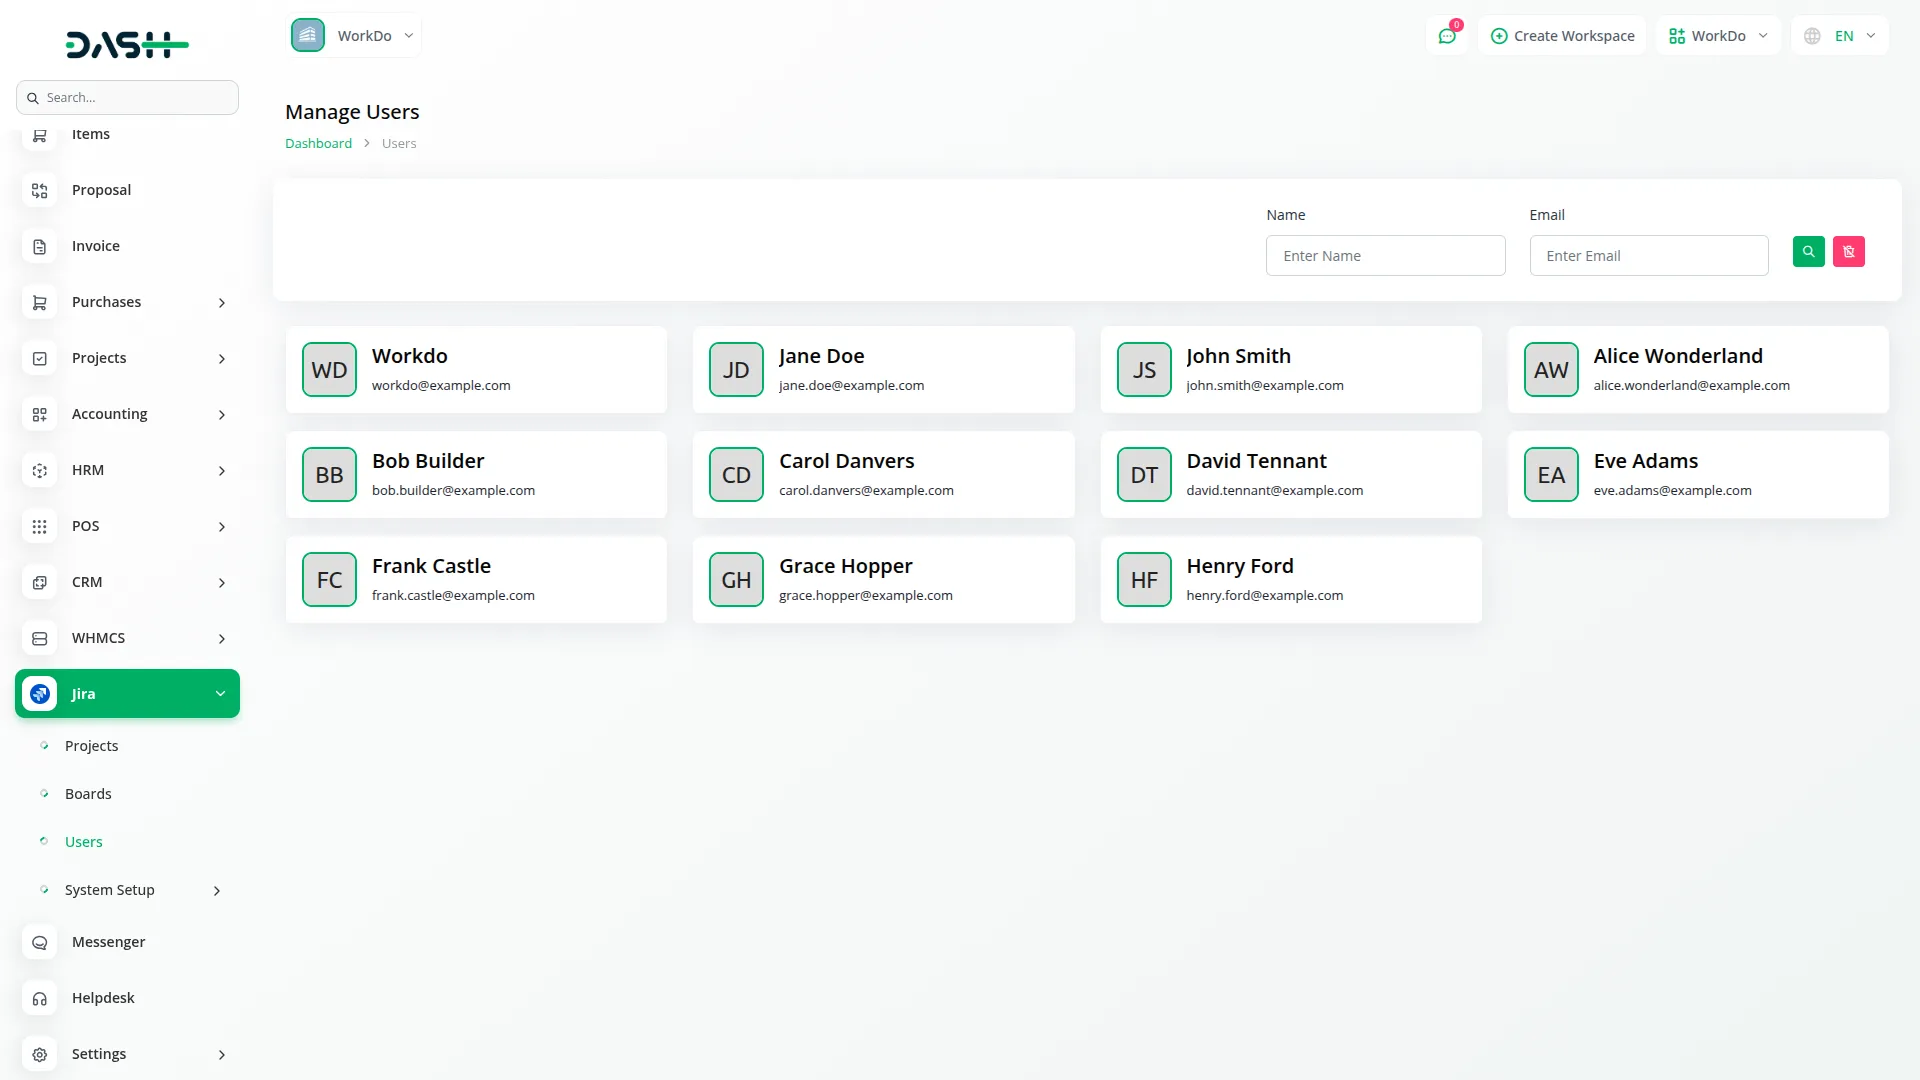
- The Users section provides access to user information and filtering capabilities for team management.
- This section allows you to search and filter users based on specific criteria. You can filter users by Name and Email to quickly find team members or stakeholders.
- The list page includes a Search button to help you locate specific users. Instead of a traditional table format, users are displayed as cards View buttoning the user’s avatar, name, and email address. This visual format makes it easy to identify and select team members for project assignments or communication purposes.
- The search functionality is particularly useful when you need to assign issues, add users to projects, or identify team members for sprint planning activities. After completing the configuration process, the users created on the Jira will be visible on our platform as well.

Categories
Related articles
- Office Equipment Management Detailed Documentation
- Fatora Integration in Dash SaaS
- eSewa Payment Gateway in Dash SaaS
- Google Calendar Credentials Generate
- WooCommerce Integration in Dash SaaS
- WhatSender Add-On Integration in Dash SaaS
- Commission Integration in Dash SaaS
- Performance Integration in Dash SaaS
- AI Document Integration in Dash SaaS
- Sign-In with Slack Add-On Integration in Dash SaaS
- Water Park Management
- Recruitment Integration in Dash SaaS
Reach Out to Us
Have questions or need assistance? We're here to help! Reach out to our team for support, inquiries, or feedback. Your needs are important to us, and we’re ready to assist you!


Need more help?
If you’re still uncertain or need professional guidance, don’t hesitate to contact us. You can contact us via email or submit a ticket with a description of your issue. Our team of experts is always available to help you with any questions. Rest assured that we’ll respond to your inquiry promptly.
Love what you see?
Do you like the quality of our products, themes, and applications, or perhaps the design of our website caught your eye? You can have similarly outstanding designs for your website or apps. Contact us, and we’ll bring your ideas to life.
