How to Create IMAP Credentials For Gmail & Outlook Document
Outlook Gmail Create IMAP Credentials For Outlook Step 1: Enable IMAP from Outlook Account Open […]
Create IMAP Credentials For Outlook
Step 1: Enable IMAP from Outlook Account
- Open your web browser and visit https://outlook.com
- Click the Settings icon located near your profile picture.
- Navigate to Mail > Forwarding & IMAP.
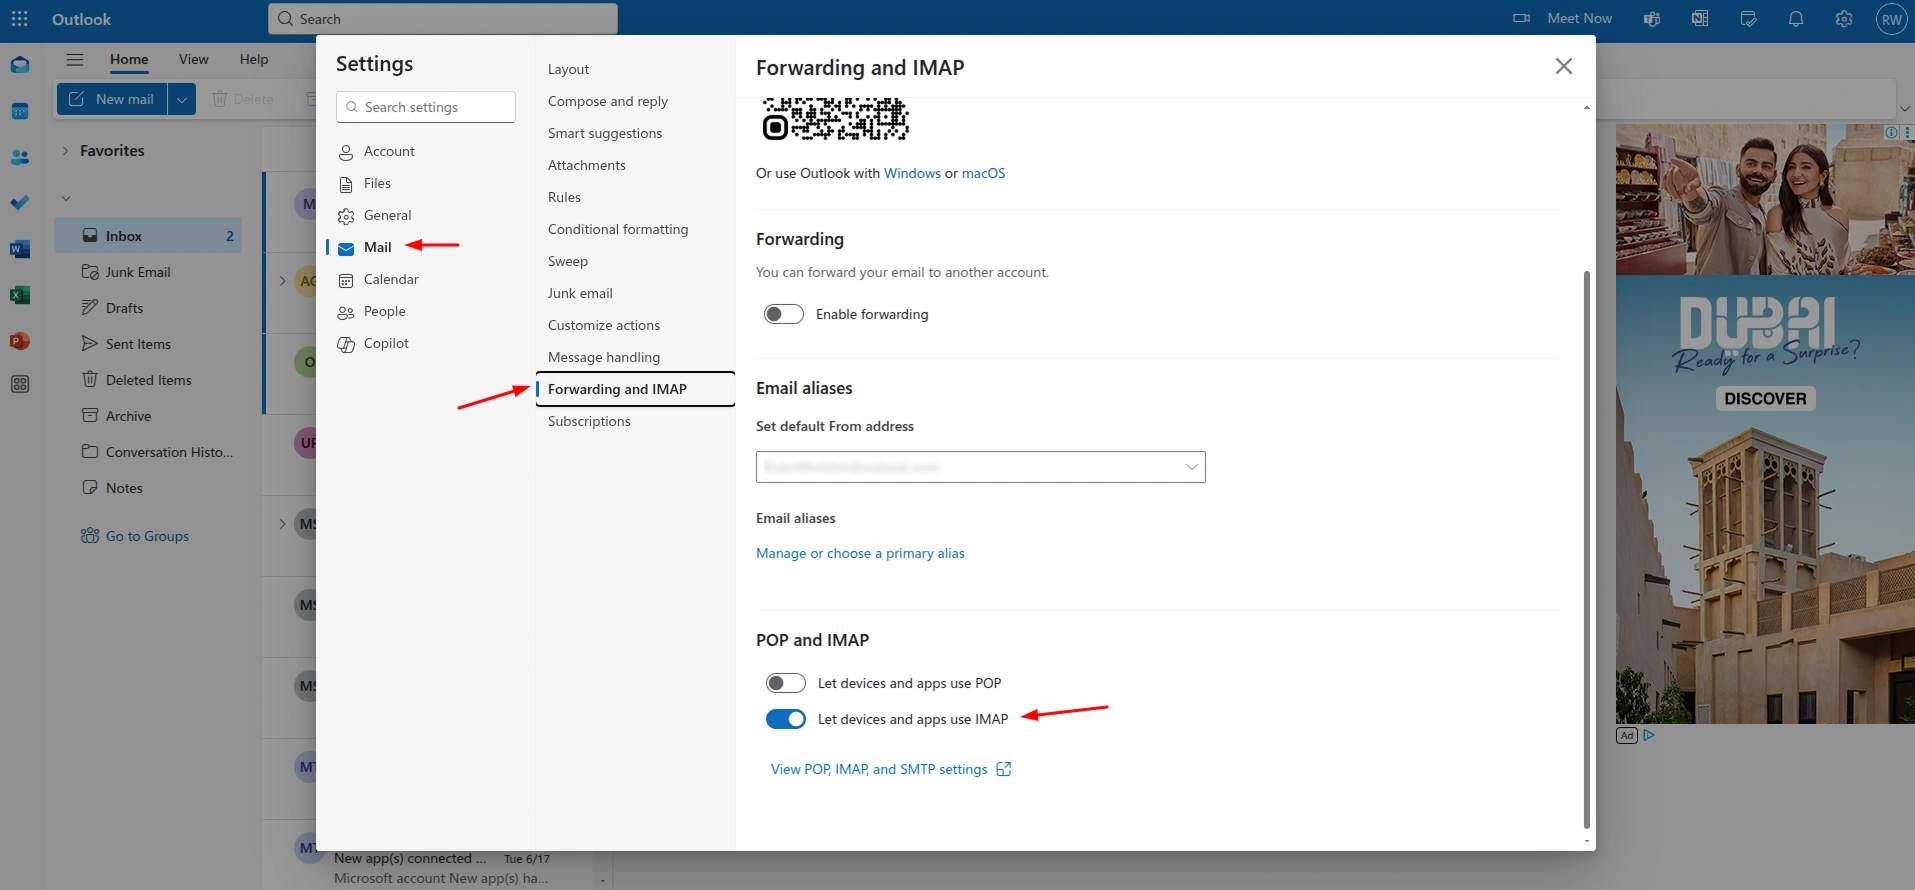
For more information about Outlook’s IMAP server settings, ports, and encryption options, refer to Microsoft’s official documentation: https://support.microsoft.com/en-us/office/pop-imap-and-smtp-settings-for-outlook-com-d088b986-291d-42b8-9564-9c414e2aa040
Step 2: Check for Two-Factor Authentication (2FA)
- Visit the Microsoft account security page: https://account.microsoft.com/security
-
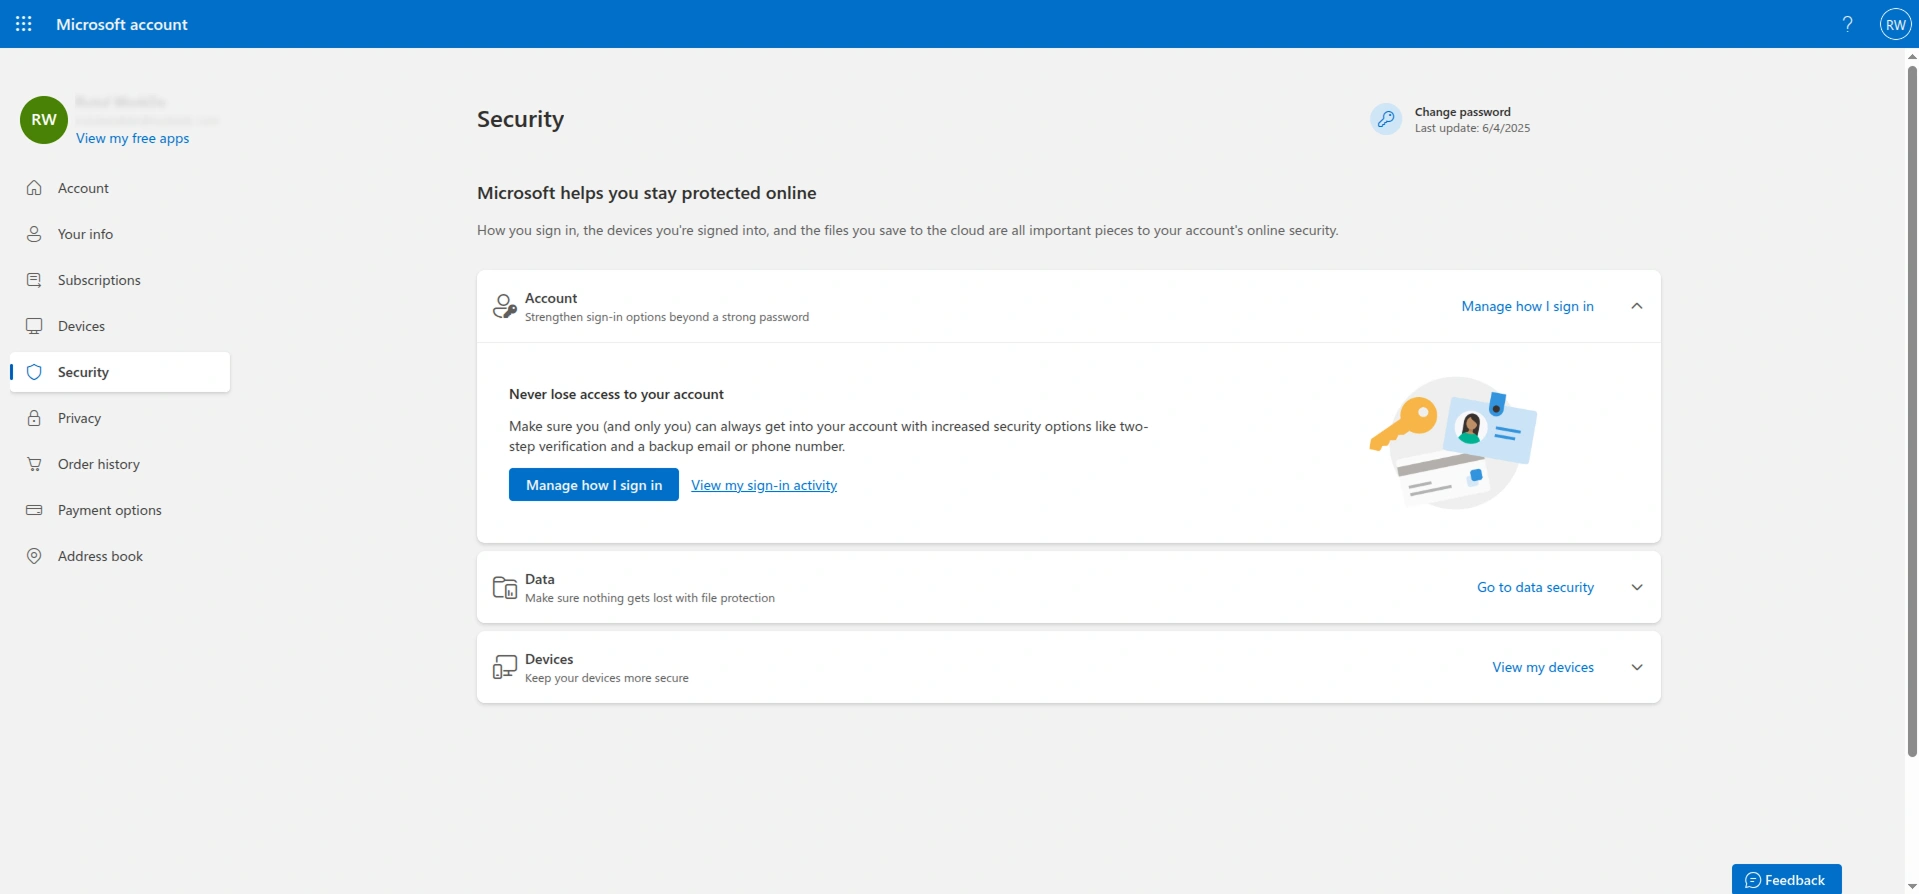
- Click on “Manage how I sign in” to enable two-factor authentication.
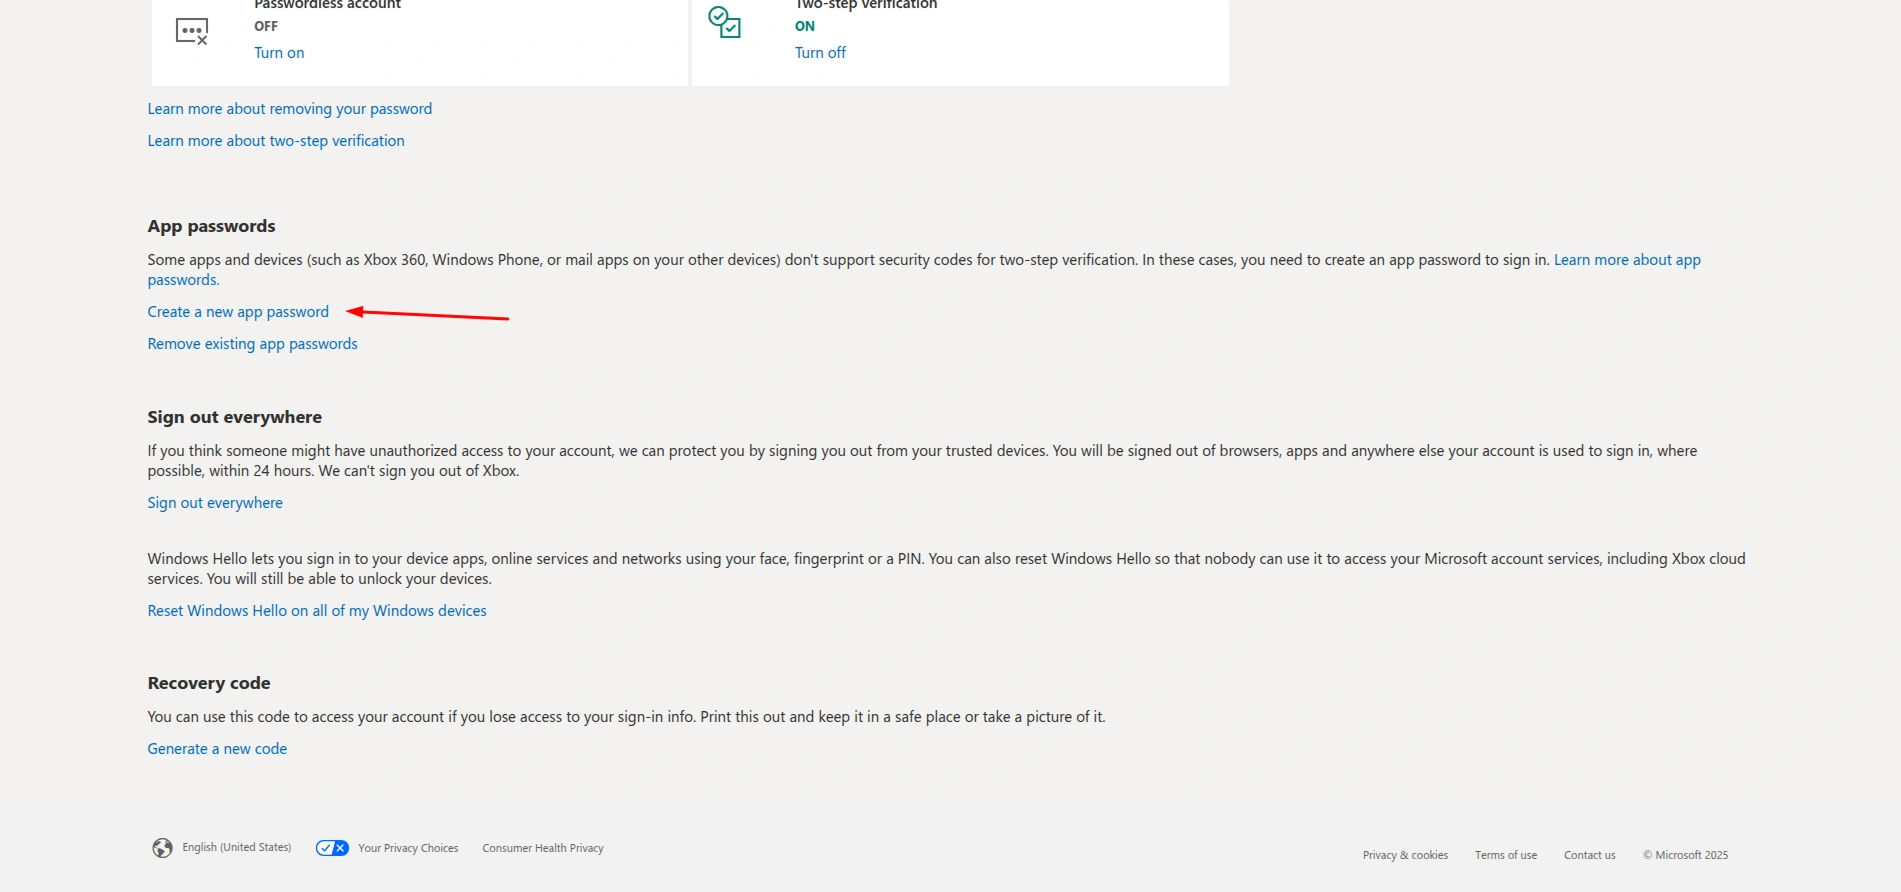
- From the same section, generate an App Password. This may be required when connecting to services that do not support direct OAuth login.
-
Step 3: Configure Azure Portal
- Open https://portal.azure.com and log in using your Outlook account.
- Once logged in, you’ll see the main Azure dashboard.
-
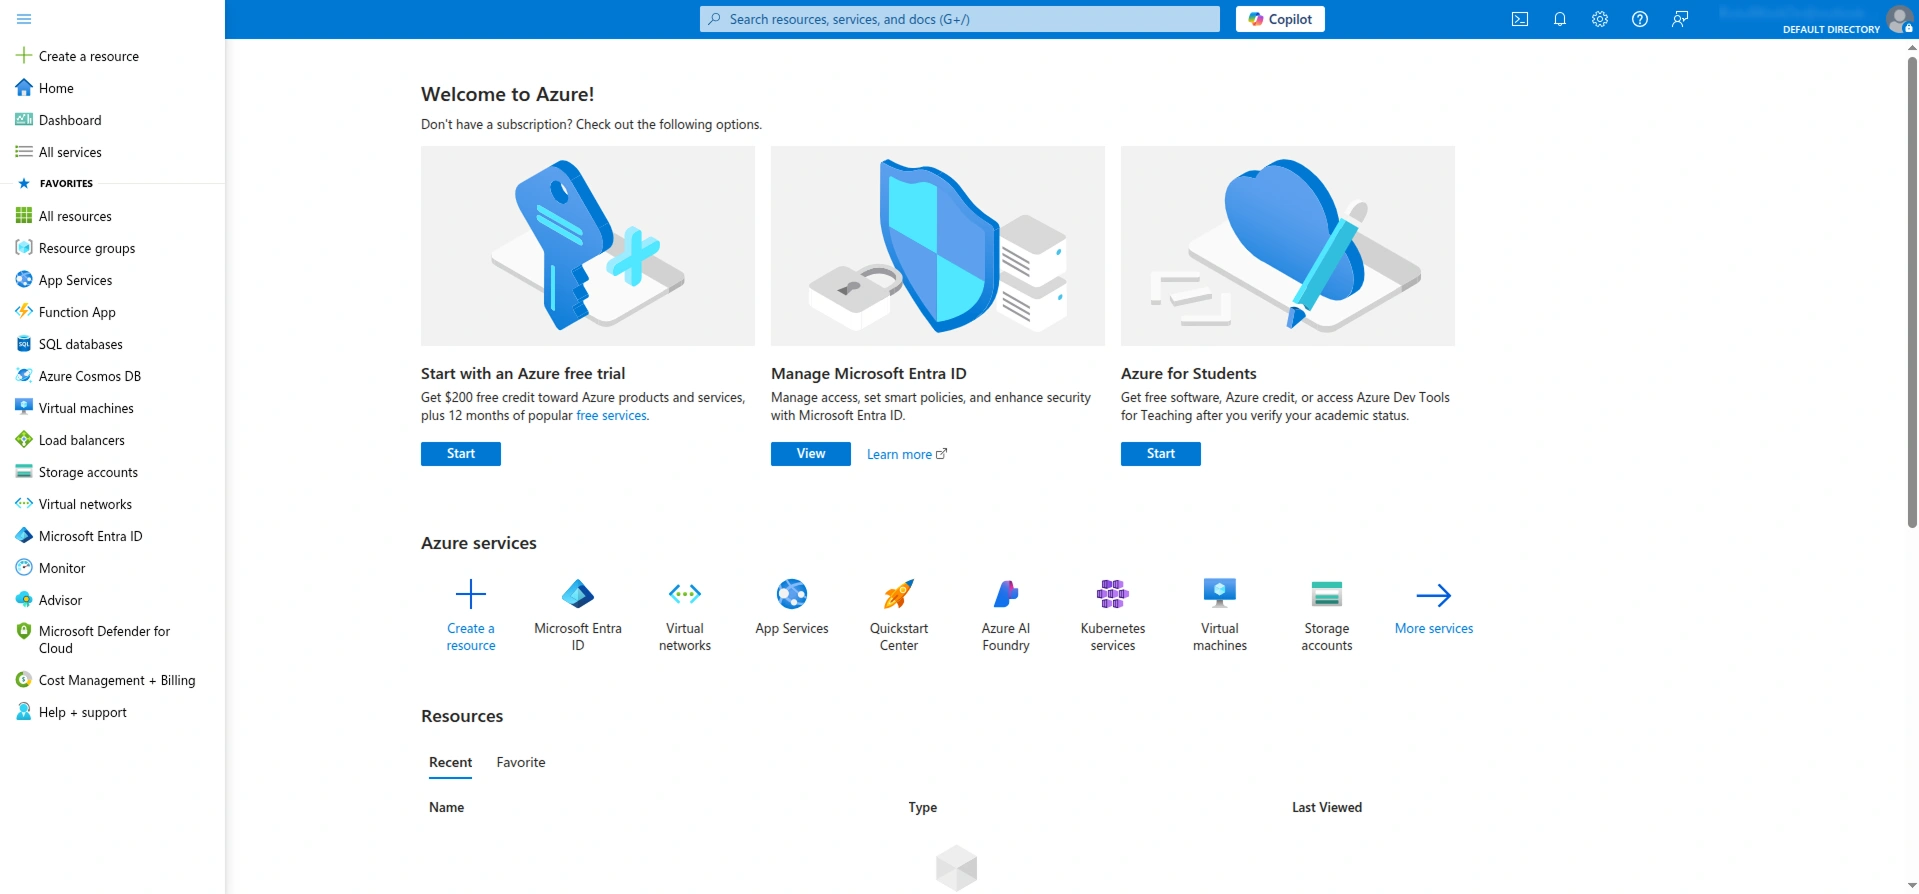
- From the sidebar, click on Microsoft Entra ID.
-
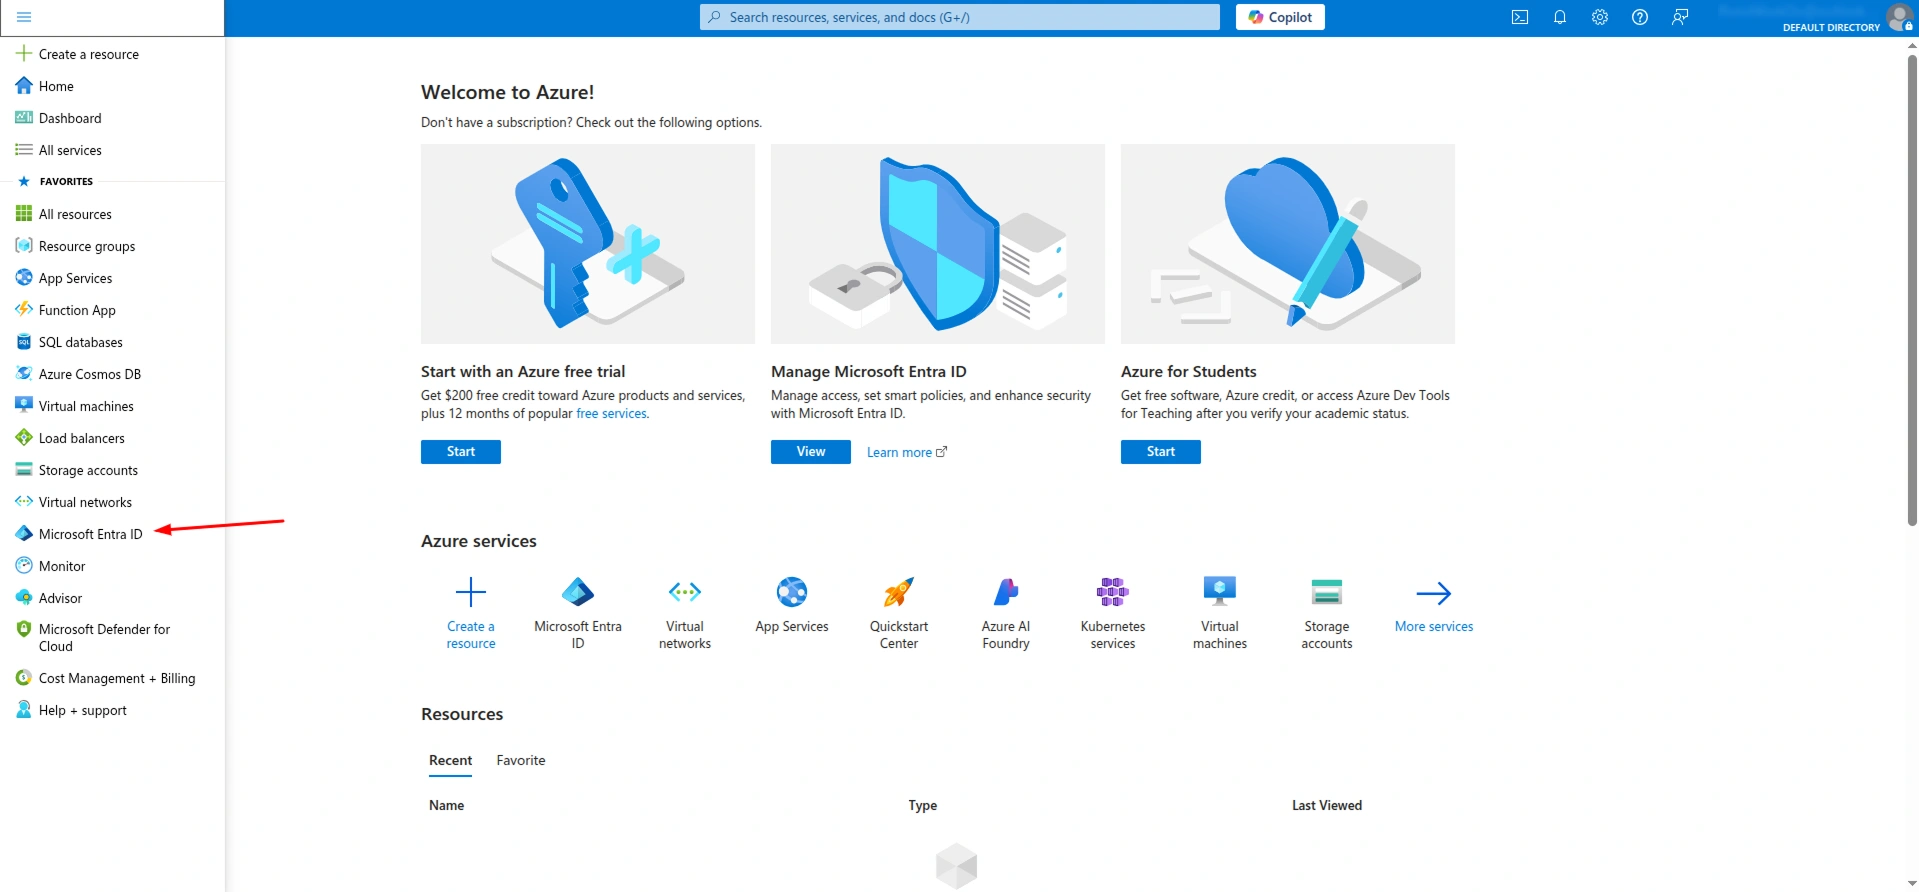
- On the Microsoft Entra ID page, go to App registrations and click “New registration”.
-
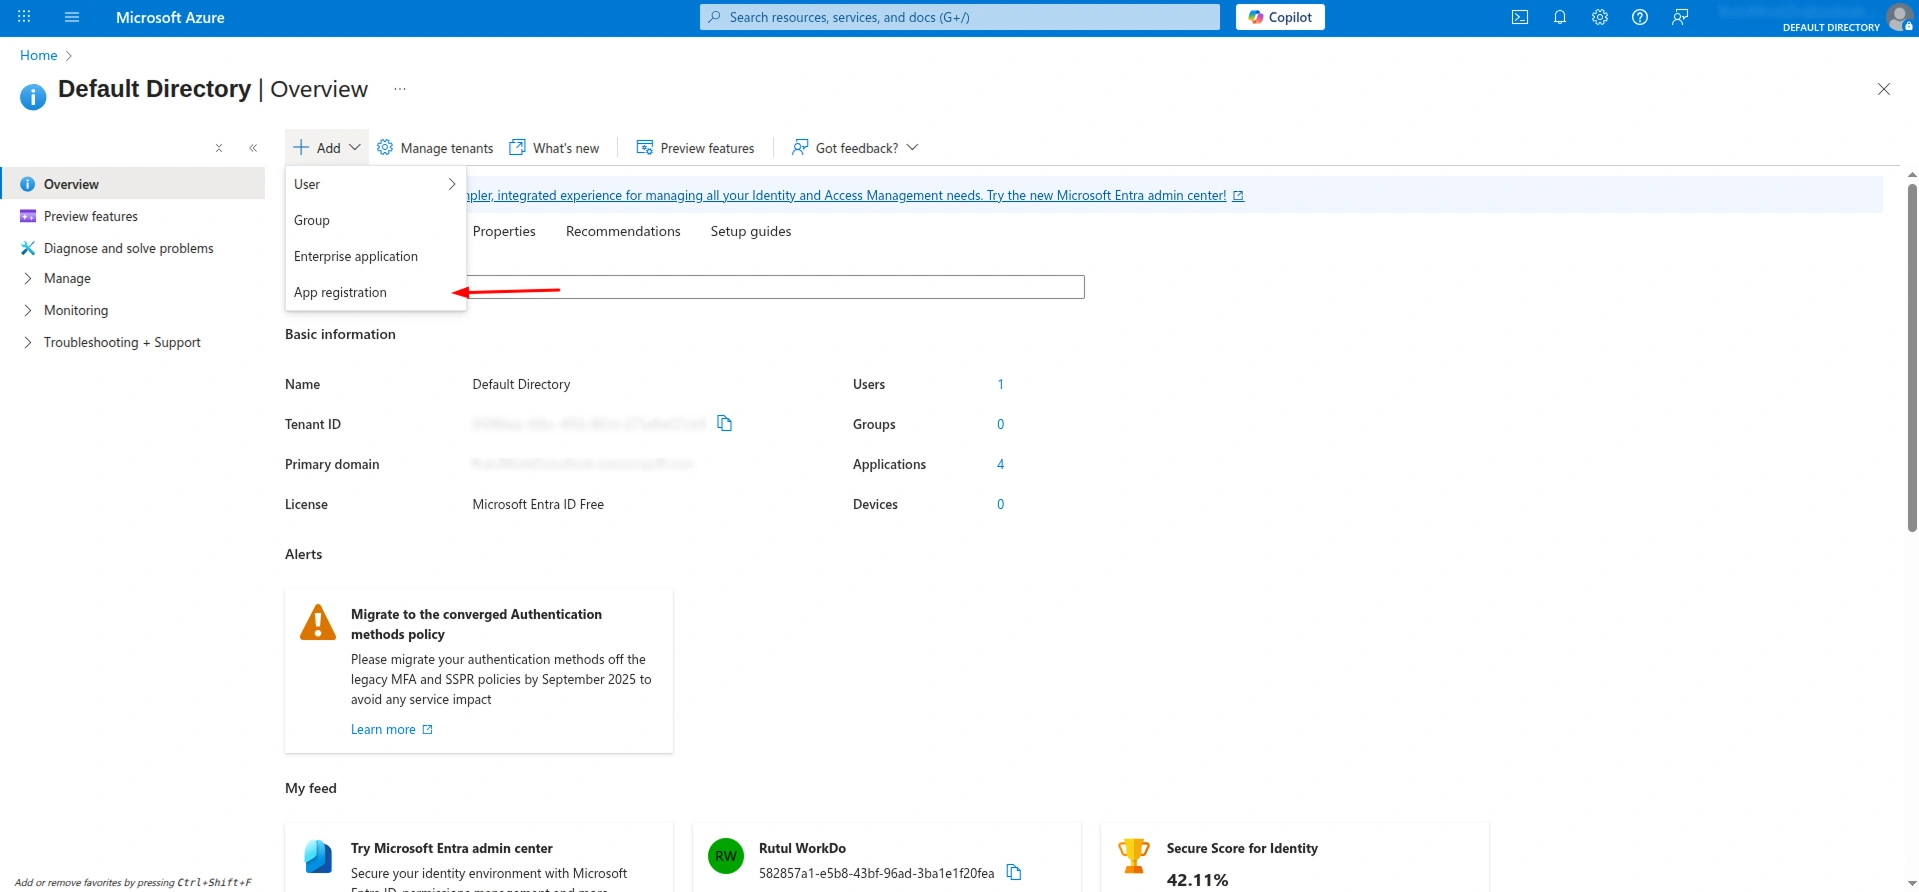
- Once you click on New Registration, you’ll see a form like the one shown in the screenshot below.
-
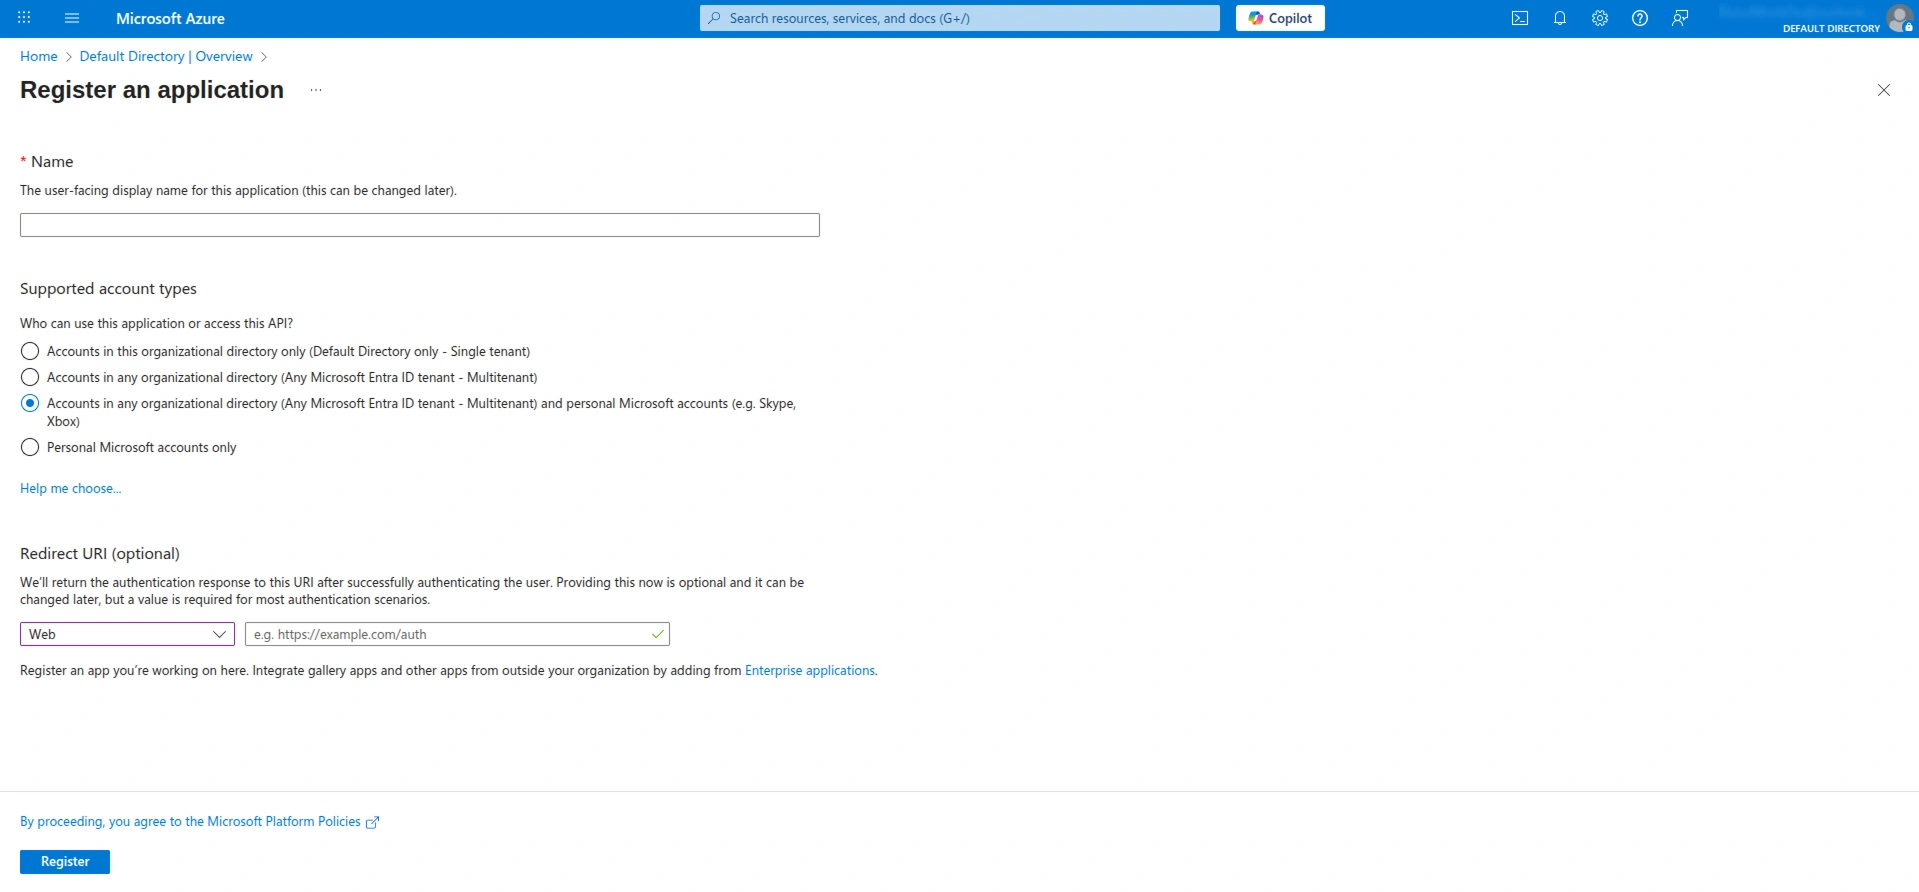
During App Registration:
- Enter a Name for the application.
- Under Supported account types, select: Accounts in any organizational directory (Any Microsoft Entra ID tenant – Multitenant) and personal Microsoft accounts (e.g., Skype, Xbox)
- Under Redirect URI, select Web and enter the Callback URL provided on the IMAP settings page in TicketGo.
-
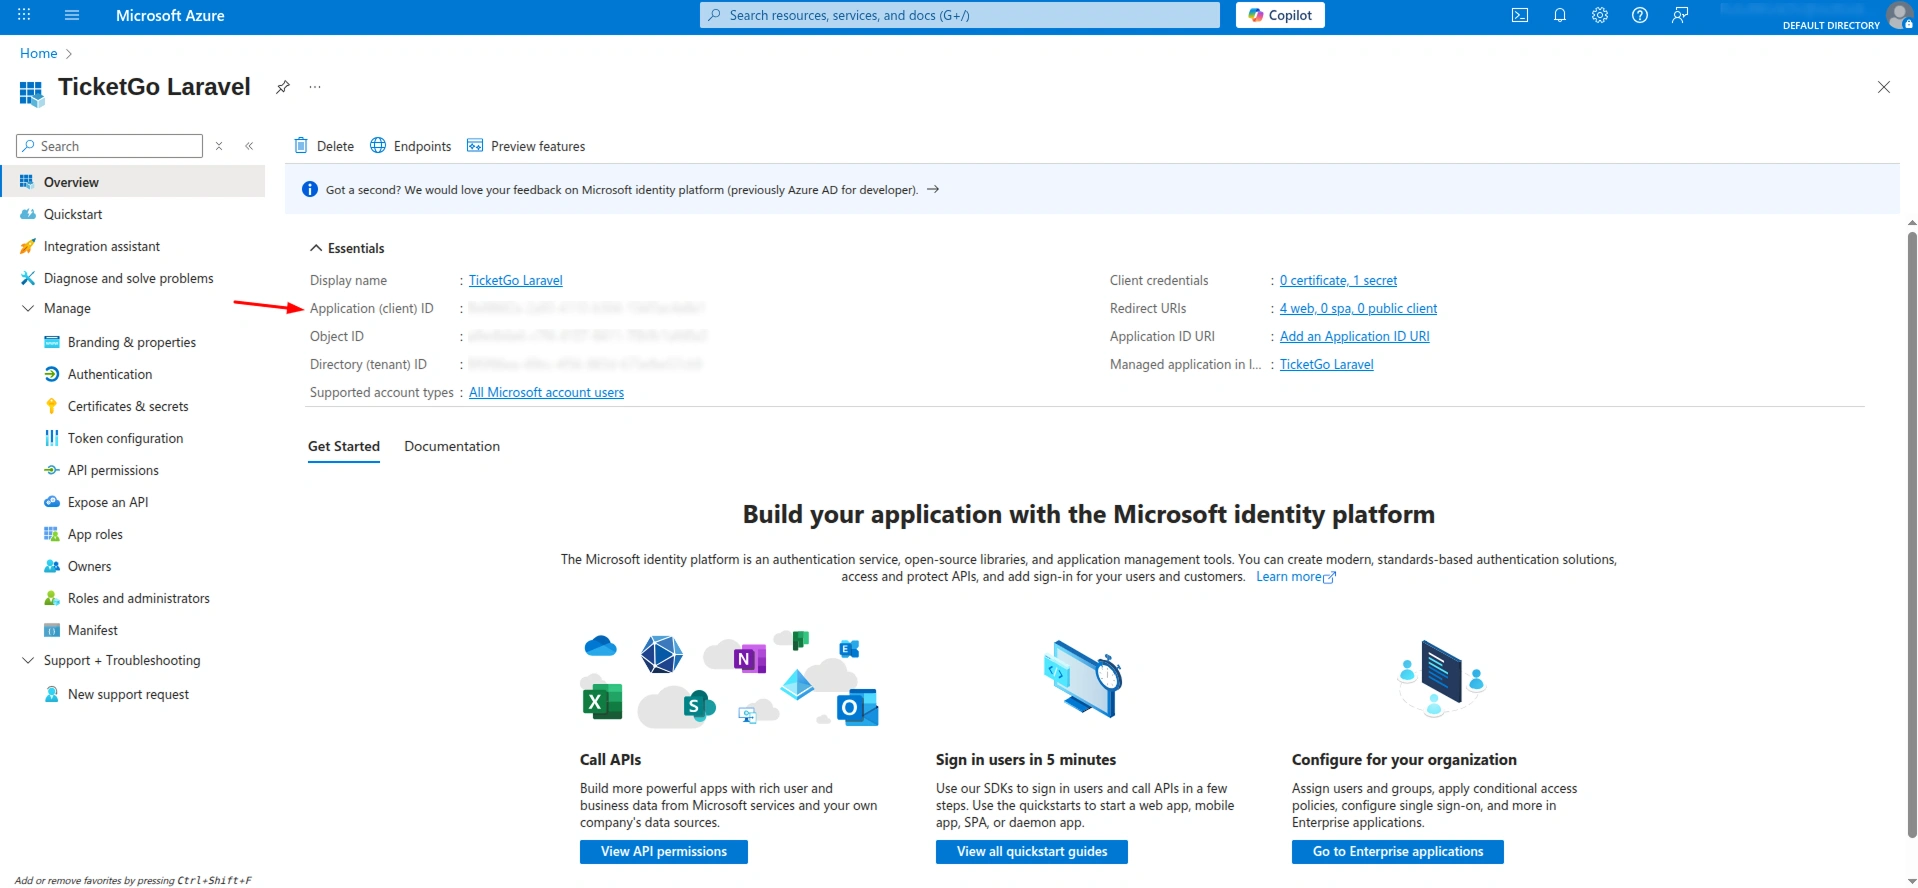
- Click the Register button. After registration, you will be redirected to the application overview page where you will see the Application (client) ID. Copy and store this ID as it will be needed later during configuration in TicketGo.
Step 4: Generate a Client Secret
After getting the Client ID, you must generate a Client Secret.
- In the registered application menu, go to Certificates & secrets.
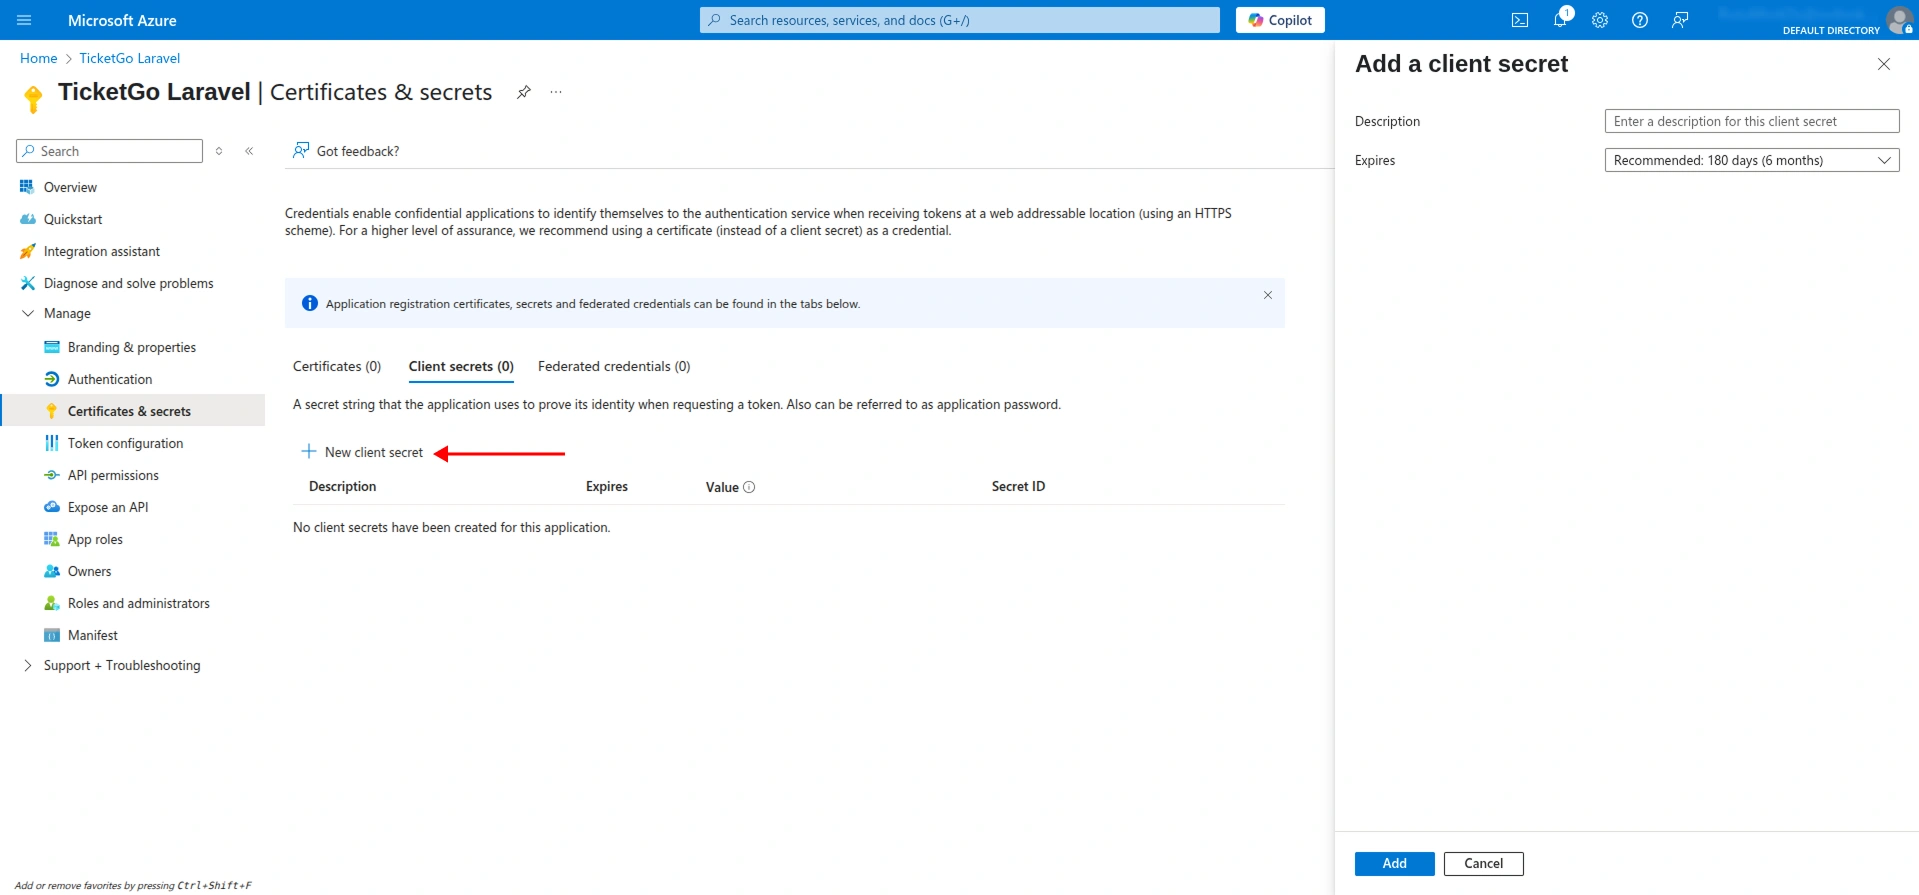
- Under the Client secrets section, click + New client secret. Once you click on that, a page like the one shown in the screenshot will open.
- Provide a description (e.g., “TicketGo IMAP Connection”) and select the expiration period (e.g., 6 months, 12 months, 24 months).
- Click the Add button.
After adding the secret, a Value will be displayed. Copy and save this value securely. It will be shown only once. If lost, a new client secret will need to be generated.
Step 5: Add Required API Permissions
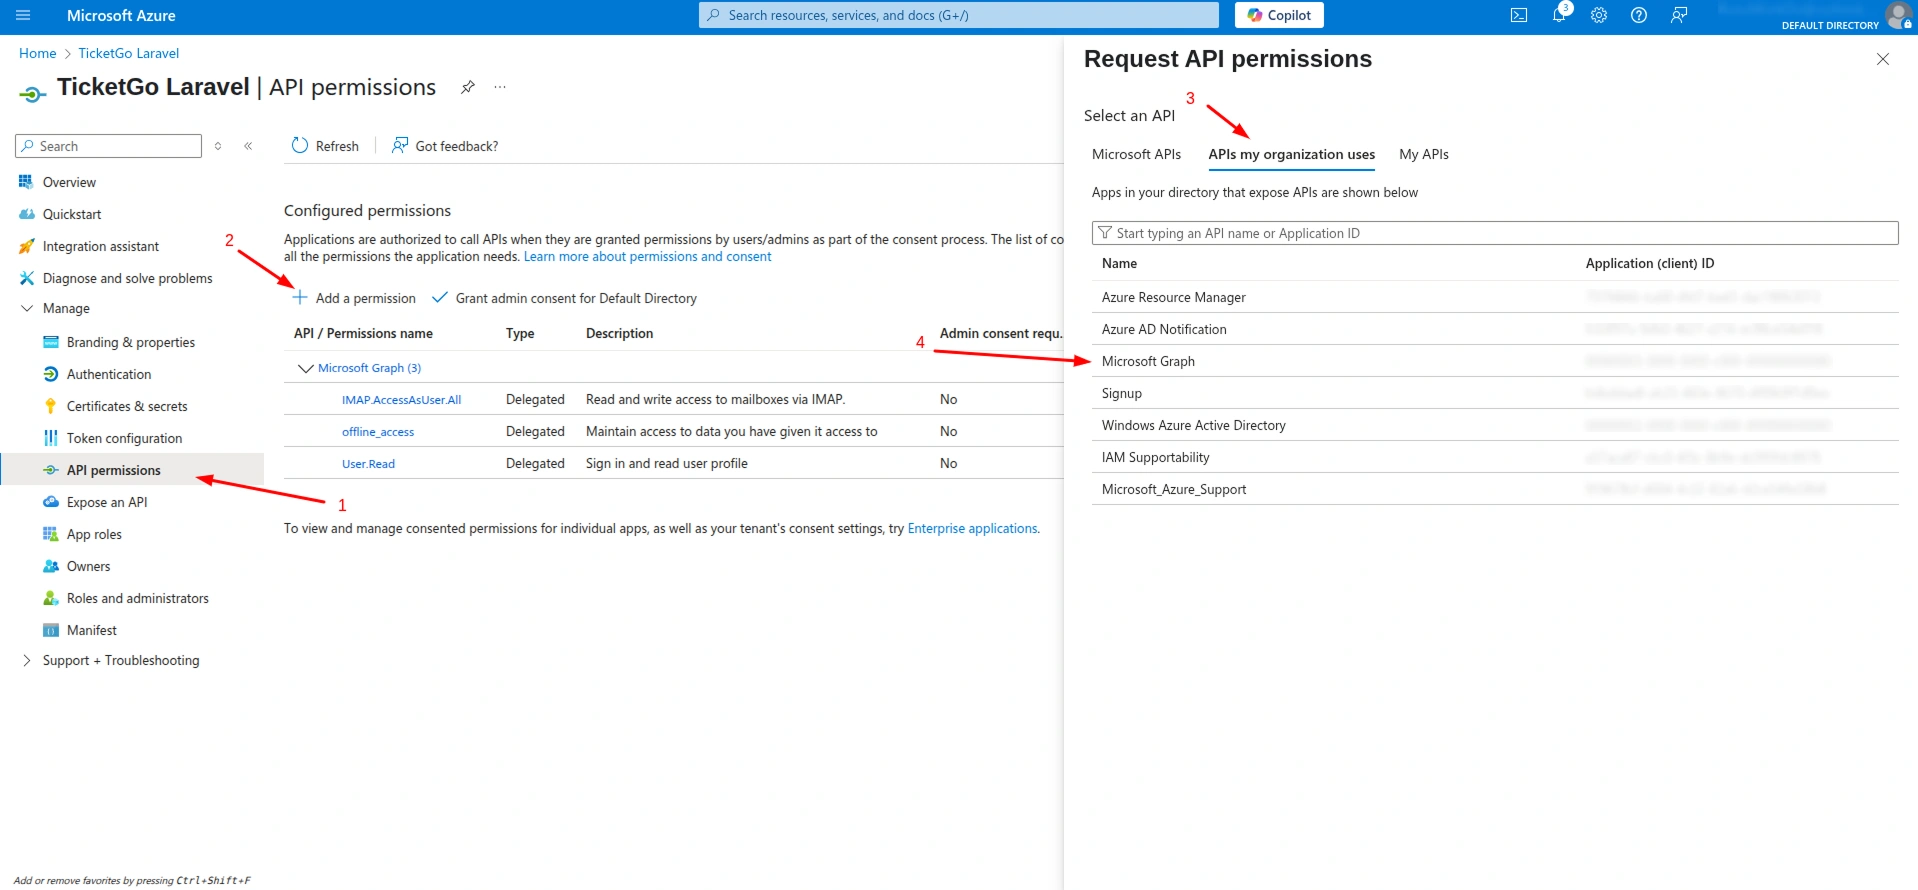
The application needs specific delegated permissions to allow IMAP access through Microsoft Graph.
- Go to API permissions in the registered app menu.
- Click on + Add a permission.
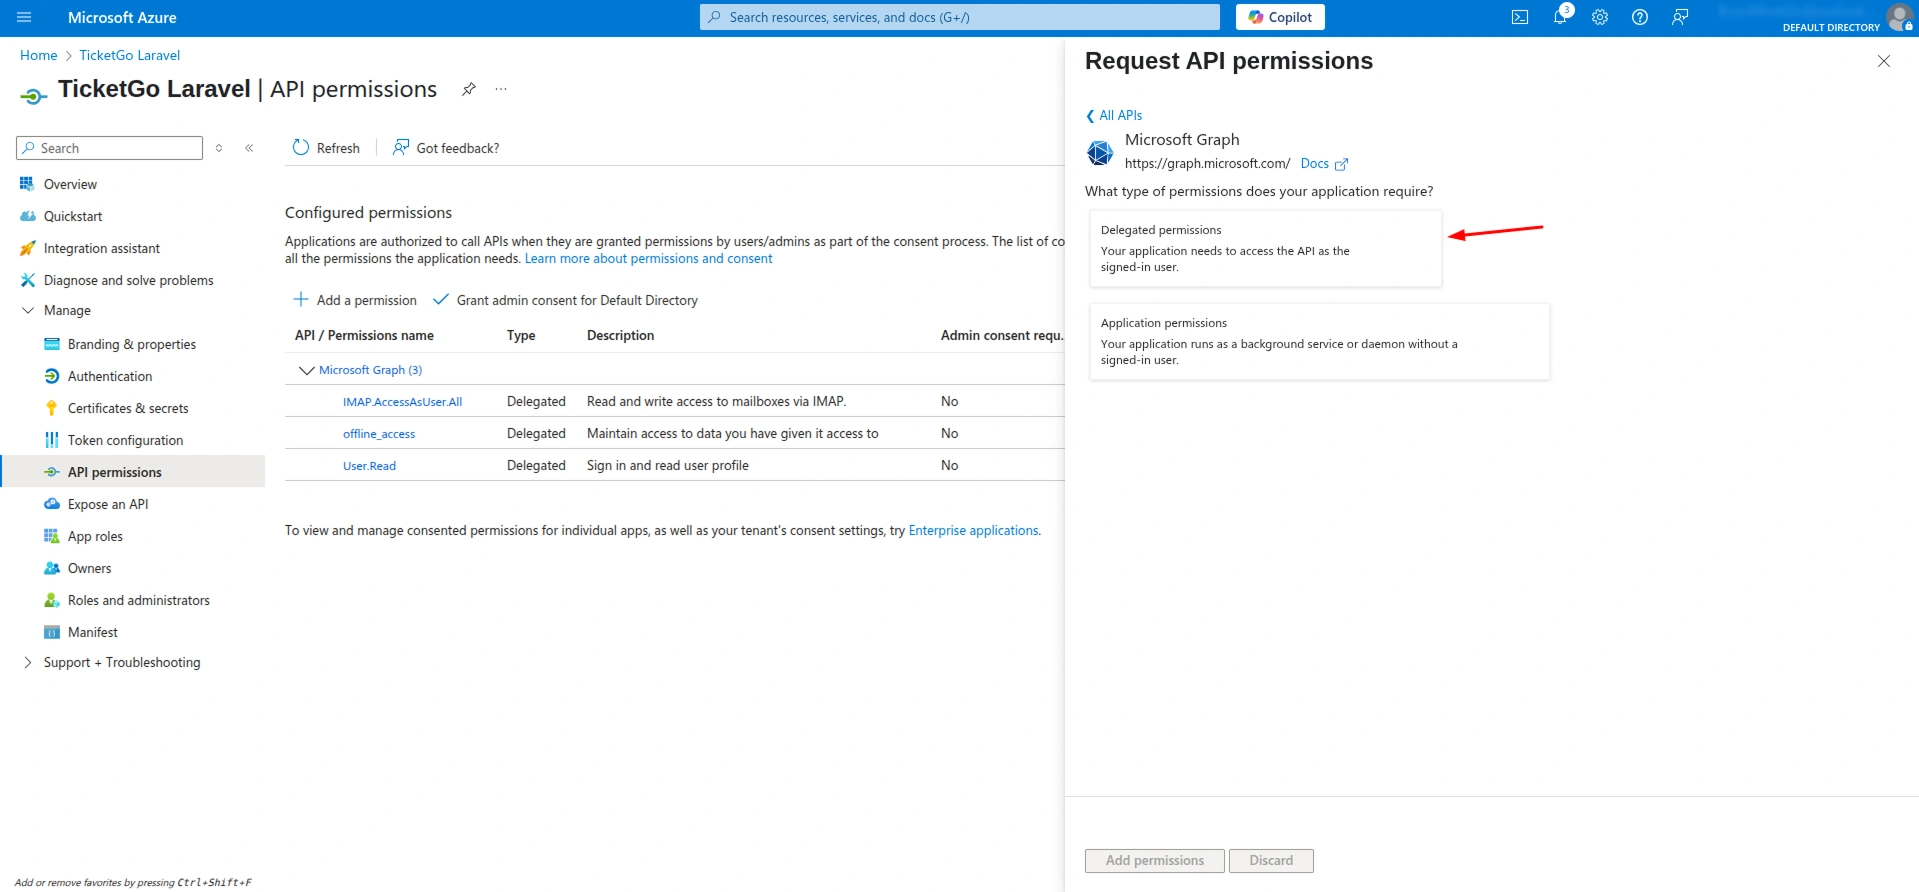
- Select Microsoft Graph.
- Choose Delegated permissions.
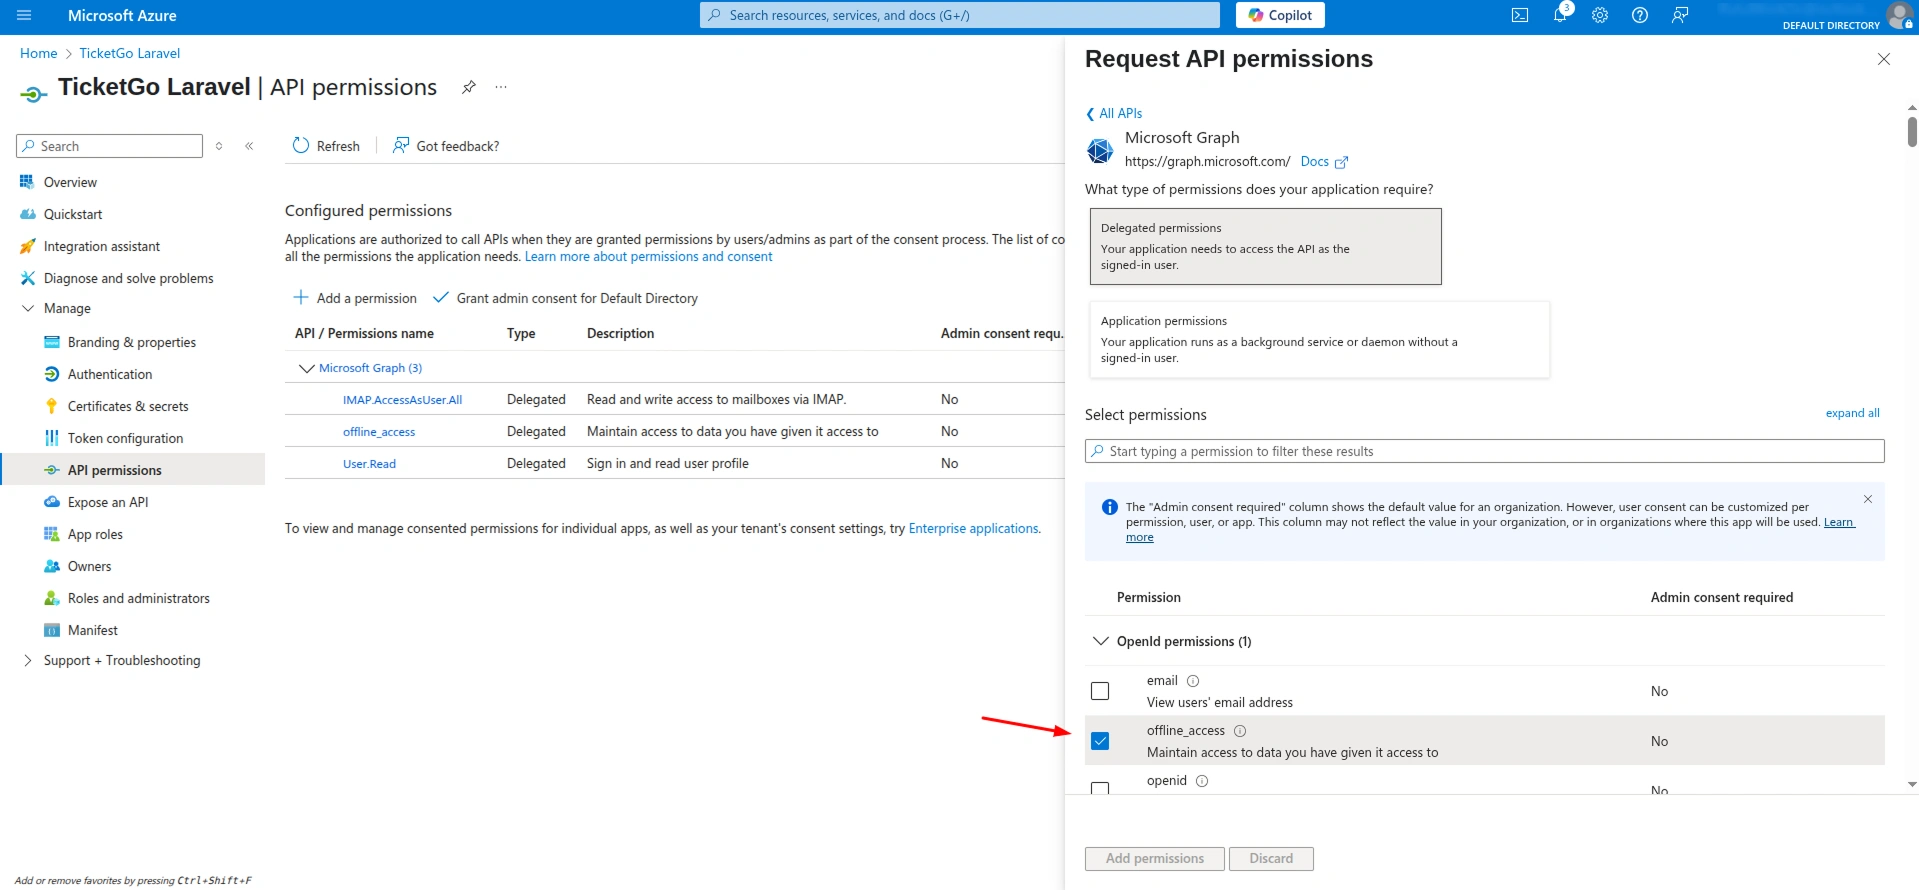
- Search for and select the following permissions:
- IMAP.AccessAsUser.All
- offline_access
- User.Read
- After adding the permissions, click on Grant admin consent to activate them.
Step 6: Configure IMAP Settings in TicketGo
- Once you have your Client ID and Client Secret, go to the IMAP Settings section in TicketGo and enter the required credentials. After entering the details, click on the Sync button.
- This will initiate the synchronization process, and TicketGo will automatically generate a secure IMAP Mail Password using OAuth. This password cannot be edited manually.
IMAP Configuration Summary for TicketGo
Use the following configuration values inside your IMAP settings panel:
| Field | Value |
|---|---|
| IMAP Mail Driver | imap |
| IMAP Mail Host | imap-mail.outlook.com |
| IMAP Mail Port | 993 |
| IMAP Mail Username | Your Outlook Email Address |
| IMAP Mail Password | Automatically generated after sync |
| IMAP Mail Encryption | ssl |
| IMAP Authentication | oauth |
This completes the IMAP setup process for integrating Outlook with TicketGo. Ensure all credentials and secret values are stored securely and follow the Microsoft Azure policies regarding expiration and renewal of client secrets.
Create IMAP Credentials For Gmail
Step 1: Enable IMAP in Gmail
- Open your browser and go to https://mail.google.com .
- Click on the Settings gear icon in the top right corner.
- Select See all settings.
- Navigate to the Forwarding and POP/IMAP tab.
- Under the IMAP Access section, select Enable IMAP.
- Scroll down and click Save Changes.
-
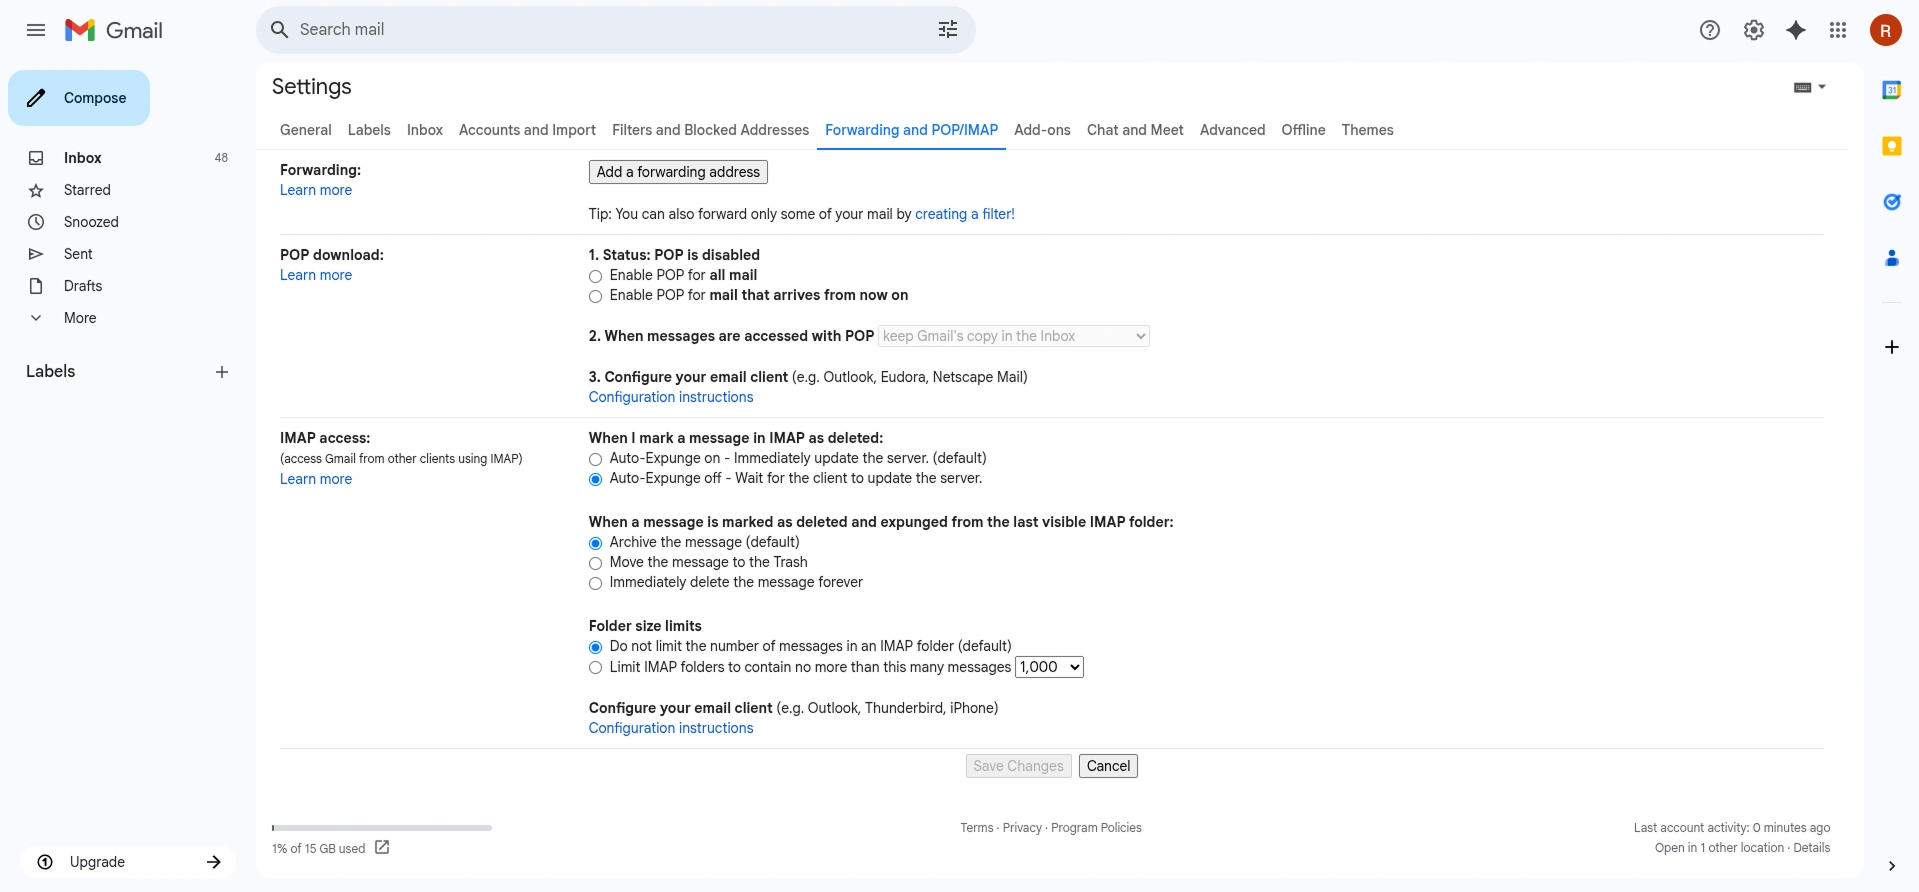
Step 2: Enable 2-Step Verification (if not already enabled)
- Go to your Google account security page: https://myaccount.google.com/security .
- Under the Signing in to Google section, click on 2-Step Verification.
- Follow the on-screen prompts to enable 2FA. This typically includes:
- Adding a phone number
- Receiving a verification code
- Confirming the setup
Step 3: Generate an App Password
- On the same Security page of your Google Account, find the App passwords section and click it. You may be asked to re-enter your account password.
- In the App dropdown, select Mail.
- In the Device dropdown, select Other (Custom name) and enter a name like “Email Client” or “TicketGo”.
- Click Generate.
- A 16-character app password will be displayed.
Important: This app password will only be shown once. Make sure to copy and save it securely. If lost, you’ll need to generate a new one.
Once you’ve generated and saved the app password, your Gmail account is ready for IMAP integration.
IMAP Configuration Summary for Gmail
Use the following credentials inside the IMAP settings panel of TicketGo or any other supported email client:
| Field | Value |
|---|---|
| IMAP Mail Driver | imap |
| IMAP Mail Host | imap.gmail.com |
| IMAP Mail Port | 993 |
| IMAP Mail Username | Your full Gmail email address |
| IMAP Mail Password | App password generated in Step 3 |
| IMAP Mail Encryption | ssl |
Categories
Related articles
- SMS Integration in TicketGo
- Instagram Chat Integration in TicketGo
- Ticket Widget Integration in TicketGo
- Plivo Integration in TicketGo
- WhatsApp Chatbot & Chat Integration in TicketGo
- Zapier Integration in TicketGo
- Bulk SMS Integration in TicketGo
- Mail2Ticket Detailed Documentation
- Zendesk Integration in TicketGo
- Slack Integration in TicketGo
- Office Hours Integration in TicketGo
- WhatsApp Twilio Integration in TicketGo
Reach Out to Us
Have questions or need assistance? We're here to help! Reach out to our team for support, inquiries, or feedback. Your needs are important to us, and we’re ready to assist you!


Need more help?
If you’re still uncertain or need professional guidance, don’t hesitate to contact us. You can contact us via email or submit a ticket with a description of your issue. Our team of experts is always available to help you with any questions. Rest assured that we’ll respond to your inquiry promptly.
Love what you see?
Do you like the quality of our products, themes, and applications, or perhaps the design of our website caught your eye? You can have similarly outstanding designs for your website or apps. Contact us, and we’ll bring your ideas to life.
