
Contract – WorkDo Dash SaaS Add-On Guide
Learn how to create, manage, and track contracts in WorkDo Dash SaaS.
Introduction
The Contract Management Add-On lets you create, track, and manage contracts from start to finish, including status updates, renewals, attachments, comments, and signatures, all in one place. Summary cards and progress bars give you a quick overview of contract health and upcoming expirations, while search and filters help you find what you need fast. You can also save time by converting contracts into reusable templates or duplicating existing ones and keeping everything organized using custom contract types.
How To Install the Add-On?
To Set Up the Contract Add-On, you can follow this link: Setup Add-On.
How To Use The Contract Add-On ?
Manage Contracts
- To create a new contract, click the “Create” button at the top of the Manage Contracts page. Enter a Subject, Value, start date or End Date, select Status from the dropdown (Pending, Accepted, Closed, Declined), select the Contract Type, and assign Users. If needed, create a new type using Create contract type (comes from the contract type section); the same applies for adding a new user via “Create user” (comes from the user management).
- At the top of the page, summary cards display an overview of your contracts at a glance: Total Contracts, Pending, Accepted, Closed, Declined, and Expiring Soon (contracts ending within 30 days).
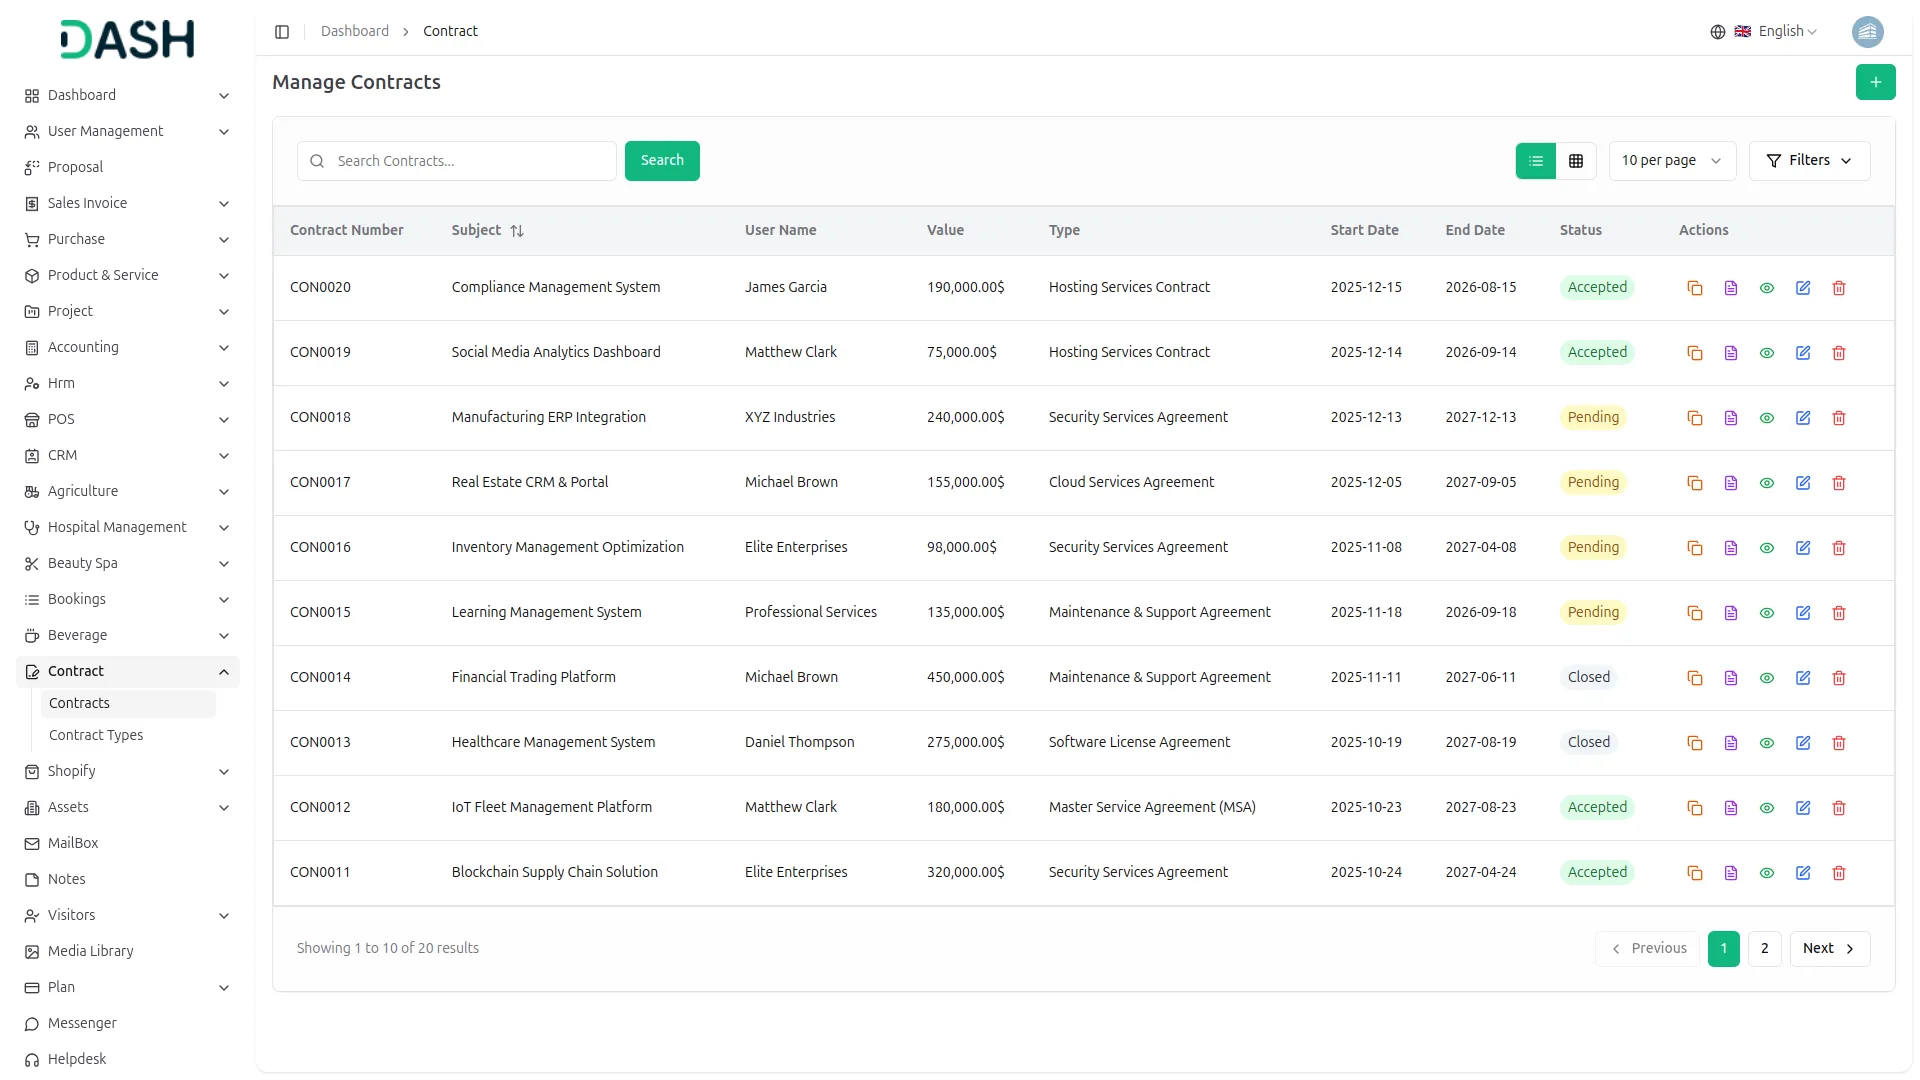
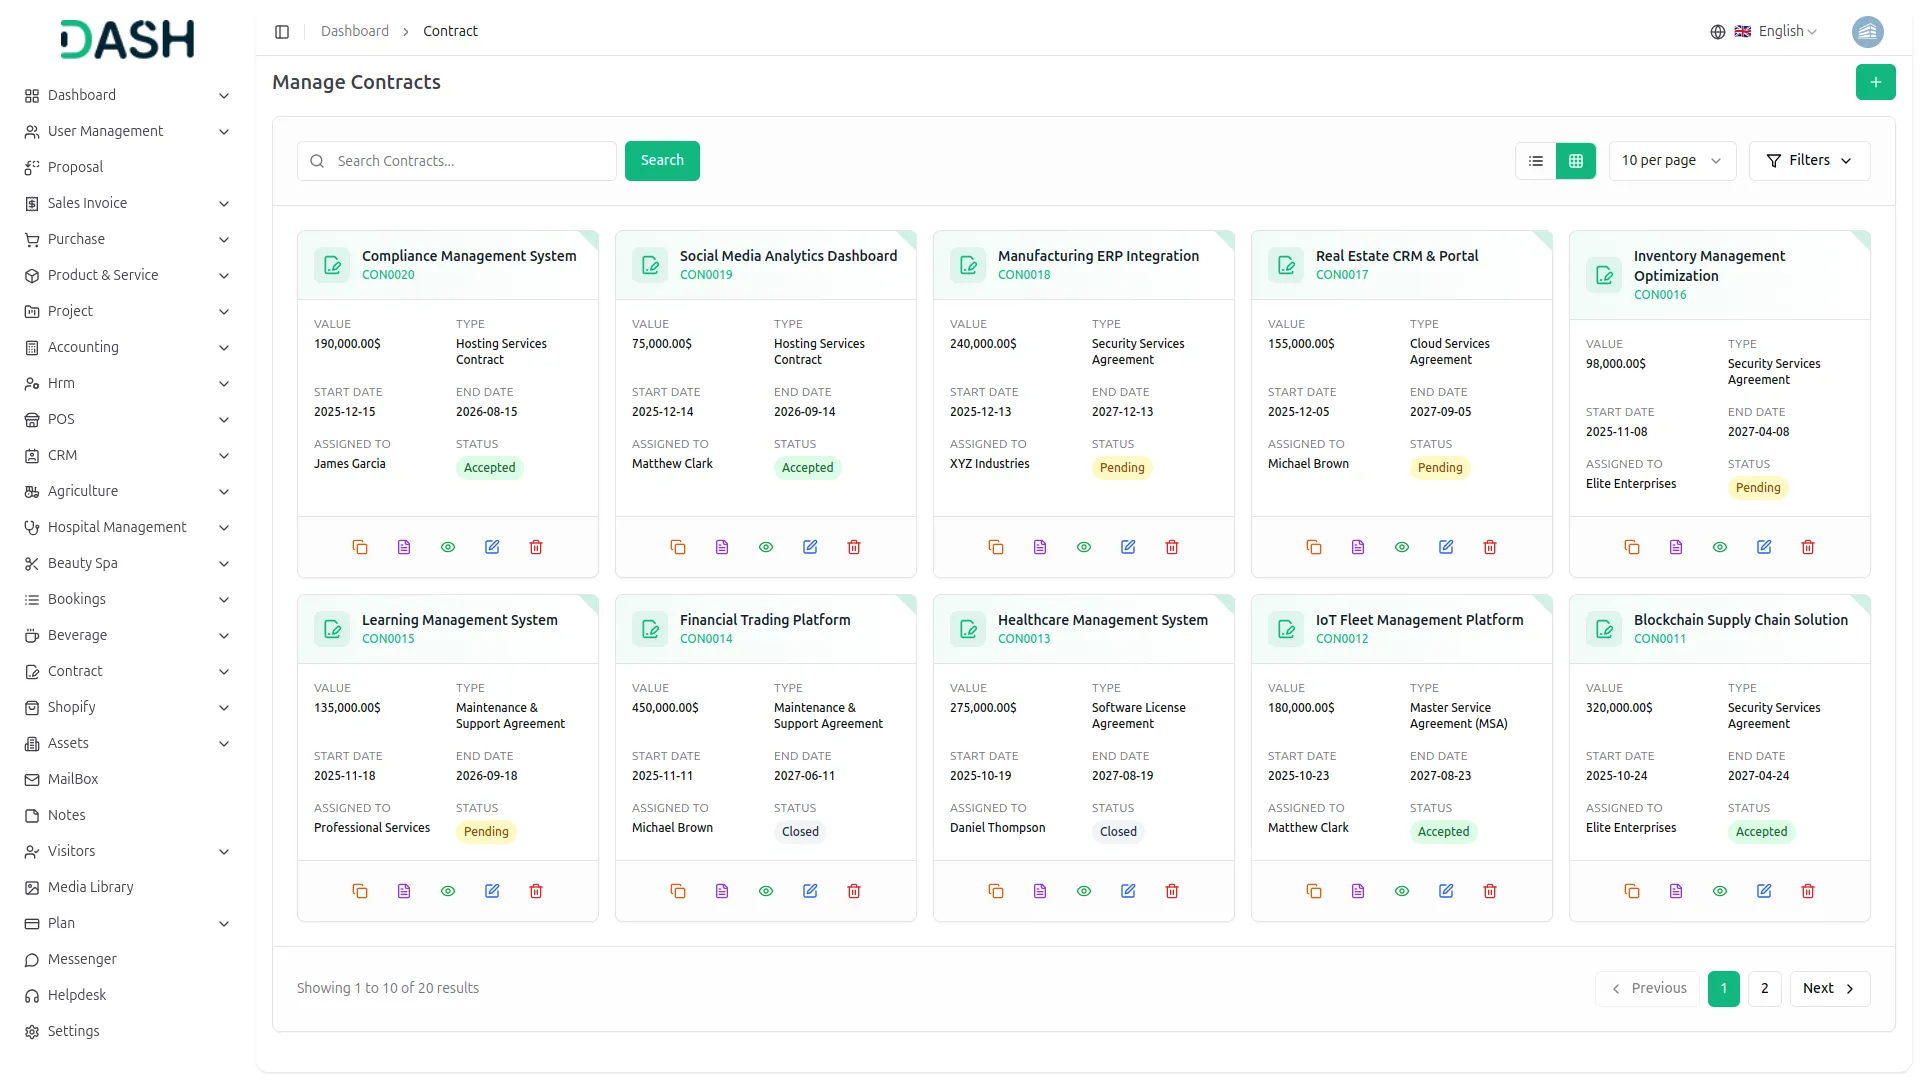
- The contracts table displays each contract’s icon, Contract Number, Subject, and Contract Type, along with the Assigned User, Status, Duration (with Start Date, End Date, and Total Duration), Value, and available Actions.
- Each contract’s Duration includes a progress bar showing what percentage of the contract has been completed, automatically calculated and updated based on the Start Date and End Date. The Status column shows a dropdown so you can update a contract’s status directly from the list (Pending, Accepted, Closed, Declined).
- Use the search bar to find specific contracts. Click the “Filters” button to expand the filter panel, where you can filter by Type, User, and Date Range. After selecting your filters, click “Apply” to view the filtered results or “Clear” to reset them.
- Under Actions, you can perform several tasks on each contract:
- Duplicate: Create a new contract based on an existing one. The form opens pre-filled with the original’s Subject (marked as a Copy), Value, Contract Type, Status, and Assigned User; just add a new Start Date and End Date. Click “Duplicate” to create it, or “Cancel” to discard.
- Preview: View a formatted, print-ready version of the contract, showing the Client Name, Contract Value, Start/End Date, Duration, and Description, with options to Print or Download as PDF.
- View: Open the full contract details page.
- Edit: Update the contract’s information.
- Delete: Permanently remove the contract.
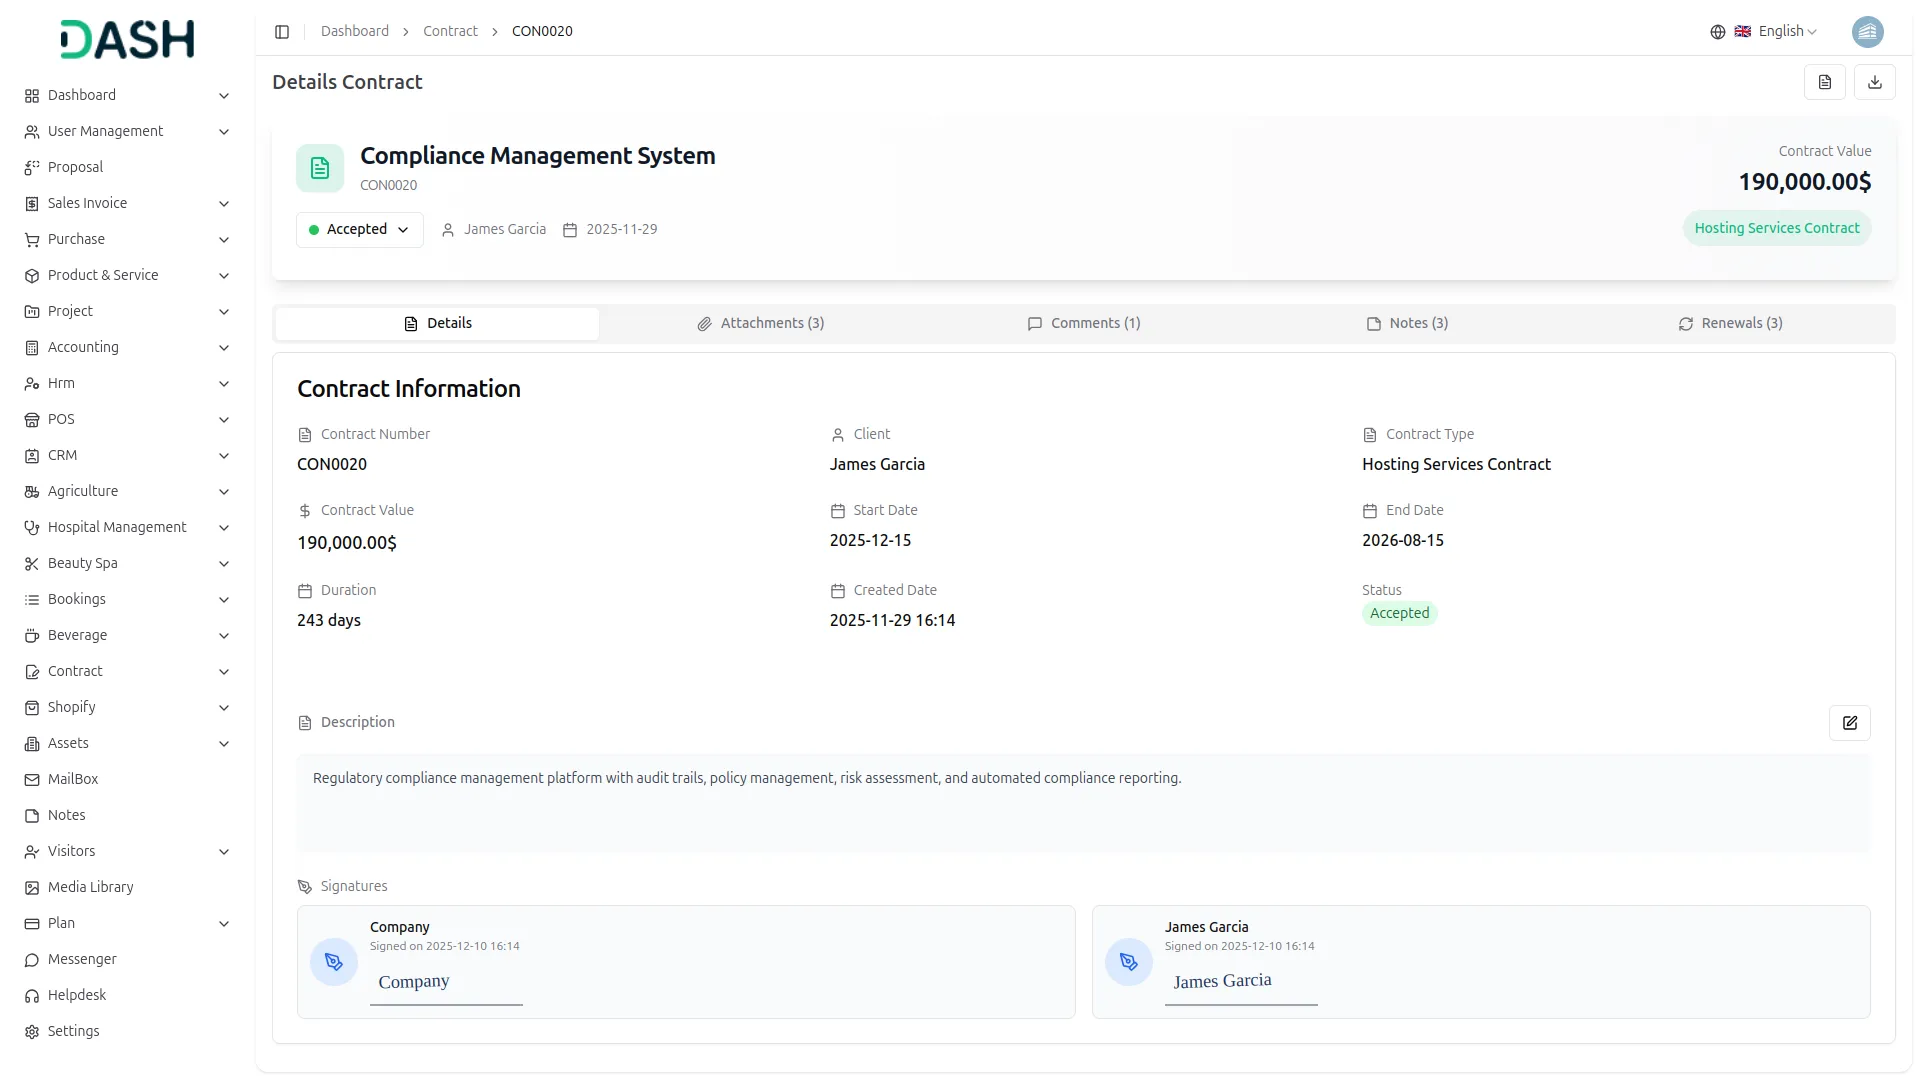
- When you click the View button, you can see the detail page, where key figures, Contract Value, Start Date, End Date, Duration, and Days Remaining, are displayed at the top alongside its current Status.
- The left panel of the contract detail page shows the Contract Details (Client, Contract Number, Contract Type, and Created Date) and the Signatures section, listing who has signed and when.
- The contract detail page is organized into five tabs: Details, Attachments, Comments, Notes, and Renewals.
- Details: Shows the contract’s Description, which can be updated using the “Edit” button.
- Attachments: Lists uploaded files with their File Name, who uploaded them, and the upload Date, with options to download, preview, or delete each file. Click the upload icon at the top right to add new attachments.
- Comments: Displays a comment thread on the contract, where you can write and post new comments and edit or delete your own.
- Notes: Works similarly to Comments, allowing you and your team to add internal notes, with the ability to edit or delete existing entries.
- Renewals: Lists any renewal records for the contract, showing Start Date, End Date, Progress, Value, Status, and who created the renewal. Click the “Create” button to add a new renewal by specifying its Start Date, End Date, Value, Status, and optional Notes.
Contract Type
- To create a new contract type, click the green “Create” button at the top of the contract type page. Enter a Name and toggle its Status (Active or Inactive) using the switch.
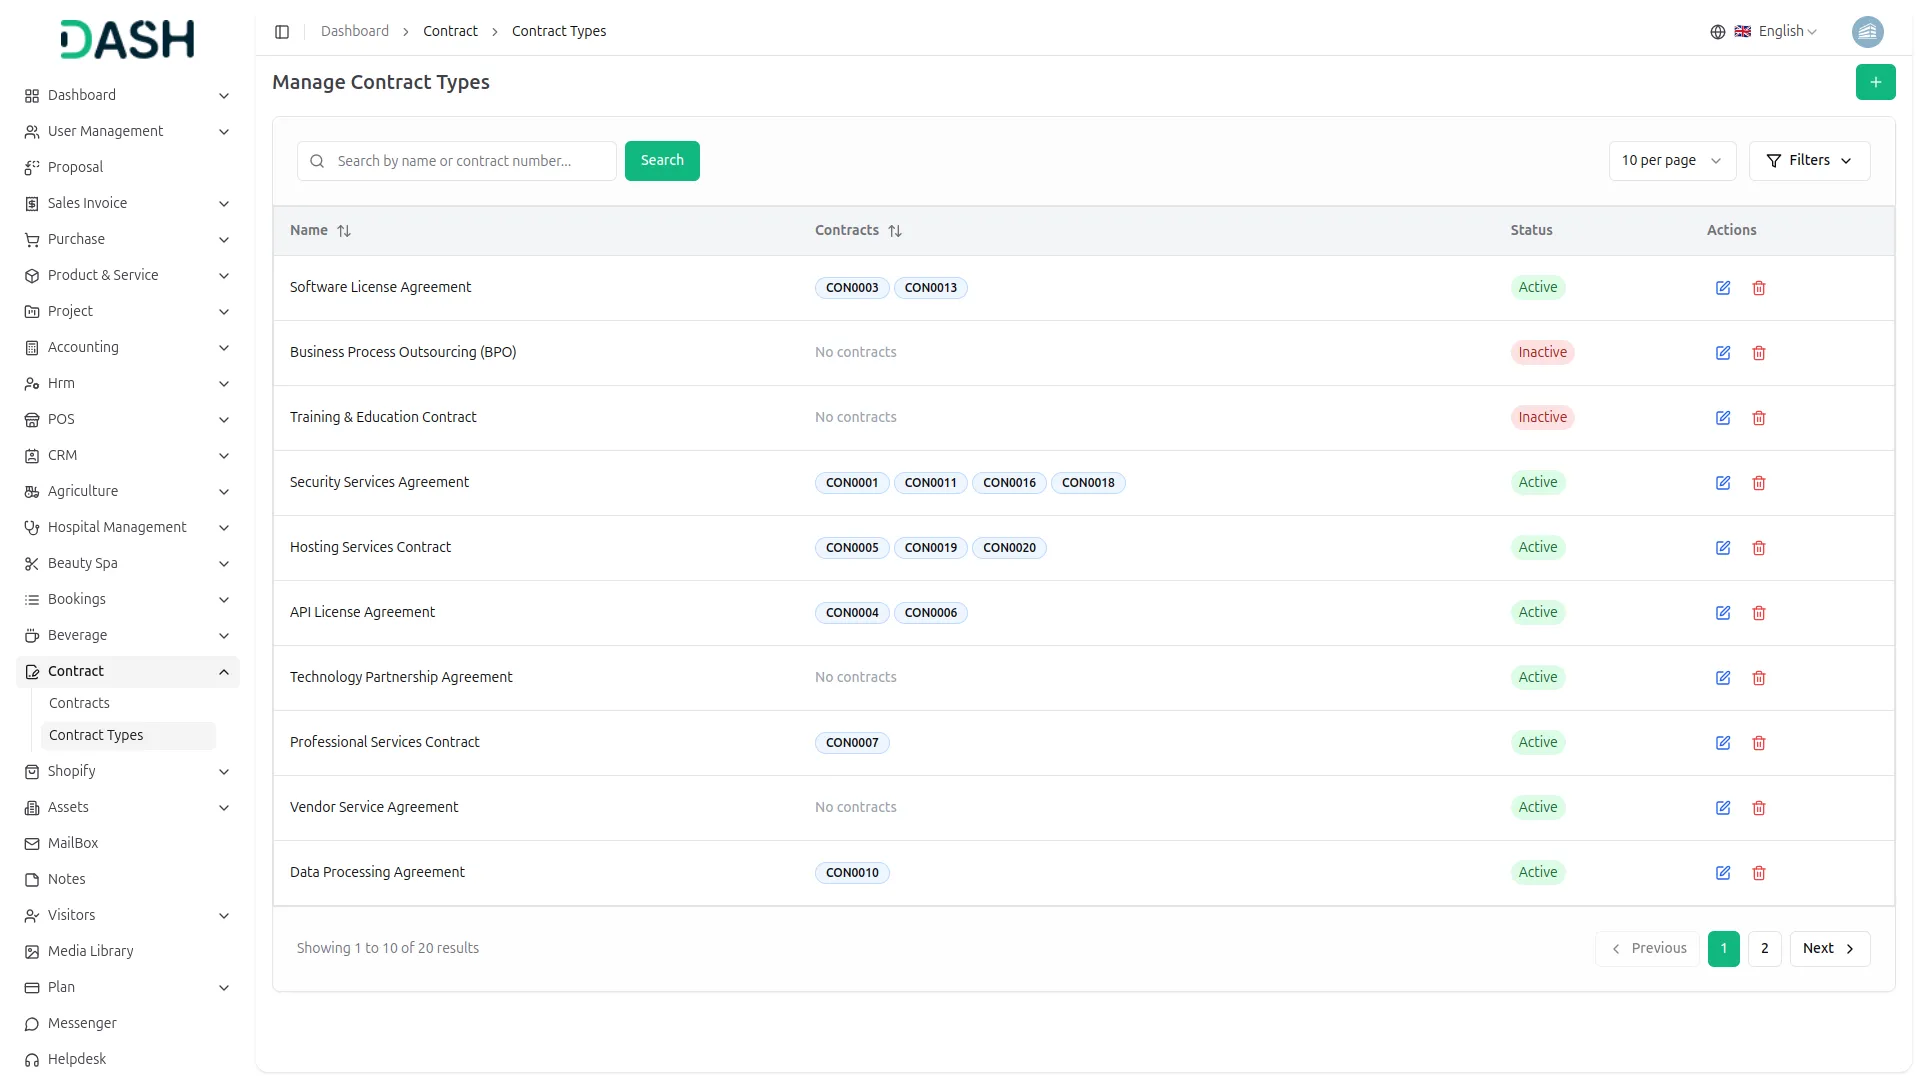
- In the Manage Contract Types page, the table displays each contract type’s Name, Contract Count, and Status (Active or Inactive). Both the Name and Contract Count columns can be sorted by clicking the arrows next to their headers.
- You can use the search bar to find a contract type. You can filter the list using the “All”, “Active”, and “Inactive” tabs, each showing a count of how many contract types fall under it.
- The Contract Count shows how many contracts are currently using that type. Clicking the count for an Active contract type takes you to a filtered view of all contracts associated with it.
- Under Actions, you can click the edit button to update a contract type’s details or the delete button to remove it.
Categories
Related articles
- PowerTranz – WorkDo Dash SaaS Add-On Guide
- Flutterwave – WorkDo Dash SaaS Add-On Guide
- SMS – BookingGo SaaS Add-On Guide
- Tattoo Studio Management – WorkDo Dash SaaS Add-On Guide
- Square – WorkDo Dash SaaS Add-On Guide
- Gym Management – WorkDo Dash SaaS Add-On Guide
- Retainer – WorkDo Dash SaaS Add-On Guide
- Tracking Pixel – BookingGo SaaS Add-On Guide
- Export Conversations – TicketGo Add-On Guide
- Xendit – WorkDo Dash SaaS Add-On Guide
- Additional Custom Field – BookingGo SaaS Add-On Guide
- BitPay – WorkDo Dash SaaS Add-On Guide
We're Here to Help - Let's Talk
Have questions about our solutions, customization services, or business tools? Our team is here to help you. let's talk.