Bookings Integration in Dash SaaS
Enhance your management processes with comprehensive Bookings Integration in Dash SaaS. Streamline service scheduling for optimal efficiency.
Introduction
Bookings is a comprehensive appointment management software designed to streamline business operations for service-based businesses. The system allows you to manage appointments, track customers, handle staff scheduling, and organize services with packages. It includes features for setting business hours, managing locations, tracking appointments through different stages, and providing multiple viewing options, including calendar and kanban board views. The software integrates with HRM Add-On for holiday management and provides detailed reporting through dashboard analytics.
How To Install The Add-On?
To Set Up the Bookings Add-On, you can follow this link: Setup Add-On
How To Use The Bookings Add-On?
Bookings Dashboard
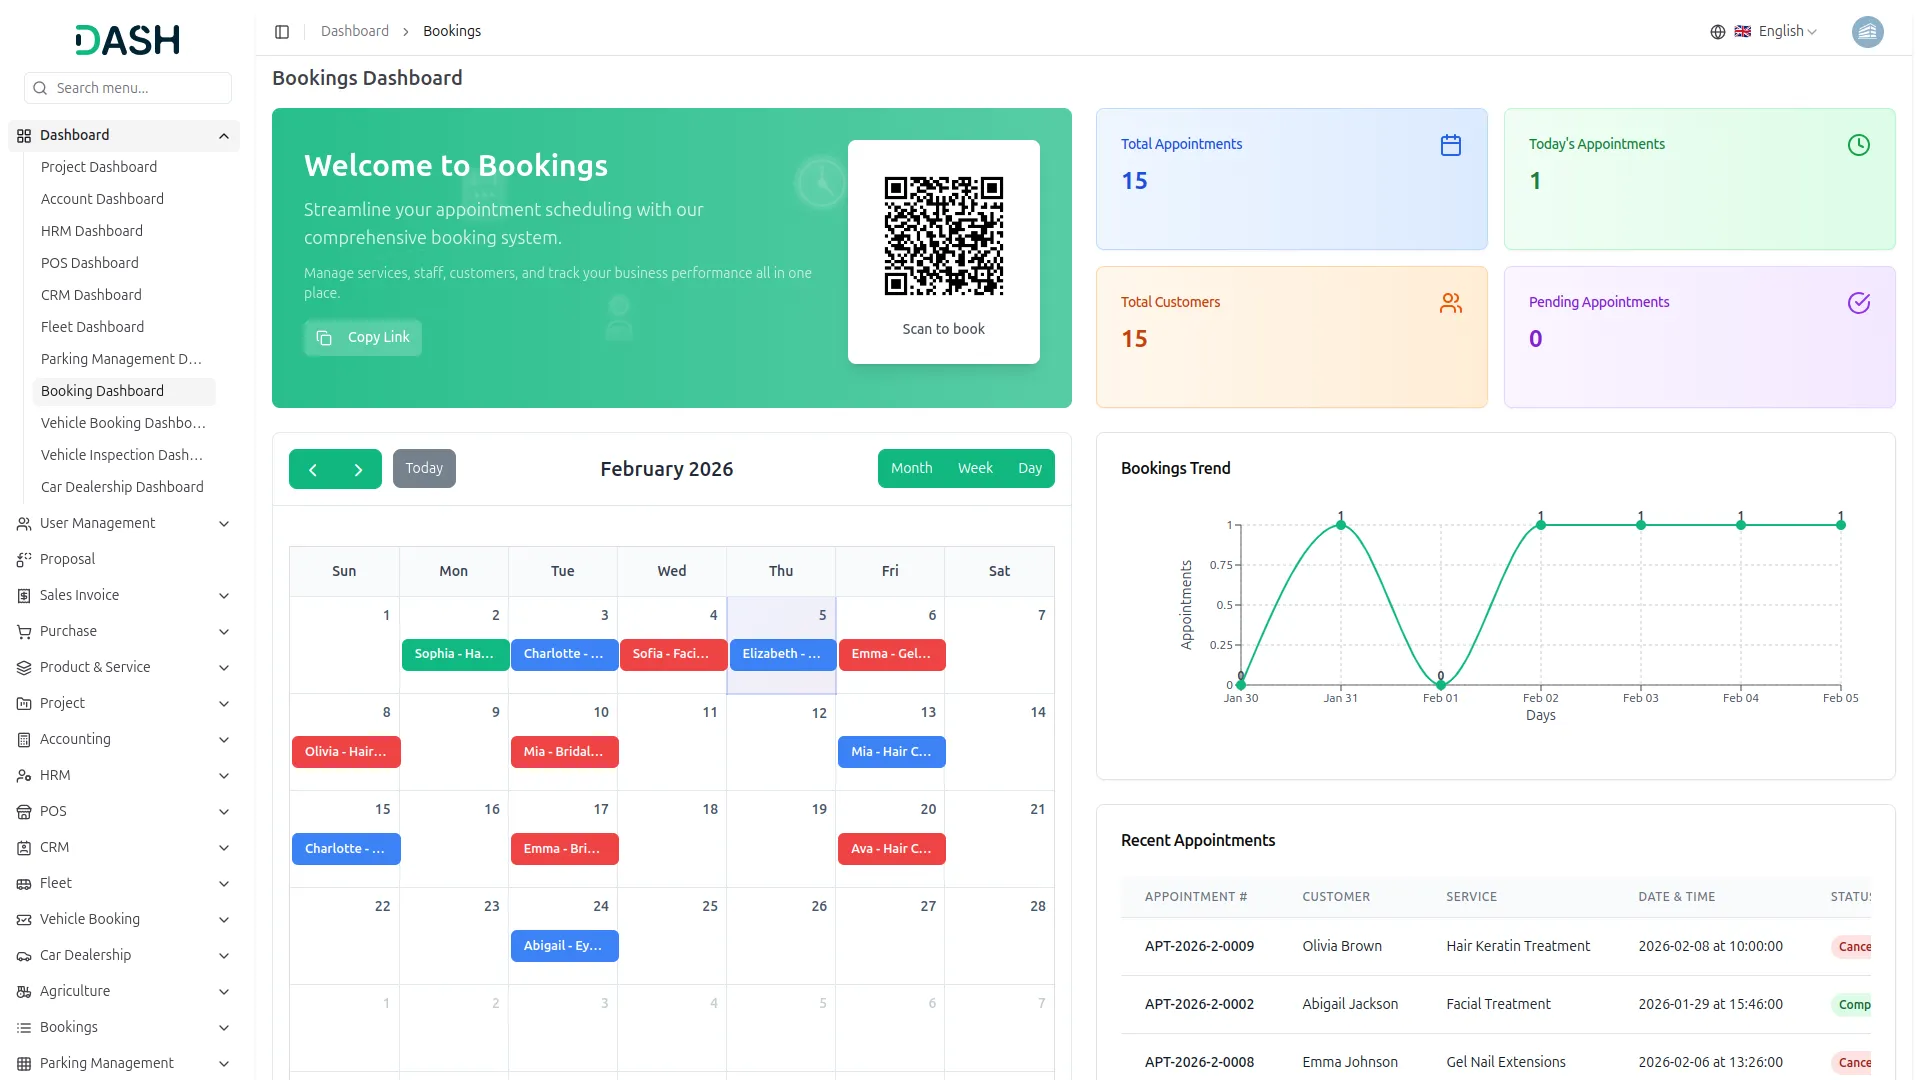
- The dashboard provides a comprehensive view of your booking operations with four key metrics at the top: Total Appointments, Today’s Appointments, Total Customers, and Pending Appointments for instant business insights.
- The Recent Appointments section displays a detailed table of all bookings with appointment numbers, customer names, services booked, scheduled dates and times, and color-coded status indicators for easy tracking.
- A monthly calendar view presents all appointments organized by date, with each booking shown as a colored block on the corresponding day. You can navigate between months and switch between Month, Week, and Day views for flexible schedule management.
- The right panel features a “Welcome to Bookings” section with a QR code that customers can scan to book appointments directly, along with a “Copy Link” button to share your booking page. Below this, a Bookings Trend chart visualizes your appointment volume over time, helping you identify busy periods and growth patterns.
Setting
General
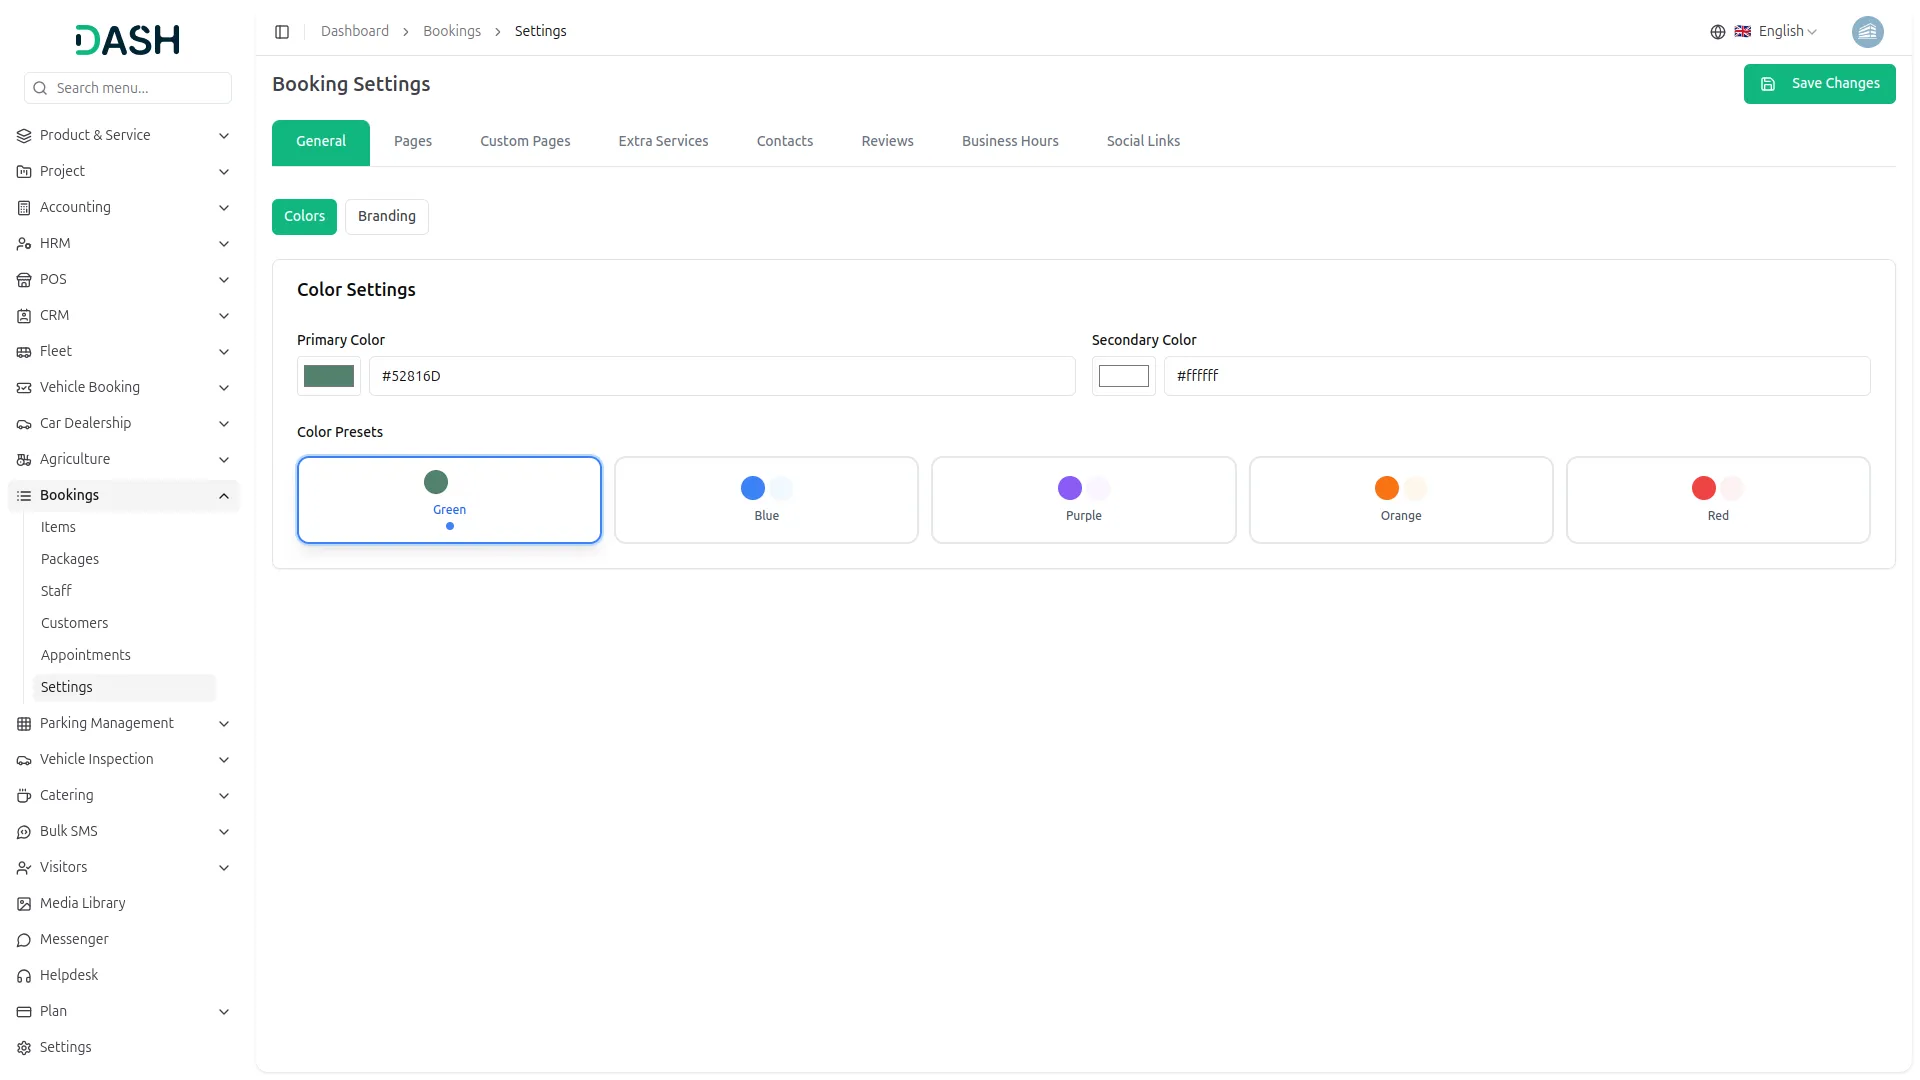
- The Colors panel contains options for Primary Color and Secondary Color. Use the color picker to select your brand colors and click Save Changes.
- After saving, your Primary Color will appear on buttons, links, and main elements throughout your booking website, while the Secondary Color will be used for accents and highlights, creating a consistent branded experience across all pages.
Colors
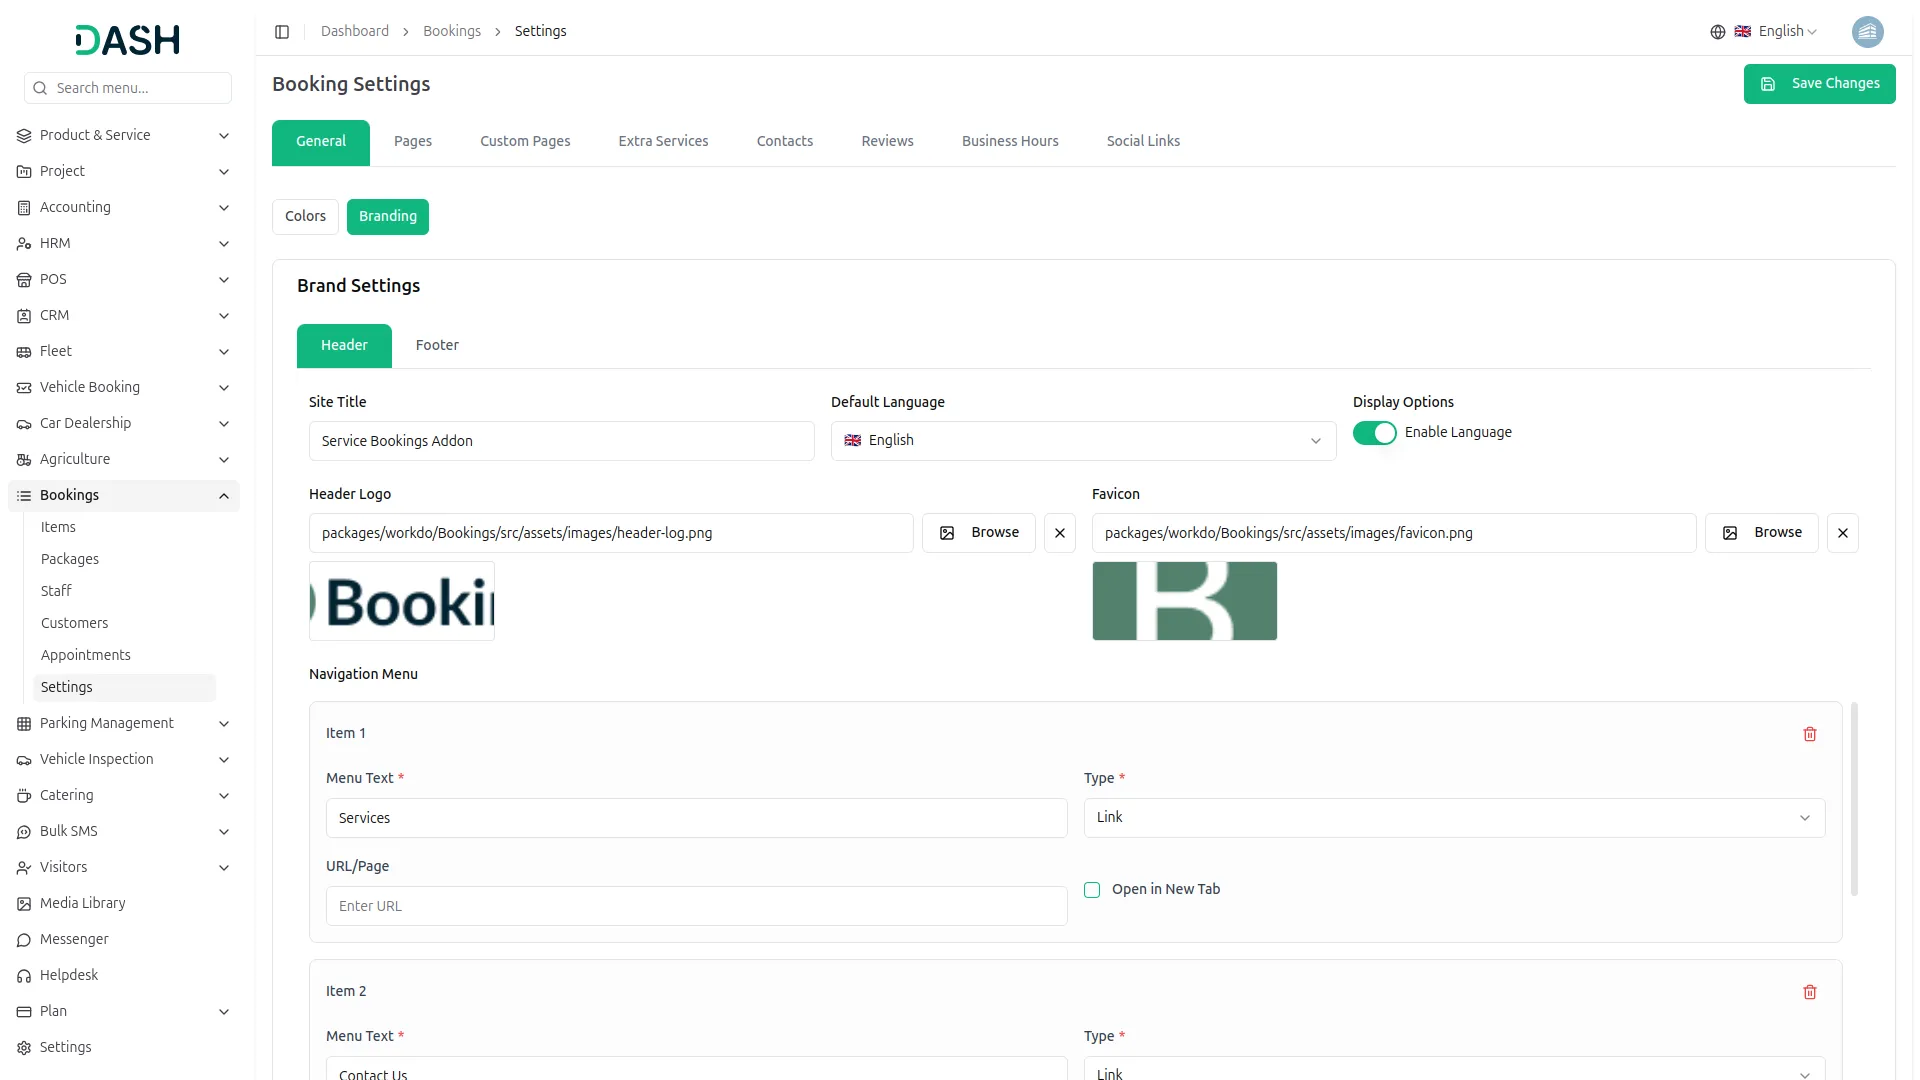
- This area includes options for Site Title, Logo, Favicon, Show Language Selector, Default Language, Navigation Menu with Menu Text, Type, URL/Page and Open in new Tab. Upload your logo and favicon, configure language settings, set up navigation menu items, click Save Changes.
- Once you’ve configured all elements, save your changes to activate your branding instantly. Your logo will appear in the header and footer of every page, ensuring consistent brand visibility. The site title reinforces brand recognition throughout the visitor journey, while your navigation menu provides intuitive access to key pages right from the header.
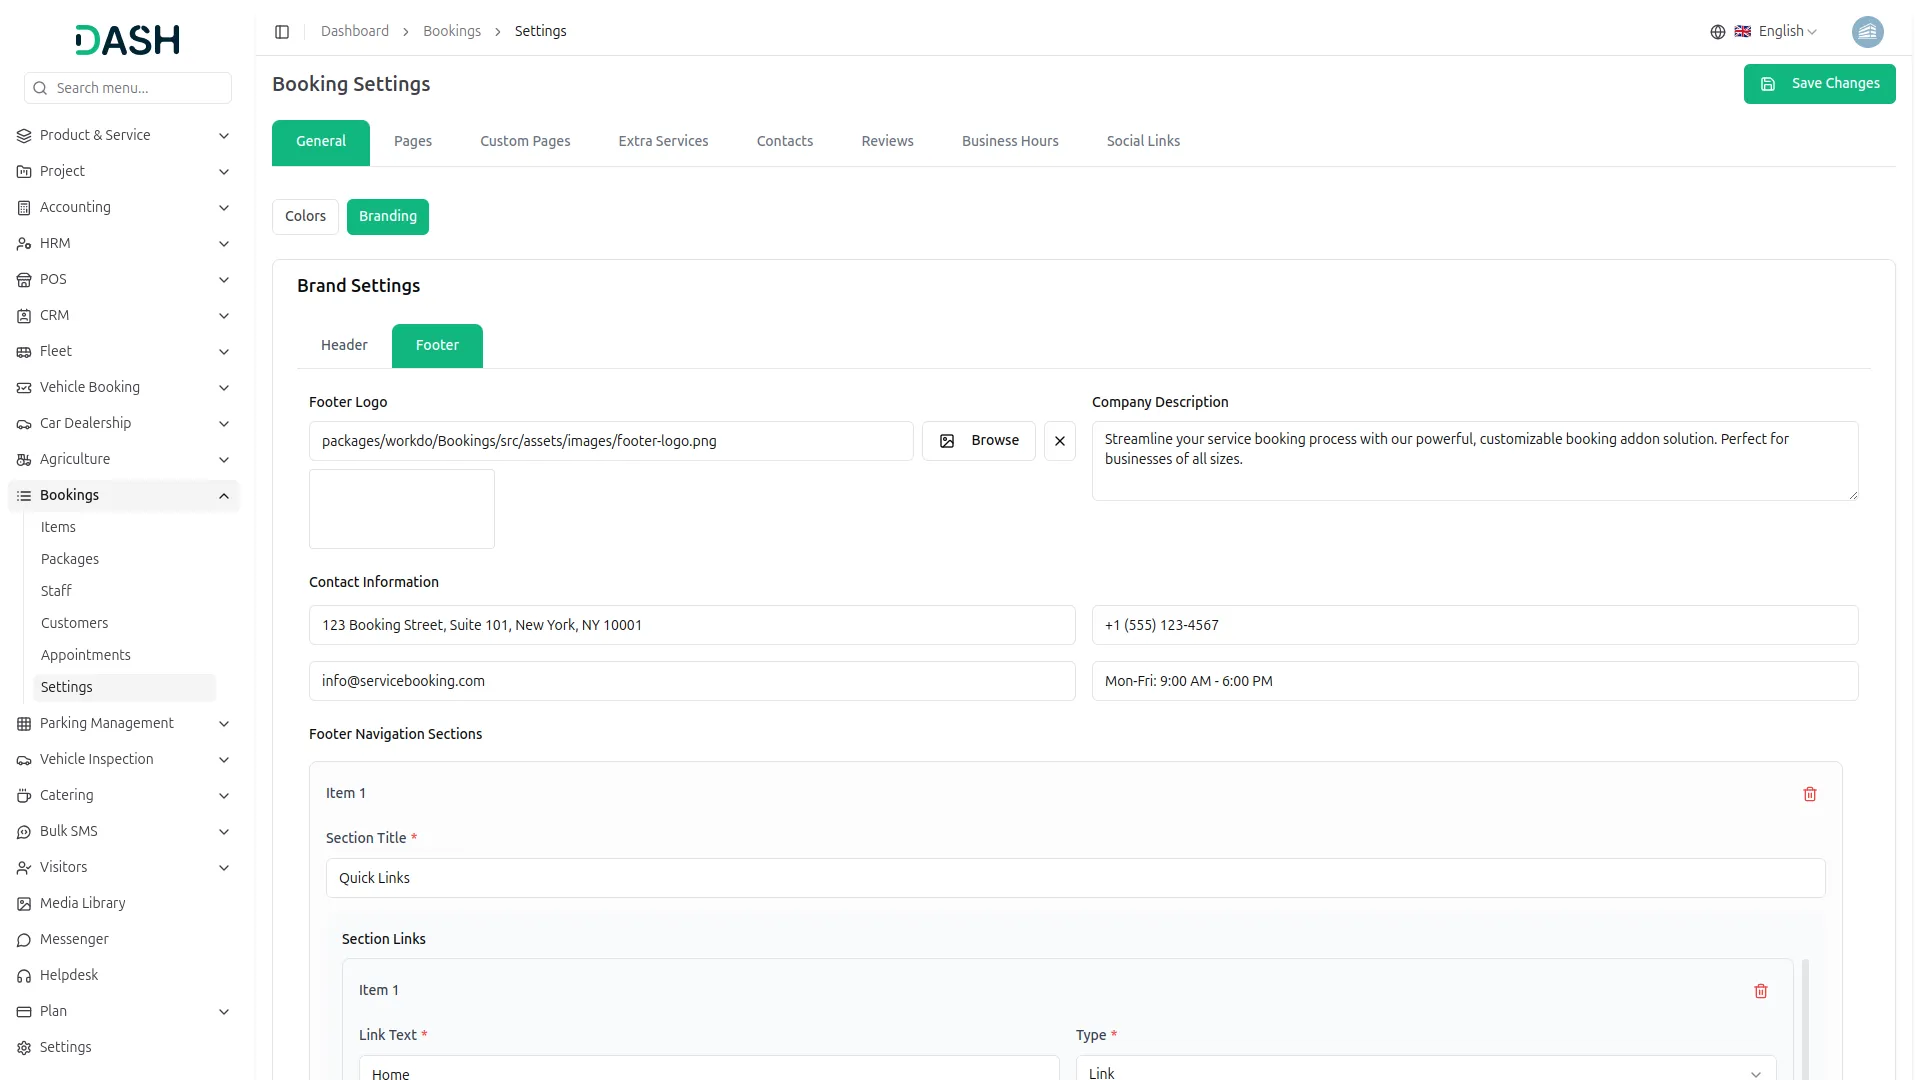
- Here you can manage Footer Logo, Company Description, Contact Information with Address, Phone, Email, Hours, Footer Navigation Sections with Section Title, Link Text, Type, URL/Page and Open in new Tab, and Copyright Text, then hit Save.
- After completion, your Footer Logo and Company Description will appear at the bottom of every page, while Contact Information, Navigation Sections with organized links, and Copyright Text will be displayed in the footer section for comprehensive customer access and professional brand presentation.
Branding
Header Settings
Footer Settings
Pages
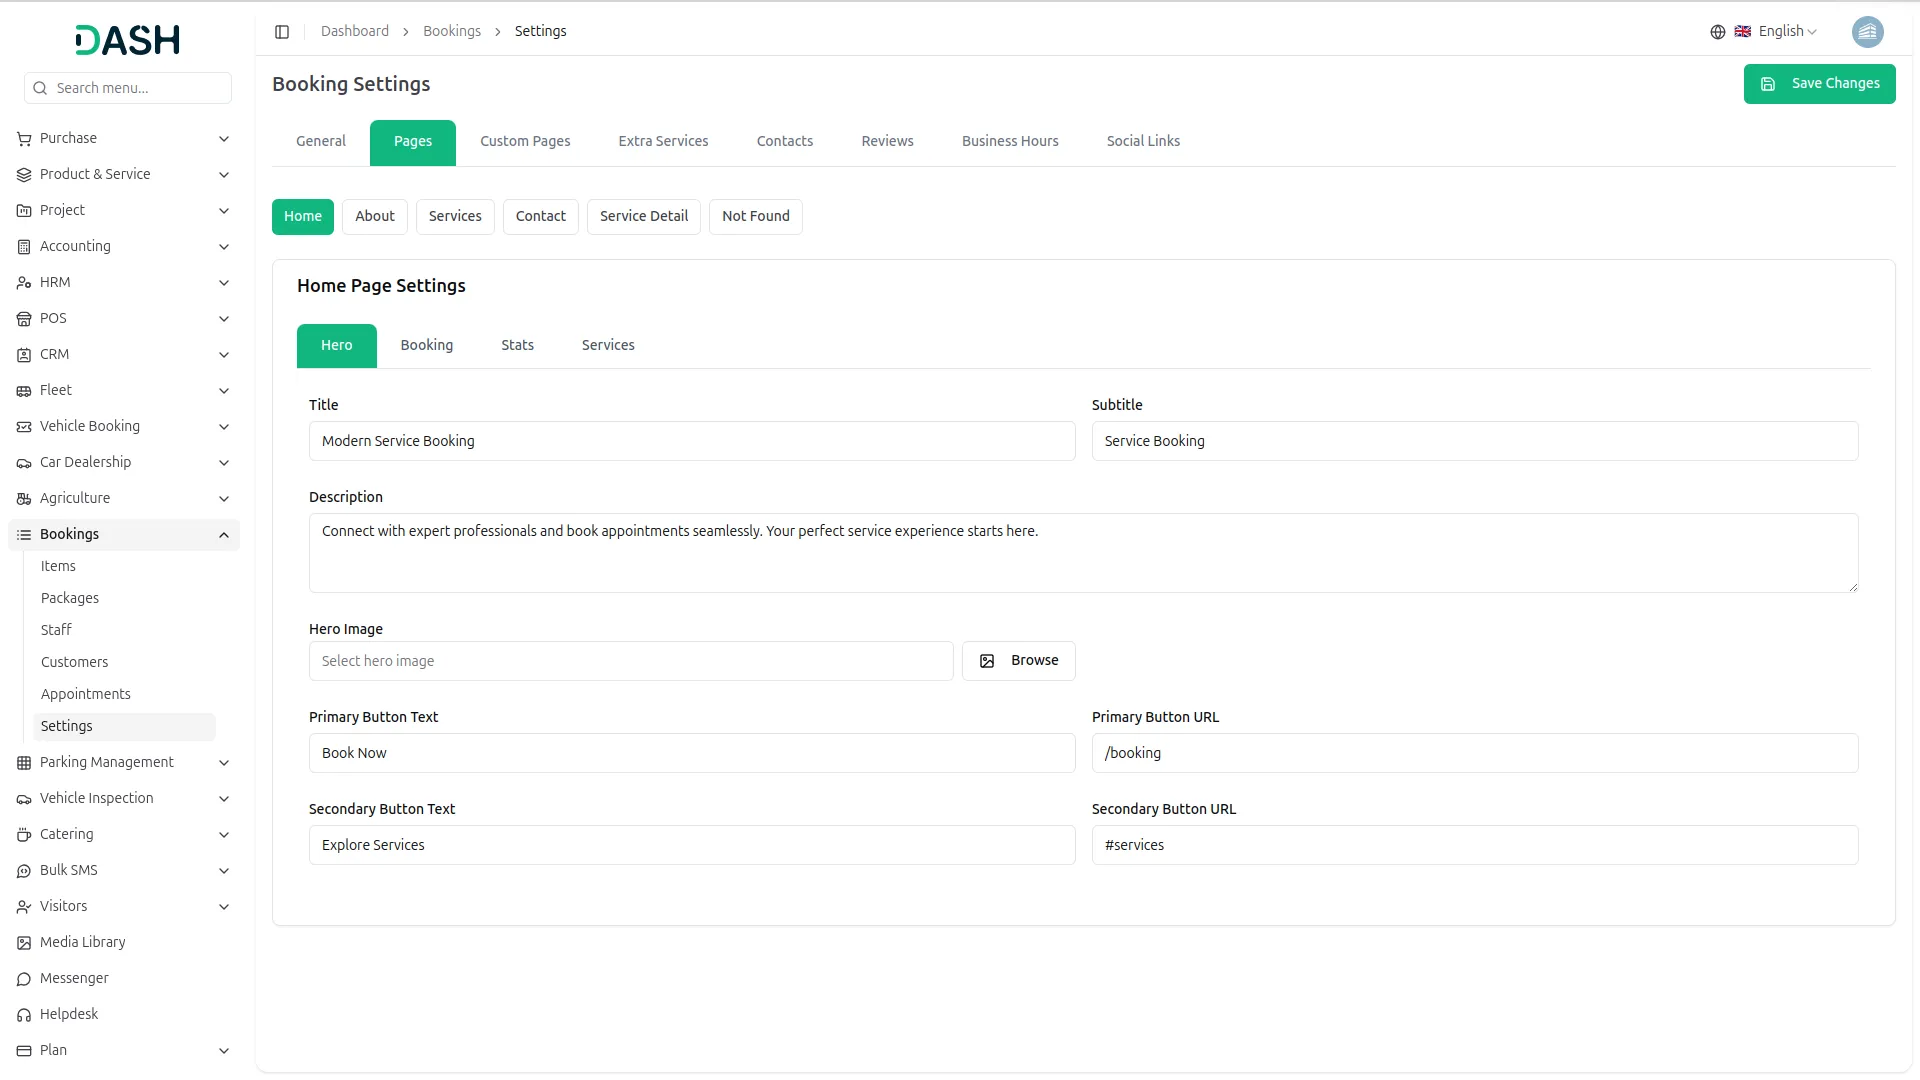
- The Hero area provides options for Hero Image, Button Text, and Button URL. Upload an attractive hero image, customize your call-to-action button text and destination URL, and submit changes.
- After saving, your Hero Image will appear as a large banner background, while your Button Text will show as a clickable “Book Now” style button that directs visitors to your specified URL for immediate engagement.
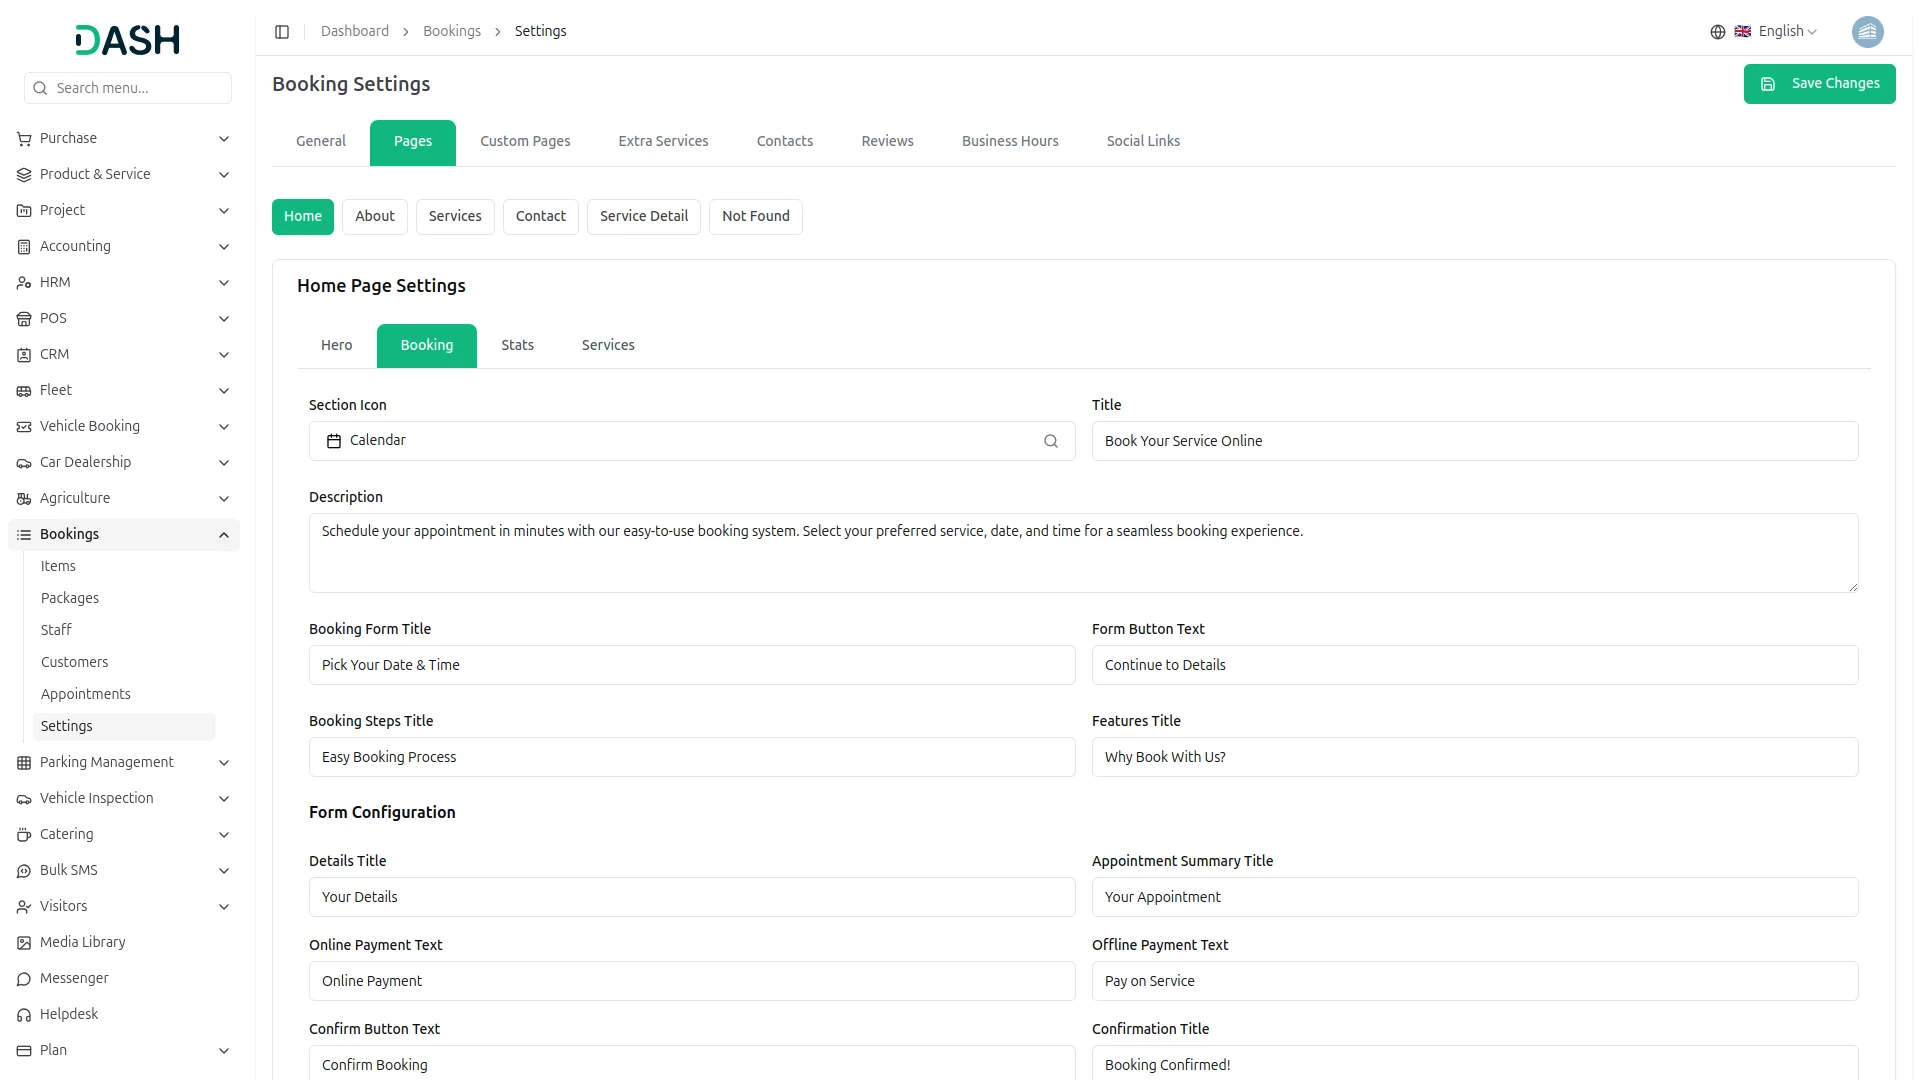
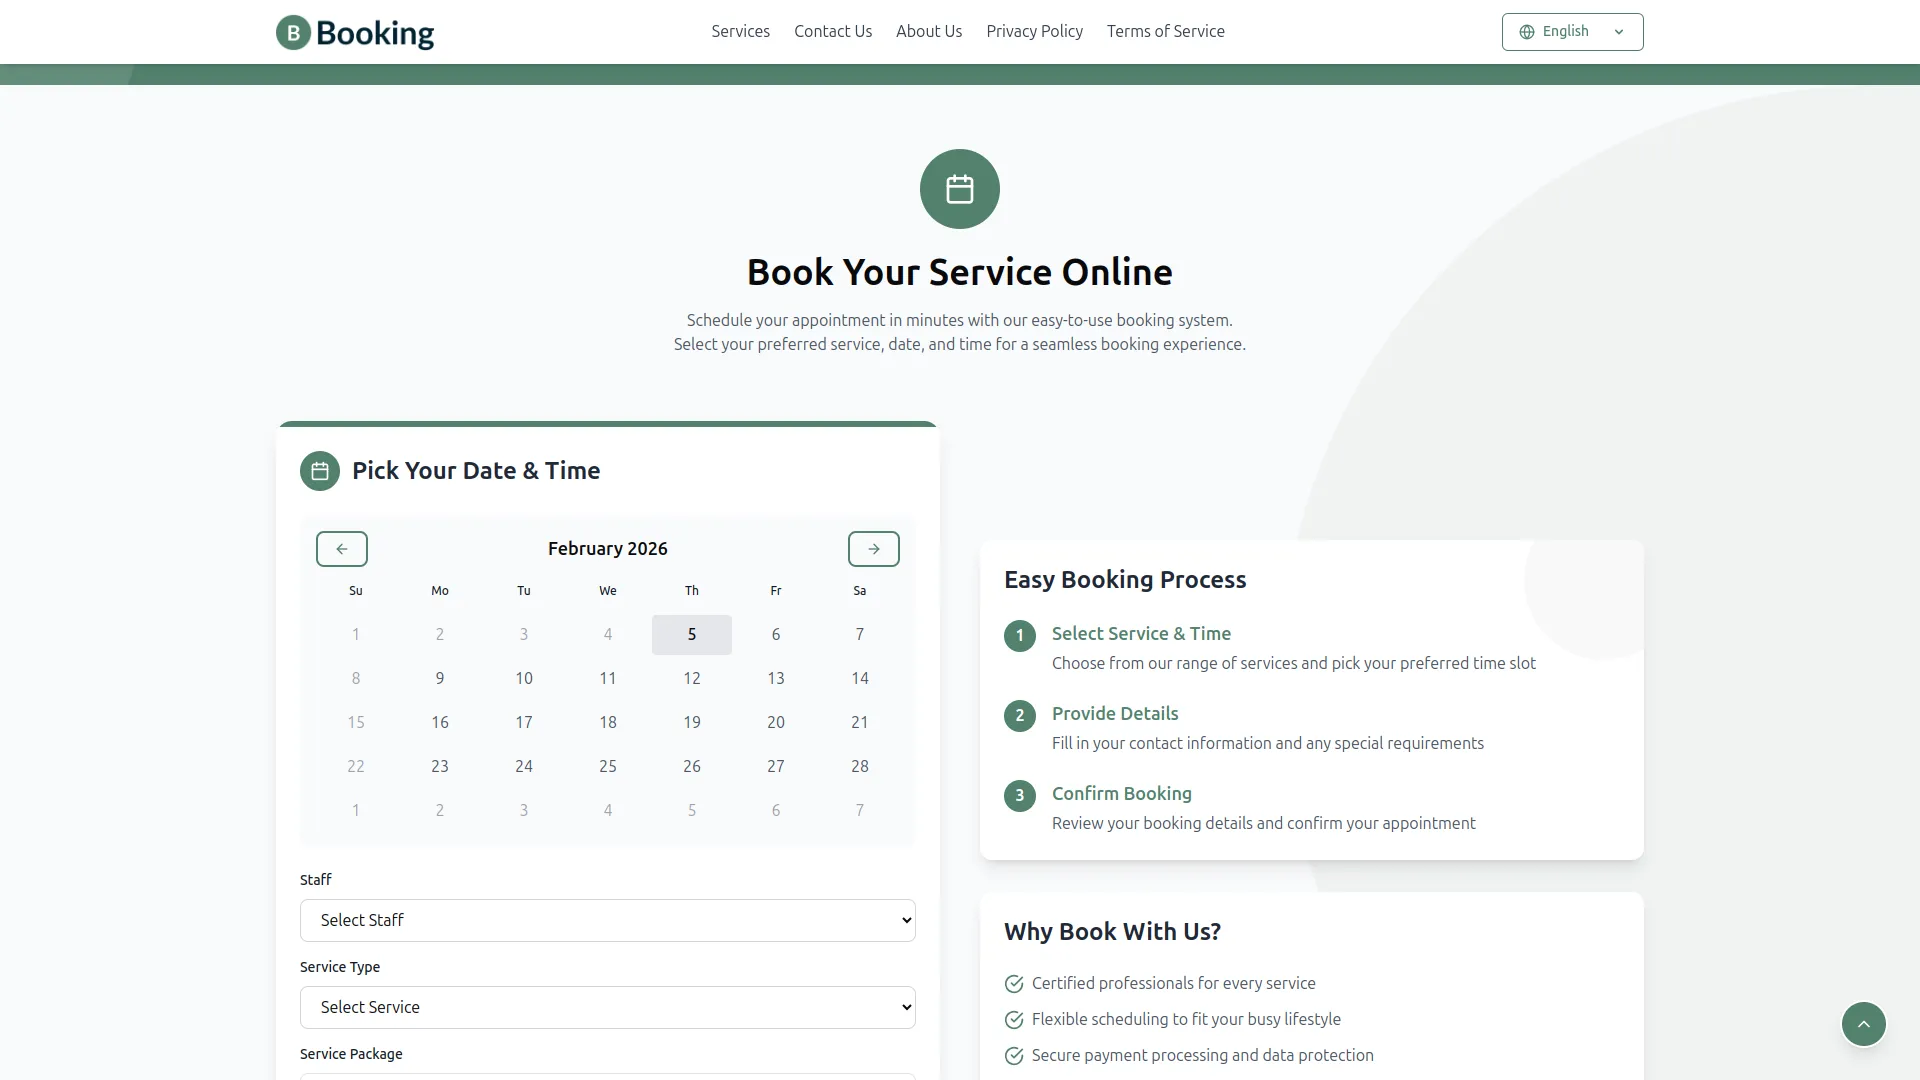
- This booking area contains settings for Section Icon, Main Button Text, Booking Form Title, Booking Steps Title, Features Title, Booking Process Steps, and Why Book With Us Features. Configure your booking interface elements, customize titles and descriptions, then apply settings.
- When published, visitors will see an Interactive Booking Interface with your custom titles, a structured booking process with your defined steps, and compelling features that highlight why customers should choose your services.
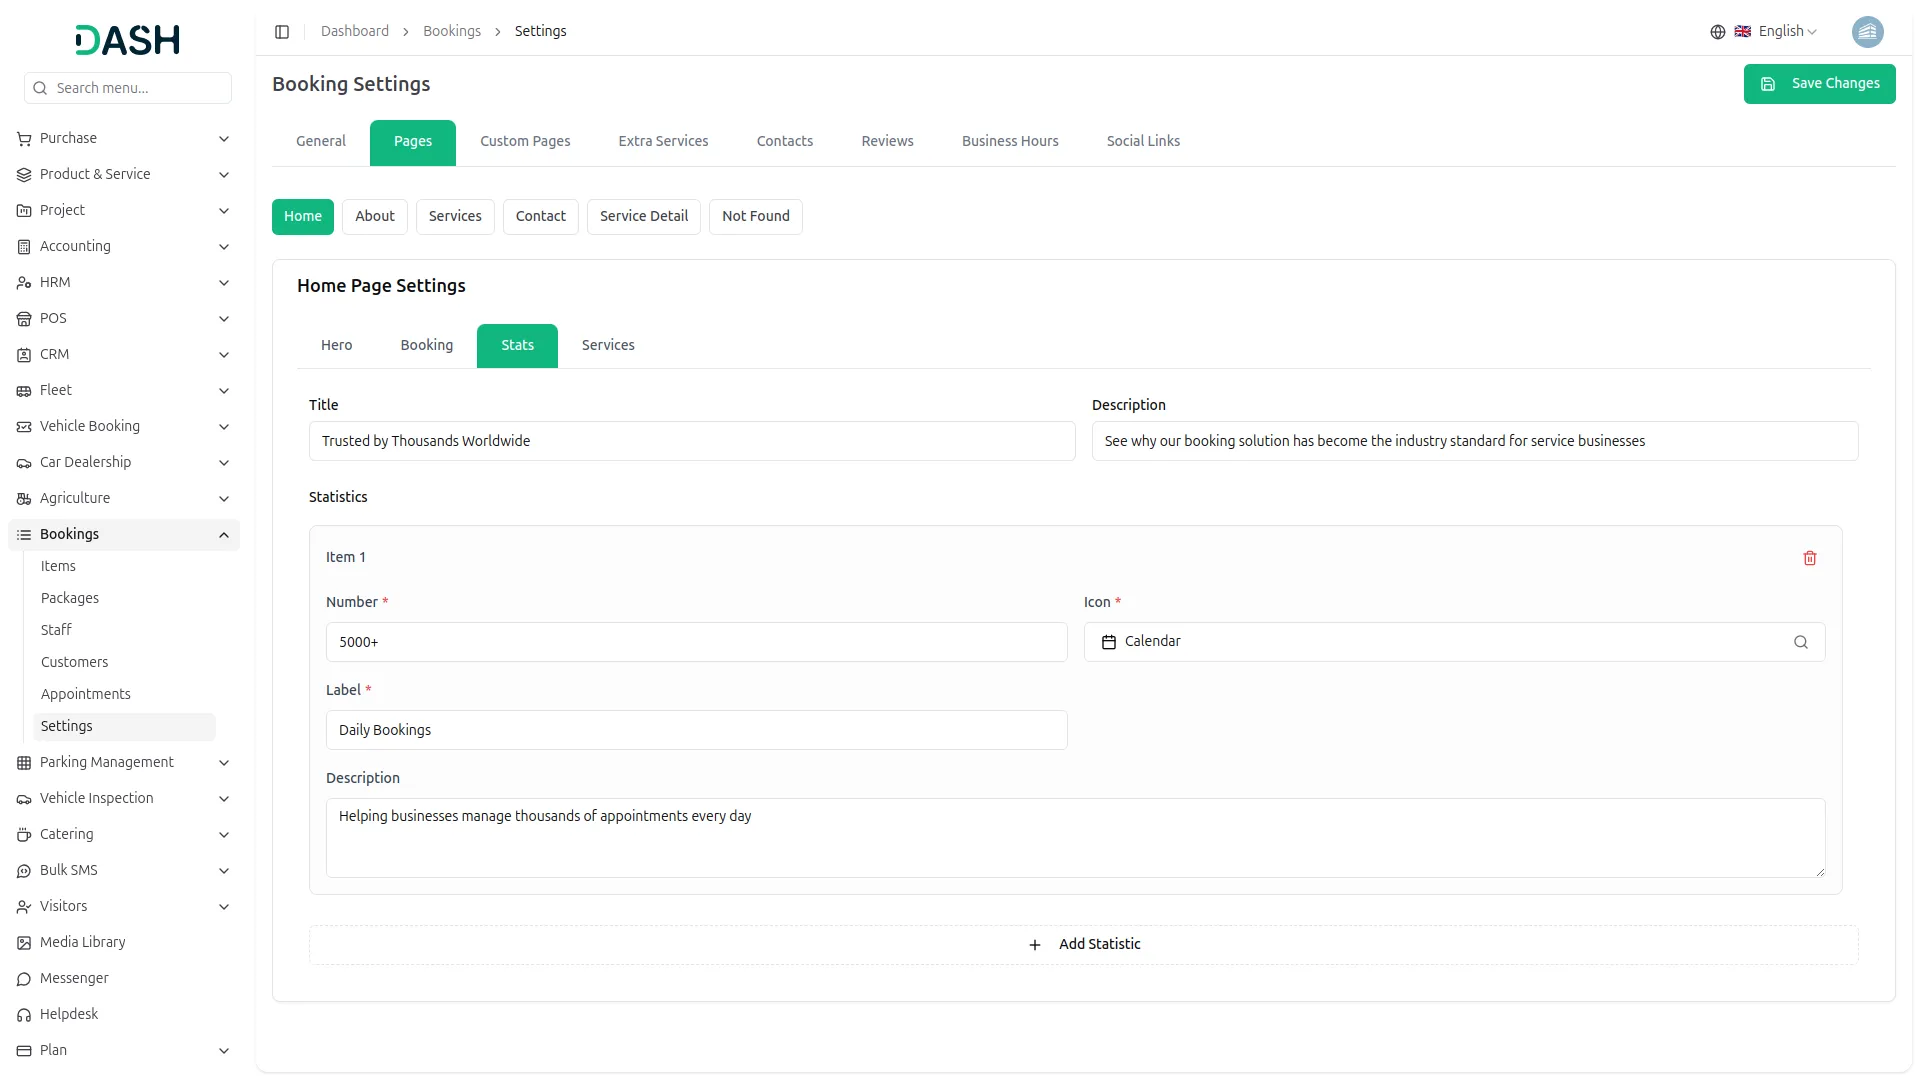
- The statistics panel offers fields for Description and Statistics with Number, Label, Icon, and Description for each stat. Enter your business achievements description and add individual statistics like “5000+ Daily Bookings”, and save updates.
- Upon completion, your Statistics will display prominently on the homepage with visual counters that animate when the page loads, showcasing your business success and credibility to visitors.
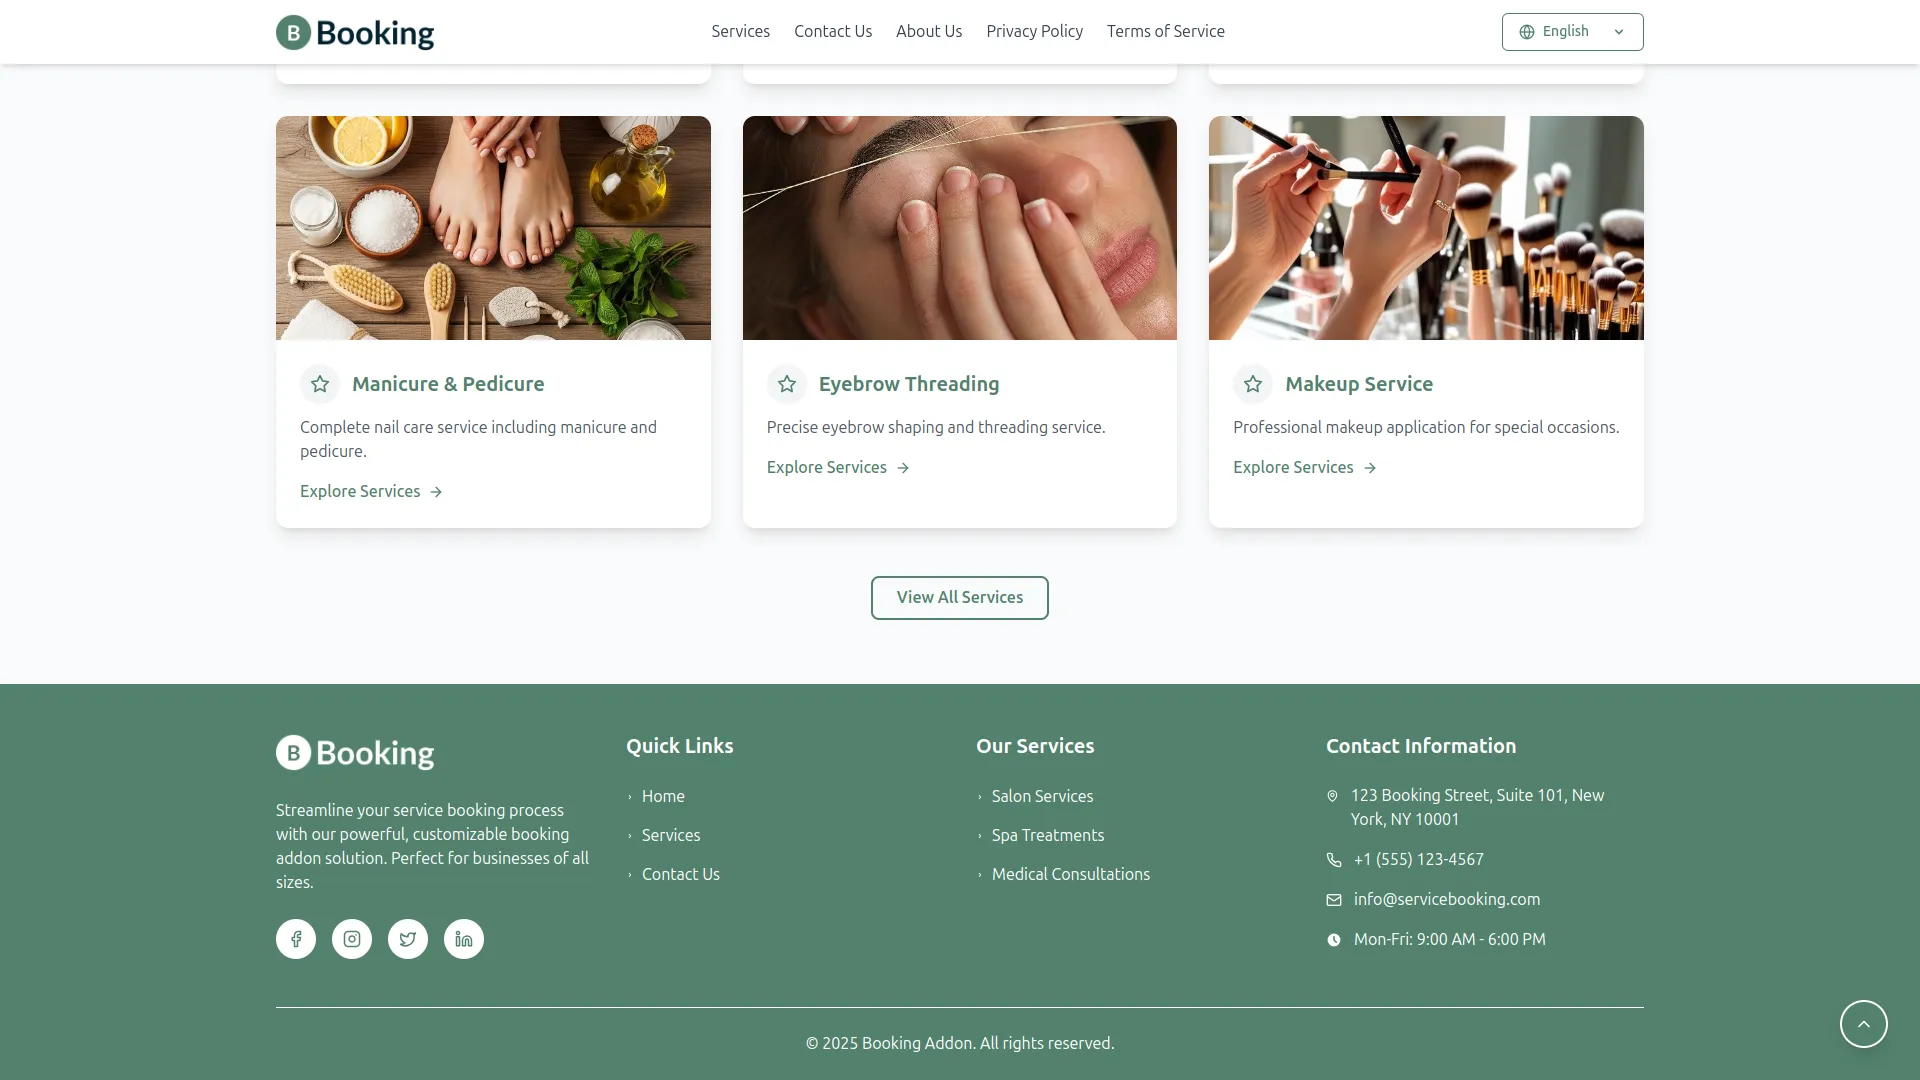
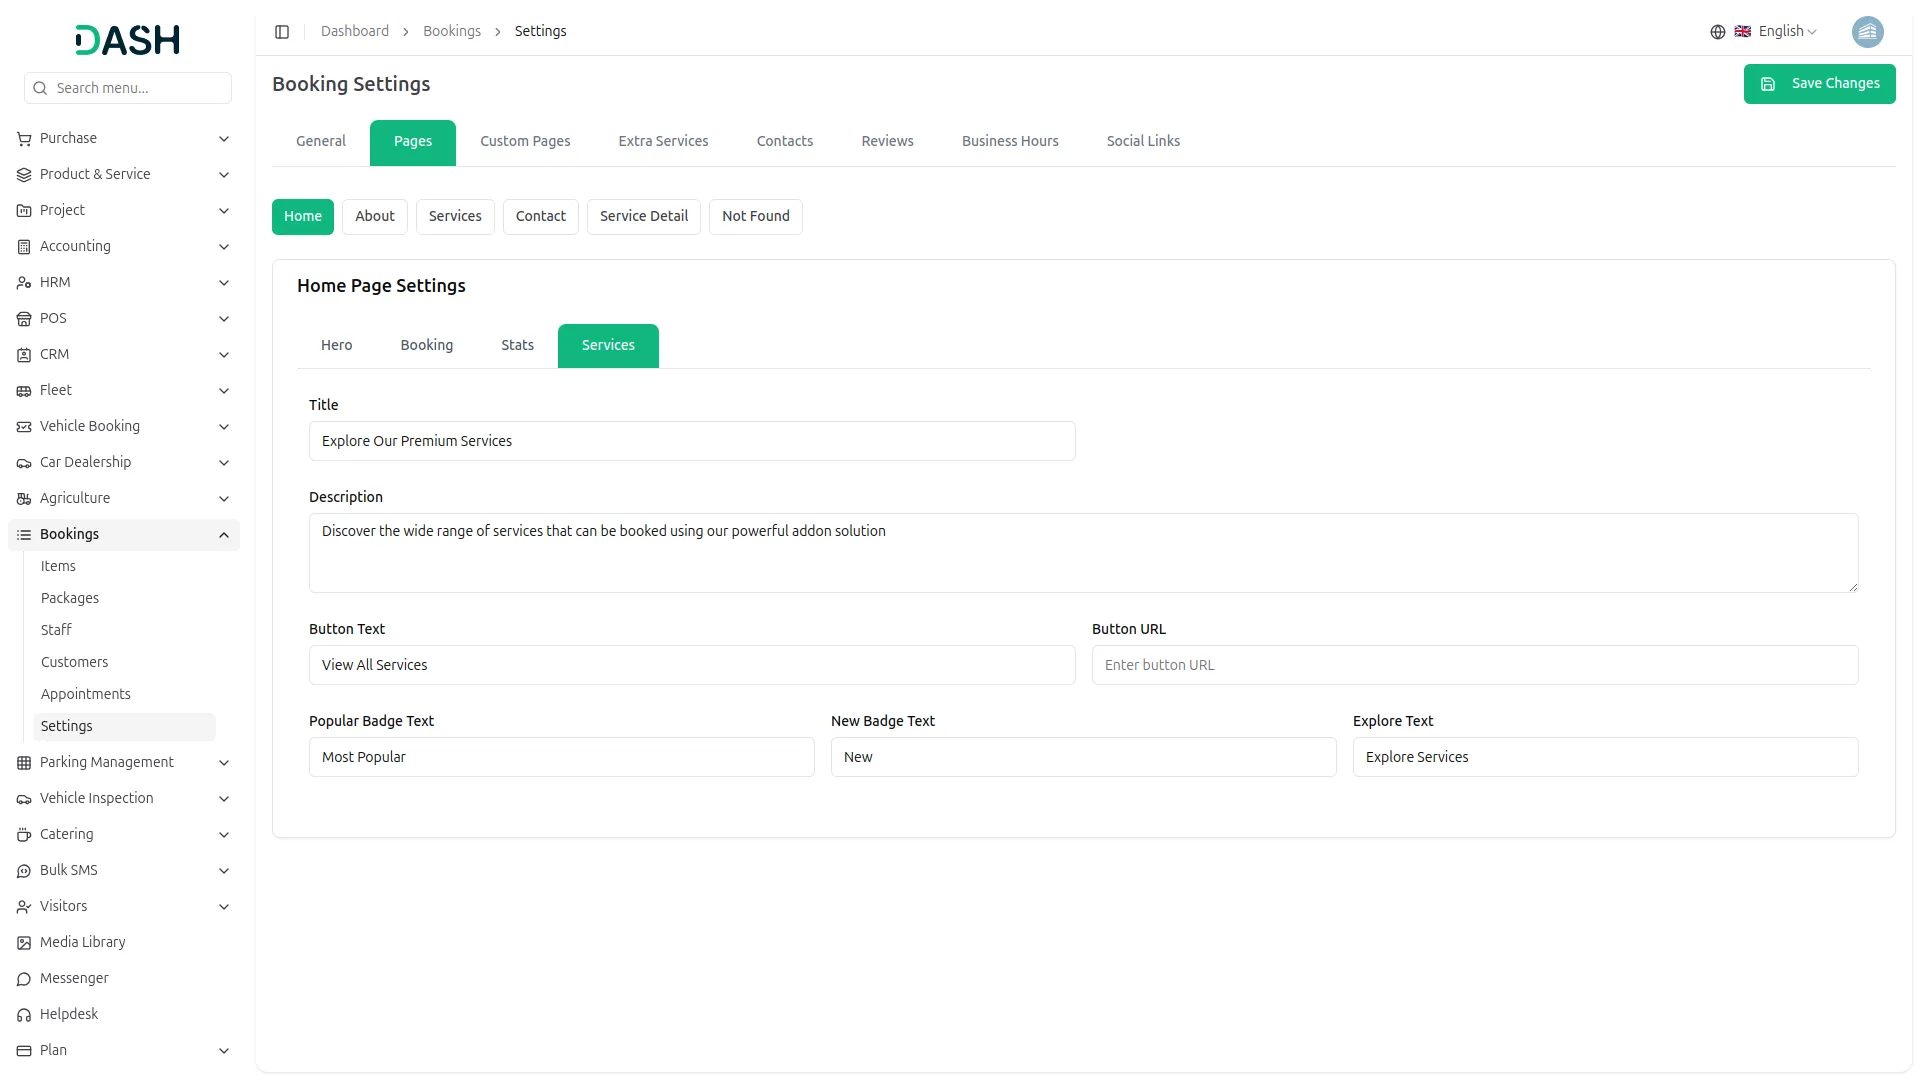
- This service area includes options for View All Button Text and Button URL. Customize the button that links to your full services page, then confirm changes.
- After updating, visitors will see a “View All Services” button that directs them to your complete services listing for detailed browsing and selection.
Home Page
Hero Section
Booking Section
Stats Section
Services Section
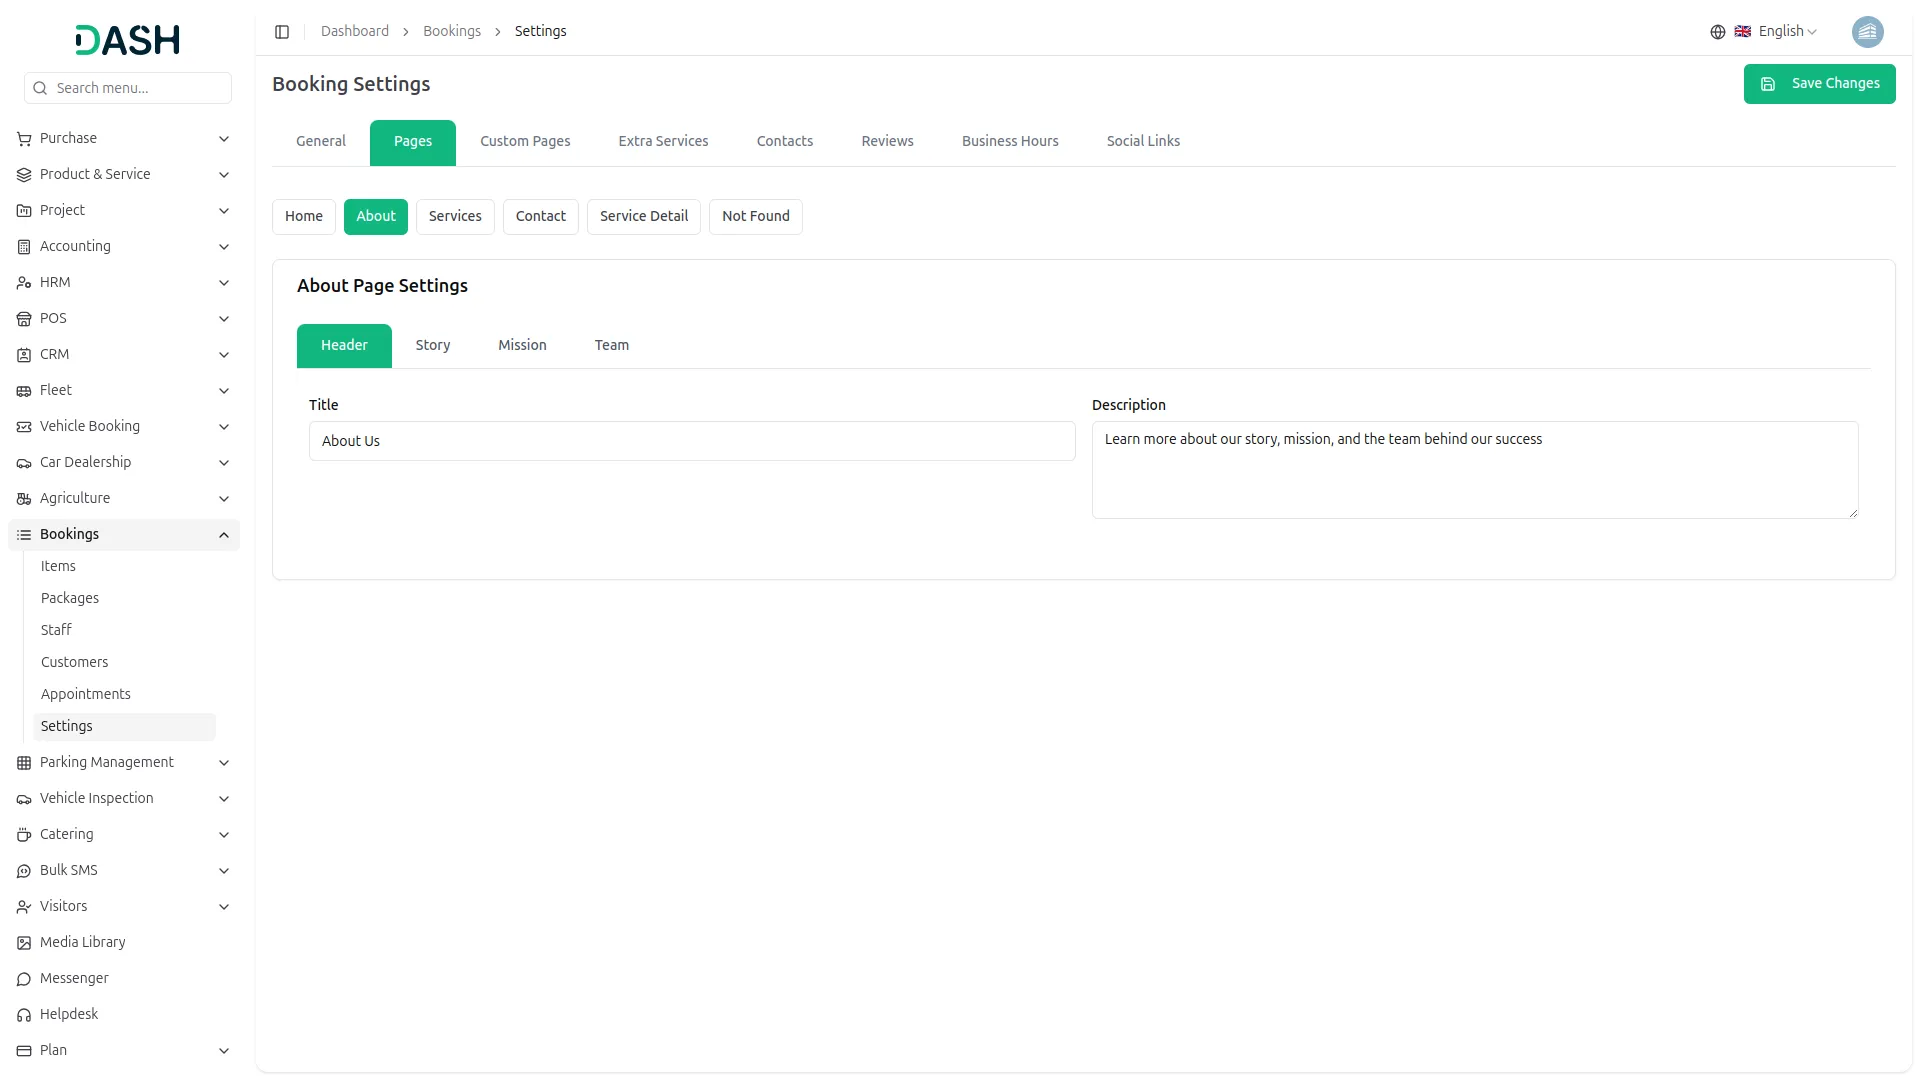
- The header area contains standard page header options for title, subtitle, and background image. Edit the page elements through the page settings and save the configuration.
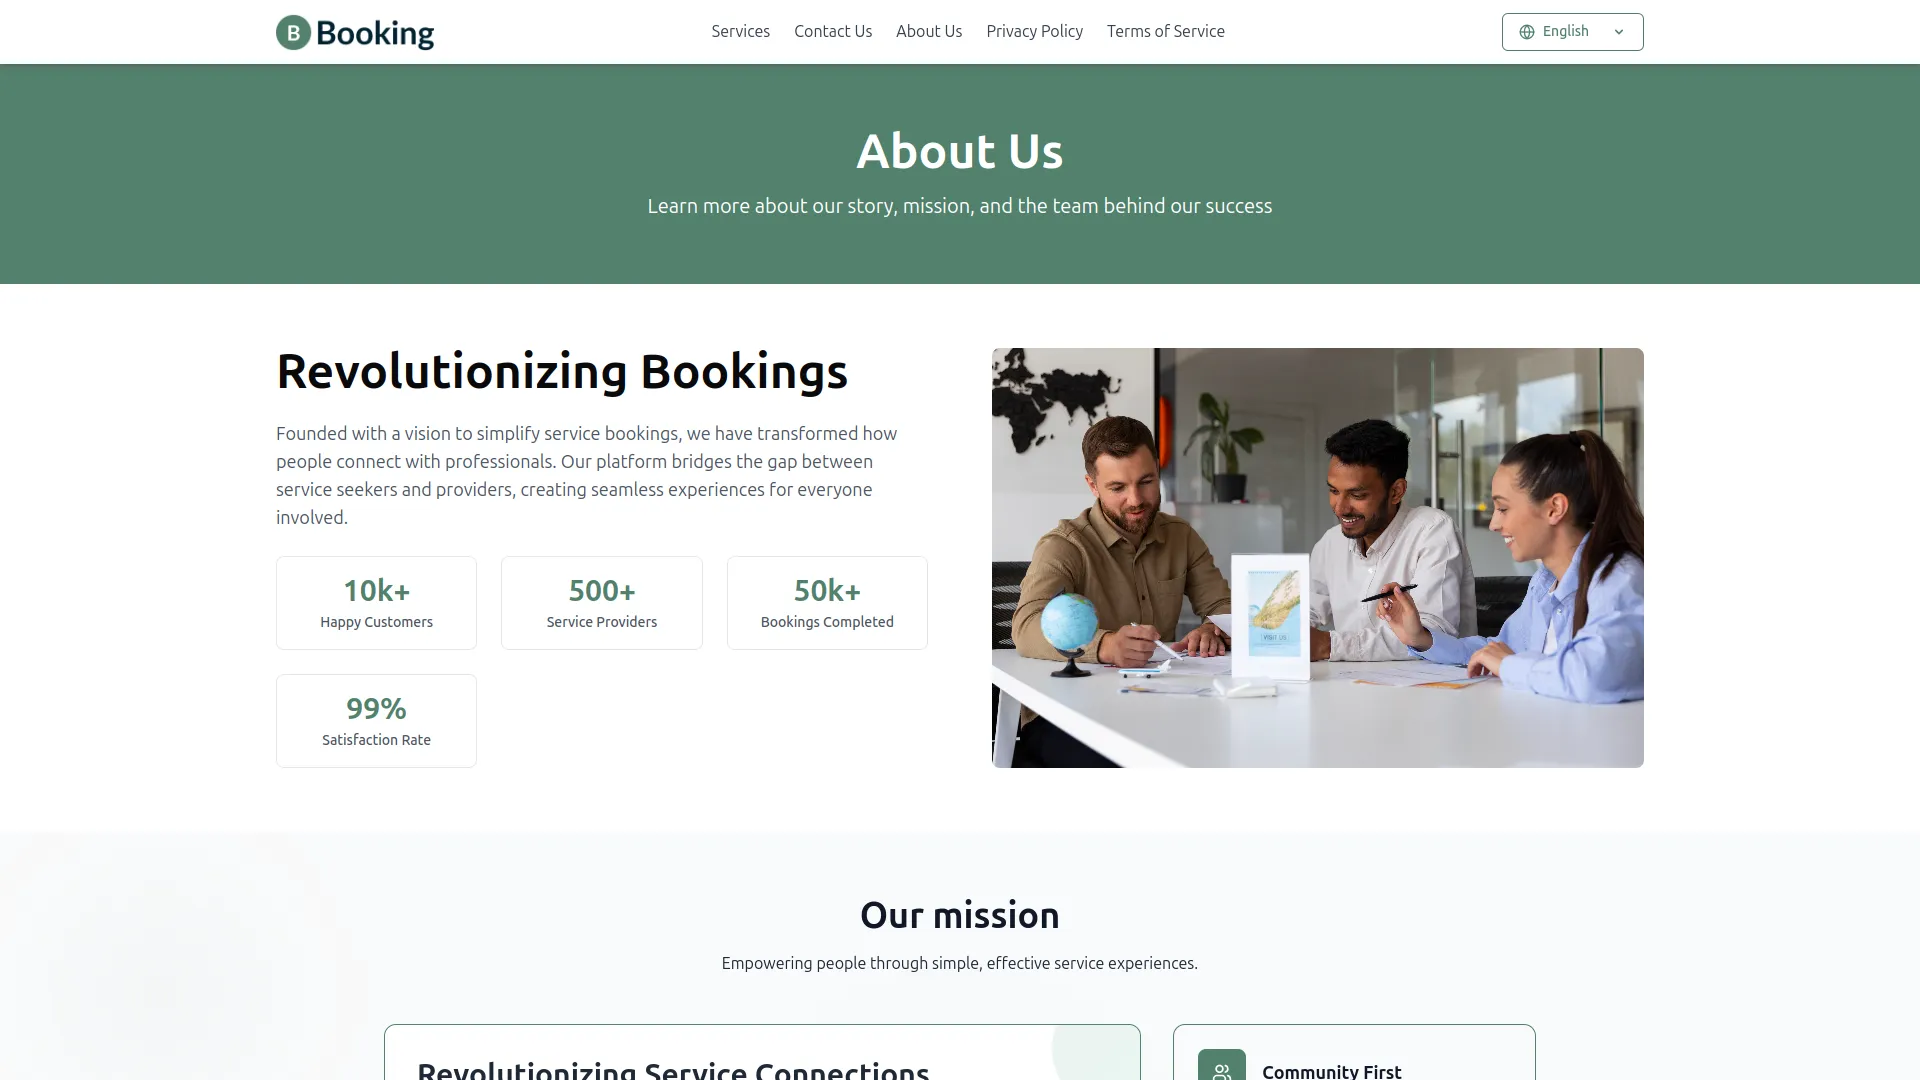
- When applied, your page will display with the “About Us” title, introductory content, and professional header design that welcomes visitors to learn about your business.
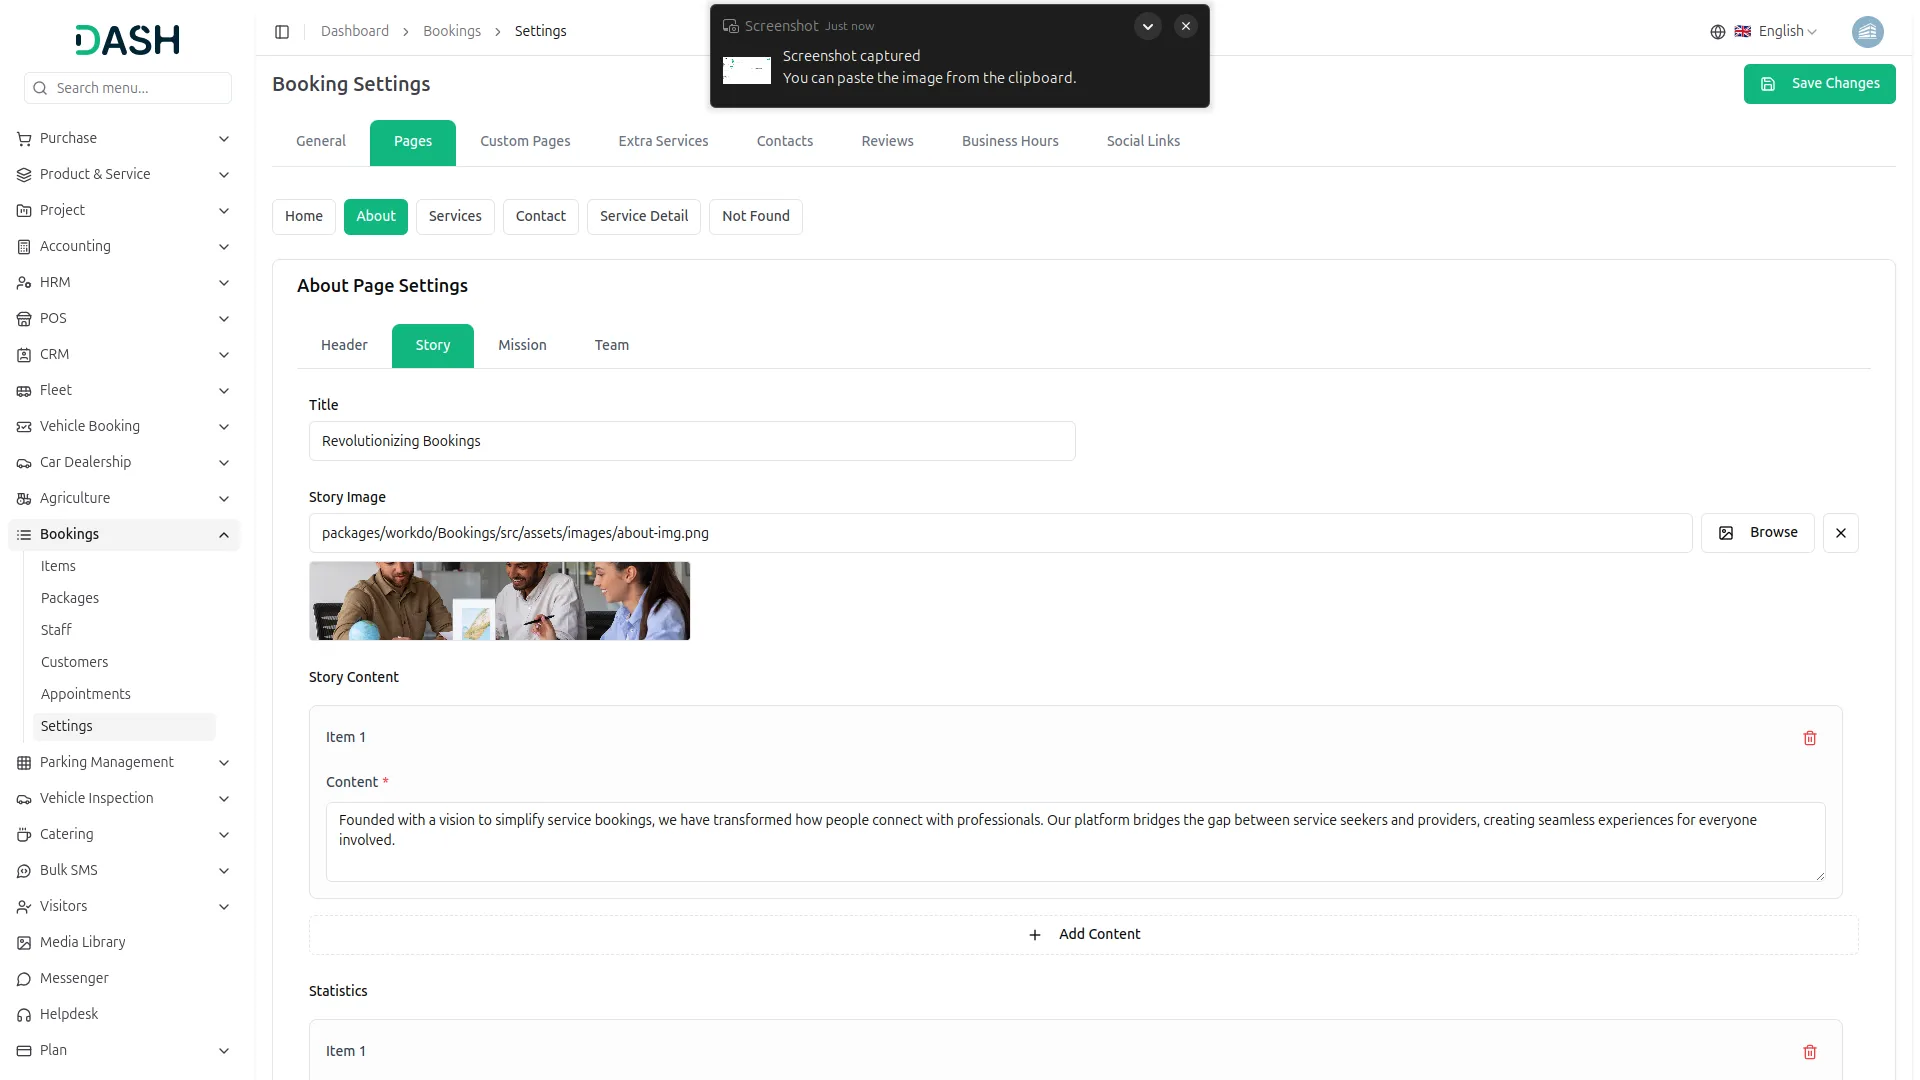
- This storytelling panel provides fields for Title and Story Image, Story Content Paragraphs, and Statistics Counters with Number and Label. Upload a compelling story image, write your business narrative in multiple paragraphs, add achievement statistics,and update content.
- After publishing, your Story Image will display alongside your business history content, while Statistics Counters will show key achievements like “10k+ Happy Customers” to build credibility and trust.
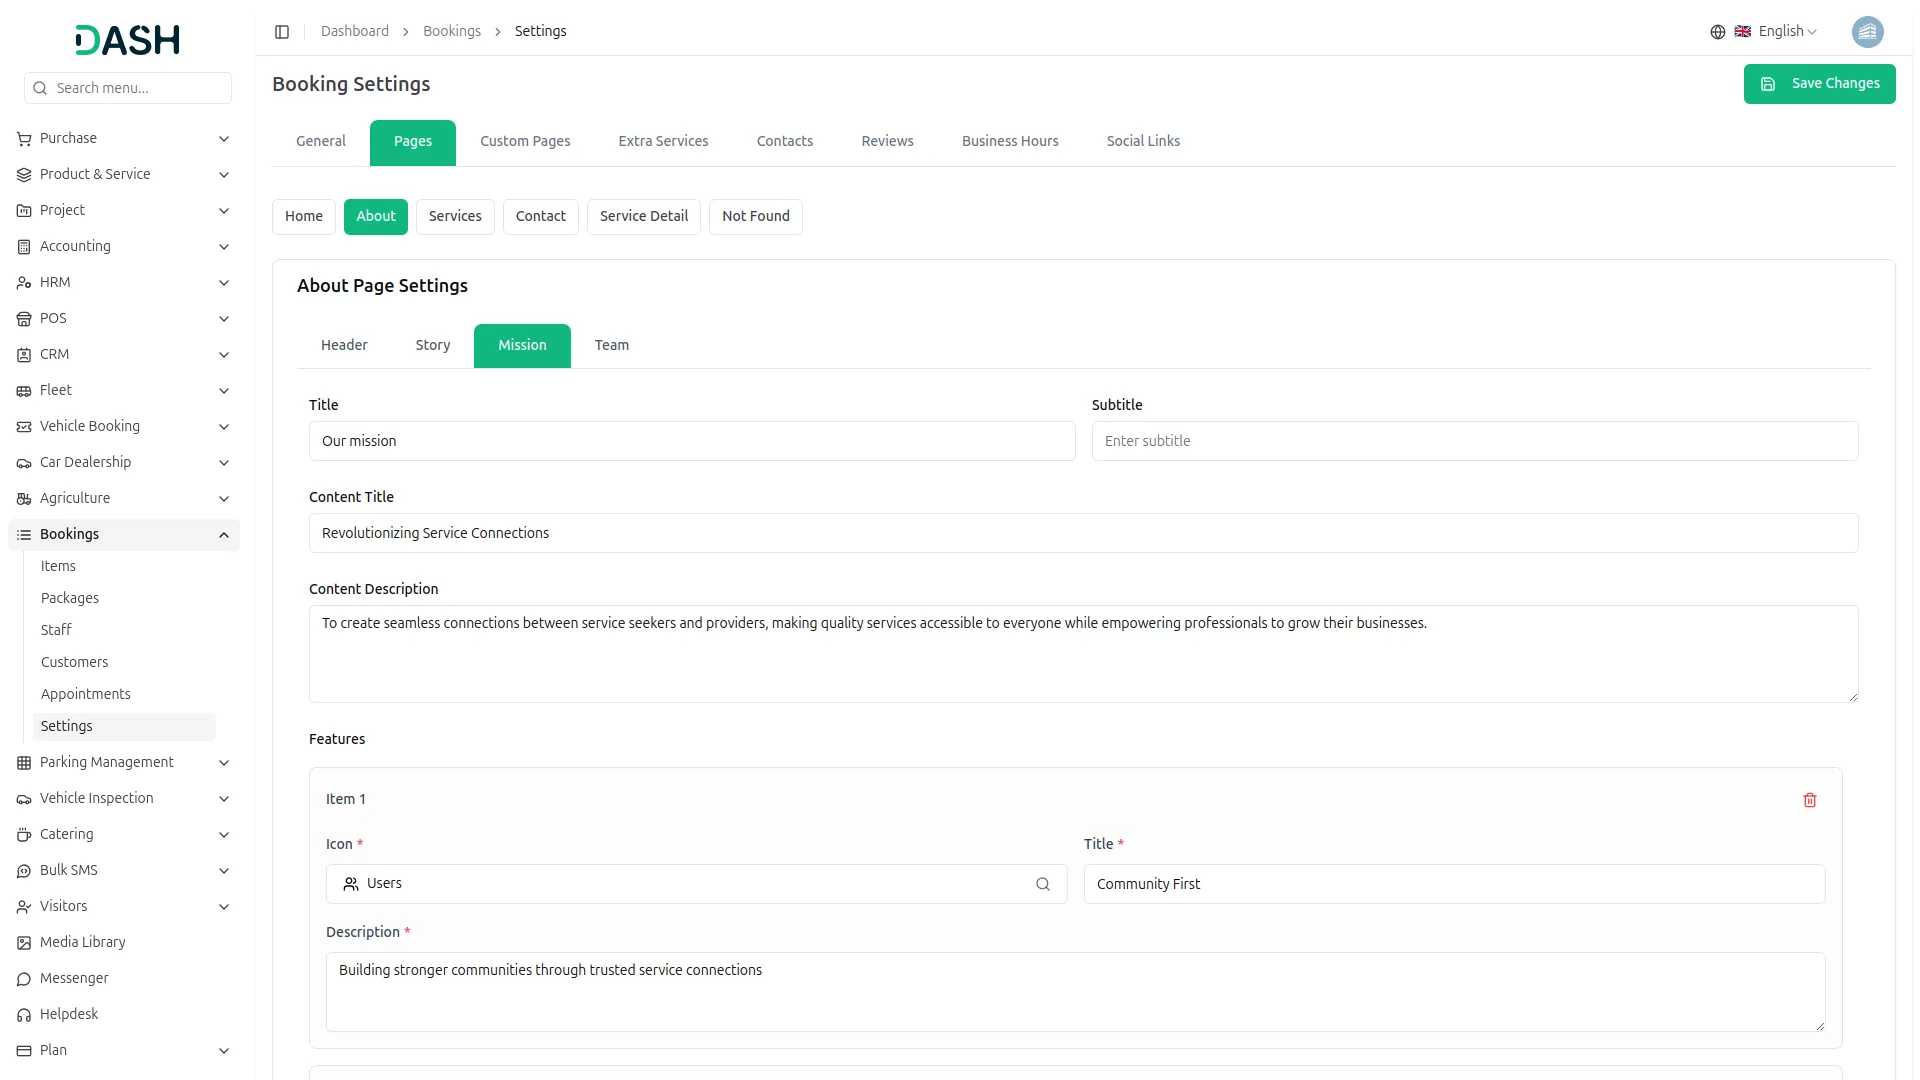
- The mission area offers settings for Main Content Title, Main Content Description, and Mission Features with Icon, Title, and Description. Write your mission statement, describe your values, add feature highlights with icons, then publish updates.
- Upon saving, your Mission Content will display your business values and goals, while Mission Features will appear with their respective icons representing your core principles and what makes your business special.
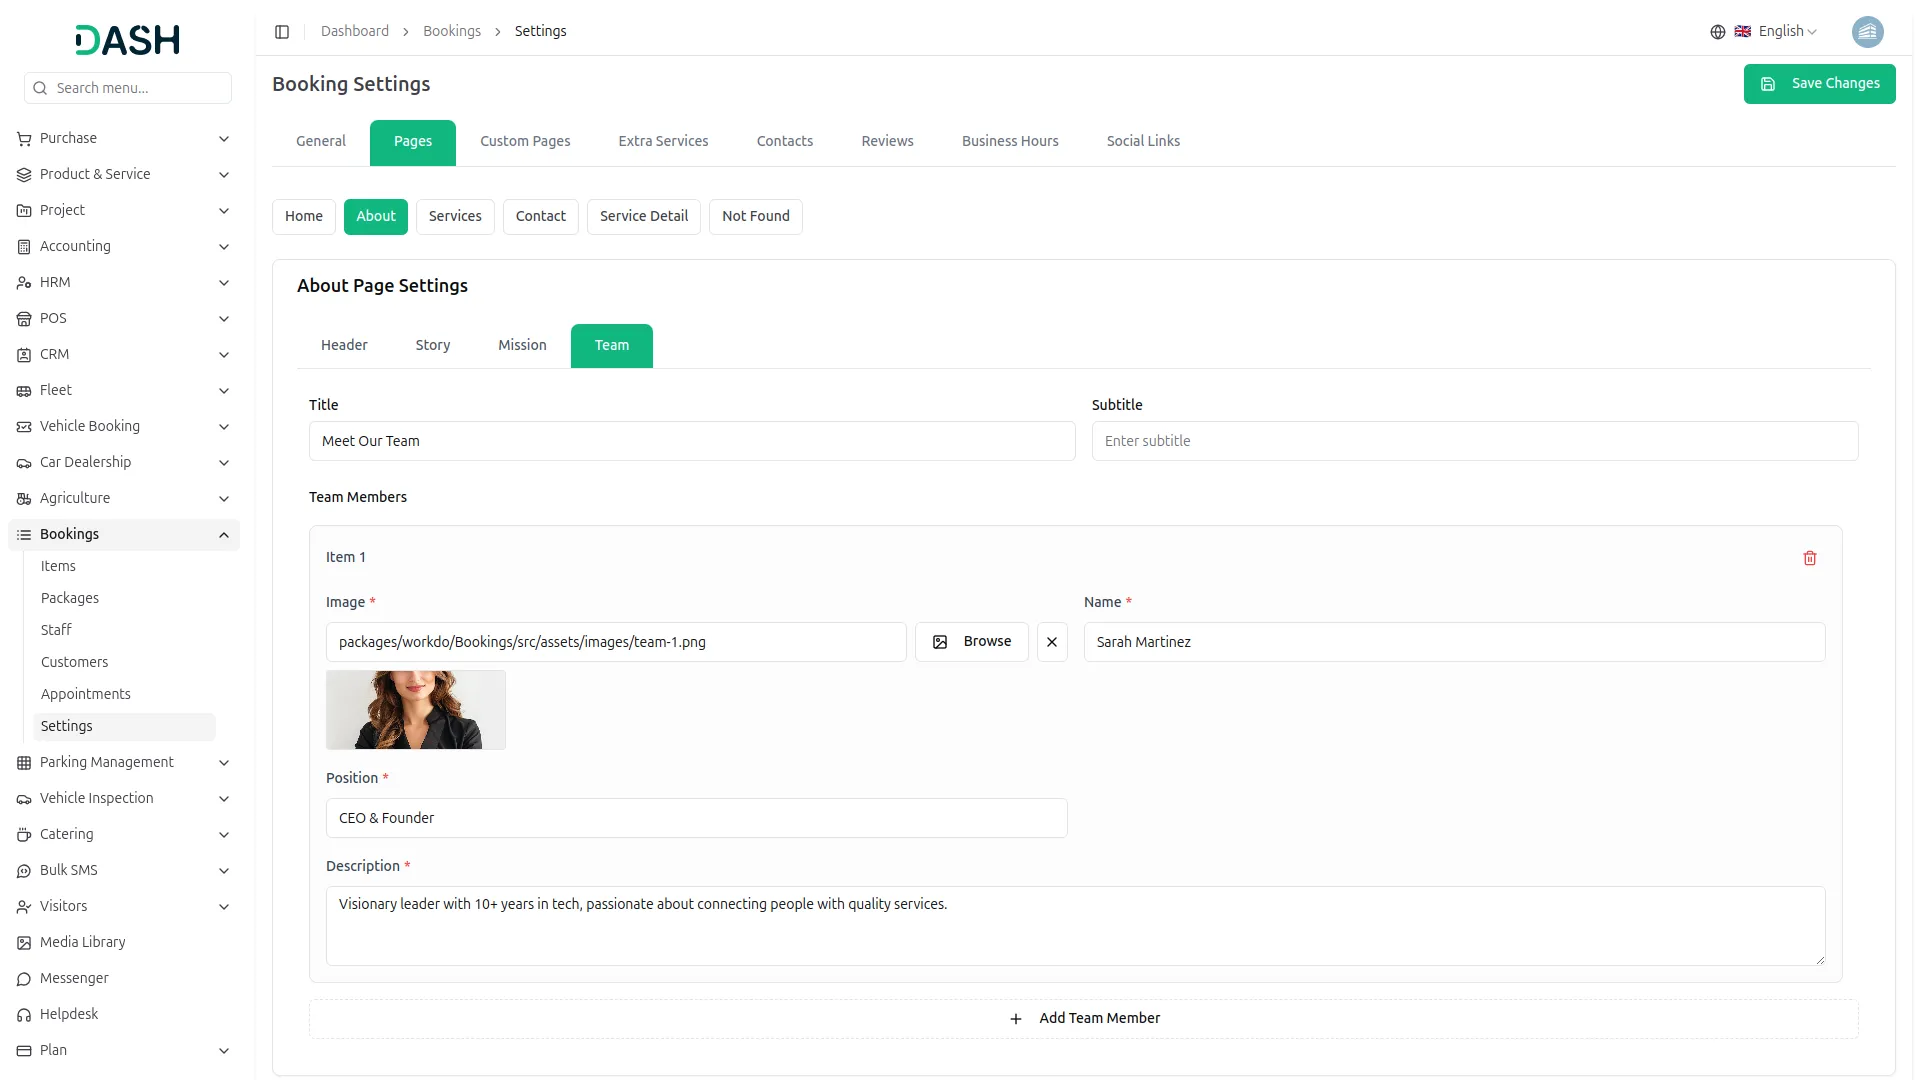
- This team management area includes fields for Title and Subtitle and Team Members with Member Photo, Name, Position, and Description. Add team member information, upload professional photos, write bio descriptions, and finalize setup.
- When finalized, your Team Members will display as professional profiles with photos, names, positions, and brief bios in an organized team presentation format.
About Page
Header Section
Story Section
Mission Section
Team Section
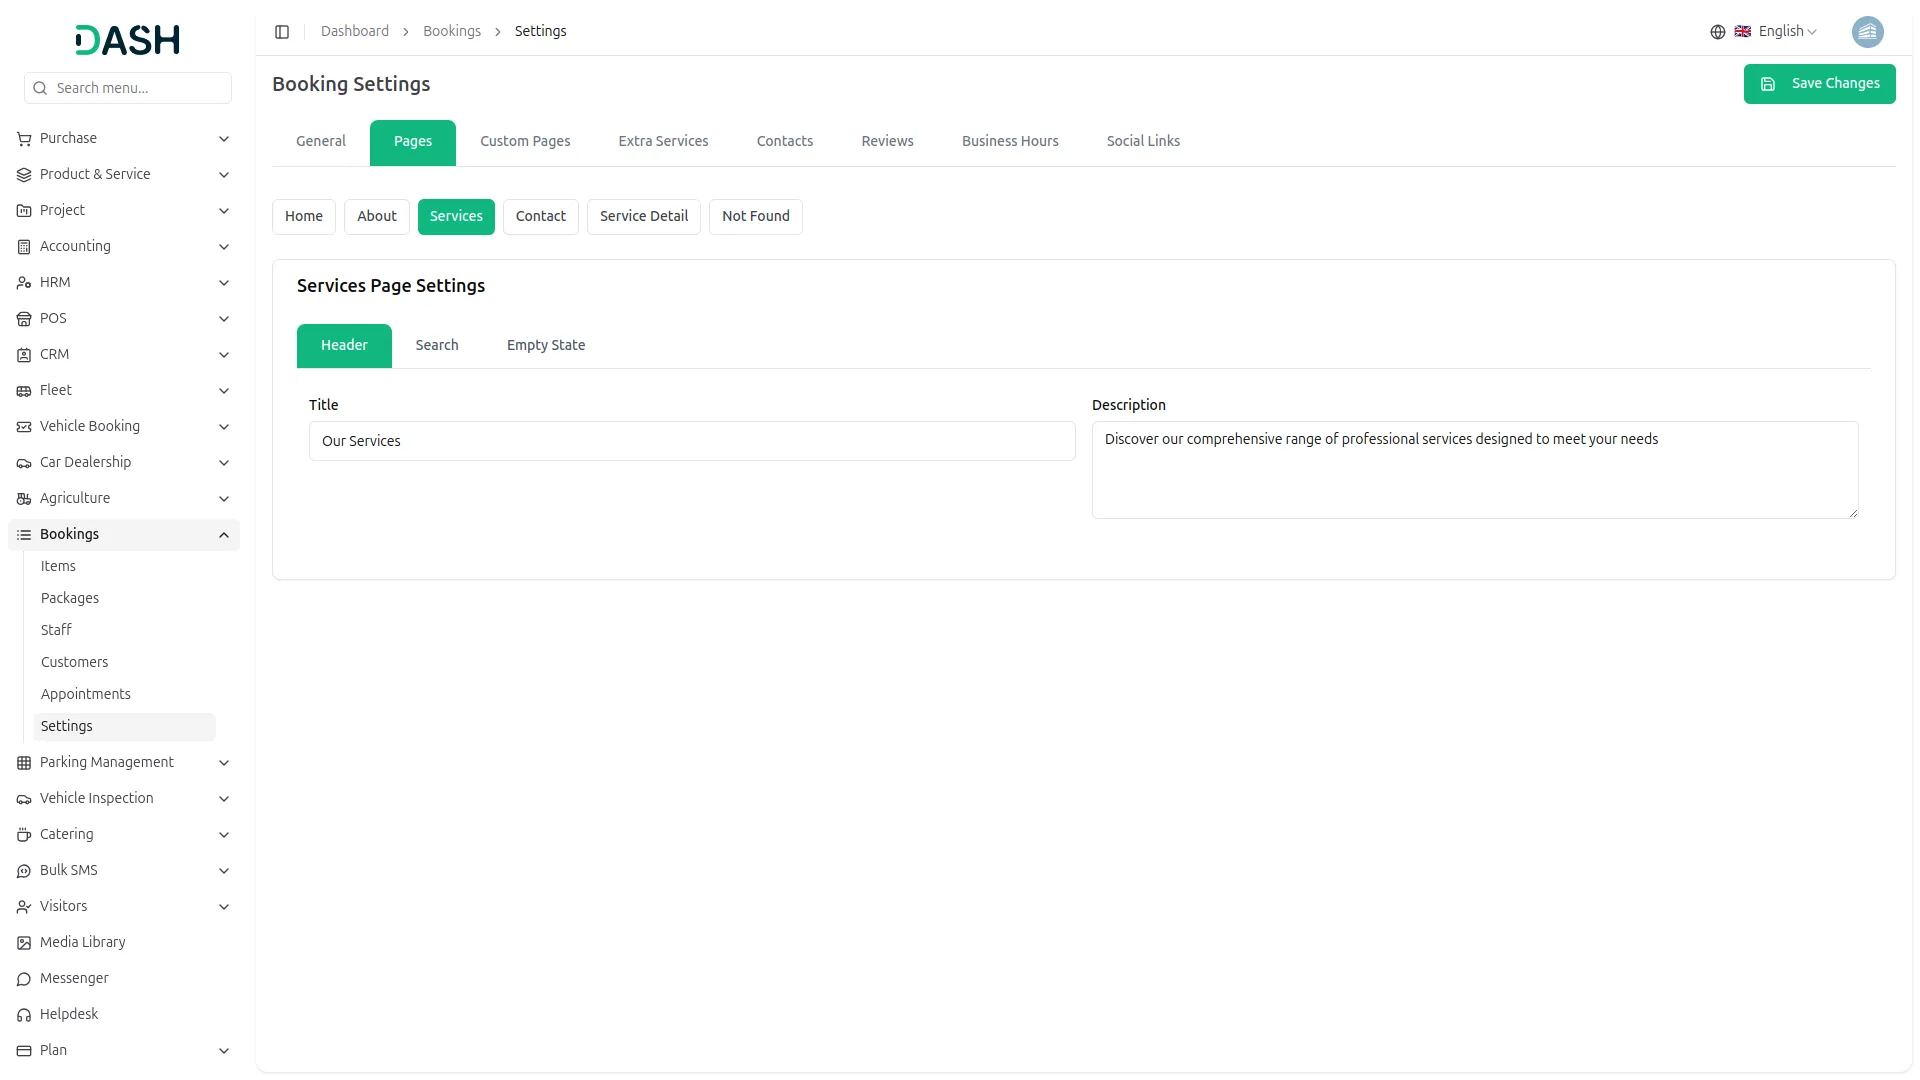
- The header configuration includes standard page header options. Configure through page settings, then submit form.
- Upon completion, your page will display “Our Services” title with description and professional page banner
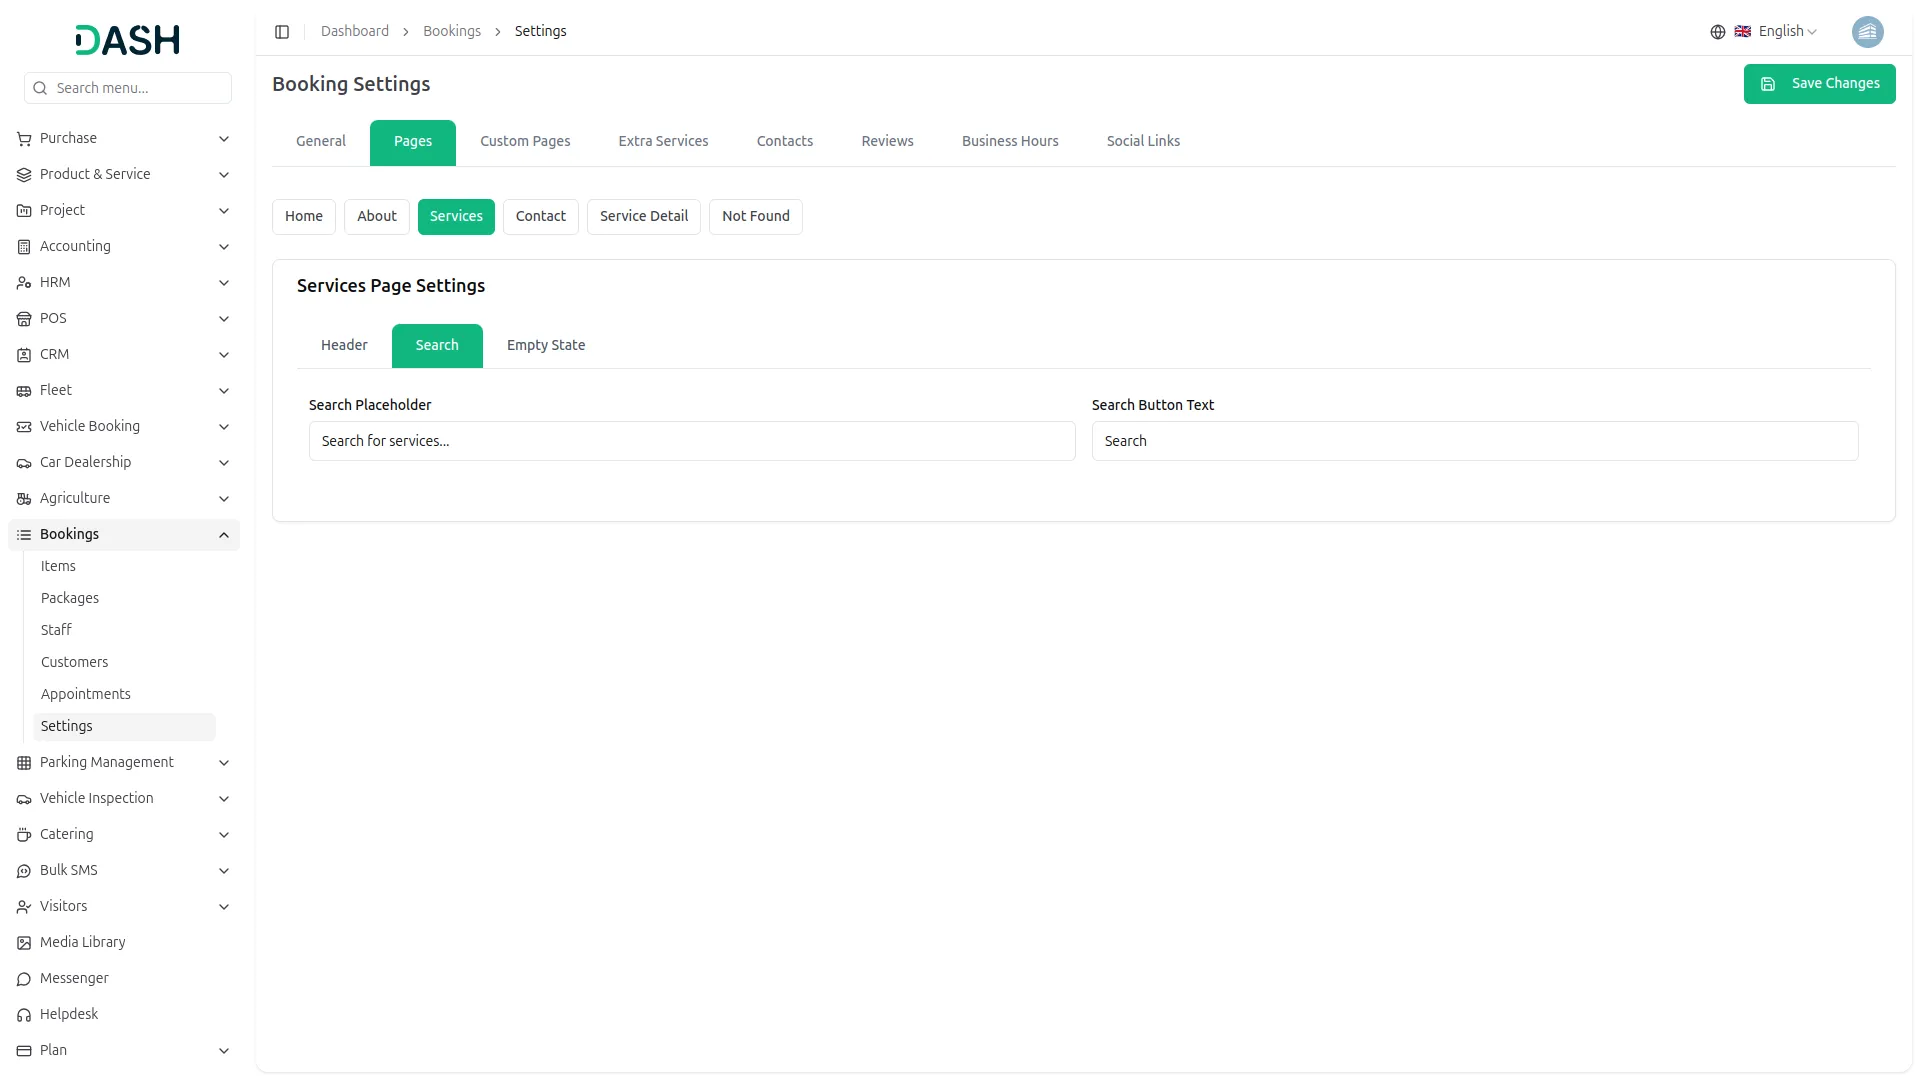
- This search panel contains settings for Search Placeholder and Configure search functionality and apply changes.
- Once applied, visitors will see a Search Bar with your custom placeholder text and button text.
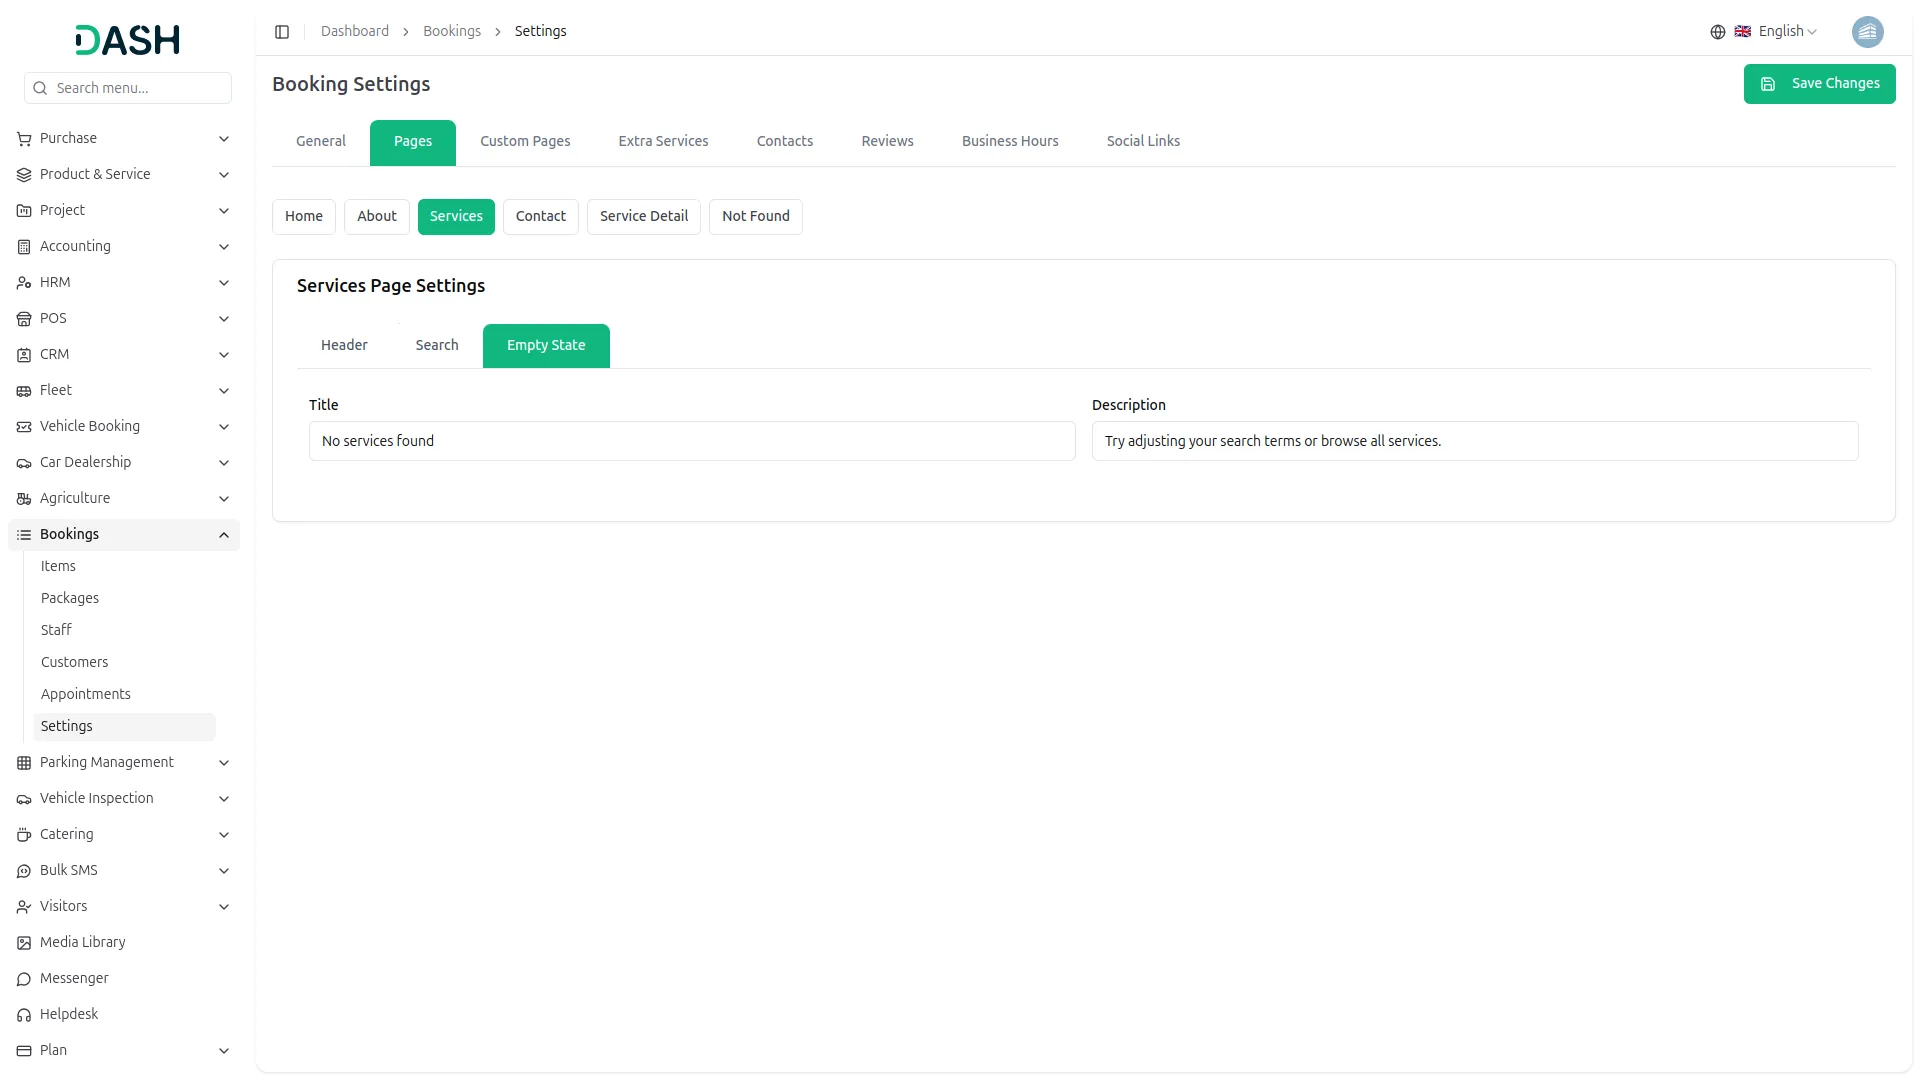
- The empty state section is used when no services are found in the cluster. At that time, some content is displayed, which you can manage dynamically from here
Services Page
Header Section
Search Section & Empty state
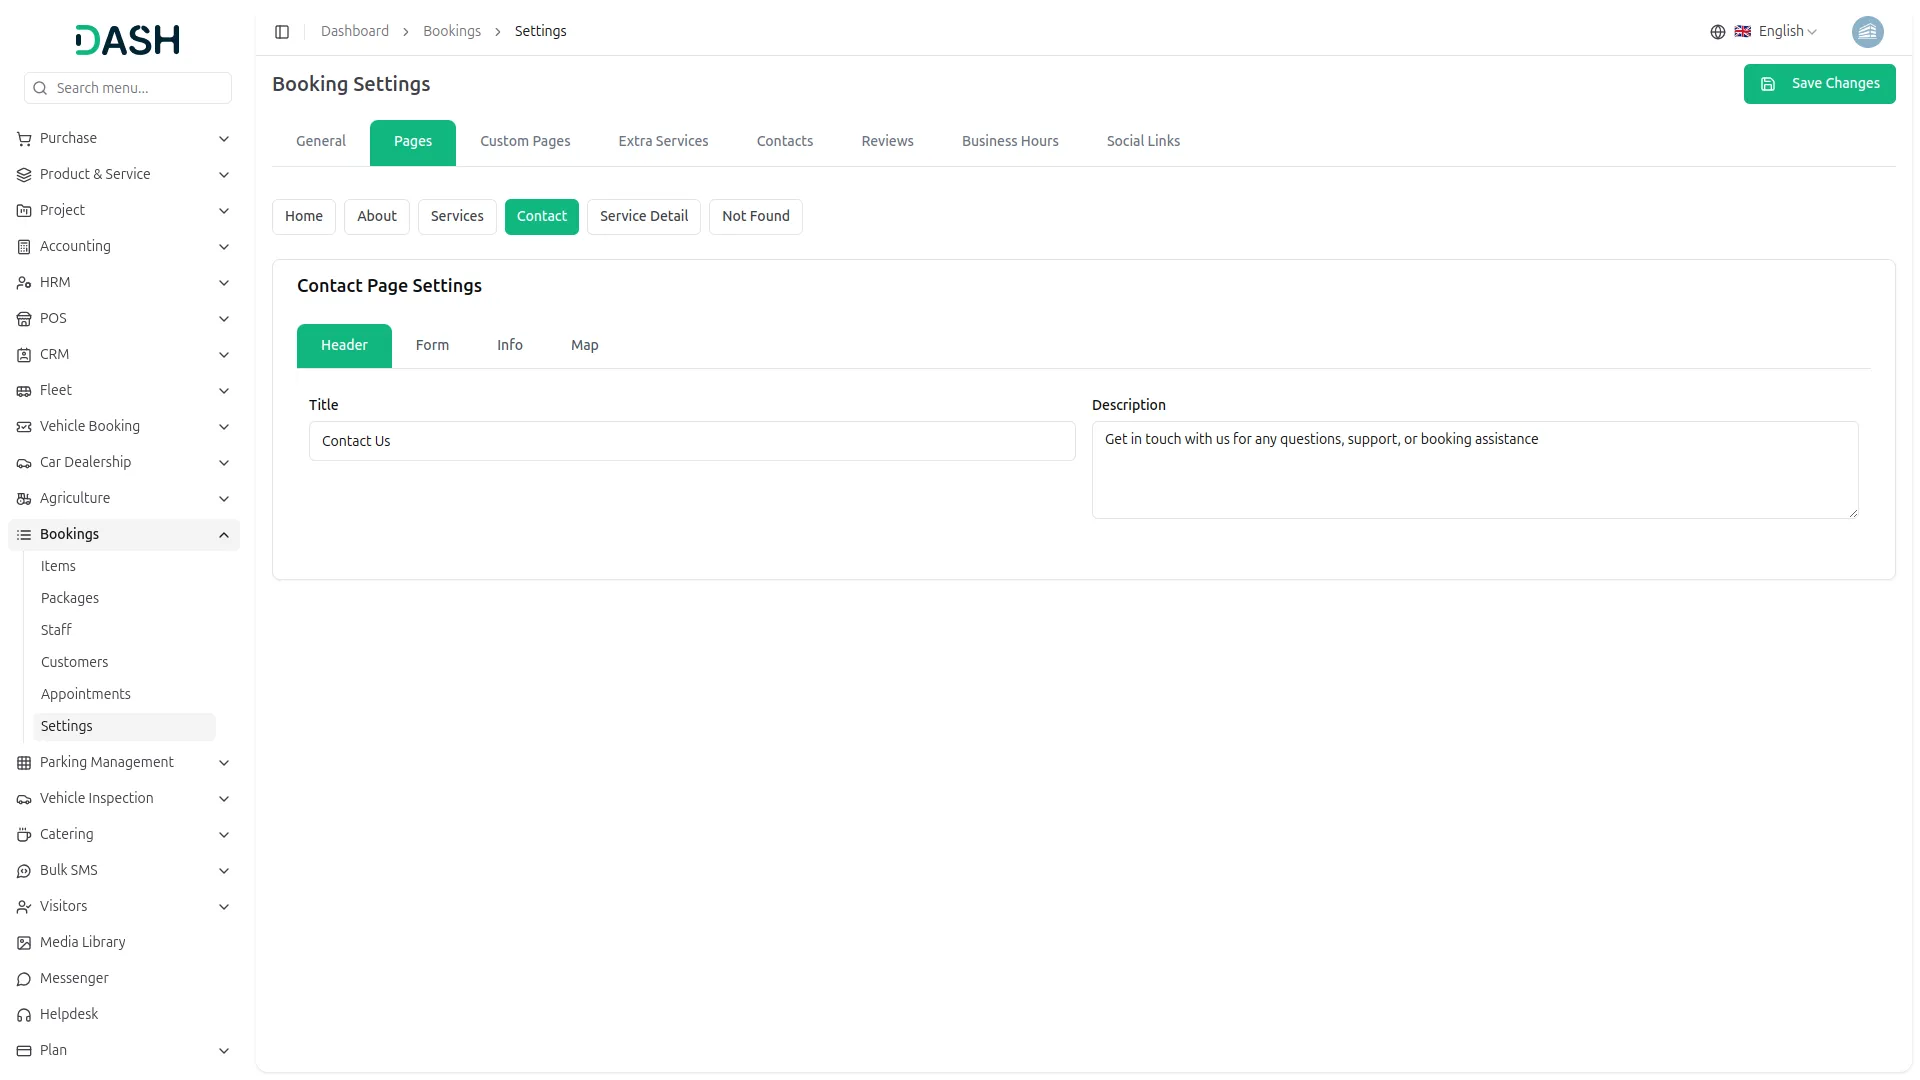
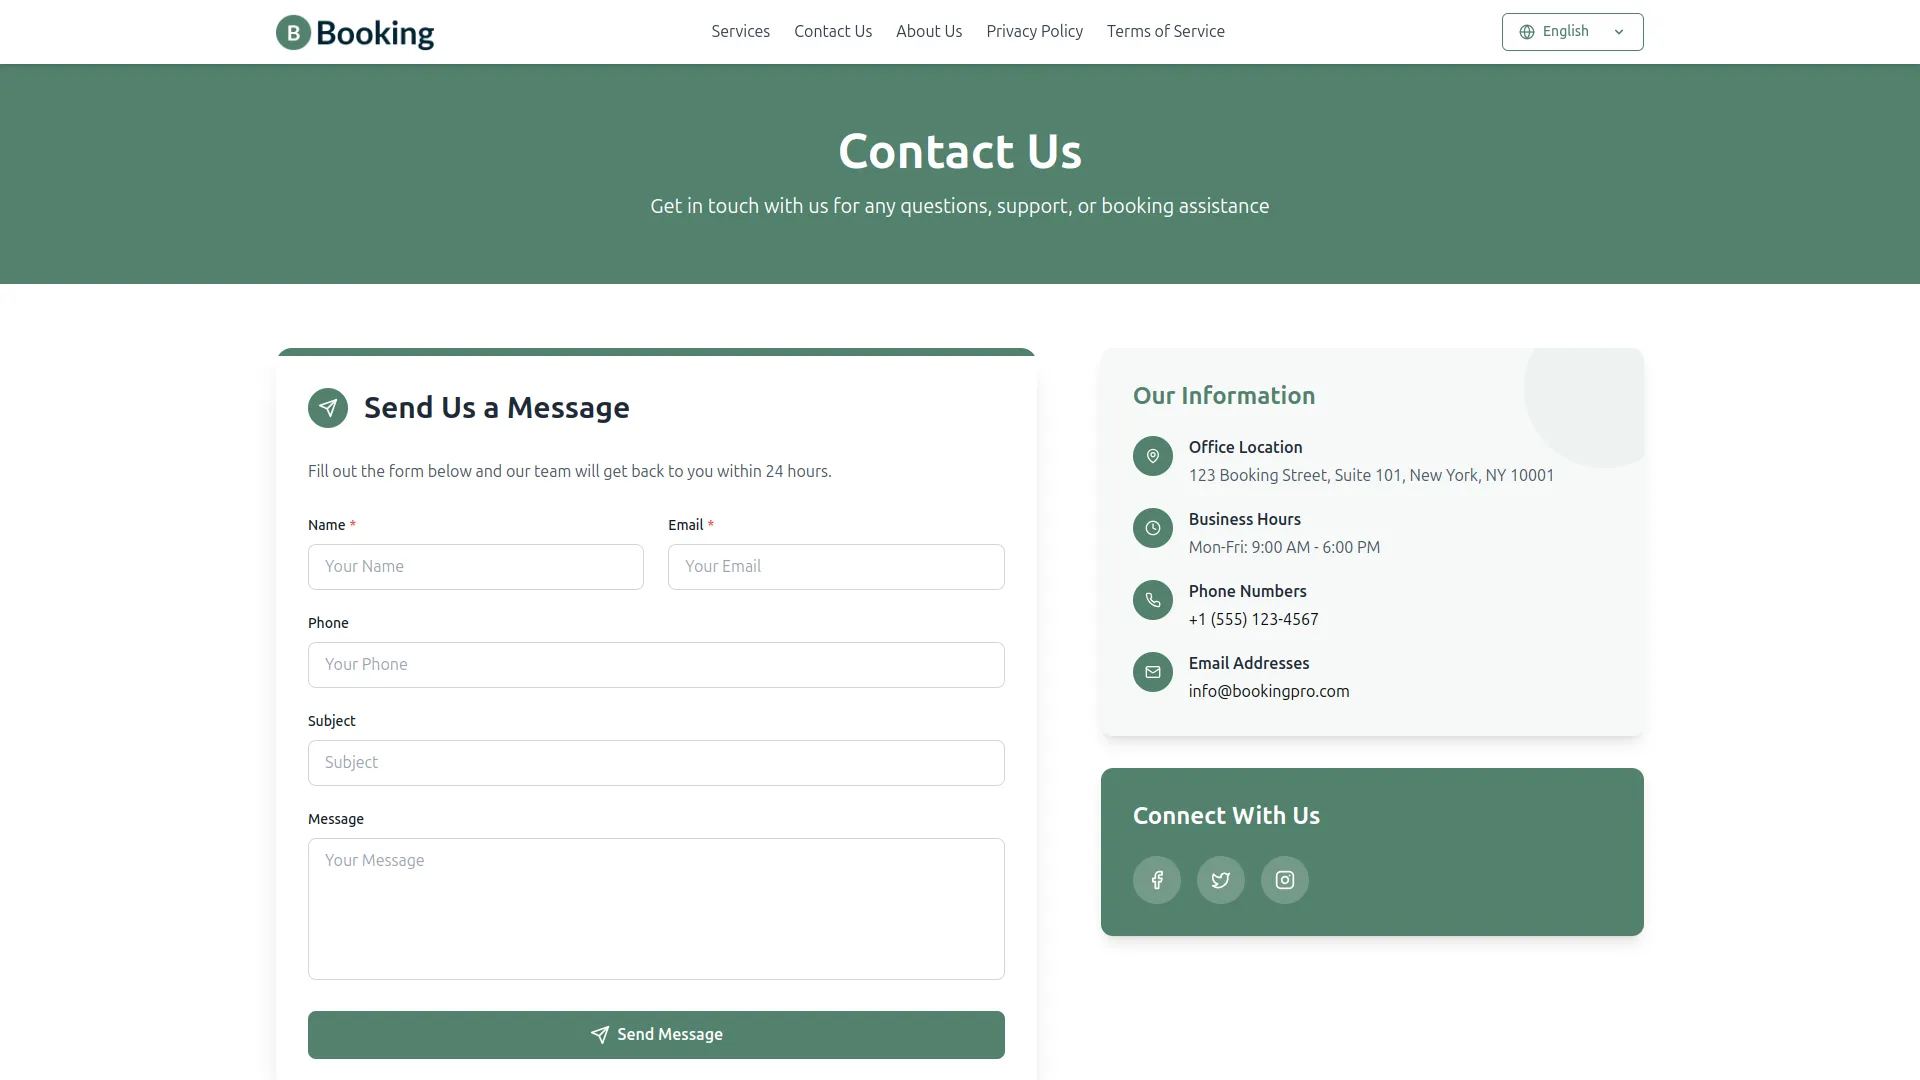
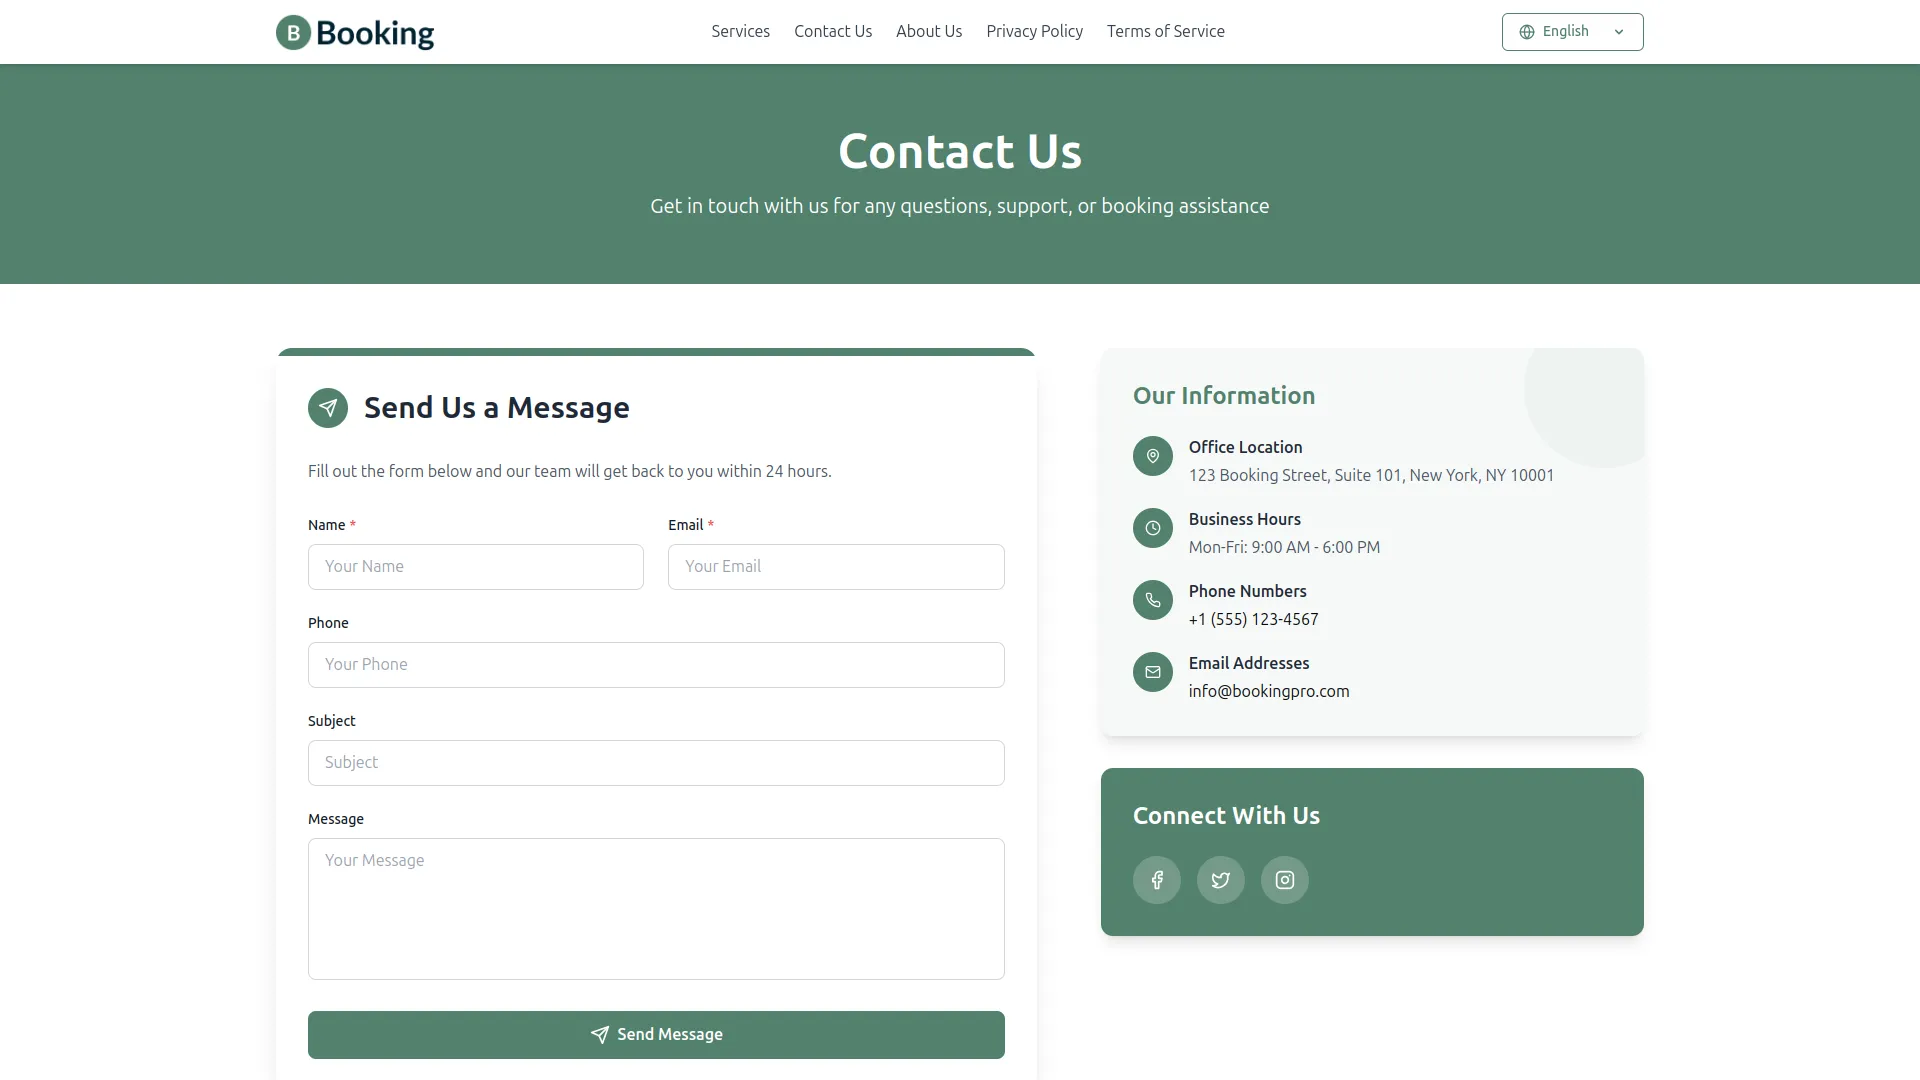
- The contact header area provides standard page header options. Configure through page settings, then save data.
- Once saved, your page will display the “Contact Us” title with a welcoming message and professional header design.
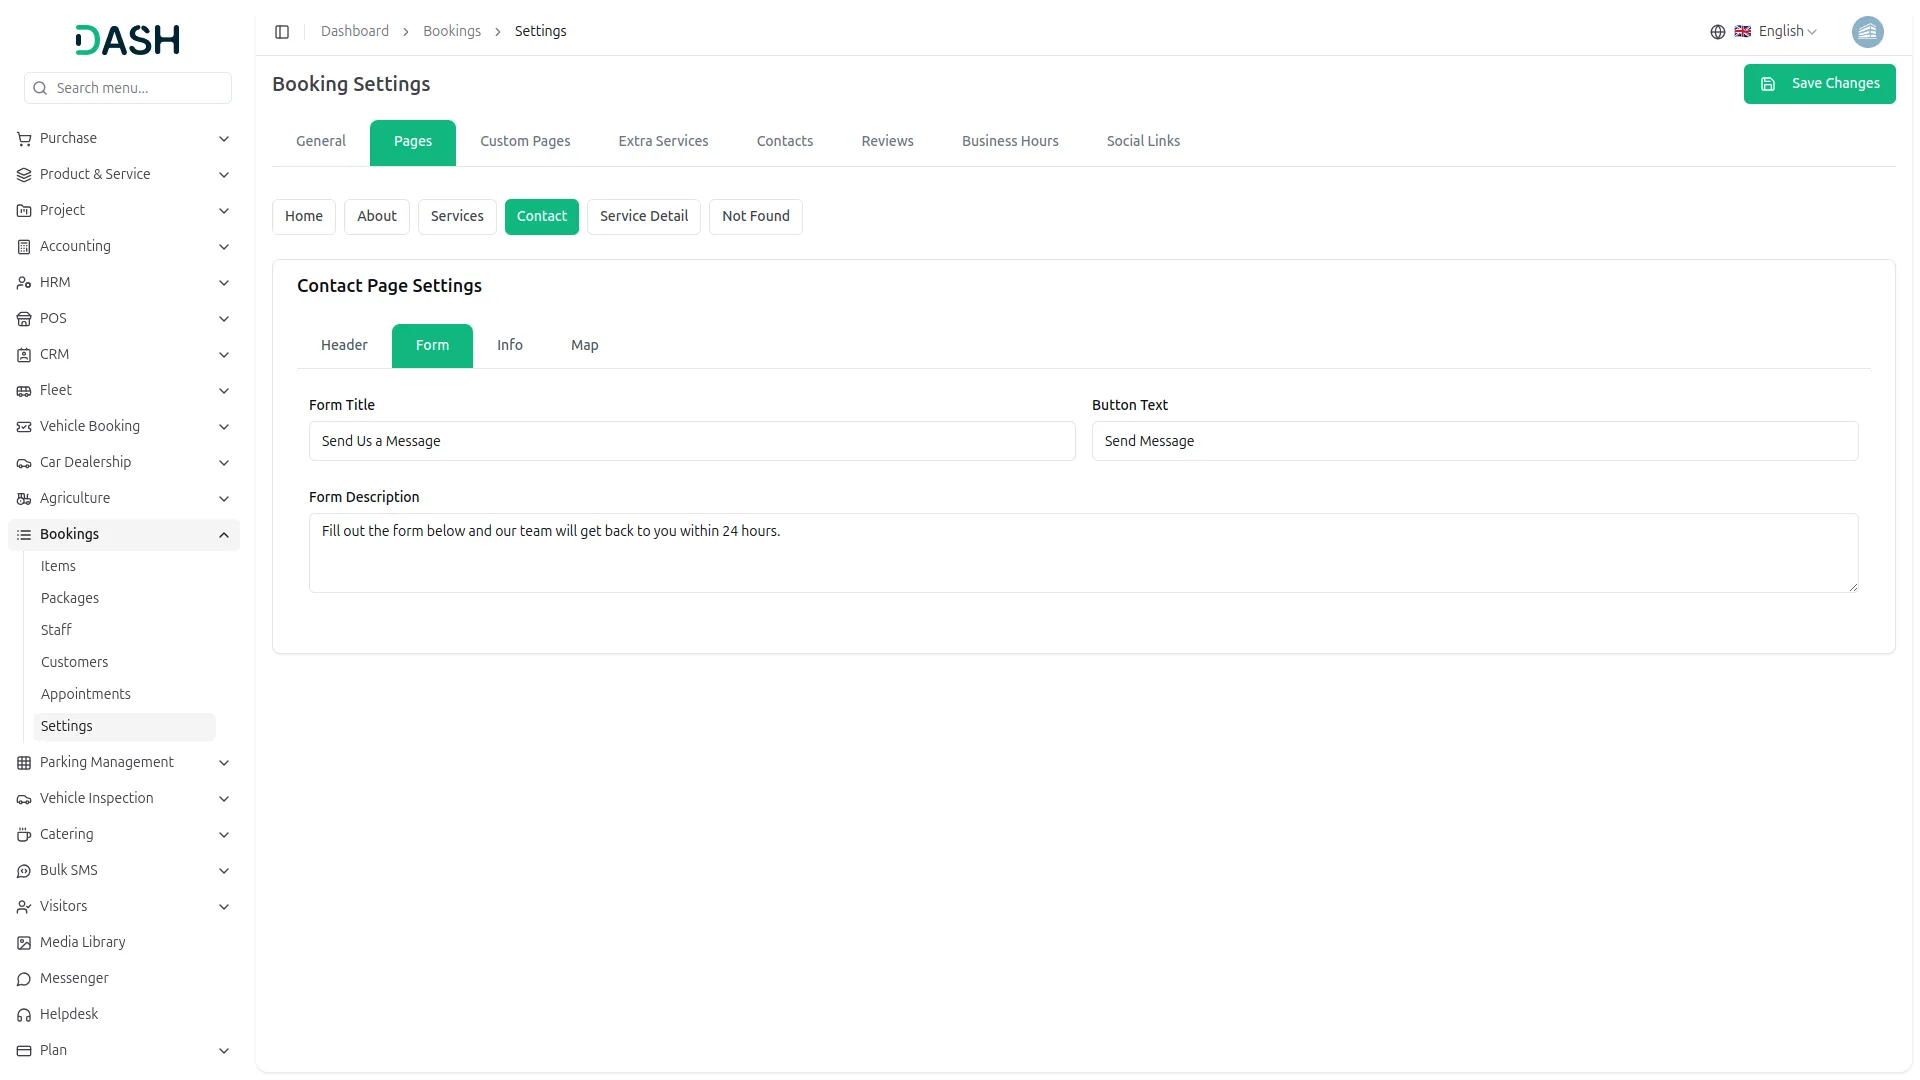
- This contact form panel contains standard contact form configuration options. Set up form fields and submission settings, and complete setup.
- After activation, visitors will see a Contact Form with fields for name, email, phone, subject, and message.
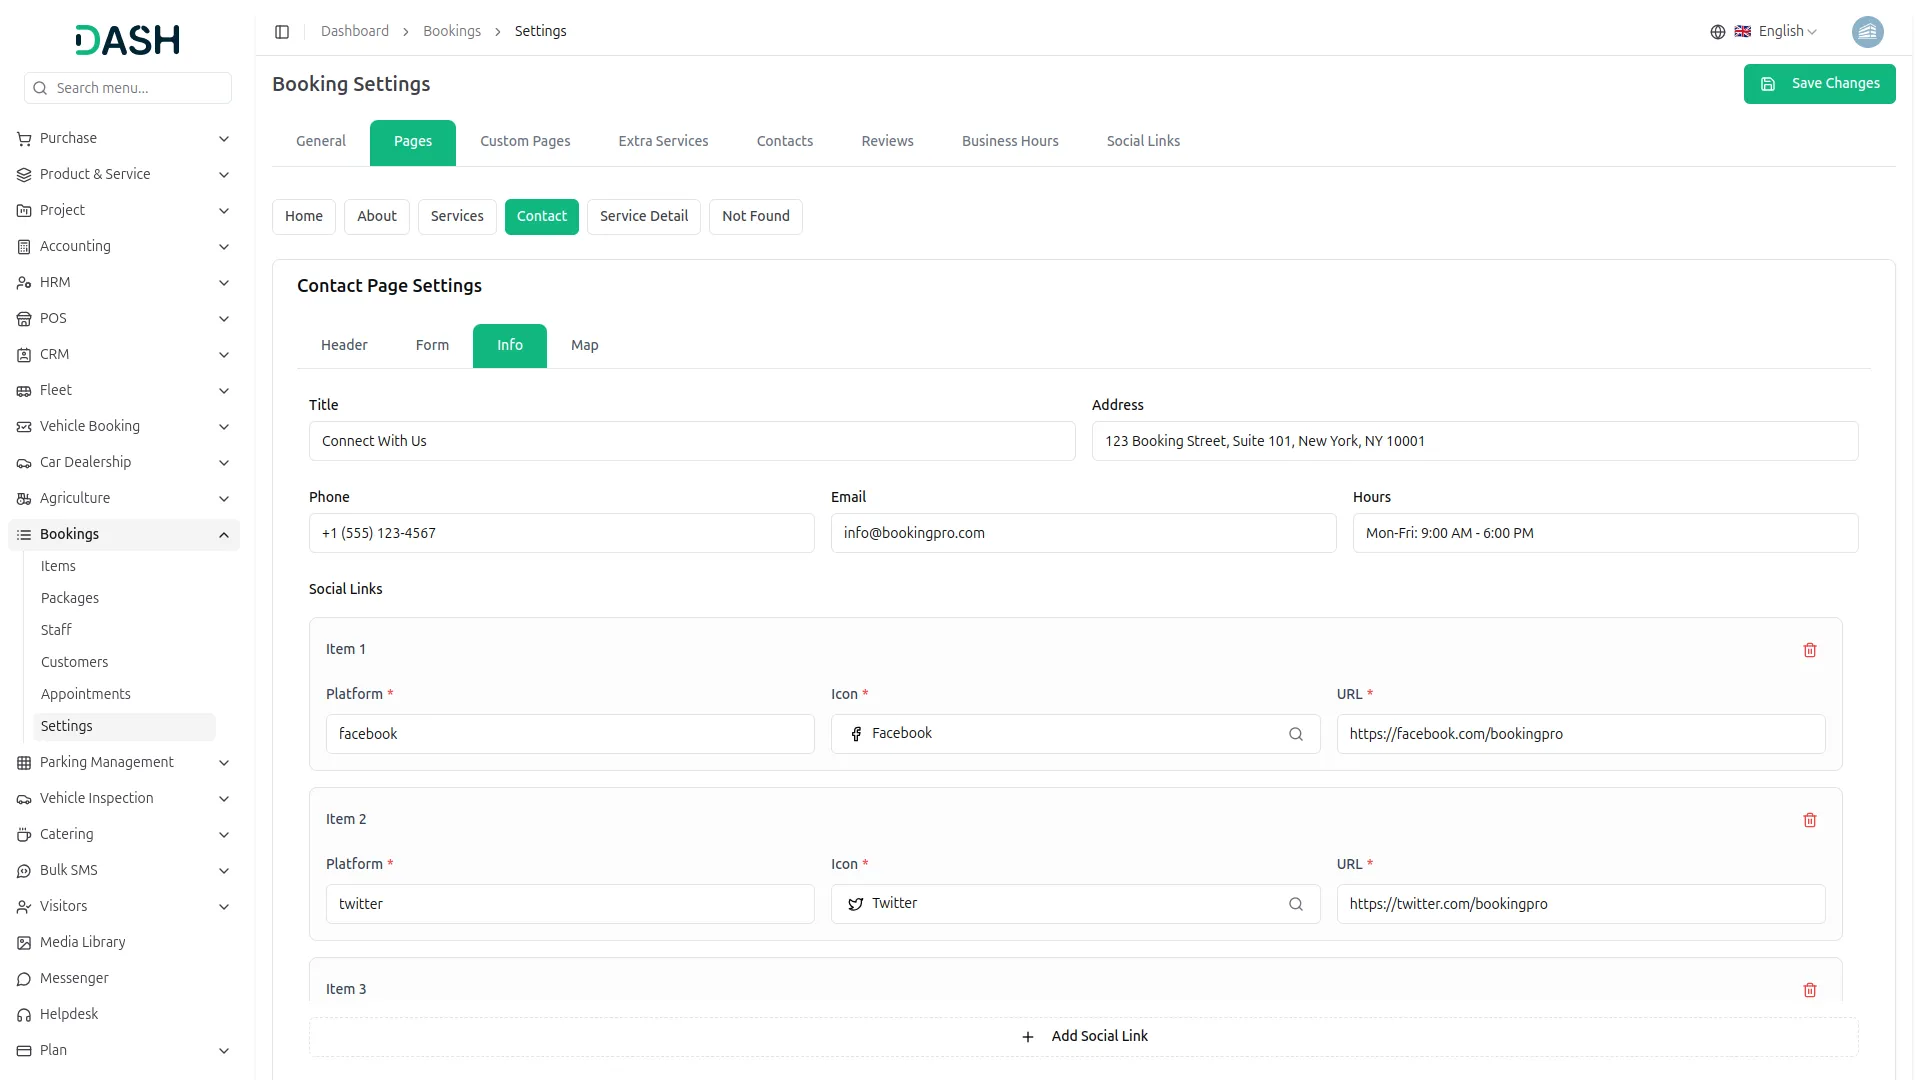
- The information area includes standard contact information fields. Enter your business details, then store information.
- When updated, your contact information will display with business address, phone numbers, email addresses, and business hours for customer access.
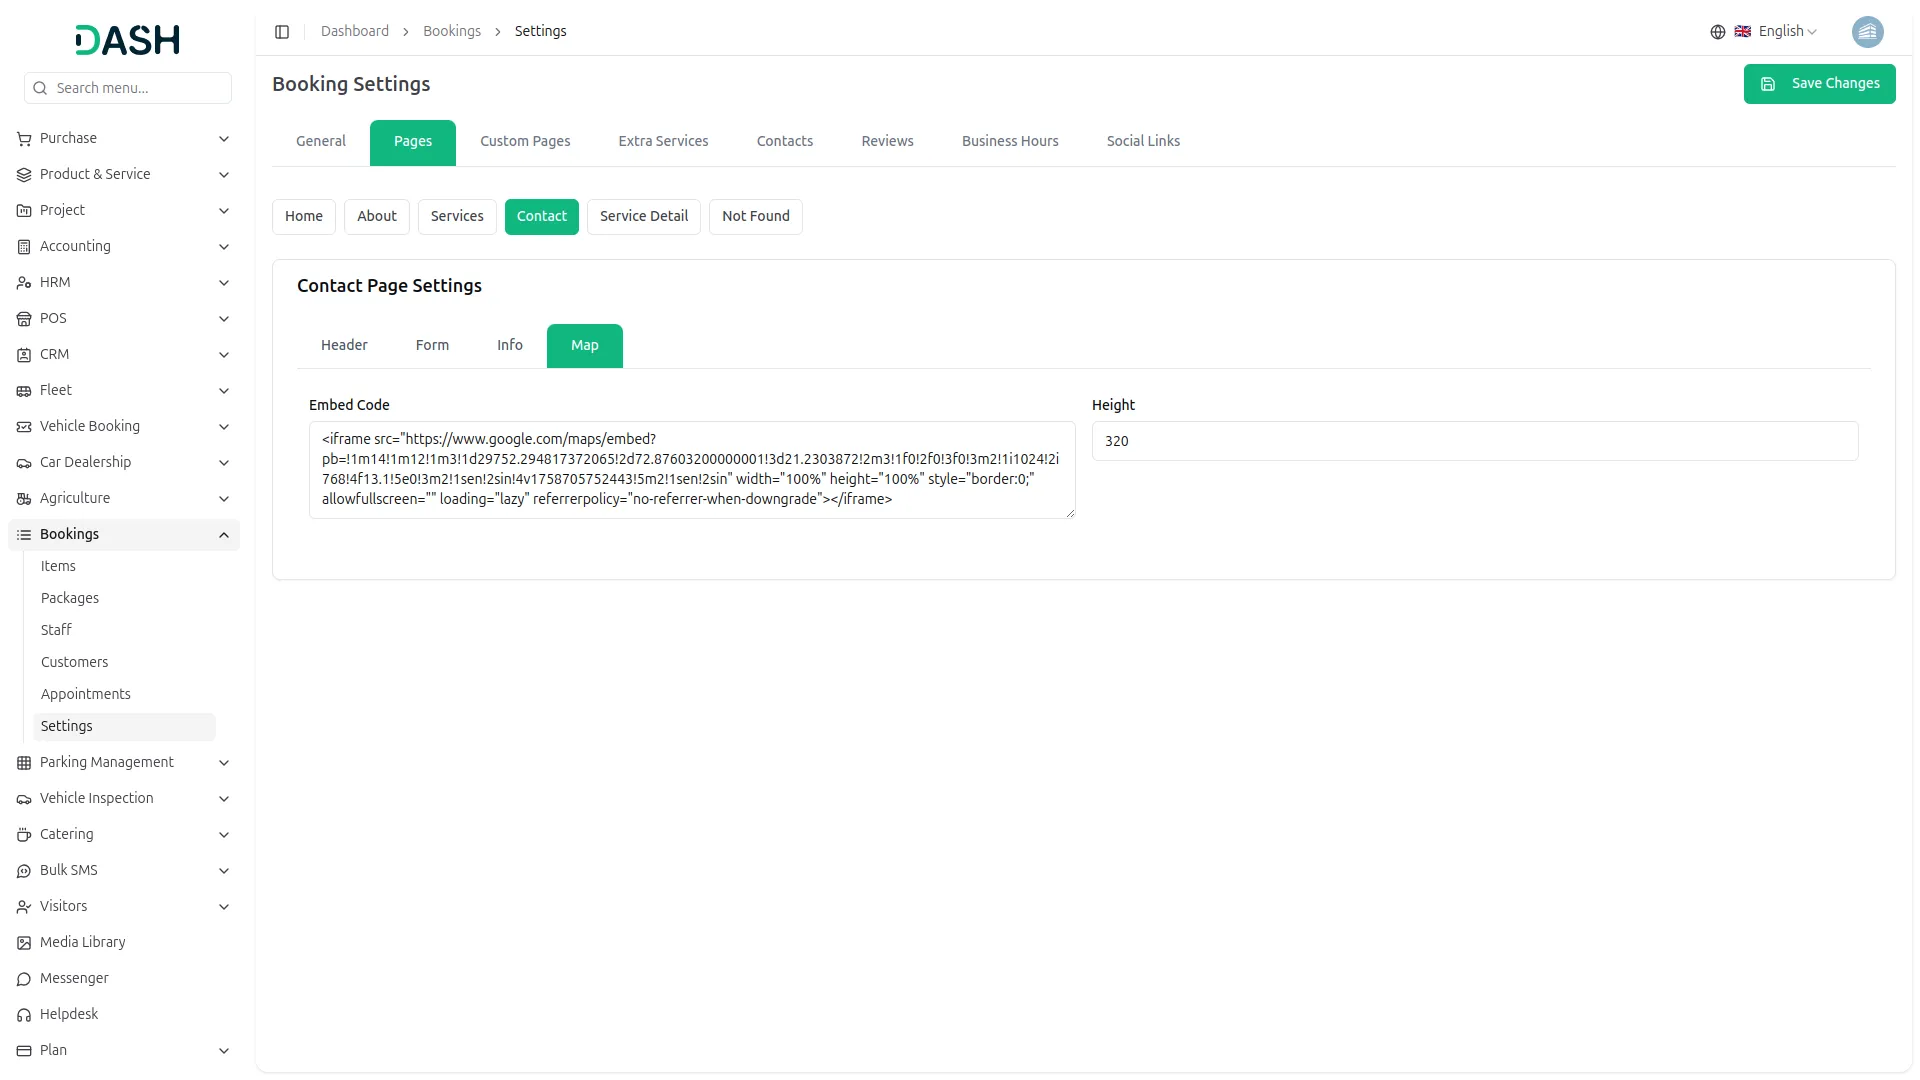
- This mapping area offers standard map integration settings. Configure your business location, and save location.
- Once configured, visitors will see an Interactive Google Maps showing your location with navigation controls and directions functionality
Contact Page
Header Section
Form Section
Info Section
Map Section
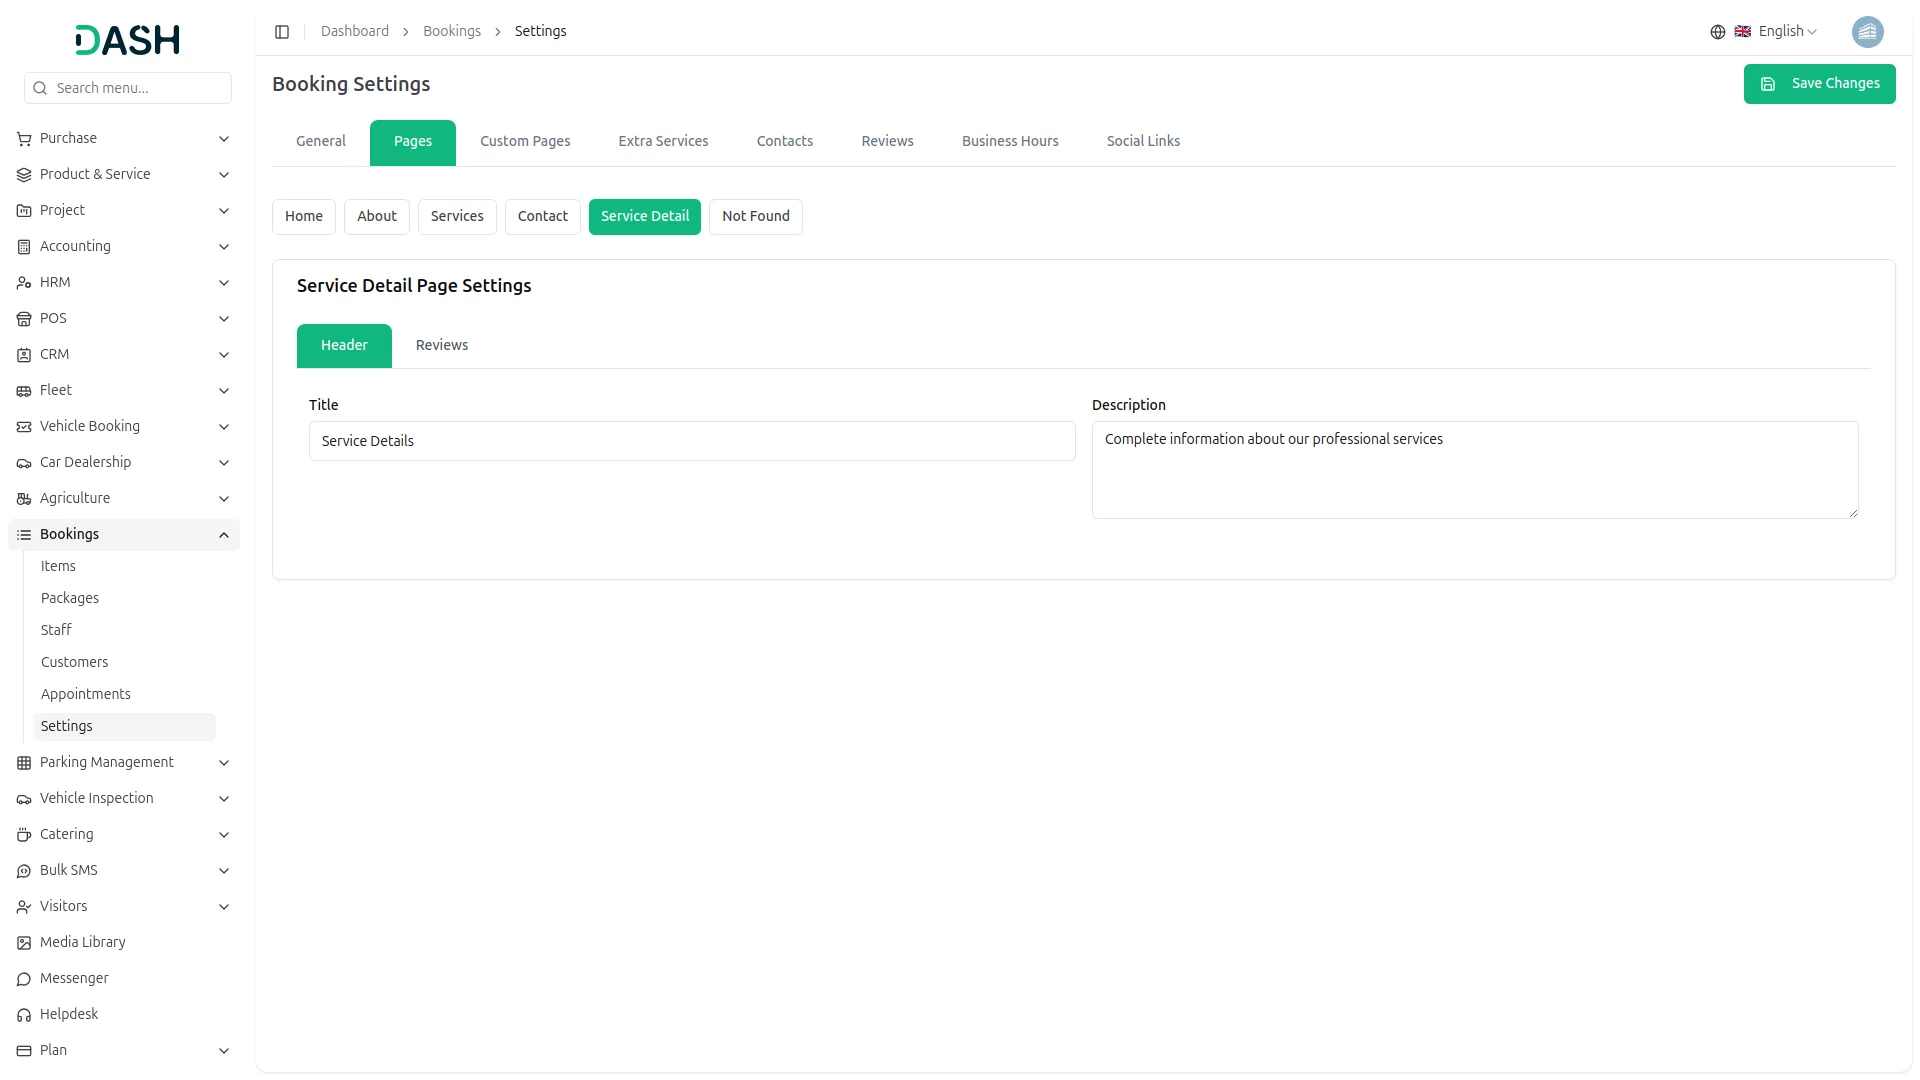
- The service detail area contains standard service display options. Configure service presentation settings, then finalize changes.
- When published, visitors will see detailed service information with images, descriptions, pricing displayed.
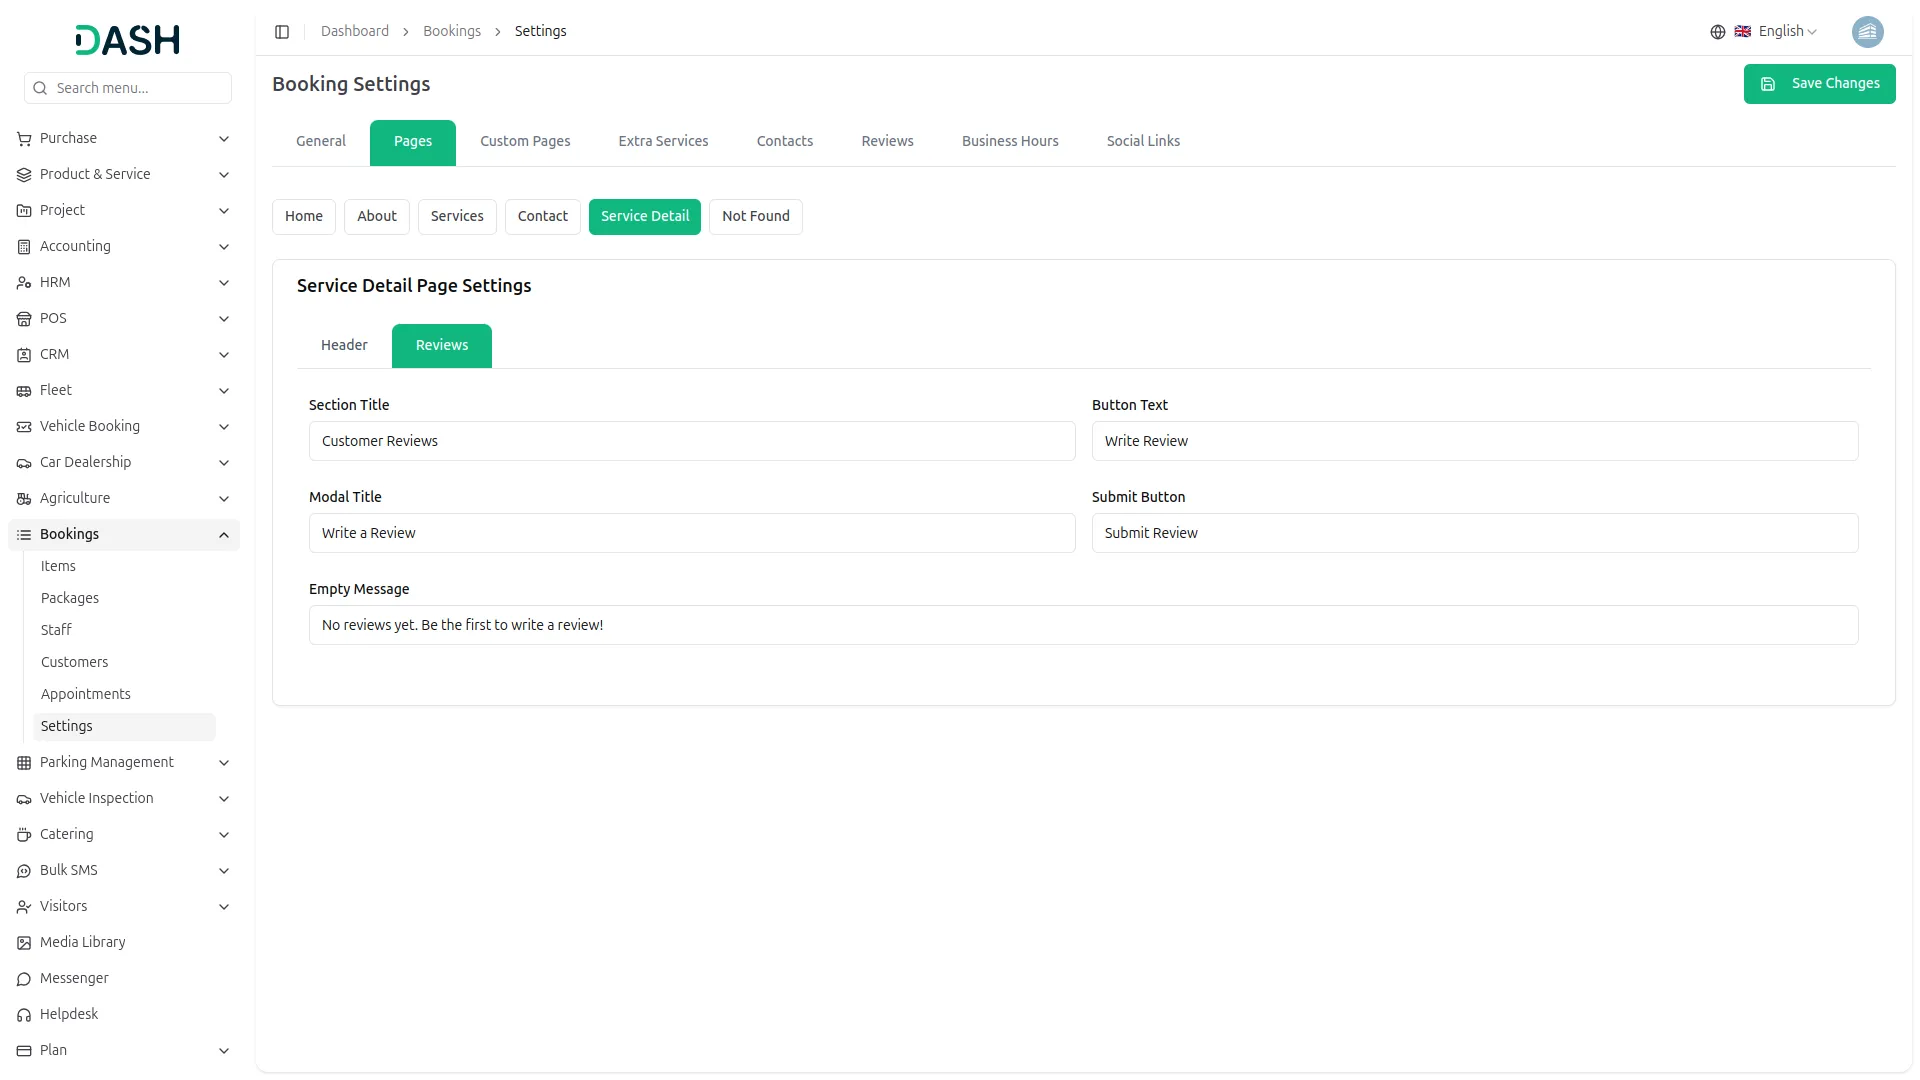
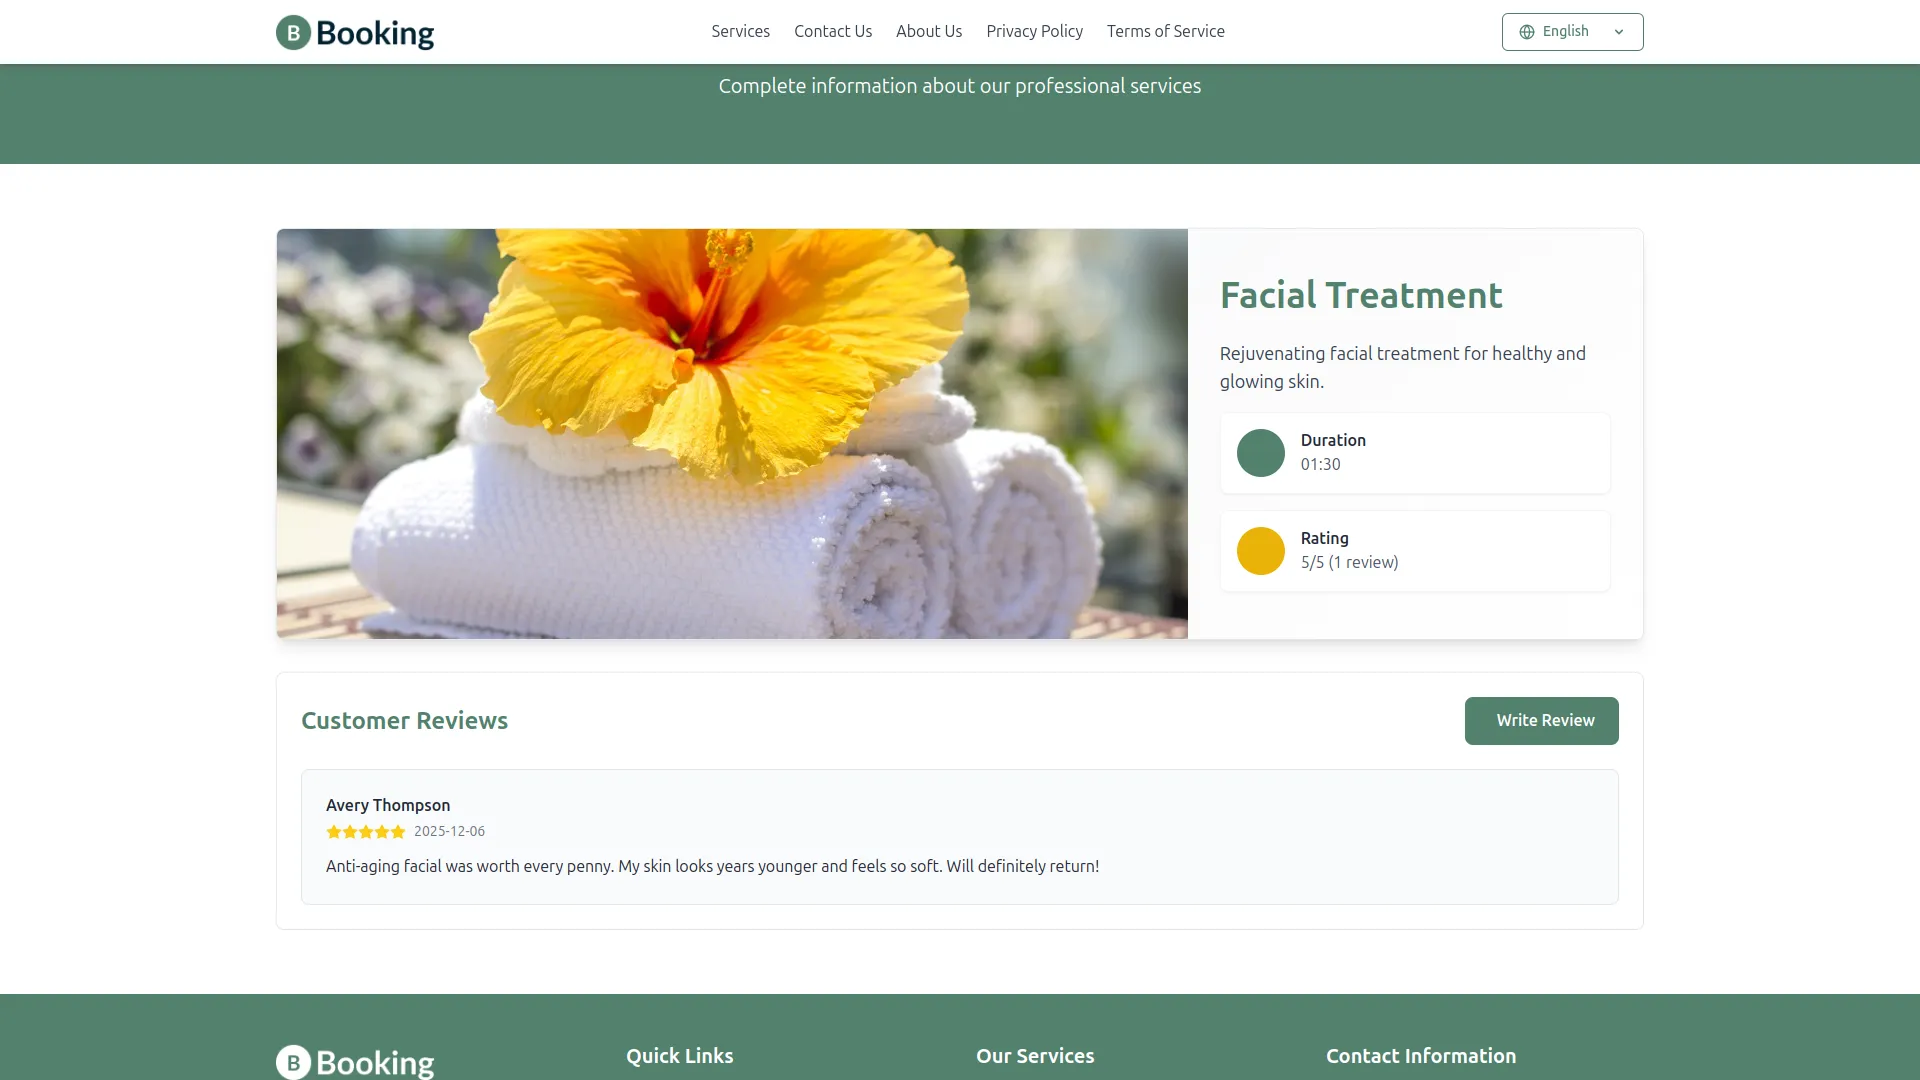
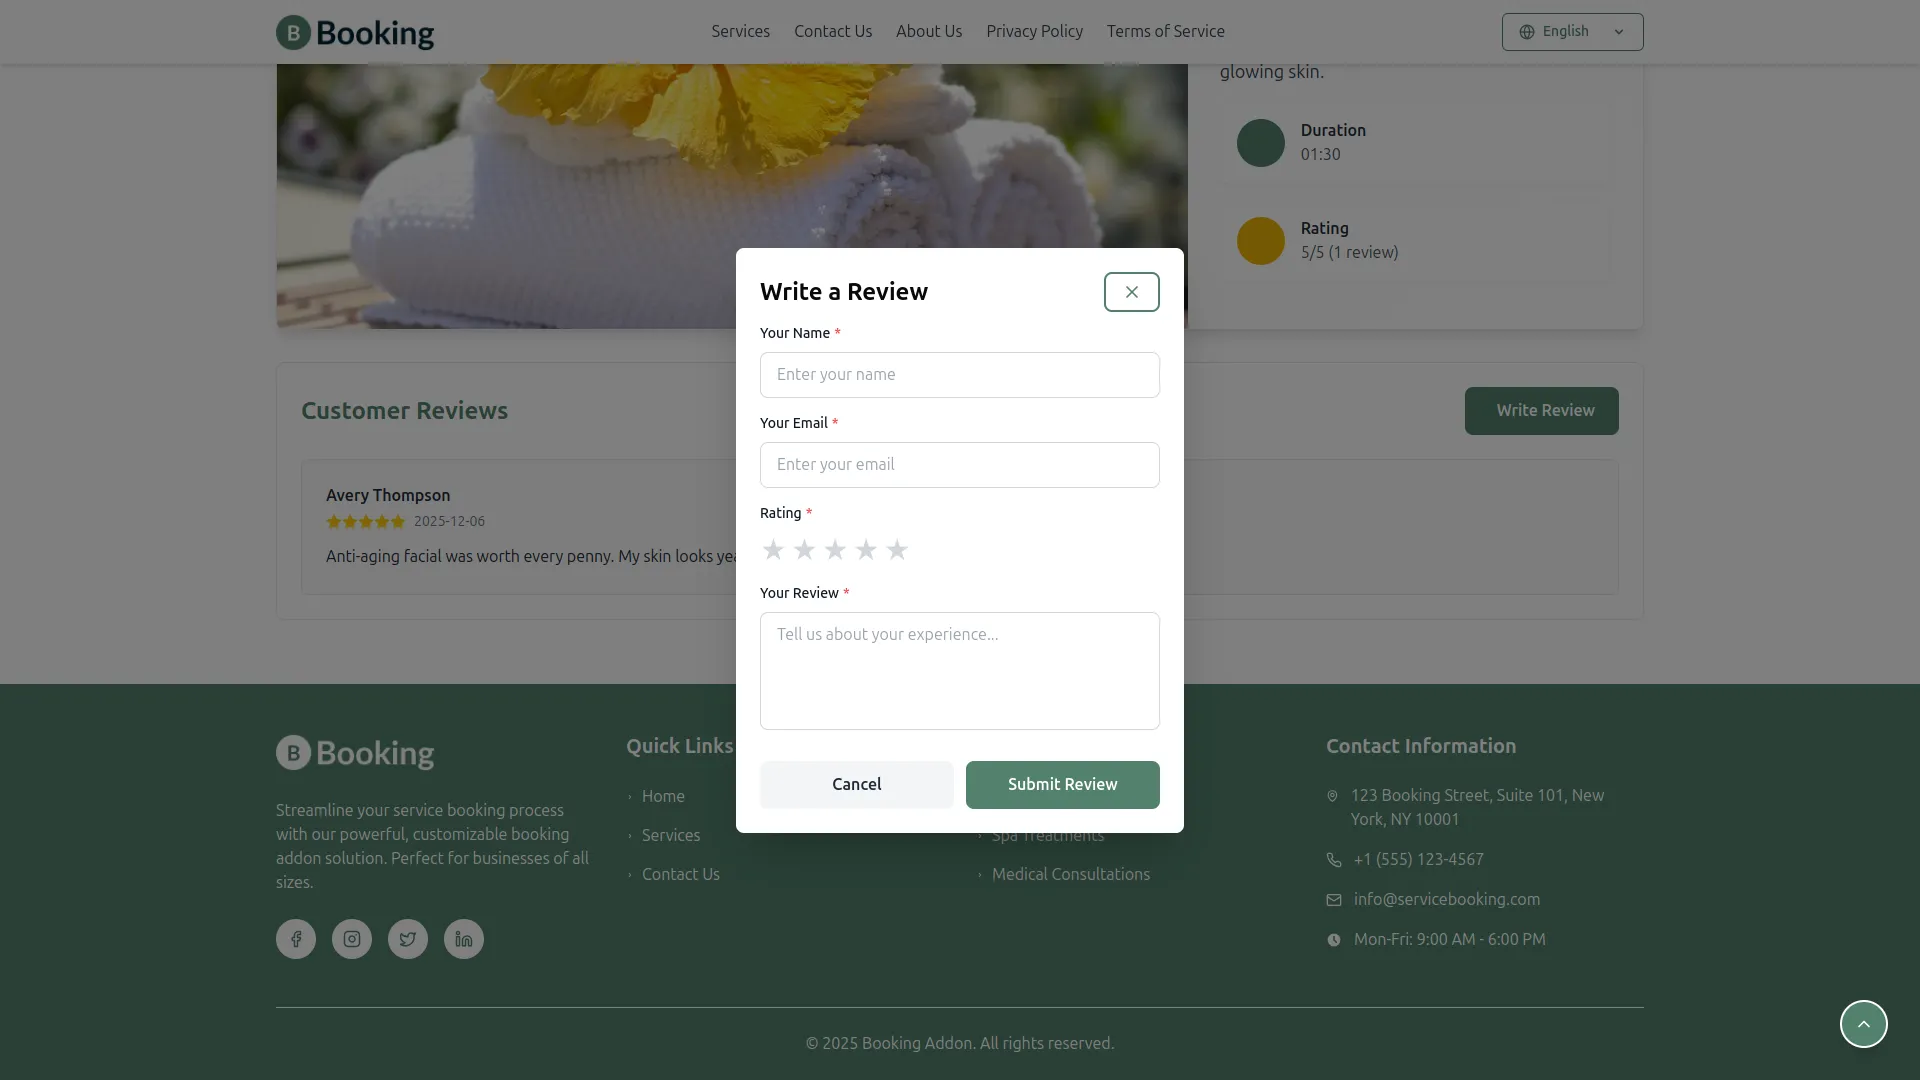
- This feedback management panel provides standard review system settings. Configure review display and moderation options, and commit changes.
- After activation, visitors will see customer reviews with star ratings, review submission forms, and average rating displays for service quality assessment.
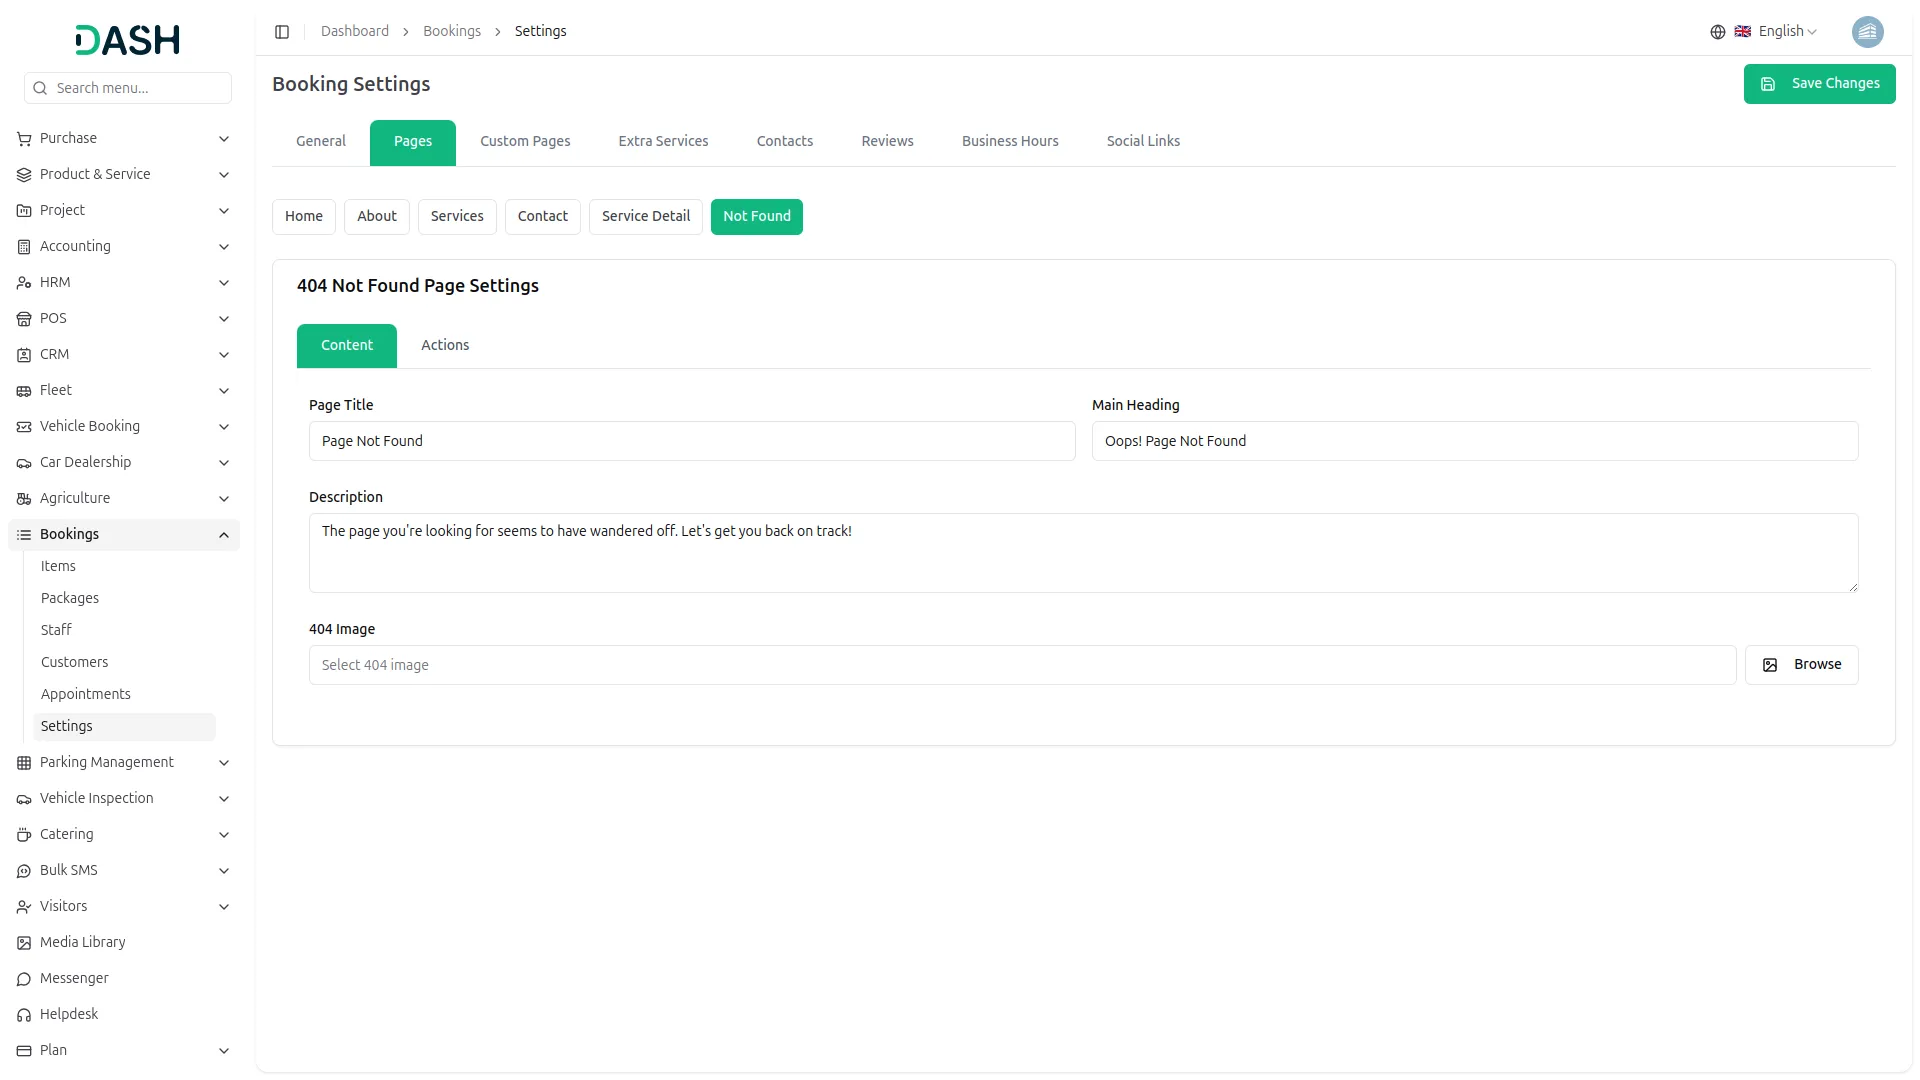
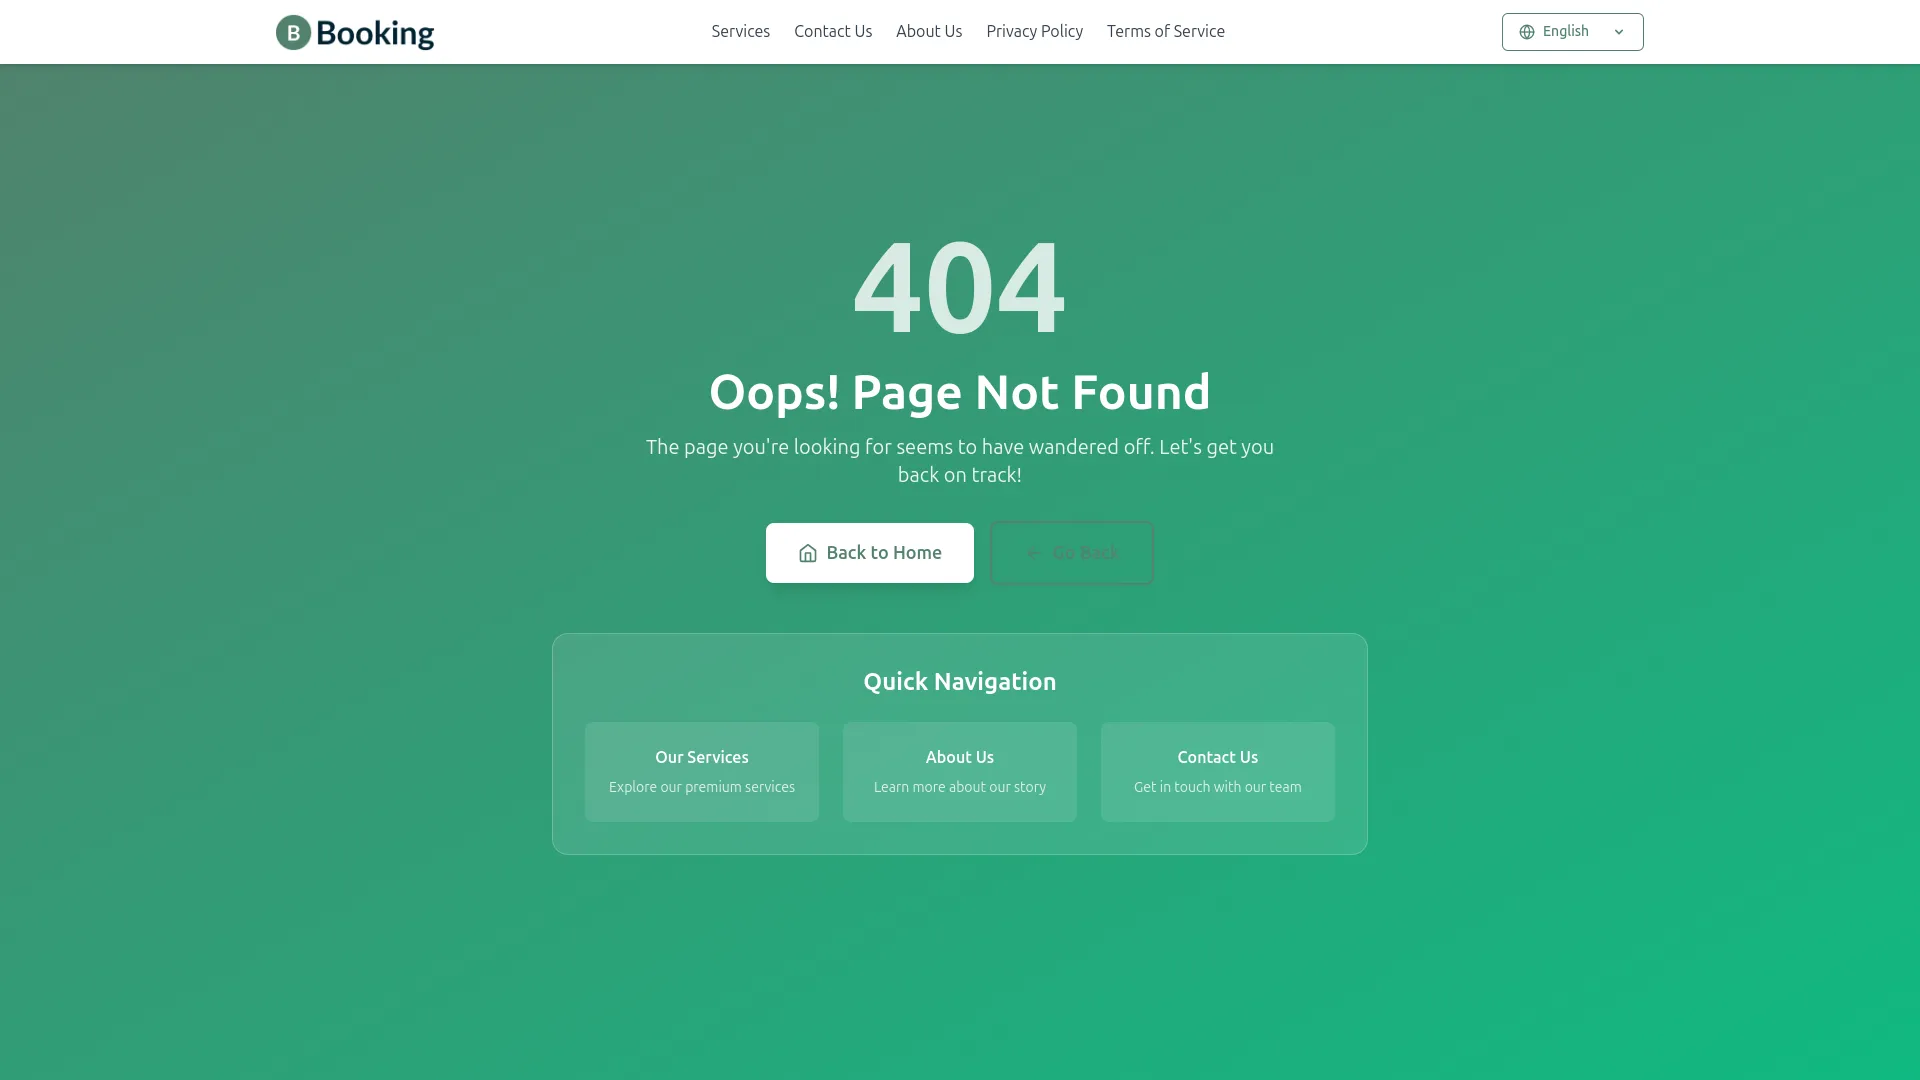
- The error page area offers standard 404 page configuration options. Customize error messaging and navigation, then save modifications.
- When applied, visitors accessing non-existent pages will see a friendly “Page Not Found” message with helpful navigation options and search functionality.
Service Detail Page
Header Section
Reviews Section
Not Found Page
Custom pages
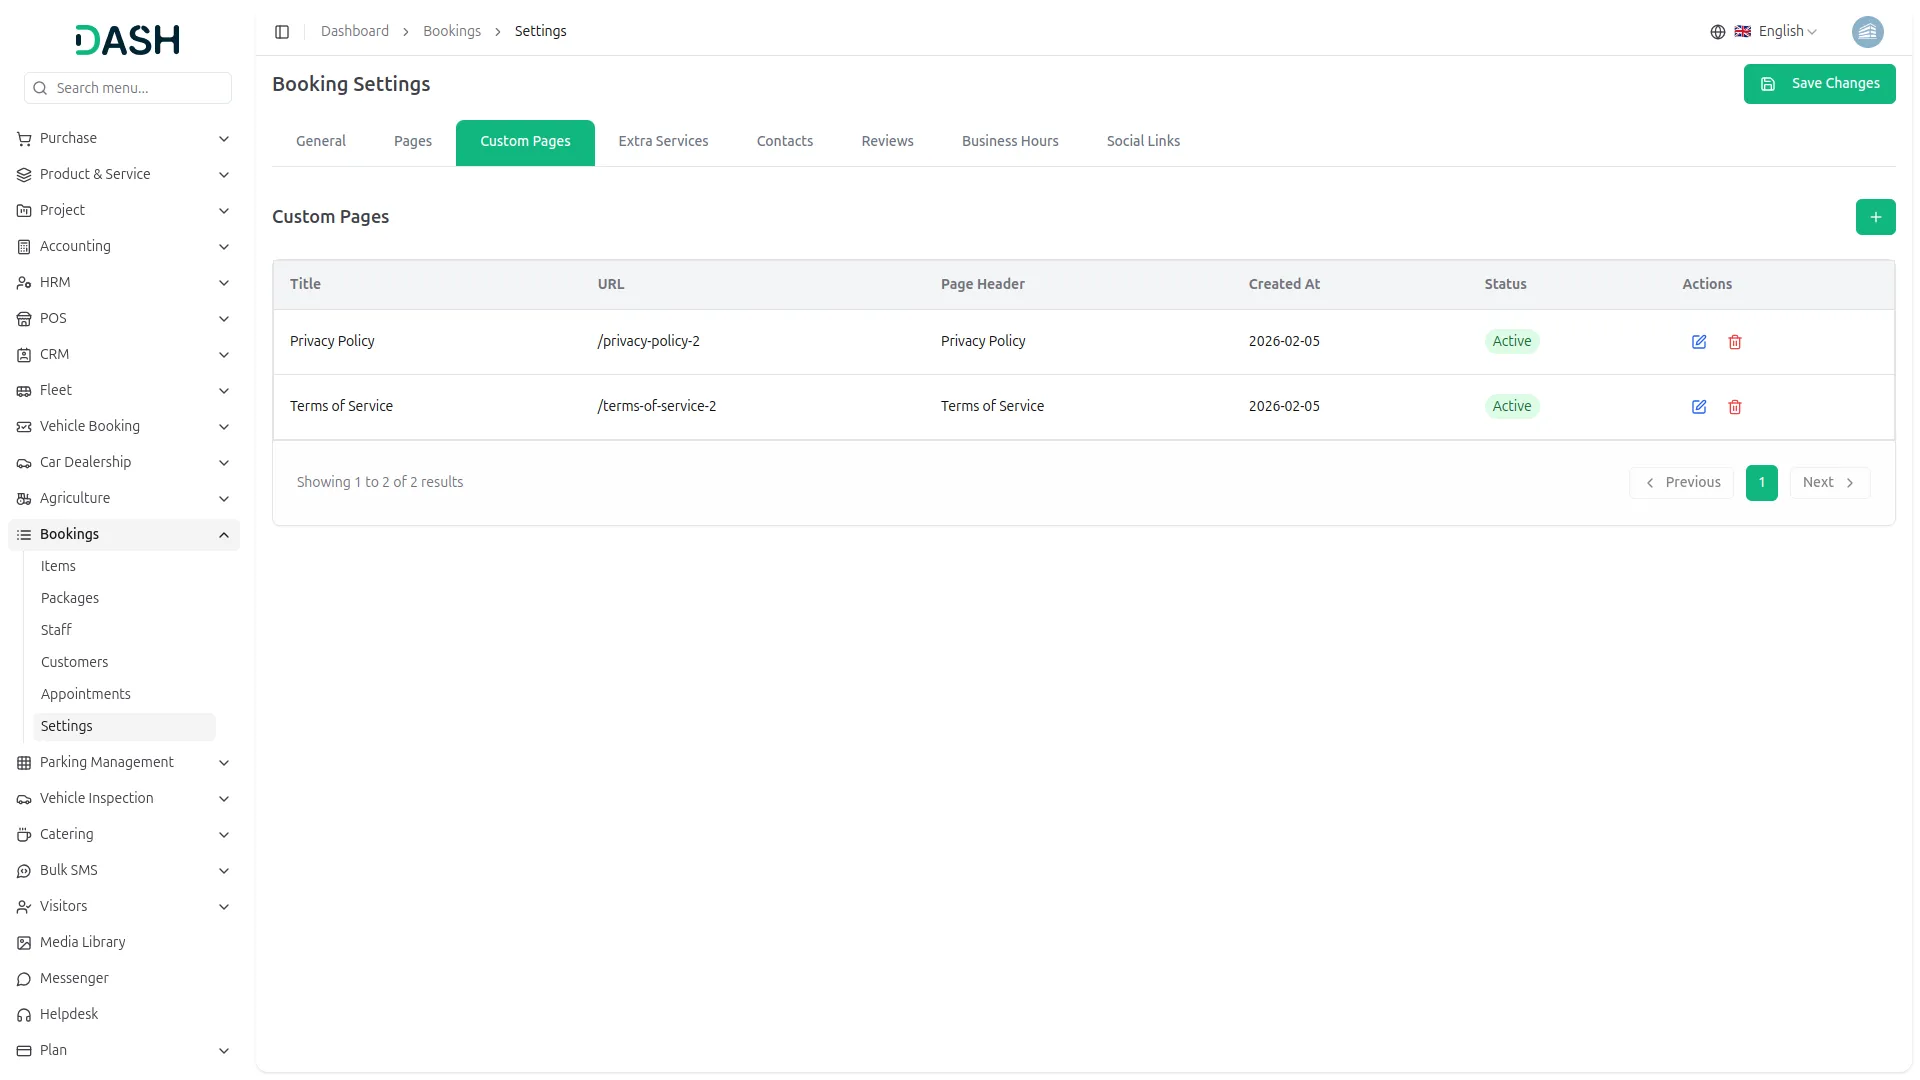
- The Custom Pages feature allows you to create and manage additional content pages for the website. From the settings, you can enter the Page title, Page Header, Page Header description, Page Content, and choose the Page Footer Display option (toggle enable/disable). If the footer display is enabled, the page will automatically be visible in the website footer; if disabled, it will not appear.
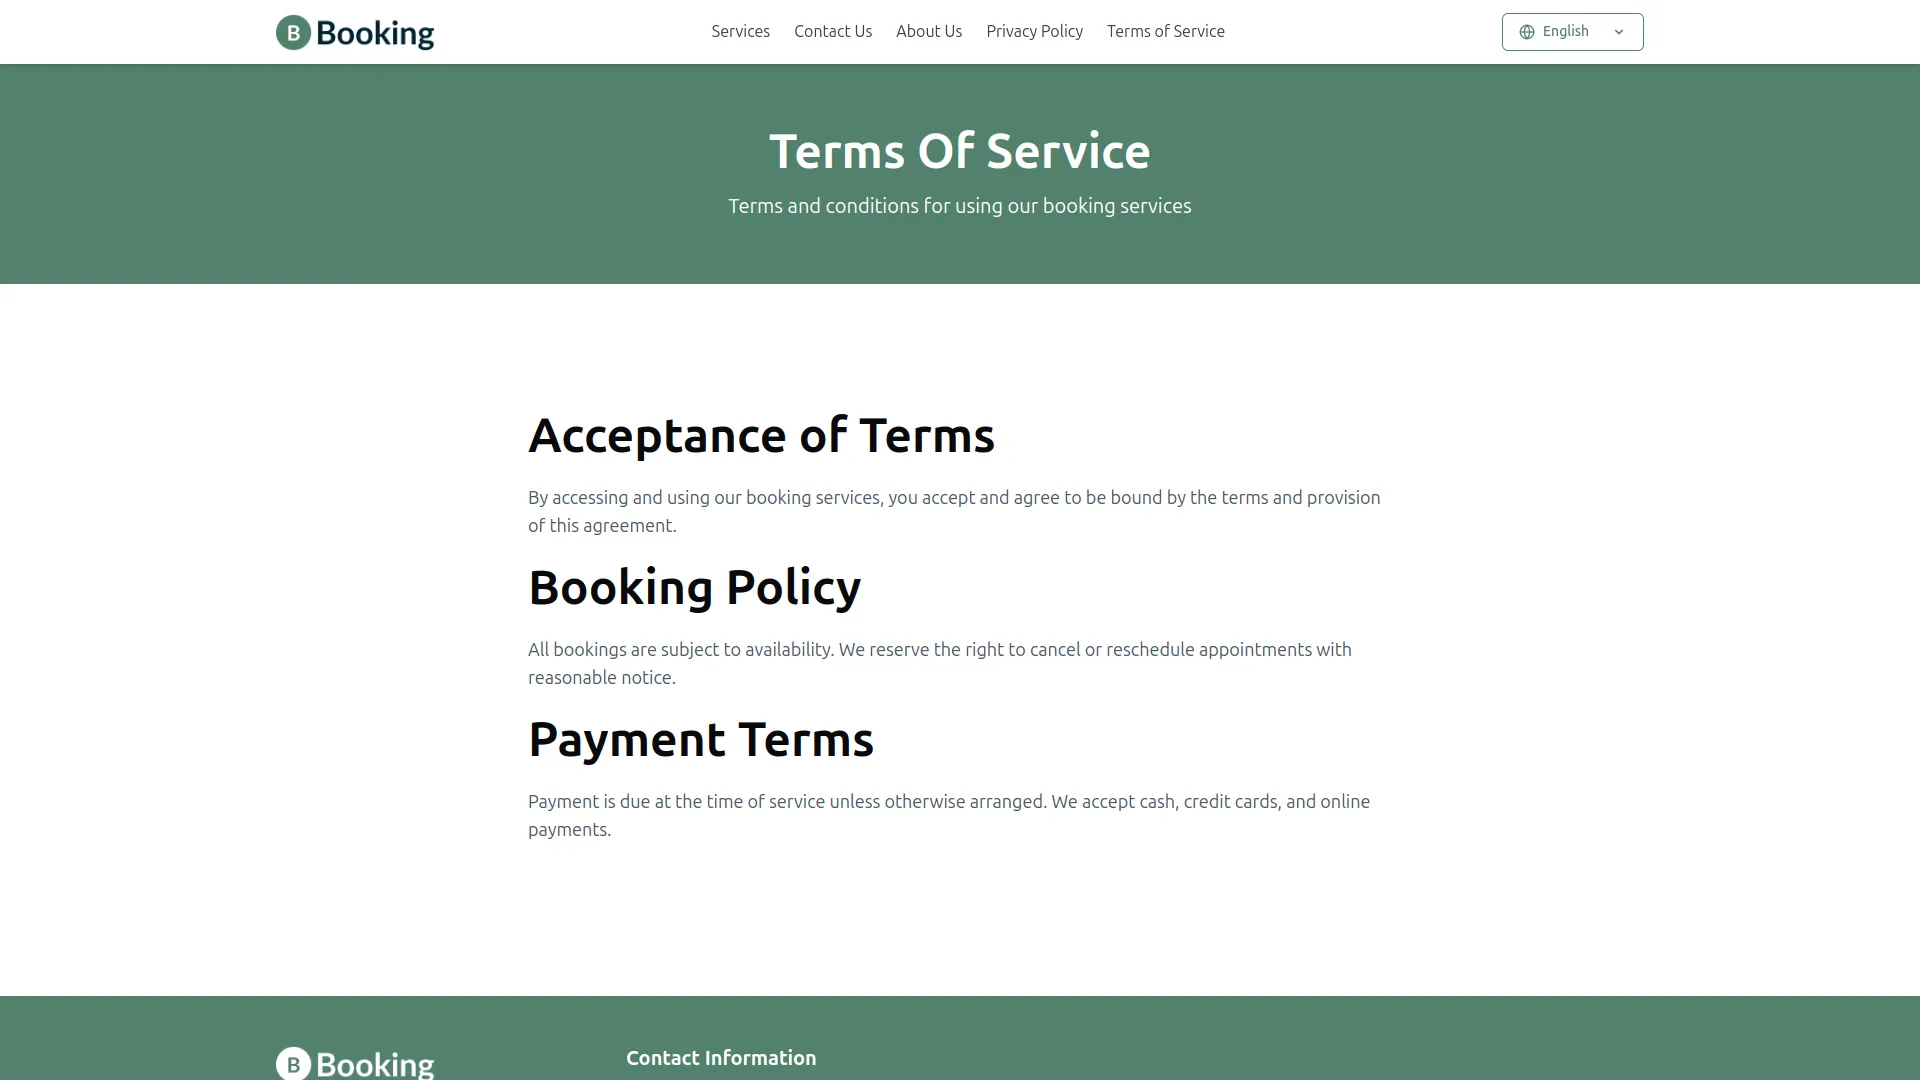
- On the frontend, the details entered in the content section are properly displayed within the custom page, ensuring that visitors can view the information clearly. The list page shows all created custom pages, including the title, url, header, footer display status and created at, and actions to edit or delete. This makes it easy to manage, update, or remove pages whenever needed.
- This setup ensures that all custom content added from the settings is properly reflected on the frontend, giving flexibility to display important information to customers as required.
Extra services
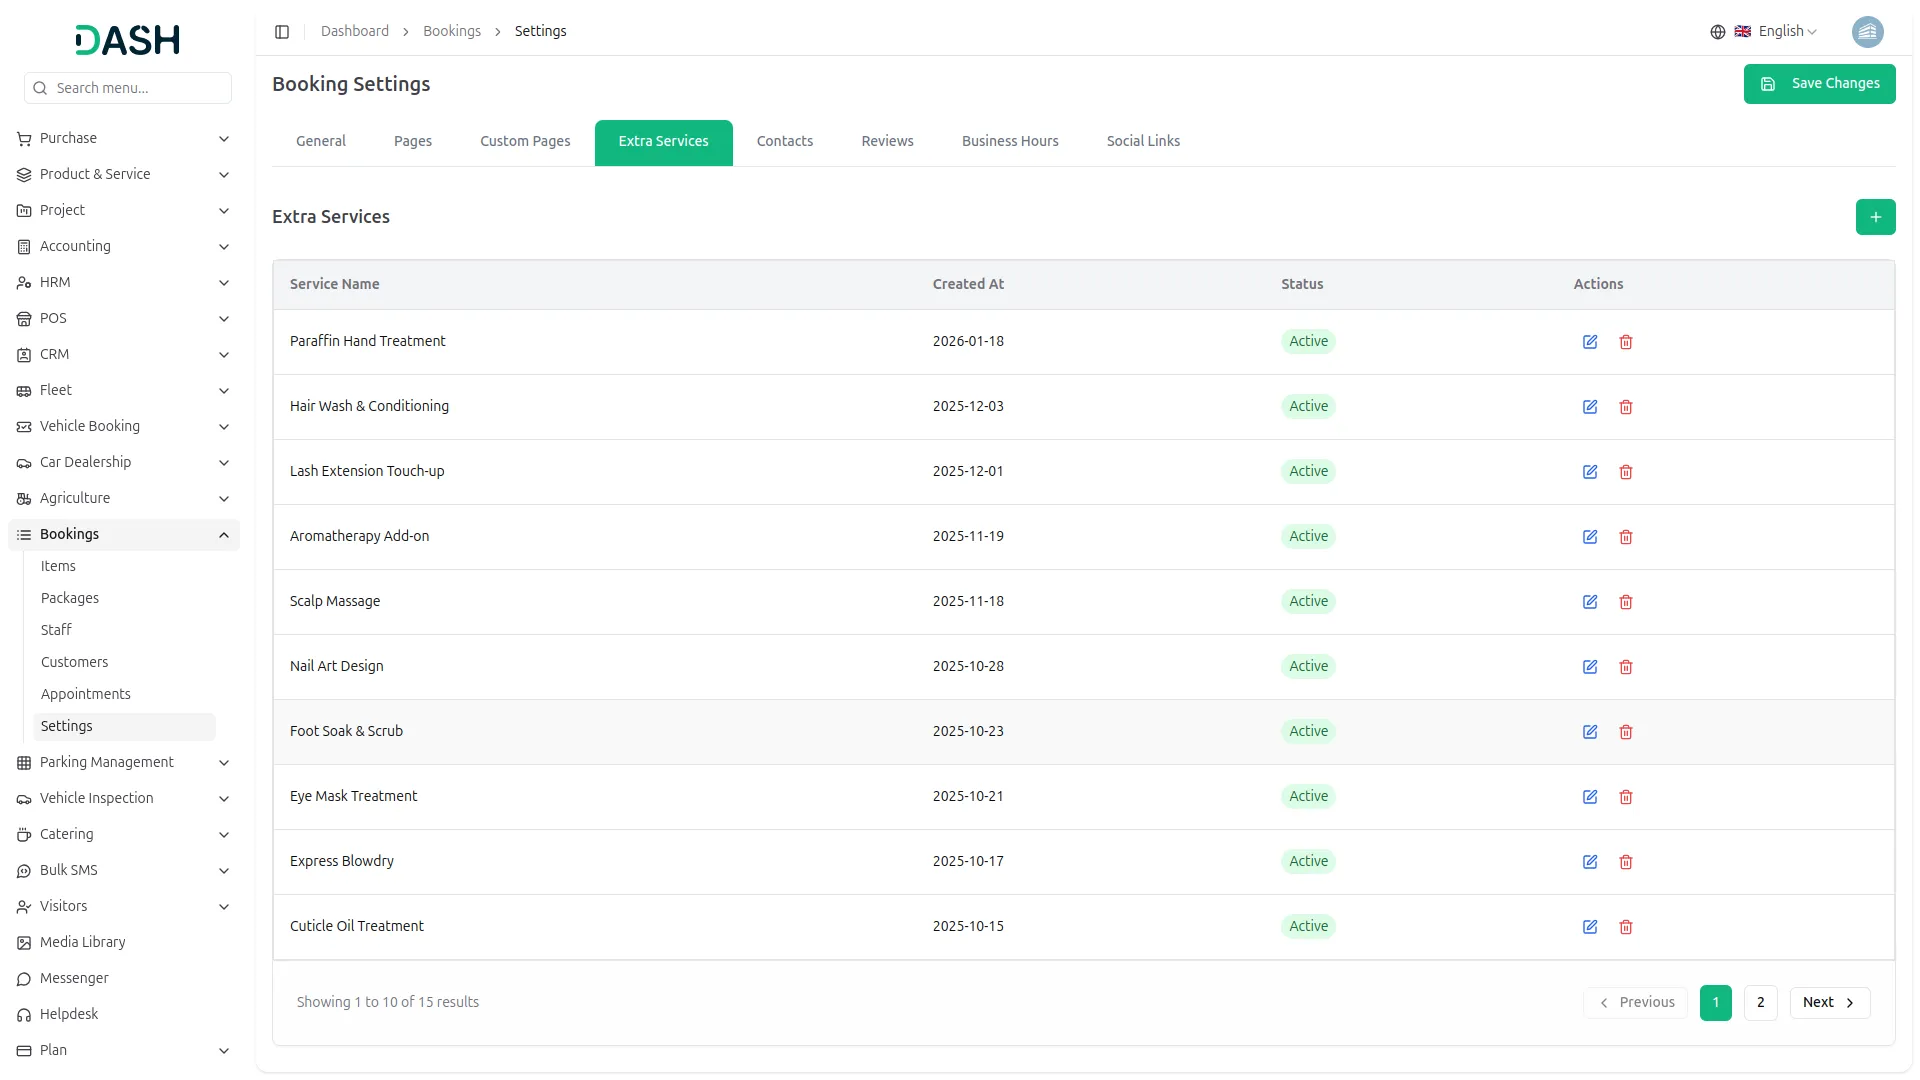
- To manage Extra Services, click “Create” to add new services. Enter the service name and select the status using the toggle buttons for Active or Inactive. The list page shows all services with columns for Name and Status, and created at. You can use the Search function to find specific services, and use Edit or Delete actions as needed.
Contacts
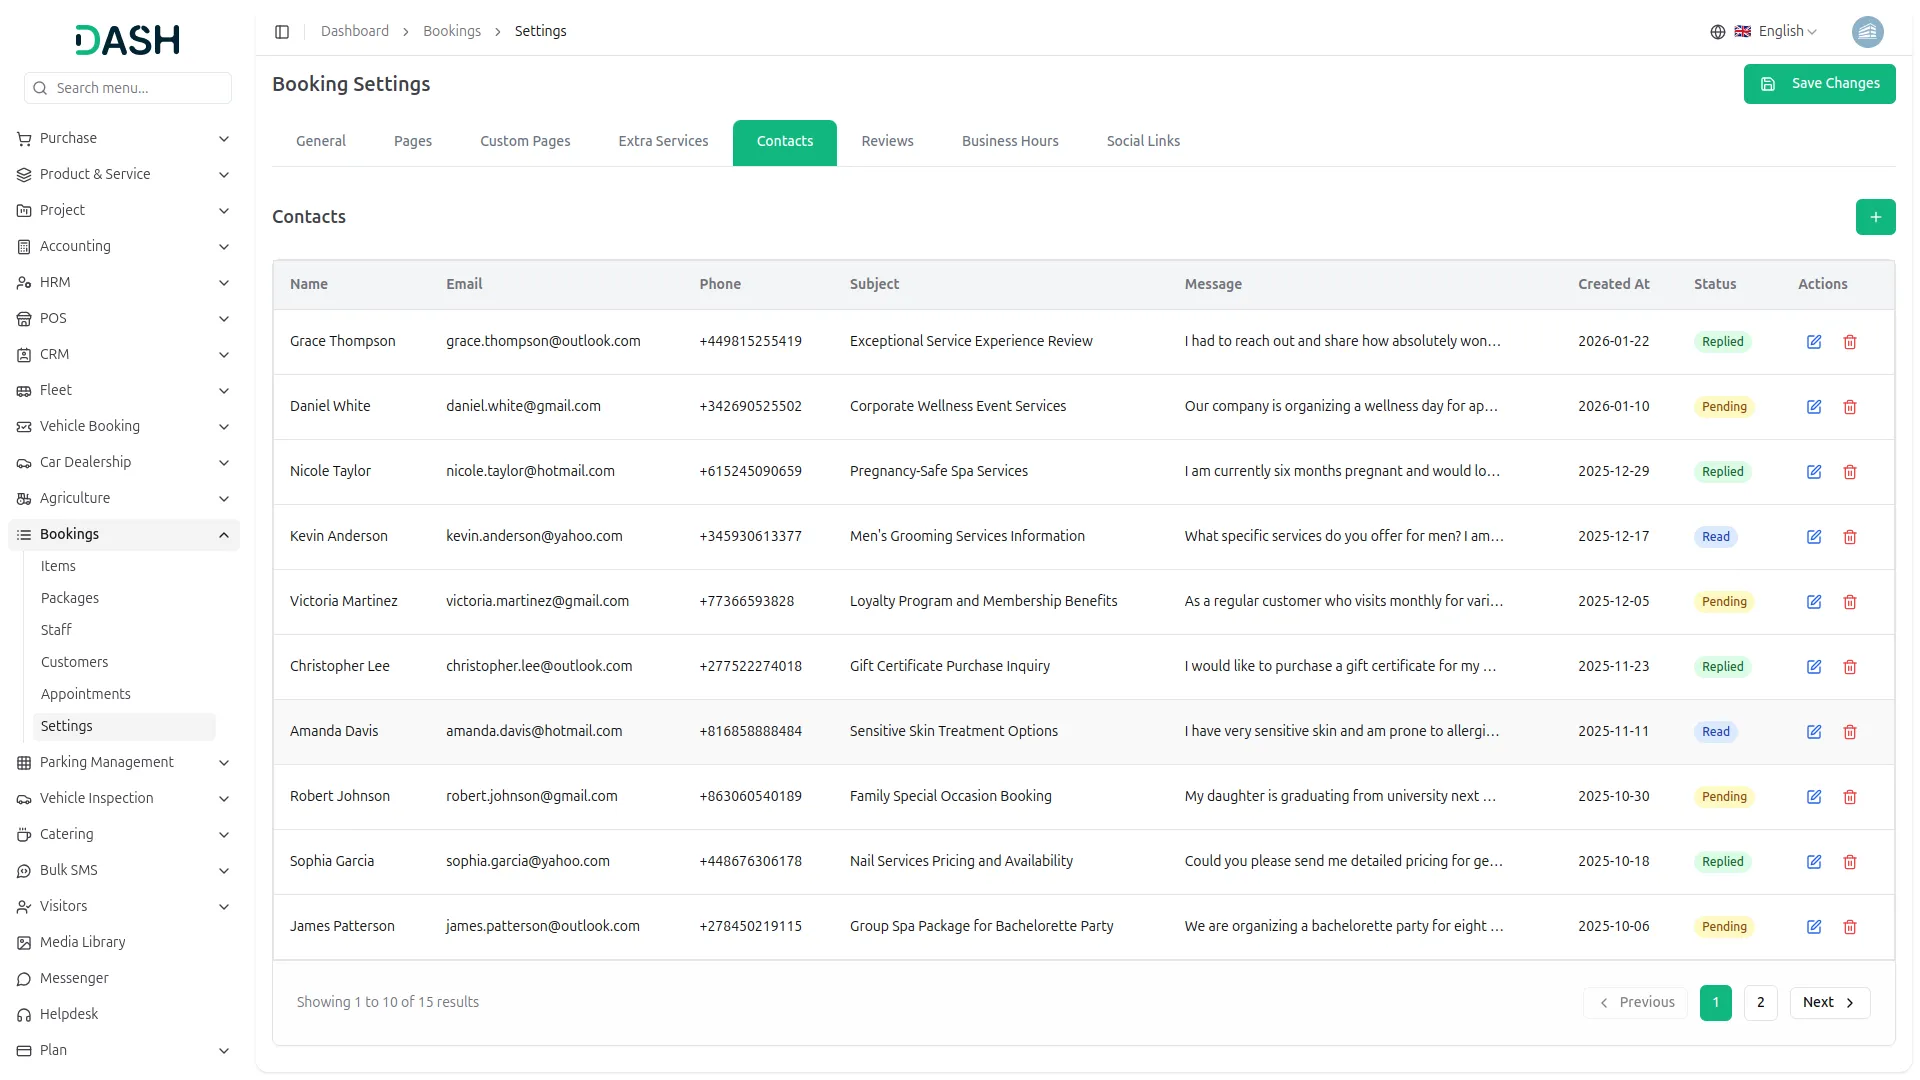
- The Contact Section displays all messages submitted by customers through the Contact Us form on the frontend of your website. When users fill in their details and send a message from the frontend, their submissions automatically appear in the Contact section of the admin panel for easy management.
- The list page shows all contact inquiries in a table with columns for Name, Email, Phone, Subject, Message, Created At, and Status. This provides a complete overview of customer inquiries and communication history.
- From the Actions column, you can view message details, update the status (such as Read, Pending, or Replied), and delete entries if required, allowing you to efficiently manage and respond to customer communications.
Reviews
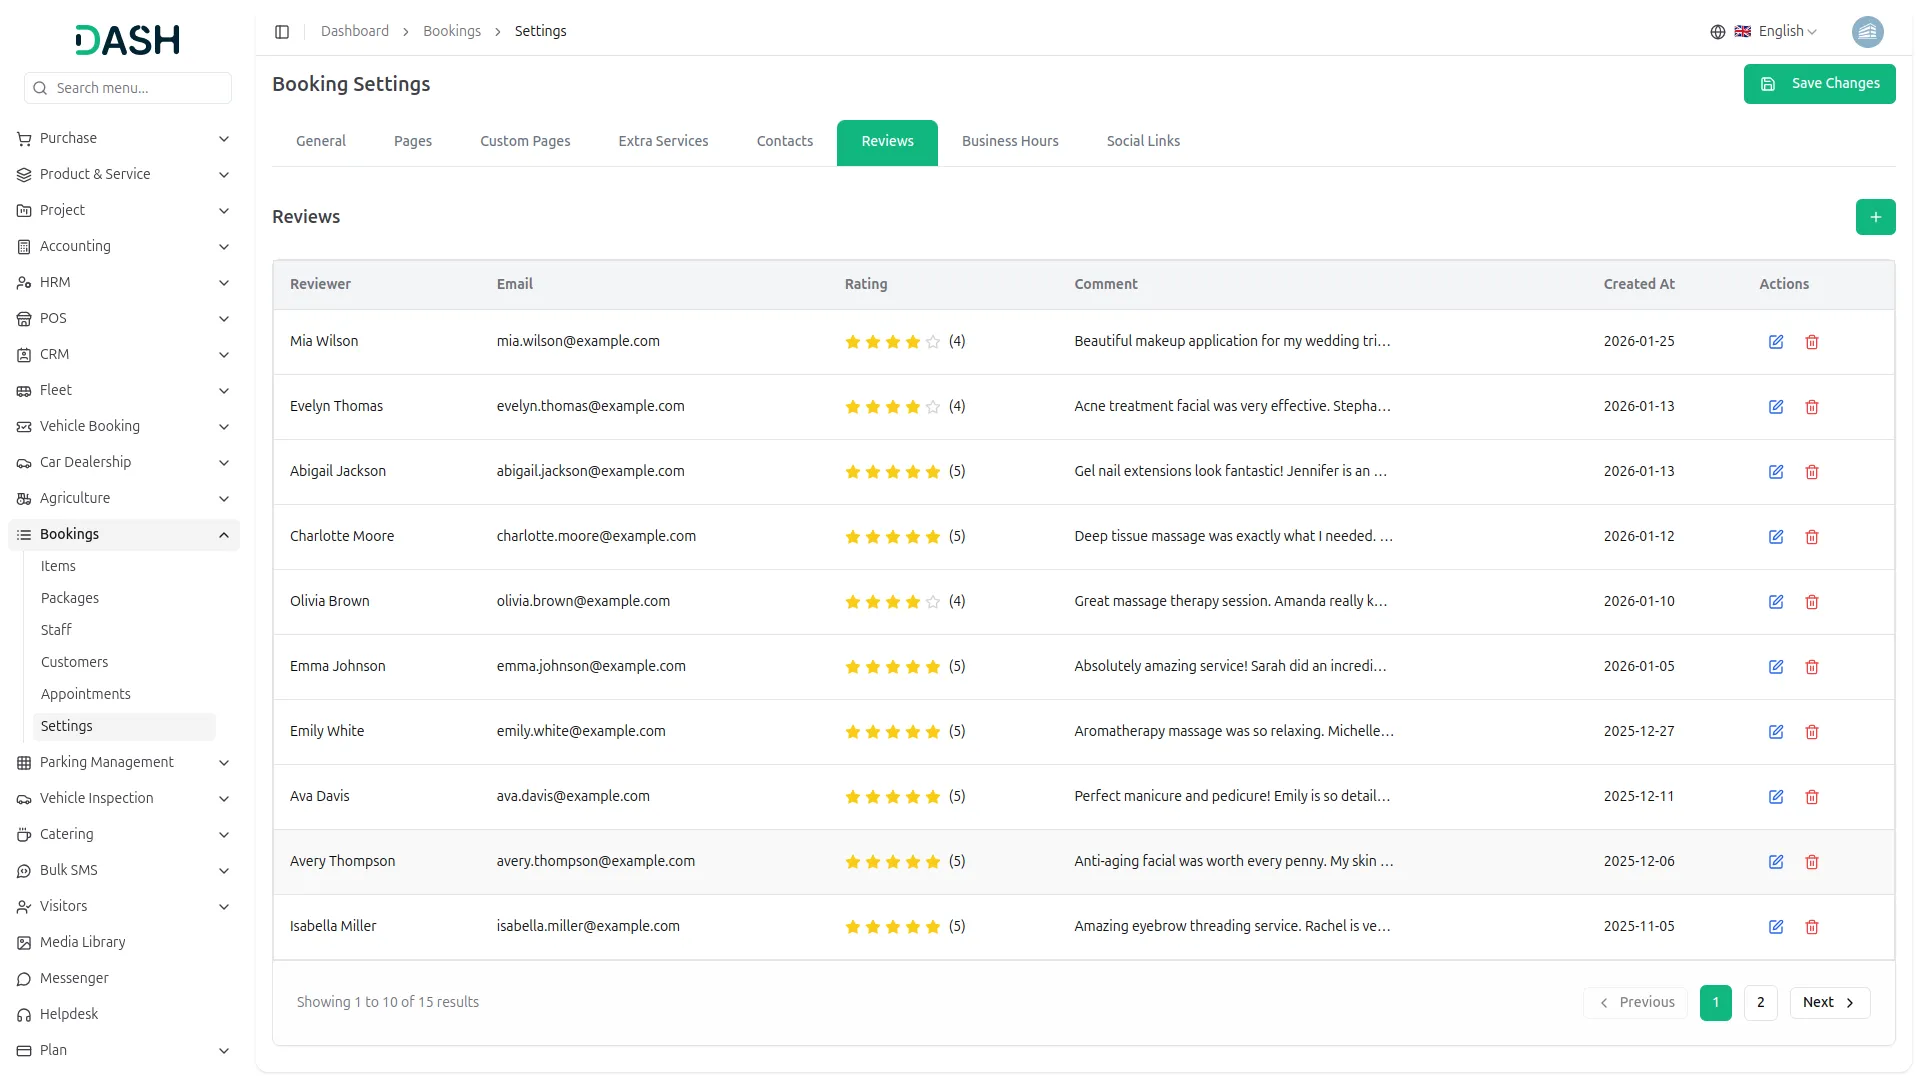
- The Review Section displays customer reviews that are submitted from the frontend side of your website. When customers add reviews from the frontend side, their entries will automatically appear in the Review Section for you to manage.
- The list page shows all customer reviews in a table with columns for Name, Email, Review (star rating), Comment, and Created at. This gives you a complete overview of customer feedback and ratings. In the Actions column, you can edit and delete reviews if needed to moderate the content displayed on your website.
Business Hours
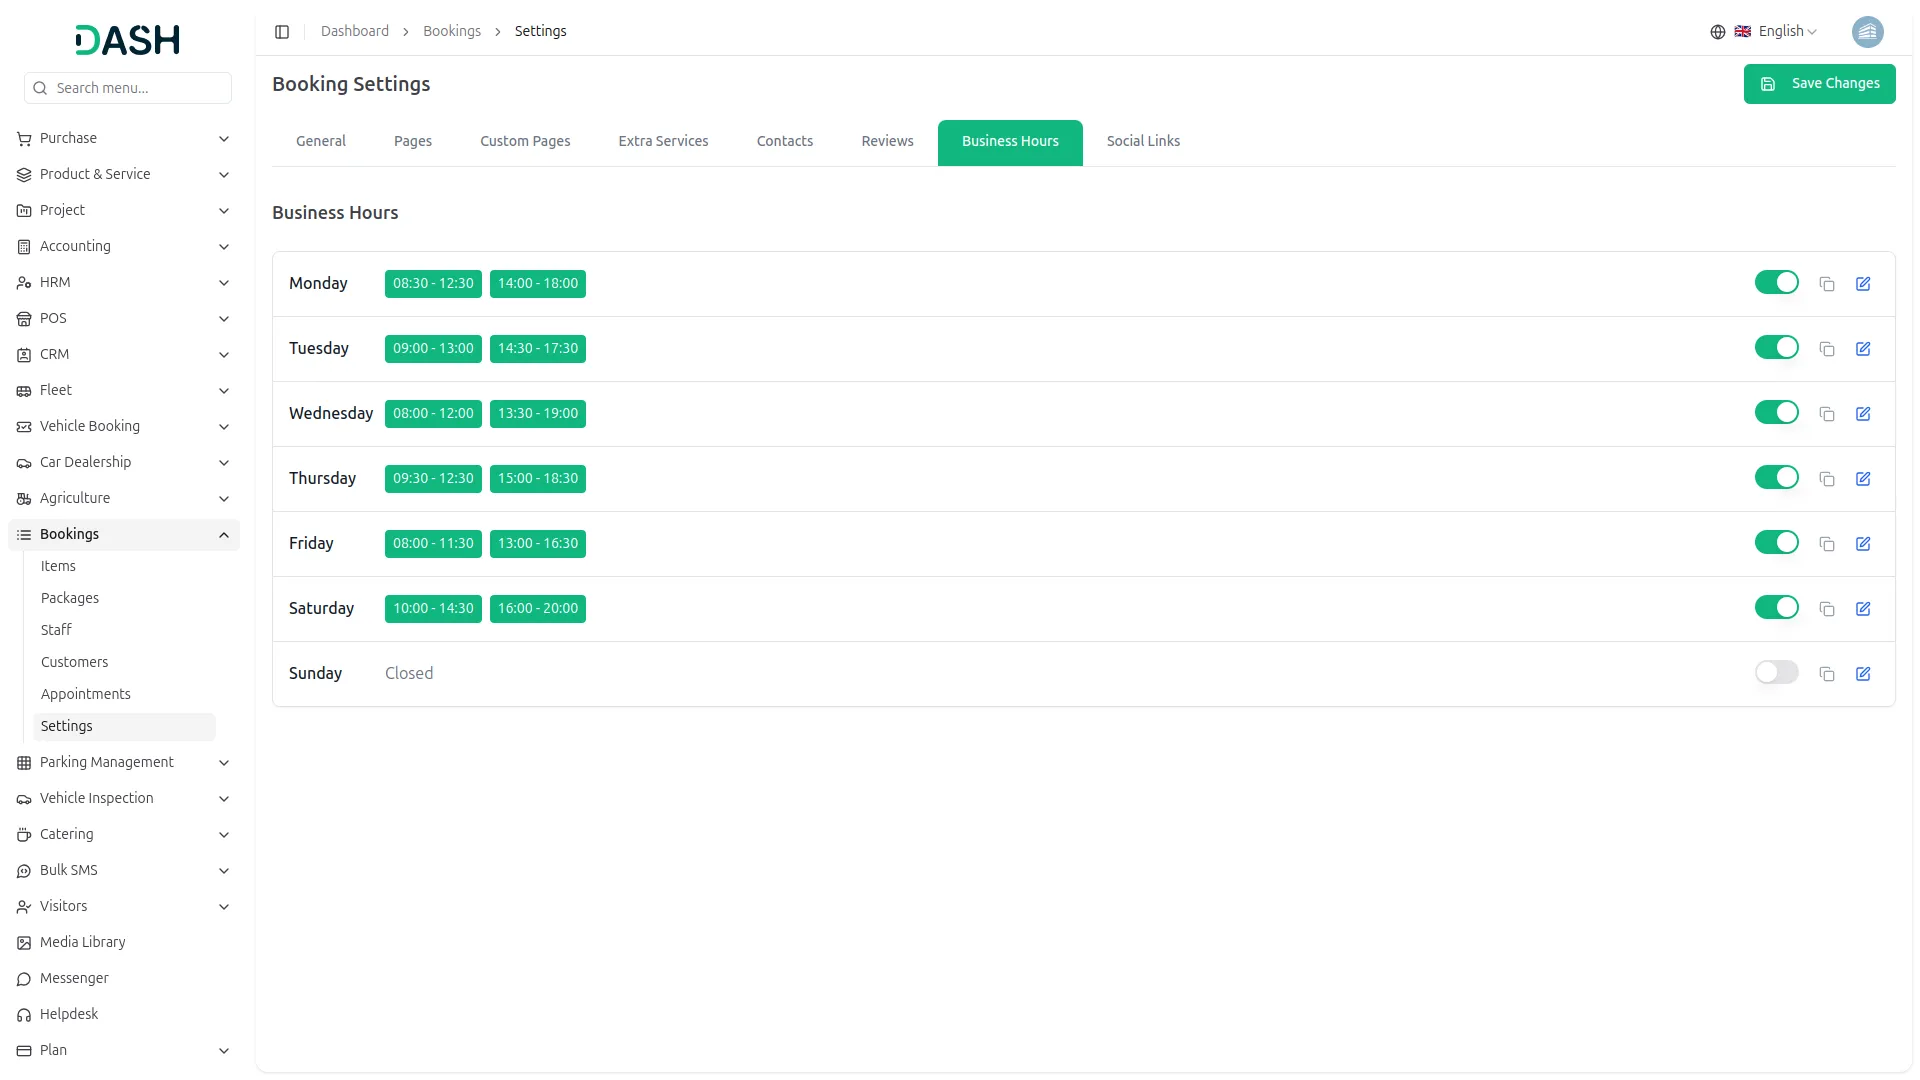
- The operating schedule panel offers a standard business hours configuration. Set your opening and closing times for each day, configure breaks and holidays, then submit the schedule.
- After configuration, your business hours will be displayed on the contact page, the booking calendar will only show available times, and holiday schedules will be automatically applied to control booking availability.
Social Links
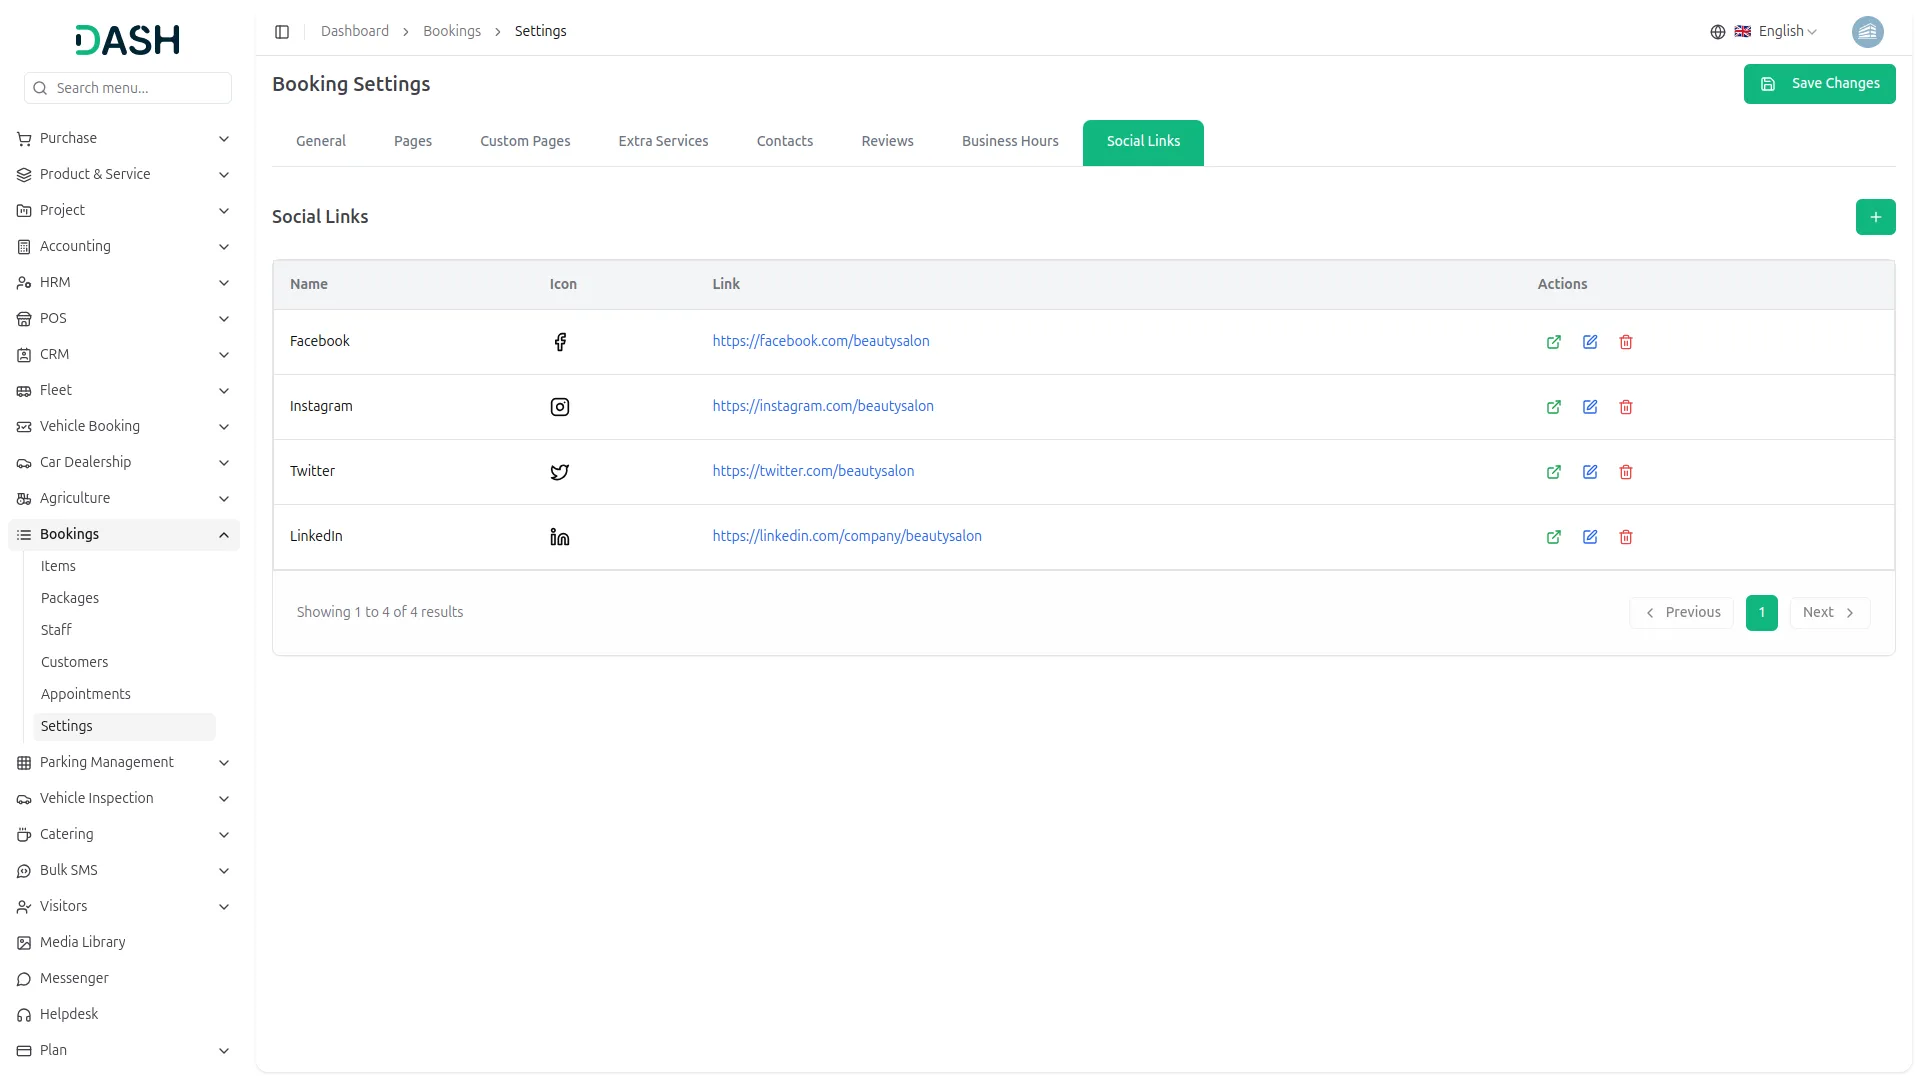
- The Social Links section allows you to manage the booking’s social media presence directly from the social links section. Here, you can add each platform’s name, icon and URL, making it easy to connect the website with your official accounts. Once added, these links are automatically displayed in the footer section of the website, ensuring visitors can directly access and follow your social media pages.
- This setup ensures that all links entered in the section are properly reflected on the frontend, helping build trust, improve engagement, and maintain a strong connection with customers through official social platforms. In the Actions column, you can visit that URL, edit, and delete the record if needed.
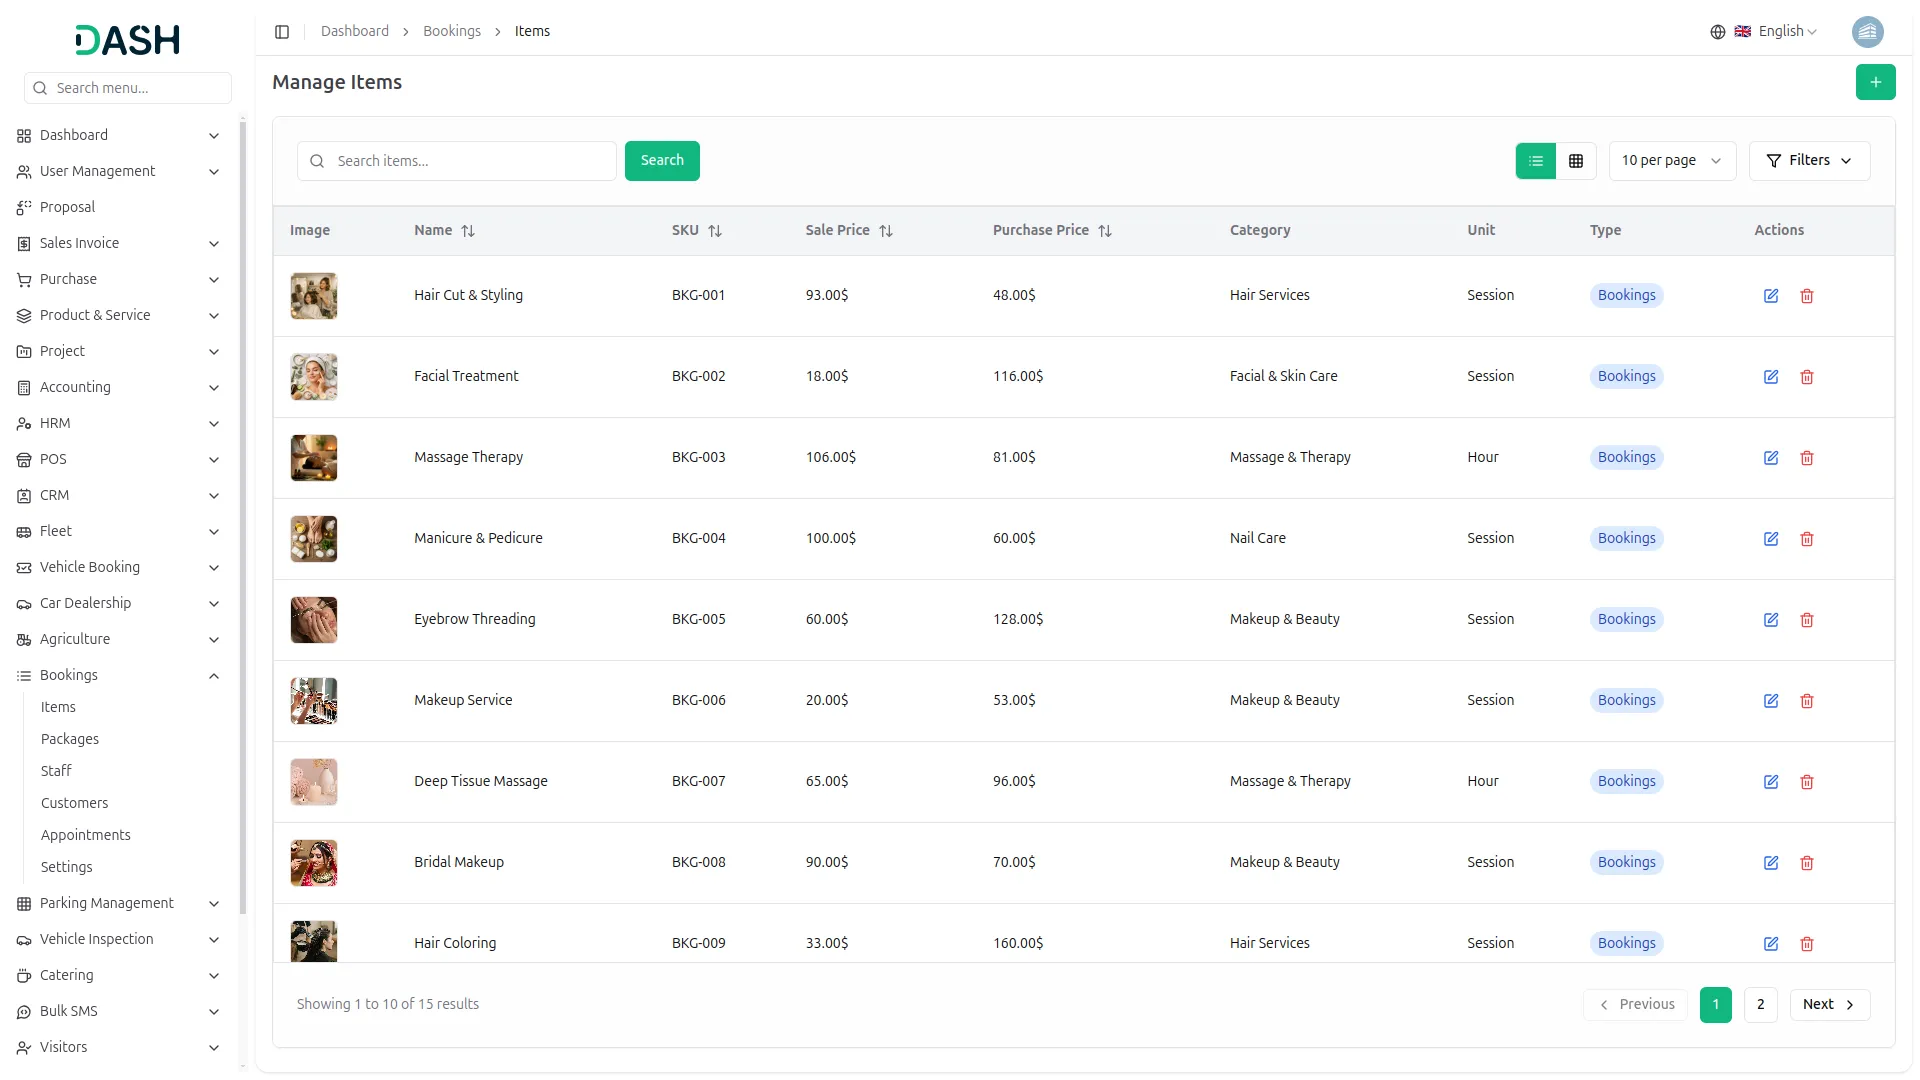
Manage Items
- To add a new item, click the “Create” button on the items page. Fill in the item name, SKU code, and description. Select the appropriate category from the dropdown menu and choose the unit type.
- Set both sale price and purchase price, then select applicable taxes using the multiple select option. Add the service duration and slots, and upload an image if needed. Click “Create” to create the item.
- The list page displays all items with columns for Image, Name, SKU, Sale Price, Purchase Price, Category, Unit, and Type.
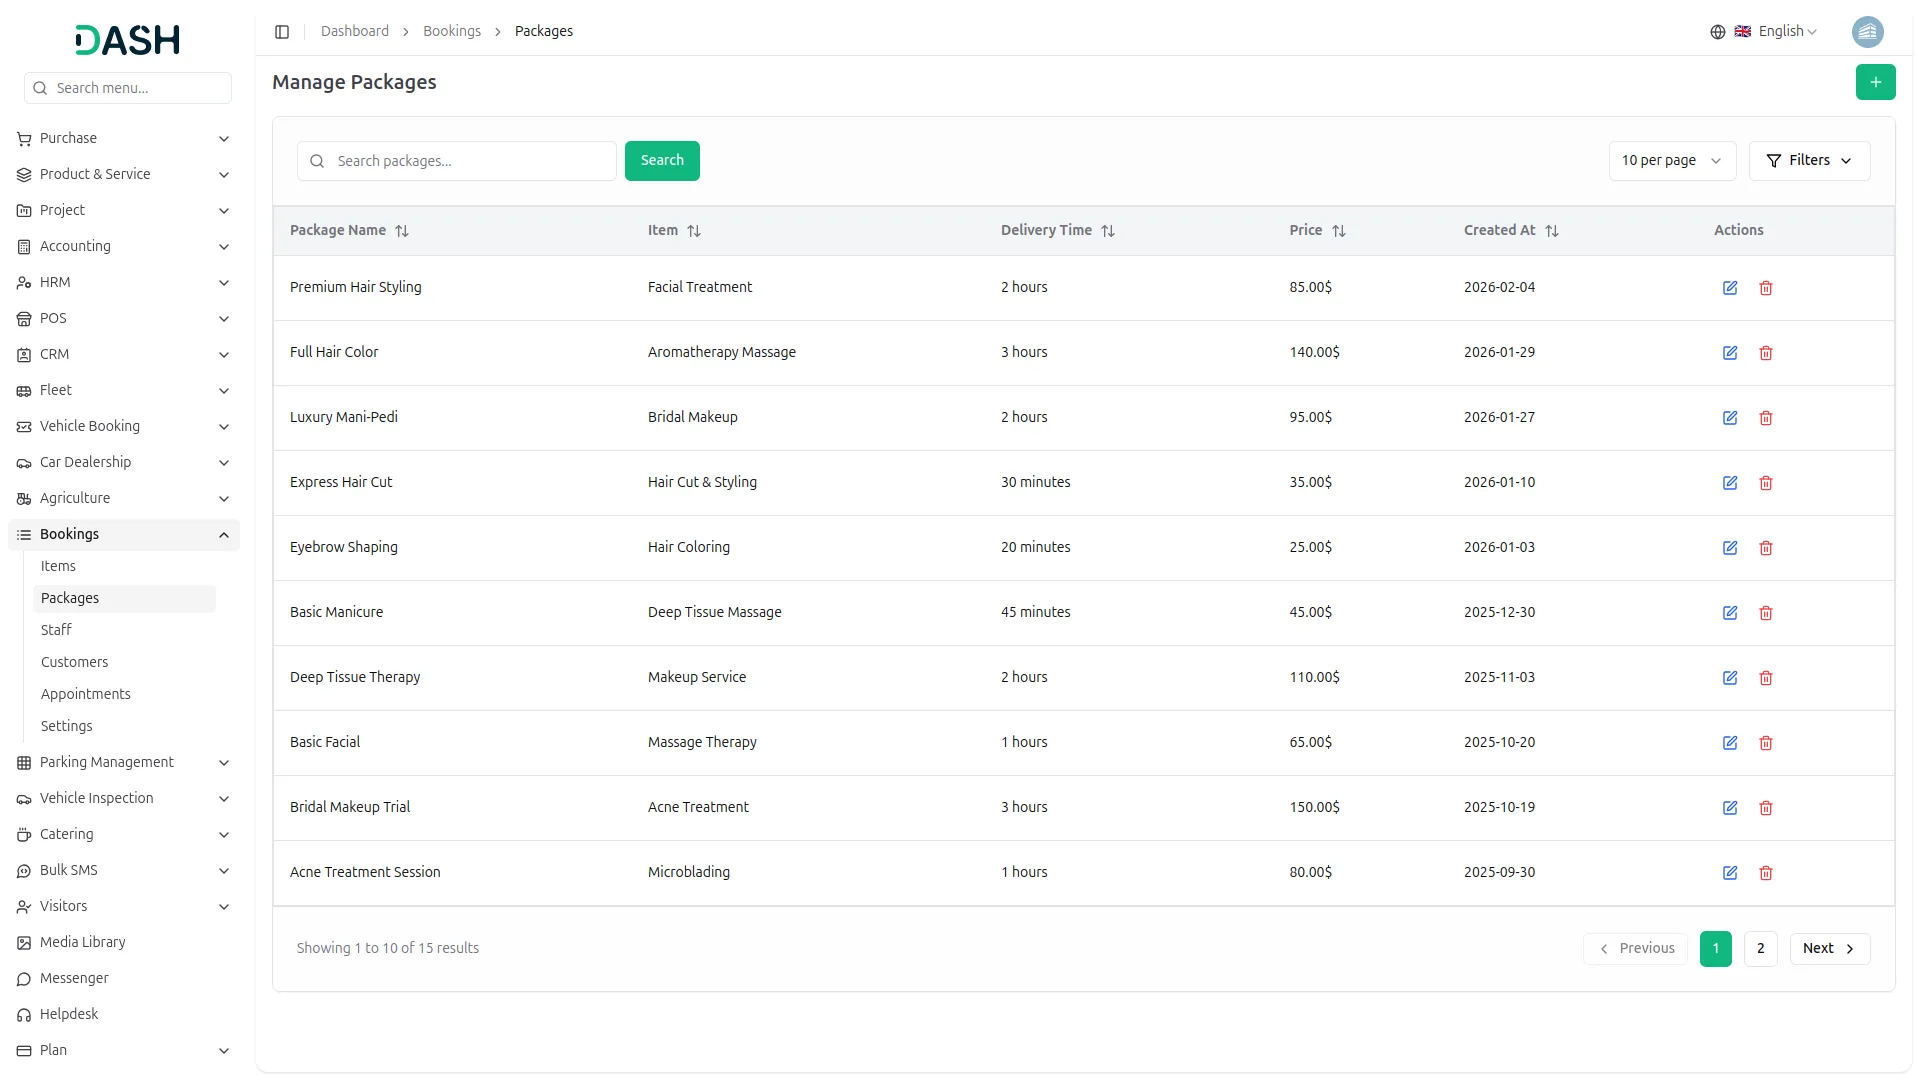
Manage Packages
- To add a package, click the “Create” button and enter the package name. Select an item from the dropdown menu and choose any extra services using the multiple select option from your system setup.
- Set the delivery time and select the delivery period from the dropdown (Hours/Minutes). The final price auto calculate with tax. Click “Create” to create the package.
- The list page shows packages with columns for Package Name, Item, Delivery Time, Created at, and Price. Available actions include Edit, and Delete for each package.
Manage Customer
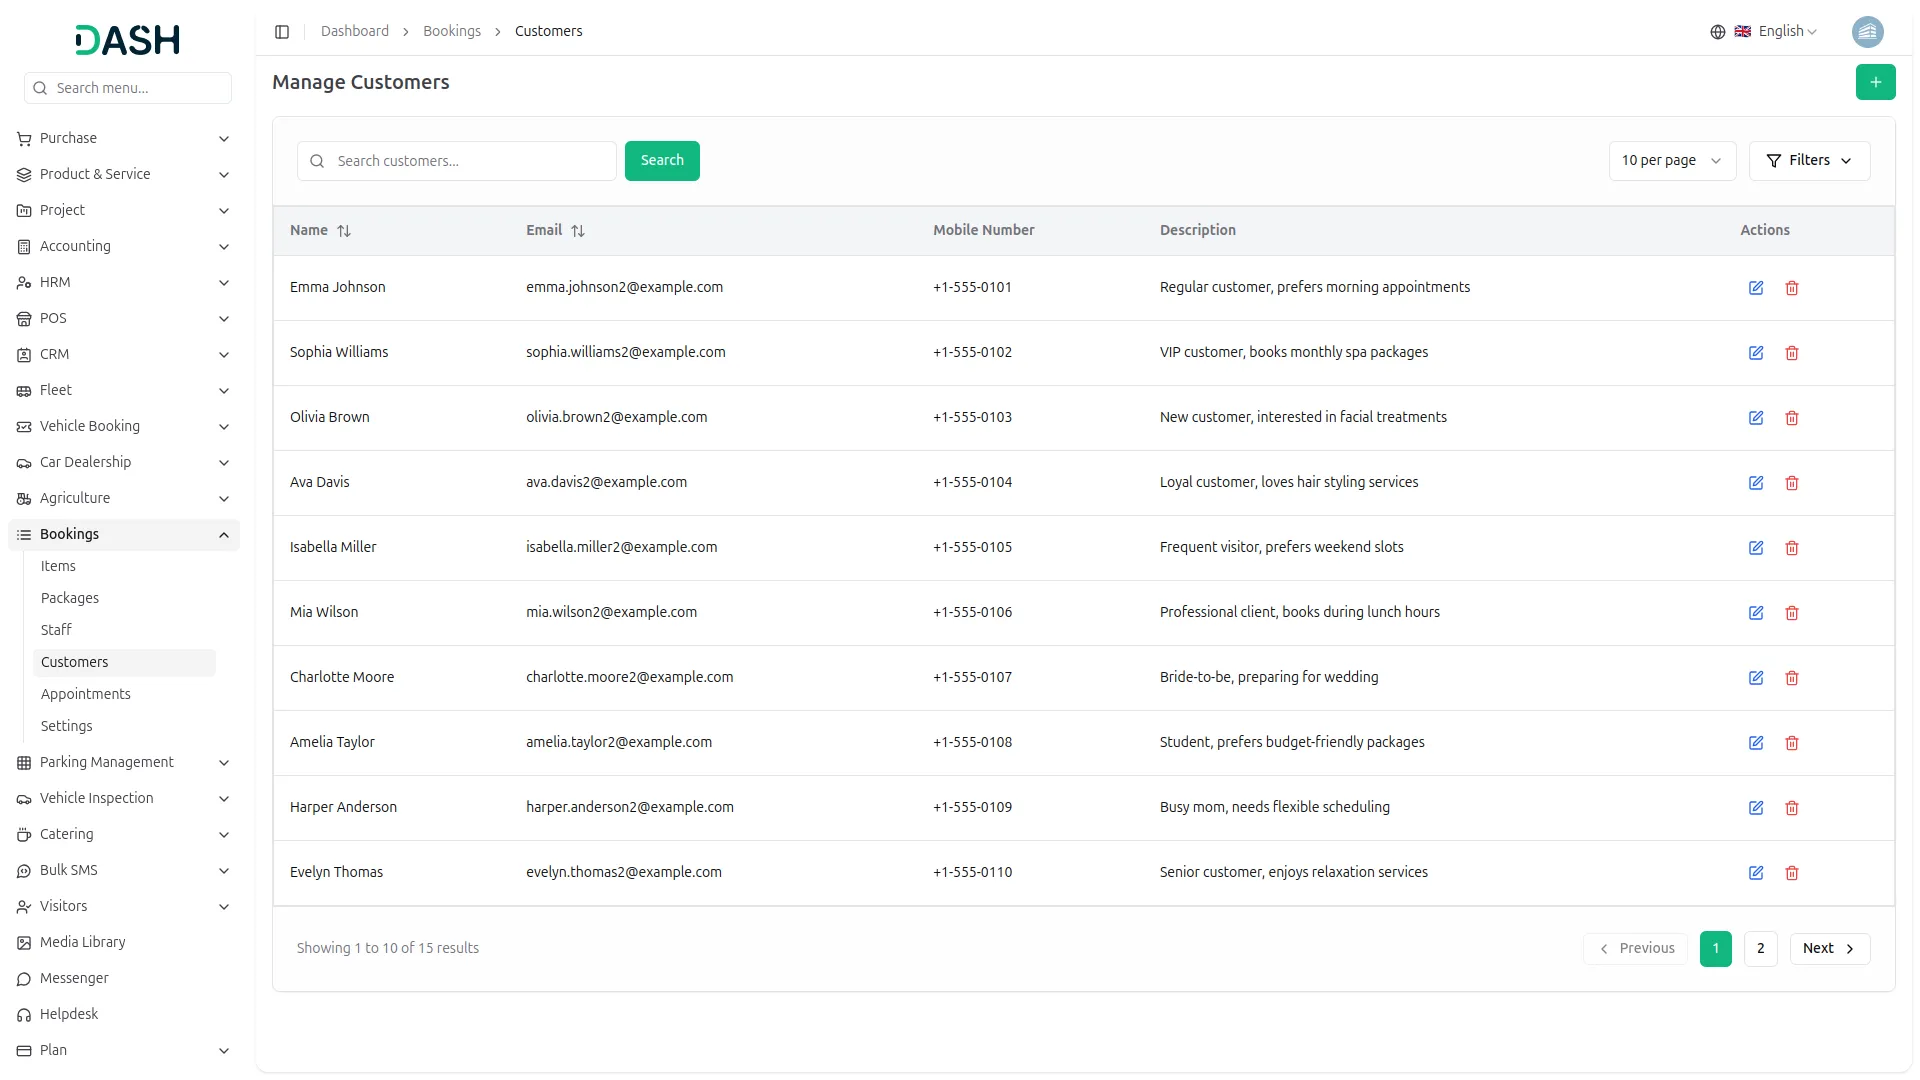
- To add a new customer, click the “Create” button and enter the first name, last name, email, and mobile number.
- The customer list page displays all customers with columns for name, Email, and Mobile Number. Available actions for each customer include Edit and Delete.
Manage Appointments
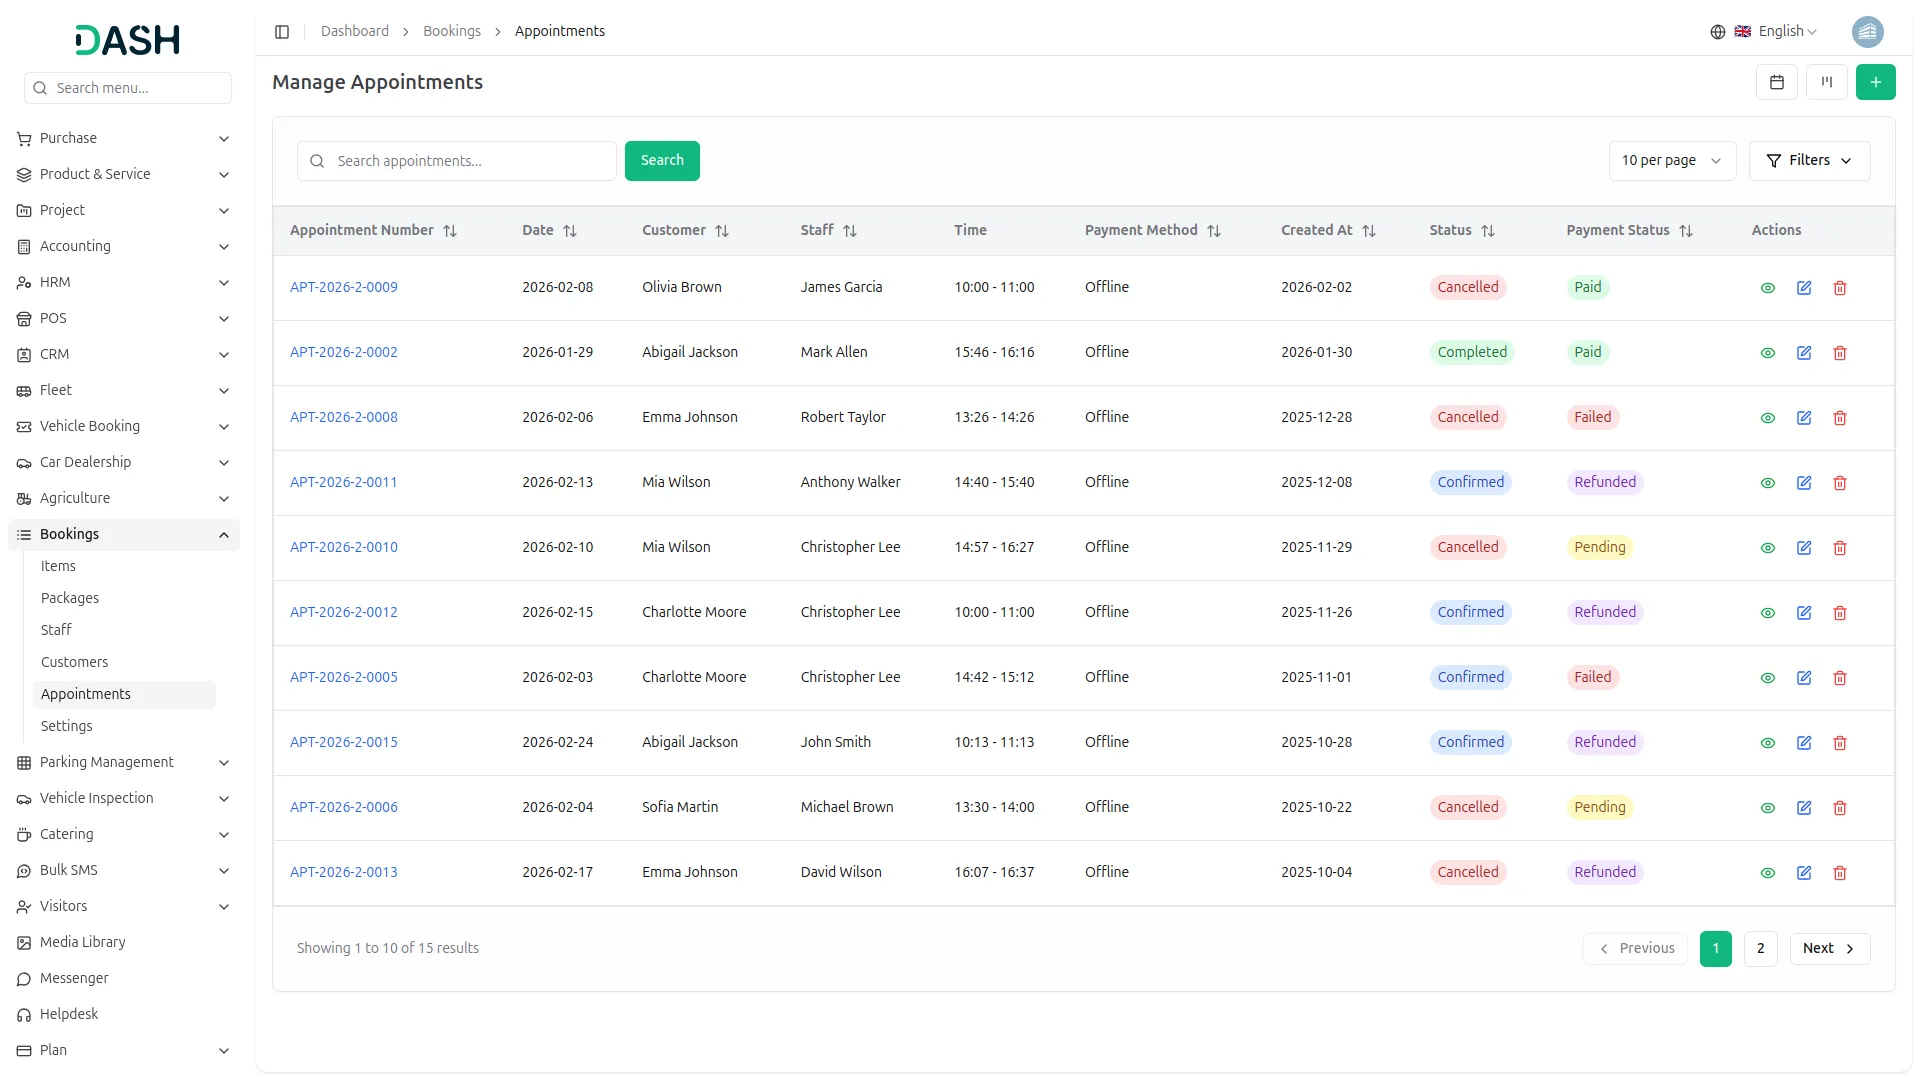
- To add a new appointment, click the “Create” button and select the appointment date. Choose the item from the dropdown menu (populated from your items) and select a package if applicable. Pick the customer from the dropdown menu and assign a staff member. Select an available time slot and select the status and payment status from the drop-down.
- The table shows columns for Appointment, Date, Customer, Staff, Time, Status, Payment, and Created at. Available actions include View, Edit, and Delete for each appointment.
- The appointments list page provides multiple viewing options. You can switch between standard list view, Calendar view, and Kanban view using the respective buttons.
- In the Calendar view, you can see all appointments for the current month displayed on a calendar interface. You can switch between monthly, yearly, and daily views to see appointments at different time scales.
- The Kanban view displays appointments on a board organized by status stages. You can easily change appointment status by dragging and dropping appointment cards between stages. Each stage card shows the appointment count at the top corner, and each appointment card includes Edit, and Delete options.
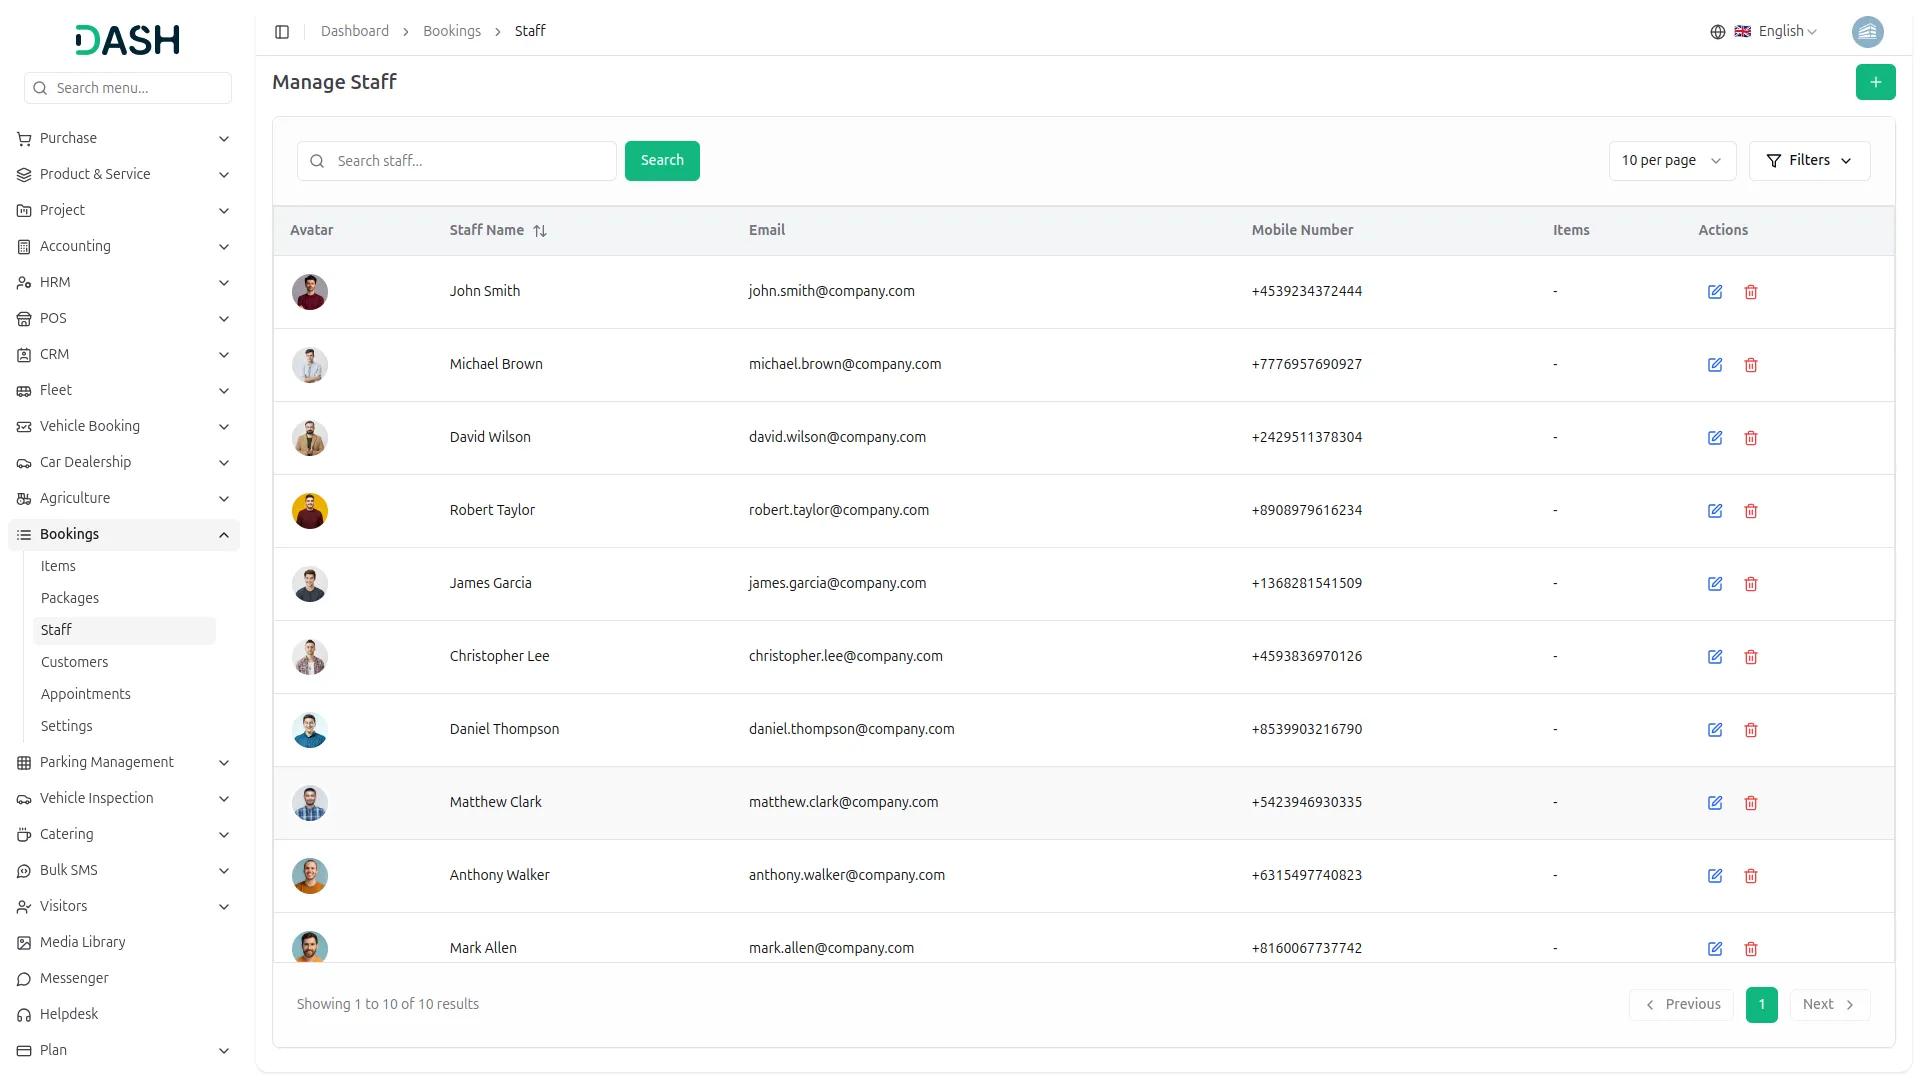
Manage Staff
- To add staff members, click the “Create” button and select the staff member from the dropdown menu. Choose the items they can provide using the multiple select option from your items list. This assigns specific services to each staff member for appointment scheduling.
- The staff list page shows all staff members with columns for Avatar, Name, Email, Mobile number, and assigned Items. Available actions for each staff member include Edit and Delete.
Frontend Booking
- The frontend booking view allows customers to book appointments directly from your website. Customers can book services by choosing the options that best fit their needs.
- At the top of the page, customers will see a booking panel. They can select the service they want, choose a related package, pick a preferred date, and select a staff.
- After filling in these options, it will show the available time slots for that day. All services, packages, and staff created on the backend are displayed here, and the available time slots are generated accordingly.
- The available time slots are shown in blocks like 08:00 to 10:00 or 10:00 to 12:00. Customers can click any available slot to continue.
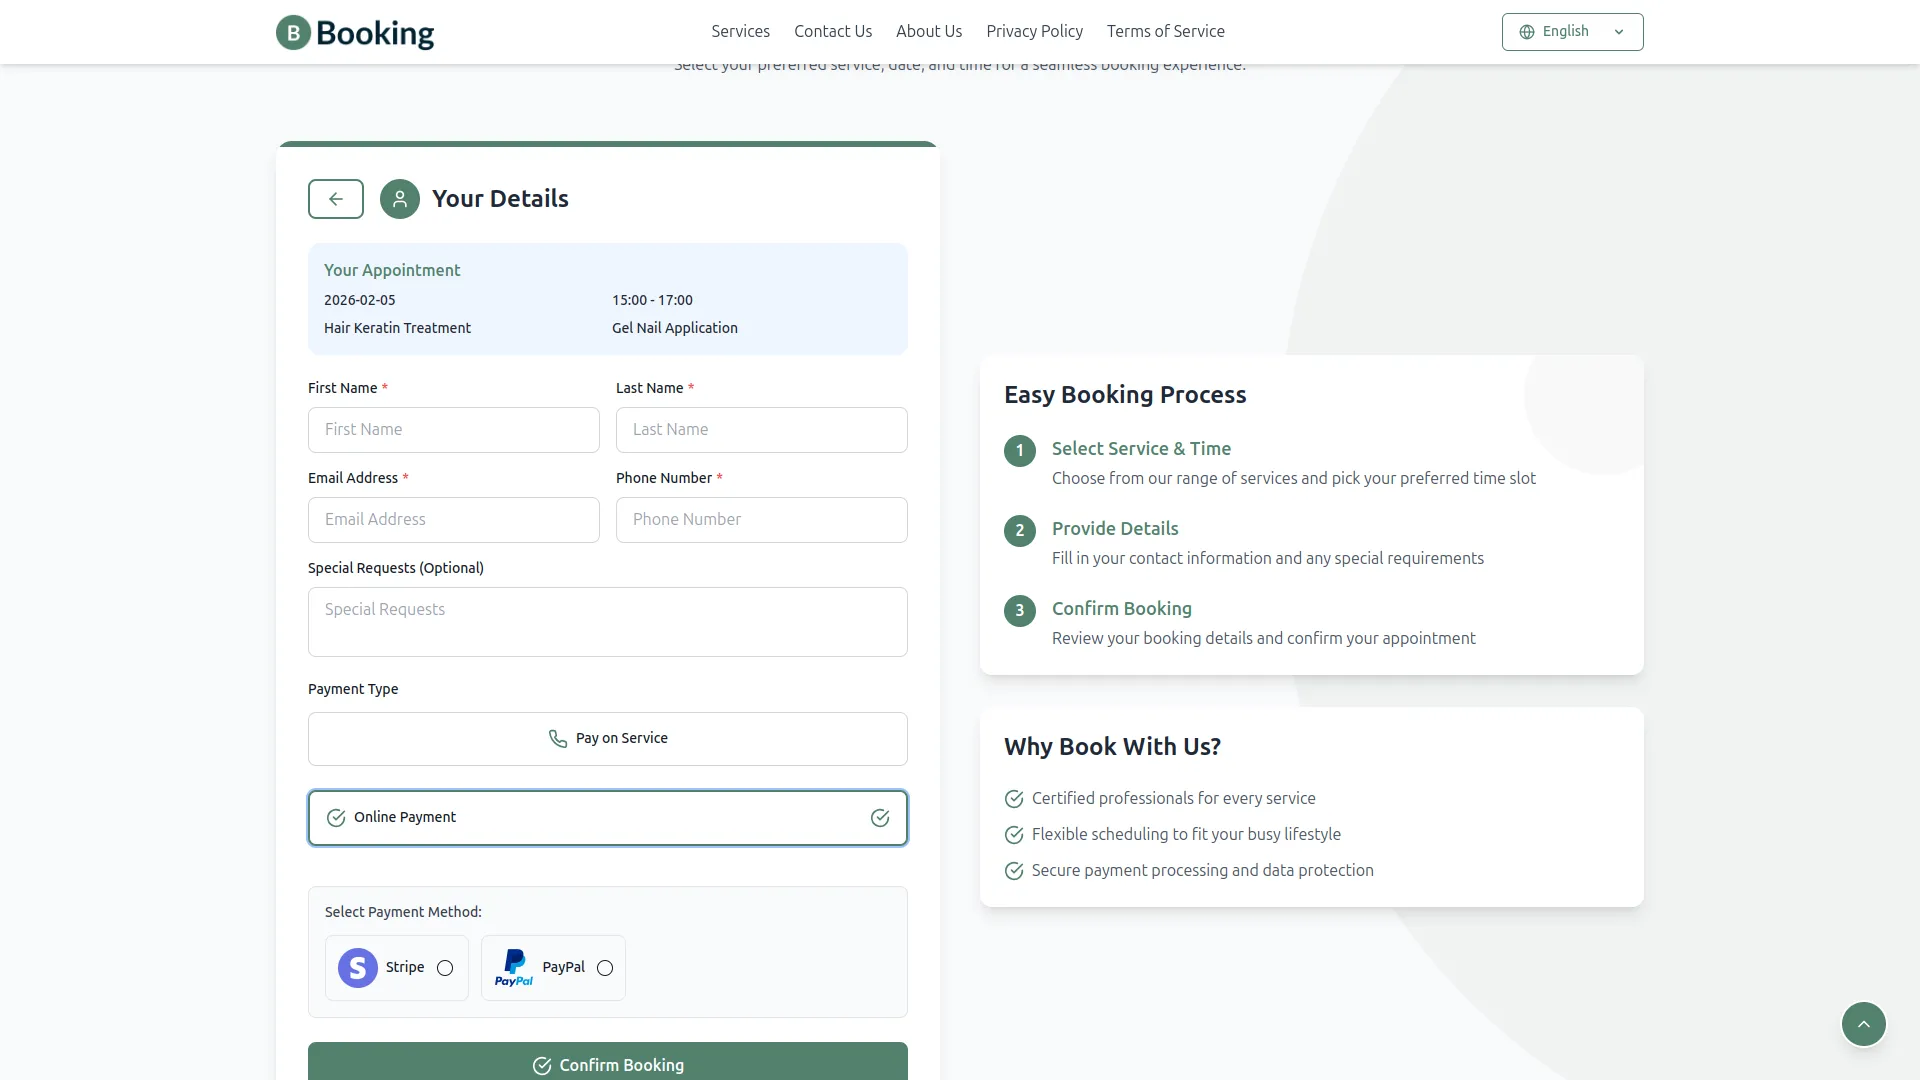
- On the next step, it shows all the details about your appointment details, customers must enter their details, including first name, last name, email, phone number, and special requests. They can also choose how they want to pay, either online or offline. A booking summary shows the selected date, time, and price before confirmation.
- Once all the required details are filled in, the customer can click the Confirm booking button. The system will save the booking and mark it as Pending. The customer will see a confirmation message on the screen once the booking is complete.
Categories
Related articles
- Work Permit Detailed Documentation
- Promo Codes Integration in BookingGo SaaS
- Beauty Spa Integration in Dash SaaS
- Document Template Integration in Dash SaaS
- Elderly Care Detailed Documentation
- Hotel and Room management in Dash SaaS
- Coupon List Integration in eCommerceGo SaaS
- Google Integration in vCard SaaS
- How to Set up Add-On in WorkDo
- Product Badge Management – eCommerceGo Addon
- Sign-In with Twitter Add-On Integration in Dash SaaS
- Discord Module Detailed Documentation
Reach Out to Us
Have questions or need assistance? We're here to help! Reach out to our team for support, inquiries, or feedback. Your needs are important to us, and we’re ready to assist you!


Need more help?
If you’re still uncertain or need professional guidance, don’t hesitate to contact us. You can contact us via email or submit a ticket with a description of your issue. Our team of experts is always available to help you with any questions. Rest assured that we’ll respond to your inquiry promptly.
Love what you see?
Do you like the quality of our products, themes, and applications, or perhaps the design of our website caught your eye? You can have similarly outstanding designs for your website or apps. Contact us, and we’ll bring your ideas to life.
