Mailchimp Integration in Dash SaaS
Mailchimp is a powerful email and marketing automation platform tailored to support the growth of businesses.
Introduction
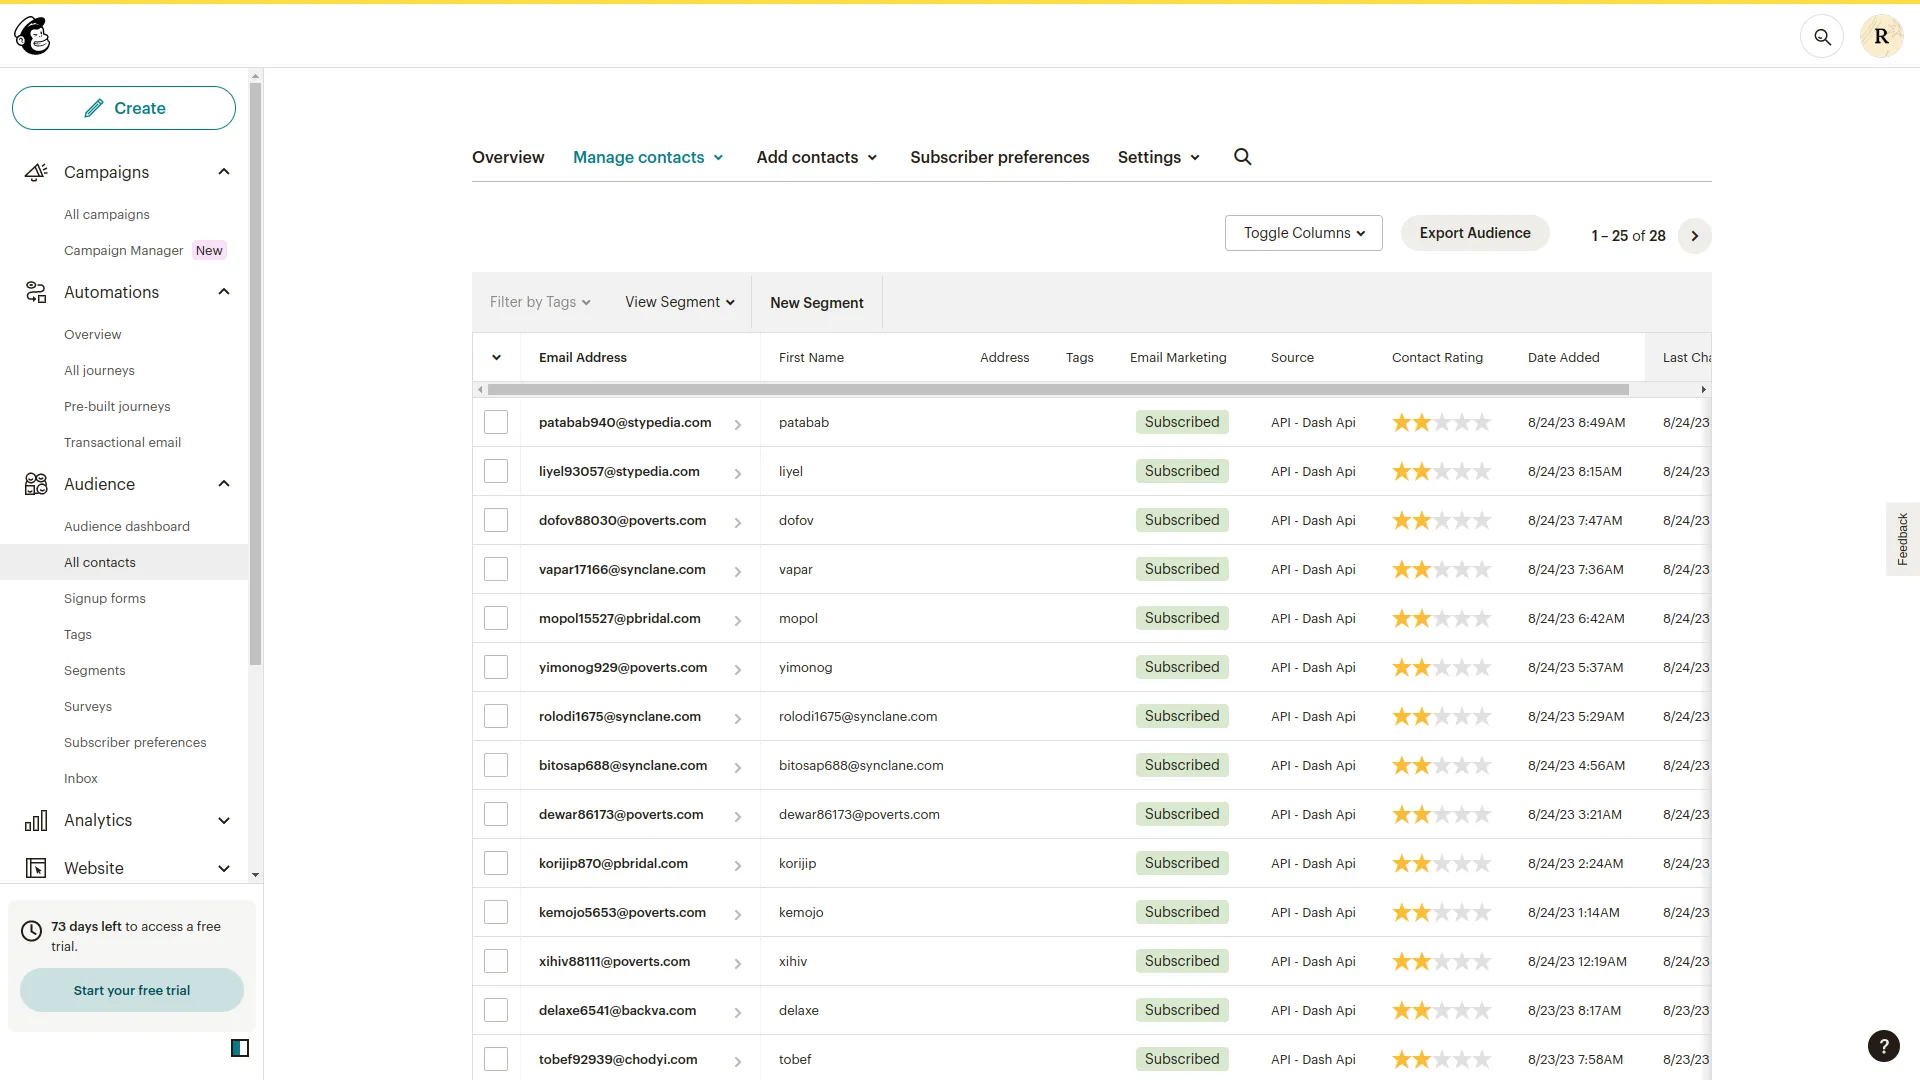
The MailChimp Add-On helps you send emails to your customers automatically. When you add new people to your system, their email addresses are sent to your MailChimp account. This way, you can send marketing emails to all your customers without adding their emails manually. The Add-On works with different parts of your system like creating users, customers, employees, and support tickets. It only sends information from your system to MailChimp, not the other way around.
How to Install the Add-On?
To Set Up the Mailchimp Add-On, you can follow this link: Setup Add-On
How to Use The Mailchimp Add-On?
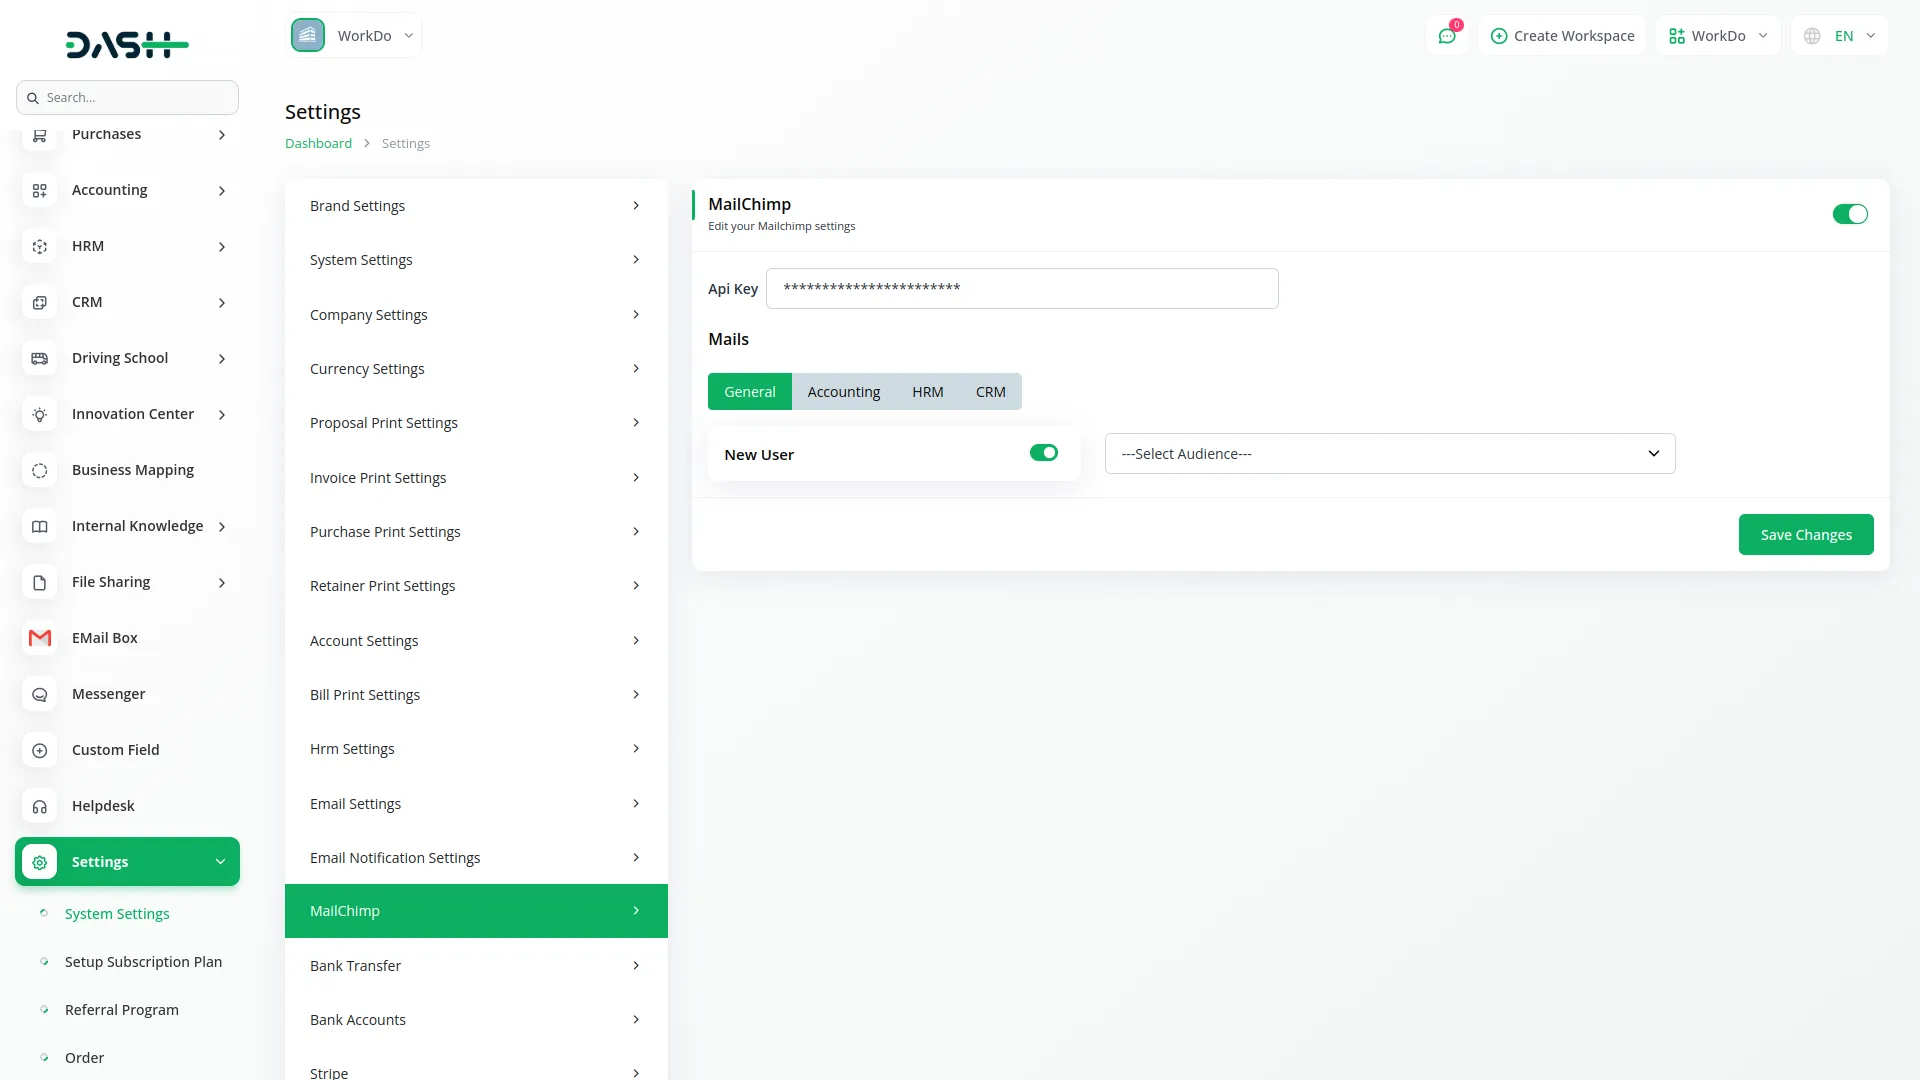
- After you buy and turn on the Mailchimp Add-On, go to System Settings and click on Mailchimp. This page lets you set up and control how your system connects to your MailChimp account.
- You need to add your Mailchimp API Key on the settings page. This key lets your system connect safely to your Mailchimp account. Think of the API key like a password that allows the two systems to talk to each other.
- To get your MailChimp API key, go to https://login.mailchimp.com/ and log into your account. Click on Account, then Extras, then API Keys, and click Create a Key. Copy this new key and paste it into your system’s Mailchimp settings page.
- You can choose which parts of your system will send emails to MailChimp. In the General section, you can turn on email sending when you create a new user. In the Account section, turn it on for creating customers and vendors. In the HRM section, turn it on for creating employees. In the CRM section, turn it on for creating leads and adding extra emails for leads and deals. In the Sales section, turn it on for creating accounts and contracts. In the SupportTicket section, turn it on for creating tickets. You can turn each one on or off as needed.
- After turning on the parts you want, you must choose which MailChimp email list to use. This step is required so that new contacts go to the right email list in your MailChimp account. The audience is just another name for your email list.
- Once you set up everything, the system starts working by itself. For example, if you turn on email sending for creating new users, every time someone creates a new user in your system, that person’s email will automatically go to your chosen MailChimp email list. You don’t need to do anything else.
- Make sure your chosen email list in MailChimp is working and set up properly. You can see and manage all the emails from your MailChimp dashboard. Remember that emails only go from your system to MailChimp, not back to your system.
-

| Module | Mail Event |
|---|---|
| General | Create User |
| Account | Create Customer, Create Vendor |
| HRM | Create Employee |
| CRM | Create Lead, Lead Additional Email, Deal Additional Email |
| Sales | Create Account, Create Contract |
| SupportTicket | Create Ticket |
Categories
Related articles
- School/Institute Management Integration in Dash SaaS
- Braintree Payment Gateway Detailed Documentation
- Outlook Mail Detailed Documentation
- Performance Integration in Dash SaaS
- Optical & Eyecare Center Detailed Documentation
- Vehicle Wash Detailed Documentation
- Exam Module Integration in Dash SaaS
- Hospital Management Integration in Dash SaaS
- Custom Field Integration in Dash SaaS
- User Manual – WorkDo Dash SaaS
- How to Generate Content with the Help of AI in Dash SaaS
- Locker & Safe Deposit Integration in Dash SaaS
Reach Out to Us
Have questions or need assistance? We're here to help! Reach out to our team for support, inquiries, or feedback. Your needs are important to us, and we’re ready to assist you!


Need more help?
If you’re still uncertain or need professional guidance, don’t hesitate to contact us. You can contact us via email or submit a ticket with a description of your issue. Our team of experts is always available to help you with any questions. Rest assured that we’ll respond to your inquiry promptly.
Love what you see?
Do you like the quality of our products, themes, and applications, or perhaps the design of our website caught your eye? You can have similarly outstanding designs for your website or apps. Contact us, and we’ll bring your ideas to life.

