Events Management Integration in Dash SaaS
The Events Management Add-On is a powerful feature designed to help you organize, schedule, and manage events effortlessly within your system.
Introduction
Events Management is a comprehensive software solution designed for organizing and managing events efficiently. This system allows you to create and manage events, handle bookings, track orders, manage customer testimonials, maintain blogs, and configure your event website’s frontend appearance. The software includes a complete dashboard for monitoring event performance, booking management, customer communication through contact forms and newsletters, and FAQ management. It also provides a full frontend website where customers can view events, make bookings, read blogs, and contact your organization.
How to Install the Add-On?
To Set Up the Events Management Add-On, you can follow this link: Setup Add-On.
How to Use the Event Management Add-On?
Event Management Dashboard
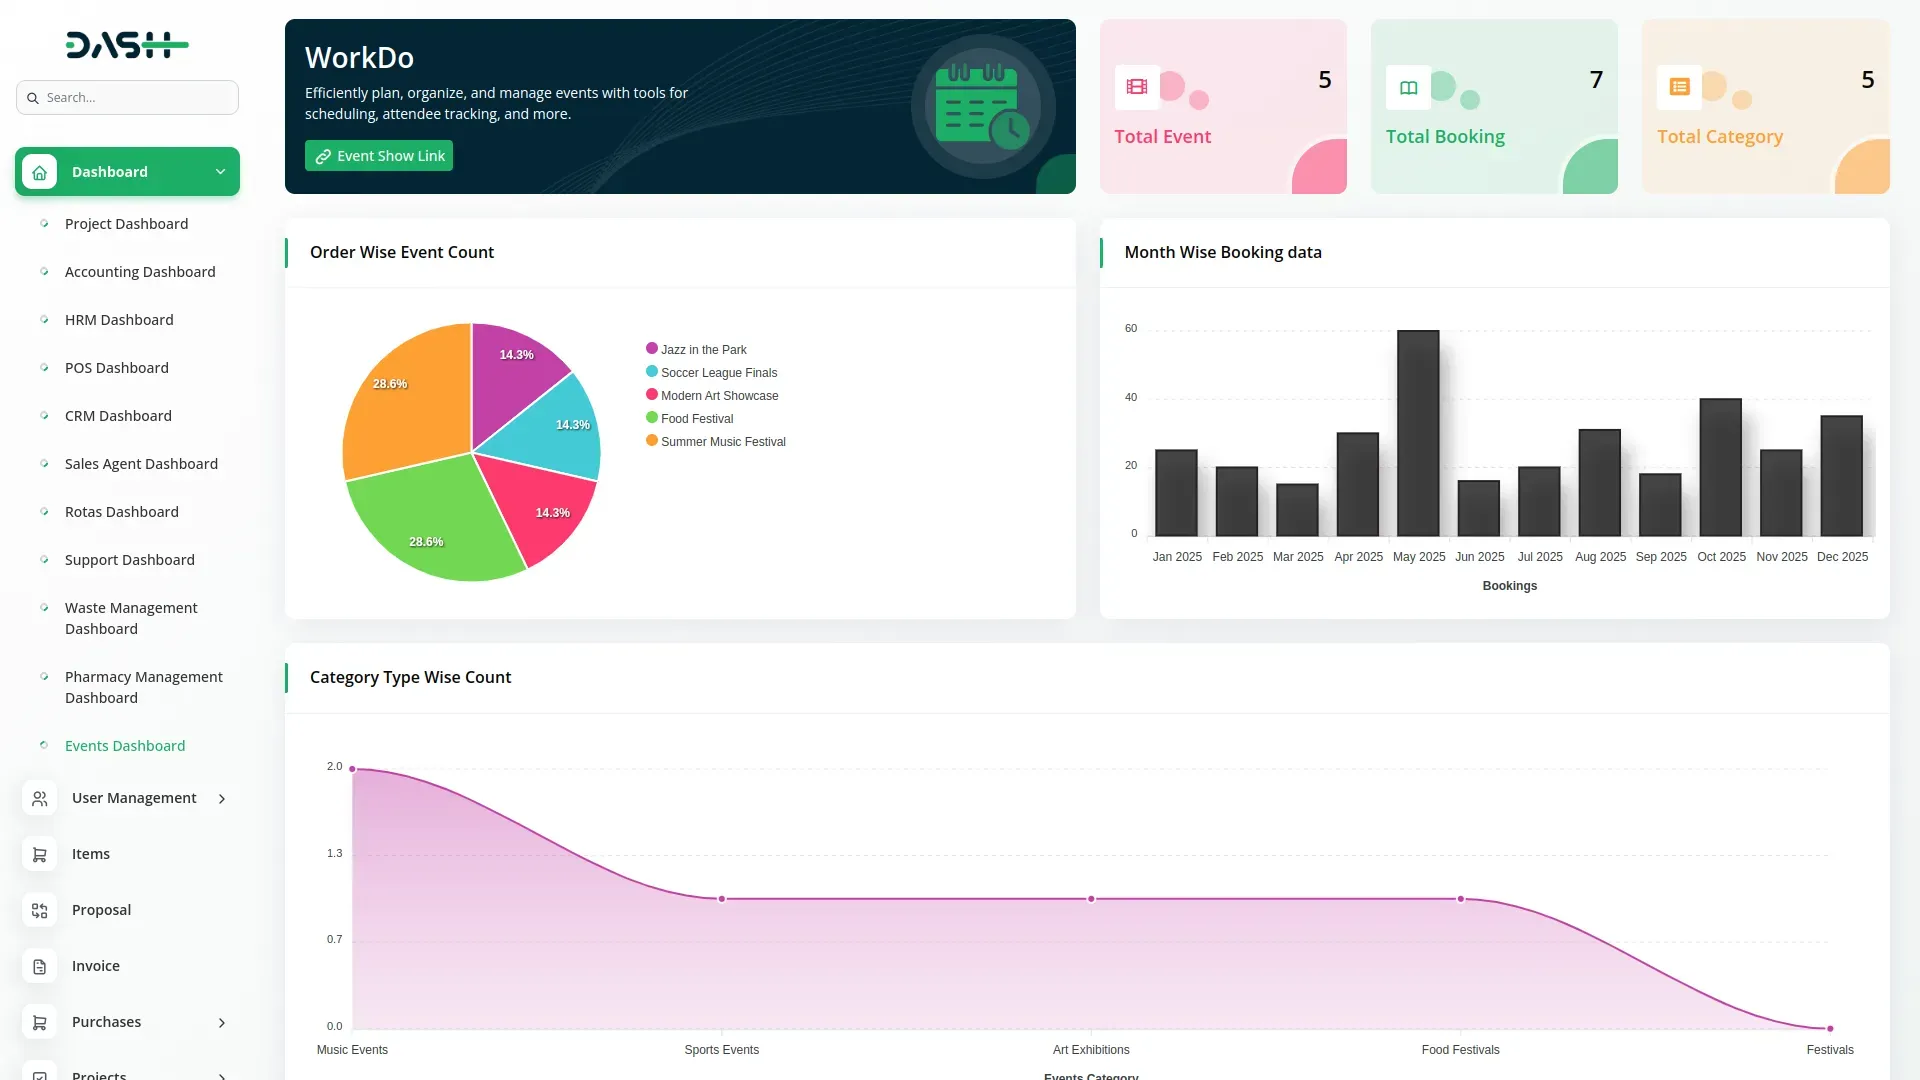
- The Events Dashboard provides a comprehensive overview of your event management system. When you access the dashboard, you will see important statistics displayed in cards showing Total Events, Total Bookings, and Total Categories.
- You can copy the link for the event booking frontend to share with customers. The dashboard includes visual charts to help you analyze your business performance – an Order Wise Event Count Pie chart shows the distribution of bookings across different events, a Month Wise Booking data bar chart displays booking trends over time, and a Category Type Wise Count Line chart shows the popularity of different event categories.
- Use these insights to make informed decisions about your event offerings and marketing strategies.
System Setup
Categories:
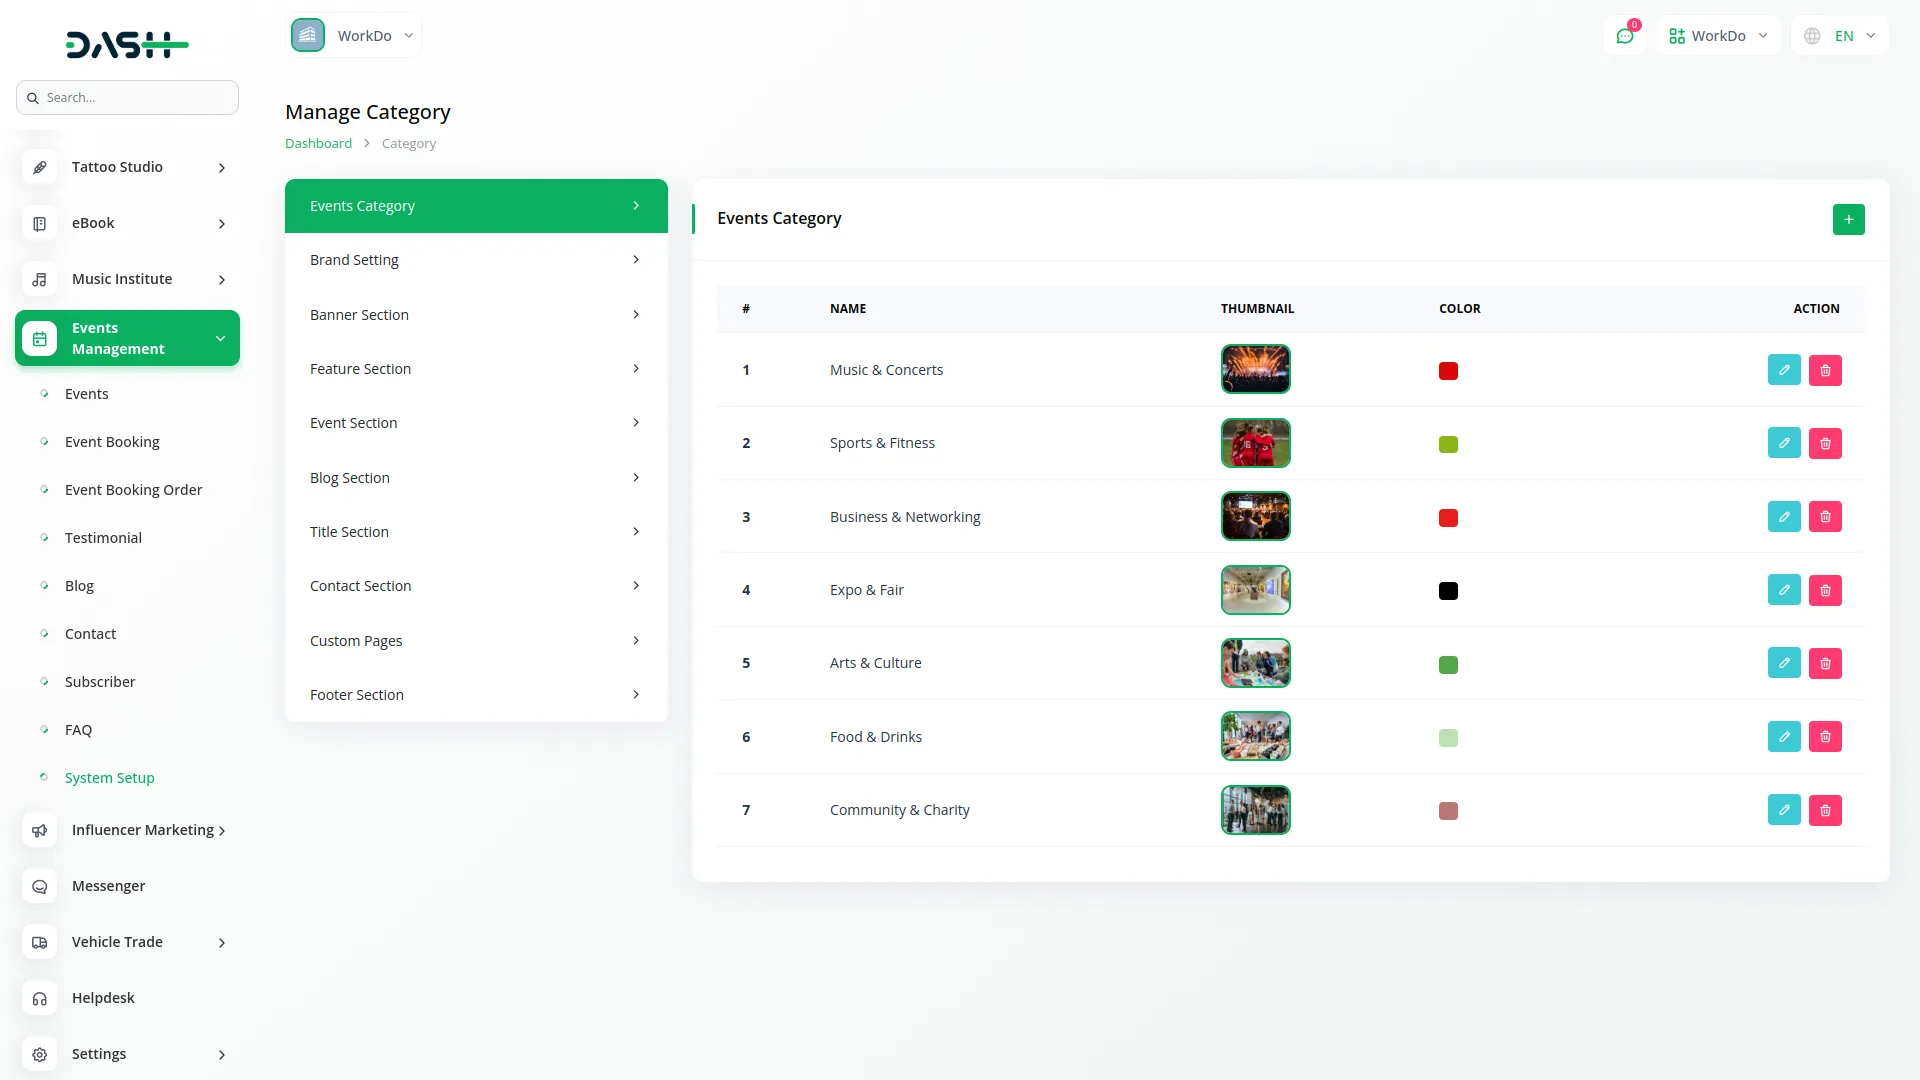
- To create a new category, click the “Create” button at the top of the categories page. Enter the category name, upload a poster image to represent the category, and select a color theme for the category.
- After filling in all required information, click “Submit” to create the category. The list page shows all categories in a table with columns for Name, Thumbnail, and Color.
- Actions like Edit to modify existing categories or Delete to remove categories that are no longer needed.
- Categories are used throughout the system to organize your events and help customers find relevant events more easily.
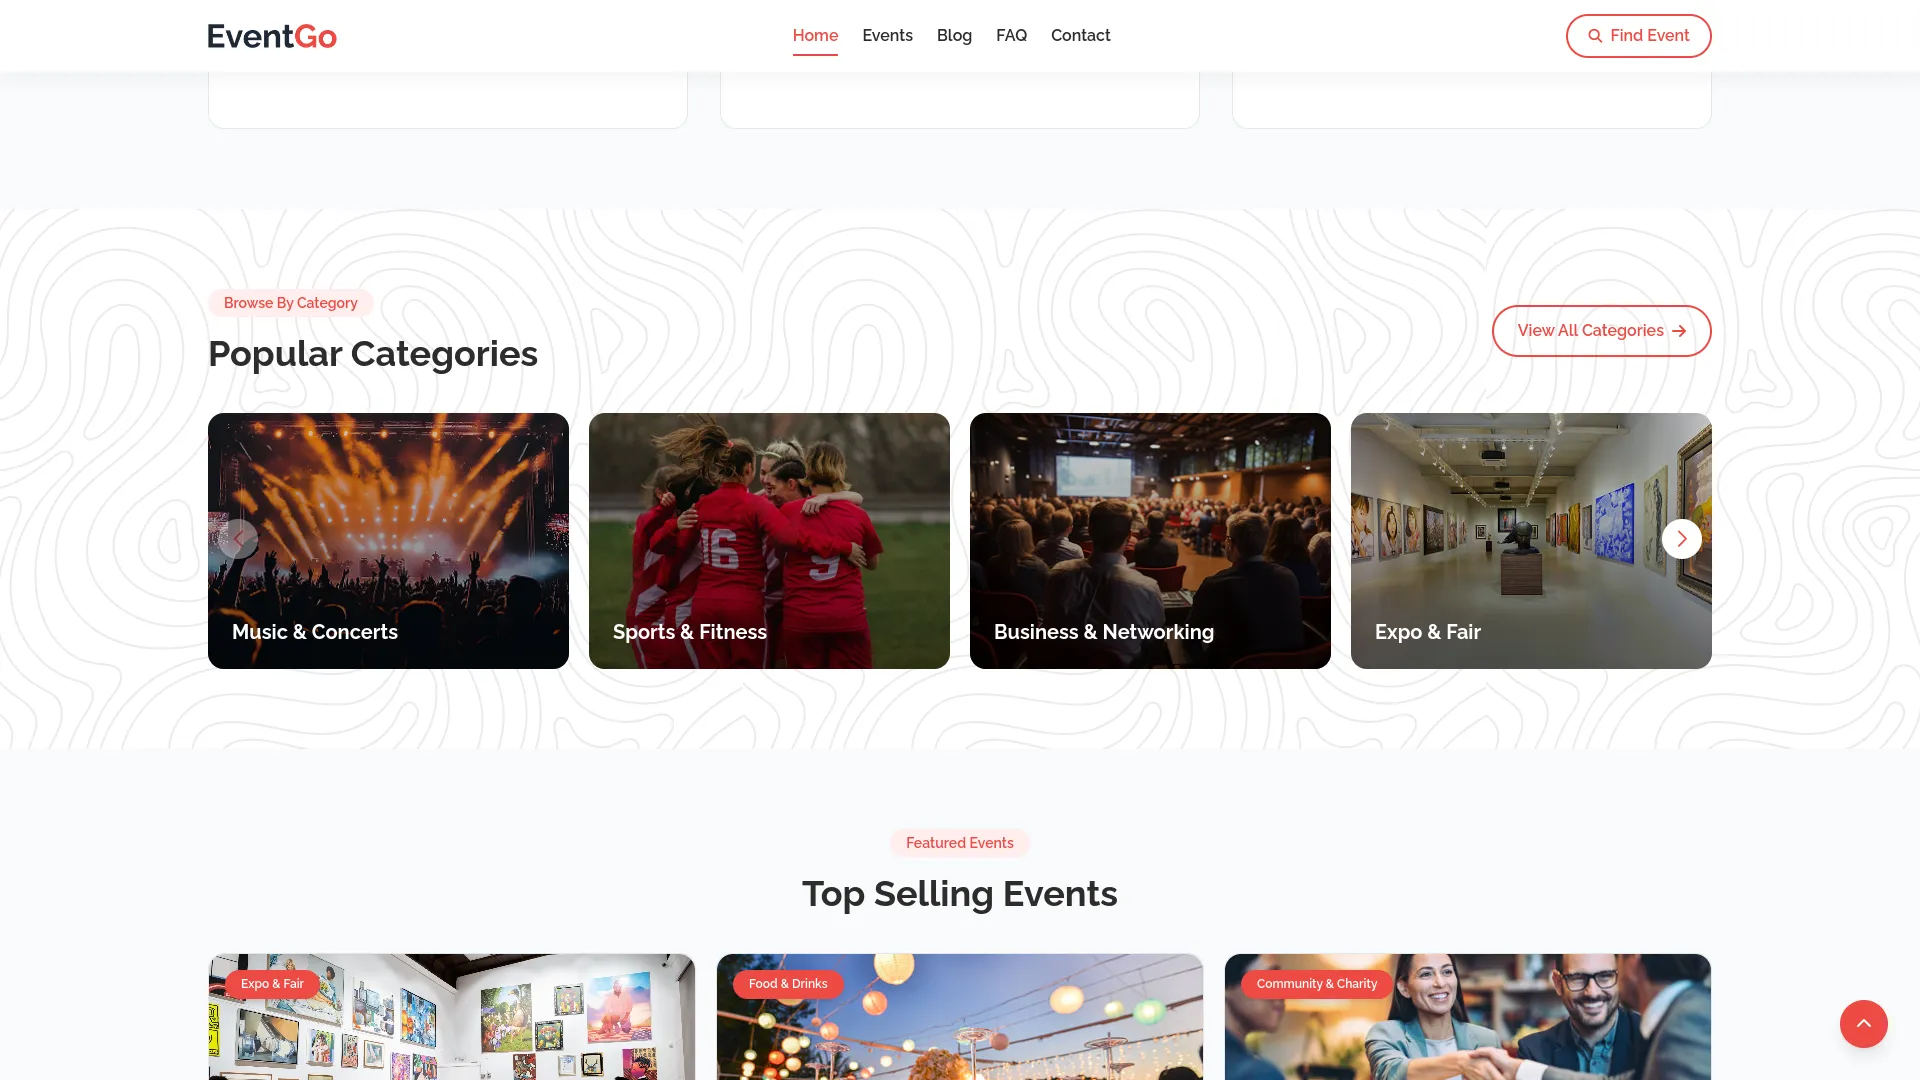
- The category section displays the category title from your Event Section setup, with a “View All Categories” button that redirects to the events page for filtering. The category list comes from your Categories setup.
Brand Settings:
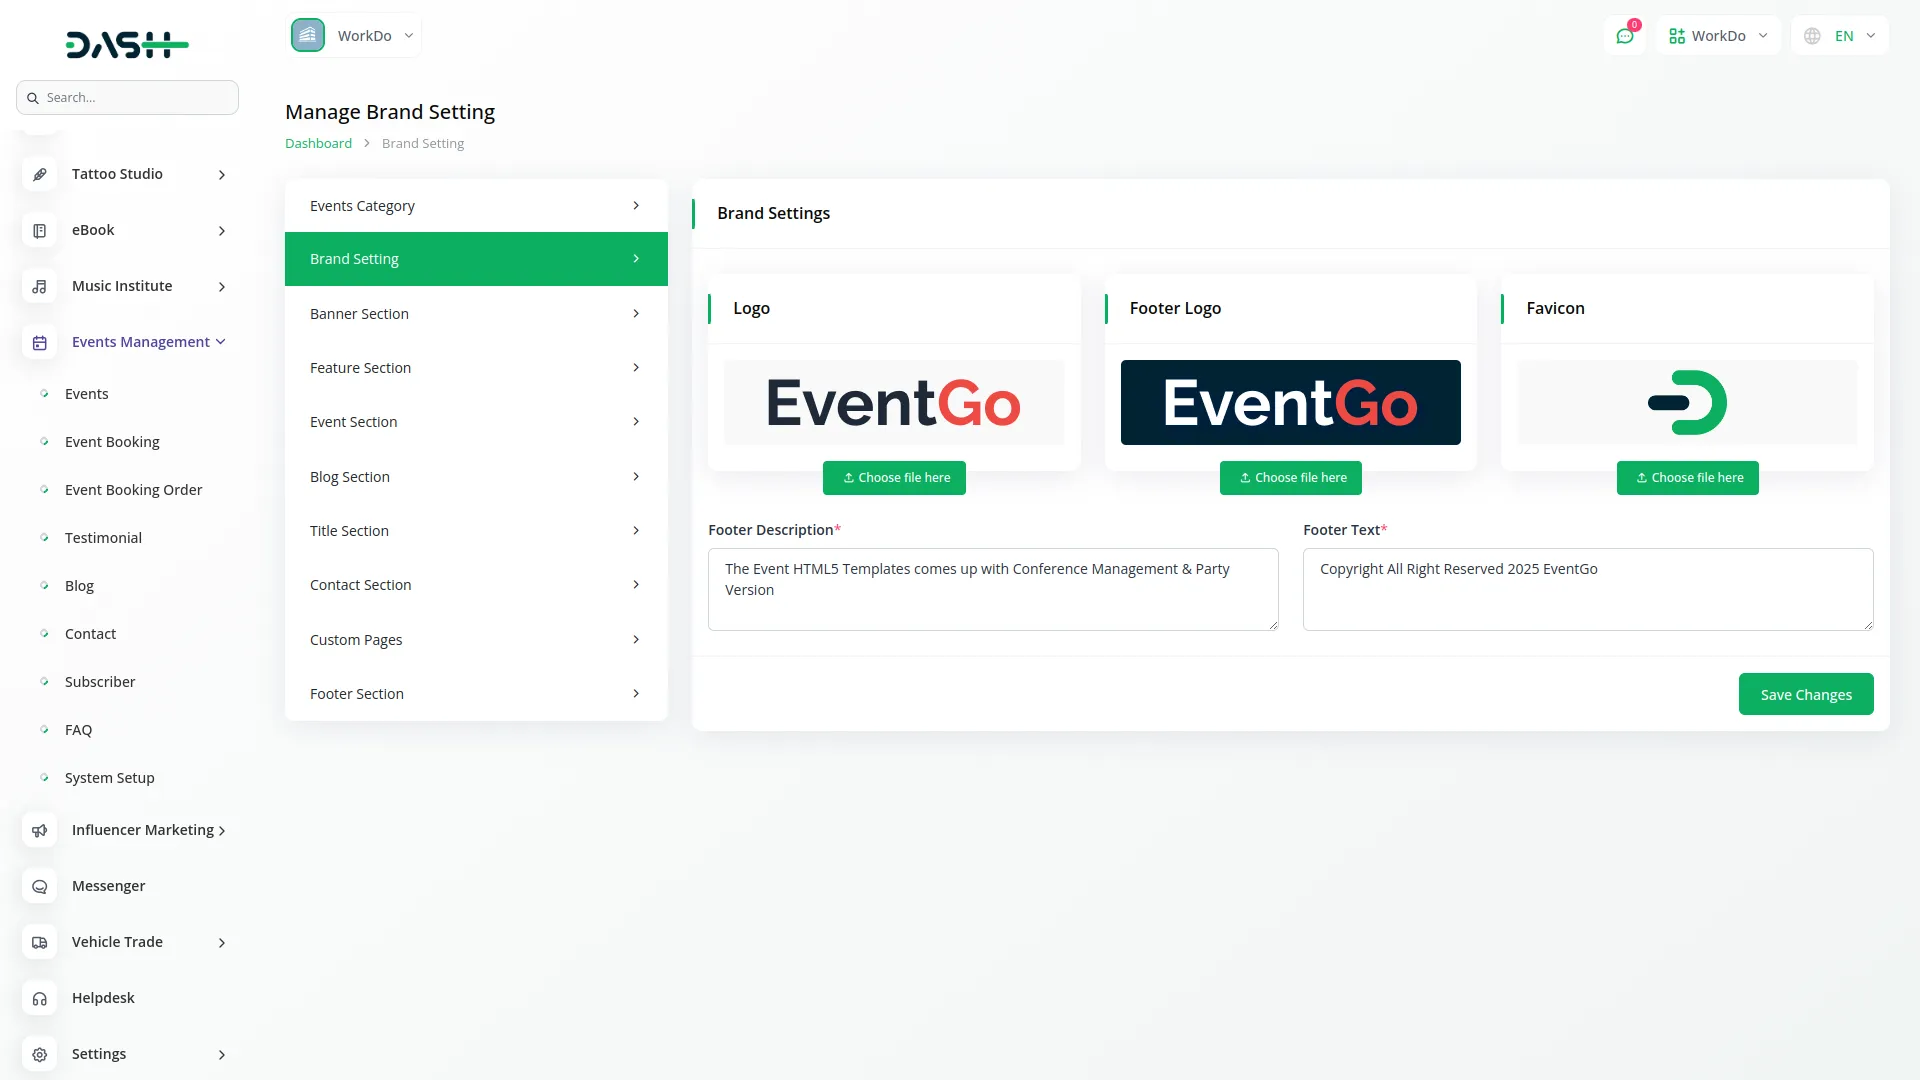
- To configure your brand settings, access the Brand Settings section from the System Setup menu. Upload your main logo that will appear on your website header, upload a footer logo for the bottom section of your website, and add a favicon that will appear in browser tabs.
- Enter header text that will be displayed prominently on your site, write a footer description that describes your organization, and add footer text for additional information you want to display at the bottom of every page.
- These brand settings will be automatically applied across your entire frontend website to maintain consistent branding and professional appearance.
Banner Section:
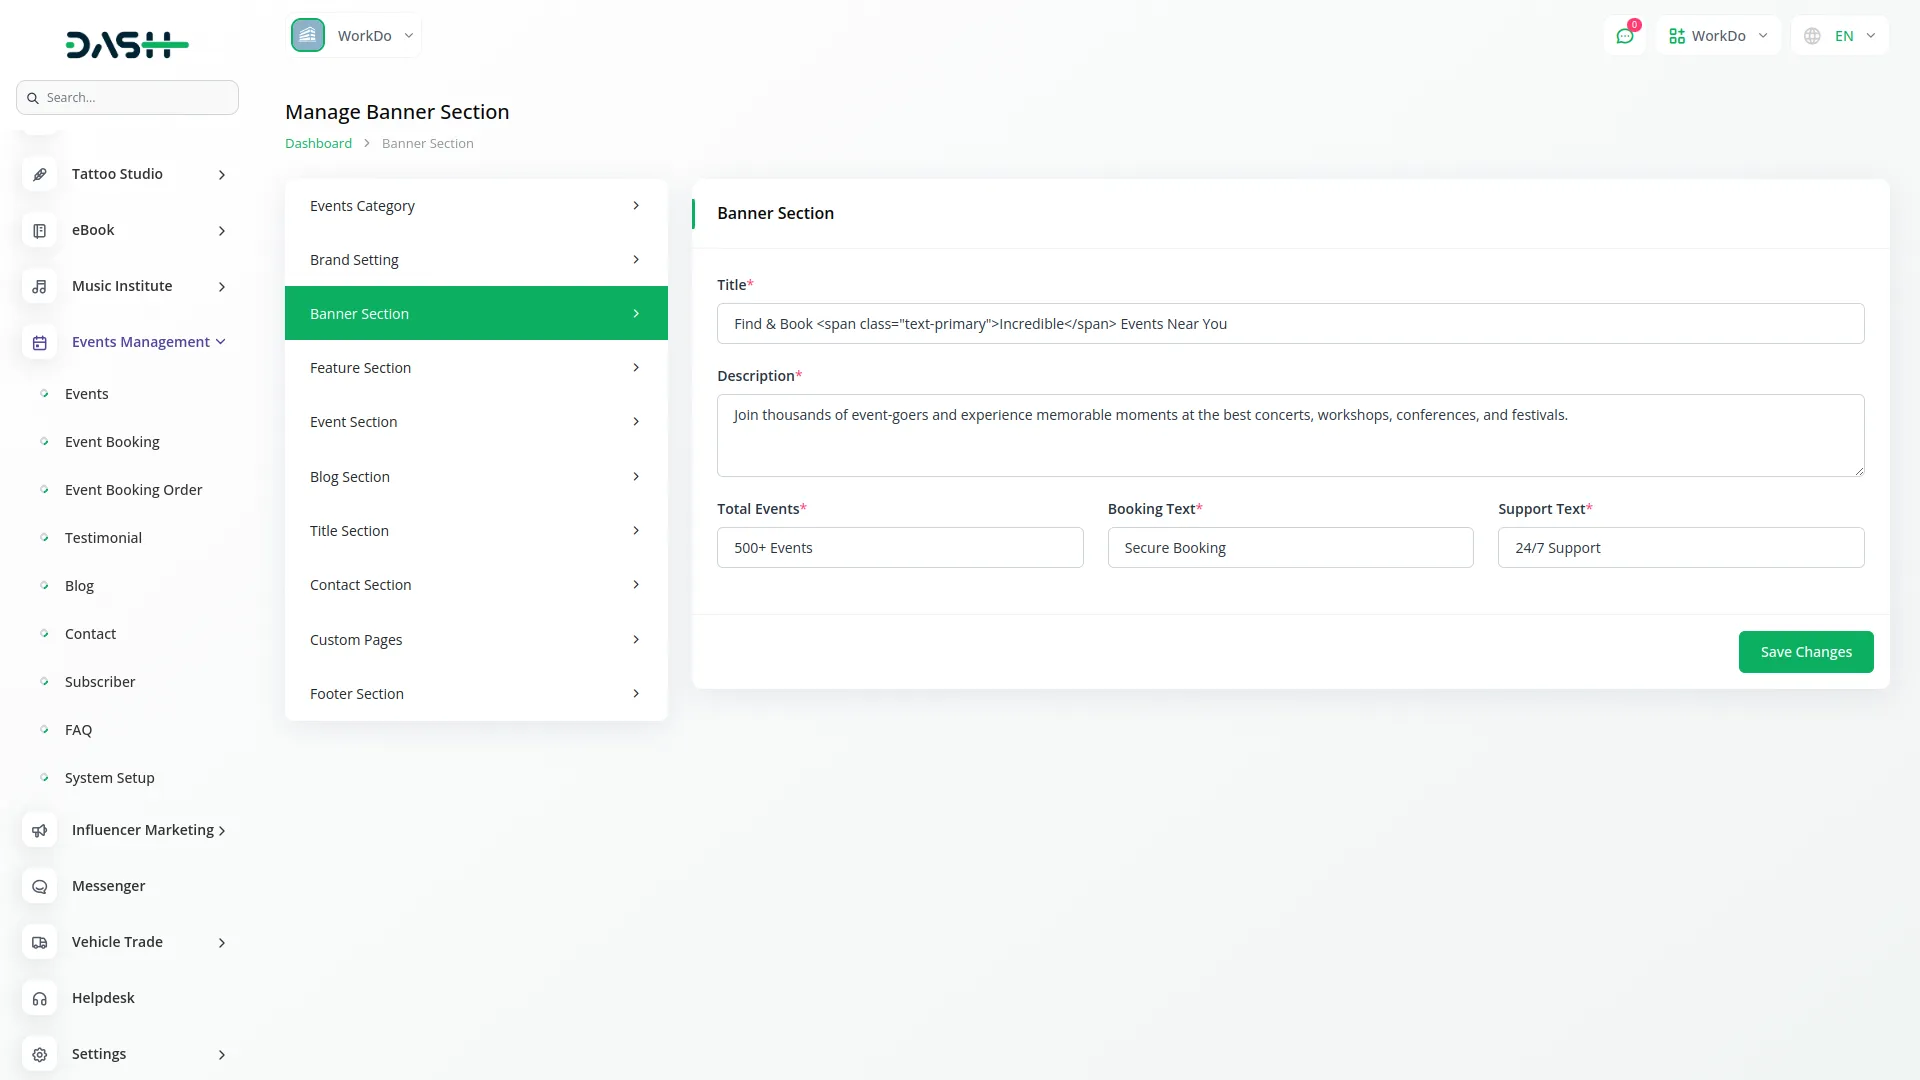
- To set up your website banner, go to the Banner Section in System Setup.In the Banner Section, you can set the Title, Description, Total Events, Booking Text, and Support Text. These fields help highlight your services, display event details, encourage bookings, and provide support information on the homepage.
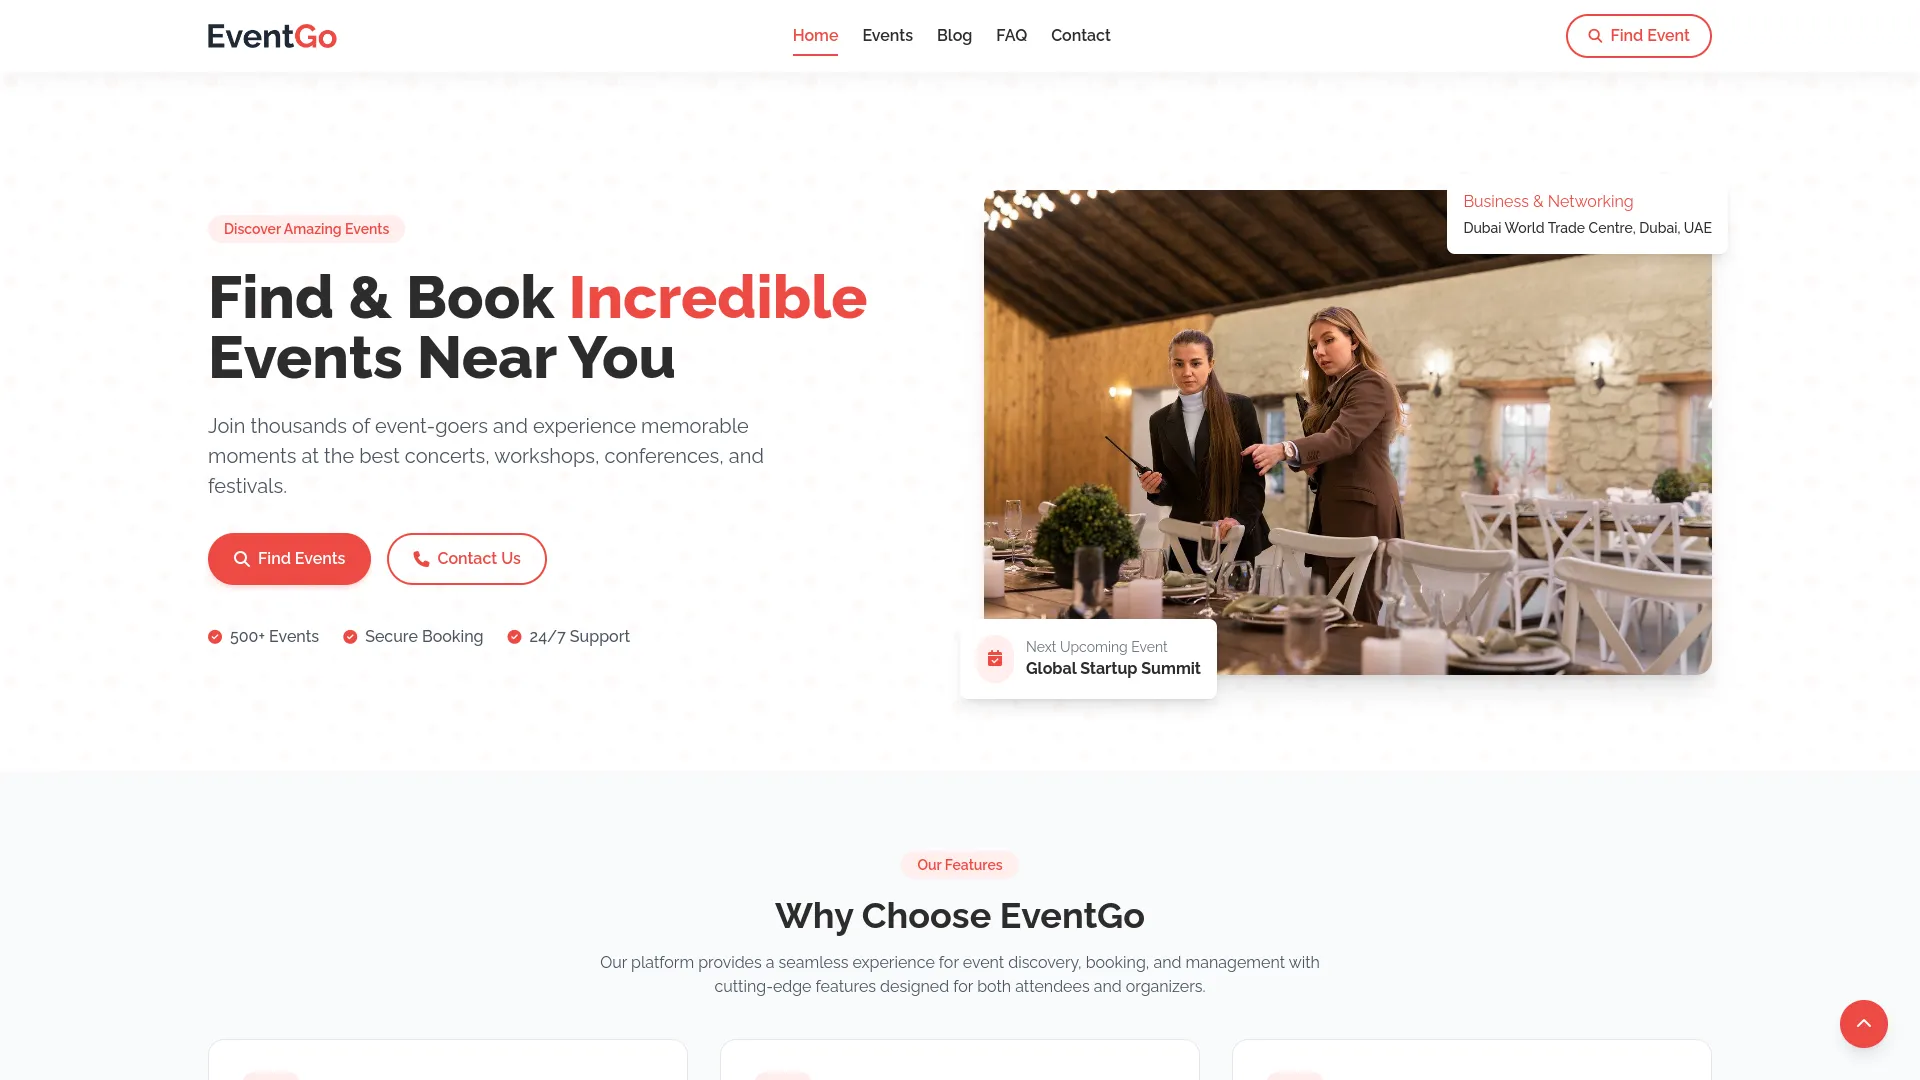
- The Frontend Page represents the customer-facing website that connects to all your backend configurations and displays your events, content, and booking functionality to visitors.
- In the header section, your logo from Brand Settings is displayed along with a “Find Event” button that directs visitors to the events page.
- Navigation links for Home, Events, Blog, FAQ, and Contact allow visitors to reach different sections directly. Additional pages include appointment, about, blog, and contact sections.
Feature Section:
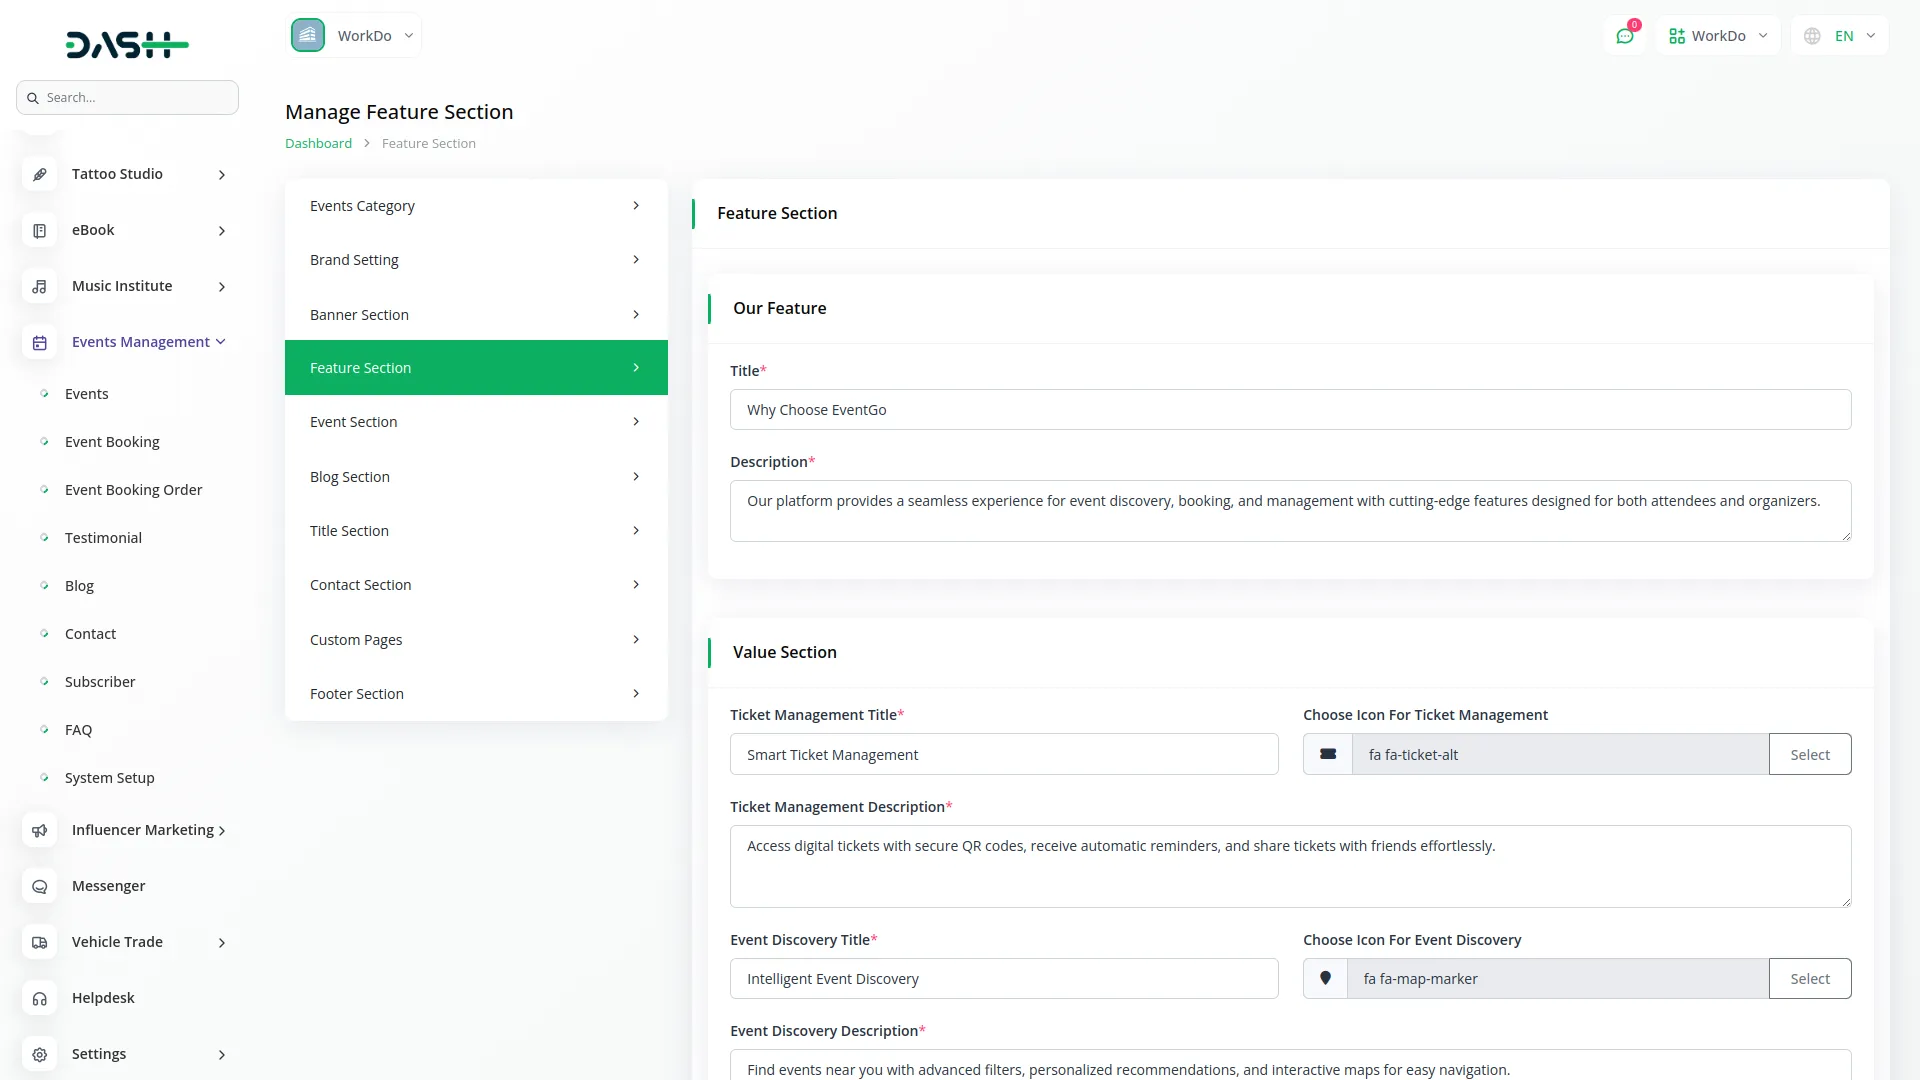
- To set up your website features, go to the Feature Section in System Setup. In the Feature Section, you can add a Title and Description to introduce your features. In the Value Section, you can configure Ticket Management, Event Discovery, and Social Experience by setting their Titles, Icons, and Descriptions. These fields highlight the main benefits of your event management service on the homepage.
- The banner section displays the title, description, total events, booking text, and support text configured in your backend Banner Section setup. The latest upcoming event poster, name, venue, and category are prominently featured.
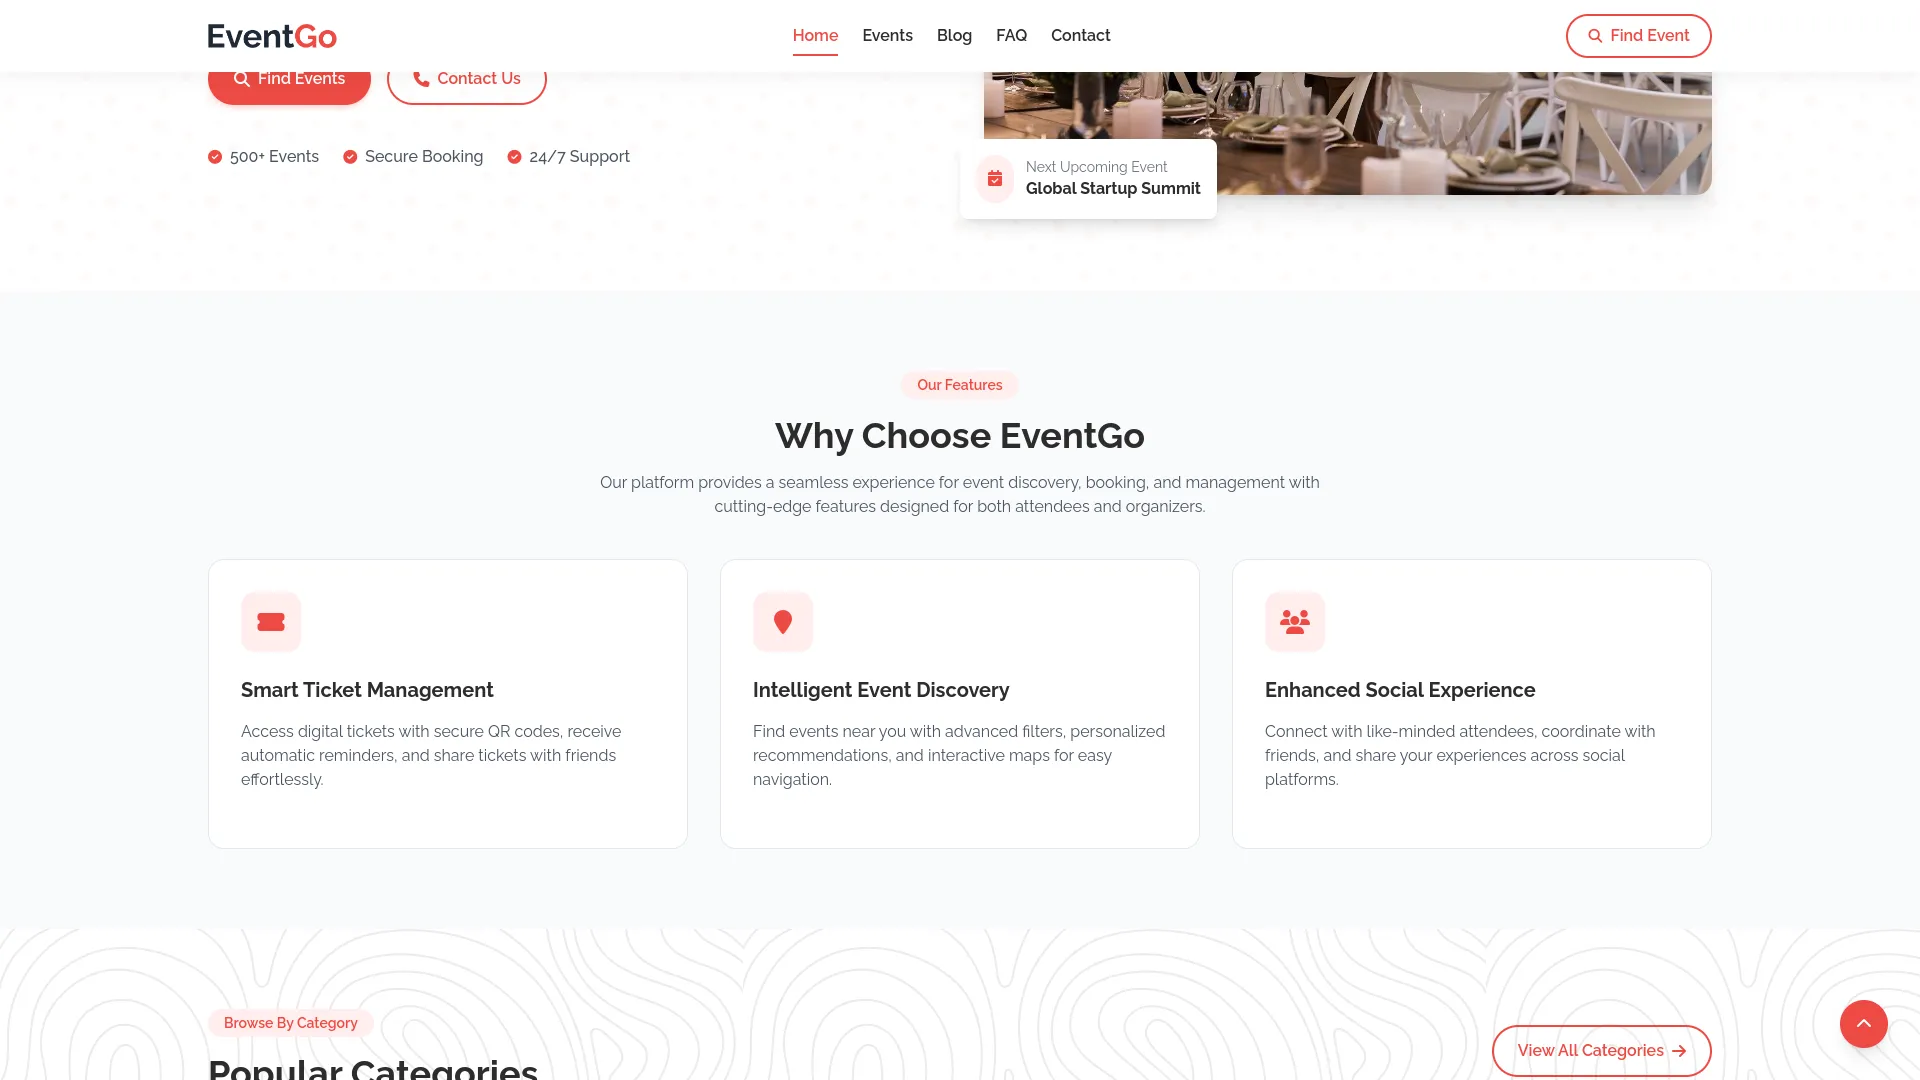
- The feature section shows the title and description from your Feature Section setup, along with feature icons, titles, and descriptions that highlight your service capabilities.
Event Section:
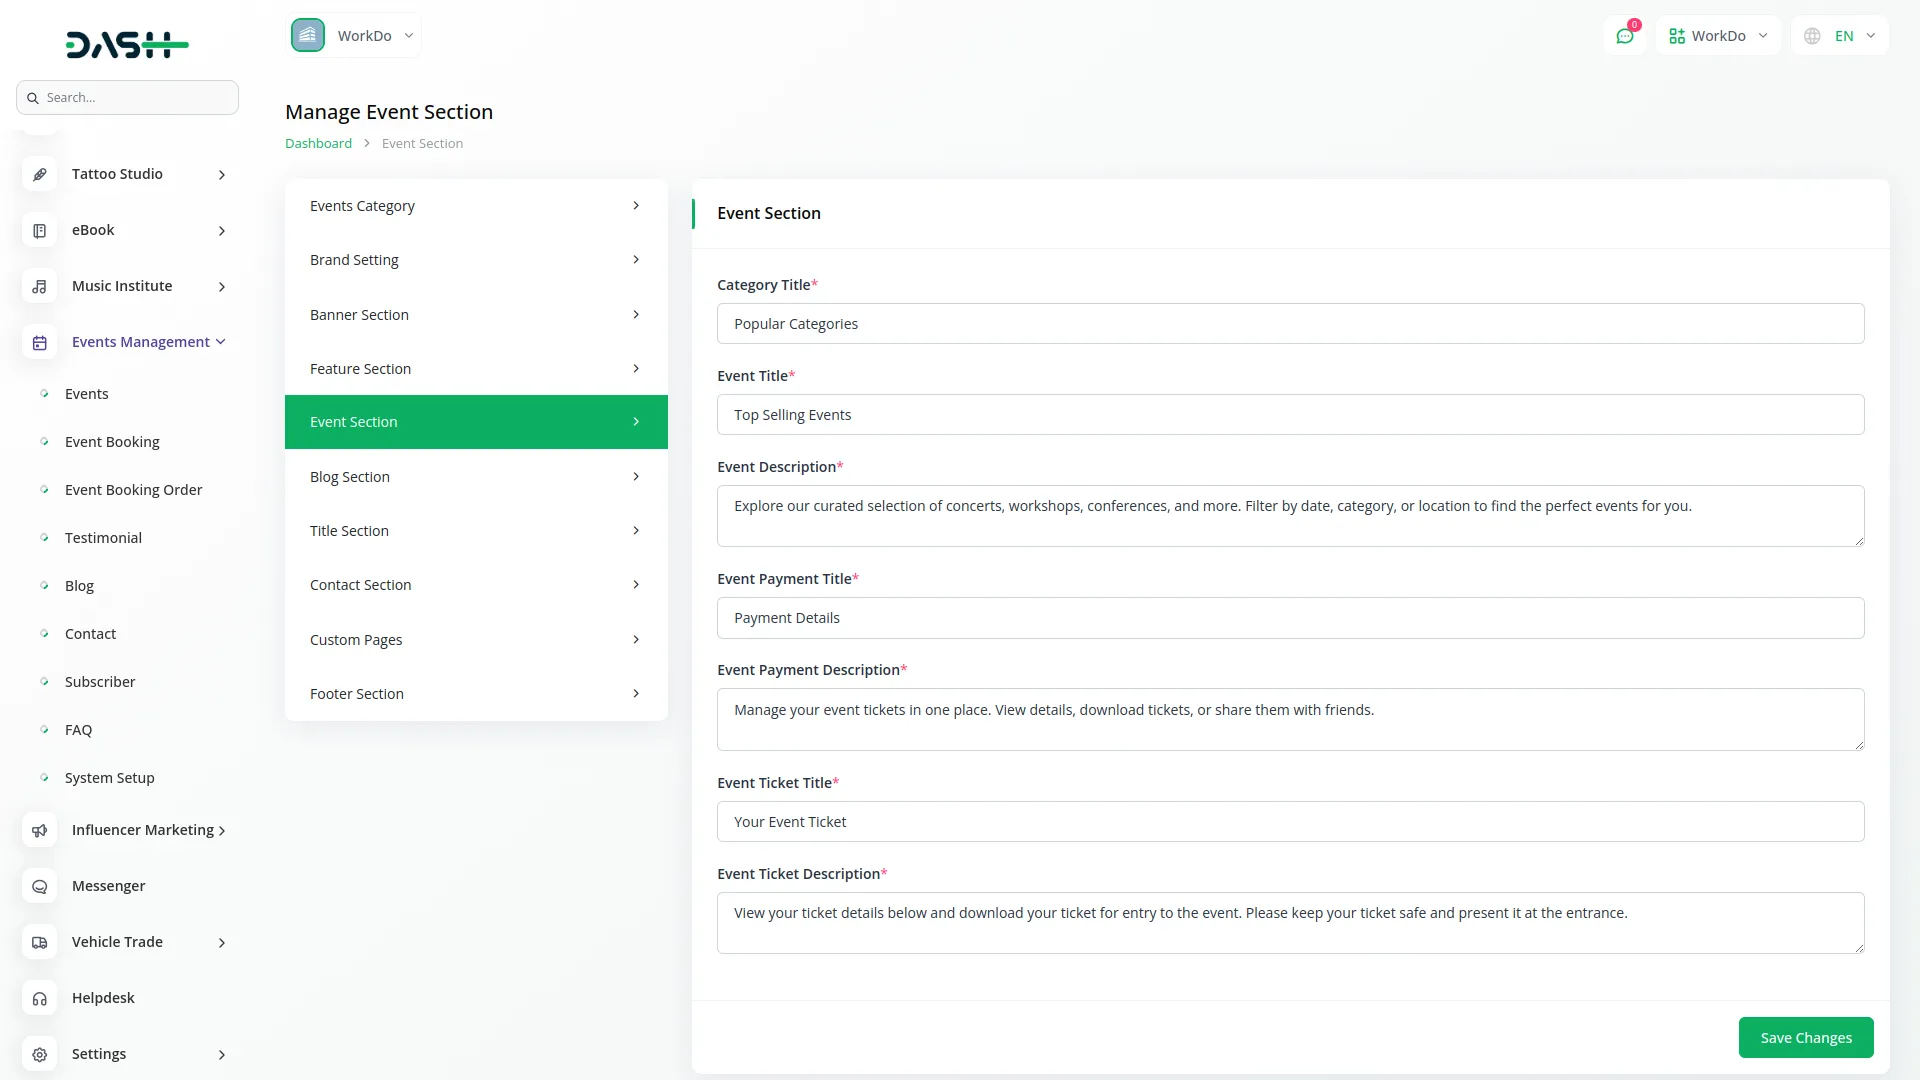
- To set up your website event section, go to the Event Section in System Setup. In this section, you can add the Category Title, Event Title, and Event Description to introduce your events, as well as set the Event Payment Title and Description to explain payment options. You can also add the Event Ticket Title and Description to guide customers on ticket usage after booking.
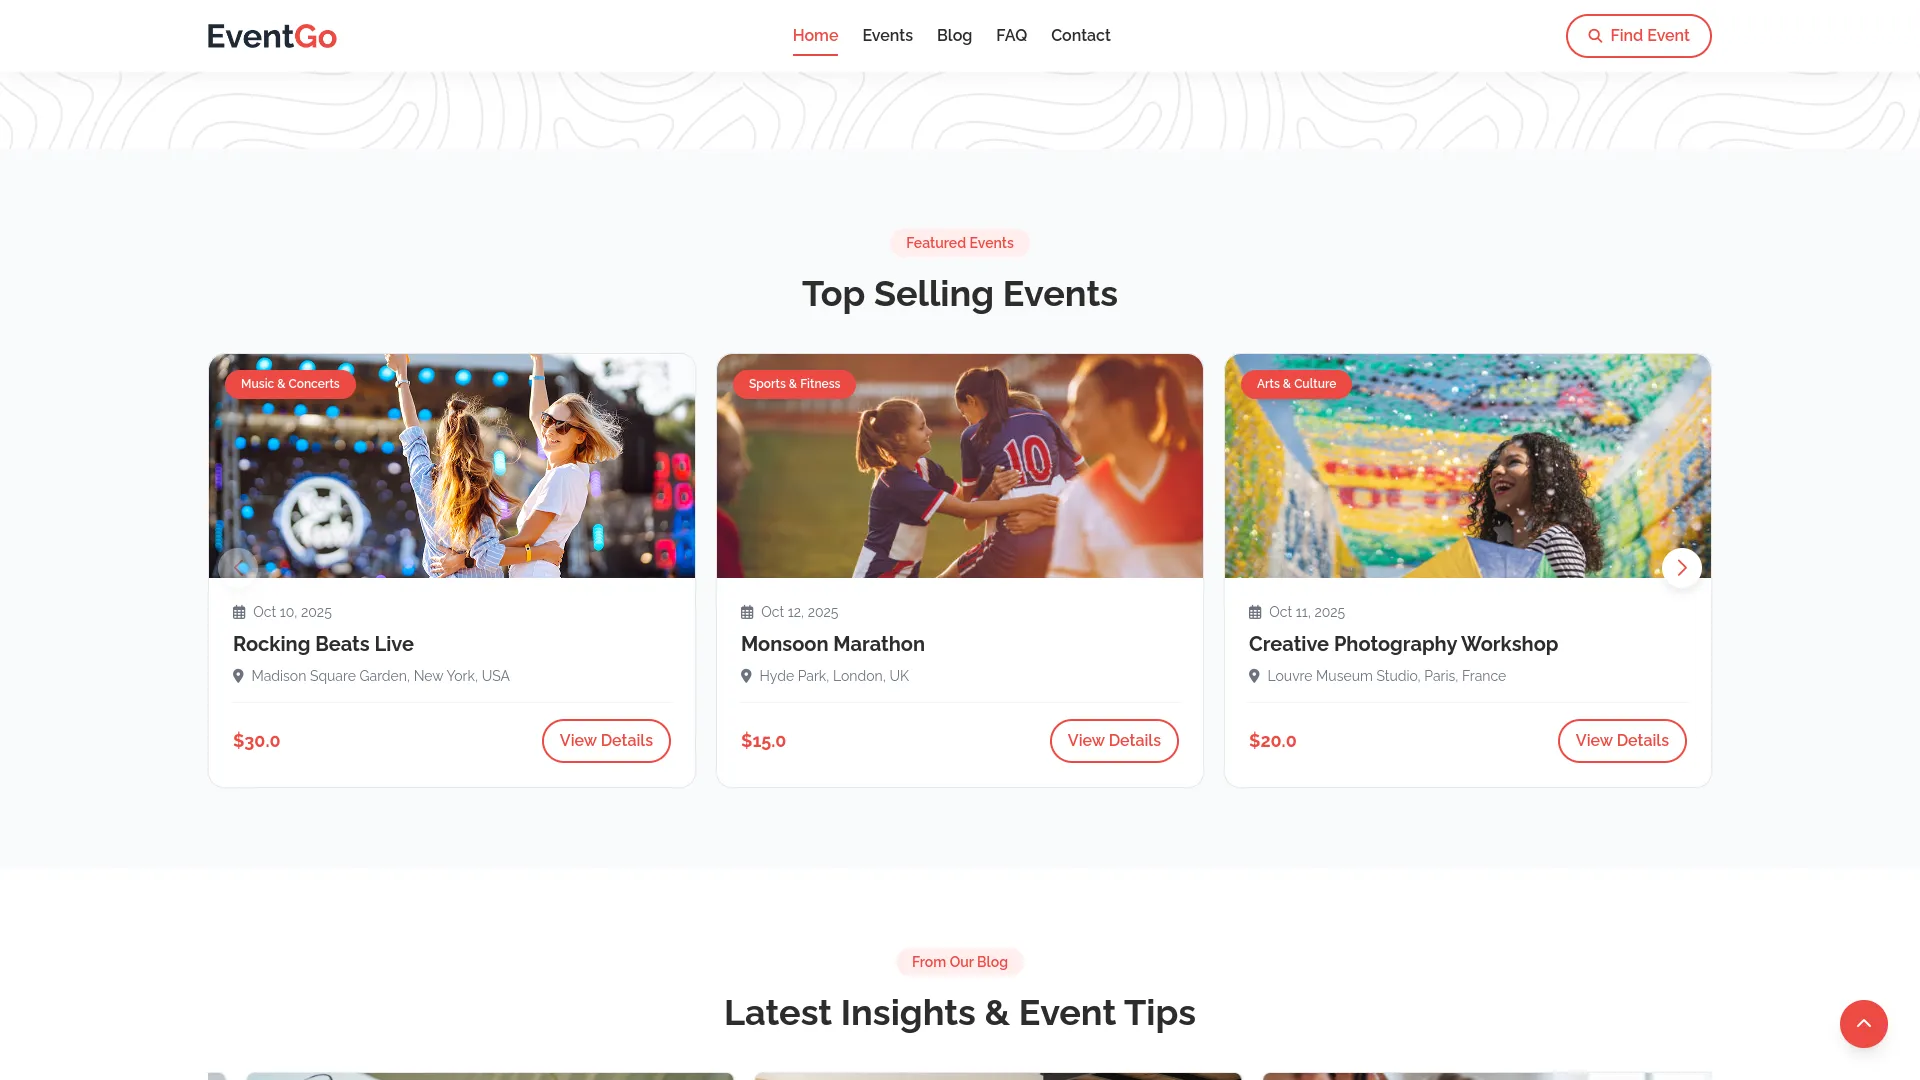
- The latest events section shows the event title from your Event Section setup, with events from your Events menu. Each event has a “View Details” button that redirects to the specific event details page for booking.
Blog Section:
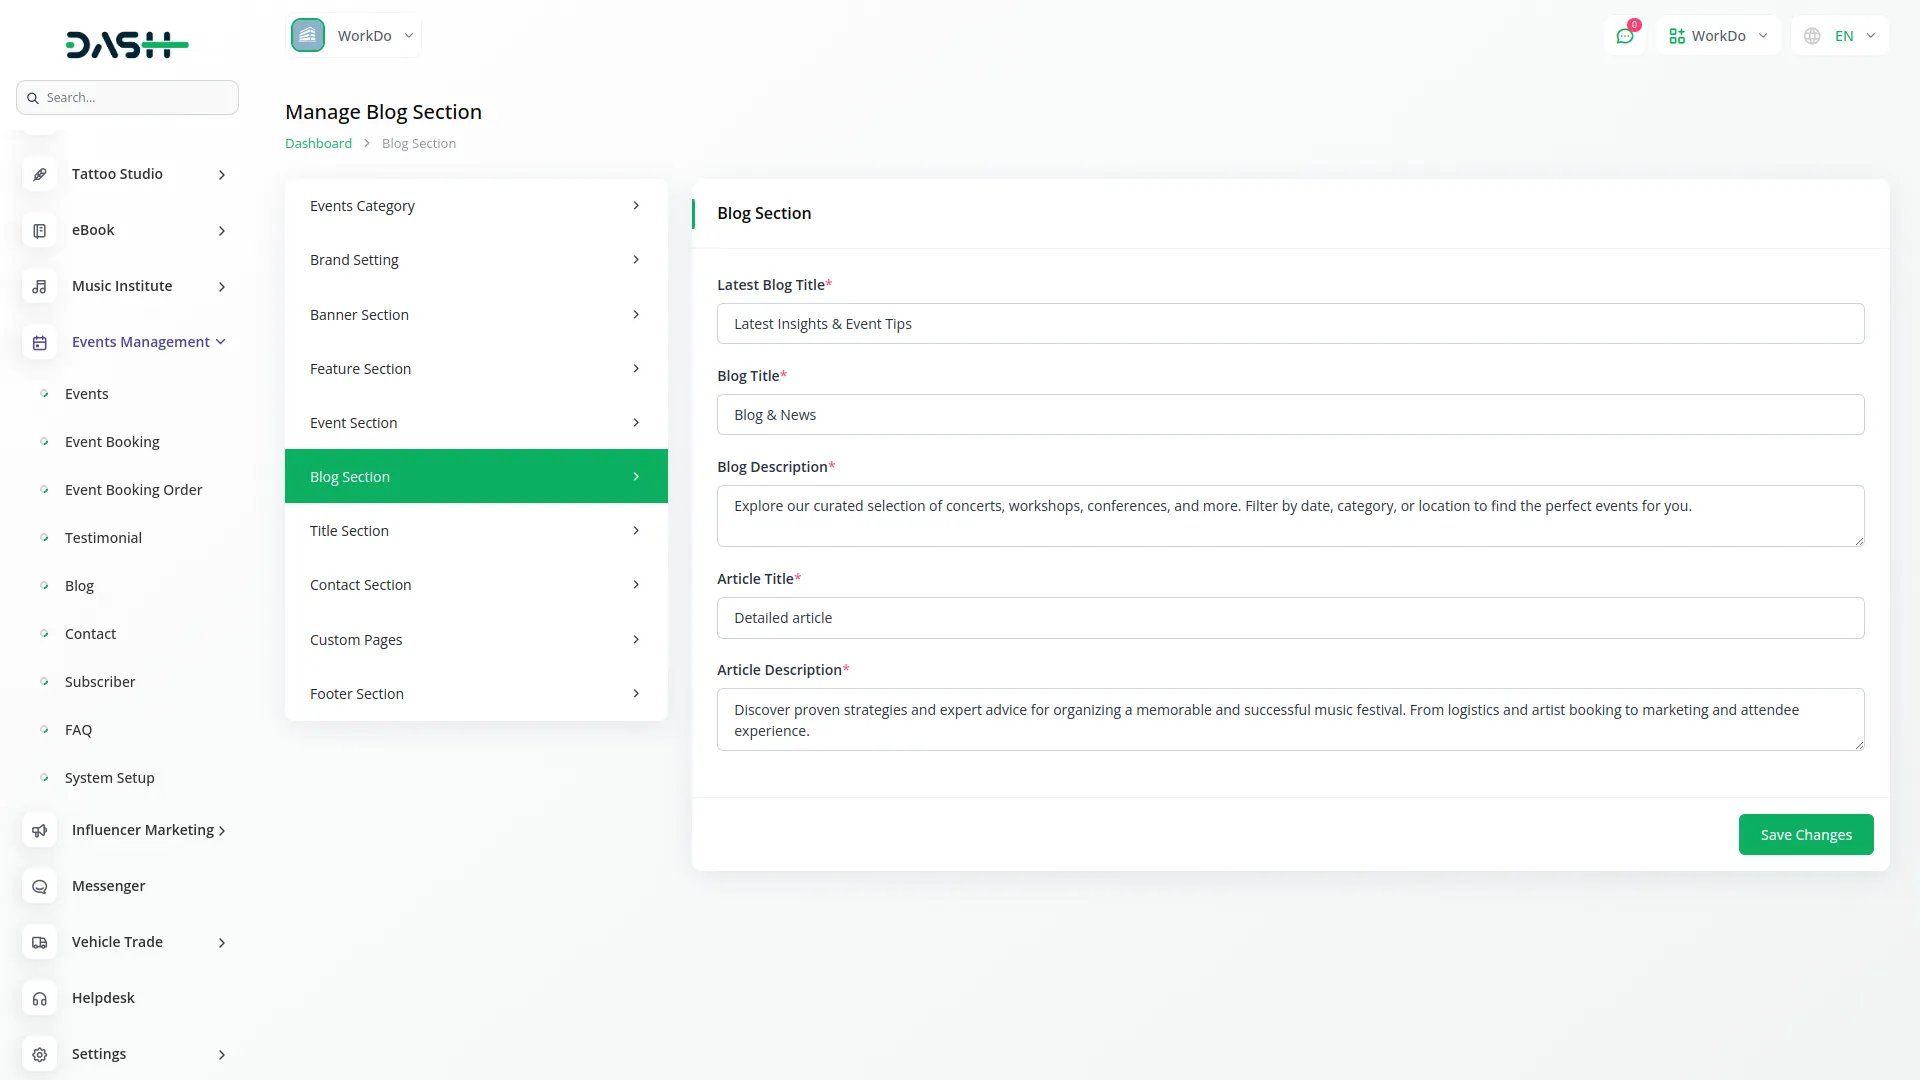
- To set up your blog section, go to the Blog Section in System Setup. Here you can set the Latest Blog Title, Blog Title, Blog Description, Article Title, and Article Description. These fields help introduce your blog, highlight recent updates, and provide context for individual articles.
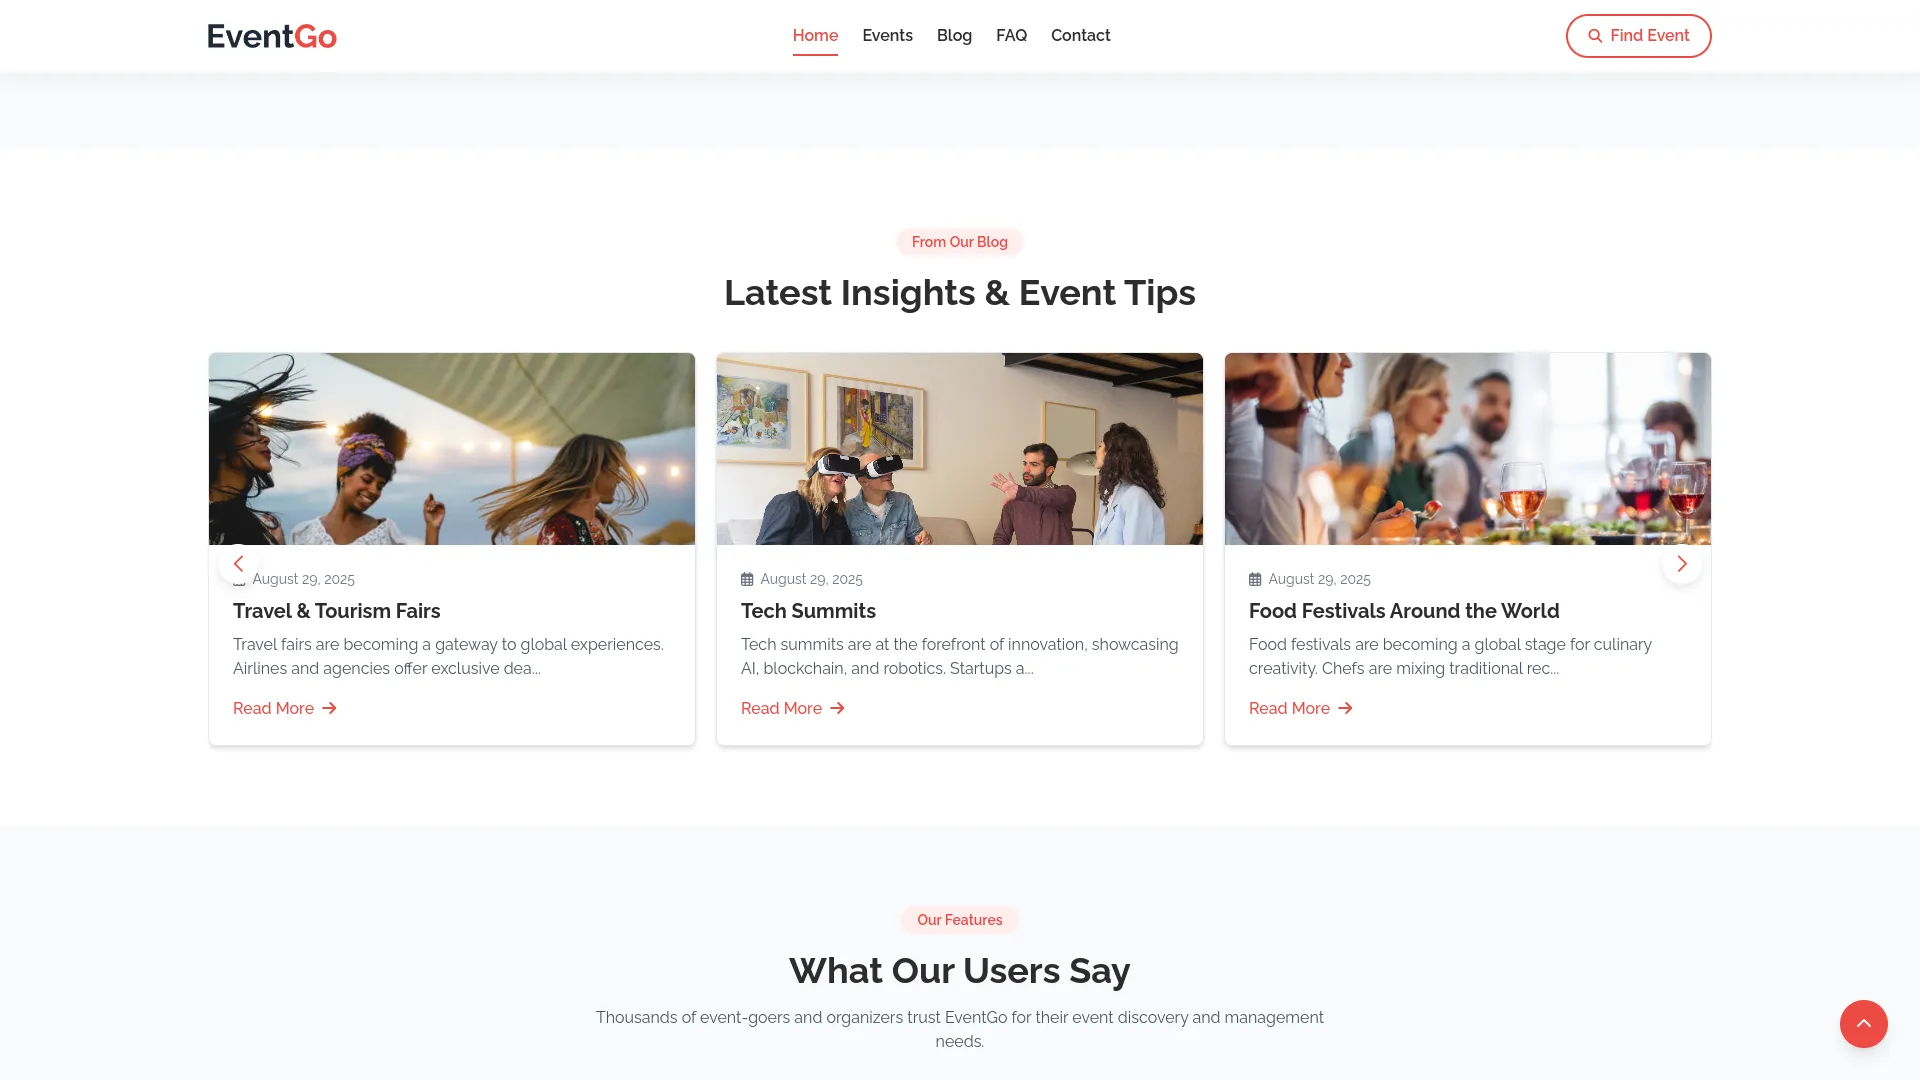
- The blog section displays the latest blog title from your Blog Section setup, with blog posts from your Blog menu. Each blog has a “Read More” button that redirects to the detailed article page.
Title Section:
In the Title Section setup, you can manage different content areas of your website.
- Testimonial Section: Set the Title and Description to introduce customer feedback and highlight experiences.
- Newsletter Section: Add a Newsletter Title, Newsletter Sub Text, and Newsletter Description to encourage visitors to subscribe and stay updated.
- FAQ Section: Configure the FAQ Title, FAQ Description, FAQ Question Title, and FAQ Question Description to guide users in finding quick answers and support.
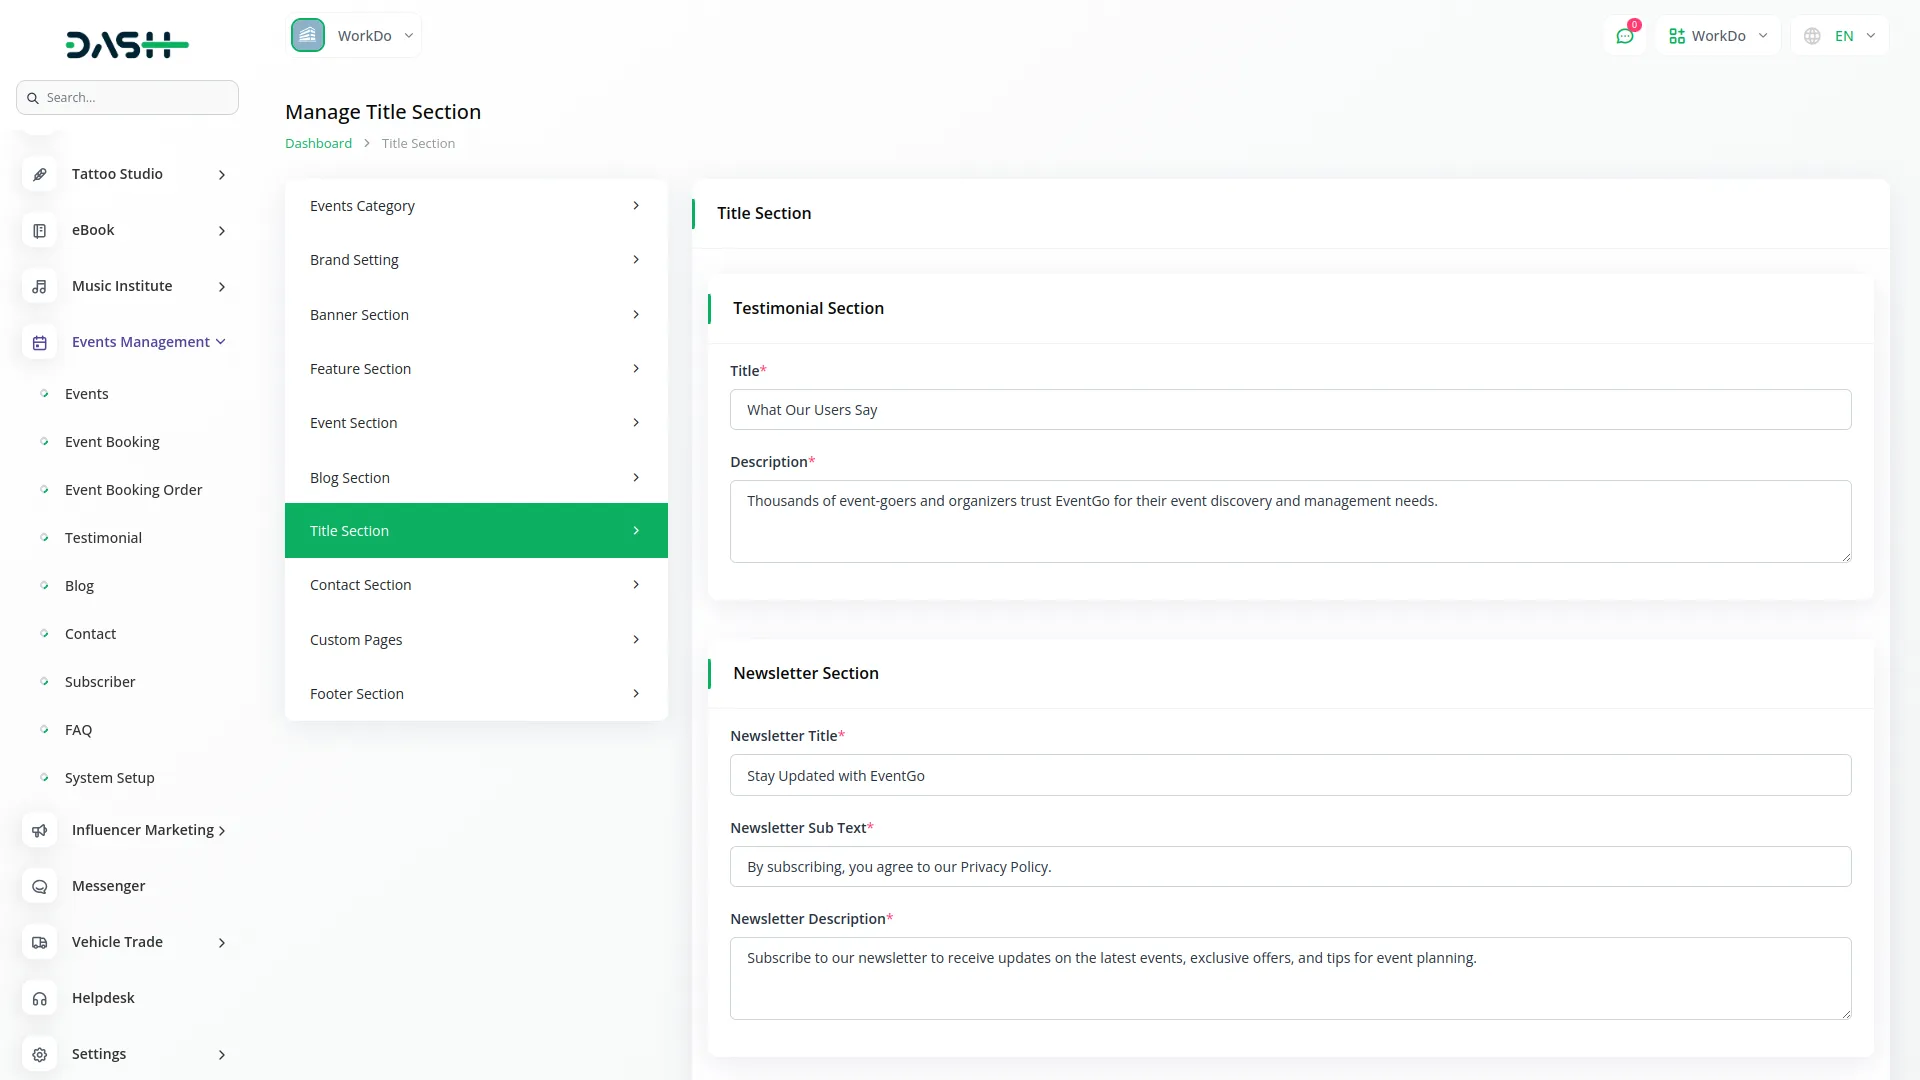
Testimonials Section:
- The testimonials section shows the title and description from your Testimonial Section setup, displaying testimonials from your Testimonial menu.
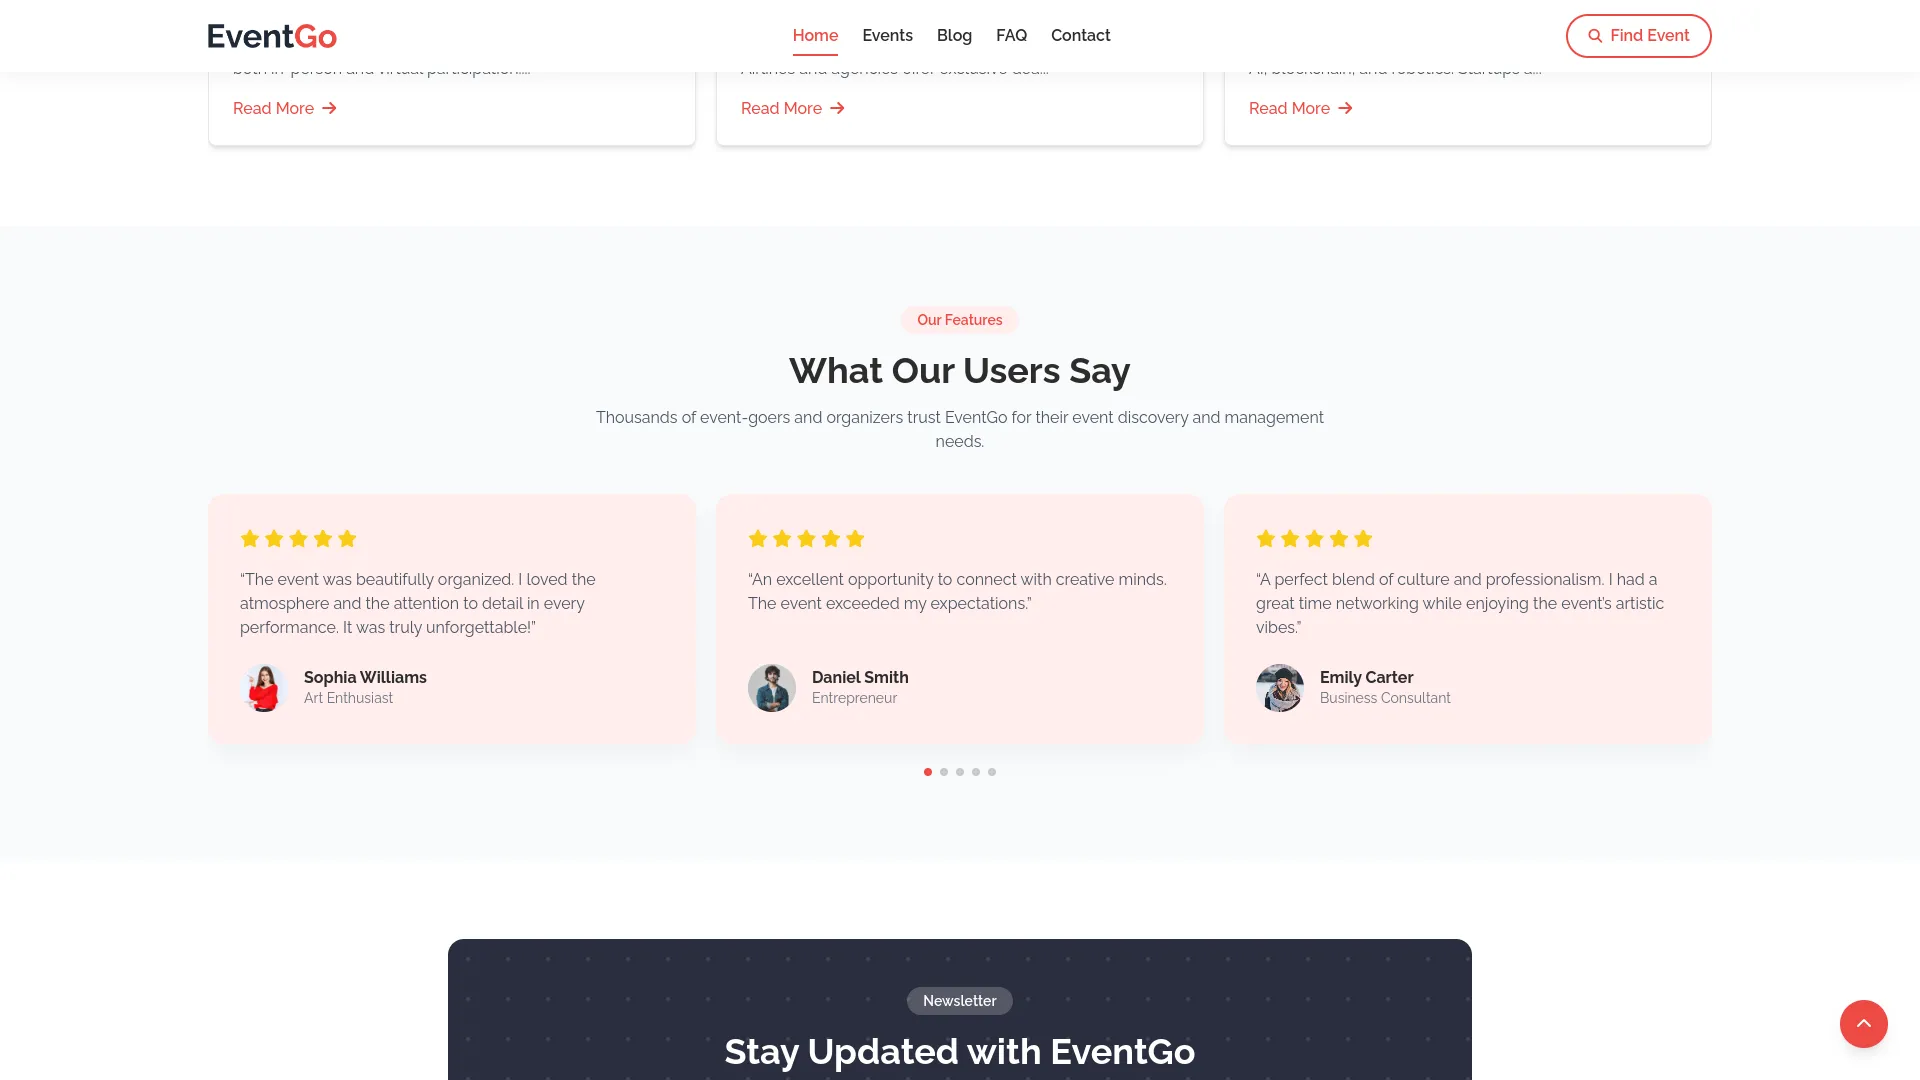
Newsletter Section:
- The newsletter subscription area allows visitors to subscribe, with data saved to your Subscriber menu.
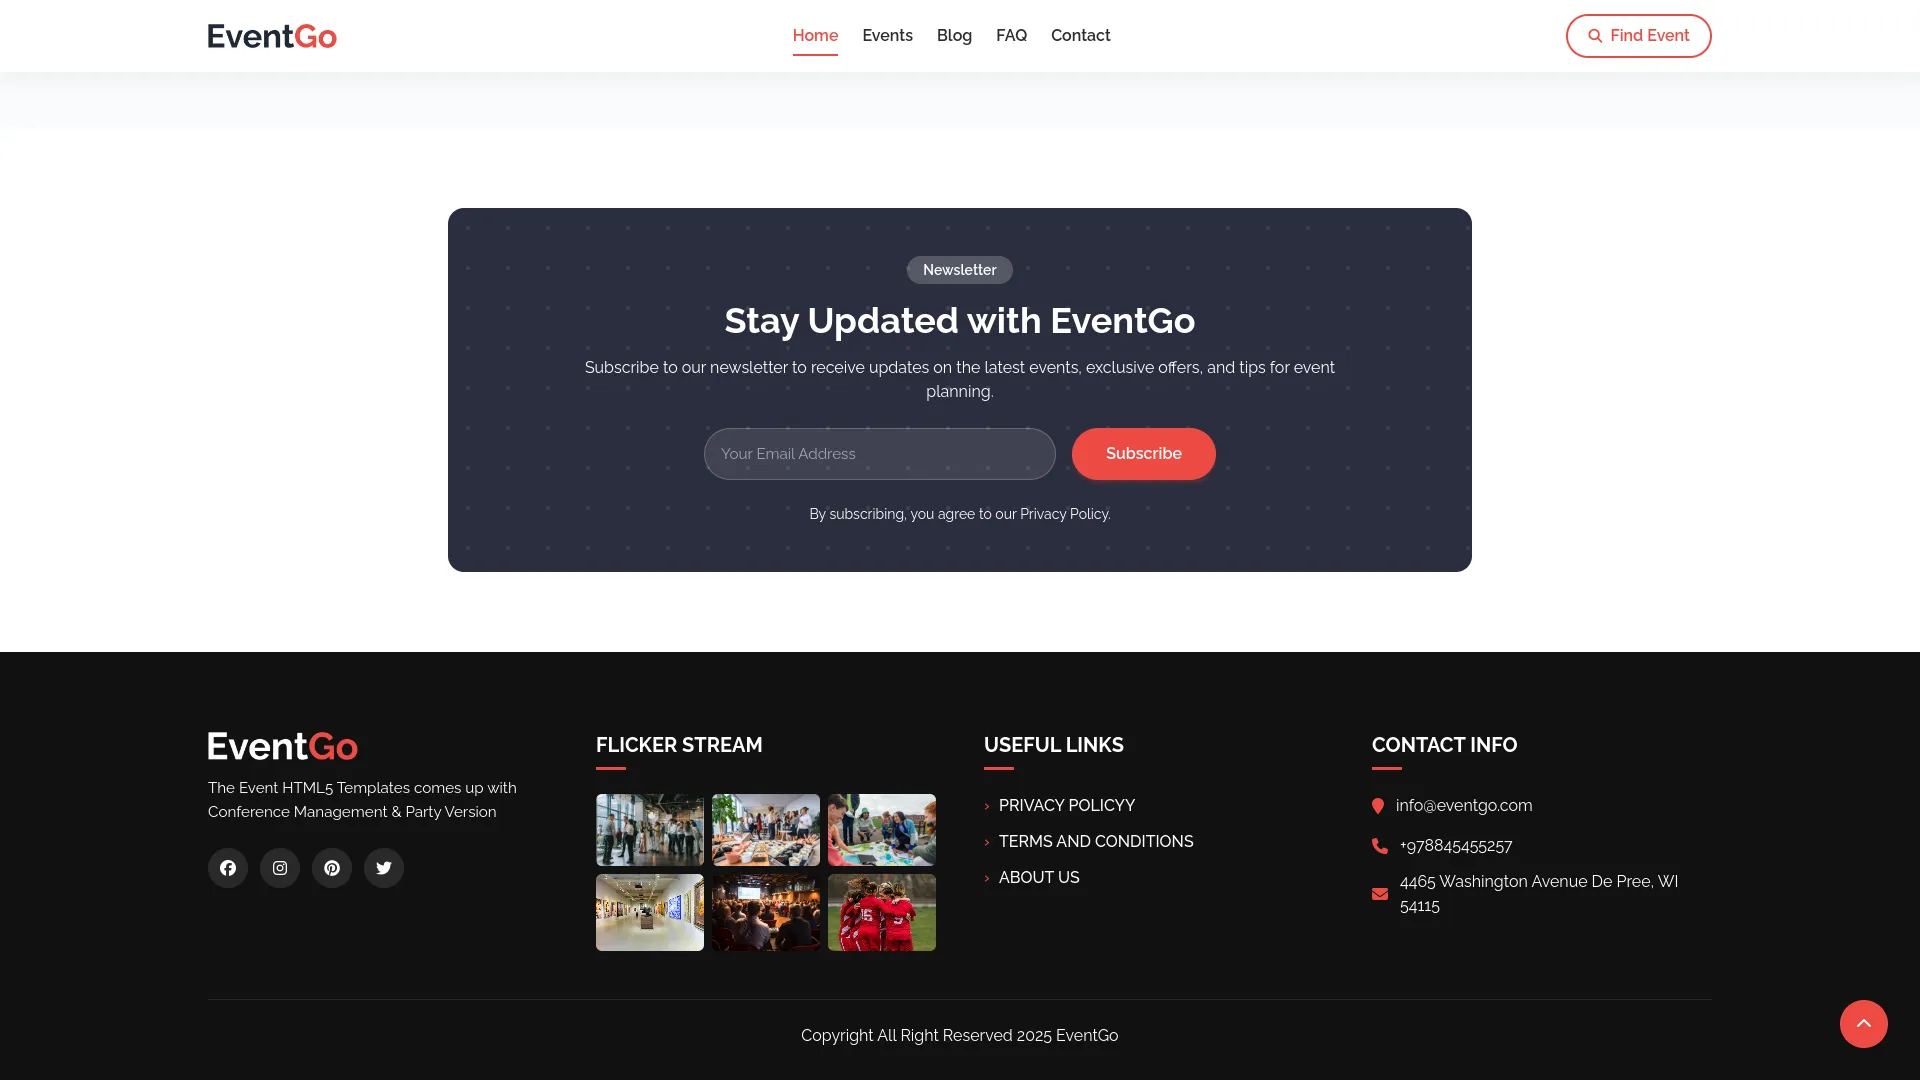
FAQ Page:
- The FAQ page displays the FAQ title and description from your FAQ Section setup. FAQ questions and answers are shown with support contact options using the FAQ Question Title and FAQ Question Description from your setup.
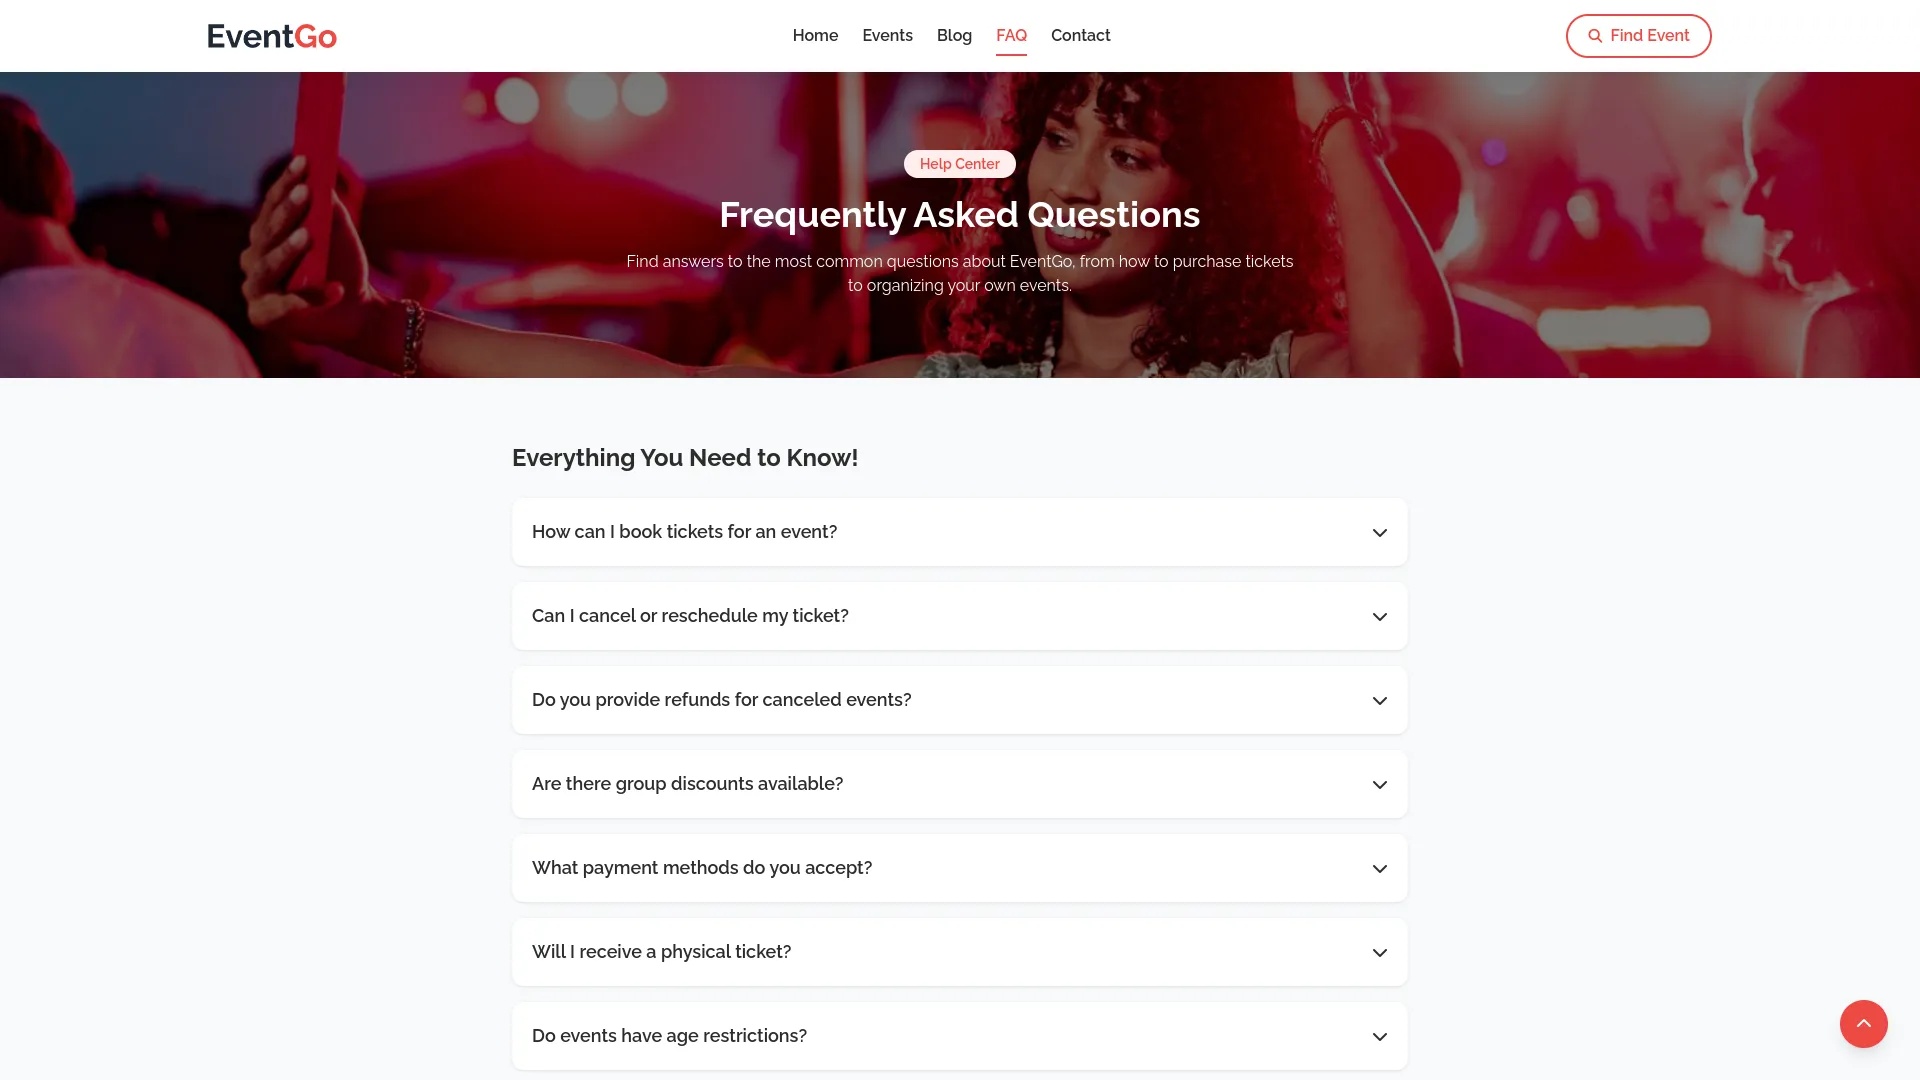
Contact Section:
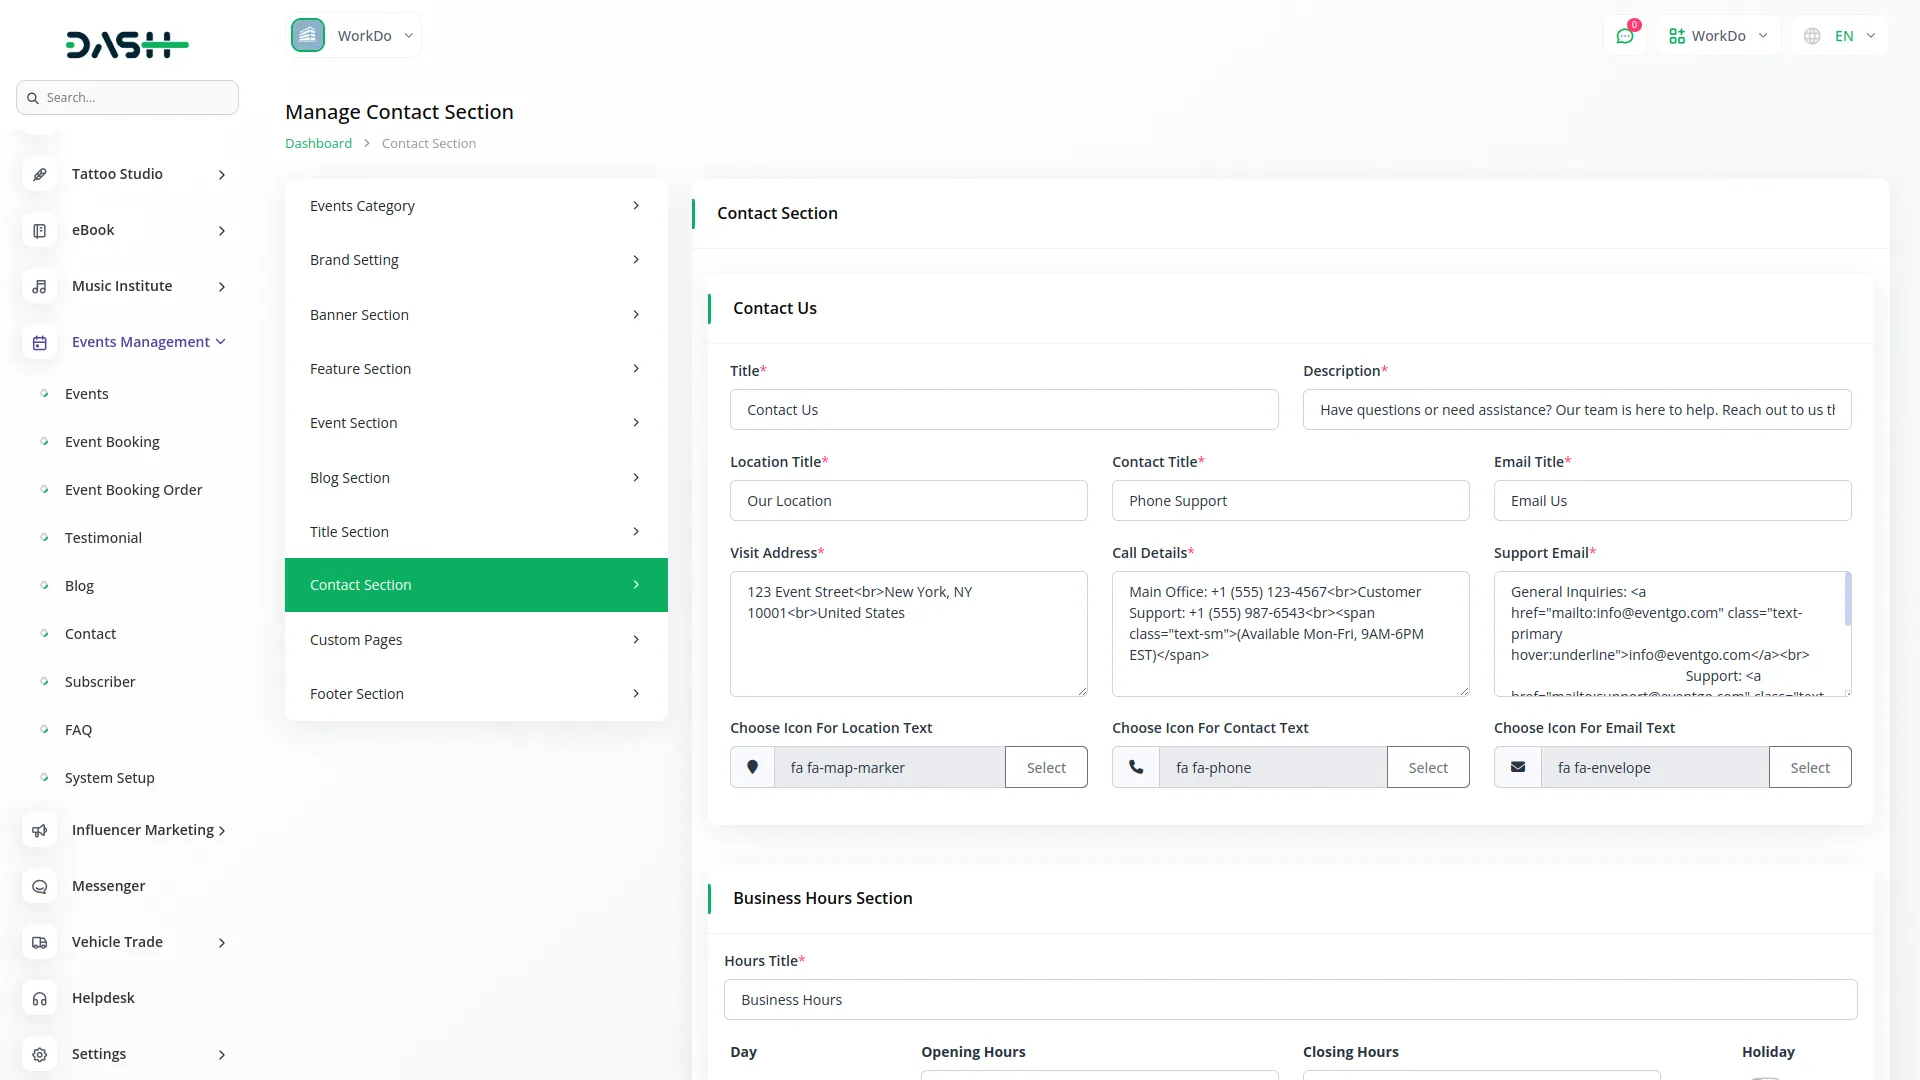
- To set up your website contact page, go to the Contact Section in System Setup. In this section, you can add a title, description, visit address, call details, support email, and set titles for location, contact, and email along with their icons. These fields organize your contact information and make it easy for customers to reach you.
- In the Business Hours Section, you can add an hours title, set opening and closing hours for each day from Monday to Sunday, mark holidays with the on/off switch, and choose an icon for operating hours. This ensures customers know your exact working schedule.
- In the Find Us Section, you can add subway, public transport, and parking facility titles with details, choose icons for each, and embed a Google Map iframe. These options help customers easily locate and access your business.
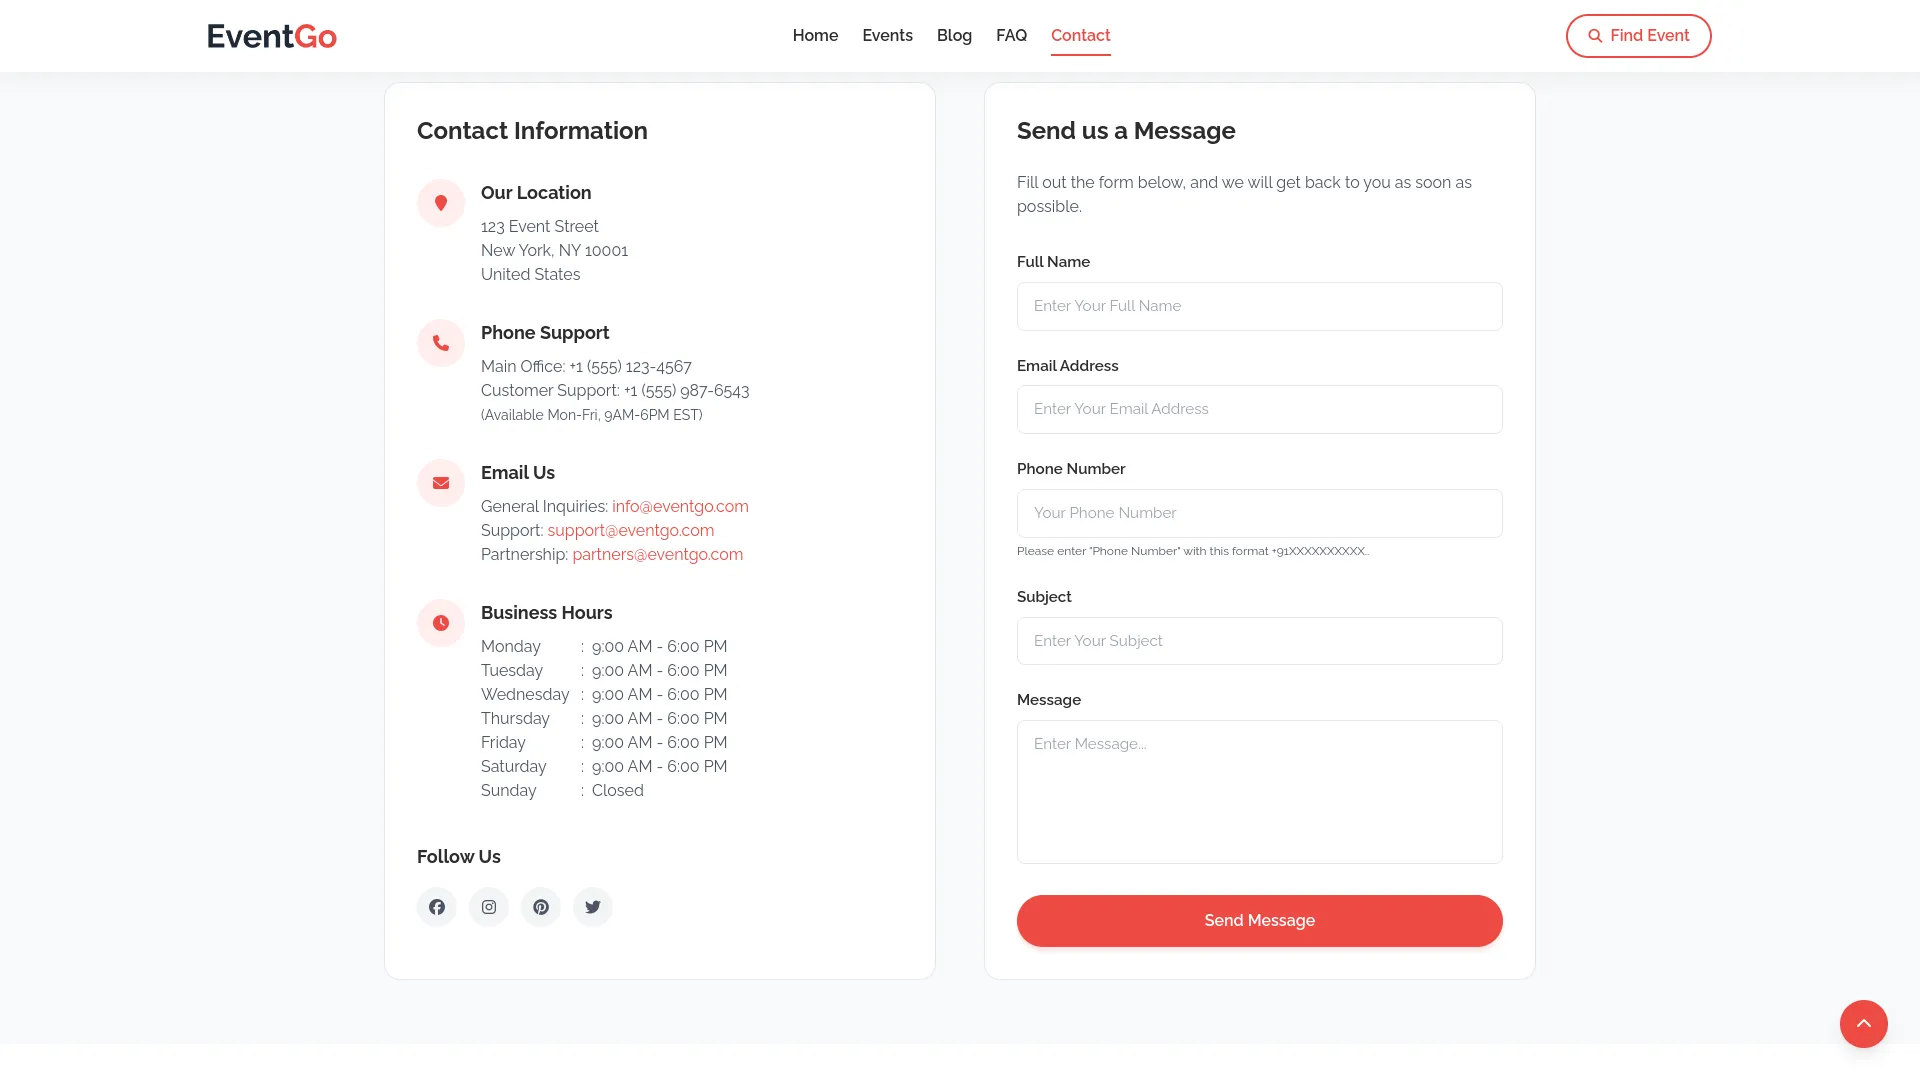
- The contact page shows the title and description from your Contact Section setup, along with location title, visit address, contact title, call details, email title, support email, and chosen icons.
- Business hours display the hours title, days, opening and closing hours, holiday status, and opening hours icon from your Business Hours Section setup.
- The message form allows visitors to send messages by filling full name, email address, phone number, subject, and message fields. This data appears in your backend Contact menu.
- The Find Us section displays subway transport details, public transport details, parking facility details with their respective icons, and a Google Map iframe from your Find Us Section setup.
Custom Pages:
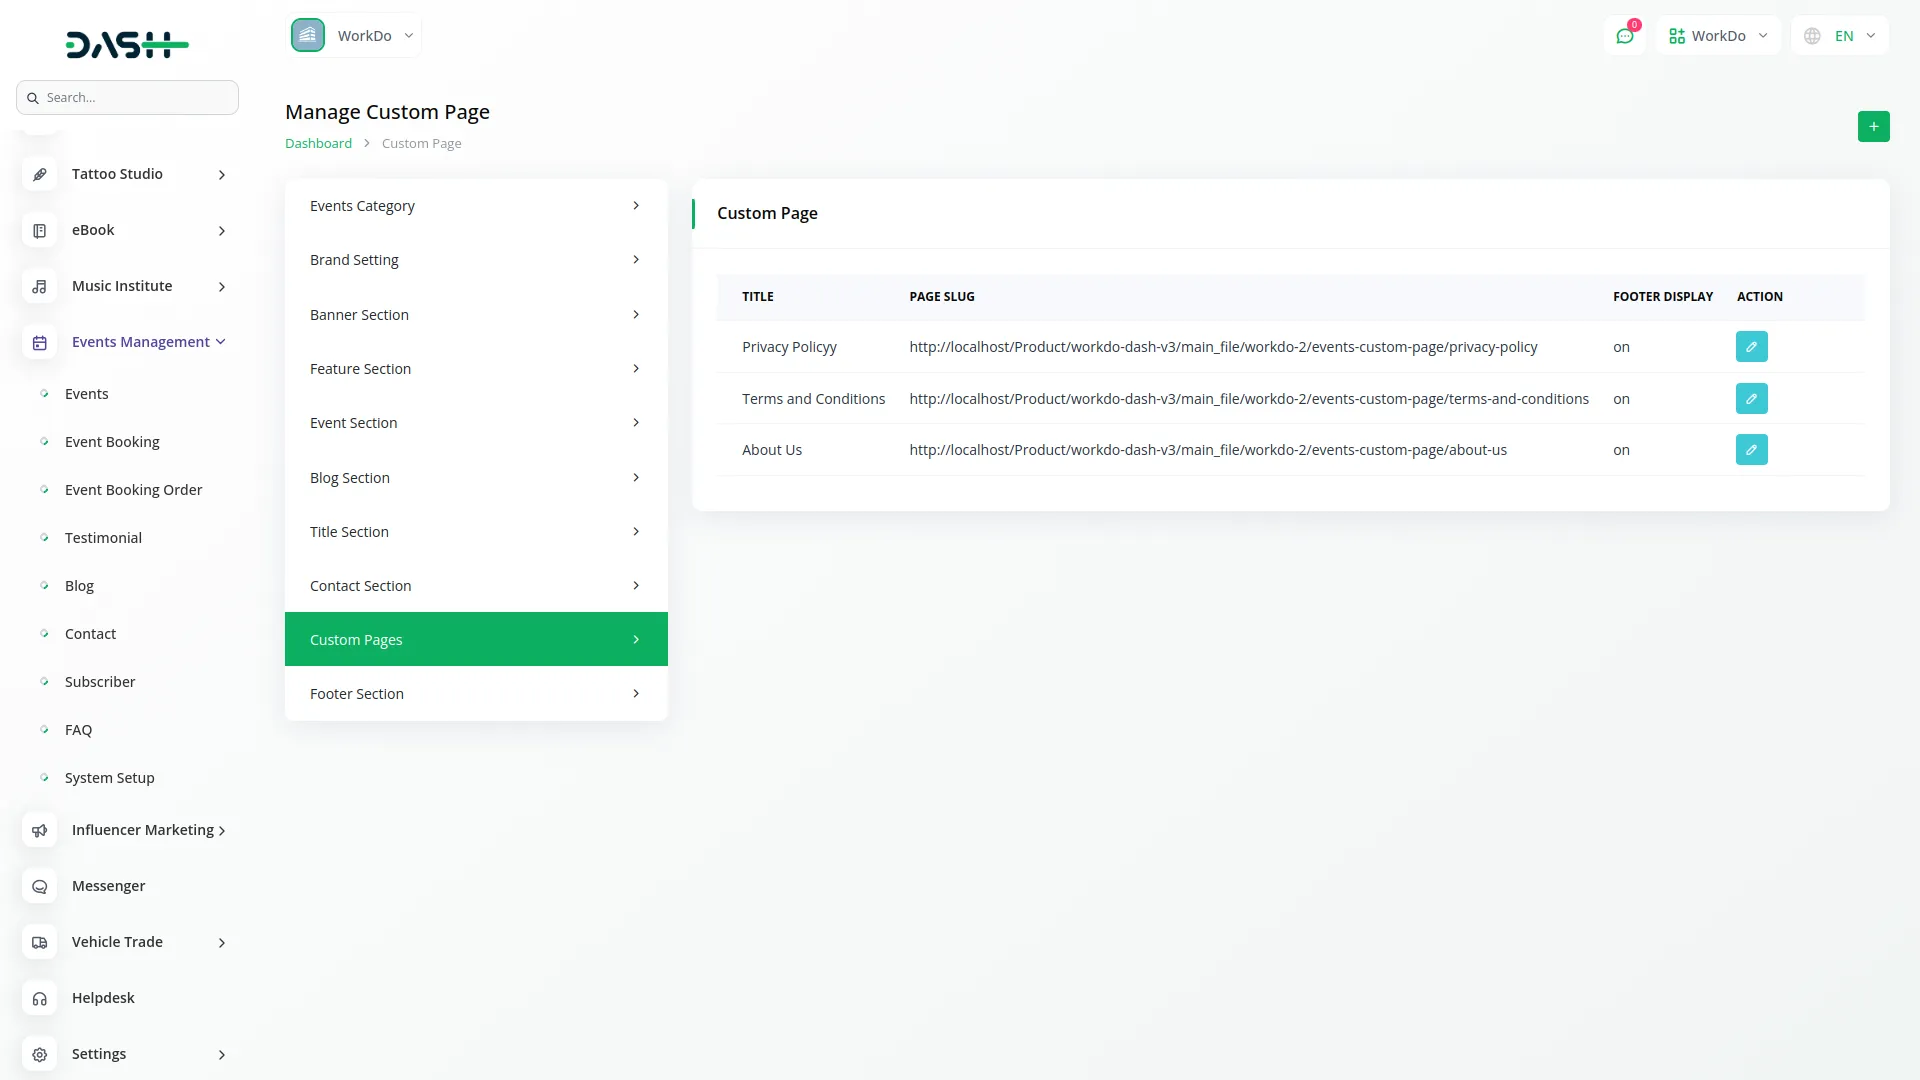
- To manage your custom pages, navigate to the Custom Pages section, where you can create and configure additional pages for your website. When creating a new page, enter a title that will serve as the page heading, write a description that provides an overview of the page content, and add the main content that will be displayed to visitors.
- Use the Page Footer Display toggle switch to control whether your custom page appears in the website footer navigation – when enabled, the page link will be automatically added to your frontend footer menu for easy visitor access.
- The system automatically generates a unique Page Slug (URL) for each custom page based on your title, creating SEO-friendly web addresses that visitors can use to access your pages directly.
- In the Custom Pages list view, you can see all your pages displayed in a table format showing the Title, automatically generated Page Slug, and Footer Display status. Use the Create button to add new custom pages to expand your website content.
- Each custom page includes Edit and Delete action options, allowing you to modify content or remove pages as needed. Note that default system pages, such as Privacy Policy, About Us, and Terms and Conditions, cannot be deleted to ensure your website maintains essential legal and informational pages.
Footer Section:
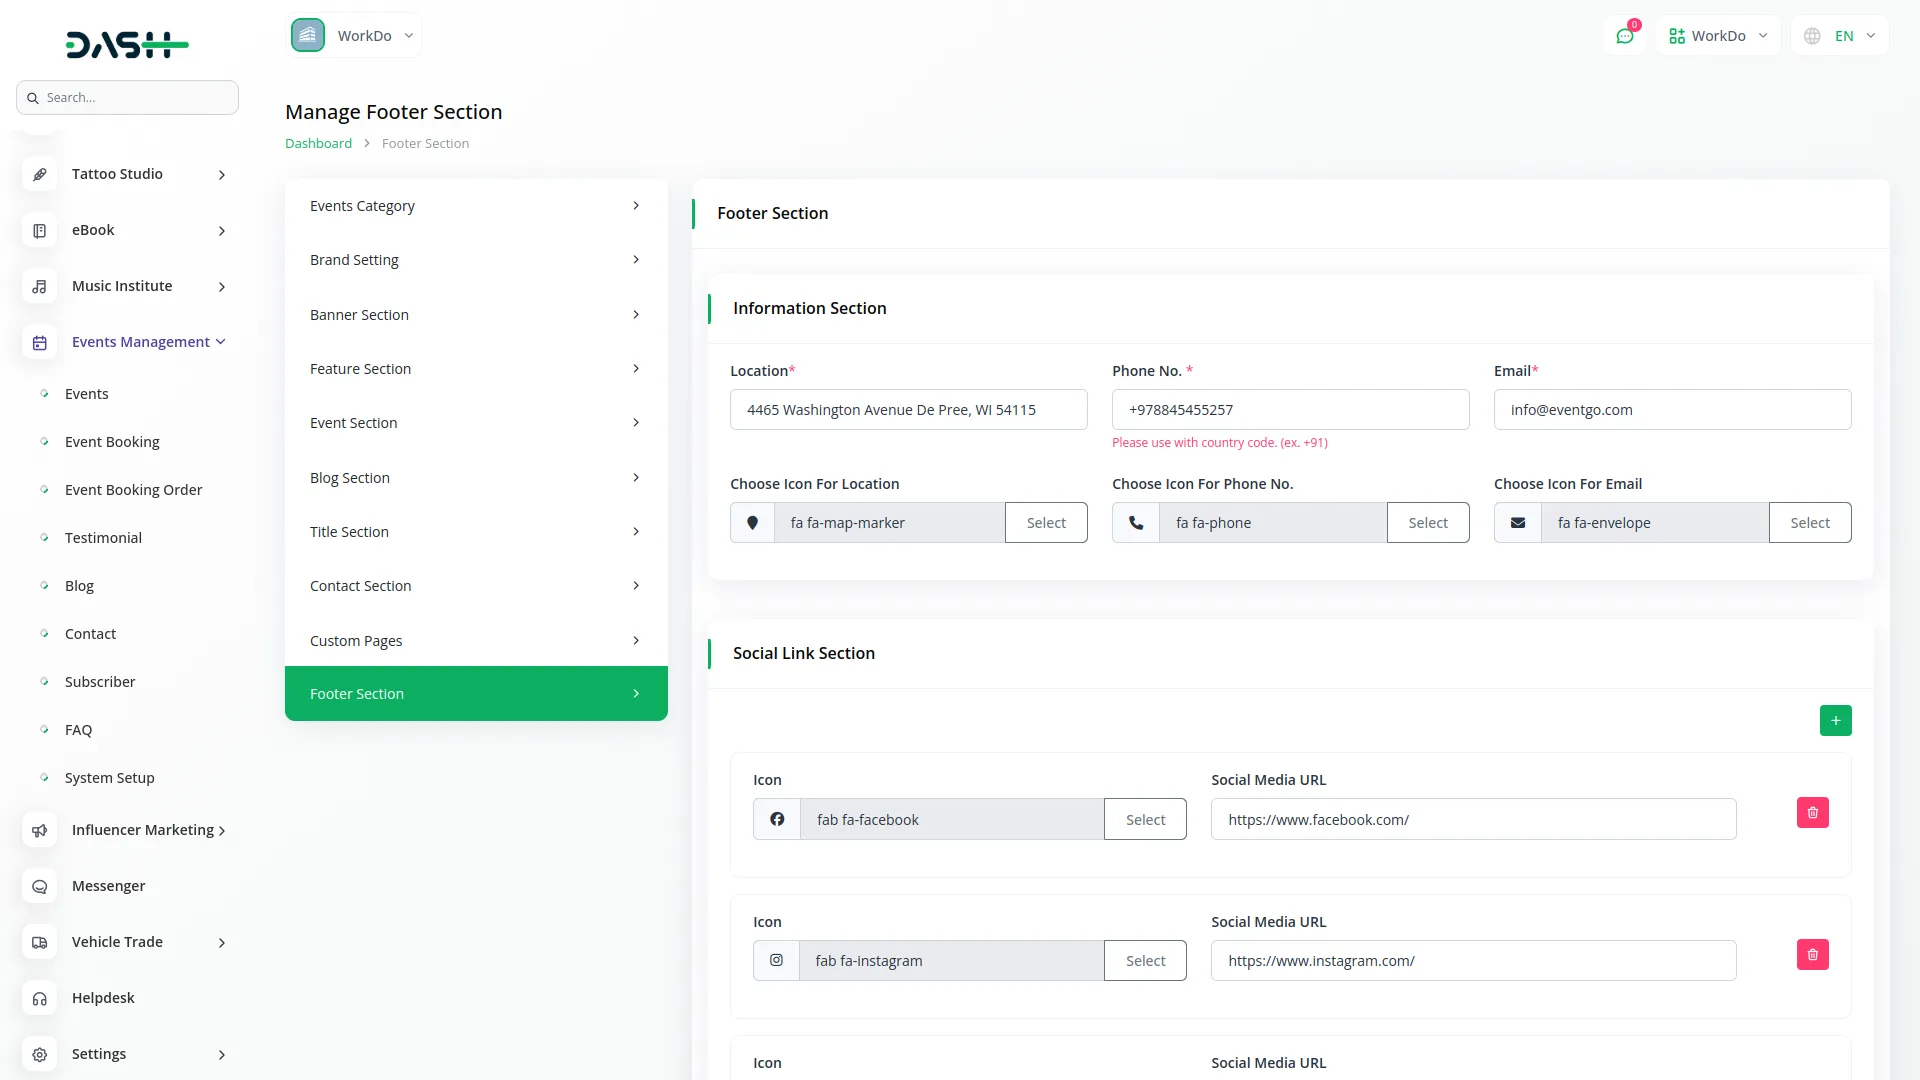
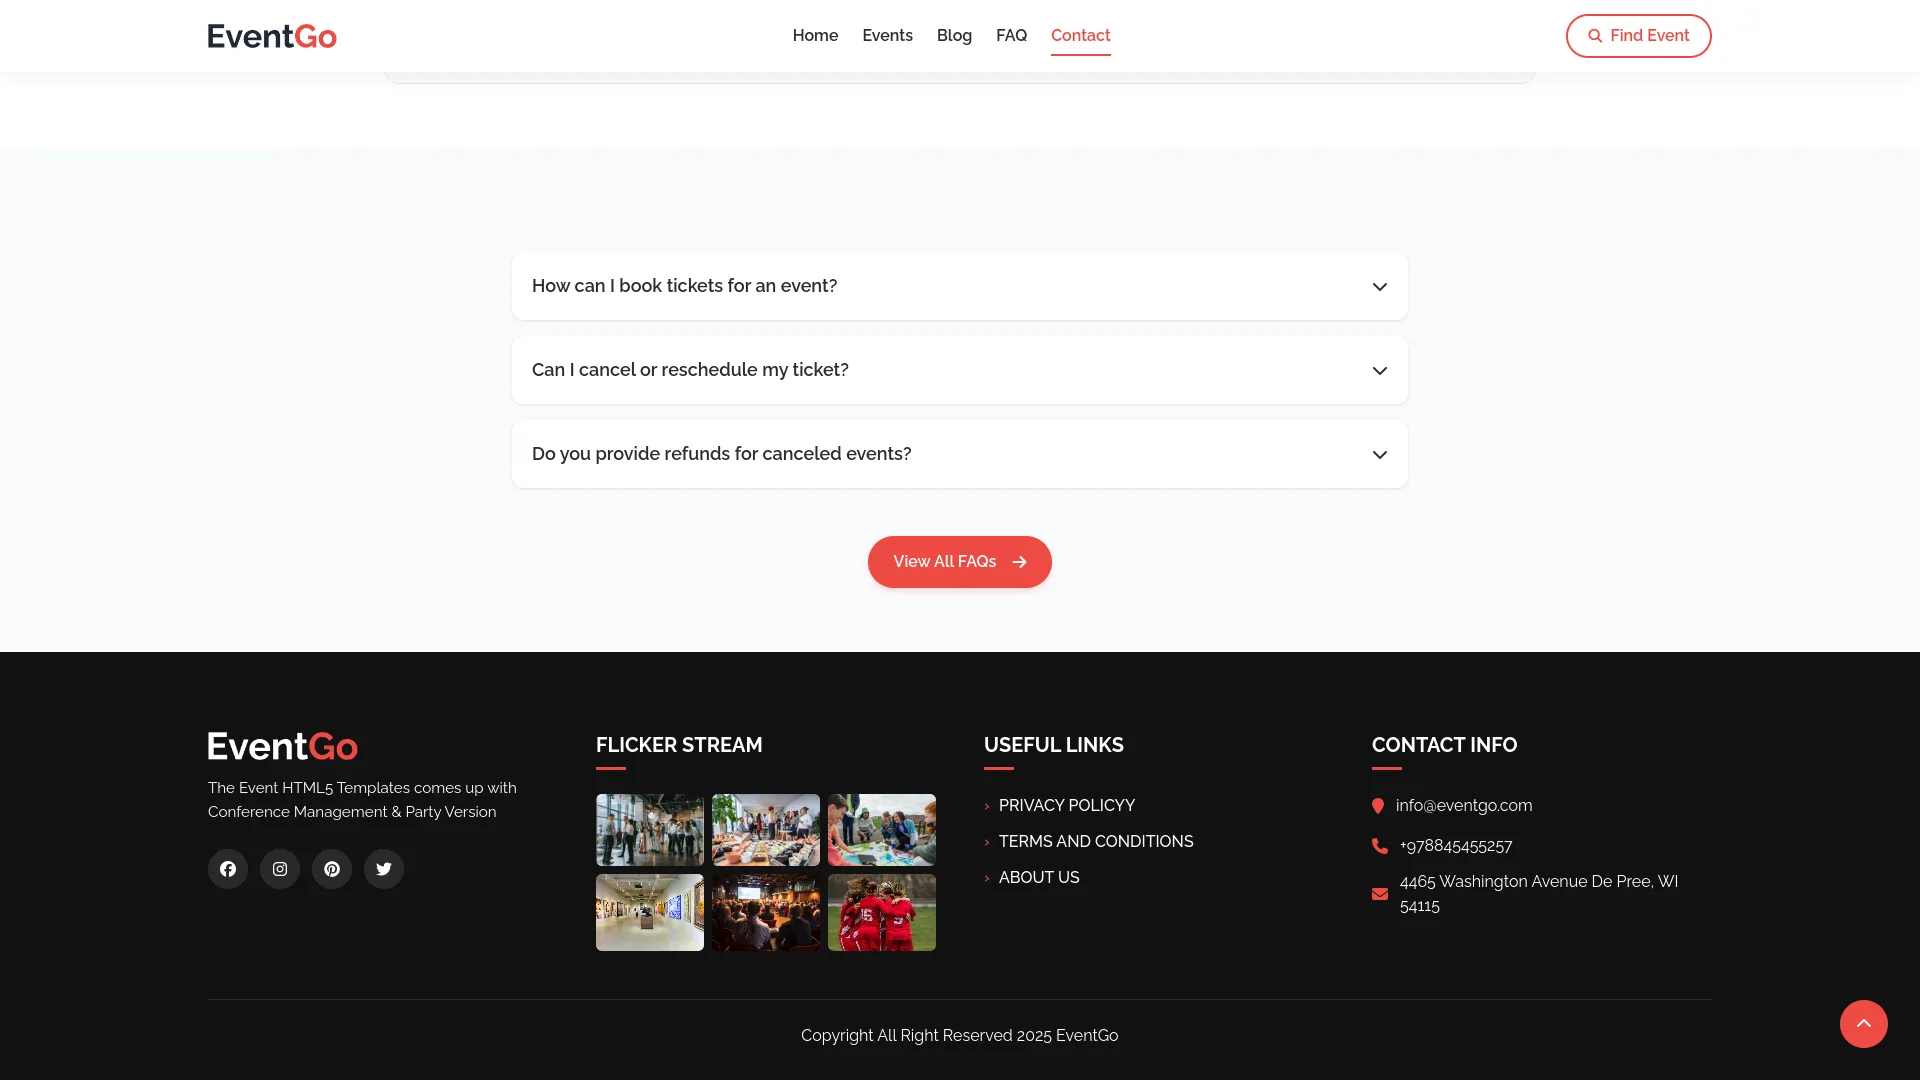
- To set up your website footer, go to the Footer Section in System Setup. In the Information Section, you can add your Location, Phone Number, Email, and select icons for each. In the Social Link Section, you can enter multiple Social Media Links and choose icons to display them in your footer.
- The footer displays your footer logo, description, and text from Brand Settings. Social links come from your Footer Section Social Link setup.
- The flicker stream section shows category posters, useful links include Home, Events, Blog, FAQ, and Contact Us. Contact information comes from your Footer Section Information setup, including location, phone number, email, and their respective icons.
Events
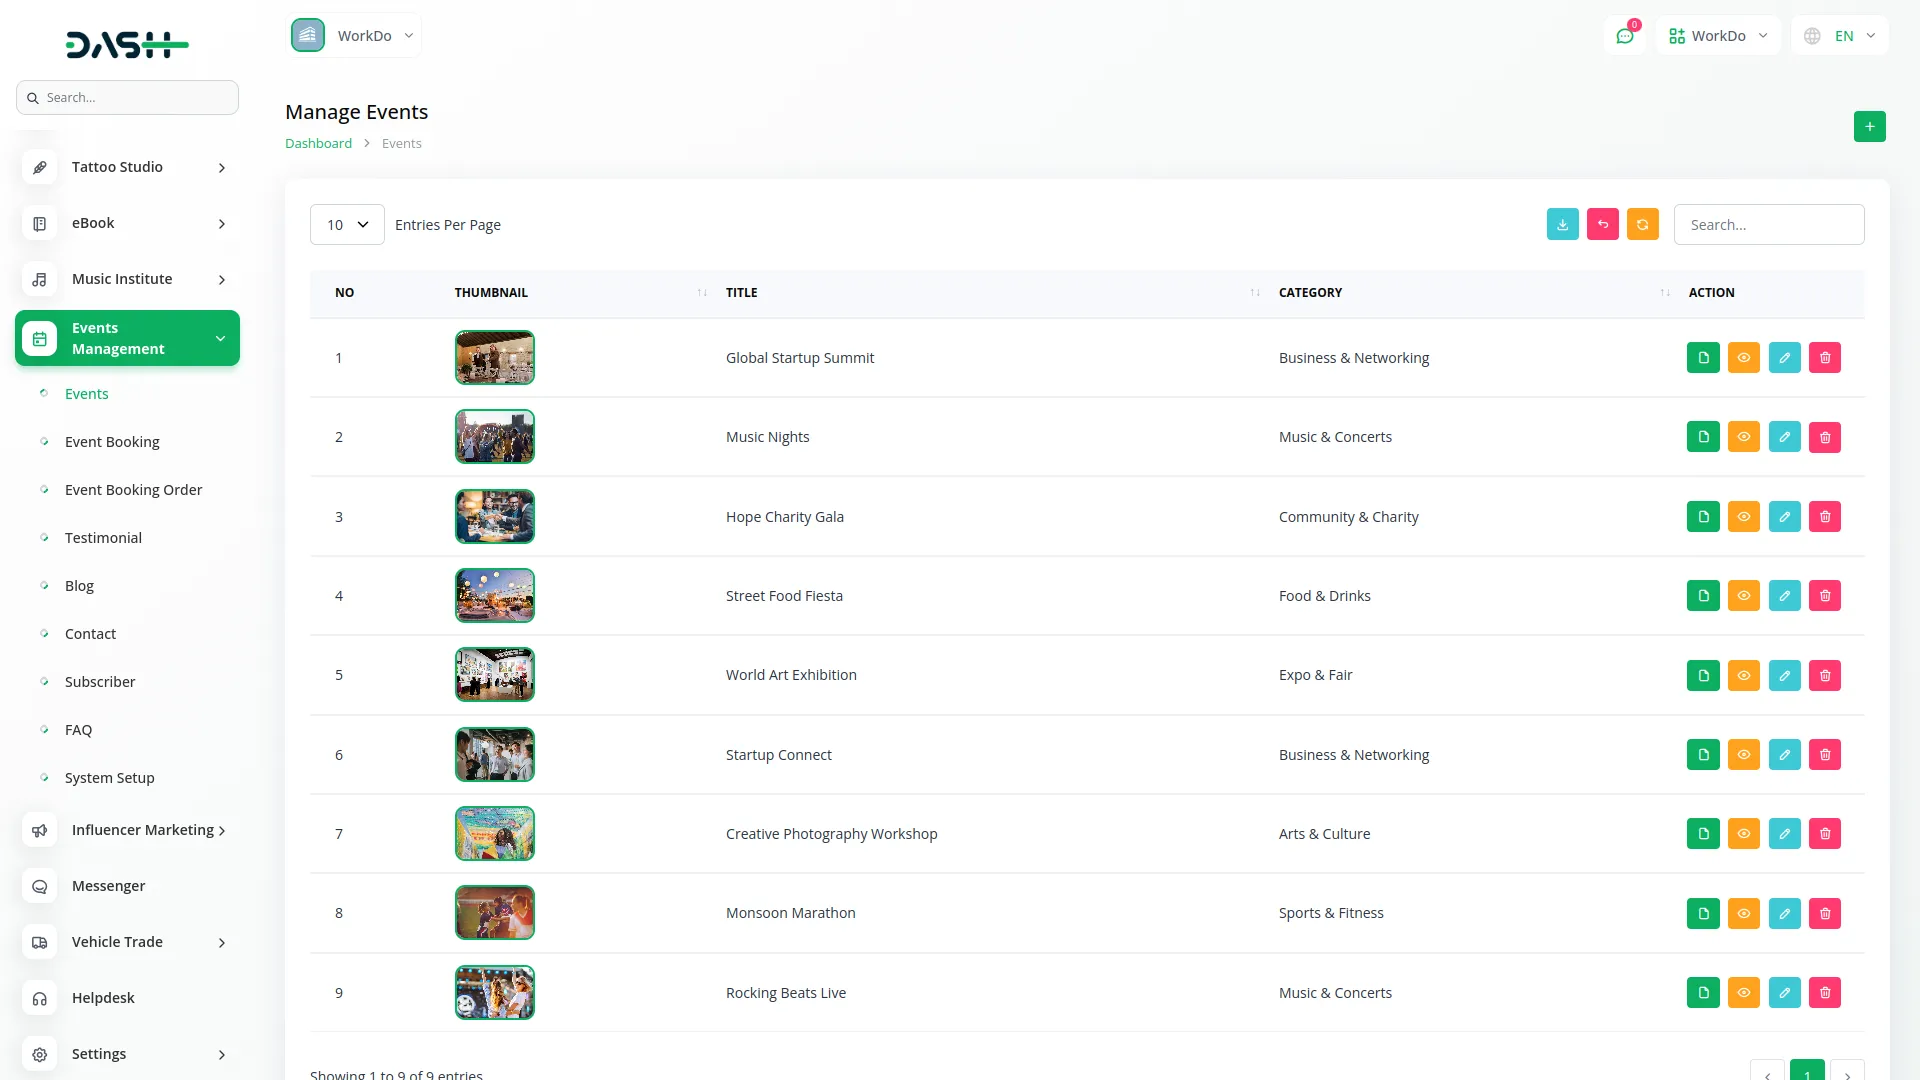
- To create a new event, click the “Create” button at the top of the events page. Enter the event title and subtitle to describe your event, specify the venue where the event will take place, and select a category from the dropdown menu that contains categories you created in the setup section.
- Set the price for the event and upload a poster image to promote the event visually. Write an event description that provides detailed information about what attendees can expect.
- In the timing section, click the “Add Timing” button to add multiple dates and time slots for your event. For each timing, select the date, start time, and end time. You can add multiple timing options to give customers flexibility in choosing when to attend.
- The list page displays all events in a table with columns for Number, Thumbnail, Title, and Category. You can use the Export, Reset, Reload buttons, and search input to manage your events list.
- Available actions include Copy to get the booking link for a specific event, View to see event details, Edit to modify event information, and Delete to remove events.
Events Page Features:
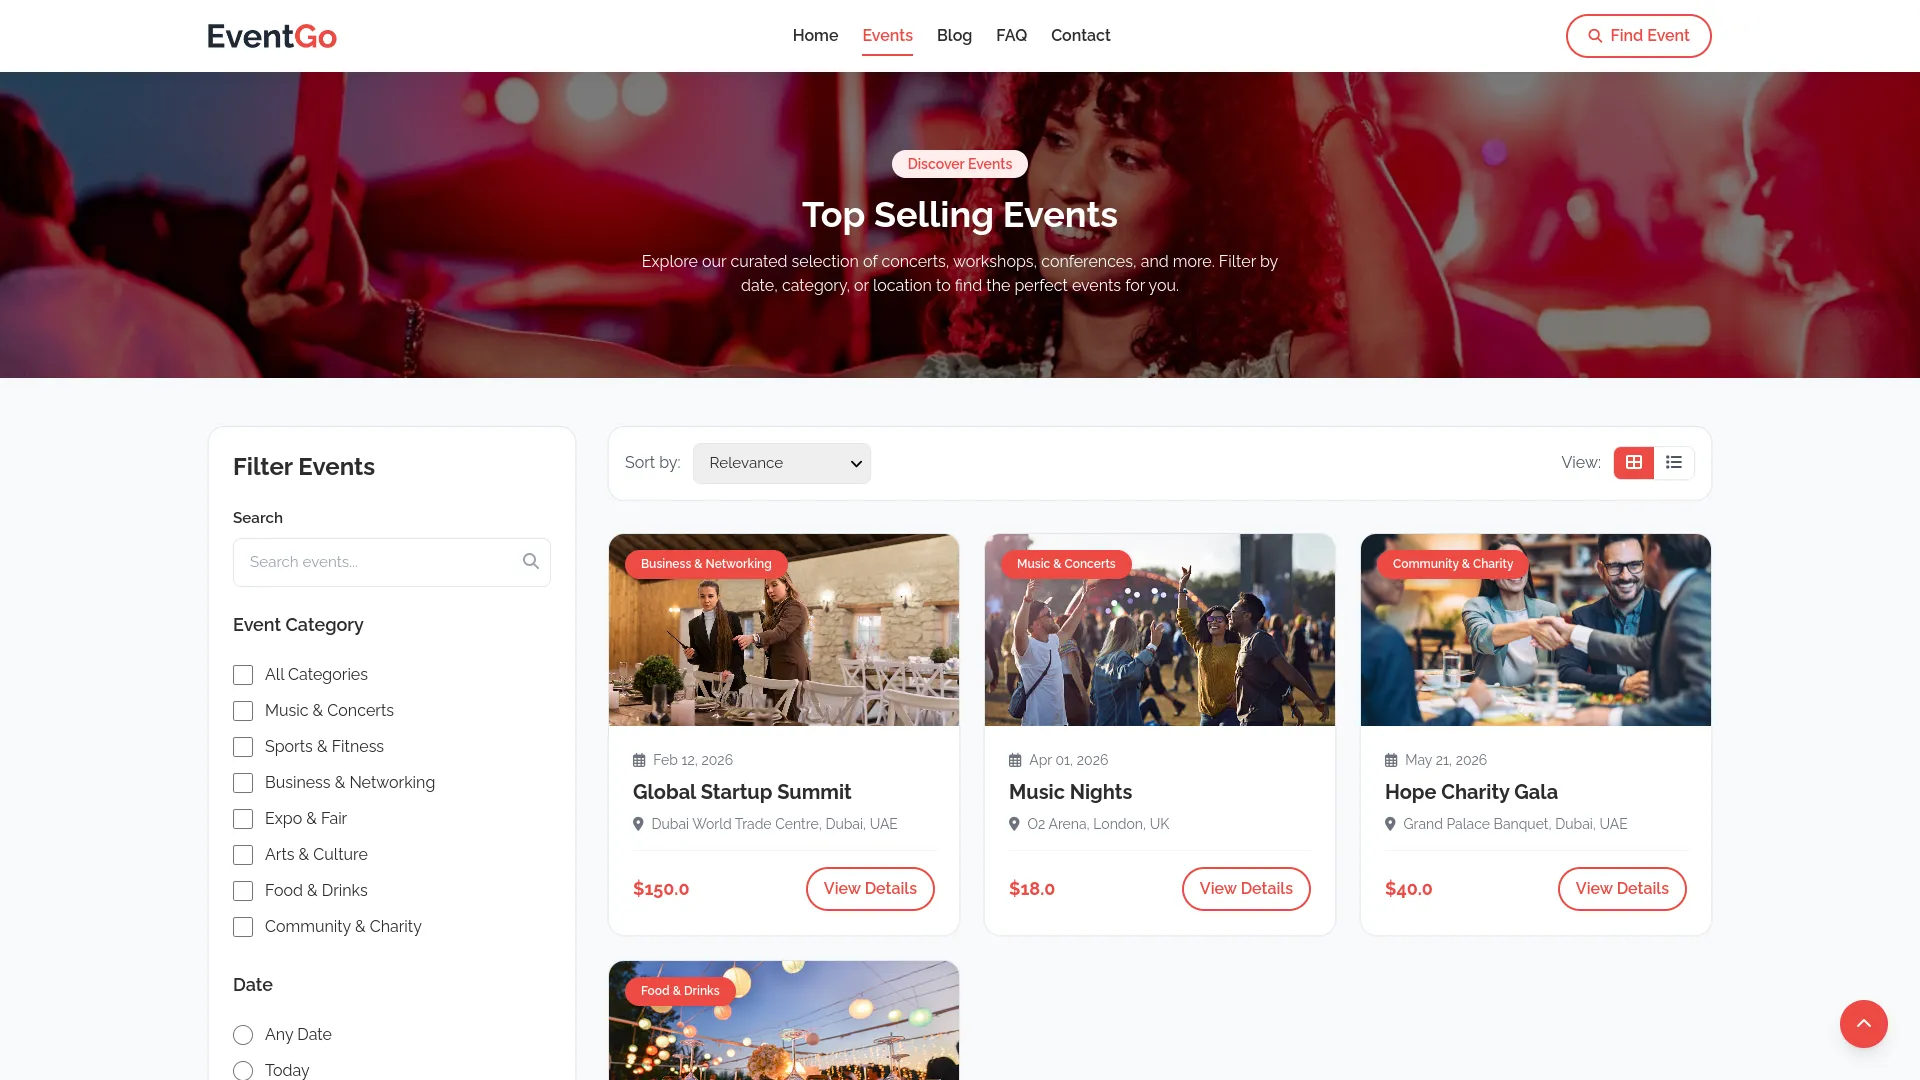
- The events page displays the event title and description from your Event Section setup. Events are listed from your Events menu with “View Details” buttons for individual event pages. Both grid and list views are available with pagination.
- The filter section includes search functionality, event category checkboxes for filtering, and date options including any date, today, tomorrow, this week, this weekend, this month, or custom date ranges. Apply filter and reset filter buttons control the display.
Event Details Page Features:
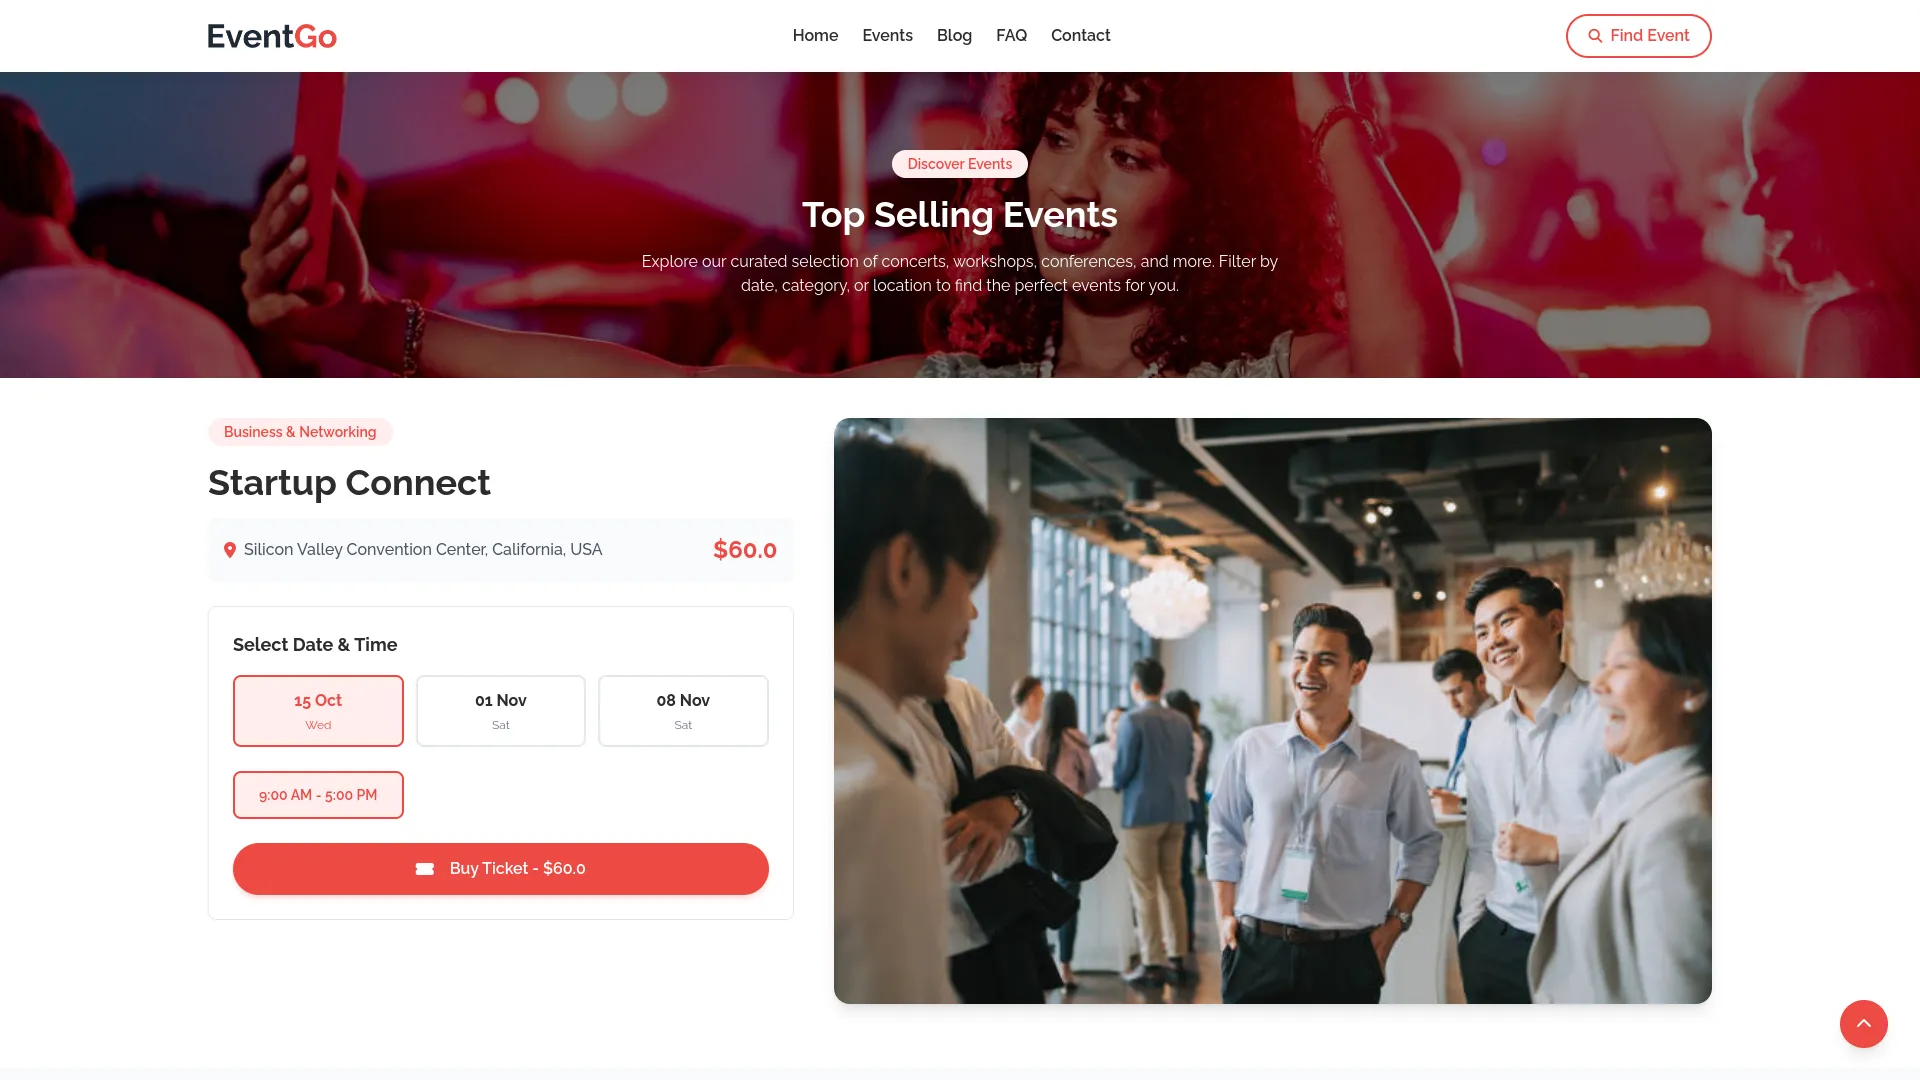
- Individual event pages show the event poster, name, venue, description, price, available dates, and time slots. Visitors can choose their preferred date and slot, then click “Buy Ticket” to proceed to checkout.
- The similar events section displays related events from your Events menu with “View Details” buttons.
Event Booking
- To create a new booking, click the “Create” button at the top of the event booking page. Select an event from the dropdown menu and specify the number of persons who will attend.
- Click the “Choose Ticket” button to proceed with the booking details. If no dates and slots are available for the selected event, you will see a message stating “No Dates Available For This Event!” If dates are available, you will see date tabs to choose your preferred date and available slots under that particular date.
- After selecting a date and slot, you will see the per-person price and total price calculated automatically based on the number of persons. Enter the attendee’s name, mobile number, and email address for the booking.
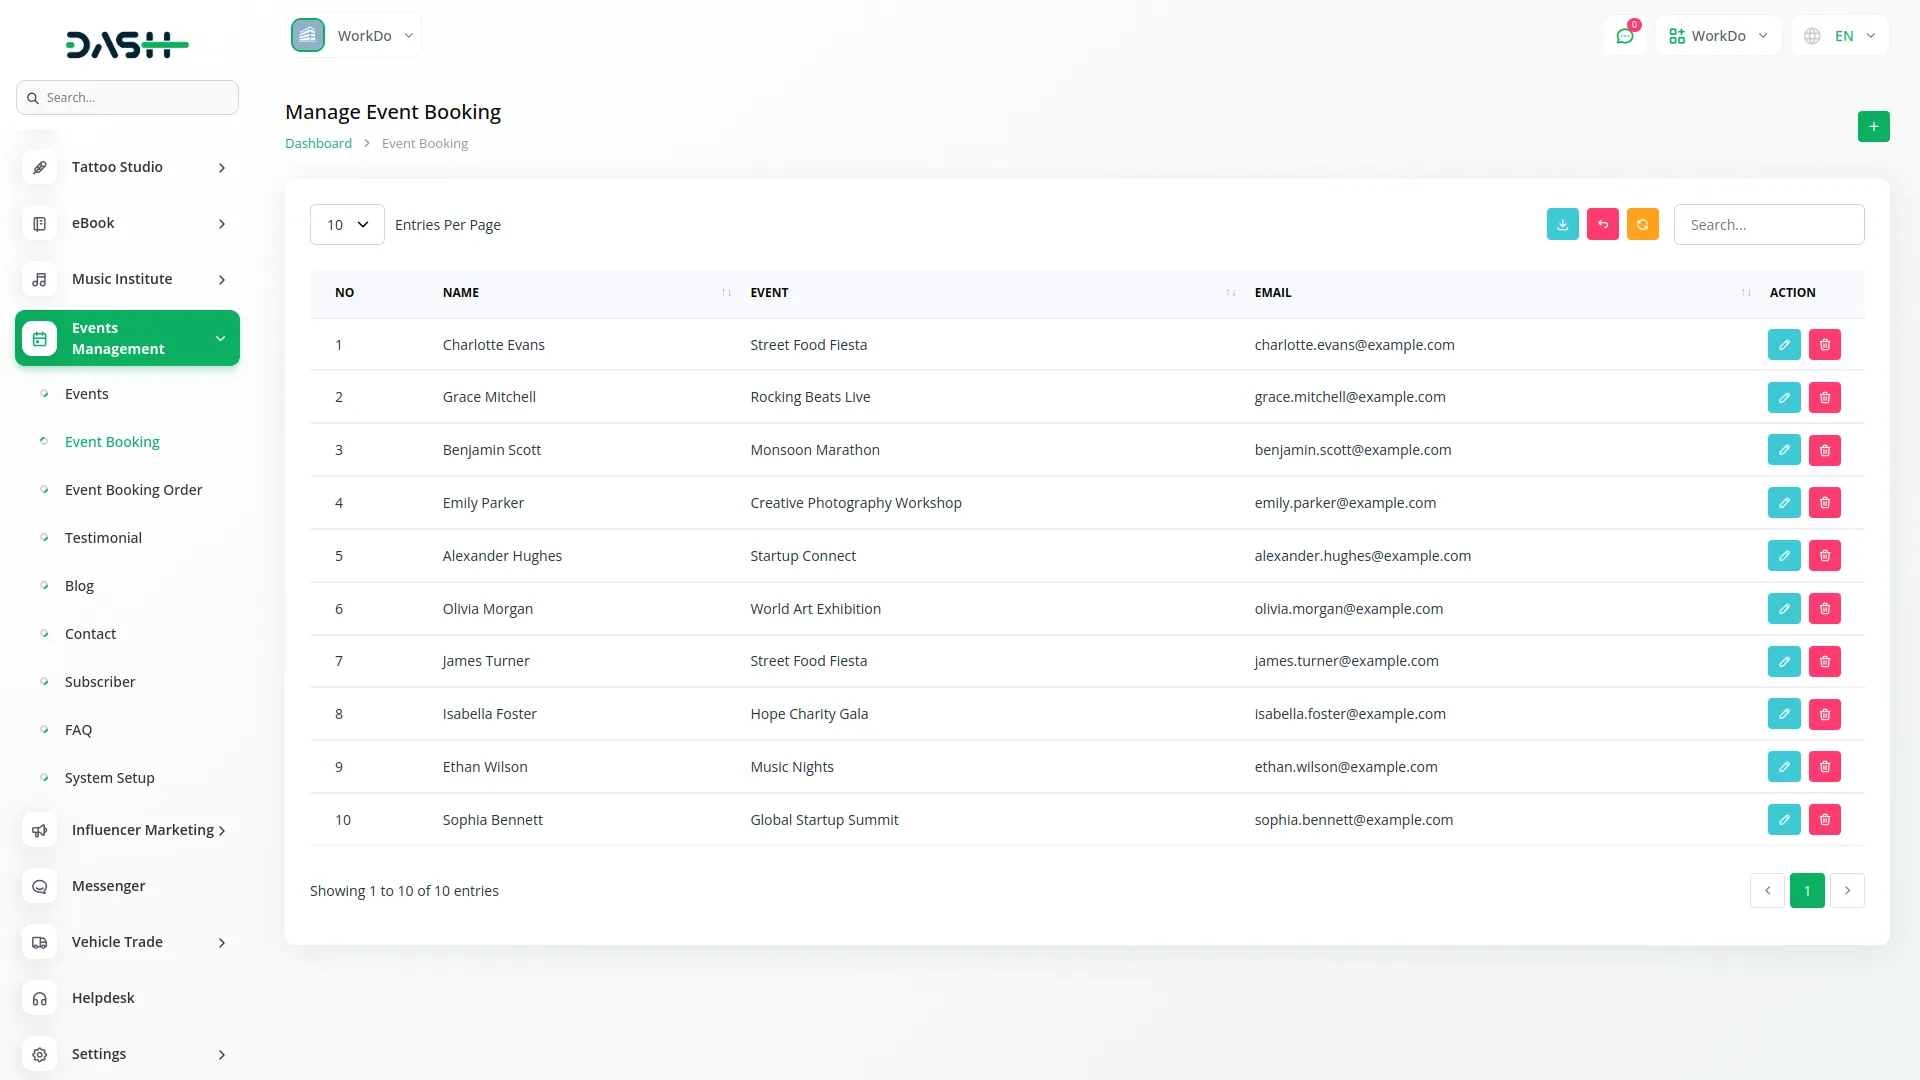
- The list page shows all bookings in a table with columns for Name, Event, and Email. You can use the Export, Reset, Reload buttons, and search input to manage bookings. Available actions are Edit to modify booking details and Delete to cancel bookings.
Event Checkout Page Features:
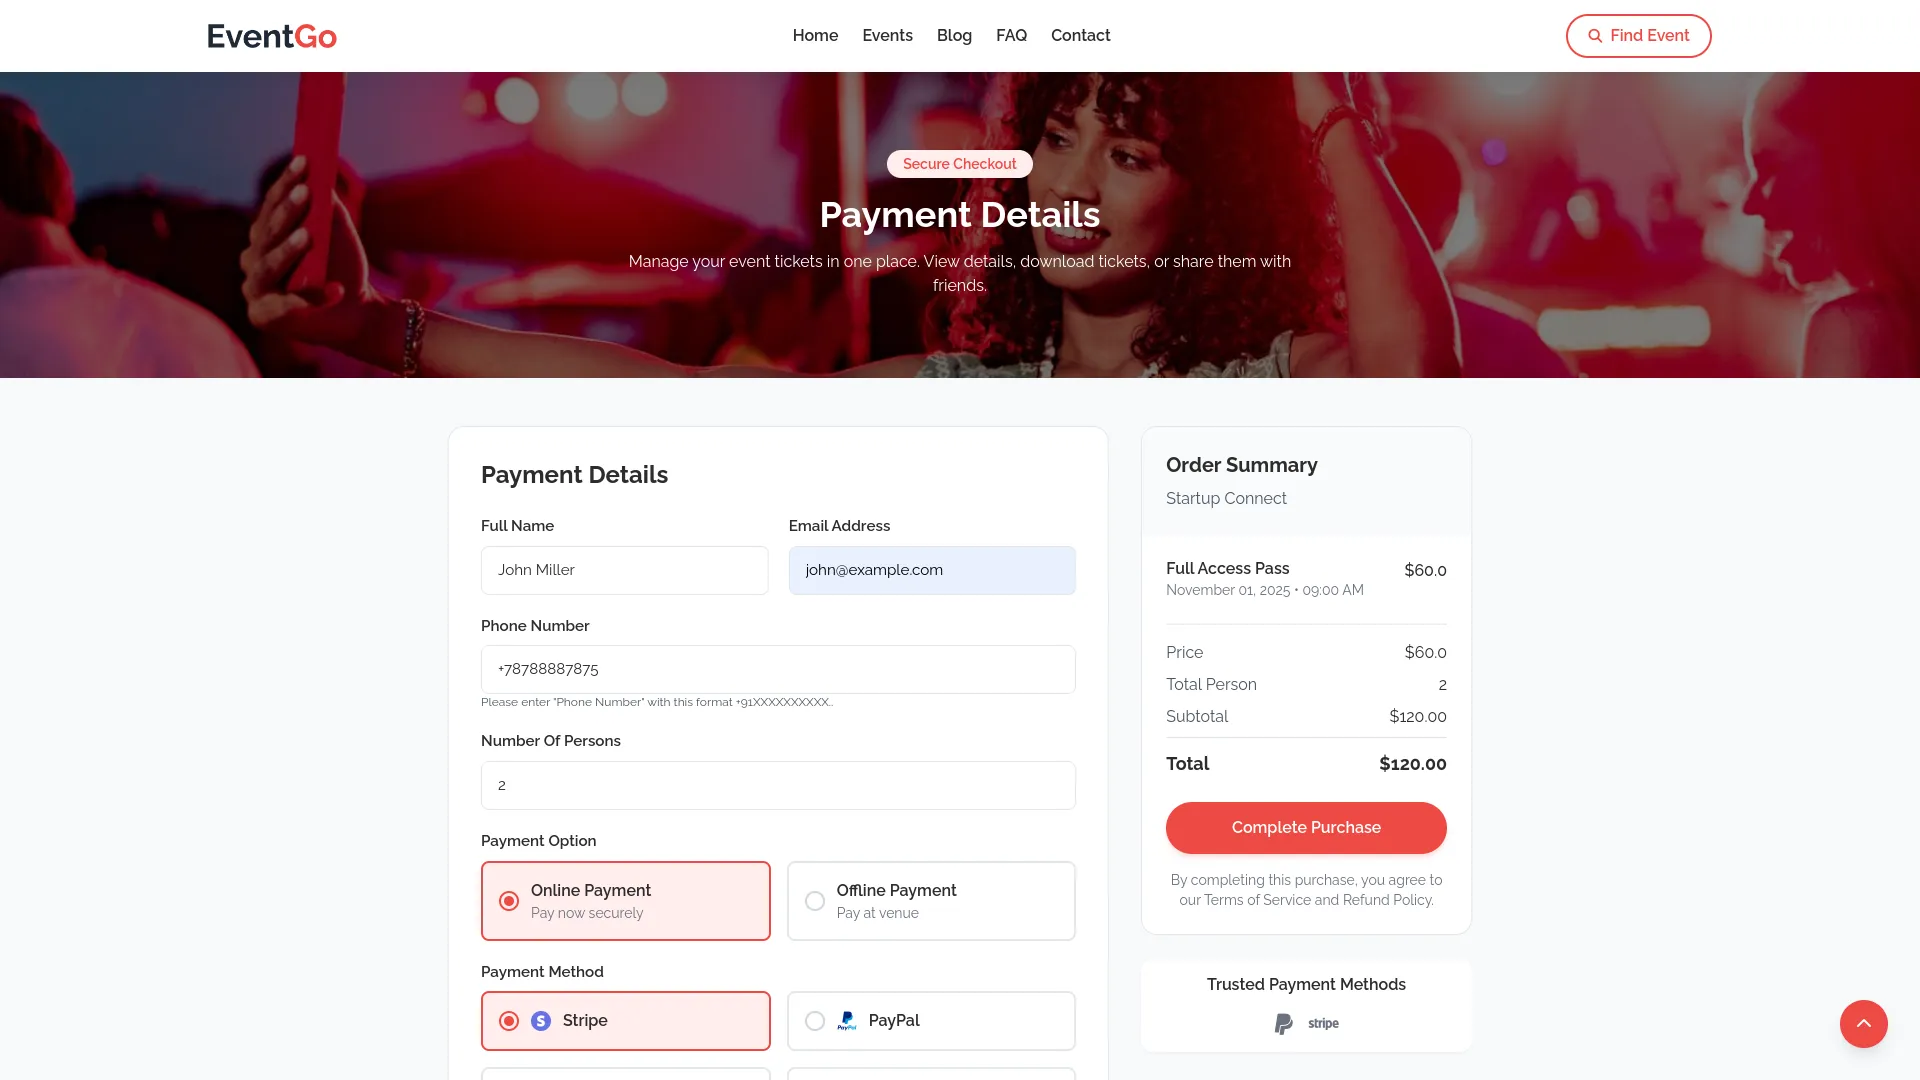
- The payment details page shows titles and descriptions from your Event Section payment fields. Visitors enter their full name, email address, phone number, number of persons, and select payment options between online and offline payment.
- For online payments, available payment gateways like Stripe, PayPal, Braintree, Cashfree, Coingate, Dpopay, and Fedapay are displayed based on your backend setup.
- The order summary shows event name, date, time, price, person count, and total price. Clicking “Complete Purchase” processes offline payments directly to the ticket page, while online payments go through the selected gateway before redirecting to tickets.
Event Booking Order
- The Event Booking Order section automatically generates order records when event bookings are created. This section provides a comprehensive view of all booking orders without the ability to create new orders manually.
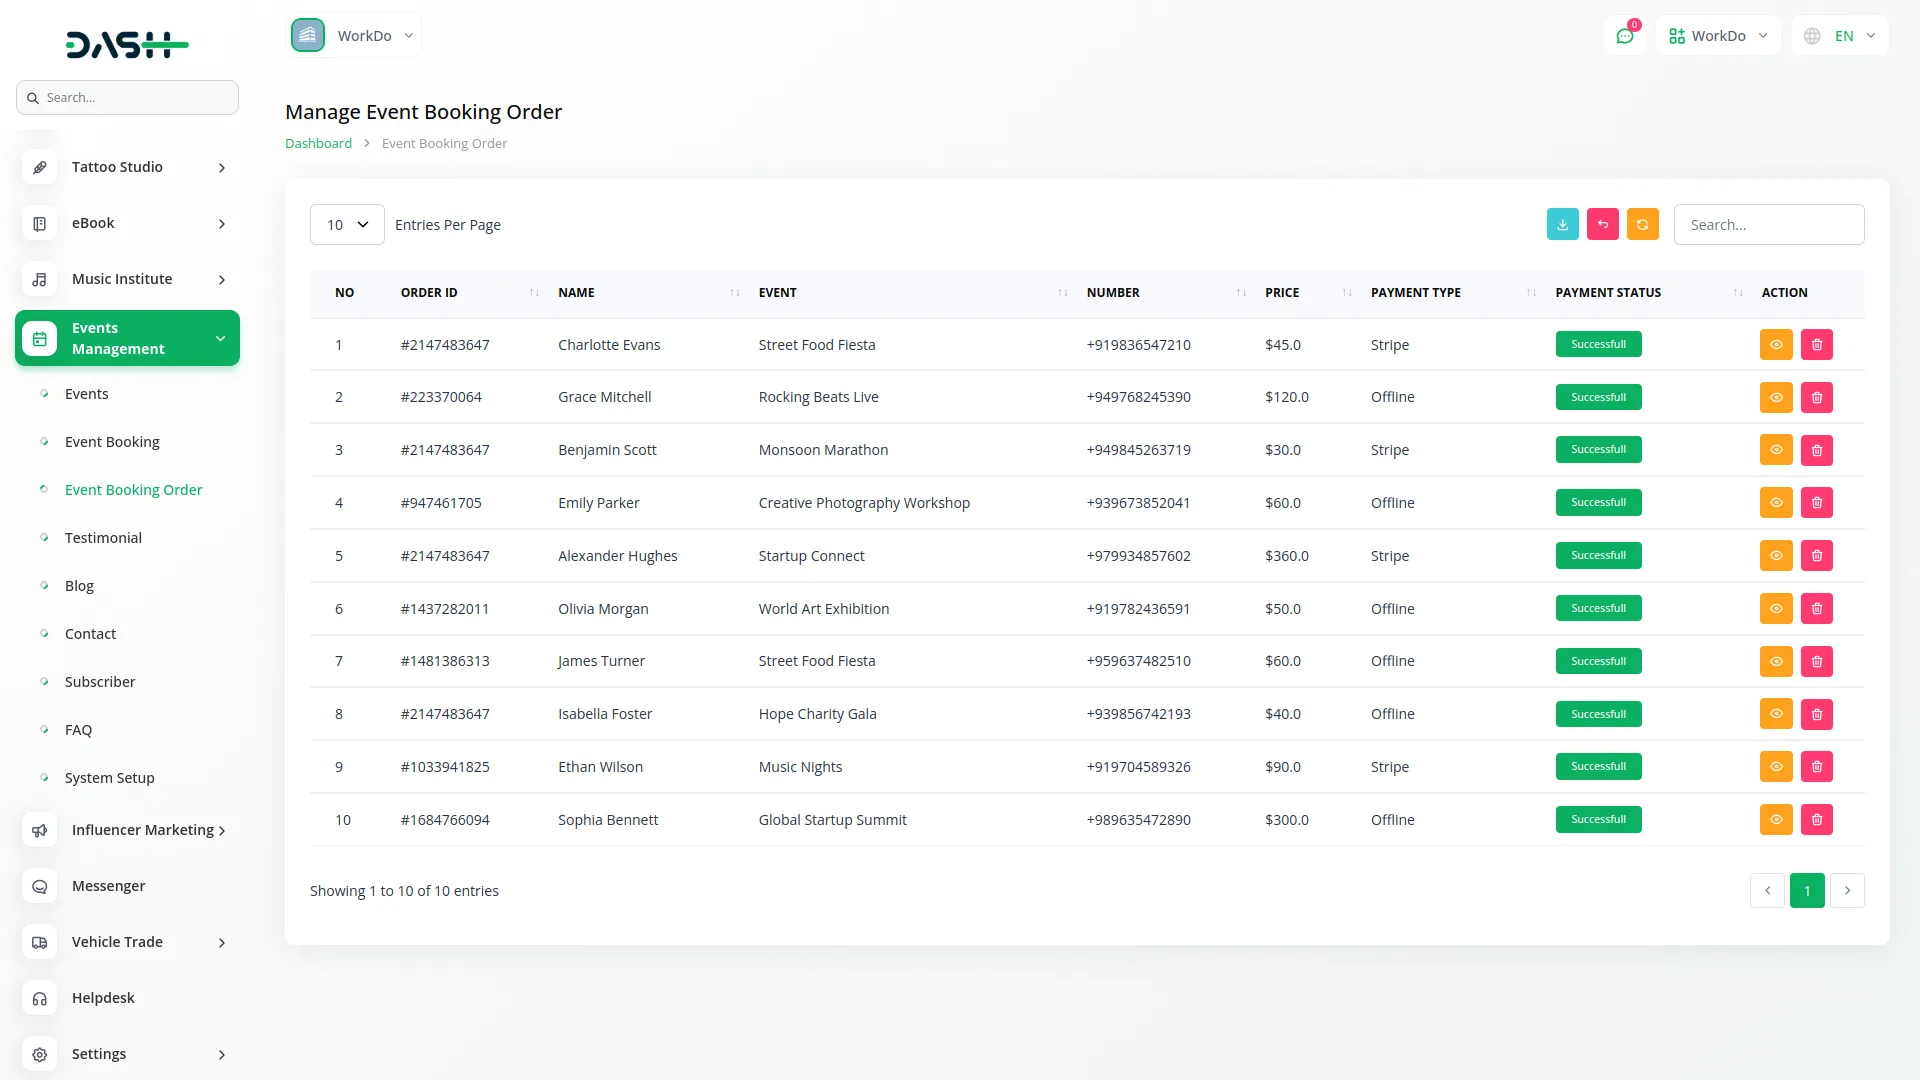
- The list page displays all orders in a table with columns for Number, Order ID, Name, Event, Number of attendees, Price, Payment Type, and Payment Status. You can use the Export, Reset, Reload buttons, and search input to filter and manage the order list.
- Available actions include View to see complete order details and Delete to remove order records. This section helps you track all booking transactions and monitor payment status for better financial management.
Event Ticket Page Features:
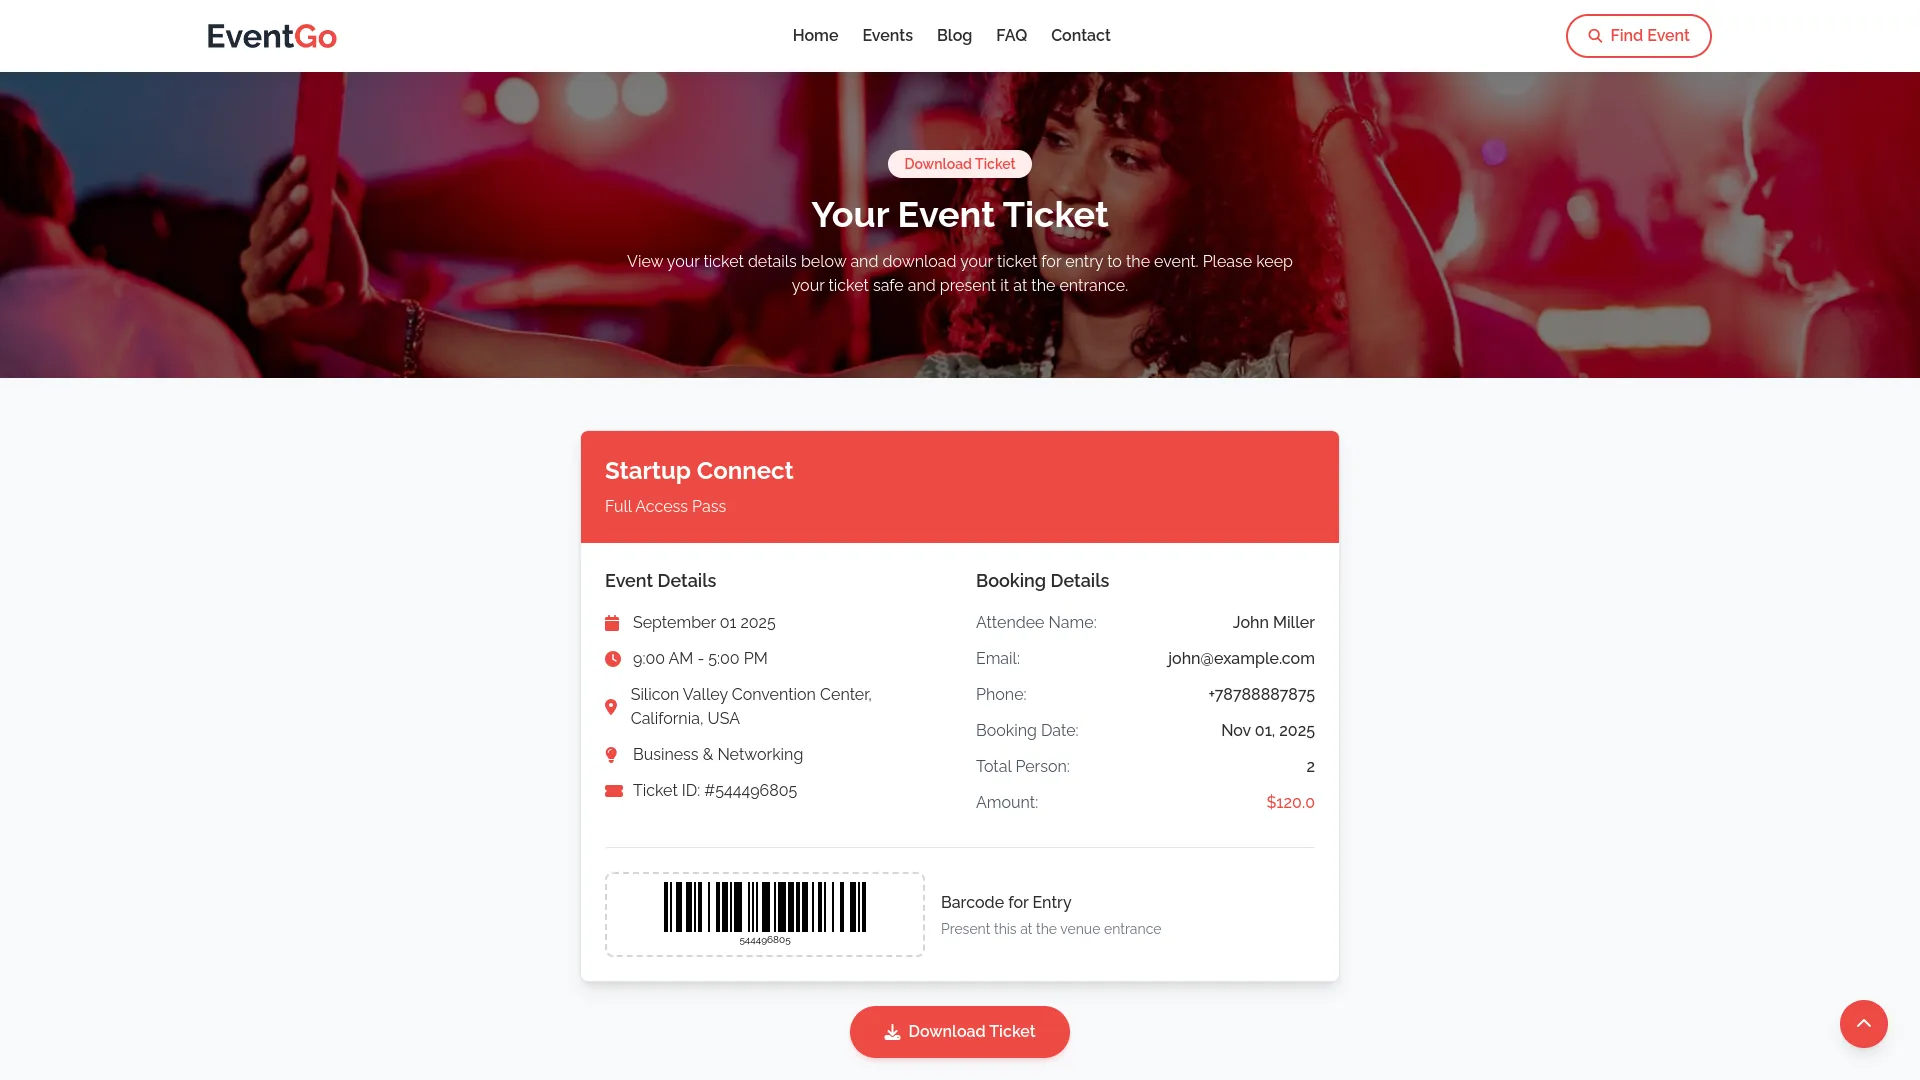
- The ticket page displays the title and description from your Event Section ticket fields. The ticket view shows event name, date, time, venue, category, ticket ID, attendee name, email, phone, booking date, total persons, amount, and entry barcode. A “Download Ticket” button allows PDF download.
Testimonial
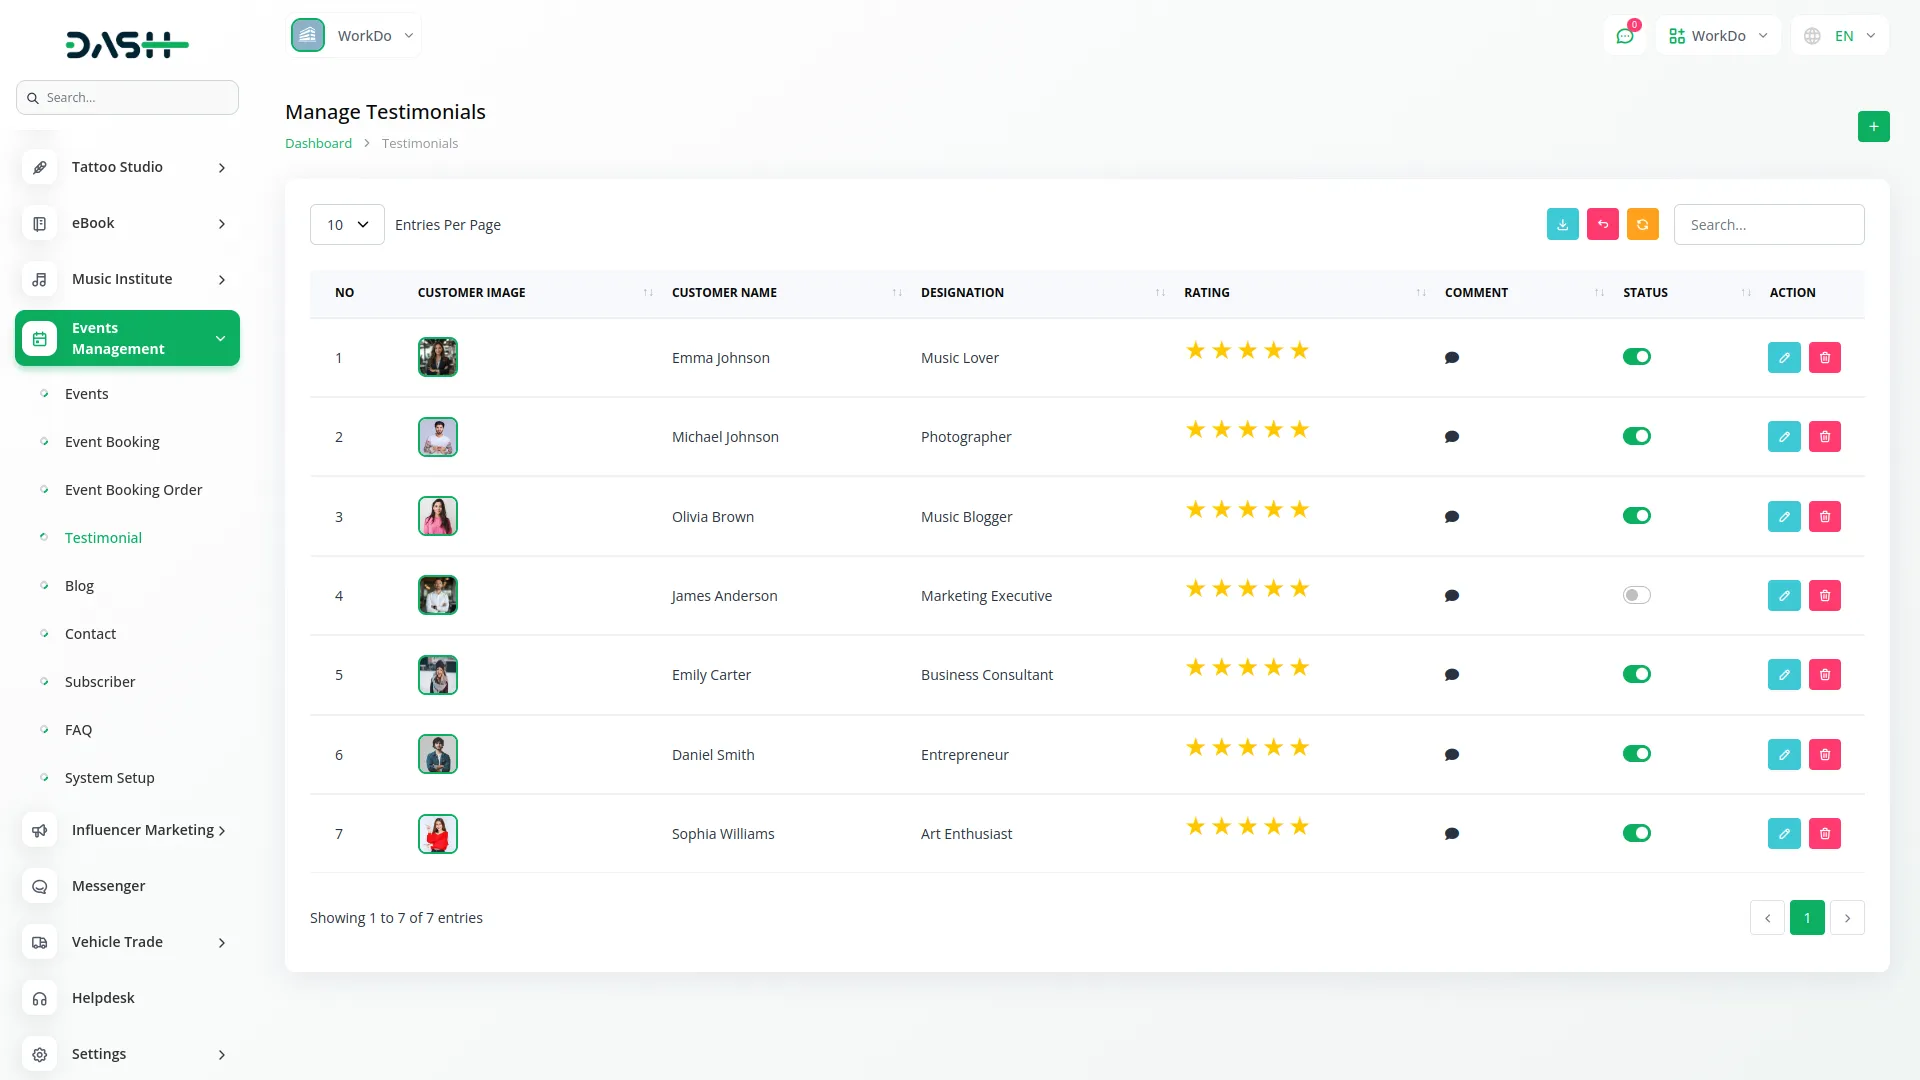
- To add a new testimonial, click the “Create” button at the top of the testimonials page. Enter the customer’s name and their designation or job title, write their comment or review about your service, and upload the customer’s image to personalize the testimonial.
- Use the star rating system to indicate the customer’s satisfaction level by checking the appropriate number of stars for the rating.
- The list page shows all testimonials in a table with columns for Customer Image, Customer Name, Designation, Rating, Comment, and Status. Use the status switch to turn testimonials on or off for display on your website.
- You can use the Export, Reset, Reload buttons, and search input to manage your testimonials list. Available actions are Edit to modify testimonial information and Delete to remove testimonials that are no longer relevant.
Blog
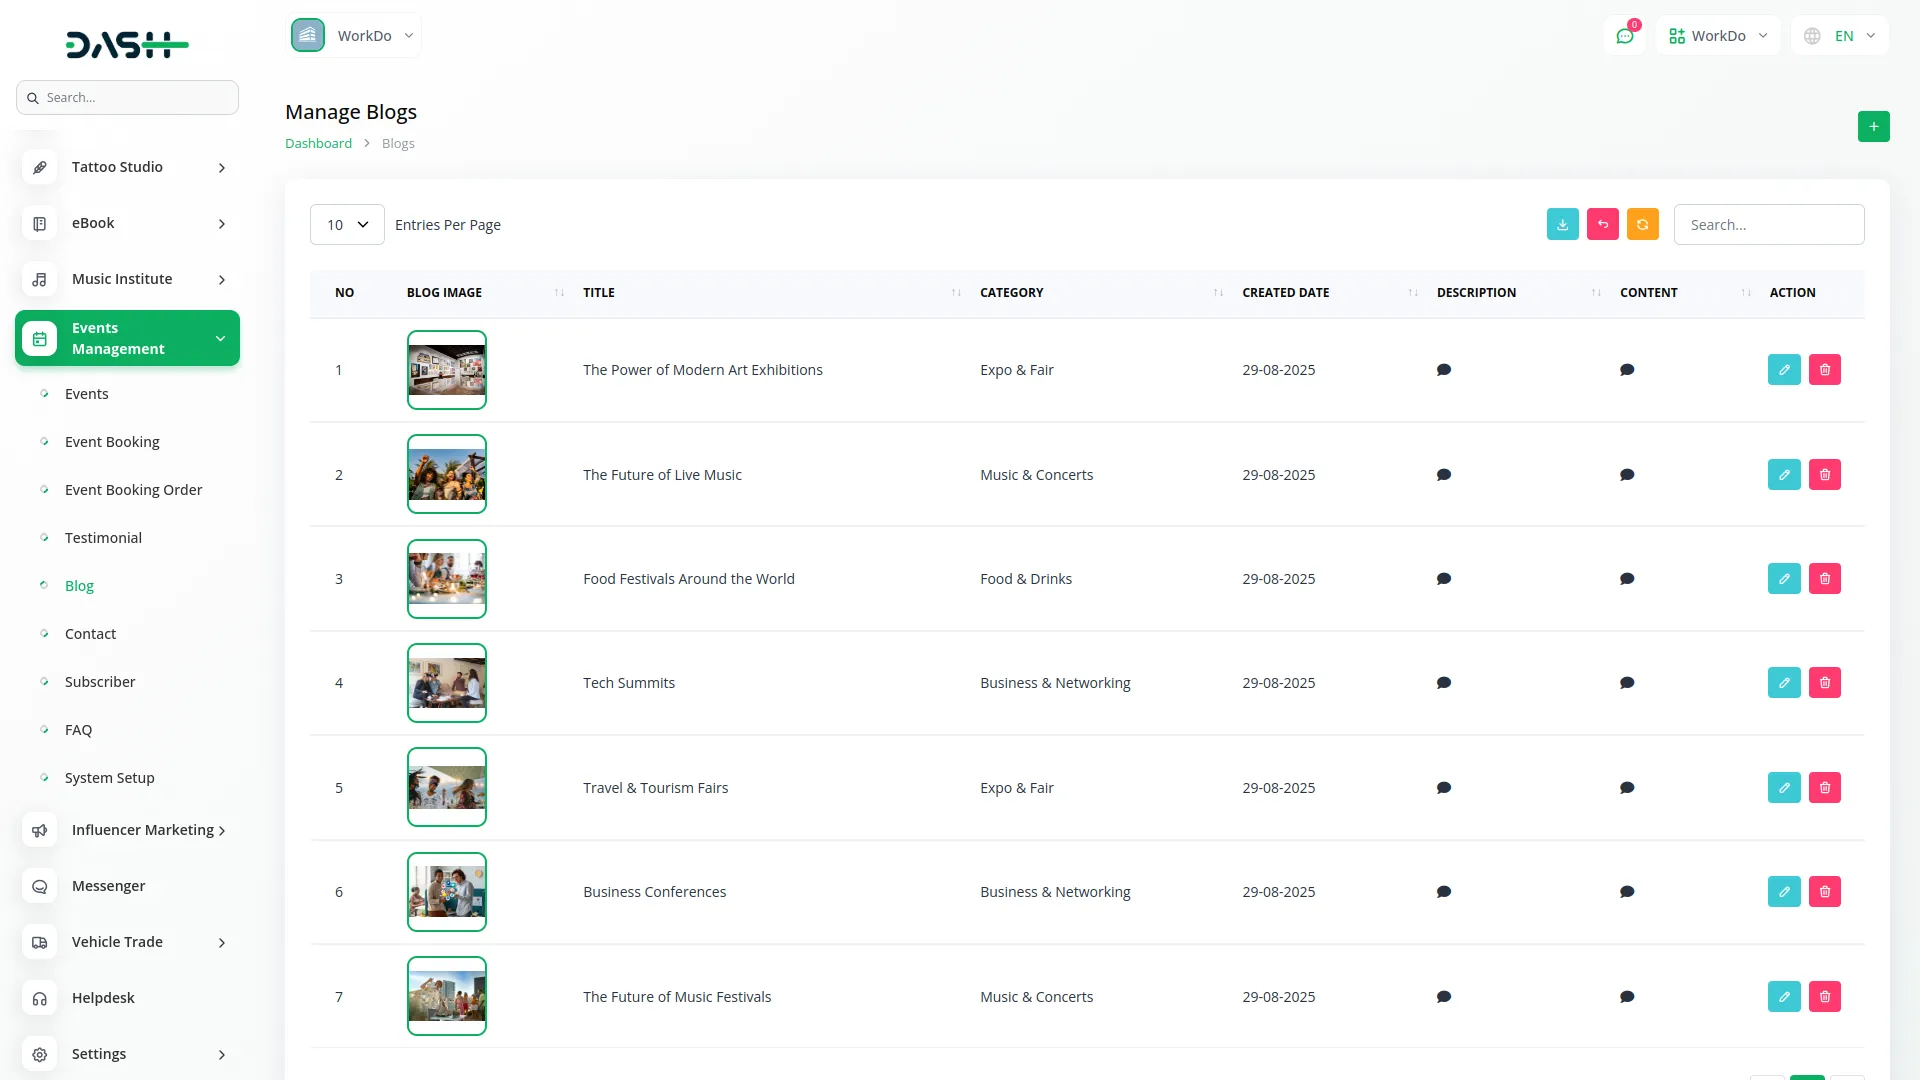
- To create a new blog post, click the “Create” button at the top of the blog page. Enter the blog title and select a category from the dropdown menu that contains categories you created in the setup section.
- Write a brief description that summarizes the blog post content and upload a blog image to make the post visually appealing. Create the main blog content with detailed information and add helpful tips related to the blog topic.
- The list page displays all blog posts in a table with columns for Blog Image, Title, Category, Created Date, Description, and Content. You can use the Export, Reset, Reload buttons, and search input to manage your blog posts.
- Available actions include Edit to modify blog post content and Delete to remove blog posts that are outdated or no longer relevant. Regular blog updates help engage your audience and improve your website’s search engine visibility.
Blog Page Features:
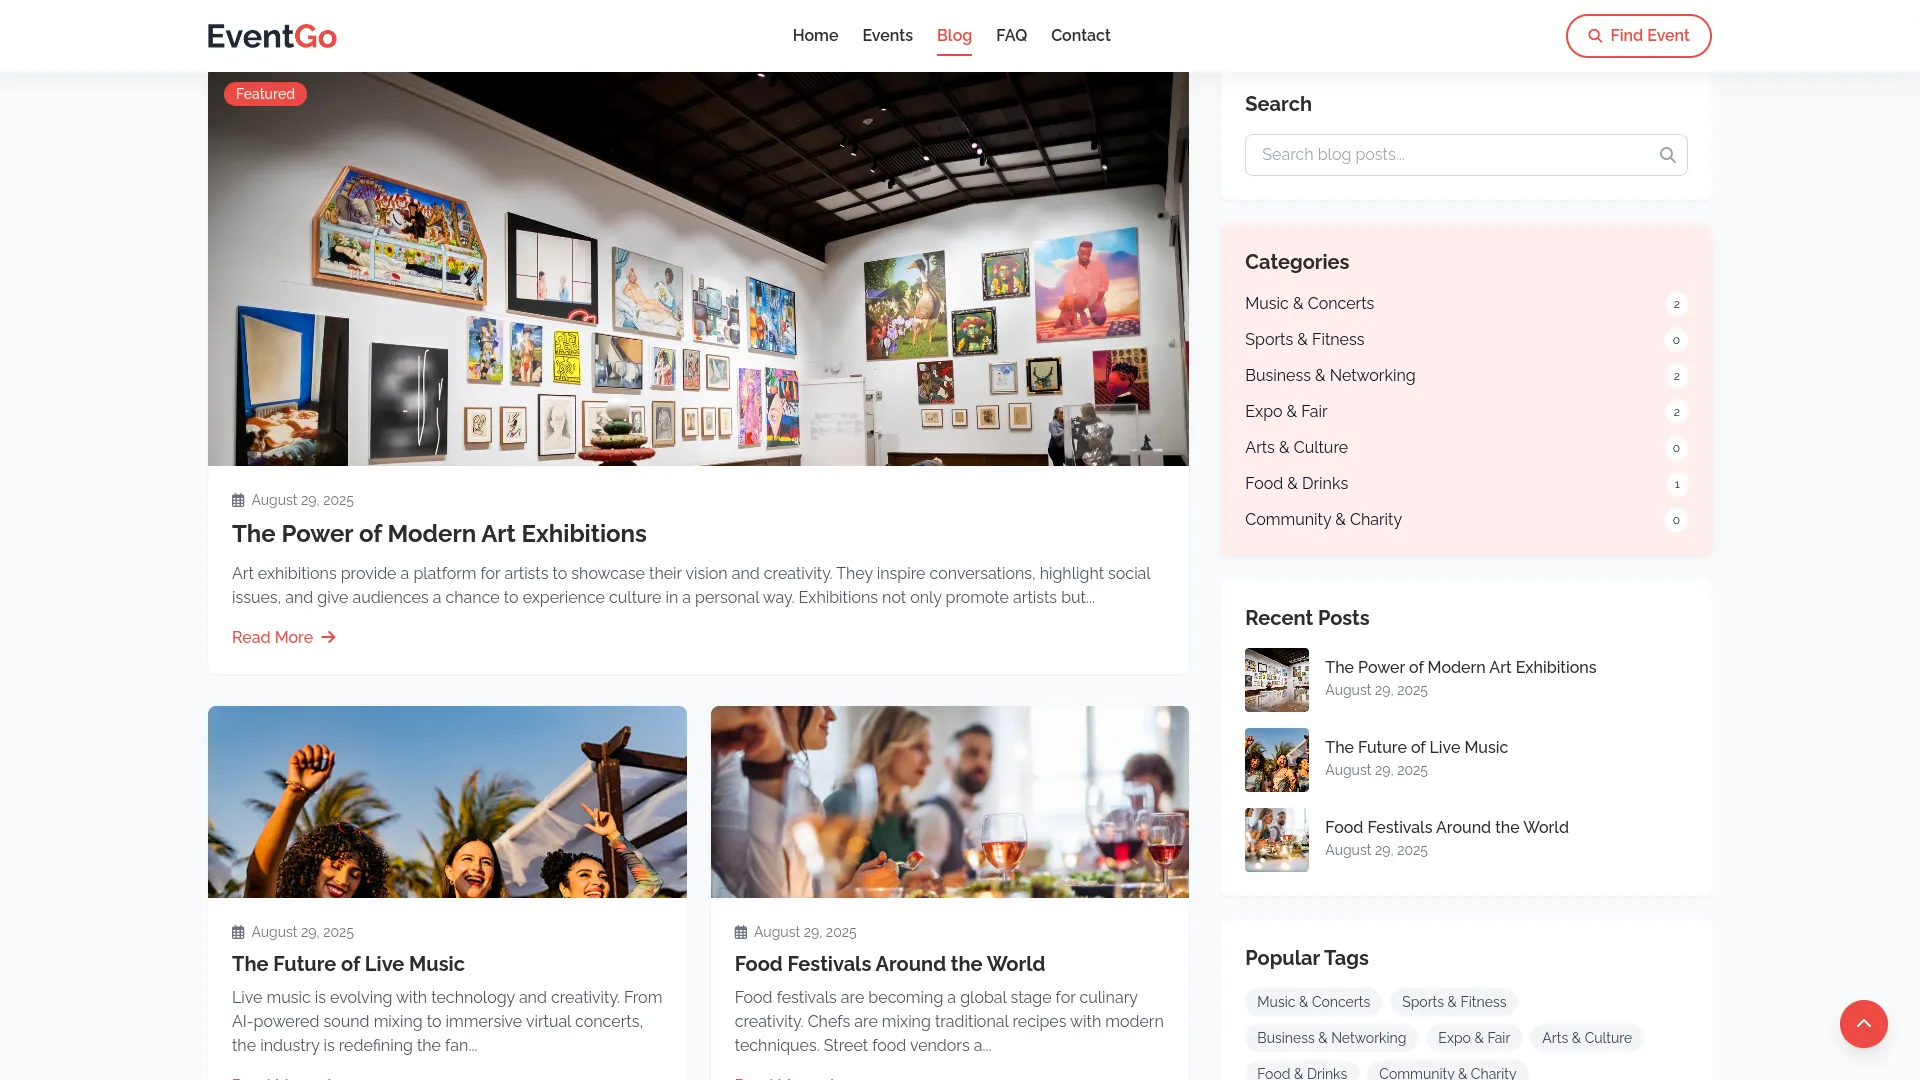
- The blog page shows the blog title and description from your Blog Section setup, with blog posts from your Blog menu. Features include blog search, category-wise blog counts, recent posts, and popular category tags. “Read More” buttons redirect to detailed article pages.
Article Page Features:
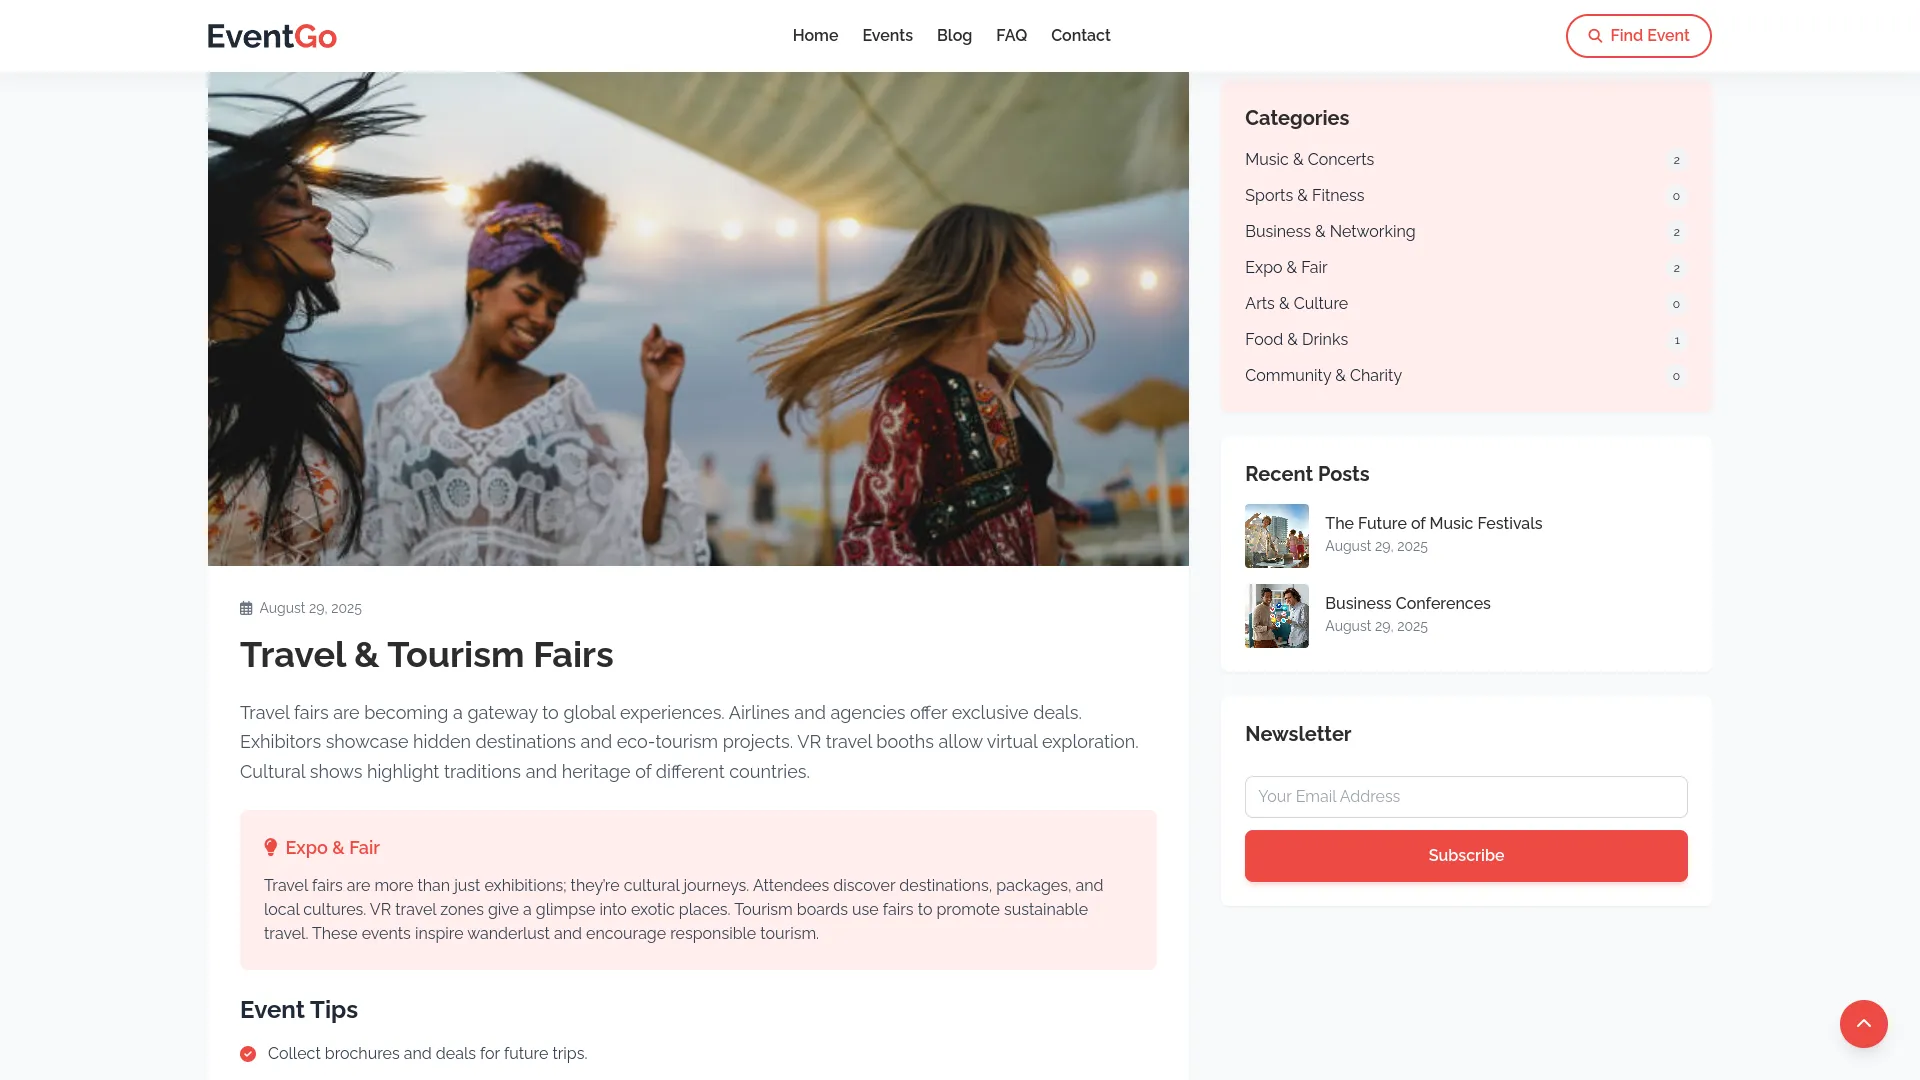
- Individual article pages display the article title and description from your Blog Section setup. Article content includes blog image, created date, author name, description, category, content, and tips. Additional features show category-wise blog counts and recent posts.
Contact
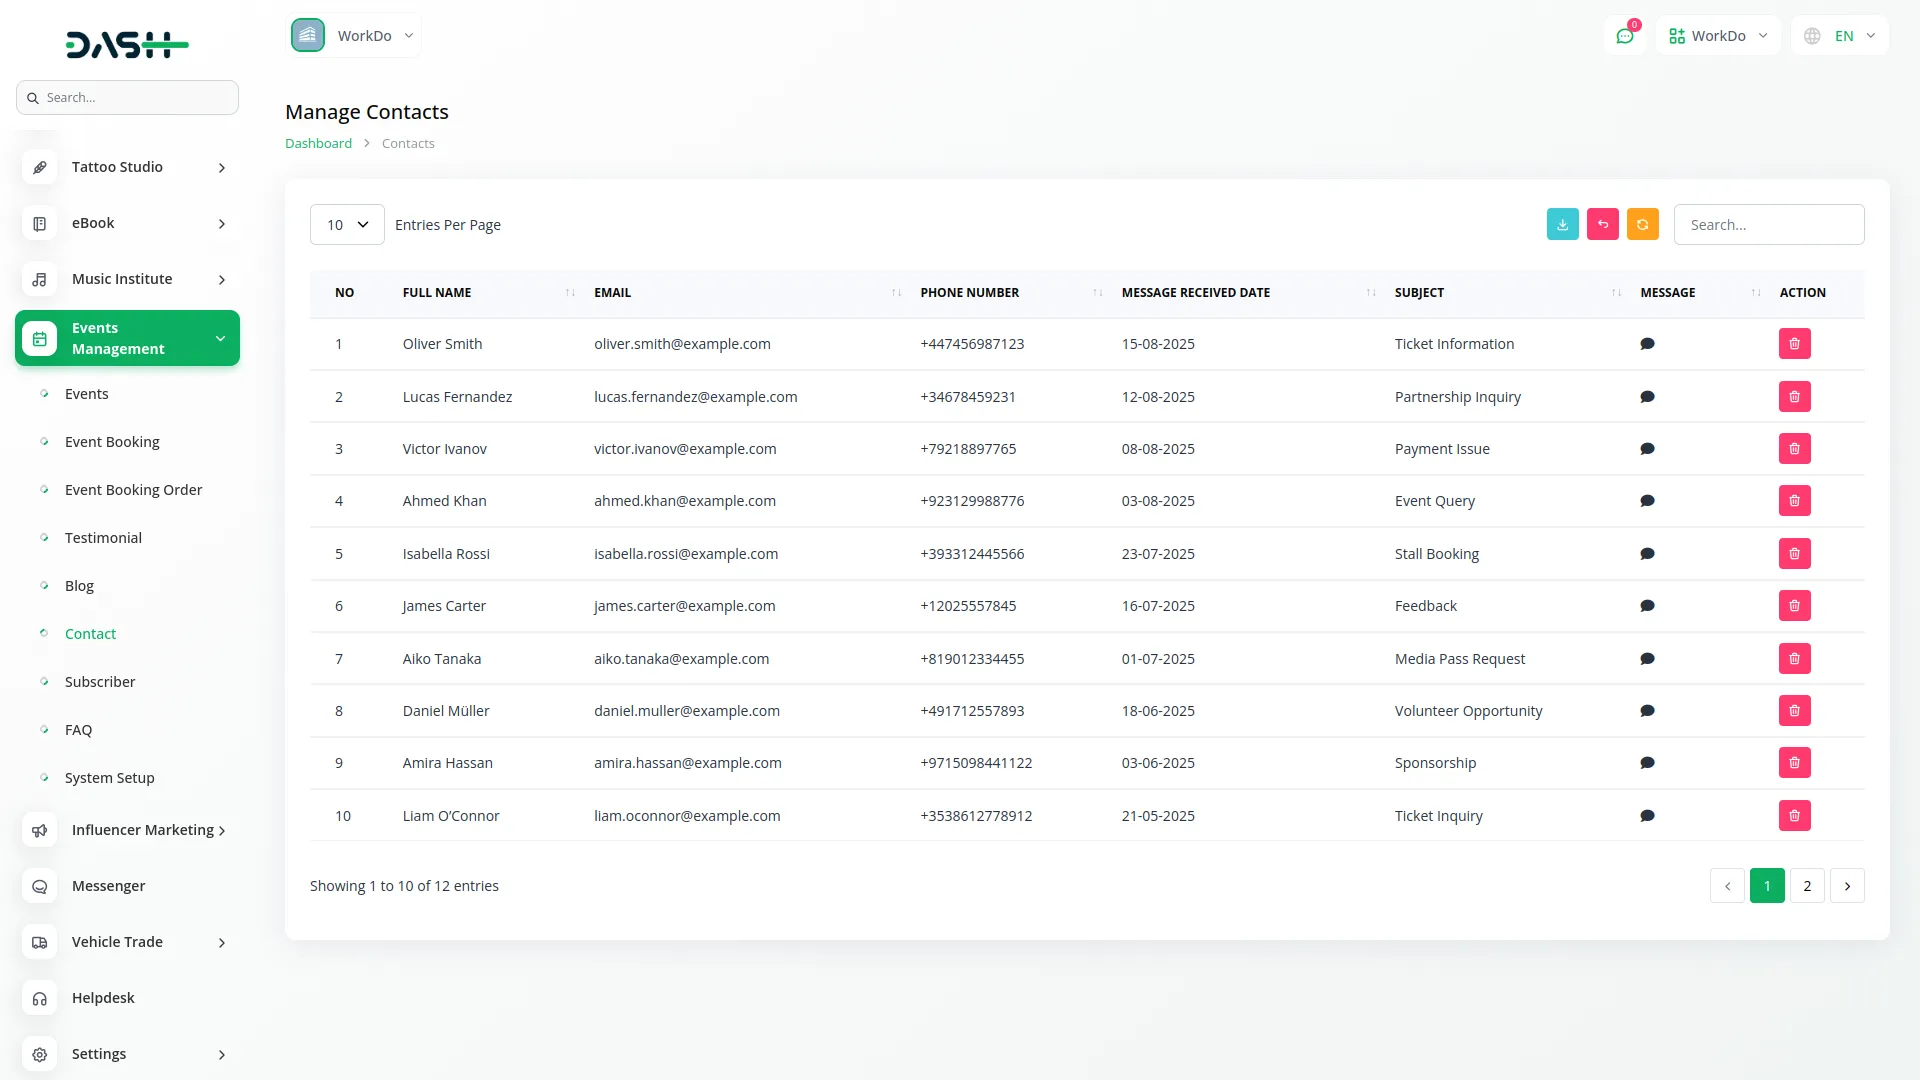
- The Contact section displays messages received from visitors who filled out the contact form on your frontend website. This section is view-only and does not allow creating new contact entries, as they come automatically from the frontend contact form.
- The list page shows all contact messages in a table with columns for Full Name, Email, Phone Number, Message Received Date, Subject, and Message.
- You can use the Export, Reset, Reload buttons, and search input to filter and find specific contact messages.
- The only available action is Delete to remove contact messages after you have responded to them or if they are no longer needed. This helps you manage customer inquiries and maintain organized communication records.
Subscriber
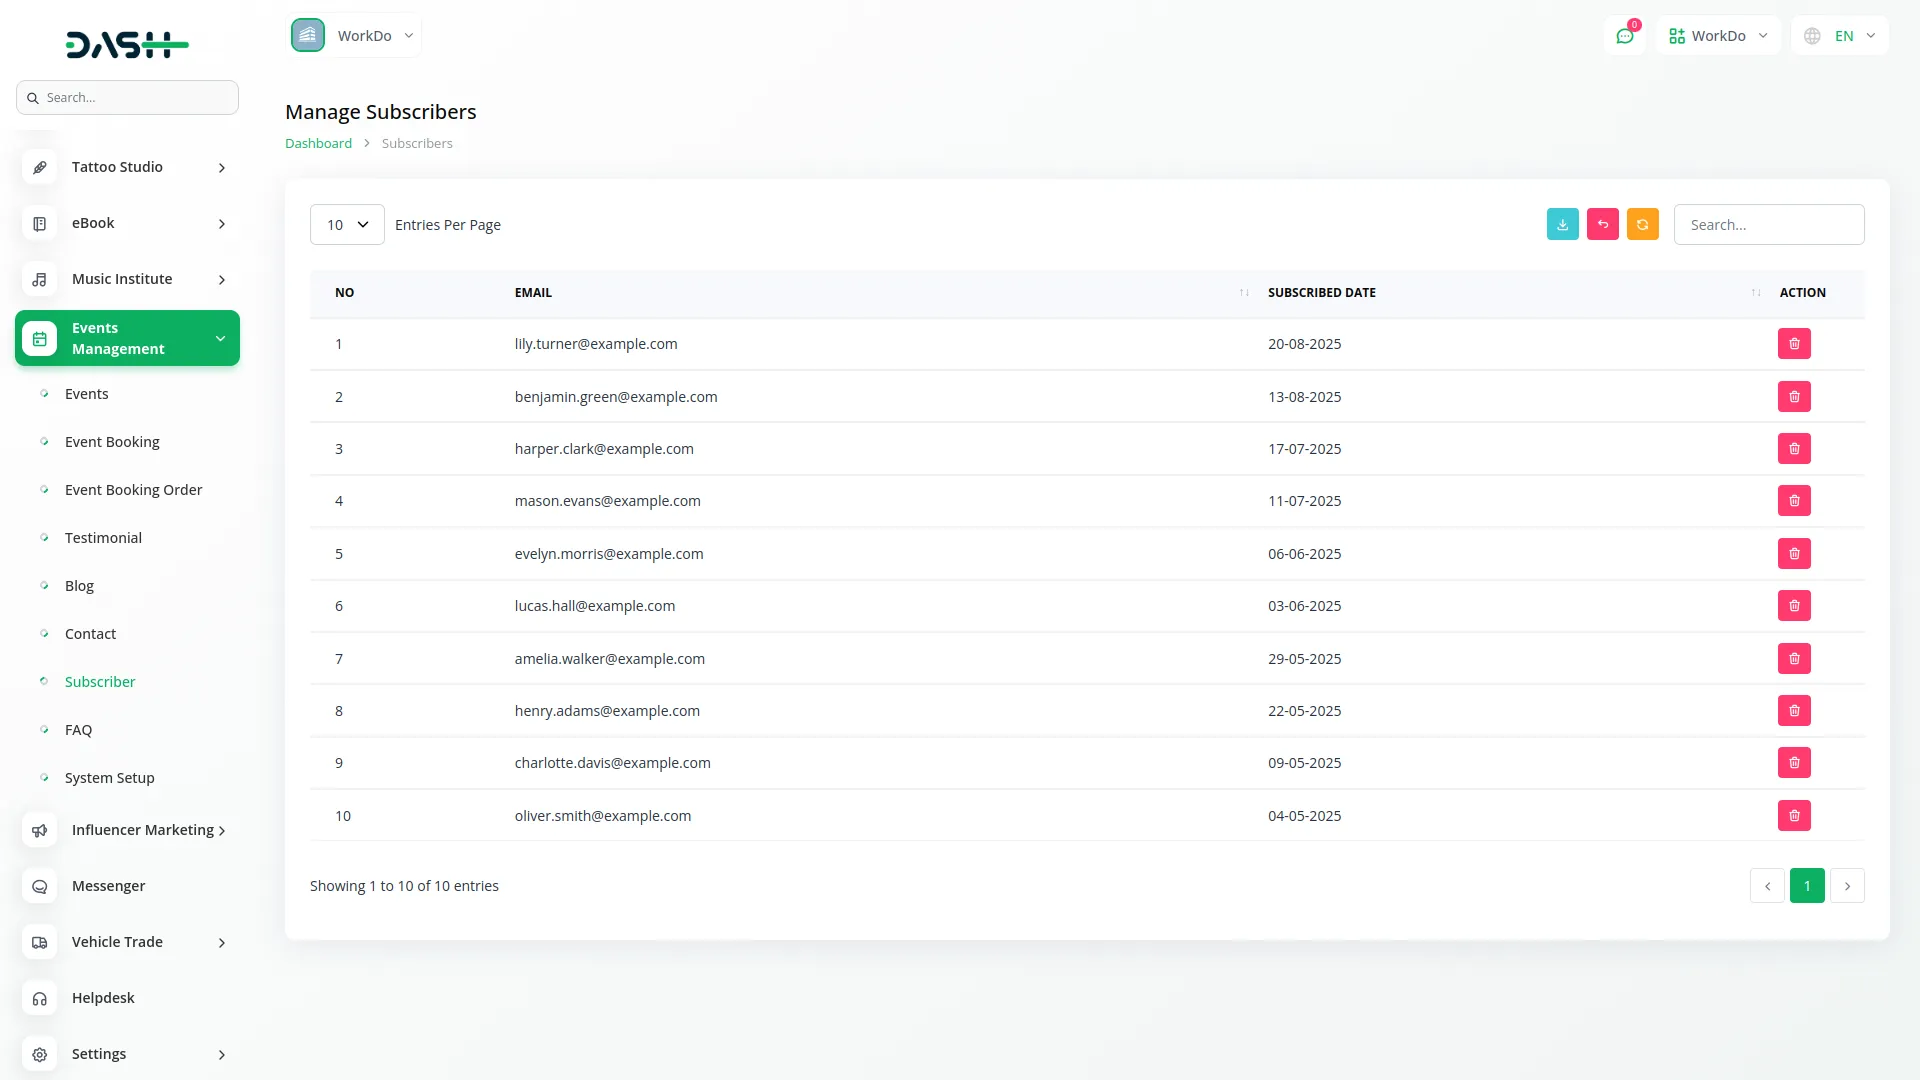
- The Subscriber section displays email addresses of visitors who subscribed to your newsletter through the frontend website. This section is view-only and does not allow manual addition of subscribers, as they are automatically added when visitors subscribe through the website.
- The list page shows all subscribers in a table with columns for Number, Email, and Subscribed Date. You can use the Export, Reset, Reload buttons, and search input to manage your subscriber list.
- The only available action is Delete to remove subscribers who have unsubscribed or email addresses that are no longer valid. This helps you maintain an accurate mailing list for your newsletter campaigns.
FAQ
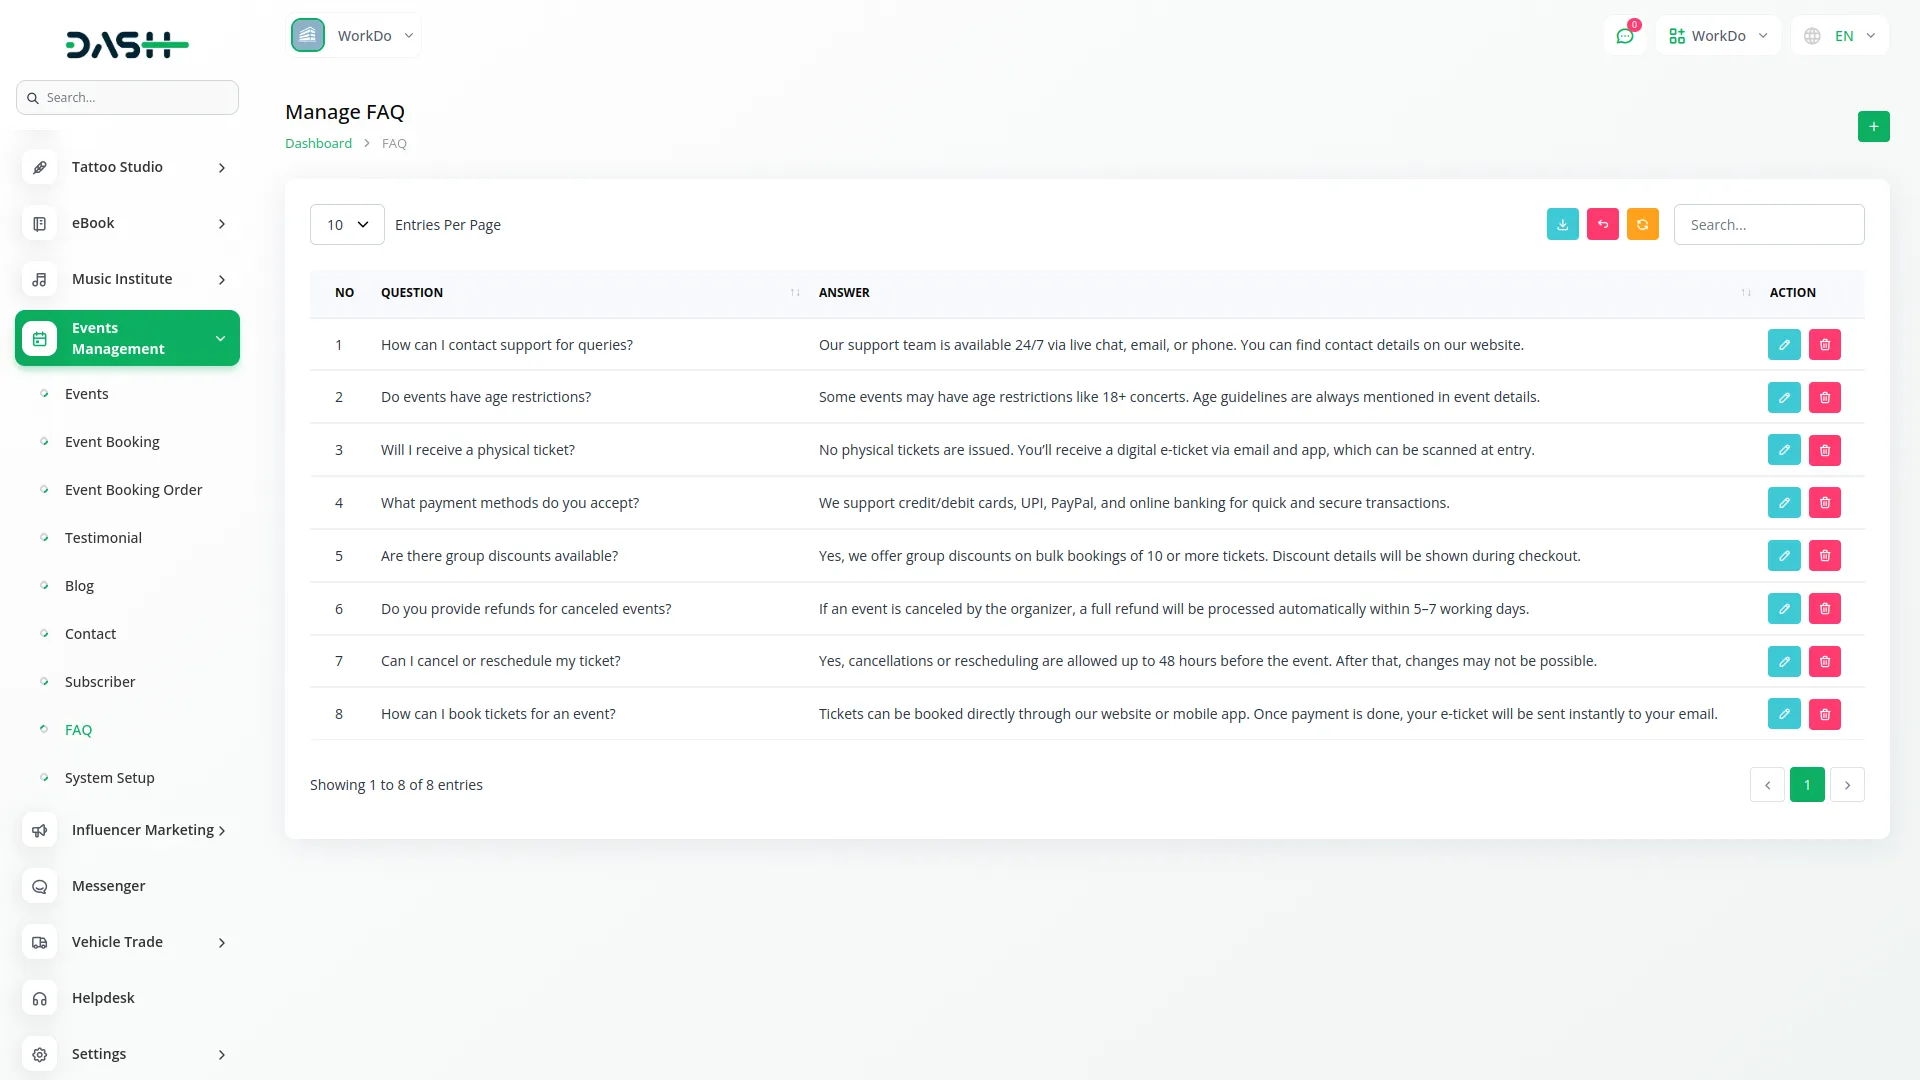
- To create a new frequently asked question, click the “Create” button at the top of the FAQ page. Enter the question that customers commonly ask about your services or events, and provide a clear, detailed answer that addresses the question completely.
- The list page displays all FAQs in a table with columns for Question and Answer. You can use the Export, Reset, Reload buttons, and search input to manage your FAQ list.
- Available actions include Edit to modify existing questions or update answers, and Delete to remove FAQs that are no longer relevant. Well-maintained FAQs help reduce customer support inquiries and improve user experience on your website.
Categories
Related articles
- AI Document Integration in Dash SaaS
- Performance Indicator Integration in Dash SaaS
- Parking Management Integration in Dash SaaS
- Blood Bank Integration in Dash SaaS
- Zoho Meeting Integration in Dash SaaS
- Moyasar Detailed Documentation
- Equipment Rental Detailed Documentation
- Gym Management Integration in Dash SaaS
- Car Dealership Integration in Dash SaaS
- Bulk SMS Detailed Documentation
- Team Workload Integration in Dash SaaS
- Ozow Payment Gateway in Dash SaaS
Reach Out to Us
Have questions or need assistance? We're here to help! Reach out to our team for support, inquiries, or feedback. Your needs are important to us, and we’re ready to assist you!


Need more help?
If you’re still uncertain or need professional guidance, don’t hesitate to contact us. You can contact us via email or submit a ticket with a description of your issue. Our team of experts is always available to help you with any questions. Rest assured that we’ll respond to your inquiry promptly.
Love what you see?
Do you like the quality of our products, themes, and applications, or perhaps the design of our website caught your eye? You can have similarly outstanding designs for your website or apps. Contact us, and we’ll bring your ideas to life.
