Timesheet Integration in Dash SaaS
The Timesheet Add-On allows you to track and record work hours for staff members across different activities and projects.
Introduction
The Timesheet Add-On allows you to track and record work hours for staff members across different activities and projects. This Add-On provides three distinct methods for creating timesheets depending on which other Add-Ons are active in your system: Clock In/Clock Out tracking when the HRM Add-On is enabled, Project-based time tracking when the Taskly Add-On is active, and Manual time entry for flexible recording. The system automatically calculates hours and minutes while providing comprehensive reporting and management capabilities for time tracking across your organization.
How to Install the Add-On?
To Set Up the Timesheet Add-On, you can follow this link: Setup Add-On
How to Use The Timesheet Add-On?
Clock In/Out via HRM Add-On
- To access the Timesheet Add-On, navigate to the sidebar and go to the Timesheet section. The system provides three different ways to create timesheets based on your Add-On configuration and tracking needs.
- The Clock In/Clock Out Wise option appears only when the HRM Add-On is active in your system. To create a timesheet using this method, click the “Create” button and select Clock In/Clock Out Wise from the available options.
- Choose a user from the dropdown, which displays all users from User Management with the Staff role. Select the Date for which you want to create the timesheet.
- The Hours and Minutes fields will automatically populate if the selected user has attendance recorded on the chosen date, pulling the time data directly from their clock-in and clock-out records. Add any specific details in the Notes section to provide context for the timesheet entry.

Log Time for Project Tasks
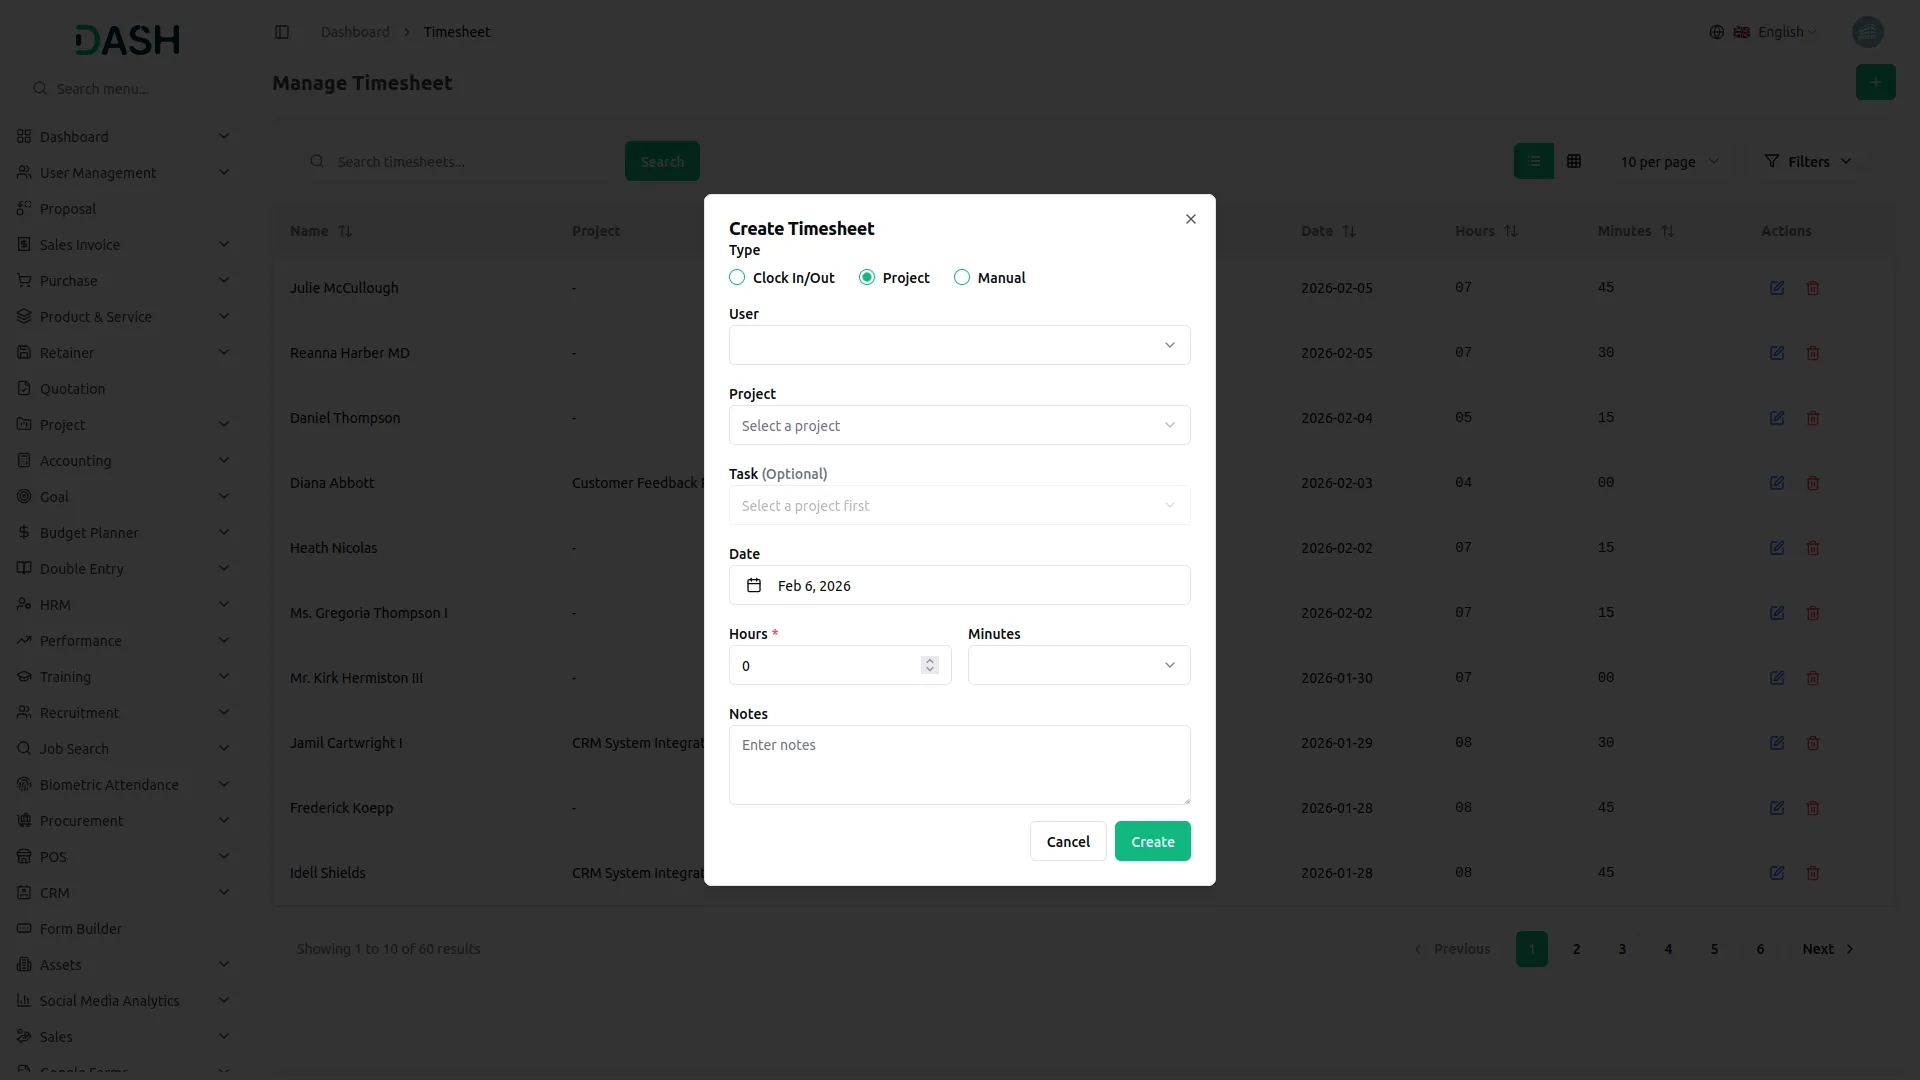
- The Project Wise option becomes available only when the Taskly Add-On is active in your system. To create a project-based timesheet, click the “Create” button and select Project Wise. Choose a user from the Staff role dropdown it comes from the user section, then select a Project from all available projects in the Projects section.
- The Task dropdown will populate with tasks related to your selected project. Choose the Date for the timesheet entry. Set the Hours by selecting a value from 0 to 12, and choose Minutes from the available options: 1 to 60. Enter any relevant information in the Notes section to document the work performed.

Manual Time Entry
- The Manual option is always available regardless of other Add-On dependencies. To create a manual timesheet, click “Create” and select Manual entry. Select a user from the Staff role dropdown and choose the Date for the timesheet.
- Set the Hours by selecting from 0 to 12, and select Minutes from 1 to 60. Use the Notes section to record details about the work or activities performed during this time period.

Role-Based Timesheet Access & Controls
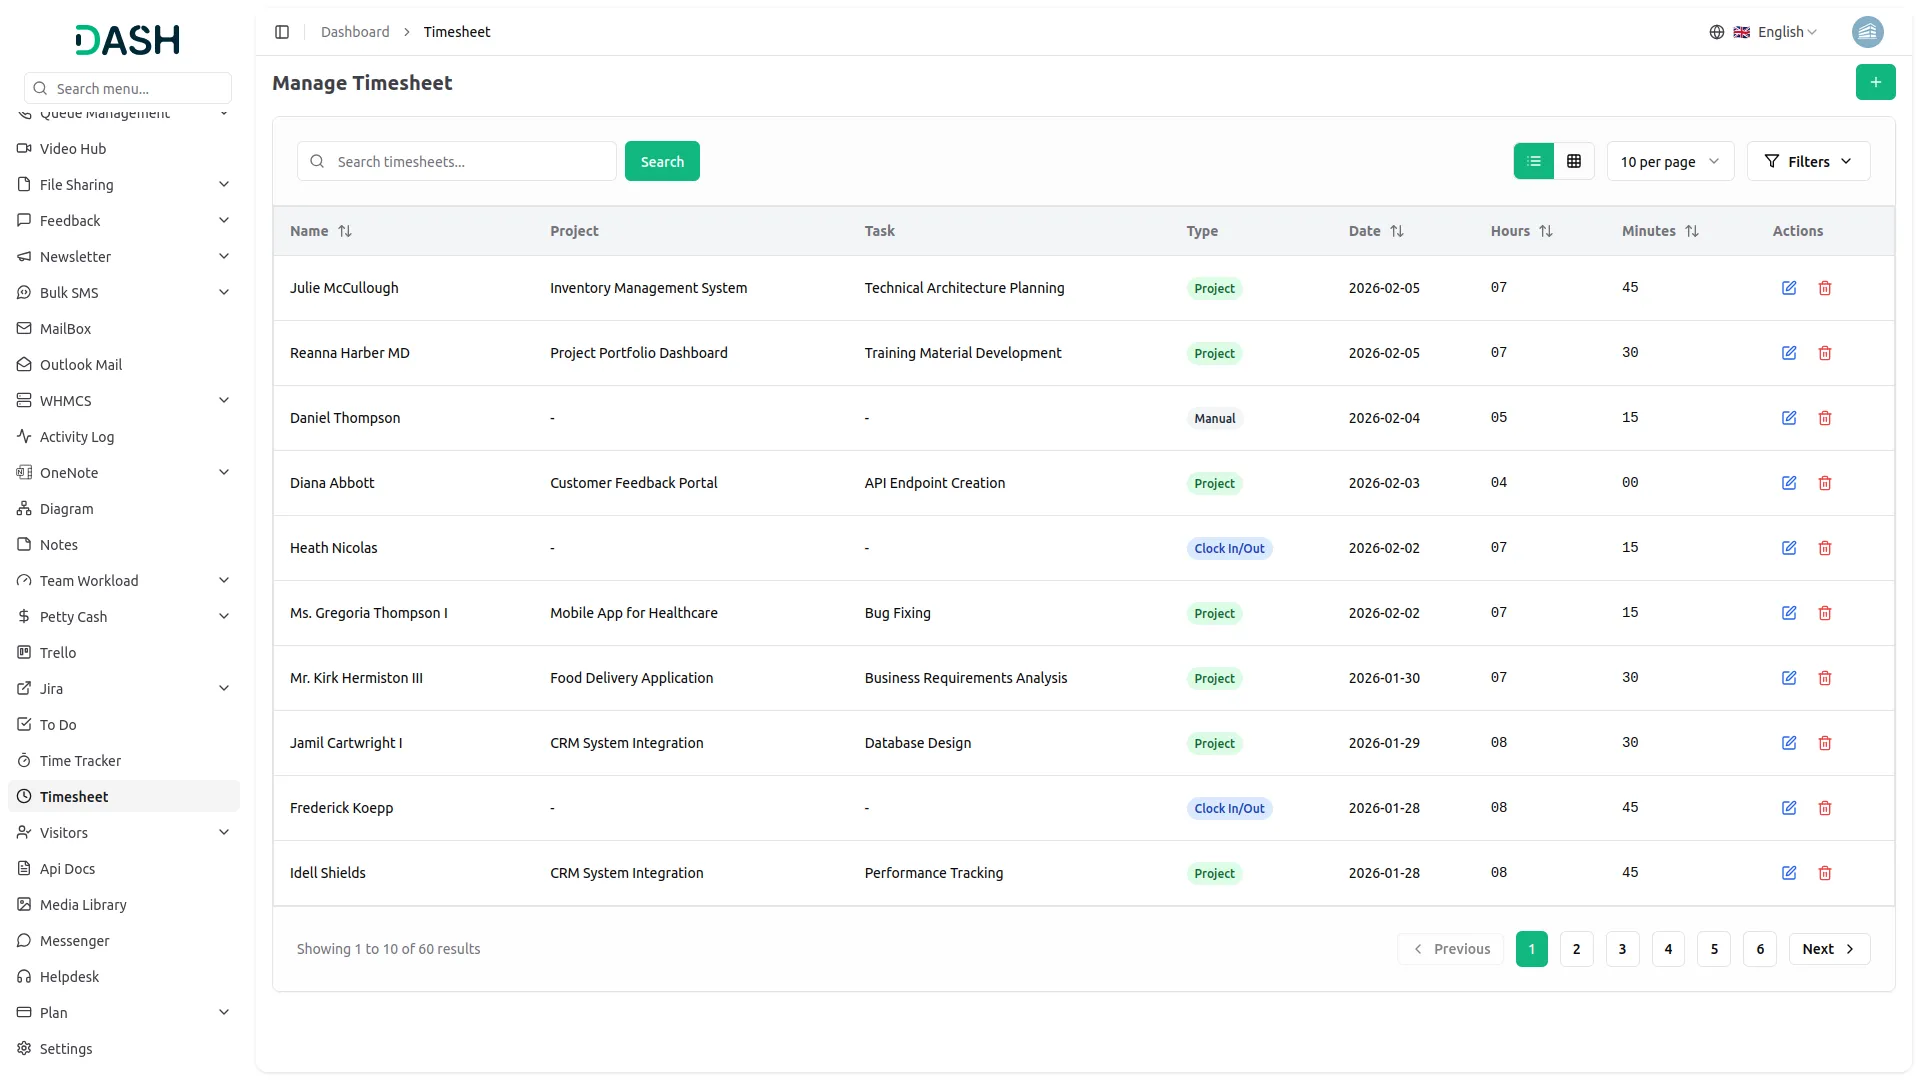
- The list page displays all timesheet entries in a table format with columns for Name, Project, Task, Type, Date, Hours, and Minutes.
- Use the Search button to find specific timesheet entries or the Filter buttons to filter data. The Actions column provides Edit and Delete options for managing existing timesheet entries.
- For staff members using the system, the user dropdown is not displayed because they can only create and manage their own timesheet entries.
- When staff members access ProjectWise timesheets, they will only see projects that have been specifically assigned to them, ensuring they can only log time against their authorized work assignments.

Categories
Related articles
- SWOT Analysis Model Integration in Dash SaaS
- Franchise Management Integration in Dash SaaS
- SinchSMS Integration in Detailed Documentation
- Courier Management Integration in Dash SaaS
- Peach Payment Integration in Dash SaaS
- Sales Agent Integration in Dash SaaS
- Google Forms Integration in Dash SaaS
- Mailchimp Integration in Dash SaaS
- Influence Marketing Detailed Documentation
- Bakery Store Detailed Documentation
- Movie Show Booking System Integration in Dash SaaS
- Google Authentication Integration in BookingGo SaaS
Reach Out to Us
Have questions or need assistance? We're here to help! Reach out to our team for support, inquiries, or feedback. Your needs are important to us, and we’re ready to assist you!


Need more help?
If you’re still uncertain or need professional guidance, don’t hesitate to contact us. You can contact us via email or submit a ticket with a description of your issue. Our team of experts is always available to help you with any questions. Rest assured that we’ll respond to your inquiry promptly.
Love what you see?
Do you like the quality of our products, themes, and applications, or perhaps the design of our website caught your eye? You can have similarly outstanding designs for your website or apps. Contact us, and we’ll bring your ideas to life.
