Procurement Integration in Dash SaaS
The Procurement Add-On helps organizations manage the entire Procurement process from creating RFxs (Request for Information, Quotation, Proposal) to handling Applications, Scheduling Interviews, and Onboarding Vendors.
Introduction
The Procurement Add-On helps organizations manage the entire Procurement process from creating RFxs (Request for Information, Quotation, Proposal) to handling Applications, Scheduling Interviews, and Onboarding Vendors. It allows users to publish RFxs, track Applications, Schedule Interviews, and Convert successful Applicants into Vendors efficiently. The system connects multiple sections such as Dashboard, Manage RFx, Manage RFx Application, Manage RFx Applicant, Manage Archive RFx Application, Manage Vendor On-Boarding, and Manage Vendor to provide a complete Procurement workflow.
How To Install the Procurement Add-On?
To Set Up the Procurement Add-On, you can follow this link: Setup Add-On
How to Use the Procurement Add-On?
Dashboard
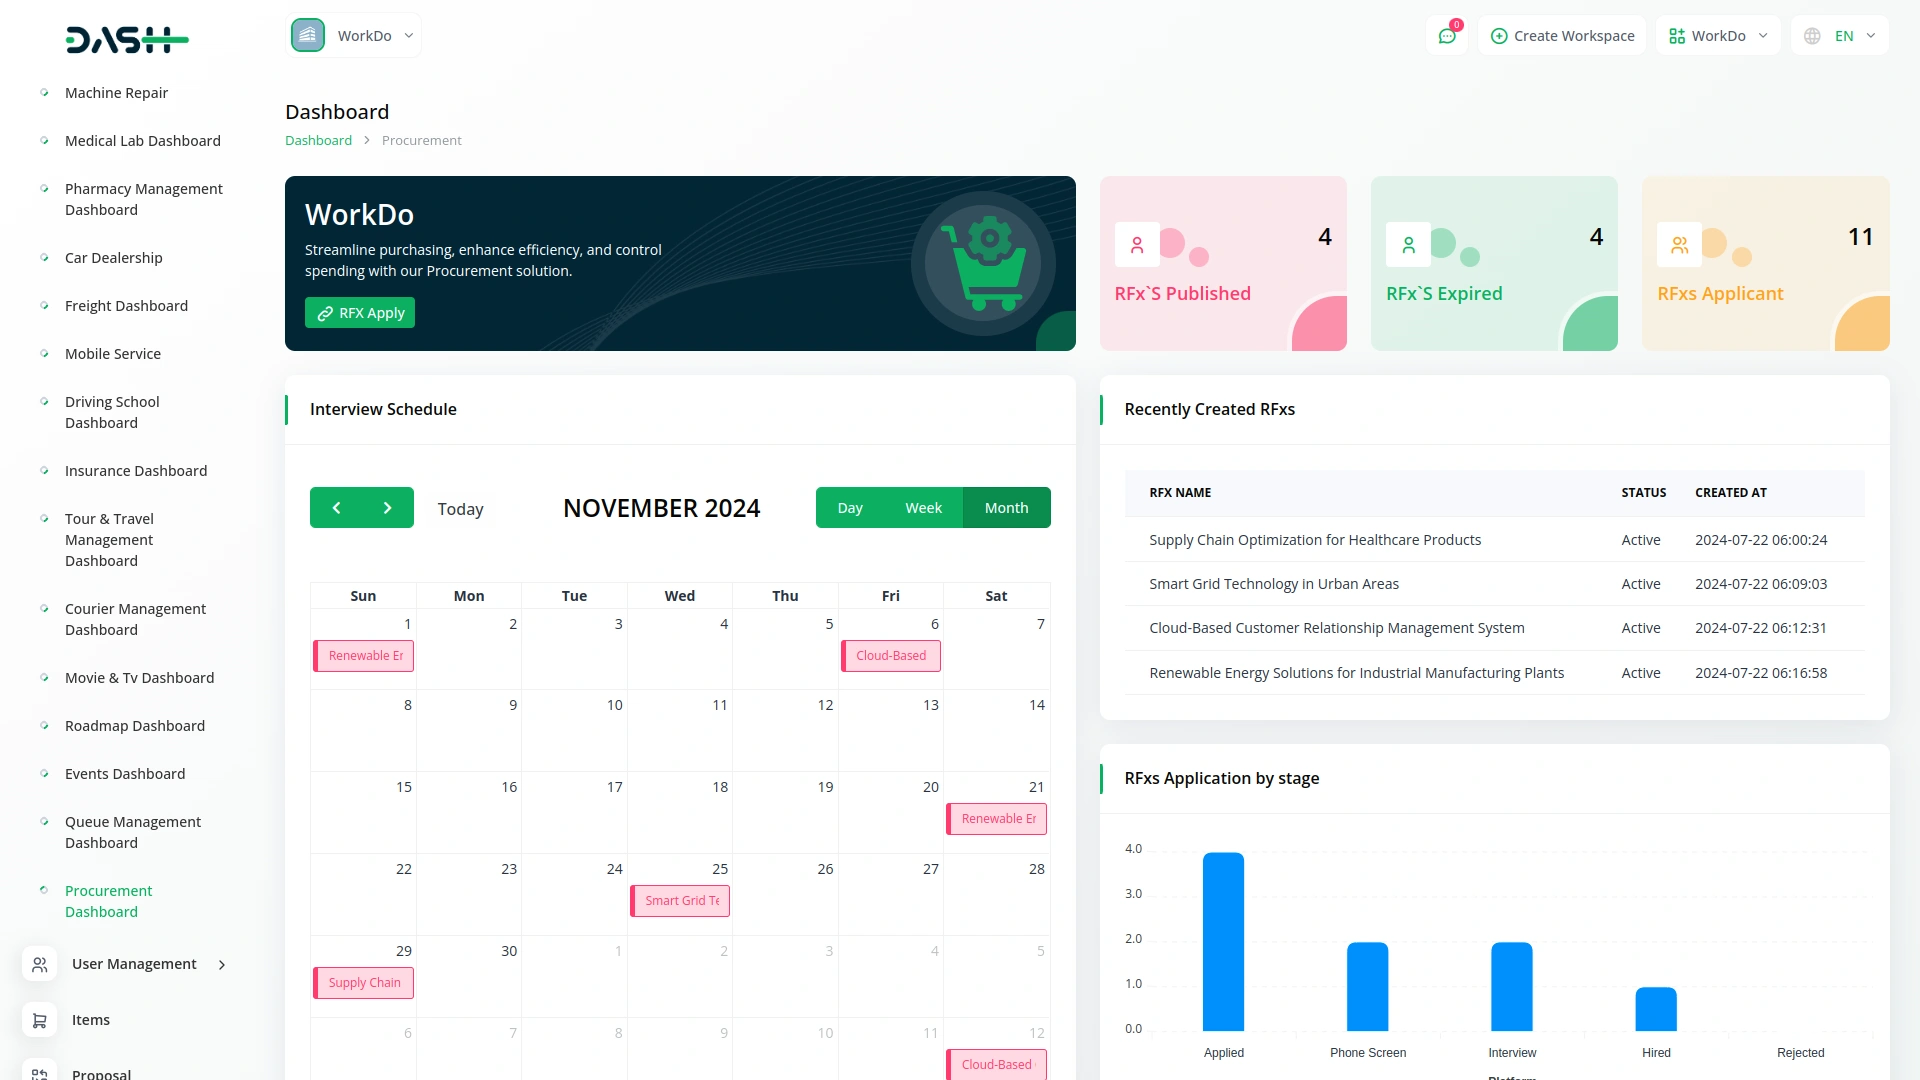
- A “RFX Apply” link button is available, which opens the frontend for users to apply.
- RFXs Published displays the number of RFXs that have been published.
- RFXs Expired displays the number of RFXs that have expired.
- RFXs Applicants displays the number of applicants who have applied to RFXs.
- Interview Schedule shows interviews scheduled for a specific date in the calendar, displaying the name of the interview on the scheduled date.
- Recently Created RFxs section displays all recently created and active RFXs showing RFX Name, Status, Created At date and time.
- RFxs Application by stage shows all RFX Stage names from System Setup with a graph displaying RFX Application data categorized by these stages.
Manage RFx
- To create a new RFx, click the “Create” button at the top of the page.
- Fill in the RFx Title, select RFx Category from dropdown, choose RFx Type, set Status, enter Location, No. of Positions, Budget From, Budget To, Start Date, End Date, add skills, select checkboxes, and provide description and requirements.
- In the Purchase section, select Billing Type, where you can choose Item to add multiple items using the repeater or select RFX to add multiple RFXs using the repeater.
- All items are fetched from the base items, ensuring consistency and accuracy in item selection across the system.
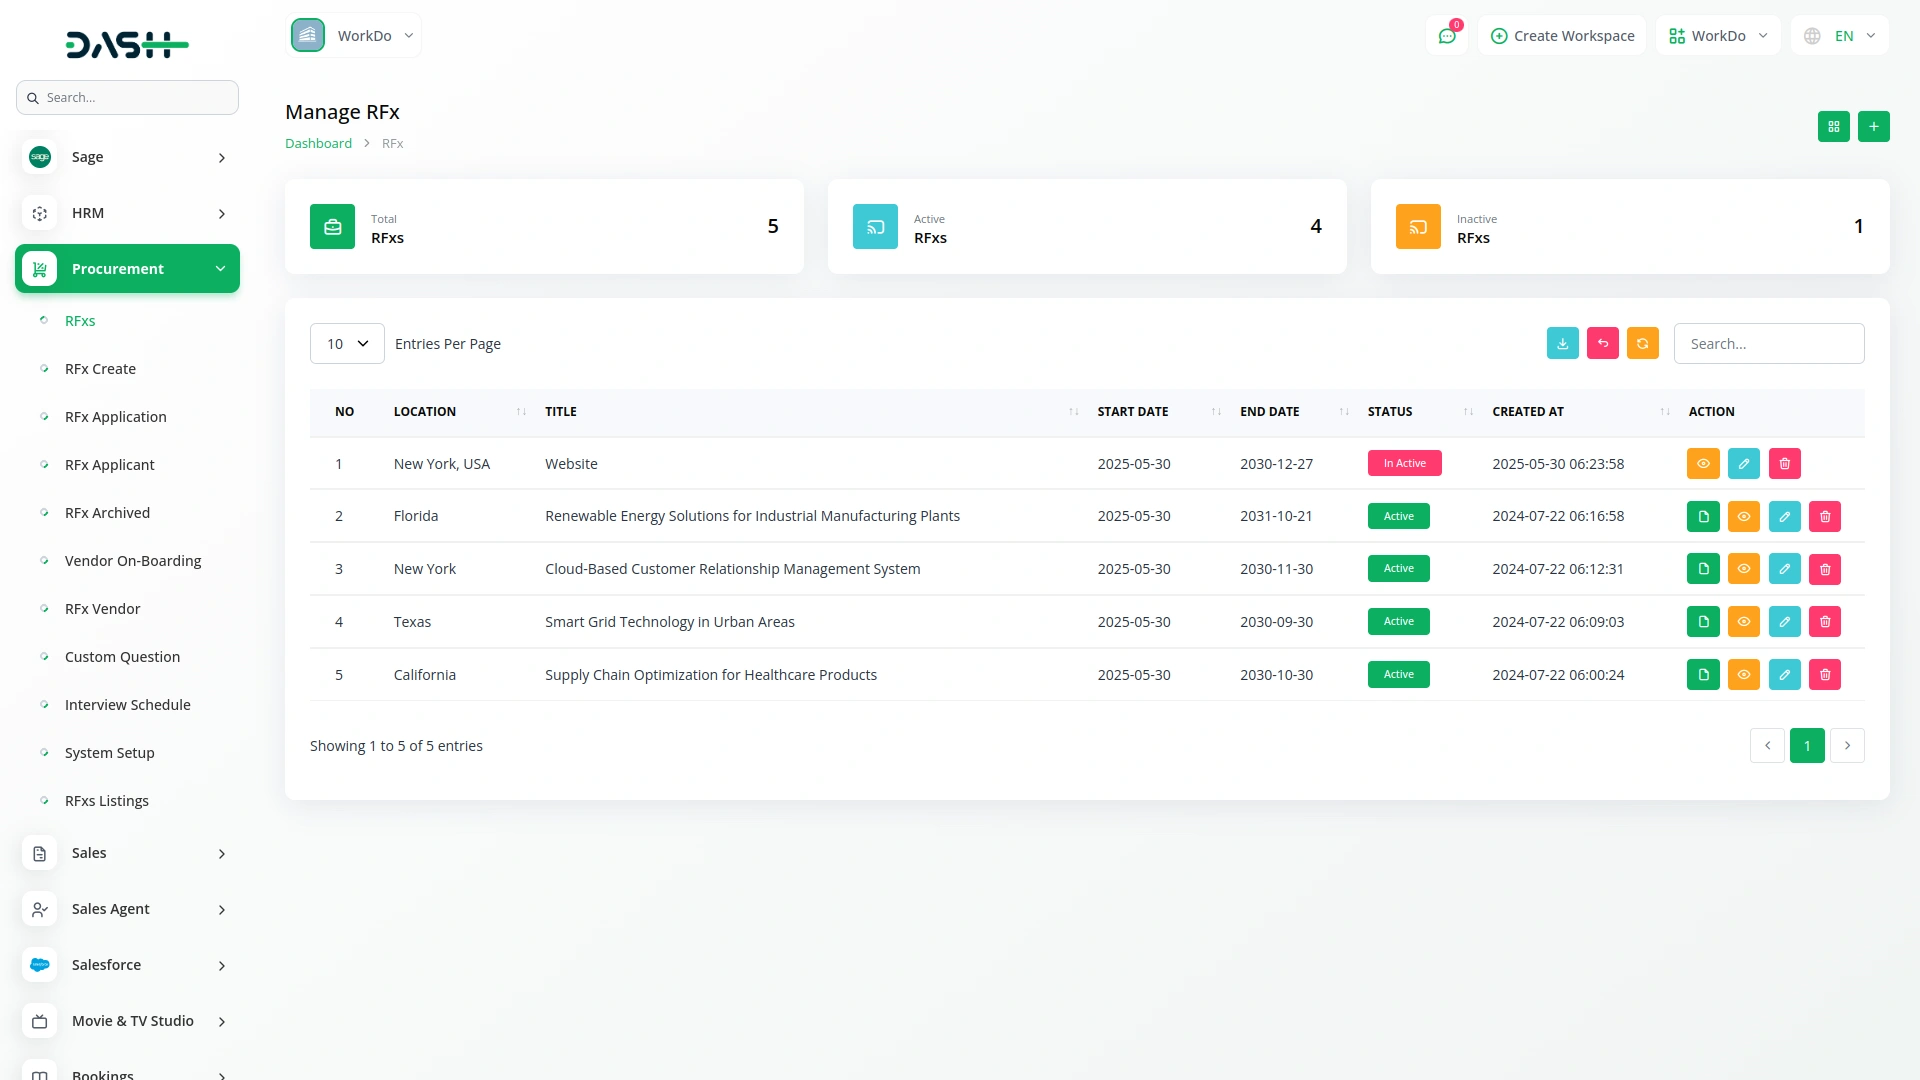
- The list view shows RFxs Cards displaying Total RFxs, Active RFxs, and Inactive RFxs counts.
- Use Grid View, Search, Export, and Create Buttons for navigation.
- Table shows columns for No, Location, Title, Start Date, End Date, Status, and Created At.
- Click the Copy button in the action column to copy the link and apply for this RFX.
- Click the View button in the action column to show RFx Details and Edit options.
- Click the Edit button in the action column to modify the RFx.
- Click the Delete button in the action column to remove the RFx.
- In Grid View, each RFX displays as a card showing the first letter of first and last name, title (clickable to show RFx Details), location, status, and action buttons.
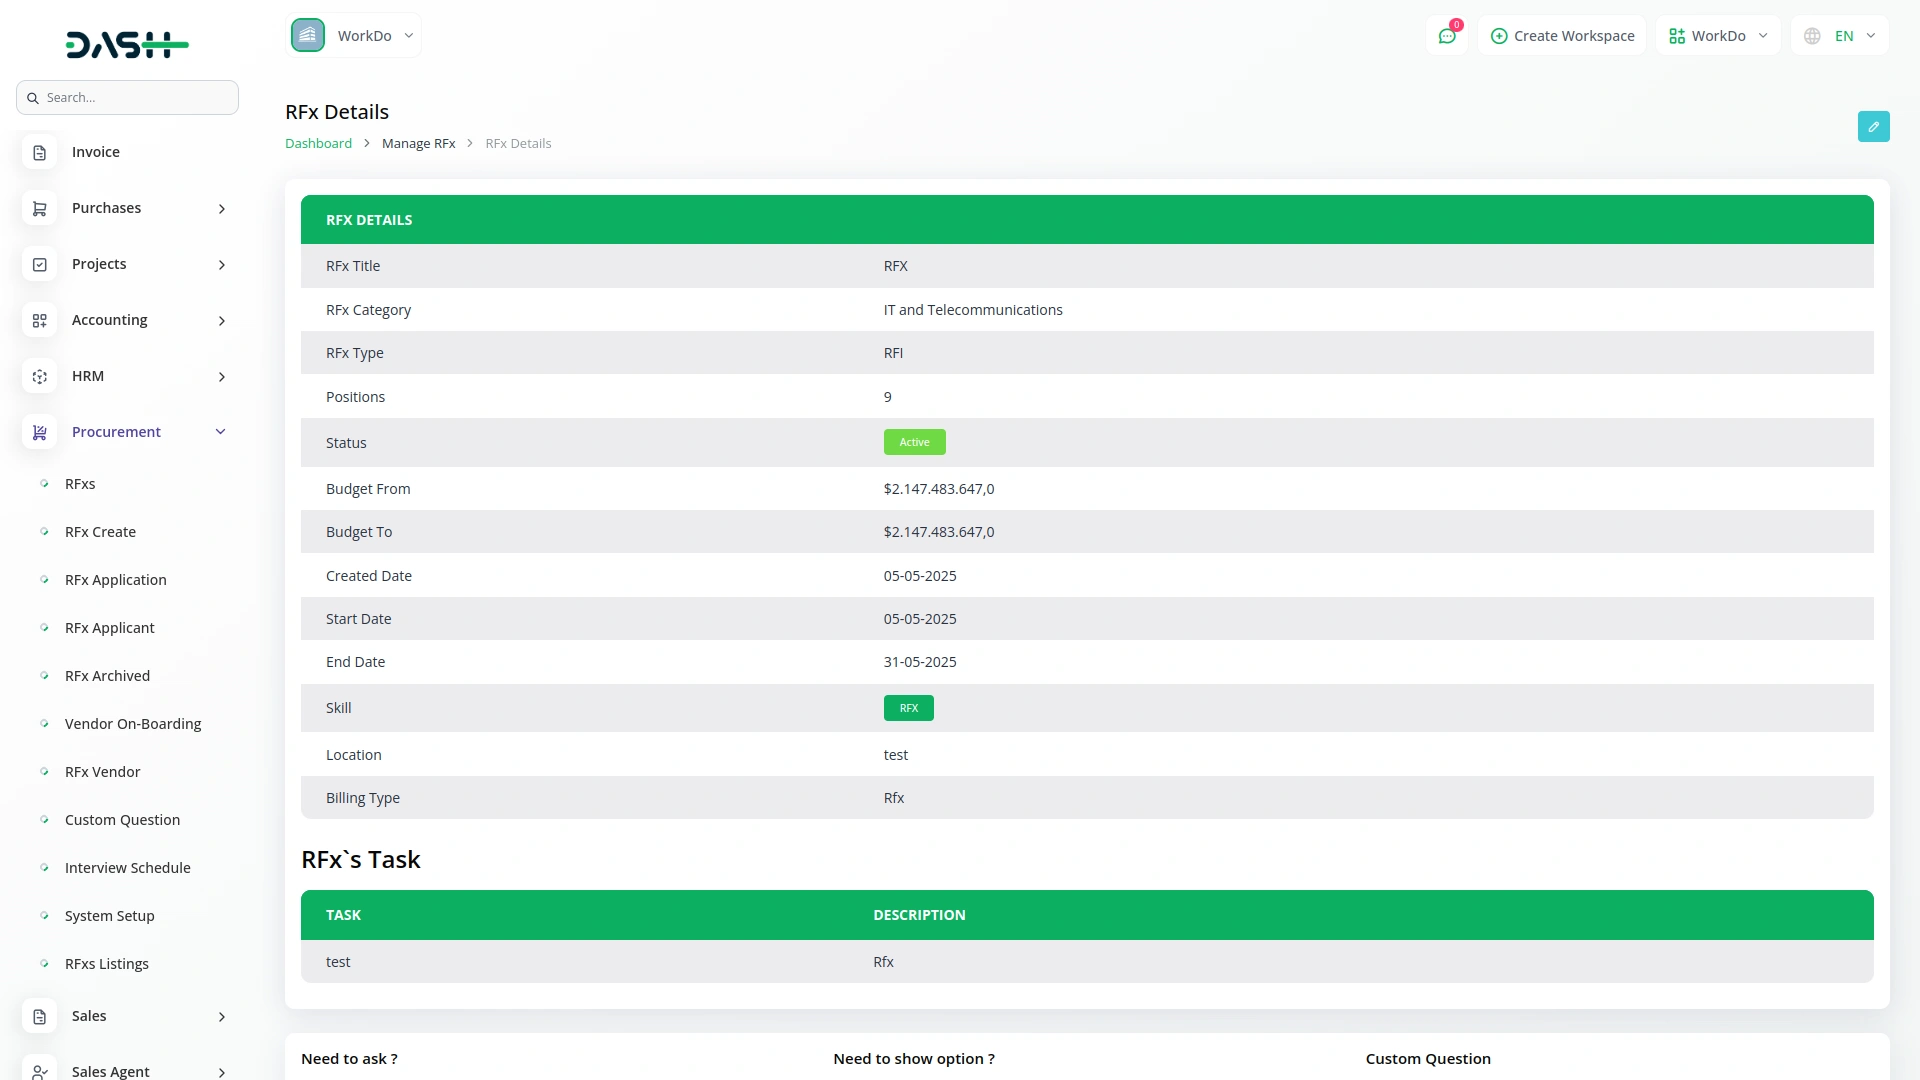
RFx Details Section:
- This section displays all the important information related to a particular RFx such as RFx Title, Category, Type, Positions, Status, Budget Range, Created Date, Start & End Dates, Required Skill, Location, and Hiring Type. Each field gives you a quick overview of the RFx requirements and timeline.
- RFx’s Task Section shows the tasks linked to the RFx. In the table, you will see columns like Task and Description to understand what actions or deliverables are expected under that RFx.
Manage RFx Application
- To create a new RFx Application, click the “Create” button.
- Select RFx from dropdown, choose Application Type, enter Name, Email, Mobile No, select Bid Type, and enter Bid Total.
- Filter records by selecting start date, end date, and specific RFX.
- Use Archive RFxs, Kanban View, Search, Export, and Add buttons.
- Table displays No, Name, Rfx, Stage, Bid Type, Proposal, Rating, Bid Total, and Created At columns.
- Click the Archive button in the action column to move the record to the RFx Archived section.
- Click the View button in the action column to show RFx Application Details where you will see:
- Basic Details displaying applicant’s profile image, name, and email.
- Unarchive button if the application is archived.
- Stages to update a candidate’s status directly from the view.
- Basic Information showing all application details.
- “Add to Vendor OnBoard” button to create a Vendor Onboarding entry.
- Option to add rating directly from the application view.
- Purchase Detail showing purchase details added during application.
- Additional Details with the “Create Interview Schedule” button.
- Options to add Skills and Applicant Notes directly from the view.
- Click the Delete button in the action column to remove the application.
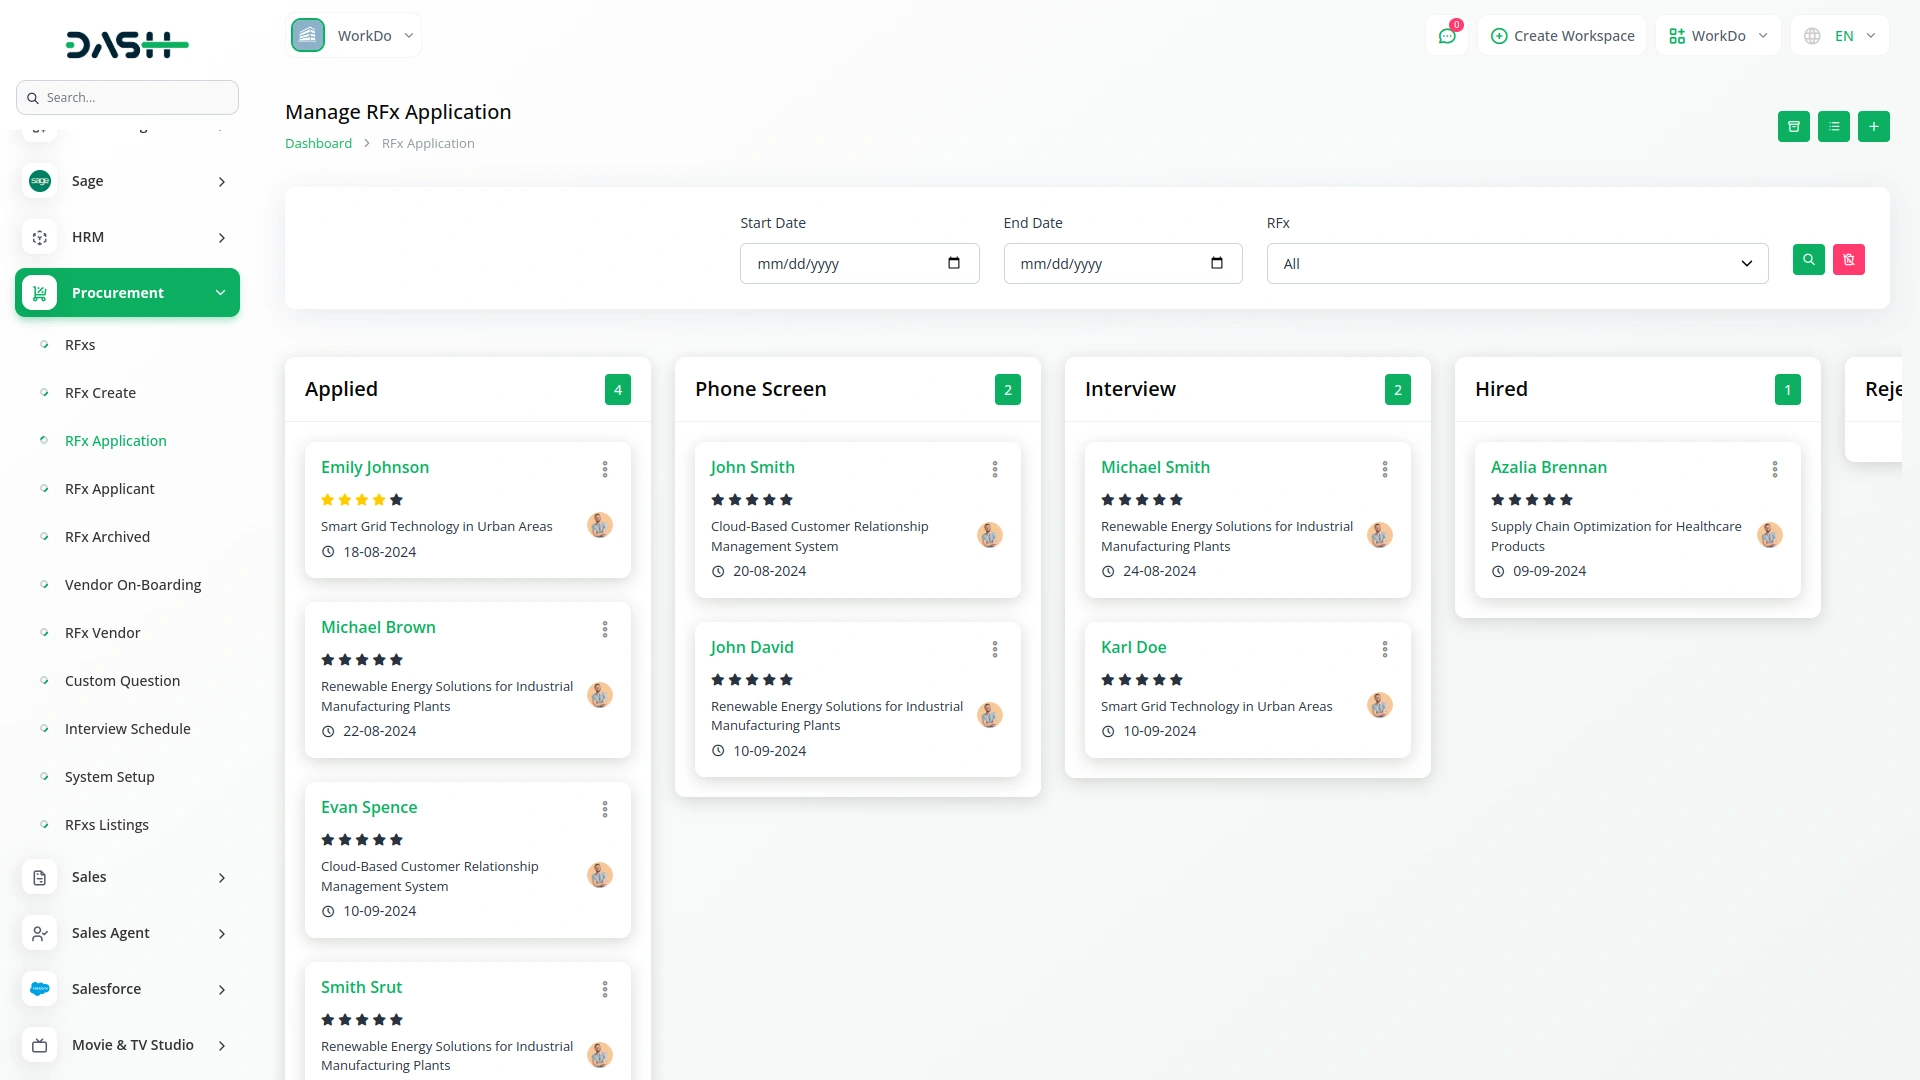
- In Kanban view, applications display as cards under respective stages where you can drag and drop to change status.
- Each application card shows the applicant’s image, name, rating, title, and created date.
- Number of applications per stage is shown next to the stage name.
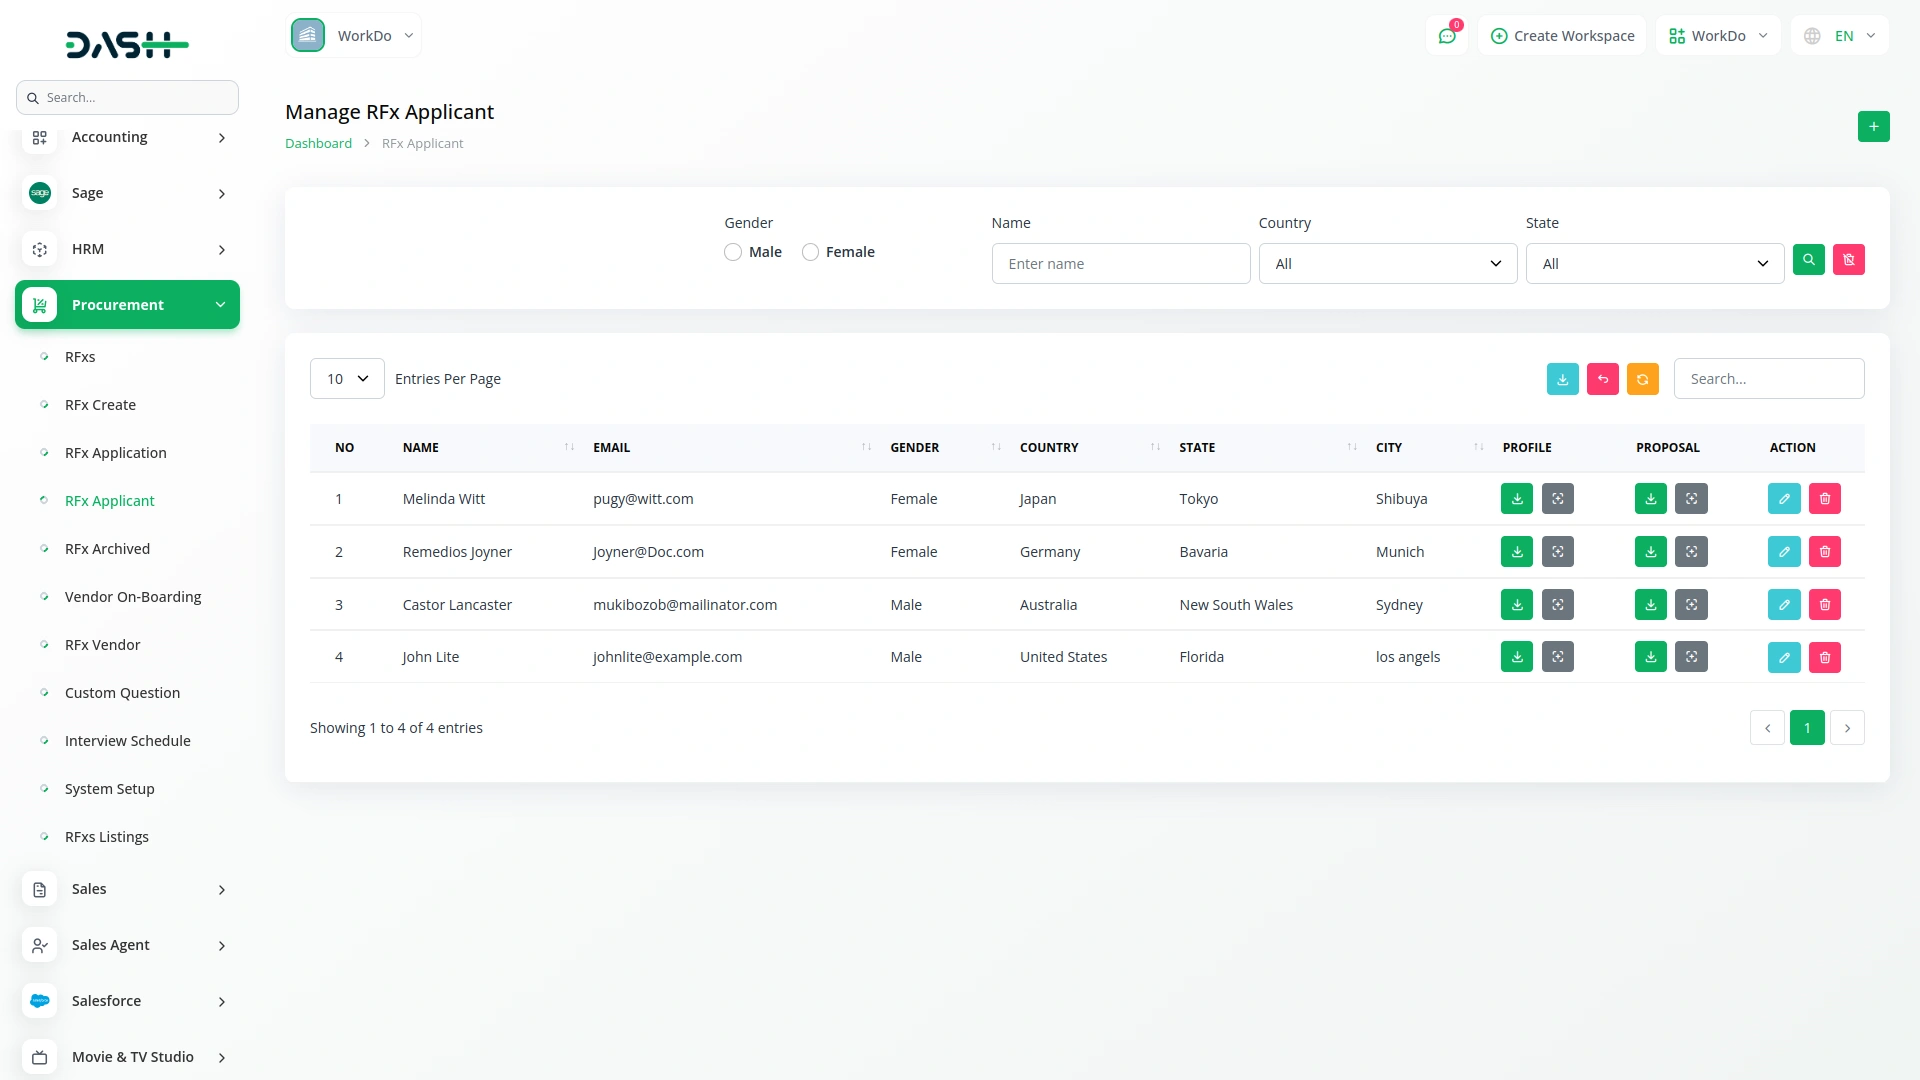
Manage RFx Applicant
- To add a new applicant, click the “Create” button.
- Enter Name, Email, Mobile No, Date of Birth, select Gender, enter Country, State, City, and upload Profile and Proposal.
- Filter applicants using Gender, Name, Country dropdown, and State dropdown.
- Table displays No, Name, Email, Gender, Country, State, City, Profile, and Proposal columns.
- Profile column allows Applicant Profile Download and Preview.
- Proposal column allows Applicant Proposal Download and Preview.
- Click the Edit button in the action column to modify applicant details.
- Click the Delete button in the action column to remove the applicant.
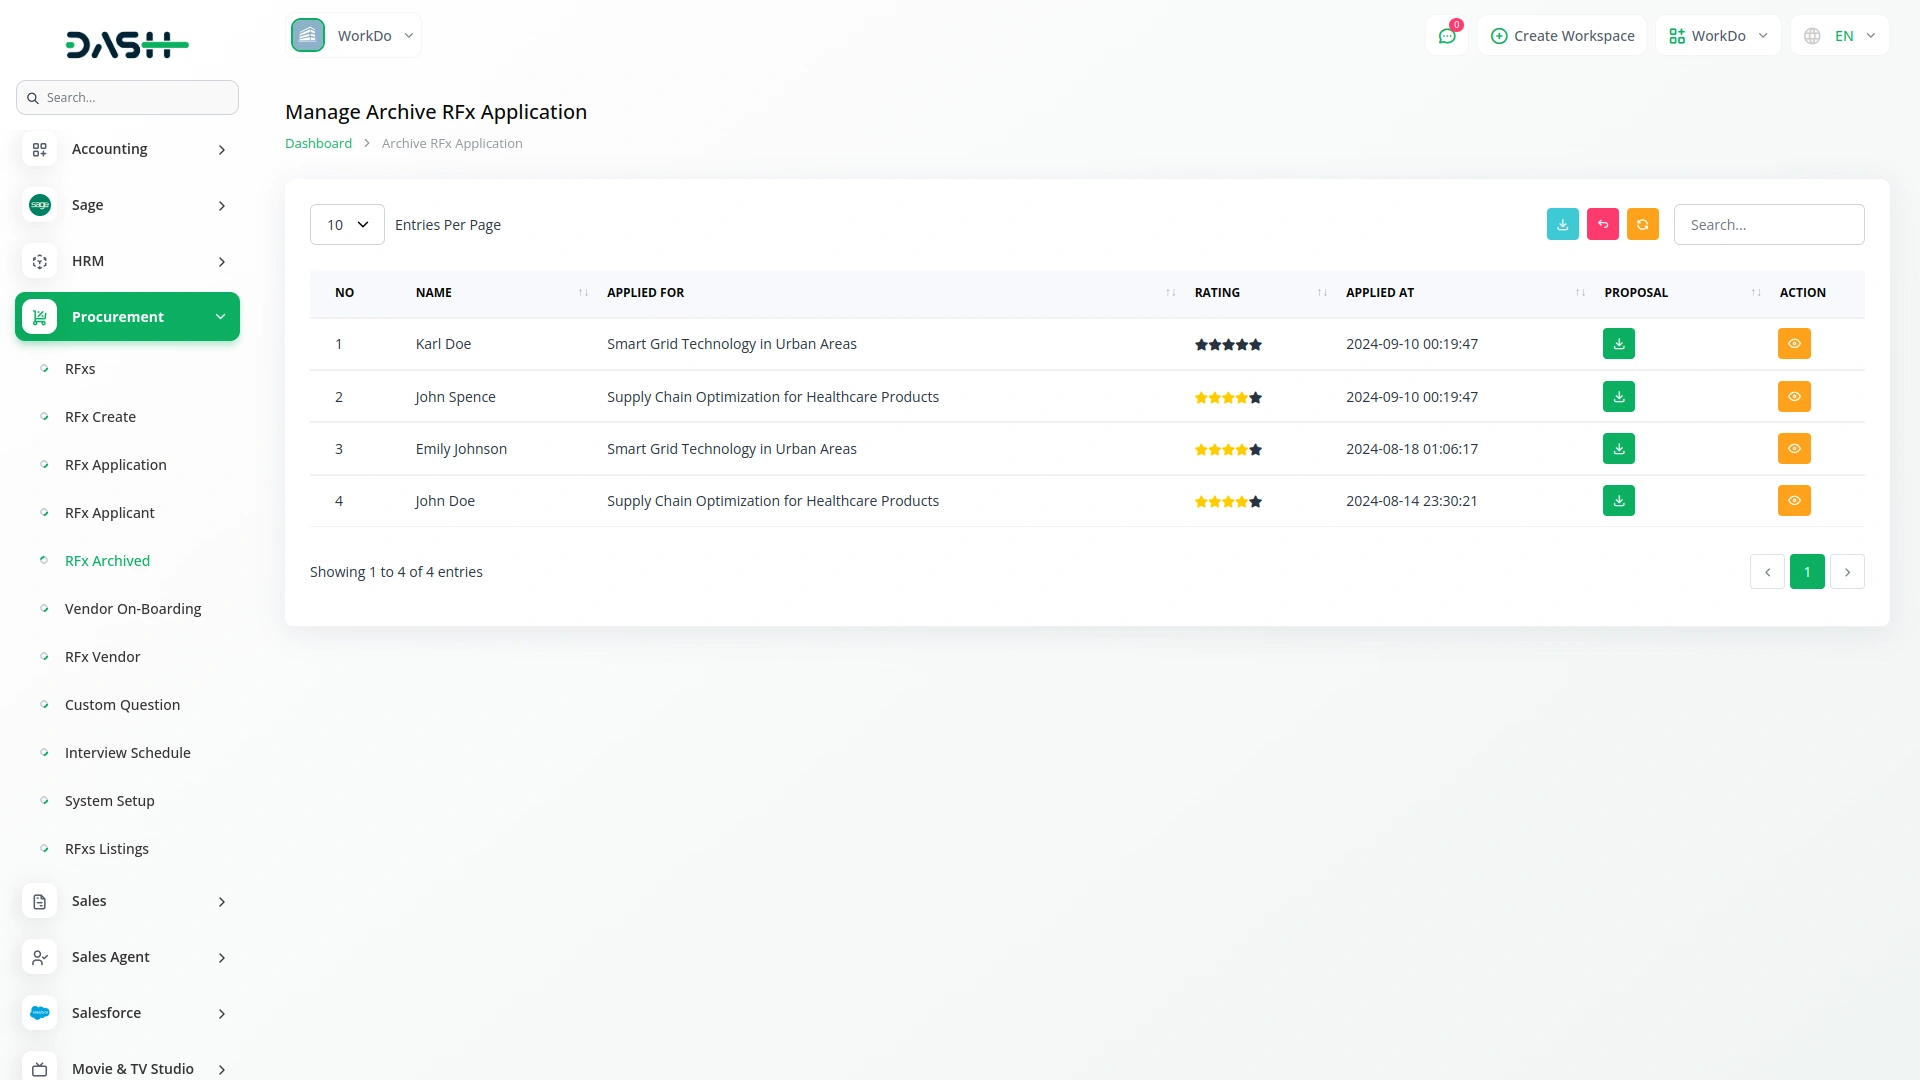
Manage Archive RFx Application
- When an RFx Application is archived, all related data displays in the Archived RFx Applications section.
- Use Search and Export buttons.
- Table shows No, Name, Applied For, Rating, Applied At, and Proposal columns.
- Click View in the action column to show RFx Application Details where you will see:
- Basic Details displaying applicant’s profile image, name, and email.
- Unarchive button to restore the application from the archive.
- Stages to update a candidate’s status directly from the view.
- Basic Information showing all application details.
- “Add to Vendor OnBoard” button to create a Vendor Onboarding entry.
- Option to add rating directly from the application view.
- Purchase Detail showing purchase details added during application.
- Additional Details with the “Create Interview Schedule” button.
- Options to add Skills and Applicant Notes directly from the view.
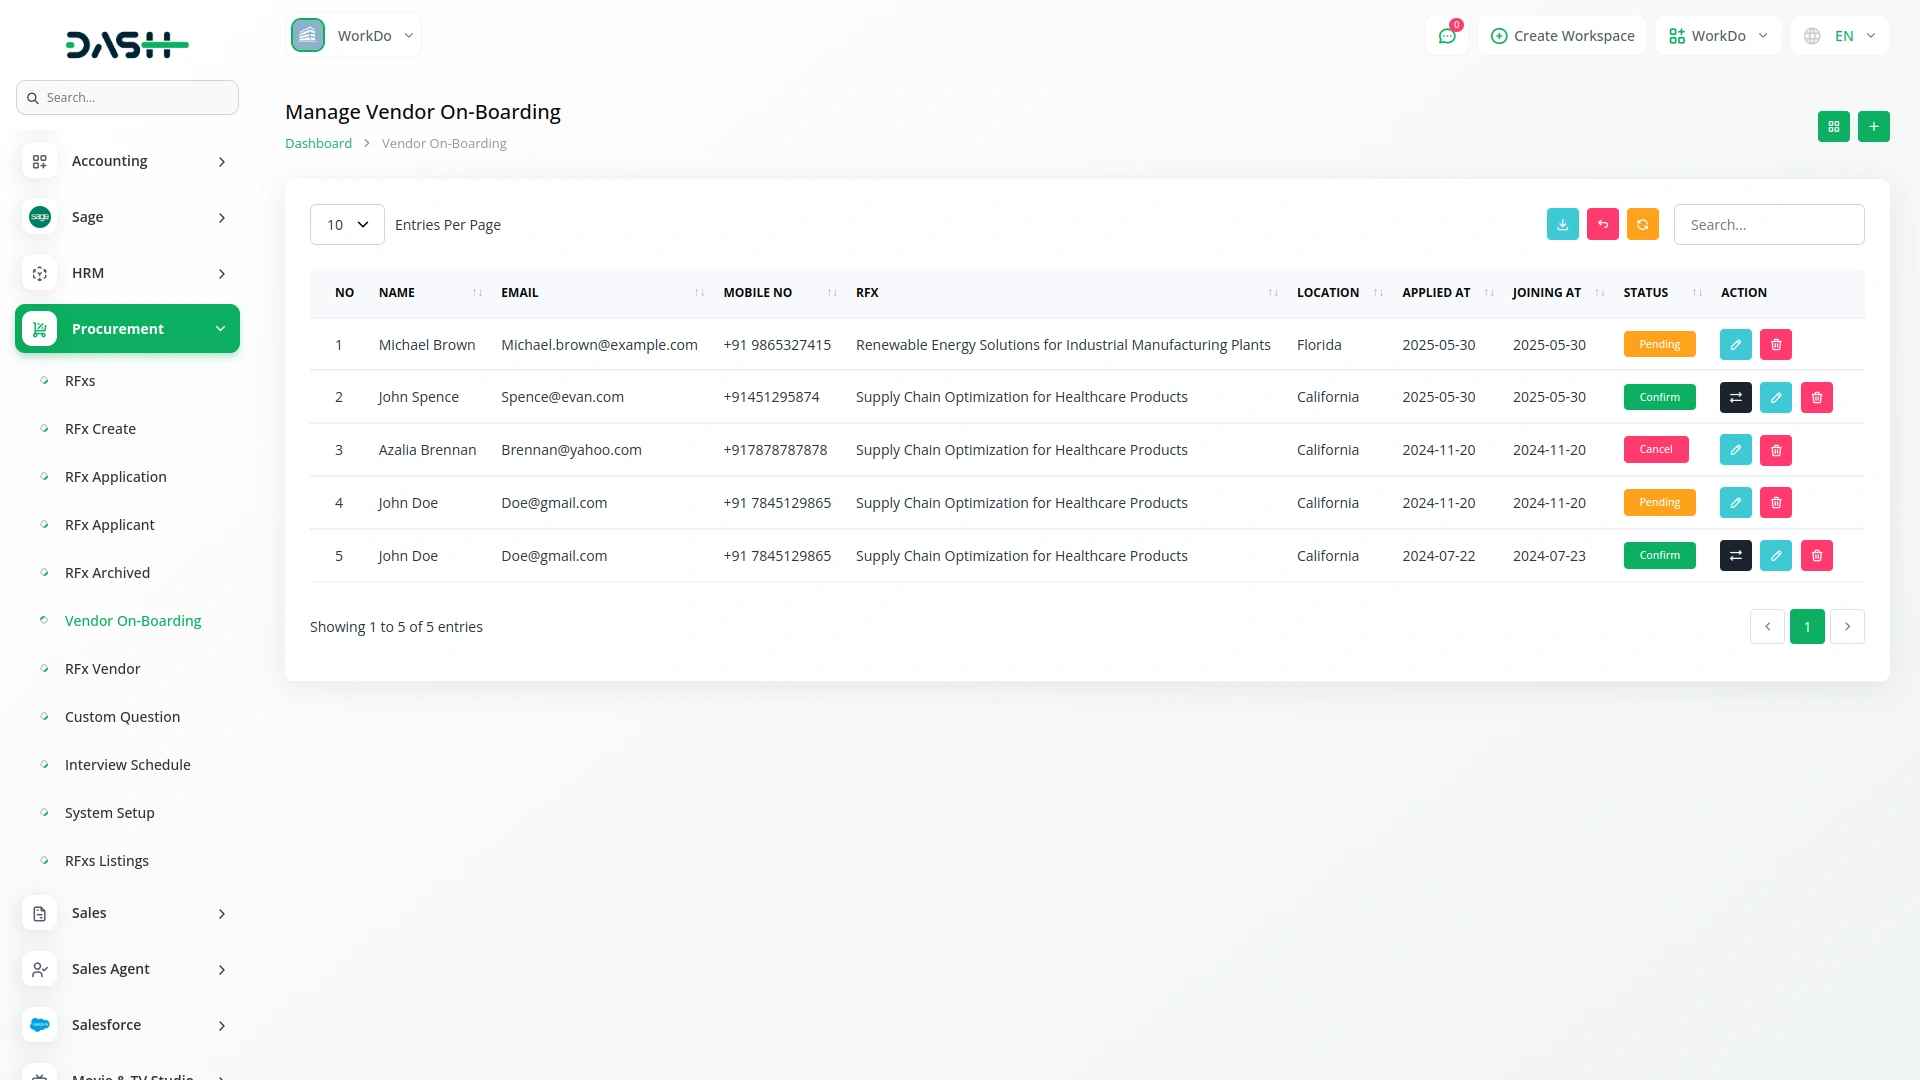
Manage Vendor On-Boarding
- To create vendor onboarding, click the “Create” button.
- Select Interviewer from dropdown, enter Joining Date, Days Of Week, Budget, select Budget Type, choose Budget Duration, select RFx Type, and set Status.
- Once status is confirmed, a “Convert to Vendor” button appears in Actions.
- Use Grid view, Search, Export, and Add buttons.
- Table displays No, Name, Email, Mobile No, Rfx, Location, Applied At, Joining At, and Status columns.
- Click Convert to Vendor in the action column when status is confirmed to convert the applicant into a vendor – data will only be visible in the vendor list after conversion.
- Click the Edit button in the action column to modify vendor onboarding details.
- Click the Delete button in the action column to remove the record.
- In Grid View, vendor onboarding cards display vendor’s name, email, status, and first letters of first and last name instead of image.
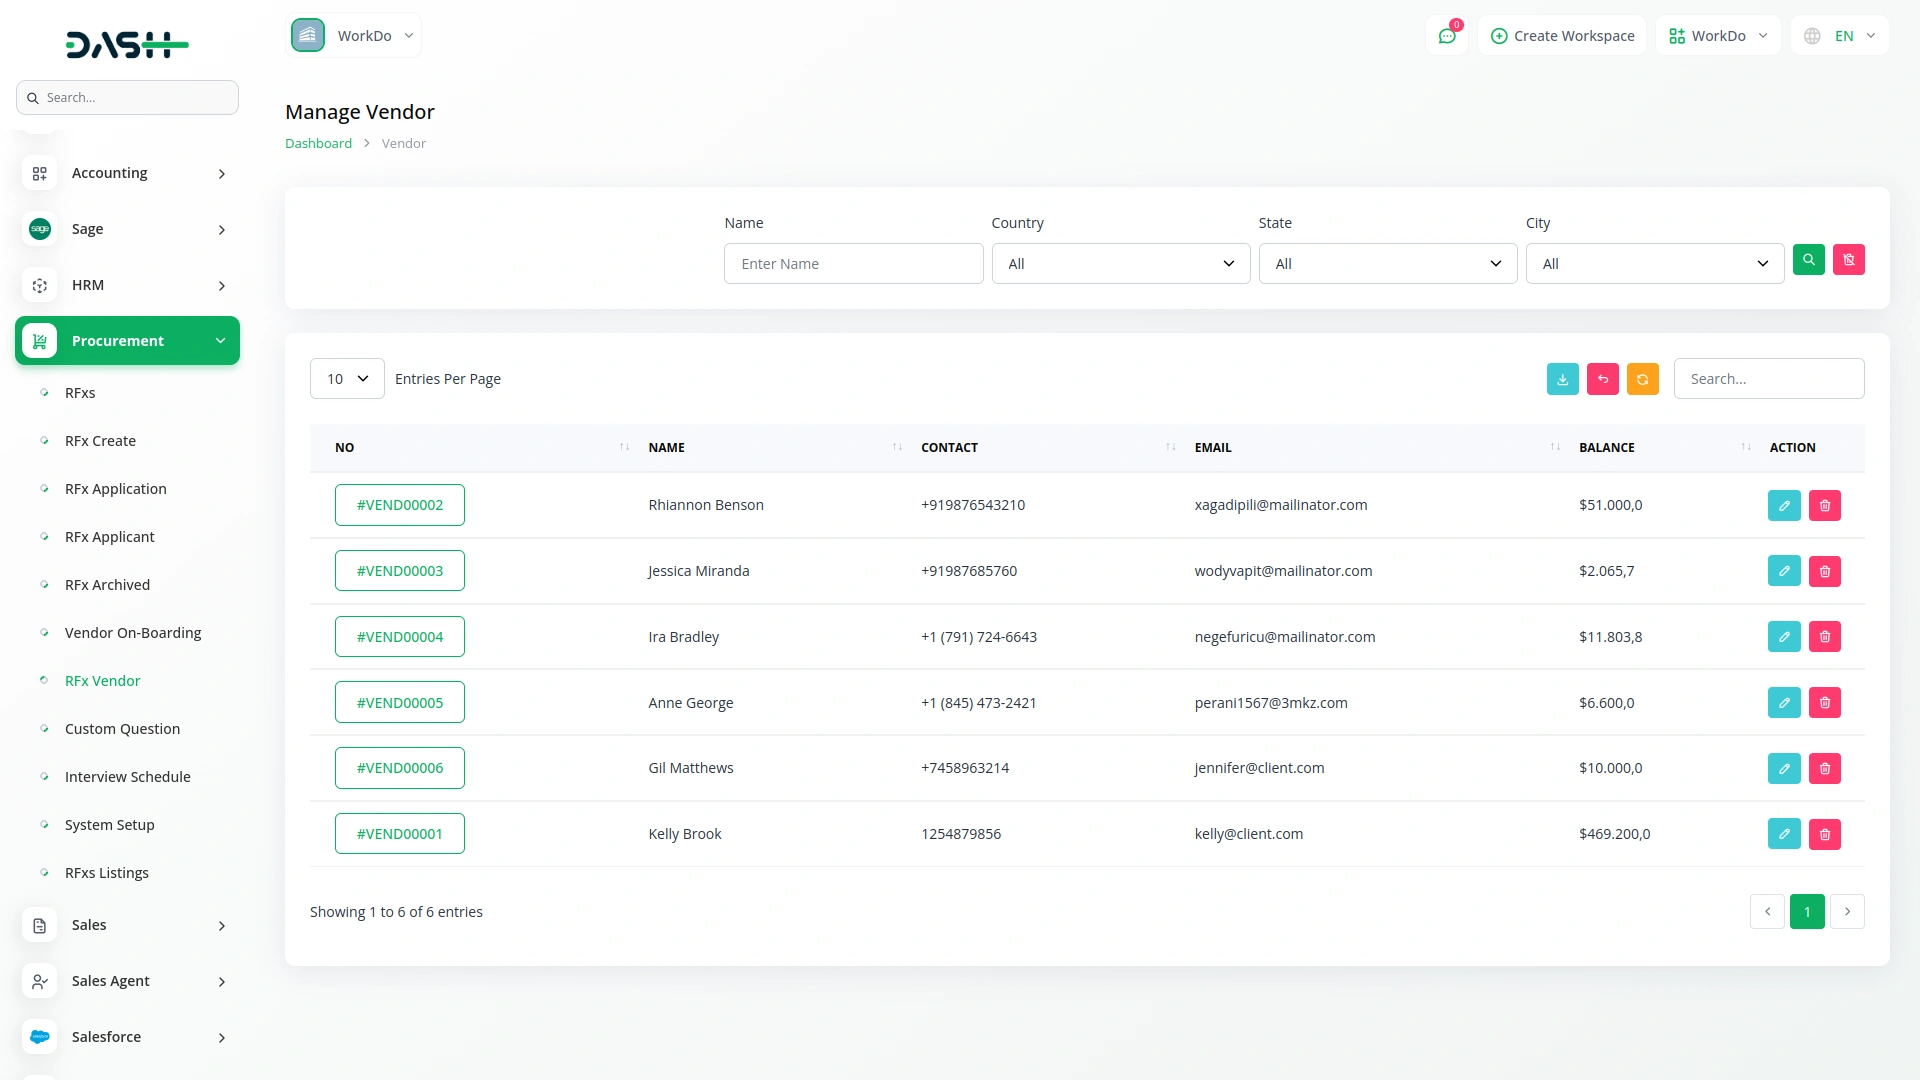
Manage Vendor
- Data appears only when Vendor On-Boarding is converted to vendor.
- Filter data using Name, Country, State, and City dropdowns populated from converted vendor records.
- Use Search and Export buttons.
- Table displays No (showing Accounting vendor details to Procurement), Name, Contact, Email, and Balance columns.
- Click the Edit button in the action column to modify vendor details.
- Click the Delete button in the action column to remove the vendor.
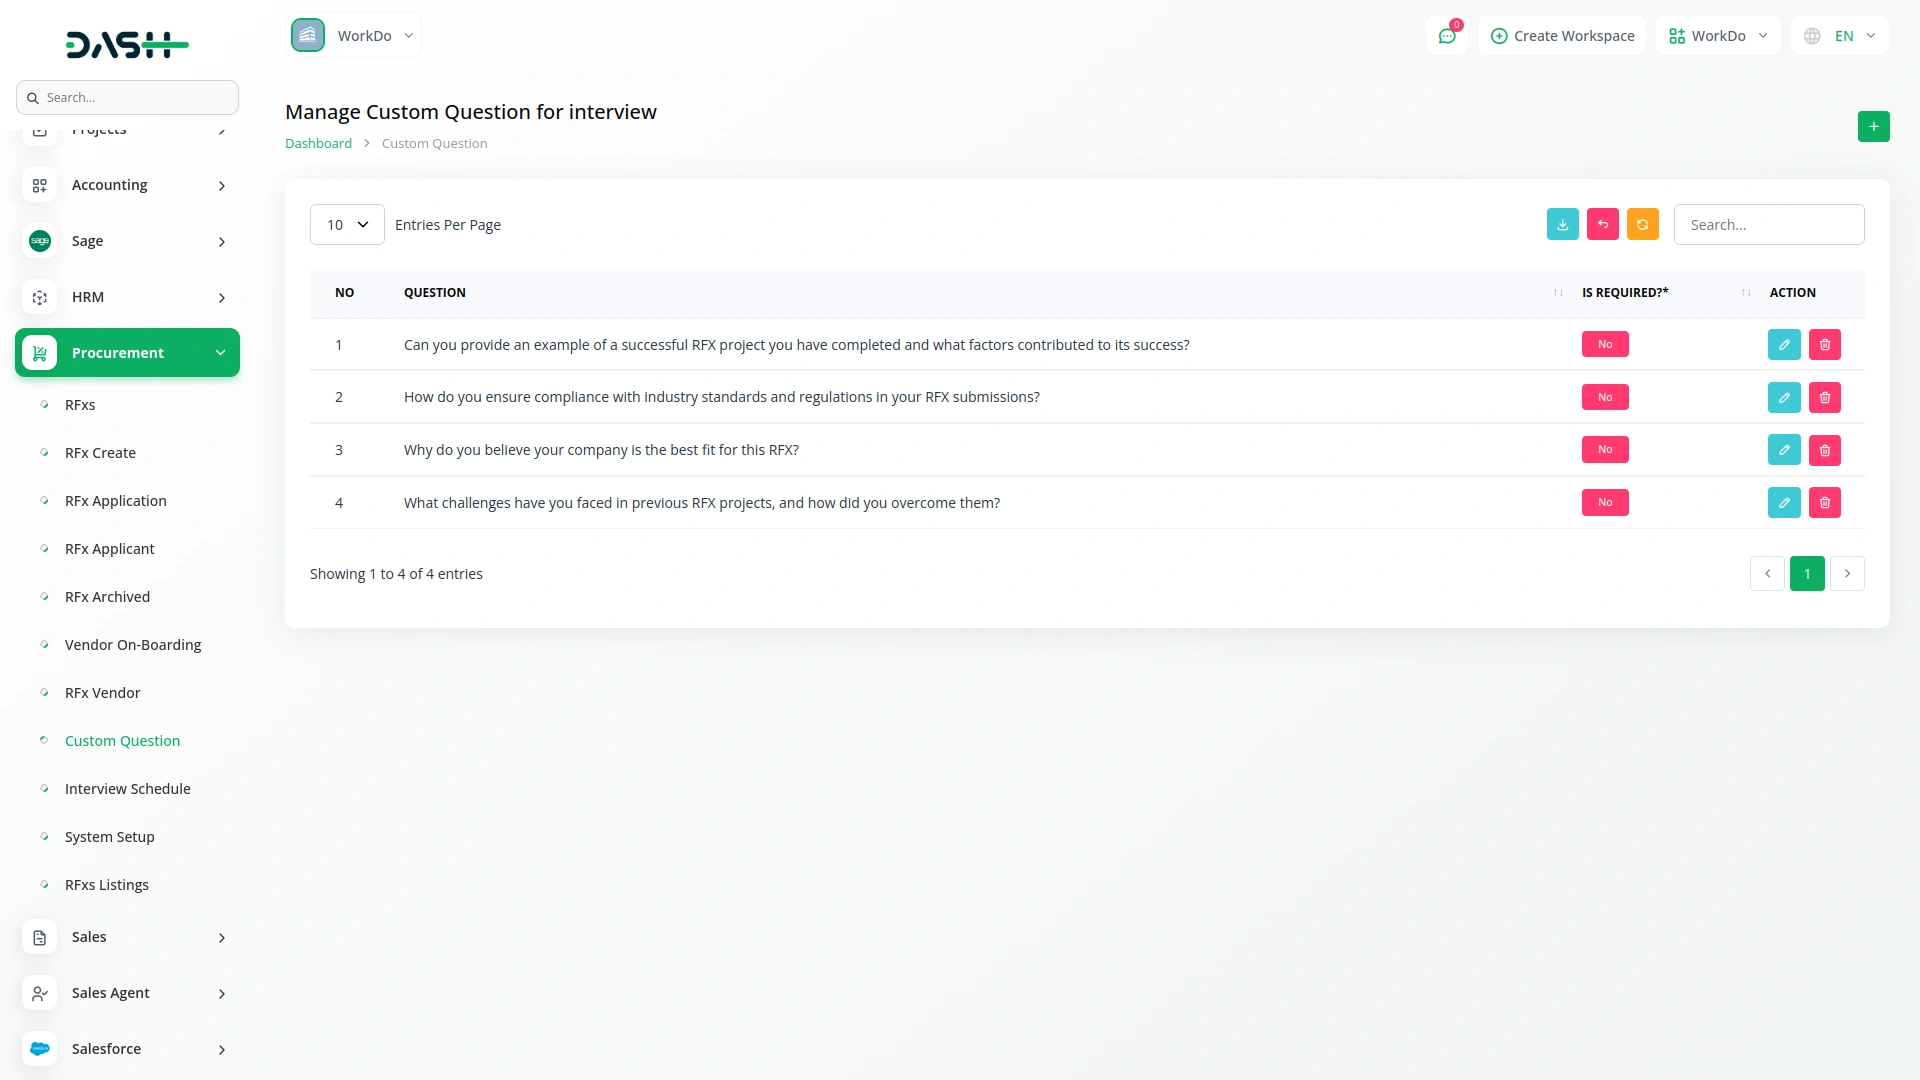
Manage Custom Question for Interview
- To add interview questions, click the “Create” button.
- Enter Question and select Is Required option.
- Use Search, Export, and Add buttons.
- Table shows No, Question, and Is Required columns displaying Yes or No.
- Click the Edit button in the action column to modify questions.
- Click the Delete button in the action column to remove questions.
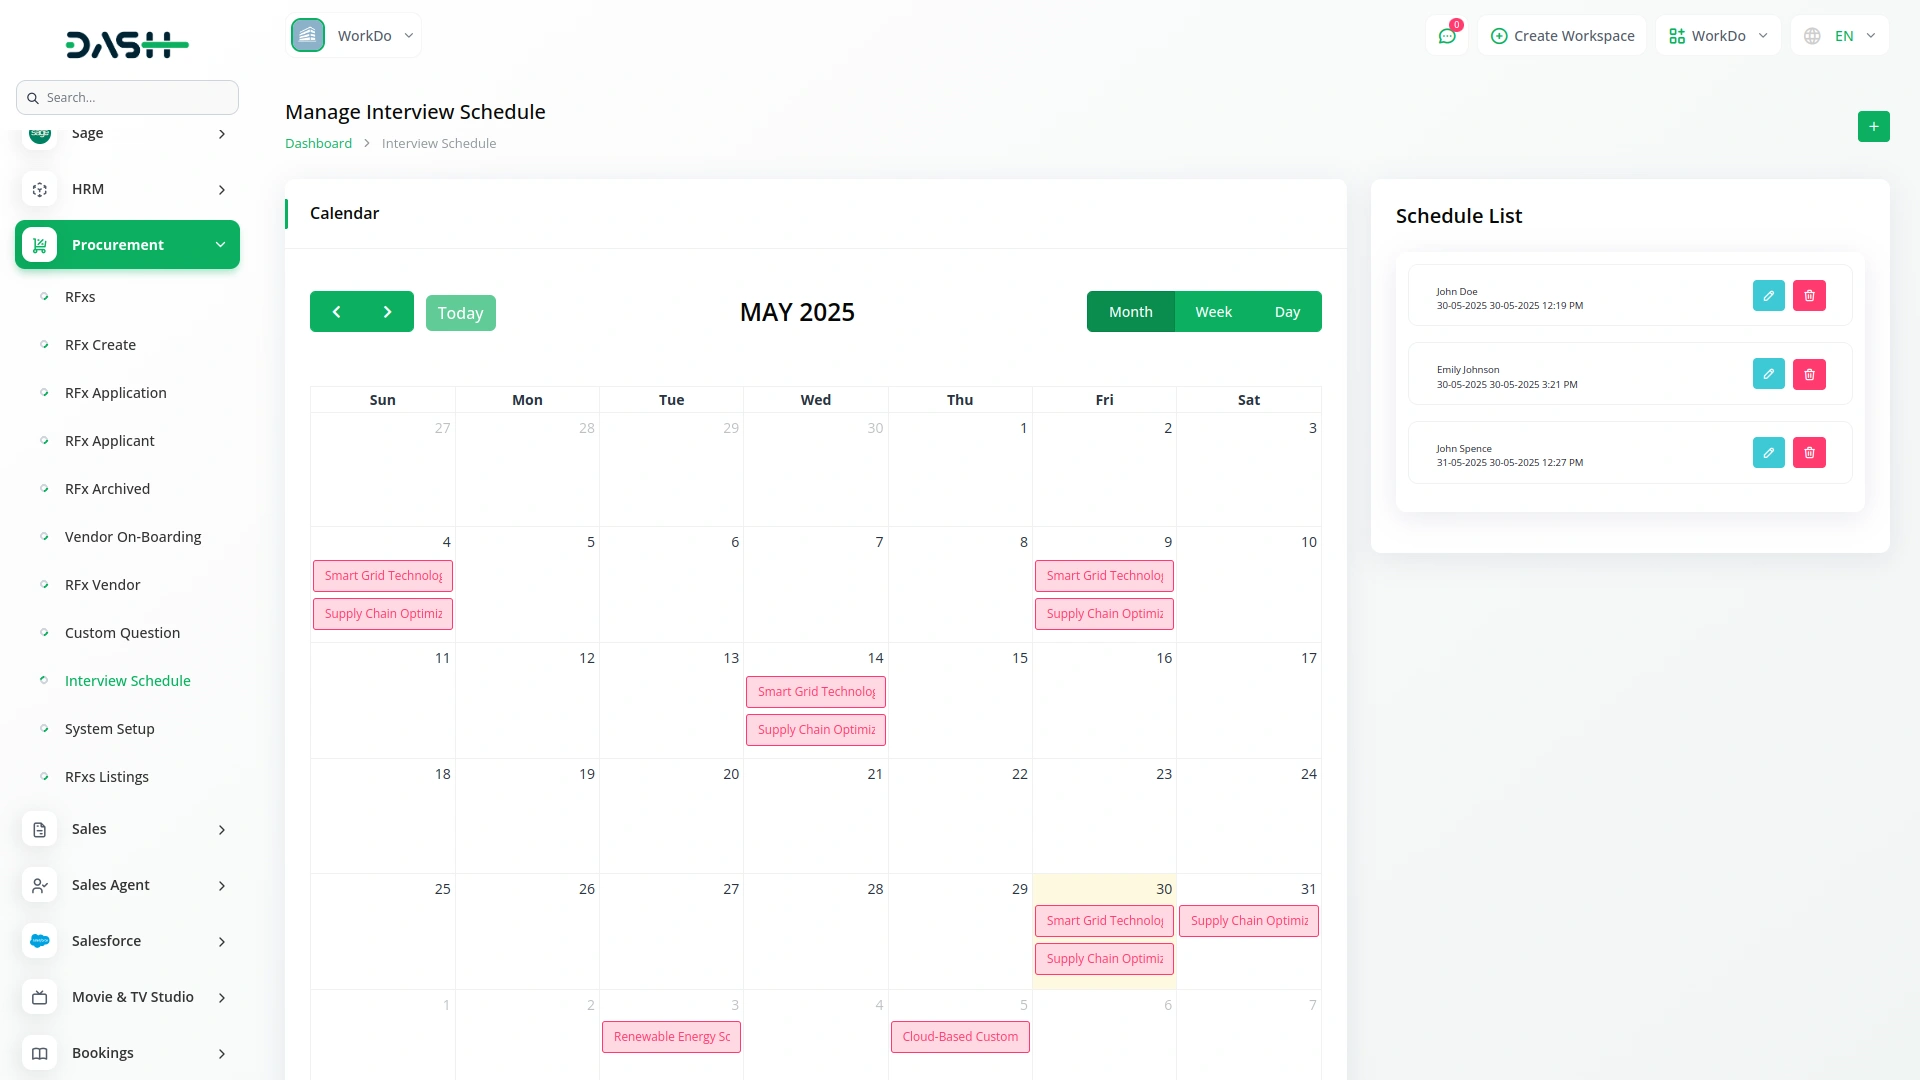
Manage Interview Schedule
- To schedule interviews, click the “Create” button.
- Select Interviewer from the dropdown showing all RFx applicant names, choose Interview Date, set Interview Time, and add Comment.
- Calendar displays interview name on scheduled date.
- Click the interview name on the calendar to open a popup showing RFx Schedule Details, Applicant Details, and Applicant Status.
- “Add to Vendor On-Boarding” button at the bottom of the popup allows creating a vendor onboarding record.
- Schedule List displays all interviews scheduled on the calendar.
- Click the Edit button in the action column to modify schedules.
- Click the Delete button in the action column to remove schedules.
System Setup
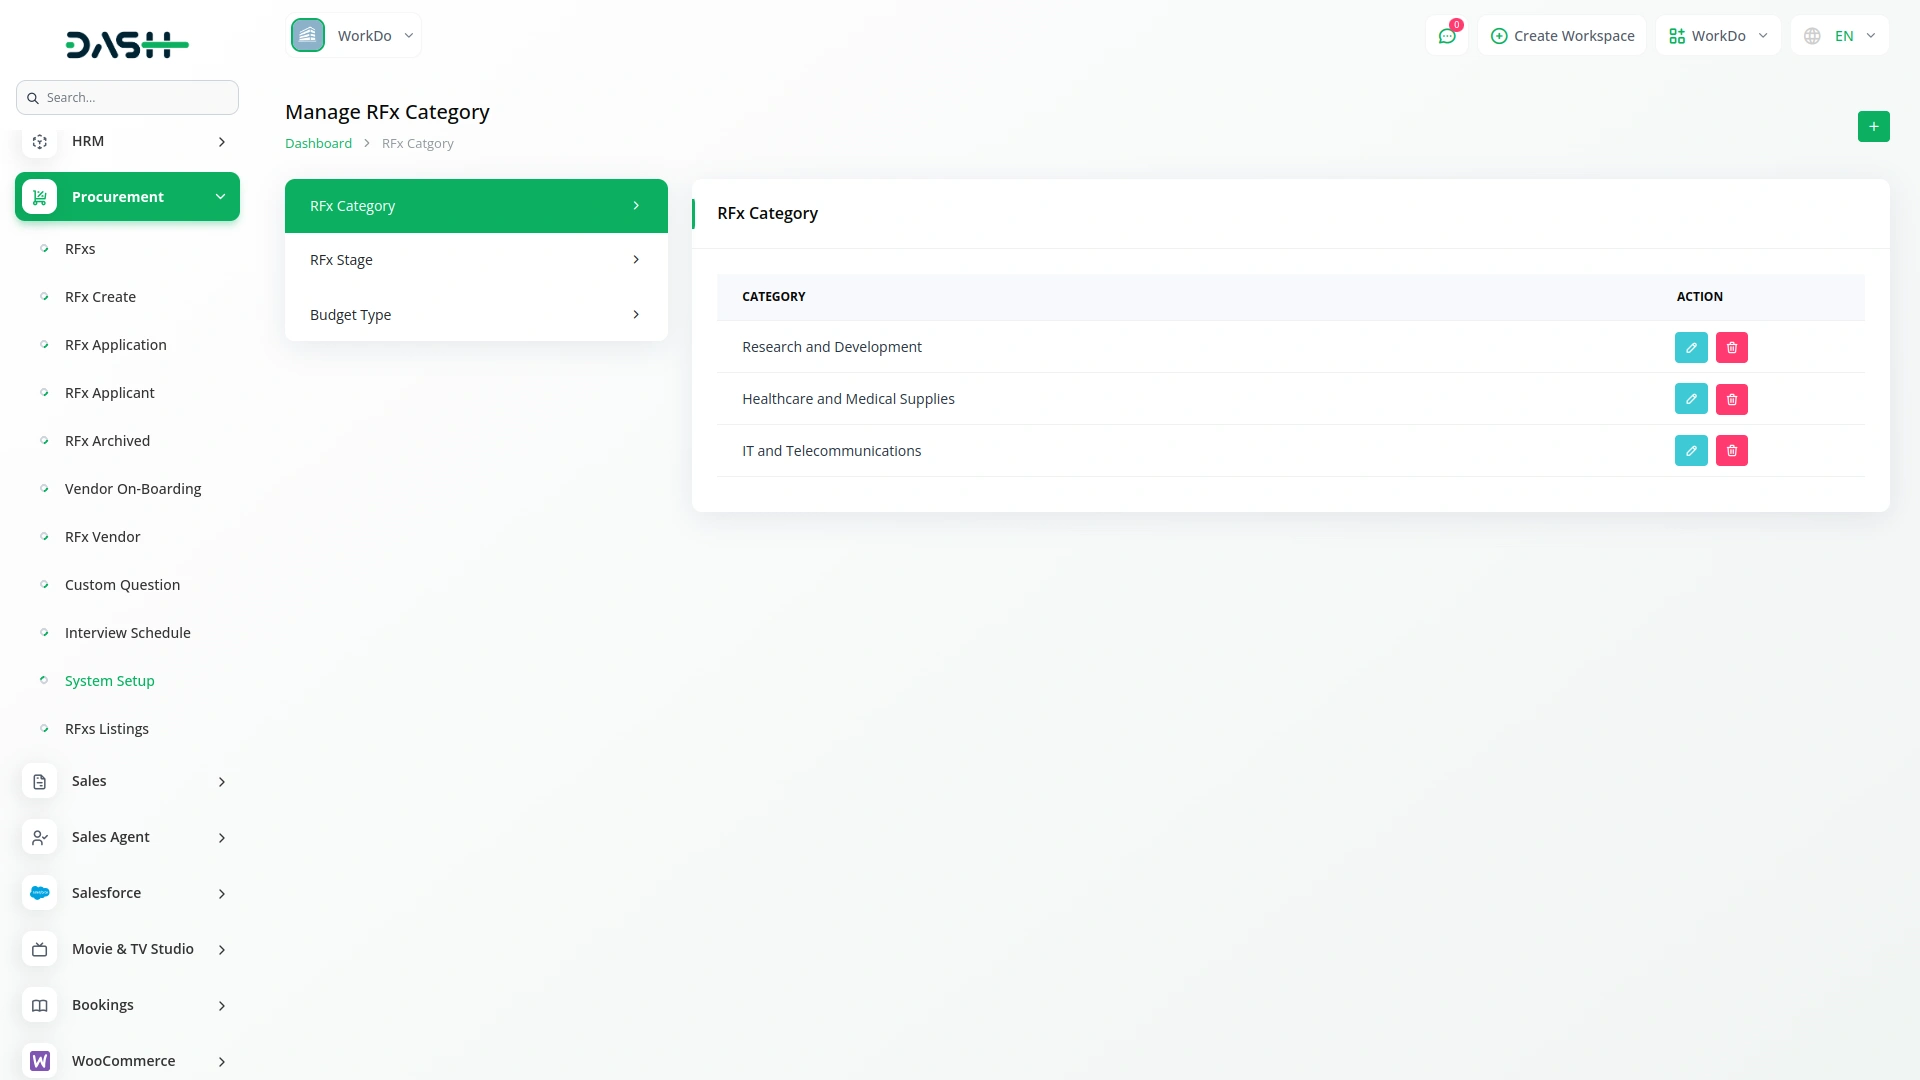
Manage RFx Category
- To create RFx categories, click the “Create” button.
- Enter Category Name which will be used in RFx creation.
- Table displays Category column.
- Click Edit in the action column to modify categories.
- Click Delete in the action column to remove categories.
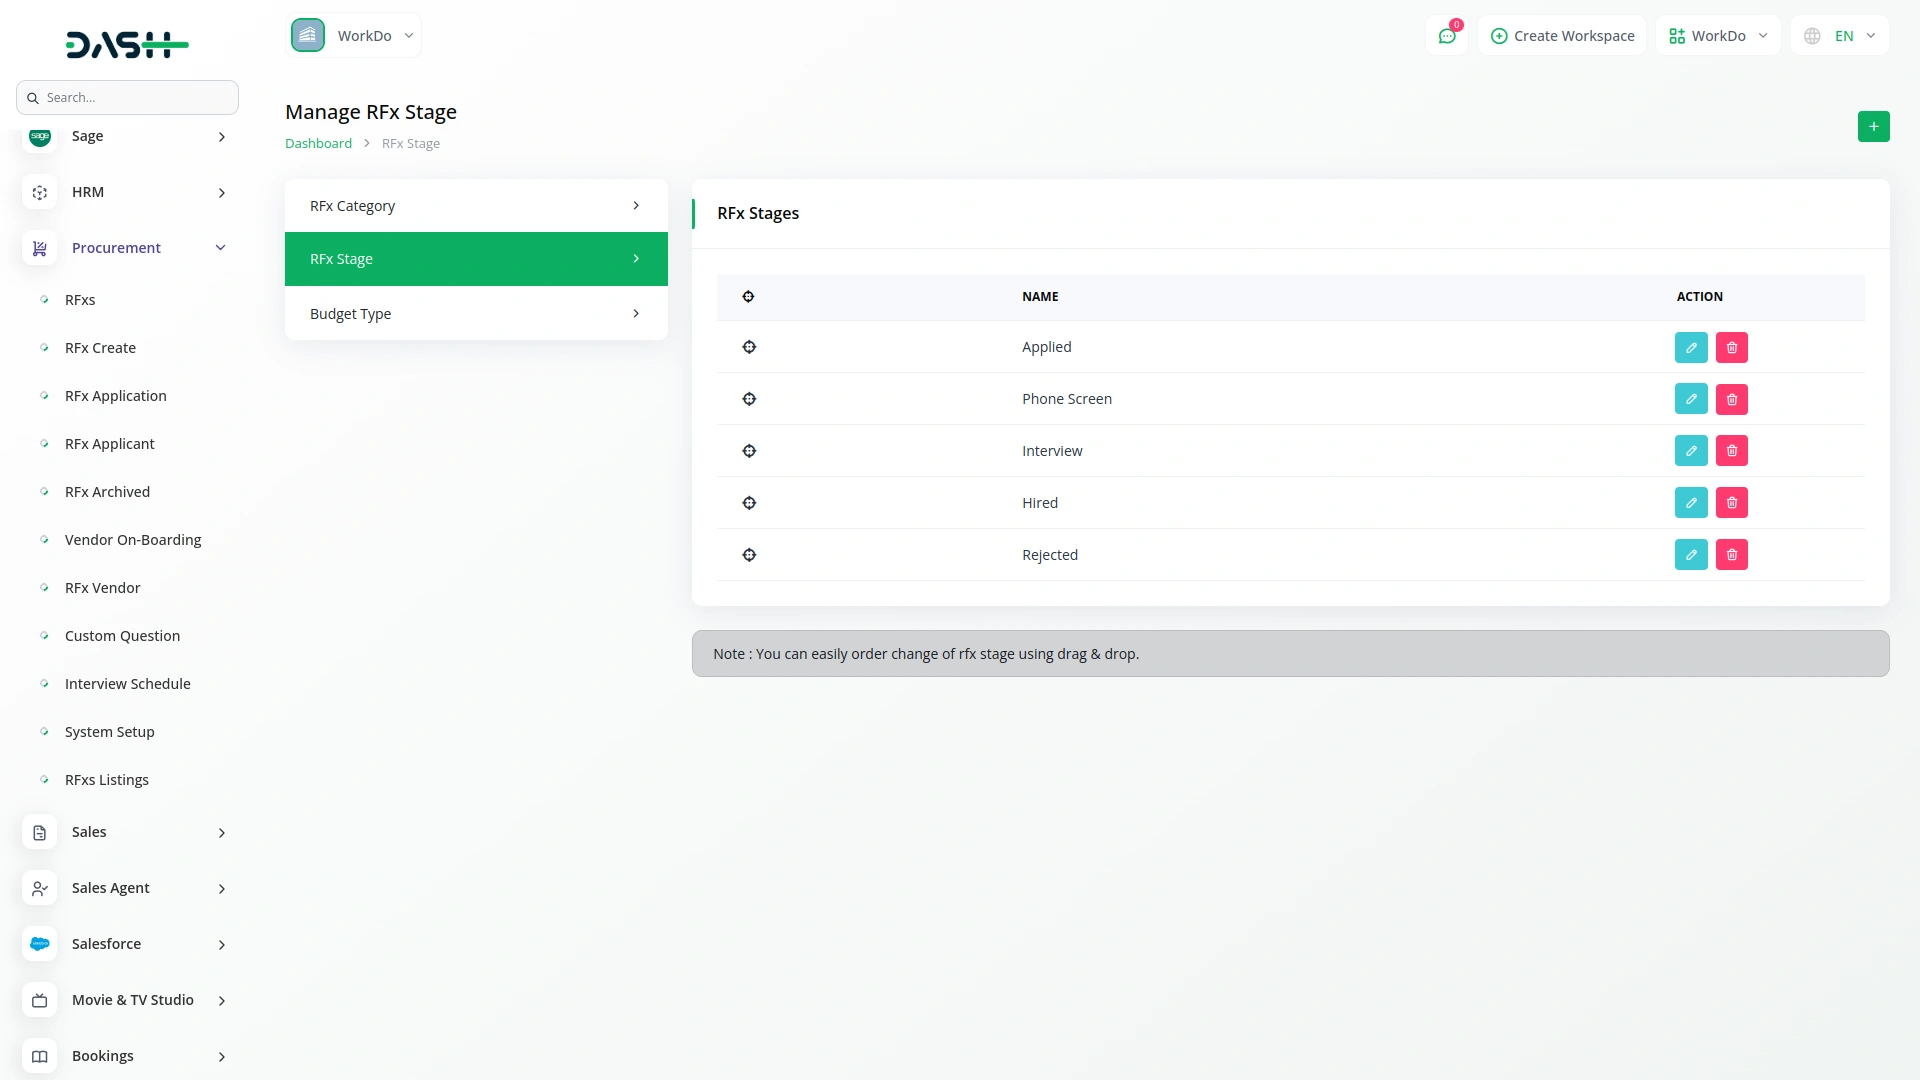
Manage RFx Stage
- To create RFx stages, click the “Create” button.
- Enter Stage Title which displays in Interview Schedule Calendar View and RFx Application List and Grid Views.
- Table shows Name column.
- Click Edit in the action column to modify stages.
- Click Delete in the action column to remove stages.
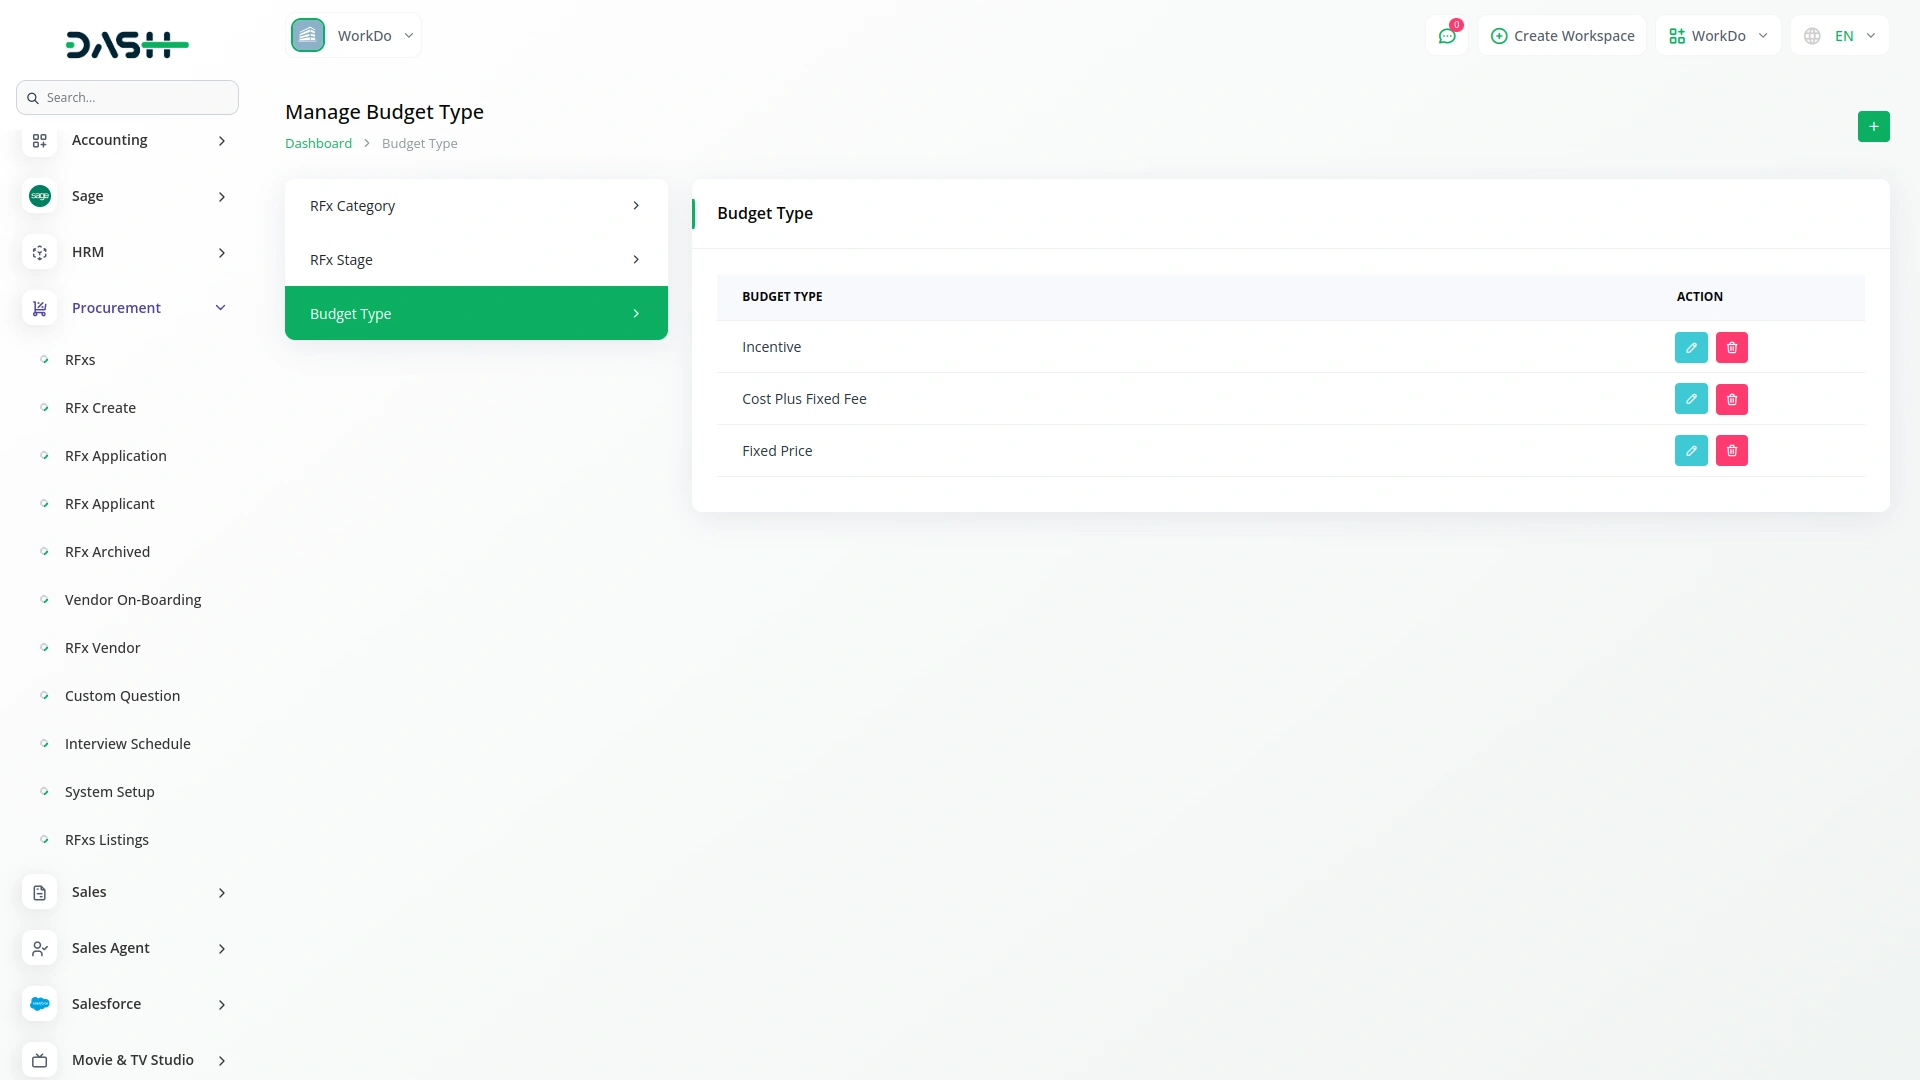
Manage Budget Type
- To create budget types, click the “Create” button.
- Enter Budget Type Name used in Vendor On-Boarding creation.
- Table displays the Budget Type column.
- Click Edit in the action column to modify budget types.
- Click Delete in the action column to remove budget types.
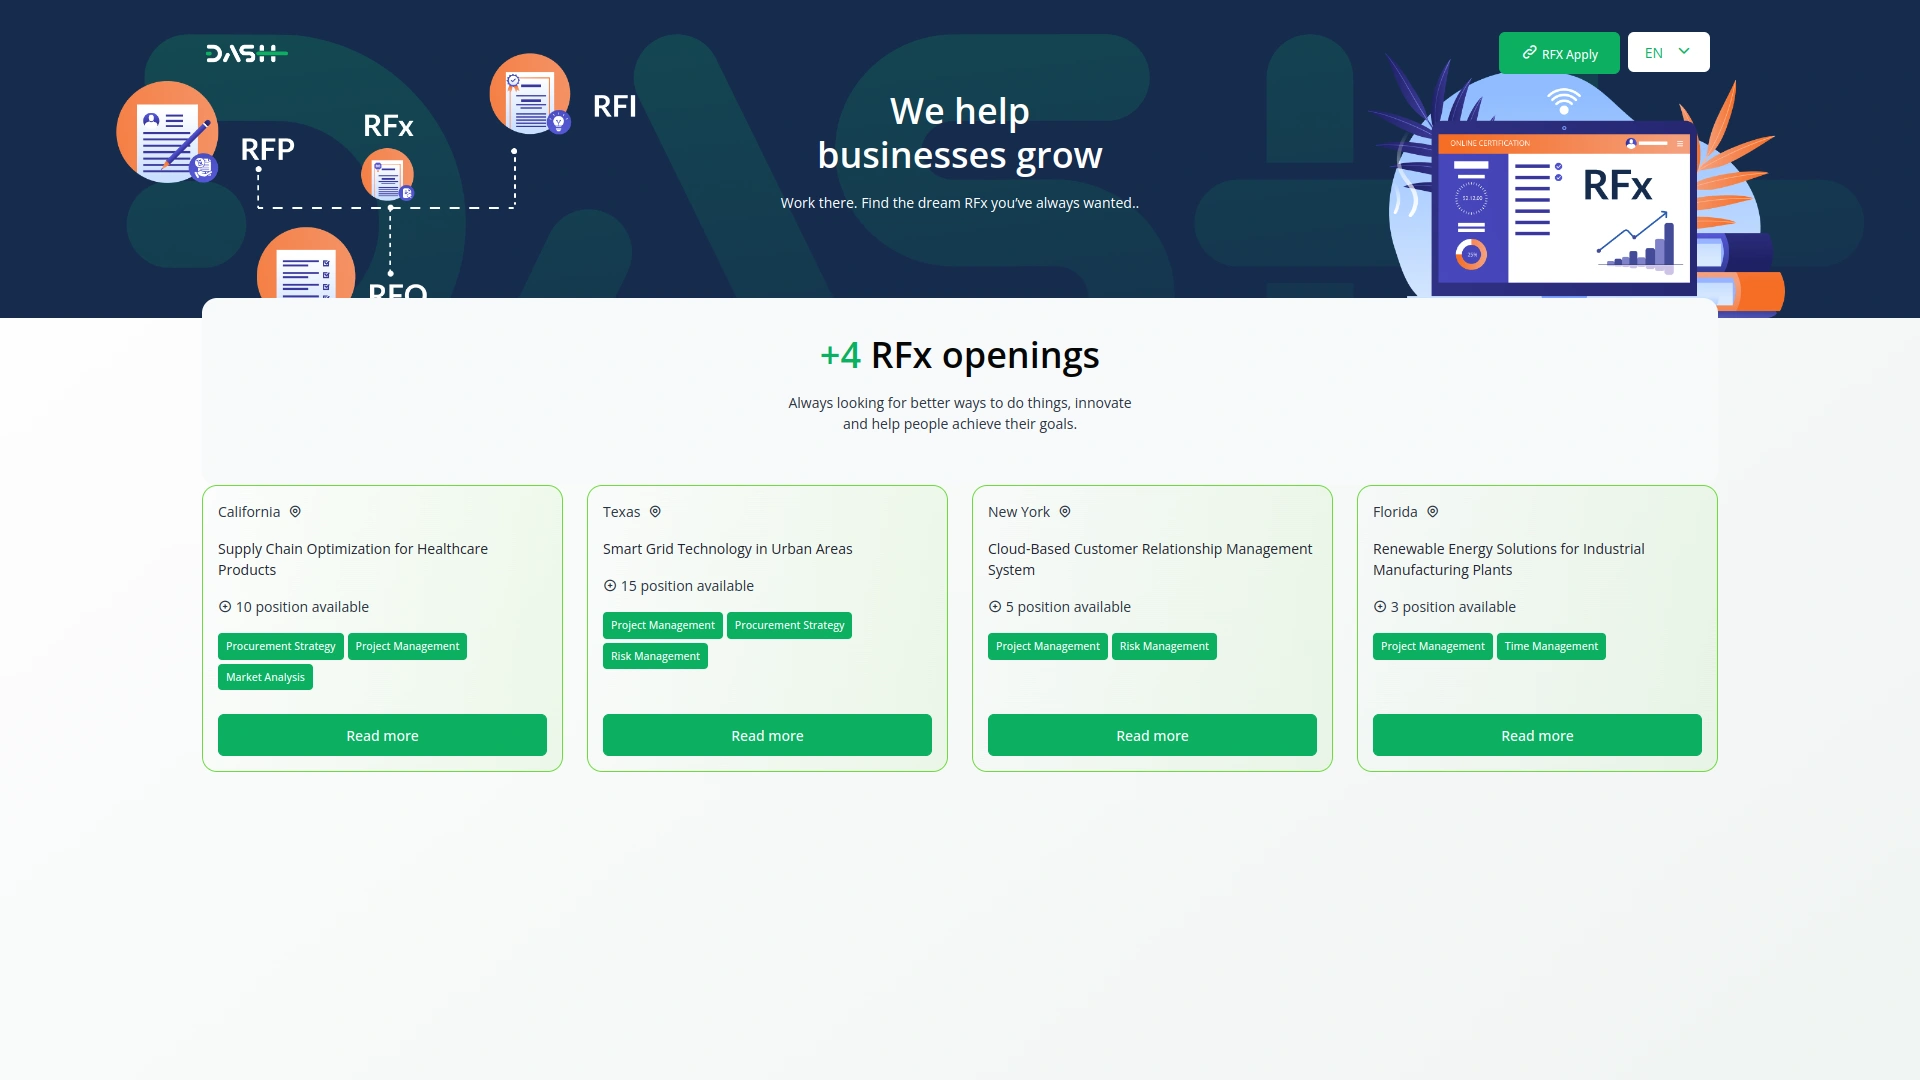
RFx Frontend Portal
- All RFx listings display on the frontend site.
- Click the “Read More” button to view full RFx requirements and description.
- Click the “Apply Now” button to submit applications.
- All submitted application data will be visible under the “Applied” stage in the RFx Application section.
Categories
Related articles
- How to Set up Add-On in WorkDo
- SalesForce Integration in Dash SaaS
- Quickbooks Integration in Dash SaaS
- Gym Management Integration in Dash SaaS
- Hotel and Room management in Dash SaaS
- NMI Payment Gateway Integration in Dash SaaS
- Sign-in With Bitbucket Detailed Documentation
- Google Authentication Integration in BookingGo SaaS
- Instamojo Payment Gateway Detailed Documentation
- vCard Integration in Dash SaaS
- Twilio Integration in Dash SaaS
- PayPay Payment Gateway
Reach Out to Us
Have questions or need assistance? We're here to help! Reach out to our team for support, inquiries, or feedback. Your needs are important to us, and we’re ready to assist you!


Need more help?
If you’re still uncertain or need professional guidance, don’t hesitate to contact us. You can contact us via email or submit a ticket with a description of your issue. Our team of experts is always available to help you with any questions. Rest assured that we’ll respond to your inquiry promptly.
Love what you see?
Do you like the quality of our products, themes, and applications, or perhaps the design of our website caught your eye? You can have similarly outstanding designs for your website or apps. Contact us, and we’ll bring your ideas to life.
