Optical & Eyecare Center Detailed Documentation
The Optical & Eye Care Management System is a comprehensive software solution designed to help eye care professionals and optical businesses manage their daily operations efficiently.
Introduction
The Optical & Eye Care Management System is a comprehensive software solution designed to help eye care professionals and optical businesses manage their daily operations efficiently. This system allows you to maintain detailed patient records, schedule appointments, conduct eye tests, manage prescriptions, handle inventory of optical products, process customization orders, and manage regular eyewear orders. The system connects all these functions together, making it easy to track patients from their first visit through prescription fulfillment and follow-up care.
How To Install the Optical & Eyecare Add-On?
To Set Up the Optical & Eyecare Add-On, you can follow this link: Setup Add-On
How to Use the Optical & Eyecare Management Add-On?
Patient Records
- To create a new patient record, click the “Create” button at the top of the patient records page. Enter the patient’s full name, date of birth, contact number, and select their gender from the dropdown menu.
- Add the preferred doctor from the available options and fill in their complete address details.
- Add any relevant medical history information and include details about their previous prescriptions if available.
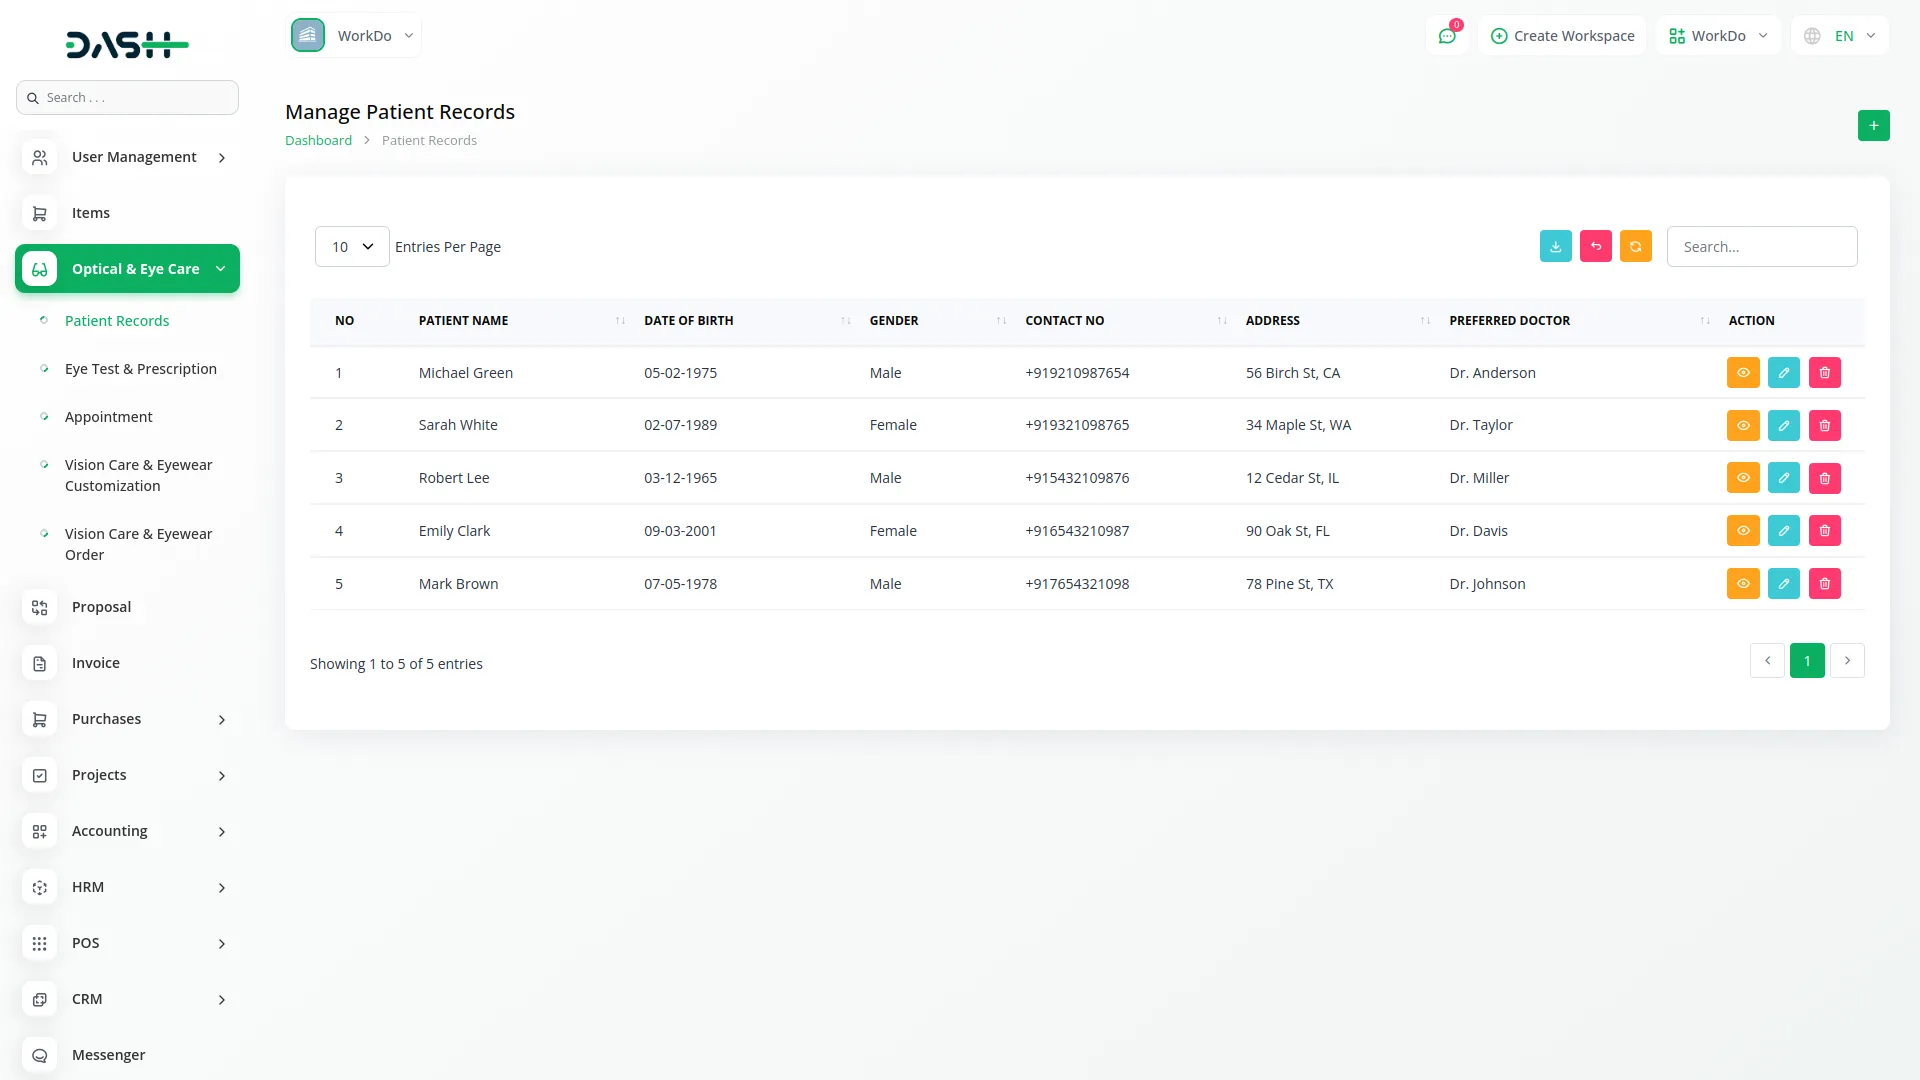
- The list page displays all patient records in a table format, showing number, patient name, date of birth, gender, contact number, address, and preferred doctor.
- You can use the search function to find specific patients quickly or export the patient data when needed. In the action column, you can click the “View” button to view complete patient details, and “Edit” button to modify patient information, or the “Delete” button to remove a patient record from the system.
Eye Test & Prescription Management
- To record a new eye test and prescription, click the “Create” button on the eye test page. First, select the patient name from the dropdown list, which connects to the Patient Records section. Add the doctor who conducted the test and enter the test date.
- Fill in the detailed test results, including vision measurements and any other examination findings. Add the complete prescription details, including lens specifications, and enter the prescription expiry date. Include any additional notes about the examination or special instructions.
- The list page shows all eye tests and prescriptions with columns displaying record number, patient name, doctor name, test date, test results, prescription details, and prescription expiry date. You can search for specific records or export the data as needed.
- The action buttons allow you to “View” to view the complete test details, “Edit” to update the information, or “Delete” to remove the record.
-
Appointment Management
- To schedule a new appointment, click the “Create” button on the appointment page. Select the patient name from the dropdown which is connected to the Patient Records. Add the doctor for the appointment and set the appointment date and time.
- Select the appointment status from the options: scheduled, completed, or canceled. Add the type of appointment being scheduled and add any relevant notes about the appointment purpose or special requirements.
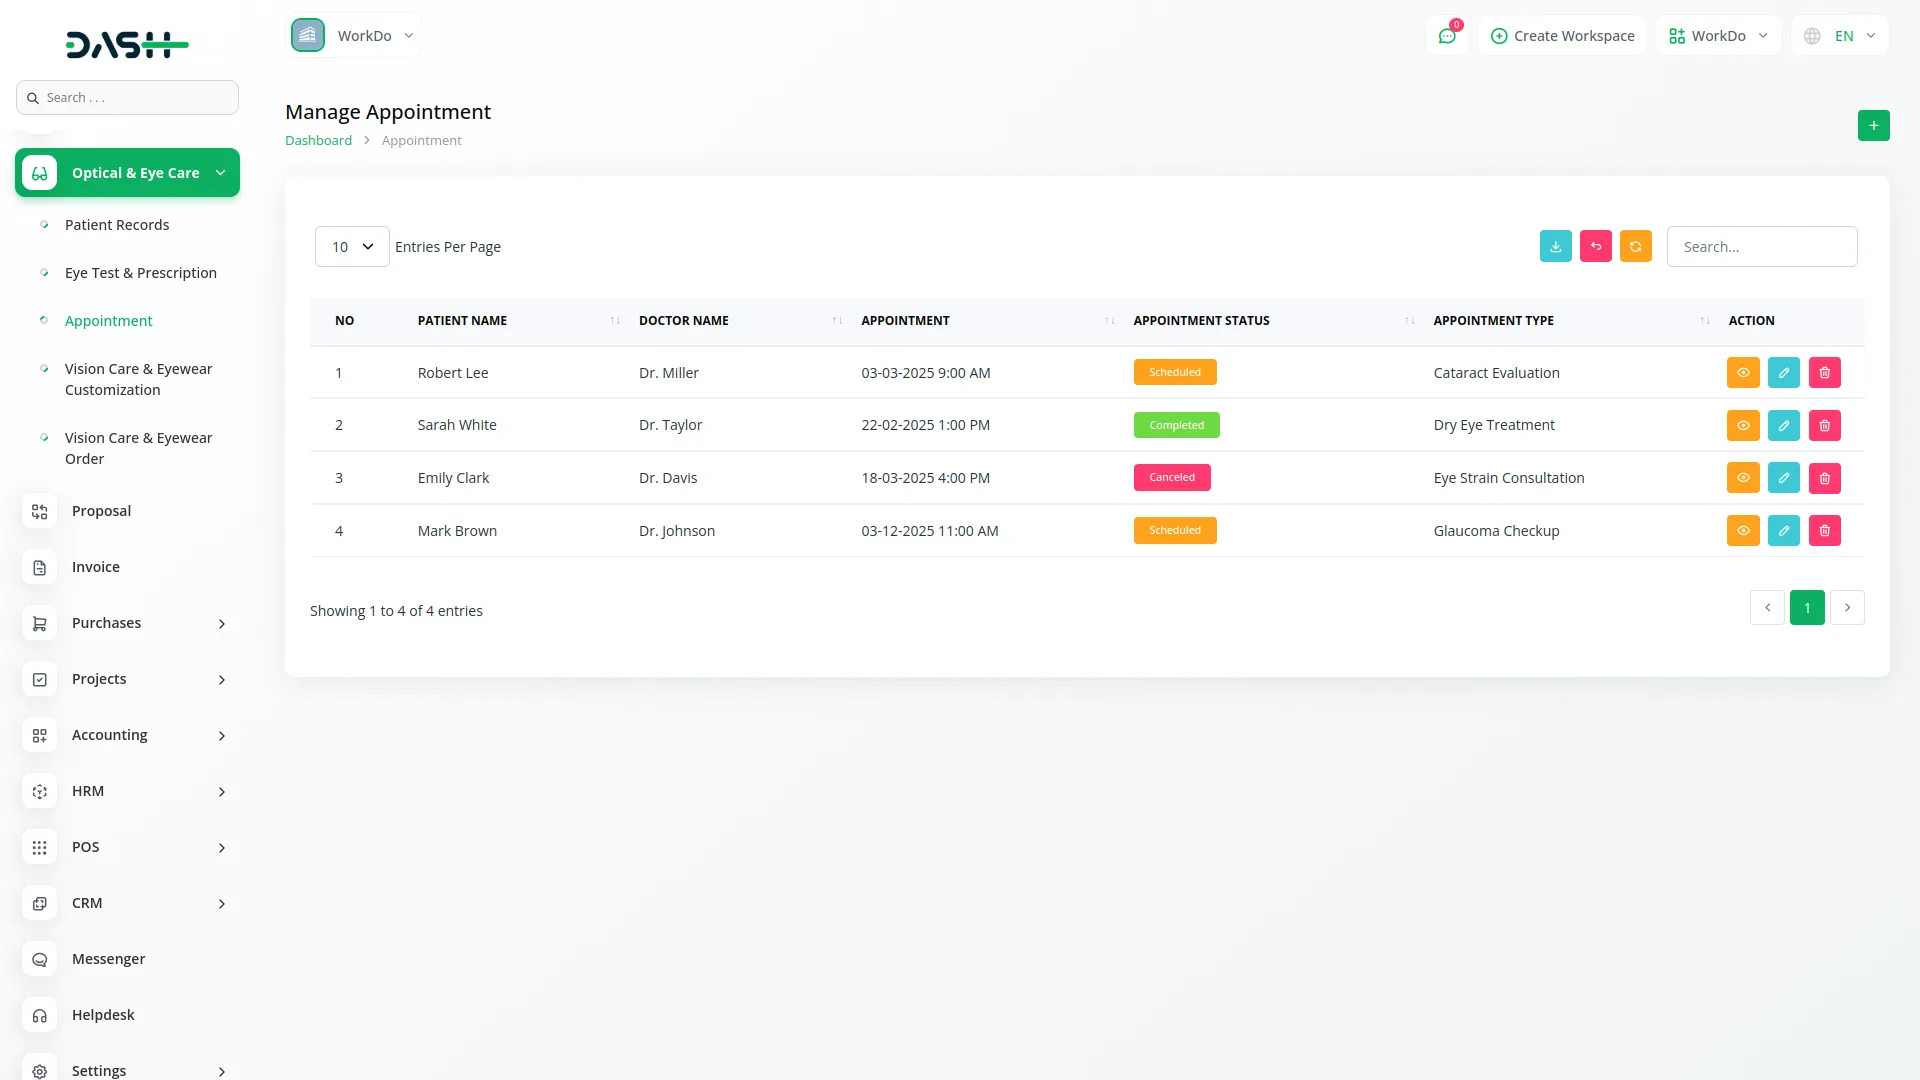
- The appointment list shows all scheduled appointments with columns for record number, patient name, doctor name, appointment date and time, appointment status, and appointment type.
- You can search appointments or export the schedule data. In the actions column, the “View” button displays complete appointment details, the “Edit” button allows you to modify appointment information, and the “Delete” button removes the appointment from the schedule.
-

Items Management
- To add a new optical item to your inventory, click the “Create” button on the items page. Make sure the “Optical & Eye Care” option is selected from the dropdown at the top. In the Details section, enter the item name, SKU code, tax percentage, category, and a detailed description of the product. In the Pricing section, add the sale price, purchase price, unit of measurement, and current quantity in stock.
- Upload a clear image of the item in the Image section. In the Optical & Eye Care section, specify the product type, brand name, and prescription details if applicable. Set the numbering status to either “Numbering” or “Non-Numbering”, and if you select “Numbering”, an additional field will appear for you to specify the numbering type.
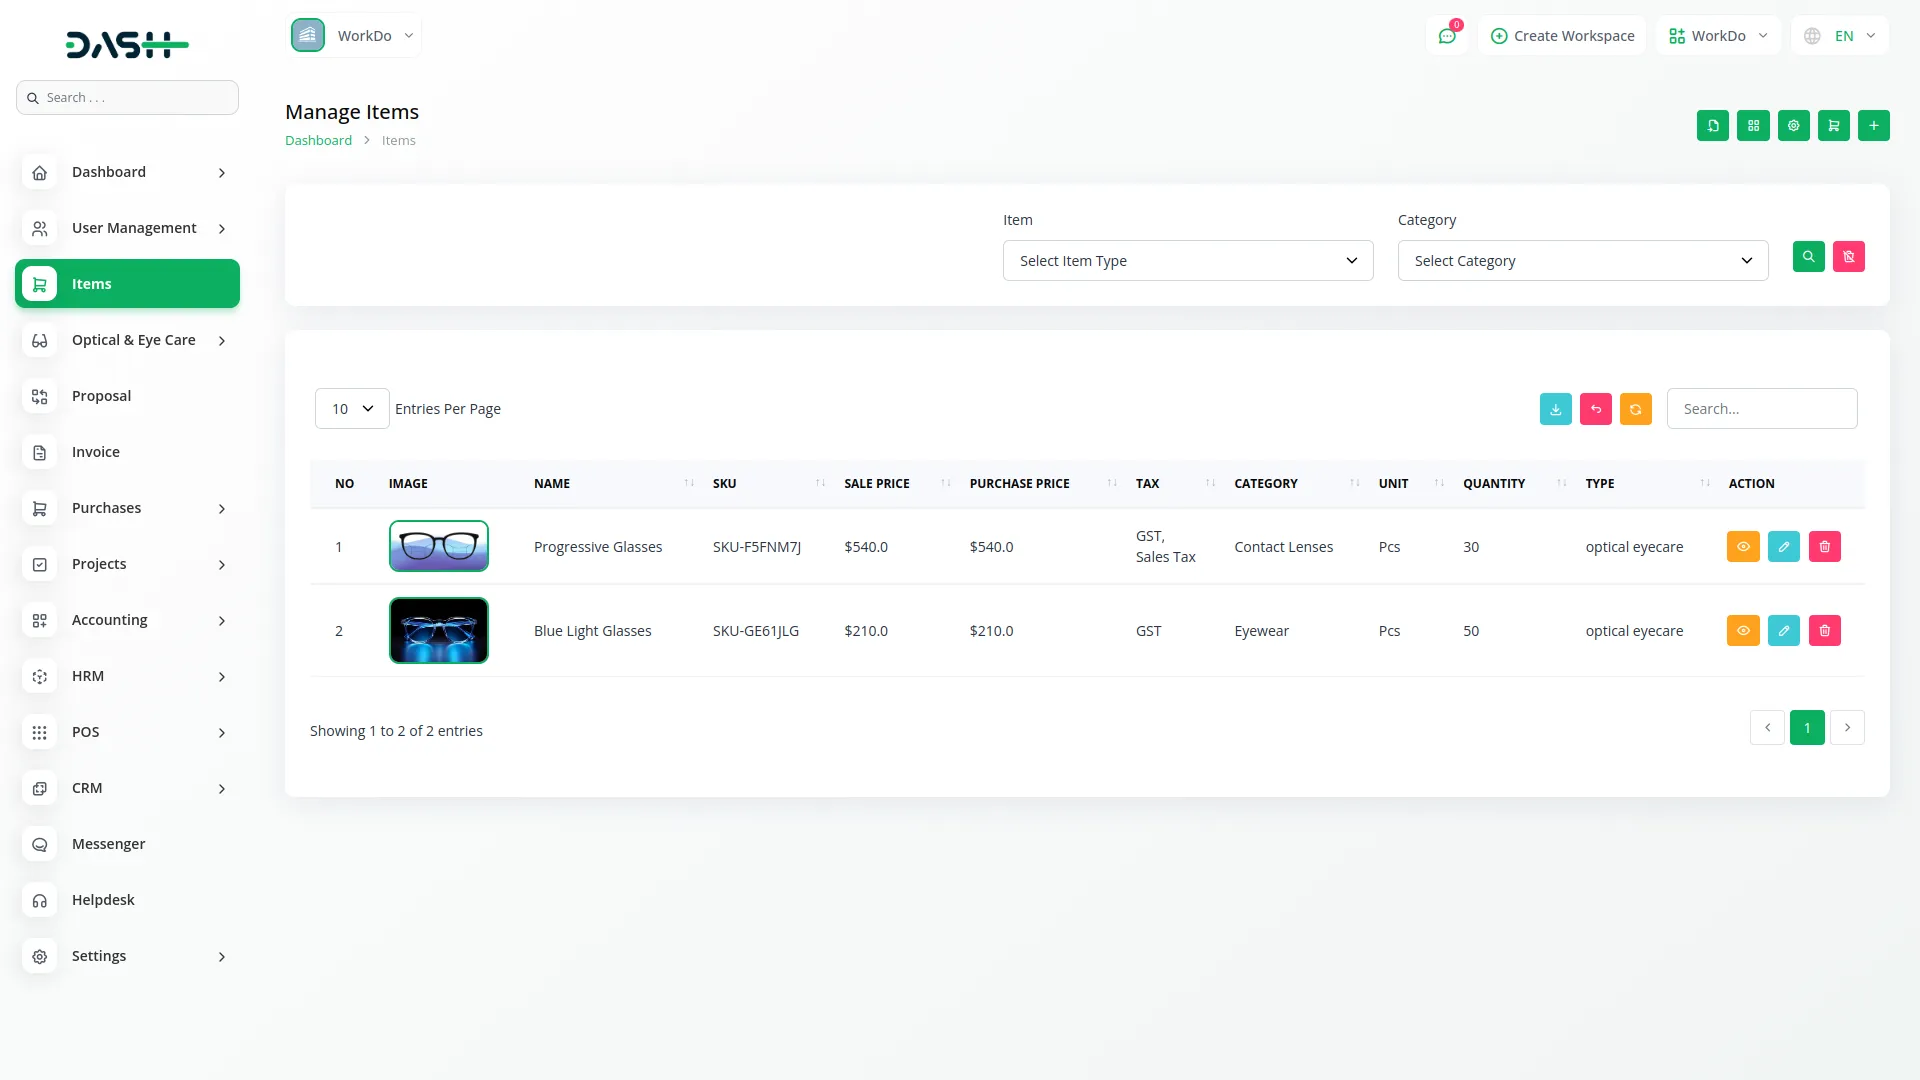
- The items list page displays all products with columns showing record number, product image, product name, SKU, sale price, purchase price, tax, category, unit, quantity, and product type.
- You can search for specific items or export inventory data. The action options include “Show” to view complete item details, “Edit” to update product information, or “Delete” to remove an item from inventory.
Vision Care & Eyewear Customization
- To create a new customization order, click the “Create” button on the customization page. Select the patient name from the dropdown, which connects to the Patient Records- the contact number will automatically fill in once you choose the patient.
- Select the item for customization from the dropdown which connects to the Items. Add the customization type and enter the estimated cost for the work. Set the delivery date for when the customized eyewear will be ready.
- Add detailed customization specifications and include any additional requests from the customer. The payment status will default to “unpaid” but you can change it to “paid” when payment is received.
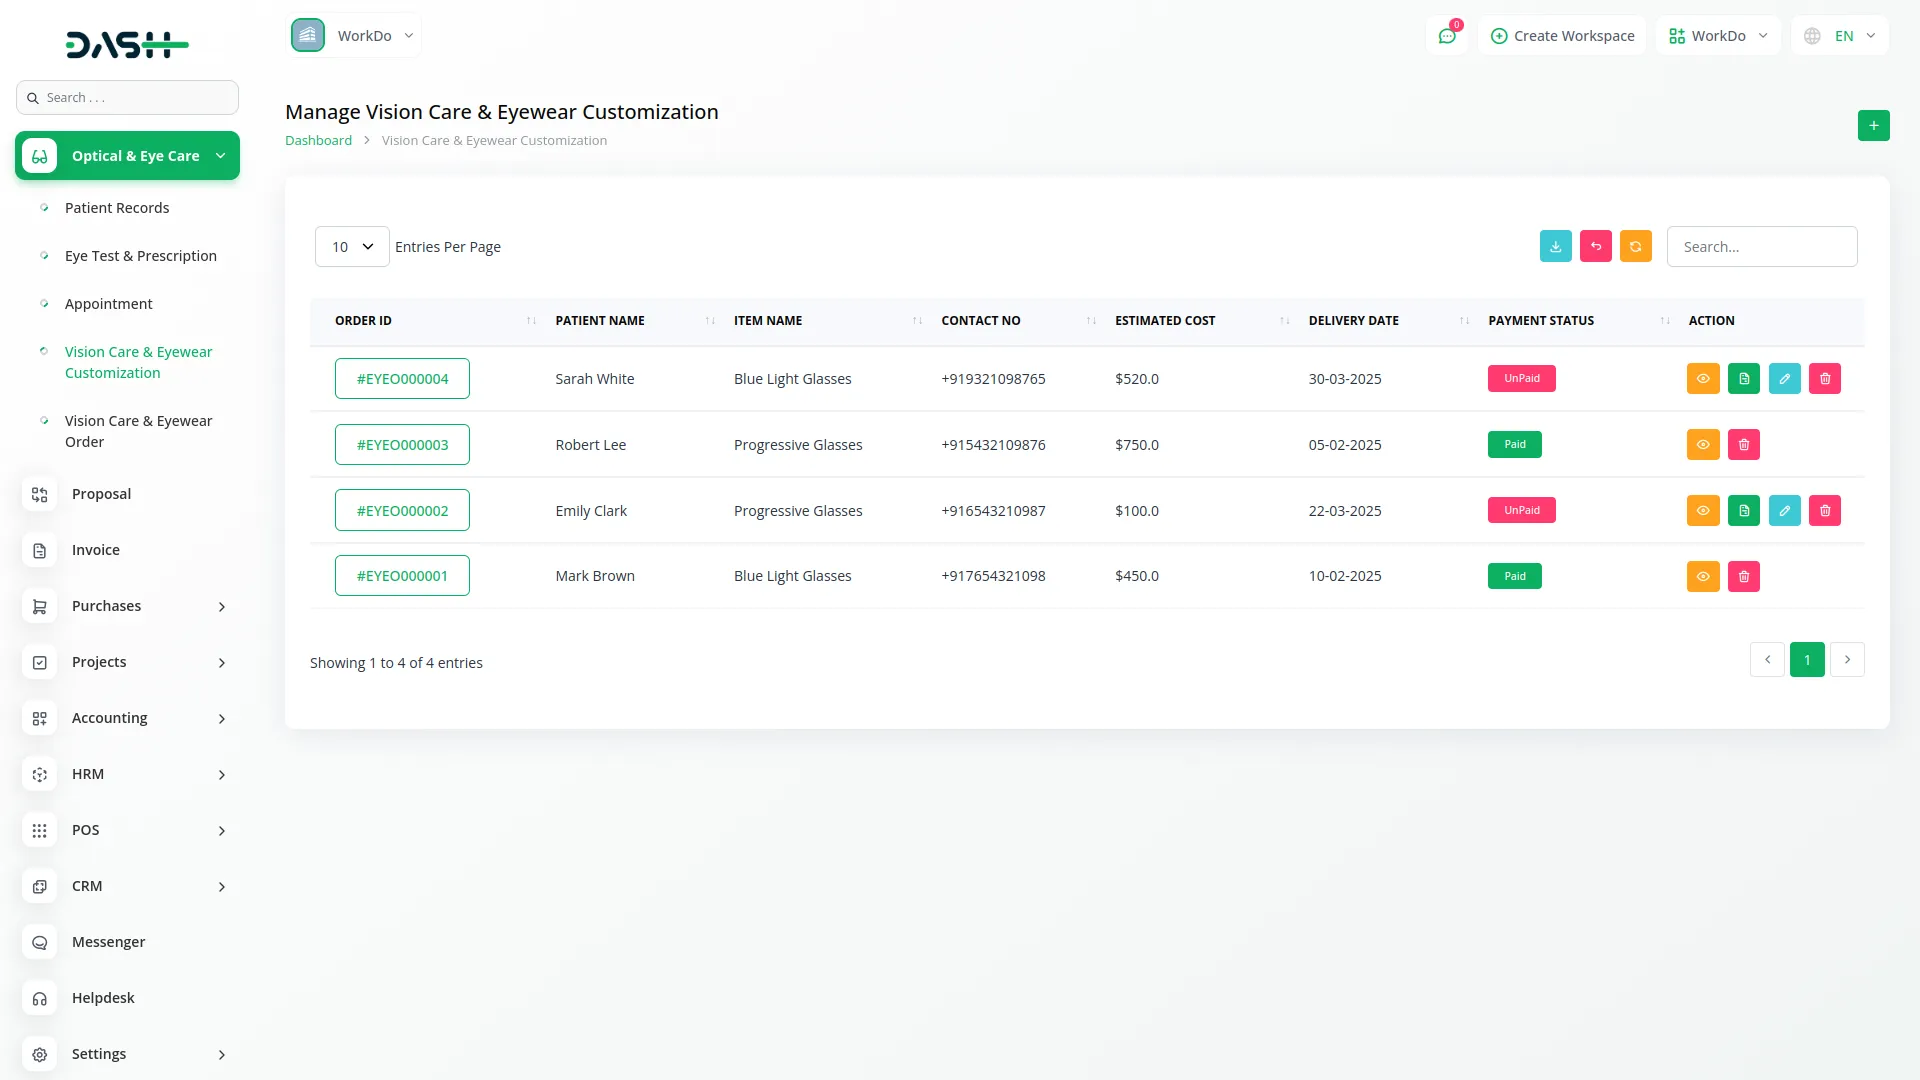
- The customization list displays all orders with columns showing the order ID. When you click on this, you will be able to view all the details, patient name, item name, contact number, estimated cost, and payment status.
- You can search orders or export the data. In the actions column, the “View” button displays complete order details. “Edit” and “Delete” options are available only when the payment status is “unpaid”. There is also a “Payment” button that appears only for unpaid orders to update the payment status.
-
Vision Care & Eyewear Order
- To create a new eyewear order, click the “Create” button on the order page. Select the patient name from the dropdown which connects to the Patient Records section the contact number will automatically fill in once you choose the patient
- Select the item for the order from the dropdown which connects to the Items section.
- Once you select an item, several fields will automatically populate: item type, brand name, numbering status, and item price will all fill in from the selected item’s information. If the numbering status shows “numbering”, an additional numbering type field will appear and automatically fill in as well.
- Enter the quantity of items being ordered and set the delivery date for when the order will be ready. Add any additional requests from the customer and set the payment status which defaults to “unpaid” but can be changed to “paid” when payment is received.
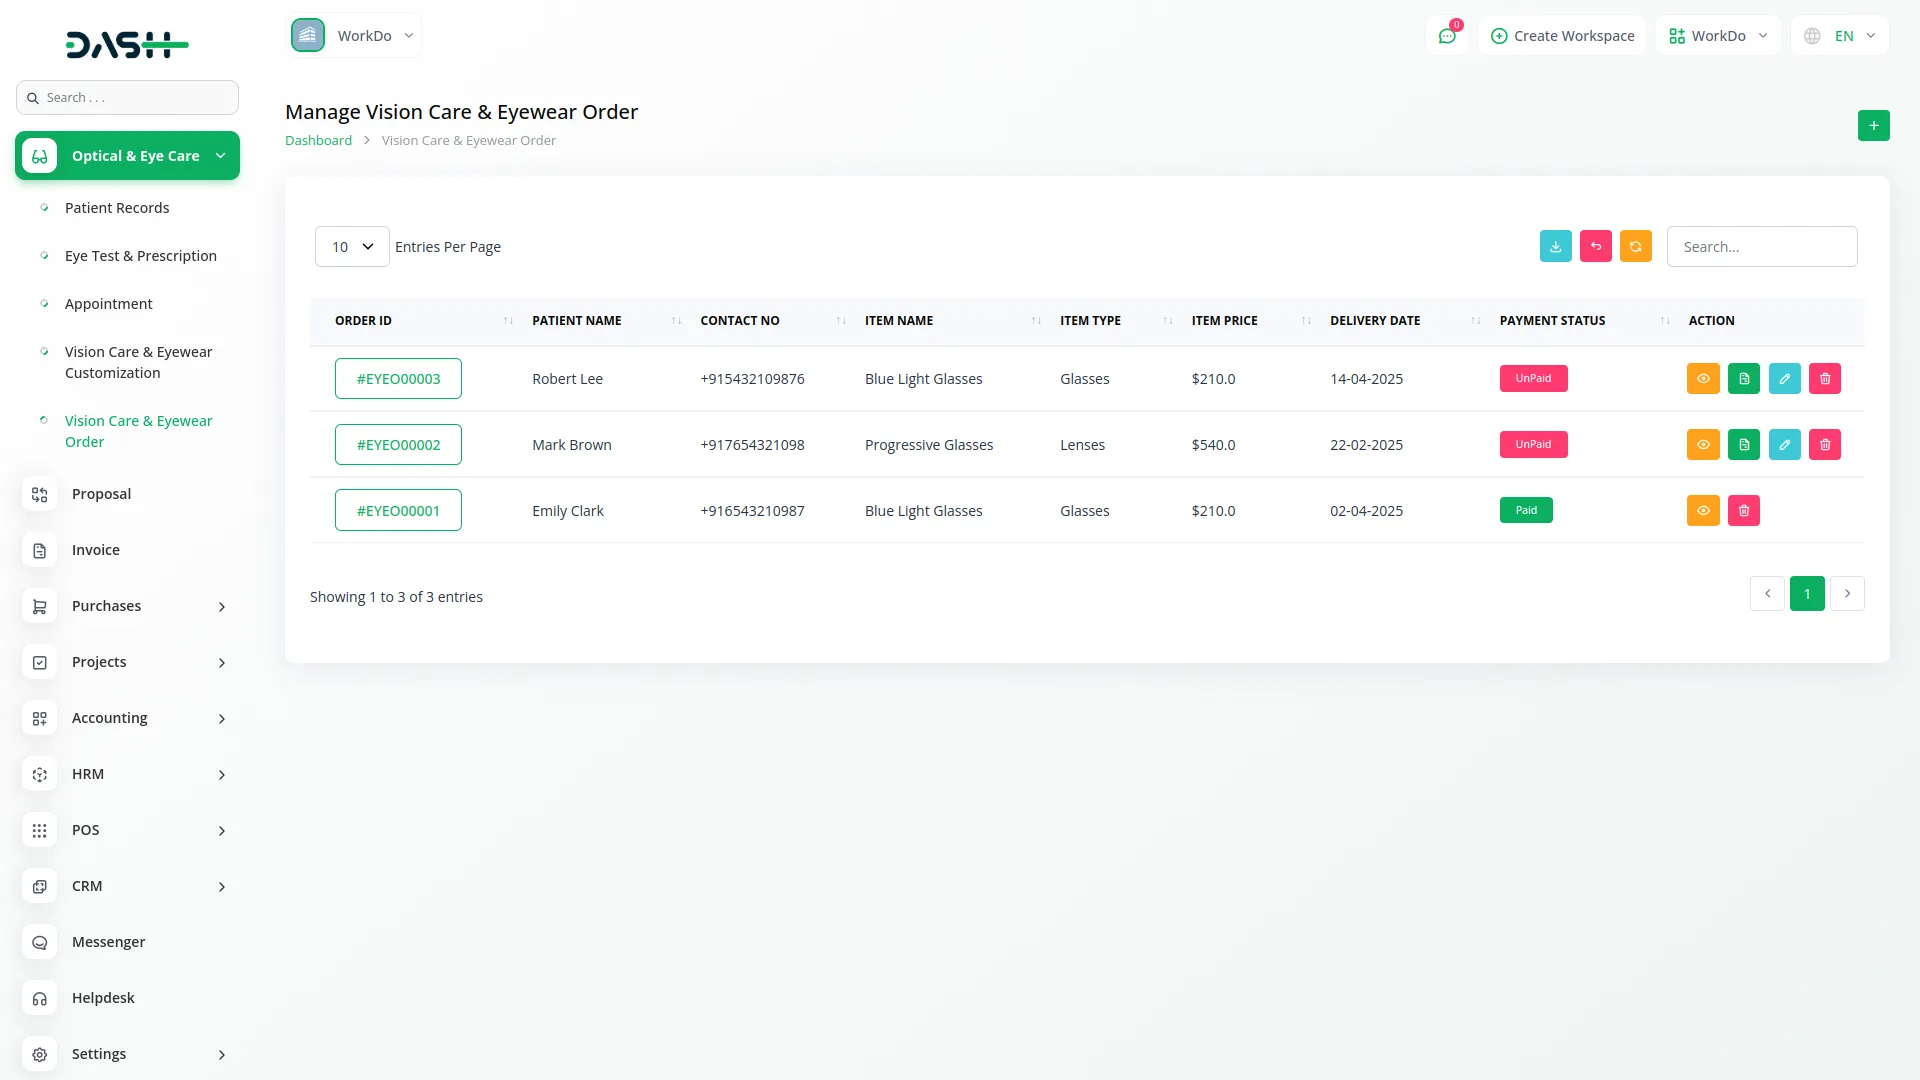
- The order list displays all orders with columns showing the order ID. When you click on this, you will be able to view all the details, patient name, contact number, item name, item type, item price, delivery date, and payment status.
- You can search orders or export the data. In the actions column, the “View” button displays complete order details. “Edit” and “Delete” options are available only when the payment status is “unpaid”. There is also a “Payment” button that appears only for unpaid orders to update the payment status.
Categories
Related articles
- Team Workload Integration in Dash SaaS
- Bulk SMS Detailed Documentation
- Google Authentication Integration in Dash SaaS
- Jitsi Meet Detailed Documentation
- Moneris Integration in Dash SaaS
- Sports Club & Academy Management in Dash SaaS
- Rental Management Integration in Dash SaaS
- Scholarship Detailed Documentation
- Launching Your Own SaaS Business With WorkDo Dash
- SalesForce Integration in Dash SaaS
- Asana Project Management Detailed Documentation
- Blog & Article Integration in Dash SaaS
Reach Out to Us
Have questions or need assistance? We're here to help! Reach out to our team for support, inquiries, or feedback. Your needs are important to us, and we’re ready to assist you!


Need more help?
If you’re still uncertain or need professional guidance, don’t hesitate to contact us. You can contact us via email or submit a ticket with a description of your issue. Our team of experts is always available to help you with any questions. Rest assured that we’ll respond to your inquiry promptly.
Love what you see?
Do you like the quality of our products, themes, and applications, or perhaps the design of our website caught your eye? You can have similarly outstanding designs for your website or apps. Contact us, and we’ll bring your ideas to life.
